
Welcome back to Goonhammer’s series for aspiring Titan Principes. We here at Goonhammer’s own Collegia Titanica know that Adeptus Titanicus can seem intimidating to players unfamiliar with its particular quirks, but this series aims to equip you with everything you’ll need to play out epic clashes on the battlefields of the far future with your very own Titan Battlegroup. In today’s article, we’ll shine a spotlight on how one of our members has approached terrain.
Greetings, readers! We covered 3D printed buildings in Adeptus Terrainicus Part I. In today’s article, we’ll cover another aspect of terrain that’s overrated: Scatter Terrain!
What is Scatter Terrain?
“Scatter terrain” consists of small to medium pieces of terrain that you can “scatter” randomly across the table for a more haphazard, realistic look. You can make rules for it in-game (breaking up line of sight, providing cover, etc.) – but you can also use it cosmetically (e.g. no in-game rules for the smaller pieces – merely shift them aside when they get in a model’s way).
Where can I get Scatter Terrain for Adeptus Titanicus?
Games Workshop sells some excellent kits via the webstore and Forge World, but the examples in this article were 3D-printed. I don’t own a 3D printer, personally. I either bought them printed from Etsy or paid for the designs to be FDM printed by someone else. While FDM printed pieces may result in visible layer lines, these are barely noticeable due to the scale of the game (and can even help with drybrushing). You can pay more for SLA printed pieces with less layer lines, but they’re not worth the extra cost in my opinion.
If you’re curious about 3D printing, Goonhammer has a lovely article to help you explore the process.
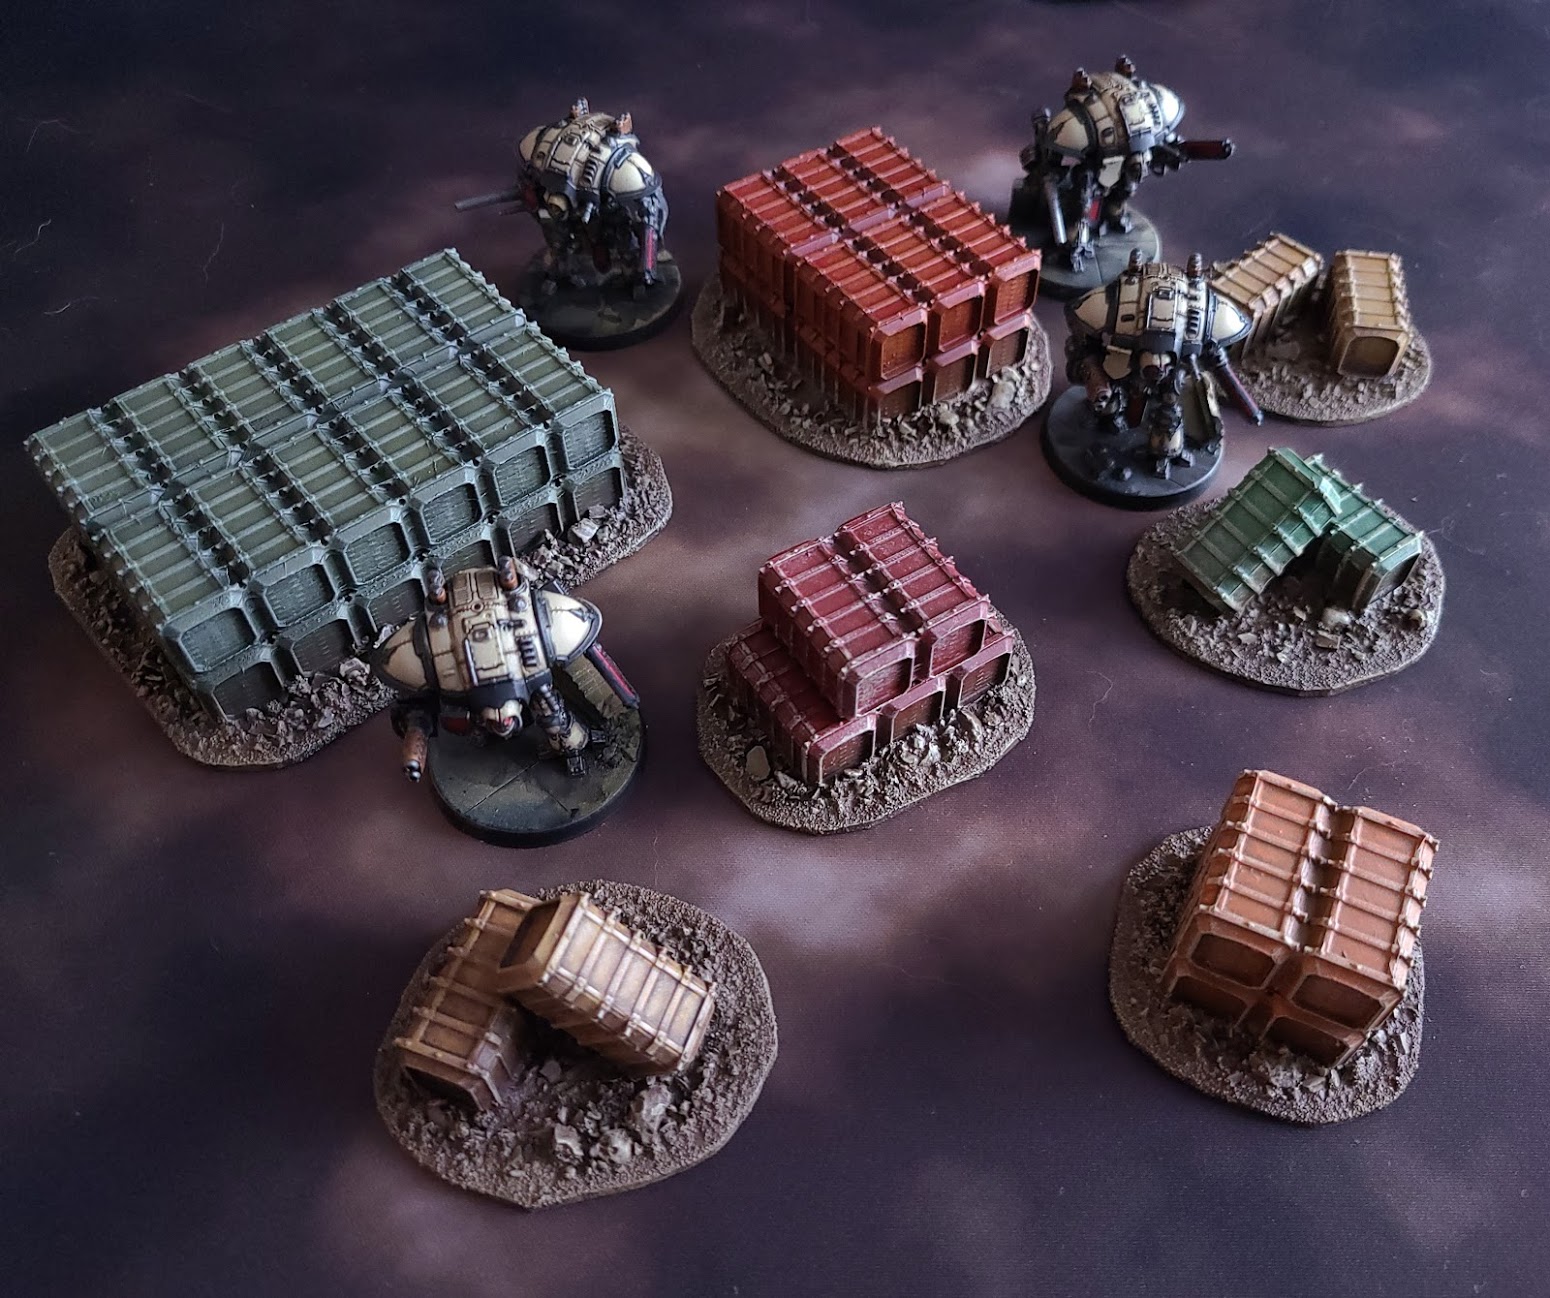
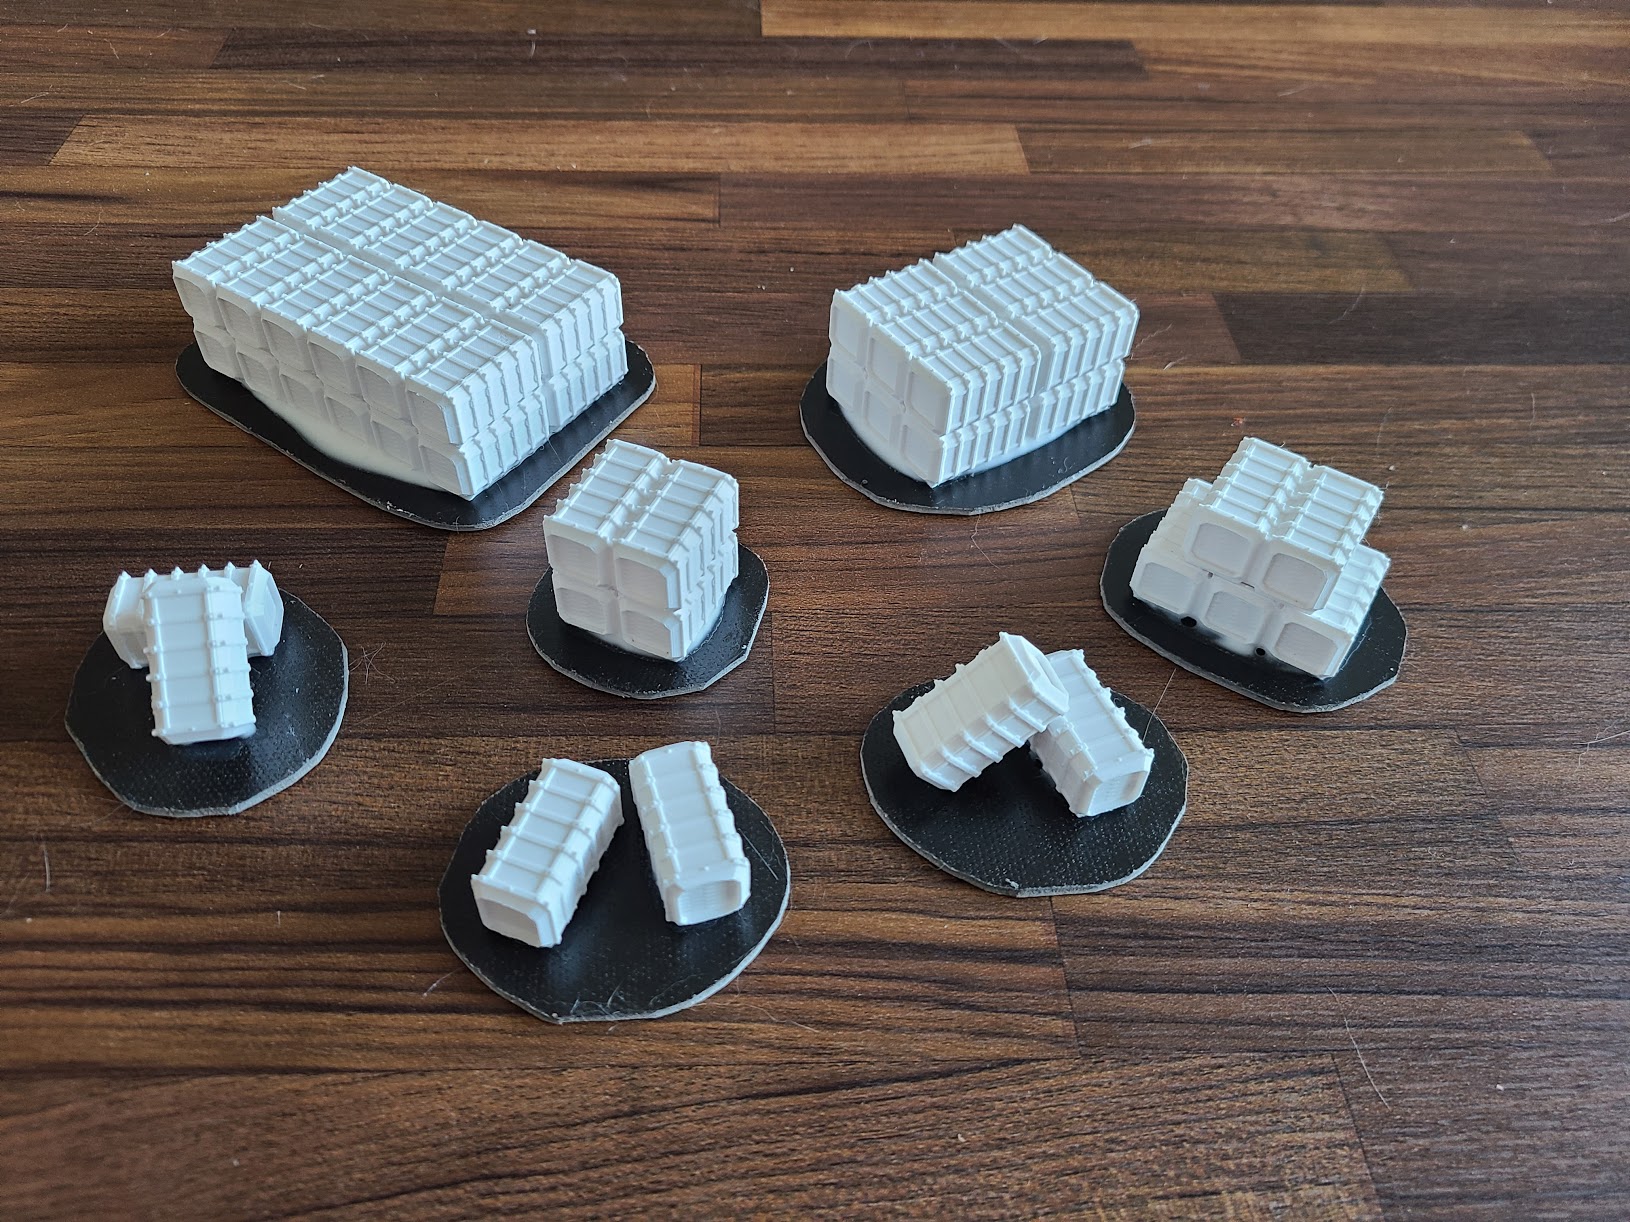
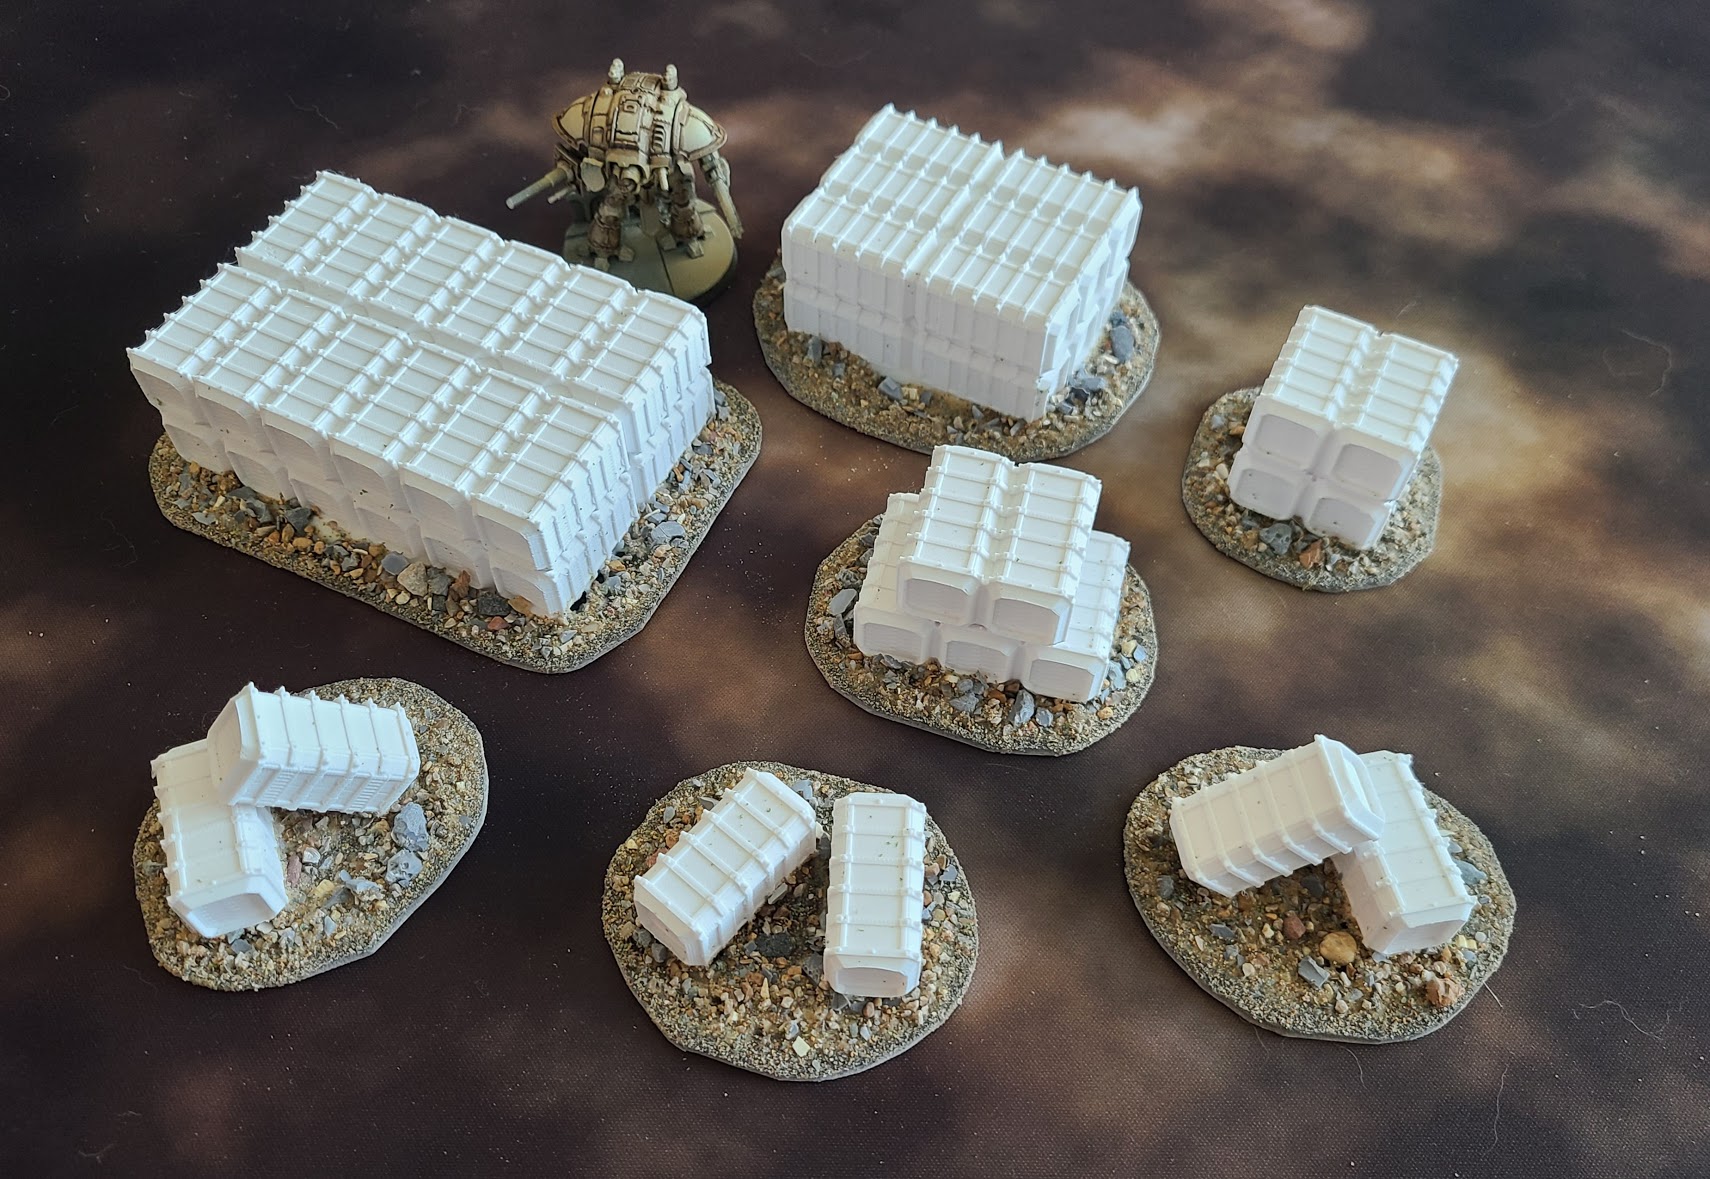
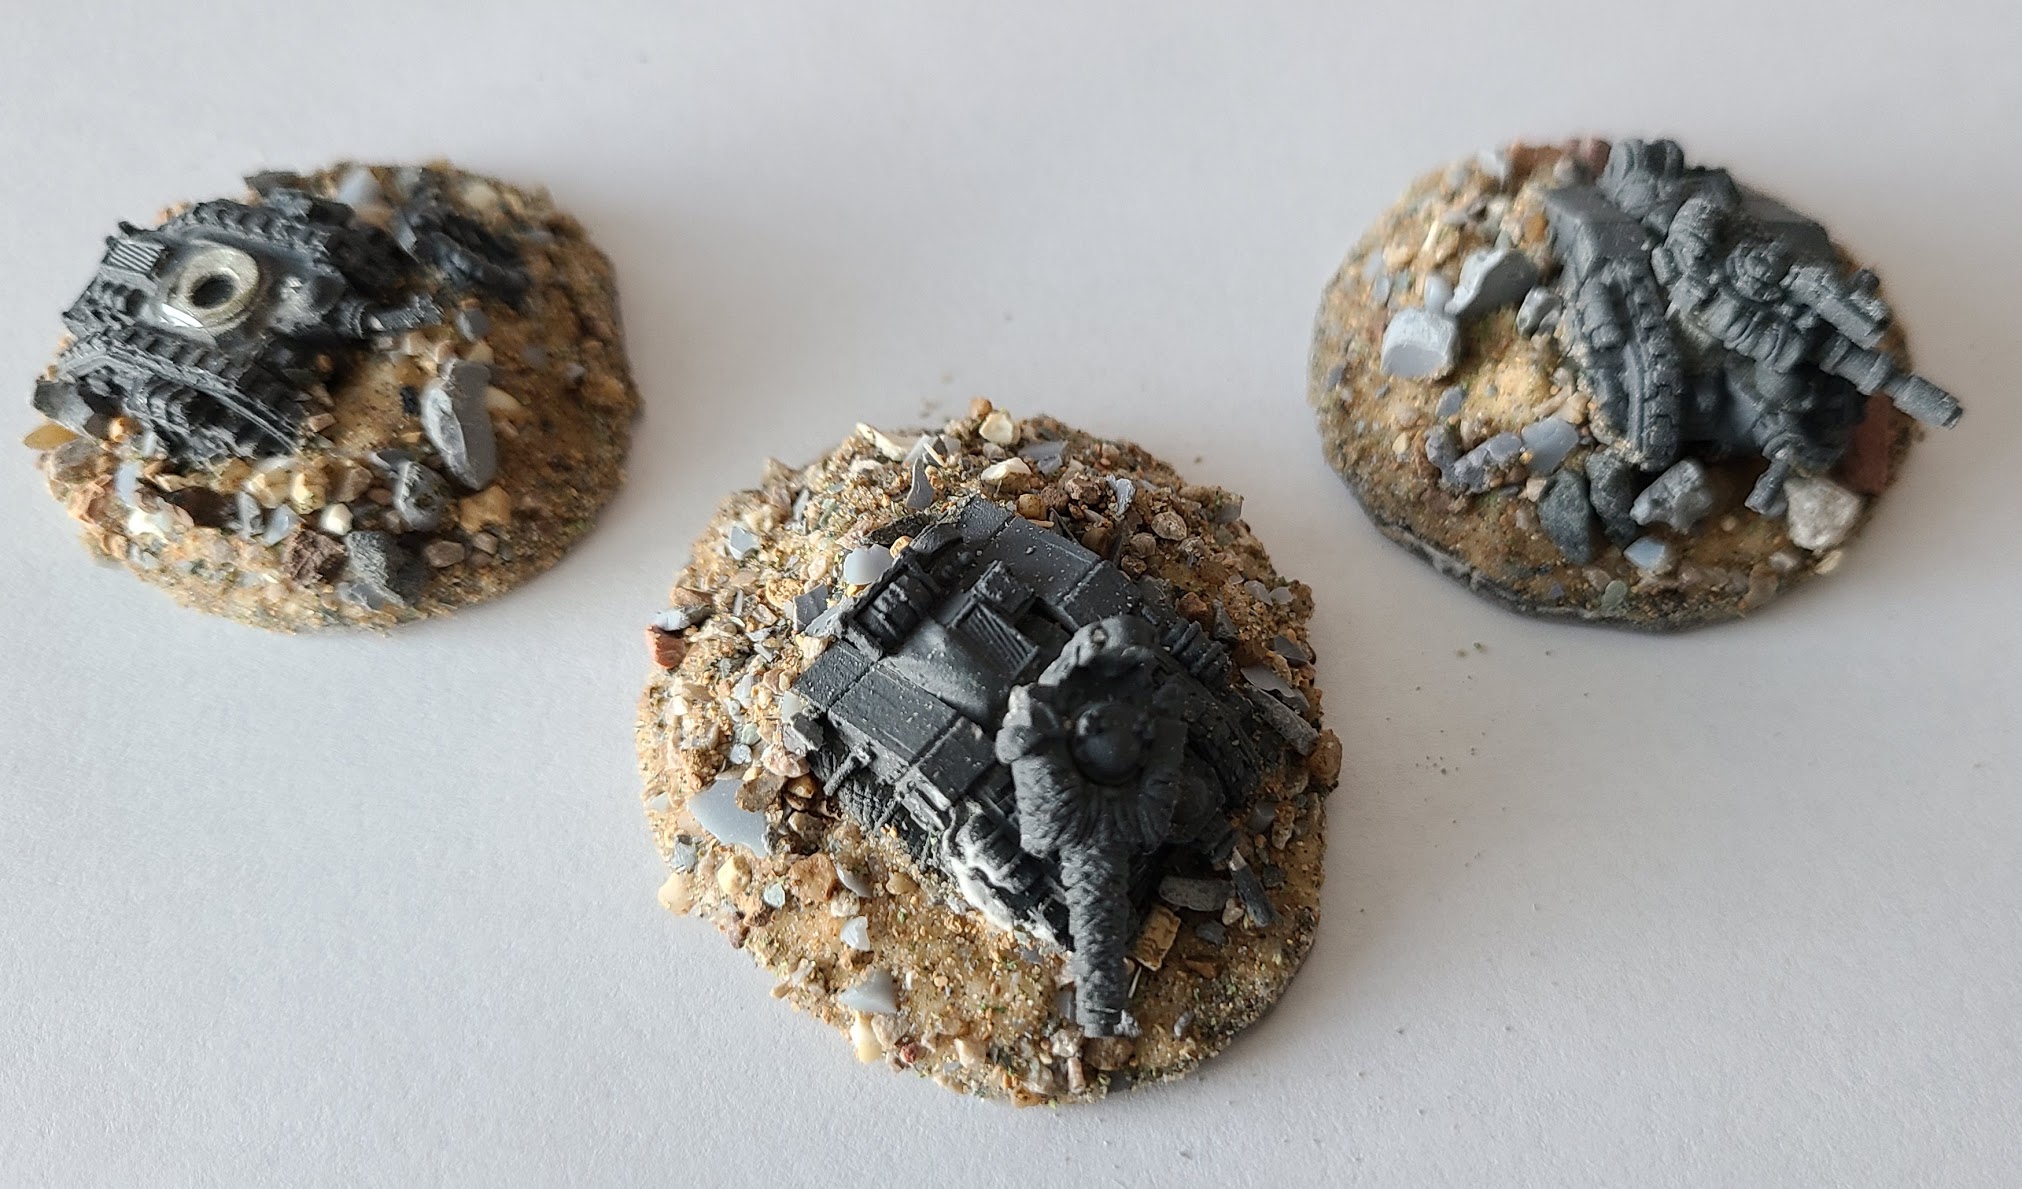
The cargo crates above were designed by Bjarn Dali and are available on Thingiverse.
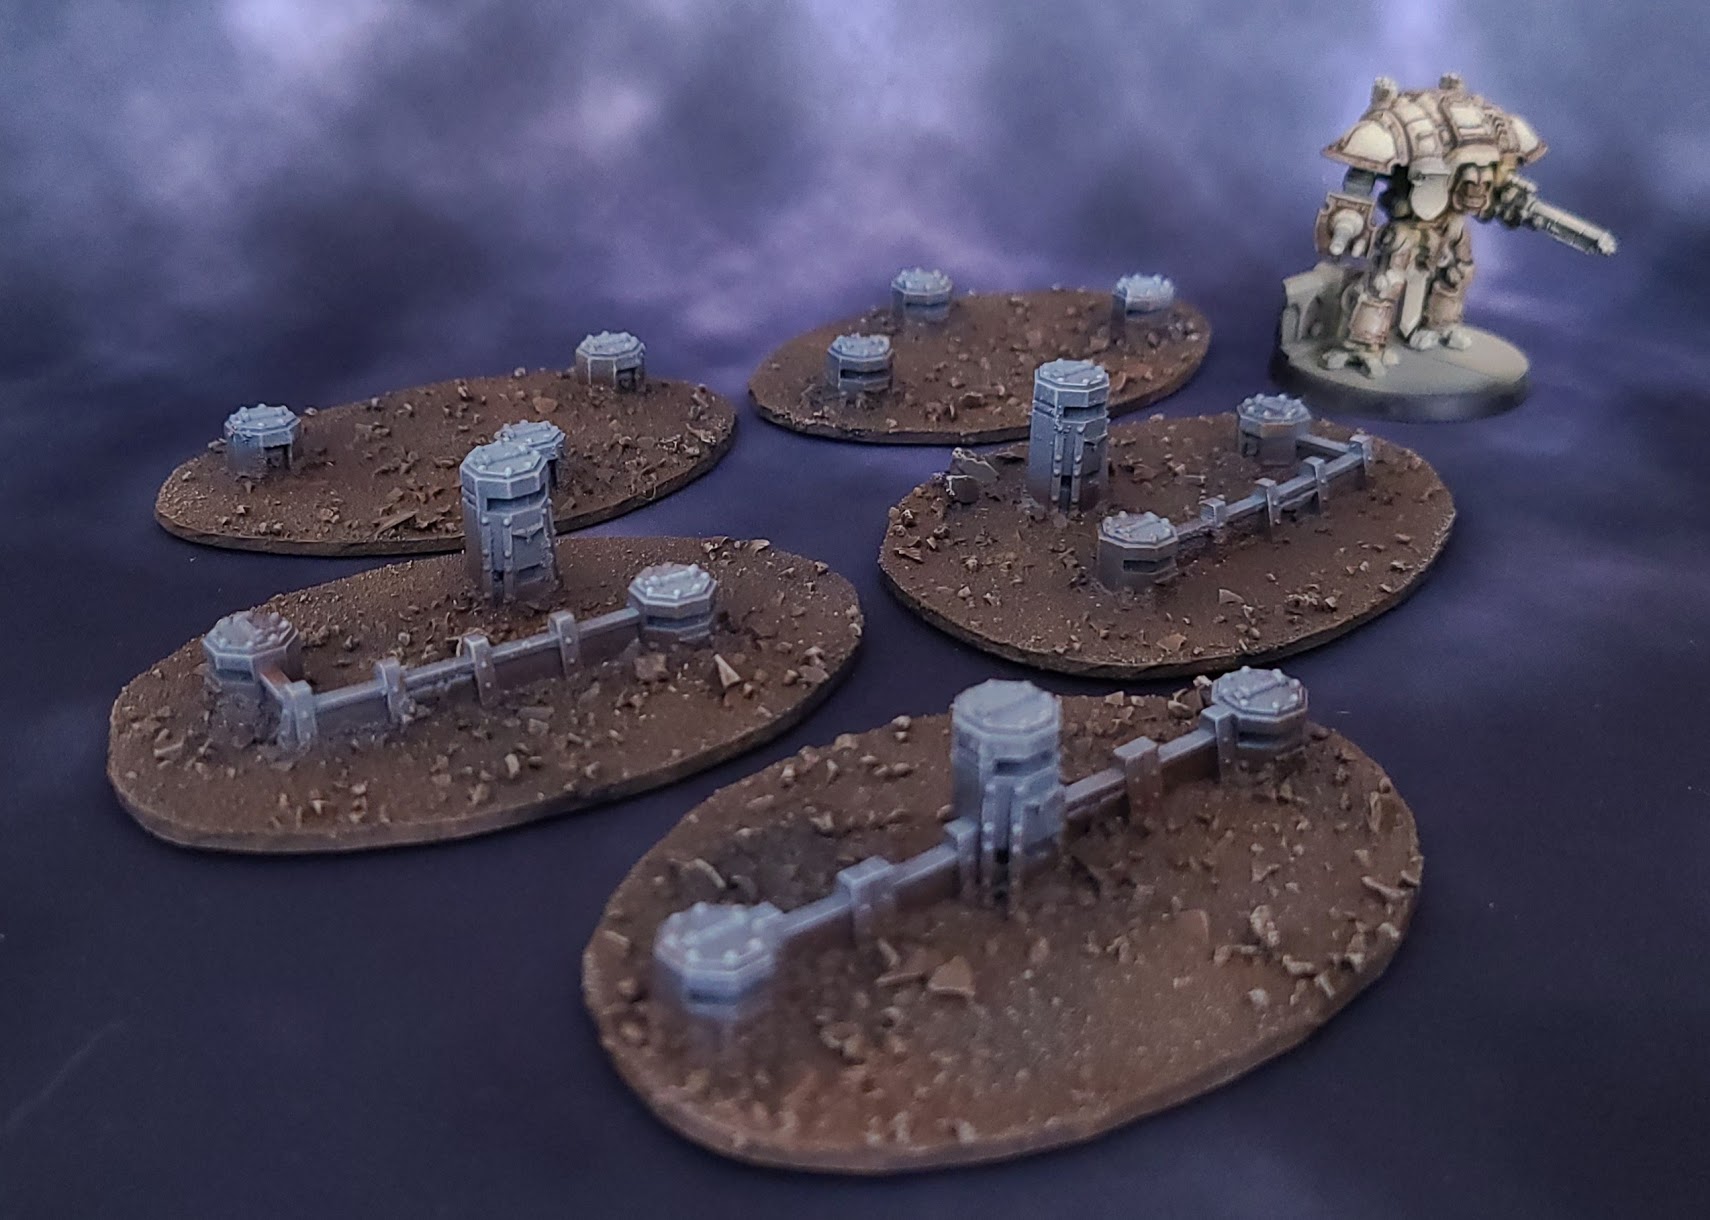
These pillboxes were purchased from Boneshop off Etsy:
I found 15mm scale craters off Etsy. I couldn’t locate the original design, but there appear to be several sellers.

You can also search for old Epic models off eBay and utilize them to create Scatter Terrain. Collectors may recoil in horror, but these wrecks see more table time than what they’re hoarding:

How do I make Scatter Terrain?
As mentioned in a previous article, basing your terrain pieces makes them easier to handle and adds to their longevity. You can learn more about the basing process and the materials used there.
Cargo Crates:
Step 1: Base your terrain pieces (details in our previous article):
Step 2: Cover them in sand, gravel or other modeling material (details in our previous article):
Step 3: Prime them with a tough automotive primer (details in our previous article). You can use black or a more neutral color such as grey (sorry, no pics of this step).
Step 4: Draw an Owl…
Okay, okay I did it again and forgot to take WIP pictures, but bear with me and I’ll walk you through it…
- Drybrush them with your base color of choice.
- I chose a combination of red, yellow, orange and green because the majority of my terrain is already monotone and I wanted these to stand out.
- You can drybrush these with progressively lighter colors and use oil paints for weathering.
- Drybrush the dirt on the bases last (details available in our previous article).

Craters
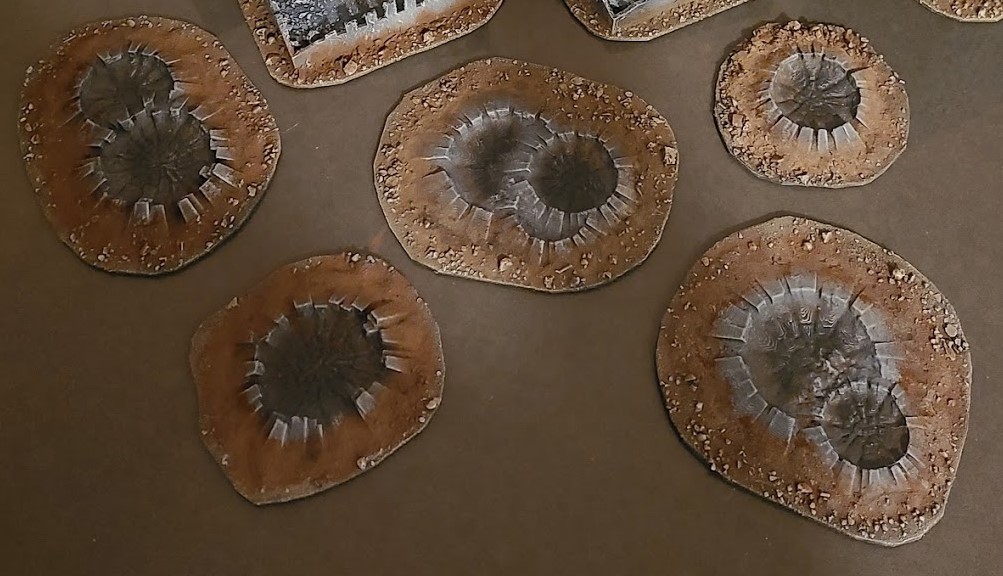
Step 1: Base the craters and prime them (details for basing and priming in our previous article).

Step 2: Roughbrush the base Dryad Bark
Step 3: Roughbrush the crater with Mechanicus Standard Grey
Step 4: Roughbrush the inside of the crater with Corvus Black or Abaddon Black
Step 5: Lightly drybrush the crater with Dawnstone.
Step 6 (Optional): Apply brown pigment powder in the color of your choice (I used some old Forge World weathering powders – but you can get pigment powders from a variety of sources).
Wrecked Tanks

Step 1: Find some old Epic terrain off eBay (nothing too precious or that you’re not willing to destroy).
Step 2: Base your terrain pieces (details in our previous article). I used cheap vinyl flooring tile because it was easy to cut with some shears.
Step 3: Use some sculpting clay or foam putty to bulk up the area around the tanks (Osssptional: Remove or bend the tank turrets to contribute to the wrecked feel).
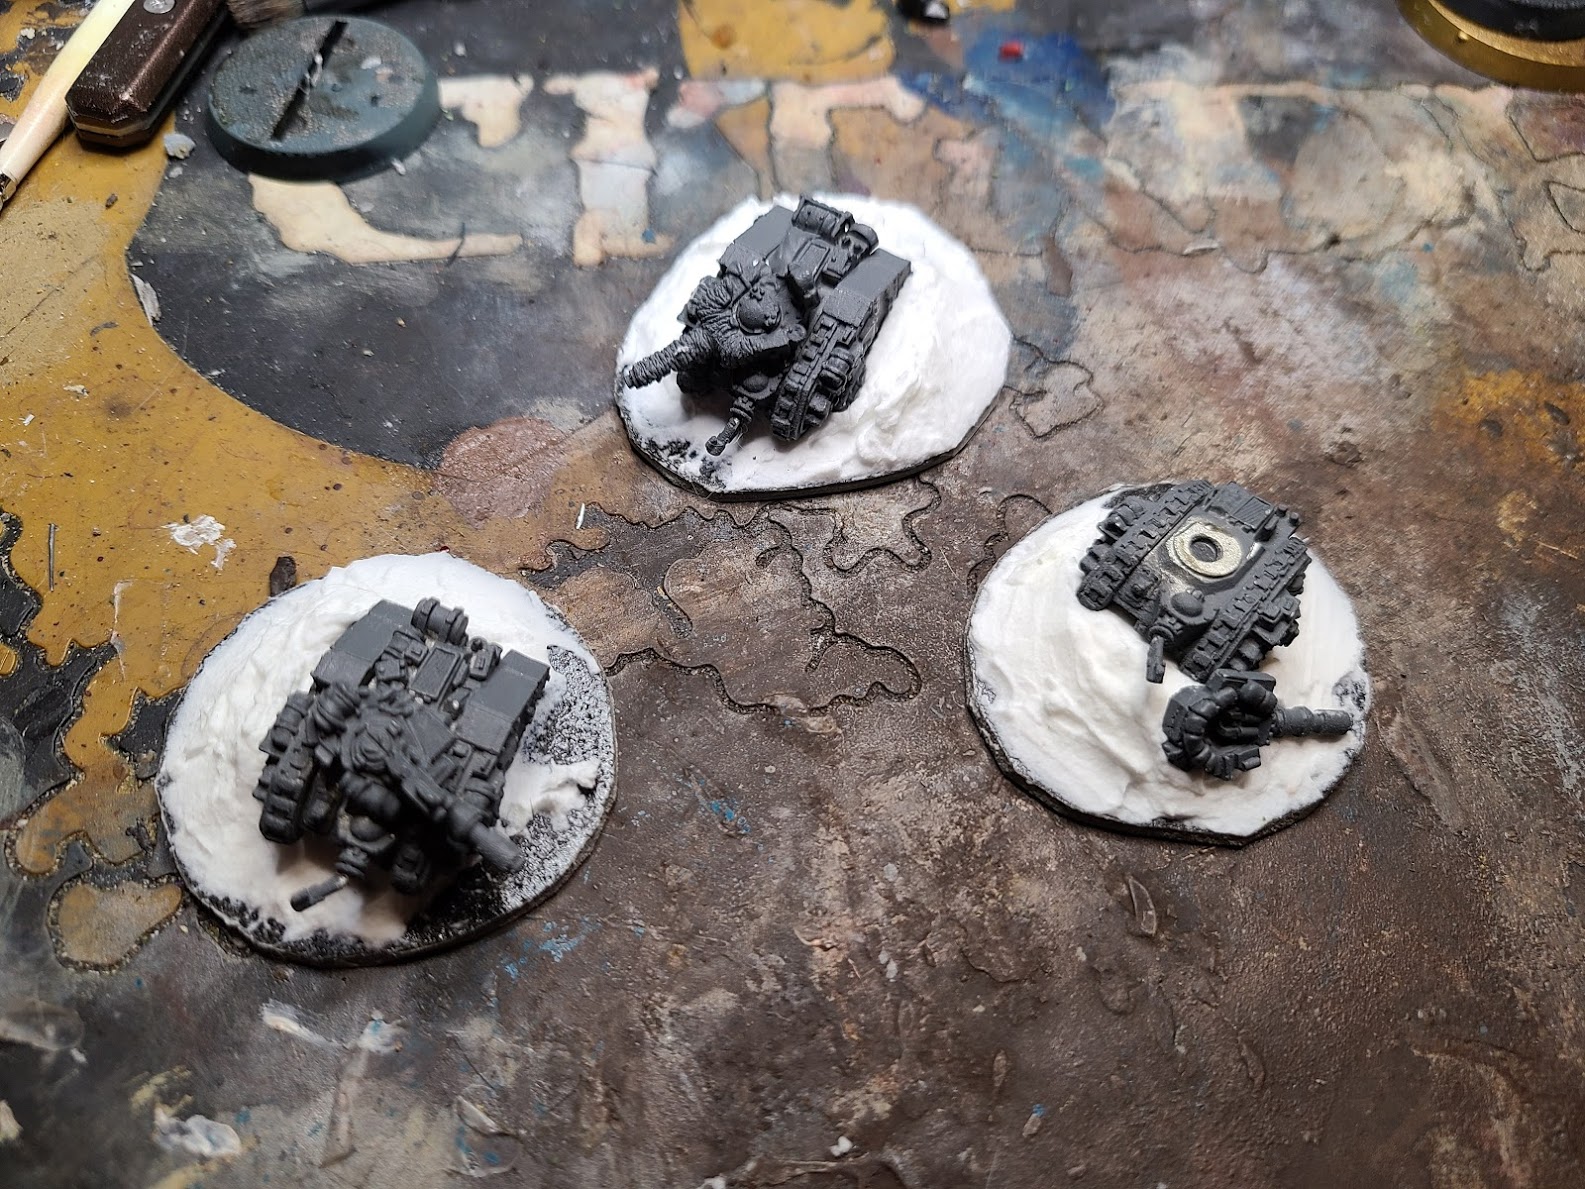
Step 4: Use some sand and rubble (details in our previous article) to bulk up the wreckage:
Step 5: Prime the models with your primer of choice (I used Citadel Chaos Black).
Step 6: Basecoat the tanks in your color of choice. I started with Castellan Green and highlighted up with Ushabti Bone before dulling things down with oil washes.
Step 7: Drybrush the dirt on the bases last (details available in our previous article).
That’s it for now, folks. For the next article in the series, we’ll explore options for cheap Titanicus Terrain!
