
Lizardmen have always been one of my favourite Blood Bowl teams, but for pile of shame reasons I held off buying the GW kit for a long time. Having recently divested myself of some backlog, and thinking about a new team to hit the tabletop with in 2023, I bit the bullet and got hold of the Lizards, and – of course – the Kroxigor to go with them. In this article I’m going to run through my journey getting this hottest of cold-blooded teams from the sprue to the pitch.
Assembly
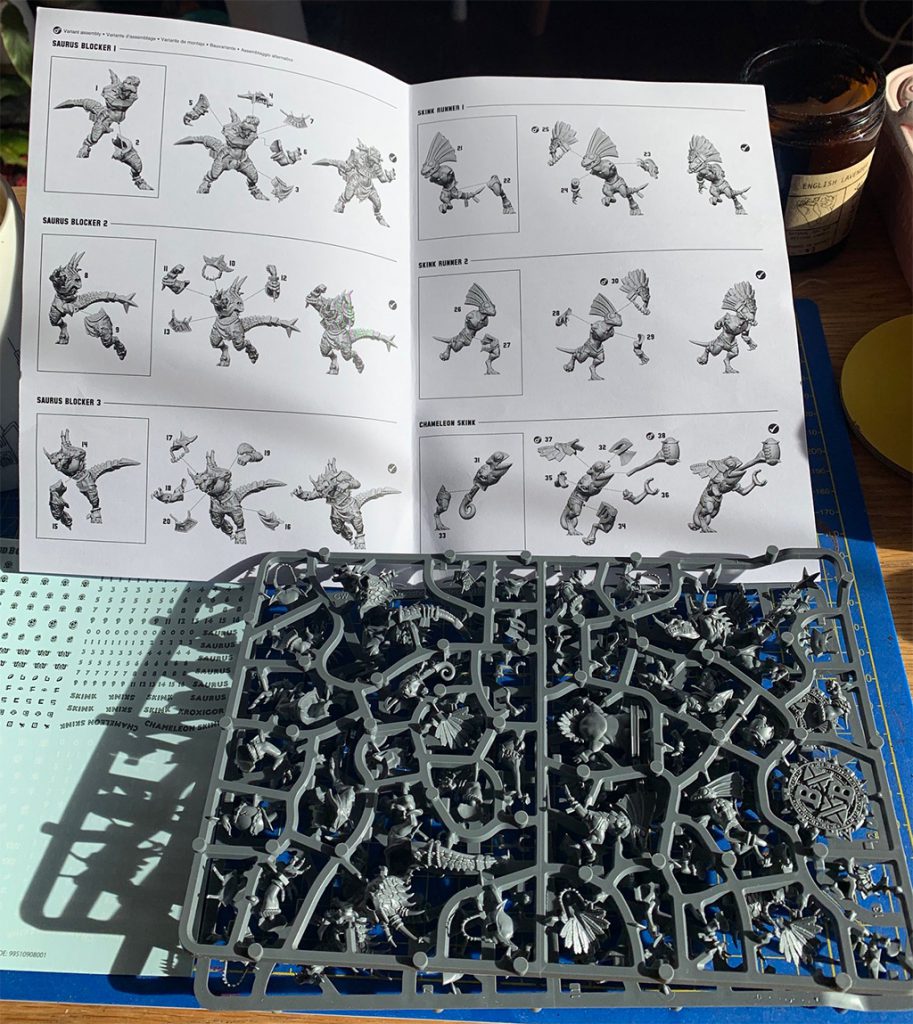
Having heard some horror stories about some of the GW kits, I was a little apprehensive getting started on these guys. However my fears were ill-founded as just about every model and step was hassle-free. Probably the hardest part was getting the Saurus chest plates to line up with the little rope connectors they join to, as there is no hole or recess to ensure they sit in one place on the chest.
I’m not a fan of the look of the facemasks on the helmets, so I snipped these on all the models. I knew this would make painting the mouth area a lot easier too, which was already going to be fiddly.
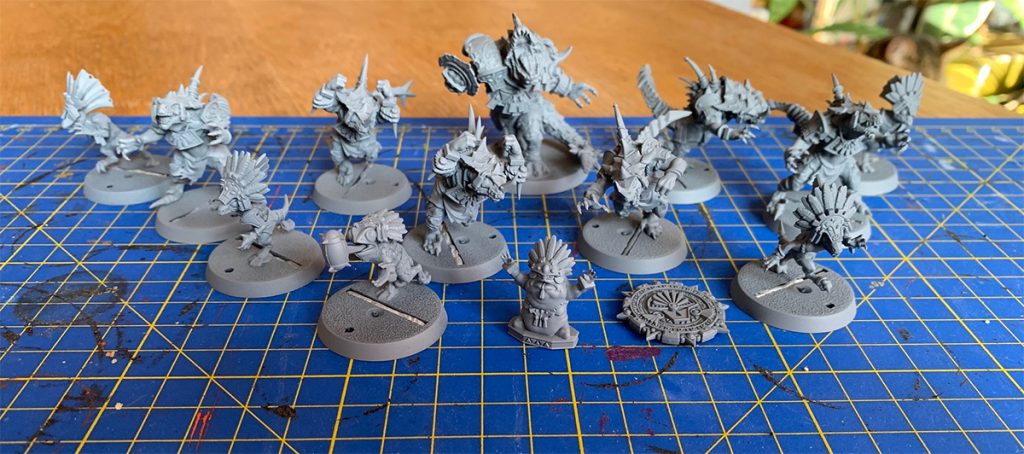
Let me be the thousandth person to say how annoying it is having to fill the slotta holes on the bases that are supplied. This is really lazy stuff by GW now, with none of their BB kits having slotta stands, and makes mounting some of these models in the best spot on their base much more painful than it needs be
The Kroxigor is a lovely model and also very easy to assemble. I ended up using some liquid green stuff to fill some small gaps, but hard to know if that was my failure to fit the model properly or the nature of the kit.
Painting Scheme
I was really torn over how to paint my Lizards. I didn’t have a particular team theme in mind because they would probably see more tourney action than league play, and all I really knew was I probably wasn’t going to paint their skin blue, because I’m contrary like that.
My gut feeling was one of red, green, or possibly even a sandy brown for their skin. For the armor I started from the perspective that it would have to be the traditional gold, as that is so iconic for the Lizards. And then I was left with some cloth pieces that would need to be a color that worked with both the skin and armor.
In the end I went with Red, and decided that the team theme would be volcanic. Cloth pieces would be done in a deep brown with a contrasting yellow stripe, and the bases would be an ash grey to contrast the skin.
Priming
The models were primed with a product that is probably only available in the UK, Halfords grey primer. This is just a standard matt grey primer that gives a nice finish and is considerably cheaper than the GW option. Wilko do a similar one, and with a little research I’m sure wherever in the world you are you can find a cheap priming solution that works just as well.
Fowler: US equivalents would be automotive or hardware store primers. Look for cans that say “matte”, “flat”, or especially “ultra flat”. I especially like the Krylon Camo line.
Painting
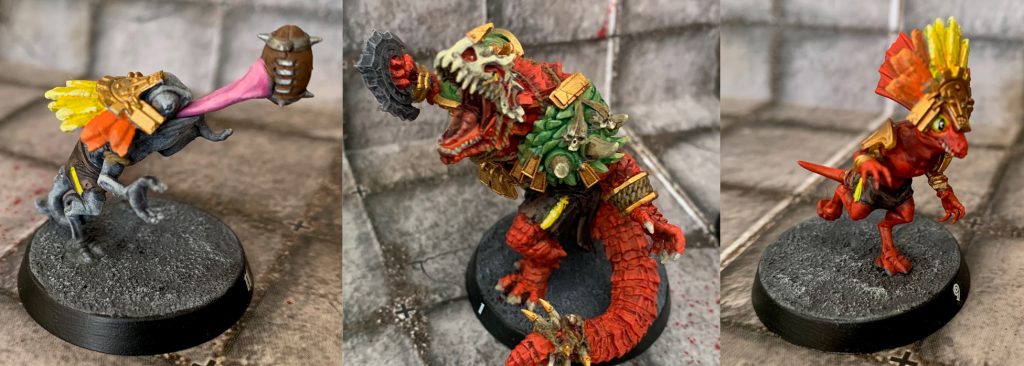
King Ghidra: The skin on the Saurus and Skinks was all done with a base of Evil Sunz Scarlet, because I wanted it to be as bright as possible. This was shaded with Carroburg Crimson and highlighted with Astorath Red dry. The Armor was a base of Retributor Armor, washed with Reikland Flesh Shade and highlighted with Auric Gold. The cloth was Dryad Bark, which is a lovely deep brown, with Nuln Oil to shade, and Gorthor Brown highlights
I decided to paint the feathers on the headdresses in orange and yellow to keep the fiery theme going. For this I used Troll Slayer Orange, shaded with Reikland Fleshhade and highlighted with Fire Dragon Bright, while the Yellow was Flash Git yellow, shaded with Casandora Yellow and highlighted with Dorn Yellow.
After doing so much red, I decided to have a little fun with the Chameleon Skink and paint it in the same colours as the base. This was done with Eshin Grey, building up through Dawnstone, and then Longbeard Grey drybrushed over the top.
Basing
The bases were done very simply (and appropriately) with GW’s Astrogranite technical. I really like the technical range of paints, and you can very quickly get a nice effect with this one by shading the dried paint with Nuln Oil and then drybrushing a lighter grey over the top. I have the Longbeard Grey Dry paint which works well.
I put a Black rim around the base for a clean look, and then applied the white number decals that came in the box. The transfer sheet deserves mention because it is one of the better ones I have seen, with lots of little symbols and icons to liven up your Lizards, and plenty of extra copies of all the decals in both black and white.
Ready For The Pitch
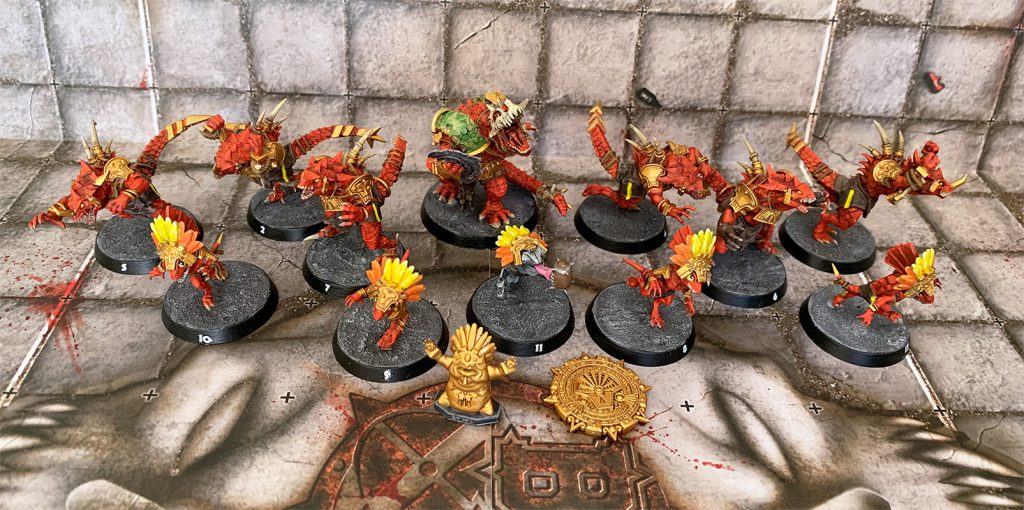
This is a lovely kit and I’m really happy with the results. There certainly were many fiddly bits, with many ropes and hidden crevices breaking up the surfaces and hiding out of sight. You’ll also need to decide for yourself if you want to go with the facemasks or not, but overall this is a very distinctive team (with clearly identifiable positionals!) that makes a great visual impact on the pitch.
As always, if you have any questions or suggestions do not hesitate to drop us a line at Contact@Goonhammer.com.
