
Welcome blunderheads! It’s me, your self-appointed Blunderdome commissioner and participant, Norman! Now that you know the lists and the bracket, let’s start digging into the meat of the dome: the games. Now you may recall from the first article, but we are using the Eternal War mission pack for our matches, because I’m sure as hell not allowing something called a “grand tournament” pack into our casual event.
The Set Up
Our mission for round 1 was Retrieval Mission. For those not familiar with the king of mission packs, Retrieval Mission is a hold 1, 2, more, 6 objective mission with a mission secondary, Minimize Losses, that gives you points for keeping units from your army alive. Now some WAAC try hards may see this as a passive player’s wet dream where they can sit back for a bit, do a couple actions and let the clock run out and just score 100, but we’re playing with real salt of the earth warhammer players and I’m sure no one will take any passive secondaries.
Game 1: Tyranids (Norman (That’s Me!)) vs Iron Hands (Condit)
This game promised to be a real slobber knocker, with my really big tyranid monsters fighting some really big space marine robots. Lots of high power models on the battlefield built to kill and our secondaries would surely reflect that. After a lot of consideration I took Banners, While We Stand We Fight and Minimize Losses. Condit took the same ones. Ok fine, our secondaries weren’t exactly “exciting” or “interactive” but I had some shooting and so did he, surely there’s a good reason there to come out of cover and start fighting.
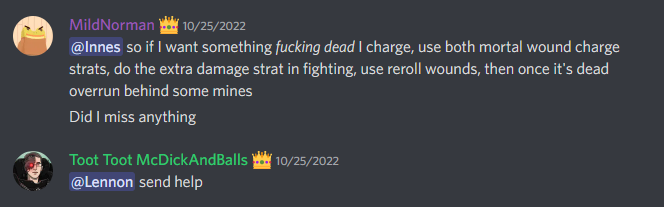
Well you may think that but, did you know with the old bodyguard rule and cover you can just sit there in the open? Also, a crazy thing you can do in the Tyranid codex is charge something, kill it, and use the stratagem Overrun to go away from the enemy. Wild right? With that I can get back to the safe bubble of my tyrant guard and wait until my next turn. That requires me to kill what i’m fighting though, so it’s not like I can just do that every turn right?
Oh…
All is not lost for Condit though! He’s got a real mean melee threat attached to some nigh indestructible dreadnoughts with a combination of buffs that can result in some crazy feel no pain and reduction of damage! (look up the original text for the Reaper of Obliterax) All he has to do is charge my big bugs and make some bug soup.
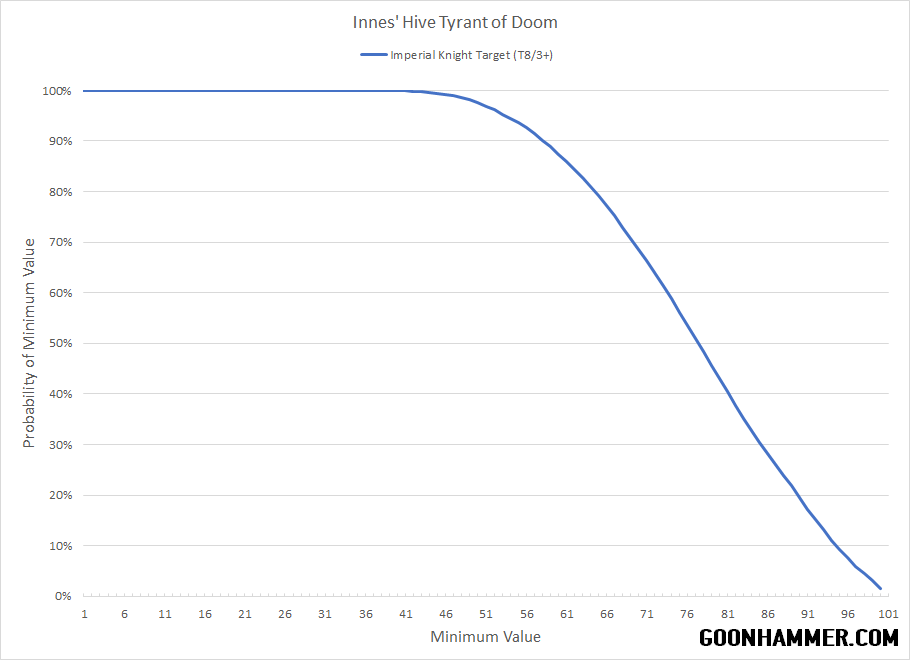
This uh, didn’t happen. Turns out I can use biovores to create a mine field just in front of the dreadnought bowling ball to slow them down, lest they take some mortal wounds, making it impossible for Condit to reach me the entire game. Then I used my Hive Tyrant with the reaper to fly over, kill something, then fly back. Meanwhile my Tyranid warriors go cover to cover, avoiding the dreads, and hit some small squads of marines hanging on objectives to tear down some banners and stifle primary. In total I moved and used 5 units from my army while the rest hung back and kinda just took it easy. There was one part where my hive tyrant failed to kill all the marines in a squad and I couldn’t Overrun, which left him out of position. At this point I remember Condit saying “AHA GOT YOU FUCKER”, but turns out I can use Encircle The Prey to just leave at the end of the turn.
Yeah it was pretty fucked up.
Result: Tyranids Win, 100-67
Game 2 Tau (TheNgumeister) vs Admech (Pendulin)
Ok this game is sure to be more exciting with more than just a couple units dying. Two incredibly powerful shooting armies with fast moving flyers and ways to get across the board fast, it’s sure to be a bloodbath. Let’s check in with our two contestants to see what brilliant strategy they’ve got cooking up.
Well ok maybe they’re just being over dramatic, I’m sure there’ll be a lot of back and forth. For secondaries we have both players taking Minimize Losses, While We Stand We Fight and Admech taking Banners while Tau take Bring it Down. Alright fine so maybe the scoring was gonna be non interactive but someones gotta get shot.
Admech get the first turn and honestly it was pretty much over from there. Turns out six is a big number when you’re talking about Admech flyers. They just flew over, bombed the shit out of some Tau, shot the shit out of other Tau and then a huge brick of super charged Skitarii teleported to midboard using the Solar Flare stratagem to just shoot the shit out of yet more Tau. After the dust settles there’s just 11 Tau models remaining who valiantly shoot back and kill 2 whole planes!
Yeah Tau gets tabled turn 2.
Result: Admech Win, 100-14 (good thing the Tau player painted their models)
Game 3: Drukhari (Dan) vs Votaan (Rocco)
Game 3 features a very interesting match up of old hotness vs new hotness. Drukhari was a book so powerful, they dominated the meta for a very large portion of 9th edition, surviving multiple nerfs, and staying relevant today. Meanwhile Votann are a brand new faction, one so strong that Games Workshop nerfed it before it came out. But this is Blunderdome baby! Casual play where we don’t need to worry about crazy combos or erratas, we’re just playing the books here. Alright I’m getting tired, so I’m gonna let Drukhari pilot Dan take this section.
I do get to go first, and now I start making good decisions. First, Rocco has picked Bring it Down as a secondary, which is punishing as hell for my list since every Cronos and Raider hands out 2 points each. But, I can deny Rocco these points by hiding my Cronos and my Raiders in my deployment zone all game long, only peeking out with a few raiders when I have to. I can then just start putting Raiders into Strategic reserves too, so they can hang out off the table for as long as possible. I also rush up a squad of reavers to the center opening of Rocco’s deployment zone between the obscuring buildings to trap him inside his deployment.
On my second turn, I make a possibly game-winning play followed by a mistake. The game winning play comes from when Rocco pops my Raider on his turn and the Wyches, wracks, and Razorflail Succubus spill out. I use this to my advantage to disembark the wyches and Succubus aggressively closer behind a wall and put the wracks on the objective. So turn 2, I score 15. I then punish the hell out of Rocco for only having one body on this objective (Rocco Note: You killed the other 9 bodies.) by advancing four wyches onto the objective to steal it, and then charging the Hearthkyn with the razorflail Succubus to clean them up. My mistake here is I overcommit a bit to move blocking by moving the reavers up to lock the land fortress here that my Succubus already tags with her consolidate move, but it’s a minor error considering that this move means Rocco only scores 5 points on his turn for primary.
The rest of the game is a whole lot more move blocking and playing cagey like this. In retrospect, this was very bad for my mission secondary scoring as I really didn’t want to sacrifice that much of my army. But it does slow down Rocco enough to prevent him from stopping my Herd the Prey scoring which is great. There is a moment late in the game where Rocco does almost sting the game around in his favor when he charges the Cronos on turn 5 because I didn’t back them away enough, but fortunately for me his Hearthguard don’t kill any of the Cronos and Drazhar manages to pop a Land Fortress with help from Incubi. My humble evil space elves are able to trounce the space dwarves, and I walk away with a round one Blunderdome win.
I made mistakes in this game for sure, but all and all man I’m proud of how I played compared to how I played this army a year ago. I was much more considerate of what I needed to do to score and what I needed to do to win, instead of just trying to zoom around the table and kill stuff. Which is very fun, but usually meant I got carried away and died when dice didn’t go my way or I just bit off more than I could chew.
I don’t know if the Drukhari have the power to beat anything else here in the Blunderdome, but I’m very pleased with this win. Now, I go boldly unto the semifinals.
Result: Drukhari Win, 90-67
Game 4: Orks (SoylentRobot) Vs Harlequins (Jamestfl)
Closing us out we have Orks and some clowns. The two go together like oil and water in the sense that one can’t touch the other one and then one causes irreparable damage to the local ecosystem. Ork shooting was one of the most lethal forces in the game for a while due to the effectiveness of indirect fire Squig Buggies and powerful Wazbom Blastajets. Harlequins on the other hand also have withering shooting from their Voidweavers and fusion pistol boats, in addition to some incredibly powerful defensive buffs.
For secondaries, Harlequins take the mission secondary, Bring it Down, and Deadly performance, while the Orks Take da Good Bitz, Bring it Down, and Attrition both armies looking to bloody the others nose while hopefully not dying.
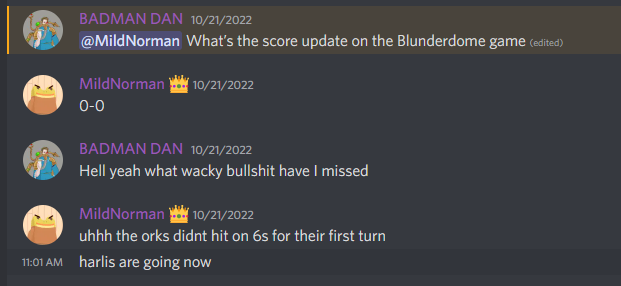
Orks get the first turn and start shooting. An important note about Orks is that most of them are BS 5, so when shooting Light Harlis they’re hitting on 6s. Now Freebooterz help mitigate that if they can get a kill, 6s make it a bit of a tall order. It doesn’t go super well.
After the dust settles only a couple boats are smashed and the rest start picking apart the Orks. After round 2 all that remains are a couple squig buggies in cover and some gretchen holding a back line objective. They don’t last much longer, and the game is called on round 3.
Result: Harlequins Win, 100-48
And that’s round one in the books! With 3 out of 4 games ending in 100 point wins for one side I think we’re starting to see a trend with the lethality of these books. I’m sure it’s fine though, we’re playing just like games workshop intended, and our casual players are having a great time free of the tyranny of constant “FAQs” and “balance passes”. Everyone’s having fun. Don’t ask.
Have any questions or feedback? Drop us a note in the comments below or email us at contact@goonhammer.com.
