
Do you dream of a golden age gifted to you by benevolent beings from beyond the stars? Do you want to overthrow your oppressors and prepare the path for that glorious future? Would an extra arm or two be really useful for getting your armies painted on time?
If you answered yes to any of these questions then rejoice, for the Day of Ascension is at hand, and the star children have gifted the Genestealer Cults a 9th Edition codex of their very own. The omens are looking auspicious on this one too – this book rules, and after a tough year for Cult players it should provide a spectacular shot in the arm, powering up a bunch of units and opening up plenty of new builds, while still retaining some of the unique tricks of the 8th Edition book.
We’re excited about this one and can’t wait to see players really dig into it, and we’d like to thank Games Workshop for providing us with a review copy so we can give you an early look at the contents.
Why Play Genestealer Cults?
Genestealer Cults thrive on surprises, able to start outwitting their opponents from turn one with Cult Ambush and a few nifty deployment tricks, then enjoying improved deep strike on all of their later waves. This lets them launch brutal strikes at any weak points, and with the new Crossfire rules they can do this either at range or in melee. To hold the board while these tactical strikes are prepared, vastly improved Neophytes and Goliath vehicles provide a solid anchor for the army, forcing the opponent to commit to a fight that opens them up to vicious flanking maneuvers. Finally, a diverse cast of powerful characters offer up a panoply of different tricks that can be used to turn the tide of battle. Play Genestealer Cults if a force with a core of industrial workers and salvaged vehicles, supported by more monstrous lurking horrors, and a feinting, cut-and-thrust game style appeals to you.
What’s in this Book?
- Lore for the insidious forces of the Genestealer Cults
- Rules for building a Genestealer Cults army, with support for six of the best known cults and a new system for creating a custom one.
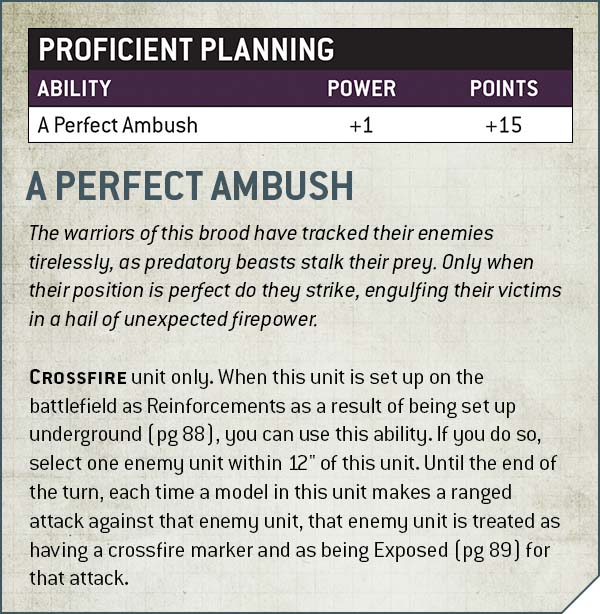
- Rules for Proficient Planning, powerful upgrades you can apply to your units allowing them to pull off some particularly devious tricks on the tabletop.
- Crusade Rules, including rules for gradually overthrowing and conquering an unsuspecting world.
- All the Stratagems, Relics and Chapter Approved rules you’d expect from a 9th Edition book, plus rules for bringing a small contingent of Astra Militarum along for the ride.
- Datasheets for all the Genestealer Cult units.
The Five Best Things About This Book
- Cult Ambush: It’s back! Blips return for setting up ambushes, and on top of that your units that set up from underground now get improved deep strike across the board.
- Proficient Planning: This is one of the best upgrade systems Games Workshop have published in this Edition, striking a fantastic balance between giving Genestealer Cult players access to some of the wild tricks that defined their 8th Edition books, while being less overwhelming for their opponents to wrap their head around.
- Crossfire: Crossfire’s powerful shooting boosts mean that the Cults can now launch alpha strikes in multiple phases, no longer relying on sacrificial melee units to get things done, and enabling a more balanced playstyle.
- Goliaths: Crushing your opponents beneath the wheels of the Cult’s iconic industrial vehicles looks like it might finally get there as a plan, with spectacular upgrades to the datasheets for Rockgrinders and Trucks.
- Choices: The internal balance of this book looks fantastic, with the vast majority of units having a role to play, most of the cults looking viable, and plenty of ways you can tweak and tune your list.
Where’s Crusade?
All Genestealer Cultists dream of conquering a planet of their very own, creating a shining beacon in the void that will surely ensure that the Star Children notice you. Good news – the new Crusade Rules let you do just that, and you can find out more in our full Crusade review next week.
The Rules
Detachment Rules
Genestealer Cult Detachments
Like most factions, the codex starts out by defining what a Genestealer Cults detachment is, and some rules that apply when you build one. Unsurprisingly, to be a Genestealer Cults detachment, every model in the detachment (excluding Unaligned models) must have the GENESTEALER CULTS keyword, which means being drawn from this book. In addition:
- If every model is from the same CULT, all units (and yes this now means all units, no more exclusions) gain a Cult Creed and access to additional rules.
- If your army contains a Patriarch, then that’s the only model you can choose as a Genestealer Cults warlord. If you don’t have one, but do have a Magus or Primus, then only one of those can be selected, and you can never give a Warlord Trait to a non-HQ Genestealer Cult unit. This shouldn’t hurt too much, as outside of tiny games you’re pretty much always going to want to make a Patriarch your warlord, and the way this is worded means that in Hive Mind soup you still have the option of choosing a Tyranid unit instead.
- You can only include each CHARACTER unit once per detachment. Same deal as in 8th.
- For each HQ unit you include that takes up a slot, you can include one other CHARACTER unit in the detachment without taking up a slot.
This last one is a very nice new bonus – as we’ve been building lists, we’ve often found ourselves wanting four HQs, and this means you can squeeze that in to a single Battalion. Alternatively, if you’re going with patrols or other detachment types, it lets you squeeze in a few extra Elites picks. Very handy, and a great trade off for the limitations rather than them being all downside.
Brood Brothers
Genestealer Cults retain the ability to bring a small contingent of Astra Militarum along with them in a Brood Brothers detachment. You can include one of these for each Genestealer Cults detachment in your army (so functionally, you can have up to one in most games) even though this would normally break the requirement for every detachment in your army to share a faction keyword. As long as you don’t spend >25% of your points total on Astra Militarum units, this also doesn’t prevent units in your army from benefiting from the Crossfire rule, which is the monofaction bonus in this book.
Units included in Brood Brothers detachment must have the <REGIMENT> keyword (so no more Scions), which gets replaced with BROOD BROTHERS, and they get a special regimental doctrine of +2 to leadership and the Unquestioning Loyalty ability for INFANTRY. You also cannot include any Warlord Traits or Relics in one of these detachments, and they’re walled off from taking Tank Aces by the wording on that ability.
Notably, in the new book this is also the only way to take Astra Militarum units in a GSC army – you no longer have the option of taking Infantry Squads, Sentinels and Russes in your main detachments, and they don’t have datasheets in this book (which is fundamentally a good thing for the game as a whole, the fewer places each datasheet is printed the better). These haven’t seen much use since cramming extra Troops into your army stopped providing extra CP in 9th, but Scout Sentinels were seeing the odd bit of play in Hive Guard soup to protect Hive Guard, so RIP to that.
As to how this will be used, the answer is likely mostly in casual and narrative games – Genestealer Cults are a highly synergistic army even by the standards of 9th Edition, so spending a quarter of your points on units that don’t get to participate in Crossfire and have to deploy conventionally isn’t appealing in a competitive environment, though a metagame could certainly arise where you’re so desperate for indirect fire that Manticores might sneak in. It’s good to see the enduring support for this for themed and converted armies though, with my one minor complaint being that currently taking a Baneblade or Shadowsword with sponsons narrowly breaches the 2000pts limit, so switches off Crossfire. Unless these are coming down in points in the near future (always possible), it would be nice to see an exemption to the limit added for Super Heavy Auxiliary detachments, as awesome super heavy conversions have historically been one of the most common uses of Brood Brothers.
Army-wide Rules
Conceal
How It Works
Cult Ambush is back, blips and all! The Cults’ signature deployment ability returns with much the same feel, but tweaked to rebalance the power slightly – you now get some baseline bonuses for units that choose the deep strike route, at the cost of the power of blip manipulation tricks being dialed back considerably (though there are still some good ones), so it’s harder to use them to completely shut down an opponent’s early options.
We’re getting ahead of ourselves there – for newcomers, what does this ability do? Well, Genestealer Cultists are incredibly sneaky insurgents, and also pretty squishy, so just setting up on the battlefield like anyone else would be a foolish move. Instead, every Genestealer Cult unit has the Conceal ability, which gives them two choices when setting up:
- Set up in Ambush. More on that in a second.
- If they are an INFANTRY or BIKER unit, set up underground, an improved version of deep strike. You declare this in the Reserves and Transports step of deployment like you would for any other army.
When you deploy your units, you don’t deploy anything that’s been set up in Ambush on the table. Instead, each time you would set up one of these units, you place one Ambush marker on the table, wholly within your deployment zone.
These get revealed in the first battle round, in your Command Phase if you go first, or at the end of the opponent’s movement phase if you go second. For each Ambush Marker in turn, you pick a unit that’s in ambush and set it up, placing the first model within 1” of the centre of the marker, >9” from any enemy units, and wholly within your deployment zone, then the rest of the unit wholly within 6” of that first model, >9” from any enemy units, and also wholly within your deployment zone.
Until an ambush marker is revealed, opposing units cannot move (or be set up) within 9” of the centre of it, and for returning players note that it’s no longer “end a move”, it’s now just “cannot move”, so markers set up 18” from one another do form a barrier that opponents flat out can’t cross, potentially handy for blocking out enemy Aircraft. Finally, there are some sensible additional qualifications built into the rule itself (an extremely welcome trend throughout this book), notably that a unit set up in Ambush counts as having been set up on the battlefield, and doesn’t count as Reinforcements at the point it’s revealed from ambush, neatly side-stepping a whole bunch of potential weird interactions.
For units set up underground, meanwhile, this works like a normal deep strike ability, but better. When such a unit is deployed, they can either be set up anywhere that’s >8” away from the enemy (rather than the usual 9”) or can instead choose to go anywhere >6” away at the cost of not being able to charge that turn. Finally, if they have any Command Phase abilities, they can immediately use them the first time they set up.
Impact
So what does this all mean? Good things, if you like Genestealers. The blanket bonuses to deep strike for units setting up underground are really handy – 8” rather than 9” makes a decent difference to your chances of charging out of deep strike just on baseline, and a big one once re-rolls or other buffs start getting involved. The 6” option is more subtle in application, but can be extremely useful for setting up Crossfire positioning (more on that in a second) or squeezing a unit in for an Action – with access to 45pts Troops unit that can set up like this, Genestealers are going to be the single best faction in the game at locking in the new Retrieve Nachmund Data Secondary. Finally, getting to use Command Phase abilities immediately is a particularly strong piece of game design, as it means setting up units that either have or want to benefit from these Underground is actually viable, vastly broadening your options.
The Ambush option, meanwhile, means you still get a vastly more flexible deployment than most armies, and is a powerful tool for adapting your plans to going first or second. The wording here is also much cleaner than it was in the initial 8th edition version, heading off various potential issues right out of the gate, another commendable piece of design work. On the note of “things this ability did in 8th”, I suspect the news that it’s back has a lot of Cult players rubbing their claws together in glee, and anyone else who played on the tournament scene in the summer of 2019 recoiling in horror. With that in mind, it is worth highlighting that while on paper this is essentially the same ability it was before (arguably better because of the full movement blocking), the tools you have for manipulating it are substantially toned down.
Most notably, there are no abilities that let you place any extra markers, and only two that functionally allow you to remove one, both of which are paid upgrades that are telegraphed on your army list. You do have the Meticulous Uprising stratagem to redeploy two of them, but in general you can no longer just sprinkle Ambush Markers onto the table like Salt Bae and be confident you’ll be able to completely no-sell your opponent’s first turn pretty much whatever happens – each marker placed needs a bit more thought put into it, as it’s vastly more likely to represent an actual unit when all is said and done. As the Cult player you still get plenty of power and flexibility out of this, but it’s going to be a lot less frustrating from the other side of the table.
A final note on this is that, somewhat to my surprise, this isn’t the mono-army bonus, so if Hive Mind soup is your jam you can still set up Ambush markers, something that Hive Guard players have been using to protect their precious shooty bugs in the last few months. My suspicion is that we’ll see this a bit less because of the loss of Sensor Decoys – without being able to place loads of extra markers, you need to bring as many GSC units as you need to build your defences, and will need to pay extra CP for Meticulous Planning or points for Proficient Planning to avoid the units being throwaway or badly out of position. It may not go away entirely though – I can imagine a Patrol detachment of a Patriarch, Sanctus or Clamavus, and a single Acolyte Unit upgraded with They Came From Below seeing play. This gives you three blips to build a wall and/or Hive Guard safety triangle, you can pull the Acolytes Underground instead of revealing them, and the other two units will provide good value from within your lines.
Crossfire
Crossfire is a new ability and keyword that appears on some (but not all) Cult Datasheets, and acts as their monofaction bonus – you only benefit from it if every unit in your army (excluding Brood Brothers up to 25%) is GENESTEALER CULTS, and all from the same CULT.
Your reward for meeting these conditions is an extremely strong boost to your shooting capabilities, which is massively helpful to the faction as a whole as it allows them to do real damage without committing to melee, substantially increasing their flexibility. I think it’s just about possible that you could contrive a very melee-focused list willing to forgo this to mix cults, but the default assumption should be that you’re incorporating this into your plans, because it rules.
As you might expect from a rule about positioning for cunning ambushes, the rules here are somewhat wordy, but they’re well explained and pretty intuitive, so people should grasp them pretty quickly once they start using them (and the same diagrams shown on Warhammer Community also feature in the book).
Crossfire provides benefits based on two things:
- Crossfire markers.
- Whether the target unit is Exposed to the firing model.
When every model in one of your CROSSFIRE units shoots at the same enemy unit, you can place a Crossfire marker next to the target unit after firing as long as you scored at least five hits, or a hit with any weapon with a damage characteristic other than 1. Crossfire markers last to the end of the turn, and there’s no benefit from having more than one on a single unit.
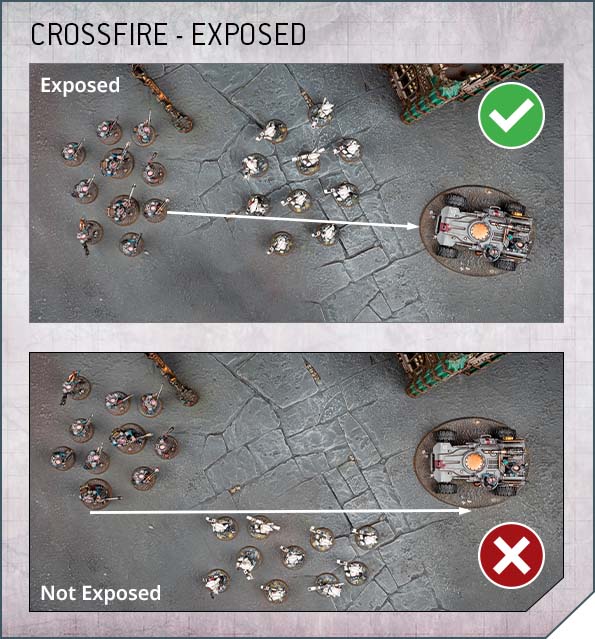
When a CROSSFIRE unit shoots at a target that has a Crossfire Marker, they always get +1 to hit, and may get additional benefits if the target is Exposed. The target is Exposed if you can draw a line from a model in the firing unit to another visible (blocked by Obscuring terrain as normal) CROSSFIRE unit in your army that crosses the base or hull of any model in the target unit at the time targets are chosen for the attacks. If the target is Exposed, the attacks also get +1 to wound, and ignore the benefits of cover if the target is also within 12”.
This is extremely good, and will be used to great effect by most armies built with this book. At baseline, it’s very easy to set up +1 to hit against any target you want to take down, which anyone familiar with Freebooterz’ recent exploits will recognise as being extremely powerful. There are plenty of high volume and multi-damage weapons in this book, and units like the Sanctus and Jackal Alphus are perfect for landing a precision multi-damage shot to kick off the party. Exposed is harder to set up on baseline, but there’s lots of tools in the book to let you treat a target as Exposed with stratagems or abilities, so what you essentially end up with is an army with a very broad set of options for getting +1 to wound on shooting (known good effect) that sometimes gets it for free!
This makes every unit in the army with CROSSFIRE and a decent gun punch above its weight, and it’s especially good news for the vehicles, as in line with most books they don’t have CORE, so are hungry for access to other methods of boosting their output. It also fires Neophytes with heavy weapons to the forefront of the army’s plans, especially either clustered around a Iconward or firing out of Goliath Trucks. Finally, it adds particular value to units that are good at setting it up – a five-model Acolyte squad with hand flamers can pop up 6” behind the enemy and automatically apply a Crossfire marker, Atalan Jackals can swoop round and chuck a demo charge, and the Sanctus or Kelermorph become very reliable hype men for the rest of your forces. Get familiar with how this works quickly – it’s gonna help a lot.
Unquestioning Loyalty
The next returning ability that appears on many units (all INFANTRY) is Unquestioning Loyalty. A model with this ability can take a hit for a CULT CHARACTER within 3” that fails an armour save by taking an Unquestioning Loyalty test. Roll a d6, and on a 4+ the model taking the test is slain and the attack sequence ends instead of the CHARACTER taking damage. This is another returning 8th Edition trick, and it’s still useful for eking out an extra lease of life on a key model like your Patriarch (who also gets +1 on the rolls), but do note that it’s been tightened up a bit – you used to be able to kill a single model in a unit that was within 3” on a passed test, where now the test has to be taken and the price paid by a model in range. Make sure to position accordingly, and keep some friends close if the opponent is packing snipers.
Call the Cult
Nearly there, and for the next trick we have something mostly new – promoted from a stratagem in 8th, Summon the Cult lets you put models back into each unit that either has a Cult Icon or are CORE and are within 6” of an Acolyte Iconward in your Command Phase. When you Summon the Cult, you put d6 models back into a Neophyte unit or d3 models back into any other unit, and while you can do this twice if you have an Icon and are in range of an Iconward, you’re capped at 6 and 3 models total per unit respectively (so no high rolling six Atalans back into a badly mauled unit).
This is very eye-catching ability, and potentially extremely good, though the Cult Icons are priced accordingly (20pts). With that price, our suspicion is that this sees most use with max sized blocks that can justify paying that price, and in armies with loads of 10-model Neophyte units surrounding an Iconward, the latter of which has the potential to be extremely tough to deal with!
Industrial Weapons
Finally, we have a label that’s applied to a bunch of weapons then referenced in various effects and stratagems – Industrial Weapons. This is handed out extremely generously – pretty much all the Cult’s unique ranged weapons are included, as are a surprising number of melee weapons, including Relic versions of each. Even some stuff you might not have expected to be buff compatible like demolition charges get the nod, so just remember that when we talk about tricks that works with these, it’s compatible with a lot of weapons.
Subfactions – Cults
Like almost all armies, Genestealer Cults get a selection of different subfactions to choose from (here, unsurprisingly, CULTS), each of which provides a detachment ability called a Cult Creed and access to a Stratagem, Trait and Relic (the last of which requires your Warlord to be from that CULT). In addition, returning from 8th, Genestealer Cults join Grey Knights in getting Cult-specific Psychic Powers, which all CULT psykers know in addition to any other powers. That’s a very nice extra upside, especially as they no longer replace another power – it’s just free real estate.
Finally, like most 9th Edition books, if none of the six named cults take your fancy, you can build your own from custom traits, using a new point buy system. We’ll cover that after going through the named options.
Cult of the Four-Armed Emperor
We start with the most famous of the Cults, who are distinct all-rounders. Their Cult Creed provides a boost for both units that want to stay at a distance (Light Cover in the open outside 12”) and those that want to burst from the Underground and slam into the enemy (re-roll charges, which takes you up to a 66% success rate when you’re looking for 8s). That’s a pretty effective pairing and you can’t go too far wrong with this cult, especially as their stratagem is also going to help in most games – A Plan Generations in the Making has gotten the same update as Agents of Vect, now being usable for free once per game to increase the cost of future uses of a Stratagem the opponent has just activated (other than Command Re-roll). It’s not splashy, but there’s plenty of viable targets in the metagame right now, and hey, it’s free.
If you like free stuff you’ll also love the Warlord Trait Inscrutable Cunning, which lets you discount a Strategic Ploy or Battle Tactic that you use on a Four-Armed Emperor unit within 12” of the Warlord by 1CP once per Battle Round, and once per Stratagem. The Genestealer Cults stratagem sheet is unusually skewed towards these two categories, so this should pretty much always bring you value. The last standout here is the psychic power Undermine, which is an eye-wateringly painful move debuff that you can drop on a visible enemy unit within 18”, cutting their movement, halving Advances and subtracting 2” from their charges. The relic is the only thing that doesn’t stand out as excellent, essentially letting either a Primus or Locus double their attacks at the cost of dropping down to D1, and getting auto-wounds on 6s to hit. It’s fine, but you don’t need it and there’s a much spicier choice for a murder Primus.
That’s the only thing that’s even vaguely a miss here though – the rest provides an excellent, balanced baseline option, and given that Cults are pretty CP hungry, the substantial extra battery that the Warlord trait provides is certainly going to lure many players to this cult.
The Hivecult
As we go through the rest of the Cults, a trend you’re going to see is that they provide lots of different options that can help augment your firebase, either by buffing up the offensive or defensive capabilities of the Neophytes that are going to be a mainstay of many lists. The unusually disciplined forces of the Hivecult are very much in the “offensive” bucket, with a variety of abilities that will keep your troops firing at maximum efficiency. Their Creed allows units to Fall Back and shoot (at -1 to hit), and also to shoot while performing Actions and after Advancing. If you want an absolute horde of Neophytes taking over the table and blasting away, this is pretty potent, and it also lets you get great value out of hand flamer Acolytes – turn up, Retrieve Nachmund Data and toast some enemies at the same time. This cult should excel at maxing out its Secondaries (even standing out in a faction that’s great at them across the board).
They also get some tools to do some serious damage. The Hivelord warlord trait is extremely good for boosting your Neophytes further, giving CORE units within 6” extra hits on 6s when shooting. Given the sheer number of shots you’re going to be cracking out from a fully operational firebase this is going to provide excellent value, and if you can set up Crossfires (extra easy with your flexible flamer Acolytes) then even enough autogun shots at +1 to wound are going to add up. The Stratagem also helps with this – when one of your CORE units targets all their attacks at the same target, you can spend 1CP to add a Crossfire Marker before the shots are resolved, handy if you’re short on setup tools.
The Relic and Psychic Power go in a different direction to the rest of the stuff here, but neither is bad. Vockor’s Talisman is a truly monstrous thing to put on a Patriarch, as it means that on a 5+ to wound in melee the target cannot take saves against it at all – including invulnerable saves. Remembering that Patriarchs have full wound re-rolls, there’s a very good chance that any enemy HQ relying on their invulnerable just dies when you swing into them, especially if you add Biomorph Adaptation as well. Finally, Synaptic Blast is a mostly better Smite – same warp charge and range, same baseline effect, but a chance to upgrade to flat three mortals by rolling a D6 against the target’s Movement characteristic, with your roll being boosted by the number of nearby HIVECULT CORE units (of which you’re going to have a lot).
Nothing here is bad, and if you just want raw damage from massed Neophytes this is your best bet. The question mark hanging over it is whether that extra output boost is worth it compared to taking one of the Cults with defensive boosts for the horde, which we’ll see in a second.
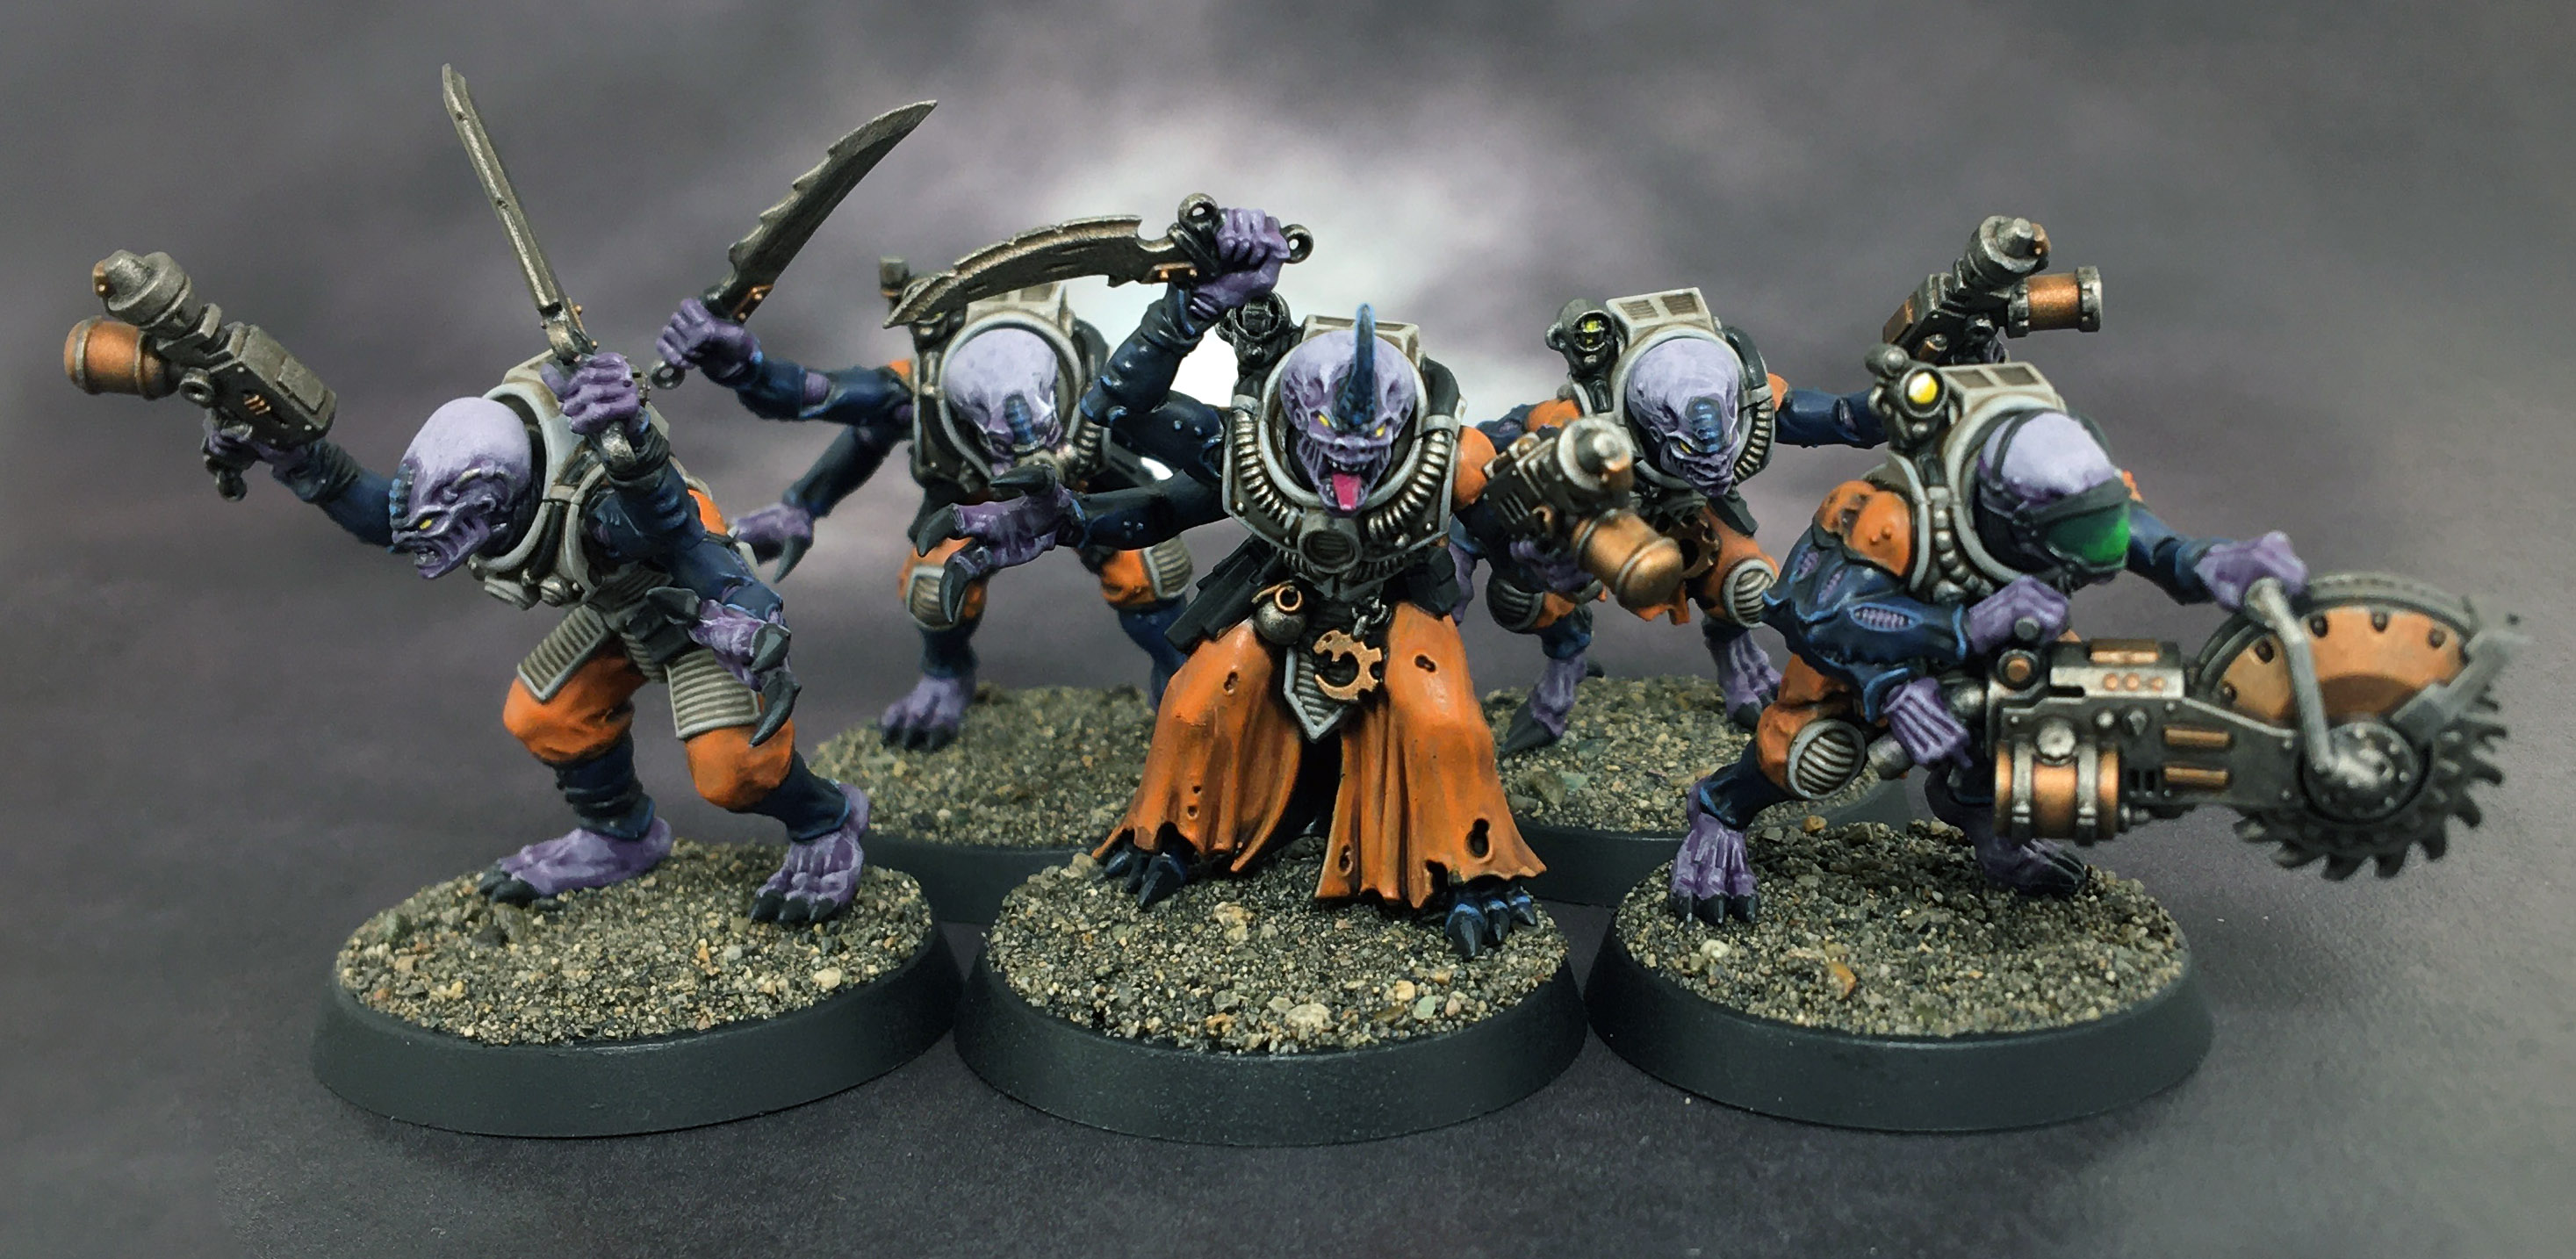
The Bladed Cog
Credit: Pendulin
The Bladed Cog are another Cult that mixes up defensive and offensive tools, and are currently my pick for the standout option. The Cult Creed has three parts – an army-wide 6+ invulnerable save (which adds up on hordes), one wound re-roll each time a unit shoots or fights (extremely good wherever it turns up, no different here) and a 3” range boost to weapons other than Grenades and caches of demo charges. This is all great stuff, ideal if you want to put down lots of 10-model Neophyte units with a couple of mining lasers, which this army absolutely wants to do. The Warlord trait Single-Minded Obsession, is also great for kicking off the game in style, letting you pick one enemy unit and getting an aura of full wound re-rolls for CORE against it, making short work of a key target.
The other powerful tool here is the psychic power, Broodvolt Surge. This gives the caster a 3” aura of the Lucius faction trait – +1 to armour saves against D1 attacks. Importantly, this isn’t CORE locked, so both helps the hordes soak up massed firepower and Goliaths shrug off small arms fire. Boosting the radius of this with Alien Majesty can also make it easier to use.
The Stratagem and Relic are perhaps a bit underwhelming compared to the rest of what’s here – the stratagem is a pre-game upgrade to give an INFANTRY or BIKER unit a 5+ invulnerable save, which is nice in theory, but scales to a 2CP cost at PL7+, and what I’ve found going through the roster is that there aren’t that many things that hit a sweet spot of wanting to use this. The attractive choices are a 10-model Acolyte unit and an 8-Model Atalan squad, both of which slide under the PL limit, and if you’ve got either of these units in your army, it’s worth considering at 1CP (and if you’re going all-in on 10 Aberrants, maybe that’s worth 2?). I could also maybe imagine paying for this on a Primus if I was going in on a murder build (more on that later). Finally, the Mark of the Clawed Omnissiah gives a model an invulnerable save and a chance of doing Mortals to enemies in engagement range in the Fight Phase – fine, but you can do vastly better with your relic picks.
These few slightly underwhelming parts don’t stop this being extremely good as a whole. You want the invulnerable save, both for your hordes and to give your Trucks a small chance to tank dark lances. You want the wound re-roll – this army excels at throwing down units with a few high-quality shots that you really want to connect with. Even the range boost is genuinely strong – mining lasers only have 24” range at baseline, so extending that slightly is helpful, and it makes shotguns maybe more of a consideration for Neophytes too. Add in a good power and a good Warlord Trait, and this cult looks excellent.
The Rusted Claw
Another Cult with a mixed trait, here providing defence and mobility. Defence wise, they get the now standard “reduce AP by 1 against attacks with AP-1 or -2”, which is decent, though a bit weaker here than it is on the Adepta Sororitas – the way the maths works on armour saves, improving a save by +1 gets more impactful the better the save was already, so protecting a point of save is stronger on a faction with army-wide 3+ than on hordes of 5+ infantry. It’s still not bad, especially with AP-1 proliferating everywhere, and stronger on vehicles and bikes. The other part of the trait allows units to count as having Remained Stationary till the end of your shooting phase if they make a Normal Move or Advance. This is good – infantry toting heavy weapons either foot slogging or riding around in Trucks (probably the latter in this creed) are a big part of this army, and this lets them fire at full effect while really zooming around the battlefield, while even units that don’t take the heavy penalty enjoy the sheer reach it provides, helping set up Crossfires
The Psychic Power also really helps exploit that – Inescapable Decay gives you +1 AP against a targeted unit, and enough autogun shots at +1 each to hit, wound and AP will gradually chip pretty much anything to death. The Warlord Trait is also pretty eye-catching, giving you double exploding 6s in melee, and an extra point of AP. The AP part is pretty academic given you’re probably putting this on a Patriarch, but the other part has great value – spike a few double exploding sixes and they’re going to melt entire units. If you want a roving assassin monster you can also combine it with the Nomad’s Mantle, which lets the bearer Fall Back/Advance and still Charge or cast Psychic Powers, and freely move through enemy units and terrain. Not sure if you need that, but it definitely makes it hard to dodge your murder machine.
Rounding things out we have one of the most notorious stratagems from the old book, Drive By Demolitions. This has, sadly, been pretty substantially toned down, but it’s pretty cool – after an Atalan Jackal unit from your army moves, you can throw one grenade at a unit they moved within 6” of at any point during that move, and automatically get max shots. While not the unit evaporating nightmare it used to be, it still has plenty of uses at 1CP. First up, the shots here happen in your Movement phase, so if you have two Demo Charges in the unit, you can drop one with this, then hurl another in shooting, and that squeezes decent value from something you can set up at a starting price of 58pts. It might also interact positively with Crossfire, but this is one of the few things in the book that possibly needs clarifying – whether a single model shooting as if it is your shooting phase is enough to meet the criteria of “a unit is chosen to shoot”, which applying Crossfire requires. If it does, then this is even better, as it would let you drop two Crossfire markers from a single unit. Either way, given that Jackals have some further bonuses for getting close to the enemy, it feels like this is a strat that will turn out to be pretty useful once the initial mild disappointment of it no longer being a “thing dies” button passes.
Mobility is king in 40K, and the Rusted Claw excel at it, making them a very attractive choice – currently my favourite.
The Pauper Princes
The Pauper Princes are unusual among the cults in that their primary boost to damage output is in melee – units with this Creed get +1 to hit in the first round of combat, potentially decent on a lot of units in the book, but maybe not quite what you’re looking for in a book that now wants to do a lot of its damage with shooting. The other half of the Cult Creed, ignoring Combat Attrition modifiers, is also not fantastic – it helps a bit with keeping units around, and is good alongside the Cult’s ability to bounce back with Summon the Cult, but is noticeably below the effectiveness of a lot of other Creeds overall.
That seems to be because quite a bit of the power budget here has gone into the relic – the Reliquary of Saint Tenndarc provides an aura 5+ invulnerable save for CORE units, which is pretty spicy if you’re loading up a wall of Neophytes. You’ve also got various other ways to make use of huge chaff hordes here too – the Xenoprophet warlord trait allows you to auto-pass Unquestioning Loyalty tests in a larger area, making a Patriarch near-immortal as long as willing minions survive, and the Last Gasp psychic power lets a unit inflict a mortal wound on a 5+ when one of its models is killed in melee, just throwing bodies onto the enemy until they die. Last of all, if you do somehow allow one of your Characters to get squished, Vengeance for the Martyred lets you get +1 to wound in melee for the rest of the game against the culprit, likely making pretty short work of them.
There’s a clear thematic pull towards hordes here, but my suspicion is that the more balanced power boost that you pick up from the Rusted Claw, 4AE or Bladed Cog is just going to outcompete this, and even if you’re looking at a melee-heavy army there’s another competitor waiting in the wings…
The Twisted Helix
The Twisted Helix are all about getting into melee and messing the opponent up, providing a flat +1 boost to Strength and Movement, and also a mini-Transhuman effect army-wide, never being wounded on an unmodified 1 or 2. This is obviously great for melee stuff – extra movement is always handy for closing into battle, and the S boost is extremely relevant on both Purestrains and Acolytes, as it gets them to the key S5 breakpoint. Hilariously, it’s also pretty good on the Goliath Rockgrinder, which presumably has a roided up Acolyte hand-cranking the drill, and quite likes the jump to S9. The transhuman effect is probably going to come up less often than some of the other defensive tricks, but the opponent trying to mow down Neophytes with S6 attacks is definitely going to happen sometimes, and it’s not bad for giving your characters a better chance of lucking out of a combat they probably shouldn’t be in. The trait is very focused on melee, but feels like it does a better job of helping you achieve your goals in that regard than the Pauper Princes, so might see some experimentation in builds wanting to try that, particularly mechanised ones.
The Twisted Helix also retain their signature move of making a truly horrible Patriarch, able to hand him +1 damage via the Bio-Alchemist trait (also nasty on a Locus), and some buffs from the Biophagus list with the Elixir of the Prime Specimen relic, likely a 5+ ignore wounds and extra hits on 6s. Since he’ll also be swinging at S6, this is pretty much as nasty as your big boss can get, definitely worthy of consideration.
The other thing the Twisted Helix are known for is helping Aberrants, which they now do via the Twisted Bio-Horrors stratagem. This aims to compensate for their new profile being pretty weak into hordes, giving them the option of getting +1 Attack at the cost of dropping to D1, also inflicting additional morale impact for each model slain. This is fine to have access to but pretty meh overall, as if you’re building with this cult you shouldn’t be struggling to rack up volume attacks that can sweep hordes out of the way.
With that in mind the last trick here is pretty interesting – the psychic power gives a unit automatic wounds on 6s to hit in melee. You fully don’t need this for Aberrants, but any of Acolytes, Purestrains or Metamorphs can easily rack up a pretty high volume of attacks with some AP on them, and if you’re throwing these into something where you’d normally be wounding on 5s, it can represent a decent number of extra wounds (~5 for a full squad of Purestrains). It helps ensure you can adapt seamlessly to the targets in front of you, and avoid being stuck in a situation where your theoretical melee unit can’t afford to get into a fight.
Twisted Helix feel like a strong place to make use of some of the melee units in this book overall. My suspicion is that lists are going to skew shootier with a smaller melee contingent as troubleshooters, but if that assumption turns out to be incorrect than things could look good for the Helix.
Custom Cults
If your revolution is too unique and special to use a named cult (an entirely understandable position, honestly) you can instead craft a Myriad Cult. Rules like this are showing up in most books in 9th, but this one does something new – rather than just picking two options from a list, you now use a point buy system. You have four points to spend on traits, and a variety of options that cost 1-3 each to select from (plus a four point option for when you want to play a named cult, but you’re the People’s Front of Judea,and not the Judean People’s Front).
This seems pretty cool – trait lists inevitably have some choices that are better than others, and this just leans into that, putting higher price tags on the better effects. In addition, it gives the new and unique option to just take four very small effects rather than any bigger ones, something we’ve not seen before.
So how are these traits? They’re kind of fine – but with a couple of possible exceptions, probably not good enough to justify the loss of a complete package from one of the named Cults. As you’d expect there are quite a few in here that are one part of one of the Named Cult traits, and the most interesting in that regard are Deep Supplies, which is the Bladed Cog wound re-roll, and Agile Guerillas, which is Rusted Claw’s ability to count as remaining stationary after advancing. These are both priced at 2, so if you just want to do damage to the opponent, then you can combine these instead of having the defensive half of either of the Cult Traits. As an alternative to Agile Guerillas, Industrial Affinity lets you ignore hit penalties, WS and BS modifiers when using Industrial Weapons for only 1pt, so if you want to play a mechanised list with lots of Goliath Trucks, you could take this, the Deep Supplies re-roll and War Convoy, another 1pt option that allows VEHICLES and BIKERS to ignore wounds on a 6.
If these rules see use, I’d expect it to be for one of these combos – there are some melee options in here, but nothing you can build with them looks like it exceeds the power of the Named Cults focused on fighting, whereas both the combos outlined above do create a Creed that’s better on the offense in a mechanized shooting list than the mainline ones (though even there, the lure of free psychic powers and stratagems will probably win out). Despite not expecting to see that much use of them, I do really like the new structure here, and hope we see it return in future books (it would be perfect for Tyranids in particular).
Stratagems
The Genestealer Cult stratagem sheet in 8th was completely wild, essentially driving their power by enabling some truly depraved plays and causing extreme headaches for any opponent with less than a perfect knowledge of every trick up the cultists’ many sleeves. The 9th book sees what is, ultimately, a healthy re-balancing – the stratagem set here is very good, but provides boosts and tricks more in line with what you’d expect from other armies – they’re strong, but there are fewer things that smash the core assumptions of the game asunder in ways that will instantly defeat an opponent who didn’t know why were coming.
That’s not to say that all of the wild, rules breaking hilarity is gone from the book entirely – instead, it’s moved across to the Proficient Planning upgrade system, still allowing Cult players to set up some hilarious power plays, but at least telegraphing them on the army list so that the opponent can refresh their memory on what the ones in play in each game do. In combination with Neophytes and vehicles being better to anchor armies with, and Crossfire enabling the army to make big plays that aren’t all-or-nothing all the time, I think the result is going to be far healthier for the game overall, and make the army much more broadly playable – but if you were using Cults at the highest levels at their peak in 8th, you’re going to find some favourites missing.
Let’s start off with some shooting hits – expect to see big units of Neophytes blowing Dig them Out and Overload Fuel Cells (1CP each) in combination a lot. Dig them Out lets you treat a target as Exposed when shooting at them within 12” (so +1 to wound and Ignore Cover as long as they have a Crossfire Marker) while Overload Fuel Cells is essentially the Dark Technomancers buff for Industrial Weapons. It keeps the same debuff – for each weapon that rolls one or more 1s to hit, the unit takes a mortal wound – but gives out buffs to either melee or shooting depending on when you use it. For ranged weapons, you get a flat +1 Damage; a great all-around buff to your output which combines extremely effectively with seismic cannons in particular, where a full unit of Neophytes can be shooting either 12 big shots or 24 small shots and racking up a whole lot of extra damage. Used with the small shots, it’s also pretty good with Massed Firearms, giving you auto-wounds on 6s to hit as long as your whole unit is focus-firing a target with a Crossfire marker. Overload is also superior to Technomancers in several ways – it doesn’t stop you re-rolling the hit roll, so if you’ve got a Primus nearby you get even more value at lower risk. Don’t forget to throw a grenade when you activate this, as both blasting charges and demo charges are Industrial, and if you want to go full mad bomber with the latter, you can guarantee maximum shots with Primed Explosive. In melee it gives Industrial Weapons +1S instead of damage; that’s less consistently useful, but good if it gets you to a key breakpoint, so handy to have in the back pocket.
More likely useful if you’re trying to take down a big target in melee is Bore Through, giving you full wound re-rolls into a MONSTER or VEHICLE with Industrial Weapons, again for a single CP. The standout users for this are Aberrants, whose heavy power weapons are Industrial, helping them land a devastating blow into enemy Knights or similar. If your Aberrants (or an Abominant) need to soak up the opponent’s revenge, they now have access to Monstrous Vigour, giving them Transhuman for 1 or 2CP depending on unit size – always great to have. Also helping them get a chance to swing are a couple of options for making use of your Crossfire markers in the Charge or Fight phases – for 1CP each, you can either switch off Overwatch, Set to Defend and (unusually) Heroic Interventions with Covering Fire, or inflict Fight Last with Coordinated Assault on a unit that has a Marker. As the name suggests, that last one is super helpful when you find yourself needing to launch multi-pronged melee pushes, as while the units in this book are generally a bit tougher than they used to be, they still don’t want to take a Counter Offensive from a dedicated melee unit.
Further helping with keeping your precious Cultists safe, both Lurk in the Shadows and Return to the Shadows have received considerable improvements. Lurk, which stops the opponent shooting a unit unless it’s the closest or within 12”, no longer requires the unit using it to be within terrain, and while the ability to bypass it within 12” is new it’s now massively easier to use, and is great for keeping a big, heavily tooled-up Neophyte unit protected while the opponent deals with close-range skirmishers. Return to the Shadows, meanwhile, still lets you pull a unit into Deep Strike in your movement phase if no enemies are nearby (having to return next turn) but also gains an extremely cool new mode – after one of your units makes their attacks in your Fight Phase, you can now immediately activate this as long as there are no enemies alive within 6”. That means that if your vicious melee killers have dunked something but are now out of position or vulnerable, you can just pull them off the table and bring them back next turn. The only downside here is that when you return it’s a standard 9” deep strike rather than the Underground rule, but that doesn’t stop this being extremely strong in the right situation – even just using it so that after you’ve cleared an Action unit out of your lines, the unit you’ve used can be re-deployed somewhere more useful is great.
Also on a mobility kick, you’ve got auto 6” Advances for Genestealers, Vehicles or Bikers (setting up a nasty Proficient Planning combo with Purestrains that we’ll get to), Advance/Charge for Acolytes or Metamorphs with Genetic Lineage, and a Fire and Fade equivalent for Bikers and Ridgerunners in Roving Engagement – all great toolbox tricks. Your faster units also have some further interactions with the Crossfire mechanic, with Atalans allowing you to designate a unit nearby to be treated as Exposed for the rest of your army, and Ridgerunners being able to get full hit re-rolls against a properly Exposed (i.e. not using any stratagem or ability tricks, but actually positioning) opponent thanks to Raking Fire. Finally for Vehicles, Rigged to Blow returns for Trucks and Rockgrinders that have a cache of explosives, generally better by dint of these being far better units in this book.
In addition to all these there are a few stratagems that key off some of the specific Cult Characters, which we’ll cover when we look at their datasheets, but there’s a final few that are generally relevant. Cults get a slightly different extra Warlord Trait effect than everyone else – rather than spending a CP per trait, you can only use this if you have a Patriarch, but if you do then you can pick two other HQ choices to get a Warlord Trait for a single CP with Leaders of the Cult. Finally, for your scheming Patriarch or Magus lurking amidst their followers, if you really need to drop a Blessing power on a far flung unit you can just spend a CP to activate Gestalt Consciousness, letting you choose a CULT unit anywhere on the battlefield as the target. This has proven to be incredibly good in our testing – it means you can have a Patriarch lurking in your backfield with Might From Beyond and drop it on your arriving alpha unit without needing nearly as much planning (and potentially while lurking outside deny range). It’s also another well written rule – after explaining what it does, it clarifies in brackets that “anywhere on the battlefield” overrules both range and visibility requirements, which shuts down some potentially tiresome arguments up front.
There are a few more tools here, but I think that hits all the most important ones – as you can hopefully see, there’s plenty of good tools here that cover a lot of your bases, and let you execute devastating strikes when needed. What if you want to do some really silly stuff though? Well…
Proficient Planning
Proficient Planning is the Genestealer Cults point upgrade system, and in my opinion one of the best things about the book. Being able to pull off some spicy tricks with Deep Strike is part of the Genestealer Cult experience, but the sheer number of ways they could manipulate this mechanic in 8th made them incredibly unfun to play against for many, and it ate enough of their power budget that they often didn’t hold up if you tried to play a “normal” game with that. Proficient Planning aims to strike a balance between those needs – there’s a couple of tricks in here that let Genestealers pull off moves that aren’t generally available to anyone else, but they’re now telegraphed on the army list and attached to a single unit, allowing for more effective counterplay and avoiding opponents needing to know the entire GSC book inside-out to play against them. What you end up with is one of the best upgrade systems across 9th and something that will see heavy use in GSC lists (especially as some of the best ones are priced to move), but should make the faction more enjoyable to face off against by gathering the nonsense into one place.
In terms of how these work, they’re incredibly broad – there’s a list of ten upgrades, each with a points/PL cost, you can buy each unit in your army up to one of them, and each upgrade can only be selected once. A few have keyword limitations, but beyond that there’s no further restrictions, so you can go wild with these if you want to (and I expect taking three or four across a list isn’t going to be uncommon). For Crusade, there’s also some additional nuance that will be covered more fully in that review, but the basic gist is that you buy these upgrades for your roster as a thing in and of themselves, and can then apply them to different units game-to-game, which rules.
With that out of the way, let’s get to the good bit. Two big standouts that I expect to see in many, many lists are They Came From Below (INFANTRY only) and From Every Angle, both costing the hilariously cheap price of 10pts each. These two effects are your source of messing with positioning at the start of the first battle round, and your way to no-sell some Ambush markers, meaning that at this price, you probably want to squeeze them into every army.
They Came From Below gives you a choice at the point you reveal the upgraded unit from an Ambush Marker – you can either immediately make a Normal Move of up to 9” with it, or you can remove the Ambush Marker and place the unit Underground instead. This rocks, as it lets you adapt to going first or second very effectively – position a marker aggressively on the board edge then either use the contents for an early push if you win the roll-off or pull them back into the shadows if you lose. It’s particularly good with Purestrain Genestealers, and if they make it into lists in this book it will be because of this. Factoring in their native Advance/Charge and ability to auto-advance 6”, if you place the marker on the line this lets you zoom 22” across the table (or 24” in Twisted Helix) and still charge, letting you flense opposing Infiltrators or launch a disruptive assault into a firebase that was deployed too aggressively. Don’t forget that if you use this to pick off an enemy unit that’s deployed away from the rest of their forces, you can follow up with Return to the Shadows to retreat to safety afterwards.
From Every Angle is equally splashy, and has two effects. First up, at the start of the first battle round you can pull the upgraded unit into Strategic Reserves for free, always nice. Even better, however, is the second part – the unit can arrive from Strategic Reserves as if it was one turn later, and this explicitly does include arriving on turn one. For those playing along at home, that means that you can scoop a unit up at the start of the first Battle Round then immediately bring it back in from a board edge that isn’t your opponents, potentially setting up powerful shooting plays, sneaky positioning or even a bold turn one charge if you need to gamble for some reason. I like this on a number of things, but I think my favourite is probably adding it to a big Neophyte unit with seismic cannons, as it makes it quite tricky to dodge early power plays with Overload Fuel Cells. The only minor issue with this is that it’s one of the few abilities that isn’t explicit as to how it interacts with Ambush Markers (something the book is generally extremely and laudably clear on). Our assumption is that you can pull a unit that’s in Ambush, and just discard the Ambush Marker that’s left behind when you reveal the rest, but a few other “start of the first battle round” effects in the book require you to choose not to put the unit in Ambush, so it’s just possible this will get that added via FAQ. We’re going to be playing it as if you can pull the unit from Ambush until we hear otherwise, but keep an eye on the Errata for this one. It says a lot about how good this is that we would probably still put it in every list even if the ruling went against it – it’s such a strong ability.
Those two effects let you play around with reserves out of the gate, but what about if you want to increase the threat from your alpha strikes over turns two and three? Proficient Planning has you covered with A Trap Sprung, A Perfect Ambush and Our Time is Nigh (all 15pts). Aside from being extremely fun to say, these are also all helpful tricks, albeit a bit less complicated than the first two. TRAP SPRUNG lets you roll 3d6 and drop the lowest dice for a unit charging out of deep strike, pretty much a mandatory purchase for a big Acolyte or Aberrant unit you’re planning to deploy that way, while if shooting is your preferred weapon, A Perfect Ambush lets you select a unit within 12” of an arriving CROSSFIRE unit, and be able to shoot at them as if they both had a Crossfire Marker and were Exposed, a lethal combination with Overload.
Finally, Our Time Is Nigh gives a unit +1A the first time they fight in the game (not stacking with Might from Beyond), an unusual effect but a good one. While you can’t pick both this and A Trap Sprung on the same unit, I think there’s potentially some real game in sticking this on five Aberrants riding around in a Rockgrinder, or a second unit of ten Acolytes in a Truck, as it ensures that the turn they hit is a real swing for you.
Moving over to esoteric upgrades, three types of CHARACTER get an option here – Meticulous Uprising for the Primus, Alchemist Supreme for the Biophagus and Meditations in Shadow for Psykers. The Primus gets a once-per-game massive enhancement to his command phase effect that grants RR1s on wounds – on the turn you activate this upgrade, you can use the ability twice, and can target any CULT unit rather than CULT CORE. This is pretty much a lock if you’re bringing Ridgerunners, and can also be hilarious on Rockgrinders or Aberrants that are planning to smash into something in melee. Alchemist Supreme on the Biophagus lets you apply one of his upgrades to a single unit pre-game, an incentive to bring a large Aberrant squad as starting a big block with 5+ ignore wounds make them tough to deal with. Finally, Meditations just lets you know an extra psychic power – not flashy, but useful, especially in a book with access to Gestalt Consciousness, because it means you can have Psychic Stimulus available to drop anywhere on the board in your back pocket, without wasting potential casts on turns where you don’t need it.
Rounding the options out, you have two more expensive, more unusual ones. Lying in Wait returns here, letting an Infantry unit set up from Underground anywhere that’s more than 3” from the enemy at the cost of being able to charge. This was a stalwart in 8th, but less directly necessary this time around because hand flamers have longer range, and the power level of tricks that interact with demolition charges has been toned down. That doesn’t mean it isn’t potentially good, however, as it turns a Troops unit into an almost unstoppable Action performer, can set up very fiddly Crossfires, and is specifically nifty with the Kelermorph, as they can move after turning up with it and shooting. Finally, Excavate is something completely new – as long as you set up the unit with this underground, then in the pre-battle abilities step you can pick one terrain feature on the battlefield to lose Light Cover, Heavy Cover, Defensible and Inspiring, and instead become Difficult Ground. This is hilarious, and may actually prove useful on some table setups. In particular, on the US Open tables with the large 12”x12” run squares, making one of the ones in your opponent’s half of the board difficult terrain can be really quite punishing. Is it 20pts worth of punishing? Unclear – it’s such a unique effect that we’ll need to see it used in some games to get a feel for the power level, but it’s extraordinarily cool.
That really sums all this up in general – I don’t usually go through every effect on these lists, but all ten of these feel like they could see actual play, and the two ten pointers feel like they belong on 95% of army lists – they’re phenomenal when they’re doing something for you, and at that price you barely care if you just don’t need them in some of your games. This section rules, great work from GW all-around.
Warlord Traits
Compared to a lot of what’s here, the Genestealer Cult Warlord traits are merely fine rather than super splashy – you’re not going to struggle to find three you want for your Leaders of the Cult, but there’s nothing army-defining either. You can boost your aura radius, and the range of some targeted abilities, with Alien Majesty (great with a Primus or on a Psyker with Broodvolt Surge), get extra vicious with Biomorph Adaptation, harder to hit with Shadow Stalker or Fight First with re-rolls via Preternatural Speed. All fine effects that you can sprinkle among your characters to taste.
The two slightly more exciting ones are Prowling Agitant and Focus of Adoration. Prowling Agitant lets your Warlord make a Normal Move of up to 6” after being chosen as a charge target, which can make them a real pain to deal with, especially a Jackal Alphus who is also screened from shooting via their Master Outrider ability. It can also make it tricky to charge you at all if the character is bundled up with other units, as the opponent doesn’t get to re-target their charge, so if they select the Character and you can move into a position where they can’t reach you (or stretch between the units) then they’re out of luck (though expect that to get FAQed in line with similar abilities like the Ad Mech equivalent fast – we played this as written in a test game and it was not a feel-good moment). Focus of Adoration is pretty much the opposite – everyone joins the party, with CORE and PURESTRAIN GENESTEALERS near the Warlord all being able to Heroic. Since a lot of these will be ObSec, and some quite dangerous, this can be quite a thorn in the opponent’s plans, but as with all such effects it also gives them a reasonable amount of agency to play around it.
Realistically, expect to see Alien Majesty and Biomorph Adaptation handed out alongside Cult-specific traits a lot, with Prowling Agitant and Preternatural Speed filling out slots some of the time.
Psychic Powers – Broodmind
The Broodmind discipline returns, with various effects shuffled around and revised. The key powers here that most lists are going to want are Mass Hypnosis, Psychic Stimulus and Might from Beyond. Hypnosis drops Fight Last and -1A on an enemy unit, an incredibly brutal debuff to any sort of melee threat, though at a steep WC7 you’ll potentially want to bring the Crouchling or Unwilling Orb to help cast it. Psychic Stimulus has been changed up a bit, now allowing a unit to Shoot and/or Charge after Advancing or Falling Back. While it’s lost the Fight First effect this is still extremely good, and the flexibility to use it to support shooting is extremely welcome in an army that does that way better in this edition. Finally, Might From Beyond is just +1A now, but if you’re bringing Aberrants or melee Acolytes you absolutely still want access to this, especially for Aberrants where a relatively low attack count is their main weakness.
Less exciting, sadly, are Mind Control and Psychic Onslaught, both of which lose their unique and terrifying capabilities. Mind Control is now a debuff of -1 to hit and some Ld/Combat Attrition debuffs if the Psychic Test beats the target’s leadership, which isn’t terrible (and is outright brutal into Orks) but isn’t reliably good in all matchups, and loses the unique charm of blowing opponents to bits with their own weapons (which is, to be fair, a mechanic that many players absolutely loathe). Psychic Onslaught, meanwhile, is essentially now an anti-horde alt-smite that has a chance to high-roll when targeting a unit of things with a single wound (but can also whiff completely). Realistically, you take the (significantly improved) Psionic Blast over it most of the time – this is a targeted Smite (with a new mechanic of obeying Look Out Sir when going for Characters) that improves to a flat three Mortal Wounds if you beat the target’s Leadership on the Psychic Test – good, clean fun.
You will essentially never leave home without a caster in a Cults list, and Mass Hypnosis and Psychic Stimulus are going to shine in most games. You do also want Might From Beyond in a lot of lists, which you can access either by taking a second caster (probably with Psionic Blast as the second pick) or just upgrading with Meditations in Shadow.
Relics
A mix of old or upgraded favourites and some fancy new toys here. Returning with very similar effects, we have the Sword of the Void’s Eye (a boosted Bonesword with hit and wound re-rolls, but now also able to replace Locus Blades where it’s very nasty) and the Gift From Beyond (improved range and damage over a regular Cult Sniper Rifle, maybe rather less mandatory than before), but beyond that new mechanics on the relevant units shake things up a bit more.
The Amulet of the Voidwyrm keeps its overwatch denial and now also provides a 4+ invulnerable save and a one-per game auto-save, nice buffs and potentially something to stick on a vulnerable character like a Magus. The Crouchling, meanwhile, now gives you a once-per turn Psychic Test re-roll and makes your powers undeniable if successfully cast on a double, definitely worth it if you’re going for the plan of having one big caster handling all your spells. The Oppressors Bane also returns, a multi-shot super-powered autopistol that now gives the bearer CROSSFIRE, and always treats the target as Exposed and as already having a Crossfire Marker. It can’t be taken on a Kelermorph any more, but is a huge boost to the utility of the various buff characters that have a throwaway autopistol shot on their statline – it can both do some damage in its own right thanks to being +1 to hit and wound all the time, and can apply Crossfire Markers for your other units to exploit. Good stuff.
Many of these same characters also have unique upgrades that boost their special abilities, which we’ll talk about when we hit their datasheets. The last three to look at in this section are the Unwilling Orb, Wyrmsbreath Rounds and Hand of Aberrance. The Unwilling Orb (great name) is another psychic boost, hading the bearer an extra deny, extra range on their denies and +1 to cast on Malediction and Witchfire powers, good if you’ve got a two-psyker build and want to build one with Psionic Blast and Mass Hypnosis. Wyrmsbreath Rounds load a Kelermorph up with a hilariously over the top alternative profile for their guns, firing at heavy 1 S6 AP-3 D3. They lose their ability to snipe when doing so, but do still get to make more shots if they connect, making them extremely threatening to elite infantry, especially Exposed targets. This is especially good in Rusted Claw, where the heavy penalty doesn’t matter except on the turn you arrive from Deep Strike, and significantly broadens the capabilities of the Keler. Finally, the Hand of Aberrance is an upgrade for the Primus’s Toxin injector claw and is extremely strong – changing it to AP-2 and flat damage 3, still always wounding on a 2+ against non-VEHICLES. The key thing with this is that while you get a bonus attack with this weapon each turn, you can choose to make all of your attacks with it if you want to, so I expect to see this combined this with Biomorph Adaptation for a cool six attacks that will deeply upset monsters and characters that stray into range.
All-in-all, plenty to work with here, a healthy mixture of generically good stuff and specific tools we’ll examine further on.
Secondary Objectives

Lastly before we head into units, Genestealer Cults get a trio of Secondary Objectives to play with.
The first of these is certainly the most interesting, which is Sabotage Critical Location. When you pick this, after selecting deployment zones, your opponent places two Critical Location markers on the table, and your goal is to sabotage them. The markers have to be at least 9” apart, and 9” from any board edge, and sabotaging them is an Action that your non-Character Infantry or Biker units can carry out, requiring them (and no enemy units) to be within 3” of the marker. For each marker sabotaged get a diminishing number of victory points depending on which turn of the game you successfully completed the action, going from 9VP for the second battle round (this can’t be completed in the first) down to 3VP in the fifth.
This is extremely flavourful, but also not very good. First up, there is a devious rider on the Action – it completes at the end of your turn, but has to be started at the end of the Move Units part of your movement phase, so you can’t use reinforcements to complete it. Secondly, while the board edge limitation stops your opponent putting this right in the corner, there’s no deployment map where they can’t fit both markers into their deployment zone, and only having to have them 9” apart means that it’s pretty easy for them to keep some stuff back to protect them – and as the Cult player, you don’t want to be baited into having to commit hard to clearing out a point. Finally, this is a Shadow Operations secondary, and GSC rule at finishing Retrieve Nachmund/Octarius Data, and can have a good old go at getting 15 from the new version of Deploy Teleport Homers as well. There’s very little reason to commit yourself to a vastly more challenging Secondary with that in mind – the only time I could maybe see picking this would be if you have multiple units of Atalan Jackals against a low drop count army like Knights or Nidzilla, and even then Homers is probably an easier option.
The other two look a bit more promising. Broodswarm is a very powerful objective that has the mild misfortune to be in the extremely potent Battlefield Supremacy category, but still might be worth it some of the time. At the end of your turn, this gives you 1VP efor having more models than the opponent in each of your deployment zone, in no-man’s land, and in the enemy deployment zone, plus an additional VP bonus if you achieve all three (for a total of 4 per turn). Getting at least two on this should be extremely easy most turns, and all it takes is one hand flamer Acolyte unit popping up in the opponent’s backfield to take out their backfield chaff and you can flip this to four with ease. While it’s obviously in contention with Engage and Stranglehold I do think this will see use on the basis that you will sometimes be able to leverage it to go 2-2-4-4-4 when you want to start the game more cautiously than either of the others will allow.
Finally, for killing stuff, you have Ambush. This rewards you 1VP each for destroying an enemy unit using a model that arrived from Underground or Ambush, destroying an enemy unit that had a Crossfire marker on it, and destroying a properly Exposed (i.e. by positioning, not abilities) enemy unit. This one I’m going back and forth on. It’s definitely not as good as it looks on a first read – it effectively caps at 13VP, because there’s no way of arriving from Ambush or Underground after turn 3 (remembering that Return to the Shadows is a separate effect), and if you go first there’s a decent chance the opponent can completely no-sell this turn 1 on heavy terrain, capping you at 10 (especially because if you use From Every Angle to get an, uh, angle, the unit used won’t qualify). Despite that, this has one major upside – it’s in Purge the Enemy, a very swingy category, and sometimes you just need a third Secondary pick that’s going to reliably reward you 7-9VP for doing stuff you were already planning on, especially in the new year when there aren’t Mission options. Probably not a common choice, but will sometimes be worth it, and also gets a whole bunch better on lighter terrain.
Post Testing Note: I tried this one out in a game where I had no spectacular third choice and it did, in fact, land me dead on 8VP without having to do too much hard work (which I could probably have pushed to 9 or 10 with a bit more practice), so it’s very plausibly viable in that situation.
Not the best set of secondaries we’ve seen, but Broodswarm is decent and Ambush will see some play, so not a wash either.
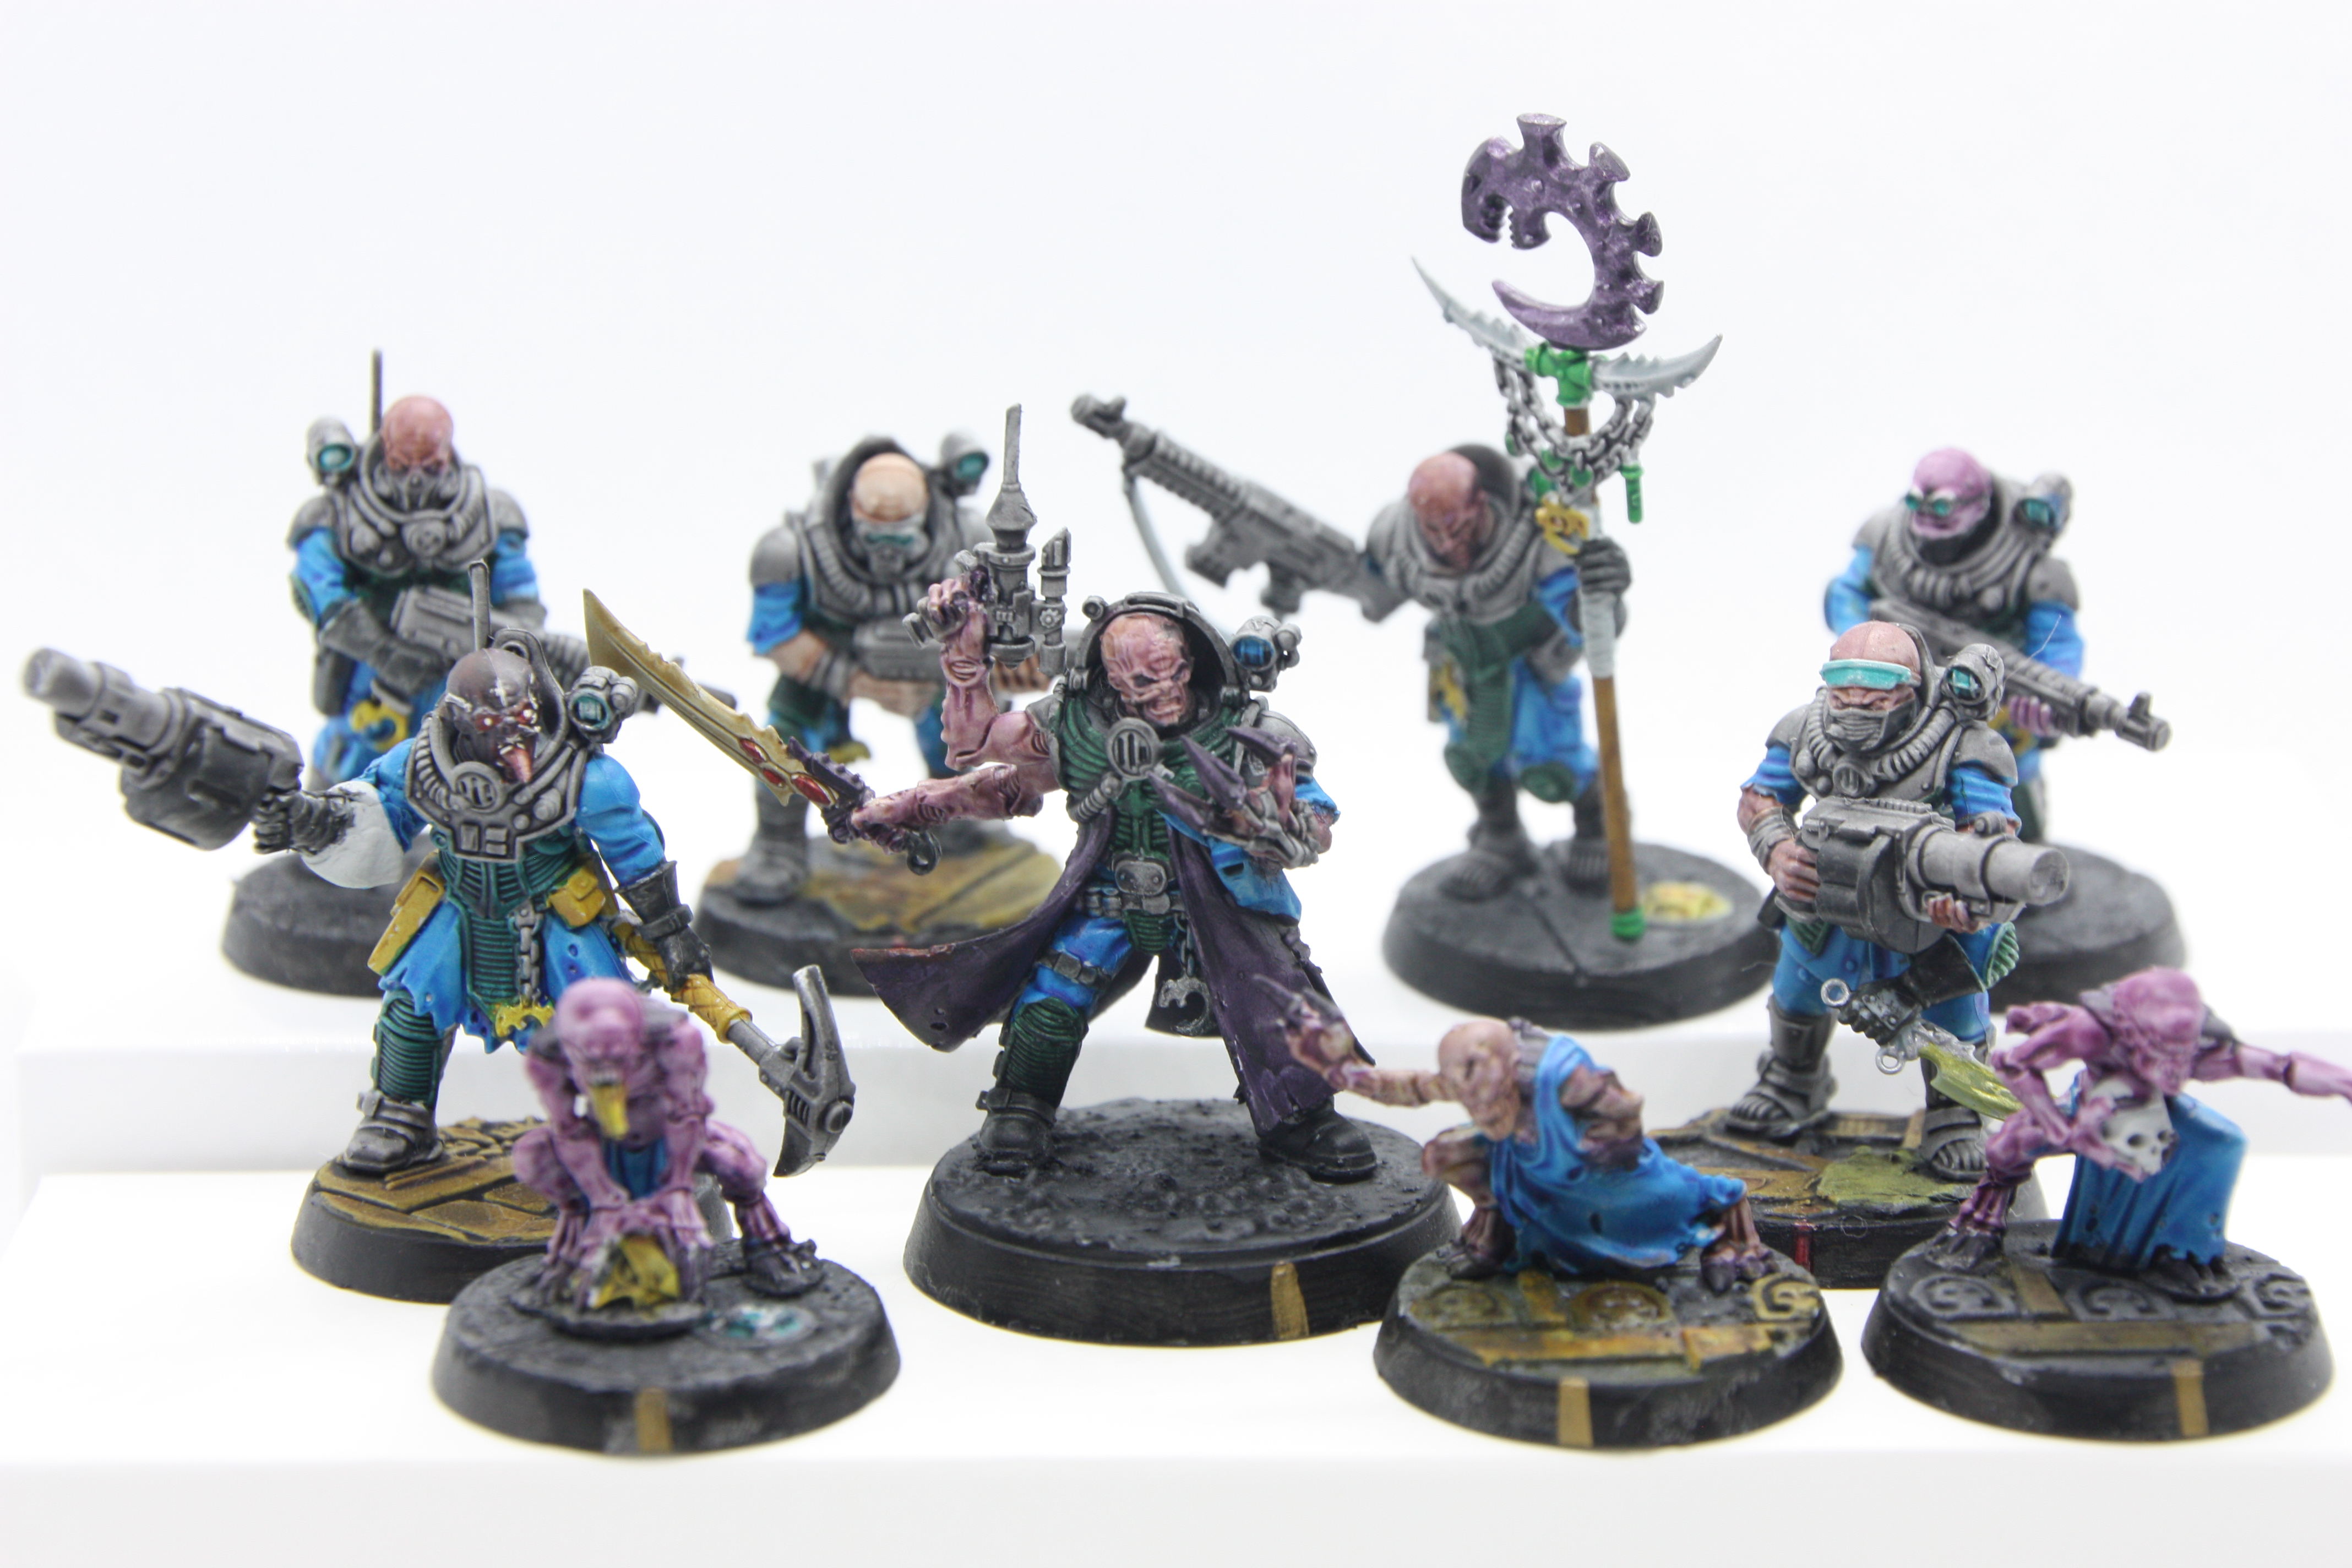
The Units
Unit time! As mentioned earlier, the list here is somewhat reduced from the old GSC book because the various Astra Militarum imports have been banished – this section is all CULT, all the time. In addition, the Tectonic Fragdrill has been banished to wherever it is that Fortifications retire to. Some sort of monument valley setup? I can only provide commiserations to anyone who was looking forward to performing activities with the giant drill.
HQ
Leading up the forces of the Cults we have, of course, the Patriarch. He’s looking much the same as he did in Shadow Throne – tougher than ever with seven wounds and a 4+ invulnerable save, a speedy blender in melee and a know two, cast two Psyker at baseline, all great stuff. You definitely want one, and can also buy a psychic familiar for 10pts to get a once-per-battle re-roll on a Psychic Test. Probably not worth it on baseline, but useful if you want the Crouchling or to slightly manipulate the cost for To the Last – 150pts gets a Patriarch to the same base price as a unit of Aberrants (tweakable higher with Meditations in Shadow), and I can believe that a triple Patrol list running three Patriarchs as To the Last targets amidst a horde of Neophytes could be legit.
Alongside the Patriarch you have four more options, all providing various buffs. The Magus is the most straightforward, being another two-cast Psyker and also bringing an aura that allows nearby INFANTRY and BIKER units to ignore psychic mortal wounds on a 5+. She’s fine, but my initial impression is that you’ll often be aiming to cover your psychic needs with either two Patriarchs or one that’s been buffed with Meditations.
The Primus, on the other hand, should be a lock for most builds – he provides a RR1s hit aura for CORE, gives one CORE unit RR1s to wound (triggerable on arrival thanks to the swanky new Conceal rules), and isn’t completely terrible in a fight any more, especially if you make him extra mean with either the Sword of the Void’s Eye or the Hand of Aberrance. Primus good, take one.
For more precision murder the Jackal Alphus is ready to direct fire. She also rules, able to pick a CORE CROSSFIRE unit and let them treat a chosen enemy unit as Exposed when they shoot at them, letting them strike for spectacular damage (especially if you pop some of the tricks like Overload). More subtly, she’s also useful for setting up Crossfires in general – she has the keyword, and her sniper rifle is D2, so whatever she pops gets a Crossfire marker, ready for the rest of your army to exploit. Alternatively, this can be especially good in combination with a Sanctus – the sniper rifles now trigger a mortal on a 4+, and two snipers working in concert have an alarmingly good chance of wasting a 4W character, and a real shot at taking down something with 5W. Finally, the Alphus is fast, can fall back and shoot, and gets the extremely useful Master Outrider rule, meaning that as long as she’s within 6” of a VEHICLE, she can only be shot if she’s the closest eligible target, allowing her to sometimes string out onto an objective in a helpful way. A very useful model all-round, though in order to use her buff the chosen target has to be visible to her in the command phase, which can be trickier to set up than it sounds. Her sheer mobility (especially as Rusted Claw with Prowling Agitant) tends to close the gap though.
Finally, for those who want to fill the board with hordes of Neophytes, we have the Iconward, essentially providing an area of effect (interestingly not listed as an aura) within which all CORE units have a free Cult Icon. Cult Icons aren’t cheap, so if you are planning to go wide with lots of 10 model squads you probably should be taking the Iconward instead of buying banners, though if you’re only taking a few larger units seeding the effect directly might be better. In addition to this, the Iconward can perform an Action at the end of your Move Units step that provides +1 to Charge for INFANTRY, BIKER and CHARACTER units (other than GENESTEALERs), so can provide dual value in an army that wants to fan out with lots of Neophytes, then launch a devastating melee punch with Aberrants or Acolytes. Likely to see plenty of use in builds designed for it.
Troops
Credit: Pendulin
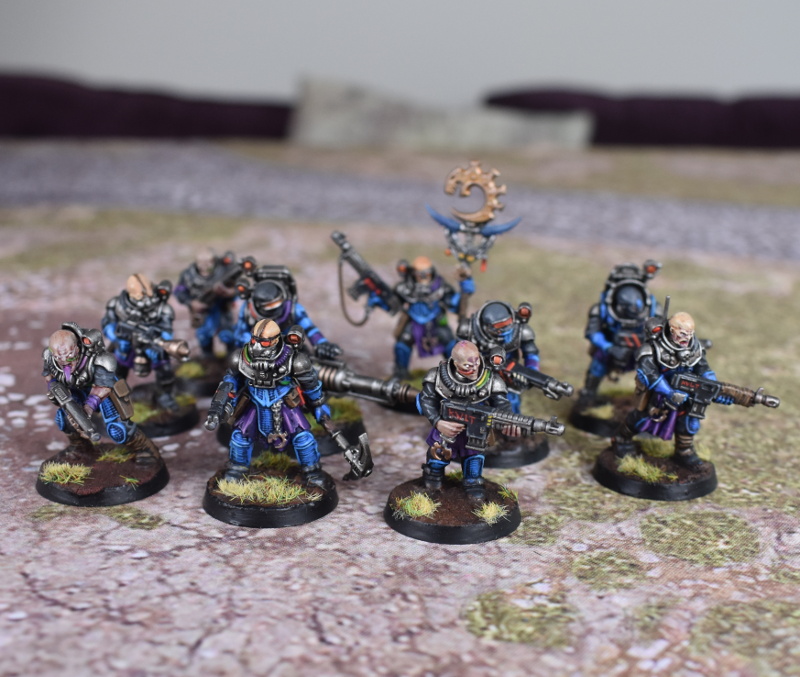
Two Troops choices for the Cult, Neophyte and Acolyte Hybrids. As you may have detected from what you’ve read so far, we’re expecting Neophytes to play a massive role in armies in the new book. While they’re still much the same on baseline, they’re cheap CROSSFIRE troops that you can seed multiple heavy weapons and grenade launchers into per ten models, and that’s something you now want lots of. The good heavy weapons aren’t cheap at 15pts a pop, but you should still expect to see plenty of 10-model units with mining lasers, and sometimes 20s with seismic cannons to maximise the value of Overload Fuel Cells and various Crossfire tricks. It should also be said that just chucking a bare-bones 10-model unit with shotguns into deep strike isn’t the worst plan.
Neophytes are going to anchor your line, while Acolytes are your precision tools for launching deadly strikes or handling Actions. Their basic statline gets a bit of a glowup – they’re 1pt more expensive, but are now T4 and have had their claws and knives simplified into a single weapon, and definitely win on that exchange – they still get a bonus attack from it, and all attacks with it are now just a flat AP-2. That means you’re getting more good attacks on baseline, and still have all the upgrade options you’d expect. Five-model squads with Hand Flamers really come into their own in this book thanks to being CROSSFIRE, letting them either pop up and set up a Marker/Exposure for your other units, or put wound-boosted shots into a key target.
You also still have the various industrial melee weapons available, with the rock saw still being a basic damage dealer, and the drill and cutter each providing new alternatives – the cutter is -1 to hit but damage 3, while the drill is only D1, but automatically wounds on any hit, and deals two extra mortals on a 6 to hit. I will, of course, be submitting this to Hammer of Math, but the initial vibe is that they’re all pretty viable, with the drill probably being the standout if the metagame continues to be heavy on Damage Reduction. Finally, if you’re building a melee squad then the lash whip and bonesword on the leader is probably worth it, now hitting at S5 and D2, and getting to re-roll hit rolls. The only other thing to note about this unit is that squad size is now capped at 15. My suspicion is that you’re going to see lots of 5-model hand flamer units, and some 10-model squads loaded for violence. There’s probably a use case for mixing stuff up too – adding a few flamers to a melee squad can drop a Crossfire Marker on a target that can then be used to inflict Fight Last later in the turn, helping launch multi-pronged attacks.
Elites
Cults essentially have two different sets of Elites – three specialised melee units, and then a massive cast of specialist characters. Let’s take a look at the units first.
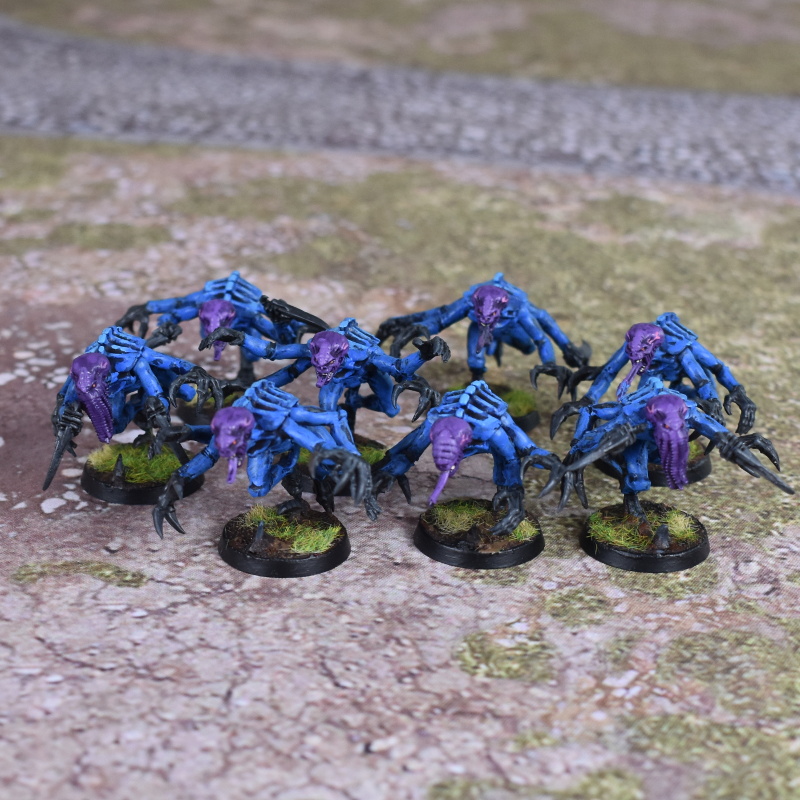
First up, Purestrain Genestealers, a unit that has perpetually struggled to find a proper niche in this army. The good news is that this time around, we’re a little more optimistic about them. Genestealers are designed to flense through targets in melee, and their statline is considerably improved for that purpose. They’ve dropped down to a unit size of 5-10, but now enjoy a base WS of 2+, have four attacks each without needing to have ten models, get AP-3 just at baseline and now have a 4+ invulnerable save. In addition, they can now benefit from Cult Creeds, which is especially good in Twisted Helix as it gets them to the magic break point of S5. More subtly, the Hivecult trait is surprisingly good on them, as they’re very fast and being able to perform an Action after advancing can be excellent for locking in secondaries. Really though, the thing that makes these appeal in the new book is They Came From Below – as discussed in the Proficient Planning section, being able to zoom these across the table on the first turn, or pull them back Underground with no penalty if you don’t get it, lets you threaten some very nasty power plays and will seriously punish opponents who are unwary. I expect genuine experimentation with an upgraded squad of ten, and honestly 80pts for a squad of five with the upgrade might be enough of a headache to take as a throwaway pick. Honestly pretty bullish on these – I expect to see them used seriously in some form, and they performed very well in our test games (especially with Might From Beyond airdropped onto them with Gestalt Consciousness).
Next, we have Hybrid Metamorphs, a unit that’s been simplified quite a bit, but not in a bad way. Rather than having three different weird mutation weapons to choose from, metamorphs just swing at a baseline S5 AP-3, and have a built-in ability to swing on death if they are killed in melee and haven’t fought yet. Veteran players may recognise this as essentially “all of the above, but better” compared to their old options. They can also still carry hand flamers and have CROSSFIRE, and seem like a strong unit that can be swapped in for Acolytes sometimes, especially as it feels like this is an army that sometimes straight up runs out of Troops slot. They’re also better than Acolytes if you want to drop in some backfield harassment that’s a pain to deal with – being able to overwatch with hand flamers then fight on death means that a small unit that tries to flush them out is quite likely going down with them. This unit is incredibly improved, and I expect to see them heavily used.
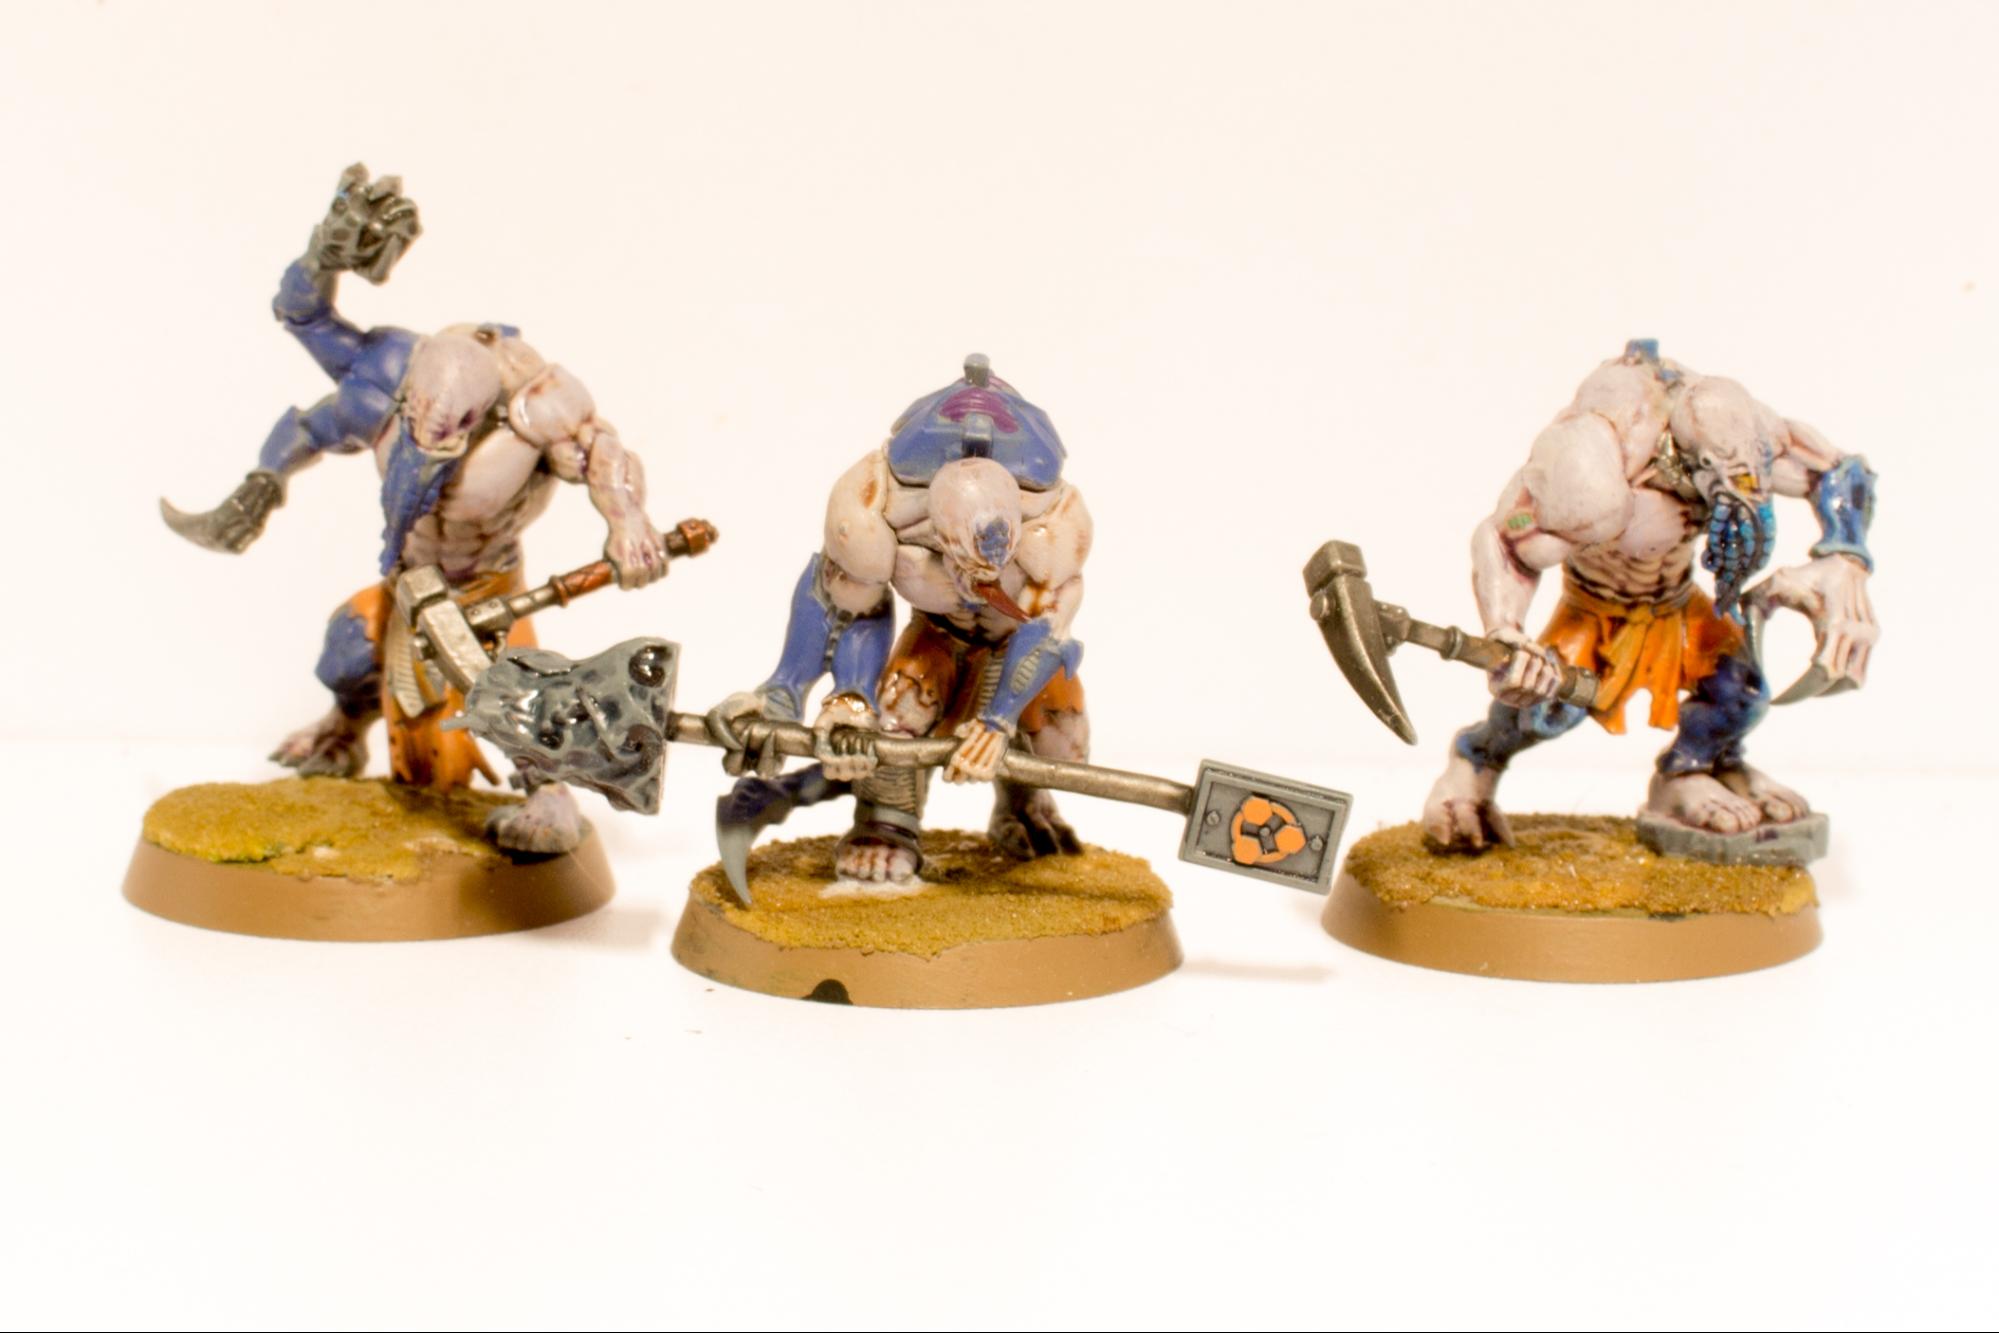
Finally, Aberrants, which I’m sure is what many returning players are here to see. Aberrants have also been simplified considerably, with every model just having a “heavy power weapon” and hitting with two attacks at S8 AP-2 D3, good for chunking vehicles and enemy elites (and able to spike to S9 with Overload Fuel Cells if they need to punt a Knight). The Hypermorph can swap out for a heavy improvised weapon for slightly more anti-horde capability, hitting less hard but spilling over excess damage. On balance, this probably isn’t worth it a lot of the time, as this army has plenty of stuff that will mess up hordes, but for really crunching something nasty, these are your guys. Defensively, they’ve been boosted to T5 and W3 and keep damage reduction, but have lost their 5+ ignore wound effect. That’s generally a trade for the better – you lose the ability to spike the rolls up, but will no longer lose a model to a flat D3 attack if you roll badly, so factor in T5 as well and you’re pretty happy on the exchange (and you have an option to get the 5+ back with the Biophagus, as we’ll get to). These end up as a weird unit, but probably one that sees some use, as a unit of five feels more like something you can expect to accomplish stuff, and more consistently shrugs off moderate pushback. In addition, there are various support options that help them out – Rockgrinders being good now means that ferrying them around in a transport is far more plausible, while either Our Time is Nigh or A Trap Sprung are great Proficient Planning upgrades to help them land an initial blow. It does maybe feel like these could have survived having CORE though, just for access to some re-roll goodness from the Primus, as they’re quite short on support.
Post-testing note: Sadly, my impression of a five-model squad of these (with Our Time is Nigh) wasn’t great – they just don’t quite do enough, at least without re-rolls. Were I taking them out again, I’d want to find points for an Abominant or go the whole hog for a buffed unit of 10 with a Biophagus. Being fair, I think they’d do better in Bladed Cog than Rusted Claw (which is what I was running), as both parts of that trait are excellent on them.
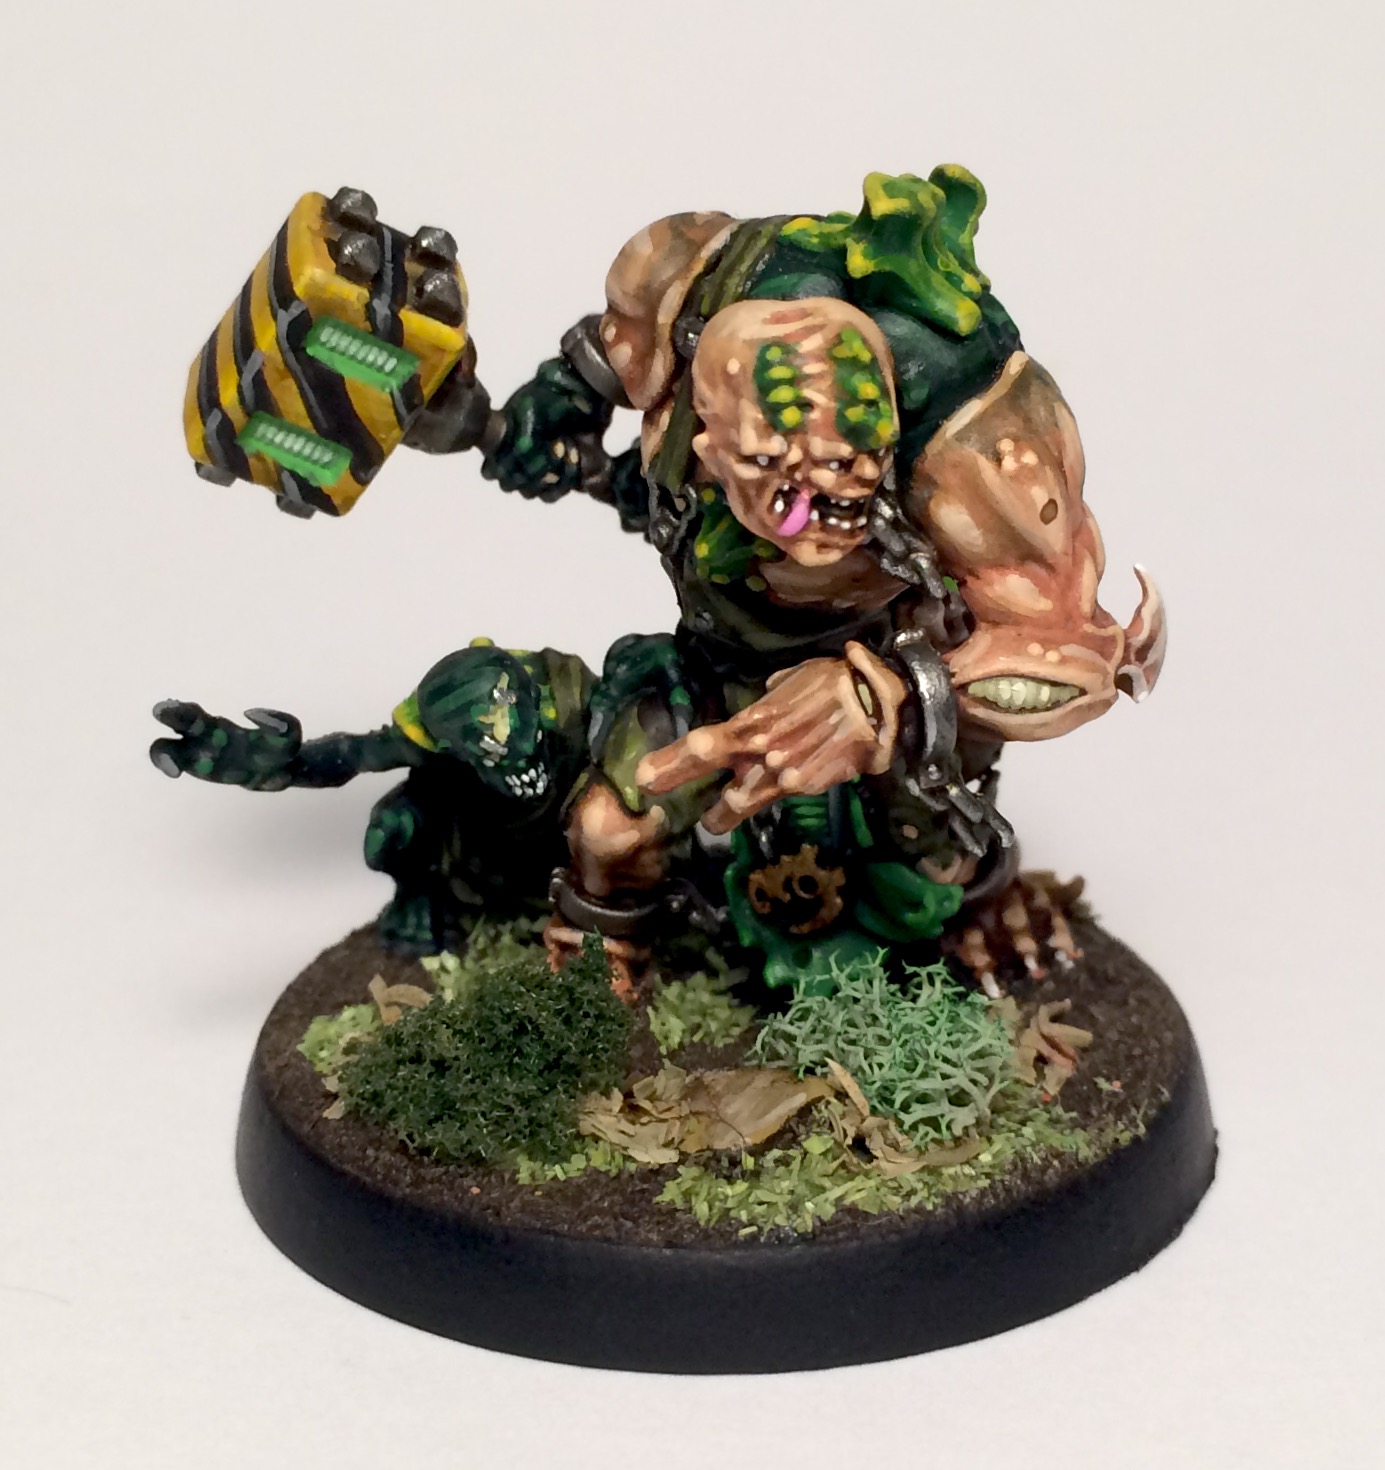
Two of the Characters also help these guys out. The Abominant, the Patriarch’s very largest adult son, provides full hit re-rolls for nearby Aberrants, and is also personally dedicated to the art of pounding your opponent’s fanciest toys into the dust. He does only have three attacks (plus two light swings from his familiar’s claws) but they’re pretty serious business, striking at S10 AP-3 for the much coveted d3+3 damage. His little helper also allows you to re-roll one hit or one wound roll each time he swings, helping him land those massive blows. Finally, he’s pretty hefty defensively, sporting 6W, damage reduction and a 5+ ignore wounds. He’s not cheap at 95pts, and you probably end up needing the points elsewhere, but might get some work done as Bladed Cog with the Mark of the Clawed Omnissiah added – he’s a huge pain to kill once you add a 4++ (and remember that he can Transhuman), and adding the threat of gradual mortal chip damage to stuff he tags can really exploit that.
Also helping Aberrants, but broadening his horizons to include CORE units too, is the Biophagus. He can perform an Action to upgrade one of your nearby units at the end of each of your movement phases, handing them either 5+ to ignore wounds, extra melee AP or extra hits in melee on a 6. When upgrading an Aberrant unit he gets to pick which applies, while for anything else it’s random, and you can also apply one pre-battle using the Alchemist Supreme upgrade (which lets you pick one whatever you’re applying it to). Alternatively, if you want to apply one at range you can buy an Alchemicus Familiar, which massively boosts the distance at which he can apply the upgrade once per game, presumably as the little guy runs over and stabs syringes hap-hazardly into ankles. Isn’t science great? Anyway – if you’re going in on a big Aberrant unit you almost certainly want an Alchemist Supreme, as starting them with a 5+ ignore wounds is a no-brainer, but even just applying that to a large Neophyte or Atalan squad can be pretty good, while an Acolyte squad arriving from deep strike can likely make use of any of the buffs being dropped on them. Striking a balance between spending on units and spending on buffs is going to be a perpetual challenge with this army, but it’s encouraging that there are real attractions to most choices.
The next broad category of stuff in the Elites slot is various flavours of killer, including the Kelermorph, Sanctus, Locus and Reductus Saboteur. Once again, all of these have been tuned to be pretty tempting. The Kelermorph was one of the most notorious models in the 8th Edition book and here the news is good – he still rules. This gunslinger wants to burst out of cover and blow away an enemy character and is pretty good at it, getting six shots with his pistols at BS2+, then an additional shot for each hit, all ignoring Look Out Sir. The guns have been tweaked from 8th, going down to D1 but now hitting at S5 and dealing a mortal on 6s to wound, plus they now have 18” range, meaning your Kelermorph doesn’t have to be quite as aggressive to get shots off. Having done the maths, this gives you broadly similar expected damage into T4 3+ characters and is (obviously) significantly better into 1W infantry or anything with damage reduction, really only losing out significantly when trying to pop T3 multi-wound targets. He’s also now got some further tricks up his sleeve – he’s an excellent CROSSFIRE enabler, and dropping one in with Lying in Wait can set up Exposed on a tricky target, especially thanks to the awesome new Hypersensory Abilities rule. After this model shoots in your shooting phase, it can immediately make a Normal Move or Fall Back even if it arrived from Reinforcements this turn. That can combine with the increased range to let the Kelermorph strike with impunity (and hand out a RR1s hit aura if he kills anything), or if one is going out there to be a hero with Lying in Wait, give you enormous flexibility to line up Exposed just right. Right now he can also still charge after doing this, but maybe don’t expect that to survive an FAQ. Finally, to further encourage the glorious sacrifice option, the Legendary Demise stratagem lets this model shoot on death, and remember that because his weapons are pistols he can still do so in melee. A very versatile killer overall.

The Sanctus is rather less versatile, very clearly designated as a character killer, with two builds that are functionally completely different. Both share the spicy new Soulsight Familiar rule however, which means that their attacks ignore cover and flat out autohit, no questions asked, and the Cloaked.Assassin rule, meaning they can’t be targeted with Ranged attacks from outside 12”. Both of these are most obviously strong on the sniper build, as when the model takes the sniper rifle it gains Crossfire, and auto-hitting with a multi-damage weapon means you can guarantee a Marker wherever you need one. Alternatively, if you want to tag-team with a Jackal Alphus to pop an enemy character, anything this model targets always counts as exposed, so enjoy wounding on 2s once the Jackal drops the Marker.
Adding further versatility, the Neural Overload stratagem brings back the option of striking terror into the hearts of enemy psykers, but is even more useful now. If a model loses any wounds from a Sanctus attack, including the mortal it inflicts on a 4+, then you can roll 3d6 against their leadership and if you beat it, inflict Perils on a psyker and switch off the model’s Auras till your next shooting phase. That is, obviously, extremely good, and running till your next Shooting phase rather than Command Phase makes it specifically excellent for going after Rites of War, easily the juiciest target out there. This can, technically, be done by the melee build too, and credit where it’s due, the designers have had a go at carving out a niche for this. As long as you’re not attacking a VEHICLE or TITANIC model, the sanctus bio-dagger just inflicts a Mortal on a 3+ to wound instead of any other damage, so with 5 auto-hitting attacks you’re looking at three and a bit mortals on average. The key here is the option of the Blade of Swift Sacrifice relic, which boosts this considerably – you get to re-roll one wound roll, and if a model survives the initial onslaught they take a further d3 Mortals. That pushes this to an average of six-ish mortal wounds into most targets, which can be absolutely brutal into some things, and is fantastic into Drukhari characters in particular, a relevant consideration for the current metagame! Realistically, the sheer number of things the sniper build helps you do probably gives it the nod, though from some of our test games with the new book it ended up feeling a bit more underwhelming than expected.
Compared to the Kelermorph and Sanctus, the Locus and Saboteur are a bit less exciting, but still far from terrible. The Locus might sneak into lists just because they’re dirt cheap and pretty handy at that – they combine a decent melee profile (five attacks at S5, AP-3 D2) with all the tricks you’d expect from both a “champion” unit (extra large heroic, always fighting first) and acting as a Bodyguard for a character you select at the start of the game (and no you can’t pick another Locus, they’re one step ahead of you there). Given that the Locus itself can be protected by Look Out Sir that can make it very tricky to shoot the character in general, and it does open up the standard tricks of stringing a character out to hold an objective while the Bodyguard hides. In addition, the Bodyguard effect is unusual in working in melee as well, with an attacking model not being able to swing at your chosen character if the Locus is a valid target, giving the boosted heroic some extra sneaky utility.
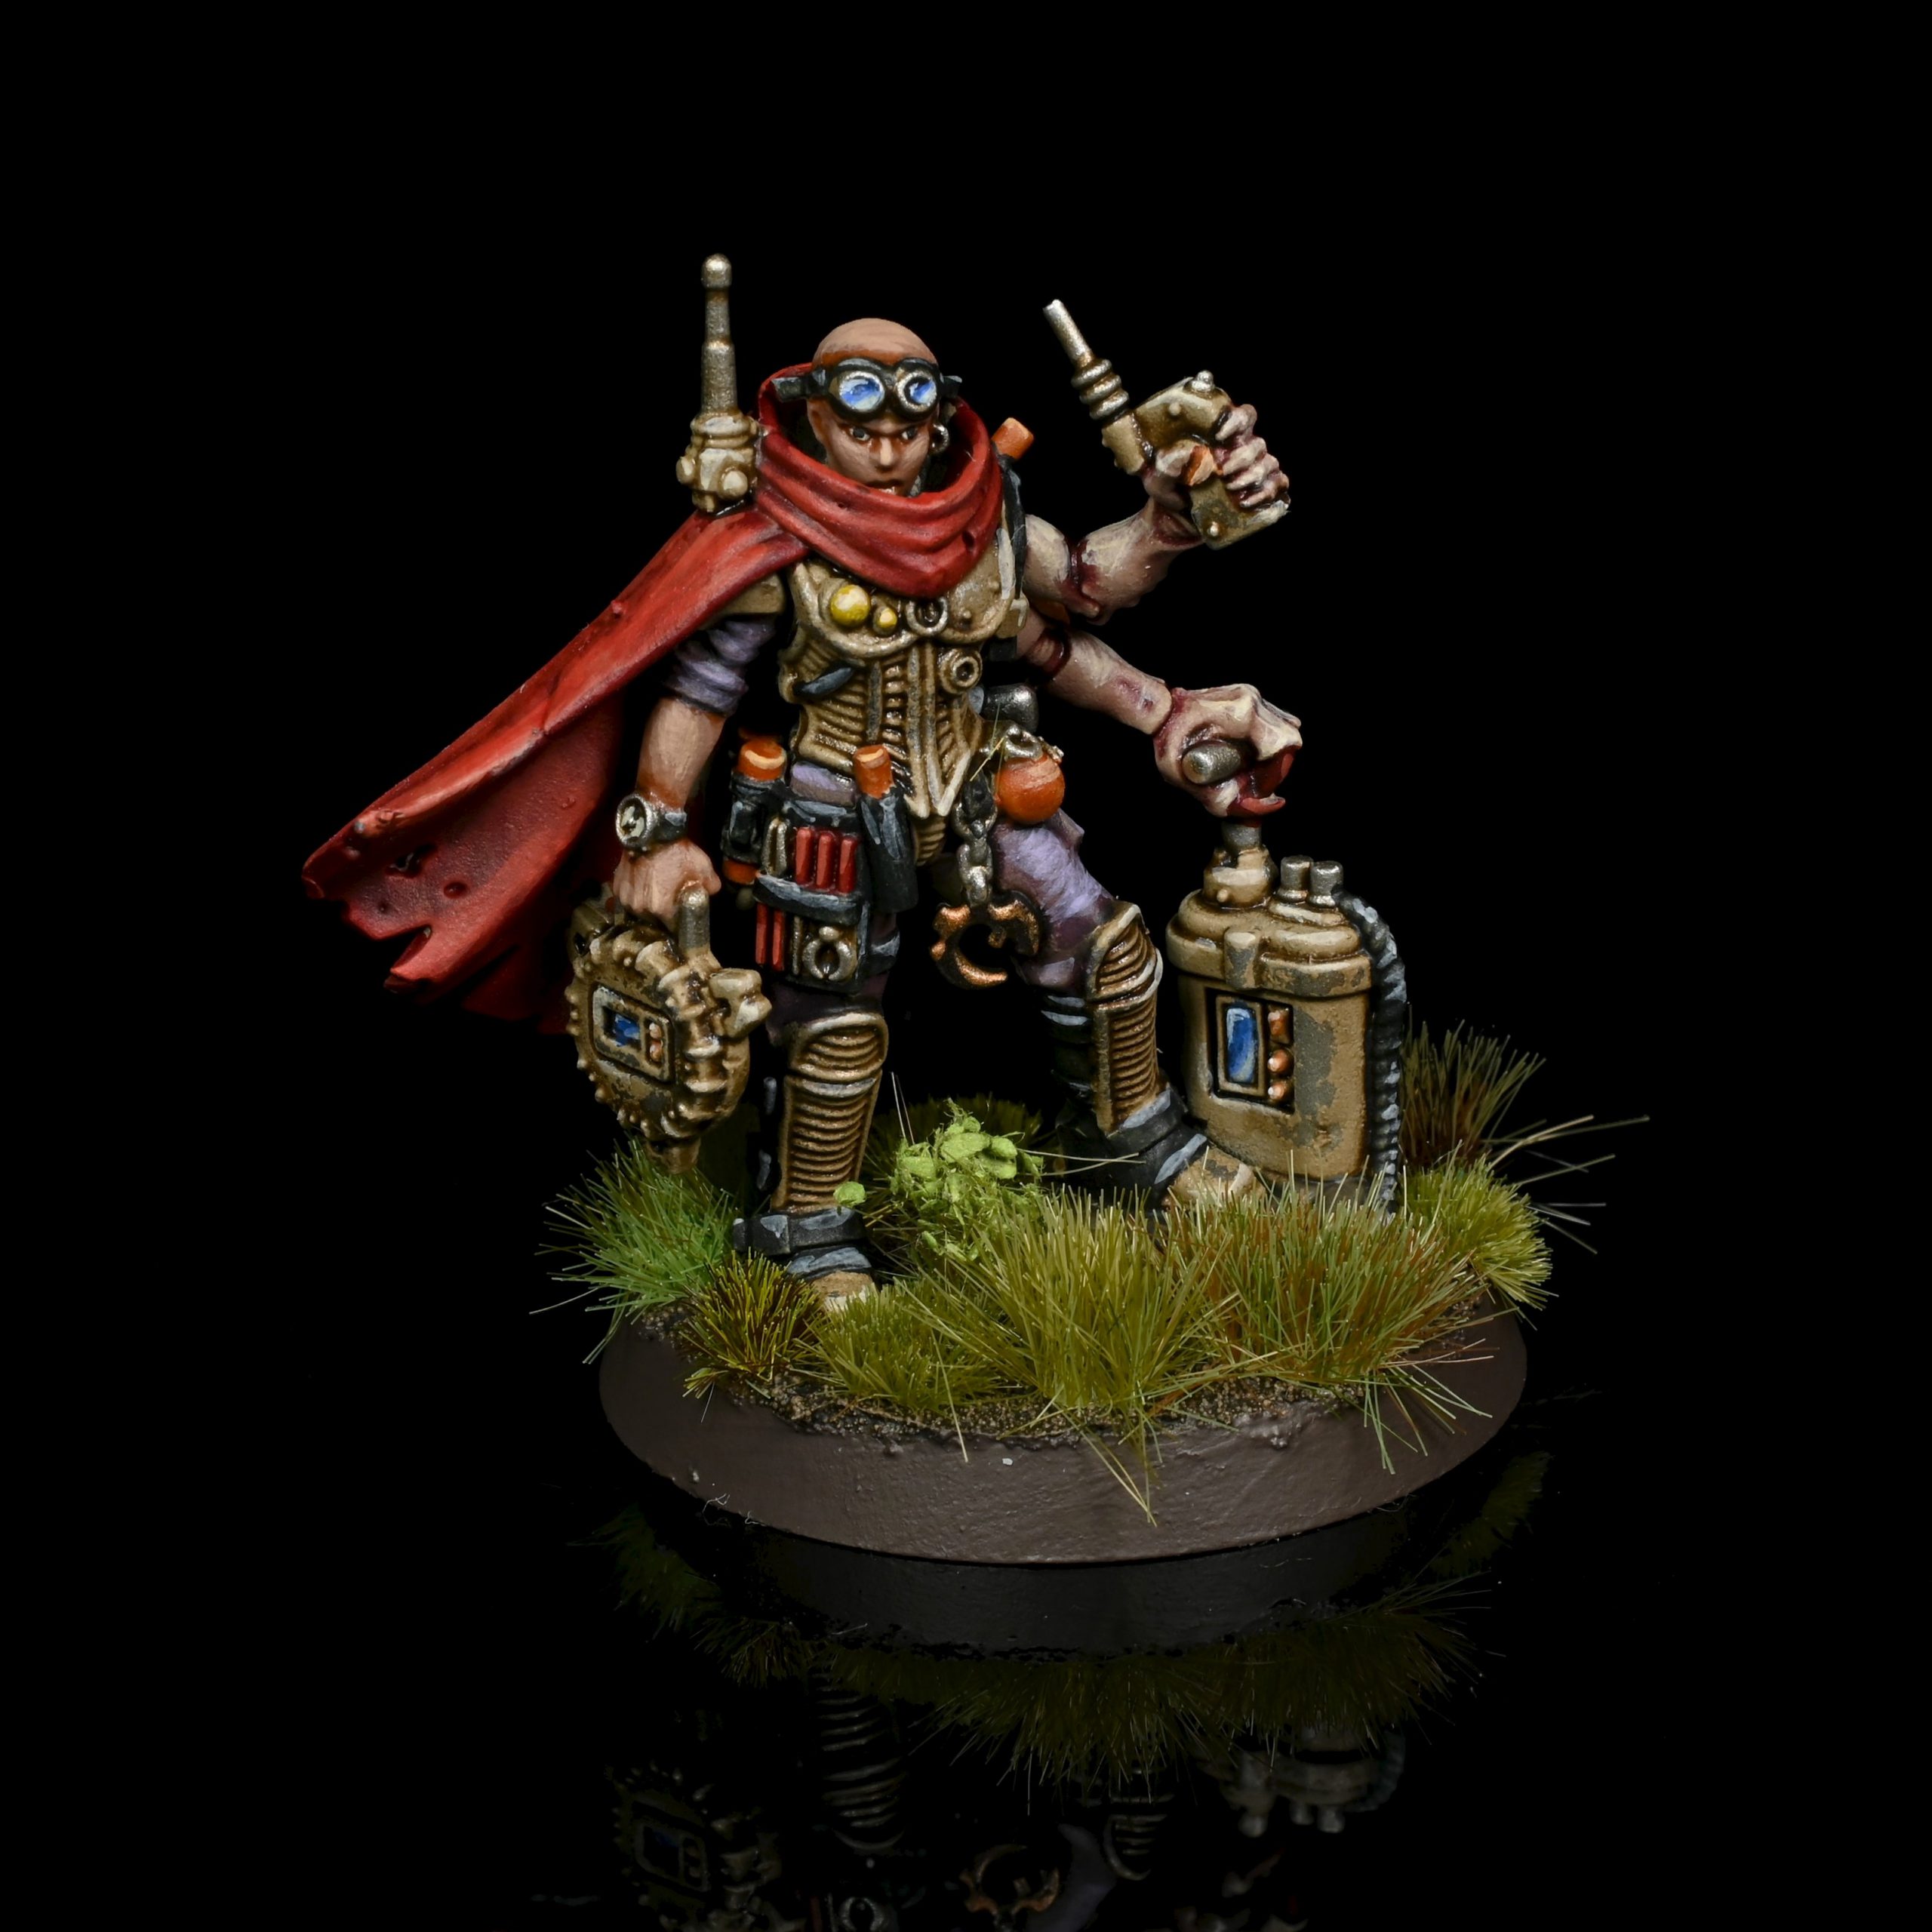
Last up for the damage dealers is the Reductus Saboteur, who we talked about in our Shadow Throne review. She’s a cool ranged damage dealer, and there are a few neat things in the book that she’s compatible with where other characters aren’t, but suffers from the pretty critical problem of not having Crossfire by default, which is a killer in a book where synergies operating around that are the main way things get done. Luckily, and astute readers may have spotted the “by default” there, you can get around this – she’s carrying an autopistol, and if you upgrade this to the Oppressors Bane relic she gains the Crossfire rules for all her weapons, not just the pistol. At that point she’s pretty interesting – you are essentially throwing away the boosted pistol shots a lot of the time, but she’s good for dropping Crossfire markers onto heavy targets, or exploiting the Exposed status to deal some big damage. Needing a relic to operate isn’t ideal, but if you’ve got this cool new model this is the way to go.
Also great users of the Bane are our last two entrants, the Nexos and Clamavus, though both these utility characters have some upgrades of their own they can use too. The Nexos is a master strategist, able to just drop a Crossfire Marker onto an opposing unit in your Command Phase, no questions asked, and can also transmit a nearby friendly Primus, Jackal Alphus or Clamavus’s aura and command phase effects to one unit anywhere on the battlefield. This is seriously good stuff, and the Nexos has the further appeal of being able to take the Cranial Inlay for CP regen plus an extra use of the aura transmission. This army thirsts ceaselessly for CP, so any access to regen is good, and if you end up spread out across the board then transmitting buffs can be very potent (though watch out for the timing requirements – you cannot select a unit that’s not currently on the battlefield). Between how CP hungry this army is and how valuable a freebie Crossfire marker can be, expect to see this used a lot.
Post-testing Note: Yeah so a free Crossfire marker turns out to be even more useful than you’d initially assume, making this guy an absolute lock for lists. Apart from the obvious uses, being able to drop one way out of sight to tee up Covering Fire or Coordinated Assault can be clutch, and can also be worth a free VP if you’ve chosen Ambush and are short on shooting. Very good stuff.
Last up is the Clamavus, providing a pretty handy suite of utility abilities. He allows one friendly unit to Action while shooting, never something you’re sad to have, and can also attempt to debuff an enemy unit within 12” in your Morale phase, in a similar fashion to a Necron Psychomancer. You roll 3d6 against their Leadership, and if you beat it you select either losing ObSec or being unable to perform Actions till your next Morale phase. You also get an unusually potent anti-vehicle stratagem in Data Parasite, letting you select a vehicle within 18” and roll a d6, then on a 3+ halving the wounds it has remaining for the purposes of calculating stats till your next turn. Situational, but not bad, and a Clamavus with the Oppressors Bane ends up as a pretty nifty utility piece.
There’s so much choice in the Elites slot here, and it will be interesting to find out which units rise to the top. The Kelermorph looks like the most obvious winner, but there’s angles on a lot of stuff – the way the Nexos smooths out the army’s operation is extremely valuable as well.
Fast Attack
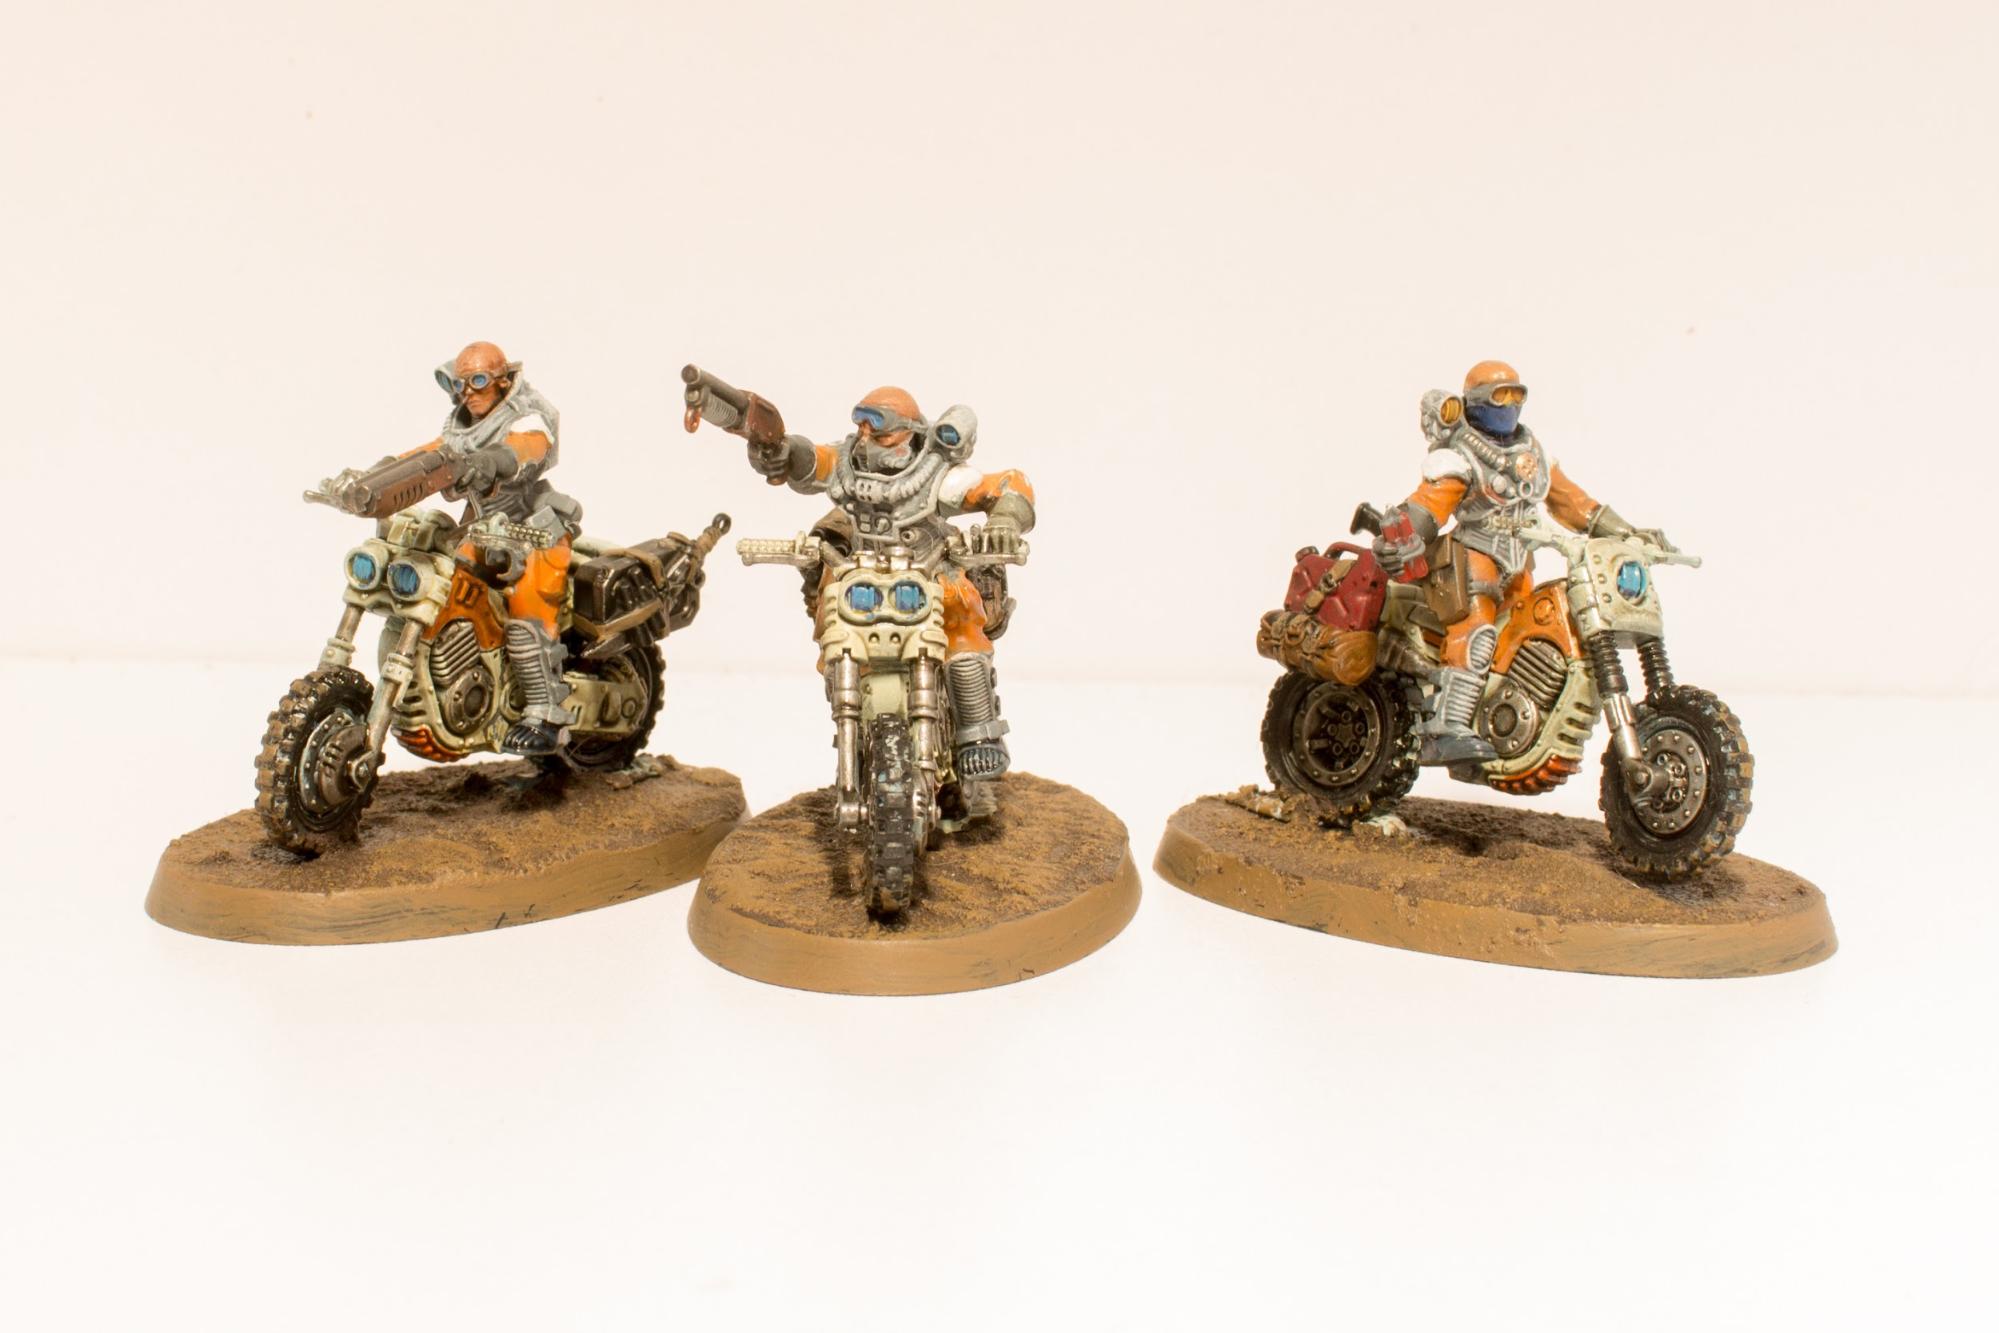
With Sentinels banished, two choices here – Atalan Jackals and Achilles Ridgerunners. Both these units can choose not to set up in Ambush in order to make a 9” pre-game move.
That’s largely going to be used to set up vicious Crossfires, with Atalan Jackals being great enablers and Ridgerunners good damage dealers. Jackals are fast – as well as their pre-game move, they have a 14” basic movement and can use Roving Engagement for additional reach. Couple that with their ability to make a pretty large line of bases and these are very strong for zipping behind enemies so that the rest of your army can unleash hell. A bare bones unit at 48pts is pretty appealing for this, and if you’ve got 5pts free adding a cheeky demo charge for emergencies isn’t a bad choice. They’ve also still got the option to add wolfquads and can buy decent melee weapons if you want (though thankfully their baseline shooting and melee weapons have been squashed into “Atalan small arms” and “Atalan power weapons”, reducing the number of extremely marginal choices you might have to make and freeing you up to just pick what looks cool in the kit) and while small utility squads (especially as Rusted Claw) are likely the best setup, there might be a place for a big unit in some lists, especially as you can combine them with some They Came From Below Purestrains for some serious first-turn charge potential. Ridgerunners, meanwhile, stack up lots of heavy mining laser shots in a unit, and can strike a brutal blow if you combine Exacting Planning and Raking Fire. It’s fair to say that there are far more good options for building big shots into a list than there used to be, so Ridgerunners are less mandatory, but their rate still seems decent.
Heavy Support

Only one choice here, but it’s a good one – the Goliath Rockgrinder might be one of the most improved units in the whole book. The biggest reason for that is that Rugged Construction is now damage reduction rather than a 6+ to ignore wounds, but that’s far from all – the vehicle is also faster, has a base 3+ save rather than 4+, and hits at a more accurate WS3+, making it a serious threat to elite infantry. It’s also got Crossfire, and sees the heavy seismic cannon in particular get a big boost – an extra point of AP on both modes, S6 on the “small” shots and 24” range on the “big” shots, making it far easier to use and far more flexible. You pay a small premium for all these upgrades (110pts base compared to 95pts) but it looks very attractive now, so if you’ve dreamed for years of mowing down Space Marines with a big drill, your time has probably come.
Dedicated Transport
Pretty much take all the notes above about the Rockgrinder and apply them to the Goliath Truck as well – damage reduction, a 3+ save and Crossfire make this a very attractive unit, and Neophytes sniping from inside thanks to it being Open Topped is much more relevant than it used to be as well.
Our Thoughts
How They’ll Play
Genestealer Cults, rather appropriately, want to use their vast array of tricks to keep the opponent de-stabilised in the early to mid game, pulling ahead on primary scoring, then either sweep forward to victory if the opponent is on their last legs or switch to a heroic rearguard action to maximise scoring if they look largely intact and real mad.
With They Came From Below and From Every Angle you’ve got some tricks in your playbook that you can start using right from the first turn to exert some serious pressure, while cunning use of Ambush should minimise the impact of the opponent’s turn if they go first. Making sure you’ve got some tools in your Underground arsenal for turns two and three should help keep the opponent on the back foot, and during these early parts of the game you can skirmish some transports onto mid-table objectives to rack up points while your opponent is in disarray. These can pivot either towards being your vanguard for a victorious surge if you scent world domination, or act as durable speedbumps as you play for time for your cult’s leaders to make their getaway from the Assassinate target that will often be on their heads.
Hot Takes
Wings
This might be my favourite single 9th Edition Codex, and I don’t say that lightly. Genestealer Cults were up there with Knights as one of the hardest armies to modernise for 9th Edition, and the design team have absolutely knocked it out of the park. There are so many potential pitfalls with this faction, but at least my initial impression is that the right balance has beens struck on pretty much every front. There are plenty of devious tricks you can throw around, including some completely unique to the faction, but not so many that they hand you free wins or ruin the game for unprepared opponents. The faction’s forces are still brittle and need to be used with finesse, but aren’t so glass jawed that as soon as you miss a swing the game is over. The huge cast of weird and wonderful characters have all been well tuned – clearly I have some favourites for competitive play, but they all contribute meaningfully and should be a blast in casual play. Purestrains are even good now!
That balance feels, from our testing, like it extends to how well they’ll compete too. On a first read of this book you do feel kind of blown away by how many valid choices there are (with some echoes of Drukhari) but when you come to constructing lists you find you’re having to make more real choices than in the initial version of that book. The builds you end up with are potent, and can do some great stuff, but don’t feel wildly out of line with what other armies are capable of. If anything, the prices are maybe a hair too high on some things, but if that is the case it’s by pretty small amounts, and the curveball capabilities of the faction plus a few rounds of list optimisation are likely to close the gap. You can see my current favourite build below, and I was able to rack up a win against a Talos list with this, which is obviously a good sign. The only potential issue is whether the army ends up a bit first turn dependent in some matchups – being able to pressure lots of objectives quickly is vital to success – but I suspect the upcoming mission changes will be very good for them, as they should excel at alternate primary conditions, and have an easier time suppressing their opponent’s score. It’s tough (in a good way) to figure out exactly where they’re going to land, but a comfortable Tier 2 with a few standout builds pushing higher is my best guess, which is generally what we want to see.
The other thing that’s worth particularly highlighting about this book is how high the quality of the rules writing is. Genestealer Cults are a complicated army with some unique abilities, and it’s clear that a huge amount of effort went into refining the wording on some abilities and adding in-line clarifications to some of the most unusual to minimise the potential for confusion or ambiguity, leaving only a tiny number of things that maybe need a quick FAQ in the first pass. This is a tremendously good move and perfect for this faction in particular, and the book just feels end-to-end like it was put together by a team who really get this faction – things like getting to activate Command Phase abilities immediately after arriving showcases a real depth of thought about how this army will interact with the Edition’s trends. Top stuff.
I basically cannot say enough nice things about this book, and am hopeful that it’s going to make a splash in the metagame without taking it over. I am mindful that last time I was this hyped on a book in a review it was the Drukhari codex, but with games under my belt I’m reasonably comfortable that it’s good without being busted, and my hype remains extremely strong. Unlike a lot of armies I get this excited about, there’s also a real chance of me getting to take them to at least one event, as chief enabler Soggy has offered to lend me his force at some point (so watch out, whichever majors I’m going to in late February or March).
More of this sort of thing!
Soggy
If I had to use a single word to describe my reaction to this codex it would be relief.
I’ve been waiting for the new codex with some trepidation, as the cult hasn’t been in a good place for some time and the pendulum could have swung hard the other way.
Instead I’m greeted with meaningful changes to datasheets making everything at least worth consideration now. The prime example of genestealers in a Genestealer Cult force is not only viable, but worth it now is hard to understate.
The new mechanics are interesting and a nice addition, Crossfire is thematic and useful to different playstyles and as mentioned elsewhere, the new Proficient Planning system is a great way of retaining some of the tricks the cult had but reducing some of the “gotcha” element – which could result in bad feels.
In the end, the new meaningful choices to be made during list creation and the many layers to remember during play to pilot efficiently will be incredibly rewarding when you pull off your plan which was generations in the making – which is all I could have really asked for.
Army List
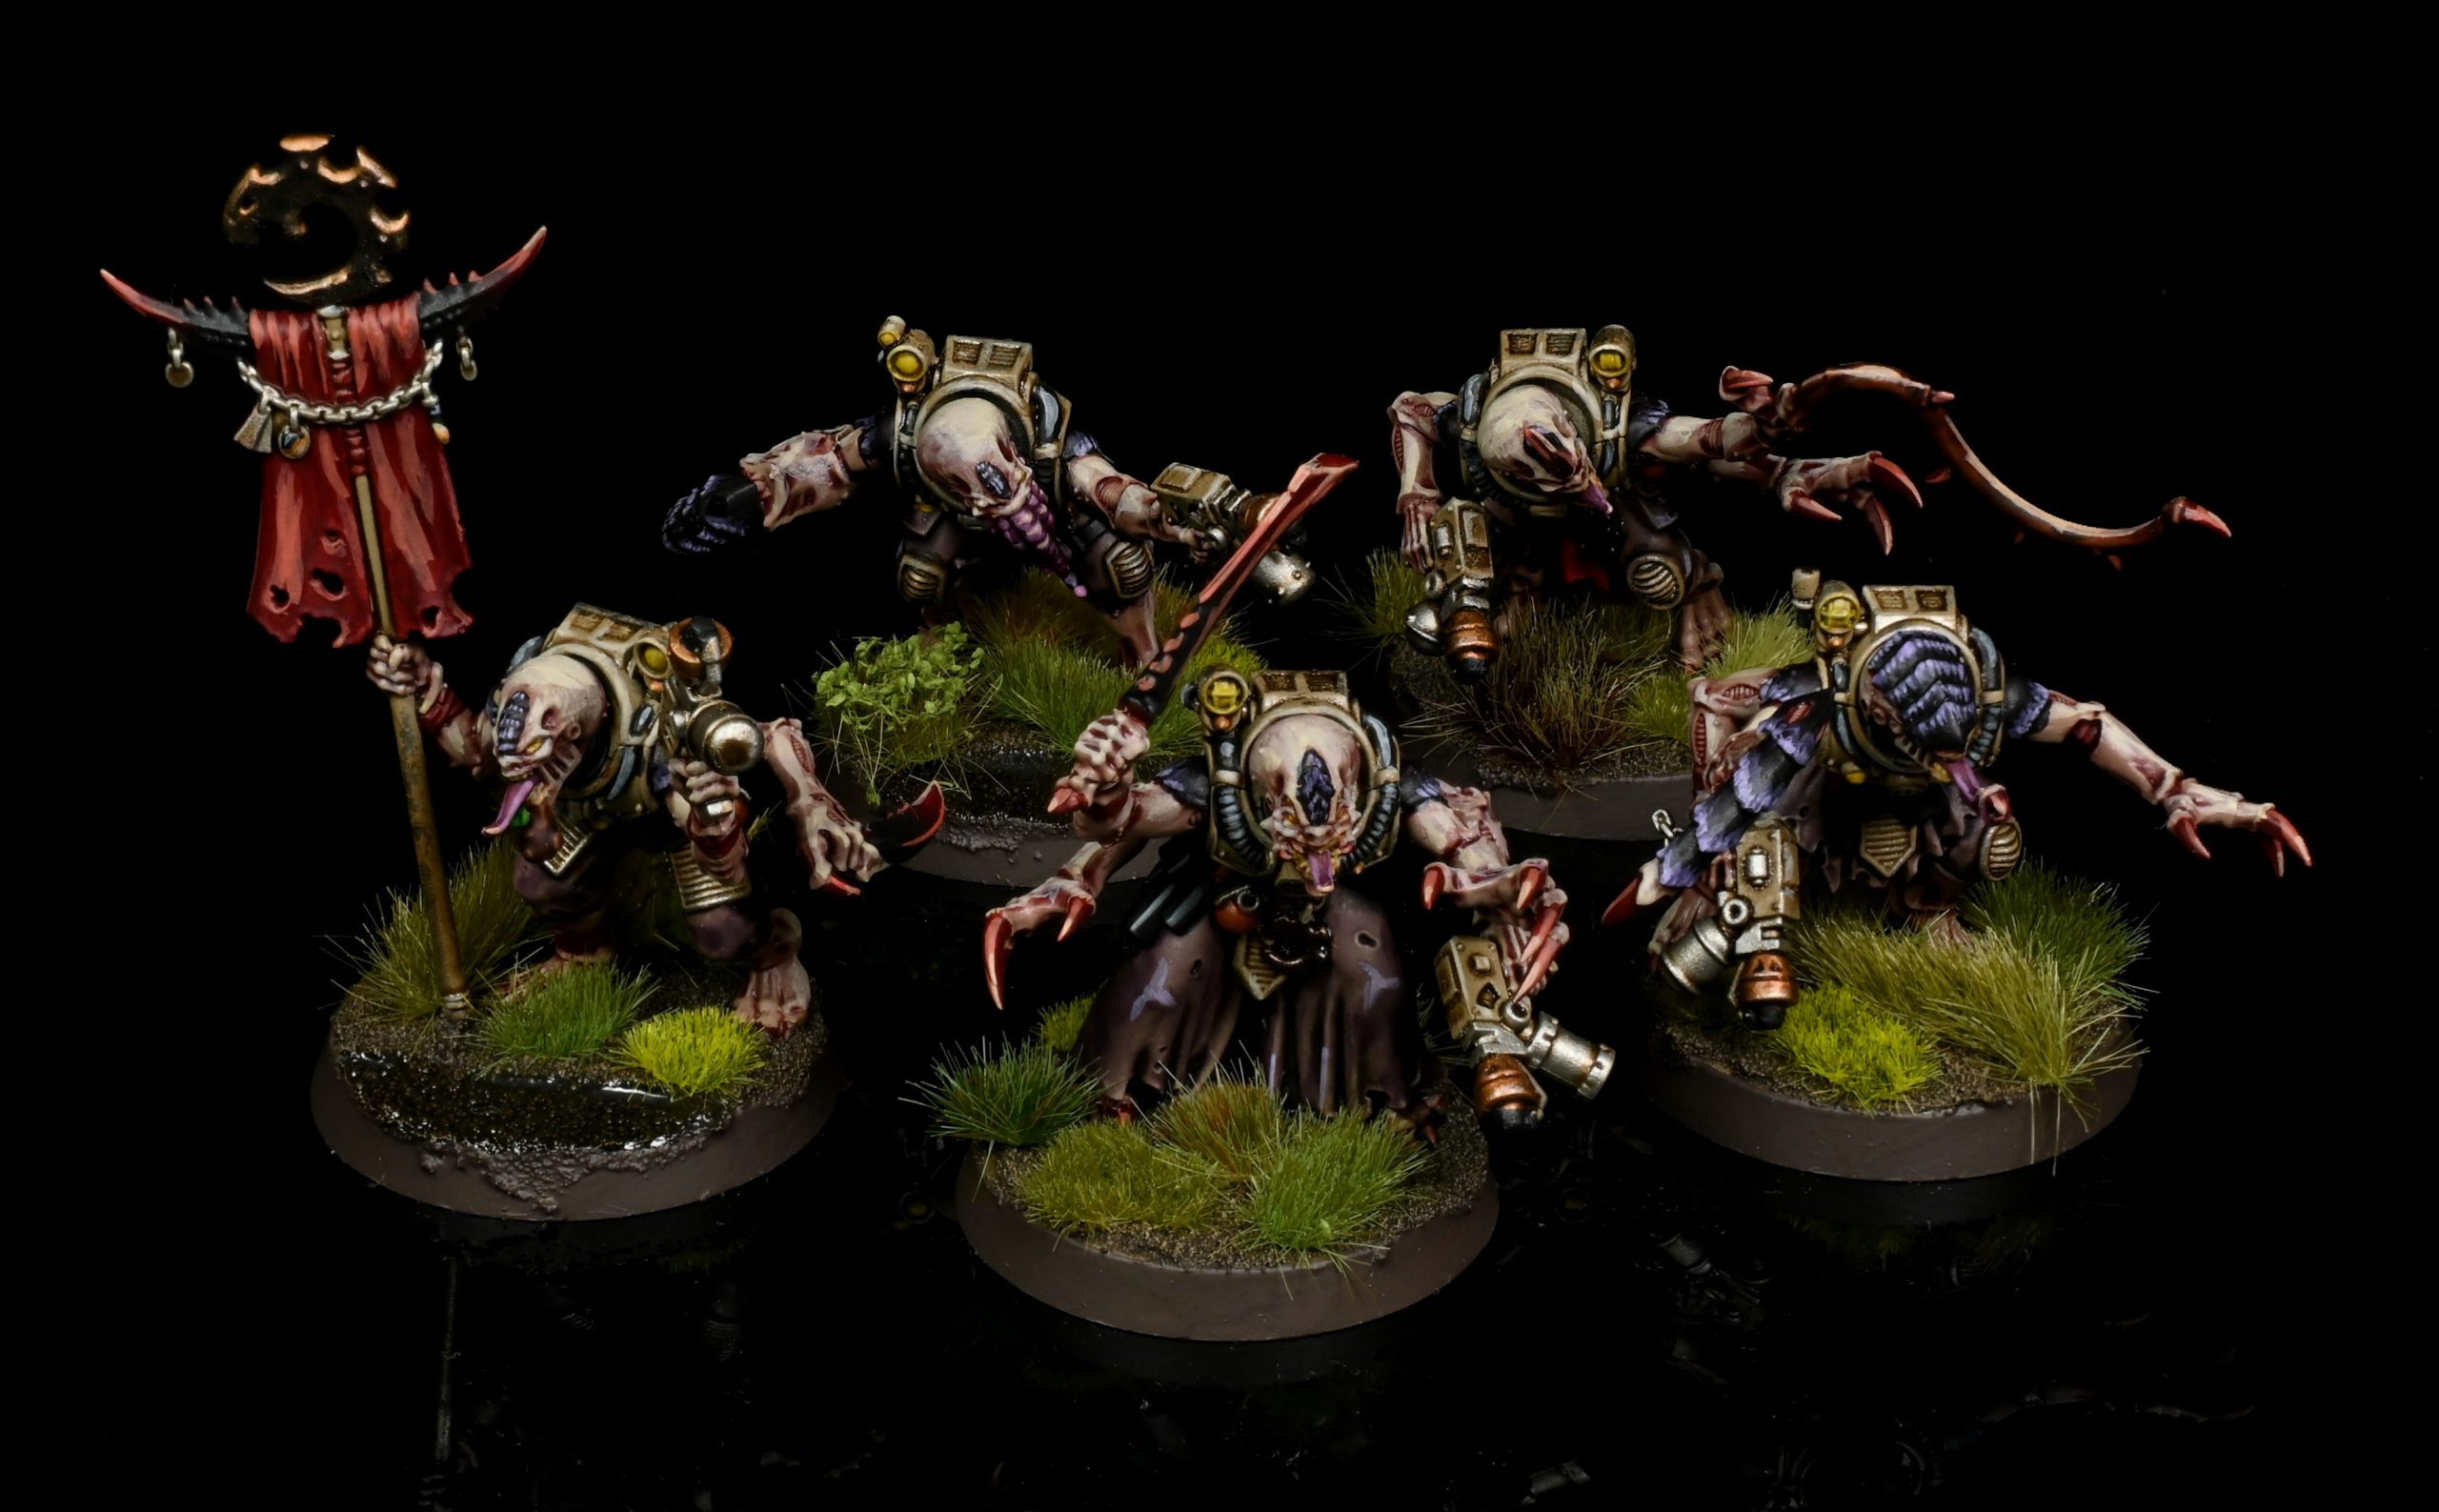
Wings
Rusted Claw Battalion
HQ
Patriarch, Mass Hypnosis, Might From Beyond, Warlord, Entropic Touch 140
Primus, Biomorph Adaptation, Hand of Abberance 80
Jackal Alphus, Prowling Agitant 80
Troops
20 Neophytes, autoguns, 4 Seismic, From Every Angle, Icon 210
20 Neophytes, autoguns, 4 lasers, Icon 200
10 Neophytes, autoguns, 1 Laser, 1 Grenade launcher 80
10 Neophytes, shotguns, 2 Laser 90
10 Acolytes, 4 flamers, 4 drills, whip and bonesword, OUR TIME IS NIGH 162
10 Acolytes, 5 flamers, 4 drills, whip and bonesword, TRAP SPRUNG 165
Dedicated Transport
Goliath Truck, demo charges 95
Goliath Truck, demo charges 95
Elites
Kelermorph, Wyrmbreath rounds 80
10 Purestrains, They Came from Below 150
5 Metamorphs, flamers 75
Nexos, Cranial Inlay 50
5 Metamorphs, flamers 75
Fast Attack
4 Bikes, 2 Demo Charges 58
Heavy
Rockgrinder, demo charges, seismic cannon 115
2000pts, 9CP
This is my second iteration of a list I put together for test games, utilising the mobility and tricks of the Rusted Claw to create an army that can play objectives very flexibly and unleash some pinpoint damage when required, and it played well enough in this form that I’d probably take it to tournaments with minimal further tweaks – the only thing that didn’t feel needed was the mining laser and grenade launcher in the footslogging Neophyte unit, so in GT2021 pack games I’d swap those out for either Meditations in Shadow on the Patriarch, giving him access to Psychic Stimulus for emergencies, or changing a demo charge to a wofquad in the biker unit, while in GT2022 I’d cut one hand flamer and add a sixth model to each Metamorph unit so they were RND-ready. At that point, with no flamer on the sergeant I’d also add the lash whip to them, because it’s free and better than an autopistol.
In terms of playing this, the goal is to keep the opponent under pressure and shatter their ability to contend on the flanks. The Trap Sprung Acolytes, the Kelermorph and one or both units of Metamorphs go underground while everything else (other than the bikes if they want to pre-game move) starts in Ambush. When it’s marker reveal time you’ve got two more things that can bug out if needed – the From Every Angle unit and the Purestrains, and both can also be used for an aggressive swing if needed, which the Purestrains pretty much always are if you’re going first, aiming to punk something then use Back to the Shadows, or zoom to somewhere extremely disruptive. The seismic squad is more of a choice – they’ll usually get pulled going first as they’re unlikely to have good targets, but going second if there’s an ambush marker they can come out from where they won’t get shot too badly and have a good line on something juicy, it’s worth just setting them up, as the Rusted Claw remain stationary doesn’t work the turn you arrive from reserves and it’s harder to load them with buffs. They obviously then want to fully unleash the might of Overloaded Fuel Cells on something juicy.
Your next power plays are moving the Trucks up to provide a mixture of shooting and counter-charge pressure, and bringing in the Kelermorph/Acolytes on turn two, both aiming to pick something useful up. The Kelermorph operates with such impunity now that his range is longer and he moves after shooting that it’s almost always possible to bring him in for some damage without too much risk on turn two, and there are some games where I’d even keep one in Ambush for first turn value. The Wyrmbreath Rounds aren’t something you want to use all the time, but once he’s on the board as Rusted Claw he can use them with limited drawbacks, and having the option to switch to some hardcore anti-heavy firepower can be transformational to the model against e.g. Custodes. The Underground Metamorphs want to wait for an opportunity to pop up and make a play for an objective, either appearing directly on it if the opponent is stretched and can’t maintain a 6” cordon, or coming in ready to flame and charge (or perform activities).
Finally, the big laser Neophyte squad castles up with most of the characters, and either snipes at stuff that emerges or moves out as the situation dictates. If your early punches land well you can plan to start taking over the table, while if they glance off then you secure your home base, and try and keep the opponent’s response scattered enough to win on objectives. Particular note in this regard goes to the Jackal Alphus – not only is she great for setting up Crossfire, she’s also a tremendous mid-game objective thief in this list. As Rusted Claw she can advance and still shoot, and has keyword compatibility for both the auto-6” Advance strat and the Atalan fire and fade. That means she can rocket 27” across the table in a pinch to steal a vacant objective, and because of Prowling Agitant she can be surprisingly tough to deal with if the opponent doesn’t have a shooting bead on her. If they’re using a counter-charge character to try and take her out, you can also use it to ensure that even if she dies, they can’t immediately take back the objective, as if you fractionally tag the edge of the radius with her base, then move her 6” away from it, no single model with a base smaller than 50mm is going to be able to engage her then consolidate back into objective range. Fun stuff.
I had a blast using this, and want to play more games with it, but I’m also very keen to try a Bladed Cog spin on things, and a few other options besides. Book Good.
Wrap Up
What a book – and it’s only the first of the two we’re looking at today! Make sure to check out our Adeptus Custodes review as well, and check back in next week for the hot Crusade news. Comments, questions and suggestions to contact@goonhammer.com.
