
Editor’s Note: An earlier version of this article claimed that Steven Crawley had mis-played the Lurk ability in multiple rounds. After further investigation we have updated it to reflect that this only occurred in a single round and was resolved before the end of the game.
It’s our favourite time here at Competitive Innovations – plenty of events are happening, the meta has been refreshed by balance changes and new arrivals and people are trying all sorts of different lists. There’s some clear front runners, but a far more diverse field at the top than we’ve seen for a while, which is great news for the game and everyone who attends tournaments, and we’ll get stuck in momentarily.
Just before we do, there’s sadly a quick note from me. Due to personal circumstances I need to take a short break from regular article writing, so you’ll see a few more things from me for the rest of this week, but then a bit of a gap until my next piece. The rest of the team will be stepping up to cover the column in my absence (as they have a few times recently, for which I am extremely grateful) so you’ll still get your regular updates on what’s going on out there on the tournament scene (and make sure to tune in next week for all the hot results from the Seattle Open). As always, I am hugely grateful to everyone who takes the time to read this every week, and look forward to seeing plenty of our UK readers at this year’s first Goonhammer Open at the end of the month.
With that bit out of the way, on to the showdowns and the lists!
The Dallas Open
All the lists for this event can be found in Best Coast Pairings.
The Showdown
Matchup & Mission – Death and Zeal
Nick Nanavati – Craftworlds – Hail of Doom/Masterful Shots Asuryani with lots of pesty individual units, then a big Hawk squads and a large Shuriken Cannon Windrider unit to play keepaway with. Finally, a Webway Gate helps some of the Infantry get where they need to be and makes it easy to pressure an objective, and allows Dire Avengers to be unleashed at the right moment.
Army List - Click to Expand ++ Patrol Detachment 0CP (Aeldari – Craftworlds) [46 PL, 830pts] ++ + Configuration + Craftworld Selection Detachment Command Cost + No Force Org Slot + Seer Council (Unit) [2 PL, 40pts] + HQ + Baharroth [7 PL, 140pts] Farseer Skyrunner [6 PL, 120pts]: 2. Doom, 3. Ghostwalk, 5: Mark of the Incomparable Hunter, Warlord, Witchblade + Troops + Guardian Defenders [4 PL, 90pts] Rangers [4 PL, 70pts]: Wireweave Net + Elites + Howling Banshees [5 PL, 105pts] Wraithlord [8 PL, 135pts]: 2 x Shuriken Catapult, Ghostglaive, 2x Shuriken Cannon + Heavy Support + War Walkers [5 PL, 65pts] War Walkers [5 PL, 65pts] ++ Outrider Detachment -3CP (Aeldari – Craftworlds) [59 PL, 1,088pts, -1CP] ++ + Configuration + Craftworld Selection + Stratagems + Stratagem: Relics of the Shrines [-1CP] + No Force Org Slot + Seer Council (Unit) [2 PL, 40pts] + HQ + Farseer [5 PL, 90pts]: 1. Guide, 3. Fortune, Witchblade Farseer [5 PL, 90pts]: 1. Fateful Divergence, 5. Will of Asuryan, Witchblade + Elites + Dire Avengers [7 PL, 118pts] Dire Avengers [6 PL, 108pts] + Fast Attack + Swooping Hawks [8 PL, 162pts] Vypers [3 PL, 45pts] Vypers [3 PL, 45pts] Windriders [12 PL, 270pts] Windriders [4 PL, 60pts] Windriders [4 PL, 60pts] ++ Fortification Network -1CP (Aeldari – Craftworlds) [4 PL, 80pts] ++ + Fortification + Webway Gate [4 PL, 80pts] ++ Total: [109 PL, -1CP, 1,998pts] ++
. *Far-Flung Craftworld*: Hail of Doom, Masterful Shots
. Warlocks: 4. Protect/Jinx
. . Warlock: Witchblade
. Kurnous’ Bow
. 10x Guardian Defender: 10x Plasma Grenades, 10x Shuriken Catapult
. 5x Ranger: 5x Ranger Long Rifle, 5x Shuriken Pistol
. 4x Howling Banshee: 4x Banshee Blade, 4x Shuriken Pistol
. Howling Banshee Exarch: Cronescream (Shrine Relic), Mirrorswords, Piercing Strikes
. War Walker: 2x Shuriken Cannon
. War Walker: 2x Shuriken Cannon
. *Far-Flung Craftworld*: Hail of Doom, Masterful Shots
. Warlocks: 5. Quicken/Restrain
. . Warlock: Witchblade
. 8x Dire Avenger: 8x Avenger Shuriken Catapult, 8x Plasma Grenades
. Dire Avenger Exarch: Stand Firm, Two Avenger Shuriken Catapults
. 8x Dire Avenger: 8x Avenger Shuriken Catapult, 8x Plasma Grenades
. Dire Avenger Exarch: Two Avenger Shuriken Catapults
. 8x Swooping Hawk: 8x Lasblaster
. Swooping Hawk Exarch: Lasblaster, The Phoenix Plume (Shrine Relic)
. Vyper w/ Shuriken Cannon: Shuriken cannon
. Vyper w/ Shuriken Cannon: Shuriken cannon
. 9x Windrider – Shuriken Cannon: 9x Shuriken Cannon
. 3x Windrider – Twin Shuriken Catapults: 3x Twin Shuriken Catapult
. 3x Windrider – Twin Shuriken Catapults: 3x Twin Shuriken Catapult
vs.
Sweet Lew – Blood Angels – Blood Angels flying circus, newly augmented by Armour of Contempt.
Army List - Click to Expand ++ Battalion Detachment 0CP (Imperium – Adeptus Astartes – Blood Angels) [110 PL, 7CP, 2,000pts] ++ + Configuration + **Chapter Selector**: Blood Angels + Stratagems + Stratagem: Angel Ascendant [-1CP] Stratagem: Relics of the Chapter [-2CP]: 2x Number of Extra Relics + HQ + Commander Dante [9 PL, 165pts] Sanguinary Priest [6 PL, -1CP, 120pts]: 3. Soulwarden, Astartes Chainsword, Bolt pistol, Icon of The Angel, Jump Pack, Rites of War, Stratagem: Angel Exemplar, Warlord Sanguinary Priest [5 PL, 90pts]: Astartes Chainsword, Bolt pistol, The Armour Indomitus + Troops + Assault Intercessor Squad [5 PL, 95pts] Incursor Squad [5 PL, 105pts] Incursor Squad [5 PL, 105pts] + Elites + Bladeguard Veteran Squad [10 PL, 180pts] Company Champion [4 PL, -1CP, 70pts]: Blade of Triumph, Chapter Command: Chapter Champion, Stratagem: Hero of the Chapter, The Imperium’s Sword Death Company Marines [8 PL, 190pts]: Jump Pack Sanguinary Guard [7 PL, 128pts] Sanguinary Guard [17 PL, 185pts] Vanguard Veteran Squad [14 PL, 307pts]: Jump Pack + Heavy Support + Devastator Squad [8 PL, 135pts]: Armorium Cherub Whirlwind [7 PL, 125pts]: Whirlwind castellan launcher ++ Total: [110 PL, 7CP, 2,000pts] ++
. 4x Assault Intercessor: 4x Astartes Chainsword, 4x Frag & Krak grenades, 4x Heavy Bolt Pistol
. Assault Intercessor Sgt: Astartes Chainsword, Heavy Bolt Pistol
. 4x Incursor: 4x Bolt pistol, 4x Frag & Krak grenades, 4x Occulus bolt carbine, 4x Paired combat blades
. Incursor Sergeant
. 4x Incursor: 4x Bolt pistol, 4x Frag & Krak grenades, 4x Occulus bolt carbine, 4x Paired combat blades
. Incursor Sergeant
. 4x Bladeguard Veteran: 4x Frag & Krak grenades, 4x Heavy Bolt Pistol, 4x Master-crafted power sword, 4x Storm Shield
. Bladeguard Veteran Sergeant: Neo-volkite pistol
. Death Company Marine: Thunder hammer
. Death Company Marine: Thunder hammer
. Death Company Marine: Thunder hammer
. Death Company Marine: Thunder hammer
. Death Company Marine: Thunder hammer
. Sanguinary Guard: Angelus boltgun, Encarmine sword
. Sanguinary Guard: Angelus boltgun, Encarmine sword
. Sanguinary Guard: Angelus boltgun, Encarmine sword
. Sanguinary Guard: Angelus boltgun, Encarmine sword
. Sanguinary Guard: Angelus boltgun, Power fist
. Sanguinary Guard: Angelus boltgun, Power fist
. Sanguinary Guard: Angelus boltgun, Power fist
. Sanguinary Guard: Angelus boltgun, Power fist
. Sanguinary Guard: Angelus boltgun, Power fist
. Vanguard Veteran: Lightning Claw, Storm shield
. Vanguard Veteran: Lightning Claw, Storm shield
. Vanguard Veteran: Lightning Claw, Storm shield
. Vanguard Veteran: Lightning Claw, Storm shield
. Vanguard Veteran: Lightning Claw, Storm shield
. Vanguard Veteran: Lightning Claw, Storm shield
. Vanguard Veteran: Lightning Claw, Storm shield
. Vanguard Veteran: Lightning Claw, Storm shield
. Vanguard Veteran: Lightning Claw, Storm shield
. Vanguard Veteran Sergeant: Master-Crafted Weapon, Relic blade, Storm shield
. Devastator Marine Sergeant: Bolt pistol, Boltgun
. Devastator Marine w/Heavy Weapon: Grav-cannon
. Devastator Marine w/Heavy Weapon: Grav-cannon
. Devastator Marine w/Heavy Weapon: Grav-cannon
. Devastator Marine w/Heavy Weapon: Grav-cannon
Thoughts
One of the game’s most legendary Asuryani players makes an appearance on the top table at Dallas to kick us off this week, bringing a build that uses the powerful Hail of Doom/Masterful Shots combo and some of the tools we’ve seen in other successful lists, but also some unique tricks. Following the normal pattern for such builds, it’s got the superstar characters of Baharroth and the Kuornos Bow/Incomparable Hunter Farseer, two units that can deal damage while staying safe in the form of the Hawks and Bikes, two units of Dire Avengers to throw big punches, and finally plenty of cheap, fast units that can be fed onto objectives to bait the opponent into firing range, and ensure the army doesn’t fall behind on the primary.
What Nick has added to the formula is that he’s gone a bit heavier on the small, semi-sacrificial units (and put in one Wraithlord for a bit more crunch on one point), added a third Farseer (allowing serious psychic dominance, and easier to set up Eldritch Storms), and freed up the points for all of this by bringing a Webway Gate. This avoids needing to bring delivery mechanisms like Wave Serpents for the Dire Avengers, as they can be put into reserves very cheaply (and remember they don’t have to arrive from the gate), allowing the army to pack in more stuff. It also means that the unit of Guardian Defenders the list has is actually valuable – assuming the gate gets placed near an objective, they can pop out to pressure the point, and either perform an Action or add a bit of damage while doing so (or both, with Will of Asuryan). In total, the list gets to play the fairly standard plan for these armies, which is to bait the opponent into battle and wither them down with shooting counterpunches, but thanks to Nick’s changes it doesn’t have to try and hide Serpent hulls from enemy shooting, has a more lethal Psychic counterattack when pressed, and can use the Webway Gate to take back one objective if things have started to go wrong.
On the other side of the table we have a very classic build that’s going to be pretty familiar to anyone who’s seen what Blood Angels can do this edition, but it’s in the hands of a very experienced player. We’ve seen Sweet pop up on Competitive Innovations articles plenty of times this edition, staying loyal to the Sons of Sanguinius even as they’ve fallen down the rankings, so we can be sure he’ll deploy this list to maximum effect. Infiltrating Phobos units provide early objective pressure and can slice up enemy chaff, baiting the opponent into counterpunch range for the flying melee, which does the Blood Angels thing of brutally butchering almost anything as required. The Death Company offer the option of early reach via Forlorn Fury if the opponent has a juicy target, while the Bladeguard supply a tarpit to brawl on a key position, while the HQ Characters charge units up to the max. Finishing stuff off, the Whirlwind can drop Fight Last with Suppression Fire, the Devastators have a broad ability to flatten targets, and the Company Champion is a powerful ace in the hole – he can Heroic in 6″, activate Angel’s Sacrifice to absorb some key melee, then use Only in Death to flatten whatever attacked him in return, very reliably trading up. This army shows the best of what Blood Angels have always been able to do, and gets a modest boost from Armour of Contempt – it doesn’t help the stuff with shields, but Sanguinary Guard have a natural 2+, so love it, and it means the Death Company die just that bit harder.
So, how do the two lists stack up here? Both these armies feel like they want to do something quite similar early game, especially on a corner deployment, which is bait the enemy into fighting for an objective, then launch brutal counterattacks into whatever commits to doing that. There the plans diverge a bit – the Asuryani want to keep doing that for a few turns, while the Blood Angels want to build momentum from there and roll around the table flattening the opponent. One advantage the Blood Angels do have here is that, as long as they can keep the Incursors Obscured from the main Craftworld shooting units, they’re actually non-trivial to remove (and ObSec) – the Asuryani only have the one melee unit in the form of the Banshees, and deploying them on the table comes with some amount of risk with the Whirlwind kicking around. Nick might, of course, be able to work around that just with the speed of his units – the Blood Angels shooting is minimal and when it’s only the grav cannons they have to be dodging then the Asuryani can worry a bit less about staying hidden than they normally would. Still, it does feel like the Craftworlds have a slightly tougher job establishing the early game pattern they want than normal, but unfortunately that’s kind of where the good news for the Blood Angels ends.
Nick’s list can, bluntly, take the Angels off the table here, and it’s very difficult for them to do enough damage to stop that happening or take control of the game. Almost all the damage dealing from the Marines’ side is wrapped up in melee units, so to do any damage they’re often going to have to open themselves up to counterattacks. Nick’s list is designed to ensure that whatever they’re killing isn’t too valuable, and also to reliably annihilate the far more valuable Marine stuff in return. The lack of high value targets other than the big Windrider brick (which is never getting caught, realistically) is a problem for the Blood Angels in general, as it neutralises the value of stuff like the Death Company, and Baharroth also presents a particular problem for an army that’s mostly operating in one phase, as once the Troops go down he can lock down whichever flank the Rites of War Priest isn’t on. The mission Primary only exacerbates all of this – for the Blood Angels to score it they’re going to have to be moving valuable melee units, while the Asuryani can rack it up with a throwaway Vyper and blasting something to bits.
It feels like the one thing the Marines can sort of do in response to this is just to fortify the centre and score as much from Oaths as possible, but even here I don’t think that’ll hold up – a big Eldritch Storm will be devastating, and the remorseless shuriken bombardment that such a castle would face would mean that it just wouldn’t last. If the Angels could combine this with staging the smaller Sanguinary Guard units to try and reach out for a counterattack they might manage to make something of a game of it, but so much stuff here is stacked against them – it feels like whatever route they take the Asuryani can construct an answer, and with Nick at the helm you can be confident that they’ll do so. As a result, a convincing victory for the Craftworlds was the result here.
Result
Craftworld Victory – 94-48
Nick Nanavati – Craftworlds – 1st Place
The List
See Showdown
Archetype
Hail of Doom
Why it’s Interesting in 9th
Great to see the Webway gate putting in some serious work in Nick’s hands, helping make this flavour of Hail of Doom even harder to pin down than normal, and securing him the mighty 8-0 undefeated champion’s position. Having the flexibility to chuck out an ObSec unit, vicious Banshees or even a Wraithlord as the matchup dictates really makes things tough for the opponent, and allows the army to face down many different challenges – always a plus when trying to navigate through this many rounds. Hail of Doom is clearly the Craftworlds build to beat right now, and Nick gave us a real showcase of why here.
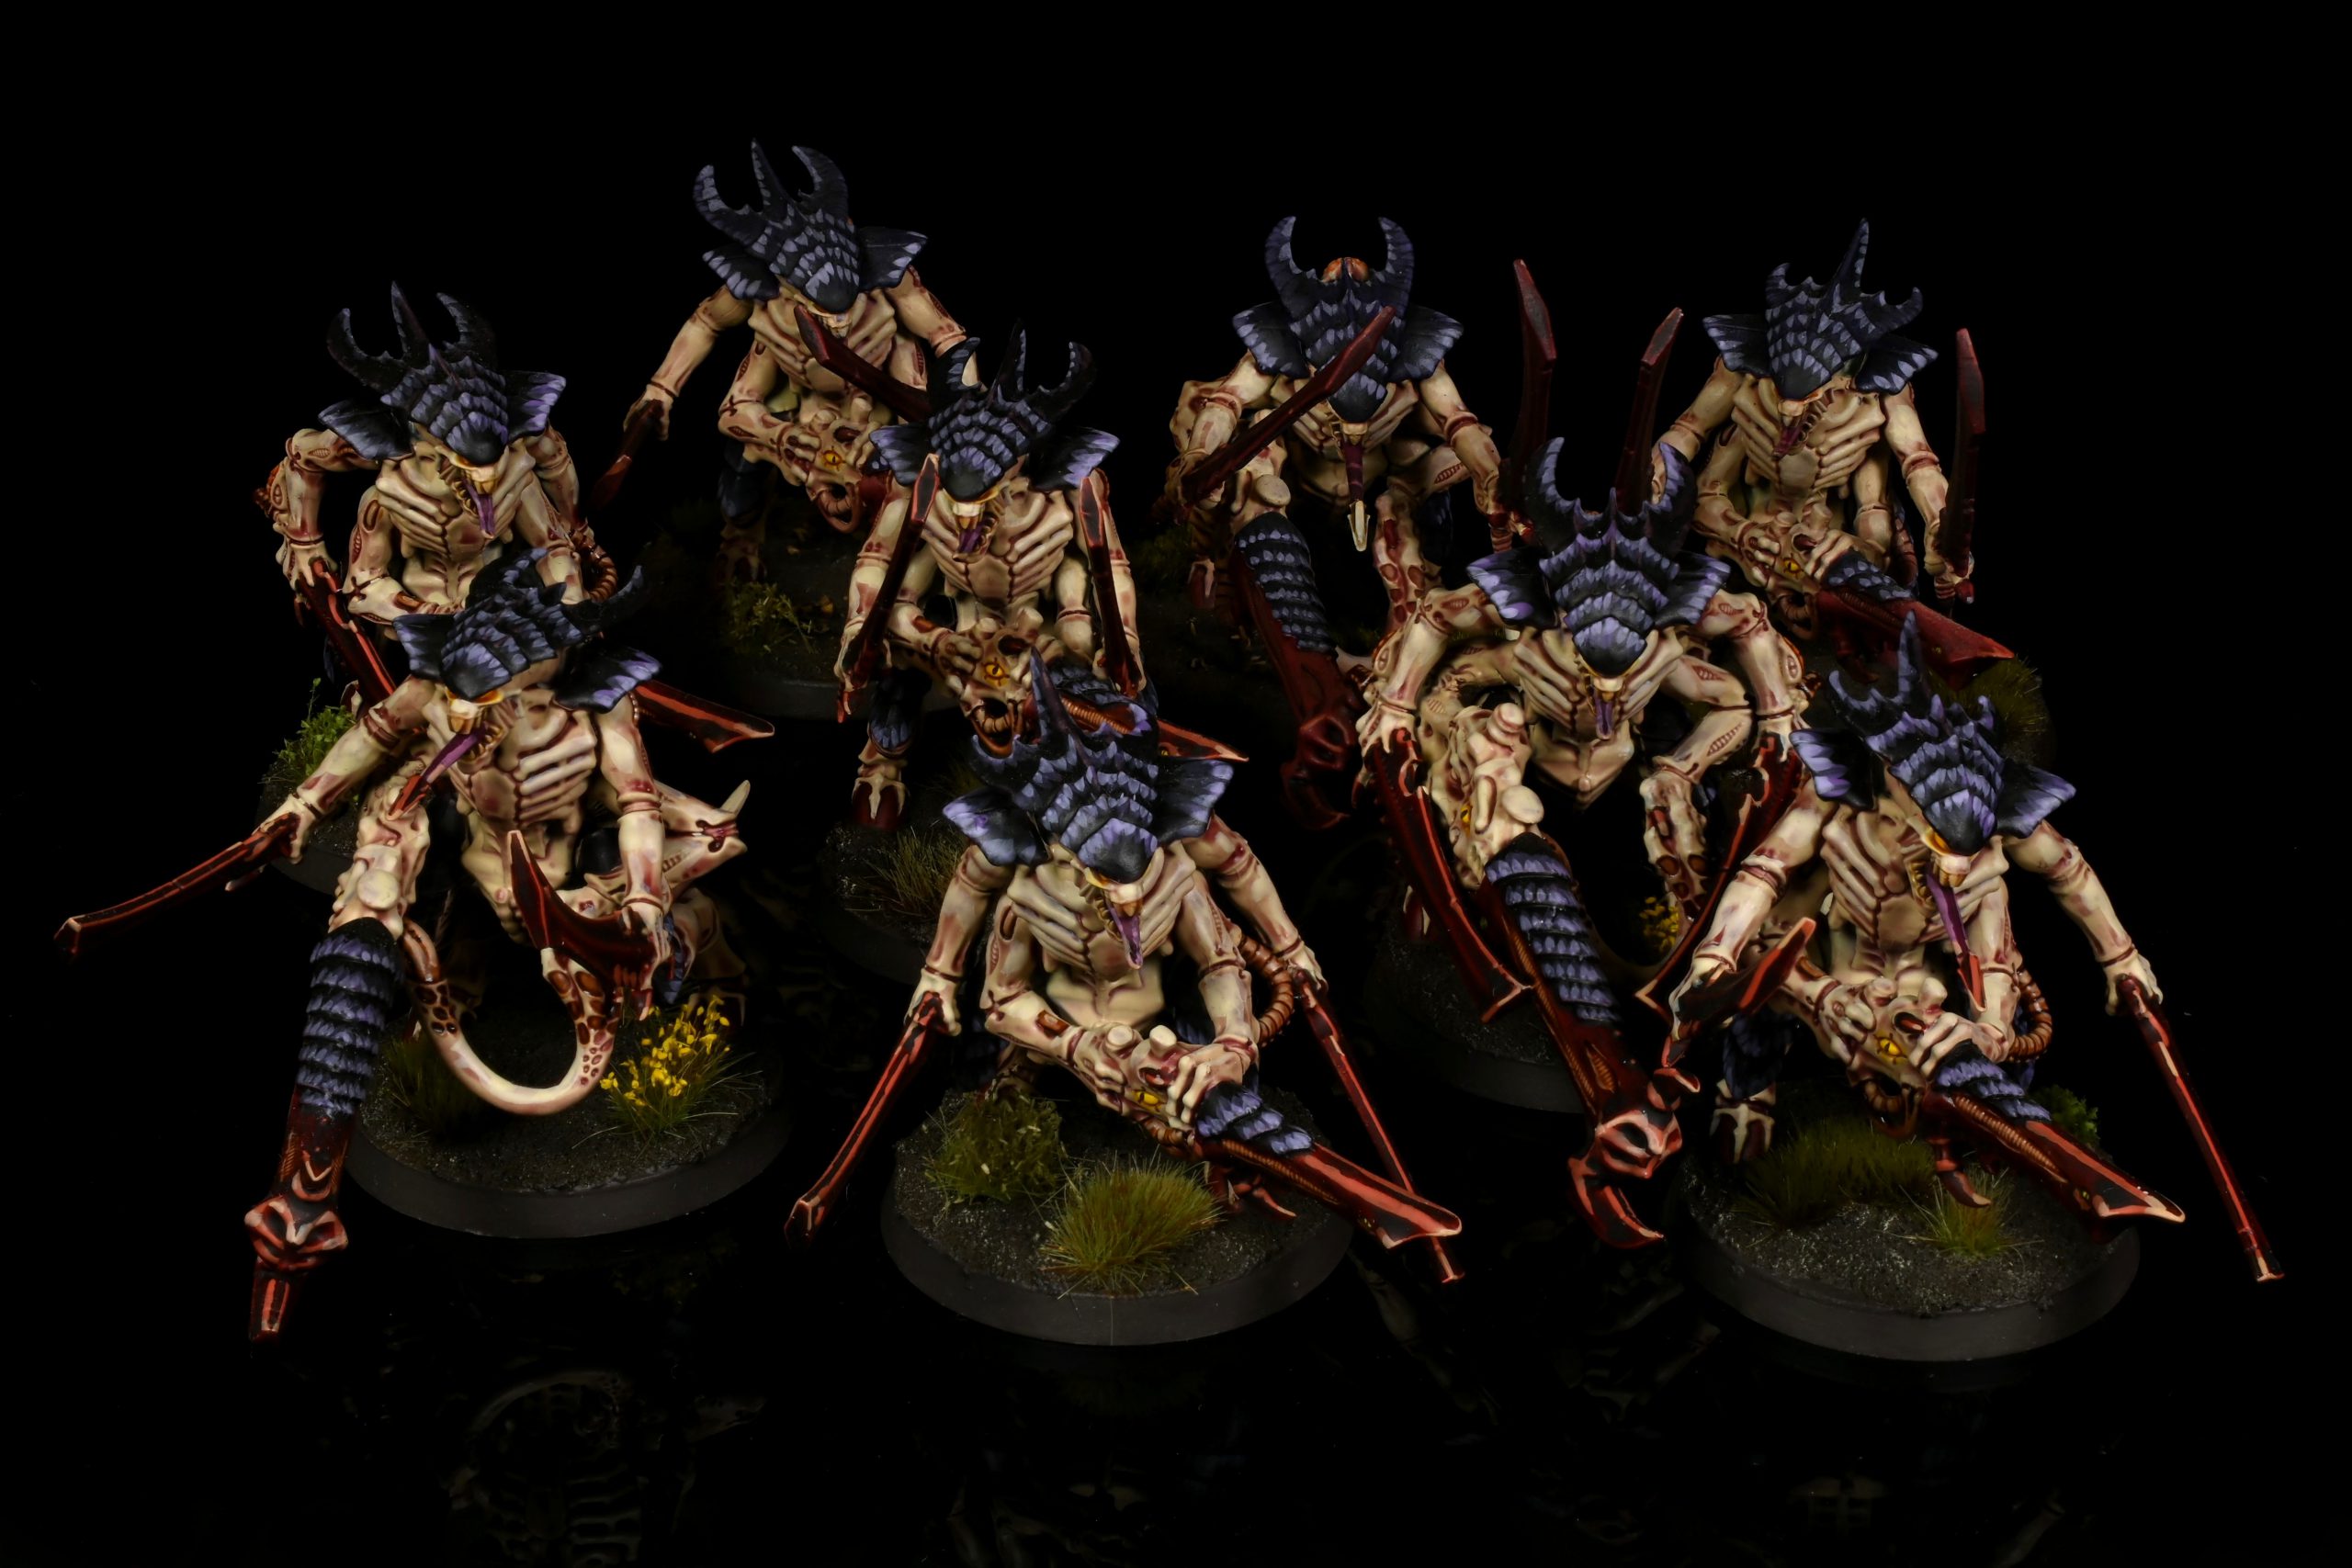
Steven Crawley – Tyranids – 2nd Place
The List
Editor’s Note: The cost on one of the Harpies in this list is incorrect, and we have been told that in one round an incorrect Hyper Adaptation was used for this army, though this was later addressed and resolved by the event judge. Similarly, the points issue was corrected at the event by dropping an upgrade elsewhere. Tyranids are a complicated army and while the army still functions without the use of this hyper-adaptation (as it did in other rounds), please bear this in mind if you’re planning to use this list as inspiration for your own.
W
Army List - Click to Expand ++ Patrol Detachment 0CP (Tyranids) [71 PL, 1,355pts, 10CP] ++ + Configuration + Hive Fleet: Leviathan + Stratagems + Rarefied Enhancements [-2CP]: 2x Extra Bio-artefact + No Force Org Slot + Tyrant Guard [8 PL, 120pts] Zoanthropes [7 PL, 150pts]: Power: Hive Nexus, Power: Onslaught, Power: Smite, 3x Zoanthrope + HQ + Neurothrope [5 PL, 100pts]: Power: Hive Nexus, Power: Onslaught, Power: Psychic Scream, Power: Smite, Warlord, Warlord Trait: Synaptic Tendrils Winged Hive Tyrant [11 PL, 205pts]: Adrenal Glands, Lash Whip and Monstrous Bonesword, Power: Hive Nexus, Power: Onslaught, Power: Paroxysm, Relic: The Reaper of Obilterax, Warlord Trait: Adaptive Biology + Troops + Gargoyles [4 PL, 80pts] Tyranid Warriors [8 PL, 165pts]: Flesh Hooks + Elites + Maleceptor [9 PL, 170pts]: Power: Hive Nexus, Power: Neuroparasite, Power: Smite, Power: The Horror + Flyer + Harpy [9 PL, 175pts]: 2x Heavy Venom Cannon, Adaptive Physiology: Synaptic Enhancement, Show Spore Mine Rules Harpy [10 PL, 190pts]: 2x Heavy Venom Cannon, Adaptive Physiology: Dermic Symbiosis, Show Spore Mine Rules ++ Patrol Detachment -2CP (Tyranids) [31 PL, 645pts, -4CP] ++ + Configuration + Detachment Command Cost [-2CP] Hive Fleet: Leviathan + Stratagems + Hive Predator [-2CP]: 2x Extra Warlord Trait + HQ + Hive Tyrant [9 PL, 190pts]: Adrenal Glands, Heavy Venom Cannon, Lash Whip and Monstrous Bonesword, Power: Catalyst, Power: Psychic Scream, Power: Smite, Relic: Shardgullet, Warlord Trait: Direct Guidance Tyranid Prime [5 PL, 90pts]: Adrenal Glands, Dual Boneswords, Venom Cannon + Troops + Tyranid Warriors [12 PL, 260pts]: Adrenal Glands, Flesh Hooks + Elites + Venomthropes [5 PL, 105pts] ++ Total: [102 PL, 6CP, 2,000pts] ++
. 3x Tyrant Guard (Scything): 3x Two Rending Claws, 3x Two Scything Talons
. Relic: Resonance Barb: Power: Catalyst
. 10x Gargoyle: 10x Fleshborer
. Tyranid Warrior: Lash Whip and Bonesword, Venom Cannon
. Tyranid Warrior: Dual Boneswords, Venom Cannon
. Tyranid Warrior: Deathspitter, Dual Boneswords
. Tyranid Warrior: Deathspitter, Dual Boneswords
. Tyranid Warrior: Deathspitter, Dual Boneswords
. Tyranid Warrior: Deathspitter, Dual Boneswords
. Tyranid Warrior: Lash Whip and Bonesword, Venom Cannon
. Tyranid Warrior: Dual Boneswords, Venom Cannon
. Tyranid Warrior: Dual Boneswords, Venom Cannon
. Tyranid Warrior: Deathspitter, Dual Boneswords
. Tyranid Warrior: Deathspitter, Dual Boneswords
. Tyranid Warrior: Deathspitter, Dual Boneswords
. Tyranid Warrior: Deathspitter, Dual Boneswords
. Tyranid Warrior: Deathspitter, Dual Boneswords
. Tyranid Warrior: Deathspitter, Dual Boneswords
. 3x Venomthrope: 3x Toxic Lashes
Archetype
Leviathan Goodstuff
Why it’s Interesting in 9th
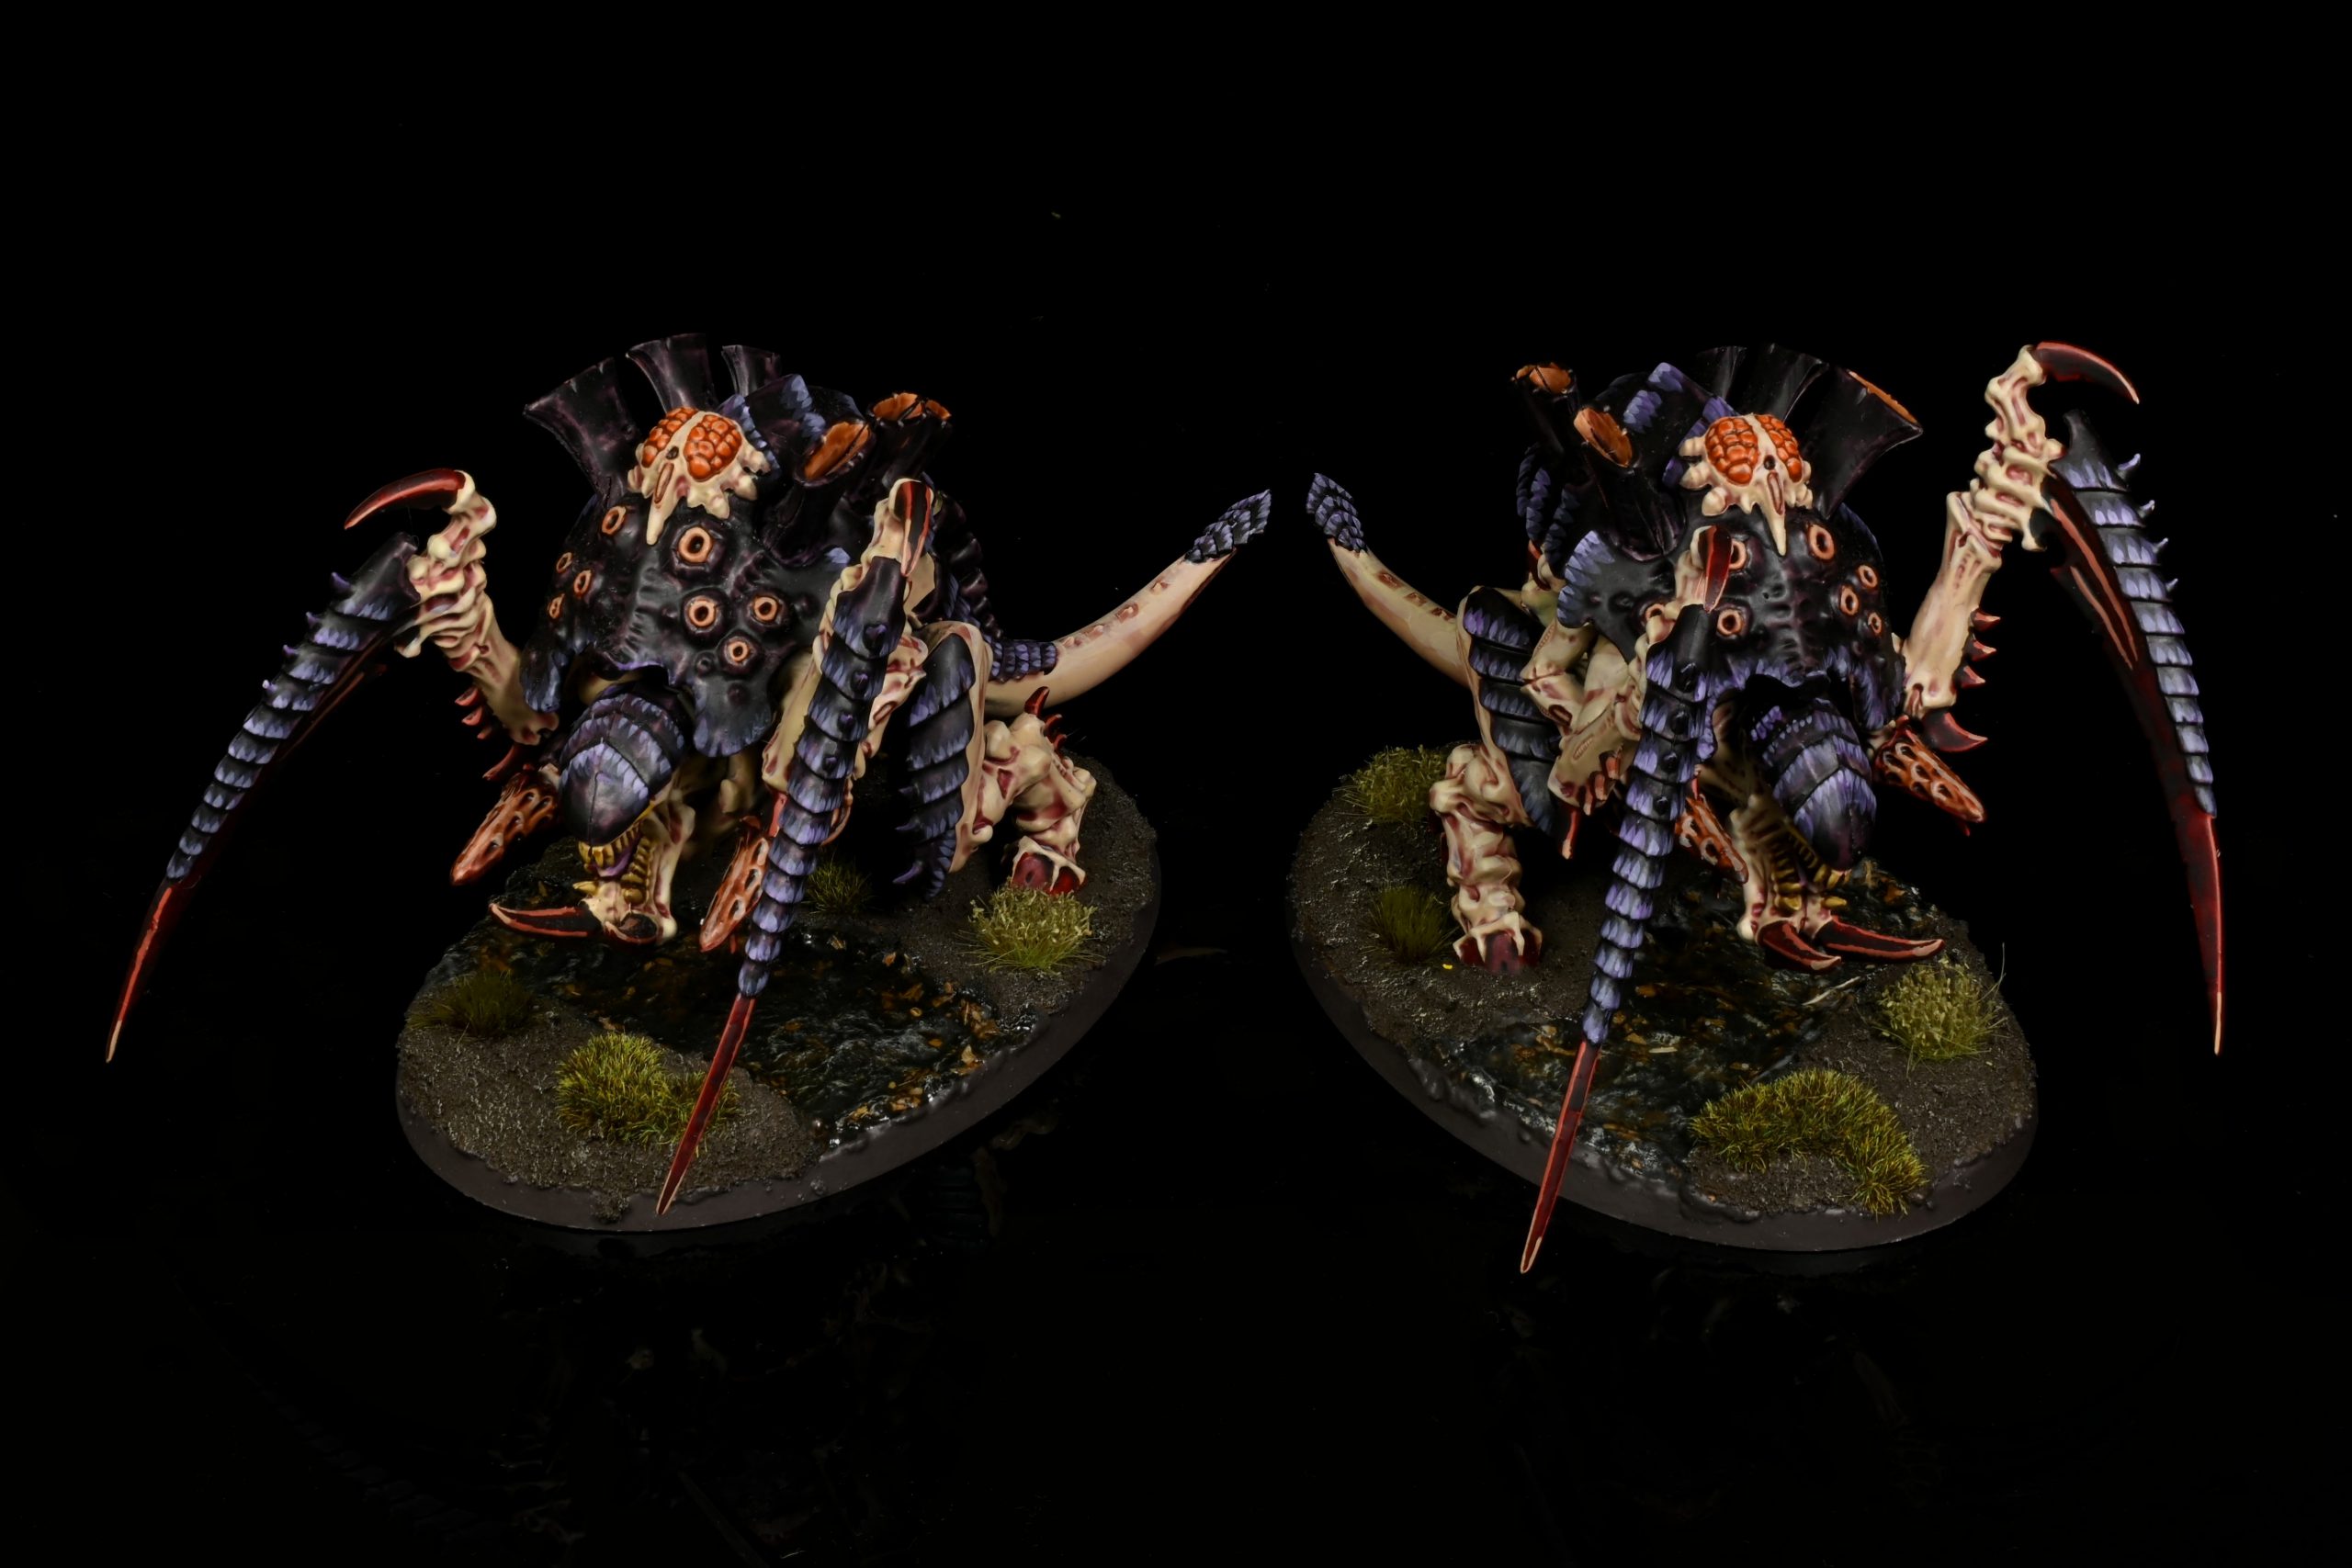
The Aeldari triumphed in Nick’s hands at Dallas, but the swarm was nipping at their heels! This list isn’t massively complicated, but is extremely potent. As Leviathan, the Tyranid Warriors have permanent Transhuman on thanks to being Synapse, and that combines with access to Reinforced Hive Node to make them an extremely durable ObSec anchor for this force. With the opponent bogged down dealing that, the extreme damage capabilities of the Harpies and shooty Flyrant, grindy Psychic might from the Maleceptor, hit and run antics from the other Flyrant (using either Overrun or Encircle the Prey) can obliterate opposing armies, allowing the Hive Mind to claim victory after victory. The fact that Hail of Doom builds do have a pretty decent story into this army seems to be keeping it from completely dominating, but make no mistake – this is the gribbly face of the latest hotness, and if your army has no plan to quickly push through the Warriors or take out the backing beasties, maybe look at what tweaks you can make to improve it.
John Lennon – Tyranids – 3rd Place
The List
Army List - Click to Expand ++ Battalion Detachment 0CP (Tyranids) [100 PL, 1,730pts] ++ + Configuration + Detachment Command Cost Hive Fleet: Kraken + No Force Org Slot + Tyrant Guard [15 PL, 170pts]: Toxin Sacs + HQ + Neurothrope [5 PL, 100pts]: Power: Catalyst, Power: Onslaught, Warlord, Warlord Trait: Synaptic Tendrils Winged Hive Tyrant [11 PL, 205pts]: Adrenal Glands, Lash Whip and Monstrous Bonesword, Power: Onslaught, Power: Psychic Scream, Relic: The Reaper of Obilterax, Warlord Trait: One Step Ahead + Troops + Tyranid Warriors [4 PL, 80pts] Tyranid Warriors [4 PL, 80pts] Tyranid Warriors [4 PL, 80pts] + Elites + Maleceptor [9 PL, 170pts]: Power: Neuroparasite, Power: The Horror Maleceptor [9 PL, 170pts]: Power: Catalyst, Power: Psychic Scream Pyrovores [6 PL, 90pts] Pyrovores [6 PL, 90pts] Pyrovores [6 PL, 90pts] Venomthropes [5 PL, 105pts] + Fast Attack + Raveners [8 PL, 150pts] Raveners [8 PL, 150pts] ++ Patrol Detachment -2CP (Tyranids) [13 PL, 270pts, -1CP] ++ + Configuration + Hive Fleet: Kraken + Stratagems + Hive Predator [-1CP]: Extra Warlord Trait + HQ + Hive Tyrant [9 PL, 190pts]: 2x Heavy Venom Cannon, Power: Neuroparasite, Power: Onslaught, Relic: Pathogenesis, Warlord Trait: Direct Guidance + Troops + Gargoyles [4 PL, 80pts] ++ Total: [113 PL, -1CP, 2,000pts] ++
. 4x Tyrant Guard (Lash/Sword): 4x Lash Whip and Bonecleaver, 4x Two Rending Claws
. Relic: Resonance Barb: Power: Paroxysm
. Tyranid Warrior: Dual Boneswords, Venom Cannon
. Tyranid Warrior: Deathspitter, Dual Boneswords
. Tyranid Warrior: Deathspitter, Dual Boneswords
. Tyranid Warrior: Dual Boneswords, Venom Cannon
. Tyranid Warrior: Deathspitter, Dual Boneswords
. Tyranid Warrior: Deathspitter, Dual Boneswords
. Tyranid Warrior: Dual Boneswords, Venom Cannon
. Tyranid Warrior: Deathspitter, Dual Boneswords
. Tyranid Warrior: Deathspitter, Dual Boneswords
. 3x Pyrovore: 3x Acid Maw, 3x Bludgeoning Fists, 3x Flamespurt
. 3x Pyrovore: 3x Acid Maw, 3x Bludgeoning Fists, 3x Flamespurt
. 3x Pyrovore: 3x Acid Maw, 3x Bludgeoning Fists, 3x Flamespurt
. 3x Venomthrope: 3x Toxic Lashes
. Ravener: Deathspitter, Two Rending Claws
. Ravener: Deathspitter, Two Rending Claws
. Ravener: Deathspitter, Two Rending Claws
. Ravener: Deathspitter, Two Rending Claws
. Ravener: Deathspitter, Two Rending Claws
. Ravener: Deathspitter, Two Rending Claws
. Ravener: Deathspitter, Two Rending Claws
. Ravener: Deathspitter, Two Rending Claws
. Ravener: Deathspitter, Two Rending Claws
. Ravener: Deathspitter, Two Rending Claws
. 10x Gargoyle: 10x Fleshborer
Archetype
Kraken Pressure
Why it’s Interesting in 9th
Lest you think Leviathan is the only game in town, our next Tyranid list goes for the high speed goodness of Kraken to keep the opponent under pressure while the damage dealers do their work. No Harpies here, as that would potentially provide an opponent with easy targets for early shooting – instead, this list invests in lots of bodies spread out into lots of different units, allowing it to press on lots of fronts at once, and avoid getting detonated by some sort of massive re-roll bomb. It also stays low enough to the ground that the 170pt Tyrant Guard are the third To The Last option, which really puts the opponent under pressure – unless they can crash through both the mid-sized bugs and the Maleceptors to pin down the Flyrants, this list starts with a very reliable dose of points in the pocket.
Given how heavy the pressure it applies is, that’s tough. Both Raveners and Pyrovores are extremely cheap for how many T5 wounds they put on the table, and neither is particularly safe to try and charge through – the Raveners are pretty deadly in combat, and the Pyrovore flamers are pretty spicy. Pyrovores in general are extremely pushed now, so enjoy looking at their per-model price tag and despairing if you’re a Tyranid player I guess.
Pushing through all that while being ground down by Maleceptors and swooped at by vicious Flyrants is a very, very tall order, and by going wide this list ends up with a better answer to some of the possible Aeldari counters than the builds with heavier Warrior units, as it both reduces how easily the nefarious elves can strike a big blow, and forces them to be more aggressive with the To The Last pick. Powerful stuff from John as always (and if you want to see his thoughts on Tyranids, make sure to check out his Faction Focus from last week)!
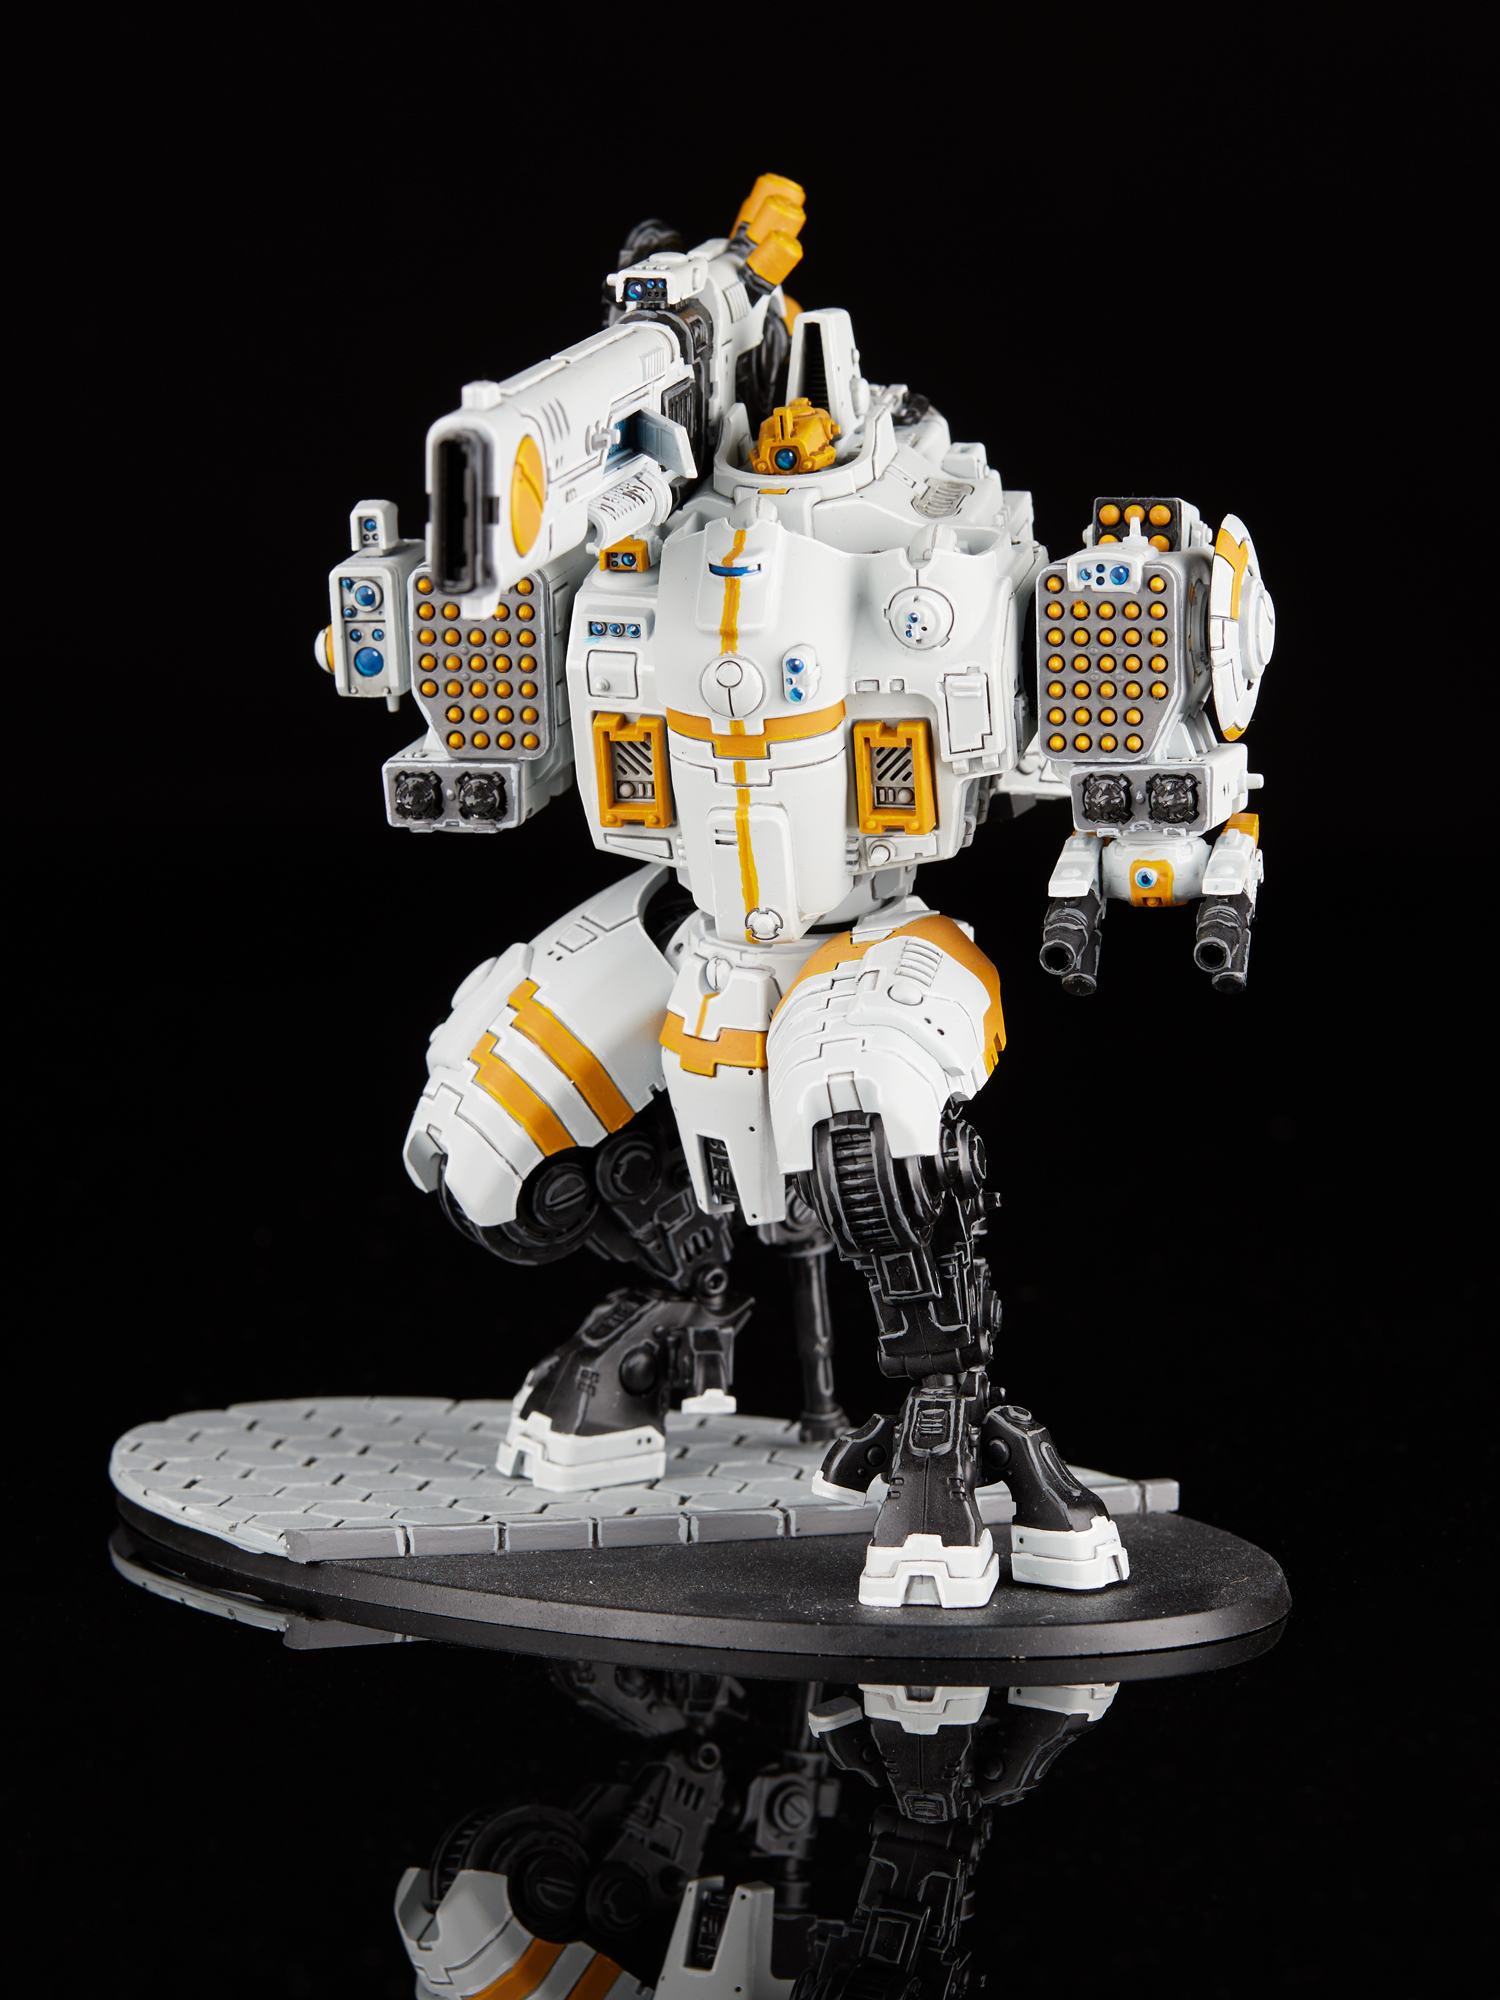
Andrew Gonyo – Tau – 4th Place
The List
Army List - Click to Expand ++ Patrol Detachment -2CP (T’au Empire) [76 PL, 7CP, 1,265pts] ++ Ethereal [5 PL, -1CP, 85pts]: 2. Sense of Stone, 5. Exemplar of the Kauyon, 6. Wisdom of the Guides, Hover Drone, Stratagem: Promising Pupil, The Humble Stave + Troops + + Elites + Crisis Battlesuits [20 PL, 287pts] + Fast Attack + + Heavy Support + ++ Patrol Detachment 0CP (T’au Empire) [21 PL, 389pts] ++ + Troops + + Fast Attack + + Heavy Support + ++ Super-Heavy Auxiliary Detachment -3CP (T’au Empire) [17 PL, -1CP, 345pts] ++
Sept Choice: T’au Sept
+ HQ +
Commander in Crisis Battlesuit [9 PL, -1CP, 165pts]: 1. Precision of the Hunter, Cyclic Ion Blaster, Missile Pod, Plasma Rifle, Stratagem: Promising Pupil, T’au Flamer, The Be’gel Hunter’s Plate, Thermoneutronic Projector
. 2x Marker Drone: 2x Markerlight
. 2x Marker Drone: 2x Markerlight
Kroot Carnivores [3 PL, 60pts]: 10x Kroot: 10x Kroot Rifle, 10x Quill Grenades
Crisis Battlesuits [21 PL, 330pts]
. Crisis Shas’ui: Missile Pod, Plasma Rifle, Plasma Rifle, Target Lock
. Crisis Shas’ui: Missile Pod, Plasma Rifle, Plasma Rifle, Target Lock
. Crisis Shas’ui: Missile Pod, Plasma Rifle, Plasma Rifle, Target Lock
. Crisis Shas’ui: Missile Pod, Plasma Rifle, Plasma Rifle, Target Lock
. Crisis Shas’vre: Early Warning Override, Iridium battlesuit, Missile Pod, Plasma Rifle, Plasma Rifle, Stimm Injectors
. 4x Marker Drone: 4x Markerlight
. Crisis Shas’ui: Airbursting Frag, Airbursting Frag, Iridium battlesuit, Plasma Rifle, Target Lock
. Crisis Shas’ui: Airbursting Frag, Airbursting Frag, Plasma Rifle, Target Lock
. Crisis Shas’ui: Airbursting Frag, Airbursting Frag, Plasma Rifle, Target Lock
. Crisis Shas’ui: Airbursting Frag, Airbursting Frag, Plasma Rifle, Target Lock
. Crisis Shas’vre: Airbursting Frag, Airbursting Frag, Early Warning Override, Plasma Rifle
. Gun Drone
. 2x Shield Drone: 2x Shield Generator
Kroot Hounds [1 PL, 24pts]: 4x Kroot Hound: 4x Ripping Fangs
Kroot Hounds [1 PL, 24pts]: 4x Kroot Hound: 4x Ripping Fangs
Hammerhead Gunship [8 PL, 145pts]: Railgun; 2x Gun Drones
Hammerhead Gunship [8 PL, 145pts]: Railgun; 2x Gun Drones
Sept Choice: T’au Sept
+ HQ +
Longstrike [9 PL, 160pts]: Railgun, Warlord; 2x Gun Drones
Kroot Carnivores [3 PL, 60pts]: 10x Kroot: 10x Kroot Rifle, 10x Quill Grenades
Kroot Hounds [1 PL, 24pts]: 4x Kroot Hound: 4x Ripping Fangs
Hammerhead Gunship [8 PL, 145pts]: Railgun; 2x Gun Drones
Sept Choice: T’au Sept
+ Lord of War +
Stormsurge [17 PL, 345pts]: Early Warning Override, Pulse Blastcannon, Twin Airbursting Frag, Velocity Tracker
Archetype
Tau Sept Goodstuff
Why it’s Interesting in 9th
Nice invuln-save bugs you have there. Would be a shame if something happened to them. This list adapts to a metagame that’s filling up with heftier targets by bringing the biggest guns out there, plenty of Hammerhead Railguns to ruin the day of anything that emerges into the open, backed up by the mighty pulse blastcannon of the Stormsurge. Between them that’s going to cut through almost anything, and thanks to the Mortal Wounds from the Hammerheads it’s still pretty good into units like Tyranid Warriors as well – if your big gun smokes two of them, you’re not too sad. Plasma rifles help with that too, and unlike some lists this army has chosen to retain an airburst squad, which I think is the right call, meaning it can scythe through enemy chaff before it can pop out to steal objectives, or deal with sneaky Fire and Fade units. Having Longstrike around to give that unit a free Markerlight token is handy for pushing through the Indirect Fire hit penalty, and with Target Locks too, they’re still going to do meaningful damage whenever they fire.
A nice broad damage dealing capability is essential, but what I also like about this list is that the Hammerheads are cheap enough that you don’t mind pushing them forward onto objectives once you hit the mid game, either to bait out an opposing counterattack or take a hail mary shot at a key thing that’s hiding away from you. The To The Last picks here are the big Crisis units and the Stormsurge, so as long as you’re not committing with those you don’t need to worry about losing it, and I think these hulls do a good job of ensuring this list has a bit more depth of semi-expendable mobility than some Stormsurge builds. I honestly just really like it in general – it’s going to be terrifying to play against, is pretty flexible, and uses some cool models. Great stuff from Gonyo.
The Rest of the Best
One more player finished up on a 7-1 record.
- 5th – Jack Harpster – Adepta Sororitas: Bloody Rose Sororitas combining skirmishing jet pack units, three large squads of Repentia (with a Rhino for an early push via Carry Forth the Faithful) and then some shooting around Vahl, most notably packing full ten-model Retributor squads to provide ablative bodies as the opponent tries to fight back.
YHP 40k GT “War In The Burg”
All the lists for this event can be found in Best Coast Pairings.
The Showdown
Matchup & Mission – Secure Missing Artifacts
John DeMaris – Dark Angels – a Deathwing deathball, two full units of Knights, two full units of claw/bolter Relic Terminators and supporting Characters.
Army List - Click to Expand ++ Vanguard Detachment -3CP (Imperium – Adeptus Astartes – Dark Angels) [99 PL, 2,000pts, 6CP] ++ + Configuration + **Chapter Selector**: Dark Angels Battle Size [12CP]: 3. Strike Force (101-200 Total PL / 1001-2000 Points) Deathwing Vanguard Detachment [3CP] Detachment Command Cost [-3CP] + Stratagems + Stratagem: Marked for Command [-1CP] Stratagem: Relics of the Chapter [-2CP]: 2x Number of Extra Relics + HQ + Interrogator-Chaplain [7 PL, 135pts, -1CP]: 1. Litany of Faith (Aura), 6. Canticle of Hate (Aura), Astartes Chainsword, Chapter Command: Master of Sanctity, Jump Pack, Litany of Hate, Stratagem: Hero of the Chapter, Teeth of Terra, Wise Orator Librarian [7 PL, 140pts, -1CP]: 1) Mind Worm, 3) Righteous Repugnance, 5) Engulfing Fear, 5. Decisive Tactician (Aura), Boltgun, Chapter Command: Chief Librarian, Force sword, Jump Pack, Neural Shroud, Psychic Mastery, Stratagem: Paragon of the Chapter, Warlord + Elites + Deathwing Knights [22 PL, 470pts] Deathwing Knights [22 PL, 470pts]: Knight Master Ravenwing Apothecary [5 PL, 100pts, -1CP]: Reliquary of the Repentant, Rites of War, Stratagem: Hero of the Chapter Relic Terminator Squad [18 PL, 345pts] Relic Terminator Squad [18 PL, 340pts] ++ Total: [99 PL, 6CP, 2,000pts] ++
. 9x Deathwing Knight: 9x Mace of Absolution, 9x Storm shield
. Knight Master: Master-Crafted Weapon
. 9x Deathwing Knight: 9x Mace of Absolution, 9x Storm shield
. Black Knight Bike: Plasma Talon
. Relic Terminator: Combi-bolter, Lightning Claw
. Relic Terminator: Combi-bolter, Lightning Claw
. Relic Terminator: Combi-bolter, Lightning Claw
. Relic Terminator: Combi-bolter, Lightning Claw
. Relic Terminator: Combi-bolter, Lightning Claw
. Relic Terminator: Combi-bolter, Lightning Claw
. Relic Terminator: Combi-bolter, Lightning Claw
. Relic Terminator: Combi-bolter, Lightning Claw
. Relic Terminator: Combi-bolter, Lightning Claw
. Relic Terminator Sergeant: Chainfist, Combi-bolter
. Relic Terminator: Combi-bolter, Lightning Claw
. Relic Terminator: Combi-bolter, Lightning Claw
. Relic Terminator: Combi-bolter, Lightning Claw
. Relic Terminator: Combi-bolter, Lightning Claw
. Relic Terminator: Combi-bolter, Lightning Claw
. Relic Terminator: Combi-bolter, Lightning Claw
. Relic Terminator: Combi-bolter, Lightning Claw
. Relic Terminator: Combi-bolter, Lightning Claw
. Relic Terminator: Combi-bolter, Lightning Claw
. Relic Terminator Sergeant: Combi-bolter, Lightning Claw
vs.
Austin Wingfield – Craftworlds – Biel Tan with a broad mix of Aspect Warriors
Army List - Click to Expand ++ Patrol Detachment -2CP (Aeldari – Craftworlds) [67 PL, 1,130pts, 7CP] ++ + Configuration + Craftworld Selection: Biel-Tan: Swordwind + Stratagems + Stratagem: Relics of the Shrines [-1CP] Stratagem: Treasures of the Aeldari [-1CP] + No Force Org Slot + Seer Council (Unit) [3 PL, 60pts] + HQ + Farseer Skyrunner [6 PL, 120pts, -1CP]: 1. Guide, 2. Doom, 5. Will of Asuryan, 6: Seer of the Shifting Vector, Stratagem: Champion of the Aeldari, Witchblade + Troops + Rangers [4 PL, 70pts]: Wireweave Net + Elites + Dire Avengers [7 PL, 82pts] Howling Banshees [9 PL, 123pts] + Fast Attack + Swooping Hawks [9 PL, 195pts] Warp Spiders [11 PL, 145pts] + Flyer + Crimson Hunter Exarch [10 PL, 195pts]: Swooping Evasion, Two Starcannons + Dedicated Transport + Wave Serpent [8 PL, 140pts]: Twin Shuriken Cannon, Twin Shuriken Catapult ++ Patrol Detachment 0CP (Aeldari – Craftworlds) [54 PL, 870pts, -1CP] ++ + Configuration + Craftworld Selection: Biel-Tan: Swordwind Detachment Command Cost + Stratagems + Stratagem: Relics of the Shrines [-1CP] + No Force Org Slot + Seer Council (Unit) [3 PL, 40pts] + HQ + Farseer [5 PL, 90pts]: 1. Fateful Divergence, 3. Fortune, Biel-Tan: Natural Leader, Warlord, Witchblade + Troops + Rangers [4 PL, 70pts]: Wireweave Net + Elites + Fire Dragons [13 PL, 168pts] Striking Scorpions [9 PL, 122pts] + Fast Attack + Shining Spears [6 PL, 125pts] Shroud Runners [5 PL, 105pts] + Heavy Support + Falcon [9 PL, 150pts]: Shuriken Cannon, Shuriken Cannon ++ Total: [121 PL, 6CP, 2,000pts] ++
. Warlock Skyrunners: 4. Protect/Jinx
. . Sunstorm
. . Warlock Skyrunner: Witchblade
. The Spirit Stone of Anath’lan
. 5x Ranger: 5x Ranger Long Rifle, 5x Shuriken Pistol
. 5x Dire Avenger: 5x Avenger Shuriken Catapult, 5x Plasma Grenades
. Dire Avenger Exarch: Avenger Shuriken Catapult, Stand Firm
. 5x Howling Banshee: 5x Banshee Blade, 5x Shuriken Pistol
. Howling Banshee Exarch: Cronescream (Shrine Relic), Piercing Strikes, Shuriken Pistol & Banshee Blade
. 9x Swooping Hawk: 9x Lasblaster
. Swooping Hawk Exarch: Lasblaster, The Phoenix Plume (Shrine Relic), Winged Evasion
. 5x Warp Spider: 5x Death Spinner
. Warp Spider Exarch: Web of Deceit
. . Two Death Spinners & The Spider’s Bite (Shrine Relic)
. Warlocks: 1. Conceal/Reveal
. . Warlock: Witchblade
. . Warlock: Witchblade
. 5x Ranger: 5x Ranger Long Rifle, 5x Shuriken Pistol
. 5x Fire Dragon: 5x Dragon Fusion Gun
. Fire Dragon Exarch: Blazing Fury, Firepike
. 5x Striking Scorpion: 5x Mandiblasters, 5x Scorpion Chainsword, 5x Shuriken Pistol
. Striking Scorpion Exarch: Biting Blade, Crushing Blows
. 2x Shining Spear: 2x Laser Lance, 2x Twin Shuriken Catapult
. Shining Spear Exarch: Heartstrike, Khaine’s Lance (Shrine Relic), Laser Lance, Shimmershield, Shuriken Cannon
. 3x Shroud Runner: 3x Ranger Long Rifle, 3x Scatter Laser, 3x Shuriken Pistol
Thoughts
Marines vs. Craftworlds for our second top table running – what is this, 8th Edition? Very different lists here though, with ultra-durable Dark Angels on one side and a fragile but very high threat Craftworld force on the other. Both armies also draw some substantial advantages from the way the game is set up, so there’s a lot to play for. From the Dark Angels point of view, this mission is ideal for playing the tanky strategy they excel at, especially if they win the objective moving roll-off and can move the no-man’s land objective on their side of the board towards the centre. That will allow them to build a fortress, rack up primary and secondary points, and aim to repel whatever the Craftworlds throw at them. They can even adapt their Secondary picks once they know who is moving the first objective, since one of the subtle changes in Nachmund is that Secondaries are chosen after the Attacker/Defender rolloff. Here that might affect whether a Stranglehold/Oaths plan or a Stubborn Defiance plan is superior, as the former becomes quite a bit harder if the opponent gets to move a key objective away from the centre. Castle up with some of the Terminators, maybe put some of the Relics in Teleport Strike to go pressure the Asuryani’s priority objective, and dare the wicked elves to try and do enough damage to win the game.
They’ll try, certainly. The big thing for the Craftworlds here is that the Dark Angels have very little reach in their damage dealing, meaning that the fragility of the various Aspect Warriors doesn’t kick in as a factor till they’re properly committed to battle. While the Dark Angel castle is a formidible obstacle to crack, being able to carefully line up exactly how you want to try is very helpful. It is somewhat problematic that the Hawks and Shroud Runners basically don’t do anything to Deathwing Knights even once Jinx has been cast, but that’s offset by, for example, having a Crimson hunter that’s going to be flying round all game with near complete impunity. The Fire Dragons slightly spoil the To The Last plan from the Craftworld side, but they can comfortably bank ten from that still if needed, and maybe pick Engage rather than Stranglehold with a safe Crimson Hunter so that they can choose to avoid a dodgy fight at a key moment if needed. They should also be able to take a high score from Psychic Interrogation, as the Librarian can’t block out every angle.
The challenge for the Craftworlds is that they do, at some point, need to take out some number of the Dark Angels to stop them just plodding to victory. While they probably can’t push their melee stuff into the board centre, setting up a gank squad of the Banshees, Scorpions and Spears plausibly can clean out a large squad of Terminators that goes for a flank, especially with Jinx and Doom backing it up. That’s a big investment, but the Dark Angels don’t have many units, so taking their stuff out quickly limits their ability to adapt and control the table. Neither side can shut out what the other is doing fast, so you have to plan for whatever incremental advantage you can build up here, and a big blowout on a flank definitely feels like the Asuryani’s best angle there. It does come with risks though – a swing and a miss is probably game over, and if the Dark Angels still have other units in Deep Strike then those coming in on the other flank once the Craftworld melee commits could be a concern.
As mentioned above, this game is always going to be close – both sides have ways of scoring lots of points and can’t quickly stop the other doing the same, and both sides get, to some extent, to live their best lives, so who wins? To be honest, this is one where I can’t really pull back from already knowing the result – the game ended on an agonisingly close 89-86 margin, suggesting that both sides executed their plan extremely well, and things came down to the wire. The Dark Angels emerged triumphant, and if I had to guess why it would either be that they got to build a beautiful three-objective castle when they moved or the Asuryani launched a flank strike and underperformed, and couldn’t get quite enough of a grip from there. There probably are more failure cases for the Craftworlds side in that regard, but with such a thin margin it could have been the tiniest thing that swung the game.
Result
Dark Angels Victory – 89-86
John DeMaris – Dark Angels – 1st Place
The List
See Showdown
Archetype
Dark Angels Deathwing
Why it’s Interesting in 9th
Whoops all Deathwing – you love to see it. Relic Terminators were already arguably very underused for what they can do, but the Armour of Contempt change is fantastic for them in general, and exceptional in armies that have other ways of boosting them up. Deathwing providing them with built-in ObSec and Transhuman does just that, and means that this list has some excellent all-purpose brawlers it can either use for counterattacks or send out hunting via Teleport Strike. That augments the already decent strategy of creating an unconquerable castle around some key objectives, so expect to see Dark Angels get a bit of a shot in the arm as other players follow John’s example and get them back on the table.
Larry Oliver – Tyranids – 2nd ✪ Place
The List
Army List - Click to Expand ++ Patrol Detachment 0CP (Tyranids) [50 PL, 935pts] ++ + Configuration + Detachment Command Cost Hive Fleet: Leviathan + No Force Org Slot + Zoanthropes [7 PL, 150pts]: 3x Zoanthrope + HQ + Neurothrope [5 PL, 100pts]: Power: Catalyst, Power: Onslaught, Warlord, Warlord Trait: Synaptic Tendrils Winged Hive Tyrant [11 PL, 210pts]: Adrenal Glands, Lash Whip and Monstrous Bonesword, Power: Psychic Scream, Power: The Horror, Relic: The Reaper of Obilterax, Toxin Sacs, Warlord Trait: Adaptive Biology + Troops + Tyranid Warriors [8 PL, 140pts]: Adrenal Glands + Elites + Deathleaper [5 PL, 95pts]: Warlord Trait: Alien Cunning Pyrovores [4 PL, 60pts] + Flyer + Harpy [10 PL, 180pts]: 2x Heavy Venom Cannon, Adaptive Physiology: Synaptic Enhancement ++ Patrol Detachment -2CP (Tyranids) [58 PL, 6CP, 1,065pts] ++ + Configuration + Battle Size [12CP]: 3. Strike Force (101-200 Total PL / 1001-2000 Points) Detachment Command Cost [-2CP] Hive Fleet: Leviathan + Stratagems + Hive Predator [-2CP]: 2x Extra Warlord Trait Rarefied Enhancements [-2CP]: 2x Extra Bio-artefact + No Force Org Slot + Tyrant Guard [8 PL, 135pts]: Adrenal Glands + HQ + Winged Hive Tyrant [11 PL, 205pts]: Heavy Venom Cannon, Power: Psychic Scream, Power: The Horror, Relic: Shardgullet + Troops + Tyranid Warriors [8 PL, 140pts]: Adrenal Glands Tyranid Warriors [8 PL, 140pts]: Adrenal Glands + Elites + Maleceptor [9 PL, 170pts] Venomthropes [5 PL, 105pts] + Flyer + Harpy [9 PL, 170pts]: 2x Heavy Venom Cannon ++ Total: [108 PL, 6CP, 2,000pts] ++
. Relic: Resonance Barb: Power: Paroxysm
. Tyranid Warrior: Deathspitter, Lash Whip and Bonesword
. Tyranid Warrior: Deathspitter, Dual Boneswords
. Tyranid Warrior: Deathspitter, Dual Boneswords
. Tyranid Warrior: Deathspitter, Dual Boneswords
. Tyranid Warrior: Deathspitter, Dual Boneswords
. 2x Pyrovore: 2x Acid Maw, 2x Bludgeoning Fists, 2x Flamespurt
. 3x Tyrant Guard (Lash/Sword): 3x Lash Whip and Bonecleaver, 3x Two Rending Claws
. Tyranid Warrior: Deathspitter, Lash Whip and Bonesword
. Tyranid Warrior: Deathspitter, Dual Boneswords
. Tyranid Warrior: Deathspitter, Dual Boneswords
. Tyranid Warrior: Deathspitter, Dual Boneswords
. Tyranid Warrior: Deathspitter, Dual Boneswords
. Tyranid Warrior: Deathspitter, Lash Whip and Bonesword
. Tyranid Warrior: Deathspitter, Dual Boneswords
. Tyranid Warrior: Deathspitter, Dual Boneswords
. Tyranid Warrior: Deathspitter, Dual Boneswords
. Tyranid Warrior: Deathspitter, Dual Boneswords
. 3x Venomthrope: 3x Toxic Lashes
Archetype
Leviathan Goodstuff
Why it’s Interesting in 9th
Once again we’ve hit the point where some of this looks pretty familiar fairly quickly – all the hits are here, with the most powerful monsters in the Tyranid book taking to the tabletop and causing problems on purpose. The main difference compared to some of the other builds we’ve seen so far is that it goes a little wider with the Warriors and has Warlord Deathleaper to use as a precision objective control tool wherever needed, giving the army a clutch angle of attack (and maybe countering someone trying to lock down an objective with Baharroth, since Deathleaper counts as five models when Warlord). As already mentioned, if you don’t already have a plan for how you’re dealing with make sure you build one, and congratulations to Larry on the undefeated second place.
The Rest of the Best
Seven players finished up on 4-1 records. They were:
- 3rd – Robin Roberts – Genestealer Cults: Twisted Helix with big Acolyte and Purestrain bombs, Trucks to protect them, and a From Every Angle Ridgerunner unit, which is an increasingly popular choice.
- 4th ✪ – Austin Wingfield – Craftworlds: See Showdown.
- 5th – Mark Hertel – Deathwatch: Kill Team Strike Force, taking advantage of Armour of Contempt to keep things a bit cheaper by running fewer storm shields on power armoured models. Also mounts some nasty shooting, with one Proteus Team loaded to the gills with missiles (via cyclone launcher Terminators and missile launcher regulars) and a Spectrus Kill Team going hard on Eliminators. Eliminators are amazing with Armour of Contempt, so the Deathwatch’s ability to bring five in a squad shouldn’t be slept on.
- 6th – TJ Lanigan – Tyranids: Leviathan Goodstuff with Hive Tyrands and Maleceptors galore, then lots of Gargoyles to steal objectives while they do their work.
- 7th – Mate Csaszar – Harlequins: Light Saedath with bikes and Troupes rather than Voidweavers, maximising pressure and durability.
- 8th – Jeffrey Kolodner – Adepta Sororitas: A heavy-duty Valorous Heart list taking maximum advantage of Armour of Contempt – two units of Paragons (each with two meltas and a flamer to allow for Holy Trinity), Mortifiers, a Castigator and a then a hard core of Sacresants and Vahl to finish. Also has Stern and Kyganil to hunt down enemy characters. Vastly harder to deal with that it was pre-dataslate, and well set up to punish opponents that can’t fight Warsuits on multiple flanks.
- 9th – Mike Taylor – White Scars: Plenty of the melee toys you’d expect, backed up by a big Relic Terminator squad. These are fantastic all-rounders now, as they are particular winners from AoC, and Scars keeping them mobile only makes them better.
Battle Shock GT
All the lists for this event can be found in Best Coast Pairings.
The Showdown
Matchup & Mission – Data Scry-Salvage
Michael Mann – Drukhari – a Realspace Raid with loads of Artists of the Flesh Grotesques as the crunchy core, backed up by Ravagers, Incubi and Characters.
Army List - Click to Expand ++ Battalion Detachment 0CP (Aeldari – Drukhari) [100 PL, 1,737pts, -3CP] ++ + Configuration + Detachment Command Cost Obsession: Cult of Strife: The Spectacle of Murder, Kabal of the Black Heart: Thirst for Power, Realspace Raid + Stratagems [-3CP] + Stratagem: Alliance of Agony [-1CP] Stratagem: Prizes from the Dark City [-1CP]: Additional Relics [-1CP] Stratagem: Prizes from the Dark City [-1CP]: Additional Relics [-1CP] + No Force Org Slot [10 PL, 152pts] + Court of the Archon [10 PL, 152pts]: As Detachment (Kabal) + HQ [15 PL, 280pts] + Archon [5 PL, 95pts]: Ancient Evil, As Detachment (Kabal), Blast Pistol [5pts], Huskblade [5pts], Overlord, The Djin Blade, Warlord Haemonculus [5 PL, 90pts]: As Detachment (Coven), Haemonculus Tools, Ichor Injector, Master Regenerist, Scissorhand, Stinger Pistol, Stratagem: Alliance of Agony WLT, The Animus Vitae Succubus [5 PL, 95pts]: 1 – Adrenalight (Combat Drug), As Detachment (Wych Cult), Competitive Edge, Stratagem: Alliance of Agony WLT, The Triptych Whip + Troops [10 PL, 155pts] + Hekatrix Bloodbrides [4 PL, 75pts]: 2 – Grave Lotus (Combat Drug), As Detachment (Wych Cult) Kabalite Warriors [3 PL, 40pts]: As Detachment (Kabal) Wracks [3 PL, 40pts]: As Detachment (Coven) + Elites [38 PL, 705pts] + Grotesques [10 PL, 175pts]: As Detachment (Coven) Grotesques [10 PL, 175pts]: As Detachment (Coven) Grotesques [10 PL, 175pts]: As Detachment (Coven) Incubi [4 PL, 90pts] Incubi [4 PL, 90pts] + Heavy Support [16 PL, 260pts] + Ravager [8 PL, 130pts]: As Detachment (Kabal), Bladevanes, 3x Dark Lance Ravager [8 PL, 130pts]: As Detachment (Kabal), Bladevanes, 3x Dark Lance + Dedicated Transport [11 PL, 185pts] + Raider [6 PL, 110pts]: As Detachment, Bladevanes, Dark Lance [10pts], Grisly Trophies [5pts] Venom [5 PL, 75pts]: As Detachment, Bladevanes, Splinter Cannon [10pts], Twin splinter rifle ++ Patrol Detachment -2CP (Aeldari – Drukhari) [15 PL, 260pts] ++ + Configuration + Obsession + HQ [8 PL, 145pts] + Drazhar [8 PL, 145pts]: The Executioner’s Demiklaives + Troops [3 PL, 40pts] + Wracks [3 PL, 40pts]: As Detachment (Coven) + Elites [4 PL, 75pts] + Mandrakes [4 PL, 75pts] ++ Total: [115 PL, -3CP, 1,997pts] ++
. *Custom Coven*: Artists of the Flesh (All-Consuming)
. Lhamean [16pts]: Shaimeshi blade
. Sslyth [18pts]: Shardcarbine, Splinter Pistol, Sslyth battle-blade
. Sslyth [18pts]: Shardcarbine, Splinter Pistol, Sslyth battle-blade
. Sslyth [18pts]: Shardcarbine, Splinter Pistol, Sslyth battle-blade
. Sslyth [18pts]: Shardcarbine, Splinter Pistol, Sslyth battle-blade
. Ur-Ghul [16pts]: As Detachment (Kabal), Ur-Ghul Talons
. Ur-Ghul [16pts]: As Detachment (Kabal), Ur-Ghul Talons
. Ur-Ghul [16pts]: As Detachment (Kabal), Ur-Ghul Talons
. Ur-Ghul [16pts]: As Detachment (Kabal), Ur-Ghul Talons
. Splintered Genius (Black Heart) [1 PL, 15pts]: Splintered Genius [1 PL, 15pts]
. Alchemical Maestro (Custom) [1 PL, 20pts]: Alchemical Maestro [1 PL, 20pts]
. Agoniser & Archite Glaive: Agoniser, Archite Glaive
. Show Stealer (Strife) [1 PL, 15pts]: Show Stealer [1 PL, 15pts]
. Hekatrix [15pts]: Hekatarii Blade, Plasma Grenades, Splinter Pistol
. 4x Hekatrix Bloodbride [60pts]: 4x Hekatarii Blade, 4x Plasma Grenades, 4x Splinter Pistol
. 4x Kabalite Warrior [32pts]: 4x Splinter Rifle
. Sybarite [8pts]: Splinter Rifle
. Acothyst [8pts]: Wrack Blade
. 4x Wracks [32pts]: 4x Wrack Blade
. Grotesque w/ Monstrous Cleaver [35pts]: Flesh Gauntlet, Monstrous Cleaver
. Grotesque w/ Monstrous Cleaver [35pts]: Flesh Gauntlet, Monstrous Cleaver
. Grotesque w/ Monstrous Cleaver [35pts]: Flesh Gauntlet, Monstrous Cleaver
. Grotesque w/ Monstrous Cleaver [35pts]: Flesh Gauntlet, Monstrous Cleaver
. Grotesque w/ Monstrous Cleaver [35pts]: Flesh Gauntlet, Monstrous Cleaver
. Grotesque w/ Monstrous Cleaver [35pts]: Flesh Gauntlet, Monstrous Cleaver
. Grotesque w/ Monstrous Cleaver [35pts]: Flesh Gauntlet, Monstrous Cleaver
. Grotesque w/ Monstrous Cleaver [35pts]: Flesh Gauntlet, Monstrous Cleaver
. Grotesque w/ Monstrous Cleaver [35pts]: Flesh Gauntlet, Monstrous Cleaver
. Grotesque w/ Monstrous Cleaver [35pts]: Flesh Gauntlet, Monstrous Cleaver
. Grotesque w/ Monstrous Cleaver [35pts]: Flesh Gauntlet, Monstrous Cleaver
. Grotesque w/ Monstrous Cleaver [35pts]: Flesh Gauntlet, Monstrous Cleaver
. Grotesque w/ Monstrous Cleaver [35pts]: Flesh Gauntlet, Monstrous Cleaver
. Grotesque w/ Monstrous Cleaver [35pts]: Flesh Gauntlet, Monstrous Cleaver
. Grotesque w/ Monstrous Cleaver [35pts]: Flesh Gauntlet, Monstrous Cleaver
. 4x Incubi [72pts]: 4x Klaive
. Klaivex [18pts]: Klaive
. 4x Incubi [72pts]: 4x Klaive
. Klaivex [18pts]: Klaive
. *Custom Coven*: Artists of the Flesh (All-Consuming)
. Acothyst [8pts]: Wrack Blade
. 4x Wracks [32pts]: 4x Wrack Blade
. 4x Mandrake [60pts]: 4x Baleblast, 4x Glimmersteel Blade
. Nightfiend [15pts]: Baleblast, Glimmersteel Blade
vs.
Matt Evans – Tyranids – A high pressure Kraken list, with lots of Warriors and Pyrovores in a Tyrannocyte to keep the opponent on the back foot, then some of the heavier hitters like a Maleceptor and Hive Tyrant behind. Deathleaper and the Parasite of Mortrex provide some utility toys to make the opponent’s life difficult, while Zoanthropes keep everything safe with their Synaptic Imperative.
Army List - Click to Expand ++ Battalion Detachment 0CP (Tyranids) [110 PL, 8CP, 2,000pts] ++ + Configuration + Battle Size [12CP]: 3. Strike Force (101-200 Total PL / 1001-2000 Points) Detachment Command Cost Hive Fleet: Kraken + Stratagems + Hive Predator [-2CP]: 2x Extra Warlord Trait Rarefied Enhancements [-2CP]: 2x Extra Bio-artefact + HQ + Neurothrope [5 PL, 100pts]: Power: Catalyst, Power: Onslaught, Power: Smite, Power: Synaptic Lure, Warlord, Warlord Trait: Synaptic Tendrils Tyranid Prime [5 PL, 85pts]: Two Scything Talons, Venom Cannon, Warlord Trait: Direct Guidance Winged Hive Tyrant [11 PL, 205pts]: Adrenal Glands, Lash Whip and Monstrous Bonesword, Power: Paroxysm, Power: Smite, Power: Synaptic Lure, Power: The Horror, Relic: The Reaper of Obilterax + Troops + Tyranid Warriors [12 PL, 245pts]: Adrenal Glands, Flesh Hooks Tyranid Warriors [8 PL, 140pts]: Adrenal Glands Tyranid Warriors [8 PL, 140pts]: Adrenal Glands + Elites + Deathleaper [5 PL, 95pts] Maleceptor [9 PL, 170pts]: Power: Neuroparasite, Power: Paroxysm, Power: Synaptic Lure Pyrovores [6 PL, 90pts] Pyrovores [6 PL, 90pts] Venomthropes [5 PL, 105pts] Zoanthropes [7 PL, 150pts]: Power: Psychic Scream, Power: Synaptic Lure, 3x Zoanthrope + Fast Attack + Parasite of Mortrex [4 PL, 80pts]: Relic: Gestation Sac, Warlord Trait: Alien Cunning + Flyer + Harpy [11 PL, 195pts]: 2x Heavy Venom Cannon, Adaptive Physiology: Dermic Symbiosis + Dedicated Transport + Tyrannocyte [8 PL, 110pts]: 5x Deathspitter, Adaptive Physiology: Synaptic Enhancement ++ Total: [110 PL, 8CP, 2,000pts] ++
. Relic: Resonance Barb: Power: Paroxysm
. Tyranid Warrior: Deathspitter, Lash Whip and Bonesword
. Tyranid Warrior: Deathspitter, Dual Boneswords
. Tyranid Warrior: Deathspitter, Dual Boneswords
. Tyranid Warrior: Deathspitter, Dual Boneswords
. Tyranid Warrior: Deathspitter, Dual Boneswords
. Tyranid Warrior: Deathspitter, Dual Boneswords
. Tyranid Warrior: Deathspitter, Dual Boneswords
. Tyranid Warrior: Deathspitter, Dual Boneswords
. Tyranid Warrior: Deathspitter, Dual Boneswords
. Tyranid Warrior: Deathspitter, Lash Whip and Bonesword
. Tyranid Warrior: Deathspitter, Dual Boneswords
. Tyranid Warrior: Deathspitter, Dual Boneswords
. Tyranid Warrior: Deathspitter, Dual Boneswords
. Tyranid Warrior: Deathspitter, Dual Boneswords
. Tyranid Warrior: Deathspitter, Lash Whip and Bonesword
. Tyranid Warrior: Deathspitter, Dual Boneswords
. Tyranid Warrior: Deathspitter, Dual Boneswords
. Tyranid Warrior: Deathspitter, Dual Boneswords
. Tyranid Warrior: Deathspitter, Dual Boneswords
. 3x Pyrovore: 3x Acid Maw, 3x Bludgeoning Fists, 3x Flamespurt
. 3x Pyrovore: 3x Acid Maw, 3x Bludgeoning Fists, 3x Flamespurt
. 3x Venomthrope: 3x Toxic Lashes
Thoughts
The Domination scoring missions have a habit of really shining a focus on a matchup where one side struggles to maintain engagement with the other, and this game looks like one of them. Michael’s Drukhari list does have some upsides here – a couple of Ravagers means that the Harpy isn’t operating with complete impunity (though they’ll struggle with the Maleceptor through its Action), Artists of the Flesh matters a lot on the Grotesques against boneswords and the higher power Pyrovore mode, and the Court provides a good, sturdy way of protecting one objective. Unfortunately, the Tyranid Warriors are, in turn, surprisingly difficult for the Drukhari to deal with, especially now that Reinforced Hive Node can be used in melee, and that becomes a fairly terminal problem thanks to Adaptive Biomorphologies.
From the Tyranid side here, they swap to Ambush Predators from the Hunt list so that they have army-wide Heroic, and it’s then incredibly hard for the Drukhari to meaningfully contest the primary all game – they’re facing a wall of ObSec units that take serious killing, and that can Heroic into combat if the elves try and dance around them. If they do push into battle they have a good chance of bouncing, and will lose whatever they pushed in with – Grotesques might be resilient to some of the stuff here, but they’ll die fast to a mix of mortals and deathspitters, and the Incubi or other infantry die hideously to Pyrovores. The Drukhari need something that can crack the big Warrior squad here and just don’t have it – perhaps a big unit of Bloodbrides with the second detachment swapped to be Strife to unlock the wuond re-rolls Stratagem? As is, it genuinely doesn’t feel like there’s much they can do, and the scoreline suggests that they did, in fact, find it impossible to contest the Primary objective.
Result
Tyranid Victory – 98- 36
Matt Evans – Tyranids – 1st Place
The List
See Showdown.
Archetype
Kraken Pressure
Why it’s Interesting in 9th
Another strong performance for Kraken pressure, this time eschewing a consistent To The Last plan in favour of an extre hefty Warrior brick to really dominate the table, and the headache-inducing potential of Pyrovores in a Tyrannocyte. Six Pyros is a lot of flamer shots that can come down anywhere on the table, and forces significant caution from a fairly broad range of lists – obviously good for the Hive Mind. Given how obviously potent the Leviathan list is, it’s great to see people repping another strategy and perfoming so strongly, so big props to Matt on the win.
The Rest of the Best
Three players finished up on 5-1 records. They were:
- 2nd – Ben Neal – Grey Knights: Another outing for Ben’s list from last week, with three Dreadknights, a small squad of Paladins and the Words of Power falchion bomb. That last toy is exactly the kind of thing you want against Matt’s Tyranids, and Ben came the closest of anyone to taking him out, losing by only a single point 80-79 in round 4 (his only loss).
- 3rd – Marshall Peterson – Orks: Something totally new here – a go-wide Blood Axe build, sporting three full units of Kommandos to lurk in terrain and punish opponents with Surprize! and Counta-Taktics, then plenty of pressure from Beast Snaggas in Battlewagons and Trukk Boyz.
- 4th – Tom Cohen – Craftworlds: Hail of Doom with loads of Dire Avengers and a big shuriken cannon Windrider units as hammers, Fire Prisms to deal with any invulnerable-save sporting nonsense and the Avatar as a big anvil.
Clash Of Alba 2022
All the lists for this event can be found in Best Coast Pairings.
The Showdown
Matchup & Mission – Secure Missing Artefacts
Simon Fitzpatrick – Craftworlds – Hail of Doom/Mobile Fighters, throwing loads of Dire Avengers out of Wave Serpents and backing them with shuriken catapult Windriders (here tuned to seven models to be the To The Last choices alongside Baharroth) and psychic might.
Army List - Click to Expand Factions used: Aeldari Pre-Game Stratagems: Champion of the Aeldari (-1CP) Treasures of the Aeldari (-1CP) Warlord and Trait: Farseer – Seer of the Shifting Vector Secondary Objectives Information: ++++++++++++++++++++++++++++++++++++ ==Primary Detachment – Aeldari <Far Flung Craftworld, Hail of Doom, Mobile Fighters> Patrol Detachment 0CP [36 PL, 678pts] NFO: Seer Council – Warlock Skyrunner (3 x 35), Psychic – Quicken/Restrain, Protect/Jinx [105pts, 5PL] HQ: Farseer Skyrunner (120) RELIC – Sunstorm, Psychic – Doom, Will of Asuryan, [120pts, 6PL] ==Secondary Detachment – Aeldari <Far Flung Craftworld, Hail of Doom, Mobile Fighters> Patrol Detachment -2CP [83 PL, 1320pts] HQ: Baharroth (140) ]140pts, 7 PL]
Army Points: 1998
Reinforcement Points:2
Number of Units/Killpoints: 17
Starting Command Points:8
Army Trait: Far Flung Craftworld – Hail of Doom, Mobile Fighters
No Prisoners: 84
To the Last Units: Wave Serpent x 3, Windriders x 2, Baharroth
Titan Hunter: 0
Bring it Down: 7
Assassination: 13
Abhor the Witch: 8
HQ: Farseer Skyrunner (120) Warlord <Seer of the Shifting Vector>, Psychic – Guide, Focus Will, [120pts, 6PL]
TR: 10 x Guardian Defenders (10 x 9) [90pts, 4PL]
EL: 1 x Dire Avenger Exarch with Twin Avenger Catapult (12), 9 x Dire Avengers (9 x 12) [120pts, 6PL]
FA: Swooping Hawk Exarch (18) Supressing Fire (15), 5 x Swooping Hawks (5 x 18) [123pts, 6PL]
HQ: Autarch (80) Jump Generator (20) Treasures of the Aeldari – 1CP RELIC – Kurnous’ Bow, Champion of the Aeldari -1CP WARLORD TRAIT – Mark of the Incomparable Hunter
TR: 5 x Rangers (5 x 13) [65pts, 4 PL]
EL: 1 x Dire Avenger Exarch with Twin Avenger Catapult (12), 9 x Dire Avengers (9 x 12) [120pts, 6PL]
EL: 1 x Dire Avenger Exarch with Twin Avenger Catapult (12) Stand Firm (10), 9 x Dire Avengers (9 x 12) [130pts, 6PL]
FA: 7 x Windriders with Twin Shuriken Catapult (7 x 20) [140pts, 12PL]
FA: 7 x Windriders with Twin Shuriken Catapult (7 x 20) [140pts, 12PL]
HS: 1 x War Walker (45) 2 x Shuriken Cannon (2 x10) [65pts, 5PL]
DT: Wave Serpent with Twin Shuriken Cannon (140) [140pts, 8PL]
DT: Wave Serpent with Twin Shuriken Cannon (140) [140pts, 8PL]
DT: Wave Serpent with Twin Shuriken Cannon (140) [140pts, 8PL]
vs.
Innes Wilson – Tyranids – Living his best Tyranid life with all the hits, two Harpies, two Flyrants (protected by a chunky unit of Tyrant Guard), two Carnifexes, and a Maleceptor for the full nonsense to cap it off.
Army List - Click to Expand Army Points: 2000 Pre Game Stratagems: Hive Predator x2, Rarefied Enhancements Warlord & Trait: Neurothrope – Synaptic Tendrils Secondary Objectives Information HQ: Neurothrope [5PL, 100pts] Psyker – Catalyst, Onslaught, Warlord – Synaptic Tendrils TR: 3 Tyranid Warrior [4PL, 80pts] 3 Dual Bonesword, 3 Deathspitter, Flesh Hooks NFO: 5 Tyrant Guard [15PL, 215pts] Adrenal Glands EL: Deathleaper [5PL, 95pts] Hive Predator – Alien Cunning (-1CP) HS: Carnifex [7PL, 130pts] Heavy Venom Cannon, 2 Carnifex Crushing Claw, Enhanced Senses FL: Harpy [11PL, 195pts] 2 Heavy Venom Cannon, Dermic Symbiosis == Tyranids – Leviathan – Patrol = -3CP, [13PL, 275pts] == HQ: Hive Tyrant [9PL, 195pts] Monstrous Bonesword and Lash Whip, Adrenal Glands, Toxin Sacs, Psyker – Catalyst, Psychic Scream, Rarefied Enhancements – The Maw-Claws of Thyrax (-1CP) TR: 10 Gargoyle [4PL, 80pts]
Reinforcement Points: 0
Number of Units / Killpoints: 14
Starting Command Points: 7
Army Trait: Synaptic Imperative
No Prisoners: 60
To the Last Units: Tyrant Guard, Winged Hive Tyrant, [Hive Tyrant, Harpy]
Titan Hunter: N/A
Bring it Down: 12
Assassination: 13
Abhor the Witch: 13
++++++++++++++++++++++++++++++++++++++++++++++++++++++++++++++++++++++
== Tyranids – Leviathan – Patrol = -2CP, [95PL, 1725pts] ==
Hive Fleet Adaptation: Synaptic Control
HQ: Winged Hive Tyrant [11PL, 205pts] Monstrous Bonesword and Lash Whip, Adrenal Glands, Pysker – Onslaught, Paroxysm, Hive Predator – Alien Biology, Relic – The Reaper of Obliterax (-1CP)
TR: 3 Tyranid Warrior [4PL, 75pts] 3 Dual Bonesword, 3 Deathspitter
NFO: 3 Zoanthrope [7PL, 150pts] Psyker – Psychic Scream
EL: Maleceptor [9PL, 170pts] Psyker – Neuroparasyte, Psychic Scream
HS: Carnifex [7PL, 130pts] Heavy Venom Cannon, 2 Carnifex Crushing Claw, Enhanced Senses
FL: Harpy [10PL, 180pts] 2 Heavy Venom Cannon, Synaptic Insight
Hive Fleet Adaptation: Synaptic Control
Thoughts
Extreme brutality on show from both sides here – these armies represent some of the most vicious stuff you can do with each book. Hyper efficient monstrosities on the Tyranid side face a nightmarish wall of shurikens from the Aeldari, and both sides here have to really respect what the other can do. Hail of Doom Dire Avengers with +1 to wound will make mincemeat of almost anything in the Tyranid list they get a shot at, but the venom cannons of the harpies will brutally chip away at plenty of the Craftworld stuff here in turn, and the carnifexes and flyrants will annihilate anything they touch. Both sides having powerful Psychic capabilities is very impactful as well – it means that Baharroth has to play far more carefully than normal as he’ll get trivially one-rounded if exposed, but Deathleaper also has to watch out for getting melted (maybe with help from Kuornos Bow) when causing mischief.
The big break for the Tyranids here is that the way these lists line up gives them a much safer To the Last plan than the Aeldari do – neither the bikes or the Serpents can stay safe from the Harpies reliably enough to make it viable. The Tyranids also have some high-reach melee units in the form of the Flyrants, which on a corner deployment makes pushing for either flank objective quite risky (especially as Overrun allows the Tyrants to flee back to safety after murdering something, keeping To The Last live). That’s a perfect tool for punishing the Asuryani for pushing for objectives, but thanks to the Secondary imbalance (and the mission Primary) they basically have no choice but to do so. With both armies being able to do horrendous things to the opposing force if they get the drop, that hugely helps the Tyranids – the Craftworlds are forced to take the initiative and play aggressively, but aren’t going to be able to maximise their damage dealing while doing so, allowing the Tyranids to build up an insurmountable advantage over time.
As ever when Innes wins stuff, I can also just cheat and ask him what happened (though in this case I had figured out that the TTL imbalance was a big deal first). Sure enough, the Asuryani were forced to take Stranglehold, Psychic Ritual (using Focus Will and Quicken to execute reliably and safely) and RND into TTL, Stranglehold and Banners, committing the Asuryani to an aggressive posture that they couldn’t sustain. The Tyranids did go first, which is bad in this game (as again, both forces can counterattack brutally), but Innes just played it very cautiously, confident that over time the game would skew inexorably in his favour (though as you can see, the Craftworld side put in a very respectable score regardless).
Result
Tyranid Victory – 95-77
Innes Wilson – Tyranids – 1st Place
The List
See showdown
Archetype
Leviathan Goodstuff
Why it’s Interesting in 9th
I mean really, what else did you expect Innes to be up to at this point? The extra hefty Tyrant Guard unit makes To The Last extra reliable here, and the extra shooting from the Carnifexes compared to some of the other lists means that both Tyrants can afford to build for melee. That means the counterpunch this list throws if an opponent gets over aggressive against it is savage, and it still has all the other nastiness going for it. Predictably potent stuff from Innes, and given how many events he’s apparently going to this month, I’m sure he’ll be back in the column soon enough.
The Rest of the Best
Four players finished on 4-1 records. They were:
- 2nd – Ryan Kerr – Grey Knights: 28 Paladins, running as Wardmakers (presumably to disrupt opposing ObSec auras with the Brotherhood power, and also helping the super Librarian operate against Tyranids). Chunky.
- 3rd – Allan Davidson – Death Guard: Shooty Death Guard with lots of PBCs and VolCons protected by some Deathshrouds.
- 4th ✪ – Simon Fitzpatrick – Craftworlds: See Showdown.
- 5th – Alex Cable – Tyranids: A crunchy Behemoth list with two big Warrior squads and a supporting cast of all the best monsters.
Queensland Gaming Guild Kickoff
All the lists for this event can be found in Down Under Pairings (though the scoring was done in Best Coast Pairings). This list was using the old Tyranid codex due to delays in the new one being easily available in Australia.
The Showdown
Matchup & Mission – Secure Missing Artefacts
Alex Terrasson – Genestealer Cults – Bladed Cog centred around two tanked-up units of Aberrants with Xenoform Bionics, backed by 3×2 Ridgerunners.
Army List - Click to Expand Bladed Cog battalion 0cp HQ: Troops: Elites: Fast Attack:
Primus, Warlord, WT: Single minded obsession 80
Magus, power: Might from Beyond, Psychic stimulus, Relic : Unwilling orb 80
5 Acolytes 45
5 Acolytes 45
5 Acolytes 45
10 neophytes, 2 grenade launchers 70
10 neophytes, planning: lying in wait 80
12 Acolytes, 12 hand flamer, planning: perfect ambush 159
10 Aberrants, Heavy power weapons, Proficient planning: our time is nigh, Strat: Xenoform bionics (2cp) 315
10 Aberrants, Heavy power weapons, Strat: Xenoform bionics (2cp), Proficient planning: They came from below 310
Nexos, Relic: Cranial inlay (1cp) 50
Biophagus, Familiar, Proficient planning: Alchemist supreme 65
Abominant,Relic: Amulet of the voidwyrm 95
Sanctus 70
2 Ridgerunners, Missile launchers, Spotter, proficient planning: from every angle 170
2 Ridgerunners, Missile launchers, Survey augur 160
2 Ridgerunners, Missile launchers, Survey augur 160
vs.
Hayden Walduck – Tau – Bor’kan with two Stormsurges
Army List - Click to Expand ++ Patrol Detachment 0CP (T’au Empire) [88 PL, -1CP, 1,307pts] ++ + Configuration + Detachment Command Cost Sept Choice: Bork’an Sept + HQ + Commander in Crisis Battlesuit [9 PL, 150pts]: 1. Precision of the Hunter, Missile Pod, Missile Pod, Solid-image Projection Unit, T’au Flamer, Target Lock, Thermoneutronic Projector, Warlord . Marker Drone: Markerlight Ethereal [4 PL, -1CP, 70pts]: 2. Sense of Stone, 5. Exemplar of the Kauyon, 6. Wisdom of the Guides, Honour Blade, Stratagem: Promising Pupil, The Humble Stave . Marker Drone: Markerlight + Troops + Kroot Carnivores [3 PL, 60pts] Kroot Carnivores [3 PL, 60pts] + Elites + Crisis Battlesuits [20 PL, 256pts] Crisis Battlesuits [21 PL, 266pts] Crisis Bodyguards [12 PL, 155pts] + Heavy Support + Hammerhead Gunship [8 PL, 145pts]: Railgun Hammerhead Gunship [8 PL, 145pts]: Railgun ++ Super-Heavy Aux Detachment -2CP (I’m assuming these are listed as -2CP each rather then one being -3CP and one -1CP for ease of copying, it makes no difference to the overall build). Stormsurge [17 PL, 345pts]: Cluster Rocket System, 4x Destroyer Missile, Drone Controller, Multi-tracker, Pulse Blastcannon, 2x Smart Missile System, Target Lock, Thunderous Footfalls, Twin Airbursting Fragmentation Projector, Velocity Tracker Super heavy Aux -2cp Stormsurge [17 PL, 345pts]: Cluster Rocket System, 4x Destroyer Missile, Drone Controller, Multi-tracker, Pulse Blastcannon, 2x Smart Missile System, Target Lock, Thunderous Footfalls, Twin Airbursting Fragmentation Projector, Velocity Tracker ++ Total: [122 PL, -7CP, 1,997pts] ++
. 10x Kroot: 10x Kroot Rifle, 10x Quill Grenades
. 10x Kroot: 10x Kroot Rifle, 10x Quill Grenades
. Crisis Shas’ui: Cyclic Ion Blaster, Plasma Rifle, Plasma Rifle, Target Lock
. Crisis Shas’ui: Cyclic Ion Blaster, Plasma Rifle, Plasma Rifle, Target Lock
. Crisis Shas’ui: Cyclic Ion Blaster, Plasma Rifle, Plasma Rifle, Target Lock
. Crisis Shas’vre: Early Warning Override, Iridium battlesuit, Plasma Rifle, Plasma Rifle, Shield Generator
. 3x Shield Drone: 3x Shield Generator
. Crisis Shas’ui: Cyclic Ion Blaster, Plasma Rifle, Plasma Rifle, Target Lock
. Crisis Shas’ui: Cyclic Ion Blaster, Plasma Rifle, Plasma Rifle, Target Lock
. Crisis Shas’ui: Cyclic Ion Blaster, Plasma Rifle, Plasma Rifle, Target Lock
. Crisis Shas’vre: Early Warning Override, Iridium battlesuit, Plasma Rifle, Plasma Rifle, Shield Generator, Stimm Injectors
. 3x Shield Drone: 3x Shield Generator
. Crisis Bodyguard Shas’ui: Plasma Rifle, Plasma Rifle, Target Lock
. Crisis Bodyguard Shas’ui: Plasma Rifle, Plasma Rifle, Target Lock
. Crisis Bodyguard Shas’vre: Iridium battlesuit, Plasma Rifle, Plasma Rifle, Target Lock
. 2x Gun Drones
. 2x Gun Drone: 4x Pulse Carbine
. 2x Gun Drones
. . 2x Gun Drone: 4x Pulse Carbine
Thoughts
Exciting times – a Genestealer vs. Tau matchup where I don’t just write “the Tau indirect kills all the Genestealers, the end”, as these builds are doing something very different. On the Genestealer side, this build highlights a quiet trend that people have been experimenting with, which is going hard on Aberrants. You’d certainly like them to be a bit more reliable at killing stuff, but they can take a punch once you start stacking buffs on them (here they’ve got both a 5+ invulnerable save and will gradually have a 5+ FNP added), and provide a way of dominating an objective for a prolonged period, something the faction can sometimes struggle with. This helps a bunch on missions like this one, where you can either send them to duel for the middle or lock in your Priority objective as needed. They also provide an anchor for the ridgerunners to pivot around, and with Terminators being incresingly popular the D3 missiles these can mount are pretty spicy (not bad into Tyranid Warriors too, as you can always swap targets once one unit puts up Hive Node).
The Tau army’s ability to deal with the Aberrants is somewhat mixed. The Crisis Suits genuinely struggle a lot – add the invuln, -1D and option to throw on Monstrous Vigour and the rate at which the plasma chips through them becomes somewhat embarrasing. The Stormsurges will fare better if they can get shots off, as the dispersed shot mode of the blastcannon is perfect for taking them out, but they might not always get to draw a bead on the Aberrants. In terms of being able to actually hold a point against Tau, this list certainly does better than most.
Unfortunately, the issue it runs into is that the Tau can just focus on killing everything else in the army and mop up the Aberrants later on, as they can’t be everywhere at once. Missiles on the ridgerunners is a good asset into Terminators, but here it means that they can barely threaten the Stormsurges, Hammerheads or Crisis Teams, and if they expose themselves they’ll get immediately blown to bits in response. Assuming one unit of Aberrants pushes for the middle and the other one waits in deep strike, you can send a Stormsurge towards the near corner objective and the Hammerheads towards the further one, with a bit of Crisis backing, and the Genestealers just aren’t going to be able to deal with both (and are vulnerable to a counterattack even if they do manage to deploy aberrants on one flank). They do have one powerful curveball in the form of the flamer Acolytes, who can very effectively divest the Tau of their ObSec units by organising a Kroot barbecue, but that doesn’t feel like it’s enough. None of the key Tau stuff is going to take enough damage prior to the Ridgerunners going down to really impede them, then in the mid-late game they can use their mobility to roll up all the Cult characters and support, then concentrate overwhelming firepower on the Aberrants to finish the job.
The best thing the Cult can do in the face of that is try and maximise how long it takes to wipe them out while scoring Secondaries as best as possible – because they can pretty easily wipe out the Kroot they can get a major ObSec advantage that they can use to disrupt the Tau Primary, and Broodswarm and RND are going to be pretty hard to stop for much of the game due to the Tau’s low footprint (maybe backed up with Psychic Interrogation) so they can put up a decent Secondary score. However, they’re still up against it – Tau have an essentially unfailable 15VP from To The Last here, and can also really take advantage of the fact that Aerospace Relays can be completed in a single turn for another easy 15CP – it seems entirely plausible they could do the whole thing across turns 4 or 5 here.
I suspect the ease with which the Tau can cruise to 40+ on Secondaries while capping the Genestealers in the 30s is the real killer here – the Genestealers clearly did a decent job of preventing the Greater Good absolutely running away with things on the Primary, keeping the margin pretty close, but in the end the Tau still did enough for the win.
Result
Tau Victory – 79-65
Hayden Walduck – Tau – 1st Place
The List
See Showdown
Archetype
Bor’kan Big Suits
Why it’s Interesting in 9th
Stormsurge stocks are apparently up right now, which is perhaps unsurprising given how aggressively costed they are. Taking two is a gamble in some ways, as it does limit how much mobile stuff you can afford, but a lot of armies will struggle to pop one at a distance, let alone two, meaning it can often lock you in to game long dominance. It’s worth saying too that on the non-Auxiliary units the value of the Bor’kan trait is pretty high right now – Aeldari armies are throwing around a lot of mid-strength shooting, Grey Knights rely on mid-strength attacks too, and even Tyranids put out quite a few S5 attacks and shots from their Warrior screens (and the Kraken lists even more). That helps keep this army’s mid-board stuff in the fight longer, and like Gonyo’s list above it has the option of sending the Hammerheads out roaming mid-game if needed, which benefit especially strongly from reducing the S of any S4 shuriken weapons that jerk elves are firing at them. Honestly the fact that all the most successful Tau lists are suddenly bringing the biggest guns is very funny to me, so congratulations to Hayden for riding the cool new Tau wave.
The Rest of the Best
One player finished on four wins and a draw, and four on 4-1. They were:
- 2nd – Braedon Kilby-Francis – Tyranids: Crusher Stampede still refusing to die huh? On brand I guess.
- 3rd – Wayne Russell – Death Guard: Mortarion’s Anvil with thirty Blightlords, support characters and not much else.
- 4th – Zach De Glas – Adepta Sororitas: Martyred Lady board control with loads of bodies, including a 20-Sister block (which feels like it has to be more of a consideration in an Armour of Contempt world).
- 5th – Bodee Bignell – Tyranids: More Crusher Stampede.
- 6th ✪ – Alex Terrasson – Genestealer Cults: See Showdown.
West Of Scotland GT#2
All the lists for this event can be found in Best Coast Pairings.
The Showdown
Matchup & Mission – The Scouring
Rhys Inglis – Thousand Sons – Endless Duplicity bodies – 5×10 Rubricae and one big unit of Scarabs.
Army List - Click to Expand ++ Battalion Detachment 0CP (Chaos – Thousand Sons) [105 PL, 10CP, 15 Cabal Points, 2,000pts] ++ + Configuration + Detachment Command Cost + Stratagems + Sorcerous Arcana [-1CP]: Additional Relics + HQ + Ahriman [9 PL, 3 Cabal Points, 180pts]: 11. Gaze of Hate, 11. Tzeentch’s Firestorm, 13. Doombolt, Disc of Tzeentch Exalted Sorcerer [6 PL, 3 Cabal Points, 105pts]: 12. Glamour of Tzeentch, 21. Presage, Inferno Bolt Pistol, Master Misinformator, Prosperine khopesh, Umbralefic Crystal, Warlord Thousand Sons Daemon Prince [10 PL, -1CP, 3 Cabal Points, 185pts]: 12. Twist of Fate, 22. Swelled by the Warp, 3. Undying Form, Conniving Plate, Hellforged sword, High Acolytes, Wings + Troops + Rubric Marines [12 PL, 1 Cabal Points, 220pts] Rubric Marines [12 PL, 1 Cabal Points, 220pts] Rubric Marines [12 PL, 1 Cabal Points, 220pts] Rubric Marines [12 PL, 1 Cabal Points, 220pts] Rubric Marines [12 PL, 1 Cabal Points, 220pts] + Elites + Scarab Occult Terminators [20 PL, 1 Cabal Points, 430pts]: 2x Hellfyre missile rack ++ Total: [105 PL, 10CP, 15 Cabal Points, 2,000pts] ++
. Aspiring Sorcerer: 22. Weaver of Fates, Inferno Bolt Pistol
. 8x Rubric Marine w/ inferno boltgun: 8x Inferno boltgun
. Rubric Marine w/ soulreaper cannon: Soulreaper cannon
. Aspiring Sorcerer: 31. Empyric Guidance, Inferno Bolt Pistol
. 8x Rubric Marine w/ inferno boltgun: 8x Inferno boltgun
. Rubric Marine w/ soulreaper cannon: Soulreaper cannon
. Aspiring Sorcerer: 23. Temporal Surge, Inferno Bolt Pistol
. 8x Rubric Marine w/ inferno boltgun: 8x Inferno boltgun
. Rubric Marine w/ soulreaper cannon: Soulreaper cannon
. Aspiring Sorcerer: 23. Temporal Surge, Inferno Bolt Pistol
. 8x Rubric Marine w/ inferno boltgun: 8x Inferno boltgun
. Rubric Marine w/ soulreaper cannon: Soulreaper cannon
. Aspiring Sorcerer: 23. Temporal Surge, Inferno Bolt Pistol
. 8x Rubric Marine w/ inferno boltgun: 8x Inferno boltgun
. Rubric Marine w/ soulreaper cannon: Soulreaper cannon
. Scarab Occult Sorcerer: Inferno combi-bolter
. 7x Terminator: 7x Inferno combi-bolter, 7x Prosperine khopesh
. Terminator w/ Heavy Weapon: Soulreaper cannon
. Terminator w/ Heavy Weapon: Soulreaper cannon
vs.
Chris Mcsheehy – Grey Knights – an all-rounder Swordbearers build with three Dreadknights, two big Interceptor units and a small Paladin squad.
Army List - Click to Expand Battalion Detachment 10CP (Imperium – Grey Knights) [107 PL, 1,995pts] + Stratagems + +HQ+ +Troops+ +Elites+ +Fast Attack+ +Heavy Support+
Brotherhood: Swordbearers
Armoury of Titan [-1CP]: 1 Additional Relic
Brotherhood Chaplain [6 PL, 110pts]: 1. Words of Power, 3: Unyielding Anvil, 5: Warp Shaping, Warlord
Brotherhood Librarian [6 PL, -1CP, 105pts]: 4: Purifying Flame, 4: Vortex of Doom, 6: Psychic Epitome, Cuirass of Sacrifice, Shield of Humanity,Nemesis Warding Stave
Grand Master in Nemesis Dreadknight [10 PL, 215pts]: 1: Gate of Infinity, 2: Empyric Amplification, Dreadfist, Gatling Psilencer, Heavy Psycannon, Nemesis Greatsword, Sigil of Exigence
Strike Squad [6 PL, 110pts]
. 4x Grey Knight (Halberd), Grey Knight Justicar, Nemesis Force Halberd
Strike Squad [6 PL, 110pts]
. 4x Grey Knight (Halberd), Grey Knight Justicar, Nemesis Force Halberd
Strike Squad [6 PL, 110pts]
. 4x Grey Knight (Halberd), Grey Knight Justicar, Nemesis Force Halberd
Brotherhood Apothecary [6 PL, 100pts]: 5: Warp Shaping, Nemesis Force Sword
Paladin Squad [13 PL, 225pts] 3x Paladin (Sword), 1x Paladin (Halberd), Paragon: Nemesis Warding Stave
4. Purifying Flame, 5. Armoured resilience
Interceptor Squad [16 PL, 260pts] 9x Interceptor (Halberd), Interceptor Justicar, Nemesis Force Halberd
Interceptor Squad [16 PL, 260pts] 9x Interceptor (Halberd), Interceptor Justicar, Nemesis Force Halberd
Nemesis Dreadknight [8 PL, 195pts]: Dreadfist, Dreadknight teleporter, Gatling Psilencer, Heavy Psycannon, Nemesis Greatsword
Nemesis Dreadknight [8 PL, 195pts]: Dreadfist, Dreadknight teleporter, Gatling Psilencer, Heavy Psycannon, Nemesis Greatsword
Thoughts
Thousand Sons already excelled at grinding their opponents (ironically) into the dust, and Armour of Contempt only makes that more true. Because of their psychic might and ObSec on all their good, durable units, if they can just hold position and bounce any challengers then victory will gradually become an inevitability. This list is fully on that plan – which is fine, until it hits an opponent that can thwart it.
This is, unfortunately, a pretty horrendous mismatch. Grey Knights are unusually resilient to the Thousand Sons attrition-based plan thanks to their good deny access and mortal resilience (plus also now an extra point of save against inferno bolts from AoC), and are incredibly good at killing Rubricae in turn, packing lots and lots of D2 melee (plus a bit of shooting from the Dreadknights). The high number of Interceptors is a particular problem here, especially on the Scouring – once they’ve had a turn to stage, it’s essentially going to be impossible for the Thousand Sons to hold any objectives without being in easy charge range, the Dreadknights aren’t going to be far behind, and the impact of Sorcerous Facade is massively muted on this mission compared to normal because of how clustered the objectives are. That’s true of Gate of Infinity as well, of course, but the base level of mobility the Grey Knights have is so much higher that the exchange still benefits them.
I know people don’t love it when this is what I have to write, but there’s very little the Thousand Sons can do here to stop themselves getting absolutely steamrollered off the table. The mission is definitely exacerbating it – a corner deployment would maybe give them a bit of scope to conquering one flank and putting up a bit more of a score, but the merciless demands of the Scouring serve to really highlight how brutally effective the Grey Knights can be at annihilating the forces of Tzeentch.
Result
Grey Knight Victory – 100-40
Chris Mcsheehy – Grey Knights – 1st Place
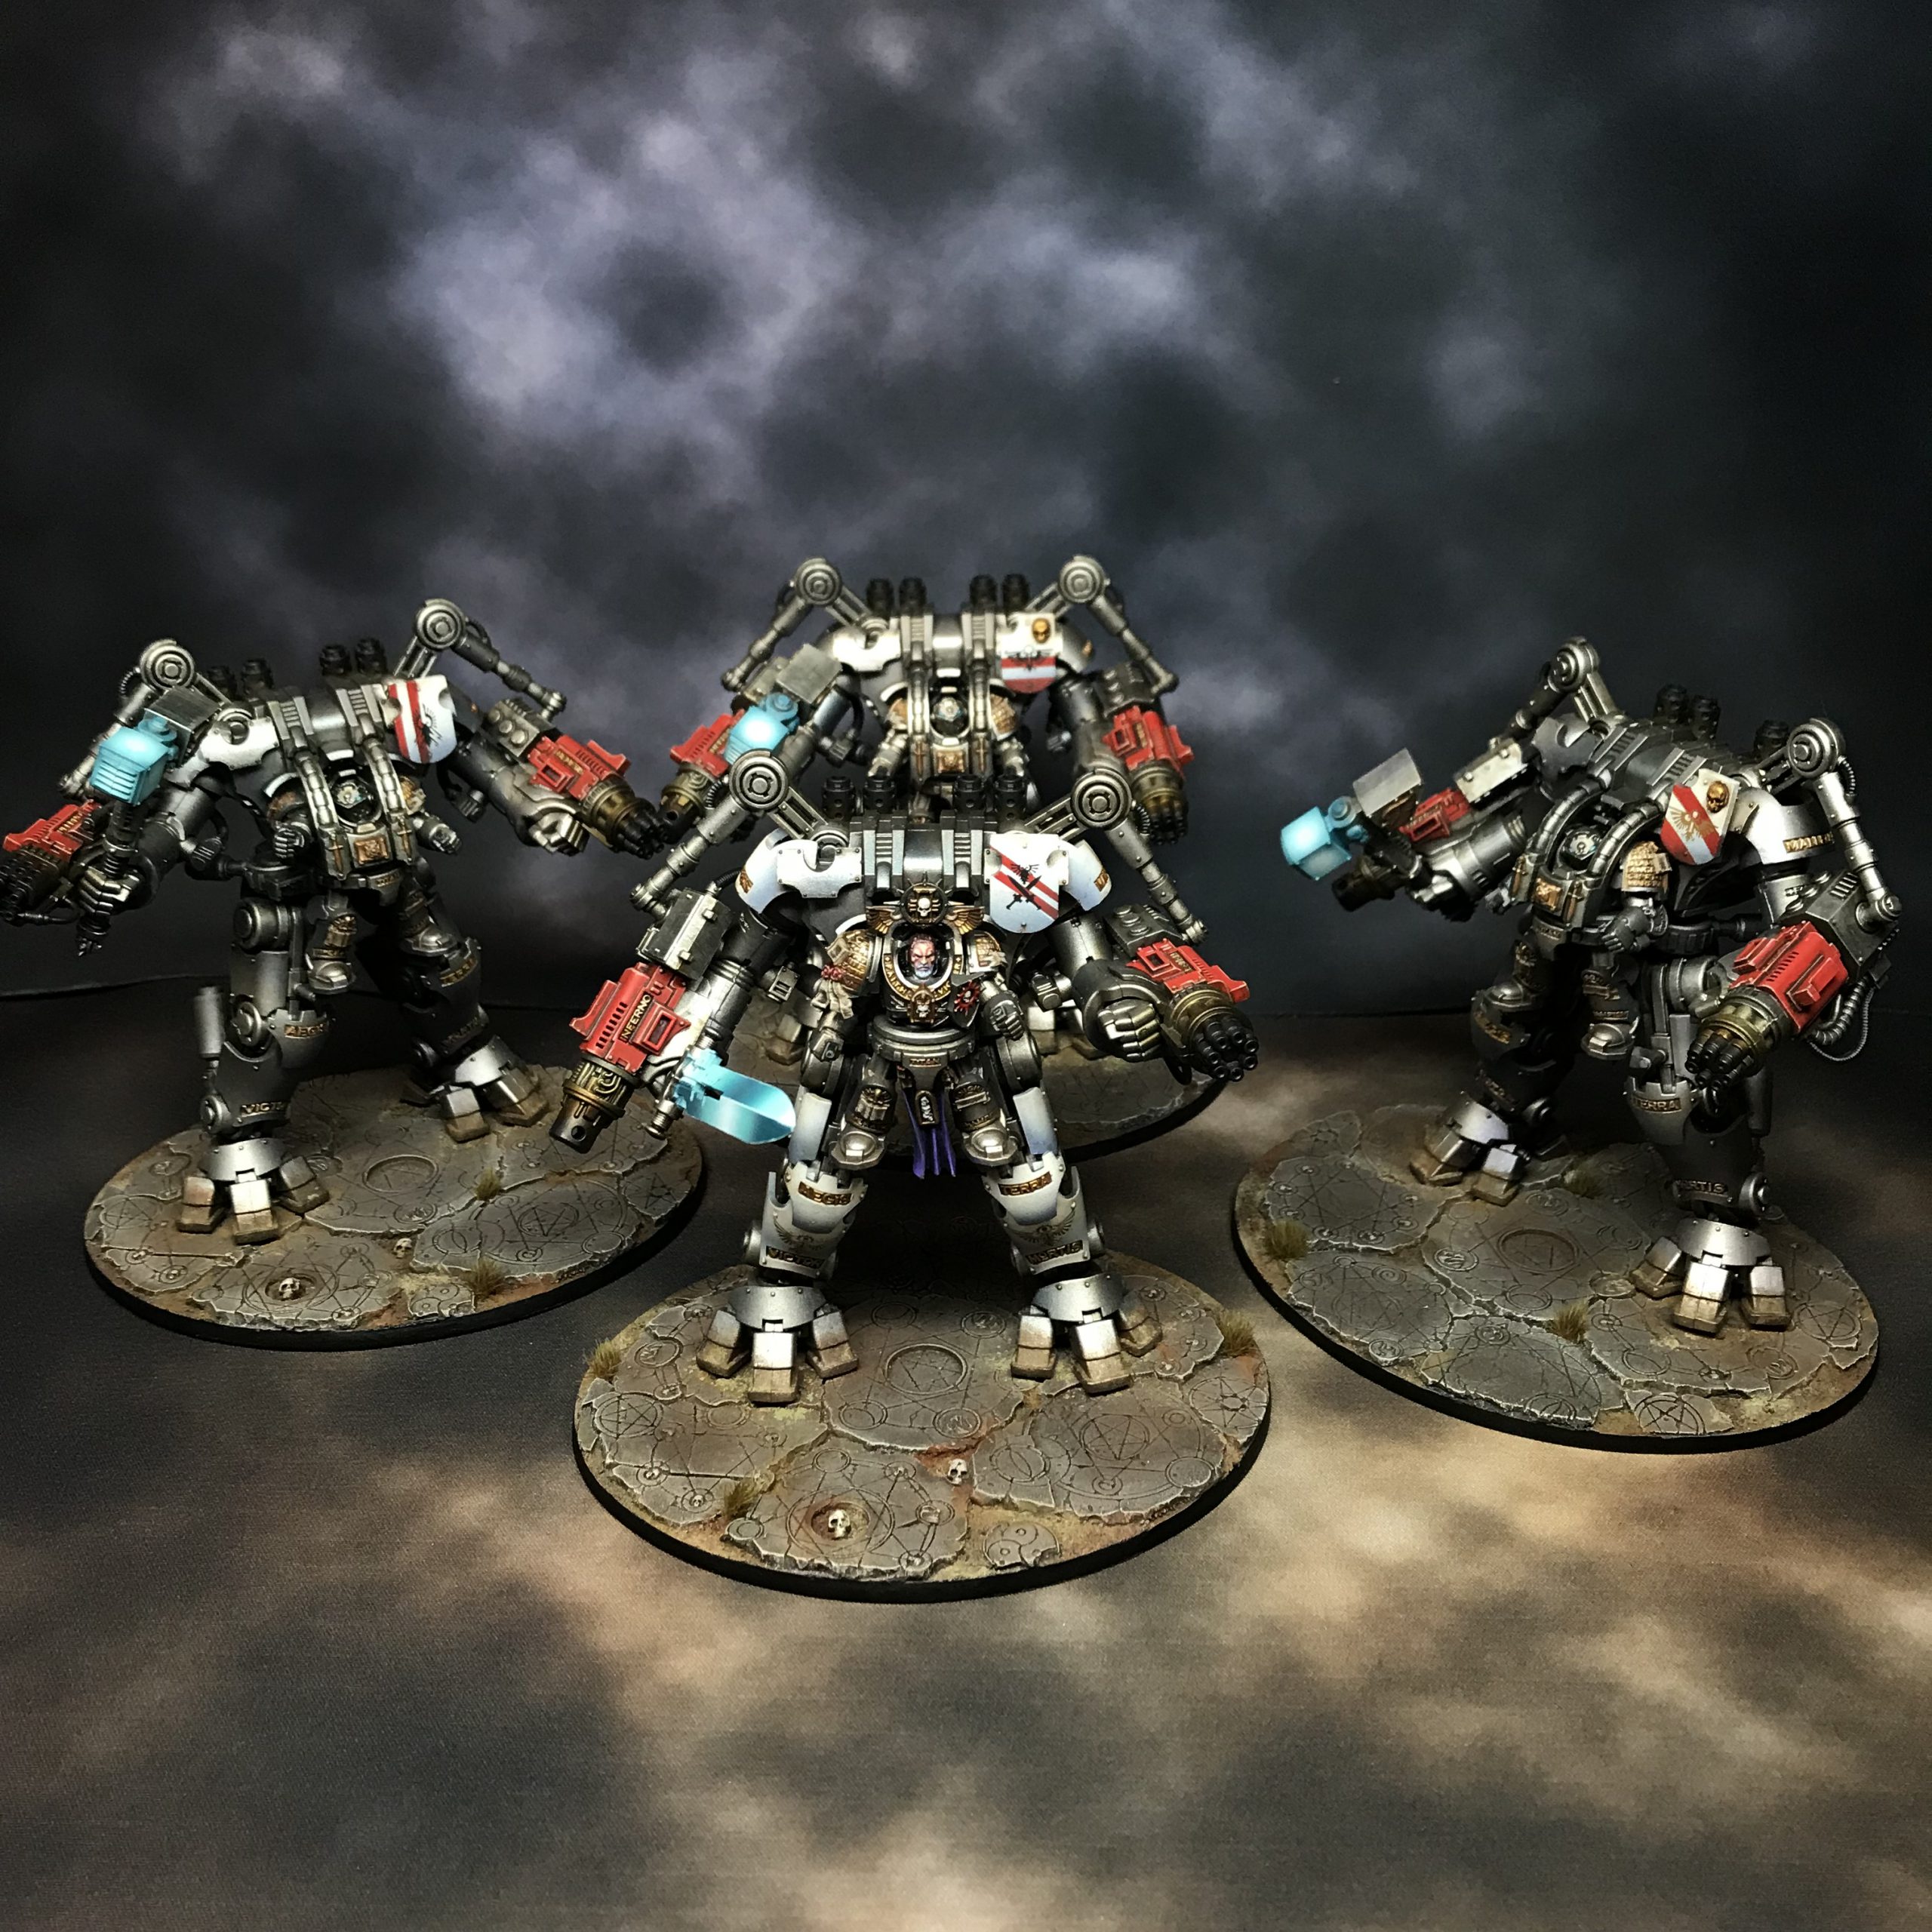
The List
See Showdown
Archetype
Dreadknights and Interceptors
Why it’s Interesting in 9th
What once was a metagame villain returns as a breath of fresh air – Dreadknights and Interceptors are still great all-rounders, and now that the Interceptors are tougher and you can augment the army with a five-Paladin unit for position control, Grey Knights end up feeling like a pretty strong army once more. Interceptors in particular feel excellent in the current metagame, as they have the speed to go and pin down pesty elves, which is vital.
The Rest of the Best
Five players finished on 4-1 records. They were:
- 2nd – Sean Baird – Harlequins: Light Saedath swapping to one unit of Voidweavers and two bike squads, finding the extra points by cutting a Death Jester now you can no longer trigger the auto-6 combo at range.
- 3rd – Fraser McFetridge – Harlequins: Aggro Dark Saedath with lots of bikes and Troupes.
- 4th – Rhys Inglis – Thousand Sons: See Showdown.
- 5th – Callum Rooney – Adeptus Custodes: Emperor’s Chosen Goodstuff, dropping to two units of bikes for some extra infantry.
- 6th – Bruce Wade – Tau: Very fast Farsight Enclaves, with three Breacher Teams in Devilfish and two big Crisis units.
FactoruM DZTV April GT
All the lists for this event can be found in Best Coast Pairings.
The Showdown
Matchup & Mission – Conversion
Giulio Cesare Ghermandi – Drukhari – Drukhari Goodstuff with a bit of everything – Grotesques, Reavers, a Ravager and some Characters to taste.
Army List - Click to Expand ++ Patrol Detachment 0CP (Aeldari – Drukhari) [62 PL, 995pts, 11CP] ++ + Configuration + Obsession: Kabal of the Black Heart: Thirst for Power Raiding Forces – CP Refund + Stratagems + Stratagem: Prizes from the Dark City [-1CP] + No Force Org Slot + Court of the Archon [5 PL, 70pts]: As Detachment (Kabal) + HQ + Archon [4 PL, 70pts]: Agoniser, As Detachment (Kabal), Overlord, Splinter Pistol, The Animus Vitae Drazhar [8 PL, 145pts]: Hatred Eternal, Warlord + Troops + Wracks [3 PL, 40pts]: As Detachment (Coven) + Elites + Incubi [4 PL, 90pts] Mandrakes [8 PL, 90pts] + Heavy Support + Ravager [8 PL, 130pts]: As Detachment (Kabal), 3x Dark Lance + Dedicated Transport + Raider [6 PL, 100pts]: As Detachment, Disintegrator Cannon Raider [6 PL, 100pts]: As Detachment, Disintegrator Cannon Venom [5 PL, 80pts]: As Detachment, Grisly Trophies, Splinter Cannon, Twin splinter rifle Venom [5 PL, 80pts]: As Detachment, Grisly Trophies, Splinter Cannon, Twin splinter rifle ++ Patrol Detachment 0CP (Aeldari – Drukhari) [39 PL, 750pts, -2CP] ++ + Configuration + Detachment Command Cost Obsession Raiding Forces – CP Refund + Stratagems + Stratagem: Prizes from the Dark City [-1CP] + HQ + Haemonculus [5 PL, 90pts, -1CP]: As Detachment (Coven), Poisoner’s Ampule, Stratagem: Tolerated Ambition, Twisted Animator + Troops + Haemoxytes [8 PL, 135pts]: As Detachment (Coven) Wracks [3 PL, 65pts]: As Detachment (Coven) Wracks [3 PL, 65pts]: As Detachment (Coven) + Elites + Grotesques [5 PL, 105pts]: As Detachment (Coven) Grotesques [5 PL, 105pts]: As Detachment (Coven) + Heavy Support + Cronos [4 PL, 80pts]: As Detachment (Coven) Talos [6 PL, 105pts]: As Detachment (Coven) ++ Patrol Detachment 0CP (Aeldari – Drukhari) [14 PL, 255pts, -1CP] ++ + Configuration + Detachment Command Cost Obsession Raiding Forces – CP Refund + HQ + Succubus [5 PL, 95pts, -1CP]: 1 – Adrenalight (Combat Drug), As Detachment (Wych Cult), Precision Blows, Stratagem: Tolerated Ambition, The Triptych Whip + Troops + Wracks [3 PL, 40pts]: As Detachment (Coven) + Fast Attack + Reavers [6 PL, 120pts]: 2 – Grave Lotus (Combat Drug), As Detachment (Wych Cult), Grav-talon ++ Total: [115 PL, 8CP, 2,000pts] ++
. Lhamean
. Sslyth
. Sslyth
. Sslyth
. Acothyst: Wrack Blade
. 4x Wracks: 4x Wrack Blade
. 4x Incubi: 4x Klaive
. Klaivex: Klaive
. 5x Mandrake: 5x Baleblast, 5x Glimmersteel Blade
. Nightfiend
. *Custom Coven*: Artists of the Flesh (All-Consuming)
. Alchemical Maestro (Custom): Alchemical Maestro
. 7x Haemoxyte: 7x Wrack Blade
. Haemoxyte Acothyst: Electrocorrosive Whip, Liquifier Gun
. Haemoxyte w/ Special Weapon: Liquifier Gun
. Haemoxyte w/ Special Weapon: Liquifier Gun
. Acothyst: Electrocorrosive Whip, Liquifier Gun
. Wrack w/ Special Weapon: Liquifier Gun
. 3x Wracks: 3x Wrack Blade
. Acothyst: Electrocorrosive Whip, Liquifier Gun
. Wrack w/ Special Weapon: Liquifier Gun
. 3x Wracks: 3x Wrack Blade
. Grotesque w/ Monstrous Cleaver
. Grotesque w/ Monstrous Cleaver
. Grotesque w/ Monstrous Cleaver
. Grotesque w/ Monstrous Cleaver
. Grotesque w/ Monstrous Cleaver
. Grotesque w/ Monstrous Cleaver
. Cronos: Spirit Probe
. Talos: Macro-scalpel, Talos Gauntlet
. . Two heat lances
. *Custom Cult*: Precise Killers, Slashing Impact
. Agoniser & Archite Glaive
. Show Stealer (Custom): Show Stealer
. Acothyst: Wrack Blade
. 4x Wracks: 4x Wrack Blade
. Arena Champion: Blaster, Power sword
. 4x Reaver: 4x Bladevanes, 4x Splinter Pistol, 4x Splinter Rifle
vs.
Sam Nash – Adeptus Custodes – A high pressure Solar Watch build with one big Custodian squad (mixed shields and spears) and a bunch of Dreadnoughts.
Army List - Click to Expand ++ Battalion Detachment 0CP (Imperium – Adeptus Custodes) [100 PL, 2,000pts, 8CP] ++ + Configuration + Detachment Type / Shield Host: Adeptus Custodes, Solar Watch + Stratagems + Stratagem: Open the Vaults [-1CP]: Additional Relics + HQ + Blade Champion [6 PL, 120pts, -2CP]: 3. Superior Creation, 6. Peerless Warrior, Eagle’s Eye, Stratagem: The Emperor’s Heroes, Stratagem: Victor of the Blood Games Shield-Captain [7 PL, 120pts, -1CP]: (Solar Watch): Sally Forth, Castellan’s Mark, Guardian Spear, Misericordia, Stratagem: The Emperor’s Heroes, Swift as the Eagle Trajann Valoris [8 PL, 160pts, 1CP] + Troops + Custodian Guard Squad [23 PL, 470pts] Prosecutors [3 PL, 60pts]: Prosecutor Sister Superior Sagittarum Custodians [7 PL, 150pts] Sagittarum Custodians [7 PL, 150pts] + Elites + Contemptor-Achillus Dreadnought [9 PL, 180pts]: 2x Twin Adrathic Destructor Contemptor-Achillus Dreadnought [9 PL, 180pts, -1CP]: Stratagem: Eternal Penitent, 2x Twin Adrathic Destructor Contemptor-Galatus Dreadnought [9 PL, 170pts] Contemptor-Galatus Dreadnought [9 PL, 170pts] + Fast Attack + Witchseekers [3 PL, 70pts]: Witchseeker Sister Superior ++ Total: [100 PL, 2,000pts, 8CP] ++
. 6x Custodian w/ Guardian Spear & Misericordia: 6x Guardian Spear, 6x Misericordia
. 4x Custodian w/ Sentinel Blade & Praesidium Shield: 4x Praesidium Shield, 4x Sentinel Blade
. 4x Prosecutor: 4x Boltgun
. 3x Sagittarum w/ Misericordia: 3x Adrastus Bolt Caliver, 3x Misericordia
. 3x Sagittarum w/ Misericordia: 3x Adrastus Bolt Caliver, 3x Misericordia
. 4x Witchseeker: 4x Witchseeker Flamer
Thoughts
A really interesting matchup here. The Drukhari list goes very wide and is very fast indeed, providing it with plenty of ways to contest flanking objectives, and plenty of stuff that it’s willing to throw away to temporarily claim an objective, something that’s always useful against armies like Custodes with a few, high powered units. They have one big problem here, however – they can essentially never take the mid-board against this Custodes list, and if they’re not careful they’re going to get bowled out of the game.
The Solar Watch infantry deathball is one of the options Custodes need to be seriously considering after their updates, this list uses it very effectively, and it’s perfect for this mission. None of the Drukhari’s close-engagement tools can stand up to it, so what’s going to happen is that they’re going to push straight to the middle objective out of the gate, occupy it, then if the Drukhari aren’t careful they’re going to keep going and Advance/Charge onto the elves’ home point on the next turn using Sally Forth. That’s a big power play on Conversion, as it will leave the Drukhari scrambling on the Primary while very quickly locking the Golden Host in for a 45 (and they should trivially be managing Grind and Engage at the same time). The Dreadnoughts are also good flank fighters here – they can get popped by Ravagers if they’re unlucky, but line up well against most of the rest of the Drukhari stuff.
The Drukhari have a few options for what to do here. Whatever else is happening, they need to make sure they’re quickly establishing control of the two corner objectives, obliterating any Dreadnoughts that try and occupy them and locking in some amount of Primary from that. Beyond that, they need to decide if they’re trying to deplete the main deathball enough that it can’t steal their home position easily, or picking up as much as possible of everything else. It feels like the latter is probably a safer bet now that Custodes don’t get ObSec on their characters – taking out the Sagittarum squads shouldn’t be too challenging, especially as baiting Arcane Genetic Alchemy on the big unit is going to be pretty doable. Strip the Custodes of ObSec on anything other than the big unit and maybe the Drukhari’s greater numbers will tell (and if they can drop the Dreadnoughts on one flank, they might even be able to threaten the Custodes home objective themselves). This plan has, of course, got a massive failure case – one turn of bouncing off the invulnerable saves on a flank could well prove terminal, but it feels like exhausting their army in a frontal assault on the big unit is even higher risk. The only possible exception here is that it might be worth keeping Drazhar back to discourage the big unit from being too aggressive and/or stopping the Custodes from blowing (the now once per game) Auspice until the late game – he’ll take a respectable chunk out of the squad even through Alchemy.
Do all of that and there’s a shaky plan for Drukhari to execute a win, but I’d probably call this for the Custodes – there are enough ways it can go badly wrong for the Aeldari, and the Custodes score floor high enough that I think they take it most of the time. As it turned out, the Drukhari did take the game – just. By a single point they managed to overcome the power of the Custodes, in what must have been a real nailbiter!
Result
Drukhari Victory – 87-86
Giulio Cesare Ghermandi – Drukhari – 1st Place
The List
See Showdown
Archetype
Drukhari Goodstuff
Why it’s Interesting in 9th
There’s so much stuff here that it’s honestly kind of overwhelming trying to sift through it, which I suspect is part of the plan in and of itself. One of Drukhari’s strengths is that ,even after quite a few rounds of nerfs, most of their units are basically good at their jobs, and many of them are very fast. That means that when facing this army down the opponent is trying to deal with a lot of stuff going on at once, and if they make any mistakes then it’s going to be easy to exploit them. It does run the risk that if things go wrong it starts bleeding stuff very quickly (giving up Grind), but here that didn’t stand in the way of victory, including the win against the fairly challending Custodes build seen above.
The Rest of the Best
Three players finished on 4-1 records (Sam who played in the final was paired up from three wins and a draw).
- 2nd – Edward Morgan – Tyranids: Leviathan goodstuff with a couple of Flyrants and two Maleceptors.
- 3rd – Joe Coles – Chaos Space Marines: Abaddon, Terminators and some VolCons make the most of the extra durability Marines now get.
- 4th – Tom Bunnel – Tyranids: Leviathan goodstuff with three Hive Tyrants (two flying, one on foot) and some Harpies.
The Death or Glory Invitational
All the lists for this event can be found in Best Coast Pairings.
The Showdown

Matchup & Mission – Secure Missing Artefacts
Thomas Ogden – Tau – Crisis-heavy Tau Sept Goodstuff.
Army List - Click to Expand ++ Vanguard Detachment -3CP (T’au Empire) [93 PL, 1,549pts, -4CP] ++ + Configuration + Detachment Command Cost [-3CP] Sept Choice: T’au Sept + HQ + Commander in Crisis Battlesuit [7 PL, 135pts, -1CP]: 6. Exemplar of the Mont’ka, Missile Pod, Plasma Rifle, Plasma Rifle, Shield Generator, Stratagem: Promising Pupil Darkstrider [3 PL, 60pts] + Elites + Crisis Battlesuits [20 PL, 294pts] Crisis Battlesuits [20 PL, 319pts] Crisis Battlesuits [20 PL, 319pts] Crisis Bodyguards [13 PL, 242pts] + Heavy Support + Broadside Battlesuits [5 PL, 90pts] Broadside Battlesuits [5 PL, 90pts] ++ Patrol Detachment -2CP (T’au Empire) [15 PL, 300pts, 9CP] ++ + Configuration + Battle Size [12CP]: 3. Strike Force (101-200 Total PL / 1001-2000 Points) Detachment Command Cost [-2CP] Sept Choice: T’au Sept + HQ + Aun’Va [4 PL, 80pts]: 2. Sense of Stone, 3. Zephyr’s Grace, 6. Wisdom of the Guides Commander in Coldstar Battlesuit [8 PL, 160pts, -1CP]: 1. Precision of the Hunter, Burst Cannon, DW-02 Advanced Burst Cannon, High-output Burst Cannon, Missile Pod, Onager Gauntlet, Shield Generator, Stratagem: Promising Pupil + Troops + Kroot Carnivores [3 PL, 60pts] ++ Supreme Command Detachment +2CP (T’au Empire) [8 PL, 150pts, 2CP] ++ + Configuration + Detachment Command Cost [2CP] Sept Choice: T’au Sept + Primarch | Daemon Primarch | Supreme Commander + Commander Shadowsun [8 PL, 150pts]: 2x High-energy Fusion Blaster, Warlord ++ Total: [116 PL, 1,999pts, 7CP] ++
. Crisis Shas’ui: Burst Cannon, Cyclic Ion Blaster, Plasma Rifle, Velocity Tracker
. Crisis Shas’ui: Burst Cannon, Cyclic Ion Blaster, Plasma Rifle, Velocity Tracker
. Crisis Shas’ui: Burst Cannon, Cyclic Ion Blaster, Plasma Rifle, Shield Generator
. Crisis Shas’ui: Burst Cannon, Cyclic Ion Blaster, Plasma Rifle, Shield Generator
. Crisis Shas’vre: Burst Cannon, Cyclic Ion Blaster, Plasma Rifle, Velocity Tracker
. Marker Drone
. 2x Shield Drone: 2x Shield Generator
. Crisis Shas’ui: Fusion Blaster, Plasma Rifle, Plasma Rifle, Velocity Tracker
. Crisis Shas’ui: Fusion Blaster, Plasma Rifle, Plasma Rifle, Velocity Tracker
. Crisis Shas’ui: Fusion Blaster, Plasma Rifle, Plasma Rifle, Shield Generator
. Crisis Shas’ui: Fusion Blaster, Plasma Rifle, Plasma Rifle, Shield Generator
. Crisis Shas’vre: Fusion Blaster, Plasma Rifle, Plasma Rifle, Velocity Tracker
. Marker Drone
. 2x Shield Drone: 2x Shield Generator
. Crisis Shas’ui: Missile Pod, Plasma Rifle, Plasma Rifle, Velocity Tracker
. Crisis Shas’ui: Missile Pod, Plasma Rifle, Plasma Rifle, Velocity Tracker
. Crisis Shas’ui: Missile Pod, Plasma Rifle, Plasma Rifle, Shield Generator
. Crisis Shas’ui: Missile Pod, Plasma Rifle, Plasma Rifle, Shield Generator
. Crisis Shas’vre: Missile Pod, Plasma Rifle, Plasma Rifle, Velocity Tracker
. Marker Drone
. 2x Shield Drone: 2x Shield Generator
. Crisis Bodyguard Shas’ui: Burst Cannon, Cyclic Ion Blaster, Plasma Rifle
. Crisis Bodyguard Shas’ui: Burst Cannon, Cyclic Ion Blaster, Plasma Rifle
. Crisis Bodyguard Shas’ui: Burst Cannon, Cyclic Ion Blaster, Plasma Rifle
. Crisis Bodyguard Shas’vre: Burst Cannon, Cyclic Ion Blaster, Plasma Rifle
. Marker Drone
. Shield Drone
. Broadside Shas’vre: Heavy Rail Rifle, Twin Smart Missile System, Velocity Tracker
. Broadside Shas’vre: Heavy Rail Rifle, Twin Smart Missile System, Velocity Tracker
. 2x Ethereal Guard: 2x Honour Blade
. 10x Kroot: 10x Kroot Rifle, 10x Quill Grenades
vs.
Joshua Minnich – Tyranids – Leviathan goodstuff with two Flyrants, two Harpies and two Maleceptors.
Army List - Click to Expand ++ Patrol Detachment 0CP (Tyranids) [88 PL, 12CP, 1,550pts] ++ + Configuration + Hive Fleet: Leviathan + No Force Org Slot + Tyrant Guard [8 PL, 120pts] Zoanthropes [7 PL, 150pts]: Power: Hive Nexus, Power: Neuroparasite, Power: Smite, 3x Zoanthrope + HQ + Neurothrope [5 PL, 100pts]: Power: Catalyst, Power: Hive Nexus, Power: Onslaught, Power: Smite, Warlord, Warlord Trait: Synaptic Tendrils Winged Hive Tyrant [11 PL, 190pts]: Lash Whip and Monstrous Bonesword, Power: Catalyst, Power: Hive Nexus, Power: Paroxysm, Power: Smite, Relic: The Reaper of Obilterax, Warlord Trait: Alien Cunning + Troops + Tyranid Warriors [8 PL, 100pts] + Elites + Maleceptor [9 PL, 170pts]: Power: Hive Nexus, Power: Neuroparasite, Power: Psychic Scream Venomthropes [5 PL, 105pts] + Heavy Support + Carnifexes [14 PL, 240pts] + Flyer + Harpy [11 PL, 195pts]: 2x Heavy Venom Cannon, Adaptive Physiology: Dermic Symbiosis, Show Spore Mine Rules Harpy [10 PL, 180pts]: 2x Heavy Venom Cannon, Adaptive Physiology: Synaptic Enhancement, Show Spore Mine Rules ++ Patrol Detachment -2CP (Tyranids) [24 PL, -5CP, 450pts] ++ + Configuration + Detachment Command Cost [-2CP] Hive Fleet: Leviathan + Stratagems + Hive Predator [-2CP]: 2x Extra Warlord Trait Rarefied Enhancements [-1CP]: Extra Bio-artefact + HQ + Winged Hive Tyrant [11 PL, 205pts]: Adrenal Glands, Lash Whip and Monstrous Bonesword, Power: Hive Nexus, Power: Paroxysm, Power: Smite, Power: The Horror, Relic: The Maw-claws of Thyrax, Warlord Trait: Adaptive Biology + Troops + Tyranid Warriors [4 PL, 75pts] + Elites + Maleceptor [9 PL, 170pts]: Power: Hive Nexus, Power: Onslaught, Power: Psychic Scream ++ Total: [112 PL, 7CP, 2,000pts] ++
. 3x Tyrant Guard (Scything): 3x Two Rending Claws, 3x Two Scything Talons
. Tyranid Warrior: Deathspitter, Dual Boneswords
. Tyranid Warrior: Deathspitter, Dual Boneswords
. Tyranid Warrior: Deathspitter, Dual Boneswords
. Tyranid Warrior: Deathspitter, Dual Boneswords
. 3x Venomthrope: 3x Toxic Lashes
. Carnifex: Enhanced Senses, Heavy Venom Cannon, Two Carnifex Scything Talons
. Carnifex: Enhanced Senses, Heavy Venom Cannon, Two Carnifex Scything Talons
. Tyranid Warrior: Deathspitter, Dual Boneswords
. Tyranid Warrior: Deathspitter, Dual Boneswords
. Tyranid Warrior: Deathspitter, Dual Boneswords
Thoughts
A clash of powerhouses here, all the nastiest new monsters of the Tyranid book up against a lethal wall of mobile Tau shooting. No mucking about on that front, just lots of Crisis suits with good access to re-rolls, able to zip round the board and obliterate anything standing out in the open. The Tyranid army is, of course, no slouch at shooting either, with two Harpies flying around and a couple of Carnifexes hauling around guns, but where it really gets mean is if you’re close enough for the Maleceptors to start melting some faces, and the Tyrants to chop you up.
The interesting dynamic that results from this is that trying to hold objectives other than their home one quickly becomes absurdly dangerous for either side, as they’re very likely to lose whatever they commit with, and neither army is really packing that many sacrificial units – just a couple of units of Warriors from the Tyranids, and one unit of Kroot from the Tau (I guess the Tyranids can also maybe use the Venomthropes and the Tau can split off drones with Designated Tasking). That means unless they can use the objective movement to set up some sort of favourable position in one of the corners, this is going to be a low scoring game primary-wise, so where does it go from there?
I think a lot of that depends on how long the Harpies get to live. While they’re on the table, the Tyranids have the ability to do big damage to the Crisis Teams with reach and a better story when things close in. Once they’re gone, however, it’s suddenly the Tau who can apply damage over time while suffering less retaliation, especially through use of Strike And Fade. In addition, the Tau have better routes for scoring secondaries just by grinding the enemy out of the game here – Bring it Down is maxable, and Grind probably quickly switches to favour them (or if they want to slightly gamble on the Harpies not going wild out the gate, TTL). The third secondary is definitely harder, but just low-balling Engage for ten might work. Over from the Tyranid side, Warp Ritual/Psychic Interrogation is free real estate here, but this list clearly wants to be playing Grind/TTL & Stranglehold and any version of that feels riskier here than normal.
A lot feels like it rides on how the game opens – if at least one Harpy dies without the Crisis Teams getting too beaten up, things look good for the Tau, if that doesn’t happen then they might end up struggling. Past that, it’s on both armies to be very judicious with how they ration out their units, and to ensure that they commit enough damage that whatever stuff the opponent does move forward with dies – with an expected low Primary score, accidentally giving up a turn of 8 or 12 is going to be a disaster.
The game did end up very low scoring – at least certainly by the standards of these two lists, both of which had a brace of very high scores under their belts (with Thomas in fact going in on 400/400pts from rounds 1-4). That suggests that both players understood that they had to play cautiously and carefully with their normally brutal lists, and the result was pretty close, with the Tau eventually taking it.
Result
Tau Victory – 75-64
Thomas Ogden – Tau – 1st Place
The List
See Showdown
Archetype
Tau Sept Goodstuff
Why it’s Interesting in 9th
OK fine, to be clear – “Whoops all Crisis Suits” as either Tau Sept or Farsight is still very strong as well, and gives you a very flexible and mobile army. Piloting it to success against the hardcore Leviathan menace suggests that Thomas was really using all these attributes to the max, giving a thoroughly deserved first place finish.
Matt Tarantine – Tyranids – 2nd ✪ Place
The List
Army List - Click to Expand ++ Patrol Detachment -2CP (Tyranids 9th Temp) [67 PL, 7CP, 1,240pts] ++ + Configuration + Hive Fleet + Stratagems + Rarefied Enhancements [-2CP]: 2x 1 Extra Bio-artefact + No Force Org Slot + Zoanthropes [7 PL, 150pts]: Power: Neuroparasite, 3x Zoanthrope + HQ + Neurothrope [5 PL, 100pts]: Power: Catalyst, Power: Hive Nexus, Power: Onslaught, Power: Psychic Scream, Relic: Resonance Barb The Swarmlord [11 PL, 220pts]: Power: Catalyst, Power: Psychic Scream + Troops + Hormagaunts [8 PL, 135pts]: 15x Hormagaunt, Toxin Sacs Hormagaunts [8 PL, 135pts]: 15x Hormagaunt, Toxin Sacs + Elites + Tyrant Guard [8 PL, 120pts] Venomthropes [5 PL, 105pts] + Fast Attack + Parasite of Mortrex [4 PL, -1CP, 80pts]: Stratagem: Hive Predator, Relic: Gestation Sac, Warlord Trait: Alien Cunning + Flyer + Harpy [11 PL, 195pts]: 2x Heavy Venom Cannon ++ Patrol Detachment 0CP (Tyranids 9th Temp) [44 PL, 760pts] ++ + Configuration + Detachment Command Cost Hive Fleet + HQ + Winged Hive Tyrant [11 PL, 190pts]: Lash Whip and Monstrous Bonesword, Power: Onslaught, Power: Psychic Scream, Relic: The Reaper of Obilterax, Warlord, Warlord Trait: Adaptive Biology + Troops + Tyranid Warriors [4 PL, 80pts] Tyranid Warriors [8 PL, 105pts] + Elites + Haruspex [9 PL, 170pts] Maleceptor [9 PL, 170pts]: Power: Hive Nexus, Power: Neuroparasite, Power: Psychic Scream + Heavy Support + Biovores [3 PL, 45pts]: Biovore ++ Total: [111 PL, 7CP, 2,000pts] ++
. Leviathan: Adaptive Adaptation (Leviathan)
. 3x Tyrant Guard (Lash/Cleaver): 3x Lash Whip and Bonecleaver, 3x Rending Claws
. 3x Venomthrope: 3x Toxic Lashes
. Adaptive Physiology: Dermic Symbiosis
. Leviathan: Adaptive Adaptation (Leviathan)
. Tyranid Warrior: Deathspitter, Dual Boneswords
. Tyranid Warrior: Deathspitter, Dual Boneswords
. Tyranid Warrior (Bio-cannon): Dual Boneswords, Venom Cannon
. Tyranid Warrior: Deathspitter, Lash Whip and Bonesword
. Tyranid Warrior: Deathspitter, Lash Whip and Bonesword
. Tyranid Warrior: Deathspitter, Lash Whip and Bonesword
. Tyranid Warrior (Bio-cannon): Lash Whip and Bonesword, Venom Cannon
Archetype
Leviathan Goodstuff
Why it’s Interesting in 9th
A few more unusual picks here amidst the standard Leviathan toolbox, most notably the Hormagaunts, who bring the ability to go very fast using Bounding Advance and still charge, throwing reasonably high volume melee with ObSec attached into whatever opposing stuff is skulking in ruins. Given that Craftworlds generally aren’t bringing much indirect now, this can be quite handy for dealing with some of their keepaway nonsense as long as you can stage the Gaunts mid-board, and though I think two units might be an over-investment, I can certainly see one becoming a flex choice seen more widely. A cool choice from Matt that adds a bit of variety to the overall Tyranid field.
The Rest of the Best
Five players finished on 4-1 records. They were:
- 3rd – Manik Gudimani – Tyranids: Leviathan goodstuff with a big Warrior brick.
- 4th – Brad Chester – Craftworlds: Ulthwe Goodstuff with Falcons, lots of Aspect Warriors and some Wraithlords to hold the line, plus another appearance for a full Skyrunner Conclave.
- 5th ✪ – Joshua Minich – Tyranids: See Showdown.
- 6th – Lyle Dixon – Tau: Crisis-heavy Tau Sept.
- 7th – Anthony Hilla – Harlequins: Dark Saedath with lots of Troupes and Bikes.
Wrap Up
That’s all for this week, but there will be plenty more exploration of the new metagame next time as the first GW US Open of the year comes around. The team will be bringing you all the hot news from that in my absence, so look forward to that, and best of luck to anyone taking part in the event!
