
I knew when we first started tossing around the idea for a series on gaming rooms that my story would have to be one in multiple parts. In part because I’ve built multiple set-ups over the last 10 years and in part because there’s a ton to say on the subject, with many different types of players whose space and needs are different, and so it would be helpful to try and cover as many of my setups as I could in order to be helpful to them. Over the last ten years I’ve gone from a one-bedroom Manhattan apartment to a two-bedroom in Jersey City to a decent-sized house in Houston, and for each of those my gaming space has changed dramatically.
Today I’m kicking off my three-part series talking about the first space I built while I was still living in Manhattan – a space that wasn’t really my own – and the planning and requirements that came along with that.

I’d wanted to live and work in NYC ever since I spent a summer at my grandmother’s place in Queens. Few places on earth buzz with the same energy as the city and as a kid I’d loved going to Neutral Ground to play in Magic and Overpower tournaments. Later I’d hoped very badly to attend NYU (but been unable to afford it). So it wasn’t a shock when, shortly after my wife and I married in 2010, we moved to the city. We had a small apartment in Battery Park City that at the time, was a steal at $2500 per month for about 700 square feet.
Moving away from your friends, even as an adult, is tough. It takes time to build new networks in new places and it’s easy to lose touch with the friends you leave behind. Staying friends isn’t something you can just take for granted, either – bridging gaps in lifestyle and geography takes a lot of work. I’d been looking for a reliable way to do that when, in 2012, my parents moved to Wilmington, Delaware. I’d recently come back around to 40k in 6th edition, and now that I had a place to stay that was only an hour from my Maryland friends, it seemed like the perfect time to start making regular trips down to play. We started playing at Greg’s house, in the table he kept in the basement. It was a good start, but I wanted to build a setup of my own, in part so that we could alternate between driving down there from my parent’s place and them coming up, and in part because I wanted to build a nice table.
Alright 500 words in and I’m finally getting to the part about building the space. My parents are great – they’re absolutely game for my weird hobby bullshit, and if it meant me visiting more often, they were absolutely up for me storing stuff at their place. My mom pulled the pro strat of asking us what toiletries we wanted so we could just stock the bathroom down there, ensuring we wouldn’t have to travel with any of that bullshit. The guest bedroom was functionally ours, since we were using it about once per month.
Despite this however, it was still their space, and I needed to be mindful of how much of it I’d use and where we’d put things when they weren’t in use. So there were a few considerations I’d need to take in mind when building this particular space:
- Where we’d be gaming
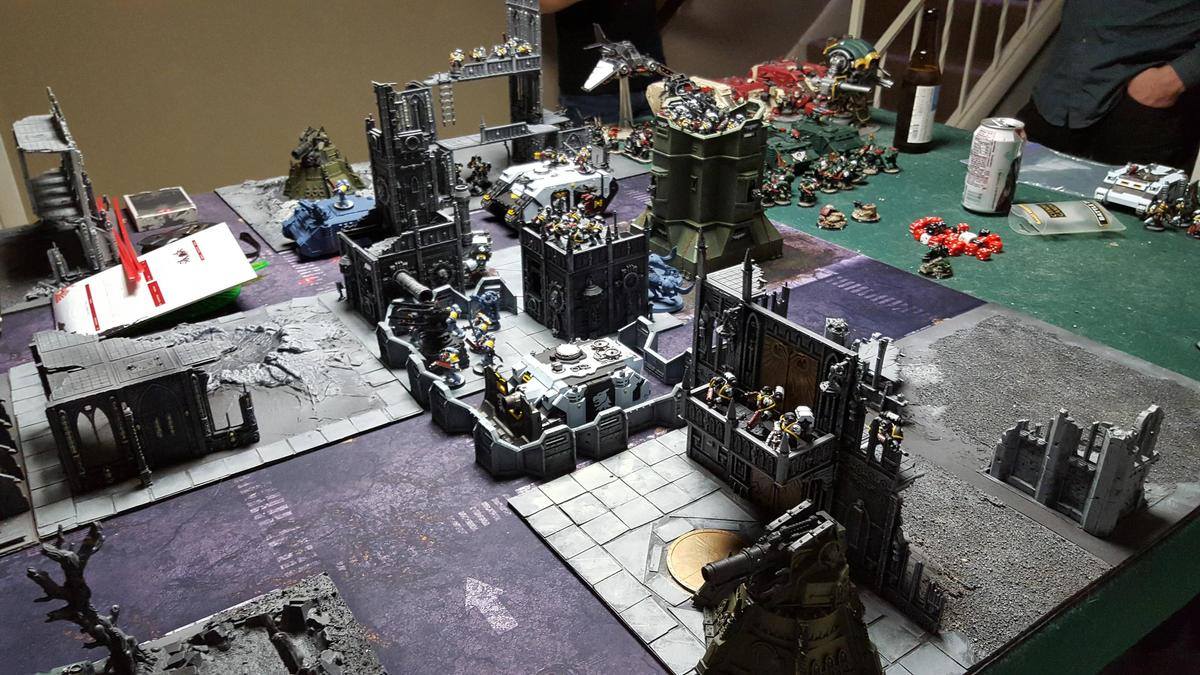
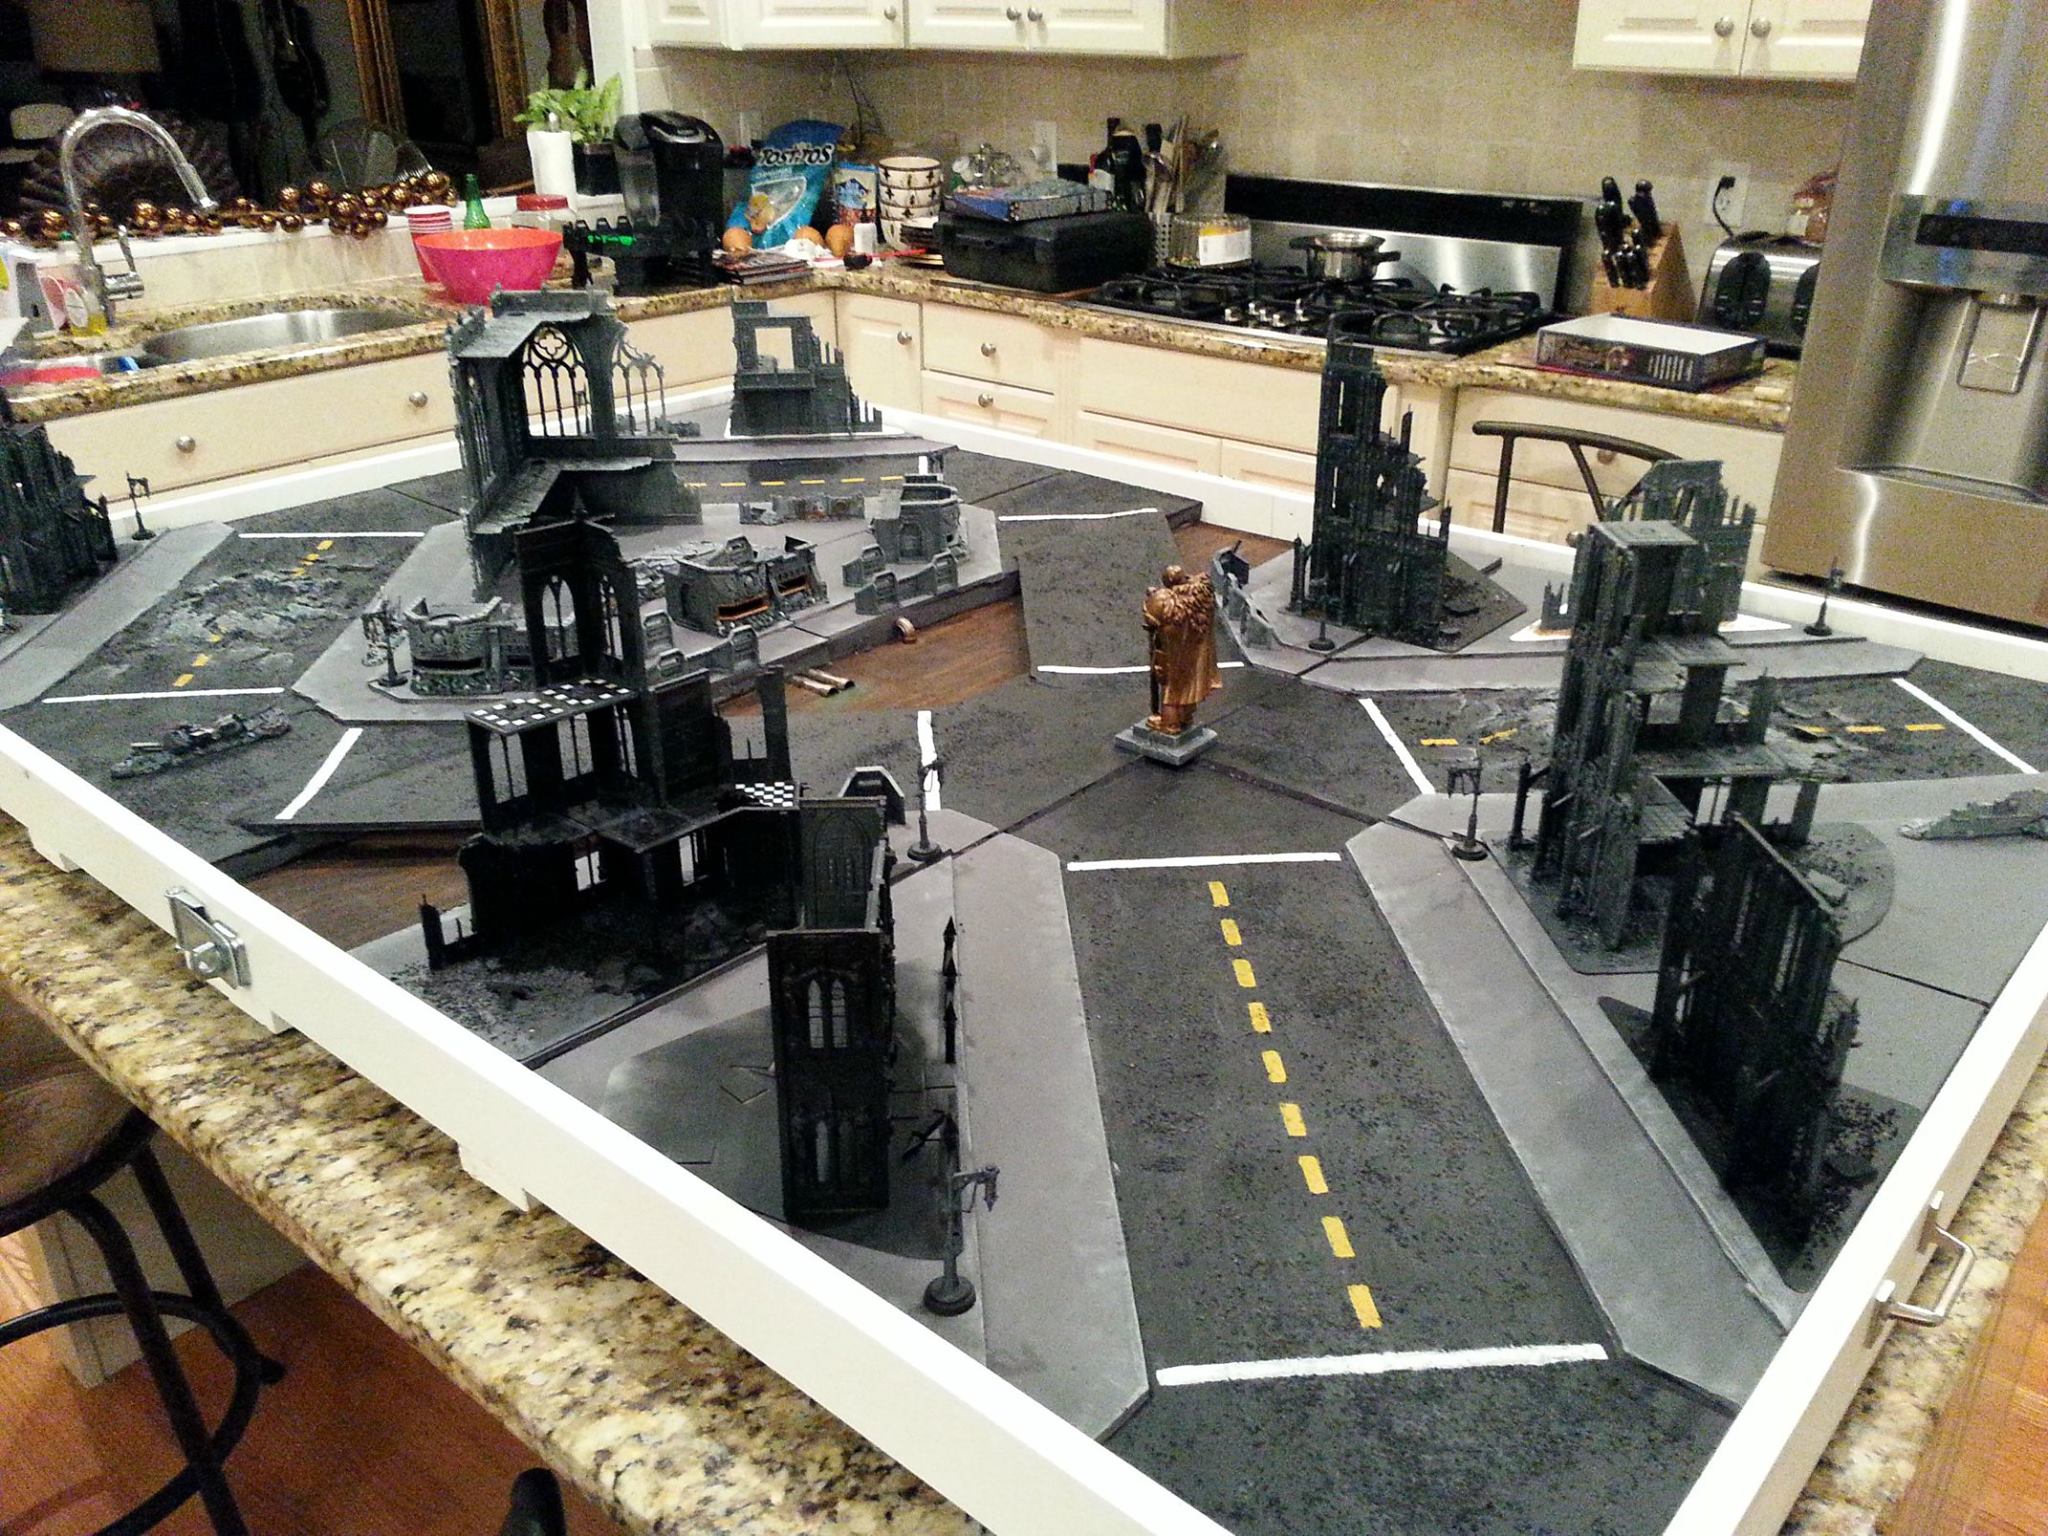
One of the best things about my parents’ house in Delaware was that they had a large (bigger than 6’x4’), marble-top island in their kitchen that was perfect for playing a game on, and they were cool with me using it for this purpose. That’s a great start, but it does mean that we’d need to set down something on top of that surface. Now these days I’d just put a mat down and call it a day but at the time mats were actually pretty rare and also, I wanted M O D U L A R T I L E S. So I decided to build something a little more detailed. In order to build something to suit both purposes, I needed a frame to hold the tiles.
- Transportability
I’ve talked before about building the table for my parent’s house – you can follow along on the construction details here – but one key element to it was that the frame needed to be both easy to store in their garage and also be something we could transport up a flight of stairs, to their second-floor kitchen. And so the frame was designed and built to be in two halves that hinge-lock together in the middle.
- How it could be stored
The next thing I had to be mindful of keeping this stuff at my parent’s place was how I’d store everything – They had some closet space but a lot of it needed to be kept in the garage. That meant I’d need to put the tiles I built on a shelf, which would mean stacking them together. When I was designing my tiles, this meant they had to be relatively flat, and couldn’t incorporate features that would get messed up when I sat other tiles on top of them.
- Don’t fuck up the countertops
Gaming in the kitchen was great, but I needed to be mindful of things like the surface we were playing on. So I took care to round corners on the table where possible and put plastic feet under the frame to avoid scratching the countertops.
Ultimately most of the decisions that went into this space were based on creating something that could be set up and broken down quickly, and would store in a compact enough space that it wouldn’t be a burden on my folks. The space itself was interesting because storage and flexibility were the key concerns – they had a large, open space to game that was very comfortable, so the space itself wasn’t really an issue. I’d take many of the things I learned building this space with my to my next apartment, when I built my own gaming space in a 2-bedroom Jersey City apartment a couple years later.
I put a ton of work into designing and building the table itself, and all of that process can be found in my article on building the table:
The Fabricator General: Better Friendships Though Table Construction
There were two places I’d end up playing on this table at my parents’ house. When the weather was nicer, we put the table on sawhorses in the garage, opened the door, and played a game “outside.” While the table wasn’t in use, the tiles for it were stored on shelves in the garage, along with the frame. This made garage gaming the easiest possible setup, though something we’d avoid most of the time, since it turns out that gaming in the kitchen is amazingly convenient.

On that note, we played the vast majority of games in my parents’ kitchen, where the island comfortably fit the slightly-larger-than-6×4′ frame I’d built. This means the kitchen could get a bit messy at times, but there were a few huge advantages to this. The first is that the island, like most kitchen islands, is set higher up, with stools for access. As you build your spaces I cannot recommend this enough – BUILD YOUR TABLES HIGHER OFF THE GROUND. The standard height of a US table is between 28 and 30 inches, but you want your table to stand a minimum of 30″ off the ground, and ideally something closer to 36″, which is the (relatively) standard height of a bar in the United States. This will mean less bending over your table as you play, and for the older folks, much less strain on your back after long gaming sessions. Ask Greggles why he had to bow out of the Goonhammer US Open Narrative event after day 1 and he’ll tell you it was because “40k is a young man’s game.”
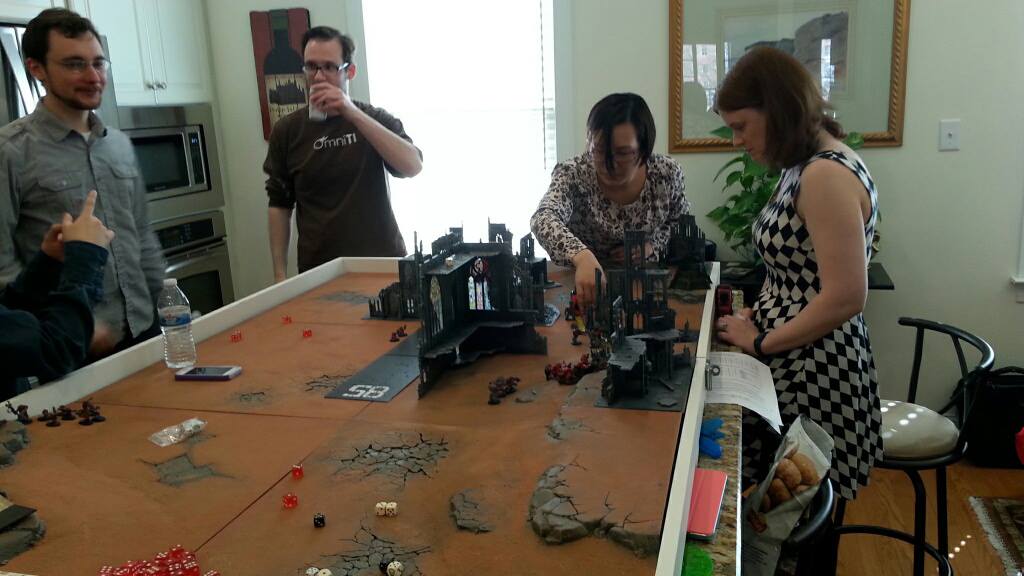
The other major advantage to playing in the kitchen is that you are in a space that is already equipped with decent lighting, a fridge, and lots of other countertop space (hopefully) for snacks. The downside is that you will not be playing on carpet, so having chairs in this kind of area is a must – standing around for 3-6 hours of gaming in bare feet on hard floors will also murder your back as you get older. I once wrote about the Paulus Campaign Apocalypse game we did at BuffaloChicken’s house; that was an extremely fun 6-7 hours of gaming, drinking, and eating and the next day I had to attend a wedding but found I could barely stand. Fun times!
Over the next two years or so after I built the table I’d go back down to visit about once per month and we’d alternate between visiting Greg’s place and gaming there and the crew coming up and visiting my folks’ place for the day. This gave us a good cadence of 10-18 games per year, depending on the size of games and how many we could manage (we were much more casual players in those 7th edition days), and also gave the wife and I good excuses to travel and visit our friends back in the MD area but felt like a decent compromise since they’d have to drive up the hour or so to visit us and meet us “halfway” for some of those. And my folks were happy because it meant I was visiting and we’d hang out and get dinner and all that.
The biggest challenge with something like this is that, while space wasn’t really the issue – my parents’ house had lots of space to store things – 40k takes up a lot of space and we’re a sloppy group. So it was just as important that, after each game, we make sure to go through and appropriately clean up after ourselves, packing up all the terrain, disassembling ad stowing the table and tiles, doing the dishes, hauling out the trash, and so on. This is one of the key things when you’re working in a space that’s not your own, in my opinion – whether it’s a hobby store, a friend’s place, or your parents’ house, make sure you clean up after yourself and leave the place in the same condition you found it. That goodwill that initially invites you to use the space is going to evaporate real quick if you leave lots of extra work for your hosts every time you have a game.
Next Time: Building a Gaming Space in a small apartment
Eventually my parents moved back to Texas, prompting me to split all of my wargaming stuff and taking away my “halfway point” base of operations in Wilmington. We’d already moved across the river to New Jersey at that point and even with a bigger space I didn’t really have room for the table I’d built at their place, let alone the tiles. I ended up giving the tiles (including the Citadel set) to SD47, along with some of the terrain. I kept some of it, but I was already working on plans to build a space in my apartment that could be assembled and disassembled as needed. Next time I’ll talk about building that space and the work that went into it.
Have any questions or feedback? Drop us a note in the comments below or email us at contact@goonhammer.com.
