
Welcome back, dear reader, to the second in a three-part series on my gaming spaces. Last time I spoke about building a space at my parents’ house and what kind of parameters I needed to work around there. Although I had moved to a one-bedroom apartment in New York City, I was fortunate enough to have my parents offer up some of their space only a couple hours away. Shortly after my wife and I moved to a two-bedroom apartment in New Jersey, my parents moved back to Texas. At the same time, I’d been gaming more in the area with BuffaloChicken and some of his crew. He’d convinced several of them to jump into 40k and they’d done so with gusto. Within a few months, we had a regular group of 40k players in the area ready to go. What we didn’t really have however, was a centralized space – there isn’t really a game store in Jersey City and there was only kind of one in Hoboken later on and that one closed. So what we were left with was a need to build our own gaming spaces in apartments that were never quite big enough to accommodate a 6’x4′ table.
In this article I’m going to talk about making a gaming space when space itself is scarce – how do you build an adequate space when your entire living area is less than a thousand square feet?
Give up on the idea of a full table
The first thing you need to do when working with limited space is give up the idea that you’re going to have a dedicated table. A large, always-up, 6×4-foot table with raised sides isn’t going to happen unless you’re living alone and OK with sleeping on your Warhammer table. When the biggest challenge is figuring out where you’re actually going to put the table in your space, how people will play around it, and where you’ll stow it when its not in use, you’ve got to make some sacrifices. While Warhammer tables have recently decreased in size to 60″x44″, a 5-foot-by-4-foot table is still a big ask for small spaces, and larger than any table you’re liable to have. That means that you’re going to need to separate your playing surface from the table itself – you need a playing surface that you can drop down on top of a smaller table in order to create the surface you need.
When I first got back into 40k in 6th edition after a few years away, I did so playing against BuffaloChicken in the small apartment he lived in with his brother and parents up in Washington Heights. The room they had there was barely large enough to accommodate a table and he made do by taping a paper game mat (neoprene mats weren’t widely available yet) to a 6’x4′ piece of plywood that he’d store behind his couch between games. To set up, he’d take the board out, plop it on a folding table in the middle of his room, and then put his terrain collection on it so we could game.

My friend Ethan pulled a similar trick at his place in the Jersey City Heights – similar to my folks’ place, his apartment had a decent-sized kitchen island and he kept a trio of 2’x4′ hardboard sheets around that he’d lay down over top of the island, then lay a paper mat down on top of that. In fact, it might have been the same mat BuffaloChicken had; BC later got a neoprene mat and he might have given his old paper mat to Ethan. I’m not 100% on that one. But it looks very similar. Anyways, this is pretty much the way you have to do things when you’re working with a limited-space apartment; you need to have your placing surface itself be stow-able until it’s time to game.
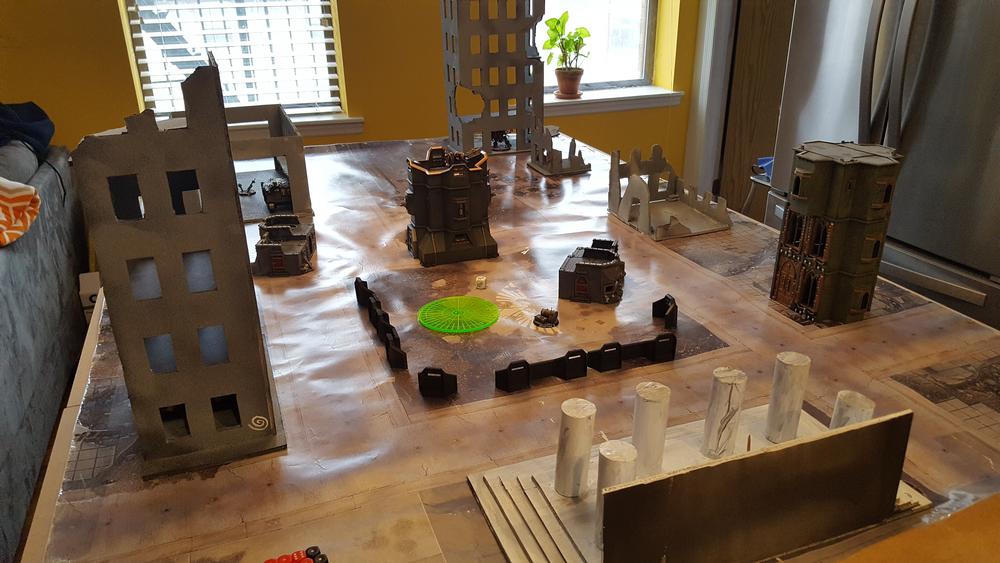
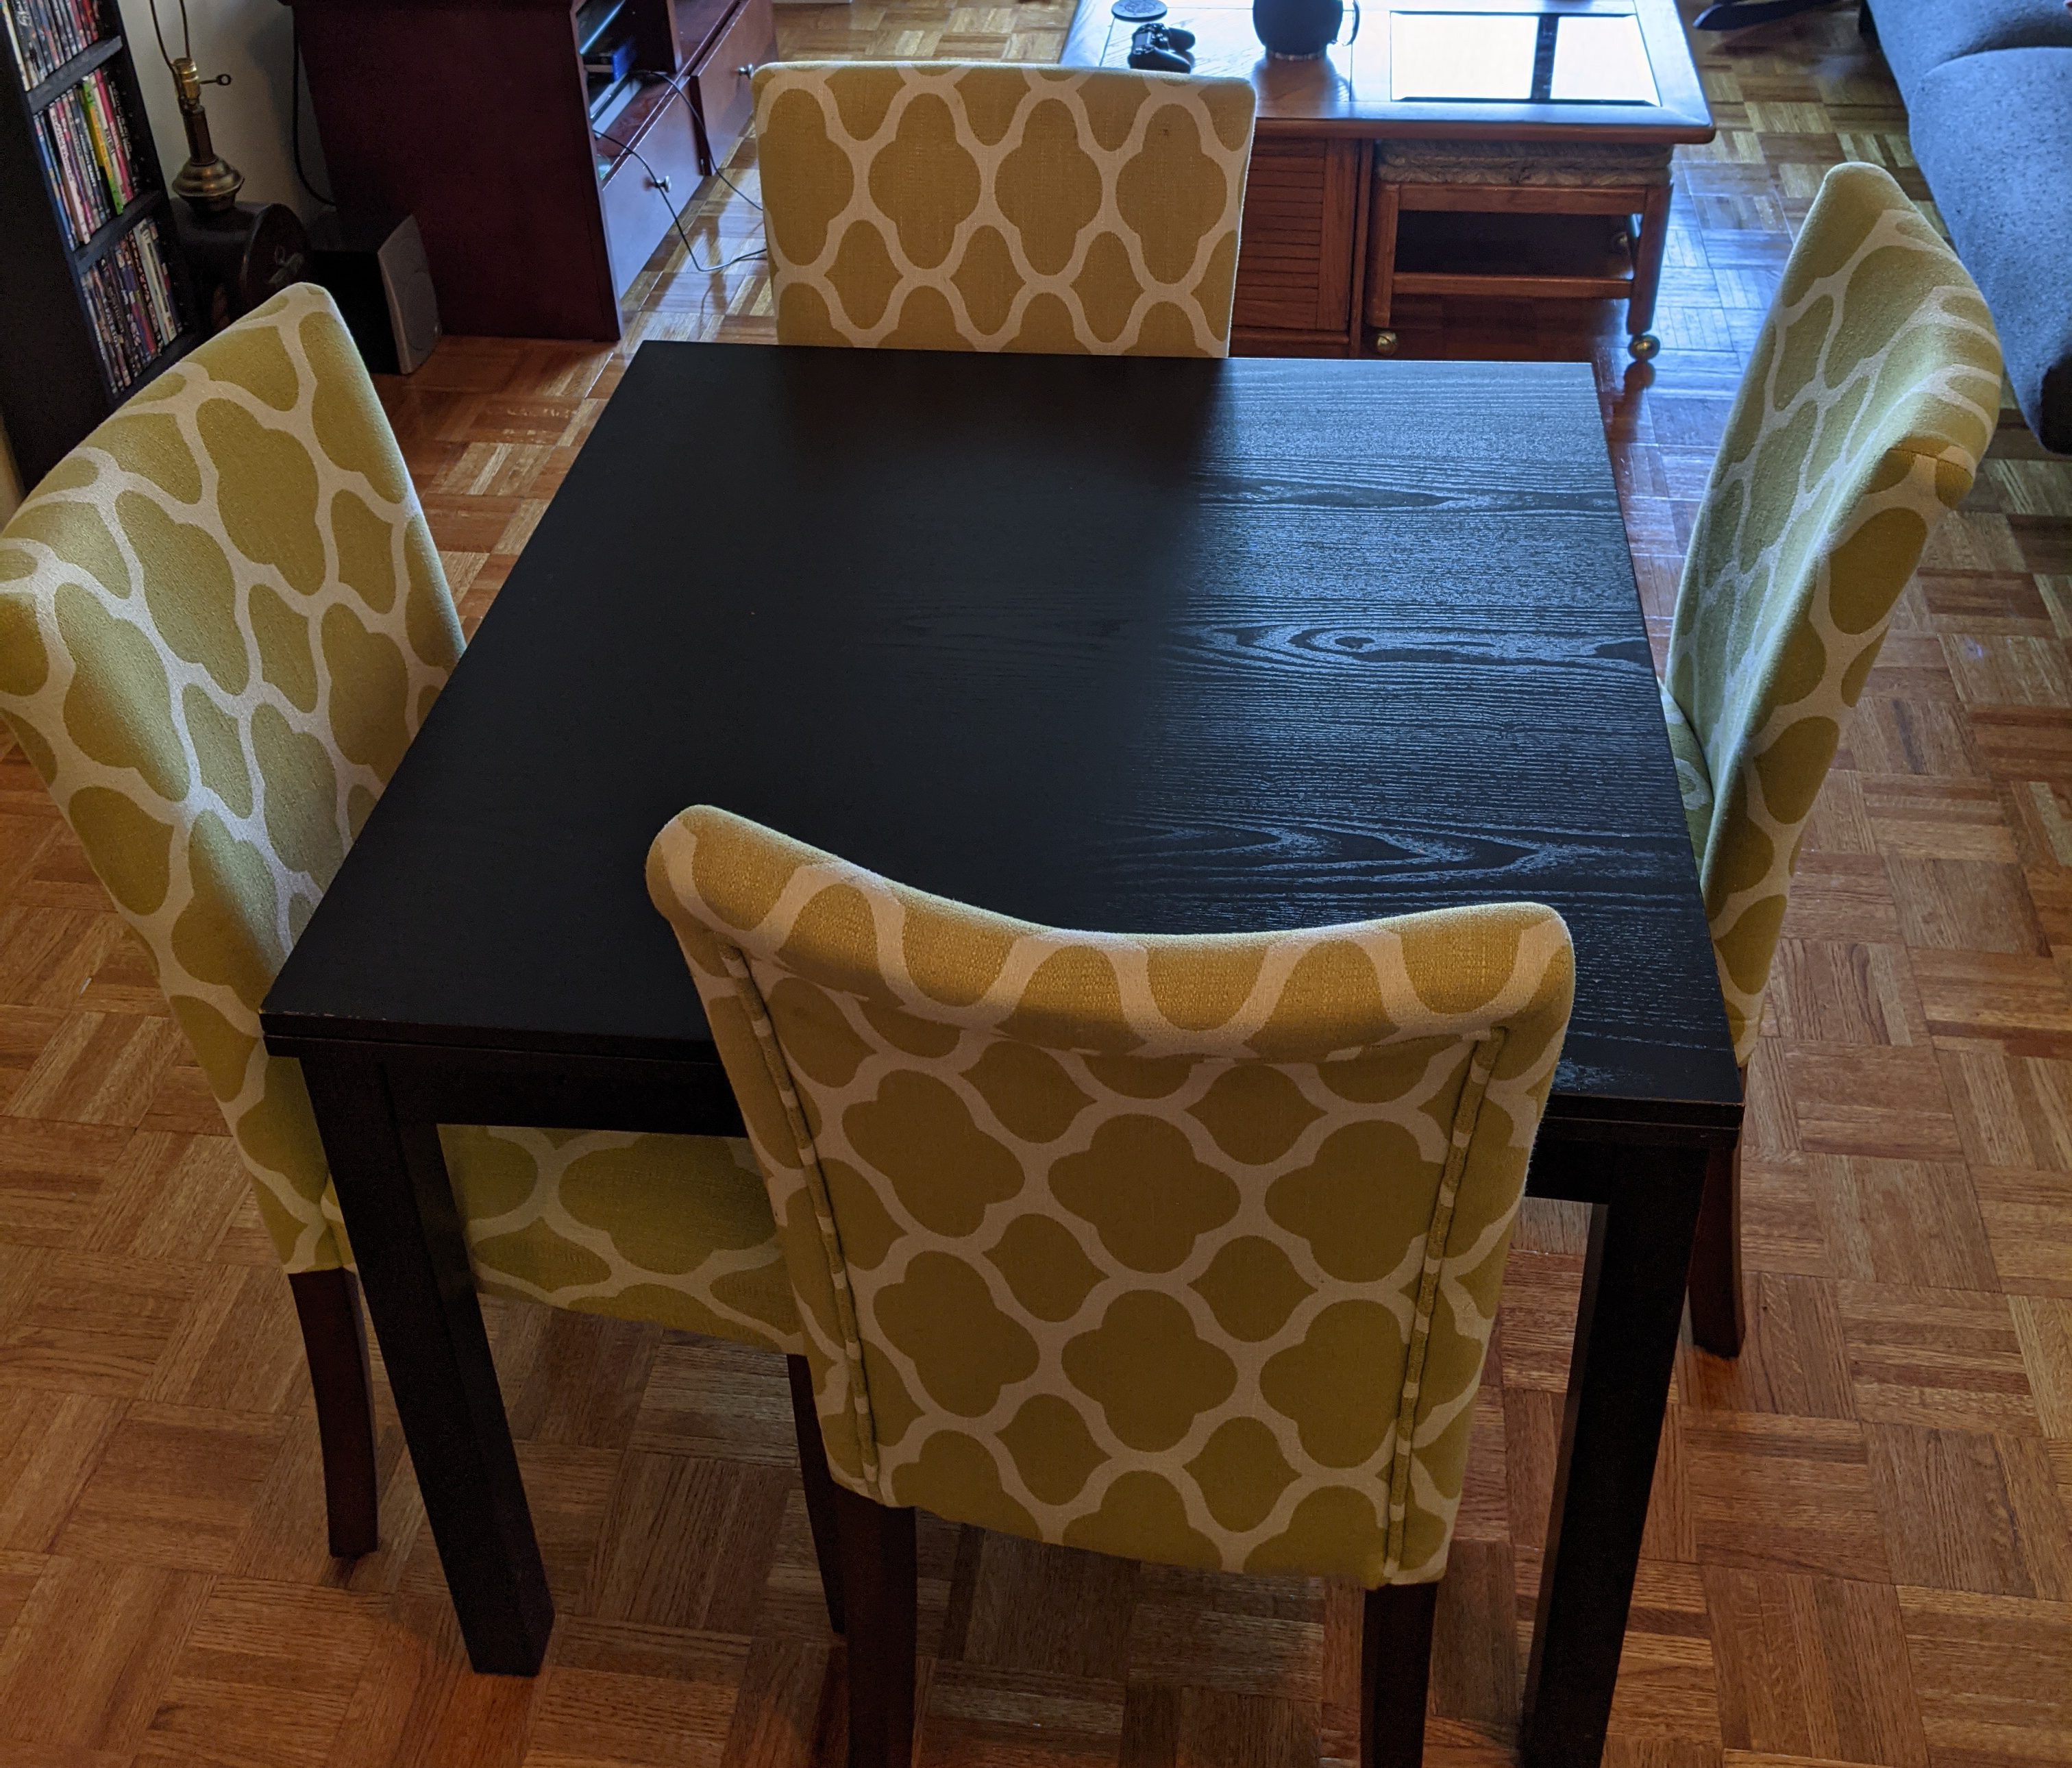
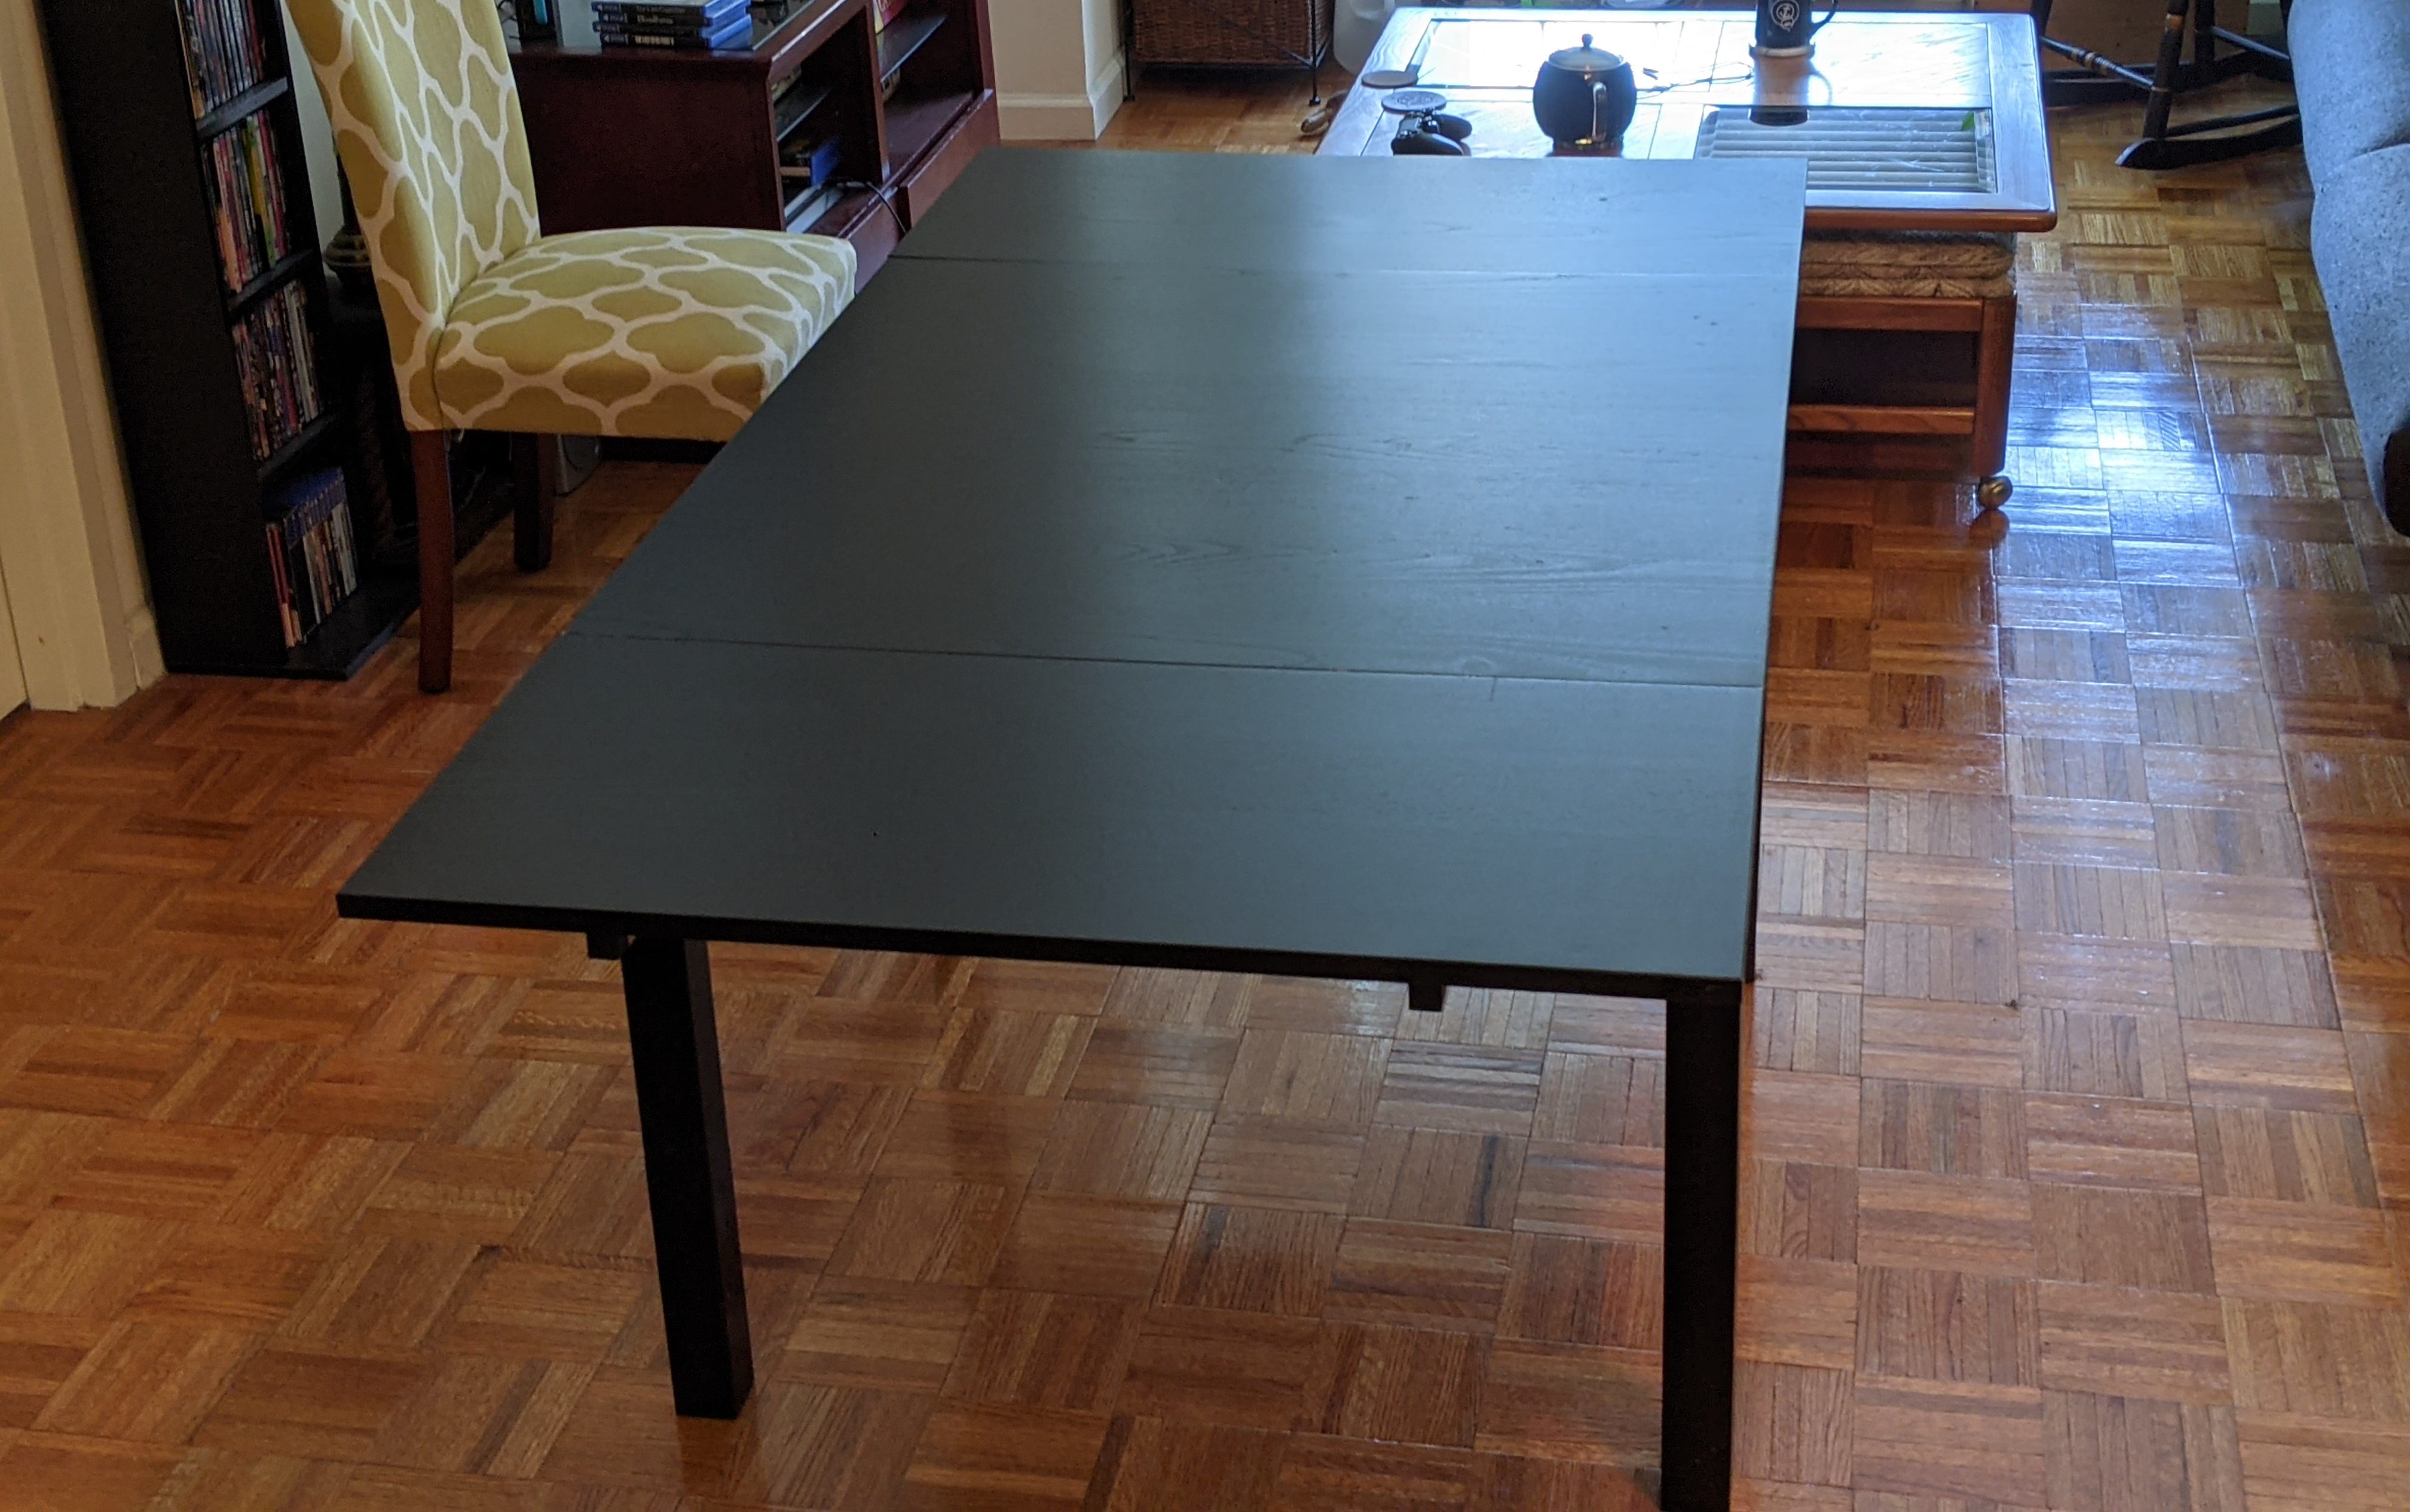
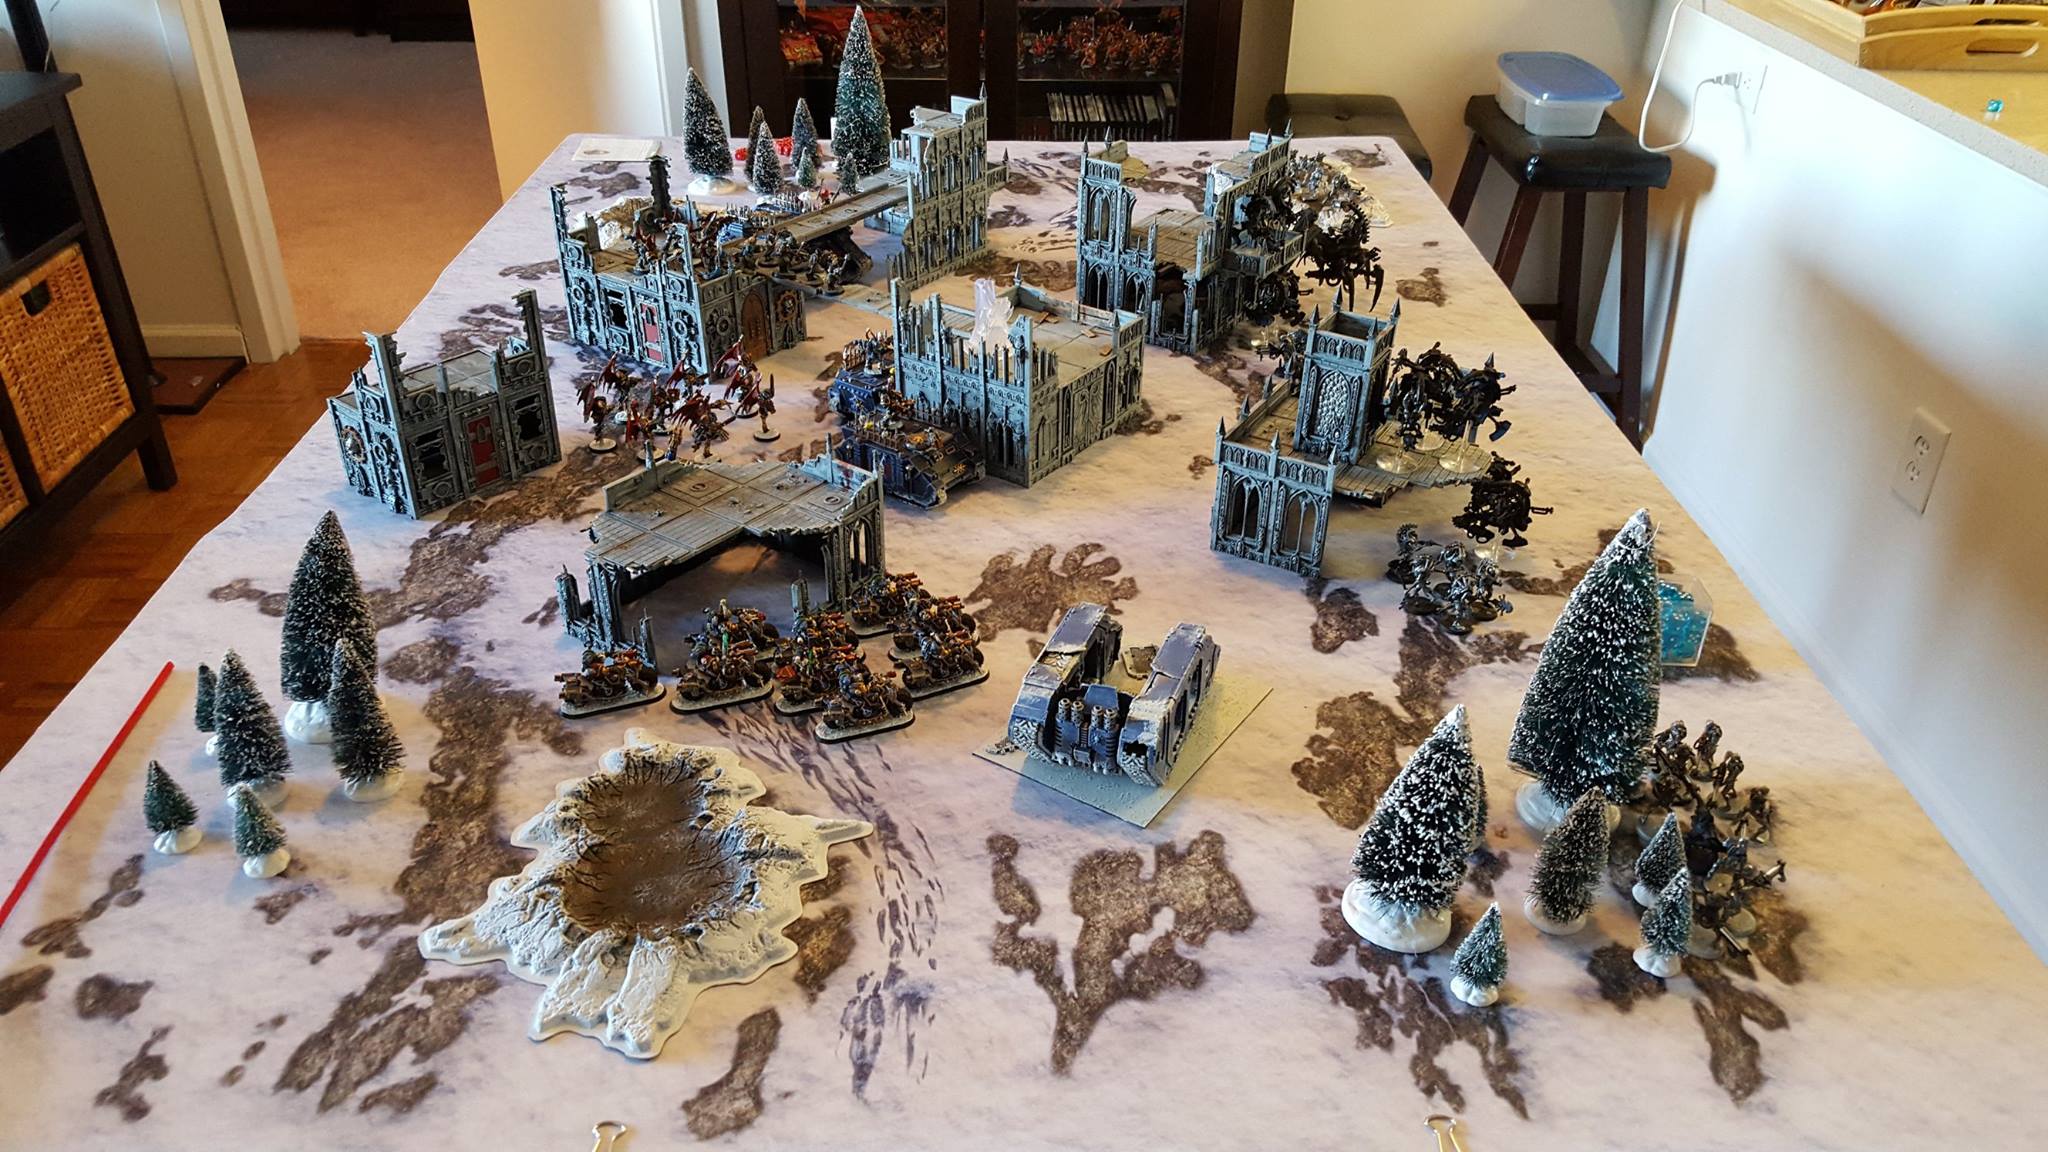
As I set out to build my playing space in Jersey City, I sought to emulate these setups, but having already been married for five years I also needed to ensure that any solution I created could stow away in an aesthetically satisfactory way and any table I bought would have to be on the wife would approve. The good news is that as we moved to Jersey, a new dining table was on the dockett of purchases. We ended up finding a very solid black table at IKEA. It’s 3’x3′ – perfect for X-Wing and a few other games – but the best feature of the table is that it expands outward on both sides, up to about 5.5’x3′.
This expanded size is perfect for laying down a proper playing surface.
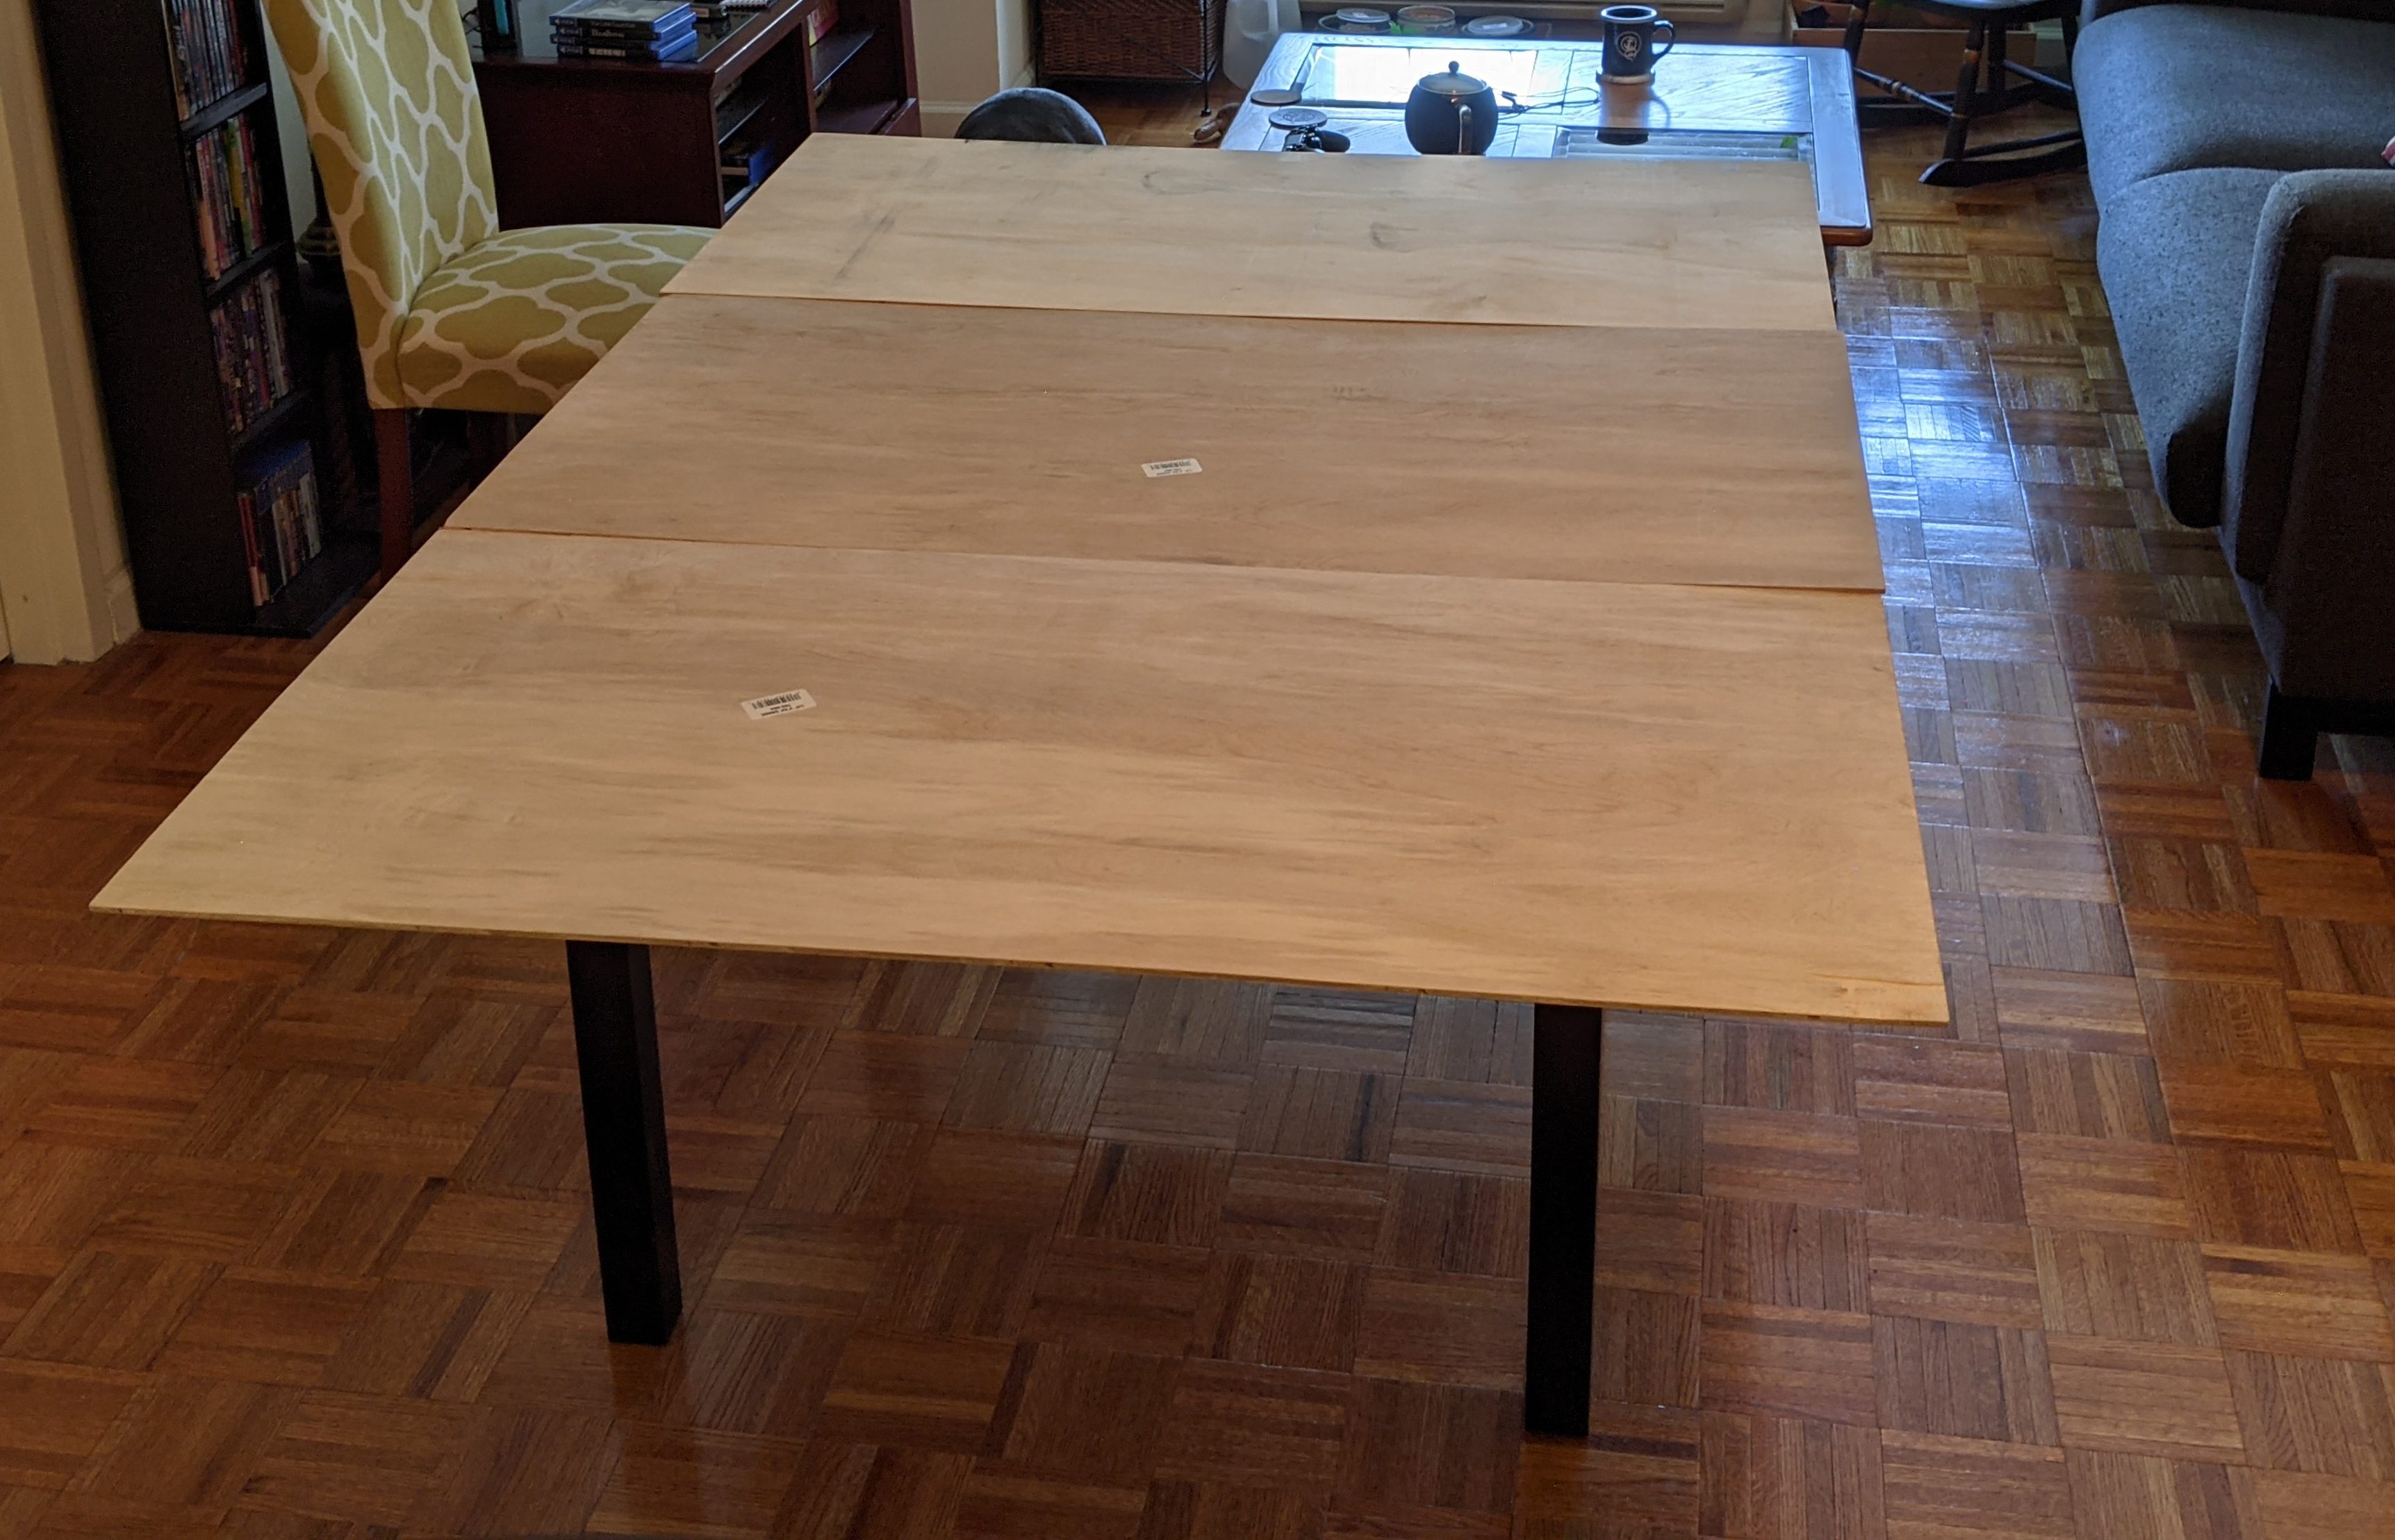
On the subject of the playing surface, that’s a different piece entirely. I ended up taking a cue from Ethan – I hit up Home Depot for 2’x4′ plywood sheets that were relatively light. Those could be laid across the table surface to create the full playing surface, and what I’ve been looking for. They’re not super light, but relatively so in the context of building a playing surface – this is the real question you’ve got to ask when you do this: How thin can my surface be? A thinner surface means that the material will be lighter and easier to stow, but also flimsier and more wobbly. Because of the size of my extended table, I’d have about a 6″ overhang on the long edges and a few inches on the short edges. That’s small enough that I could get away with 1/8″ thickness, but the more overhang you have, the thicker your material will need to be.
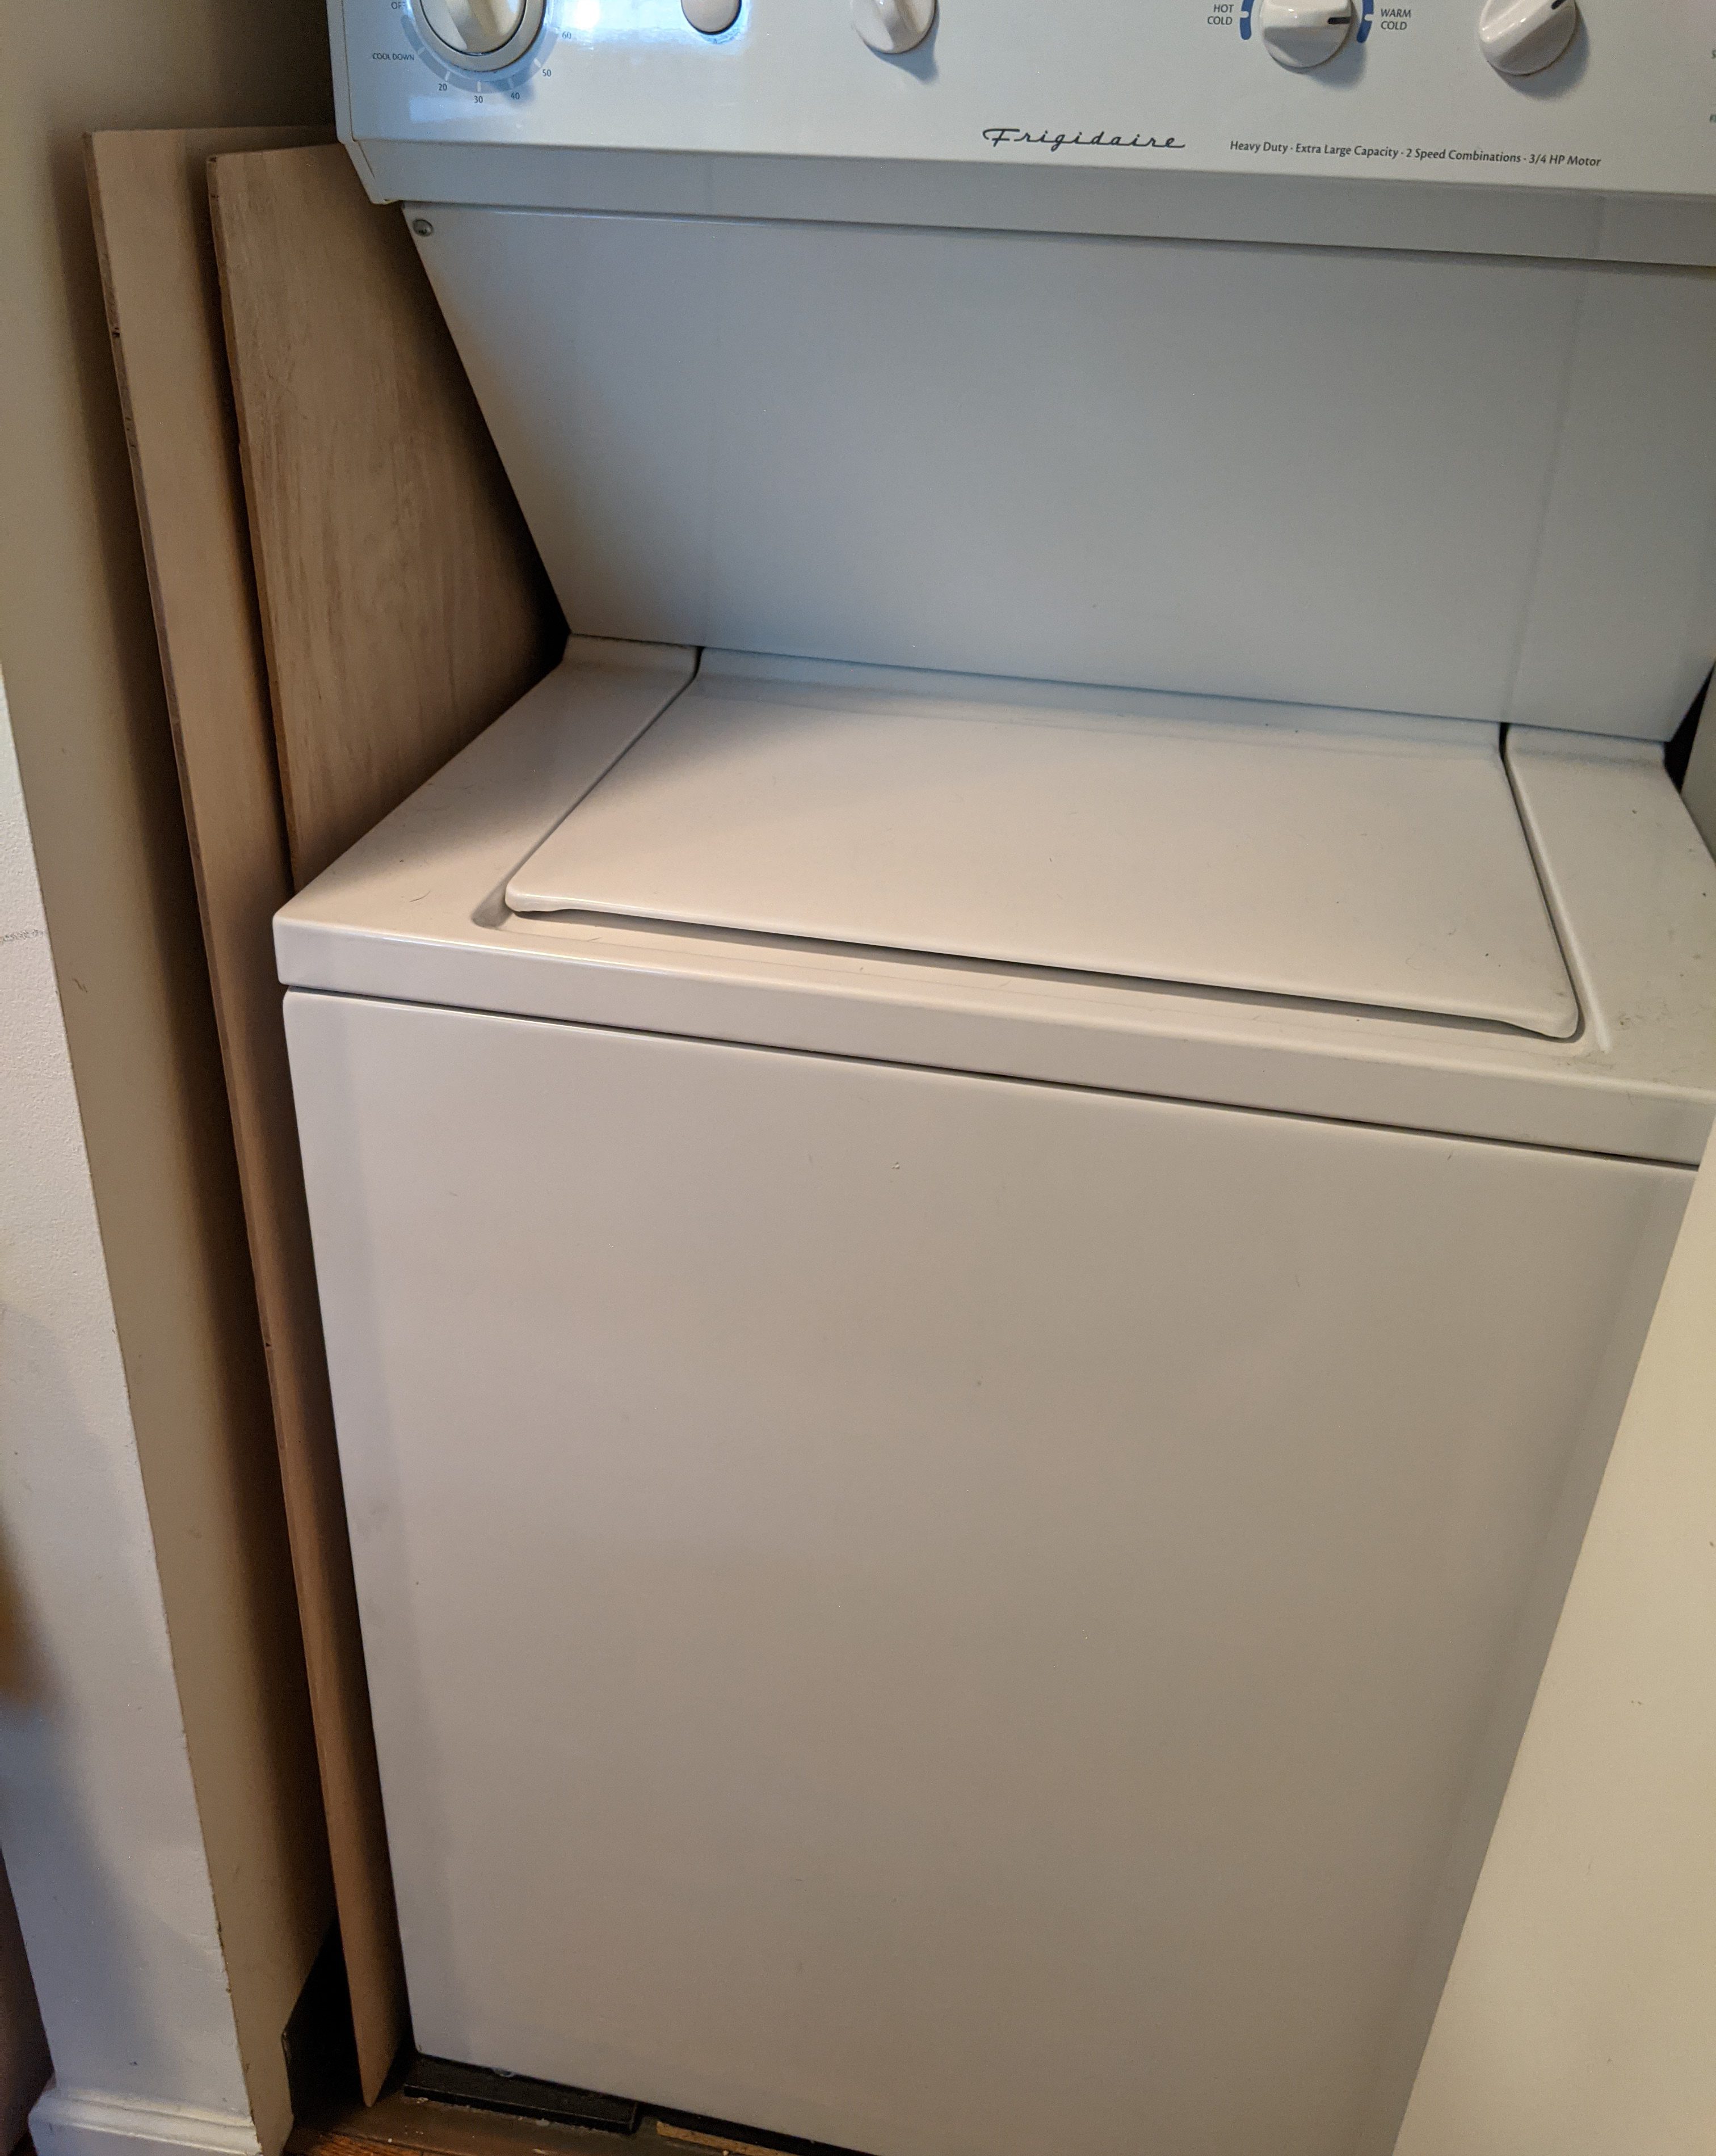
Storage is also the question – one of the good things about moving to Jersey City was finally having a washer/dryer in my apartment, and there was ample space next to that for storing the plywood sheets.
The other thing you’ll want to do is invest in some non-slip cabinet liner. Those sheets are liable to slip around on your table, so what I did was lay down a layer of cabinet liner on top of the table before putting down the plywood sheets. This, in concert with the neoprene mat I laid down on top, essentially kept the table in place, though someone bumping it with their hip would still move it considerably (though typically not catastrophically). Only so much you can do there. After laying down the sheets of plywood, a neoprene mat did the rest – I’d lay out two or three sheets of plywood depending on the game size, then use large butterfly clips to secure the mat to the wood.
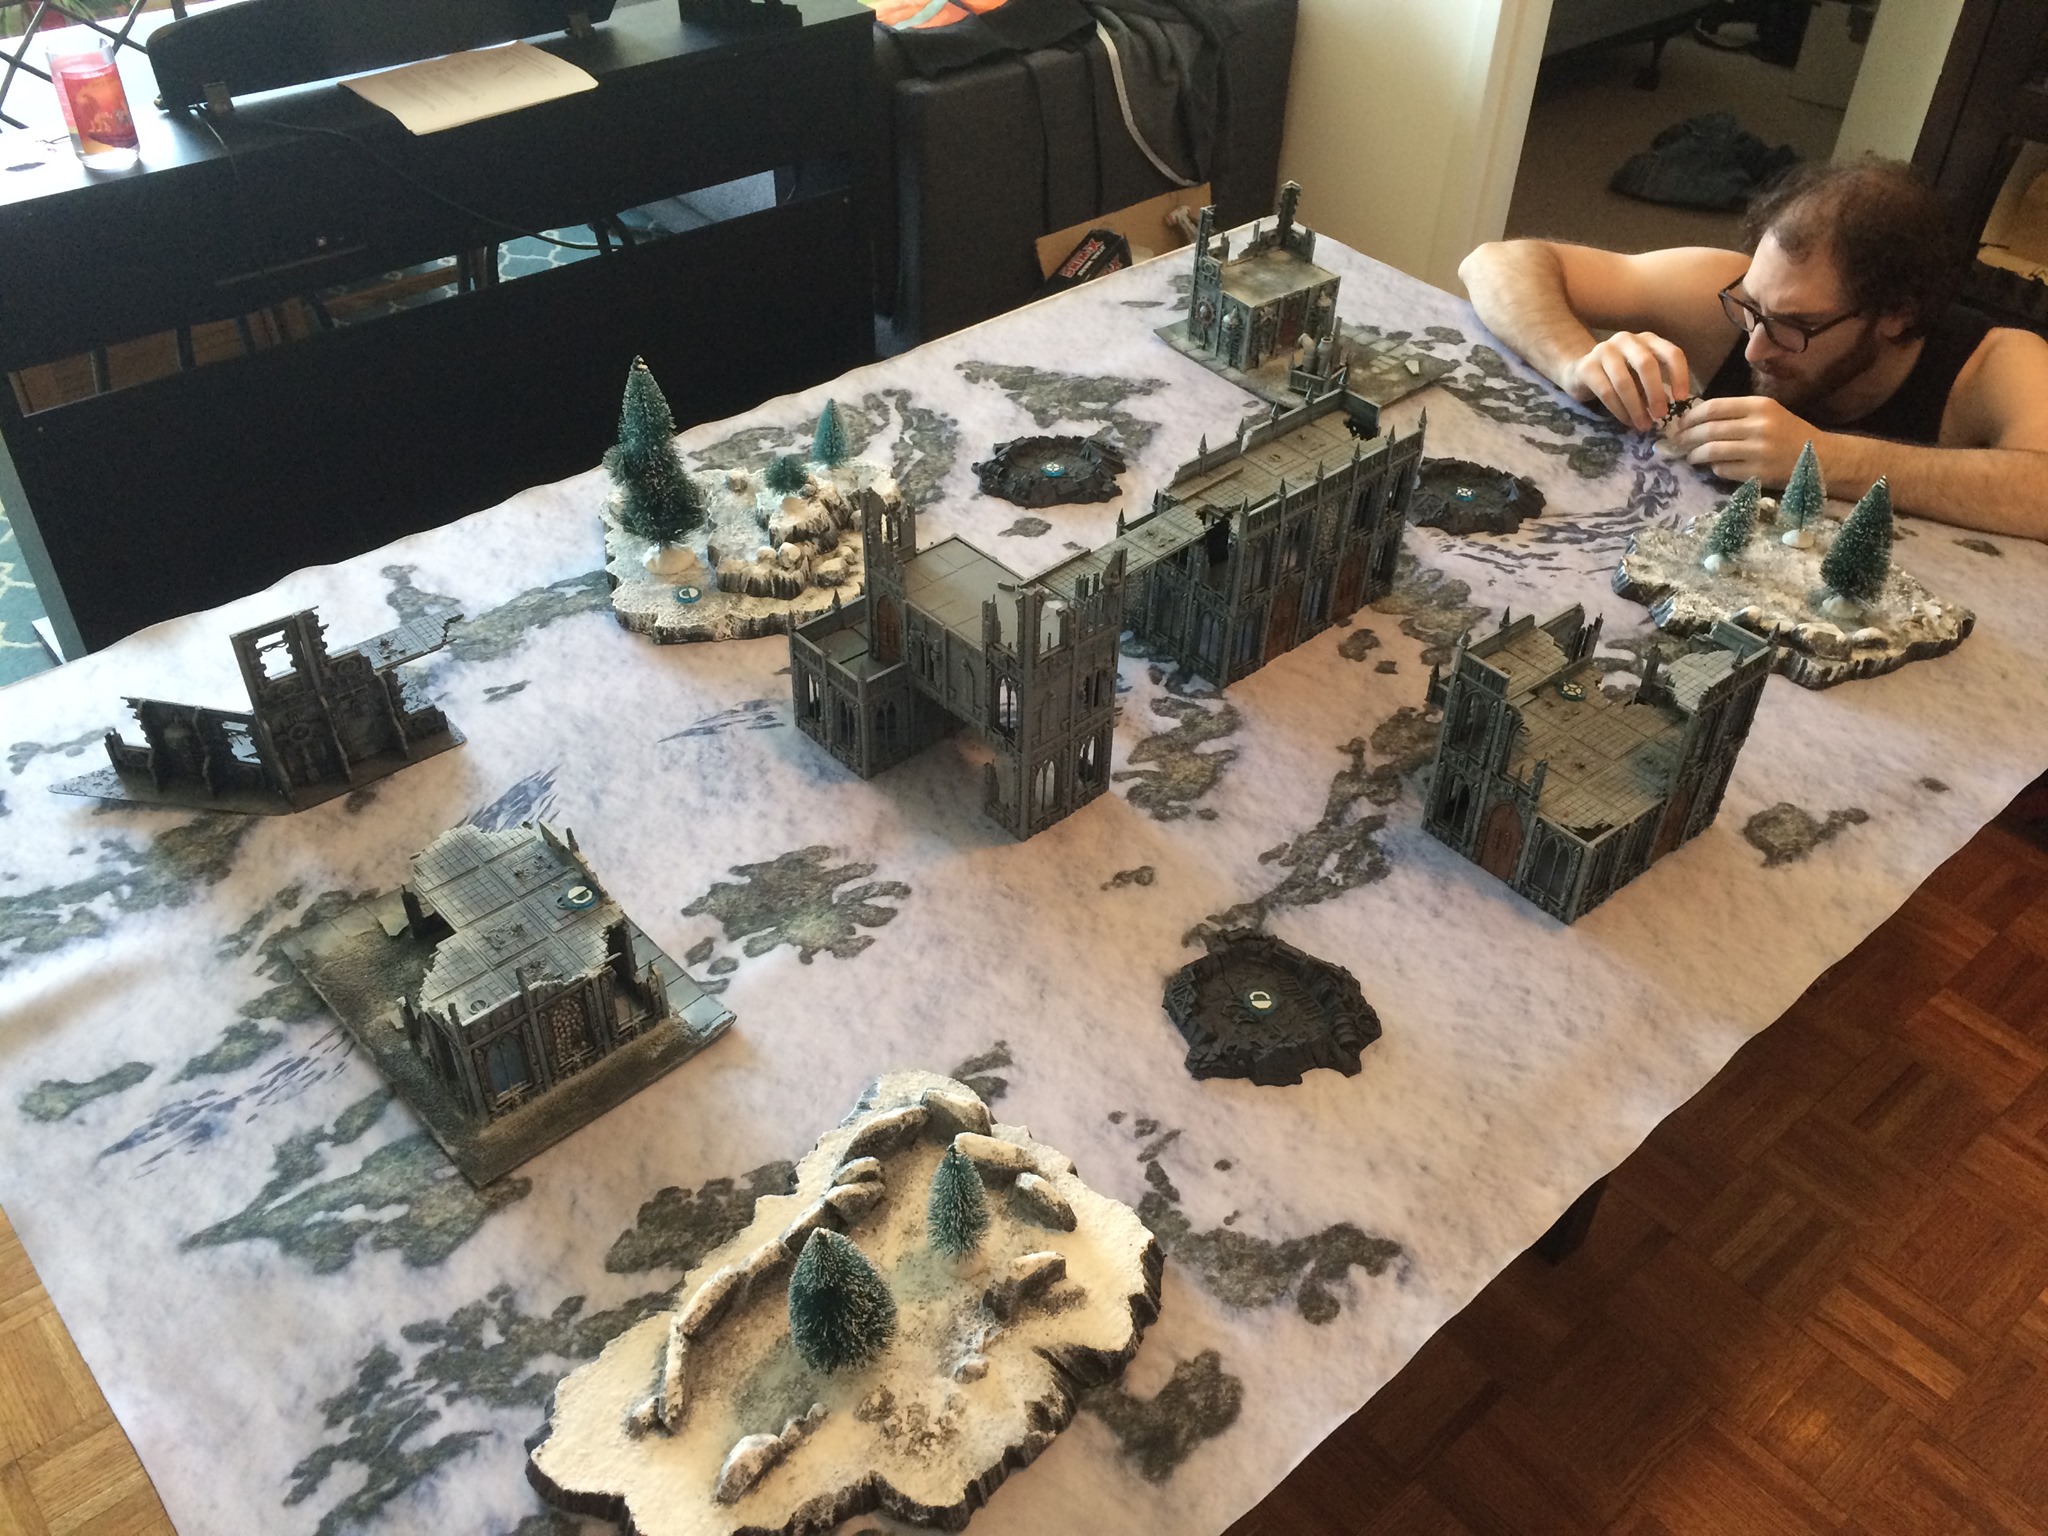
This layout worked pretty well for me during the four and a half years I lived in that space. The biggest downside was having to move the chairs out of the room whenever we’d game, but all things considered the table left a couple of feet of room to move around it and was plenty sturdy. It’s even more comfortable with the extra foot of space for putting armies and stuff on. The bigger challenge was terrain storage – I ended up using some closet shelving and the tops of my IKEA DETOLF cases to store the terrain while it wasn’t in use, stacking higher as a way of mitigating the limited floor space.
Ultimately making a small space work for gaming is feasible, but you’re going to need to make some concessions. For my money, the expanding table and plywood boards version gets you the most bang for your buck, and you can easily store some plywood sheets behind a couch or in thin spaces – just be mindful you aren’t scraping paint off the walls when you store them. And be sure to get no-slip cabinet lining for the table – it both protects the table’s finish and also prevents your setup from sliding around every time anyone leans over it.
Next Time: Everything’s Bigger in Texas
That wraps up this look at creating a hobby space in cramped quarters. I lived in that Jersey City apartment for nearly five years before we moved to Texas during the pandemic to be closer to my family and buy a bigger place. I’ve already talked about building the gaming table I play on there but next time I’ll talk about the finishing touches I put on that table as well as the space I built around it, which was nearly as time-consuming an endeavor. Until then, if you have any questions or feedback, drop us a note in the comments below or email us at contact@goonhammer.com.
