
Alright, Dear Reader, this is it. The final part in my three-part series on building a gaming space. I’ve previously talked about the space I built at my parents’ house, the stow-able, modular table I built for gaming in a cramped New Jersey apartment, and today I’m going to talk about the dedicated gaming room I built in my house in Texas. If you missed my last two articles, you can find them here:
We didn’t plan on moving to Texas. It’s just something that kind of happened last year during the pandemic. After schools in New Jersey closed, we decided to go stay with my folks in Texas for a bit; they had more space, and any parent will tell you that having grandparents around makes things a million times easier. So we made the trip down and what we initially thought might be a week or two turned into months and we ended up looking at houses kind of “for funsies” and before we new it, we’d bought one and worked out how to work from home with our companies long-term.
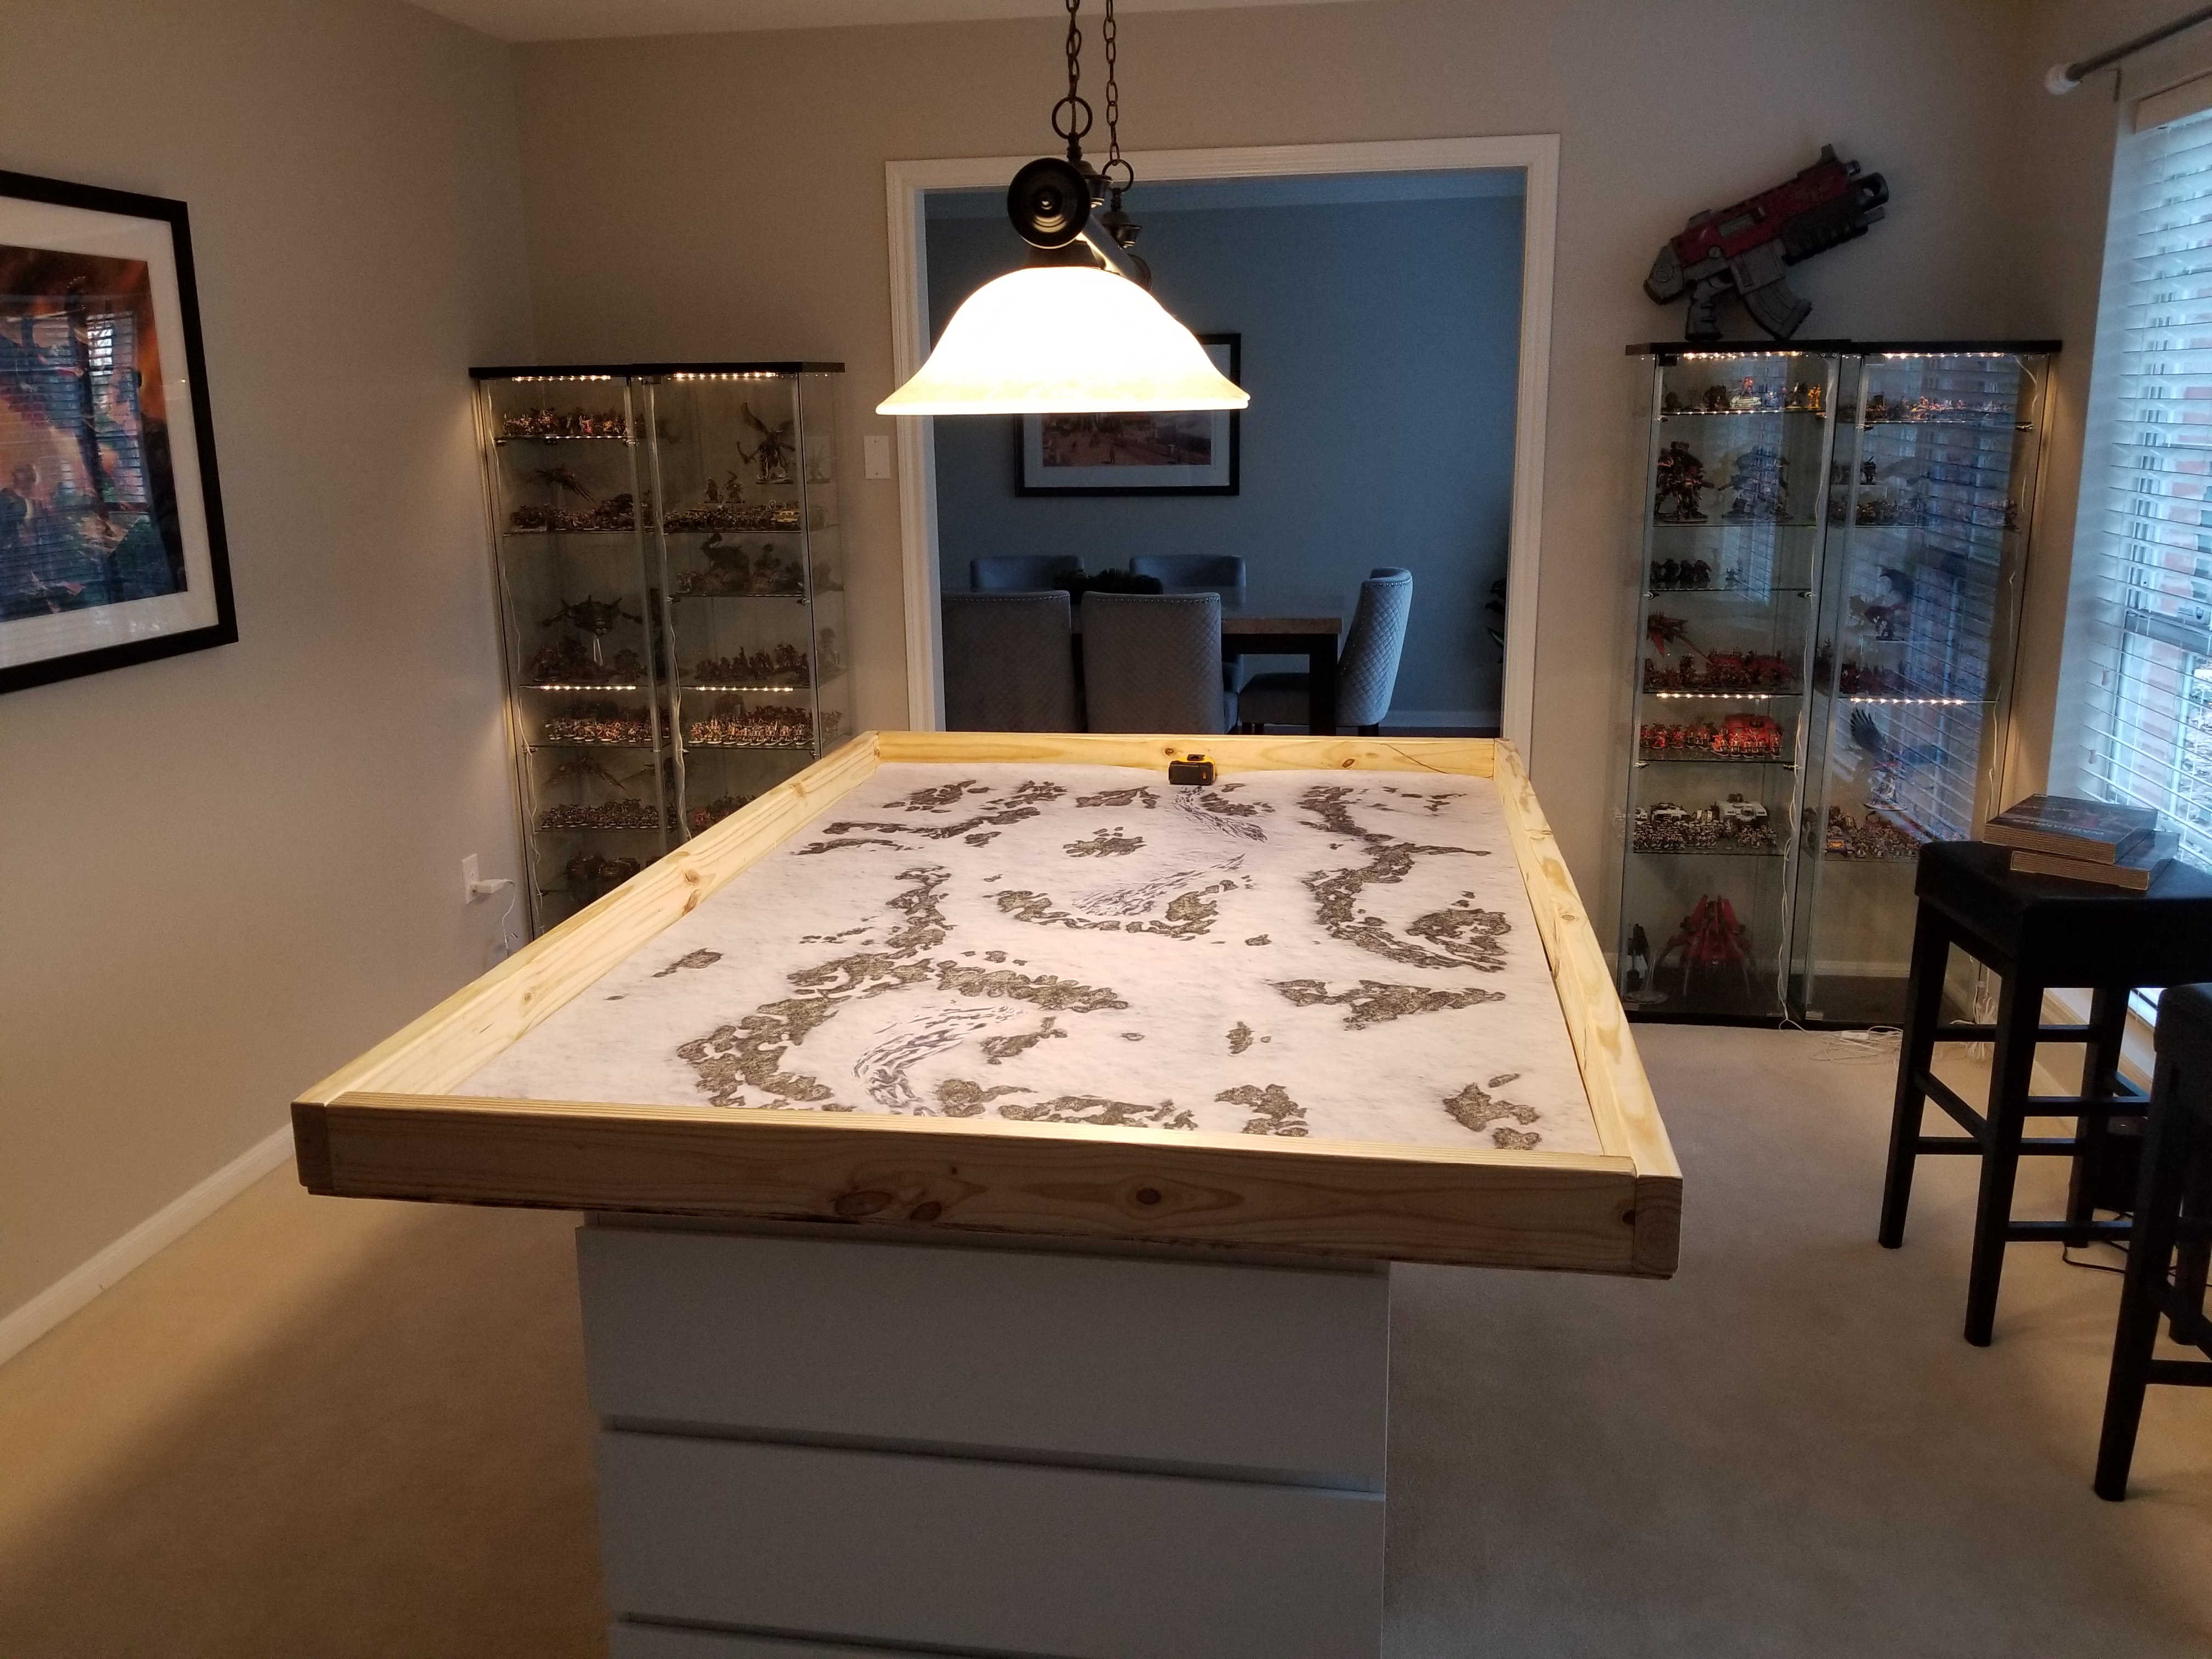
The house itself was everything we wanted and more. By New Jersey standards it’s absolutely massive – though less so by the standards of Texas suburbs – with five bedrooms and a decent yard. One of the more notable features of the house for my purposes however, was a room on the front of the house where the prior owners had installed a pool table. It had plenty of space around the table and they’d already installed some fairly decent hanging lights.
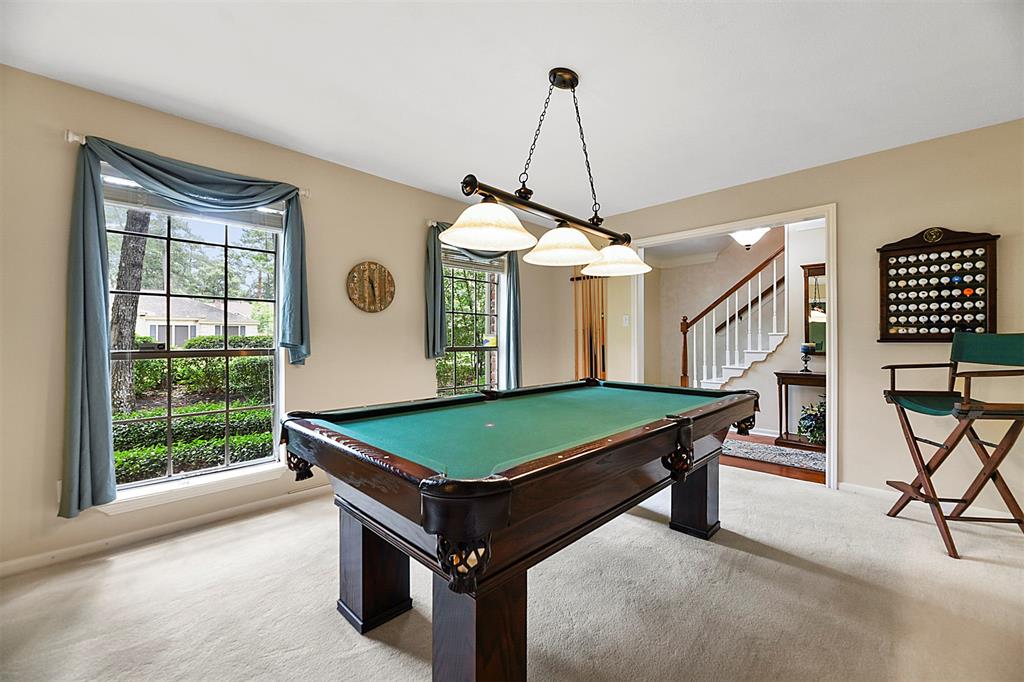
Now normally this would mean that I had also acquired a pool table but in this instance the owners had found a buyer for the thing already who was willing to come in and haul the thing away. That worked just fine for me – I had other, bigger plans for the table anyways. The moment I saw the room and the hanging lights, I knew it’d be perfect as a game room for 40k.
Part 1: Figuring out an Aesthetic
One of the awesome things about my wife is that she’s not shy when it comes to our hobbies – she is more than happy with us having a dedicated Warhammer/gaming room in the front of the house – but the caveat here is that it has to look good. And by “good,” I mean that she wants our spaces clean (though she forgives me my office, which is a total disaster at the moment), and to be polished to a certain extent – under no circumstances could my gaming room, especially if it was going to be in this open, visible space, evoke thoughts of dark, cluttered game store. It would have to have a much more polished look that would fit with the rest of our house.
Up to this point, the aesthetics of my gaming space hadn’t been something I’d considered – hell it wasn’t even something I had the luxury of considering. I’d mostly had to work with whatever decor was on hand and create a space that could work with whatever else was already there, be it a kitchen, or our living room couch. But now I had the opportunity to build a full room dedicated to Warhammer, and that meant I could consider more than just the table surface – I could think about how I wanted to decorate the whole area. There are a few ways you can go with this. For some people, that aesthetic of “a gaming store in my house” is something they’re after – and I totally see the appeal (we’ll talk to Dylan Gould in the coming weeks for a look at what that approach looks like). But I wanted something a little more dressy, that felt like a standard room in my home. That meant uniform display cabinets, a dedicated table, and framed prints on the walls. Once I had this in mind, I could think about what would go in the space. I’ll come back to the decorations in a bit.
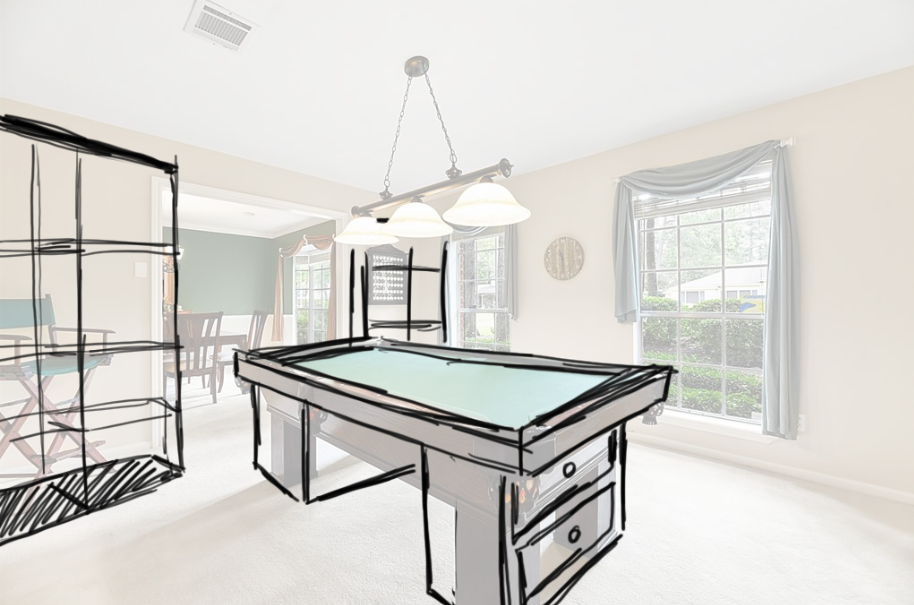
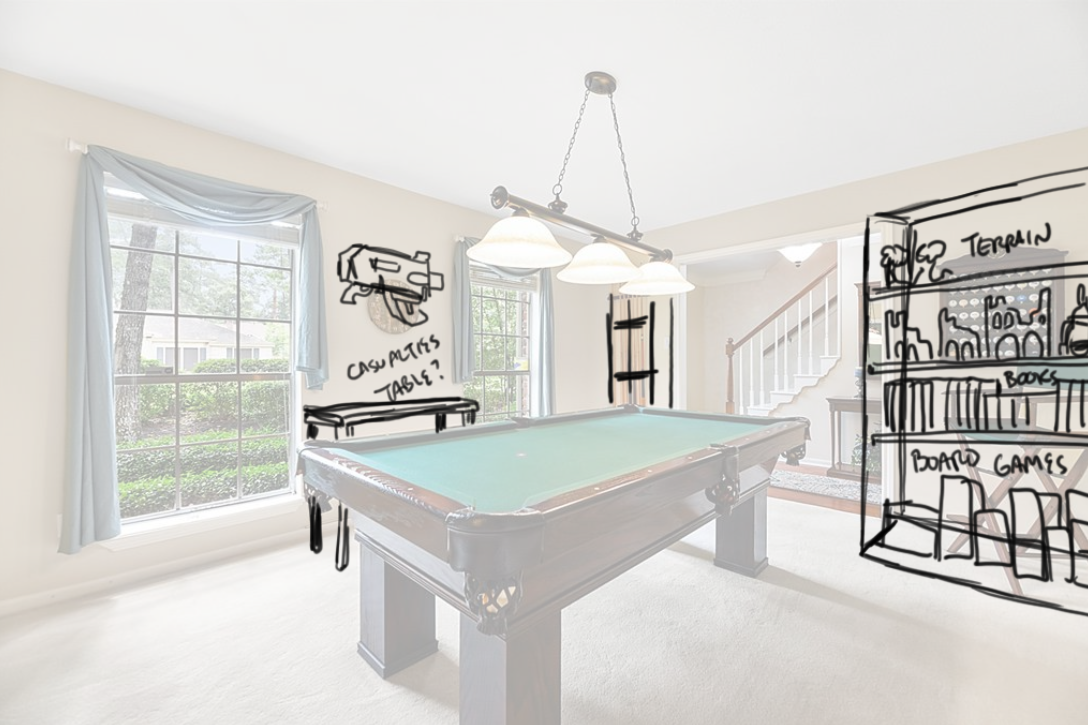
My plan was to build a custom table, add shelves for terrain on one side of the room, and then put display cases for minis on the other side, with framed prints and memorabilia on the walls.
Part 2: Building the Table
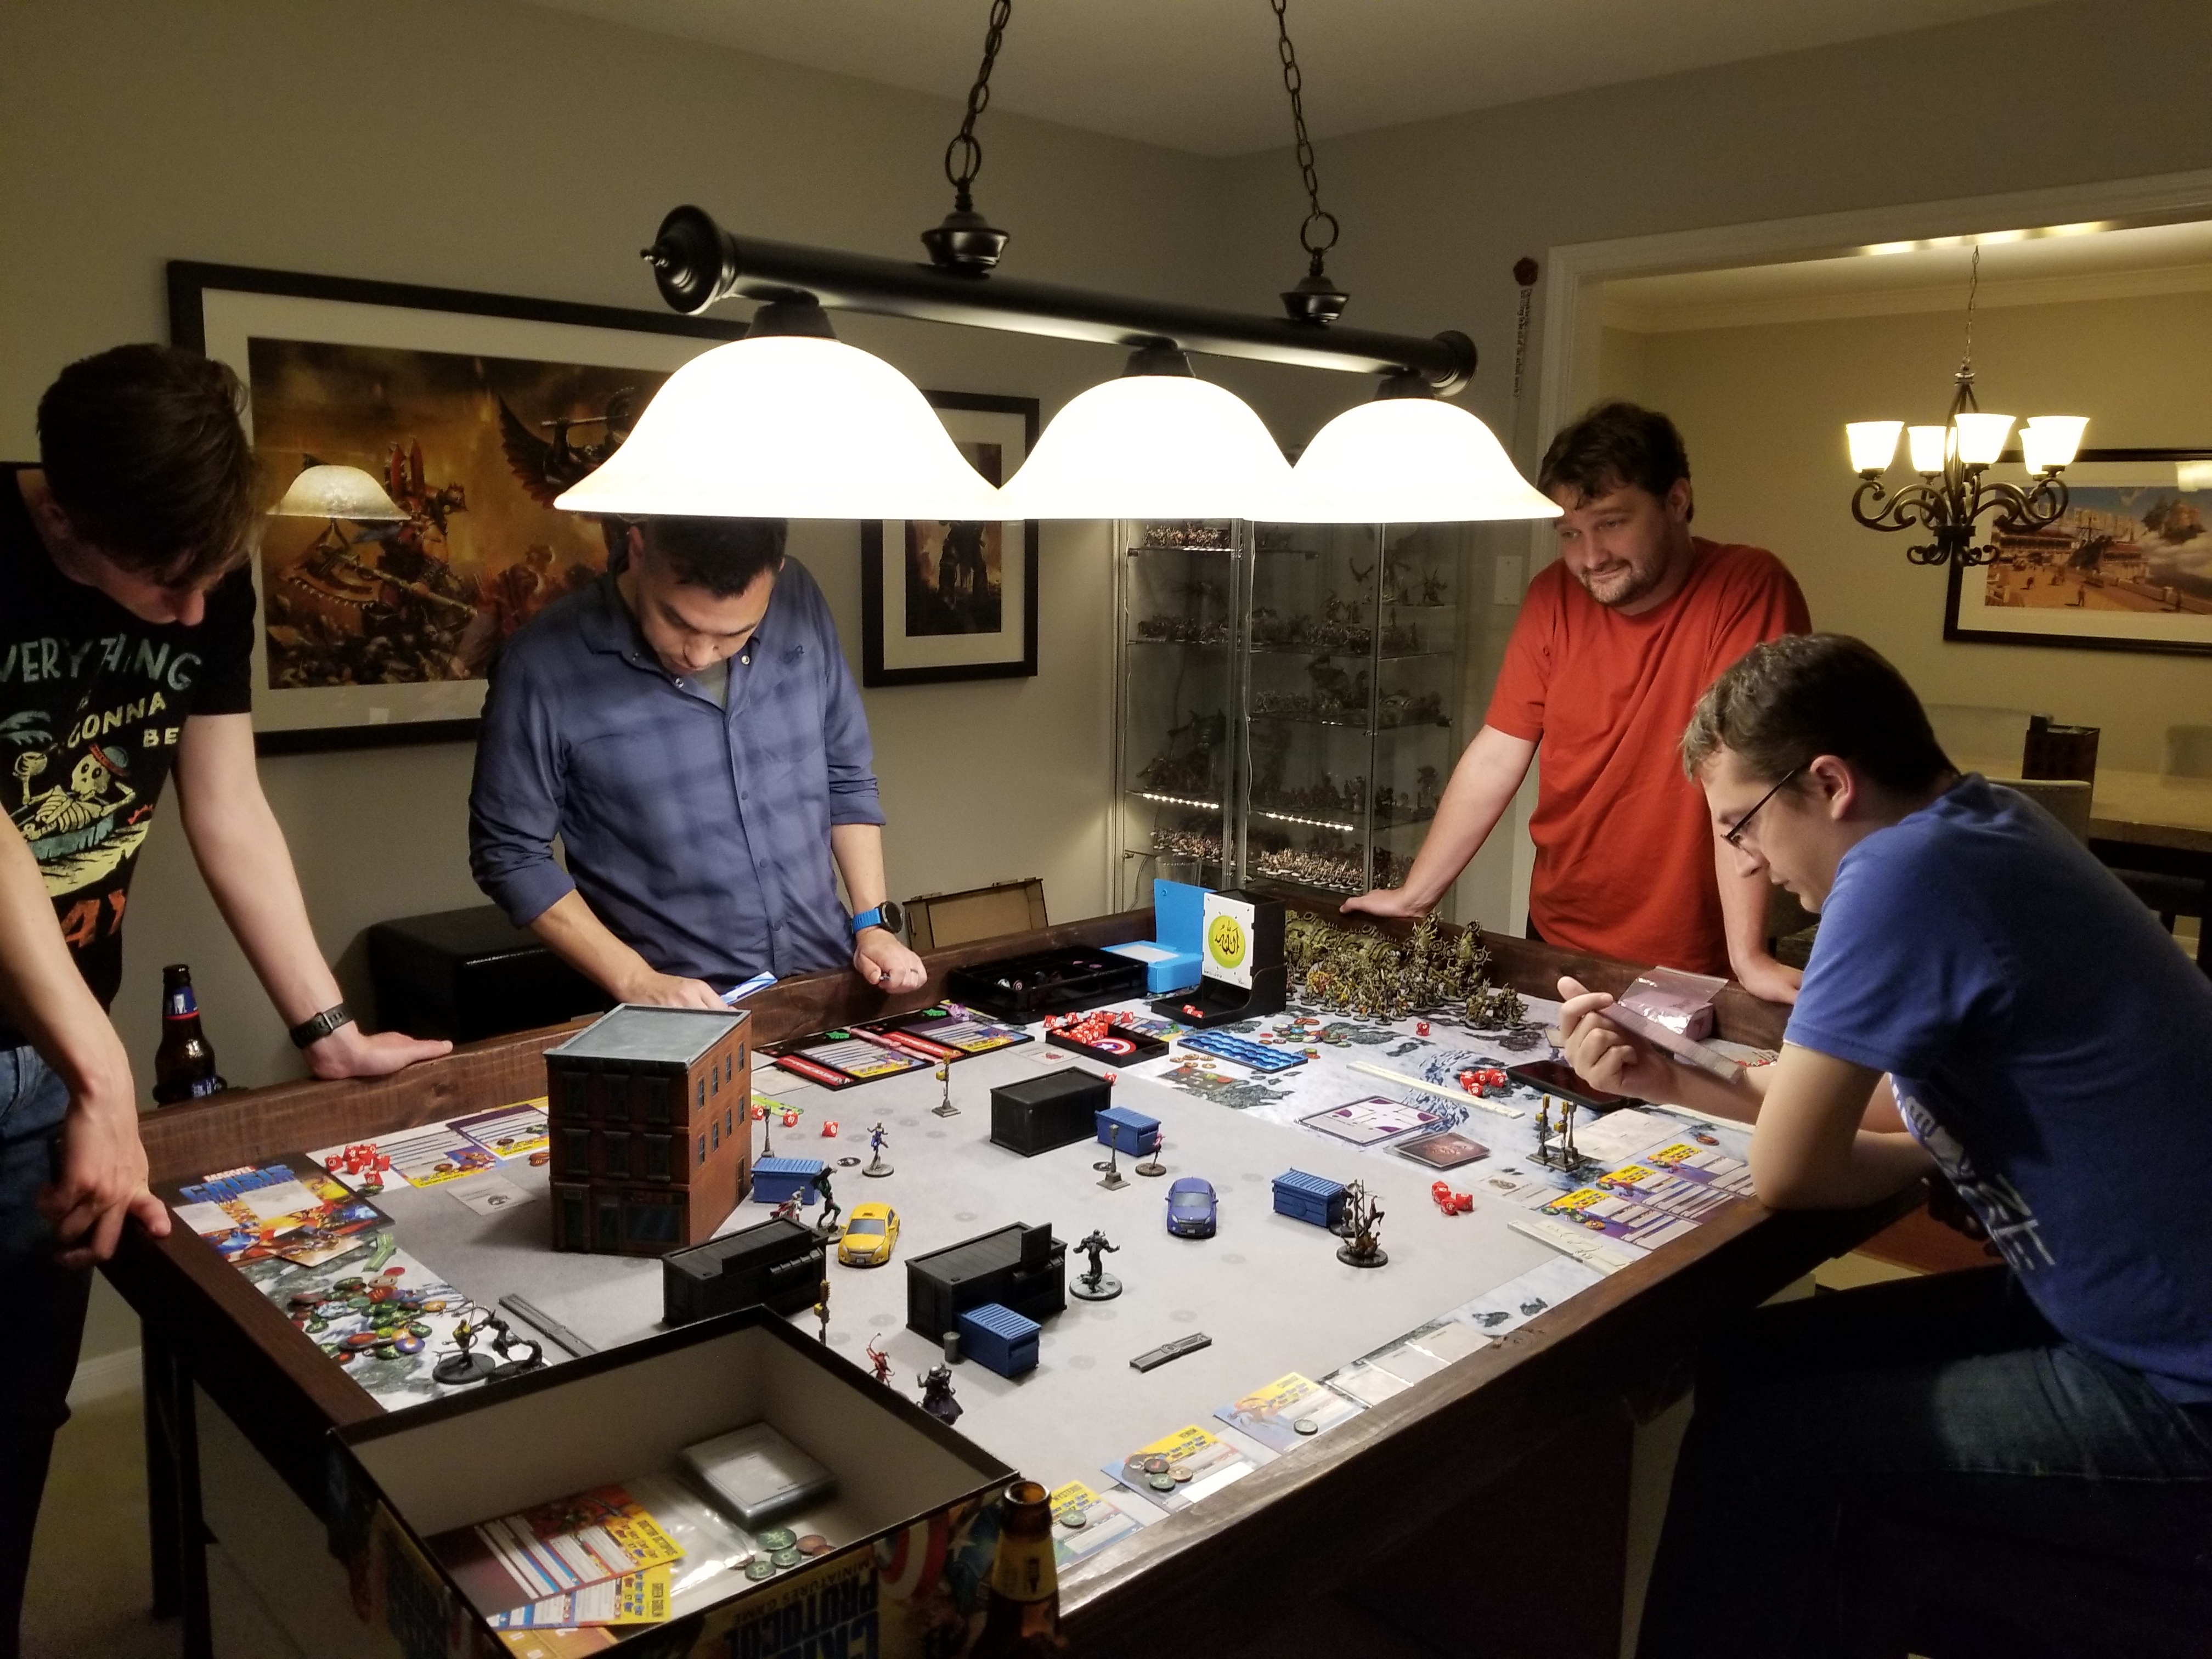
The custom table was the most important part. Originally I looked at having one built but decided that was out of my budget for the time being. That said, I’m a pretty handy guy, with access to a few tools. Building my own wasn’t out of the question. I’ve previously written in detail about the table construction – you can find that article here – so I’ll just give you the quick beats on this and then talk about the finishing work I did.

The table itself is constructed out of pine and screwed into the top of two IKEA MALM dressers to give it extra storage. It’s sized for a full 4’x6′ table, and the surface that sits inside it is a 48″x72″ sheet of plywood that mats sit down on top of. When I last talked about the table, I had it in a pretty good place, having finished the principle construction and installed four cupholders on the sides:
This was good, and perfectly functional. And it looked alright, but I could do better. So about two months later, I laid down some drop cloths and stained the whole thing to give it a darker finish.
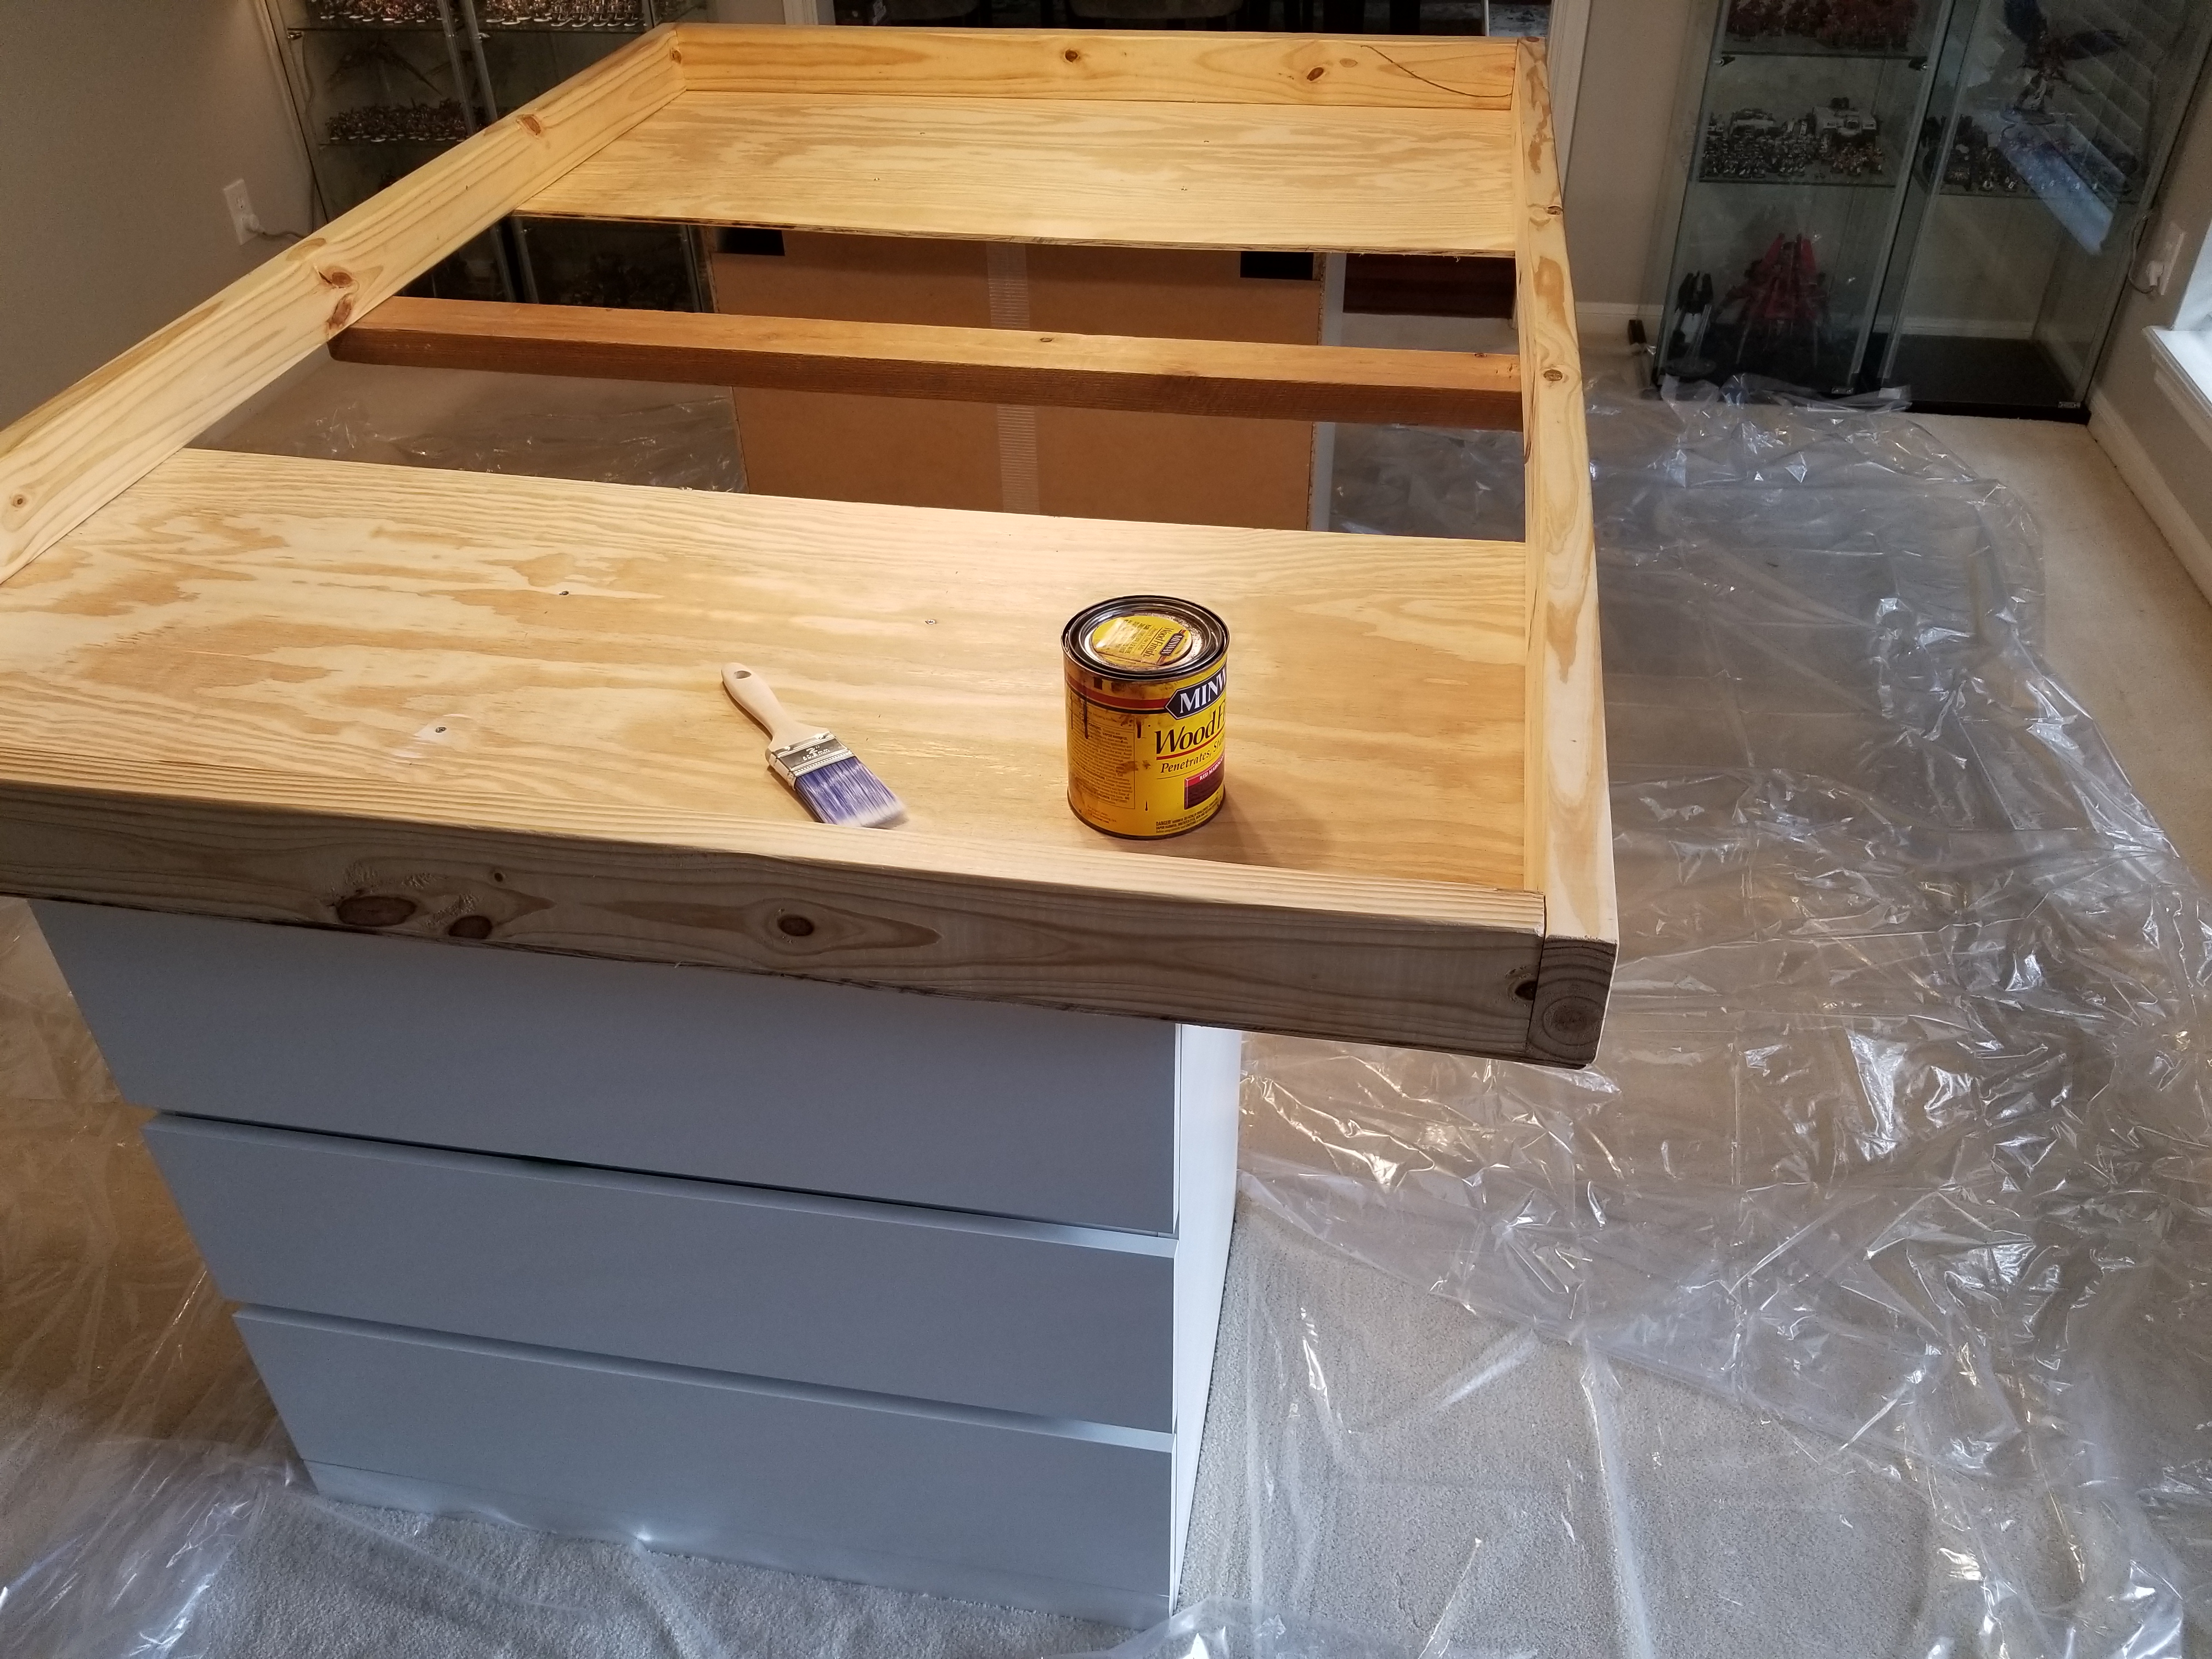
I can’t stress this enough: PUT DOWN CLOTHS. We have light carpet and getting any wood stain on them would have been a big mistake on my part. Once I got started, I put two coats on the table. The whole thing took about an hour, plus another couple of days to dry completely. The effect was completely transformative, though.
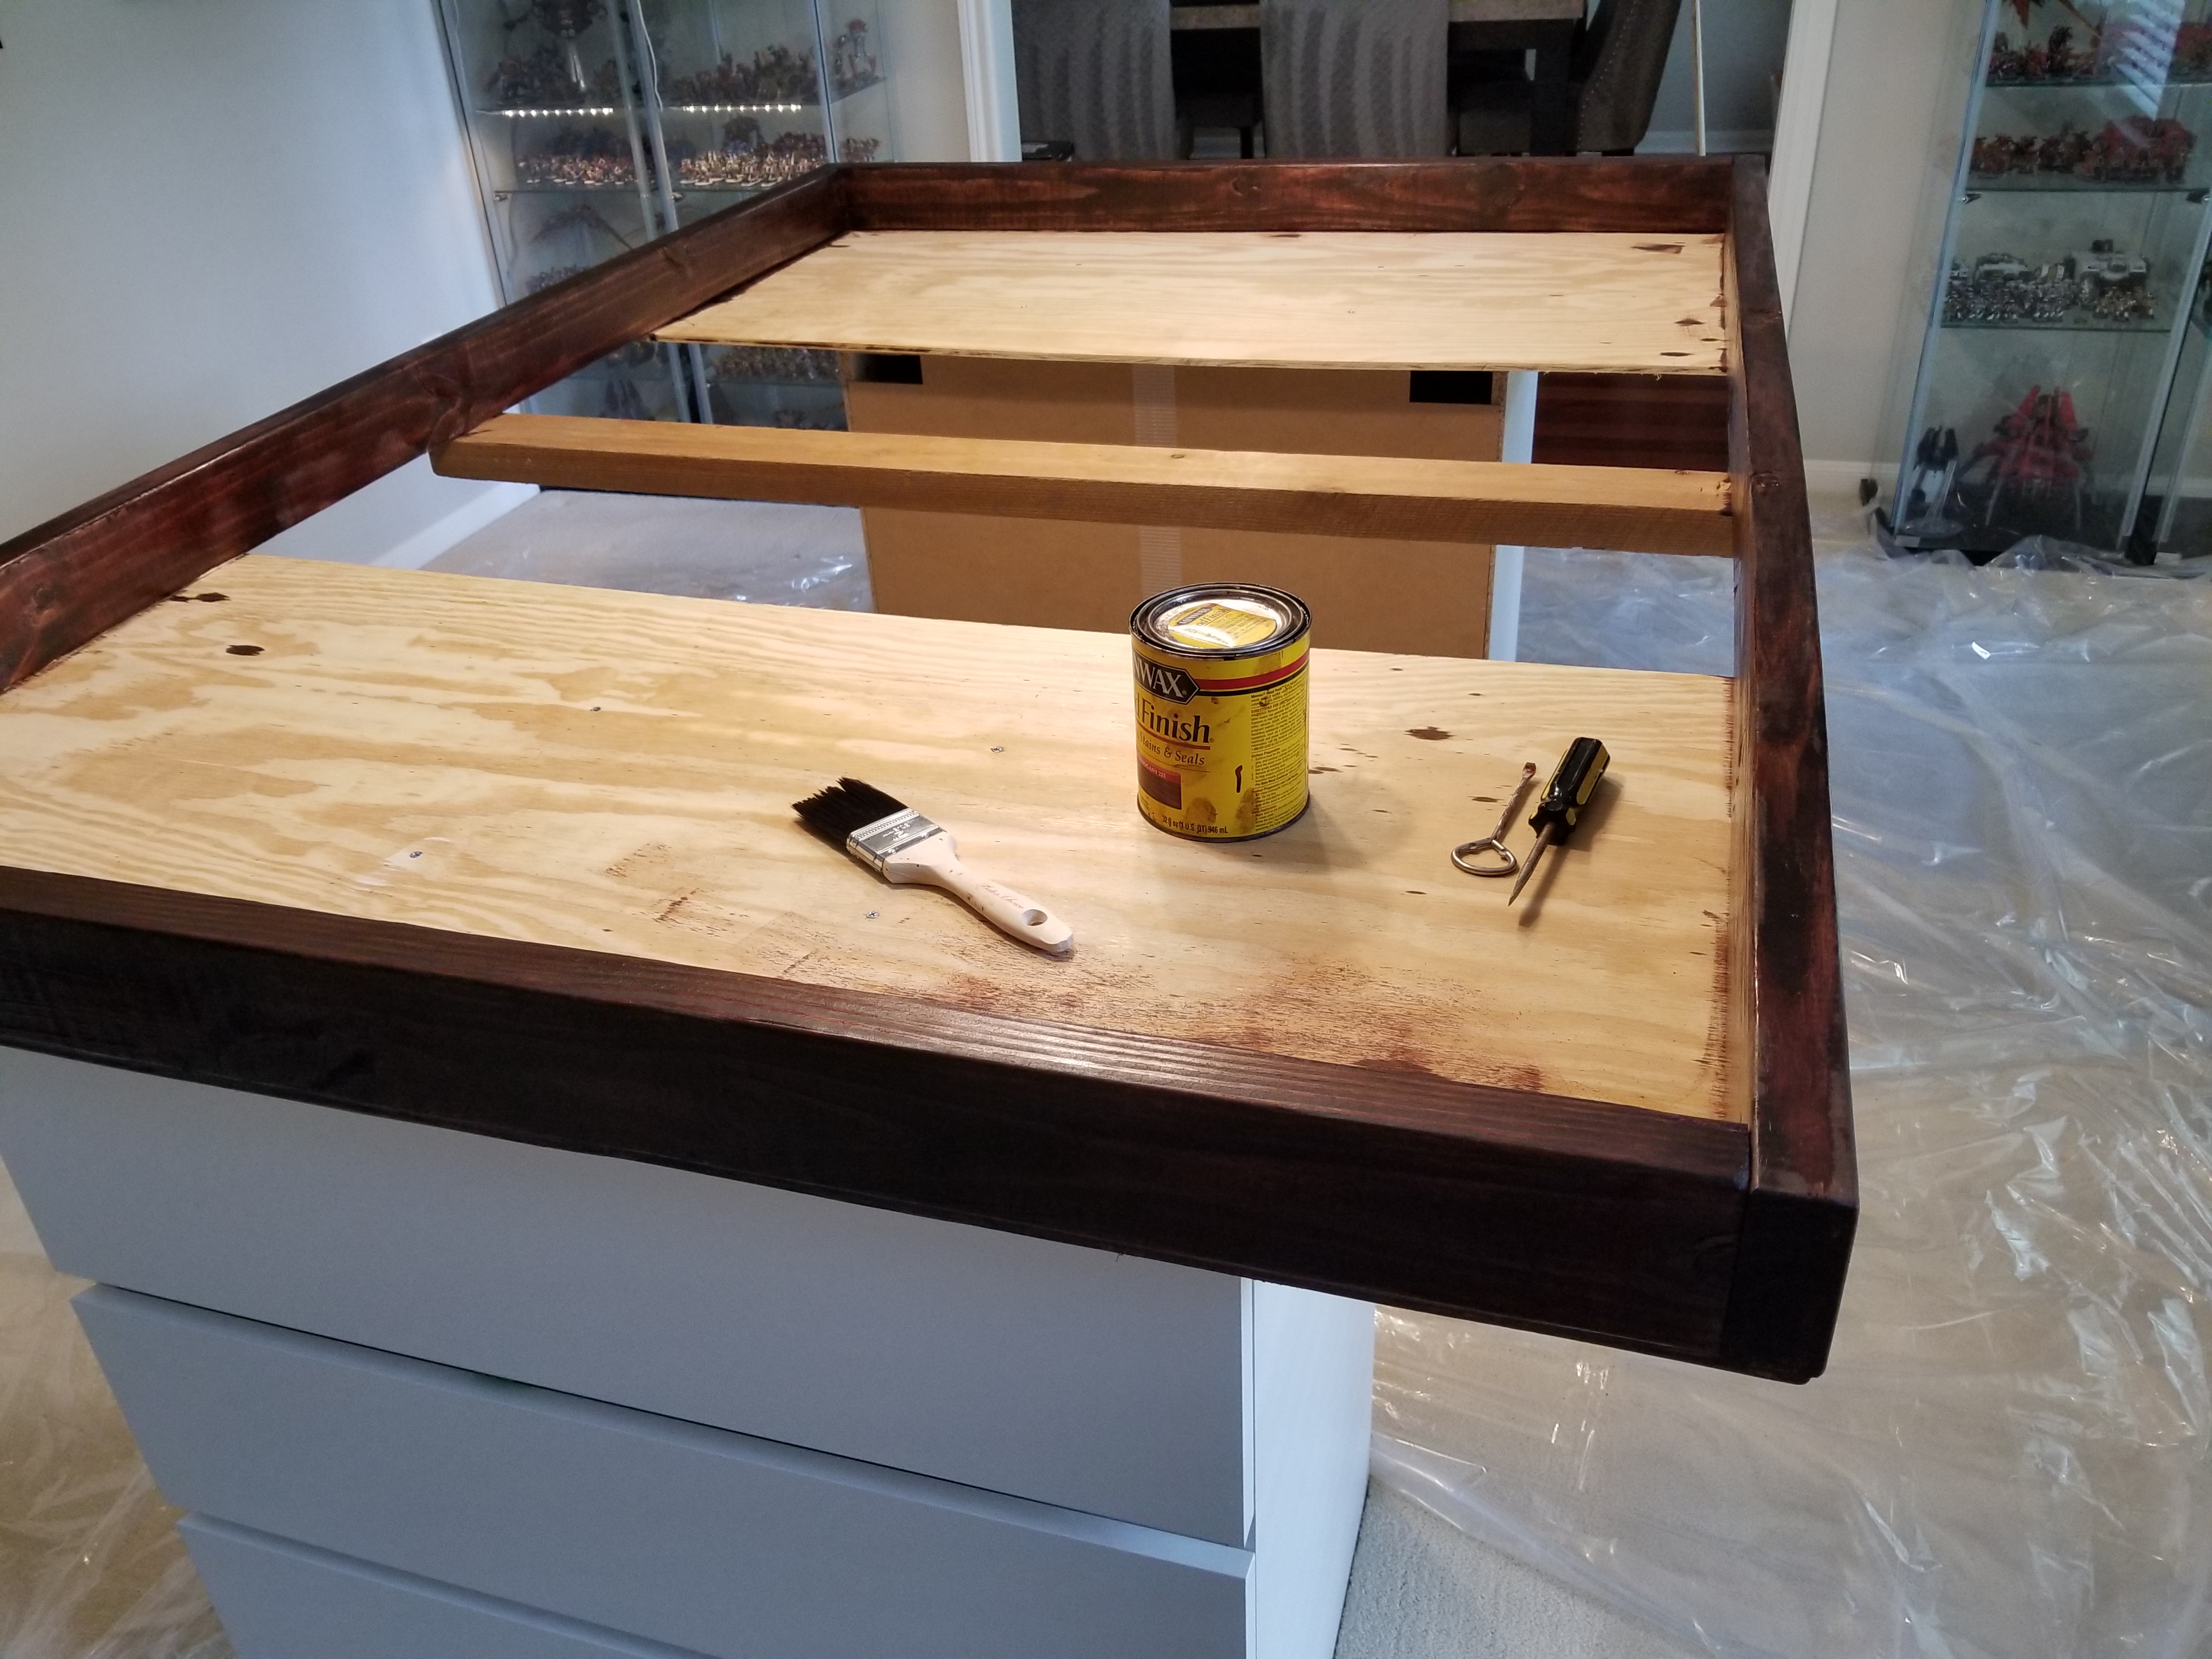
The next step was cleaning up the corners a bit. The table looked better like this, but was missing a few details that might give it more polish.
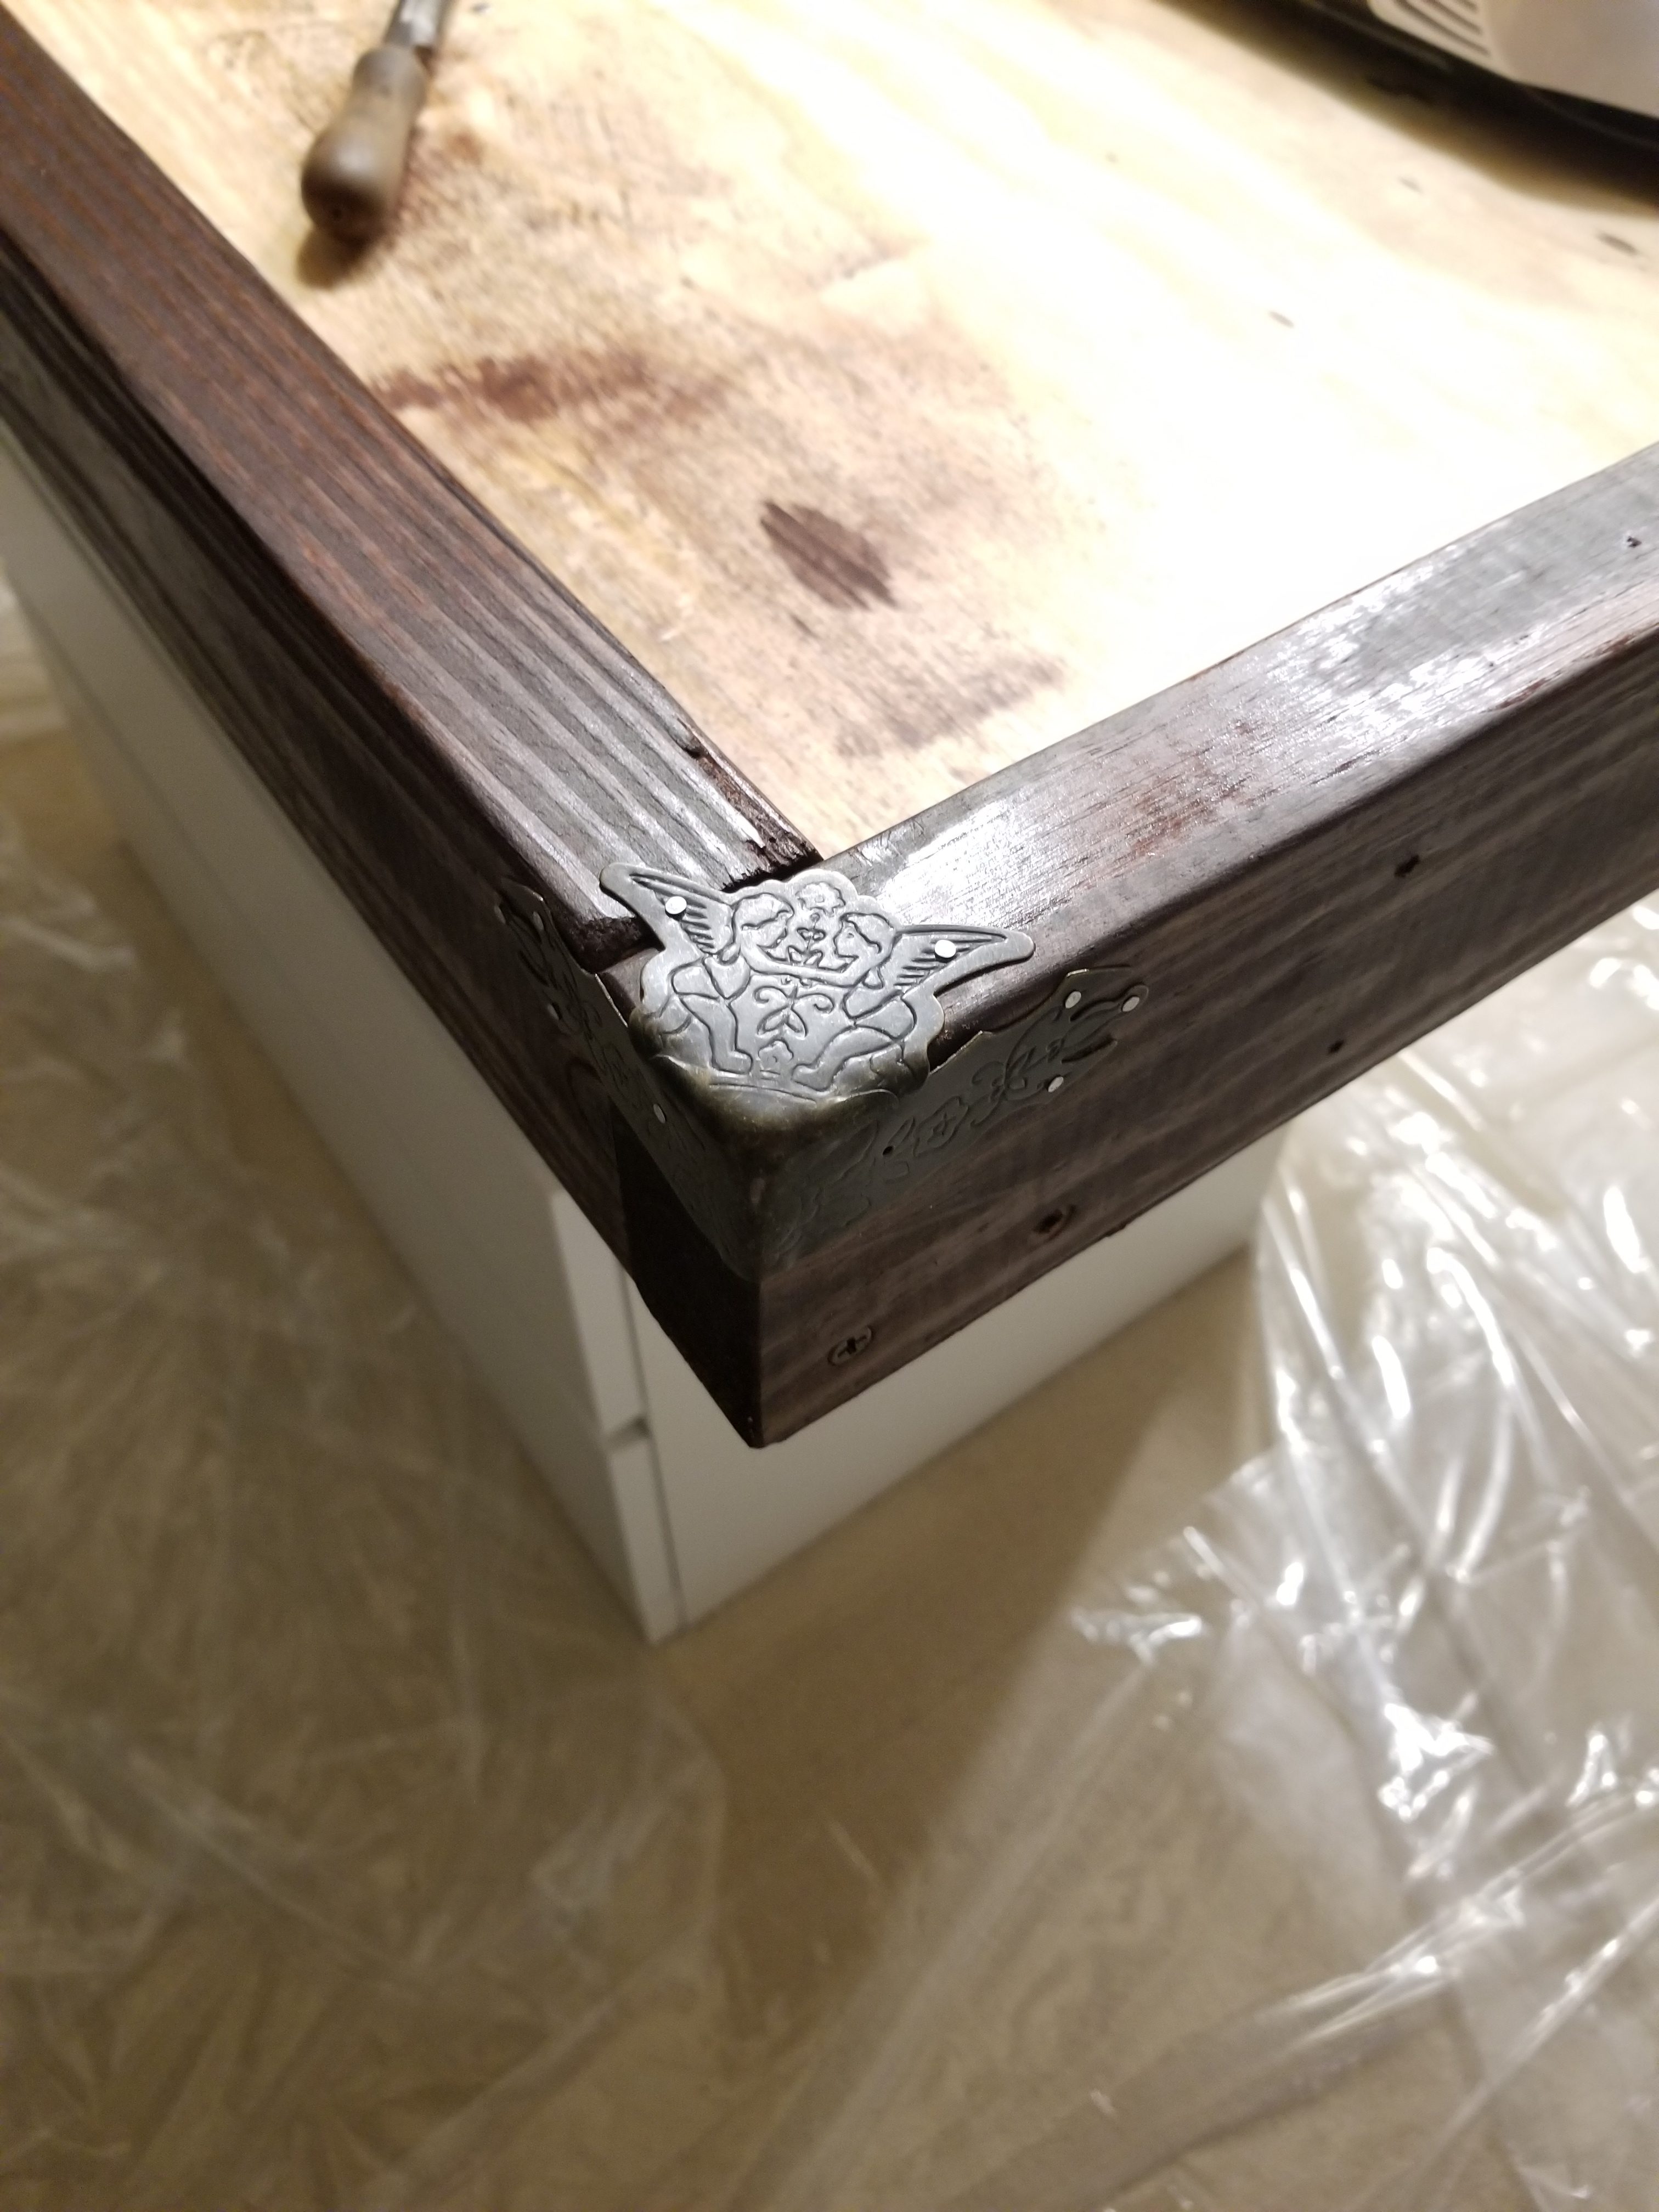
My dad found these metal corner covers on ebay and bought them for me as a gift. They’re nice, and after using a rasp to smooth down the edges, I was able to apply them and nail them in using 3/4″ wire brads.
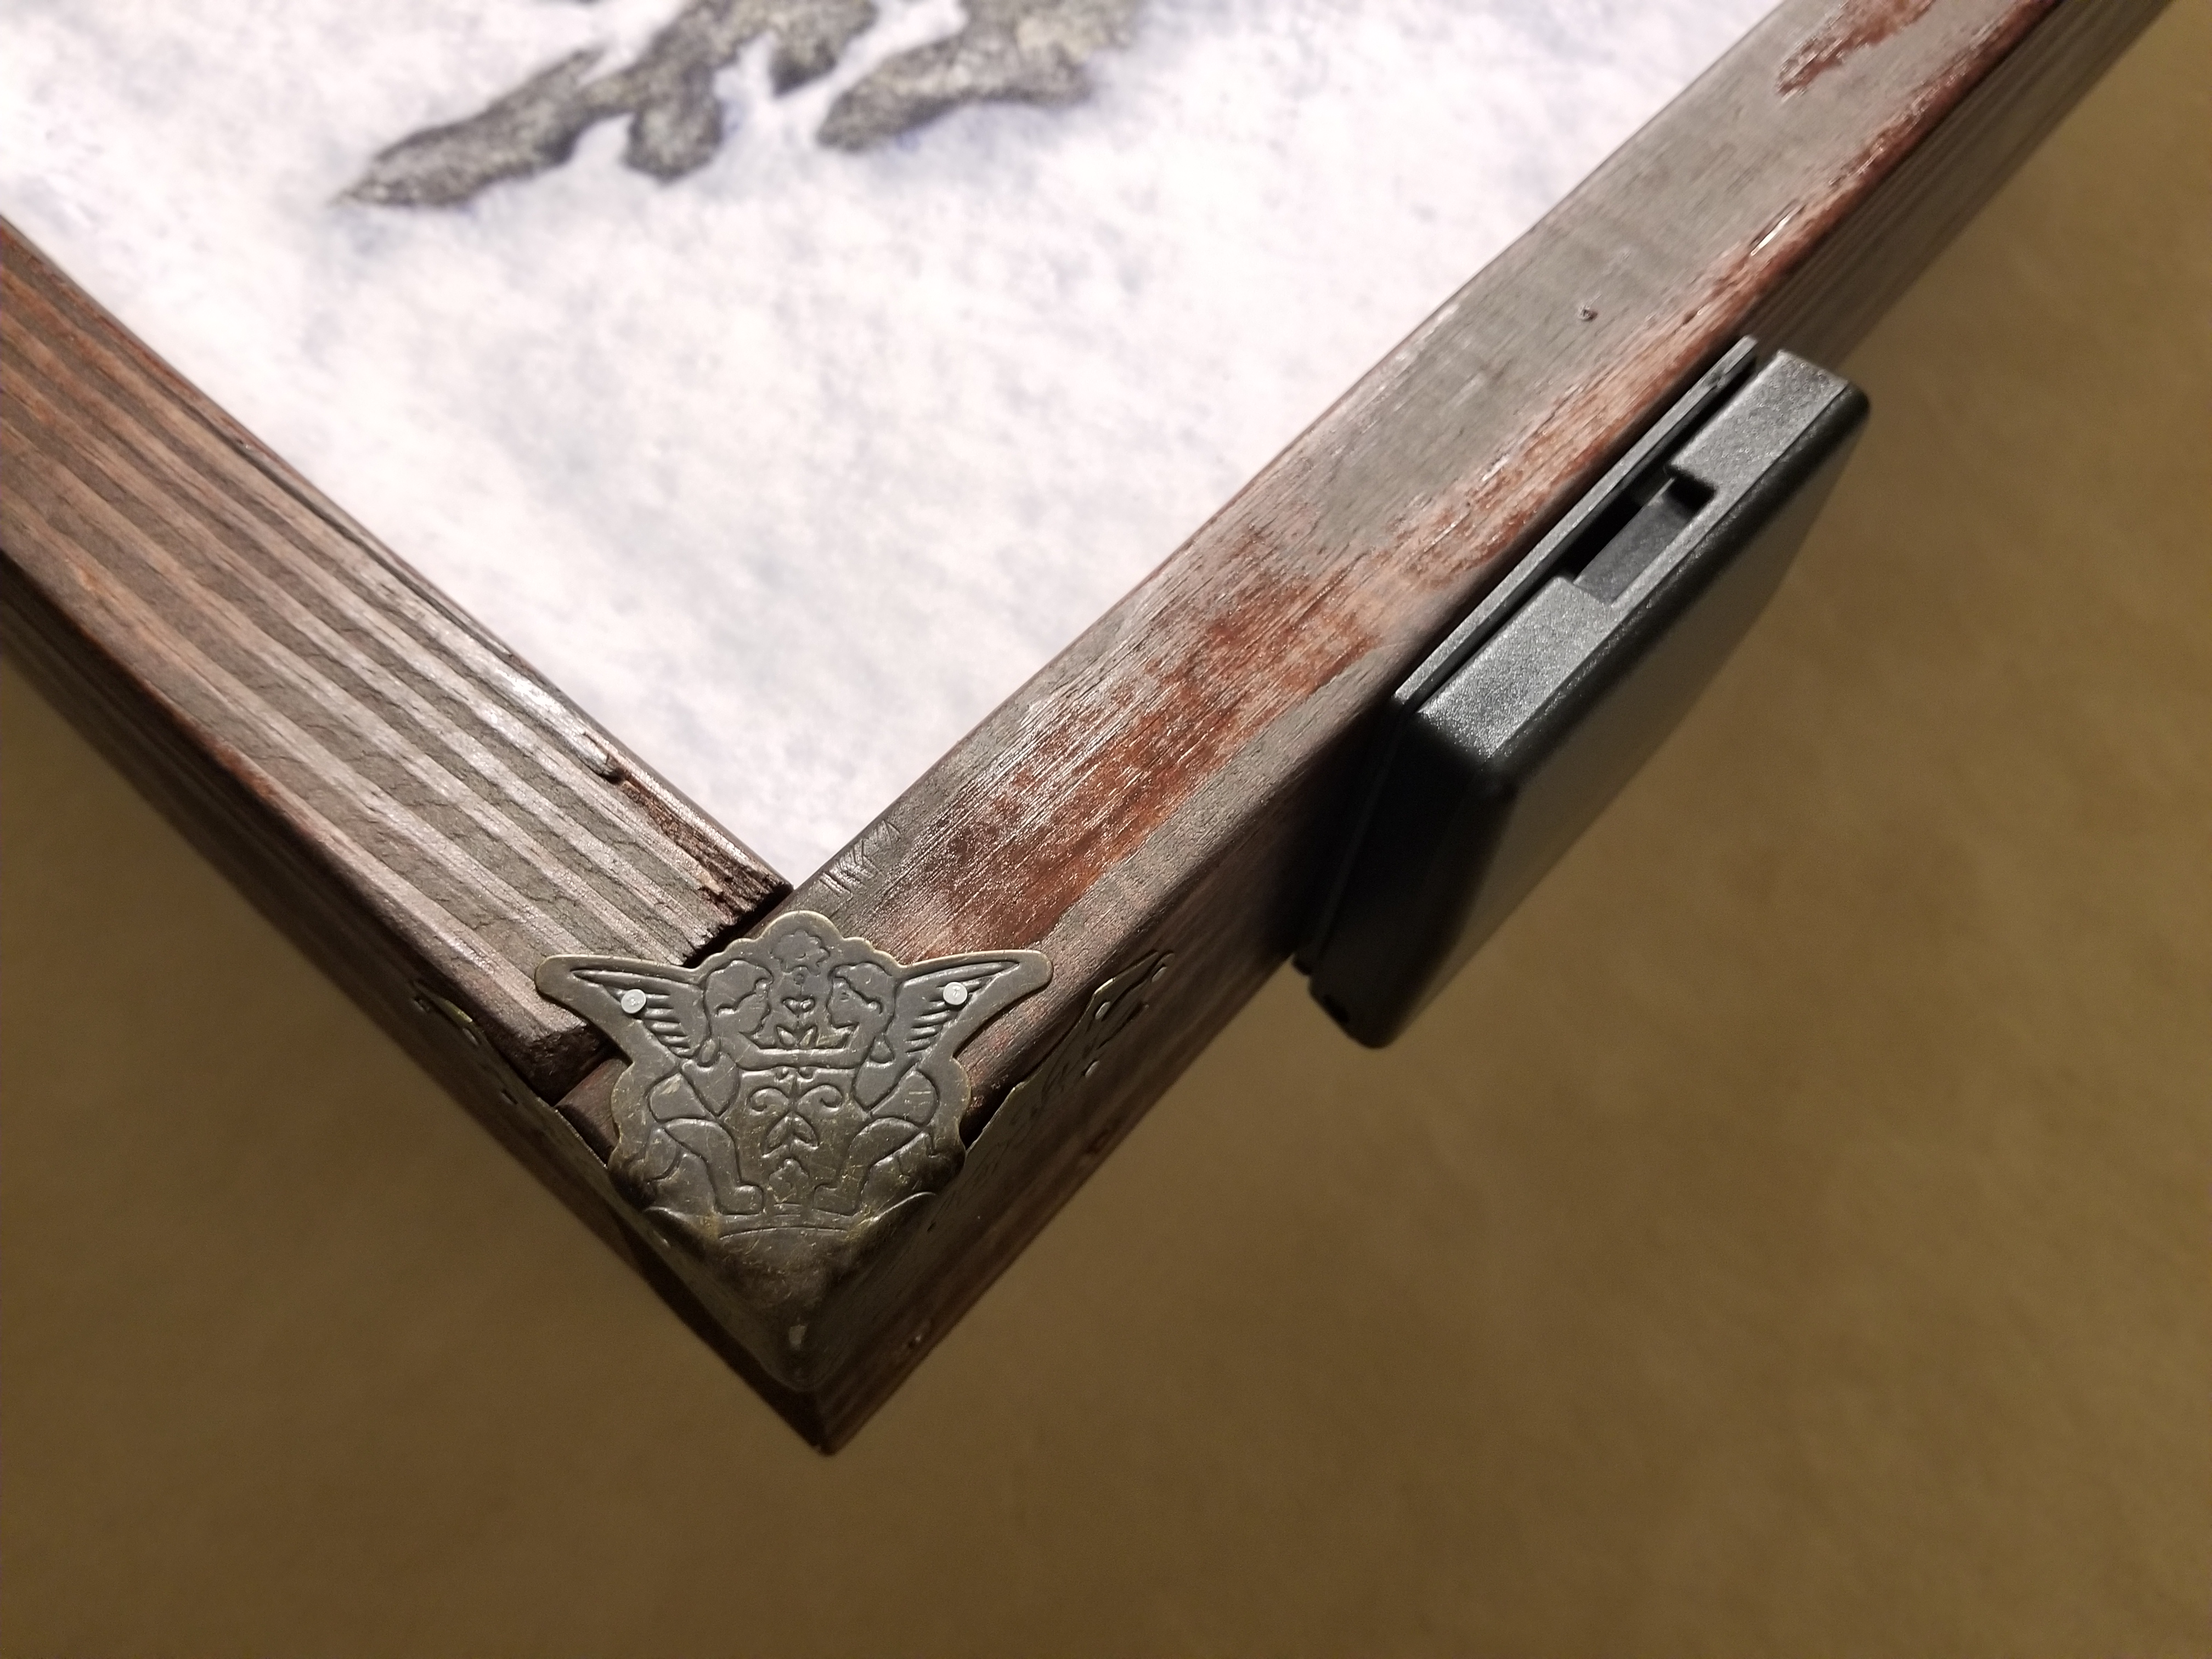
Adding these also meant moving the cupholders, so those moved in just a little bit on each side.
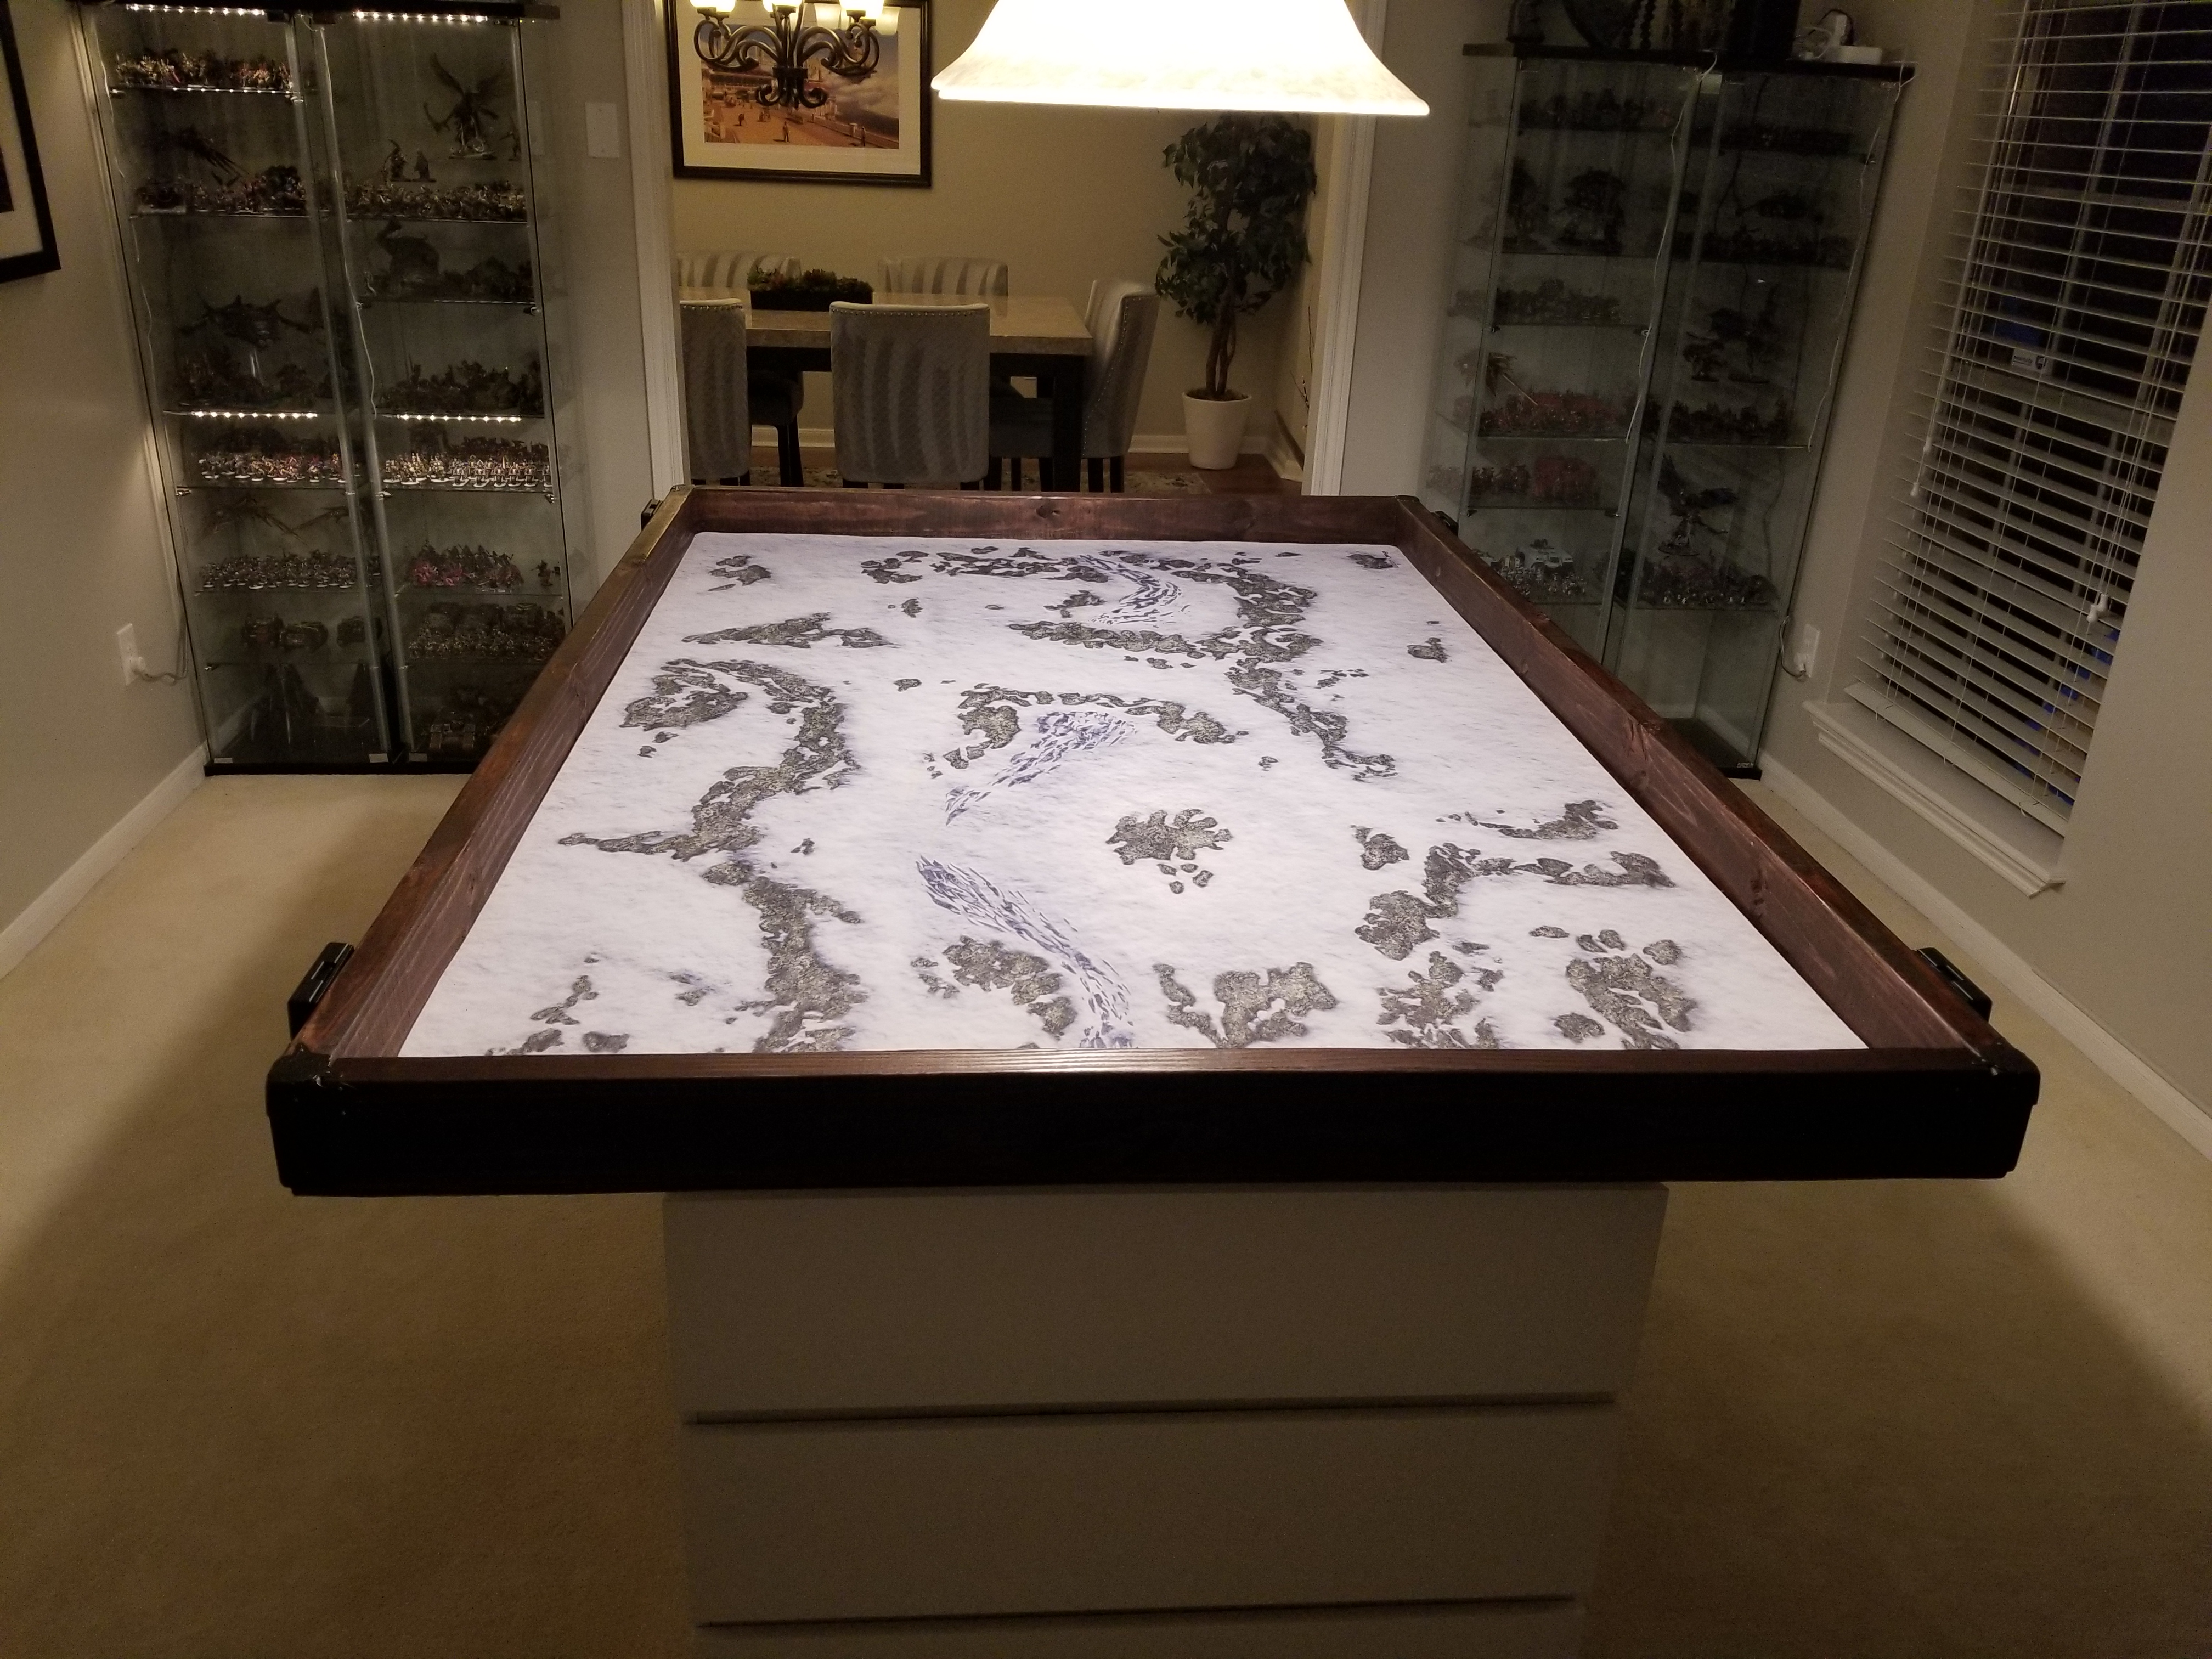 I’ve said it already but let me repeat: The final effect was transformative, giving the table a much, much more polished look. staining it and adding the corners turned it visually from “a neat thing I made” to “a real piece of furniture” as far as appearances are concerned. I’m very, very happy with it at this point. If I do anything else with it now, it’ll be applying a coat of urethane to it to seal it and give it a gloss coat finish. But I’m 50/50 on doing that at the moment.
Part 3: The Display Cases
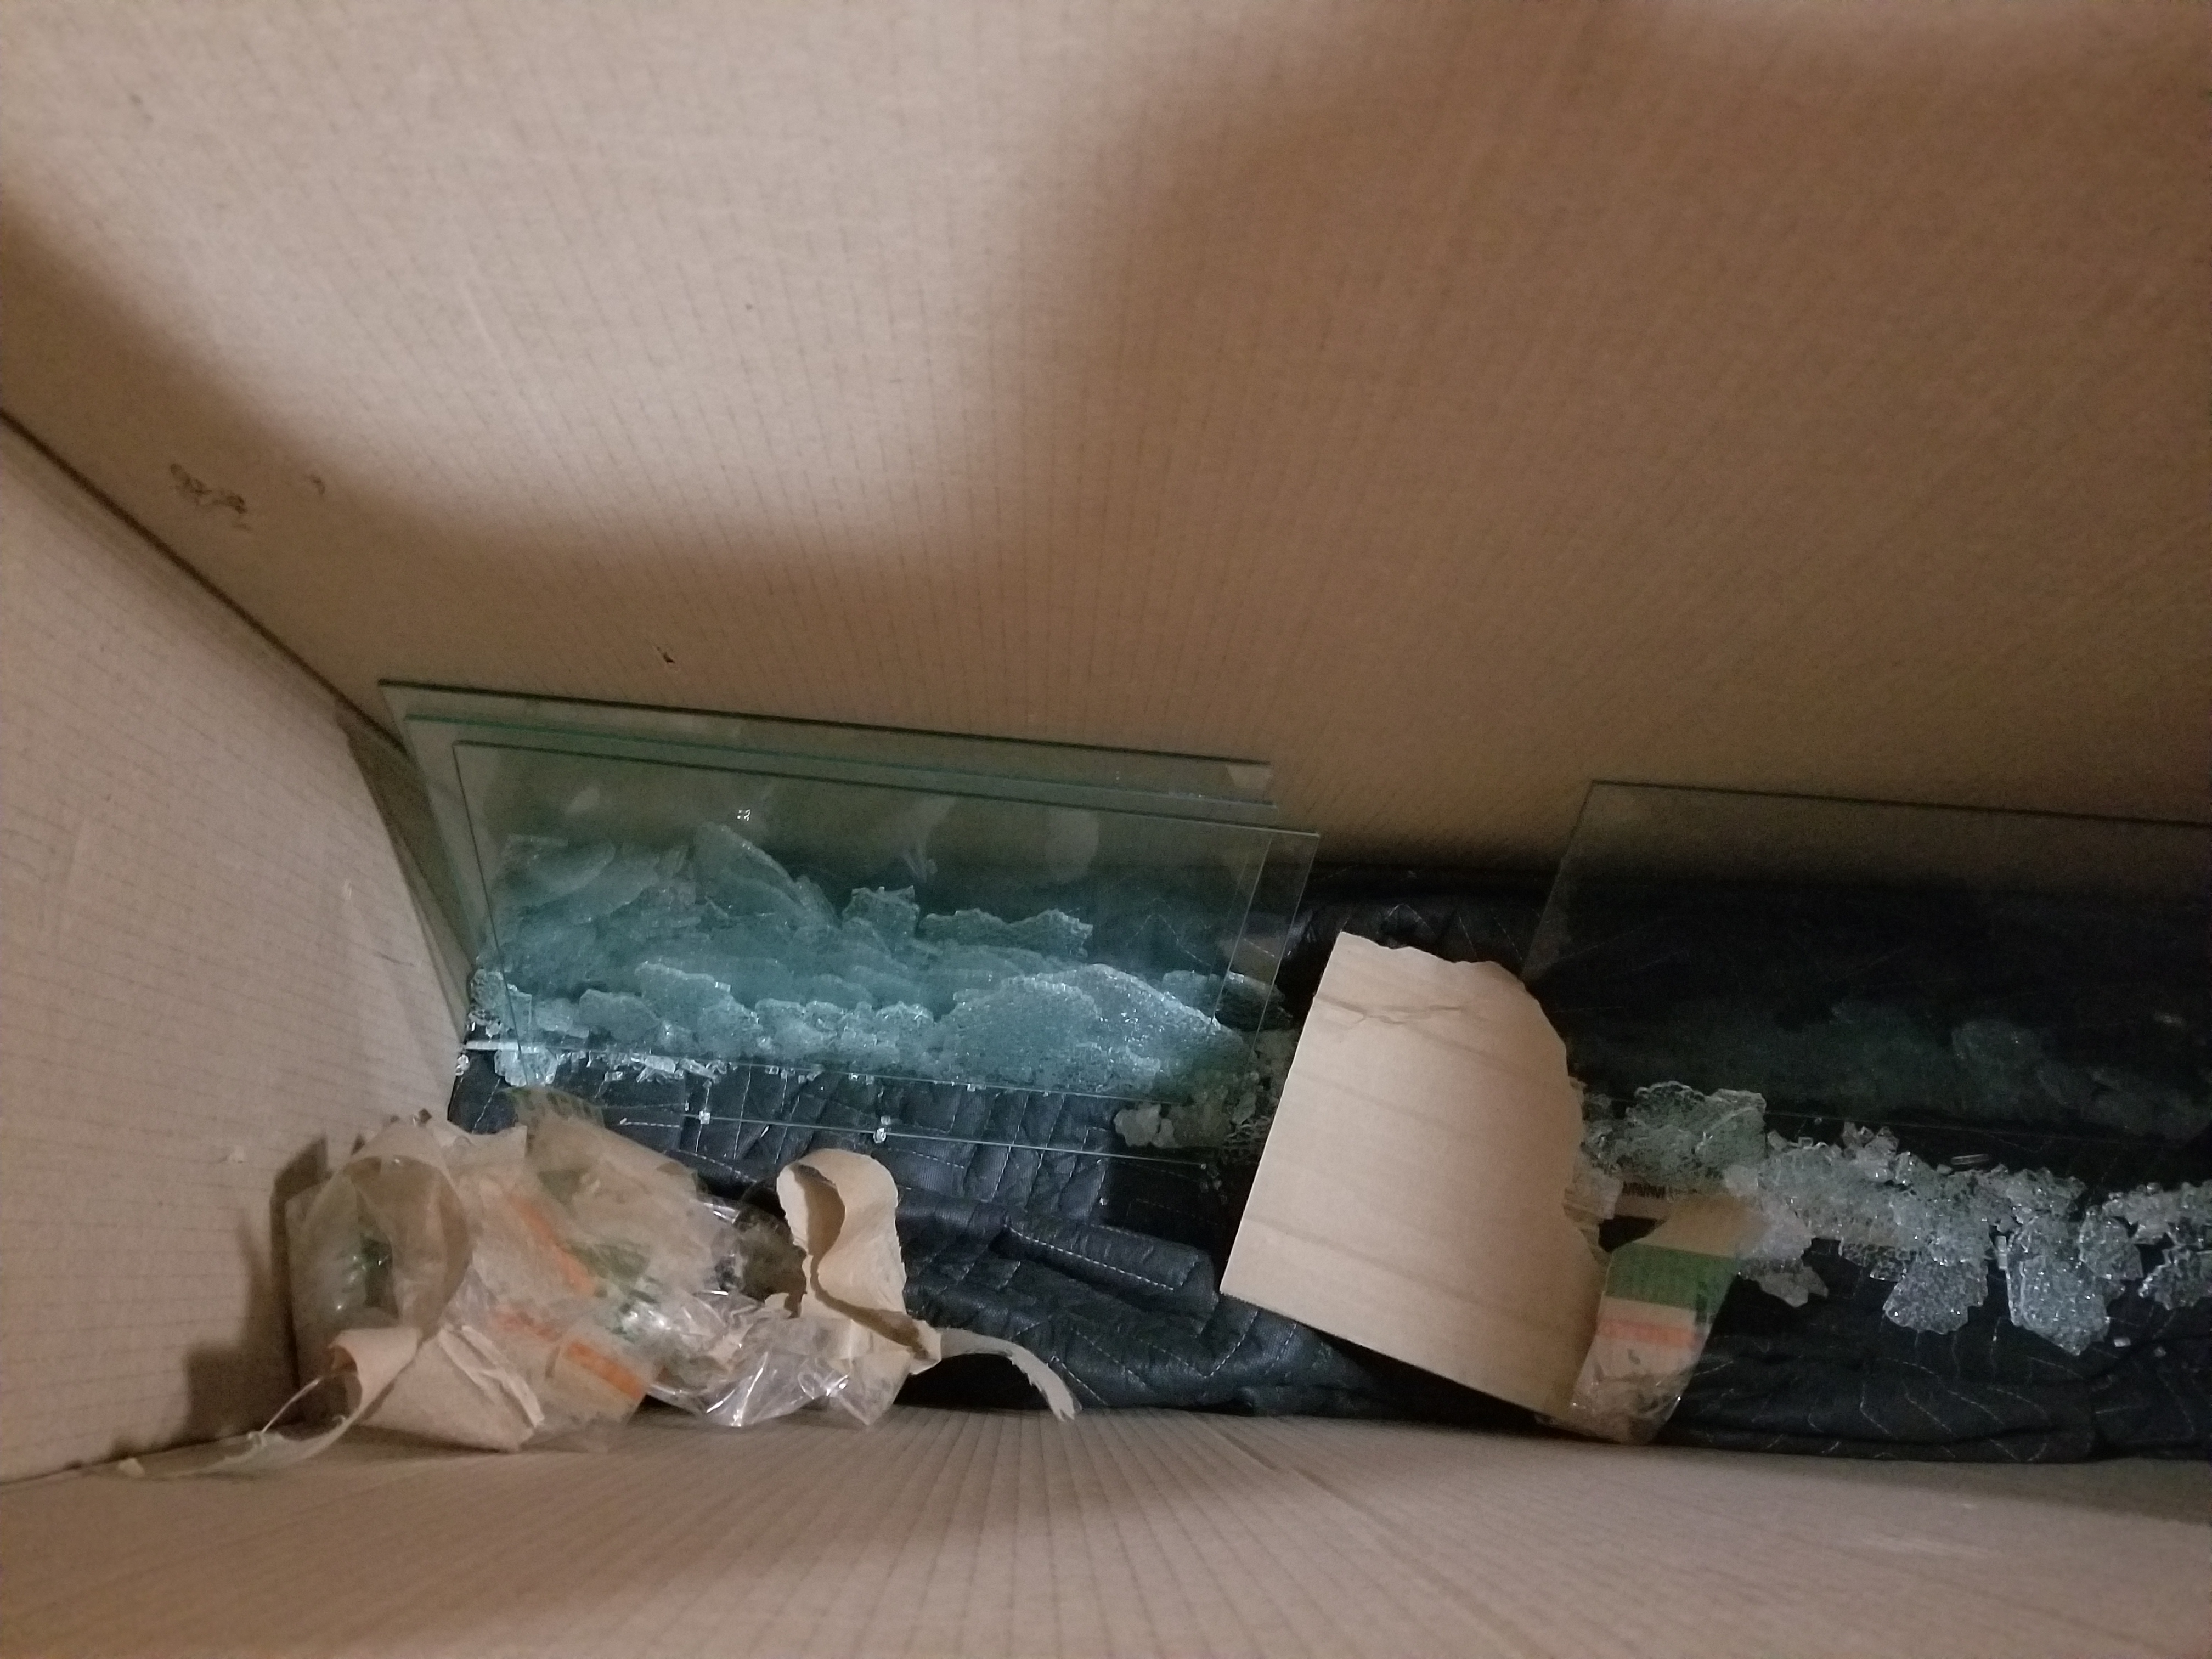
I’m currently using a quartet of IKEA DETOLF glass cases for storage on the far side of the room. That said, I’ve done a little bit of extra work on them. See when we moved, the cases themselves made the journey OK, but the shelves that were supposed to be inside them, well…
I salvaged the shelves I was able to save – about 6 in total – and ordered two more DETOLF cases to the new house, along with four light strips to install in the cases. Those of you who have looked may already know that buying extra DETOLF shelves isn’t really something you can do, so the question became “how could I install more?” I ended up having a local glass cutter cut me some replacements, plus an additional dozen or so shelves to install. one of the big problems with the DETOLF is that it has too much vertical space, so these shelves really let me stretch what I can do when it comes to storing my painted collection.
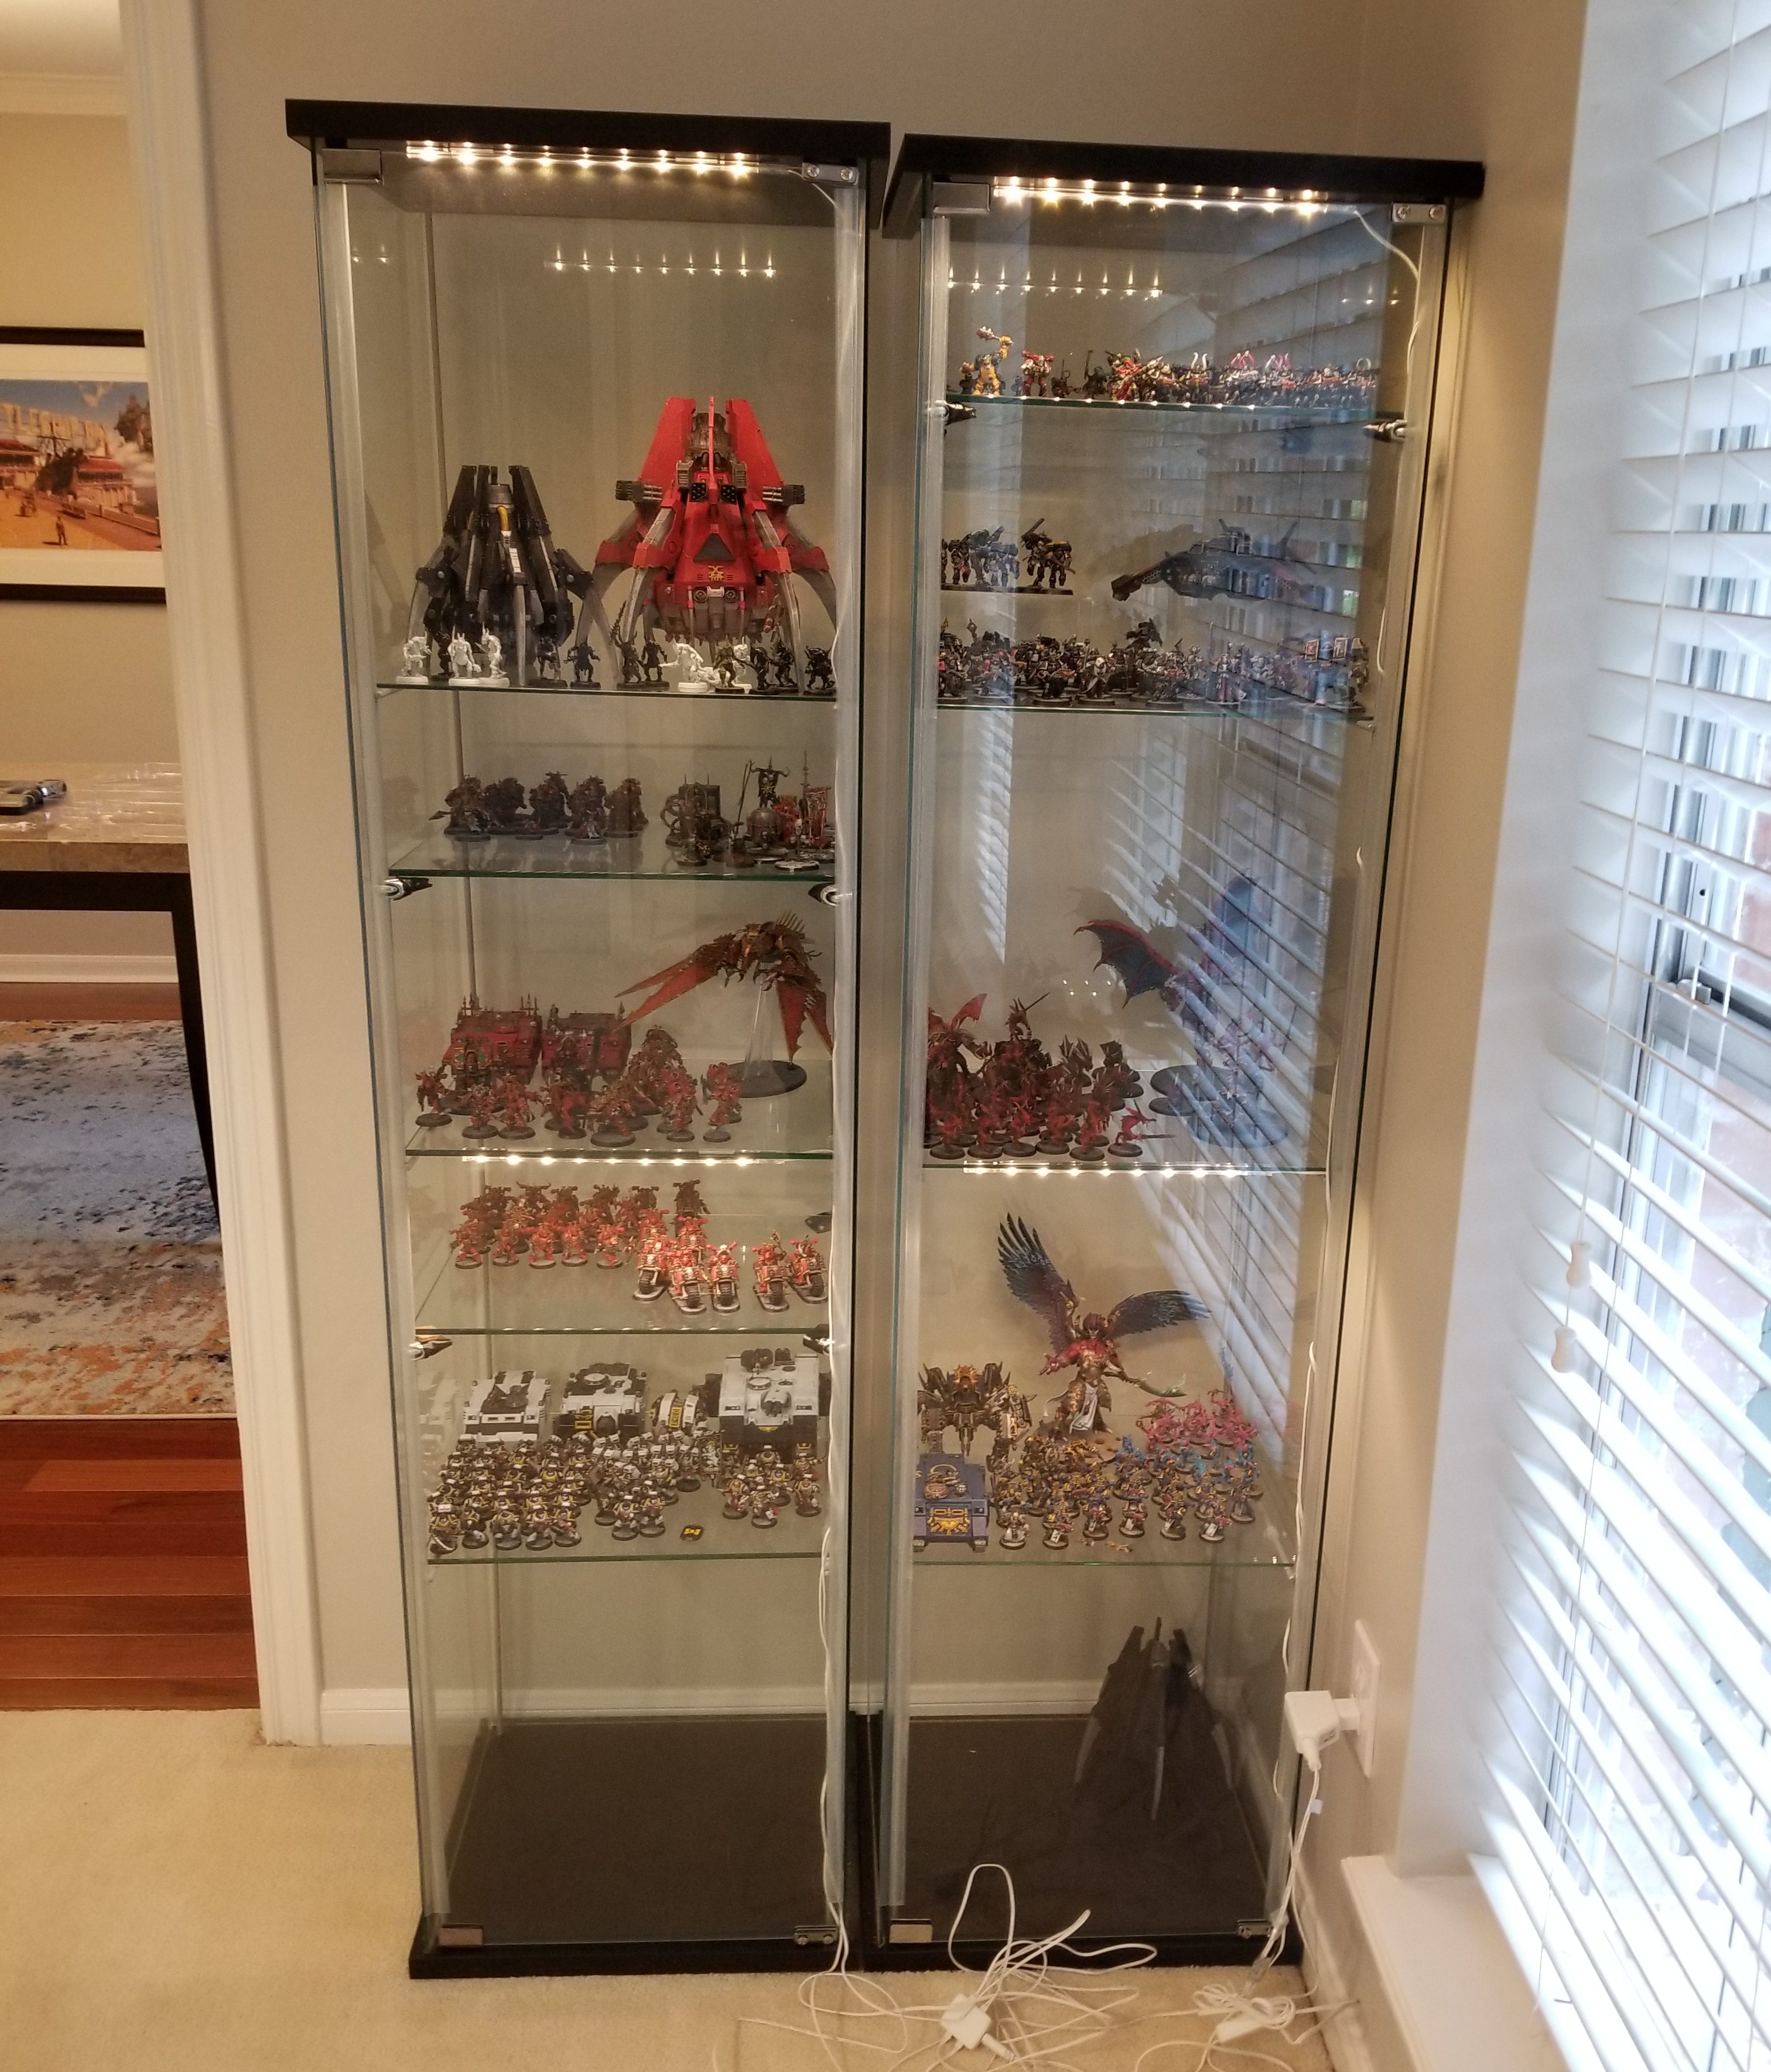
I’d end up using the same method my friend Greg came up with a few years ago to add the extra shelves, using wire clips from home depot and wrapping them in Electrical tape as a way of adding support for the shelves. The lights are just the ones IKEA sells and while I initially ran them up the front of the cases, I’d later redo the wiring so they’d plug in to power strips on top of each pair of cases. This is because the Detolf plugs look fuckin terrible sticking out of the walls and I also wanted to add a Sonos to the room – more on that in a bit – so it made more sense to have power strips on top of each case.
The other major addition I’ve made here is to add strips of 3M weatherstrips to the doors – this essentially stops dust from getting into the display cases and it’s a total lifesaver. This used to be a major issue, with dust building up over time. Nowadays I don’t have to worry about it, and the models inside always look great. I’d highly recommend doing this to your cabinets.
Part 4: Seating
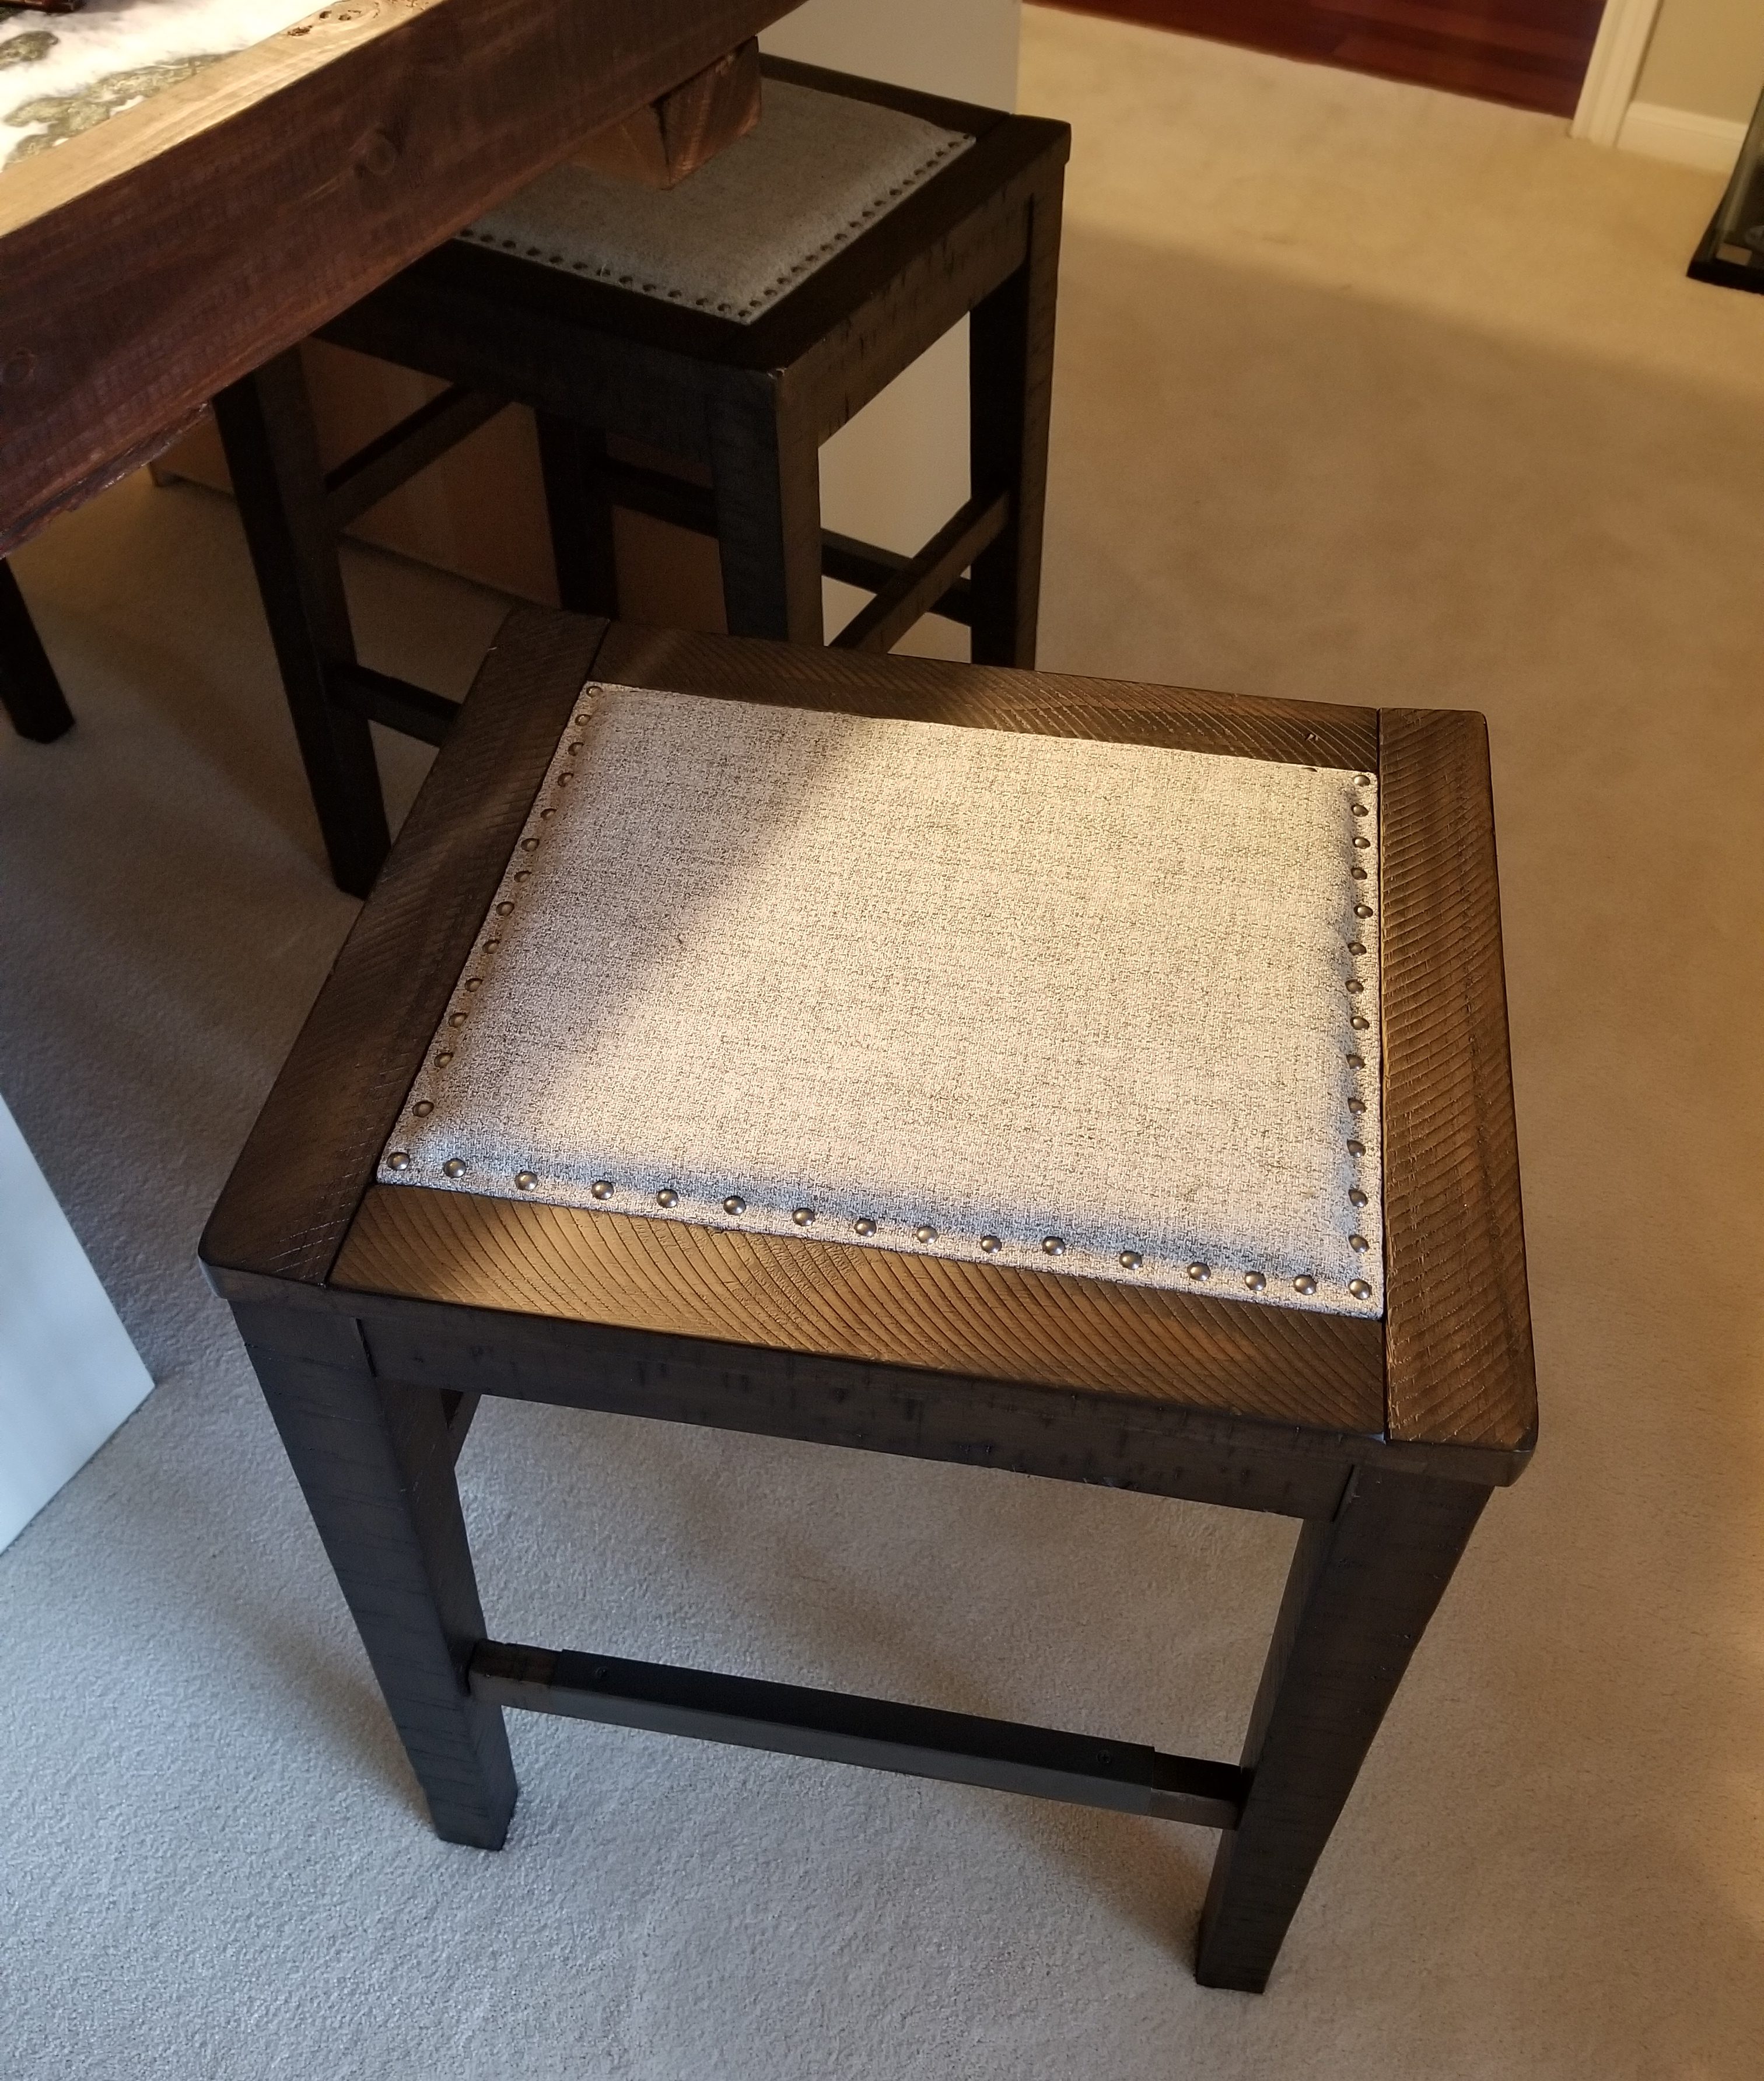
Although I already had a pair of stools in the room that the prior owners had left in the house, these were a little too tall for the table, plus they were wobbly in ways I didn’t love. So after I’d stained the table I went over to Ashely Furniture and found a set of four shorter, well-made stools to tuck under the table. These all fit under the table very well and are extremely well made. They’re cushioned – also important – and while they don’t have backs (a tradeoff I had to make to have them stow more easily), they’re pretty comfortable.
Part 5: Tunes

One of the things I loved about playing at the Glen Burnie battle bunker as a kid was that they always had on some awesome soundtracks – typically the Conan the Barbarian soundtrack would be playing and it always set the mood perfectly. I knew that I wanted background music in my game room and so I went ahead and picked up a Sonos One SL for the room. The Sonos is a pretty solid speaker that can connect to your wifi network and be controlled by a phone, and my favorite parts about the SL are:
- It does not have a microphone, nor does it have Alexa
- It can connect to my Pandora account, to play my movie soundtracks playlist
The lack of Alexa means there isn’t a microphone in the room listening to us at all times, and it means my friends can’t yell stupid shit for my speaker to do. The thing sounds pretty great overall, and works very well for game day background music. I keep it on top of the display cases.
Part 6: Terrain Storage
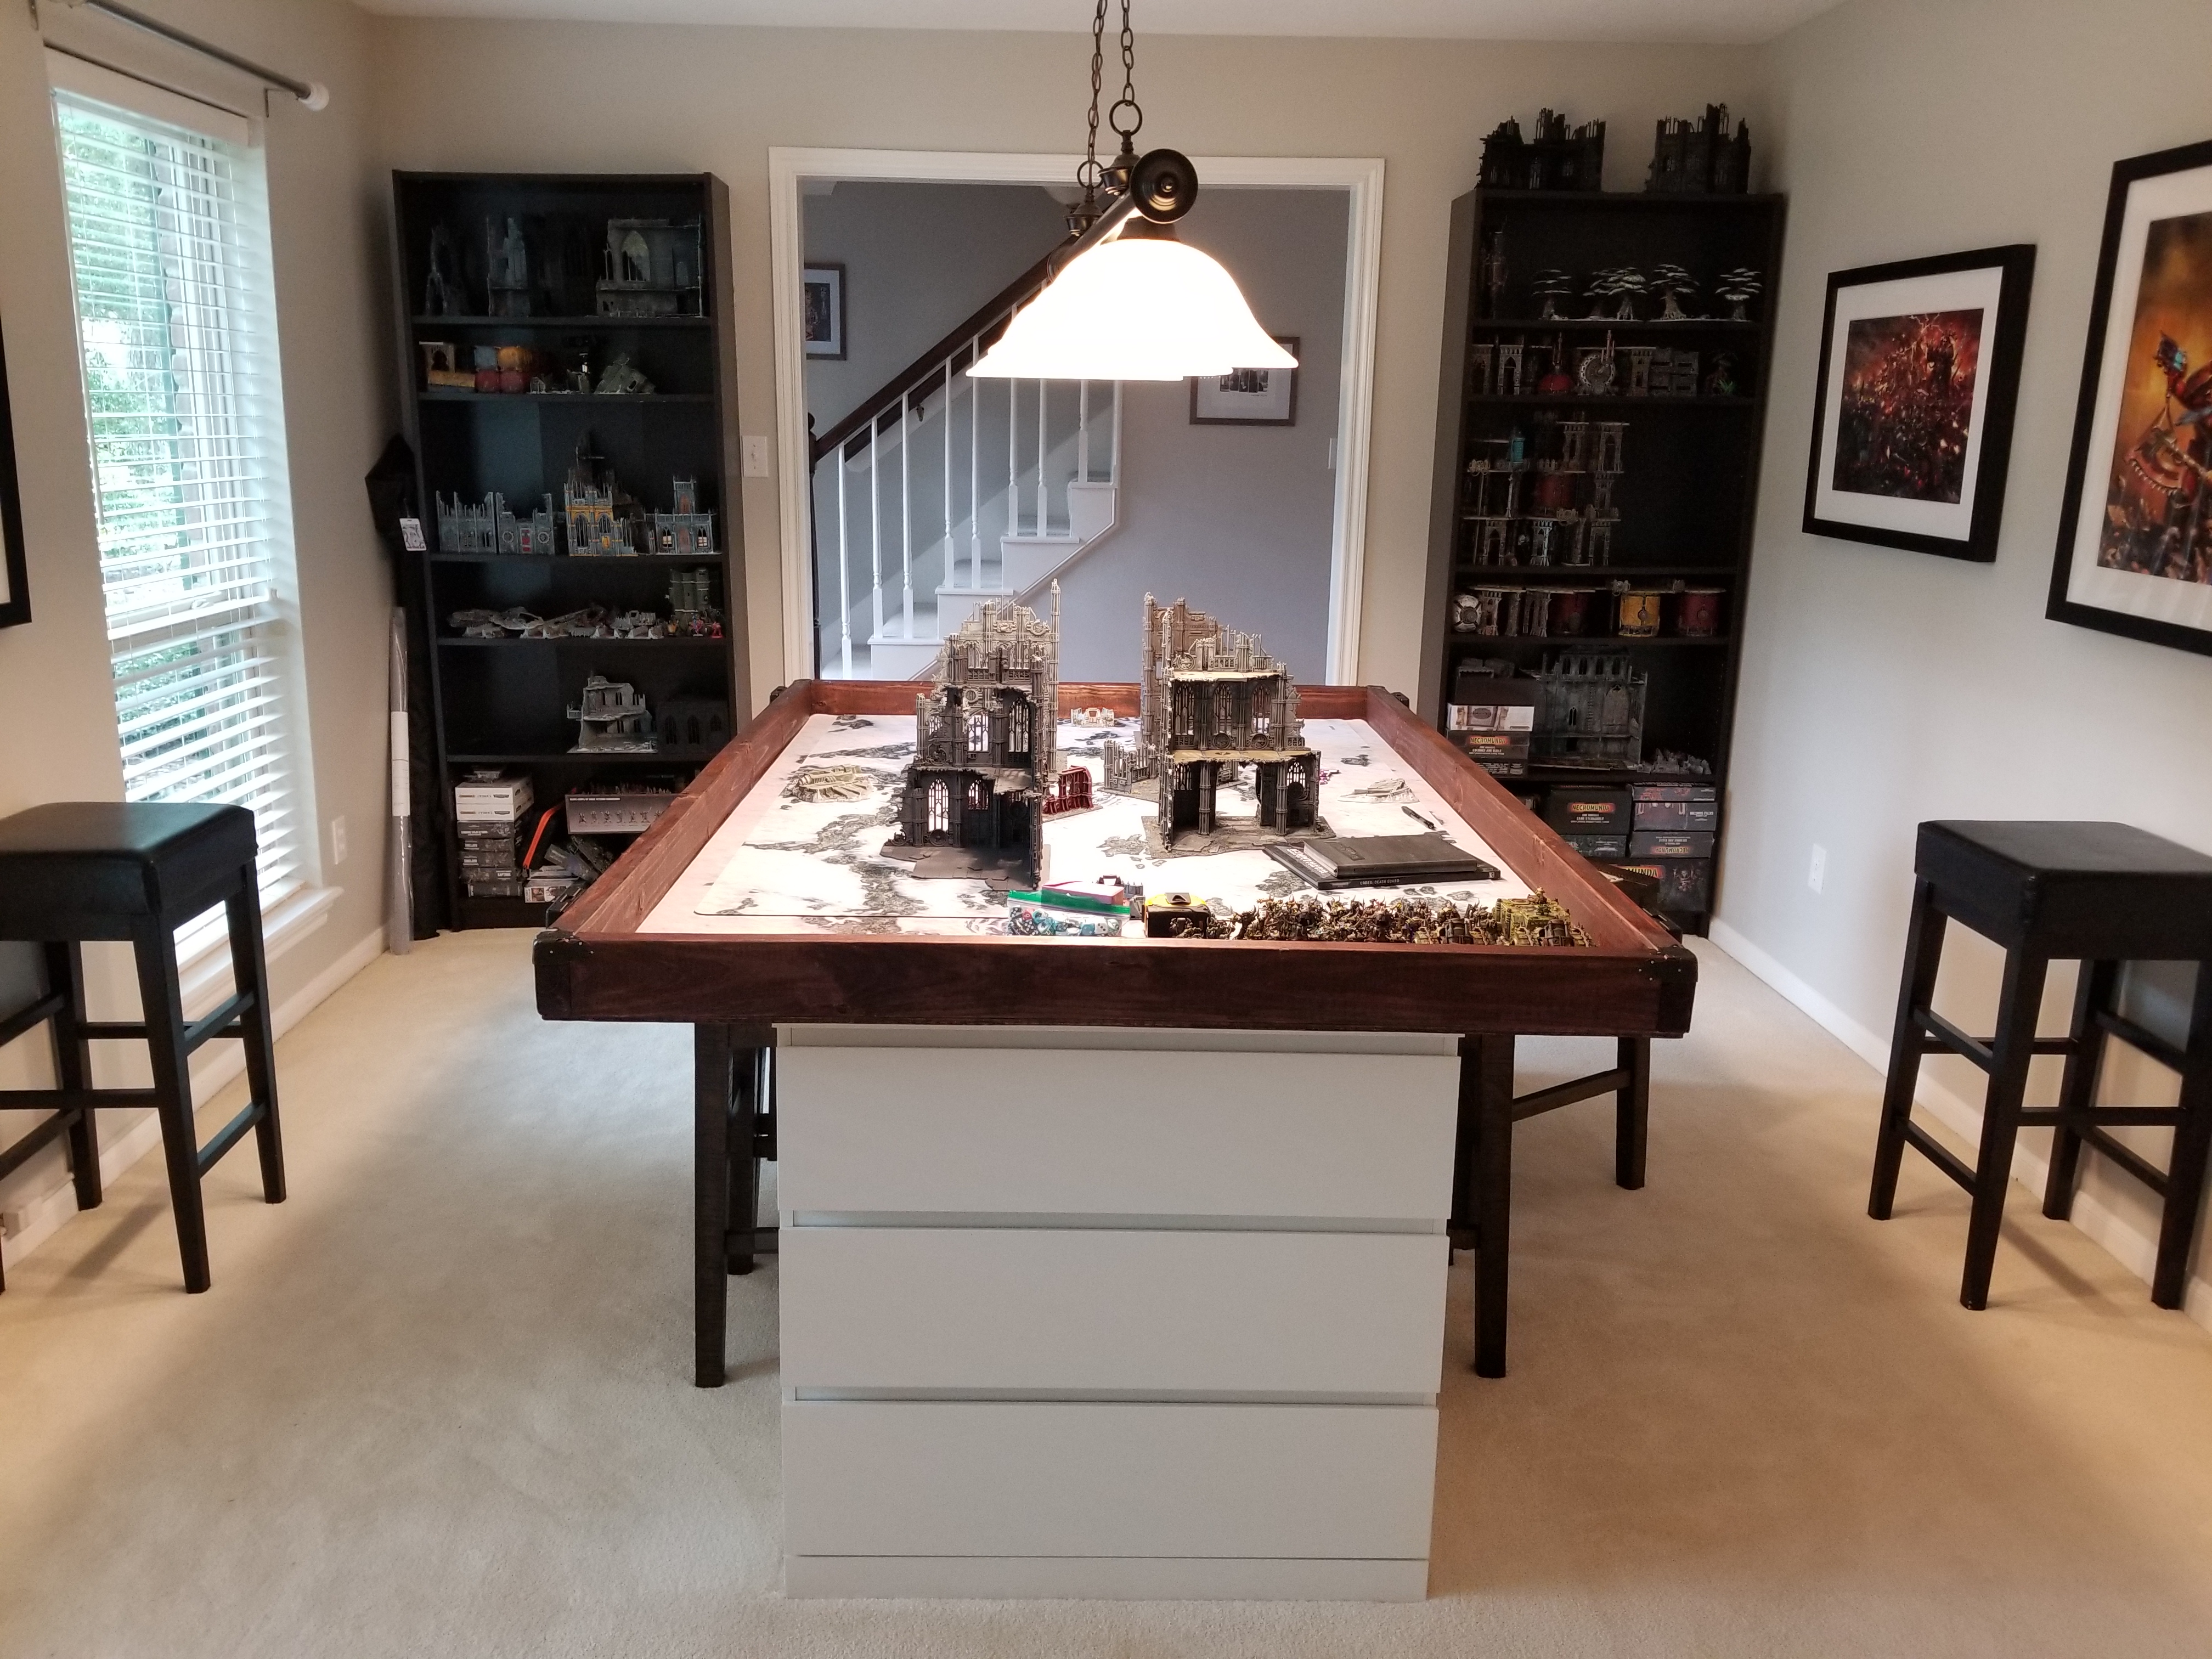
Terrain probably takes up more space than anything else I need to store in the room. In addition to six drawers for storage under hte table, I’ve got two tall IKEA shelves on the far side of the room for storing terrain. Even with these, it’s still a bit of a Jenga-style process to fit things, but I’ll be making more room and moving some things around in the future as I clear out some of the boxes of minis currently taking space on the shelves. I put the tallest terrain I have on top of the shelves here.
Part 7: The Wall Decor
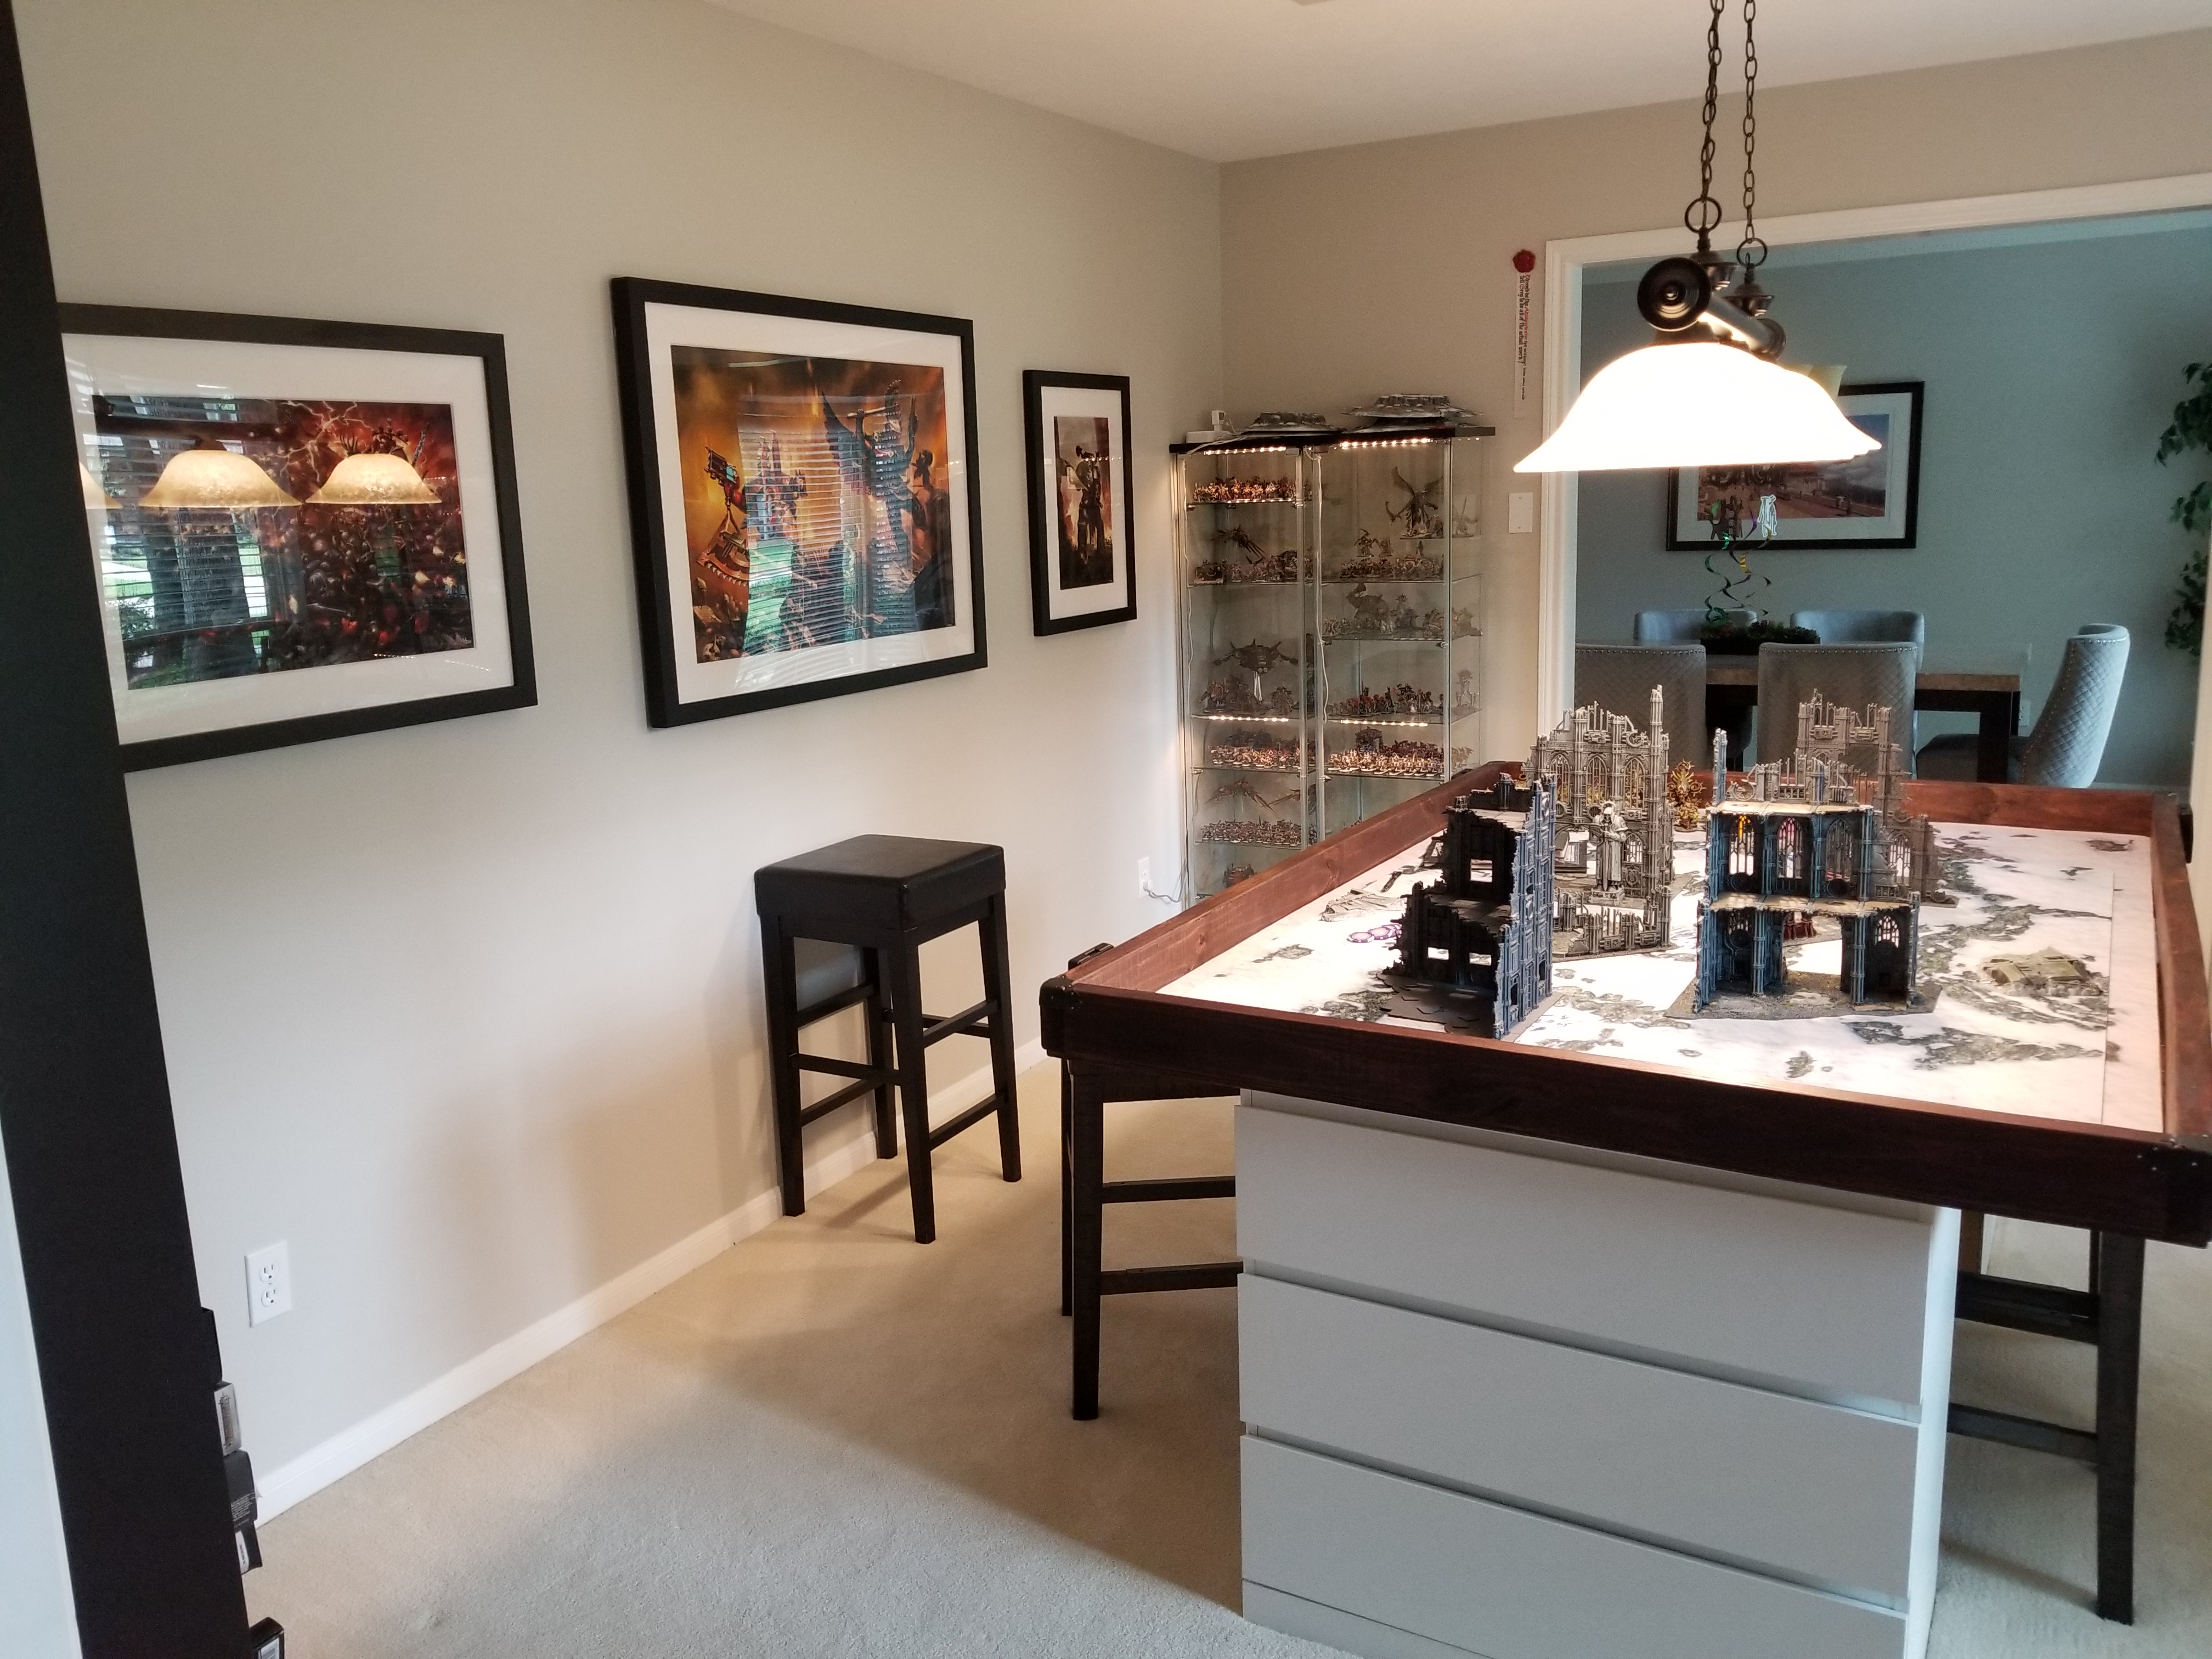
For the wall decor, I’ve opted for a series of large, framed prints showcasing my favorite artwork of Chaos Space Marines stuff in 40k. All of this comes from Warhammer Art, a site that specializes in official Warhammer 40k prints. I ended up ordering four prints from them, including a 24″x36″ print of the Kharn vs. Lemartes print from the cover of Traitor’s Hate, which is just a stunning piece.
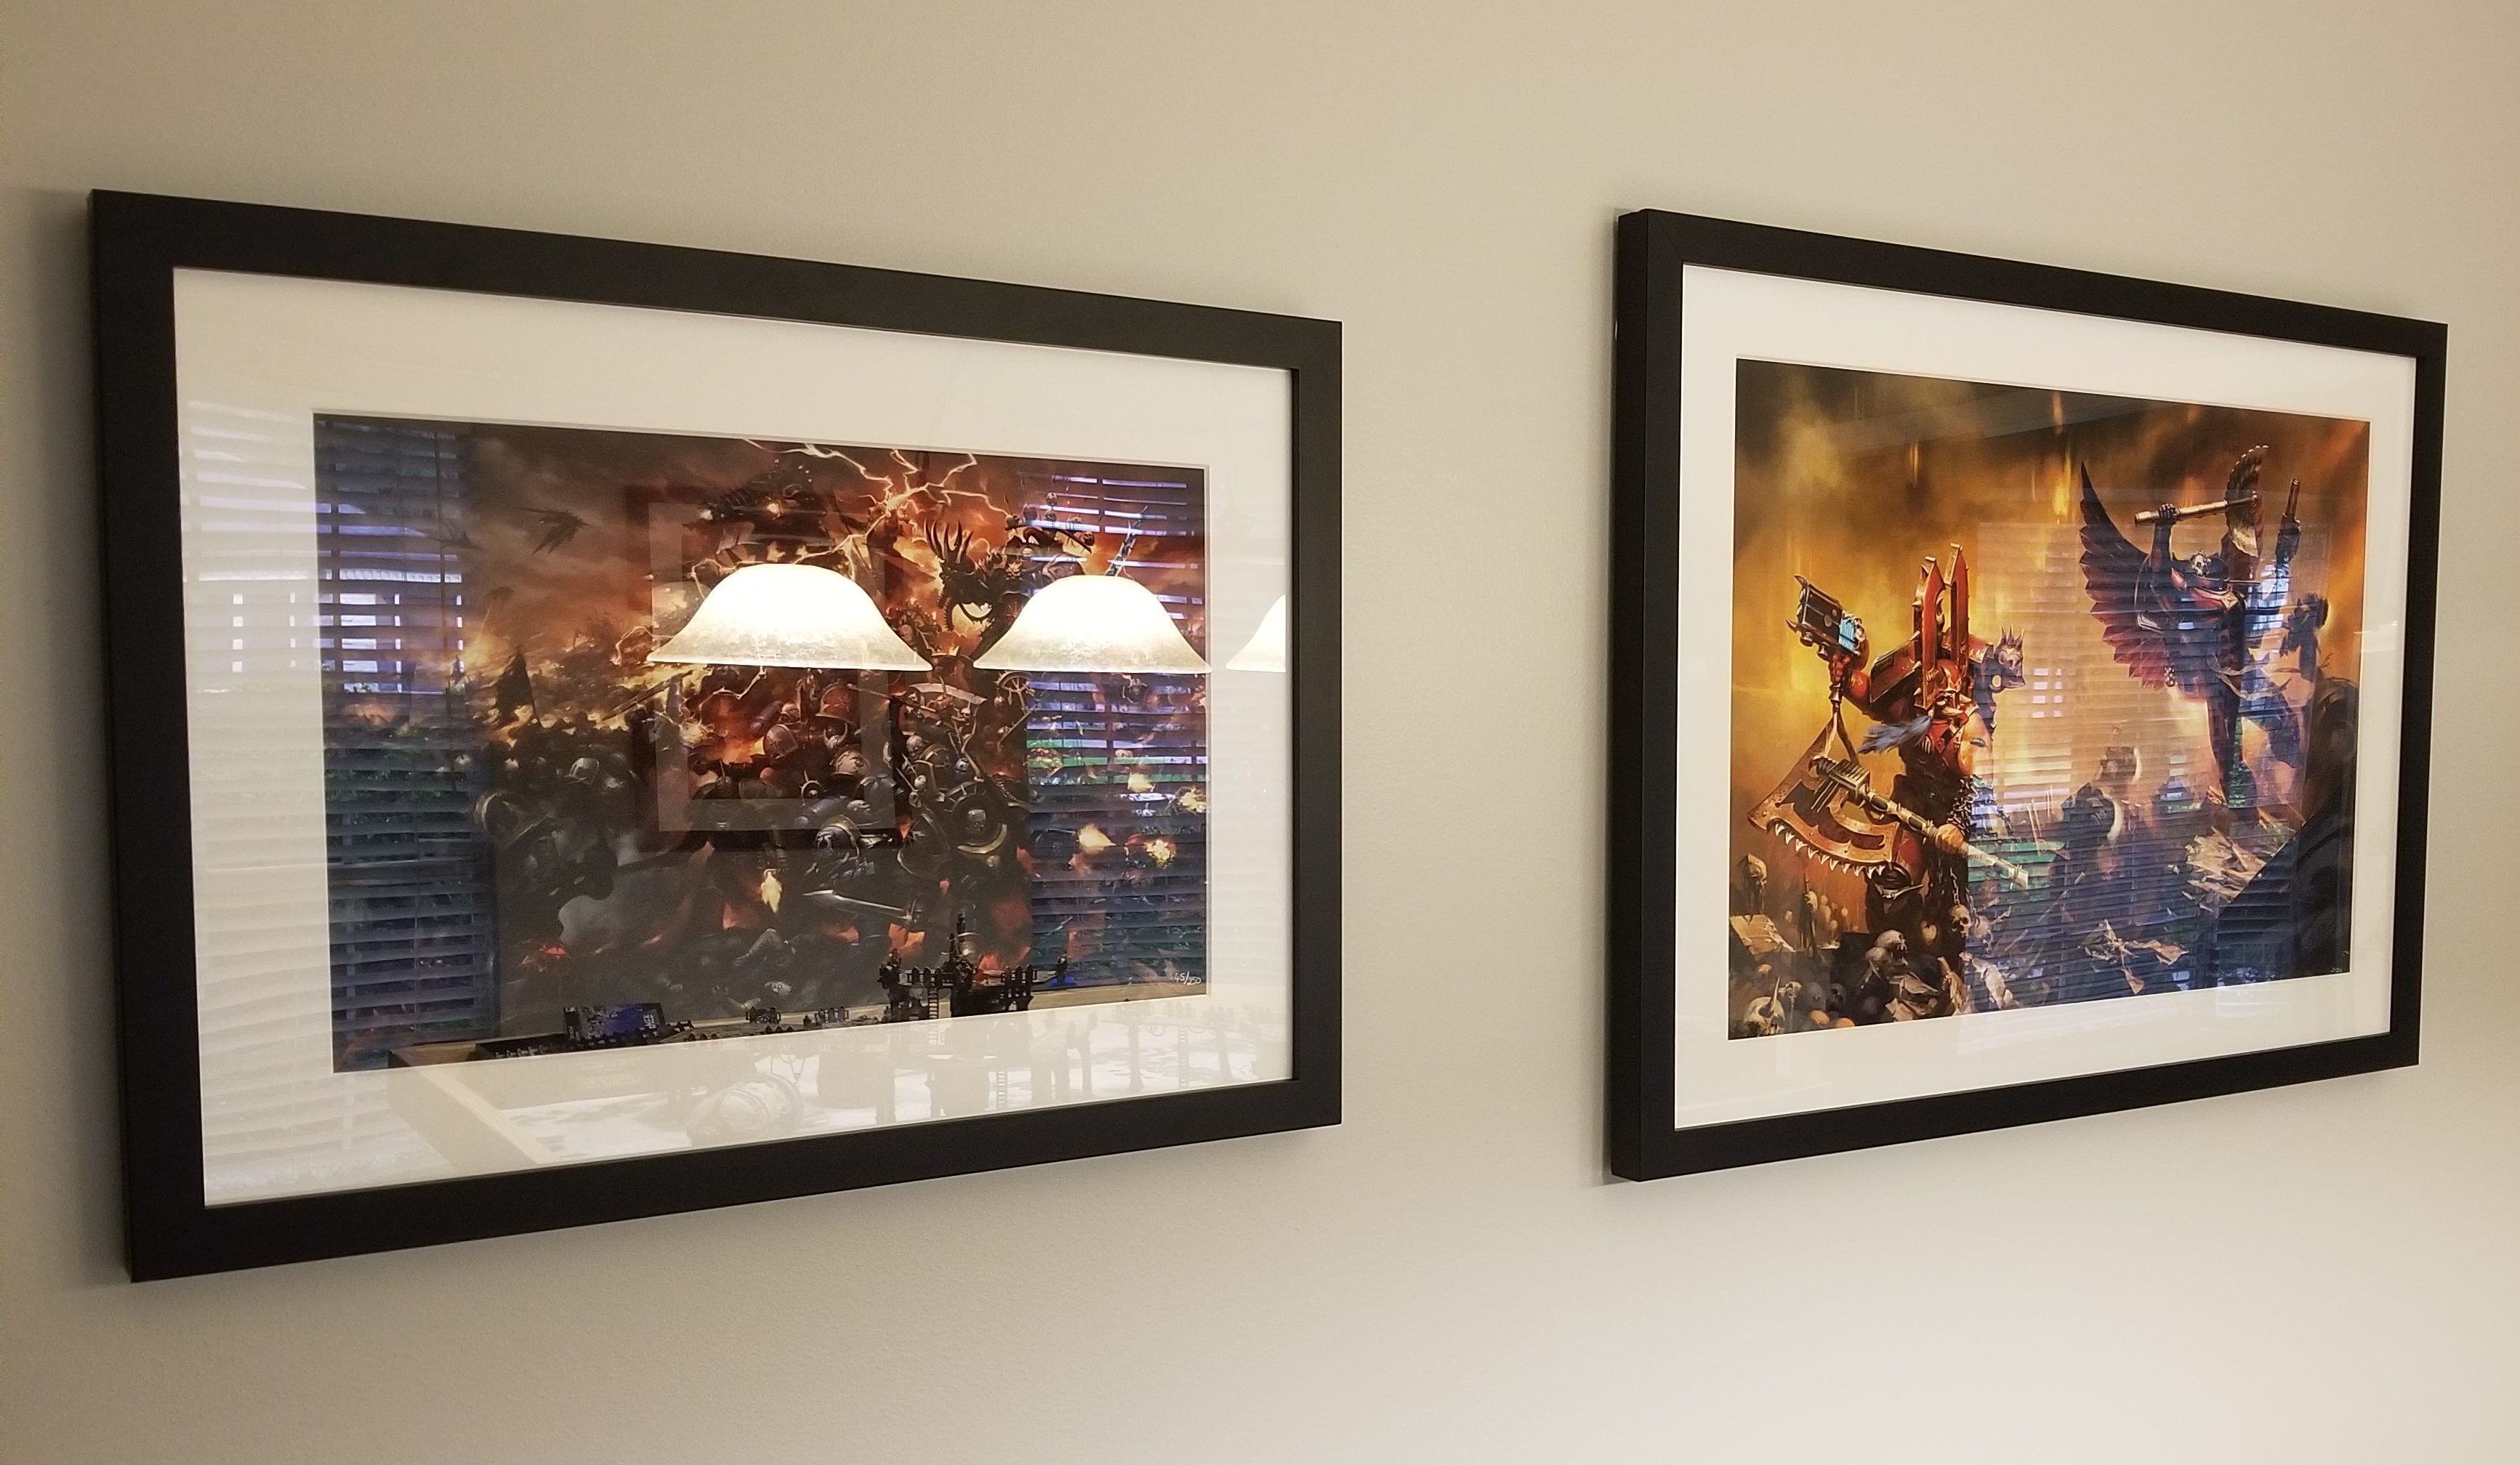

On the other side is a print of Mortarion leading the Death Guard, which rounds out the whole space nicely. These prints really add a lot to the ambiance and if you can snag one or two, I’d highly recommend it. That said, I might encourage you to get them framed locally – I ordered mine framed and while that was nice, I ended up having to get the Kharn print re-set after the mat detached from the print, which cost more than I’d have liked to have spent on an already expensive print. Anyways the quality on them is great and the effect really makes it feel like “real” art on the wall as opposed to say, just a poster.

Coming back to that space with the Sonos, I also keep a cosplay/replica Bolter up there – this was a Best Man gift from fellow Goonhammer author Greg, and was something he ordered off Etsy from a hobbyist in Australia. It looks great and while I may mount it on the wall eventually, it works very well in that spot. On the opposite side I’ve put the custom purity seal Evan “Felime” Siefring made for me at the US Goonhammer Open and eventually I’ll make another one to put on the opposite side of the door frame there.

The space also connects to my dining room, where there’s another table that, in a pinch, can be converted into another 40k table to allow for games going side-by-side. This is something I’ve done a few times and it’s plenty comfortable.
Part 8: What’s Next?
At this point, the space is mostly complete. There are a few other things I still want to do in the space, but they’re also minor “quality of life” improvements at this point. The biggest thing I’d like to do is add a dice tray to one side of the table, likely to be done with metal hooks so it can hang off one of the short table sides, and I may do a pair that can be easily moved around and attached/detached. I also want to come back and put a urethane gloss coat on the wood, giving it a really high quality finish. I may also investigate putting some kind of sliding trays under the table, and potentially putting some kind of power/charging solution into the table as well, but I’m just completely out of my element when it comes to electrical so that last one is more of a pipe dream. The Ikea shelves may also get replaced at some point, and I’m going to pick up a few more cosplay props to put on the walls – I’d like a replica chainsword to put over one of the door frames, and there’s room for more purity seals.
Well, that wraps up the epic saga of my three gaming spaces. It has been a fun time writing these articles, documenting the spaces I’ve built and played in over the last decade or so. I’m extremely happy with my current space, and looking forward to playing there for years to come and slowly adding small improvements here and there. Come back next week when we’ll be talking to Dylan Gould about his space. And in the meantime, if you have any questions or feedback, drop us a note in the comments below or email us at contact@goonhammer.com.
