
Turn your physical models into digital 3D models in this guide to photogrammetry. This second article covers cleaning and preparing photos in Photoshop.
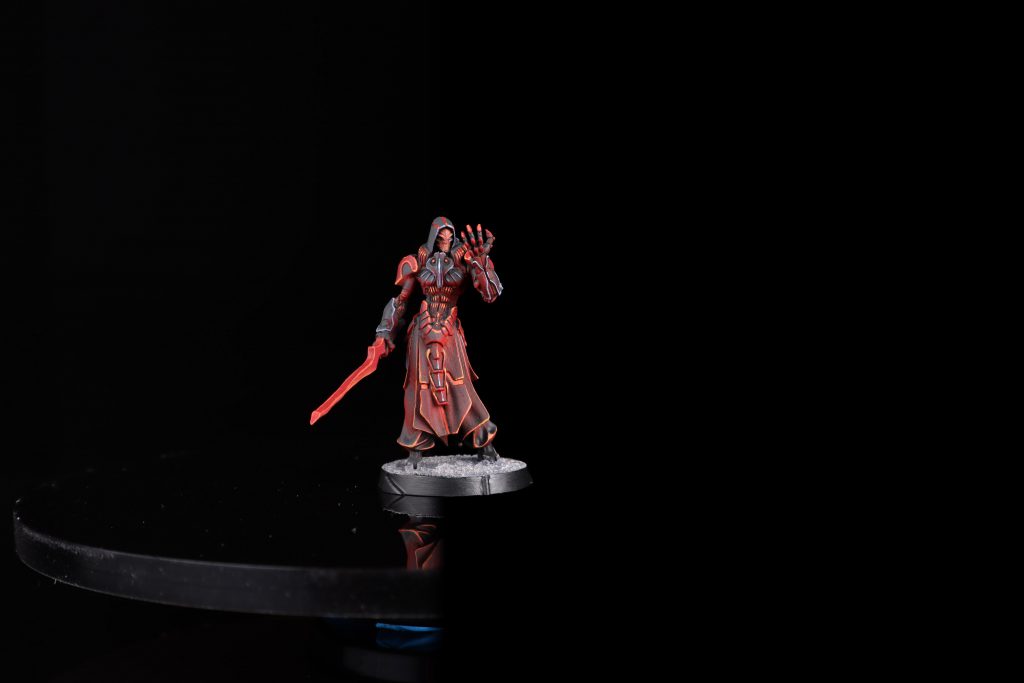
Welcome back to Getting Started with Photogrammetry, this time I’ll be covering how to clean photos in Photoshop. If you’re new here, go ahead and checkout the first article in the series which covers what photogrammetry is how many photos to take and at what angles, and how to get great looking photos. But to keep it brief, the overall goal of this series is to turn your physical models into 3D models and import them into Tabletop Simulator.
With 30-50 photos of your model ready to go, let’s do a little bit of cleanup to get them them spotless.
Table of Contents
Why Clean Photos
Even with the best of setups, you might find things in your shot other than the model itself. Anything from bits of dust, all the way up to parts of your lazy susan or light blockers. The photogrammetry software we’ll be using doesn’t know the difference between your model and a stray hair, so if you give it a photo of a model with cat hair on it, then those hairs will show up in your final 3D model.
To get a more accurate 3D model, we want the photos we feed into the photogrammetry software to be photos of the model, the model’s base, and nothing more. Well, usually, as there’s a big wrench to throw in here.
Removing background detail may cause alignment issues. The front and back of the model, for example, can be mapped to different locations, making your model look like it was sliced in half and sliding apart. If this happens, try leaving the lazy susan in the pictures. Having a large, fixed object to use as a frame of reference lets the photogrammetry software better align the photos and can produce a higher quality result. There are downsides to this though: this can cause texture issues where parts of the lazy susan are mapped onto on the model’s texture, and it can cause the photogrammetry software to take longer to run (up to several hours longer, in fact).
Like every step in this article, there’s no single correct way to do this. In fact, you might be able to skip this step entirely. The next piece of software we’ll be using, 3DF Zephyr, is pretty great and you might find success with pictures straight from your camera. However, I’ll nonetheless walk through the steps I personally use when building my 3D models.
Photoshop
To clean these photos, I use Photoshop. It’s basically the golden standard of photo editing software, and if you’ve never used it before, it might be worth grabbing a free 7 day trial to try out. I personally find Adobe’s Cloud Creative Photography subscription to be worth it. It’s about $10/month, and gives me all the latest Photoshop updates, but that’s a decision between you and your wallet.
Photoshop Alternatives
That being said, I’m confident that you can similarly clean photos with free software, like Gimp or 3DF Masquerade (which comes with 3DF Zephyr). Masquerade is a bit clunky to use, but it’s designed for the single purpose of creating masks for photogrammetry pictures, as opposed to the swiss army knife that is Photoshop, or the swiss army spork of Gimp.
I’m not going to cover how to clean photos in either of those pieces of software, partially in the interest of keeping this article series focused on my personal workflow, and partially because I’ve used Gimp for maybe a total of 30 minutes in my life and it was struggle to figure anything out. Okay, it’s mainly because of the later. Oof Gimp, oof.
Open the Photo and Create a Backdrop
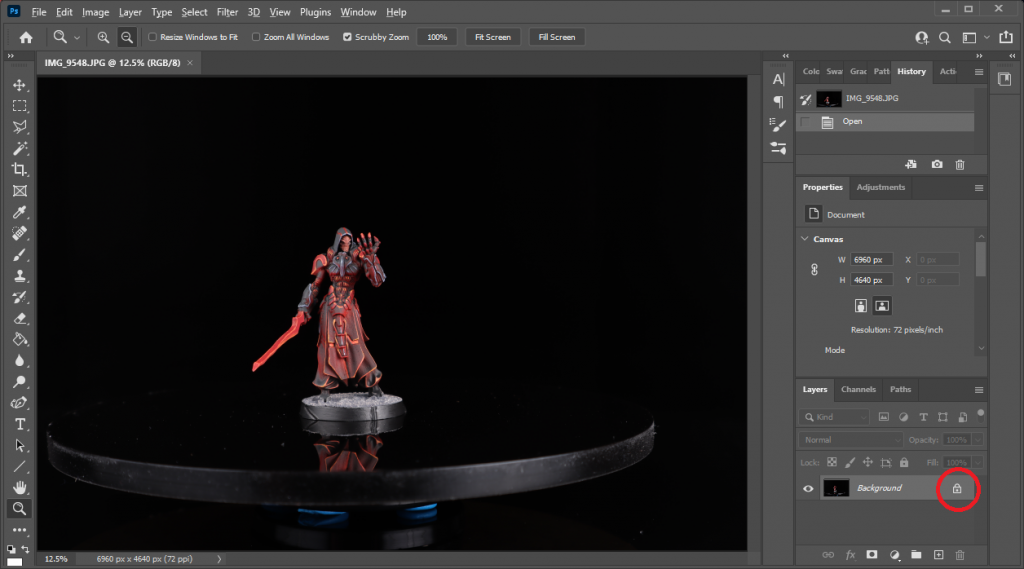
Now that we’ve settled into using Photoshop, open up your photo in Photoshop and be sure the layer is unlocked. You can do this by double-clicking the layer and pressing OK, or by clicking the lock icon (circled in red above).
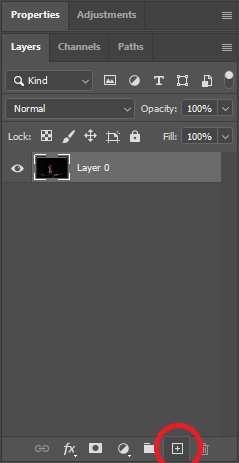
Create a new layer underneath the photo by clicking the + on the bottom of the Layers panel, and rename this layer by double-clicking “Layer 1” and give it the name “Backdrop”. Drag this new layer underneath your photo’s layer (which should be named “Layer 0”. Go ahead and rename that one “Photo” for good measure), and use the paint bucket tool (g) to paint your backdrop layer solid black.
Next up we need to create a pair of Adjustment Layers: one to give the color a bit of pop, and the other to crush the dark greys into pure black.
Adjustment Layer – Auto
Adjustment layers let you modify aspects of a layer without destructive changes (i.e. any change you make to the adjustment layer does not alter the layer it’s adjusting). You can always delete the adjustment layer later, and you’ll be left with the original, untouched photo. This is yet another step which might be unnecessary for you, but I’ve found it helps make better looking 3D models.
We’ll be adding two adjustment layers, the first being one with some automatic settings that help create a better contrast between the black backdrop and the model.
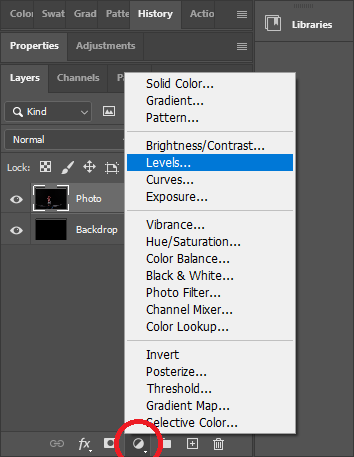
First, click the photo’s layer, then add an Adjustment Layer (the red circle in the above picture) > Levels. Name this new layer “Auto” to keep track of it.
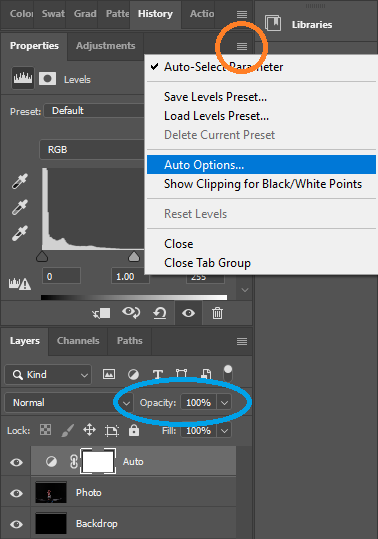
In the properties of this layer, click the dropdown in the top right (circled in orange in the above picture), then click Auto Options. Then pick the algorithm that you feel most accurately reflects how your model looks in-person. For black-background pictures, I almost exclusively use Enhance Monochromatic Contrast. Now this setting can be a bit too vibrant, so after clicking OK, I usually adjust the adjustment layer’s opacity to 50% (circled in blue in the above picture) in order to dampen the effect just a bit.
You can toggle the adjustment layer on and off by clicking the eye to the left of the layer. Go ahead and experiment with different automation options and opacities to find one that looks good to you.
Adjustment Layer – Manual
Next up is another adjustment layer, this time we want to alter the color of the background from being close-to-but-not-actually black, and change it to be true black.
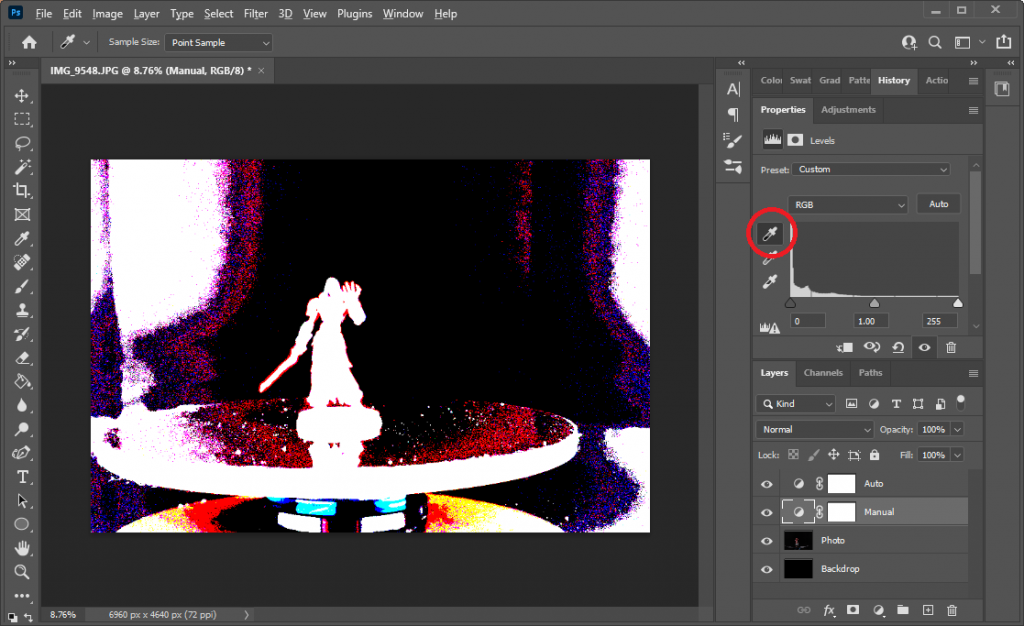
Once again click the photo’s layer, and add another Adjustment Layer. Name this one “Manual”. In the properties of this new layer layer, set the black point by clicking the top eyedropper (red circle in the above picture), then hold Alt and click a spot on your photo that you want to set to black. This new display looks weird, but it’s pretty easy to understand what it’s doing.
While holding Alt, you can see the areas of the photo that are most strongly affected by this adjustment layer. The regions that are colored black are, somewhat intuitively, the areas that you are crushing to black. Click around, holding and releasing Alt, to see how it changes the picture. Try to find an area that creates a nice black outline around your model, while still leaving all the details intact. If you mess up here, don’t worry! Like before, this is a nondestructive change so the original photo is still intact.
Masking
Once you’re happy, there’s one final step: masking. Layer masks act as a cutout, preventing parts of the layer from being visible. Layer masks themselves are black and white: black is the concealing color and white is the revealing color. You can also have grey tones for partial concealment, but don’t worry about that. We’re going to use one of these layer masks to hide all the bits and bobs in the background that the adjustment layers didn’t get rid of. Dust, hairs, lazy susan, hidden Greg: they’ll all be masked away.
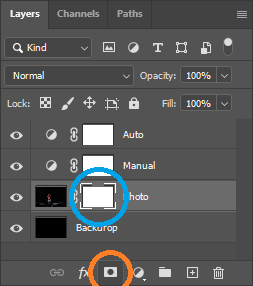
Click the photo’s layer one more time, then click Add Layer Mask. This is circled in orange above, and is directly to the left of the Adjustment Layer button from before. To the right of your image preview, a little white box will appear (circled in blue in the above picture). That box is the layer mask we just created. Select the layer mask by clicking it and let’s begin masking.
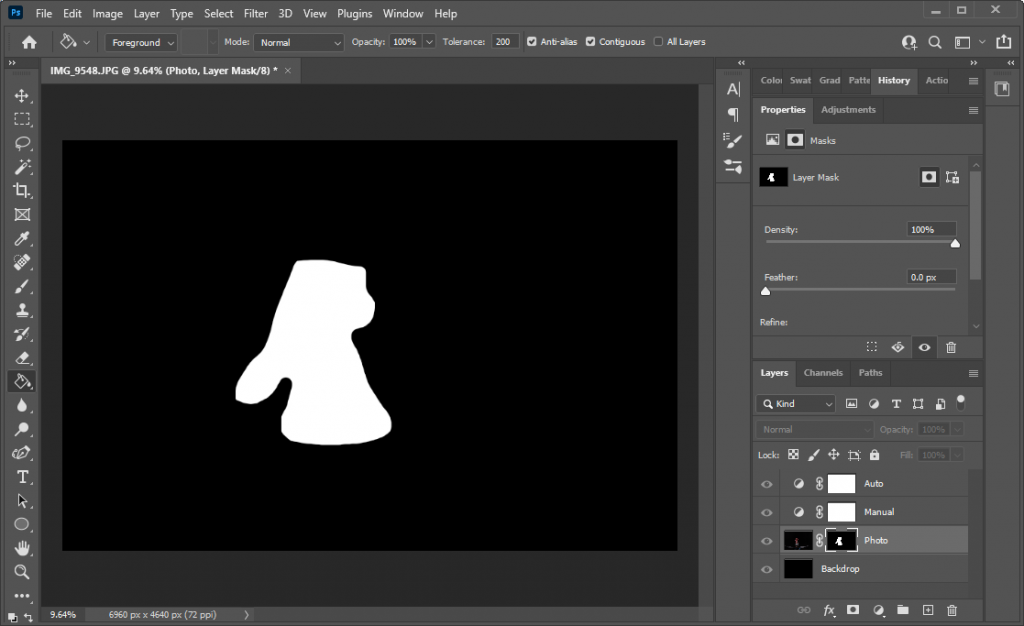
Use the brush tool (b), change the brush preset to Hard Round (brush preset should be in the top left corner of Photoshop), select the color black, and then draw a black outline around your model. Don’t bother with being precise about this, just a 5 second general outline is fine right now.
You’ll notice that your photo is disappearing wherever you draw, but again this is a nondestructive change. We are drawing on the layer mask, and the photo itself is unchanged. To confirm this hold Shift and click the layer mask to disable it. If the outline you just drew remains, then you were drawing on the photo itself, and not the mask. Bust out your Ctrl+Z undos, click the layer mask (circled in blue in the above picture) and draw that outline again.
Switch to the paint bucket tool (g), and click somewhere outside the outline you drew. If your outline didn’t have any gaps, you should see everything outside the outline disappear. To see the directly see the layer mask, hold Alt and click the mask in the layer pane (circled in blue above). This will let you check for gaps and fine tune stuff. To go back to looking at the photo normally, either Alt click the mask again or click a different layer.
Once you have this general mask around your model, the fun begins. The more you mask out of your photo, the better the results of the photogrammetry will be. Ideally the photo is the model, the whole model, and nothing but the model. Using the brush tool, mask away dust, reflections, and anything other than the model or model’s base in your photo.
You can easily sink a lot, and I mean a lot, of time into cleaning these photos by hand. However, remember that you have 30 to 50 of these to get through, and above all else we want all these photos to be consistent. Don’t spend an hour cleaning just a single photo, because you’ve got dozens and dozens more ahead of you. Limit yourself to spending no more than a couple minutes on cleaning each photo. Ideally you should be able to clean all 30-50 of the photos in an hour or so.
Once you’ve got your first cleaned photo, you need a location on your computer to save it.
Project Directory
We’ll be creating a lot of files for this project, so find a good place on your computer to store them all. For this project, I used \Photogrammetry\Infinity – Umbra Legates folder. Save the final cleaned up picture to this project directory, and then repeat all these photo cleanup steps for the other 30-50 pictures you took. It sounds like a lot of work, and it is, but trust me it’ll be worth it.
Next Time

While you work through your photos, I’ll work through the next article in this series. Next time we’ll be importing all these photos into 3DF Zephyr, generating a rough 3D model, and confirming it works in Tabletop Simulator.
Have any questions or feedback? Drop us a note in the comments below or email us at contact@goonhammer.com.
