
The next in our ongoing series for the Totensonntag Pint-Sized Campaign for Chain of Command, this week we’ll play through the first scenario and talk about some of the campaign’s asymmetries and how those are captured on the tabletop.
Last week I introduced the concept of “Pint-Sized Campaigns” and talked about the historical context of the battle. This week we’re going to fight through the first scenario, but I want to take a little bit of time up-front to talk about two important aspects of the game: setting up the battlefield and choosing supports.
The Battlefield
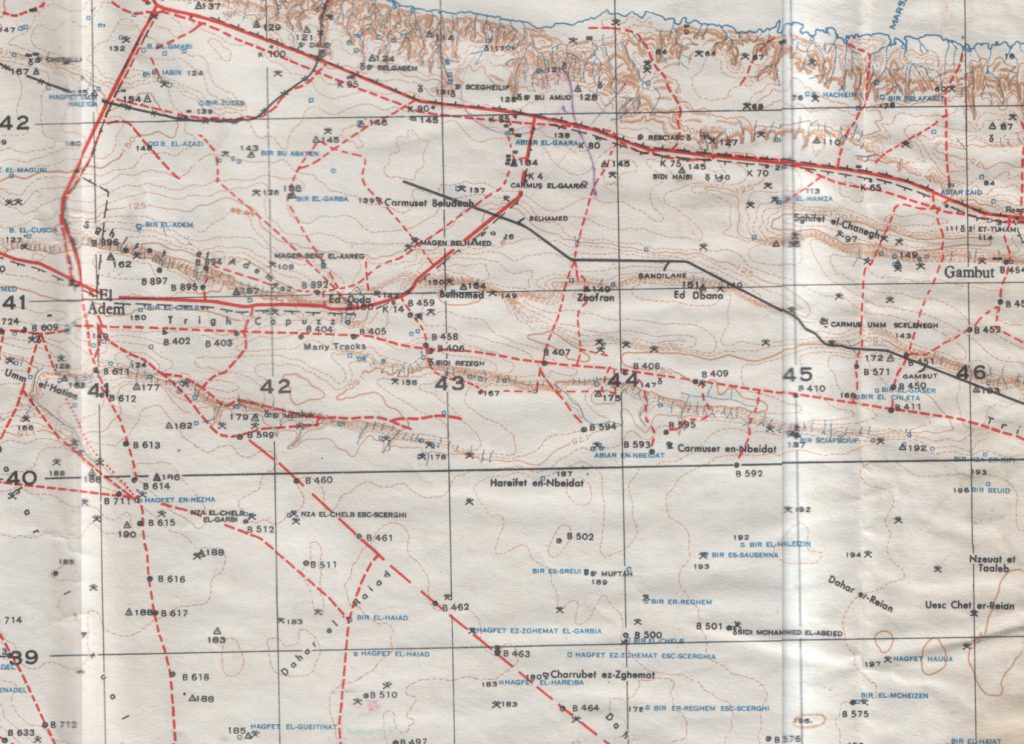
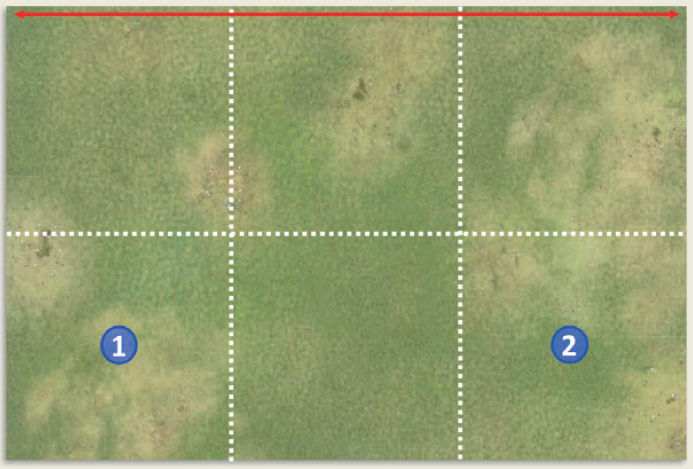
This particular battle was fought in the Libyan desert south of Sidi Rezegh. The land steps up from the coast in a series of escarpments, but the terrain between those escarpments (especially farther from the coast) is very flat – note the wide, meandering elevation contours on the map above. According to Google Earth, across parts of this battlefield there’s an elevation change of less than 10 feet over 5 miles. Just for reference, the curvature of the Earth would cause an apparent elevation change of 16 feet 8 inches over the same distance. When earth-curvature is doing more for you than terrain variation, to call this area flat is an understatement.
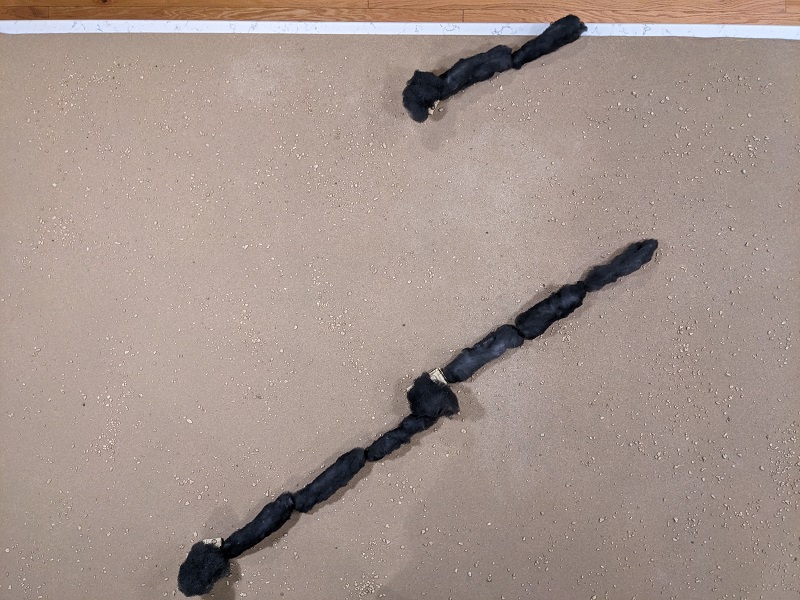
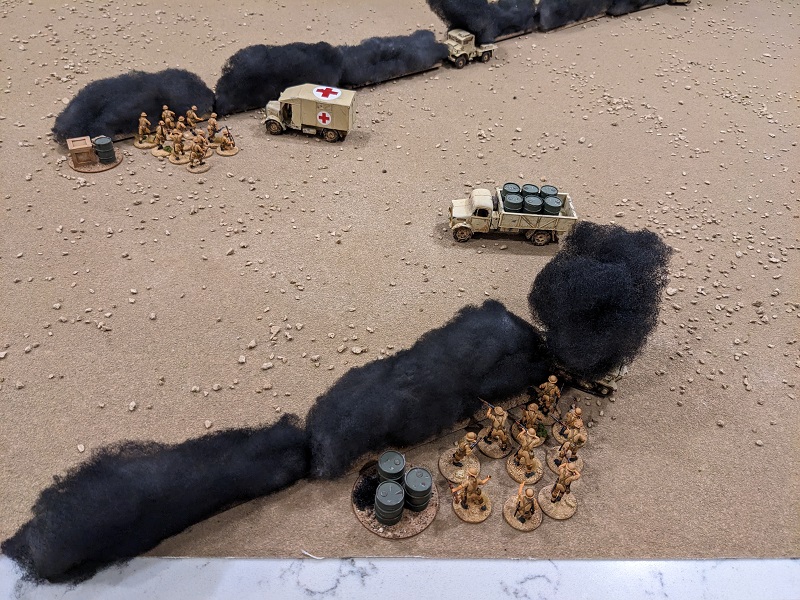
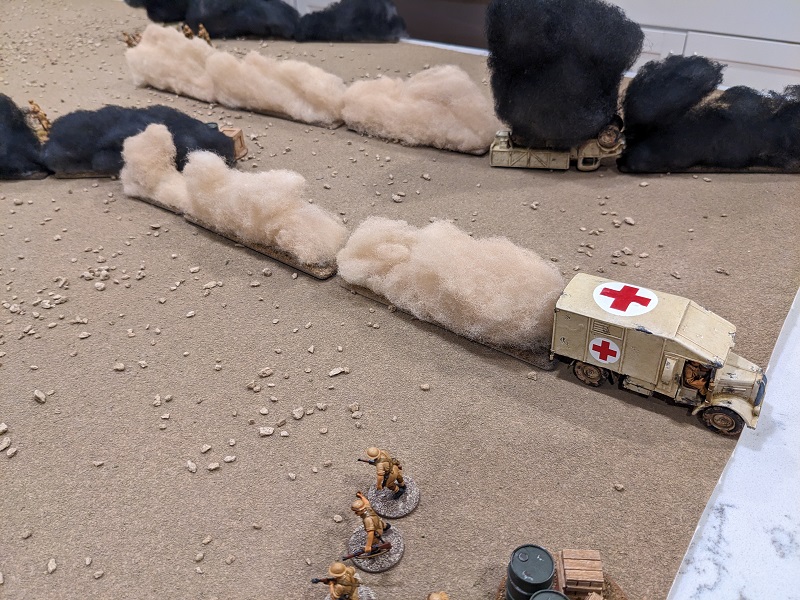
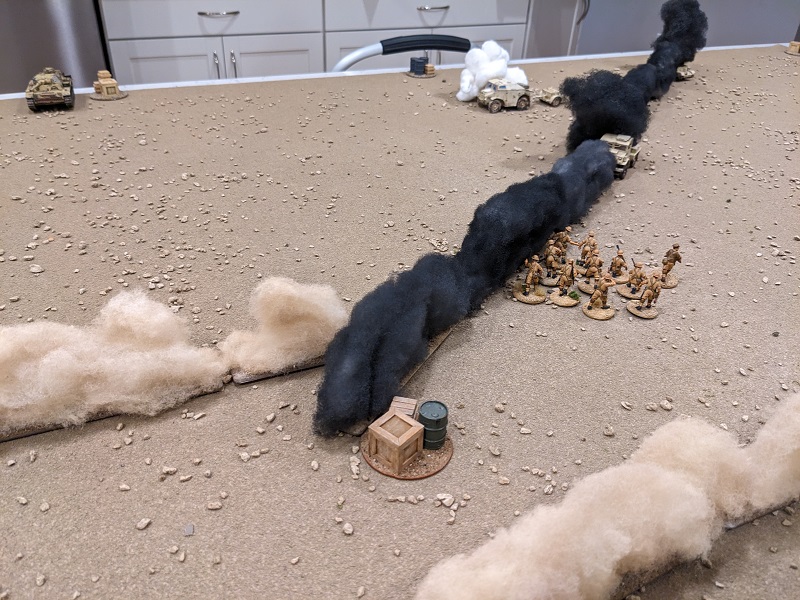
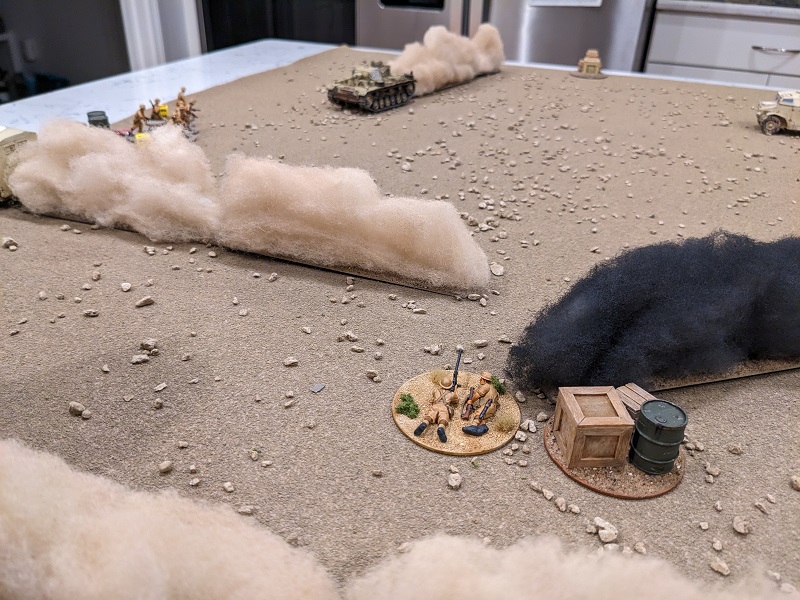
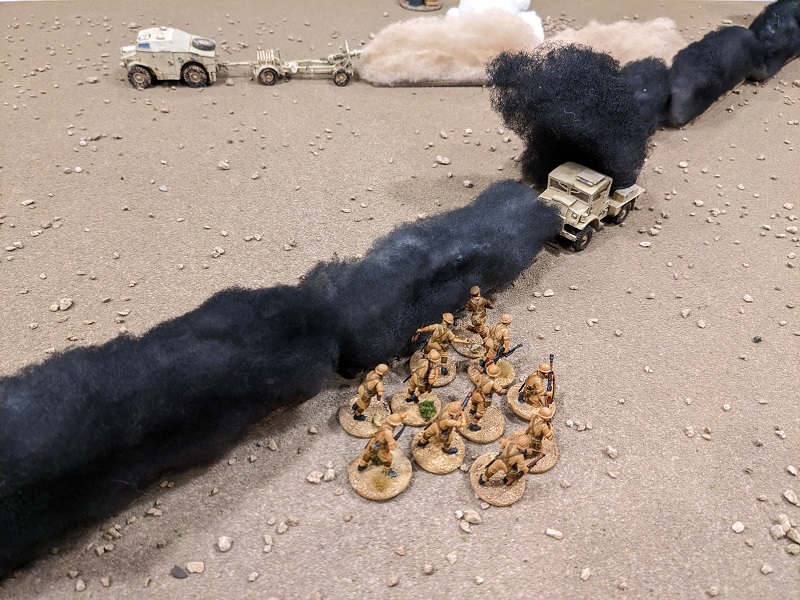
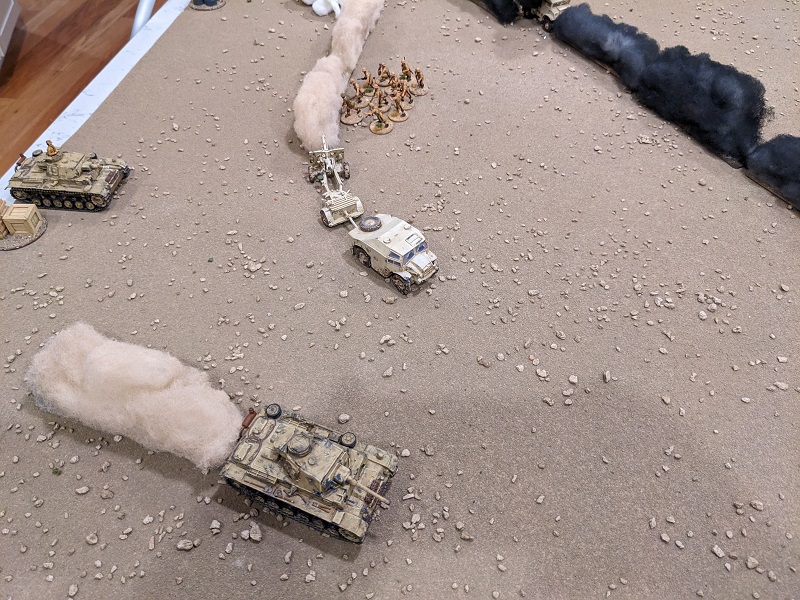
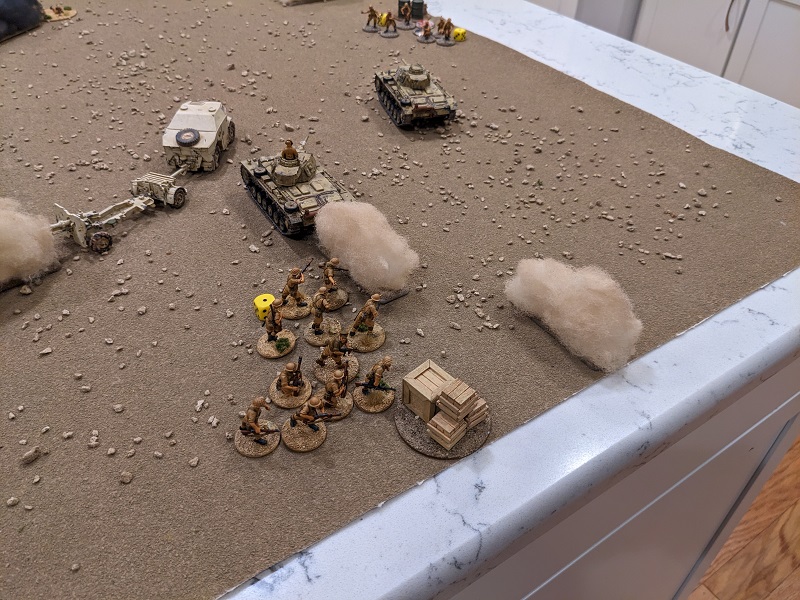
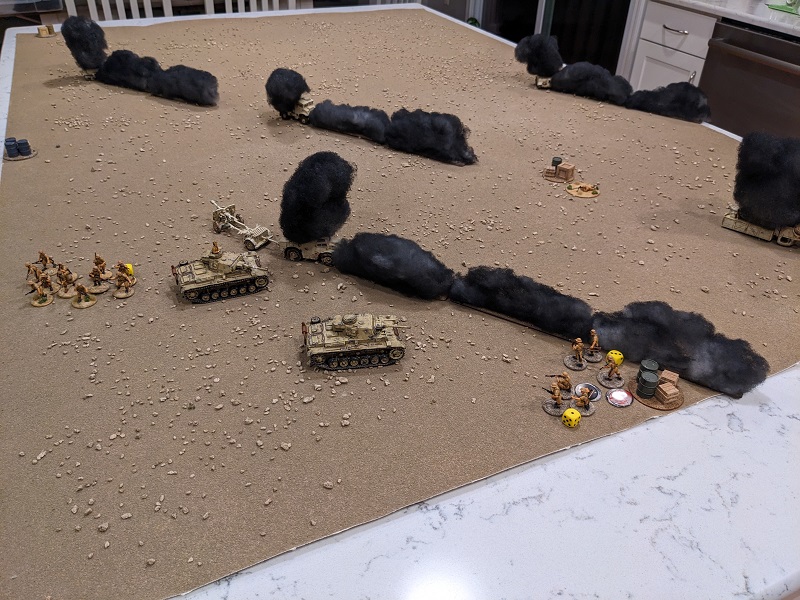
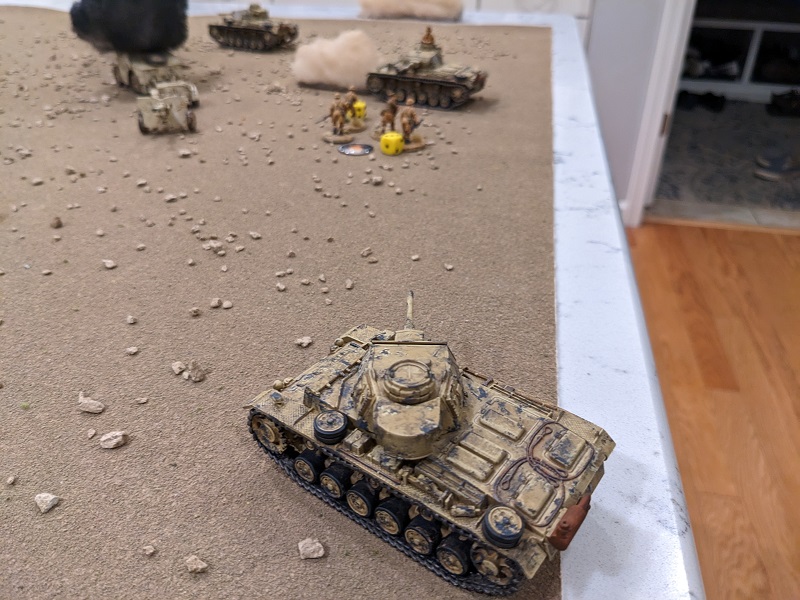
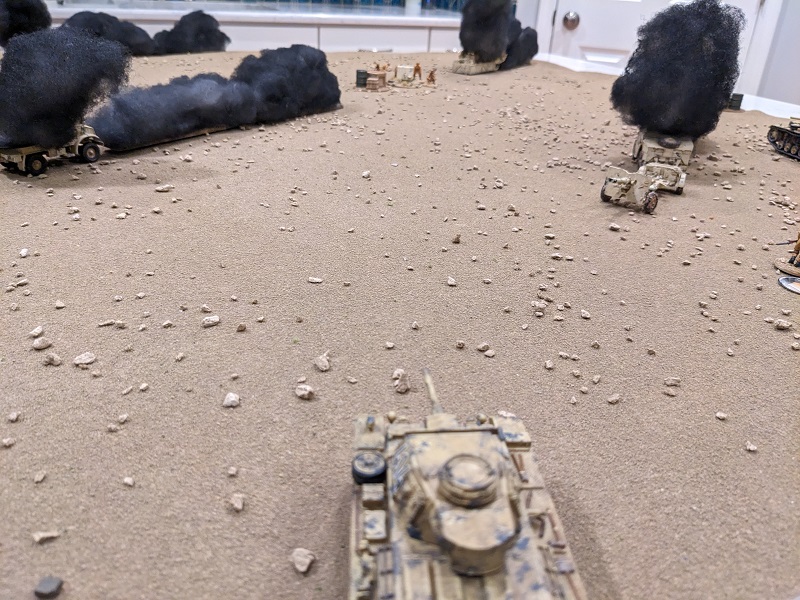
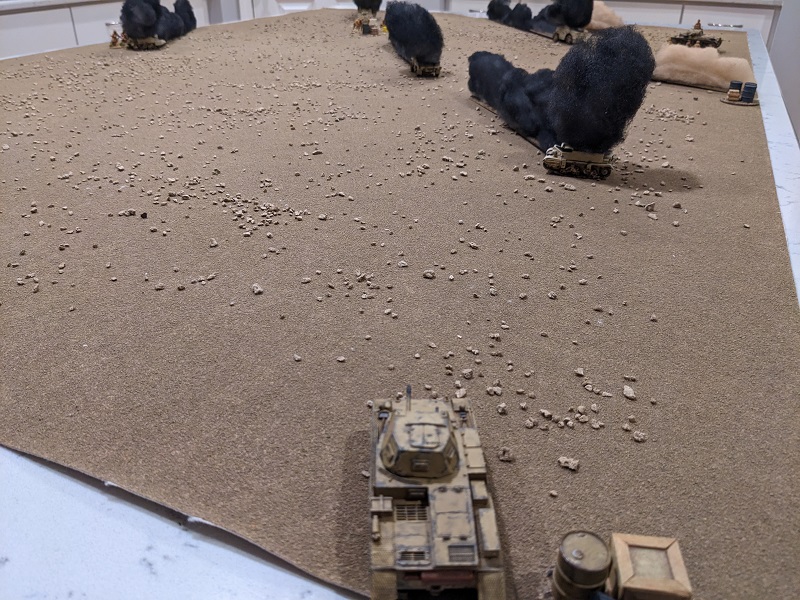
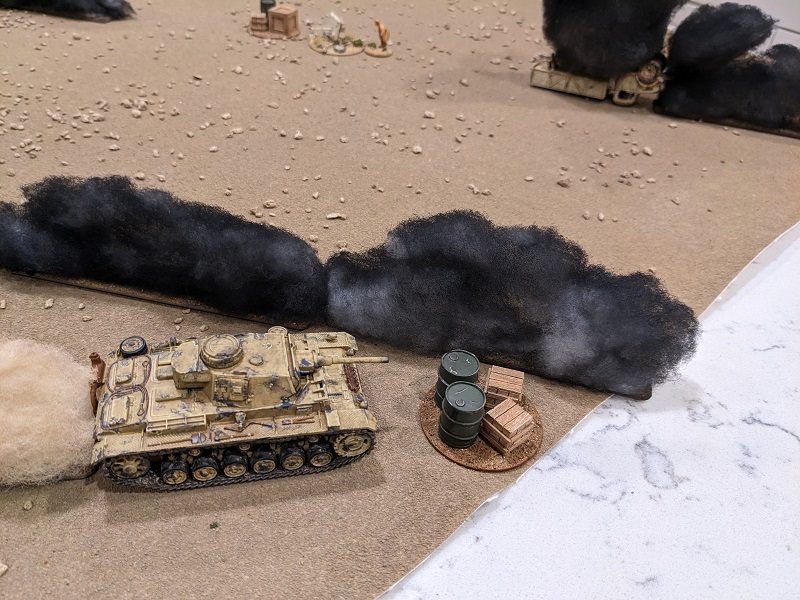
From the perspective of setting up the tabletop, this makes things super easy! But while there’s not much in the way of terrain, all of the period accounts of the battle talk about how limited the visibility was and how confused the fighting became. Much of this was the result of blowing dust churned up from the mass of vehicles moving about (either fighting or fleeing). As such, the campaign has rules for dust plumes (created whenever a vehicle moves) and smoke (created whenever a vehicle is destroyed). Additionally, this first game will start with three burning vehicles (and their associated smoke plumes) already in place. This initial number of flaming wrecks will increase as the campaign goes on, representing the increasingly confused situation. The campaign has a system for randomizing both the location of the smoking wrecks and the direction in which the wind is blowing them. After rolling some dice, here’s what things look like:
Shooting through a dust cloud imposes a -1 “to hit” modifier to shooting, and counts as light obscuration for targeting vehicles. Shooting through smoke imposes a -2 “to hit” modifier and counts as heavy obscuration for targeting vehicles. These modifiers are cumulative with each smoke or dust plume between the shooter and target. Chain of Command is a D6-based system, so this is a big deal. Firing through multiple plumes is difficult if not impossible, and as vehicles move around the tabletop the relative visibility penalties between units will change. This produces a kind of “dynamic terrain,” which makes for a very interesting play experience.
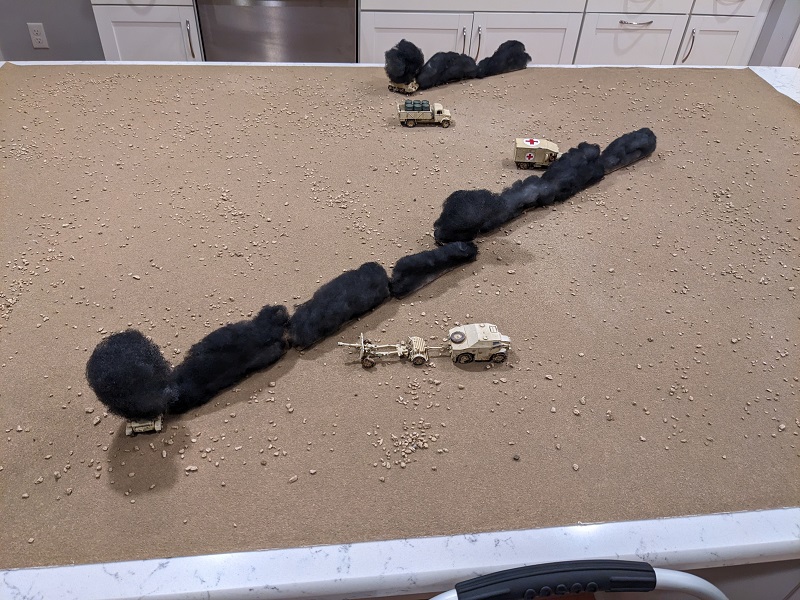
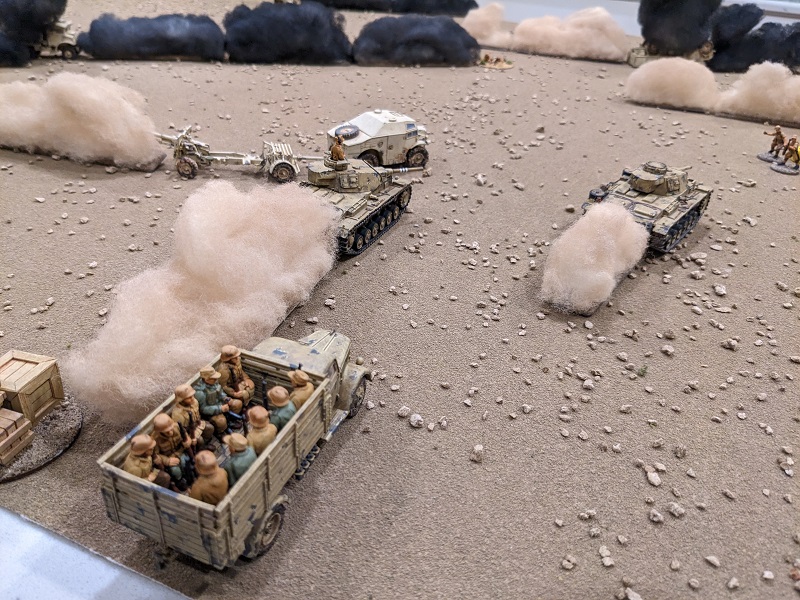
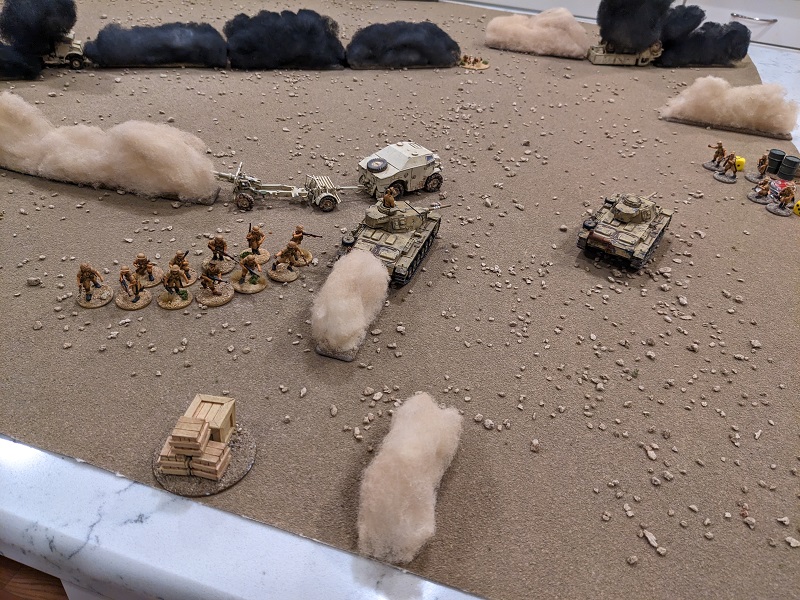
In addition to the burning vehicles, three B-Echelon transport vehicles will be placed on the table. These are important objectives for both players, and they too will be moving around the table and throwing up dust as the game progresses. The campaign has a table for what kind of vehicles are generated, and it’s important to note that the victory points gained by the capture (Germans) or escape (South Africans) differs depending on type. For instance, fuel is of the utmost importance to the Germans; capturing a single fuel truck is worth a whopping 4 points to the Germans, but only 2 points to the comparatively well-supplied South Africans if it escapes. Conversely, no one likes to see their wounded get captured, so it’s worth more to the South Africans if an ambulance gets away than the Germans would gain by capturing it (to them it’s a further strain on their already taxed logistical tail).
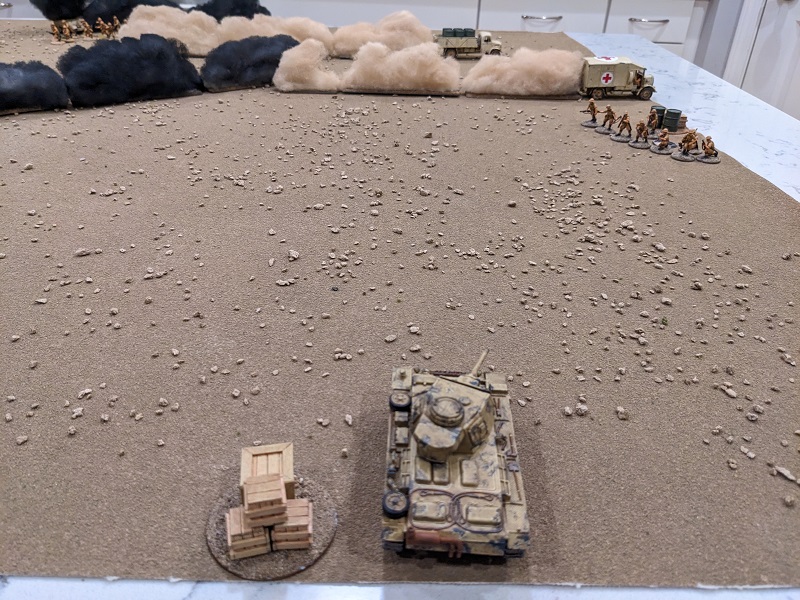
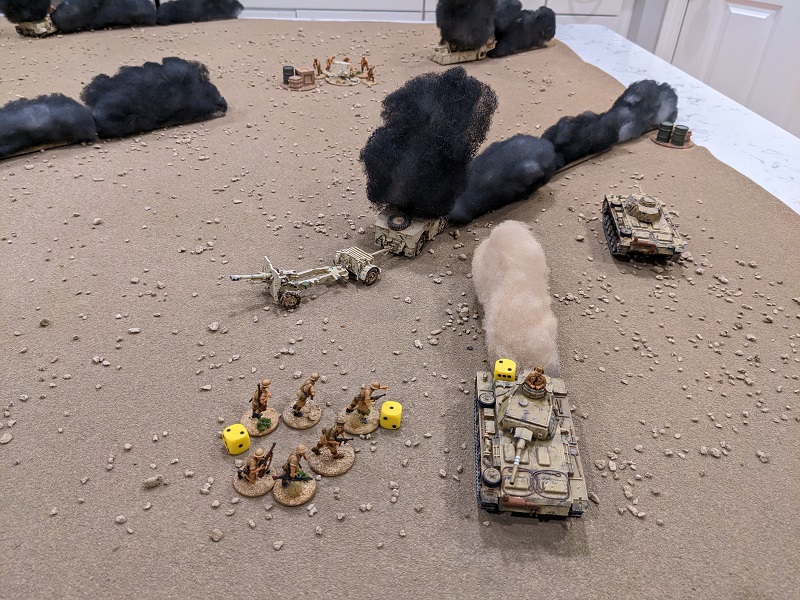
Rolling for the three vehicles I generate an ambulance, a fuel truck, and a gun tractor with a limbered 25-lb artillery piece. Juicy! After placing these on the table in randomized positions as well, our battlefield looks like so:
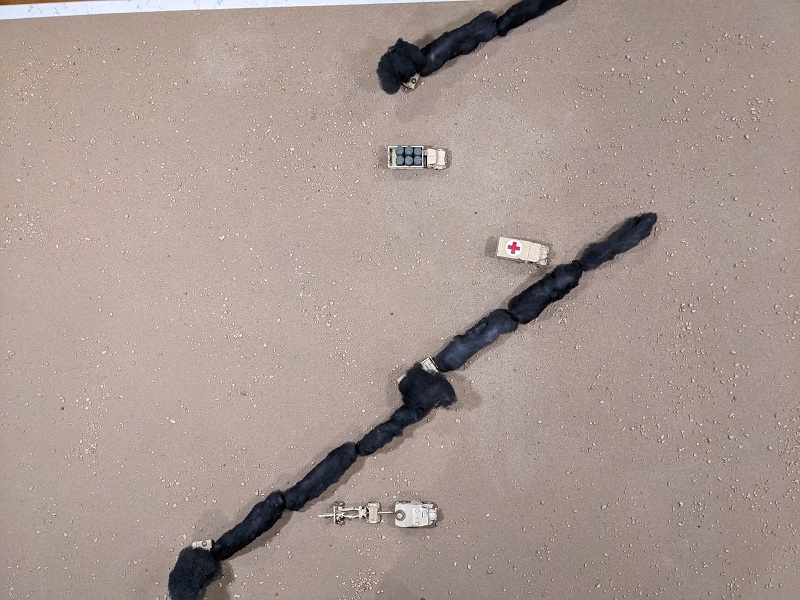
This placement ends up being fantastic for the Germans, as the artillery train (worth a whopping 4 Victory Points) is dangerously close to the German board edge, making it much more likely to be captured.
The Mission
The scenario for the first game of the campaign is the “Hasty Defense” scenario from the Blitzkrieg 1940 supplement. In this mission, the attacker is trying to achieve a breakthrough of a disorganized defender. The table is divided into 2′ x 2′ squares. The attacker wins by clearing two of the three squares on the defender’s side of the table and getting a single attacking unit off the defender’s board edge. This mission is a unusual in that the defender’s Patrol Markers can potentially start as two separate pairs rather than a single group, but more on this below.
Choosing Supports
In a vanilla game of Chain of Command, each side’s basic platoon will have some amount of “Supports” available to them. Small things like minefields or a medic will be relatively cheap, bigger things like AT guns or tanks will be progressively more expensive. One of the things that campaigns and custom scenarios allow you to do is to tweak the amount of support each side gets – as well as the base cost of each support option (perhaps based on its prevalence or availability during the battle in question). This in turn lets you tweak the balance of the scenario, as well as that scenario’s affect on the campaign as a whole.
For this campaign, the Germans get a whopping 12 points of Supports every campaign turn. That seems like a lot (and it is), but remember that the German player’s infantry support options get more expensive as the campaign goes on (as the armored units get further and further separated from the infantry). Additionally, any infantry support the German player brings must be embarked in a transport vehicle, further increasing its cost. For this first game, the German side will have the following:
- A Regular Schützen infantry squad with Junior Leader (5 points)
- An Opel Blitz transport truck (2 points)
- A Panzer IIC (4 points)
- An Adjutant (1 point)
The infantry squad comes with 12 men split into two teams, each with an MG-34 LMG. However the two of those men will be lost to crew their (required) Opel transport, leaving an “on the table” strength of 10 men. Taking an entire squad is crucial because it gives the Germans the opportunity to capture more than one enemy support vehicle. As the campaign continues and the German infantry supports get more expensive, these opportunities will dwindle, so it’s best to do it early. The 20mm autocannon of the Pz IIC reduces cover, handy in the likely event that the South Africans field an anti-tank gun with a gun-shield. Finally, the Adjutant means the Germans can put their Leutnant on the table without impacting their deployment capabilities.
For the first campaign turn the South Africans have a measly 4 points of support. This will consist of:
- A pre-game barrage (2 points)
- A 2-lb anti-tank gun with 5 crew and Junior Leader (2 points)
The pre-game barrage limits the Germans’ ability to deploy (in any given phase a German unit can only deploy on a roll of 4+ on a D6). Anything that slows down German deployment will increase the opportunities to get those valuable South African vehicles off the table. And while the South African platoon has at least some organic AT capability in the Boys Anti-Tank Rifle, the addition of a 2-lb gun will add a respectable additional wallop. Much maligned for its poor performance at range, in this particular engagement the humble 2-lb gun punched well above its weight due to the very short distances at which the battle took place. Additionally, unlike the core South African platoon the 2-lb AT gun crew are treated as “regular” as opposed to “green,” making them much more resilient.
Force Morale
Another thing that I really like about Chain of Command is the concept of an overall morale rating for your force. Lots of games have rules for unit morale (and CoC does too through the “Shock” mechanic), but very few relate that to the overall fighting spirit of the force as a whole. In CoC, your Force Morale represents your side’s willingness to continue fighting. As “Bad Things” happen to your force (units breaking and fleeing, officers or NCOs getting wounded or killed, vehicles getting knocked out), your Force Morale starts to degrade. When it drops below 5, you start to lose Command Dice, which represents the loss of command an control as things start to spiral out of control. And if your Force Morale ever drops to 0, you lose the game immediately.
Because of this, you don’t need to actually table your opponent to win a game. While some games will certainly be meat-grinders, it is often the case that a few relatively key events (like a beloved Platoon Sergeant getting unceremoniously domed by an enemy sniper) can cause your force to crumble even with relatively light casualties. And in many ways, this is perfect for campaign play, because it conserves your forces for the next tabletop battle. And narratively speaking it’s fantastic, as it helps tell the story of why your force ceded the field to the enemy beyond “LOL, they all died.” It’s also great for setting up moments of heroism, those actions you take when your Force Morale is teetering on the edge of collapse to snatch victory from the jaws of defeat.
Rolling a D6 for each force, we end up with a South African Force Morale of 9 and a German Force Morale of 11. Clearly the men of the 8th Panzer Regiment are feeling cocky.
The Patrol Phase
One of the stand-out elements of Chain of Command, the Patrol Phase is where things start to really come together. This segment of the game – essentially a “mini-game” before the battle starts – helps define each side’s deployment points. For the South Africans, the Patrol Phase is as normal, with any smoke plumes on the board at the start of the game counting as “cover” for the purposes of placing Jump Off Points. But since the core German force is all vehicles, all of the German JOPs must be placed at the table edge. German vehicles will deploy within 6″ of one of these points.
As mentioned above, this scenario is a little unusual in that the defender’s (in this case the South African player) Patrol Markers might start in two unconnected stacks. This has the potential to give the defender a better chance of keeping the attacker off their flanks. As it turns out, when I roll for placement, both stacks start in the same region of the board, but to the South Africans’ relief it is toward the eastern edge of the board. This is important because eastward is where the objective vehicles will be fleeing, and this will help keep the Germans from getting any JOPs on the eastern board edge – in turn forcing the Germans tanks to work a little harder to catch said fleeing vehicles. The German player’s Patrol Markers start in a single stack anywhere along the southern board edge.
The Patrol Phase is probably the hardest part of the game to do in solo-play, because you know what your “opponent” is up to. But honestly you usually know what your opponent is up to anyway. But I often find that even just walking around and looking at things from the opposite table edge can give you surprising insights, or lets you notice something you might have missed from the opposing viewpoint.
Given the fact that the South African markers are all starting in the same place, the Germans have the ability to kind of pen them in. The mission objective requires the Germans to clear two of three 2’x2′ squares, so if the Germans can limit the South Africans’ deployment options, it might make a quick win easier. As a result, I start the German marker stack a little farther west.
As I go through the process, as the Germans I am struck by my competing goals – get a JOP as far east as I can (to better catch escaping vehicles) while also hemming in the South African JOPs. At one point I use a German marker to simultaneously lock two South African markers in such a way that if I can’t get a JOP in the southeast corner I can at least get it very close. But as I walk around the table to take a turn as the South Africans, I realize that locking both of these markers at once was probably a mistake for the Germans. You see, the Patrol Phase ends abruptly when either side has all of their markers locked, and now the South Africans only need to lock two more to end the phase. This will limit the Germans’ ability to maneuver and envelop from the west. Sure enough, by the end of it all the South Africans aren’t nearly as well penned in as they could have been.
The JOPs are now placed, and for the Germans the choices are relatively straight forward. Along the southern edge I place a JOP as far eastward as I can and another one near the center of the southern edge. And while completely penning in the allied force is unsuccessful, I am able to place a JOP on the southern side of the western table edge. This is nice because it has good lines of sight along the smoke trails (rather than across them) and will make a great starting point for a dash to get a unit off the northern edge (one of the German mission requirements). For the South Africans the options aren’t great, but I am able to get a JOP behind the smoke plume near the ambulance and another at the northern board edge behind the smaller smoke plume. For the last JOP, I decide to take a risk and put it fairly exposed at the eastern edge of the table. Activating the fleeing vehicles can sometimes be difficult (they only activate on a Command Die roll of 1), and worst case as these vehicles get closer to escaping I might be able to deploy a sacrificial Senior Leader here to help chivvy them along.
With the Patrol Phase complete, we’re ready to start shooting.
The Battle
As mentioned above, this game was played solo. For the first couple of games of this series, I’m going to go through the actual Command Dice rolled for each phase and talk through the resulting activation decisions to give you a sense of how the game plays. Because you don’t know from one phase to the next what you’ll be able to activate (or even who is going next) it is easily possible to surprise yourself in this game. The old saw that “no plan survives first contact with the enemy” is very much the case, and the game is about managing the chaos as best you can (as you’ll see below).
As the campaign goes on, I’ll shift from this more mechanical AAR to a more narrative portrayal, and bring on folks from my gaming group as human opponents so you can see how things like the Patrol Phase or unknown enemy Support options add even more depth to the game. But for now, let’s begin; with the higher Force Morale rating, the Germans will take the first phase of play.
Turn 1, Phase 1 (German): 65411 – Well, scheiβe. This leaves me with extremely limited options, basically just to deploy Leutnant Krauss’ command tank. I could add the two 1s together and deploy my infantry in their Opel, but that would be utter madness as they would be a bullet-magnet for everything the South Africans would deploy. I decide to risk deploying Krauss – as his ability to command other vehicles via radio can be a huge help – but as it happens the South Africans’ pre-game barrage means I need to roll a 4+ to do so, which I of course fail.
The only silver lining here is that the 8th Panzer Regiment has seen action in Poland, France, and now North Africa and as such they are seasoned veterans. They don’t rate as “elite,” but one of the special capabilities that reflects their experience is that a single Command Die of 6 (which is usually wasted) instead adds a pip to the Germans’ “Chain of Command Die,” so they now have 2 pips.
Aside: during play testing, the German player deployed his command tank in the first phase of the first scenario. In the subsequent South African phase, the Boys AT rifle managed to score a lucky shot that caused that command tank to explode, killing everyone inside. In that one hit, their Force Morale dropped 4 points and the Germans never recovered, losing that scenario decisively. The risk is real.
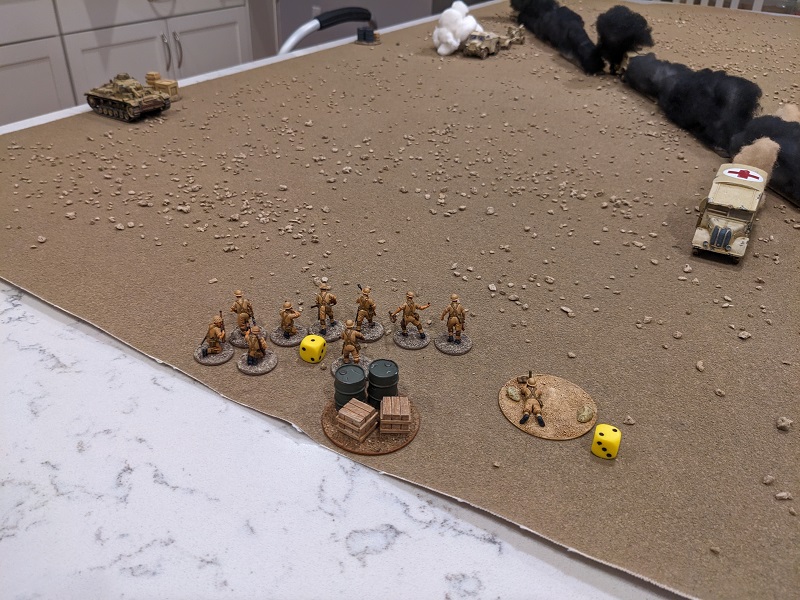
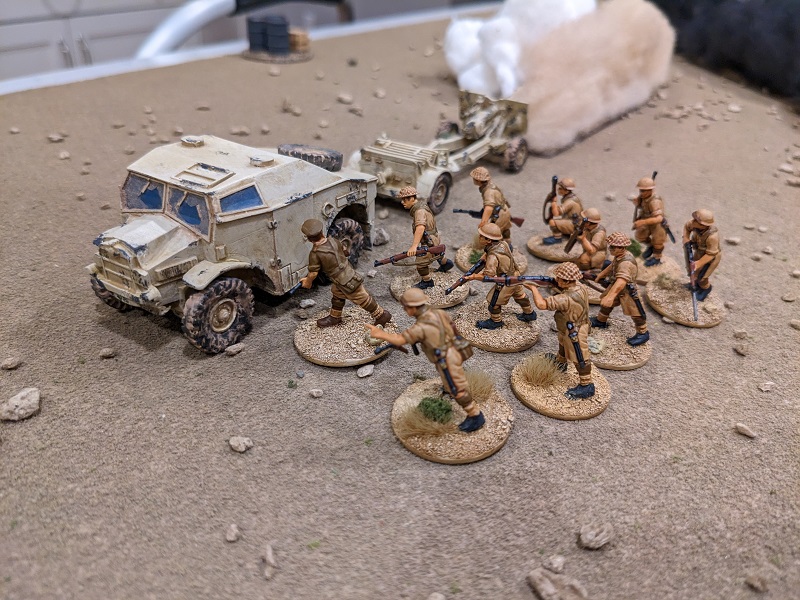
Turn 1, Phase 2 (South African): 55532 – And just like the South Africans build up 3 pips of their own, they’re half-way there. One of the campaign special rules that applies to the South Africans is “enforced deployment,” which means if they have any “green” units (which their entire platoon is at the start of the campaign) they must deploy them if able. The 3 and 2 are enough to deploy the 1st and 2nd Sections. I debate where to place them, ultimately putting the 1st behind the smoke near the ambulance and the 2nd behind the smoke near the fuel truck. With no German units yet on the board, it’s a good thing I was not forced to deploy my Boys AT-rifle team, as I want to keep that in my pocket just now. Because I used a 3 to place 2nd Section (i.e. activated their section leader), I place them in “tactical” stance just for added protection. They’re hunkered down waiting to see what’s going to happen.
Turn 1, Phase 3 (German): 65511 – The Germans can’t catch a break here. Without any 3s or 4s (and with no way to combine dice to make them) I can’t deploy any tanks at all. Three more pips towards a CoC Die (two for the 5s and one more for the single 6 as mentioned above) is nice, but I can feel the Germans’ initiative from their higher Force Morale slipping away. The German phase passes with no action at all.
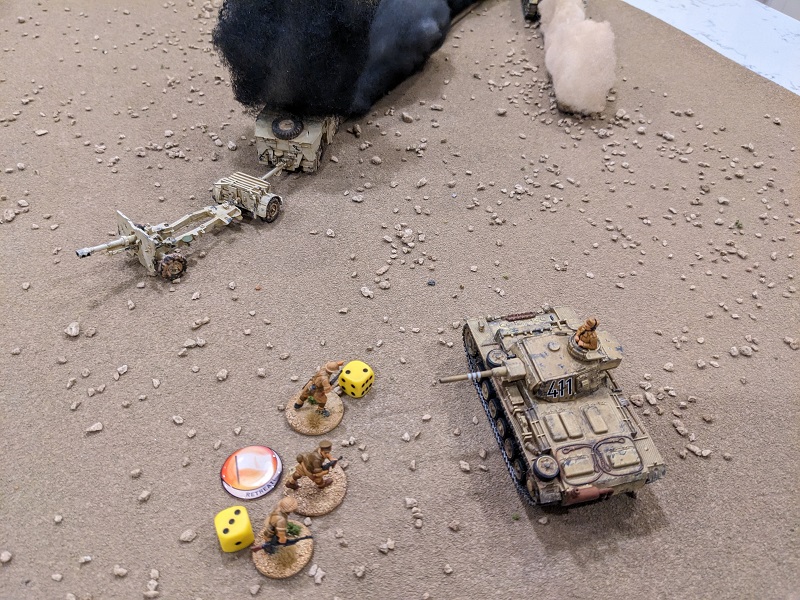
Turn 1, Phase 4 (South African): 64421 – Enforced deployment means both of the South Africans’ Senior Leaders (the Lieutenant and Platoon Sergeant) must be placed on the table this phase. The Lieutenant deploys with 1st Section near the ambulance. He uses one Command Initiative (hereafter “CI”) to put the entire section on overwatch and another to order the nearby ambulance to get a move on. Mashing the accelerator, the ambulance moves 12″ towards the eastern table edge. The Platoon Sergeant deploys out in the open and orders 2nd Section to move through the smoke to cover him. This puts him close enough to order the fuel truck to move. Not needing to be told twice, that vehicle similarly races 13″ towards the table edge. This is not looking good for the Germans. Finally, 3rd Section deploys from the easternmost JOP. I debated where to put them, but decided I wanted the 2″ mortar team (which also deploys this turn) to have a clearer line of sight to more of the battlefield (which will increase the accuracy of their smoke). Thus, 3rd Section deploys nearby to give them some protection. The mortar team proceeds to fire a smoke round to screen the dangerously exposed artillery train, and while they flub the roll (clearly engine-repairmen who haven’t used the thing since basic training) it manages to land in a decent spot.


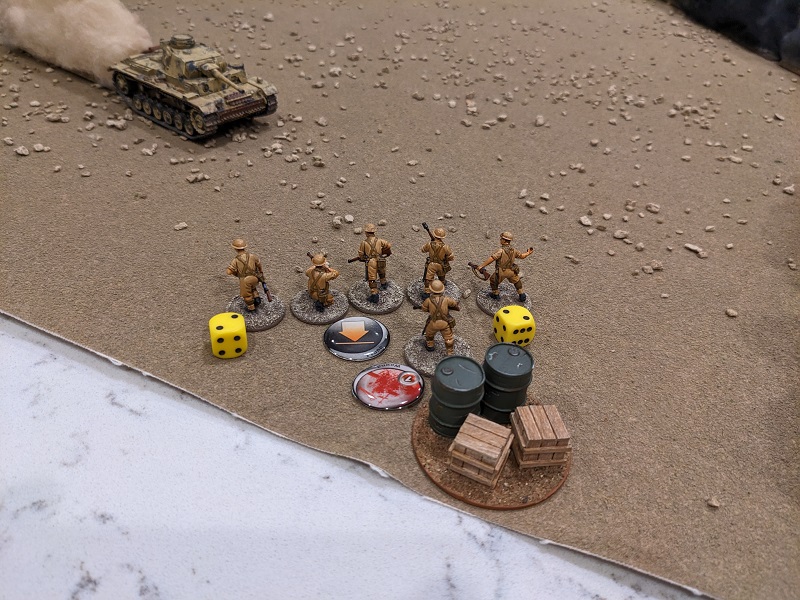
Turn 1, Phase 5 (German): 65532 – Not great, but the Germans now have a full CoC Die. Using the 3, I manage to roll high enough to negotiate the pre-game barrage and successfully deploy a tank! On a whim I decide that Unteroffizier Wilhelm Mauser is first on the scene. Deploying from the easternmost German JOP, he immediately turns the hull-mounted and co-axial machineguns on the 2″ mortar team. The rifle team of the nearby South African 3rd Section is close enough to share hits, but even still the fire is devastating; the rifle team only suffers 1 kill and 1 shock (not bad for inexperienced men milling about in the open), but the fragile 2″ mortar team suffers 1 kill and 2 shock. Starting with just two men, the little team now has twice as many points of shock as men, instantly breaks, and retreats off the board. Guess those motor-pool repairmen aren’t cut out for this! Their precipitous flight drops South African Force Morale by a point, dropping it to 8.
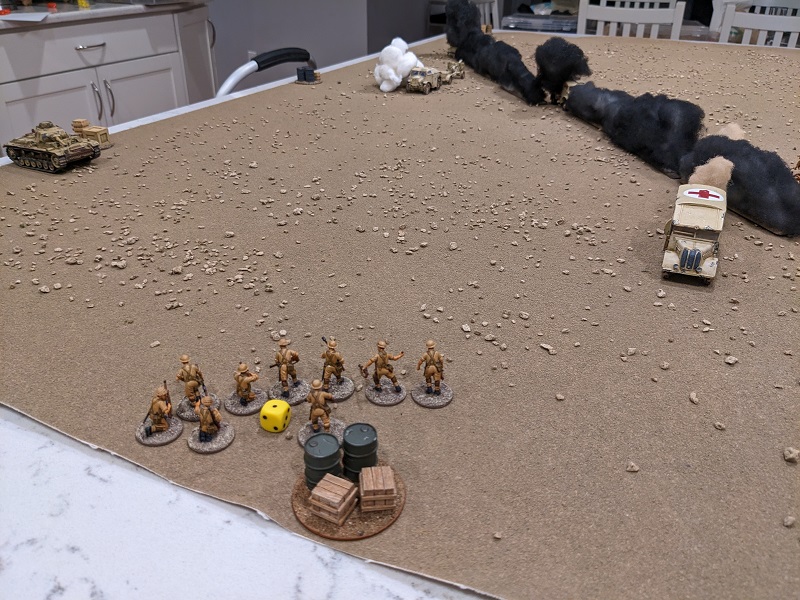
Turn 1, Phase 6 (South African): 55433 – Using one of the 3s I immediately activate the Junior Leader in charge of the exposed 3rd Section, who rallies off a point of Shock and commands the men to hit the dirt (i.e. go “tactical,” which increases their level of cover by one step). Both the ambulance and the fuel truck are within the platoon Lieutenant’s command radius, so he spends a CI on each to exhort them to keep moving. This they do, both racing a further 13″. This puts the ambulance right on the edge of the table and the fuel truck only a little bit behind, spelling potential disaster for the Germans.
At this point the Germans have no realistic chance to effect the surrender or capture of either of these vehicles, and must destroy them if they want to keep the South Africans from gaining Victory Points for their escape. As such they have little choice but to use their CoC Die to perform an Interrupt, as it’s really the only way they can guarantee a getting a shot (in case they roll like crap next phase). An Interrupt is exactly what it sounds like, you get to activate one of your units during your opponent’s turn. In the context of a vehicle, it means you can activate a single crew position, and in this case that’s the gunner manning the 50mm main gun.
But here we have the kind of problem that this campaign’s style of “dynamic terrain” is so good at creating: Do we take the shot at the ambulance (in the open, needing a total of 5 on 2D6) or the fuel truck (lightly obscured behind the ambulance’s dust trail, needing a 7)? Both targets moved flat out so both are subject to a -1 penalty to hit, meaning we’ll actually need a 6 and 8 respectively. Further, intentionally targeting an ambulance confers the same penalty to the Germans’ Force Morale as intentionally targeting a medic does in a standard game of CoC. So do we take the easy target and eat the Force Morale hit, or take the high road and target the fuel truck? Worse, the South Africans would actually score more VP for saving the ambulance than they would the fuel! While the German Force Morale is as high as it can get (an 11) and could probably afford to take a point or two off, I decide that young Wilhelm Mauser isn’t a dick; he directs his gunner to target the fuel truck. It’s probably a good thing that turbo-nazi Jürgen Lendt wasn’t commanding the first tank that arrived!
Aside: during play-testing for this campaign, one of my gaming buddies who played the Germans for many of the scenarios was faced with a number of these kinds of difficult situations. He gained an unfortunate reputation for brassing up ambulances with 20mm autocannons.
Historical Note: As it regards the treatment of enemy casualties, North Africa was a radically different theater than, say, the Eastern Front. Later in the afternoon during this very battle, tanks from both sides dueled back and forth across the 5th Brigade’s main medical dressing station, which by this point had casualties laying all over out on the open ground. The head of the brigade medical staff was terrified that wounded men would be accidentally run over by British tankers or callously crushed by the Germans. He was both relieved and impressed when the tanks of both sides gingerly picked their way around the wounded, and not a single casualty in the aid station was driven over.
With bated breath I rolled the dice for the shot – a 10! A solid hit on the fuel truck! Better still I rolled the requisite 3 net successes to destroy the vehicle, which exploded in a massive fireball! Fortunately, the ambulance was just outside the explosion radius and didn’t suffer any damage. But seeing all that delicious fuel go up in flames was soul-crushing.
Putting my South African hat back on to finish out the phase, the platoon Lieutenant used his last CI to move 1st Section (and himself) 7″ along the smoke towards the artillery train. Maybe he’d be able to get close enough to get it moving! I strongly considered deploying the 2-lb AT gun with my remaining 3 and taking a shot at the lone German tank on the field. But I decided against it, hoping to get a better opportunity like a double-phase or a chance at a tank’s side armor.
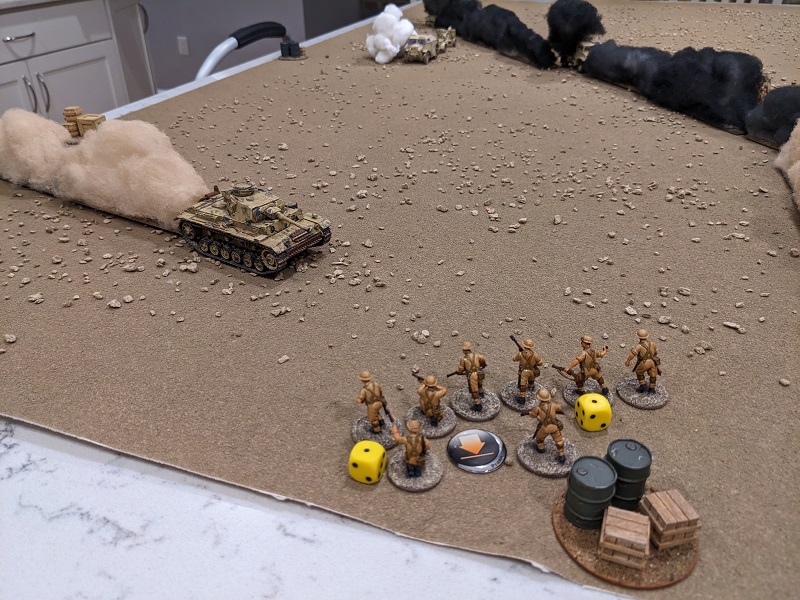
Turn 1 Phase 7 (German): 65421 – Using the 4 I once again tried to deploy Krauss but failed due to the South Africans’ pre-game barrage. This was really becoming a problem! Adding the 2 and 1, I activated Wilhelm Mauser’s tank, advancing and firing the co-axial MG at 3rd Section. Advancing this way brings them into “close” range, and with their targets being “green” the Germans need only 3s to hit at this range. This fire puts 1 kill and 1 shock on the Bren team and 1 shock on the rifle team. Not a terribly productive phase, but it will hopefully set up better things in the future.
Turn 1, Phase 8 (South African): 54311 – Enforced deployment meant I had to deploy the Boys AT-rifle team. I debated where to put them, but was sensitive to the idea that with 3rd Section deployed so far to the east and 1st Section working its way up to get the artillery train moving that I might only have troops in one of the three squares. As such, I put the AT rifle team near the middle JOP and took a shot at Mauser’s tank. What should have been an average shot needing just a 7 on 2D6 was a dismal 3 – a miss! Clearly these cooks had nicked the Boys rifle out of the back of a fleeing truck and had no idea how to use it!
With the entire core South African platoon deployed, I was free to use my remaining Command Dice however I saw fit, and the other 1 was immediately spent getting the artillery train moving 11″ closer to safety. The Junior Leader in charge of 3rd Section rallied off two shock and the platoon Lieutenant advanced a further 6″ up the smoke with 1st Section. A real go-getter, that one.
Turn 1, Phase 9 (German): 22221 – Adding two 2s together to make a 4, the Germans were finally able to get Hans Krauss’ command tank to deploy. He used two of his CIs having his hull and co-axial machine guns fire at 3rd Section. Due to the position of Mauser’s tank those gunners had no line-of-fire to the Bren team, so the resulting two kills and one shock all went on the rifle team. Any time a unit takes casualties there’s a chance that a leader is hit, and unfortunately for the South Africans one of those kills was instead a wound to the lance-corporal in charge of the section. It was a minor wound, which reduced him to only having a single CI when activated – this is bad because it makes it harder for him to keep rallying shock off the men. Adding insult to injury, Krauss uses his last CI via radio to order Mauser to also fire his co-ax at 3rd Section. Though only 6 more dice, this resulted in an additional 1 kill and 2 shock on the Bren team and 1 shock on the rifle team. The Bren gunner was now alone in his team, which would reduce his effectiveness as he had no men to carry reloads or swap his barrel.
Finally, using a 2 and adding the remaining 2 and 1 together the Germans tried to deploy both the infantry in their Opel and the Pz IIC, failing both due to the barrage. Argh!
Turn 1, Phase 10 (South African): 54331 – Using the 1 the ambulance was at last able to escape, netting the South Africans three Victory Points. With no reason to be lurking in the open, 2nd Section retired 6″ to the rear behind the nearest smoke plume. With a wounded Junior Leader, 3rd Section was faced with a difficult choice – rally a single point of shock or transfer a man from the rifle team to the Bren team? Ultimately, I chose the latter, as I figured that losing a team (and suffering the potential loss of Force Morale) was the higher risk. Finally, the Lieutenant used one of his CIs to have 1st Section advance at the run, moving a whopping 17″. Not too shabby on 3D6! This brought him right next to the artillery train, so his next CI was to scream at them to move, for the love of god! Moving in a long arc to the northeast so as to avoid Krauss’ oncoming command tank, the Morris Quad moved a good 10″. In CoC, running causes some disruption to infantry units, so the Lieutenant’s final CI was used to rally the shock off the Bren team caused by their headlong dash through the smoke.

Turn 1, Phase 11 (German): 33221 – In this campaign, armored units that move close enough (within 4″) to an enemy vehicle or green unit and which dedicate a weapon to “covering” it can force that enemy unit to surrender. So long as they remain covered, surrendered units can’t activate. If anything changes (say the tank that forced their surrender gets destroyed or is forced to move away) they are free to move as normal. As such, forcing the valuable artillery train to surrender was the Germans’ top priority.
Adding the 2s to make a 4, Krauss’ panzer activated. Advancing at normal speed, it moved a mere 7″, which was just enough to get it close enough to effect the surrender of the Morris driver, who found himself staring down the barrel of the hull-mounted MG-34. Hands away from the steering wheel and no sudden moves, friend! Meanwhile, the co-ax slewed around and continued to engage the beleaguered 3rd Section – along with Mauser’s co-ax activated via radio. These two MGs added up to 12 dice, of which a whopping 9 here hits. For all that, the end result was only an additional 1 shock on the rifle team. Being “tactical” was the difference here, as it must be remembered that these guys are kissing the dirt for all they’re worth. Once again the Pz IIC failed to deploy, but now that the Germans actually had the artillery train surrendered, Krauss breathed a sigh of relief when an Opel truck carrying a squad from the 115th Infanterie Regiment arrived through the barrage.
Turn 1, Phase 12 (South African): 65542 – Seeing the approach of a soft-skinned transport through the blowing dust, the Lieutenant decided it was time to take a risk: commanding 1st Section to advance 1D6″ and fire at half effect (one of the ways infantry can be activated), he and the men surged 6″ forward through the dust trail kicked up by the artillery train. This actually brought them to within 6″ of the enemy vehicle, meaning that both the Lieutenant and 1st Section’s lance-corporal were able to fire their Thompson SMGs to full effect. When all was said and done, even firing at half effect the men who could draw a bead on the German truck were rolling 9 dice! Better still, three of those dice were 6s, meaning that the vehicle itself could also be damaged. Sadly, the damage dice were not on the South Africans’ side, as only 1 point of shock was inflicted on one of the German infantry teams and the Opel itself escaped harm. With the final CI a grenade was lobbed at the nearby German command tank, and while it hit it did no significant damage.
Turn 1, Phase 113 (German): 63211 – The very first thing that happened in this phase was the expenditure of a South African CoC Die to perform an Interrupt. Given that the Germans need infantry to actually capture the support vehicles (as opposed to forcing a temporary surrender), and that those German infantry were still cooped up in their truck and within SMG range, this brought a whopping 18 dice into play. Seven of these were hits, again including the requisite three 6s needed to potentially damage the vehicle. This time the damage was more severe – 1 kill and 1 shock on one MG team and 2 shock on the other. Better still, the Opel driver thought better of the situation and slammed the truck in reverse, backing right off the table! Who is this hard-charging South African Lieutenant and how the hell did he end up leading a quartermaster unit?
Trying to recover, the German phase consisted of Mauser’s tank unloading both MGs at the Boys AT-Rifle team, killing one and leaving a point of shock on the one remaining man. Once again, the Pz IIC failed to deploy. That barrage was becoming maddening!
Turn 1, Phase 14 (South African): 53211 – The Boys gunner fired back at Mauser’s tank, striking it solidly. It didn’t penetrate the armor, but it certainly got the crew’s attention – the tank would be forced to halt and engage the Boys team next phase. The wounded lance corporal in charge of 3rd Section rallied a point of shock. Finally, caught up in the Lieutenant’s spirit of derring-do, the Junior Leader in charge of 1st Section rallied the point of shock off his rifle team and ordered the men to advance. The overall roll was poor (only 5″), but that was just enough to make contact with the German JOP, preventing it from being used to deploy any more German units. This would mean that if and when the German infantry came back on, it would have farther to go to get to the artillery train, making it that much harder to effect a capture.
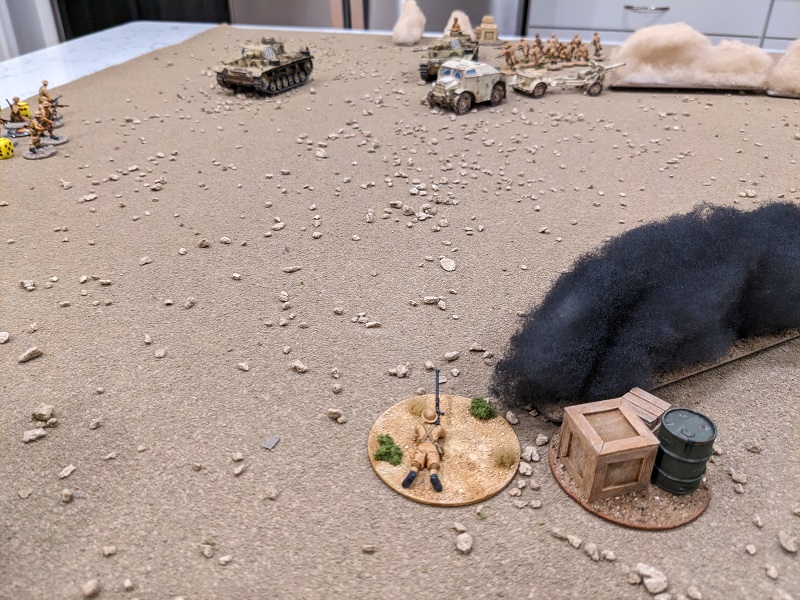
Turn 1, Phase 15 (German): 66661 – Holy shit! This is a special thing in CoC, and in all the games I’ve played I’ve only seen it happen a couple of times. Four or more 6s means an end to the Turn, and the Germans would get the first phase of the following turn. Additionally, they get an entire CoC Die and there’s a random event. Rolling on that table, I got a result of “Fire!” Ordinarily, this causes a building on the table to catch fire. If there are no buildings, the nearest “flammable feature” to the center of the table catches fire instead. It is with a sinking feeling that I realize that this is actually the artillery train. I suppose it stands to reason that with all the bullets flying around a fuel line could have gotten clipped. Well, there goes that capture up in flames. Maybe best to not be nearby when the attached limber full of shells goes up! The resulting plume of smoke cuts off visibility between the Boys team and the deployed German tanks. With nothing to activate on the single 1, the Turn ends. This clears all the dust, shortens all of the smoke trails, and removes the 2″ mortar smoke screen. It also causes the captured German JOP to be lost, which brings the German Force Morale down one point to a 10. The one silver lining is that this also means an end to the South Africans’ pre-game barrage. Good riddance!
Turn 2, Phase 1 (German): 54433 – OK, time to get serious. Now that the barrage is out of the way, Jürgen Lendt’s panzer comes on from the JOP farther west along the south edge of the board. From this vantage point it immediately fires on the lone Boys gunner with its hull-mounted MG, killing him outright (although South African Force Morale holds steady at a 6). Meanwhile its co-ax blasts 1st Section, inflicting 1 kill and 1 shock on the Bren team and 2 kills on the rifle team. Luckily for the South Africans, no leaders are hit. Both MGs of Mauser’s tank and the coax of Krauss’ command tank unload on 3rd Section, inflicting a combined 2 kills and 1 shock on the Bren team and 2 kills and 3 shock on the rifle team. This sees the Bren team wiped out, but again the South Africans’ Force Morale remains at 6. This does pin the remnants of 3rd Section however.
As soon as the phase passes to the South Africans, the Germans spend their shiny new CoC Die to once again interrupt. Mauser’s co-axial MG once again blasts the poor men of 3rd Section, killing one and inflicting 2 more points of shock. This is enough to see the remnants of the section break and flee the table. The rifle team breaking and the wounded lance-corporal leaving the field each cause a loss of a point of Force Morale, bringing the South Africans down to a 4. Finally it feels like the tide is turning. At a FM of 4 the South Africans would lose a Command Die, but since this was an interrupt they technically would have already rolled. As such, for this phase they still roll their full five dice.
Turn 2, Phase 2 (South African): 65541 – Sadly, even with that 5th die that’s just not a great roll. It does give a 1 to deploy the 2-lb AT gun, however. I had been holding off on this for “the right moment,” but it just hasn’t come. I’m also keenly aware that again I only have units in one of the squares the South Africans need to hold. As such, I put the 2-lb gun very close to where the Boys team was. There’s no real cover to be had here, so those gunners will have to trust their gun-shield. They manage to get a shot off at Lendt’s panzer, and while it’s a palpable hit the solid-core projectile has no effect on the tank. Using the 4, the Lieutenant commands 1st Section to toss a hail of grenades at the rear of Krauss’ command tank. Two of the three actually hit, and both manage to rattle the crew. The improvised grenade attack inflicts 2 shock on the tank crew and causes the panicked driver (who has no idea where the blasts are coming from) to throw the tank in reverse! Backing straight up, the tank rumbles over 1st Section’s position, though the men easily dodge aside.
Turn2, Phase 3 (German): 55431 – Leutnant Krauss screams at the crew of his tank to settle the fuck down, spending two of his CI to rally off all of their shock. He then slews his turret around and trains his co-ax on 1st Section, miraculously inflicting 1 kill and 1 shock on each of that section’s Bren and rifle teams. This finally causes 1st Section to become pinned.
Turn 2, Phase 4 (South African): 6332 – With men hitting the dirt all around him, 1st Section’s lance corporal rallies 2 points of shock off the unit. Even though this drops them below the threshold, they’ll remain pinned until Turn end. Meanwhile, the savvy leader of the 2-lb gun crew rallies off their single point of shock and blasts Lendt’s tank again. It is again a hit, but this time the round bounces harmlessly off the panzer’s front glacis plate.
Once again the South Africans have a full CoC Die and again use an interrupt. The 2-lb gun again fires at Lendt’s panzer, and even though the roll is only a 3, they have hit that vehicle twice since it last moved. As such, they’ve got the range dialed in and that 3 is actually a hit! Sadly, the Pz III G’s armor once again bounces the incoming shell. Opportunity wasted!
Turn 2, Phase 5 (German): 54331 – Not wanting to sit around like a dope with an AT gun ranged in on him, Lendt orders his driver to advance (the tank moves 5″) and fires his co-ax at the gun team killing one man and adding a point of shock. Meanwhile, Krauss continues to punish 1st Section with his coax (inflicting 3 more shock) while ordering Mauser’s tank via radio to advance on the unprotected easternmost South African jump off point. Mauser’s driver proves timid and the vehicle only advances 5″ (which sucks when you’re rolling 2D6 + 2). Finally, with the barrage ended the Pz IIC makes it onto the table. Its MG amounts to nothing, but the 20mm autocannon (which reduces cover) kills 2 men of the 2-lb gun crew.
Turn 2, Phase 6 (South African): 5412 – The Lieutenant rallies a point of shock off 1st Section’s Bren team and orders 2 more grenades thrown at Krauss’ command tank. These again hit but only do superficial damage. The Junior Leader for the 2-lb AT gun rallies off the point of shock and commands the gun to again shoot at Lendt’s tank but has apparently not compensated for that vehicle’s movement – a roll of 4 is a complete miss this time. A thoroughly ineffective South African phase.
Turn 2, Phase 7 (German): 54432 – Krauss once again hoses 1st Section with his co-ax, putting a point of shock back on the Bren team and killing the last man of the rifle team. This drops South African Force Morale to a 3. Via radio he again orders Mauser to get a move on. Maybe sand has gotten into the gearbox, but again the tank doesn’t make it, ending up just 1″ short of contacting the enemy JOP. At this point, I feel like it will be faster for the Germans to crater the SA Force Morale than to meet the scenario objectives, and capturing a JOP is a guaranteed hit to Morale. Meanwhile, both Lendt’s panzer and the Pz IIC unload on the 2-lb crew, killing 2 more men. Now the crew’s Junior Leader is manning the gun by himself! The end feels near, but then again I’ve seen these kinds of fights turn around in a heartbeat.

Turn 2, Phase 8 (South African): 542 – Well this sucks, as there is no way to activate the 2-lb gun! The platoon sergeant puts the untouched 2nd section (still lurking behind smoke at the north edge of the table) into tactical stance.
Turn 2, Phase 9 (German): 33321 – It occurs to me belatedly that if Krauss turns his tank and advances just a few inches, he can force 1st Section (who it should be remembered are green) to surrender! This he does, and the three men remaining (the Lieutenant, the lance-corporal, and the lone Bren gunner) put up their hands. Meanwhile, Lendt again advances and directs MG-34 fire at the 2-lb gun, though this proves ineffective. Finally, the 20mm autocannon on the Pz IIC barks again, this time inflicting a hit on the lone gun-leader. Rolling for effect comes up a 1, meaning the heroic gun captain is killed. The combination of the loss of both a support unit and a Junior Leader craters the remaining three points of the South Africans’ Force Morale and the game comes to an end.
Postgame Campaign Stuff
The South Africans get 3 Victory Points in the campaign for the escape of the ambulance. The Germans gain 1 point for destroying the fuel truck, and even though they didn’t necessarily pull the trigger on the Morris Quad that went up on flames, I still give them credit for its destruction (another 1 point). So long as the Germans win the game they also count any surrendered unit as captured. As a result, they also net 1 point for the capture of 3rd Section’s Bren team and 2 more for the capture of the gutsy-as-hell South African Lieutenant. Even if it’s as a POW, I’m glad that guy survived. That brings the current campaign score to:
South Africans: 3
Germans: 5
In “At the Sharp End” (used by most Pint-Sized Campaigns), there are some post-game steps that track unit losses and morale effects, and this campaign is no exception. The two big ones are the CO’s Opinion and the Men’s Opinion. Gloriously, there are competing objectives here: The CO only cares about winning with no real regard for casualties. The men aren’t heavily invested in winning or losing any given engagement but are extremely sensitive to casualties. It is very difficult to balance these two priorities, and both have ramifications as the campaign continues.
Since the game resulted in victory for the Germans, the CO’s Opinion (which starts at a neutral value of 0) rises to a +2. This won’t have any effect in the next battle, but if it keeps rising the German force will get additional support – commanding officers love to back winners, after all. Because the Germans lost fewer men killed than the South Africans, and because the casualties were very light (two or fewer men killed, and the Germans lost only a single infantry casualty this game) I make two rolls for The Men’s Opinion. I flub the first one (no change), but get a +1 on the second. This too will have no effect on the next game, but as it rises it gives bonuses to the roll at the start of each game to determine the side’s Force Morale. Finally, the victory improves Leutnant Hans Krauss’ outlook from “secure” to “sociable.” Chatting comfortably with the men under his command as their tanks are hastily refueled, young Hans has a good feeling about how things are going so far. This new outlook is infectious and will confer a +1 bonus to the start-of-game Force Morale roll.
For the South Africans, things are simpler. Because their side gets a fresh platoon every game, neither the CO’s Opinion nor the platoon leader’s outlook is appropriate to track. That said, we do track the Men’s Opinion, not of any particular platoon but rather as a gestalt reflecting the morale of the brigade as a whole as the day wears on. Suffering both more men killed than the enemy and an unusually high casualty count (by my count 24 men across both the platoon’s core units and the 2-lb AT gun crew, which using the ATSE casualty tracker means 12 men killed outright), we are forced to make two rolls. I roll well for both, so the South African gestalt opinion only drops to -2. It could have been much, much worse. This is not yet enough to cause Force Morale roll penalties, but the men of the brigade are already starting to realize what a complete clusterfuck this day is turning into.
Debrief
Jesus, that was brutal! While the Germans may not have suffered any real losses in this particular game, the South African barrage was incredibly disruptive (which to be fair is the whole point of an artillery barrage). It took three German phases to even get a single vehicle on the table! The Pz IIC (with its delicious, cover-reducing 20mm autocannon) failed to deploy 3 times and Krauss’ command tank failed to deploy twice. Further, given how the Patrol Phase played out the initial placement of the fuel truck would have made it a tall order to capture regardless, but losing the towed artillery piece to a random event was murder. That’s a loss of 3 campaign Victory Points (4 for its capture versus 1 for its destruction). At this stage the Germans really need to bank VPs, because they get a lot harder to come by as the campaign goes on.
And that’s why for as bloody as this was for the South Africans, I’m actually pretty optimistic about where they are right now. As long as they can keep the VP tallies within striking distance of each other, they will have a real shot at winning this. Given that their level of Support actually increases every campaign turn, they can expect to start inflicting heavier losses on the Germans in the future. This is part of the balance of this campaign despite the asymmetry of the forces involved. The South Africans will and should suffer relatively horrendous losses early, but the clock is very much on their side. Only being down 2 VP almost feels like a win here. Further, the Pz III G is only sporting 4 points of armor to the 2-lb gun’s AT value of 5. Even the humble Boys Rifle is AT 3, so every time the South African player picks up dice to roll for an AT gun firing, the German player is going to experience a certain amount of sphincter pucker. It can so easily go to hell in an instant.
One notable thing about this game was the lack of double-phases. With the exception of the quadruple-6 roll by the Germans that ended the turn and caused the artillery tractor to go up in flames, neither side had the opportunity to capitalize on back-to-back activations. That’s actually kind of unusual in Chain of Command. That’s why even as the momentum slowly started to swing in the Germans’ favor, I kept waiting for the other shoe to drop. That they emerged largely unscathed is something of a miracle, really.
I have run this opening campaign scenario a bunch of times in the past – it makes a great convention game because it’s so easy to set up in terms of terrain. The variability of the initial vehicle placement and the dynamic nature of the smoke and dust makes the game different every time, and in so many of those instances the end result has been a real nail-biter.
I hope you’ve found this an entertaining read. Check back in a few weeks for the next installment!
