
We here on the Goonhammer Historicals team natter on constantly about how much we love Too Fat Lardies games in general, and I have opined many times in the past about just how much I like Chain of Command in particular. But while we’ve talked about and even reviewed this game, we’ve never really given you an in-depth, play-by-play insight as to why. So it seemed like high time to take you on a journey that showcases why this game is so special!
CoC in a Nutshell
Chain of Command is a platoon-scale tabletop wargame set during the Second World War. In case you missed it, one of the Goonhammer Historicals team’s inaugural articles (before we were even official) was a review of the game, which you can read here.
One of the things that sets CoC apart is the novel mechanism used for unit activation, through the use of the Command Dice. This process means you don’t have any real idea from one go to the next what activation resources you’ll have at your disposal, or even who will be going next! This uncertainty means that the game is set up exceedingly well for solo play, which was a god-send during pandemic lockdowns.
Another aspect of CoC that doesn’t get talked about enough is just how good it is for campaign play, supported through the fantastic “At the Sharp End” supplement for the game. It’s one thing to play a “one-off” game on the tabletop, but all too often it can result in players making “gamey” decisions that might reflect the immediate objectives without taking the wider context of the battle (or war) into account. We’ve all seen it – the desperate expenditure of men to make a last-gasp attempt to secure an objective before the game ends. But in the context of a campaign – where your casualties from one game can limit your available forces in the next – these last-ditch efforts for any given game must be balanced against the overall objectives of the campaign. Players are faced with more complicated and difficult choices; do I withdraw from this battle early and cede the win to my opponent so as to conserve my forces for the next fight? Do I hang on and hope to inflict more casualties on my opponent in order to slow him down for future campaign turns? As the attacker, do I pause and regroup knowing that it will give my opponent time to further entrench his defenses?
TFL has published a number of “Pint-Sized Campaigns” (so called because they cost as much to buy as a pint of beer at the local pub) that create a series of linked scenarios representing some historical action. These are available either as stand-alone products (available as PDFs on their website) or as articles in the various “Lard Annual” magazines (also available as PDFs on their website). These articles are a fantastic mix of historical background, orders of battle, special rules, and tabletop scenarios that put you in right in the battle.
The Plan
To highlight some of the ways that Chain of Command really shines, we’re going to do a series of actual-play articles (or “After Action Reports” as they are often termed in the community, or “batreps” if you’re coming at this from 40K) as we play through a Pint-Sized campaign. Earlier articles will focus on some of the rules mechanics that make CoC so compelling, and as the campaign progresses we’ll talk more about how campaign play influences your decisions on the tabletop. And through it all, the narrative elements that TFL games are so good at providing will become readily apparent. So which campaign will we be playing on this journey?
Totensonntag
Back in 2018 and 2019 I was reading a lot of material about the war in North Africa in general and doing research into Operation: Crusader in particular. Hip-deep in historical references, I decided to try my hand at writing a Pint-Sized campaign of my own, which I submitted to the gentlemen at TFL and which was subsequently published in the 2019 Lard Annual. I have written previously on Goonhammer about asymmetric warfare on the tabletop, and one particular action during the swirling dust-up that was Operation: Crusader struck me as a perfect example of just such an asymmetric fight that could make for an interesting PSC: Totensonntag.
In the Lutheran calendar, the Sunday of the 23rd of November, 1941 was a religious day of remembrance of the departed, referred to in German as Totensonntag, or “Sunday of the Dead.” It also coincided with one of the most lopsided battles that took place during Operation Crusader, as the better part of three Axis armored divisions tore through a single South African infantry brigade from back to front.
The roots of the battle lay in the exceedingly chaotic opening stages of Operation: Crusader, the British 8th Army’s massive offensive to relieve the siege of Tobruk, Libya, which by this point had been surrounded by Axis forces for 232 days. The 8th Army achieved almost complete surprise against German and Italian forces in North Africa, but their impressive initial gains were squandered through an almost complete lack of operational coordination. It didn’t help that the main concept of the operation – that the British would lure Rommel’s tanks into a massive clash in the open desert and overwhelm them by weight of numbers – didn’t survive first contact with an uncooperative enemy. Instead of meeting the Germans in one huge engagement, British armored forces were committed piecemeal, often spread out just trying to find the Germans, let alone fight them in a stand-up battle.
Contrary to popular belief, the German “blitzkrieg” wasn’t about overwhelming the enemy with tanks, but rather with top-to-bottom combined arms doctrine. German infantry, artillery, and anti-tank units would blow holes in enemy formations, which would then allow armored forces to exploit breakthroughs, advancing deep into the enemy rear areas to sow chaos. Though a relatively small proportion of German infantry and artillery were motorized, those that were could mount up, follow the tanks through the breach, and set up to tackle the next enemy line of resistance. Rinse, repeat.
During the early stages of Operation: Crusader, this combined-arms discipline led to crippling losses by the British, who repeatedly committed unsupported tank formations against German positions. Between the commencement of the operation on 18 November and the evening of 22 November, the British 7th Armored Brigade would be reduced to less than a quarter of its starting number of tanks still in operation.
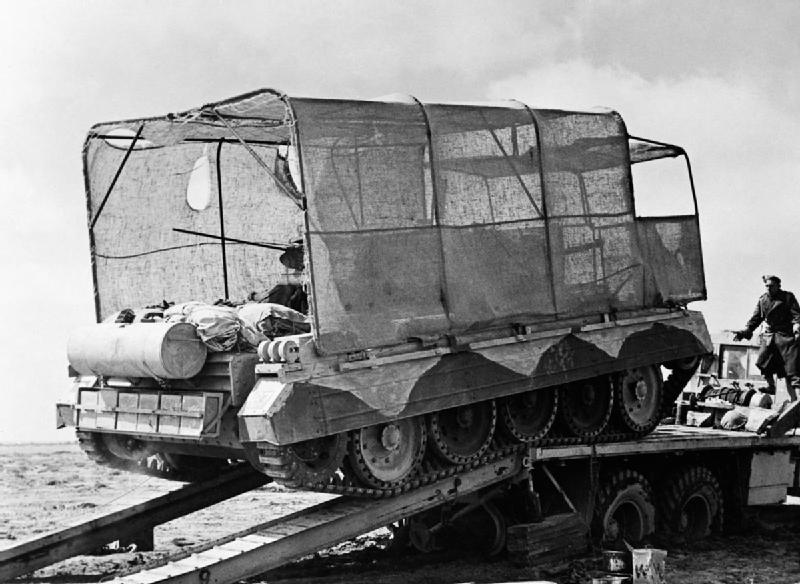
Because of this unexpected destruction of the bulk of the armored force in 30th Corps, it fell to the men of the 1st South African Infantry Division to secure the left (western) flank of the advance to Tobruk. A night march the night of the 22nd of November was supposed to see them in position to attack the next morning, but the South Africans didn’t have much experience with night marches. As a result they botched the maneuver badly. The two brigades of the division (the 1st and the 5th) became widely separated in the night. Worse, when the 1st Brigade became mixed up and called a halt part-way through the night, the halt command was not communicated to the B-Echelon (support) units, who continued advancing into the trackless desert ahead of their combat units.
At the same time, the German commanders planned a classic encircling movement, intended to surround the South Africans completely. As is so often the case, nothing went quite according to plan and the German “grand encirclement” ended up driving straight into the gap between the two South African brigades. When the sun came up on the 23rd of November, the German armored units found themselves effectively “surrounded” by the South Africans, but between the advance B-Echelon units of 1st Brigade and the trailing B-Echelon units of 5th Brigade. After some confusion in the forming-up phase, the Axis forces launched their attack.
But in order to cover the distance to make their encirclement, the Germans left their heavy artillery and much of their anti-tank units behind. Today, the tables would be turned and it would be the Axis forces making a largely unsupported armored attack. The stage was set for a massive clash.
The Battle
Once the attack kicked off (over an hours late), the German armored units tore through the B-Echelon of the 5th Brigade. These vehicles began a panicked flight to the east, which cause huge clouds of dust to obscure visibility. As some of these vehicles were destroyed, palls of smoke further confused things. And due to the delays in forming up, the South Africans had already begun re-orienting their anti-tank defenses to the rear. Due to the confused visibility and the speed of the German advance, Axis tank commanders often reported rolling up on a burning South African transport truck only to have an anti-tank gun hidden behind it open up on them at point-blank range. For a battle on the open desert – indeed, in an area where the elevation changes less than two meters over several miles – this was an incredibly close-range engagement, described by several veterans as a “bloody knife-fight.”
South African troops began surrendering to the German tanks in droves, but staying still to keep those prisoners covered made the tanks sitting ducks for South African anti-tank guns. Bringing up infantry units to effect the capture of these surrendering men exposed said infantry units to fire as well. In some cases, German motorized infantry units of the 115th Infantry Regiment were de-bussing their soft-skinned transports within 200 meters of enemy troops. Faced with this quandary, the German armored units chose to “attack their way out” of the situation – which in turn left pockets of resistance in their wake that the infantry had to deal with, further slowing them down and separating the armored and unarmored elements of the German formation. Gone was the combined-arms doctrine for which the German Panzer Divisions had become so feared.
Still, the speed and ferocity of the German advance overwhelmed the South African commanders’ ability to maintain situational awareness of the battle. The headquarters of Brigadier Bertrand Armstrong (the commander of 5th Brigade) were overrun. They had no idea they were even under attack until a staff officer noticed German tanks just 300 yards away. The brigadier himself was captured.
As the day wore on, the 5th South African Infantry Brigade unraveled. There were elements of heroism – members of the brigade artillery engaging advancing German tanks with 25-lb guns shooting over open sights – but in the end the situation was never in doubt. The 5th suffered reported losses for the day as 224 killed, 379 wounded, and nearly 2800 captured. In a single day’s fighting, it had effectively ceased to exist.
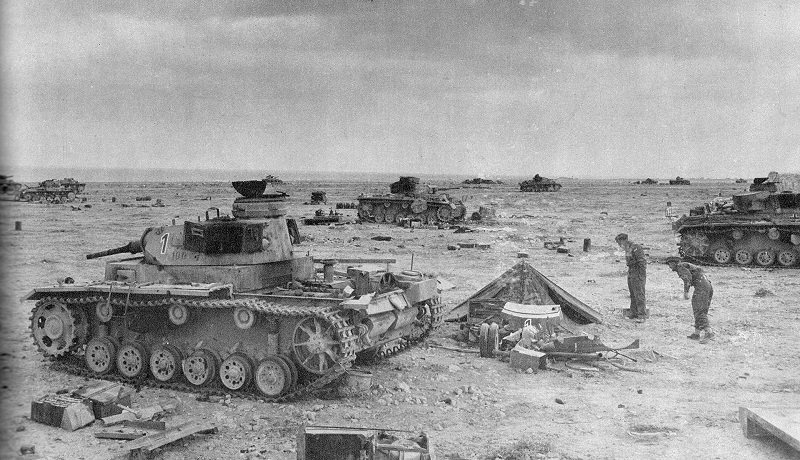
This might sound like a crushing victory, and in many ways it was. But in the process of making this unsupported attack, the German armored units that participated in the attack lost something close to 30% of their armored strength. This came at a time when Axis forces could not afford such attrition. The Afrika Korps would not recover from their “victory” on Totensonntag, and this action was in many ways the turning point for the whole operation. After this battle the tide turned, and within a few short weeks Axis forces would be driven out of Cyrenaica.
The Campaign
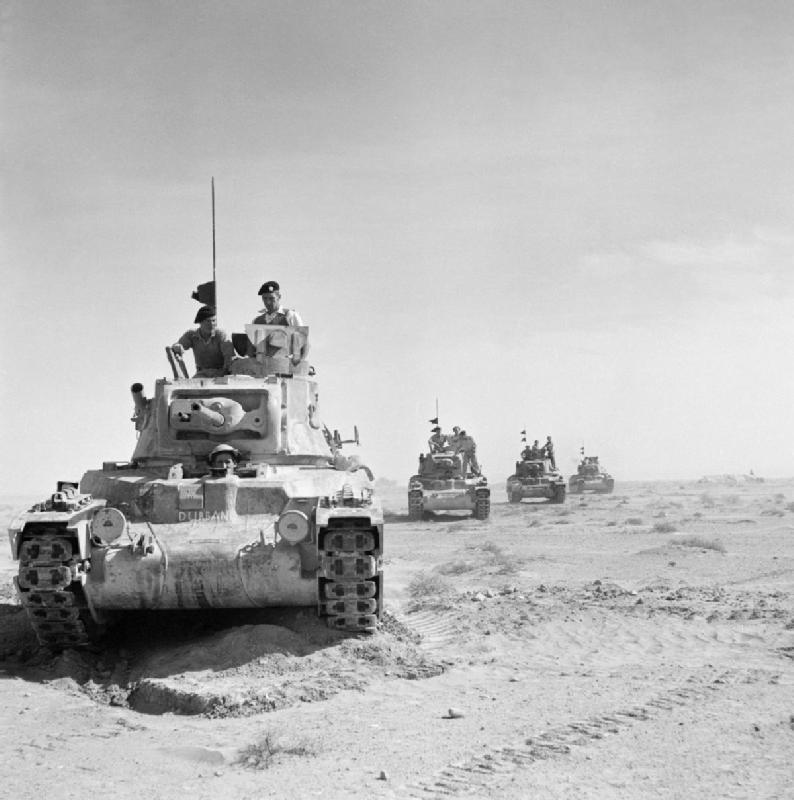
In general, Chain of Command assumes that each side is fielding an infantry platoon – usually with a few supporting units – and that is true of the South Africans in this campaign. But to capture the nature of this particular historical action (and to show that the game handles asymmetry very well), the German player is fielding an armored platoon of five Panzer III ausf. G tanks. In a typical game, if a player wants to field any armor, it comes as a support unit, but flipping this assumption on its head, if the German player wants to bring any infantry he or she needs to pay for it. And there’s a good reason to bring infantry, as one of the German player’s key objectives is the capture of as many of the South Africans’ units and support vehicles as possible.
You see, even by this stage of the war, the Axis war machine in North Africa was plagued by supply issues. Every usable vehicle or gallon of gas that could be captured was extremely valuable. And here’s where the asymmetry begins: the South Africans just want to get their vehicles off the table, and while the Germans can simply destroy them, they are worth so much more when captured.
Further, there is a time component in play as well; the longer the Germans dilly-dally around trying to capture support vehicles, the more time they give the South Africans to organize their defense. The amount of support that the Germans have is fixed – 12 points per campaign turn – but their infantry supports get more expensive every turn (as the infantry struggles to keep up with the armored advance). Thus, there is a constant tug-of-war between the desire to score points and the desire to keep pushing ahead, as the Germans lose campaign victory points the longer the campaign drags on.
Conversely, the South Africans start out with a mere 4 points of support and a mostly “green” infantry platoon (representing the cooks, medical orderlies, and quartermasters comprising the B-Echelon units) but gain an additional cumulative point of support every campaign turn. Further, they can progressively “upgrade” their forces from green to regular as the campaign continues, representing the German forces pushing out of the B-Echelon and into the actual combat troops. The South Africans’ objectives are very clear – hold out as long as they can to give their vulnerable support vehicles a chance to escape.
The Narrative
One of the things included in the “At the Sharp End” campaign supplement is a set of tables used to randomly generate some background information for your unit’s officers and NCOs. At first this seemed kind of weird to me – like role-playing in my tabletop wargame? How odd! But after I played a campaign, I totally understood why this is here and why it adds so much to the game. By giving some personality to your officers and NCOs, you get further invested in what happens to them as the campaign goes on, something that really adds depth to the narrative unfolding on the tabletop. After just a few turns of my first home-brew campaign I had a British Platoon Sergeant mentioned in dispatches for averting disaster; after a grenade was poorly posted through a window by one of the men in the unit, the sergeant kicked is away like a professional football striker. Said platoon was led by a ginger lieutenant who was initially very popular with his men due to his having come up through the ranks, but who would eventually come to be referred to as “The Red Menace” by the men under his command for his propensity for getting them killed.
Because the South African side is getting a fresh platoon every game (and because ATSE only has tables for the Brits, Americans, Germans, and Russians), we’ll only be doing this for our German tank commanders. Though the Axis plan was to slam both the 15th and 20th Panzer Divisions and the Italian Ariete division down the South Africans’ throats, due to poor planning and coordination the bulk of the fighting was done by the German 8th Panzer Regiment (part of the 15th Panzer Division), so our fictional NCOs will be part of that unit. After a little bit of randomization, here’s what we come up with:
Leutnant Hans Krauss: At just 22 years old, Hans is younger than all of the unteroffiziers he commands. A short, wiry bantam of a man from a farming community outside Dortmund, Hans’ career trajectory is all too common for bright young men his age: school, mandatory membership in the Hitlerjugend, public service training, followed by a commission in the army. He just hopes that the mistakes of the previous war will not be repeated.
Unteroffizier Jürgen Lendt: Jurgen’s father was a dyed-in-the-wool Communist, a labor organizer in Nüremberg. But where did that get him? Still only 26, Jürgen decided from an early age that only the Führer can save Germany. Completely buying into German propaganda, he sees this is a war against international communism and capitalism; once it is won a new society can be built on socialist principles of freedom for all Germans. He is a a model citizen of the new Germany. All of these dudes are German, but this guy is a fucking Nazi; let’s see if we can get him killed.
Unteroffizier Wilhelm Mauser: Only 25, Wilhelm is and inner-city kid from Berlin. The son of a worker in an arms factory, Wilhelm himself worked the line for a time, in the process becoming a stocky barrel of a young man almost as wide as he is tall. Not prone to deep thought, Wilhelm joined the army almost as soon as he was able.
Unteroffizier Berndt Ehrenreich: At 35, Berndt is the oldest man in the platoon. Shockingly overweight given his reliance on army rations, Berdt spent his younger years as a game warden on a large private estate near Offenberg, right on the edge of the Black Forest. His claim to fame among the men of the platoon is that he has hunted boar with Reichsmarschall Hermann Göring. The longer this war goes on, the more he wonders how much better things would be if he’d taken the shot when he had the chance.
Unteroffizier Dieter Bauer: The longest-serving member of the platoon, Dieter joined the army back when there wasn’t much other employment to be had in his native Münich. 33 years old and a veteran of the Spanish Civil War, Dieter has seen some shit and is haunted by it.
Finally, one of the things that can influence the Force Morale of a platoon is the outlook or attitude of its commander. ATSE has a way the generate and track this as well. If we assume that young Hans has been part of the Afrika Korps since its start, that makes him an experienced commander. One more die roll gives us a starting outlook of “secure.” Hans is a professional and this isn’t his first rodeo. When the shells start to fly, he knows what needs to be done.
So there we have it, the stage is set! Check back for the next article in this series, where we kick off the first battle of this campaign!
