This week the Goonhammer Historicals team takes a look at one of the lesser-known gems from the Too Fat Lardies catalog: Bag the Hun!
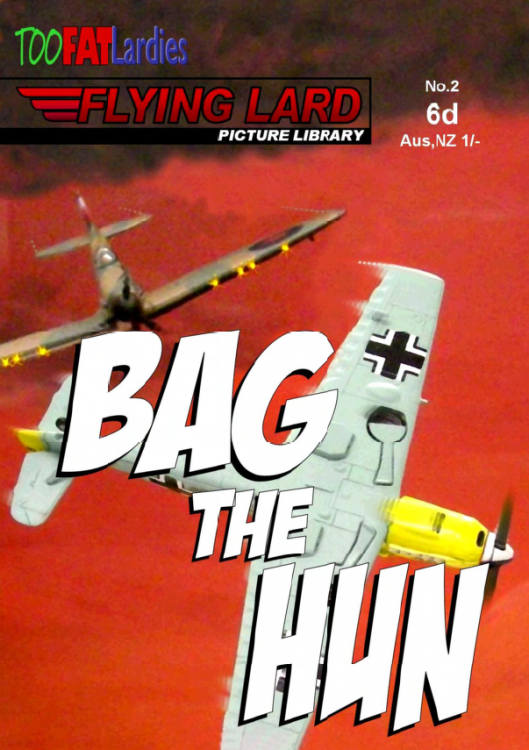
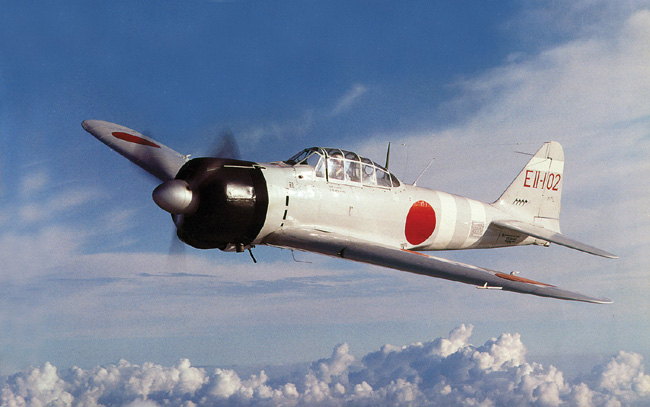
Now in its second edition, Bag the Hun is a game of aerial combat set during the Second World War. Whether it’s a straight up dogfight between Spitfires and Bf-109s, or a pair of intrepid Dauntless dive bombers dodging Zeros to drop their payload onto the deck of a flak-spewing Japanese carrier, or an Me-262 knifing into an unsuspecting formation of B-17s, Bag the Hun delivers the complete aerial combat experience in a way that is fun, easy, and – like most Lardie games – surprisingly nuanced.
The Deadly Dance
Aerial combat first became a thing that people did in the First World War, as the pilots of flimsy, canvas-clad biplanes discharged their pistols at each other or dropped grenades into the trenches below. Early attempts were…unsophisticated, but all of the combatants learned quickly. Changes in radial engine design led to faster aircraft, the invention of the interruptor gear allowed pilots to safely shoot through the arc of their own propeller, and pilots continued to push the envelope in terms of tactics and maneuvers.
But if WWI was the origin of aerial combat, WWII was where the practice was honed into a deadly military profession. The interwar years saw huge advances in aircraft design, and by the outbreak of hostilities in Europe most modern nations had graduated from ungainly multi-wing aircraft made of cloth and wood to sleek and deadly mono-wing machines made of aluminum and steel. Aircraft could fly higher, faster, and farther than ever before. And during the war itself, all combatant nations continued the development of new aircraft designs at a breakneck pace, culminating in Germany and then England fielding jet-powered aircraft in combat by the end of the war. It is in this context then, that Bag the Hun (henceforth BtH) sees the players squaring off, each controlling a handful of aircraft.
The Game
Unlike most modern tabletop miniatures games, BtH is designed to be played on a hex grid. This might result in the tabletop purists out there immediately writing it off as “a board game,” but I found that the hexes served to make everything easier. Having played other aerial combat games with more complicated, freeform movement, I can attest to the fact that when you’re moving in three dimensions shit gets complicated in a hurry. BtH solves many of these issues by locking the action to defined hexes and 6 discrete altitude bands (handy because you can use a D6 next to your mini to easily mark your altitude).
Like most games put out by Too Fat Lardies, BtH is somewhat scale-agnostic, leaving the hex and miniature sizes to the players. I really like the aesthetics of 1/600 scale aircraft in 1″ hexes, but if you wanted to go bigger or smaller the sky is literally the limit. And you can get transparent roll-out acetate hex maps in a variety of sizes (both the mat itself as well as the hexes) that you can put over just about any other gaming mat in a pinch.
Aircraft in the game are rated by a variety of metrics, including their base speed (in hexes, though more complex maneuvers cost additional speed to pull off), maneuverability, altitude ceiling, rate of climb, robustness, size, and firepower in four different arcs. And here is where the real distinctions between aircraft begin. Speed ranges from dog-slow DeHavilland DH-82 bombers with a 2 to a whopping 10 for early jets like the Me-262 and Gloster Meteor. Nimble fighter aircraft have maneuverability scores topping out at 6, whereas large level bombers like the Heinkel He-111 clock in at a dismal 1. The parameter space is sufficiently wide that you can have meaningful differences between airframes, and even for aircraft with very similar performance features many have a special rule that slightly alters their behavior – Republic P-47 Thunderbolts get extra speed in a dive, Supermarine Spitfires are more capable of shaking a tail in a break turn, Mitsubishi A6M Zeros (and all variants thereof) get a bonus to snap-rolls. These little special exceptions are subtle in play, but add a ton of character that help capture historical capabilities and further differentiate the different aircraft.
Speaking of character, no aircraft is complete without a pilot. BtH rates pilots according to skill, ranging from the lowly sprog (a rookie with just a handful of flight hours and no confirmed kills) through regular to veteran to junior and senior ace. Sprogs have a harder time pushing their aircraft to its limits, while aces can make their aircraft perform in ways that seem almost magical by comparison.
And herein lies the rub – you’re almost never flying alone. In the ideal circumstance, aircraft are flying in formations – pairs at the least such that everyone has a wingman. While you can play BtH with players each controlling a single aircraft, the game is much more interesting when each player is controlling formations of at least two aircraft. And it is here that the disparity in pilot skill becomes crucial; you might want to pair your sprog with your junior ace to help keep the poor rookie alive long enough to become a regular, but if that ace needs to perform some complicated maneuver to get on the enemy’s tail, he might lose his inexperienced wingman in the process – making both of them more vulnerable. Or you could put all of your experienced pilots together to make them more effective in combat, but the formation full of rookies is going to be a tempting target for the enemy. And BtH has a great table at the beginning of the rulebook that helps you randomize the skill level of all your pilots based on the level of training that different combatant air forces had at different stages of the war (for example, Japanese air crews in 1941 are in a much better state of training than in 1945). Additionally, there are rules at the back for tracking pilot improvements in the context of campaign play.
Formations
Significant space in the rulebook is dedicated to explaining the various formations that different nations used during the war (along with some discussion of how they changed and why). Formations are important in the game because planes activate by formation (more on activations below), and if a pilot shooting at an enemy has at least one wingman formed up with him he gets a bonus to that shooting (as he can concentrate on his sight picture without constantly having to look over his shoulder). Additionally, planes in a formation are eligible to get a bonus activation. Crucially, however, once your formation breaks it cannot be formed again, with the notable exception of the “pair.” But even here, reforming a pair requires both pilots to fly straight and level for a turn – and flying straight and level in combat can be a recipe for disaster. As a result, combat in BtH always starts out with serried formations facing off against one another before degenerating into a vicious furball. The side that is better able to maintain disciplined formations will usually have an edge, and in that regard the game is quite historically accurate. Also historically accurate is the quick list of which formations may be adopted by which nations at various points during the war, reflecting changing air combat doctrines over the course of the conflict.
Formations also make movement in the early phases of the game (where players are maneuvering to contact and setting up their lines of approach) much easier. When it comes time to move, so long as the formation is intact and not doing anything complicated, all movement is done with just the section leader’s aircraft and the other planes of the section are simply moved so as to maintain the formation. Easy-peasy. But if the section leader tries to do something complicated, the other aircraft may need to make a test to keep up. If your “senior ace” section leader snap-rolls into a diving break turn, chances are good that he’s going to lose any sprogs in his formation more or less immediately, which in turn is going to break the formation. If a pilot fails to follow his section leader, he flies straight and level instead. Remember that, because “straight and level” is not what you want to be doing in a dogfight.
Bogeys
In order to be able to fight the enemy, you have to be able to see the enemy, and BtH uses a simple system of blinds for “bogeys,” that is unspotted or unidentified aircraft. Depending on the scenario, either side may start with some number of bogey markers to place in lieu of their planes, and some of these bogeys may actually be decoys. Thus, the beginning of the game usually sees some jockeying and maneuver as each side tries to spot the opponent’s bogeys. The spotting test is simple and based on both the direction of the sun and the distance between the spotter and the bogey. For small games this doesn’t add a huge amount to the game, but for larger engagements the inability to determine your opponent’s main force or vector of approach can add a nice element of paranoia to the game.
Movement and Maneuver
Basic movement in BtH is very simple – each plane rolls a D4 and adds it to its Speed attribute. This is the number of hexes that plane can move in straight and level flight. For inexperienced pilots it’s the amount of hexes they must move, but more experienced pilots get to use as much or little of it as they want.
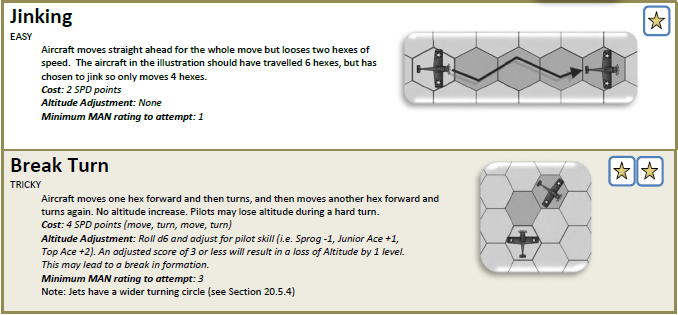
But basic is boring, and once you get to grips with your opponent you’re going to want to maneuver. Maneuvers are rated as easy (no test required), tricky (a test is required that might trip up inexperienced pilots, but veterans or better should be OK), or hard (only experienced pilots can reliably pull these off under combat conditions). Stuff like climbing or easy turns or slow descents are easy maneuvers. Break turns, hard dives, and barrel rolls are among the tricky maneuvers, and the more esoteric stuff like the Split-S and Immelman Turn and snap-roll are classed as hard. Each of these maneuvers has both a movement cost and a prescribed change in hex position, facing, and altitude. And of course for those maneuvers that require a test, failing that test means you abort the maneuver and instead fly straight and level – still not what you want to be doing in a dogfight
Thus, you’ll generally be putting together some combination of maneuvers to get the where you ultimately want to be – looking at your opponent over your gun-sights and lined up for a shot!
Activation
Like most Too Fat Lardies games, this is where the real magic of the game happens. BtH uses a card-based activation method that will look very familiar to players of some of their other games like Dux Britanniarum or Sharp Practice 2 or Infamy Infamy. For each “section” of aircraft (a section usually consists of 2-5 aircraft), there is a card for movement and a card for firing in the deck. When a section’s card is drawn, all of the planes within that section make the appropriate activation (movement-and-spot or firing). In addition, there are a number of other cards in the deck that allow “bonus” activations (like “Axis Formation Bonus” that allows one Axis section of planes that is still in formation to make a bonus move or spot, or “Altitude Bonus” that lets a single section from either side at the highest altitude make a bonus move or spot, with formations taking precedence over unformed sections in the case of a tie). Then come the “Senior Ace Bonus” and “Junior Ace Bonus” cards (generally one for each side if their force has any pilots of the suitable experience level), which allow a single pilot of the commensurate rank to make a move (if they have not already done so this turn) or firing action. Depending on the scenario, there may be other cards present as well, things like “Ships Move” if there are ships present, or “Flak Fire” if there’s flak in the area, or “Air Gunners Fire” if there are bombers with gun turrets in play. Finally, there’s my personal favorite, the “Bail Out” card, which is the card that allows pilots to evacuate the plummeting, flaming wreck that has just been shot out from under them.
The really intriguing thing about this kind of randomized, card-based activation is the uncertainty it provides. You don’t know when in a turn you’re going to get to move or whether you or your opponent is going to be able to get their shot off first. You might line up a sweet forward deflection shot on an approaching enemy fighter only to have his movement card come up before your firing card is drawn. This uncertainty represents the split-second opportunities that appear and disappear in the blink of an eye in aerial combat.
But lest you think there’s no way to mitigate this randomness, the game includes one very important aspect that can allow talented or lucky pilots an edge – getting on the enemy’s tail!
Tailing
If you can manage to maneuver your plane into the four hexes directly behind an enemy plane (or the three on either side of it) and end up both in the same altitude band and facing the same direction, you get to make a “tailing test.” Like most other basic tests in the game, this is a simple D6 roll with a handful of positive or negative modifiers for relative pilot skill, relative aircraft maneuverability, and special circumstances like approaching out of the sun. If the final result of your roll is 3 or less, your opponent has outfoxed you and you are not considered to be tailing. But if you manage a 4+ after all is said and done, congratulations, you are locked onto your enemy’s tail. Now, whenever he moves, you move too – breaking the random card draw activation order. And if your own movement card comes up, you get to ignore it and stay on your opponent’s tail (or break off, if you so choose, but that’s the coward’s play!).
But your opponent isn’t going to wait around like a dope – as soon as he can move, he’s likely to attempt a maneuver to try to shake you – snap-roll away or dive into a Split-S or the like. If you fail the piloting test, he shakes you and leaves you scoping empty air. Of course these maneuvers are difficult to pull off in combat, so your opponent first needs to succeed in his own maneuver test. And here again the pilot skill becomes paramount; sprogs are easy to tail and easy to shake, but seasoned aces are both likely to be successful at hard maneuvers designed to break a tail and hard to shake once they’ve got you in their sights.
This interplay between the random activation sequence and the out-of-sequence moves offered by the tailing mechanic combine to lead to some really interesting and tense game-play. Often you and your opponent are hanging on every card draw, hoping that things will come up your way and you’ll be able to leave your opponent in the lurch (or give him the whole nine yards).
Shooting
That said, being on your opponent’s tail is not the only way you can engage them. For most fighter aircraft, the forward firing arc is only the line of hexes immediately to the front of the plane, and in order to get off a shot your opponent’s plane needs to be in that line and in the same altitude band, and while you can engage at quite long ranges, your chances of hitting anything are much better if you’re up close. Further, you need to consider the angle of your opponent’s plane relative to your own, i.e. whether the attack is head-on, front-deflection, rear-deflection, or rear. This matters because it dictates the length of the burst you can direct at your foe – when lining up a head-on shot your opponent is only going to be in your sight picture long enough to pull off a squeeze. But a rear-deflection shot is going to let you get off a full burst and a rear shot (which you automatically get when on an opponent’s tail) lets you take your time and rattle off a long burst.
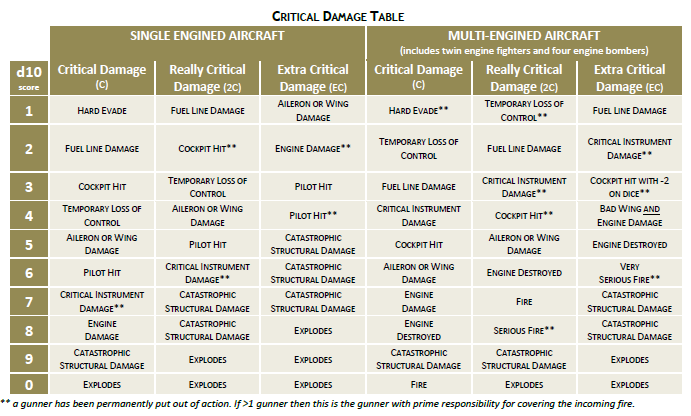
Your plane’s base Fire Factor dictates how many dice you roll. This is then modified by the length of the burst you’re firing and a set of other modifiers (things like +1 die for having a wingman watching your back or -2 dice if your target is jinking). Once you arrive at the final tally, you roll your dice, with every 5 and 6 you score indicating a hit. Your target of course is not just going to take this lying down, and is going to try to evade. The target rolls a similar number of dice, starting with his Maneuver score and modified from there, the biggest modification being +1D6 for each hex of range from the firer to the target. This is why long-range shots generally don’t pay off as well, as they give the opponent a better chance to take evasive action. Once the final number of dice is determined, the targeted player rolls, again looking for results of 5 and 6.
This is where things start to get a little complicated, because the relative number of successes between the shooter and target feed into a table. If the intended target nets more successes, bad things can actually happen to the shooter – either a sideslip or additional ammo expenditure as they struggle in vain to keep the opponent in their sights. A tie score results in a few minor bullet holes but no real damage. But as the shooter’s number of successes relative to the target’s increase, the damage becomes more severe. This is all captured on a table for the damage category, which feeds into another table where said category is compared to a D10 damage roll result to determine the final effect. There are loads of different effects here, and this is in my opinion the aspect of the game that really shows its age. It harkens back to a much earlier era of chart-driven wargames, and is a little clunky in play. Once you get the hang of it it’s easy, but it’s still more rolls and table referencing than I have come to expect from a TFL game.
But one really clever aspect of the game is how it handles ammunition expenditure. Each aircraft has a finite amount of ammunition, say 14 for your garden-variety Supermarine Spitfire I/II. For every one of the shooter’s dice that comes up a 1 during the firing, one unit of ammunition is used. Long bursts automatically consume 2 more ammo, and once again pilot experience plays a roll here – aces reduce ammo expenditure through good fire discipline, sprogs waste more ammo due to naive exuberance.
And if you roll more 1s than hits (which recall are 5s and 6s)? Then your guns jam. It’s a statistically unlikely occurrence, but it happens. You can clear a jam – most aircraft of the era had controls that gave the pilot access to the gun’s loading mechanism to try to eject a badly-loaded shell or chamber a new round – but doing so requires the one thing you don’t want to be doing in a dogfight – straight and level flight.
In the very first game of BtH I played, my German Junior Ace pilot’s movement card came up. Successfully pulling off both a barrel-roll and a break turn, I managed to line up a 1-hex range forward deflection shot on an enemy aircraft whose movement card had already been drawn – and being a lone aircraft, he couldn’t claim the altitude or formation bonus to escape me. So I knew he wasn’t going anywhere before I could fire. Better still, I knew that both my firing card and my Junior Ace bonus card had not yet been drawn, meaning that I would have at least two chances to light my target up before the end of the turn, and if the cards came out right in the following turn I might get one or two more. Everything had worked out perfectly! So when my firing card came up I cackled with glee as I counted out and rolled my dice – only to look on in impotent horror as I rolled some absurd number of 1s and exactly zero hits. Thus, my poor pilot was left to scream “scheisse!” over and over again as he tried to hold the stick steady and rack the ejection lever for his jammed cannons, his erstwhile target flying away and having no idea how close he had come to fiery, flaming death.
Bailing Out
As damage to your plane mounts, things get increasingly difficult. Loss of control surfaces or engine hits can make it tough to keep your plane in the air, and at some point you’re faced with a choice – auger in or bail out. If you choose the latter (and smart money does), then your course is simple: when the “Bail Out!” card is drawn from the deck, your pilot makes a basic 1D6 roll to try to get clear of the cockpit. Again pilot experience plays a role here (this is likely not an ace’s first rodeo when it comes to un-assing a burning plane, but a sprog is more likely to panic). But crucially, planes that are making uncontrolled descents do so when their section movement card comes up, which might very well happen before the “Bail Out!” card is drawn.
This too can lead to some tense moments. In the same inaugural game I played (a 2v2 game run over Zoom as part of the “Virtual Lard 3” game day), our team of four Bf-109s had splashed two Spitfires and driven a third one off with heavy engine damage. The only Spitfire still flying was the unfortunate British sprog, and my teammate finally got in a shot that took out his engine. The dogfight was happening at altitude band 5 (somewhere between 20,000 and 30,000 feet), and after the engine hit the poor sprog’s plane immediately lost 2 altitude bands and would continue to do so every time its movement card came up. Fortunately, the Bail Out card had not yet come up, so the pilot still had a chance to bail at altitude 3 in the same turn – but the player failed the roll. Panicking, the inexperienced pilot was fumbling with his harness release. The next turn, the cards are reshuffled and the drawing begins anew. The airplane drops to altitude band 1 and the sprog once again fails his roll, the latch just won’t release!. By this time, the fight is over and the victorious German pilots are heading home to rest, refuel, and rearm. But god damn if every single player wasn’t just transfixed by what was happening.
The deck is shuffled again, and everyone knows that if the movement card comes up first, the plane augers into the British Channel at high speed and the sprog dies. As the cards start to come out, even we German players are screaming, “Get out of there, sproggy! Bail out!!!” Every card draw was excruciating anticipation. Finally, fortune smiled on the lad and the “Bail Out!” card came up before the movement card – and on his third attempt the player finally made the roll. With a huge sigh of relief, everyone sees the young pilot’s chute finally open somewhere well below 1000 feet. That’s about as close as you can cut it! And while ultimately the fate of a single pilot really only matters in the context of an ongoing campaign (and certainly not in a one-off convention setting), TFL games are almost universally fantastic at creating a narrative from the game itself. BtH is no exception in this regard, and it makes for a really compelling game-play experience.
Taking it to the Next Level
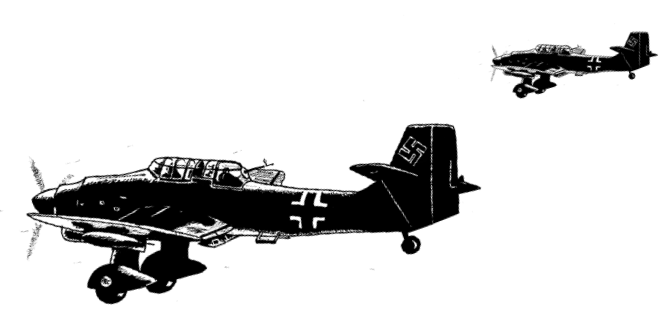
As if the riveting action of air-to-air combat weren’t enough, BtH doesn’t stop there. The book includes rules for flak, strafing runs, dive bombing, level bombing, torpedo runs and even goofy stuff like skip-bombing. Whether you want to torpedo a ship, strafe a train, dive-bomb a ground unit, or pound a bridge or factory installation with B-29s from 35,000 feet while flak explodes all around you, BtH has you covered. The mechanics for these activities build upon the basic rules, and while they add a lot of interesting aspects to the game they aren’t overly complicated. They can be hard to pull off successfully, however. This is especially true of level-bombing, and after having tried it in-game I can completely understand why the Allies dropped millions of tons of bombs on occupied Europe and didn’t manage to cripple much of the German industrial infrastructure; hitting shit from that high up while flying at 200 mph and trying not to get killed by flak or enemy fighters is hard.
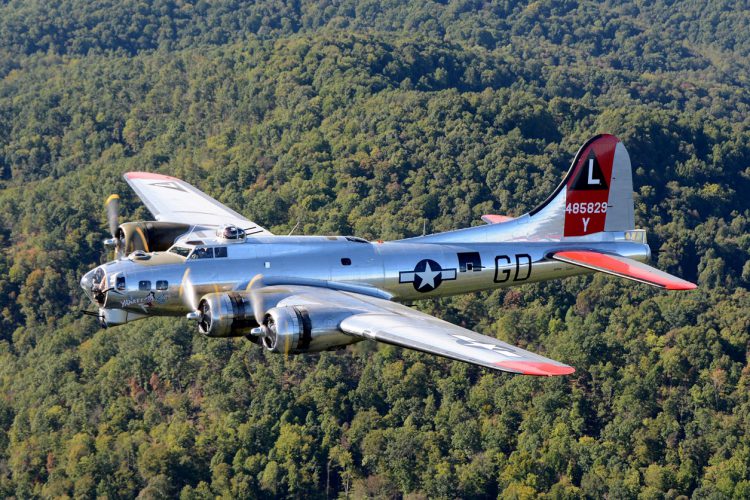
In order to support all of this extra content, there is a truly mind-bending catalog of different airplanes listed for each combatant nation. Brilliantly, this list encompasses the entire war, and pretty much any aircraft that any combatant put into service is represented in the game. This is great, because the endless variety makes for fantastic scenario options and replayability. Want to play a Schwarm of Messerschmitts trying escort Ju-52 transports to their drop zones in the face of Polish fighters? You can do that. Italian bombers over North Africa? No sweat. Curtiss P40 “Flying Tigers” battling it out with Japanese fighters over China? Done. There are pages and pages of different aircraft fully statted out and ready to go, and my only complaint here is that the planes are listed in alphabetical order by manufacturer. In the PDF copy that’s not too much of a problem because you can just search to find what you want. But if you didn’t know beforehand that North American produced the P-38 Lightning, it might take you a while to find it in the hard-copy edition. But this trove of different kinds of aircraft – from the well known to the fringe experimental – supports an immense breadth of different scenario possibilities. Virtually any aspect of air-to-air, air-to sea, or air-to-ground combat can be played out using BtH.
And best of all, this extra content isn’t hidden away in a supplement or expansion, it’s included right there in the base rulebook. In an era where it can often seem like game companies are just trying to sell more rulebooks or sourcebooks, the completeness of BtH is really refreshing.
What’s Missing
If you’re looking for point values or list building or some kind of balancing mechanism, you’re out of luck. BtH is very much designed with historical scenarios in mind. True “balance” is a murky concept here, and asymmetric scenarios are likely to be the rule rather than the exception.
Also, while aircraft start the game in formations that streamline and simplify movement and spotting in the early stages of the game, once the bullets start flying you quickly get into an “every man for himself” mode where the actions of each plane are being determined individually. This complicates the game in the later stages, especially as planes sustain damage that affects their ability to shoot or maneuver (as each needs to be tracked separately). While you certainly could play a BtH game in which dozens of aircraft took part, I’m not sure you’d want to. The game is probably best targeted with each player controlling no more than a handful of planes(say 2-6), especially if you have more than two players. But that gets me to…
Solo Play
Because the activation sequence is uncertain, because movement can be variable, and because you never know just how long your ammunition will last, BtH joins a long list of Too Fat Lardies games that are excellently adapted for solo gaming. Better still, there’s a great Tabletop Simulator mod for the game, so even if you don’t (yet) have an appropriate hex map or tiny airplanes, you can still enjoy all that BtH has to offer. I’ve played a number of games solo now (whereupon I learned that trying to successfully dive bomb a moving destroyer with a Stuka is also really hard), and these games have been just as compelling as the games I’ve played against real opponents. I’m kicking around ideas for doing a “Defense of Malta” solo campaign. I think that any game that supports solo play is a good investment, especially as we continue to move in and out of lockdowns or for people who don’t have an active local gaming group.
And here is where you have the potential to really scale things up. Particularly if you’re playing solo in an environment like TTS (where you can save the state of your game without annoying your spouse by taking up the kitchen table with tiny planes for days or weeks on end), you can play those larger scenarios with more aircraft taking part.
Odds and Ends
The Second World War heralded the beginning of the jet age, and the game has rules to handle the early jet-powered aircraft. And once you’ve crossed that bridge, it’s easy to keep going. To that end, the Too Fat Lardies 2006 Christmas Special (available on their webstore here) contains a supplement called “Bag the MiG,” which extends the game into the Korean War. A further expansion called “Fox2” (available in the 2007 Christmas special, which you can find here) extended the game into the Vietnam era.
Additionally, if you’re intrigued by the concept of campaign play, you might want to check out the supplements Finest Hour (a campaign centered on the Battle of Britain) and Squadron Forward (a generic system for creating your own campaigns).
Miniatures
TFL is exclusively a rules publisher, and as a result players are free to play with whatever miniatures strike their fancy. I really like the 1/600 scale miniatures produced by Tumbling Dice. They have a really extensive range of aircraft available for very reasonable prices (a pack of three fighters of pretty much any type is just 2.00 GBP). Though they are much bigger, the 1/200 scale miniatures made by Ares Games for their “Wings of Glory” game are absolutely gorgeous and come pre-painted (though they are more expensive in comparison). Warlord Games’ “Blood Red Skies” game is produced in the same scale and are very reasonably priced. Tamiya has an extensive range of 1/700 WW2 aircraft, which is even further supplemented by other manufacturers like Navwar.
But let’s talk about the gorilla in the room – Shapeways and Thigiverse both have a growing collection of very nicely detailed STLs for the more common aircraft of WW2. If you have access to a 3D printer – especially a resin-based printer like an Anycubic Photon – then you can create your own air force in whatever scale strikes your fancy. The increasing quality and ease-of-use of 3D printing is a huge boon for historical wargaming, especially for games that use vehicles instead of human models.
Tail-End Charlie
Though it is one of their older offerings, I really feel like Bag the Hun holds up well. The game delivers the kind of tension and split-second opportunities that one normally associates with aerial combat. All of the other aspects of the game (air-to-sea and air-to-ground combat) are just icing on a very well-constructed cake. At 10.00 GBP for the PDF, it’s almost a steal for the amount and quality of material in the game. You can pick it up direct from the TFL web store here.
So if you ever watched Tora Tora Tora or the 1976 film Midway or the 1969 Battle of Britain and said, “Hell, yeah!” then you might want to give Bag the Hun a look.
