
Note that this article is part 4 in a series. If you’re looking for our overview of the book, you can find that here. Or if you want the deep dive into the other Craftworlds, that part is here. Finally, you can find Ynnari here.
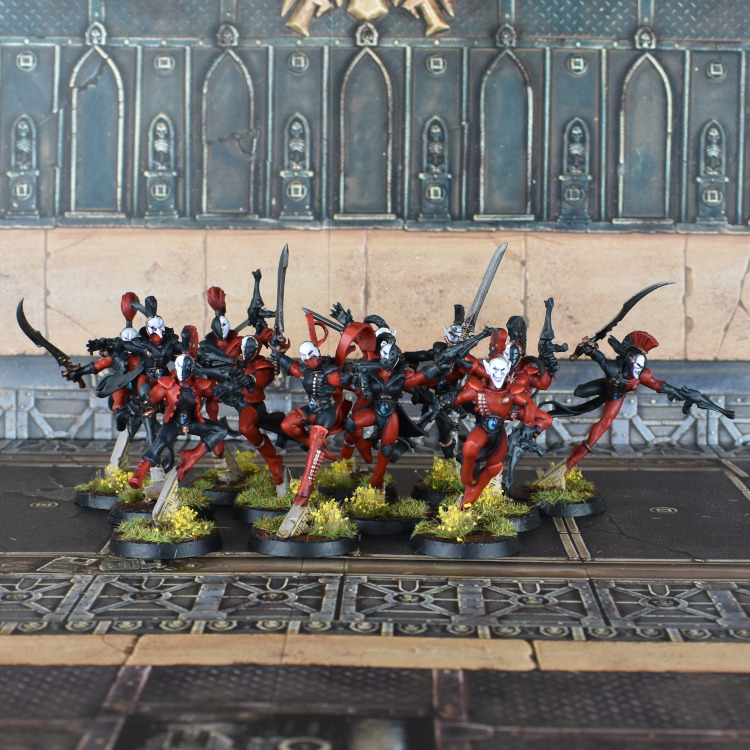
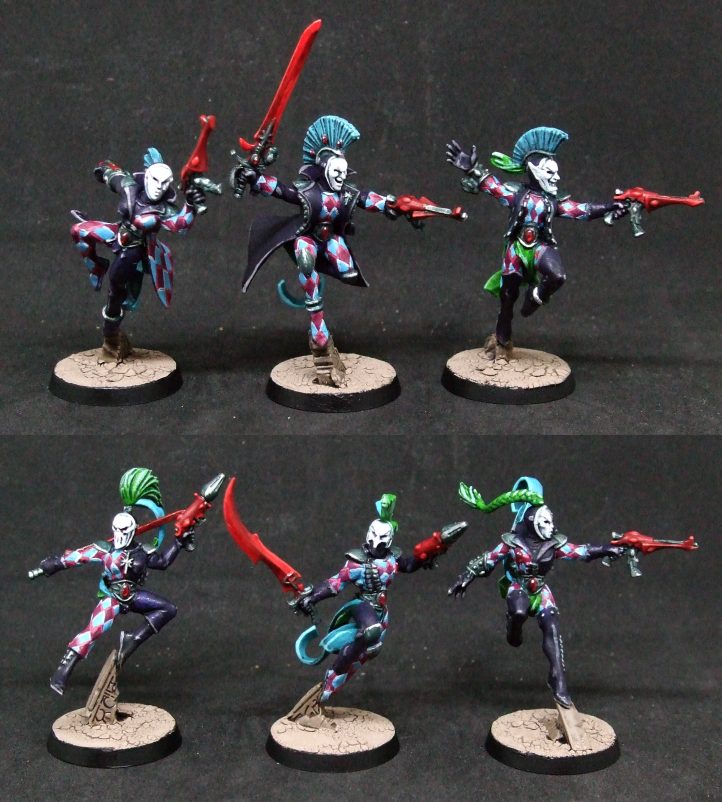
Welcome to the closest thing to a circus the game of Warhammer 40,000 has to offer. Of all the Aeldari factions we’ll be looking at, the Harlequins are the most mysterious and game-breaking. Not game-breaking in the terms of being broken or unfair, but in the way that when you play against them (or with them), they tend to do things that will catch you off guard. This is an army made up of warrior acrobats, and show-elves who don’t distinguish between murder and art on the battlefield. Their incredible feats of agility and brutality make them the fear of everyone they come into contact with.
The rules for Harlequins have been updated and folded into Codex: Aeldari, with several big changes. They still retain their datasheets, Stratagems, relics, powers, and warlord traits, and can operate as a standalone faction or be folded into an Asuryani or Drukhari army. In this article, we’ll be reviewing the new Harlequins rules in depth. If you’re looking for a lighter touch, you can find our overview here.
Before we start, we’d like to thank Games Workshop for providing us with a review copy of this book, and with some of the models, you’ll see pictured within the article.
Why Play Harlequins?
If you thought the races of the Asuryani were low in number, let me introduce you to the most elite of the elite in elf land. When we are talking about speed, shooting, psychic abilities, and close combat that is nearly unrivaled – the Harlequins standing near the pinnacle. With this new book Harlequin players will be able to enjoy much of the same playstyle they have been used to, but with new tricks provided to them with the new Aeldari stratagems. In addition, many fan-favorite rules for the faction also return, plus the Harlequins can benefit from the power of a new-and-improved Webway gate.
Naturally, all of these goodies come at a cost, and that cost is paying a premium in points, but it is a cost well worth it we’ve found. Finally, by being true to the Trickster God you lose the abilities of the Asuryani – Strands of Fate – and instead have access to the Luck of Cegorach, which gives you a minimum of 3 free rerolls a turn. Harlequins are an army that moves fast, hits hard, has 4+ invulnerable saves across the board (without having to be Custodes), and has an irritating amount of luck. What’s not to love?
What’s in this Book for the Harlequins?
- Lore of the Harlequins, their Saedaths, what they mean to the Aeldari, and their role in Aeldari culture
- Rules for constructing your Harlequin army, and rules for the Aeldari and Drukhari to include a patrol detachment of clowns for their very own
- A touch up to the Pivotal Role system
- The Harlequins discipline of Psychic powers
- Warlord traits, Relics, and Stratagems
- All Eight Harlequin Datasheets.
The Five Best Things About Harlequins
- The Webway Gate: Games Workshop has been trying to make a Fortification that matters for years, and it looks to us like they’ve finally nailed it – the Webway Gate is tremendously powerful and hugely important to the army’s dynamic. It’s so good we had to talk about it twice. It’s priced to move and Harlequins love this thing.
- Saedaths: The new detachment abilities that feel like the 6 old masques combined into 3.
- Luck of the Laughing God: Being able to get at minimum, 3 free rerolls (and usually 5) is S-tier stuff.
- Skyweavers: The toughest unit with Core, and able to be buffed to be near untouchable via some magic.
- Pivotal Roles: These character upgrades provided significant boosts, at only the cost of some points! No longer do you need to trade away Blitz from your Solitare to get some great additions to their rules.
The Rules
There’s less here given the size of the Harlequins faction, but we’ll cover the major beats of the faction and how they might be built as a standalone force.
Building Armies
There are three things to keep in mind as you build Harlequins standalone armies:
- They follow the standard detachment rules, locked down to only one kind of Saedath
- You can only have one Solitaire per army, as before.
- The new Lead Role rule means that if your army includes any Troupe Masters, then only they can be a Harlequin warlord.
Harlequins have the standard Objective Secured rules for their Troupe but don’t have any restrictions or limits on the number of “General”-rank characters they can have in a detachment. It’s worth noting that Harlequins do not keep Strands of Fate in their standalone armies but instead replace it with the incredibly useful Luck of the Laughing God.
Army-wide Rules
- Harlequin’s Panoply– This is the replacement to the flip belt with a little twist.
- Rising Crescendo– The “ignore the rules” rule that Harles are known for. Everything with this rule (which is everything except the vehicles) can Advance/Charge and Fall Back and Shoot/Charge.
- Luck of the Laughing God– Your reward for being pure Harlequins, 3 free rerolls with a twist.
- Shuriken giving a -2AP modifier to Pistols and Cannons on 6s to wound.
- Deep-strike via Pivotal Rolls and Stratagems.
These rules provide the play style for Harlequins that they’ve been used to since they were released with a few small changes. Firstly, Harlequin’s Panoply provides the expected 4++ invulnerable safe to all infantry units, also providing them with a pseudo-fly allowing us to move horizontally through models and terrain features. GW did do the clowns a big favor here by adding a third ability onto this, causing all Infantry to be -1 to be hit in close combat. Being a Toughness 3 army that wants to live in close combat, this is a great little buff, especially as they’ll often be -1 to wound as well from a Shadowseer.
Next, and most importantly, is the Luck of the Laughing God. Luck gives the Harlequin player access to a minimum of 3 free rerolls per Battle Round and any that don’t use by the end of the battle round are lost. Now, that alone is very good, especially in an army where you will be tearing through your command points. There is an additional line to this ability that gives this the flavor we like to see in Harlequins. After banking these rerolls, you are allowed an option to do a bit of gambling and go for even more.
What this looks like is that we can roll up to six additional d6s, and if every result is a different one, we gain as many rerolls as we used for dice. Plainly, that means if you roll a single dice, you get one more reroll since it’s a unique result. Two, the same thing just don’t roll doubles and giant two rerolls. This can get pretty crazy once you start rolling for three or four, as if the luck is with you, you’ll be sitting around 4 ~ 6 free rerolls a turn. What can these rerolls be used for? Similar to the Strands of Fate, you can apply these to a set list of things, which this time around are:
- Advance
- Hit Roll
- Wound Roll
- Saving Throw
- Damage Roll
To put it simply, any time there is a single dice being rolled, you can reroll that. Charges and Psychic tests you will need to use a CP for, and morale is still off the table.
Gunum: When it comes to using these rerolls, I like to use about half of my available rerolls in my turn and make sure to save some for my opponent’s turn as well. Luck of the Laughing God will start to feel a bit oppressive in the late game as you’re sitting at zero CP and still re-rolling while your opponent is trying to play honest 0 CP Warhammer.
Subfactions: Saedaths
Codex: Aeldari mixes things from what we’re used to concerning Harlequin sub-factions. All of the Masques are now gone, replaced by three Saedaths: Light, Dark, and Twilight.
- Light – Takes the ability of Soaring Spite (Advance and then shoot as if you Remained Stationary) and combines it with a defensive buff that has been pretty rare up till now – if you’re shot at from outside 12″, a hit roll of 1-3 always fails.
- Dark – Brings a modified version of the Masque of the Dreaming Shadow, where models now automatically get to Fight on death if they haven’t swung yet, and also just provides a flat +1AP boost in melee all the time.
- Twilight – Is the combination of Midnight Sorrow and Frozen Stars. Extra attacks, extra Consolidation move. They have a Warlord trait with big Riddle-smith energy as well.
The Saedaths presented to us are a conglomeration of our old masques and present an interesting take on the Harlequin playstyle. Each of these three options gives provides completely different ways to play the game. Light encourages a shooty play style focused around bikes and transports, definitely for those who were enjoying the days of the Soaring Spite Melta pistol. Their Warlord Trait, Player of the Light gives a fighty leader +1S and attack on the charge, as well as a 6” heroic intervention, and their relic, is the old auto-include, The Shadow Stone, boosting aura and spell ranges for the Shadowseer. Providing a Light Shadowseer +3” to their auras and their spells. Finally, their stratagem is the extremely strong Capricious Reflections, which allows an unengaged Light unit to make a 6″ move when declared as a charge (which the opponent then gets to retarget).
Next, Dark is going to be focused on close combat and staying engaged with their enemies. Losing the shoot on death ability is going to feel a bit rough here, but every single Harlequin in your army feeling like a Wulfen is quite a feeling, especially with how strong +1AP all the time is. Dark’s warlord trait is Player of the Dark providing the warlord with a chance of some Mortals in melee, which is fine but not super exciting. Their relic is The Ghoulmask, which was not taken very often previously but has a better shot now, as it both adds an extra deny and provides a powerful 3″ aura that turns off Objective Secured. Their stratagem is a classic one from the Silent Shroud called The Silken Knife, letting you switch off Overwatch for 1CP, which looks increasingly clutch as Tau dominate the meta with high shot count Crisis Teams
Finally, Twilight is another Saedath that is very focused on close combat and taking the fight to the enemy. The abilities provided are +1 Attacks when they are charged, get charged, or heroically intervene, and also boost their pile-ins and consolidates, allowing them to exploit the combat movement aspect of the Fight Phase. Their Warlord Trait, Player of the Twilight, plays towards the “Fun” side of Harlequins. As well as giving you a pretty standard CP regen ability, whenever you roll dice for the Luck of the Laughing God if you roll for 4 or more dice you gain a command point. This may feel like a bit of a trap, as the odds of four unique results isn’t super great, so you’re taking a big risk, but having the ability to guarantee access to an extra Command Point immediately can be clutch, and sometimes you’ll win your gamble and find yourself rolling in CP and re-rolls for a big alpha turn. Some very cool flavor here, and worth adding as an extra trait. Their relic is a holdover from the White Dwarf and one of the most taken, The Twilight Fang. This is a wonderful weapon upgrade for an Aeldari power-sword that gives the bearer extra attacks equal to the current battle round number – you want this. Finally, Malicious Frenzy returns as their stratagem, giving them automatic wounds on 6s to hit, and given the sheer number of attacks they’re throwing out that’s pretty cool.
Gunum: When I am comparing these three Saedaths against each other and which ones I would want to play, it’s a big fight between Light and Twilight for me. Light gives my forces a massive defensive boost when combined with Shadowseer treating shooting models as being an extra 6” away. The front-loaded defenses that are provided by Light are hard to ignore and are especially fantastic combined with the -1 to be wounded aura provided by Shadowseers. This allows our fragile units to be much more durable than they normally would be. The Shadow Stone providing a larger Aura for that very same Shadowseer only furthers this utility. Finally for Light, always being treated as Stationary when you advance or move allows for our bikes and Melta-boats to function as we want them to, allowing our pistols and heavy weapons to always be shooting. Value!
On the other side of that, looking at Twilight, we are talking about a much more aggressive play style that is focused heavily on Rising Crescendo to deliver our units into that juicy close combat. The extra consolidation pushing our units to 5” will allow us to touch back lines with ease and make sure we continue to push pressure onto objectives. Taking the Twilight Fang is also nearly a requirement with this force, as we won’t want any of our opponents’ units making it out of close combat. When equipped with Harlequin Blades, our basic players will be attacking with 6 a model, which will add up when we are supporting them with stratagems and the reroll 1’s to wound via the Troupe Master.
Wings: I’m mostly looking at this through the lens of soup, which means that it’s Light all the way for me. “Hit Transhuman” combined with the fact that opponents can’t re-roll shots against Starweavers means that even the most elite armies opening up against Harlequins have a severe chance of spiking downward, especially when they have to push through a 4+ invulnerable as well. Add in speedy pistol shenanigans and a really good stratagem as well and they’re a hugely valuable add-on to Asuryani (and obviously pretty good in their own right). In terms of monofaction play I honestly think all three look good – you get very powerful bonuses from all of them, each tuned to a slightly different playstyle. I think this showcases that less can sometimes be more in design – consolidating these down to three powerful options rather than trying to have five or six because it’s the done thing seems to have massively paid off for the faction.
Stratagems
- Harlequins share some stratagems with the Asuryani, such as Phantasm.
- Many Codex and White Dwarf stratagems were brought over, though a few have been lost on the way.
- Tricksy Elf stratagems that keep opponents on their toes.
- Stratagems for each unique Close Combat weapon choice, where one weapon in the unit unlocks buffs for the entire unit.
Harlequins share stratagems with the Aeldari brethren, which we’ve mostly covered in the Asuryani review. Generally speaking, there are quite a few Stratagems that key off Asuryani, Harlequins, or Ynnari, such as Lightning-fast reactions, or that key off Asuryani or Harlequins, such as Bladestorm, that work for the Harlequins. Shadowseers also get to dip into the Farseer toolset, having options to Psychic Action and Cast, or to throw an extra power, definitely not to be sniffed at. Here we’re just going to be focusing on the two pages of Harlequins-only Stratagems.
First up we have some stratagems that are making a glorious return, such as Prismatic Blur and Cegorach’s Jest. Blurs CP has been increased to 2CP to help reflect GW trying to make a 3++ Invulnerable save costly, and is now locked to Infantry, but if you want to bring a full foot Troupe it’s fantastic, especially with lots of save re-rolls available. Jest has been adjusted to combine two stratagems into one. For the cost of 1CP, a Harlequin’s infantry unit can shoot an enemy unit that fell back. For 2cp, instead of shooting, they can consolidate up to 6” to try and keep those enemies in close combat, and maybe even grab some of the friends, in line with what Twilit Encore used to do! Virtuosos of the Webway and Murderous Spectacle also remain very similar, allowing you to pull a unit into Strategic Reserves (now any unit) and giving +1D to all close combat attacks from a Harlequins unit that charged respectively. This can get pretty crazy with the stat squish that happened to the Kisses, Caresses, and Embraces, pushing these all to three damage.
You do also keep access to War Dancers (though it’s now Troupe only) for an expensive Fight Again, which can be vicious on a decked-out unit. Finally, for your broad stuff, Dramatic Entrance allows any Harlequin infantry unit a 6” Heroic Intervention. Combo this ability with Light’s Capricious Reflections for some real fun movement shenanigans – opponents are probably not going to expect your unit to move 6″ away from their charger then Heroic 6″ into something else.
For your Characters, No Price Too Steep has returned for Fight on death, and Torments of the Fiery Pit lets you power up if you’ve been damaged at any point earlier in the battle, though it no longer works on Solitaires. Also no longer affecting them is Heroes’ Path, which gets a complete rewrite. Instead of moving a trio of characters around, it now gives a Troupe Master and either a Shadowseer or a Death Jester +2″ to movement and +1″ to charge for a single CP. Death Jesters probably don’t super need this, but there’s some real use on a Shadowseer, as their extra movement will allow a better deployment of their aura. You’ll just about want it to get a Death Jester into position for Mocking Laughter, which uses a cool new morale mechanic – stopping the opponent using Insane Bravery. This has historically been the thing that’s stopped most morale tricks ever mattering, so it’s good to see GW finally acknowledging that and giving you a way to shut it down. As a final neat bonus for Harlequin characters, Favoured of the Laughing God allows your Warlord to take a second trait, and while you don’t have that many choices, this does set up a few interesting combos.
Two key things left to cover. First up, the Soaring Spite’s Skystride has been generalized as The Curtain Falls, allowing a Harlequin unit to embark on a Transport that they’re all within 6″ of rather than consolidating. This is very tasty, as it happens immediately after you fight, so can be used to keep your still somewhat fragile units safe from vicious reprisals, or double-dip on firing your characters out as missiles. Very handy to have this available to the more melee-focused Saedaths.
Finally, the way the Harlequin melee weapons are differentiated now is through a set of stratagems that GW showed off on WarCom: Kiss of Death, Oblivion’s Caress, and A Deadly Embrace. Each of these abilities can be used on a Harlequin unit that has the Caress, Embrace, or Kiss keywords that are granted from taking a single count of each weapon. A Kiss of Death allows every unmodified roll of a 6 to deal a mortal wound in addition to any extra damage, up to a maximum of 6. With the weight of attacks that a Troupe unit can put out, you can expect to see this net the maximum quite a lot of the time, and it makes one Kiss a very cheap way to add threat to your units. Oblivion’s Caress is 2CP to have the entire unit ignore invulnerable saves. This will stack very nicely with a Troupe Master who has chosen the Dark Saedath, racking up as much AP as possible. Last of all, A Deadly Embrace becomes a fantastic tool for when you charge or heroic into the enemy rolling a dice for each of your models and doing a Mortal on a 4+. Worth noting that you can’t activate Caress and Kiss in the same turn but you can pop this with one of them, which means if you take one of each weapon you can potentially threaten a very broad range of effects.
Warlord Traits
Time to look some for some of the wild things Harlequin characters can get up to. Something to keep in mind as we look at these is that the Warlord can take two of them, or one of these plus a Light, Dark, or Twilight trait. Stacking these can have some real fun combos for Troupe Masters.
Starting off, we have the Favour of Cegorach. This provides our warlord with a once-per-turn automatic six for either a hit, wound, or saving throw. This can get pretty handy for weapons such as the fusion pistol, and it’s also applied after you make the roll, so can pull you out of a sticky situation. Next, we have Fractal Storm, this causes your enemies to never get a reroll of any kind against you Warlord. Because our clowns are so fragile, having this ability will help our survivability quite a bit, and it’s great on a Shadowseer who will be at -1 to hit and wound in melee as well.
Finally, we have the best one in my (Gunum) opinion with a huge glow up from the last book, A Foot in the Future. Each time our Warlord Advances, we auto-advance 3” + d3 inches, when mixed with our ability to advance and charge this already seems handy. The real strength is in the second part, where each time we make a charge roll for the Warlord, we add 6” to the result. I’ll give y’all a second to think about that. This is incredible when we are combining it with the Dark warlord trait of 5+ to deal mortals, or even with Fractal Storm. Troupe Masters want to be in combat and this Trait allows them to put on their best Solitare impression and have a nearly guaranteed charge at any time. Is a unit 12” away from you? That’s fine, just roll a 6 on two dice, and you’re in. Adding the 6” to the 2d6 you normally roll is an incredible buff to this Warlord trait that feels exactly like something Harlequins will use. For something extra spicy, keep in mind you only need a roll of a 3” to make a charge out of deepstrike. Using the Stratagem Virtuosos of the Webway, our Murder Clown can be almost anywhere at any time.
Relics
Outside of the Saedeth relics, Harlequin players can enjoy the class suite of 6 relics to choose from to stick onto any character that isn’t a Solitare. We don’t have any new ones, but old fan favorites have been adjusted quite a bit. RIP my Suit of Hidden Knives. First off, we have The Storied Sword, which was +1 strength and D3 damage has been changed to +2S and D2! A great small buff. The real key here is that its reroll all failed hits ability has been replaced with attacks from this weapon automatically hit. Troupe Masters sit on 5 attacks base, going up to six if they’re are Twilight. That’s 6 auto-hitting -3 attacks at 2D, pretty great for hunting infantry or even some Elite units! Next, we have one of the old go-to relics for a Dodge-a-taire, The Suit of Hidden Knives. This has been completely changed, instead of it doing mortals when your opponent rolls a certain result, it now is 3 extra melee attacks at the end of the fight phase. These attacks cause a mortal wound for each hit. Not a terrible relic at all, dealing 3 extra mortal wounds in a fight phase could be helpful. I don’t see it being taken often under the weight of awesomeness the rest of the relics provide sadly. Wings: I actually really like this one, and I’d probably throw it on a Death Jester if I had a spare slot, it makes them great for cleaning up random utility units, and also moderately threatening to enemy characters.
Next, we have the classic Pistol relic, the Crescendo. Another wonderful attempt by GW to make a pistol relic worth taking, this one is an upgraded Shuriken pistol that goes up to a whopping 6 shots at S4, -3, 2D. In a Light detachment, I could see this being taken on a Shadowseer to give her a little punch as she follows around some foot players. It’s a huge upgrade on the old version for sure.
With a bit of an odd change, next, we have Cegorach’s Rose. The rose got quite a glow-up moving to +2S and +2AP and is always Damage 3, while keeping its full wound re-rolls, making it enormously potent. What’s interesting is this weapon is competing directly with the Storied Sword and the Twilight Fang so you’ve got some real choices to make. Just a very cool close combat weapon to be on our Troupe Masters that I can see being used in conjunction with A Foot in the Future.
After the offensive relics, we get to our two defensive ones. The Starmist Raiment used to provide a 3+ invulnerable save and prevented overwatch when advancing. With the new book, we see a bit more of GW trying to curb 3+ invulnerable as much as possible (Wings: although frankly Harlequins keep far more of it than anyone else). The 3+ has been made into a once per battle ability, activated on your command phase and lasting till your next one, so you have to plan when to use it. Further helping with the durability, the ignore overwatch has been replaced by your opponent not being able to re-roll hits against the bearer. Incredibly defensive Relic that may provide an extra layer of survivability to a Shadowseer who has found themselves in a tough spot. Finally, The Laughing God’s Eye gives an aura providing a 5+ against Mortals. Great buff on expensive players, but not sure if I’ll take it as it can’t be stacked with the increased Aura range provided by the Light relic.
Pivotal Roles
Here we get into some more bread-and-butter choices for the Harlequins. Pivotal Roles were introduced with the White Dwarf rules, letting you replace one of their datasheet abilities with something different, or add it on top for a CP. Like many Psychic Awakening things, these are now purchased for a points premium instead, and always apply on top of what the character normally gets. Standard rules of one per character, and each upgrade only being able to be taken once apply.
Gunum: When I say premium, I do mean premium. In an elite feeling army like Harlequins, points can get very tight, and the prices here go as high as 30pts.
The Troupe Masters’ three abilities are Prince of Light, Queen of Shards, and Veiled King. Prince of Light provides an aura of +1 to charge. Great, simple, gets the job done. When we are looking at running a couple of squads of foot players being escorted by the Prince, it helps control that variance. Queen of Shards is a bit more expensive than the others but provides a second source of ignoring invulnerable saves for Harlequins. On an unmodified 5+ to wound, invulnerable saves can’t be taken against this attack. A great upgrade for a Dark Troupe Master with The Storied Sword or Cegorach’s Rose. The Veiled King is the classic wound anything that isn’t a monster or vehicle on 2+. It’s good, it works where it needs to, is it an auto-pick? Nah.
Death Jesters have been changed a bit from before. Instead of having the ability to cause a model of your choice flee when a morale test is failed, instead, each destroyed model is counted as two when they take their test. Buffing this effect is reflected in their Roles. Harvester of Torment, Lord of Crystal Bones, and Rift Ghoul. Harvester is nice and simple, scoring three additional hits on a six. The gun is a 3 shot weapon and the odds of getting at least one 6 is okay, so this isn’t terrible at 15. If it was any more points I wouldn’t even look at it. Wings: this is a decent combo with Favour of Cegorach to auto-proc it. Lord of Crystal Bones means that every time you hit a target unless they are a Vehicle or Monster, their movement is reduced by 2” for the next turn, and the unit cannot fire Overwatch or Set to Defend. Gunum: This is very close to my ideal choice as it affects Bikes and Beasts as well. Being able to slow down some Custodes isn’t ever a bad thing.
However, the last is my favorite, Rift Ghoul. Ghoul is a very straightforward upgrade that ignores the benefit of cover as well as doing a mortal wound on a 4+ in addition to any normal damage. I could see taking two Death Jesters, one of whom can slow down enemies and turn off overwatch, the other whose job was to snipe. Giving mortals on 4+ with a 3 shot D2 gun vs 5 wound characters could be great!
Solitaires are the next thing we look at and his abilities are a tough sell on a unit that we are looking to try and trade up with. Prince of Sins, Spectre of Despair, and Thirsting Darkness are the options we have for this guy. Prince causes a base -1 to be hit and no rerolls against him which is pretty great to allow for some survival after he kills the character he was hunting, especially stacked on top of the baseline 3+ invulnerable he has. Specter is my vote for the worst of the options here. This grants the Solitare the ability to be set up in deep strike then arrive 9” from enemy models. Then each time a charge roll is made for the model you can roll an extra D6”, which seems good. The issue is that he has to be set up in deep strike, far from ideal, and getting into battle is what Blitz is for.
Gunum: Thirsting Darkness is the one I want to go with, each time this model advances you never need to make an Advanced roll, you are always getting a 6. The second part allows an additional consolidate and pile in of 3”. Mix that with the Twilight 2” extra consolidate and pile in as well and you’re looking at a very fast specter of death.
Finally, we have the Shadowseers. They have the most expensive option in Agent of Pandemonium at 30pts, Gloom Spider, and Mirror Architect. Agent is a remake from before, remove an Attack from every unit within 6”, this is also an aura so a great combo with The Shadow Stone. Gloom Spider is new, and allows you to pick an enemy unit within 12” in your Command Phase and prevent them from benefitting from Auras. This could be useful when you’re about to approach a unit that is getting re-rolls before you are charged into combat, but you do have to be pretty close to do it. . Finally, the real winner of all of the roles is the powerful Mirror Architect aura. This is an aura that reaches out 6” (9” with The Shadow Stone) that causes each enemy unit that targets you with shooting, to be treated as though they are 6” further away. This stacks amazingly well with Lights first ability causing enemy models to have to be inside of 6” to avoid missing on 1’s, 2’s, and 3’s. Given that this works on vehicles as well as everything else, it’s almost an auto-take.
Phantasmancy Discipline
The Phantasmancy Discipline returns. The spells are all the same spells as before, but each has been changed a little bit.
- Twilight Pathways – This one still lets a Saedath Core or Character immediately make a normal move, but unlike before, they are no longer able to charge after making this move. This is a pretty major change, and taking away the charge is a pretty big kick to some old strategies, making this more about positioning than charging from across the table.
- Fog of Dreams – Fog of Dreams has changed quite a bit from the current build. Instead of handing out a negative modifier to hit, it now makes a Saedath Core unit unable to be shot unless they are the closest eligible unit or within 12” of the firing target. This is very powerful as our bikes are now Core and make great targets for the power. A unit of 6 bikes with their new-and-improved Haywire cannons, zooming around while being unable to be shot? That’s huge.
- Mirror of Minds – A power I lovingly call “the mini-game,” this ability has also undergone a bit of adjustment, with some nerfs and buffs. You can still pick any unit you want inside of 18”, but now instead of having a non-capped mortal wound roll-off game. It now deals d3 mortals and then you do the roll-off game until a maximum of 6 mortal wounds are dealt or the opponent beats your dice. Technically, better. But to this author, much much less fun. Wings: bearing in mind that the chances of getting to 7MWs with the old version were about 2%, and it had ~40% chance of doing nothing I’m going to go ahead and call this a gigantic buff – this power is an absolute monster now.
- Veil of Tears- Remains about the same as it was, picking an enemy unit within 18”, and preventing them from shooting any SAEDATH units outside of 18″. Great in combination with the Mirror Architect power and the Shadowstone.
- Shards of Light- This changed a tiny bit, going from a weird smite to doing just a single mortal wound unless it is targeting a Vehicle, Monster, or unit over 6 models, in which case you still get d3. In exchange, it now applies -2Ld rather than -1.
- Webway Dance – The dance is as strong as it was before, which is… eh? Gives every unit within 6 of the pysker a 6+ to ignore wounds. Cool enough because it affects vehicles and bikes, not cool because… well it’s a 6+ and uses up one of their very valuable spell slots.
Secondary Objectives
Now we’re getting into some -real- cool and fluffy stuff for the army. Harlequins could easily have been given a reduced number of secondary objectives, or just ignored altogether since they are in the Eldar book, but GW choosing to allow the small subfaction a proper Ration of secondaries, which is pretty great! They come with three of them, one in each of the following categories: No Mercy, No Respite; Battlefield Supremacy; and Warpcraft.
A Deadly Performance is our first choice here. At the end of our turn, we will score 3 points if we achieve two or more different objectives. First, if you control an objective that you did not at the start of the turn. This is interesting because you aren’t necessarily taking an objective from our opponent, this could be an unclaimed objective that you stumble (gracefully) across. The next option is having a unit wholly within our opponents’ deployment zone. Easy enough – you want to be there anyway. Did you kill 2 units with ranged attacks? How about three units in Melee? Any of these can be achieved, and as long as you do two of them a turn you get 3VP. Is this the auto take? Maybe, it is good as we are rewarded for just playing the game, but I think you can run out of units to kill or objectives to take after a bit. We’ll always be in their deployment zone, but the rest of the options do have a top end. Wings: This looks exceptional to me because it has one of the big hallmarks of a standout Codex Secondary – it breaks the rules of its category. You can theoretically max this just by positional play, and if you aren’t switching on one of the kill conditions on at least some of your turns as Harlequins, you probably aren’t winning anyway. Slam dunk stuff.
Take Your Places is -the- stand out secondary to Gunum. 100%. At the cost of losing out on Engage or Behind enemy lines, we get a thematic and achievable secondary that has a high scoring ceiling. After both sides have finished deploying, the Harlequin player gets to place an additional objective marker in your opponents’ deployment zone. (Note: this doesn’t have to be entirely in the zone, just toe in that bad boi) Next, their opponent then places one objective marker in the Harlequins deployment zone, and a final one within 6” of the center of the battlefield. These objectives cannot be within 9” of each other, 6” of a battlefield edge, or within 1” of any other objective marker, and only matter for this Secondary. At the end of your turn, you score 2 points if you control two of these locations, and 4 if you control all 3. These are spotlights for our play of death! Super cool, super thematic. There are always moments in lore where a Harlequin takes a dramatic pose on someone’s dead body or breaks into an odd dance in a different location for no reason. This secondary gives off this lore vibe -and- is incredibly achievable.
Finally, Weave Veil is attainable and allows for some freedom in our secondary choices because of some auto-takes in the other two categories. This secondary gives us a psychic action that is the same as Psychic Interrogation, except instead of picking characters, you’re picking units. Each unit you pick can only be interrogated once for 3 points, and you have to work your way up to max, but it’s still far harder to avoid in most games, and can even be used alongside one of your Psychic powers thanks to Multifaceted Mind.
The great thing about all of the Harlequin secondaries is that they can each go to 15 points. This makes them all very competitive and honestly, there’s a pretty great case for each of these choices. The first one is probably the weakest of the three, with Take Your Places being quite possibly the strongest.
Wings: As above, strongly disagree that Deadly Performance is the weakest – it seems absurdly pushed, but then frankly all of these do. This is probably the best set of Secondaries we’ve had for a while.
The Units
HQ
The Troupe Master is a workhorse HQ. One of these must be your Warlord if any Harlequin units are, but bucking the trend of recent books for captain-esc characters, you are not restricted to having only one of these in our detachments. A Troupe Master can be equipped with a plethora of weapons. From the Fusion Pistol to the Harlequin Kiss, this guy can put out some damage.
Gunum: There are a great number of combinations you can use with each Troupe Master and I’m going to grab the build that I’ve been enjoying the most. I have been taking a Dark Troupe Master with Favoured of the Laughing God stratagem to provide them with two warlord traits. These two traits are going to be A Foot in the Future and Favor of Cegorach. This provides my Master with a near 100% charge success rate and also provides a guaranteed 6 roll for when I need it most, whether that is attack or defense. How I have him geared out is with a Harlequin’s Kiss that has been upgraded to Ceogorach’s Rose. Since he no longer provides full rerolls to wound, giving him that option seems invaluable when making sure he’s putting out as much damage as possible. With Dark as our Saedath choice, this weapon also moves up to -3! A great breakpoint for a wide variety of elite infantry, and at 3 damage, -1D traits become blunted from his onslaught. I also toss on a Fusion Pistol, because at 5 points for that kind of damage is a bit of a steal. Dark also provides every single Harlequin model on the table with Fight on Death. If for whatever reason this Troupe Master is slain before he can swing, making his 6 attacks that crack back deal the most damage possible is very important. Finally, for his Pivotal role to stack with his re-roll 1’s aura, I’ve been taking the Queen of Shards. This ability, alongside the rerolls to the wound provided by the rose, allows me to try and dig for 5+ rolls to ignore invulnerable saves with my 3D attacks.
Overall, Troupe Masters got moderately nerf by only re-rolling ones to wound in close combat, but their combat ability makes up for it a bit.
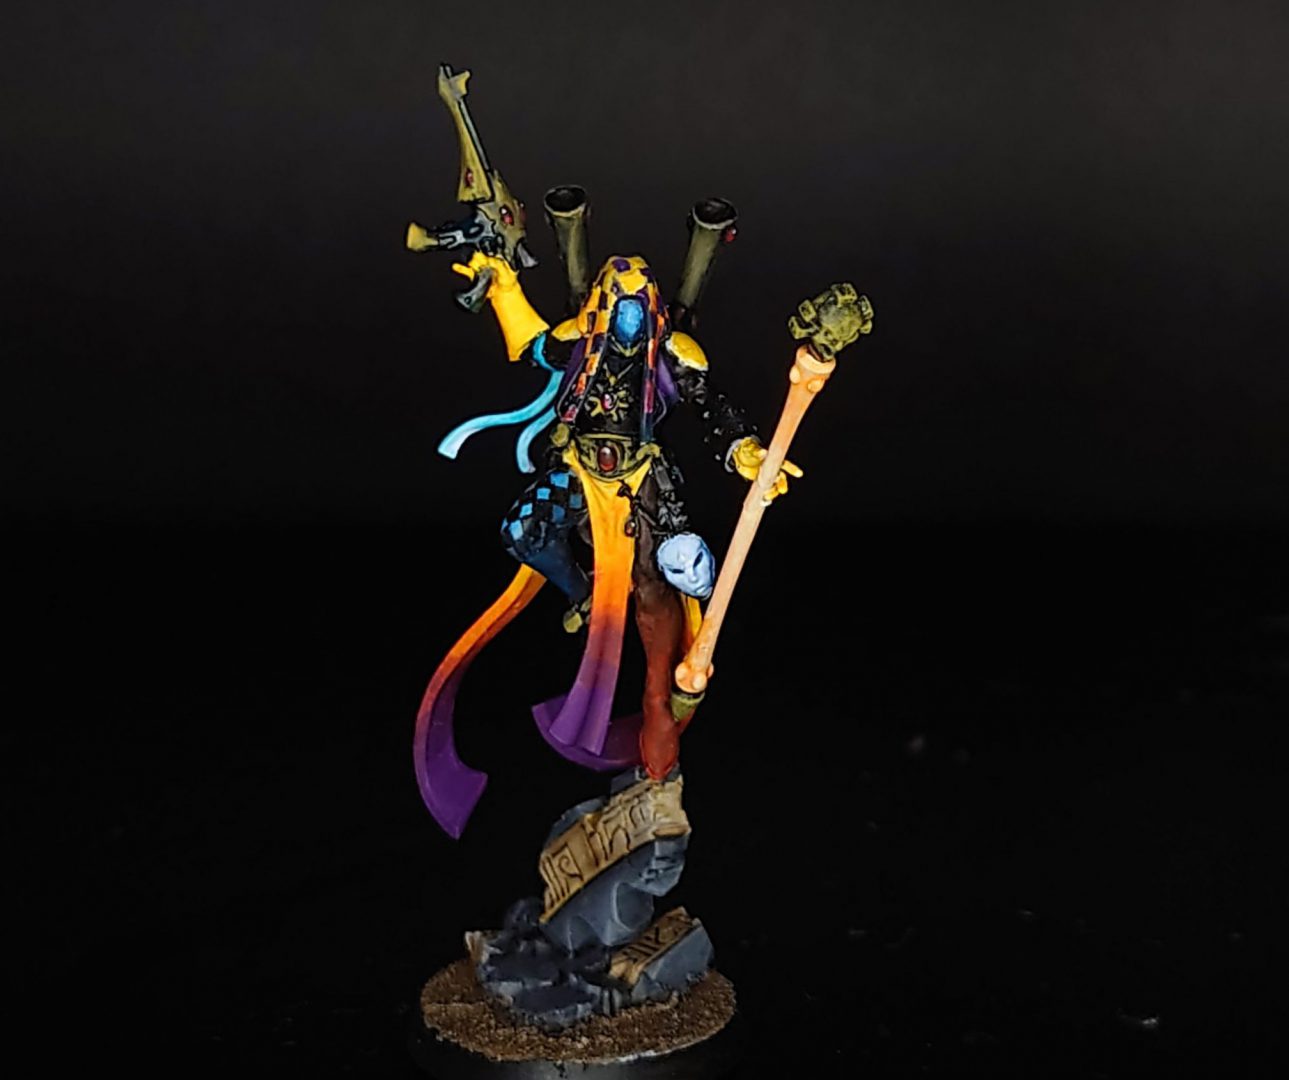
Shadowseer
The Shadowseer feels like the other side of the coin to the Troupe Master. Their abilities are all focused around making sure her nearby Troupes make it into combat and to where they need to be on the table. Shield from Harm has been adjusted a bit to bring it in line with the new ruleset, only applying to Core units and Characters, but that -1 to wound is so important (as is Mirror Architect) that they’re still an auto-take in most lists. Their grenade launcher has been adjusted to be up to 3 shots that can do a mortal wound each, instead of a single shot that did d3, flattening out the curve a bit. They can also take the new and improved (maybe?) neuro disruptor, which just plinks something for a free mortal (unless they’re a Vehicle, and even there it’s an S6 AP-3 shot).
Gunum: For my Shadowseer build, I’ve been finding the most benefit from the Light Saedath. With the ability provided by this Saedath, I want to get as much value as I can from attacks failing on my units outside of 12”. I take the pivotal role of Mirror Architect to make enemy units that my units as though they are another 6” further away, plus an additional 3” range to spells. Then I will be taking the Shadow Stone as their relic to make the range of all her auras go a further 3” than normal. That means every unit within 9” of my Shadowseer is protected up to 6” away instead of 12” for the Light buff. Finally, their two spells I’ll be taking are Fog of Dreams, to make a core unit untargetable, continuing to buff survivability as much as possible, and Veil of Tears which will pick one enemy unit with 21” that will no longer be able to shoot at targets further than 18” away. I’m not 100% sure when that will be useful, but if I can get my elf eyes onto some Broadsides to stop them from blasting my players hiding out of LoS, I’ma do it and I won’t be stopped. Great unit, take one if you have the 9” aura, take two if you don’t get the maximum coverage for Shield from Harm.
Troupes (Troops)
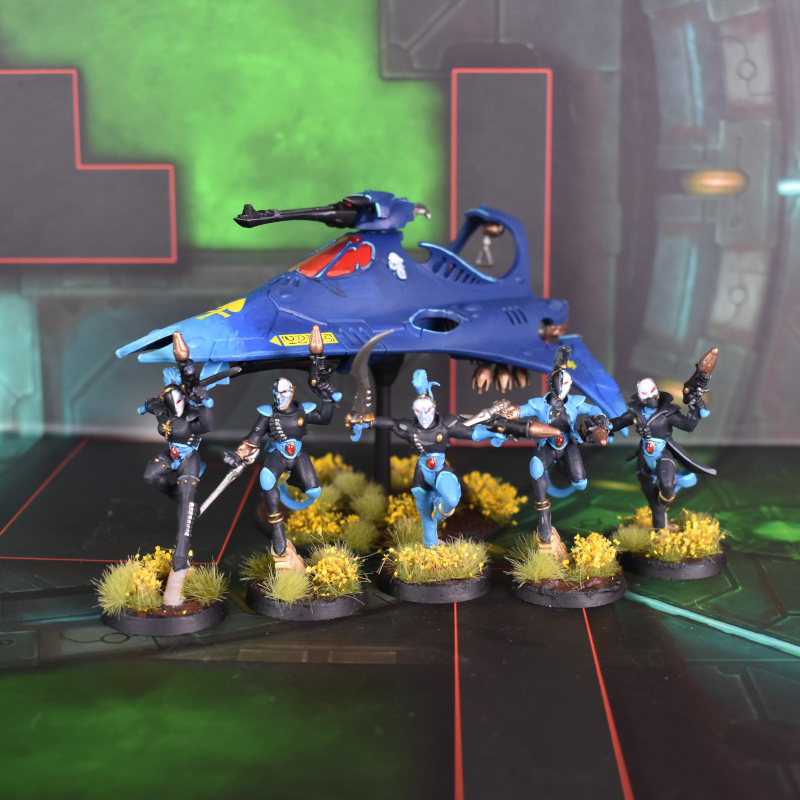
There’s just the one Troops choice for Harlequins, and that’s the Trusty Troupe. Troupes have changed quite a bit in the new book. For starters, each Troupe squad now comes with a Lead Player, whose profile has two wounds, which is neat. Second, they dropped in cost, to 13 points per model. Third – and very significantly – their wargear options have shifted. Now if you have 10 or fewer models you can only take two each of the special weapons (other than the classic Kiss, which they can all take if desired), i.e. fusion pistols, neuro disruptors, Harlequin’s Caress, and Harlequin’s Embrace (you can take four if your squad is 11-12 models). This hits the hardest on fusion pistols, where taking a squad of five models with four fusion pistols (in a Starweaver) was a key part of the army’s strategy pre-Codex. The remainder of the weapons aren’t nearly as big an issue, mostly because of how the Stratagems for Troupes work – you only need one of a given weapon to give the unit the relevant keyword, i.e. HARLEQUIN’S KISS, and as a result, give the benefit of the relevant Stratagem to the whole unit.
Otherwise, their weapons are even more deadly, including the Harlequin’s blade, which is a steal at 0 points and now hits at AP-1 and gives the user an additional attack, meaning a unit of 5 models with blades can throw out an eye-watering 25 attacks. You’ll generally want to arm units with mostly blades and a pair of fusion pistols, then have single models with the special weapons so you can get the Stratagems off. The best combo among these is Harlequin’s Kiss, where the Kiss of Death Stratagem will quickly help you get to your 6 mortal wound maximum with the unit.
One more thing: Troupes are inexplicably not CORE. We believe that is a clear error, and one that will be corrected in an FAQ very quickly, and have written the review on this assumption.
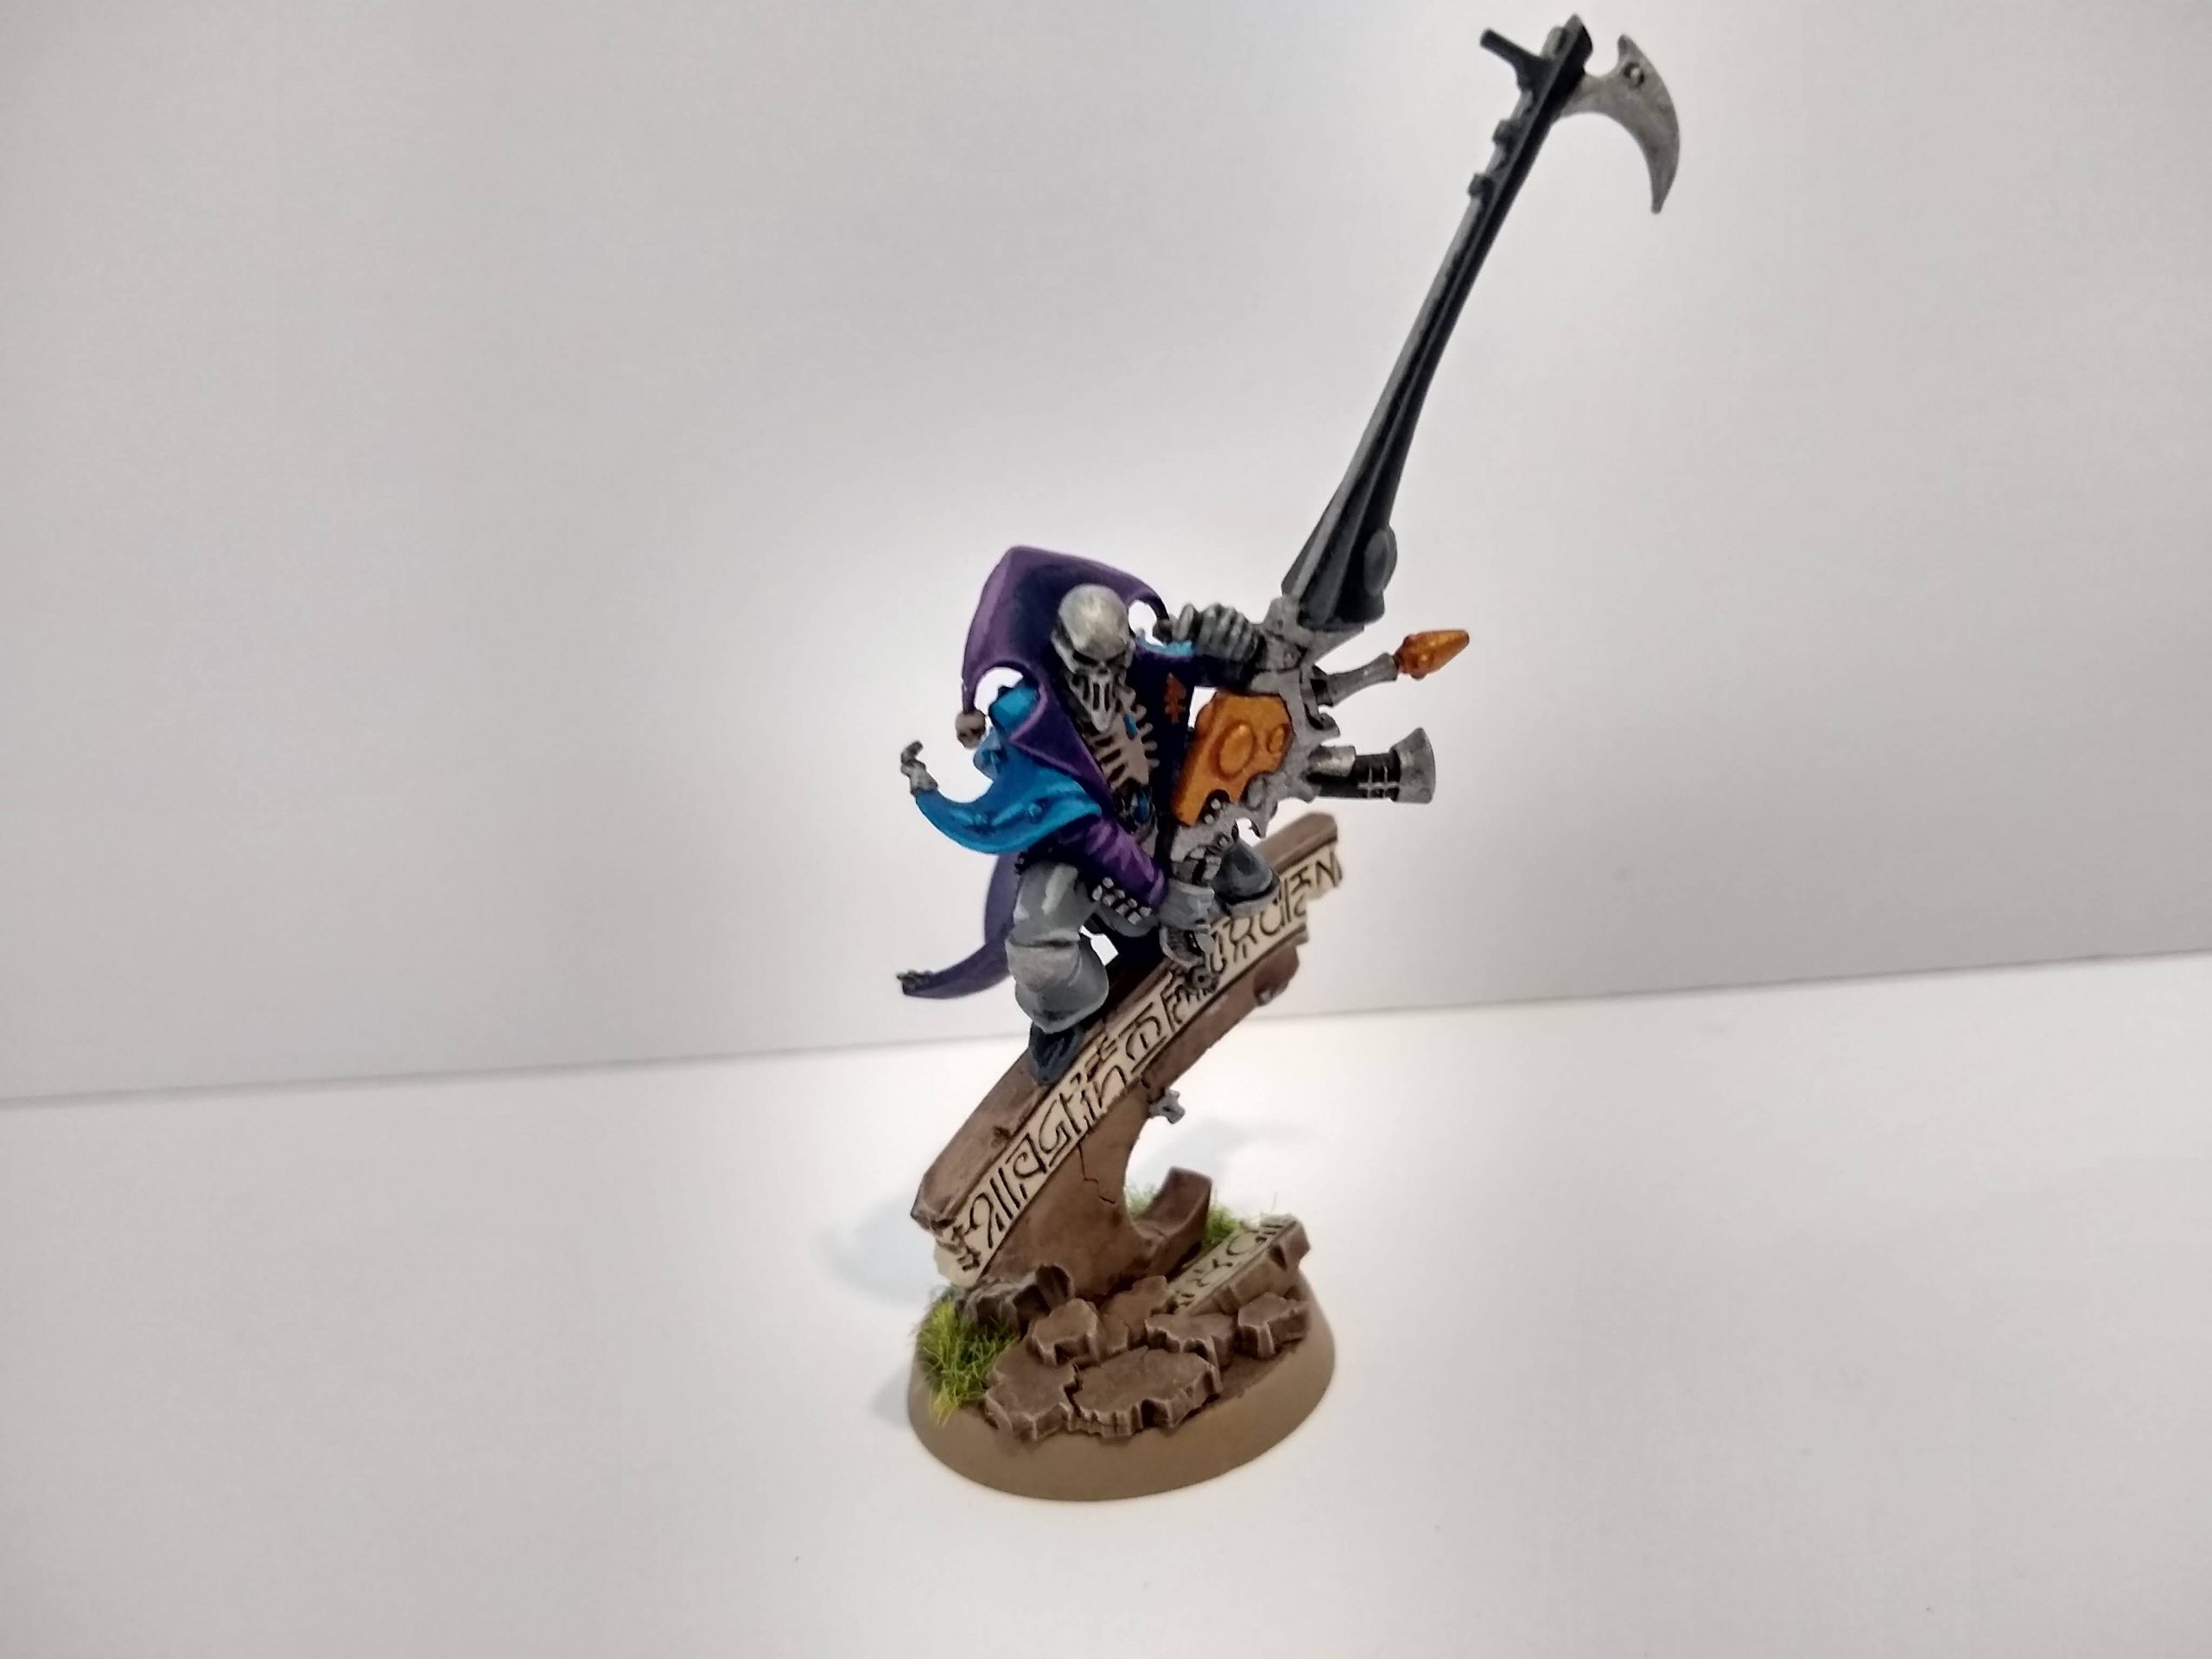
Elites
Death Jesters retain their role as pesky harassment shooting, and frankly are just wildly better than they used to be on the baseline and a good value include at only 55pts. Their gun has jumped up to be AP-2 and D2, making it properly threatening (and unlike other shuriken cannons it’s still Assault), access to Mocking Laughter means their double-counting for morale when they kill stuff can matter, and the fancy scythe on their gun now gives them S4 and AP-1, making them a bit less anemic in a fight. Great stuff at the price you pay, and as discussed earlier they have some useful Pivotal Roles to play with too – their only real issue is that their relic gun options have gone away.
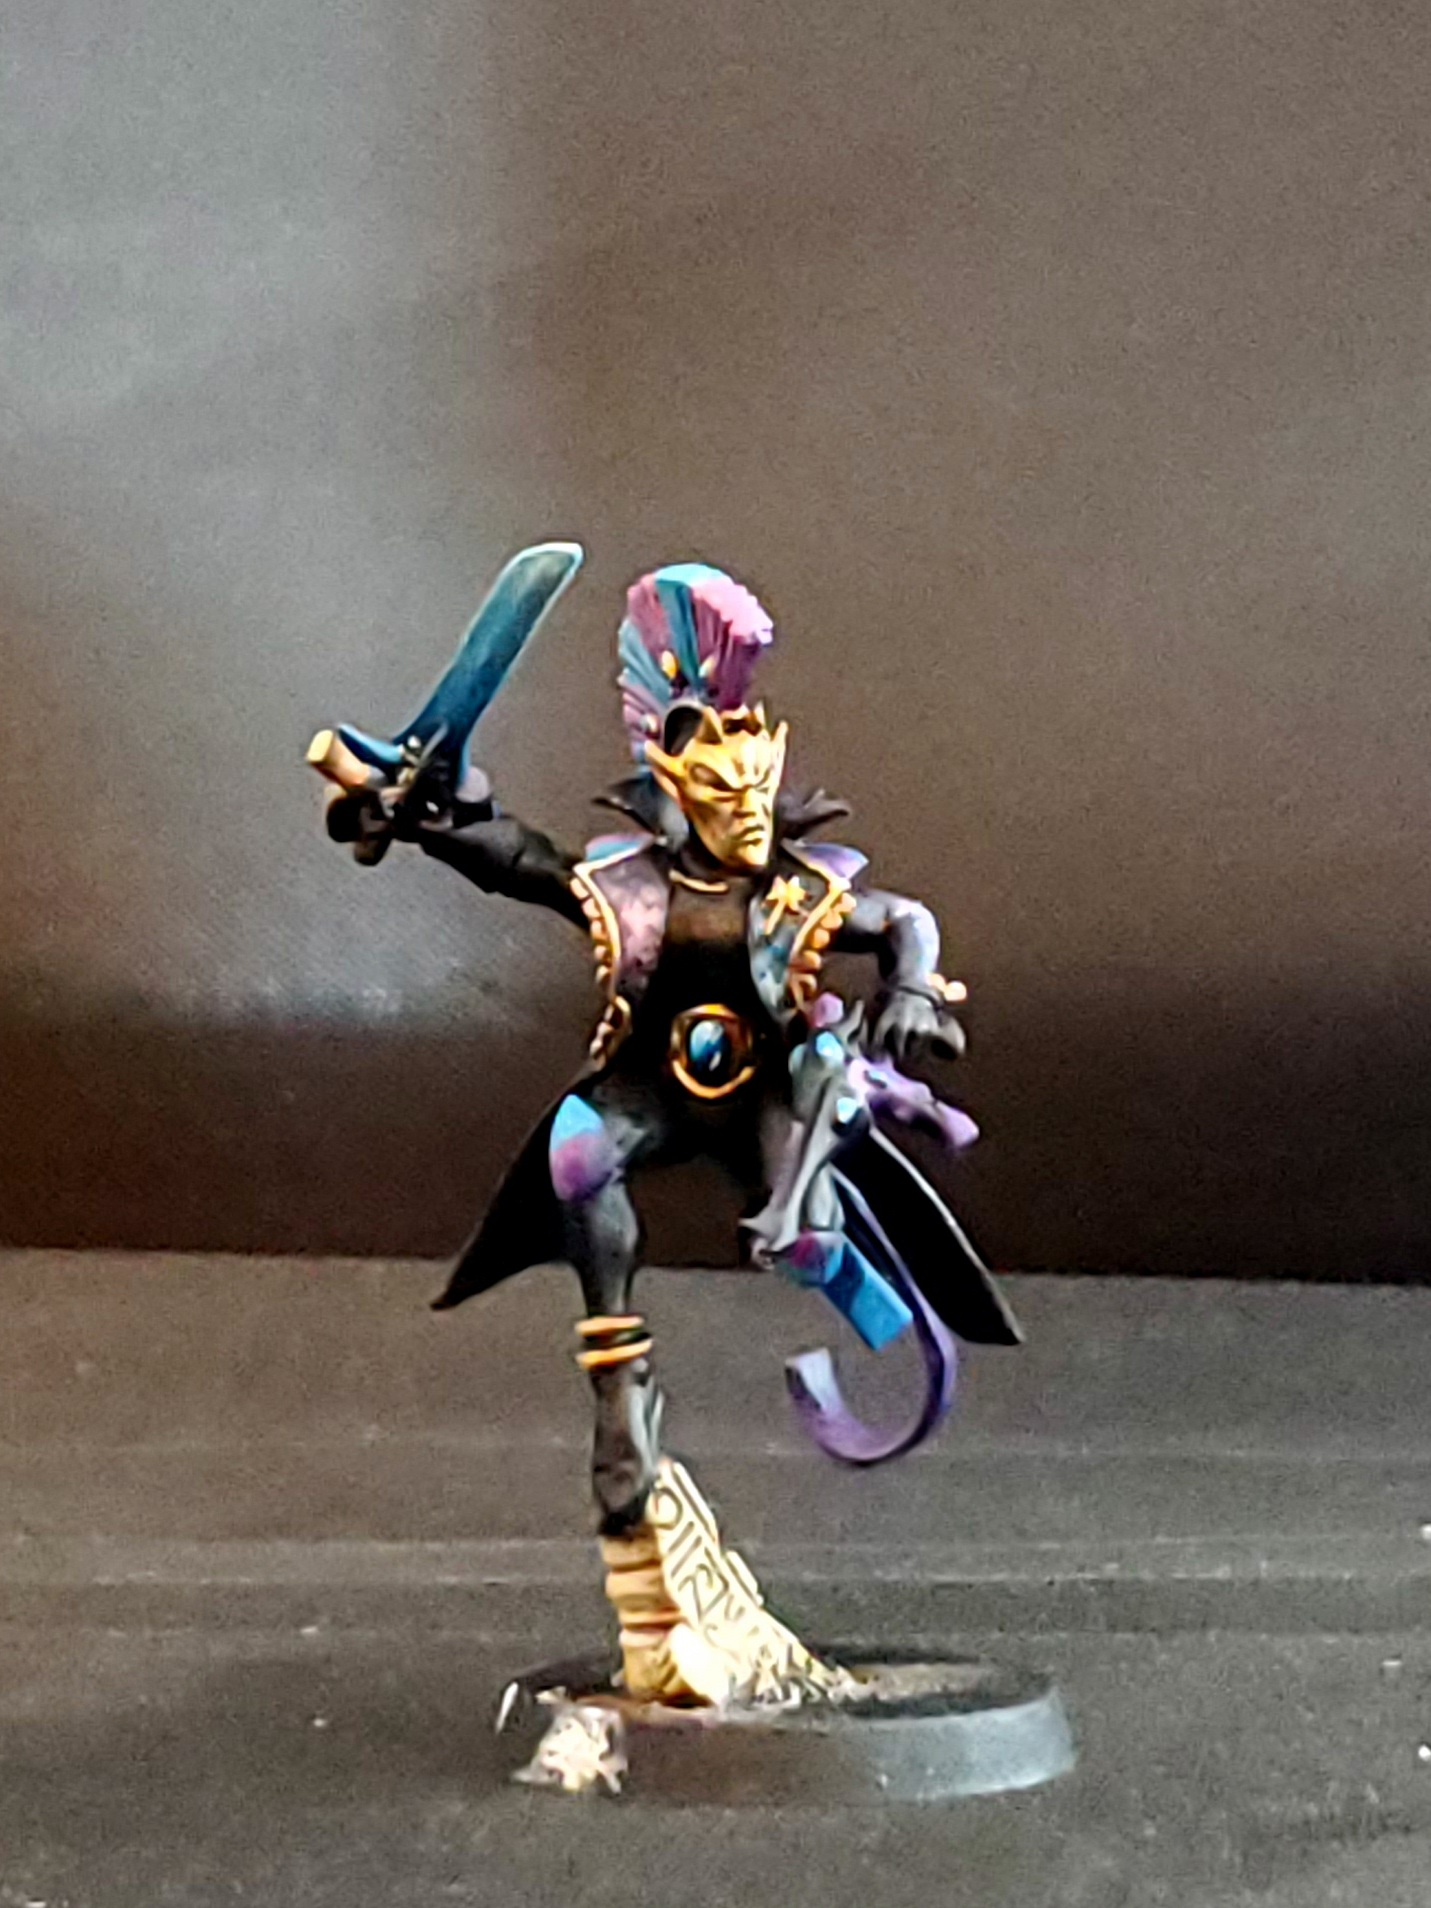
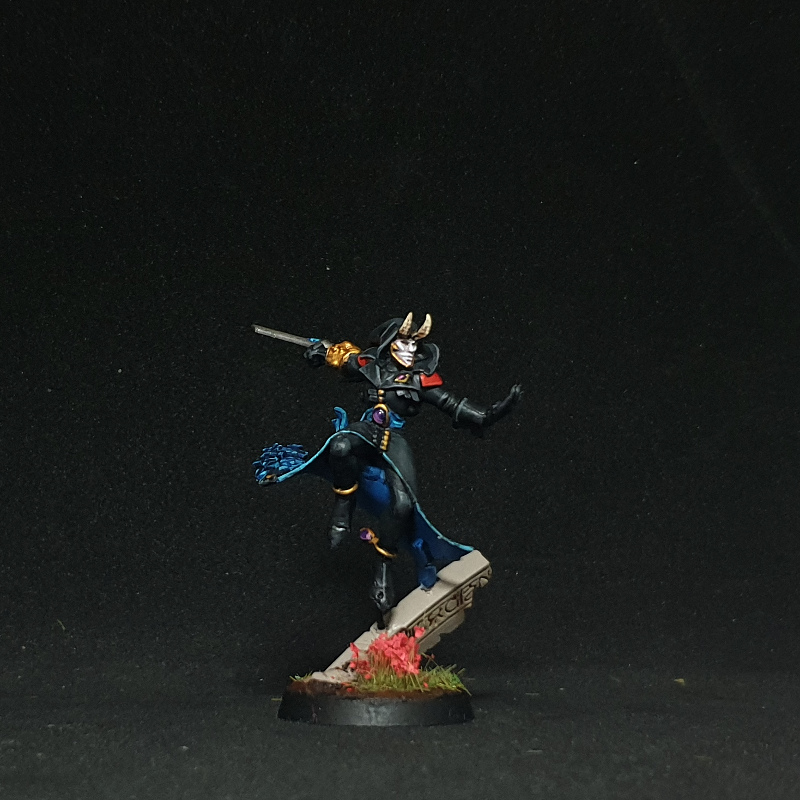
Solitaires, meanwhile, remain terrifying solo combatants, and have received some big stat boosts, going up to a base of strength and toughness four, and hitting at S6 AP-2 D2 – nasty stuff (and with both Kiss and Caress keywords for whichever tool you need). They’ve also kept their 3+ invulnerable save in an edition where those have been dropping like flies, which is wild with Luck of the Laughing God – unless you’re getting buried under an absolute avalanche of attacks, if you want one of these to stay alive you can probably make it happen. They do lose the ability to take any relics, so what you see is what you get, and the only real question is if you need one, but they seem fine in any list that wants to be able to reliably throw something into the opponent’s deployment zone on turn one for Performance.
Fast Attack
Skyweaver Jetbikes return as the army’s lone Fast Attack options and they’re significantly improved from prior iterations. The most notable improvement here is to the Haywire cannon, which now has a profile that’s Heavy D3+1, S3, AP3, D3 damage, and auto-wounds vehicles on a 4+ with D3 additional mortal wounds added on when you roll a 6 to wound a vehicle. This makes it a solid option going up against non-vehicle heavy infantry, but the improved Shuriken Cannon isn’t a bad option, either. If there’s a downside it’s that Skyweavers lost their -1 to be hit with Shooting attacks, but their mirage launchers prevent enemy units from re-rolling hit rolls against them, especially good in combination with Light. On the plus side, they’re far more deadly in melee, with 4 attacks each, and Zephyrblades now hit at S5. In addition, if you wanted to stick with the Star Bolas, it’s now an Assault D3 weapon and hits at S7, a massive improvement that can be taken unit-wide for profit.
Heavy Support
The lone heavy support option for Harlequins is the Voidweaver, which received a major glow-up in the new book. For starters, they now come in units of 1-3, dramatically increasing your ability to take multiples in a Patrol detachment. On top of that their defensive profile improved significantly – in addition to being -1 to be hit, opponents now cannot re-roll attack rolls against them. Add in Luck of the Laughing God to re-roll their 4+ invulnerable saves and you have a unit that’s much tougher than before. And their offensive profile improved substantially as well – they now have 4 attacks in melee, while every one of their weapon options is more deadly. Voidweaver Haywire Cannons are now AP-3, flat 3 damage, and Heavy 2D3 with blast, plus they auto-wound vehicles on a 4+ and rolls of 6 do an additional D3 mortal wound to those same vehicles. The Prismatic Cannons are also improved, with two modes, one that fires 2 shots at S12 AP-4 2D3 damage and the other firing 3D3 shots at S5 AP-3, 1 damage with blast. Also, don’t forget that they’re strapping two shuriken cannons each, so a full squad of these is a spectacular amount of firepower, especially if you pop Bladestorm.
These look exceptional, frankly, especially as they’re only running you 90pts apiece. More Harlequin stuff can affect non-Core than in most books, so you get huge value from them, and taking big units is a very strong way to make To The Last pretty achievable.
Dedicated Transport
The Starweaver is anything but a humble transport and is a consistent staple of Harlequin lists. That isn’t changing in the slightest – these are incredibly good, remaining at their previous 80pt price tag but with better shuriken cannons and preventing your opponent from re-rolling hits against them. Take lots. That’s all there is to it.
How They’ll Play
Not too different from before, most likely. Harlequins are still incredibly fast and annoying to kill, but the nuance in how they kill their targets will change. With the loss of fusion boats – something that had recently seen some renewed tournament success against the heavy infantry and monster-packed meta of Custodes and Crusher Stampedes, Harlequins will likely pivot more from fusion boats to a melee force supported by bikes and Voidweavers, where the new and improved guns on those should help make up for the 2-per-10 limitation on fusion pistols. Harlequins will be constantly looking to trade up against better targets and avoid getting bogged down in combats against hordes that can render their luck re-rolls obsolete through a sheer volume of attacks.
An Army List
Gunums Light Harlequins
HQ
Troupe Master ~ Warlord Fractal Storm – (-1cp) A Foot in the Future – Fusion Pistol – The Storied Sword – Veiled King – 105
Shadowseer – Fog of Dreams- Veil of Tears -(-1cp) The Shadow Stone – Mirror Architect – 100
Troops
12x Players 11 Kiss 1 Embrace – 216
12x Players 11 Kiss 1 Embrace – 216
5x Players + 1 Fusion – 70
5x Players + 1 Fusion – 70
5x Players + 1 Fusion – 70
5x Players – 65
Elites
Death Jester – 55
Death Jester – 55
Death Jester – 55
Fast Attack
5x Skyweaver 5x Bolas 5x Haywire – 250
Heavy Support
3x Voidweaver w/Prismatic Cannons
Dedicated Transport
Starweaver – 80
Starweaver – 80
Starweaver – 80
Starweaver – 80
Fortification -1CP
Webway Gate – 80
1997, 9CP
Going through the article, I’m sure some of the choices I’ve made here are pretty obvious. I’ve got the big unit of Voidweavers, a five-man unit of bikes with haywire and bolas, and squads of players rolling deep with not so gentle kisses. This list focuses heavily on the survival with the Light Trait and abusing it as much as possible with my Shadowseer. The buffs provided by the Shadowseers spells get turned up to 11 when combined with Mirror Architect and the Shadow Stone to manipulate those ranges. I told every at the Goonhammer offices my gameplan here was to cast Veil of Tears on a Broadside unit to make it worthless as it can’t shoot anything I have outside of 12″. Next, I wanted to use a very powerful Troupe Master who could rumble with most characters in the game. Giving him the Storied Sword, (Auto-hit with all attacks) and the Veiled King (2+ wound on everything that isn’t a vehicle or monster) makes him incredibly constant and killy.
Troupes are a unit that I personally have modeled with kisses on every guy, as that was my preferred weapon choice. Sticking to that with the new stat-squash on their close combat weapons felt natural. Since I’m taking two units, I’ll be focusing on dumping defensive buffs on one unit (3++ for example), while the other hides in my Webwaygate. The 4 other units of players will be moving around for board position in their Starweavers doing some drive-by pistol action. Thanks to Light I am still able to do some sweet melta pistol action. Sure, I’ve only got one in most units, but that’s all I need sometimes.
The elite slot was a bit of a struggle for me to decide what I wanted to run here. I was between a Solitare and two more Death Jesters, and I think that the Death Jesters new gun suddenly made them a huge win. I could purchase some Roles for them, but coming in at 55 points they are a massive win for the book. Nine S6, -2, 2D guns that hit on 2’s with Shuriken make a ton of characters worried about them being on the table. I plan on hiding them in the three Starweavers that will be carrying around the melta pistol teams. Hidden snipers shooting out of the back of rides? Sick
The bike choice makes the most sense for what I want to use them for, which is To the Last targets. I plan to make them untargetable and have them sit at a comfortable 24″ away from all the baddies. If somebody does try to get within 12″ to actually start to threaten them, they will eat the shots from the Haywire Cannons and the Bolas. Bolas are 100% worth using now and I just can’t get over the amount these bikes can put out. Very expensive at 50 points a guy for a single upgrade, but just great units. There is going to be some real crazy play with them for close combat brawlers, but this list wants to protect them.
Finally, another unit that needs no real introduction is the unit of 3 Voidweavers. Another incredible and durable unit when combined with the powers of the Light. The defensive buffs that are stacked on this unit are to such a point of being one of the least interactive units in the game. From the Light buff to using Fire and Fade on them, they make an amazing To the Last choice. Ignoring their massive defensive buffs, the Voidweavers also put out some serious firepower that we can combine with Bladestorm to remove elite infantry and tanks alike.
The secondaries I’m planning on taking are To the Last, Take Your Places, and Raise the Banners High or some kill strat. Maybe I’ll get lucky and play against somebody I can use Assassination against with all my Death Jesters.
Wrapping Things Up
That wraps up our coverage of Codex: Aeldari today and wow – there was a lot to cover! Hopefully, you enjoyed reading this as much as we enjoyed writing it. We’ll be back next week with even more – stay tuned for our round table discussion with the Art of War team, plus keep an eye out for our Crusade rules review on Tuesday.
Have any questions or feedback? Drop us a note in the comments below or email us at contact@goonhammer.com.
