
In Hobby Heresy, we look at conversions, kitbashes, and other custom projects by Goonhammer authors and explore the thought processes behind them and the work that went into them. It’s part hobby showcase, part tutorial. This week, we’re looking at That Gobbo’s Ork Gundam packed with grots.
In February my local gunpla group Minnesota Gunpla started one of our bi-yearly build off contests. The so-called Ball-Off was a build-off in which every participant had to use the MG Ball kit. The MG Ball is fairly small and unassuming so it really encourages the builder to think outside the box and add something creative to it. I’ve always had the idea in the back of my head to use gunpla to kitbash into an Ork dread so this was the perfect opportunity for me to do it.
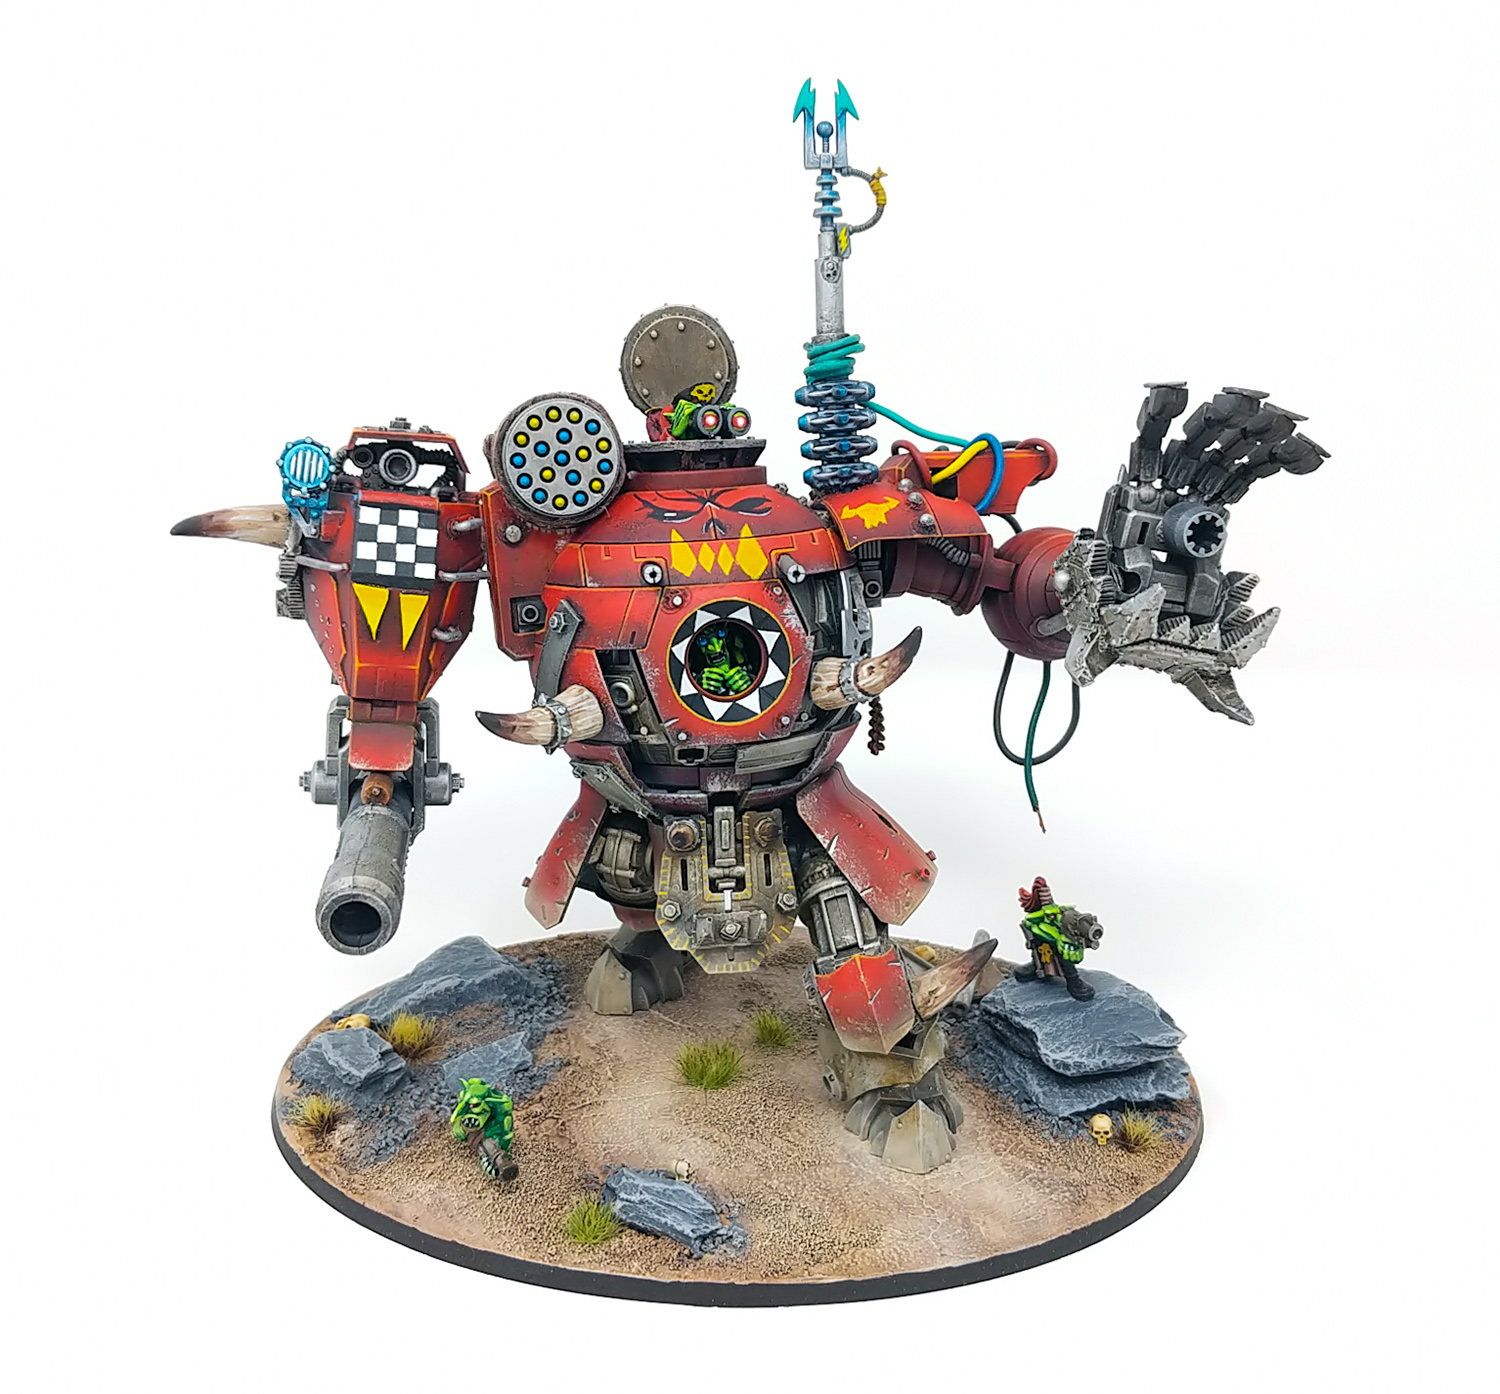
Initially going into this project I was envisioning this ramshackle Morkanaut slapped together from a Ball with its posse of hootin’ and hollerin’ gobbos stomping across a rusty red desert. As the build-off was announced a fair bit ahead of when I could begin building the kit I had time to collect lots of parts and bits to use in this kitbash. Specifically I would be looking for parts that would be helpful in creating the equipment of a Morkanaut as well as detail bits that would help break up a lot of the featureless curved plates of the Ball and give the sense that it had been looted by Orks and jerry-rigged into working.
Assembly
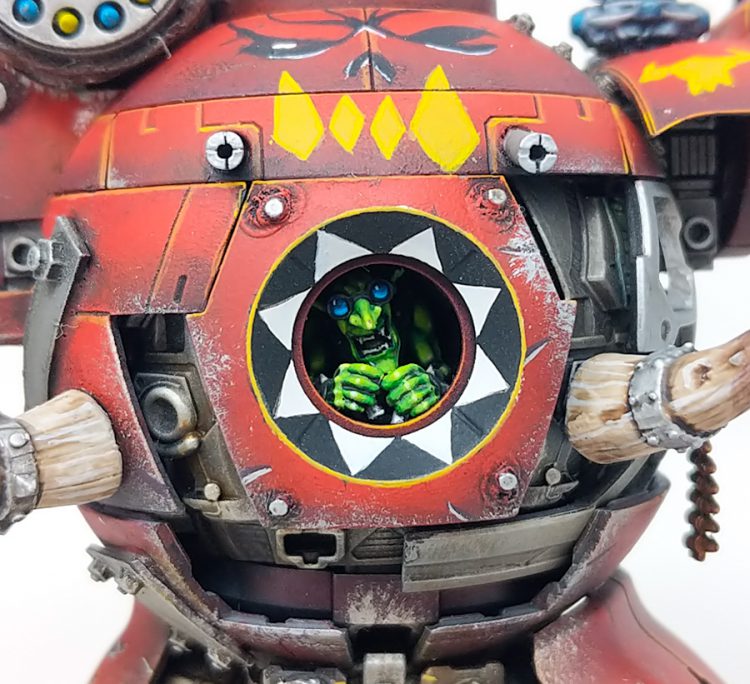
Going into this kitbash I wanted to attempt to be as WYSIWYG as possible to the profile of the Morkanaut. In addition to that, fitting the Morkanaut to the appropriate base was important too. Lastly and most importantly, I HAD to include a goblin pilot inside the Ball.
A quick rundown of the equipment is: a Klaw, a Mega-blasta, a Mega-zappa, Rokkit Launchas, Twin Big Shootas, and the Kustom Force Field. For two of them I had obvious parts I wanted to use in mind: The cannon from the MG Ball kit for the Mega-blasta and the rocket pod from the Vulture for Rokkit Launchas. For the rest I would need to create something.
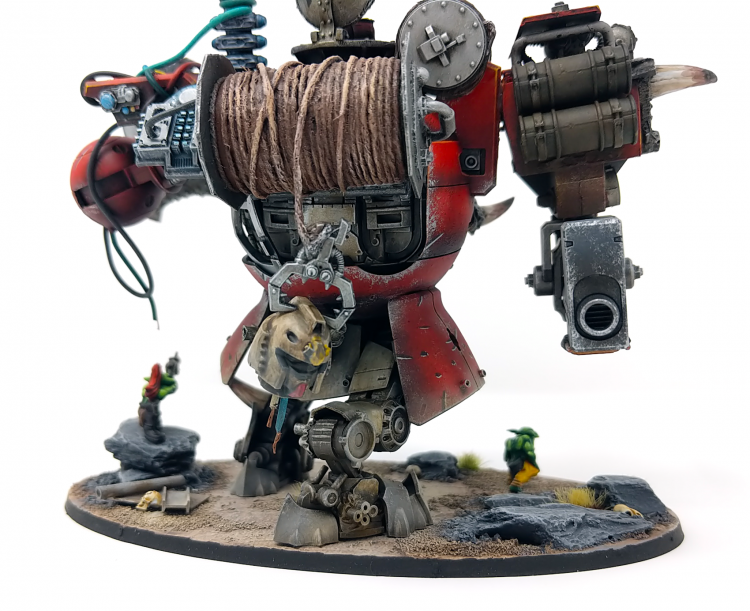
This is where the fun of kitbashing comes in. For the Shootas I quickly came up with a simple idea of taking a plastic tube, cutting it to appropriate size, and then using a hobby knife to create perpendicular slits on the barrel end. Pretty quick and easy but I found it worked very well in depicting simple Ork shootas. For the Kustom Force Field the basic idea was an antenna that would project the force field to nearby units and a big mess of wires to emphasize the messy DIY nature of Ork vehicles. I used some electrical looking bits from the Dreamforge Leviathan and Gretchin box, wire, plastic tubes and a side plate from the MG Ball to use as a base for the force field as well as shoulder armor for the left arm.
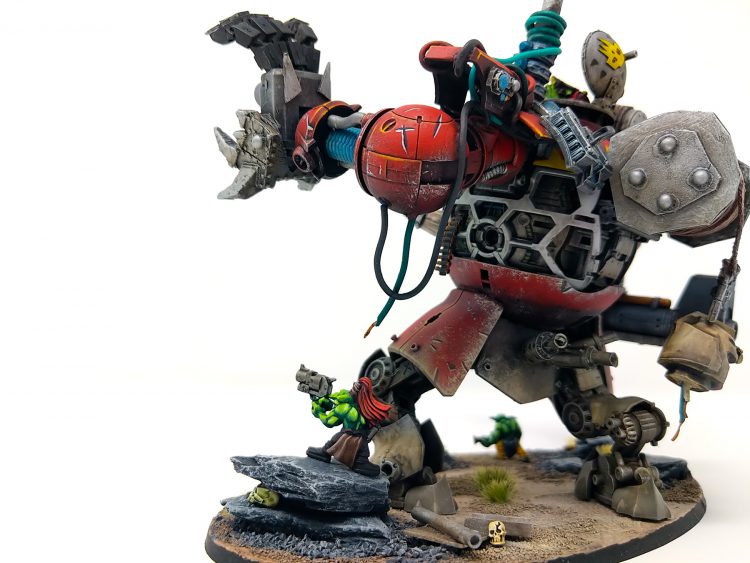
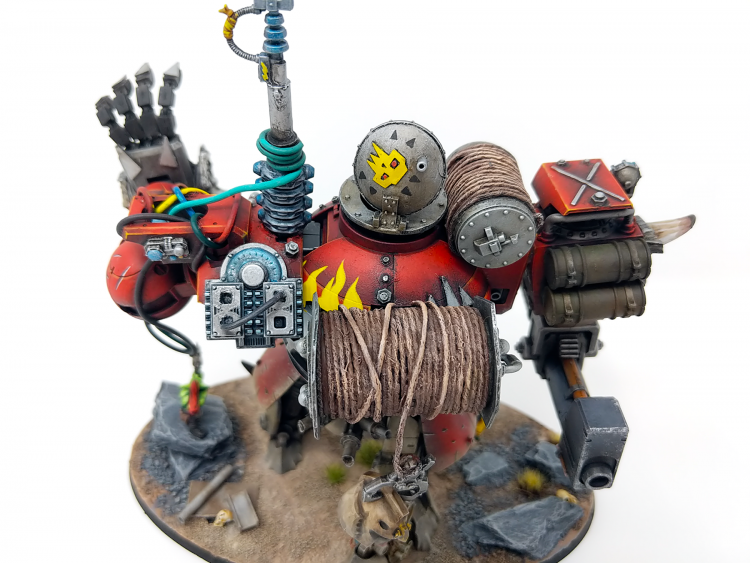
I created a rope winch by cutting a dropper bottle to a cylinder, gluing plaplate on both sides, and then wrapping braided thread until it was fully wrapped. A claw from the grot kit worked great to add to the end of it. I then salvaged a head from the First Grade Gundam RX-78-2 kit with hanging wires to use as a trophy that the Morkanaut is dragging around. It was a fun opportunity to add a sort of tribute to my two plastic modeling hobbies.
While working through the kitbash I used bluetac a lot to assemble bits together and get a good idea of how the piece would look glued together. After each limb or part was finalized with glue I set up pins using plastic tubing or brass rod to provide a good place to hold during airbrushing as well as a way to make the final assembly very easy. All I would need to do is slide a limb in place and glue.
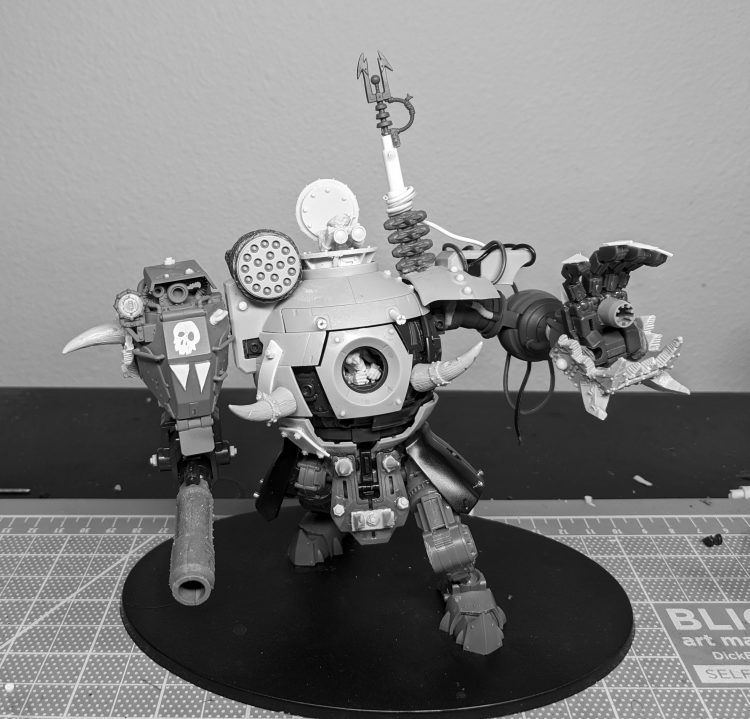
After I was satisfied with all of the assembly I now needed to add detail as the kit I was using had some large curved plates that are relatively light on surface detail in comparison to Games Workshop miniatures. I used a variety of materials like bits from other kits, tiny plastic rivets and bolts, teef and metal plates made of plaplate, wires from an old Arduino kit, and braided thread. All of these were used to add detail to further push the idea that this mech was looted and has been ramshackled together with random parts and scrap metal. In addition to all the extra materials, I used a cast iron technique in which I spread plastic glue over the surface of a plastic piece and then vigorously brushed the surface with an old toothbrush to create a rough texture.
Painting
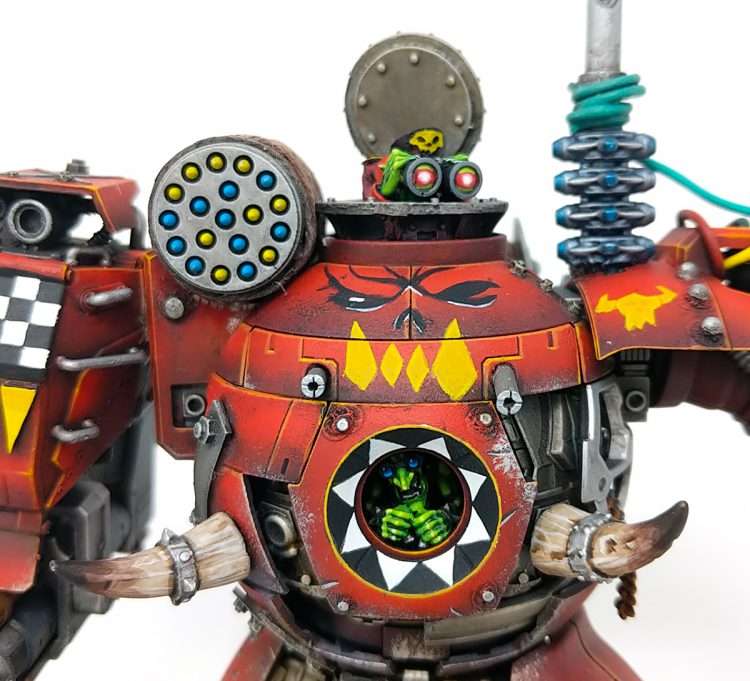
With red armor I wanted to have a nice build up to a vibrant red with drybrush stippling, it’s one of my favorite techniques since it gives a nice texture to the surface and it’s easy to do. I started from a black basecoat and stippled gradually up through Scale75 reds. Here I picked out each armor plate separately with the brightest highlight at the top. I then did a red ink glaze over all of the armor to punch up the saturation. From there I then edge highlight with orange, do a gloss topcoat, and pick out the panel lines with a black oil pin wash. To finish it off with weathering I do a very light drybrush and stippling of Vallejo Model Air Steel on edges as well as add handpainted slashes in the armor with S75 Black Leather and the same steel paint. Most of the weathering was done on the lower half where I’d expect most of the scraping, dings, and scratches would occur.
Painting and weathering metal is becoming one of my bits of miniature painting, for this build I used a fairly basic workflow that mainly uses oil paints for the bulk of it. I start off basecoating the metal parts in Vallejo Mecha Color Steel which is a nice mid tone steel that’ll give us room to highlight and shade with our weathering. I then use Vallejo Model Air Steel, which is from a different Vallejo paint line but is brighter and more of a silver, to drybrush and stipple on texture. I focus more on quick strokes back and forth on the edges and do a stippling motion on the plate surface. With this it helps to attempt to focus on areas that would get the most wear and tear but also add a bit of randomness otherwise to give it some variety.
Once we’ve done the basecoat and drybrushing, I spray a gloss topcoat and use a black oil wash all over the parts. After giving it maybe an hour or two of drying I go in with an enamel thinner and a brush to clean up large surfaces, but leaving that wash in any crevices or recessed areas that would accumulate grind. From here I use black and brown Ammo MIG’s Oilbrushers and dab spots in random areas as well as any places that would have significant buildup of rust, oil, dirt, etc. Again I leave the oil to dry for an hour or two and then go in with my brush and enamel thinner to work with the oil to spread it across a whole panel for filtering as well as vertical strokes for streaking.
Now that our metal is proper dirty we can go back in with a very light and specific drybrush of Model Air Steel aiming for our raised edges. I then go in with a handbrush with the same paint and add larger scratches into the metal where appropriate. With this we mainly want to add more surface variety and contrast.
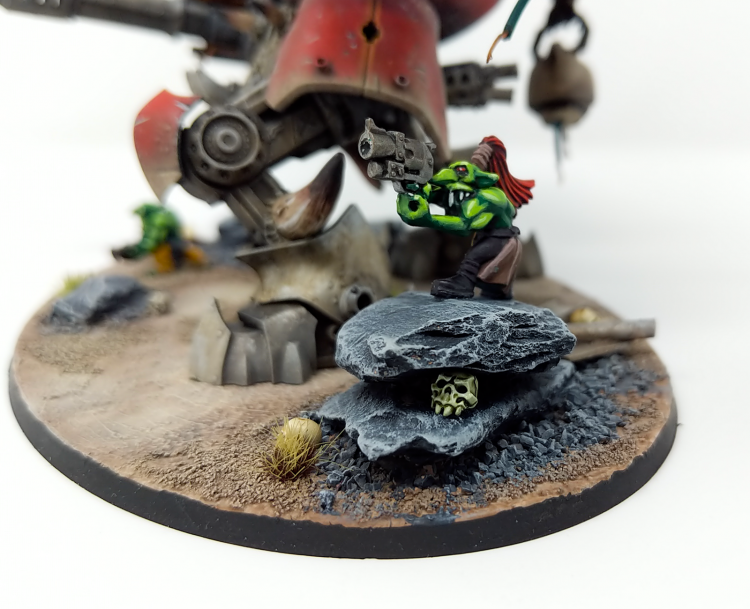
The goblins were real fun to paint and based on Brin’s Orruk skin from How to Paint Everything: Orks. I went a bit lazy with it and didn’t include the purple basecoat for the shadows or the flesh color final highlight but they turned out well enough. I particularly love how the lenses came out on the grot pilot!
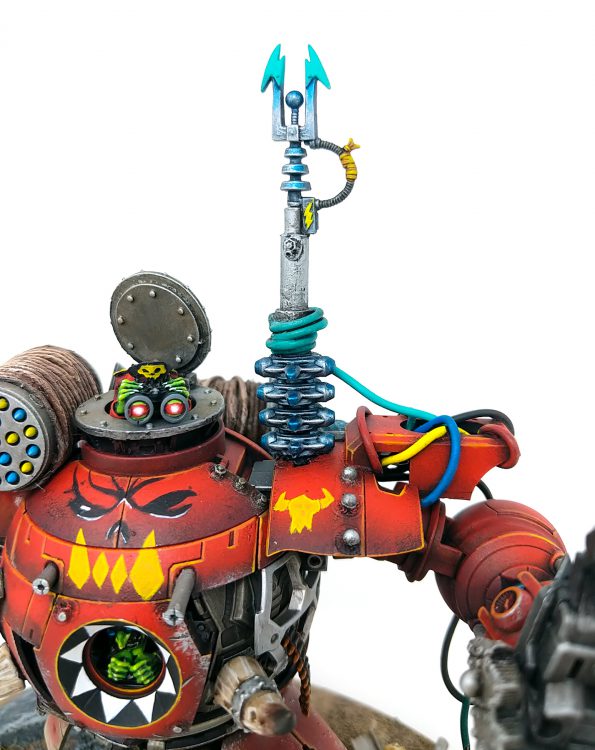
A lot of the freehand was done using a 3/0 brush and Vallejo Yellow Ochre and Valleo Black. For this I looked around on the internet for good Ork graffiti and art to take inspiration from.
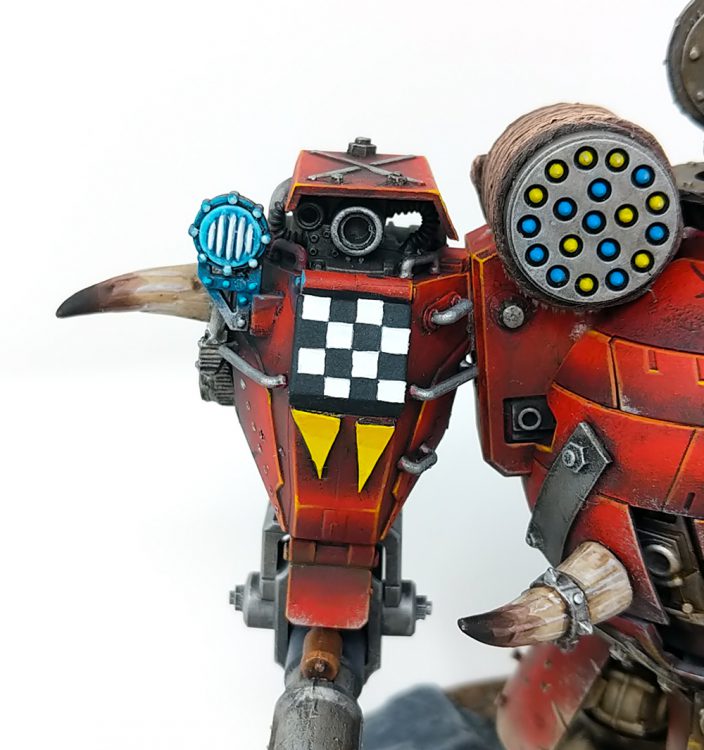
The spotlight OSL on the Morkanaut’s right side was done based off on How to Paint Everything: Quick and Easy OSL and the checkers were done based on How to Paint Everything: Checks, Hazard Stripes, Zig-Zags, and Other Heraldic Details.
Basing
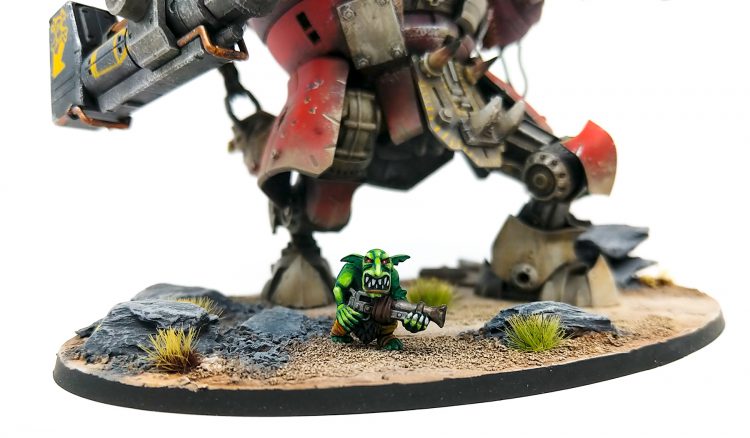
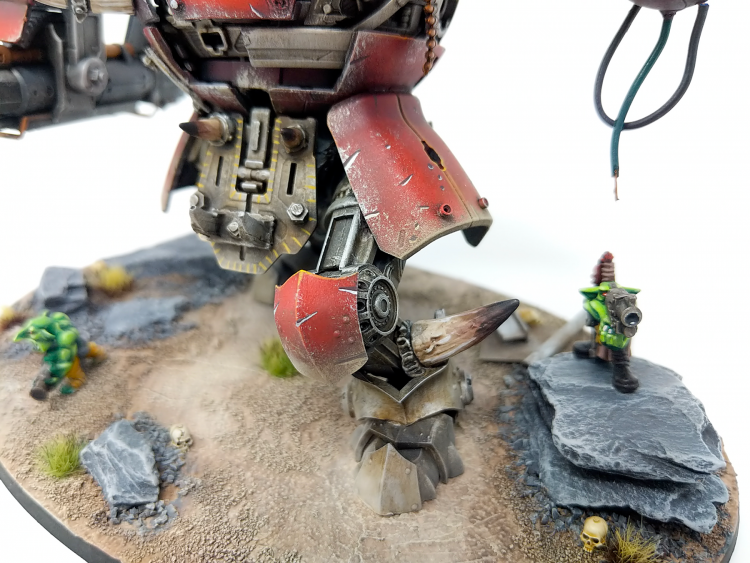
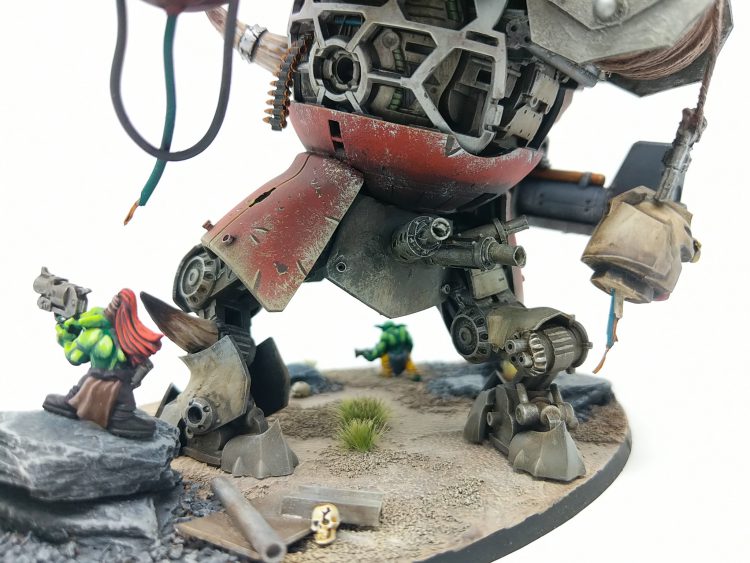
Finally it’s time to build the base to tie the whole project together. Let’s think back to my initial imagined scene of this Morkanaut stomping across a rusty red desert. Unfortunately what was left out of this was the color scheme of the Morkanaut and how it would contrast with the base, so our nice red mech against a rusty red desert is… not the best choice. So we’ll go with a tan desert instead. This change actually goes more into our favor as a less saturated tan will provide a better contrast with our bright saturated red from the Morkanaut and the green from our goblins.
To begin I sketched out where the Morkanaut’s feet would go onto the base so that when I began to plan where my rocks and gobbos will go I’ll be aware of the feet and general volume the Morkanaut will be in. I used slate rocks for this base, picking out interesting ones and testing them out on the base. In particular I was looking for a rock for a detail I wanted to add, a grot elevated on a rock next to the Morkanaut firing his little revolver at the same target. He wants to help!
After gluing the rocks in place I put down a layer of Liquitex Black Lava onto the base This will start our base with a bit of smooth bumpy texture. Next I add Vallejo Desert Sand texture paint, which has much more of a sandy texture, adding mainly to around the rocks I’ve added and leaving a lot of the middle of the base out to give the impression of a traveled trail. I also make sure to not add any of this to where the Morkanaut’s feet are to make the final gluing to the base easier. Lastly, I use Mod Podge and loose gravel, that’s a bit bigger than the grains in Vallejo Desert Sand, and glue them randomly around the rocks.
Now that all of the rocks, gravel, and texture paints are finished being glued down I prime, basecoat the base and rocks. I then apply washes over the whole base, adding variety by using black, brown, and sepia washes in different areas. Everything is then highlighted with drybrushing and then dusted with pigment for more depth. The goblins, grass tufts, and skulls are then added as the final bit of scatter detail before gluing the Morkanaut onto the base. As a final touch the lower half of the Morkanaut is dusted with the desert sand pigment to give the sense that it’s been stomping around the desert for a while.
The Final Result
Overall I’m satisfied with how it turned out! I had a lot of fun mashing parts together to make a mech walker that looks very Orky. I enjoyed trying out my freehand skills and was surprised with how well the results ended up. I definitely want to do another kitbash at some point for a Stompa or a Gorkanaut but I definitely need some time for that given this project took nearly two months to complete. In the mean time I’ve got an instagram if you’d like to follow my hobby progress, check it out here: https://www.instagram.com/thatgobbo/
