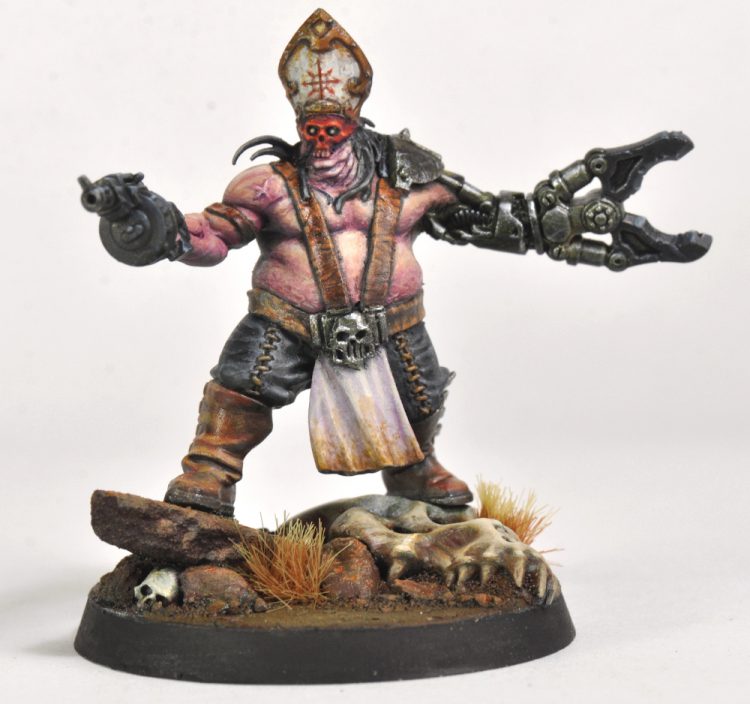
In this article I’m going to run through the building of the Cult Demagogue for my Blanchitsu warband. The initial idea for this character came out of a project that was to make a Blanchitsu style warband using just two kits of infantry with the option of using the Citadel skulls, green stuff, and any sort of non-miniature materials. This warband was built using Necromunda Orlocks and Age of Sigmar Kairic Acolytes.
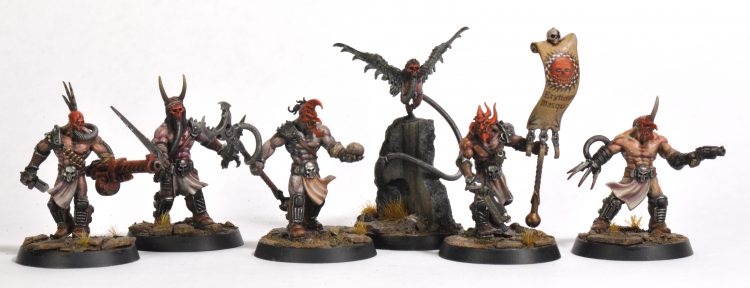
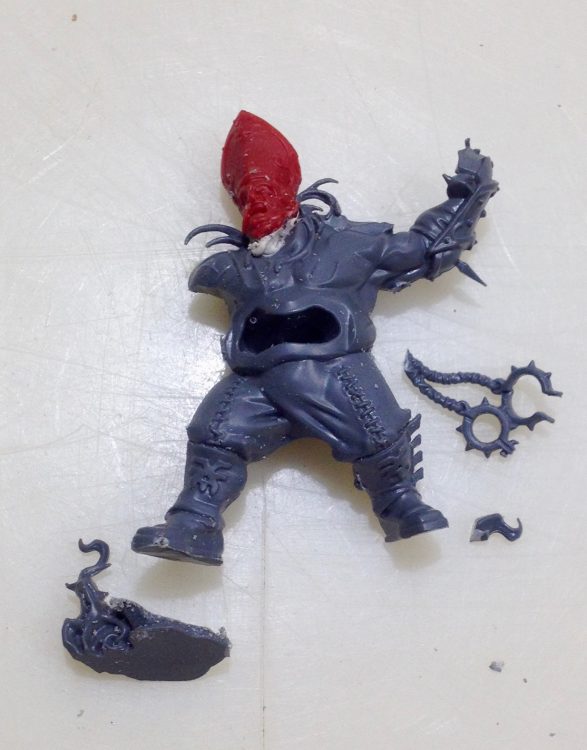
The gang slots pretty nicely into Necromunda Helot Cult. It brought to mind the question of who would fit into the Demagogue role for the gang. The characters fit nicely into the disciple, witch, and familiar roles. They are very cohesive as a gang, but none really stand out as the leader. From there, the idea for this build came together from figures and bits that were already on hand. The body would be from the Bloodstoker. I got this guy because he has a great whip bit I wanted for another project. Taddeus the Purifier’s hat seemed like a great fit for the character, an official symbol of religious authority bent to his own dark ends. I had Taddeus because he’s such a great Ministorum weirdo. From there it was just a matter of figuring out how to arm the Demagogue. Bits from the Orlocks sprue would help him fit in with the scheme of the rest of the band.
Tools:
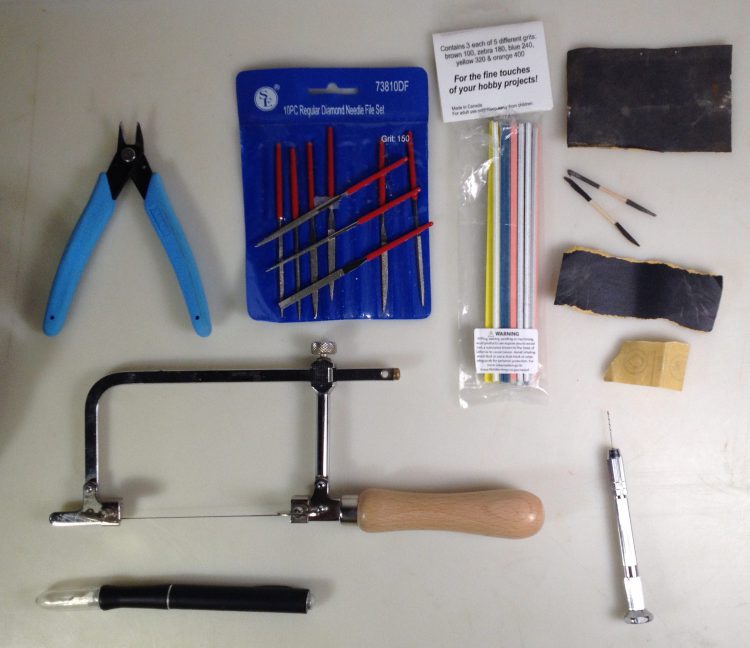
The two most important tools I use here are a jewelry saw and x-acto knife. A jewelry saw is great for cutting through thick plastic or delicate pieces without the danger of damaging a model or slipping. The thin blades mean minimal impact. Sandpapers of various grit can remove material quickly or smooth surfaces. Most material removal is done with the needle files. They are great for fitting into tight spots. The sanding sticks and strips of sandpaper are used where they can reach. 400 grit or more is done for smoothing. I have a couple toothpicks with sandpaper superglued to the ends of them for smoothing in harder to reach spots.
Sculpting Tools:
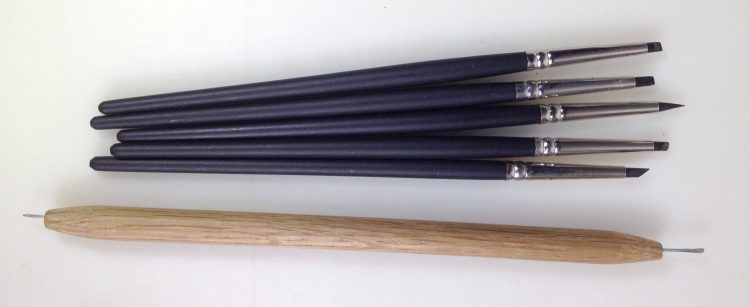
For sculpting I have a set of firm color shapers and a tool I made from a piece of dowel rod and a paper clip. There is a part of a paperclip in either end, one is sharpened to a point, the other hammered flat to make a tiny spatula. Having water on hand to keep the metal tool wet is important, otherwise the greenstuff will stick to it. The color shapers are used for smoothing and gently moving the putty and the metal tool is used for moving putty and forming up shapes.
Here are some general sculpting resources I found helpful:
Tom Mason: https://www.youtube.com/user/AvatarSCA
Patrick Keith Blog: http://www.patrickkeith.com/2010/08/sculpting-tools-and-putty.html?m=1
The Build:
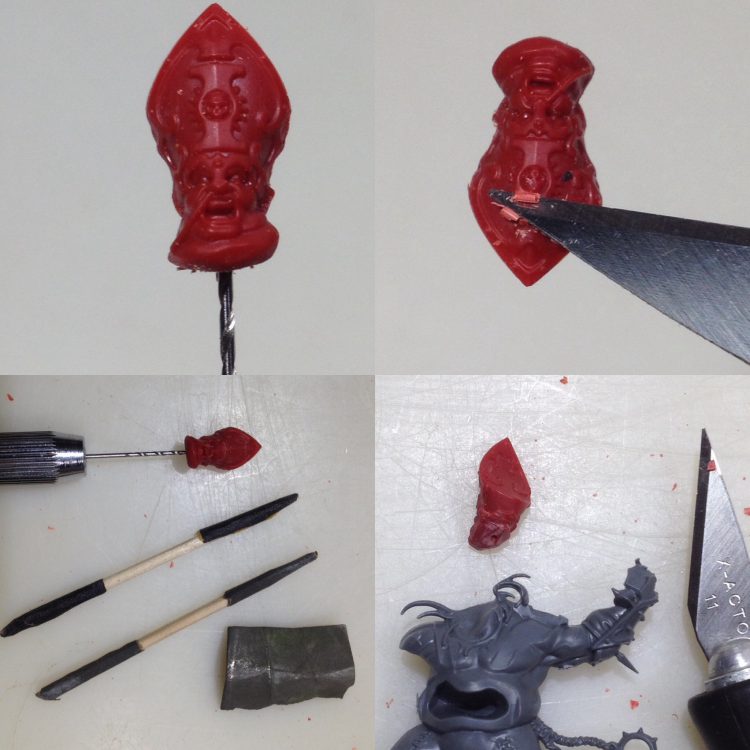
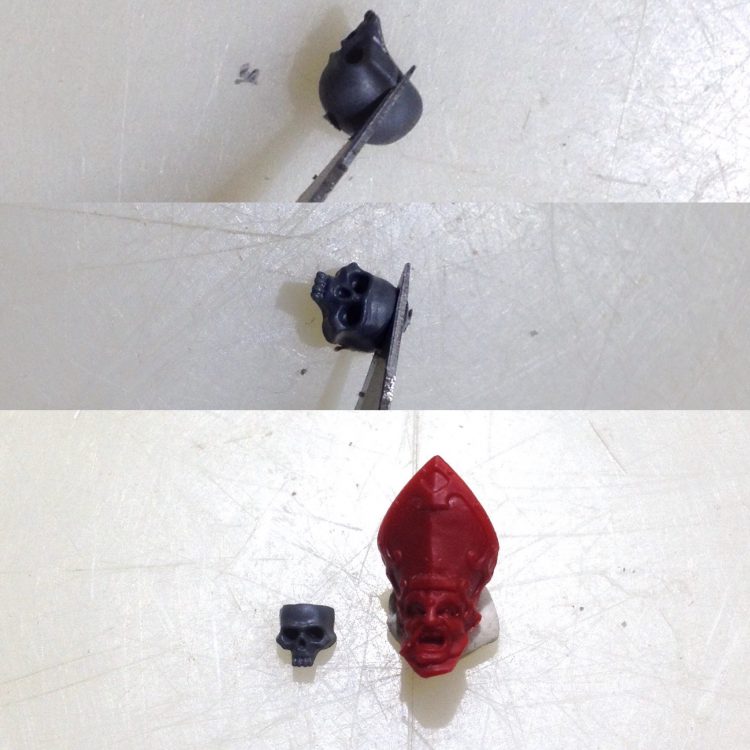
The first step was to remove Taddeus’ head. This was done carefully with the jewelry saw. I was careful to cut slowly from each side of the head to do as little damage to the body as possible. Throughout this project I wanted to preserve the unused parts for potential use. The jewelry saw is great for this because it has some flex and slightly turn as it cuts. I have snapped the blade on it before so you have to develop some tool sense in regards to how much bending you can get away with (thankfully this one came with a bunch of extras).
Now to deface that hat! The ministorum symbol was carefully shaved away with a sharp x-acto blade. Once it was mostly flat, sandpaper was used to do some final smoothing. The x-acto was used again to carve the back of the neck down to fit on the body. It’s important here to cut away a little, then test fit until things line up nicely. Cutting too much away isn’t too big of a problem though, because green stuff can compensate for any overzealous carving.
Here I’m using poster tack for sticking parts together to get an idea of how things will fit.The manacles were removed carefully with the x-acto blade, then the rock was cut away from his foot with the jewelry saw. That rock probably won’t be used again, but the manacle and the little plant are nice bits.
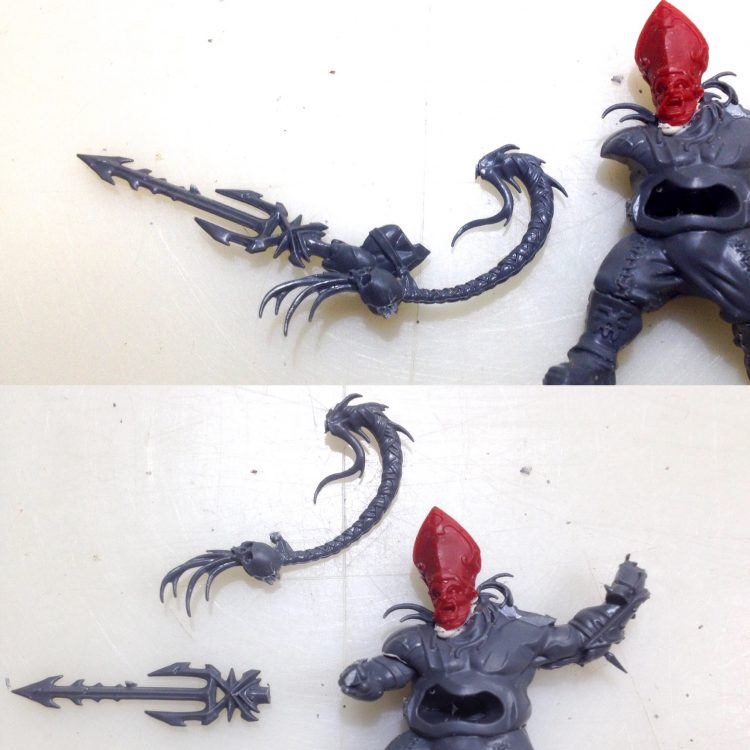
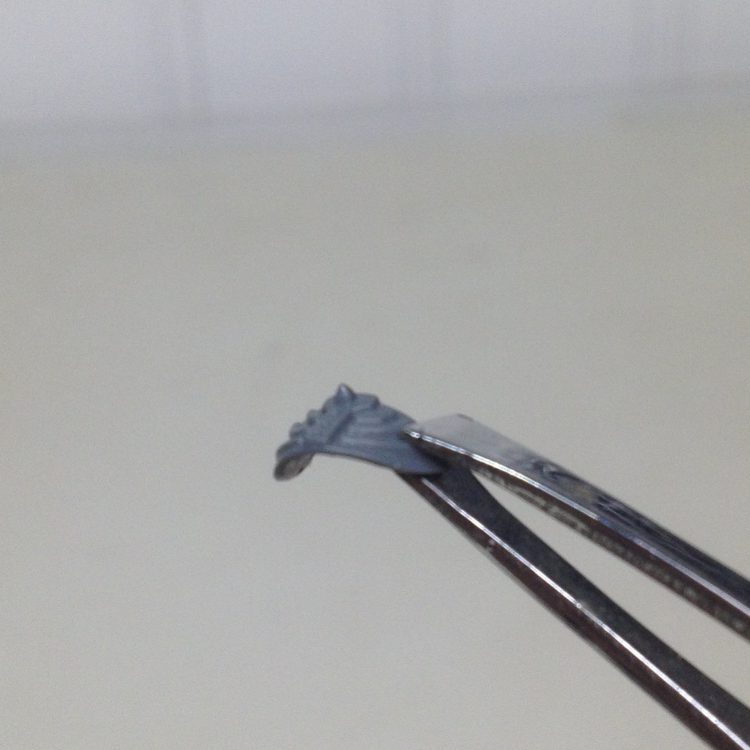
Next, the arm was separated from the hair/skull bit and the spike/blade was removed. These were cut off with the x-acto blade. Again, these are two more cool bits that could see some use for something else.
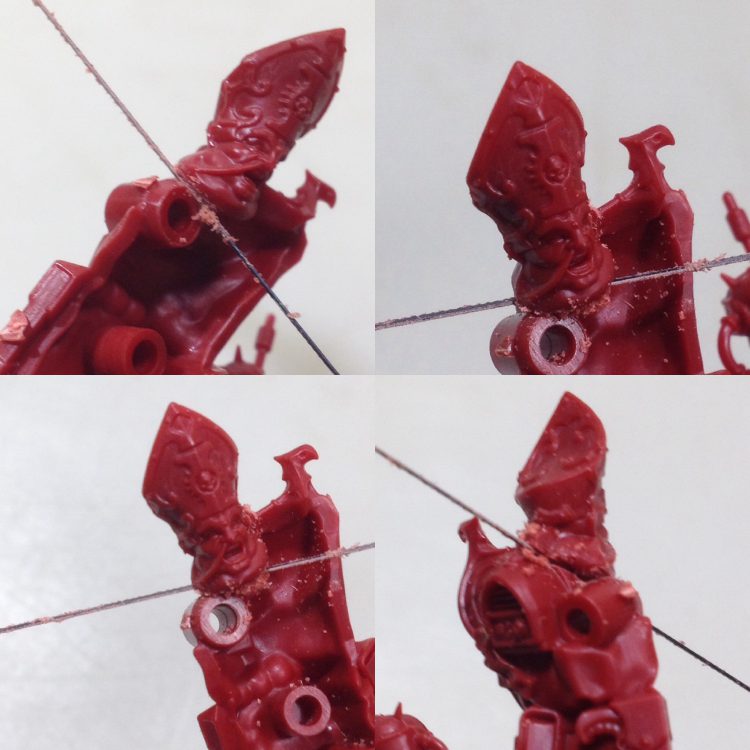
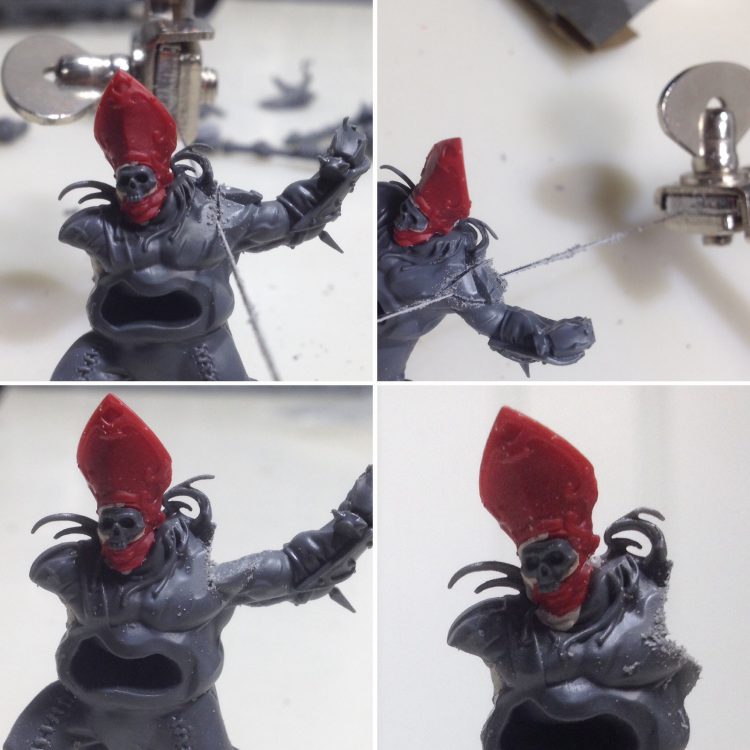
Now for the face. The back and top of a citadel skull are removed to fit over the face.
Then a wedge was cut from the face using the jewelry saw to make room for the skull mask. The back of the skull was sanded down with the 150 grit diamond file. Some more careful carving and sanding was done on the head and the skull until the fit was pretty good.
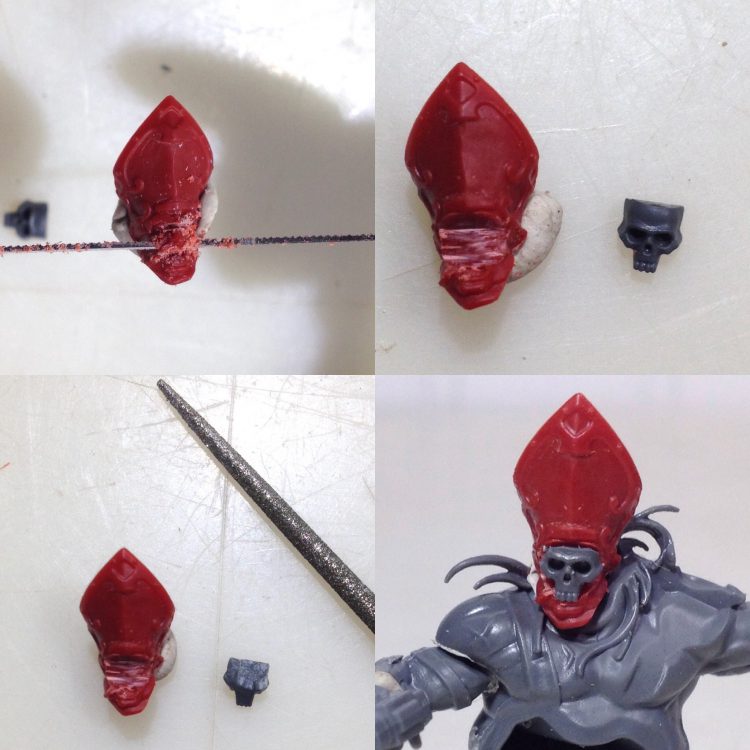
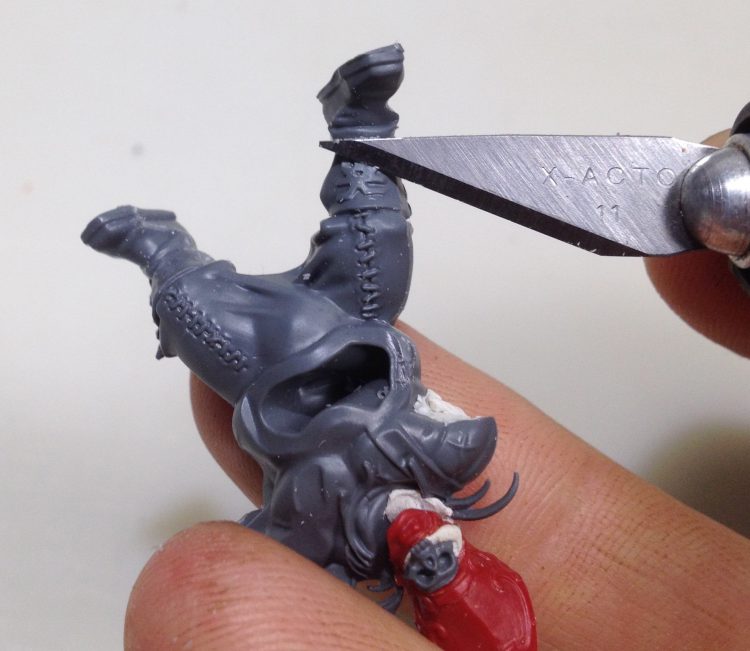
The Khorne logos were carefully carved flat with the x-acto and sanded smooth. (My fingers are only holding the model like this for photo reference, don’t cut toward them!)
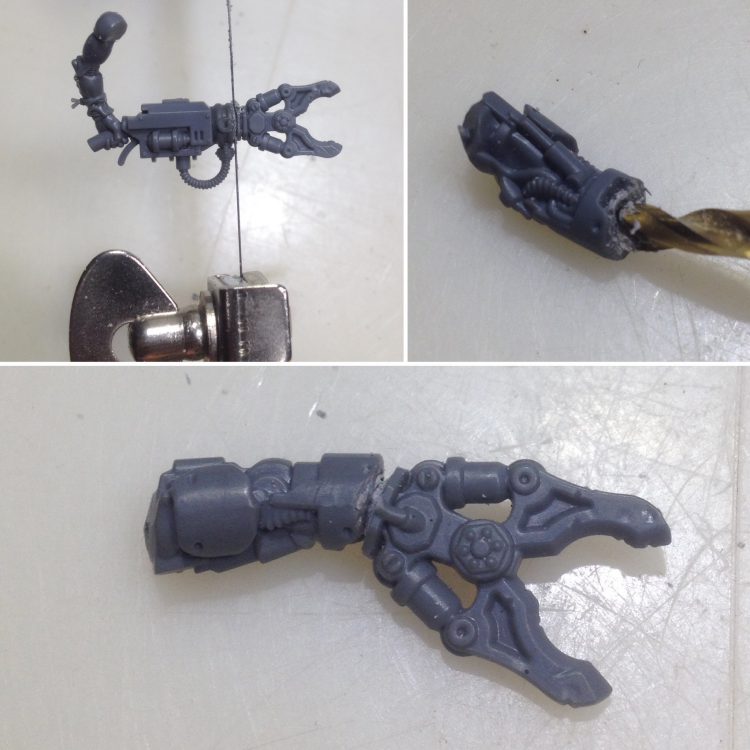
This power fist is from the Orlocks kit. It didn’t quite have the feel I wanted, so I replaced the fist with the blades of a rock-cutter from the Genestealer Cult Acolyte kit. The fist portion was cut away, following the lines of the wrist section.
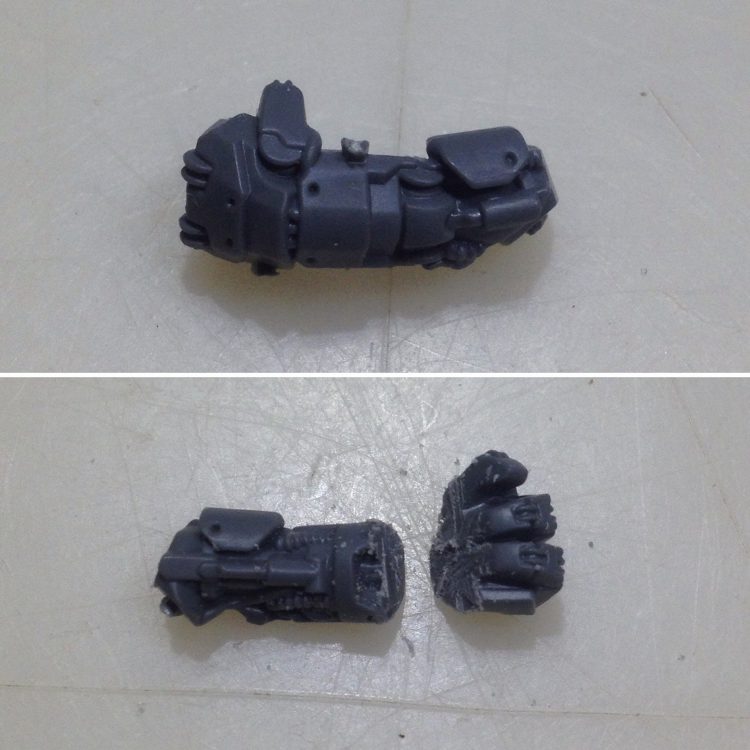
The cutter blades were removed with the jewelry saw, leaving enough nub to slot into the wrist. A slot was carved and drilled into the wrist section.
A wedge was cut out of the shoulder with the jewelry saw for an Orlocks pad to slot into. Initially I wasn’t 100% sure about replacing the whole arm, but decided to go for cutting it all the way off.
The shoulder pad was separated from the back section and sanded smooth along the bottom.
The rest of the crew is sporting nice loincloths, so he needed one as well. This one is a piece I had cut from a Space Marine torso. It originally had the Marine chest armor attached, but I have no idea what kit it came from. The top portion was cut off and the seals carved down with the x-acto knife, and then sanded smooth.
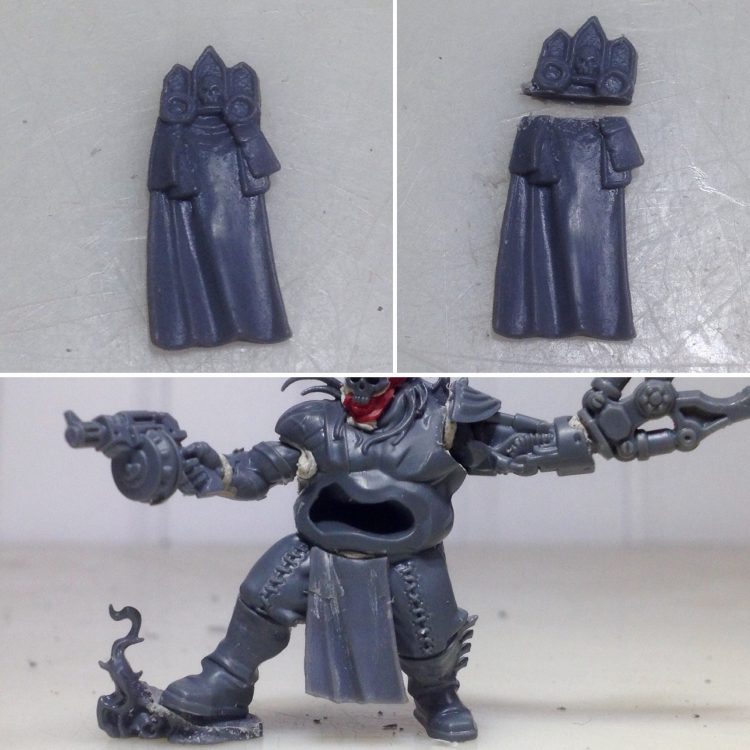
The autopistol is another bit from the Orlocks kit. The pistol is leaning to right in order the follow the lines of his wrist. The end result will look more natural when you take into account body mechanics as you build. It also gives this guy a more open, welcoming pose. A bit of paperclip was cut to space the hand from the arm where the wrist should be. Then a pin-vise was used to drill holes in the hand and arm for the paperclip, and the barrel was drilled out.
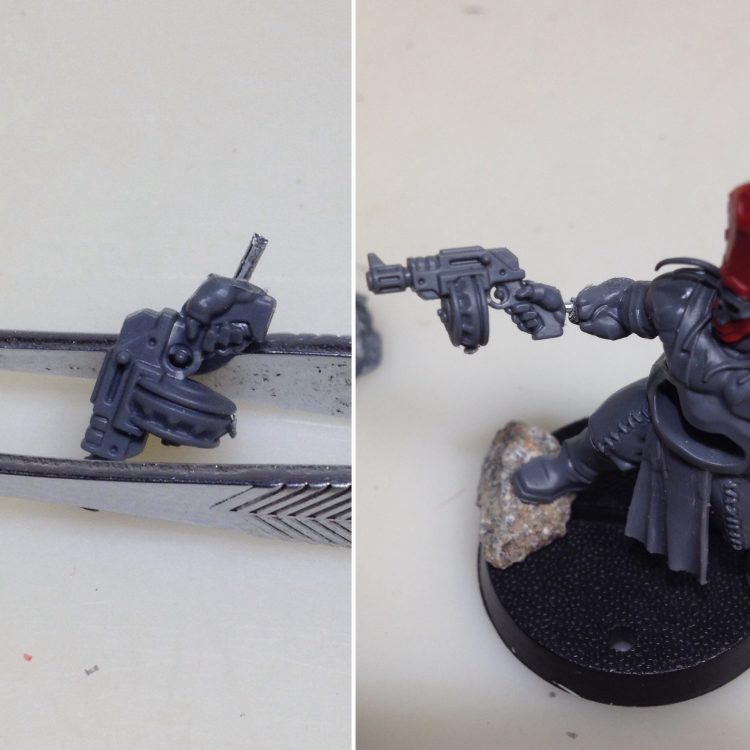
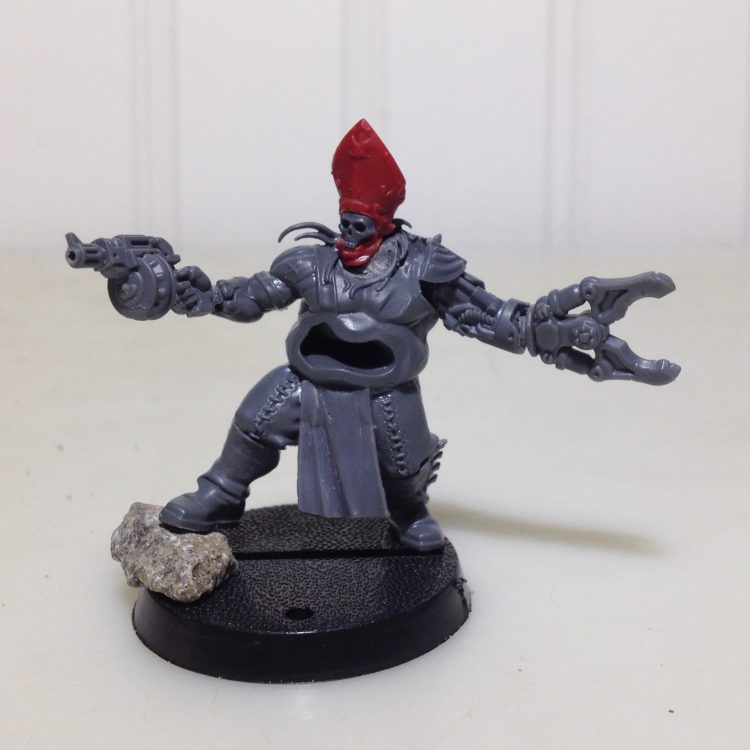
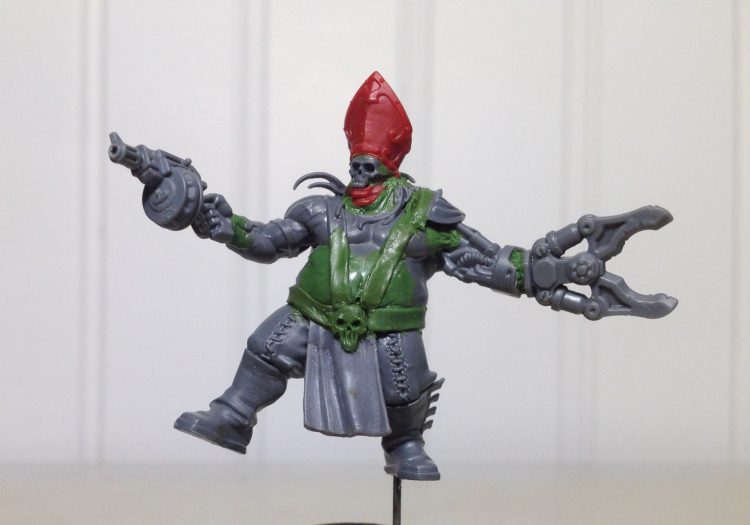
Here he is glued together! The gun hand was done with superglue and the rest of the plastic joins were done with tamiya thin plastic cement. The power arm was a little tricky, and probably the weakest glue join, but it will be reinforced with green stuff.
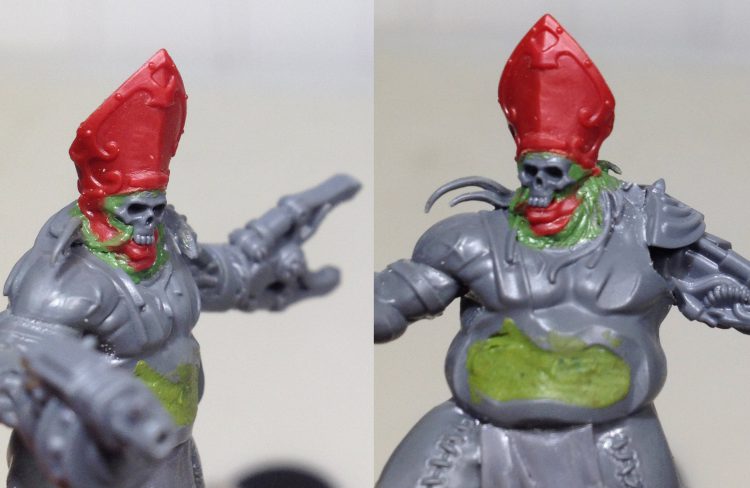
Now for the green stuff. This is where the pieces really get blended together. I don’t want to get too deep into the technicalities of sculpting here, there are lots of great resources on youtube that would be better at that anyway. The gaps around the top and sides of the skull were filled in and smoothed with a firm clay shaper. Taddeus’ face had a little tube going to his nose, so I followed the lines of it into the cheekbone. The neck needed a little more filling in so I sculpted in folds similar to what was already on the face and chin. Then I filled in the space between the existing hair and made lines connecting to the ones already on the hair.
The wrist was fairly simple as well, filling the space then making indentions where the existing fissures on the arms would extend into.
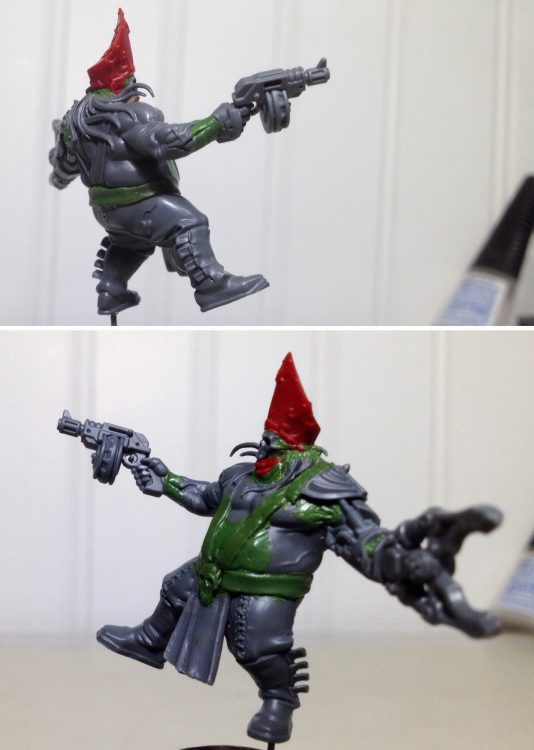
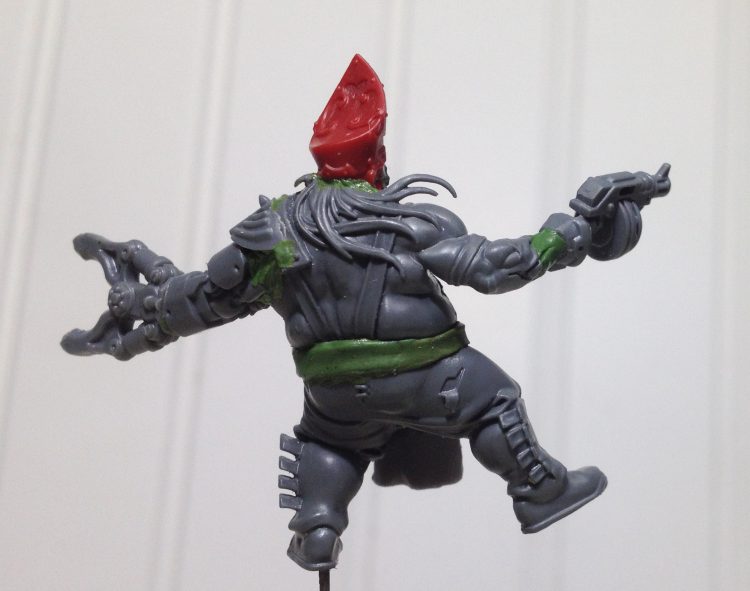
I missed a picture of the stomach sculpted without the belt or suspenders. It had to be done and cured before I could work on the rest. The stomach was pretty straightforward to do. It was mostly round and smooth except for a slight indentation on his right side, following an existing crease. The belt and suspenders were done by rolling out some green stuff flat between to sheets of wetted plastic bag. They were then cut to the right width after they were flat enough. The skull a small oval of putty shaped to be as close to the Orlocks belt buckle skulls as I could get. On the left arm I pulled the putty from the edge of the chest over part of robotics to give it an integrated look, like the muscles are attached to it. The gap between the claw and the wrist was filled with greenstuff and then lines of dot indentations to give it some texture. At this point I also built up the from side of the shoulder pad. The back had part of the blood stokers original shoulder pad to which I glued to Orlock pad.
Here you can see where the Orlock pad is glued on, and the little bit of gap filling there. The space between the pad and the arm was filled with green stuff at this point and I ended up not being very happy with how it looked. I will revisit that at the end.
After the belt and skull cured out I could to the additional detailing for the buckle. The bars next to the skull and the little right angle bits next to the jaw are based on the Orlock belt. Then I made small bars at the ends of the suspenders. At this point I found that the skull looks way off-center from the loincloth. This was the result of not planning well, but not impossible to fix. The x-acto blade was used to carve off some of the loincloth on his right side. Then it was sanded smooth.

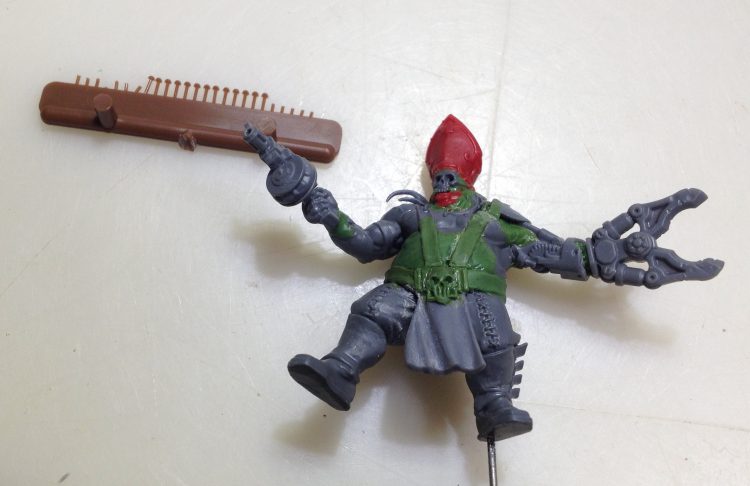
Next comes the eyes and a rivet on the front bottom edge of the shoulder pad. These are done with Tichy Train Group .35 rivets. I drill a hole and leave a bit of the stems on to help keep them in place for glueing. The rivet on the shoulder pad was sanded flat on top. The ones for the eyes have some material trimmed off their edges so they fit neatly into the eye sockets.
Huzzah!
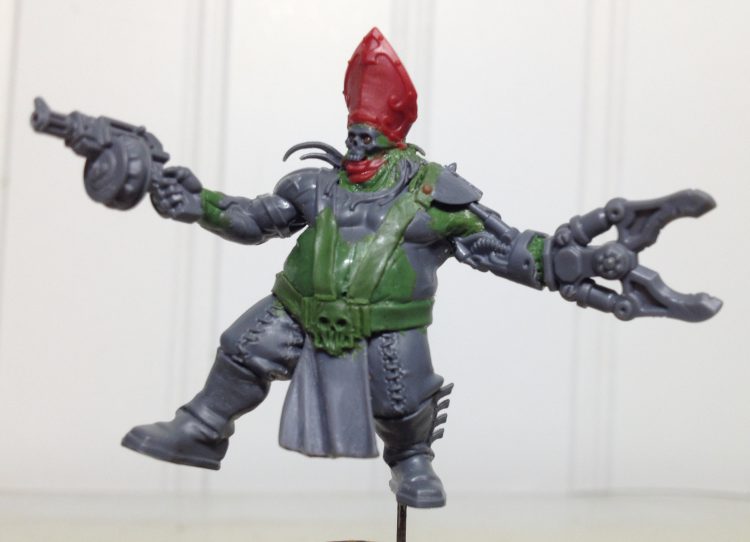
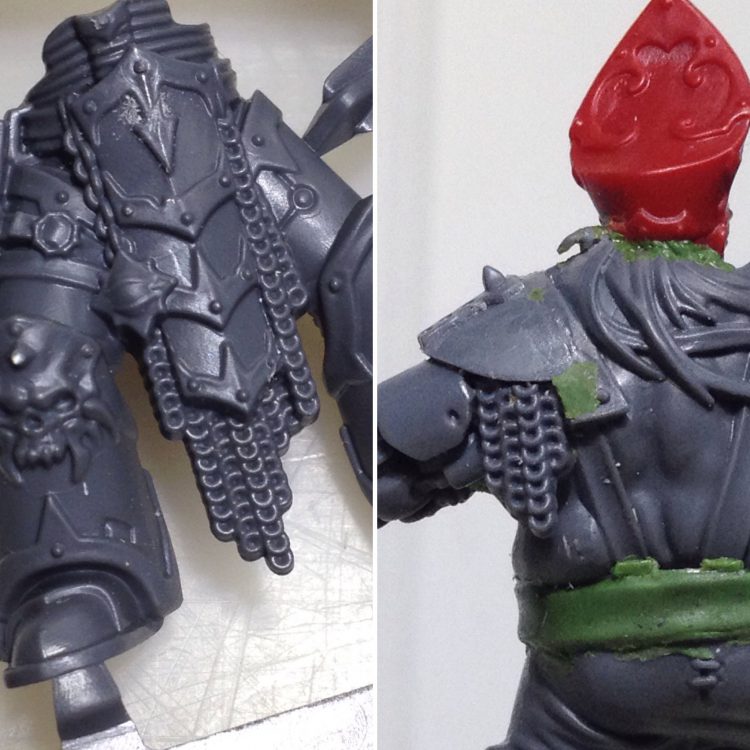
Finally, the idea of using chainmail to fill the gap between the arm and shoulder pad occurred to me. That gap really needed some way to bulk out the space and also provide a clear separation of robotics and shoulder pad. I could a nice piece of the right size on the new Chaos Space Marines sprue. It was cut off with the jewelry saw then carved and sanded to fit.
I don’t really expect anyone to build this exact model as I have, but I hope it provides some ways to approach that rad conversion idea you’ve been kicking around. There is occasionally some lamentation that goes around about the new dynamic kits from GW being mono-pose. While it’s not as easy as slapping different arms or legs on a torso these things are still endlessly mutable, and with a little effort will look great. This kind of conversion takes quite a bit of time but pays off for a centerpiece model.