
In the Fabricator General, we talk about the finer points of construction, conversion, and hobby projects that require a bit more elbow grease and technical know-how. From adding shelves in your display case to building an army display board to making a wet palette, there’s on project too big or small for the Fabricator General. This week, we’re covering how to build a plastic Deimos pattern rhino.
I think this is actually the first fully-plastic kit we’ve done a How to Build Everything for. Looking back through the archives it sure does look like it. You might even be wondering at this point why this is even an article and who it helps, I mean a plastic rhino should be easy to build….right?
For the most part, it is. This kit has come out alongside the massive launch of Horus Heresy 2nd edition and is one of the first fully plastic kit that was previously a Forgeworld kit (a part plastic, part resin, nightmare) so is still much better but there’s one small part which seems off.
List of Materials
This is a much simpler list than you usually see in this series, but still important:
- Clippers – always important to have a good pair, I use the Citadel ones because they cut close and well, just don’t use them on metal
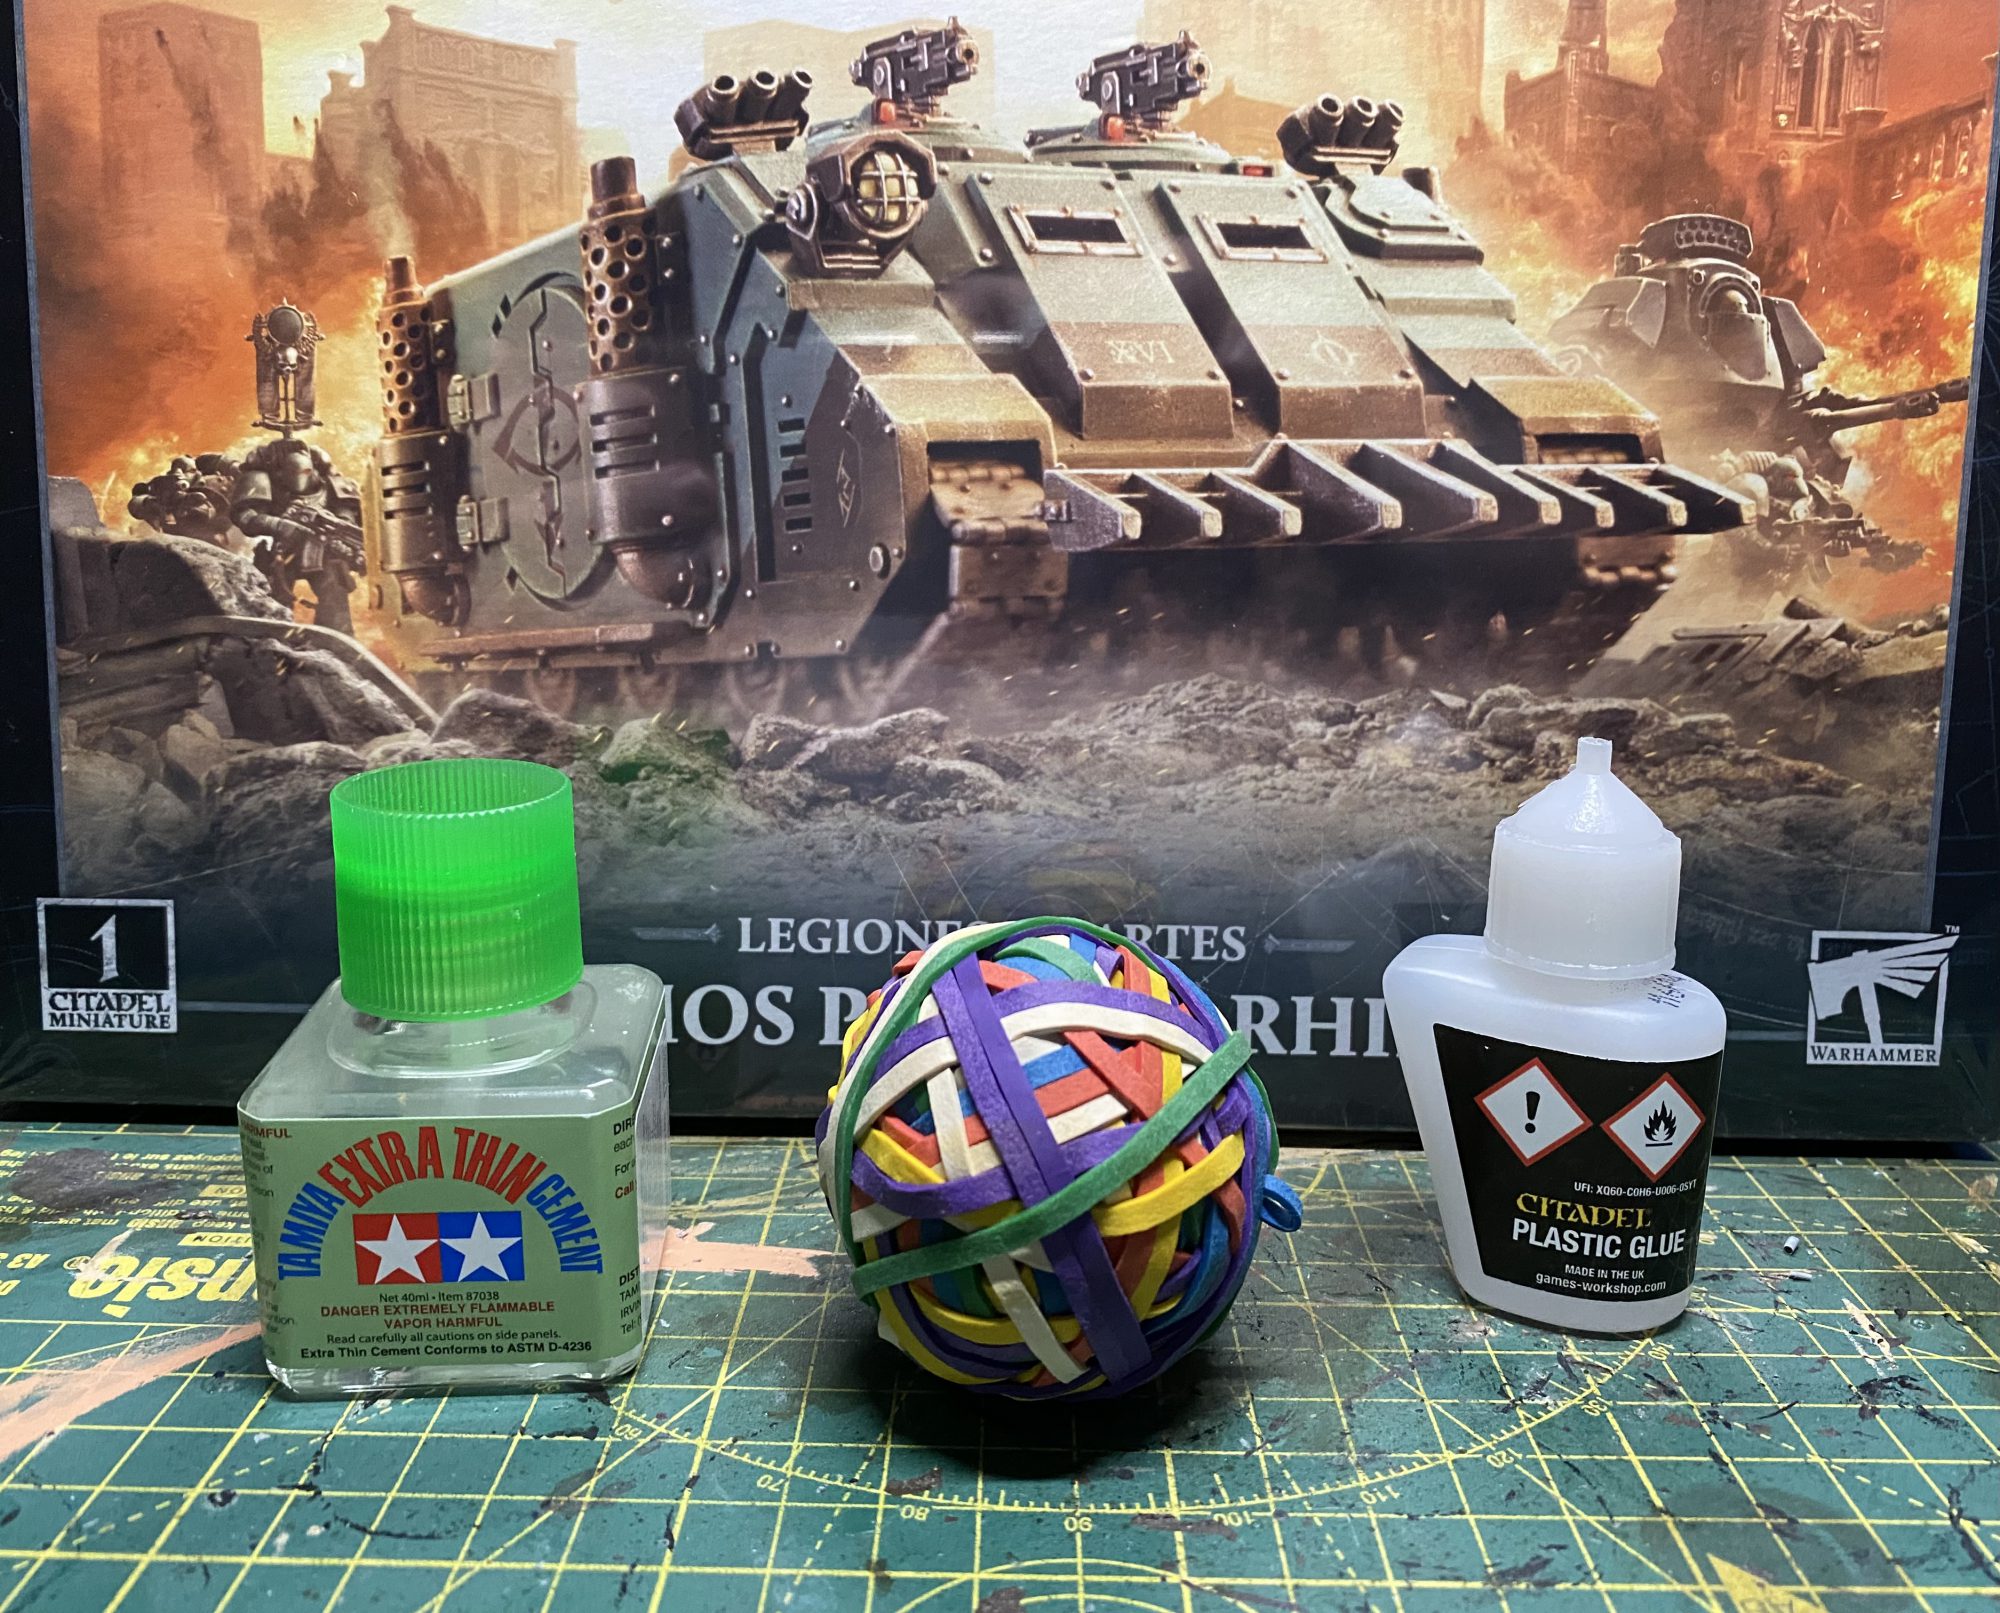
- Plastic glue – I use 2 different kinds when I’m building both Citadel plastic glue for larger areas and Tamiya extra thin cement for smaller pieces I want more control over
- Hobby knife – always with a fresh new blade to take off excess sprue pieces and mould lines
- Rubber bands – to hold your rhino together so there are as few seams as possible while all the glue sets
- Hobby drill – if you’re the kind of person that needs to drill their weapons barrels (spoiler alert: I’m not)
The Sprues
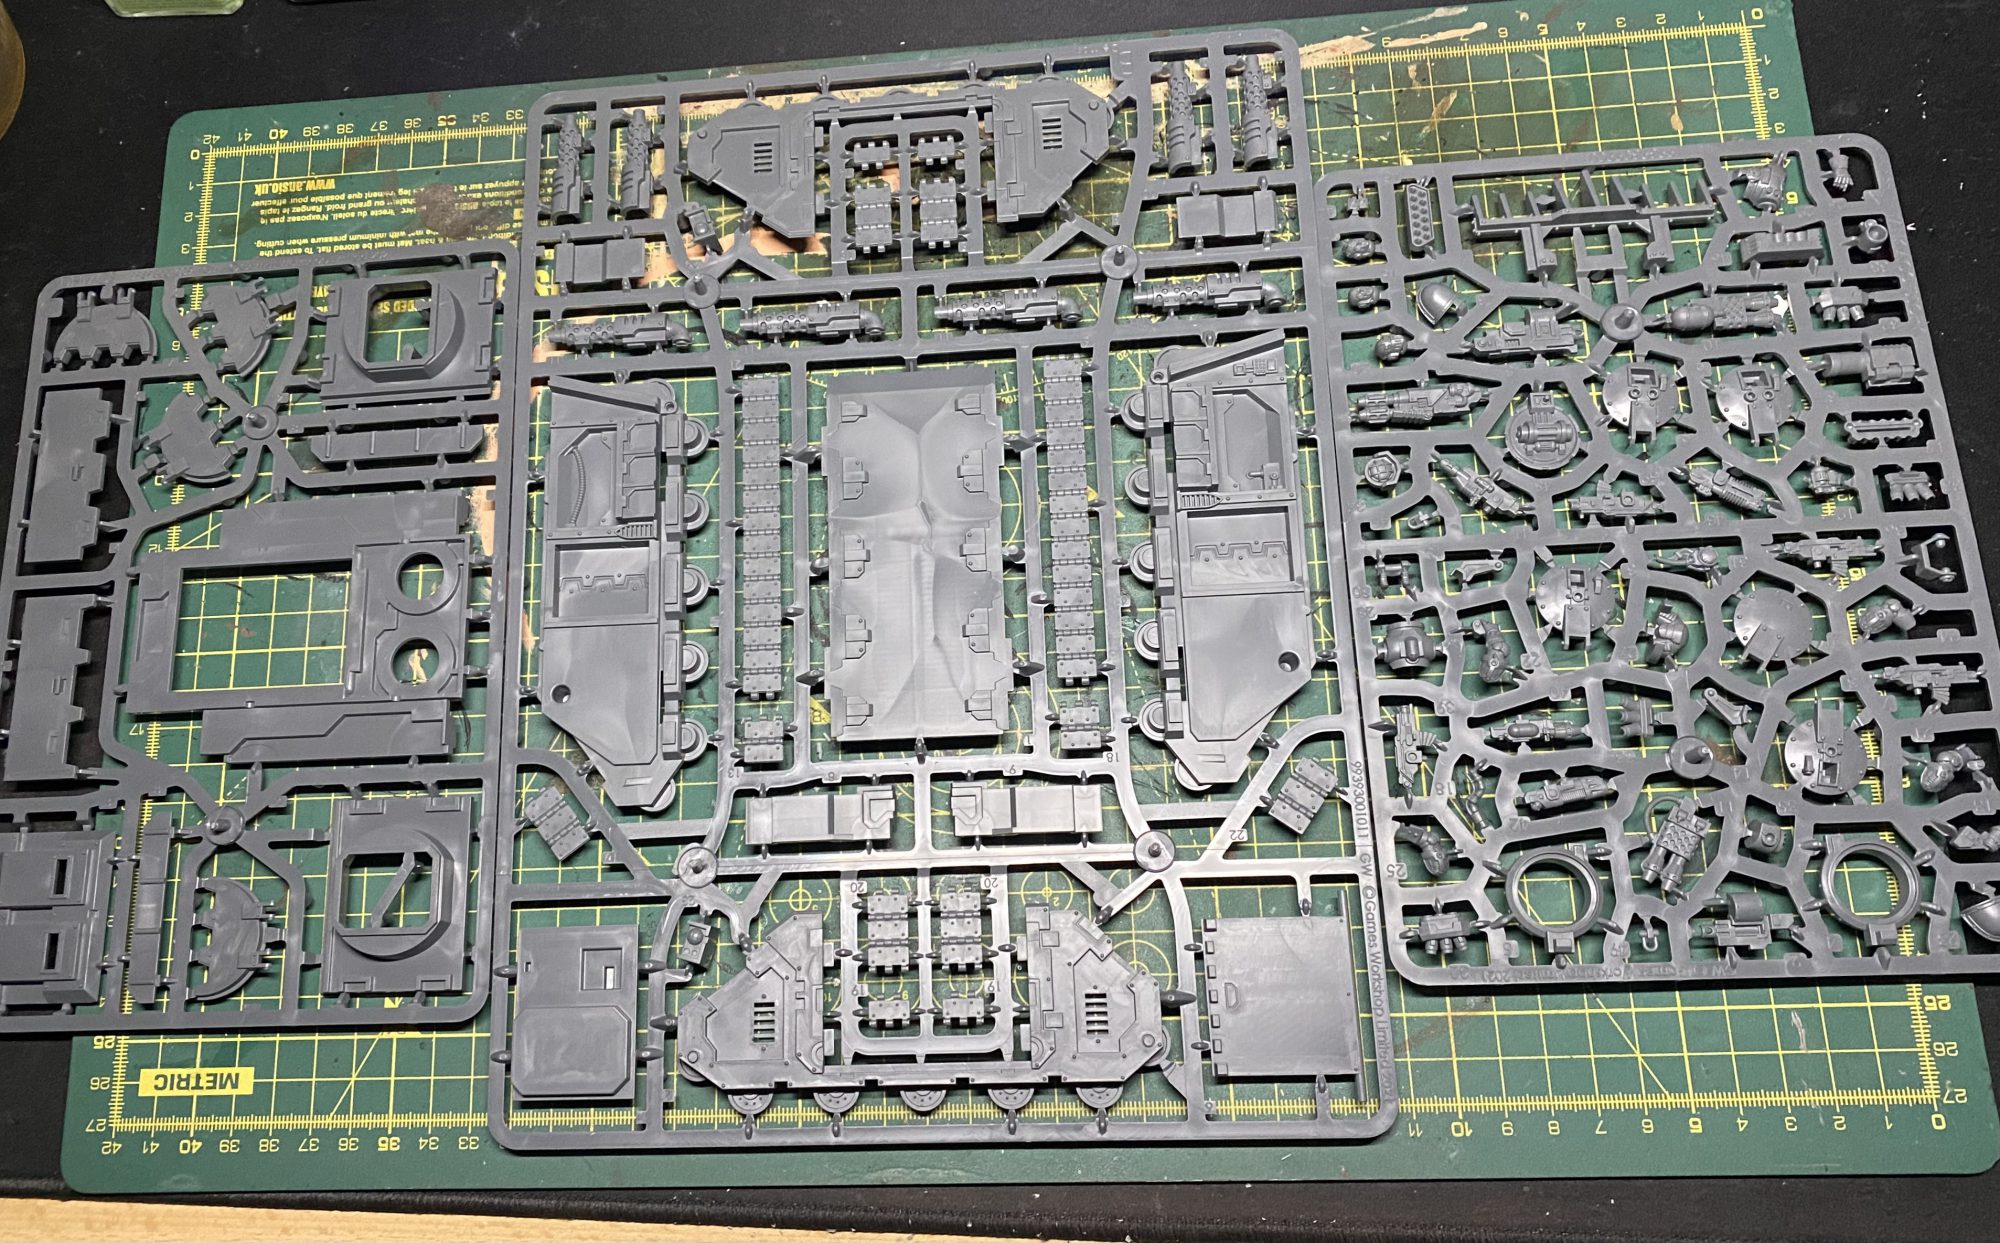
As you can see here it’s a rhino. All of the parts are lettered and numbered, are easy to find, and are very intuitive. The left and middle sprue make up the entirety of the rhino itself. The sprue to the right looks like it’s just going to be in every vehicle kit, a very generic weapon sprue for pintle mounted weapons with optional gunner and a tank commander.
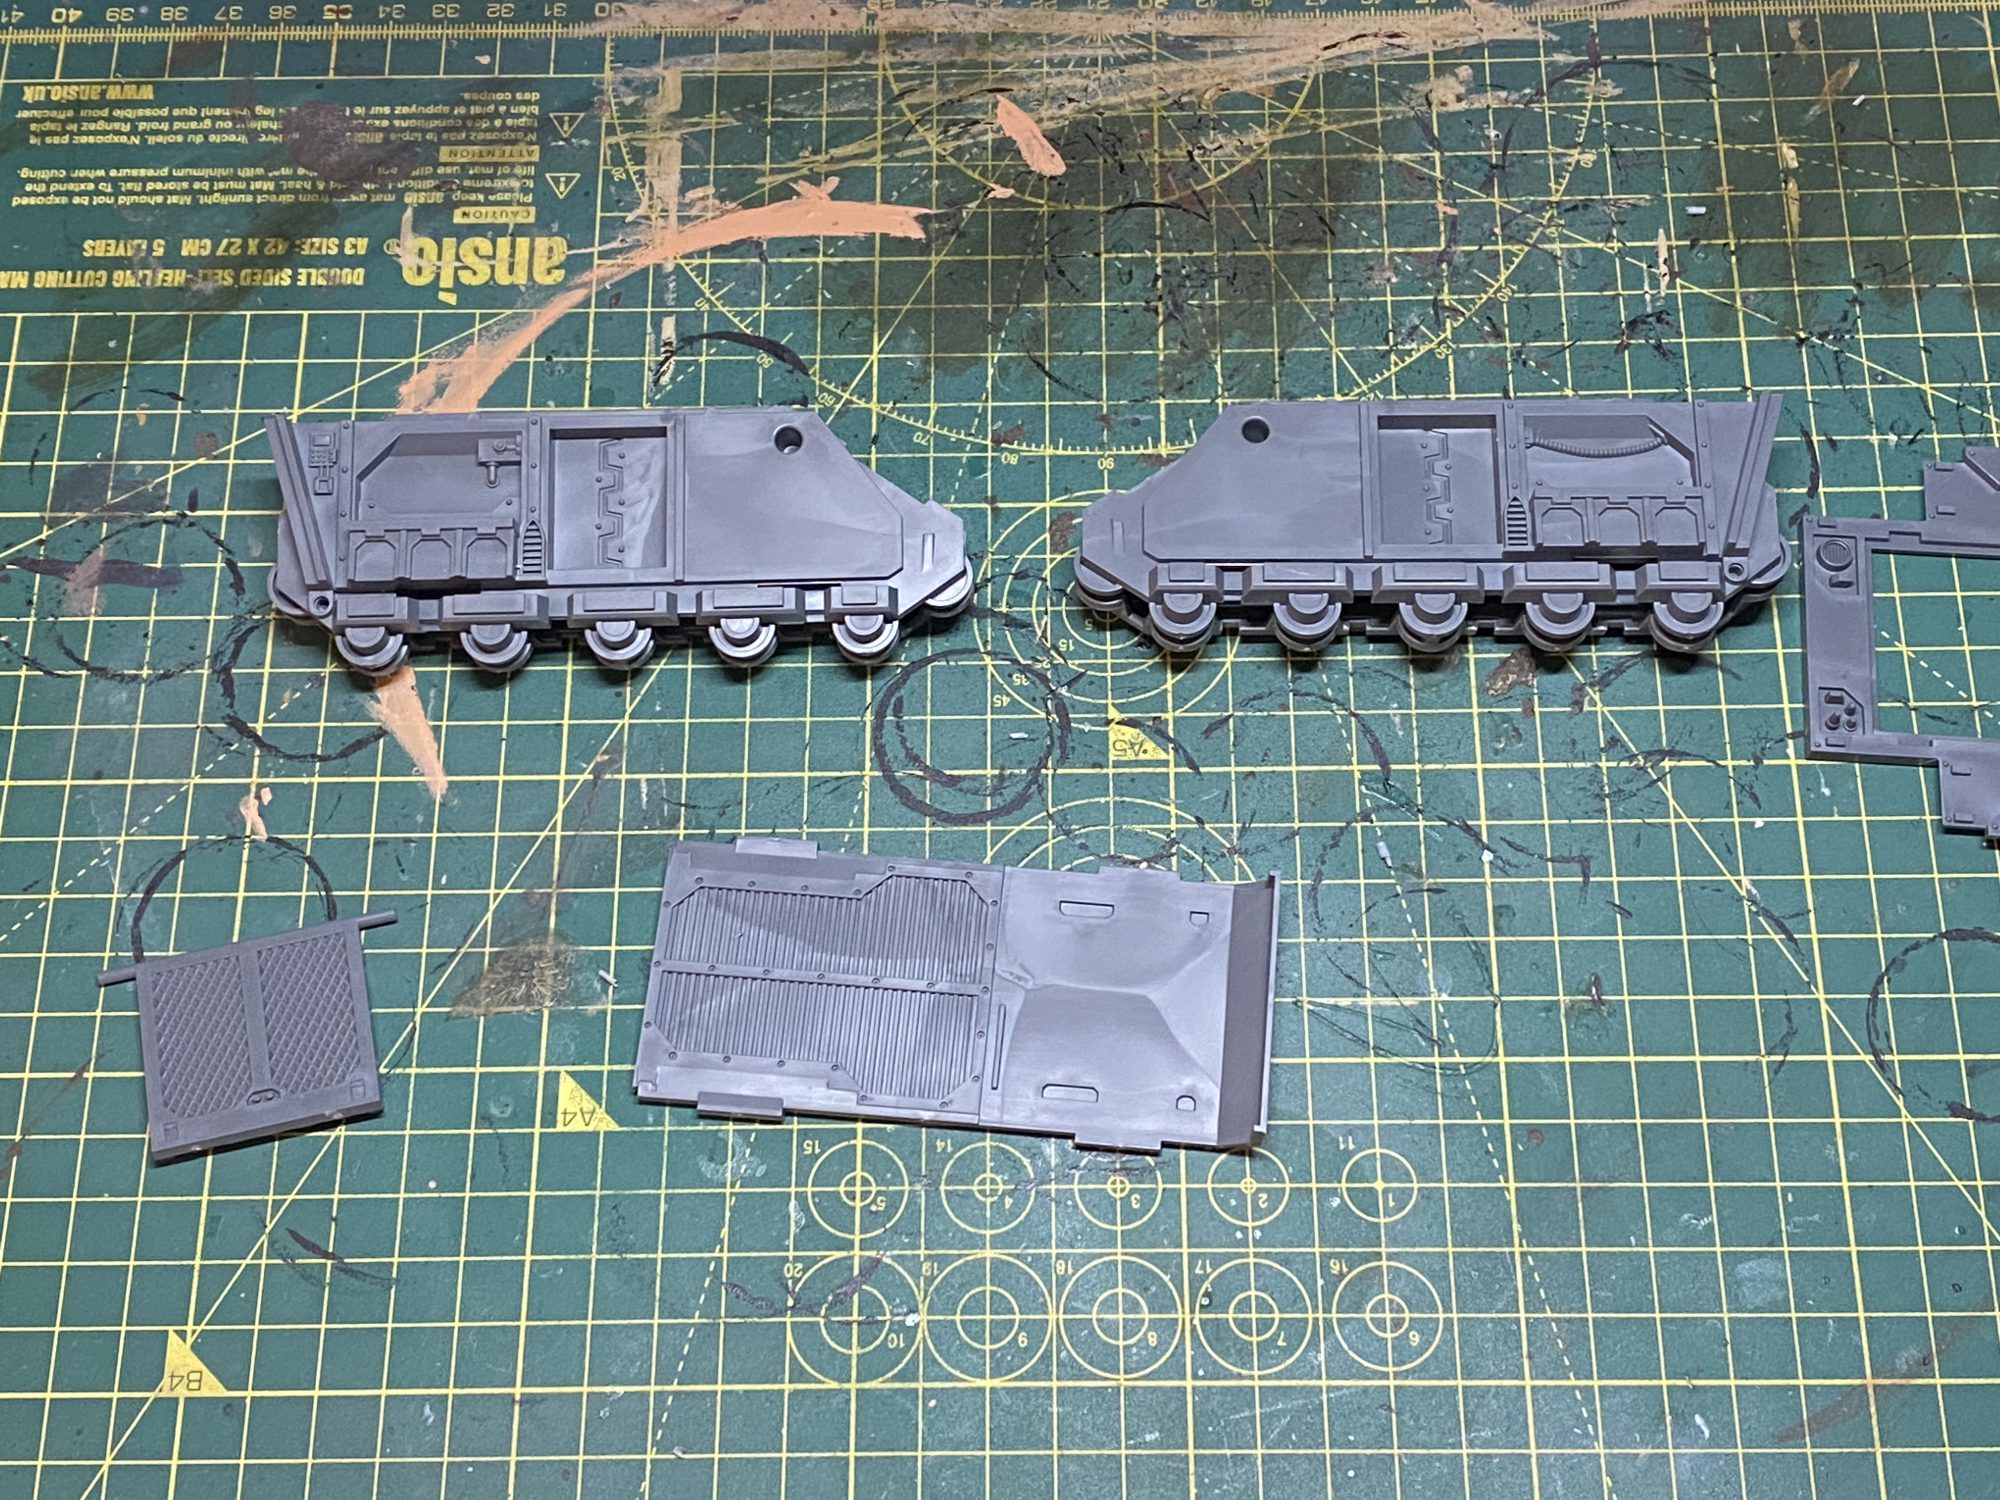
The Hull
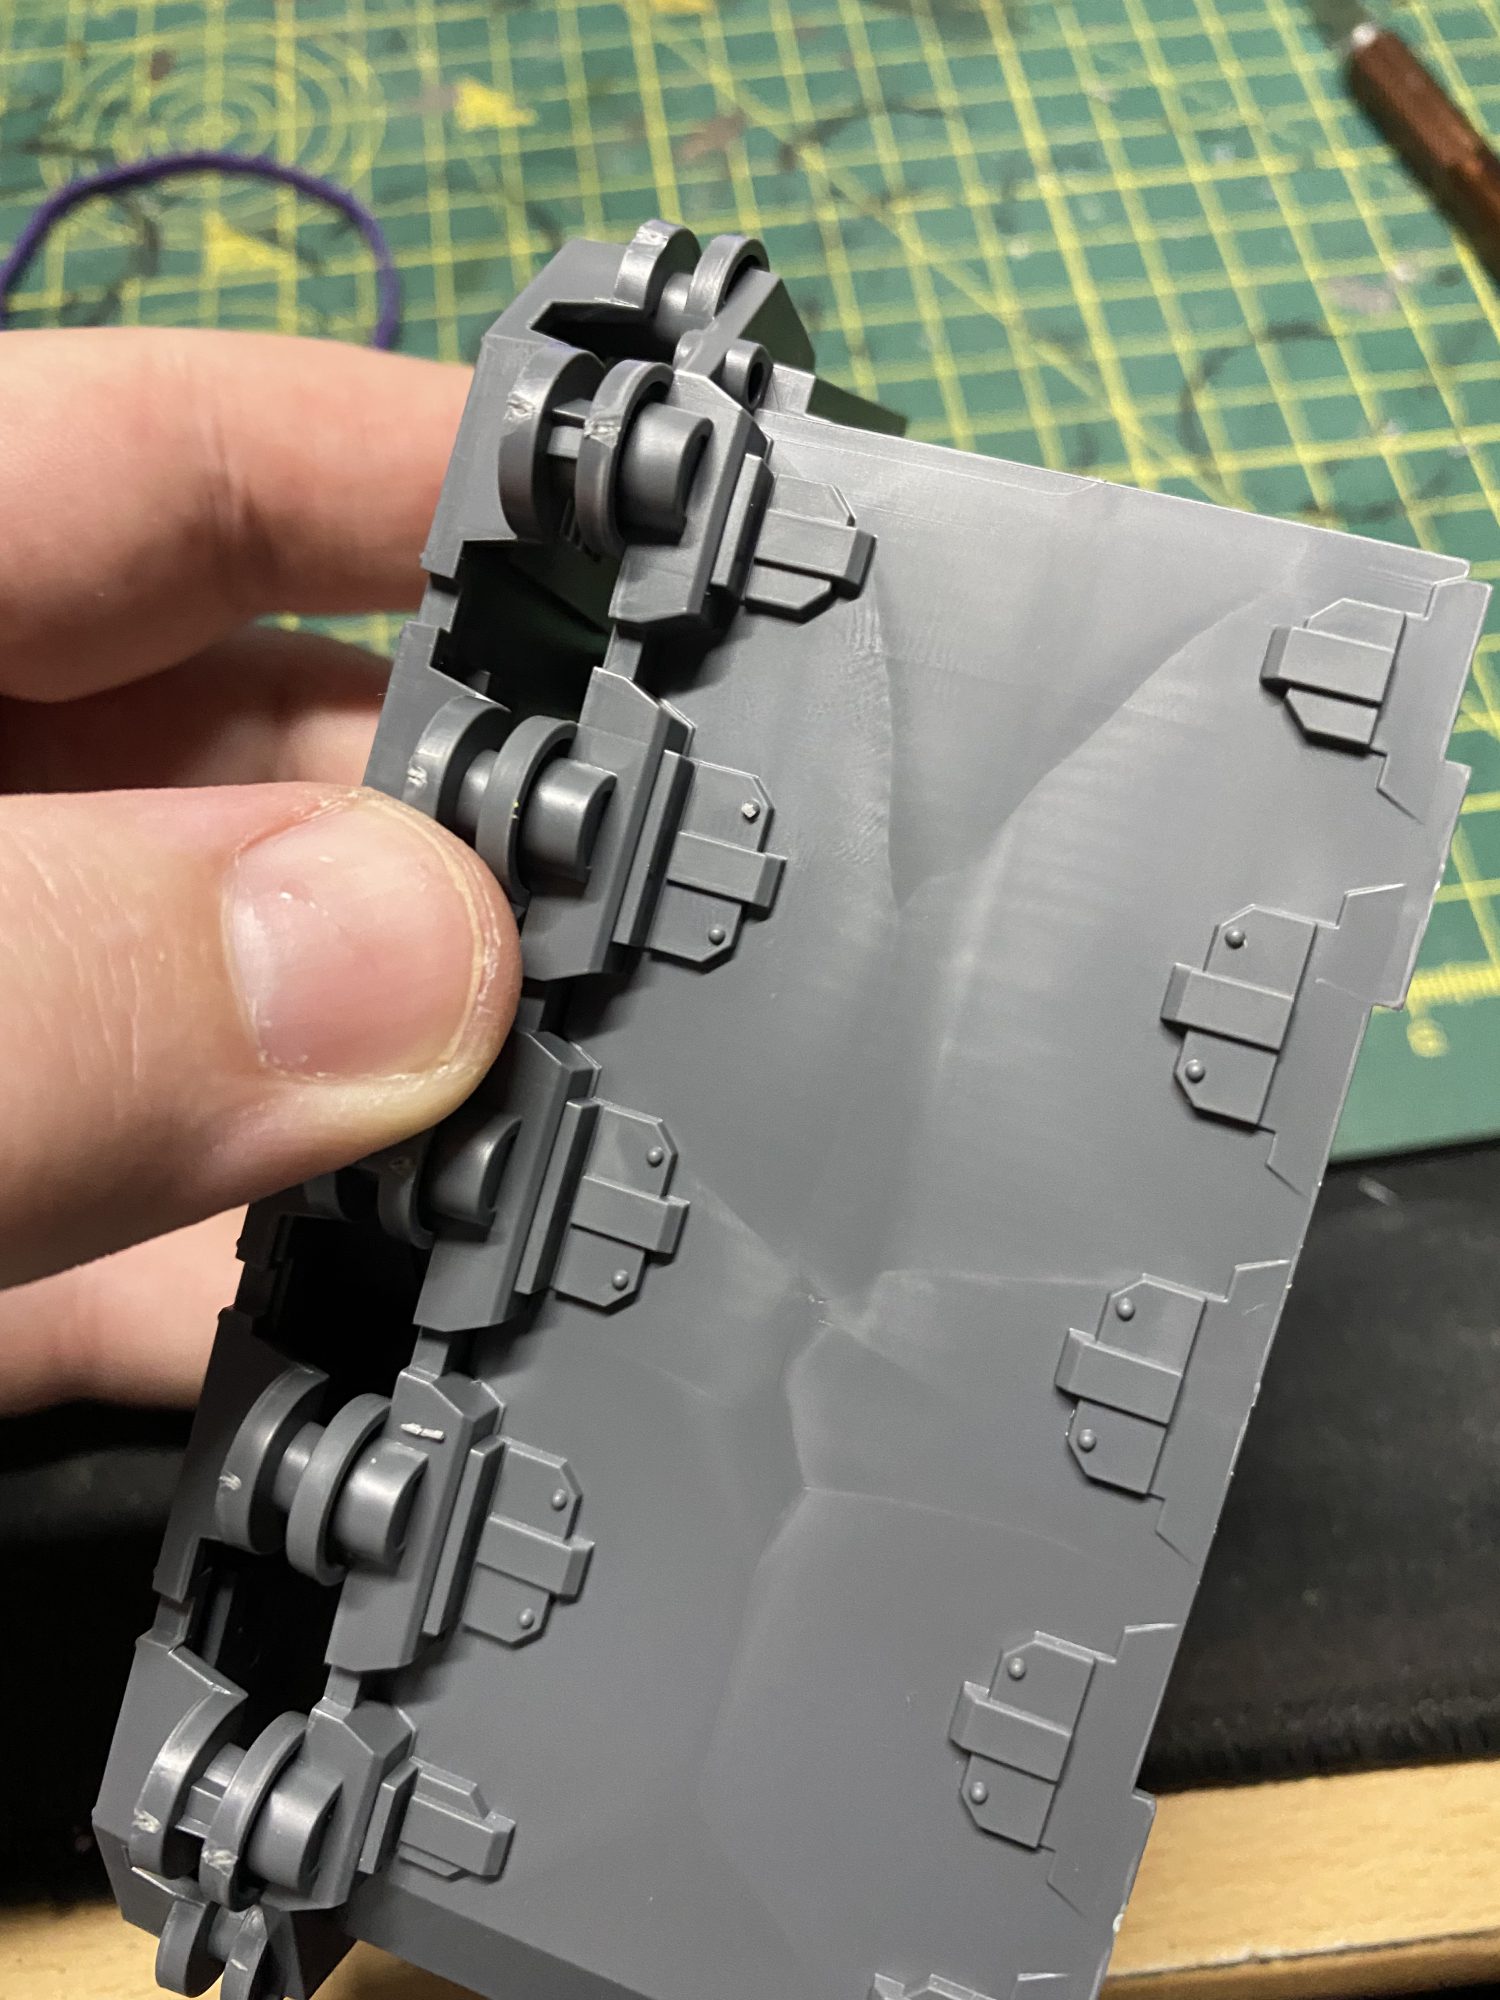
This is where we start to run into a little bit of trouble, and really why I’m spending time writing this instead of building my 4th of 6 rhinos this morning. The rear portion of the flooring (piece B1) has a lip that is a bit too thick to easily slide into place into the side of the rhino. This is a problem on both sides on the tank not just one and as you can see it tapers up then drops off. They seem to want you to just brute force this piece until it finally clicks into place but for some hobbyists this might be much harder than it sounds. It took me 3 rhinos to realise that you could just pop it into place, having tried on the first 2 but giving up before shaving pieces down.
You can see in the second picture how the piece doesn’t line up and sticks out before trying to pop it into place.
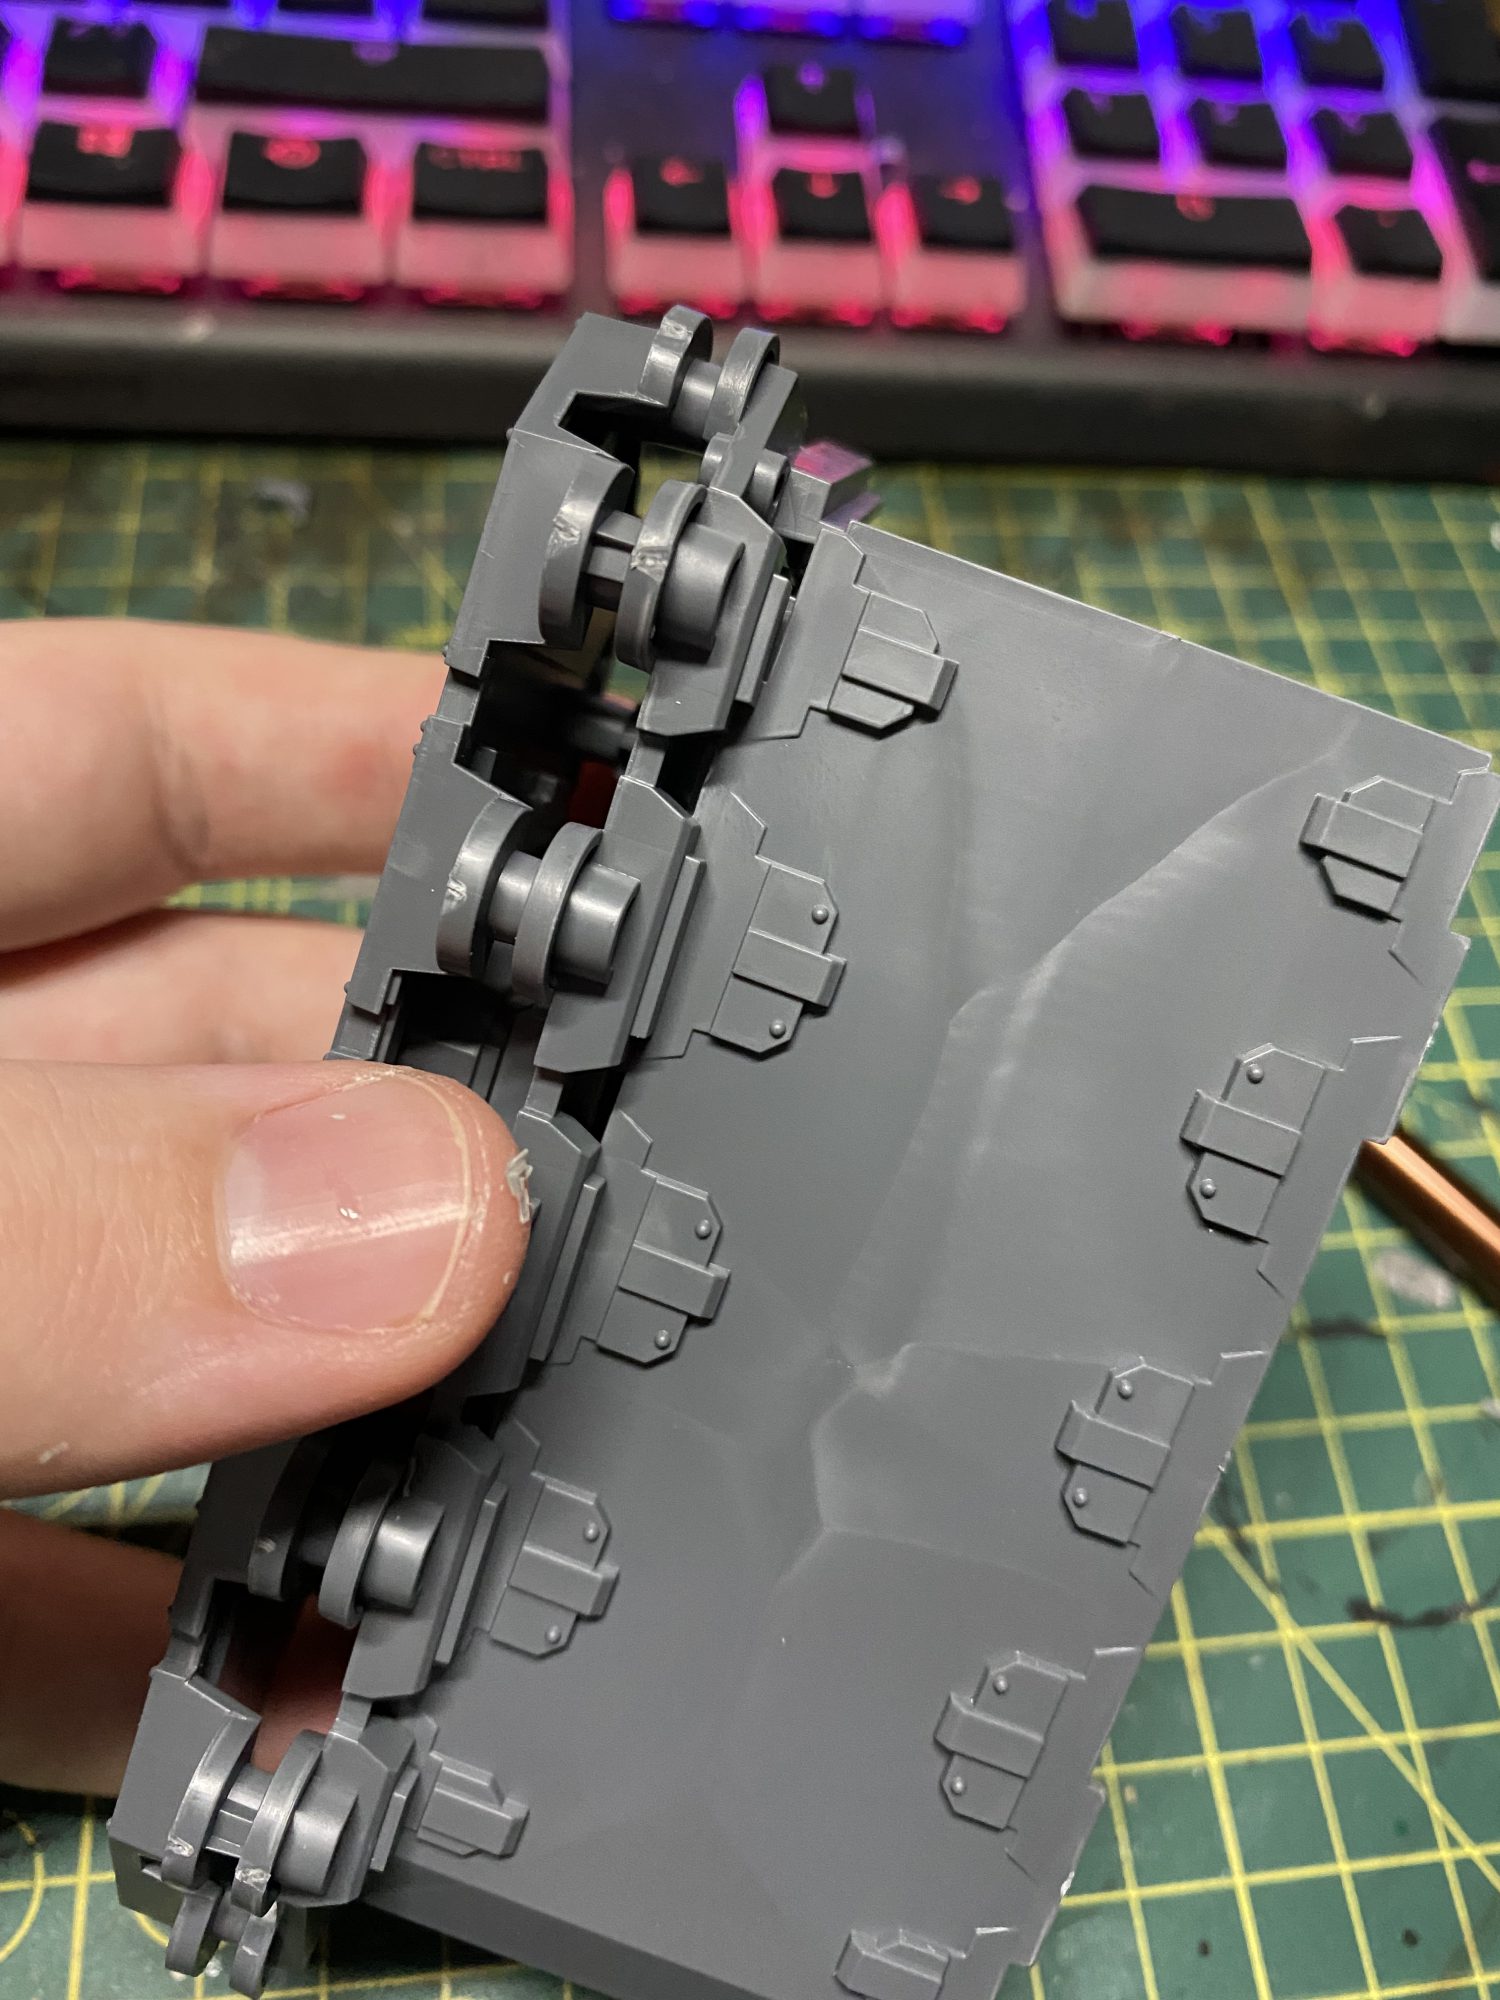
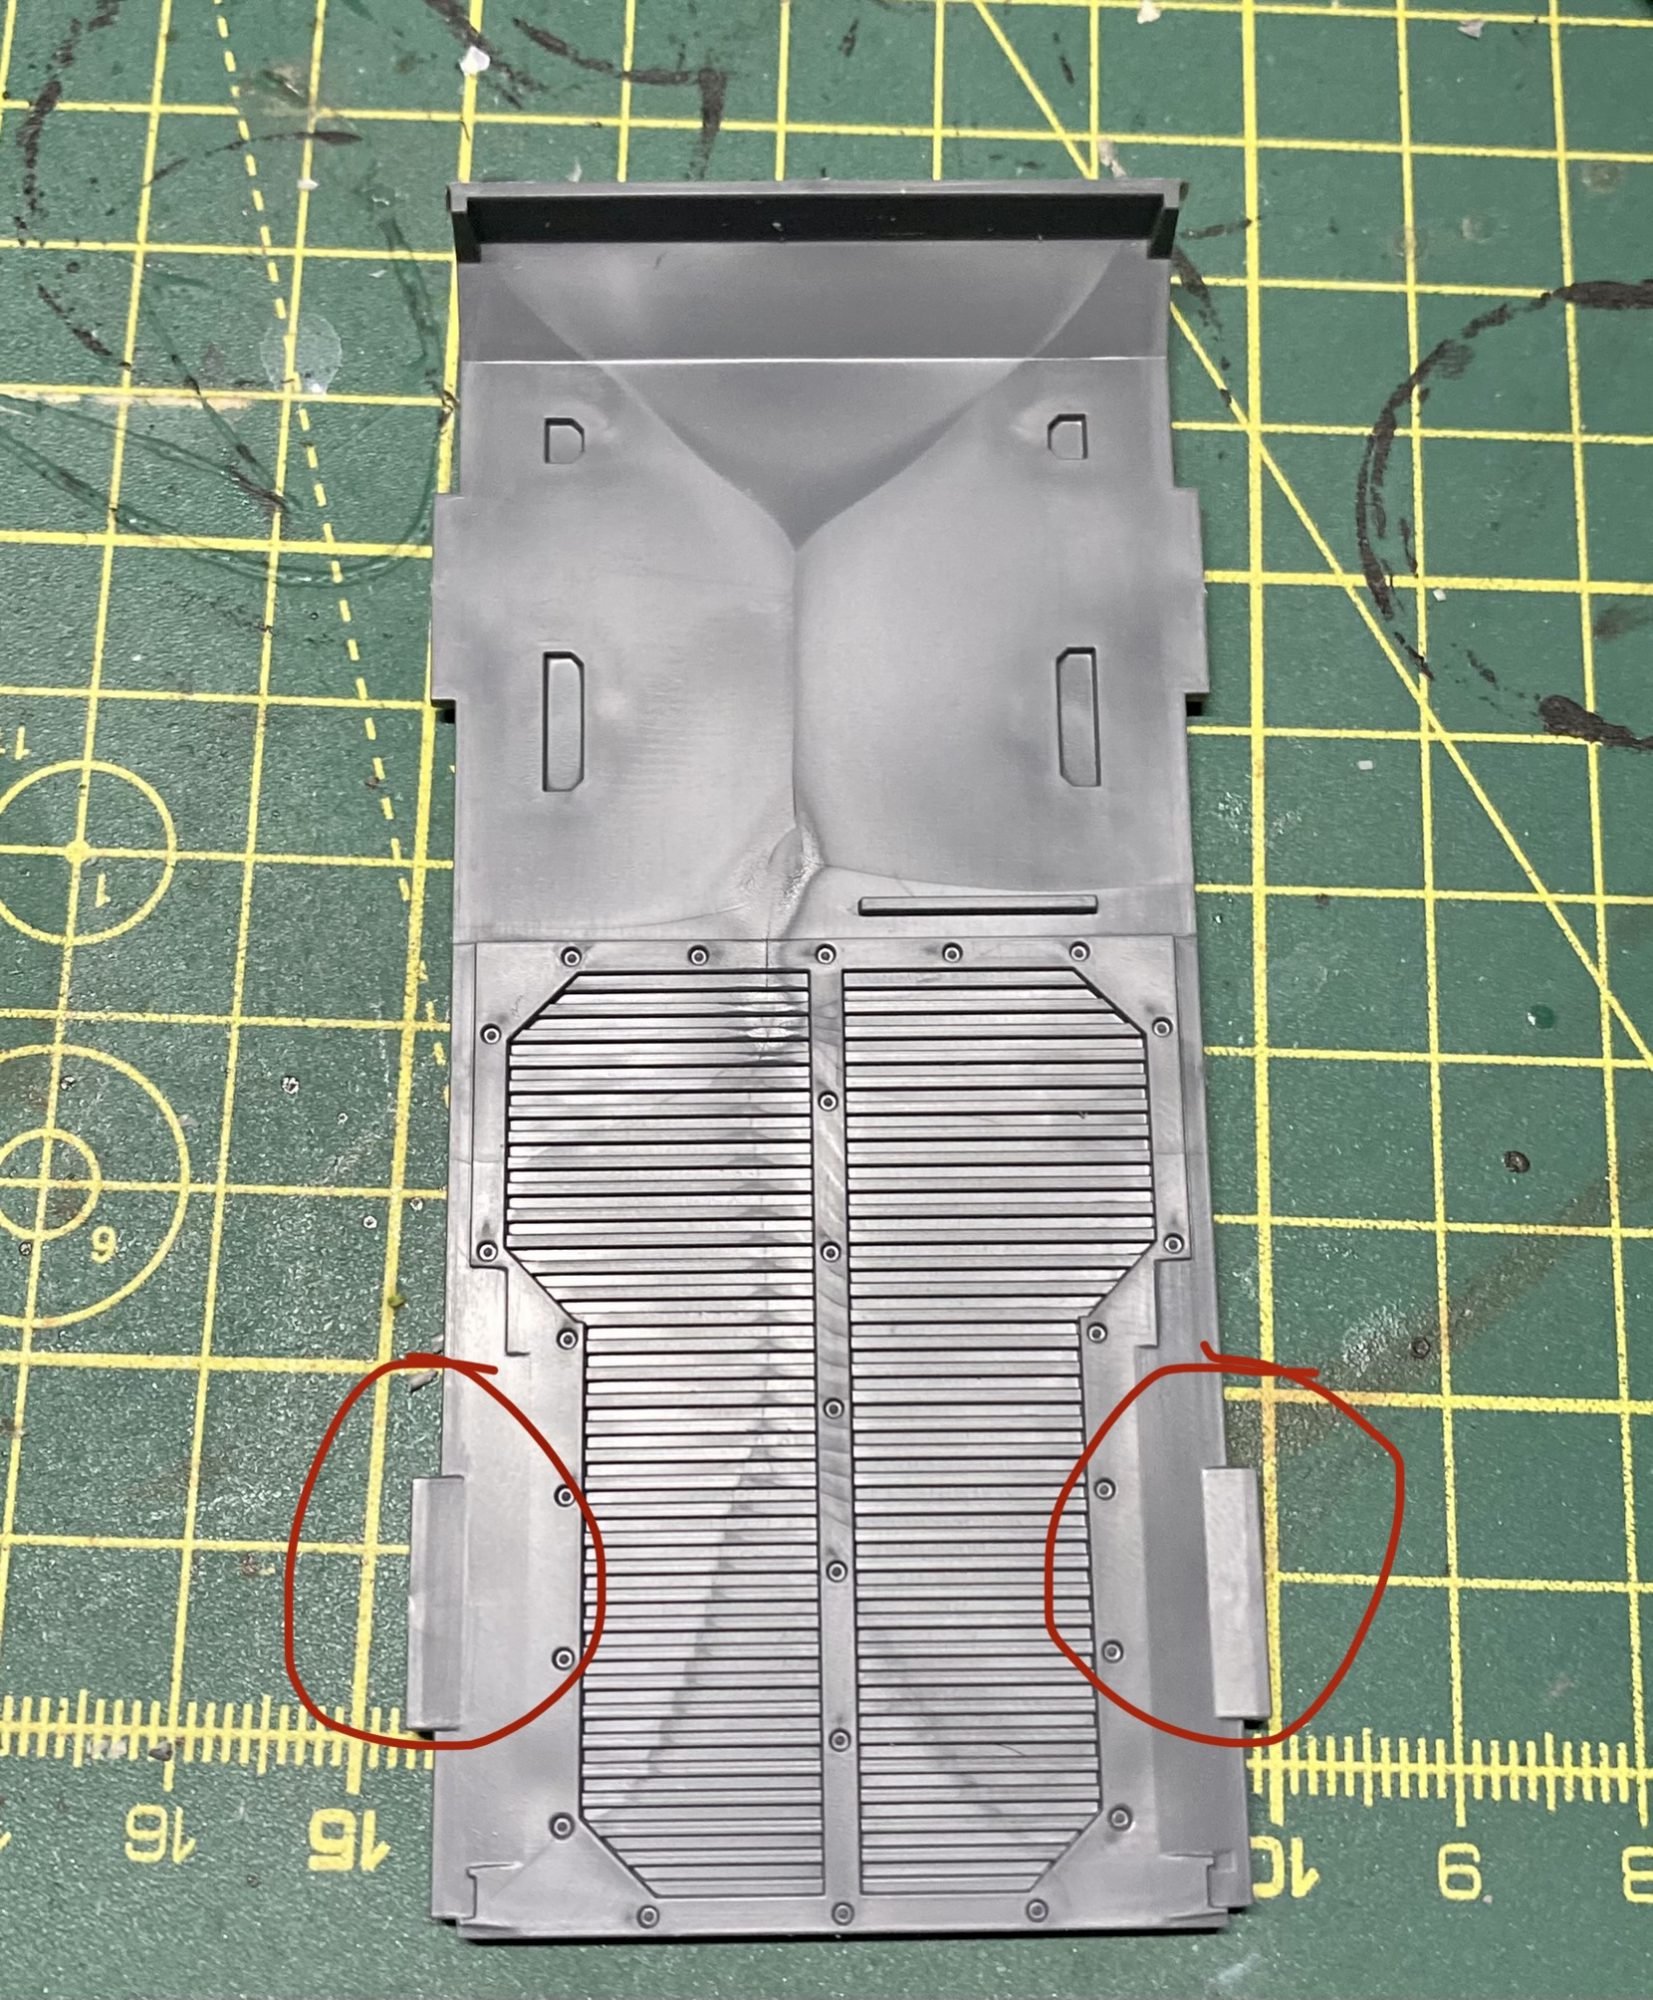
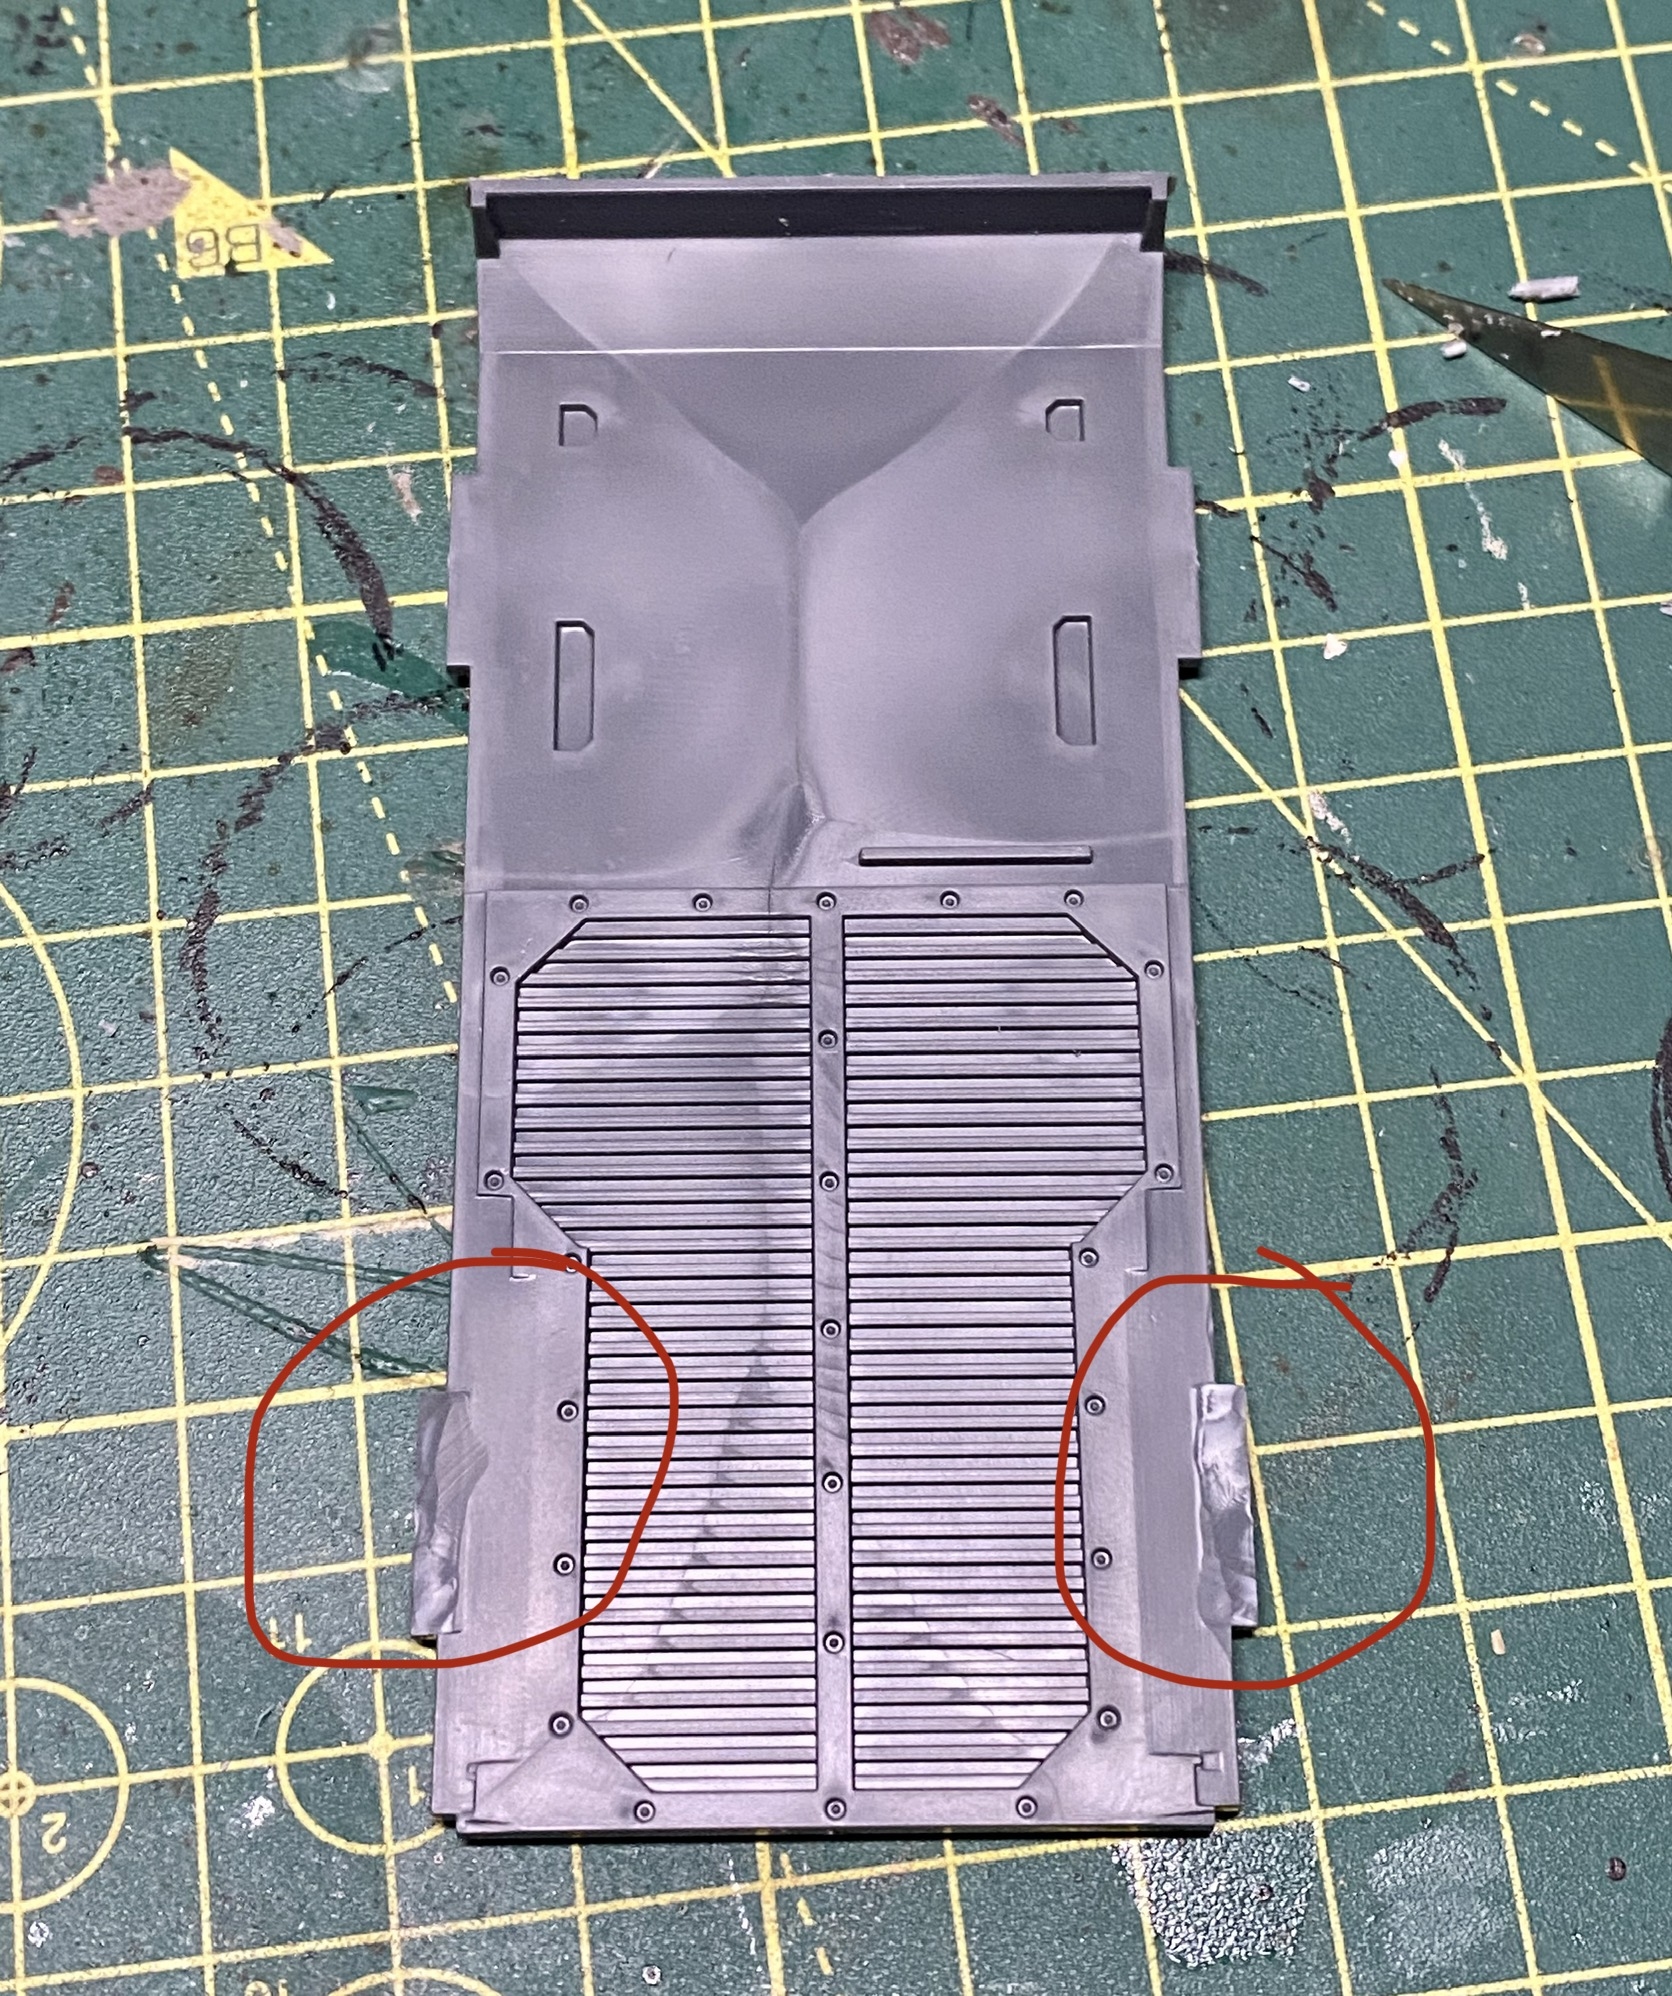
If you want to make this step easier for yourself or find you can’t get it to pop in then just use a fresh scalpel blade on your knife and (cutting away from you, please) shave the circled parts down to be flat with the rest of the flooring. You only need to do this on the rear pieces; the front ones slot in easily.
Once this is together put the sides and top on the rhino before using your rubber bands to keep this all together while your plastic cement sets for minimal seams and gaps to fill later on.
The Tracks
You can either glue on the tracks when the instructions tell you to (like me, because I’m lazy and will lose them if I don’t) or you can leave them off to be able to paint them separately. If you do want to leave the tracks off for painting it’ll be easiest to just leave them on the sprue and spray silver or black.
Just remember that if you do leave them off to paint separately you need to use super glue to attach them to the tank! Plastic glue will melt away the paint you’ve stuck on already and won’t work as a great adhesive.
The Weapons
These are all very easy to stick on and actually gives you some easy choice between different options without gluing or magnetising them together either. The pieces will sit somewhat loosely on the rhino but if you build the combi-bolter it always comes with on one hatch then the other you can swap between:
- Empty (closed or tank commander)
- Combi-weapon – whether that’s a second combi-bolter or a different combi weapon, this will have to be glued or magnetised though if you want different combi weapon options
- Havoc Launcher
- Pintle-mounted heavy bolter or multi-melta (with or without gunner)
Generally speaking though you want to keep your rhinos cheap and cheerful, not spending any unnecessary points on them and just using them as a transport for your troops to be delivered safely. While not technically a weapon, the dozer blade is something that I’ll never leave home without though so it doesn’t immobilise itself running over a rock turn 1.
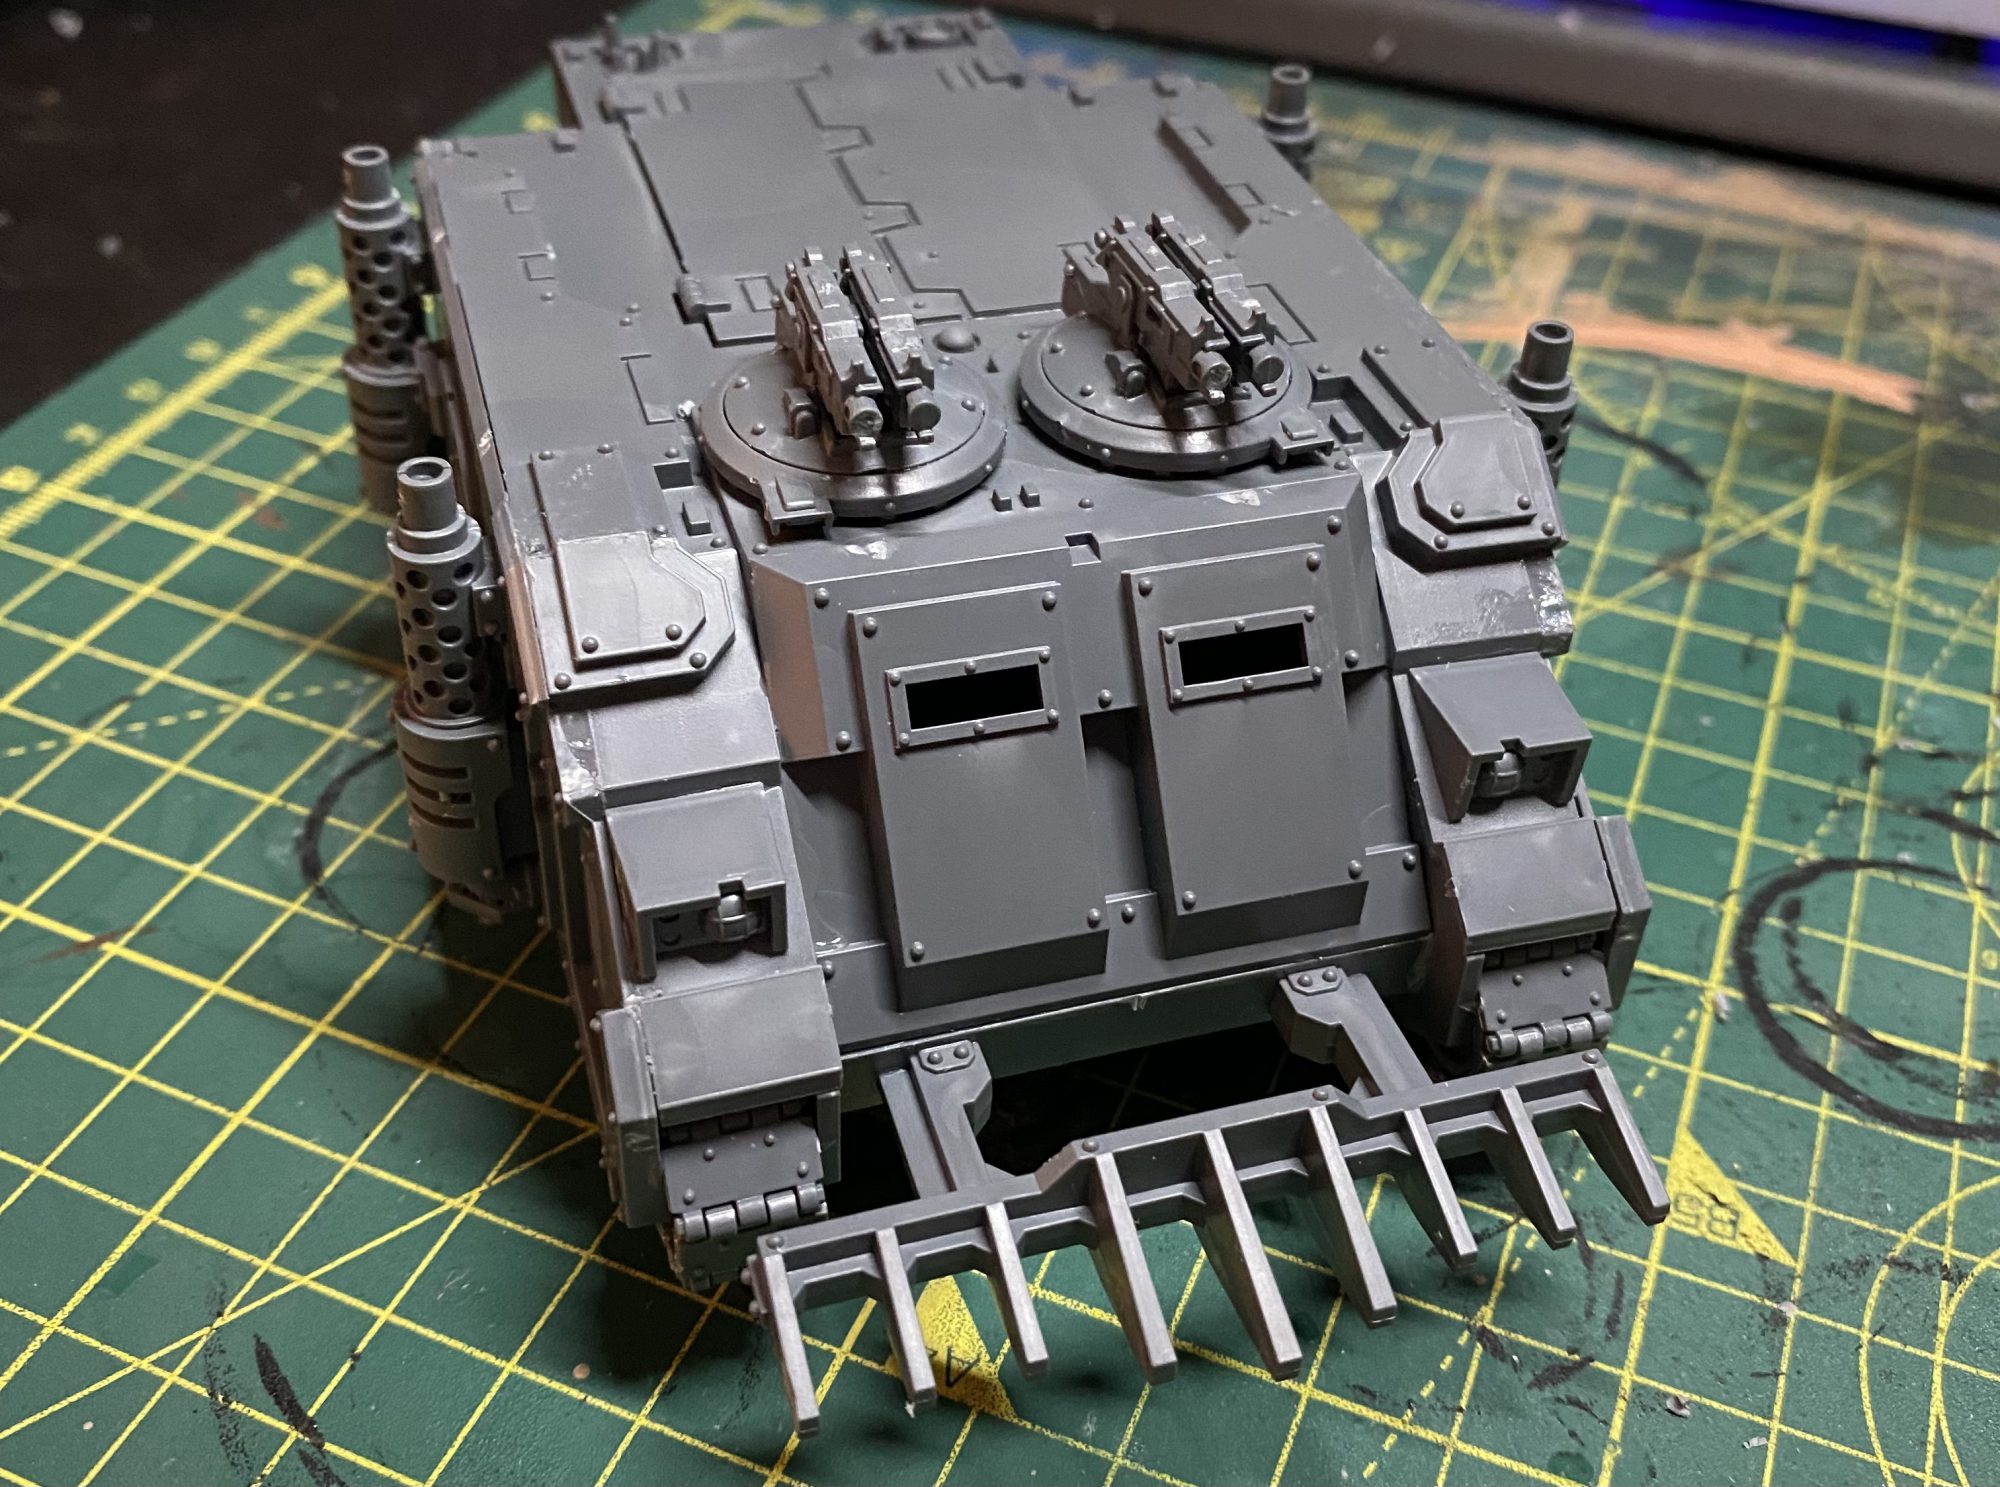
Ready for Paint
That’s pretty much it for this kit. Once all the glue is fully set go ahead and prime it up ready for whatever colours you’ll be painting it.
Have any questions or feedback? Drop us a note in the comments below or email us at contact@goonhammer.com.
