
In the Fabricator General, we talk about the finer points of construction, conversion, and hobby projects that require a bit more elbow grease and technical know-how. From adding shelves in your display case to building an army display board to making a wet palette, there’s on project too big or small for the Fabricator General. This week, we’re covering how to build a Forge World Legion Fellblade.
Welcome back to another episode of “Jack builds big resin kits.” I’m scaling down a bit from the reaver to what’s absolutely one of the coolest Space Marine tanks around, the fellblade. An upgraded baneblade chassis, the fellblade has a turret with two giant guns, a hull mounted demolisher cannon, and no fewer than 8 lascannons. A sweet rounded turret calls back to both the very earliest predator tanks and the more modern deimos pattern predator (another Forge World kit).
An older FW kit, this has characteristically terrible instructions and is a plastic/resin hybrid, where resin upgrade parts attach on a plastic hull frame. We’re going to work our way through building this, taking a look at any places to deviate from the provided instructions and any significant choices you might want to make.
Tools
- Clippers. While this is a large tank, none of the gates are particularly large. While some might be easier to do with a saw, I was able to clip through all of them.
- Mold line remover. I’m not sure exactly why, but I adore my mold line remover for resin kits. The flat side will scrape down fairly large areas extremely quickly, and the curved side is fantastic for eliminating mold slip on curved surfaces. I got a lot of use out of it on the main gun barrels.
- 5-minute epoxy. Superglue works fine for 99% of the tank, but you may want something with a little bit longer setting time while building the tracks. Some 5 minute epoxy is perfect for this.
- Your favorite putty. I filled gaps with superfine milliput, but you can use green stuff, procreate, or whatever your favorite putty is. You definitely need actual putty and not just liquid green stuff or any other thin filler, as there can be some big gaps.
- A hair dryer. Heat guns that go to low temperatures can work too, but I find both of these much easier than boiling water. You’re going to want to be able to reshape parts that you’re holding. A cheap hair dryer from the drug store to keep at my hobby desk has been one of my favorite investments.
The Hull
Starting right here at the very first step is where we need to deviate a bit from FWs instructions – if you fully assemble the plastic hull as they recommend you’ll be doing some serious heat work to get the front plate in. Build up the bottom and one side, then drop the front plate in before moving on.
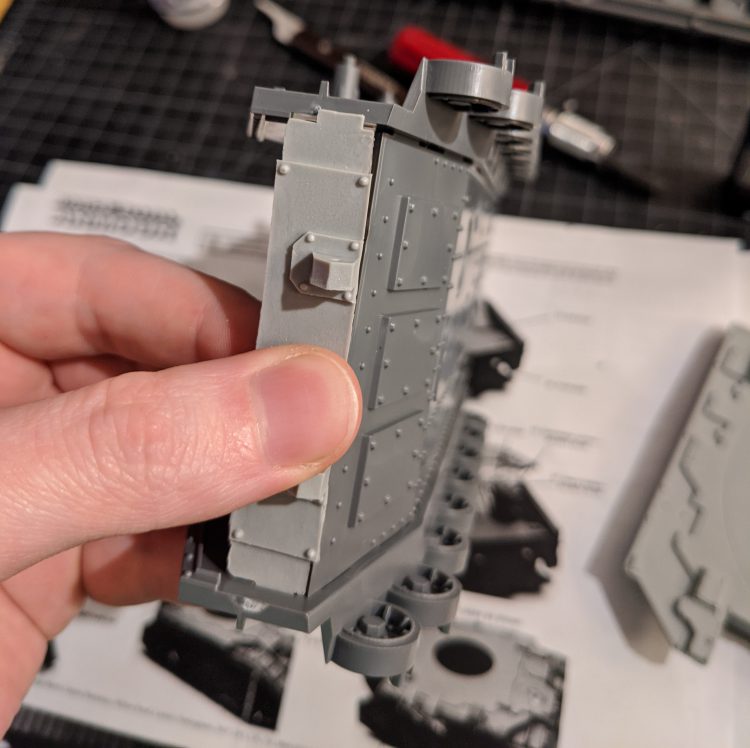
Test fit the front hull, top plate, and engine in the back before gluing any of them in. I needed to do some heat reshaping of the front hull to get it to line up with the top, though the engine fit nicely. I’m not gluing down the bolter cover, bolters, demolisher cannon, or gun plate at this step. I’m going to want to be able to paint the cannon and bolters separately from the tank, so I just test fit everything and used the hair dryer to make sure it fits, then set it aside to paint and prime separately.
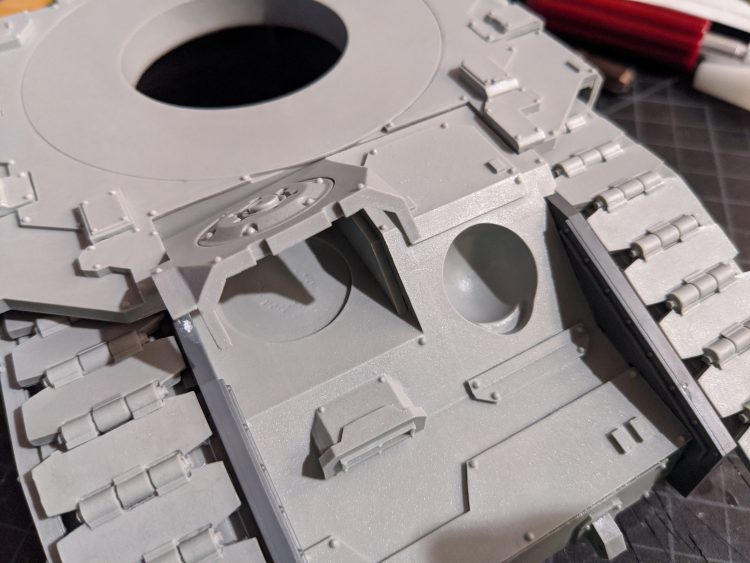
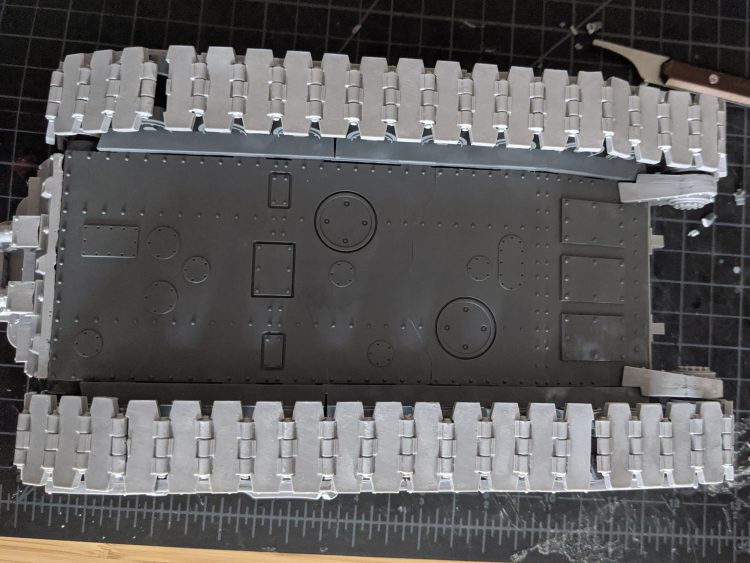
The last part of the hull assembly is to attach the left and right hull sections, and you want to ignore the instructions and not attach any of the track sections yet. You’ll be able to fit them all in just fine later, but getting your tracks nicely lined up will be a pain if the first few sections are already glued in. Use them to help make sure the hull sections line up nicely while assembling them, but do not glue the track down yet.
The Tracks
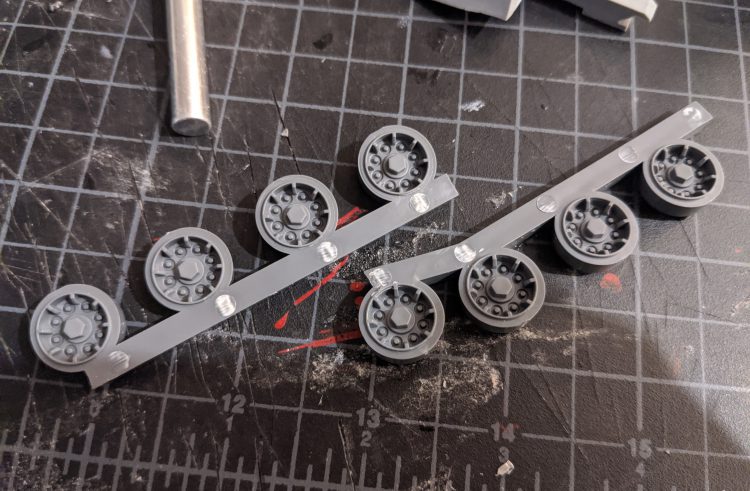
Here’s where we really deviate from the instructions. Get out all your track pieces, get them nice and flat, then don’t glue any of them in. Clip the lugs from the plastic wheels, and start dry fitting them. These end up needing to float a bit away from being glued all the way in – you’re gluing to the side of the hull and not all the way to the bottom of the slot. The most important thing is to make sure they align nicely to the matching wheels on the plastic hull frame you built earlier.
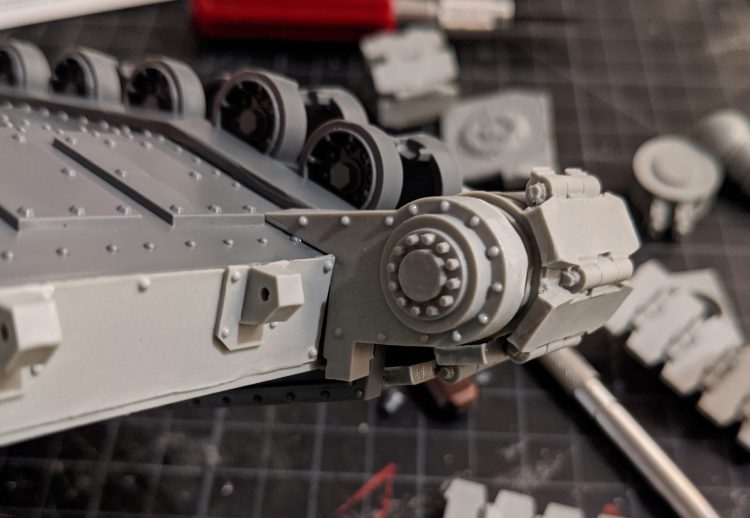
Next, take one side and dry fit every single piece. The front wheel and bracket assembly is the most complicated part, you need to make sure the wheel lines up nicely with the plastic road wheels and the bracket aligns with the hull as best as possible. Once this is in place, you can start placing the tracks from here. Pieces one and two (the upper front tracks) need to go in at the same time, and are a good time to use the epoxy. You may also want to glue tracks down at one end then use your hair dryer to help them lay flat.
This is a good time to think about whether you’re building this for gameplay or for display, and if you’re building for display if you maybe want to build an entire diorama that hides the bottom tracks. This entire assembly is fiendishly difficult to make exactly right, and you may end up with some gaps and misalignments despite your best efforts. If you’re really aiming for display quality you may want to watch this video, it’s quite helpful to have a second viewpoint. Either way, I think the very front and rear treads are the most important, and particularly for a gaming model you can get away with some gaps on the bottom.
Weaponry
The turret is straight forward (a total of 5 pieces, including cupola hatches), so we’re going to skip right past it and onto the quad lascannon sponsons. After you un-spaghetti the barrels, start out by assembling both halves of the weapons and attach the targeter to the top. This is all a lot easier if you’re not worried about being able to rotate them, but if you do want that movement be very careful while gluing and keep wiggling pivots around while things dry. Flipping over to the bottom, only glue the first power cable in at the gun connection, not the pivot point. We’ll be locking it down as we go, so there’s no reason to risk getting glue in there. With the first power cable in, glue the second one to the gun only, let it dry, then blast it with your hair dryer. The cables are nice and thin, so won’t take long to get flexible, at which point you can put a dab of glue on it and attach to the central hub, rotating it a bit around as needed so things line up.
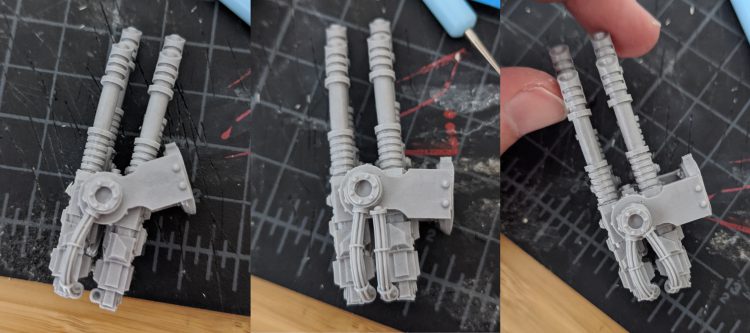
Glue the third power cable to just the bracket, not the gun at all, and everything is set up to be able to move around. Glue up the remaining part of the gun mount following the directions and your gun assembly is complete.
Subassemblies and Final Prep
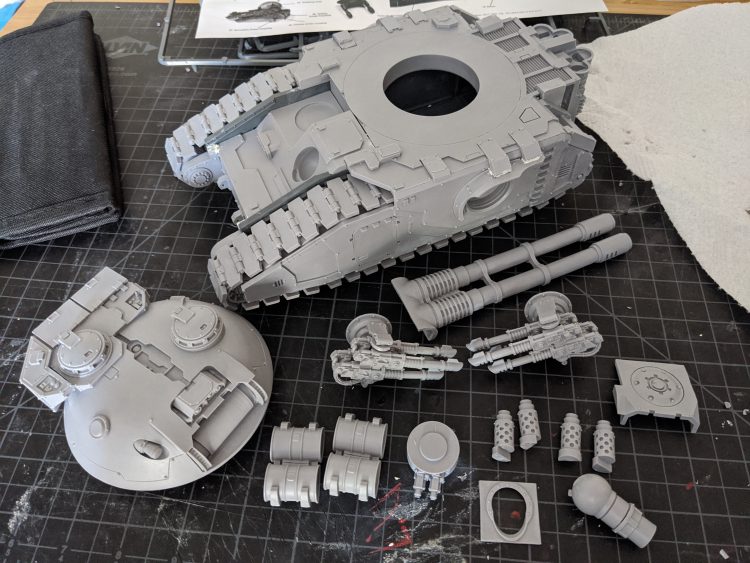
At this point we’ve got everything built out into the various assemblies I’m going to want for painting. I’ve kept all these parts loose as they’re substantially different materials than things they sit next to (or block another piece that I want to paint separately like the gun covers on the front hull. Ordinarily I’d keep tracks separate from a vehicle to paint them, but I really don’t think there’s any viable way to do so on this tank, they just take too much work to make fit. This is also where I do any gap filling that I skipped over earlier. It’s off to the spray booth now, so check back in a few weeks to see what the Imperial Fists can do to a tank!
And as always, if you have any questions or feedback, or want to show off photos of your own tanks, drop us a note in the comments below or email us at contact@goonhammer.com.
