
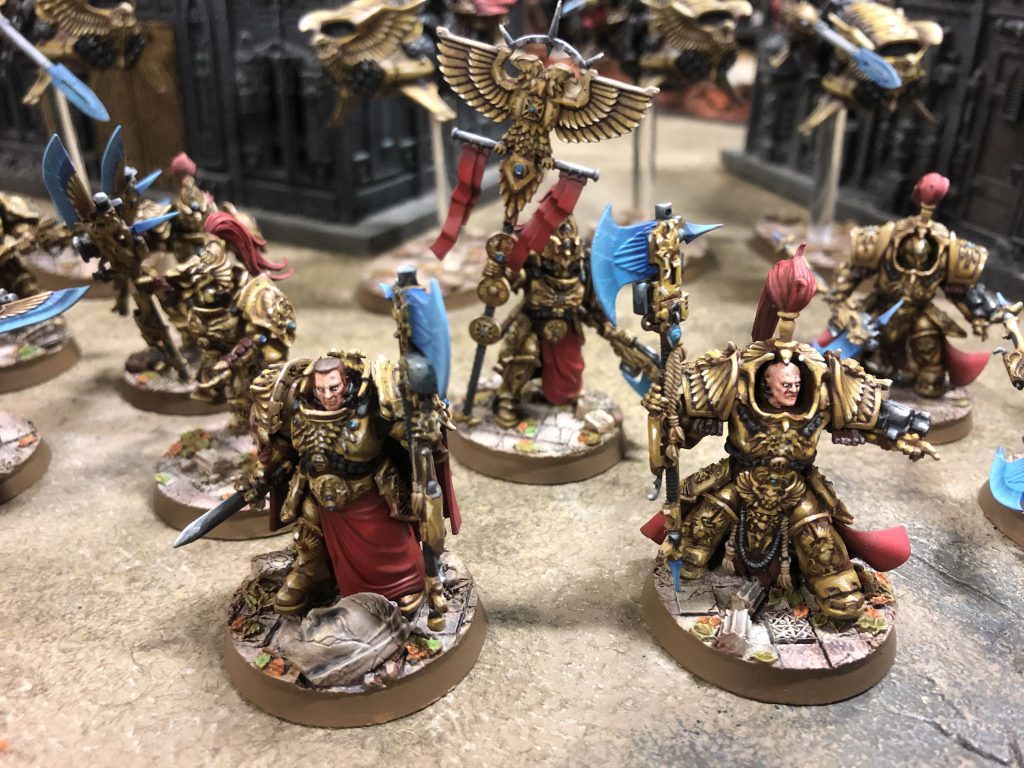
In our How to Paint Everything series, we take a look at different armies of the Warhammer universe, examine their history and heraldry, and look at several different methods for painting them. In this week’s article, we’re looking at the Emperor’s Brotherhood of Demigods, the Adeptus Custodes.
Table of Contents
Who Are The Adeptus Custodes?
Do you like gold? The Adeptus Custodes are the Emperor’s personal bodyguard and his greatest warriors. Each Custodian is a demigod in golden armor, wielding the Imperium’s most finely-wrought weapons, surpassing even the Space Marines in martial prowess and tactical acumen. Simply put: These guys are the best, of the best (of the best). Don’t let Space Marine or Grey Knight players tell you different!
The Adeptus Custodes, originally called the Legio Custodes, were the first of the Emperor’s genetically modified warriors, first seeing service during the Unification Wars on Terra, where they acted as personal bodyguards to the Emperor. Since their inception, the Custodes have always had access to the most advanced armor and finest weapons and technology in the Imperium, even above and beyond what was given to the space marine legions. Each Custodian stands a full head taller than an average space marine, and are still taller than newer primaris marines. Custodes are consequently much more powerful than astartes and created through a process similar to that of the Thunder Warriors, but without the genetic instability and bouts of insanity and bloodlust that plagued the latter.
Although their numbers were greatly reduced during the Battle of the Webway during the Horus Heresy, the Legio Custodes now once again numbers ten thousand warriors, each dedicated to the protection of Terra. Since the return of Roboute Guilliman and his ascension to the role of Imperial Regent, they have lifted their self-imposed Edict of Restraint and once again begun crusading across the Imperium to bring swift death to the foes of mankind. They played a pivotal role in Guilliman’s battle against Magnus and the Thousand Sons on Luna, and in the defense of the Imperial palace. Such is their might that the Administratum has never recorded a single loss for the a battle that the Custodes have participated in.
Where to Read More
Codex: Adeptus Custodes is full of insight into the Emperor’s glorious bananas, highlighting their nature, organization and secret wars, but if you want to read more, here are a few books we’d suggest that dive into greater detail on the Custodes.
- Watchers of the Throne: The Emperor’s Legion by Chris Wraight is the best place to get started.
- Blood Games by Dan Abnett is a short story set within the Emperor’s Palace and what Custodes do when they’re not fighting.
- The Master of Mankind by Aaron Dembski-Bowden takes place during the Horus Heresy and gives you insight into the Emperor himself (and his finest creations).
Painting Adeptus Custodes
There’s more to painting the Adeptus Custodes than just spraying your models down with Retributor Armor spray – though that’s certainly an option if you want to save time. We’ll look at several different methods for painting them here.
Crab-Stuffed Mushroom’s Method
Hobby Tip! Retributor Gold Spray can be tricky to work with as the contents of the can may not mix well. Shake the can thoroughly (for at least a minute) and do a test spray on something other than your model. If the spray looks ‘watery’ or transparent, it didn’t mix well. Also note that Retributor Gold Spray is a primer and does not need to be sprayed over black. You will only obscure detail on your model.
Battle Ready
- Basecoat the model with Retributor Gold Spray.
- Wash the model with Reikland Fleshshade Gloss.
- Wash the model with a 50/50 mix of Lahmian Medium and Druchii Violet.
- Drybrush the model with Golden Griffon.
- Basecoat the metal parts with Leadbelcher.
- Wash the Leadbelcher parts with Nuln Oil Gloss.
- Basecoat the leather with Doombull Brown.
- Wash the leather with Agrax Earthshade.
- Basecoat the jewels Thousand Sons Blue.
- Basecoat the power weapon Kantor Blue.
- Basecoat the gun casing Abaddon Black.
Parade Ready
- Spot Highlight the armor (gold and leadbelcher parts) with Stormhost Silver (try to ‘dot’ the edges of the armor only – less is more)!
- (Optional) Paint the armor with Satin Varnish to give it a nice sheen (pure gloss varnish is too shiny)!
Painting Power Weapons
Create smooth layers on the power weapon by mixing your highlights with Lahmian Medium:
- Basecoat the blade with Kantor Blue
- Apply the 1st highlight with Sotek Green (mixed with Lahmian Medium).
- Apply the 2nd highlight with Temple Guard Blue (mixed with Lahmian Medium)
- Apply the 3rd highlight with Baharroth Blue (mixed with Lahmian Medium)
- (Optional) Wash the blade with a 4:1 mix of Contrast Medium to Akhelian Green
- Re-apply the layers above if the wash was too dark or you need to “clean” things up.
- Final Spot Highlight of White to the tip of the sword only.
Painting Jewels
Tutorial assumes that light is reflecting on the model from the top-left.
- Basecoat the jewels with Thousand Sons Blue
- Highlight almost the entire jewel with Ahriman Blue (leave some of the previous layer showing at the edges).
- Highlight (“darklight?”) the top-left of the jewel with Incubi Darkness
- Highlight the bottom-right of the jewel with Temple Guard Blue
- Highlight the bottom-right of the jewel with a smaller layer of Baharroth Blue
- Final highlight the bottom-right of the jewel with an even smaller layer of Baharroth Blue mixed with White.
- Apply a dot of White to the top-left of the jewel (the part painted with Incubi Darkness). This should be a literal dot. Don’t worry if you mess up: Re-paint the area with Incubi Darkness and try again!
- (Optional) Paint the entire jewel with a light layer of ‘Ardcoat (gloss varnish) to make it shine!
Urban / Cityfight Bases

- Basecoat the base with Abaddon Black
- Roughbrush (heavy / sloppy drybrush) the base with Doombull Brown
- Drybrush the base with Dark Reaper
- Drybrush the base slightly less with Thunderhawk Blue
- Lightly Drybrush the base with Administratum Grey
- (Optional) Lightly Drybrush parts (not all) of the base with Screaming Skull. Focus on edges.
The trick to multiple drybrushes is to apply less than you did with the previous layer: Focus on smaller areas and leave some of the previous layer showing on different parts of the base – or use less paint / pressure on the brush. Apply successive drybrushes sporadically to create a sense of texture – or focus on the “edges” with each drybrush (going from dark to light).
Painting Skin
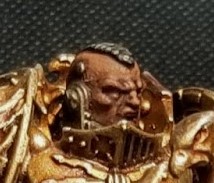
I utililzed tips found in How to Paint Everything: Human Skin
- Basecoat the skin with Bloodreaver Flesh.
- Wash the skin with Druchii Violet.
- Re-apply Bloodreaver Flesh (ignore the recesses).
- Highlight the forehead, eyebrows, nose, cheeks and upper lip with Knight-Questor Flesh.
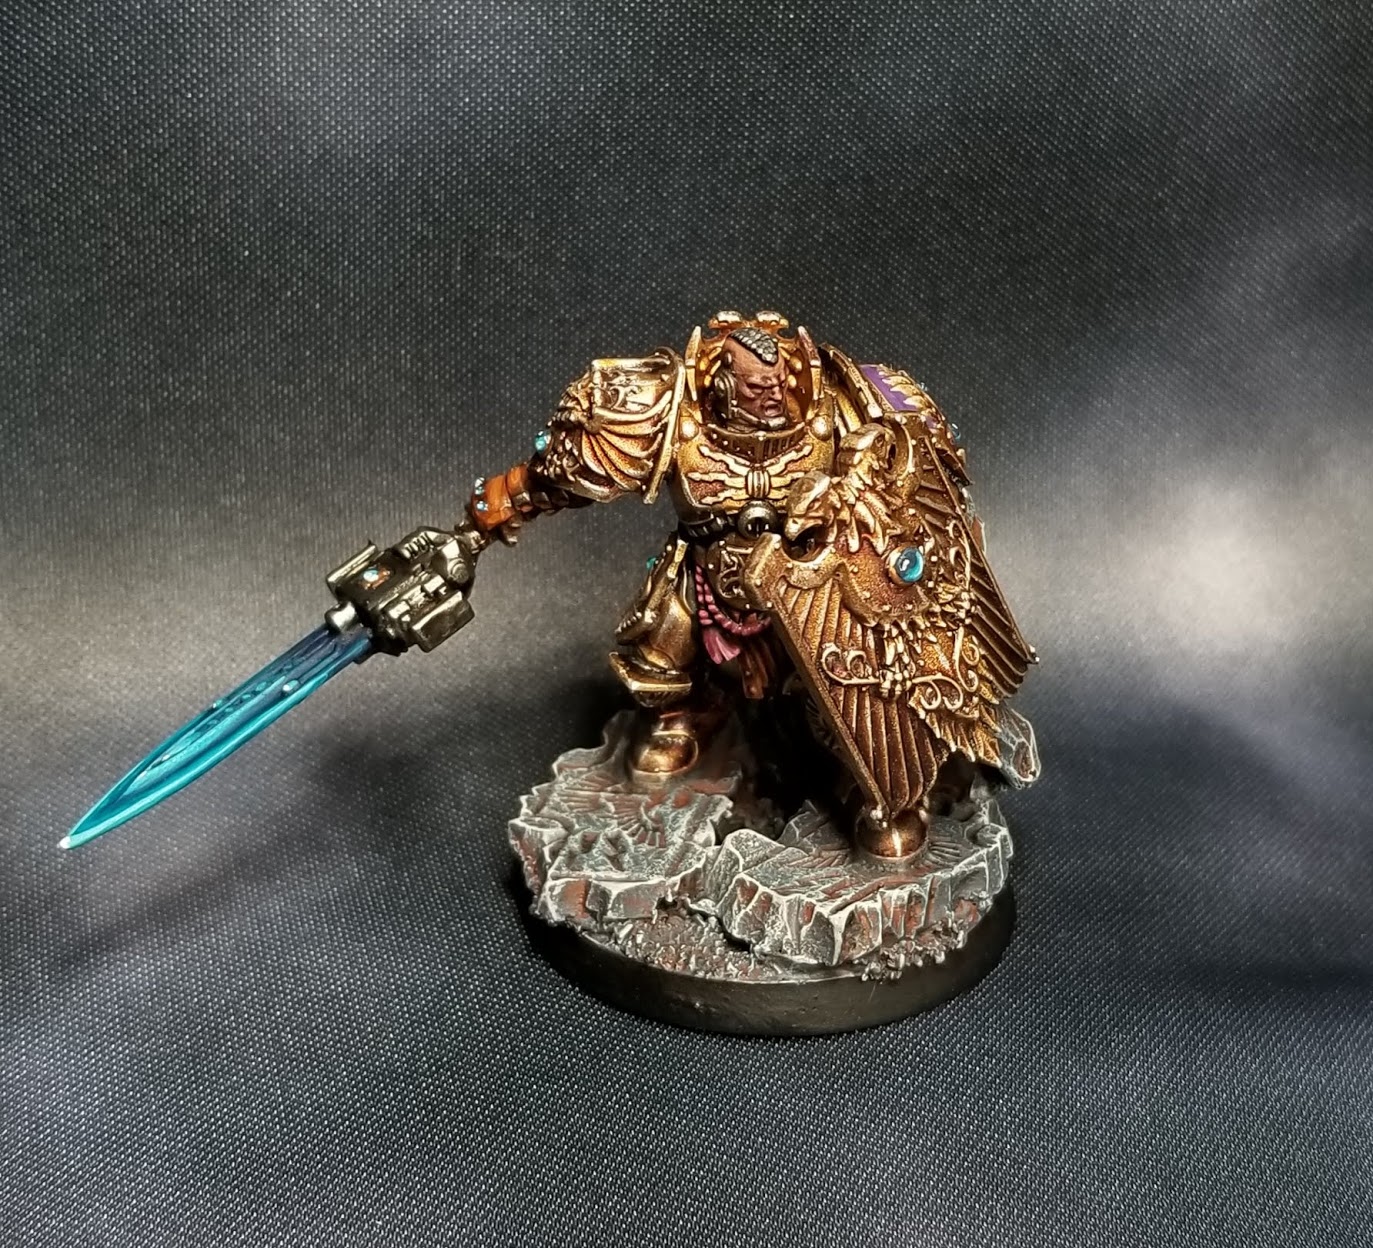
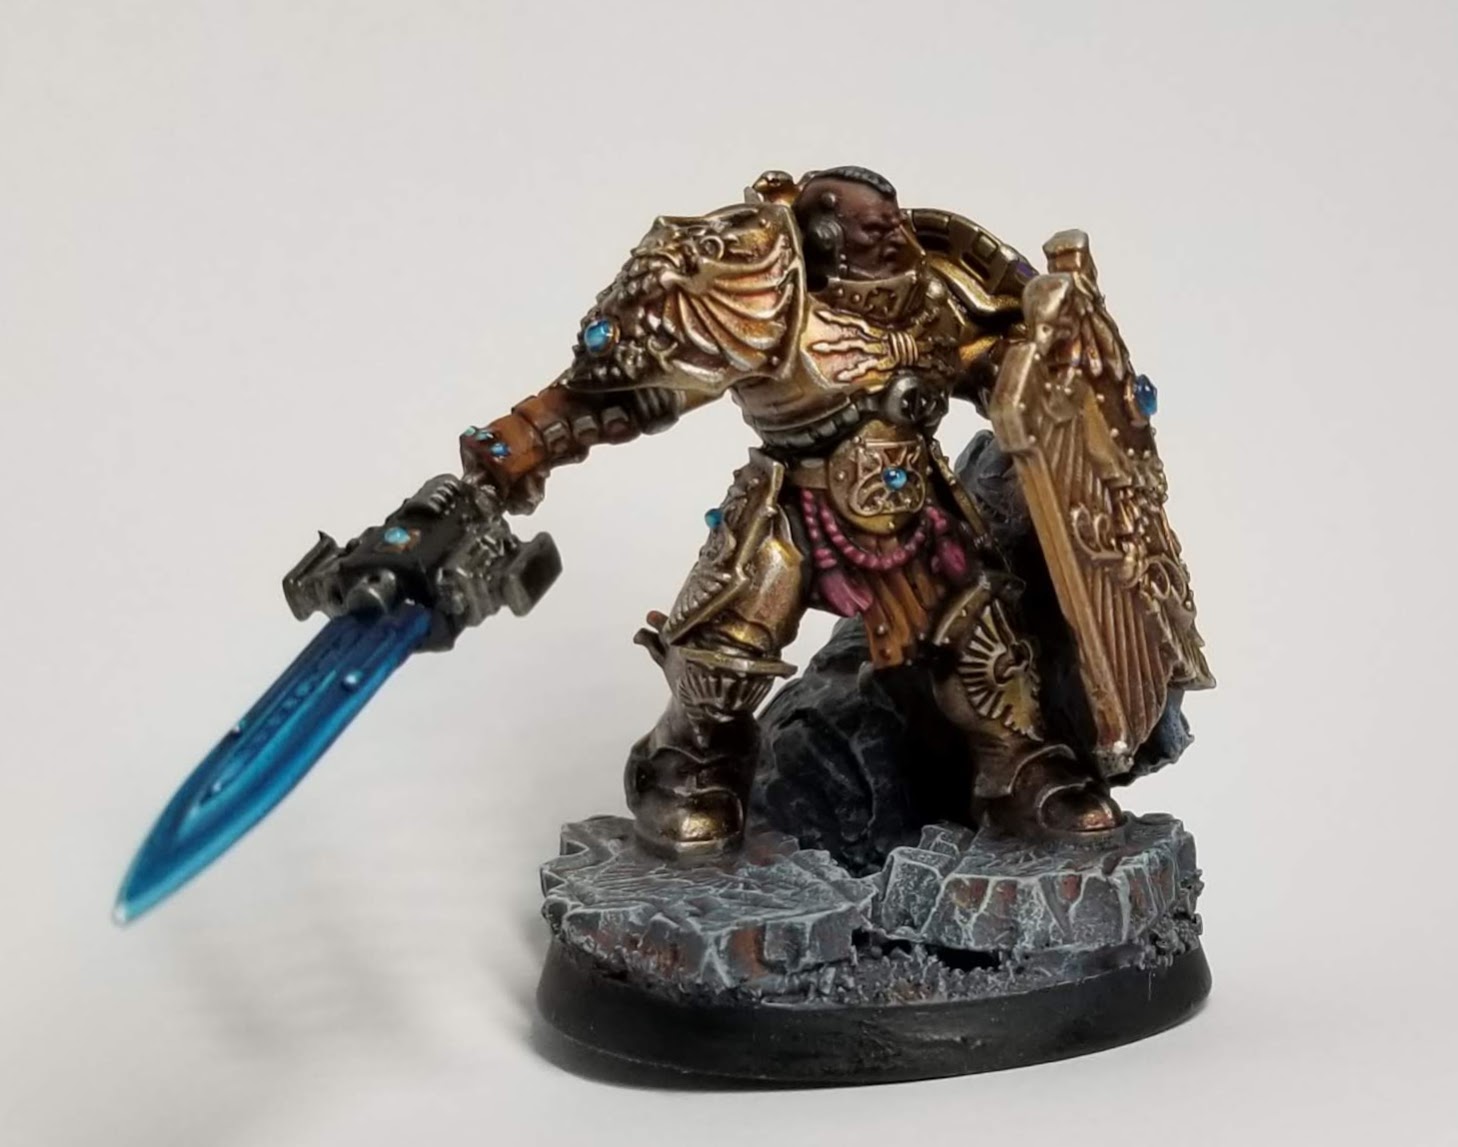
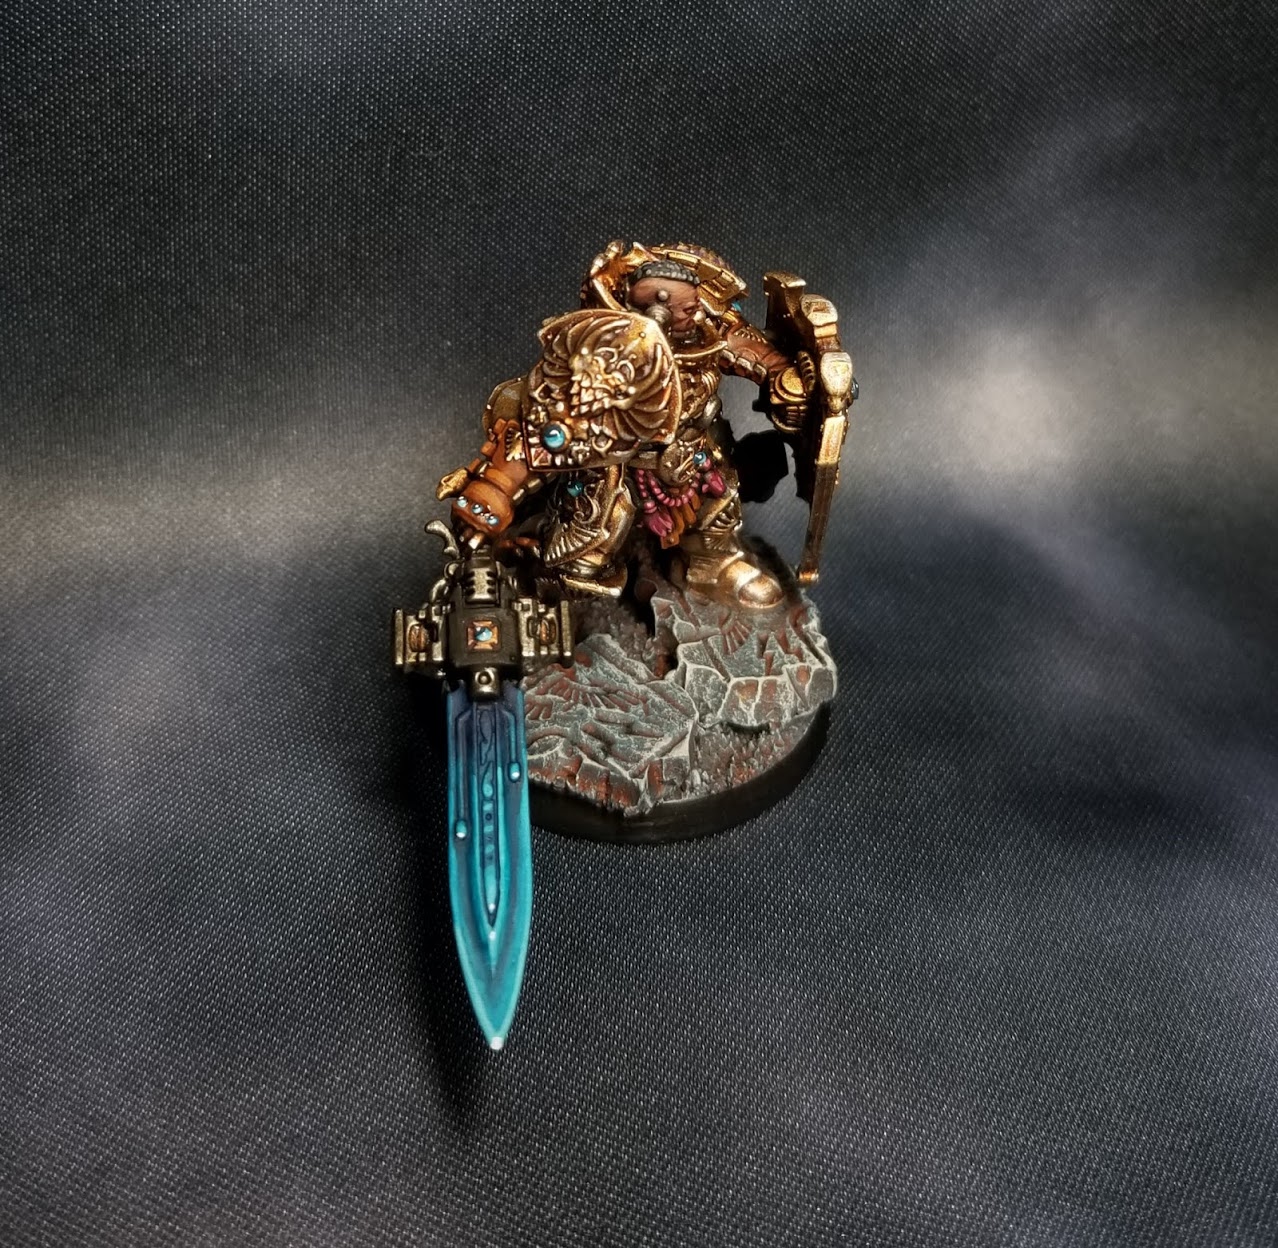
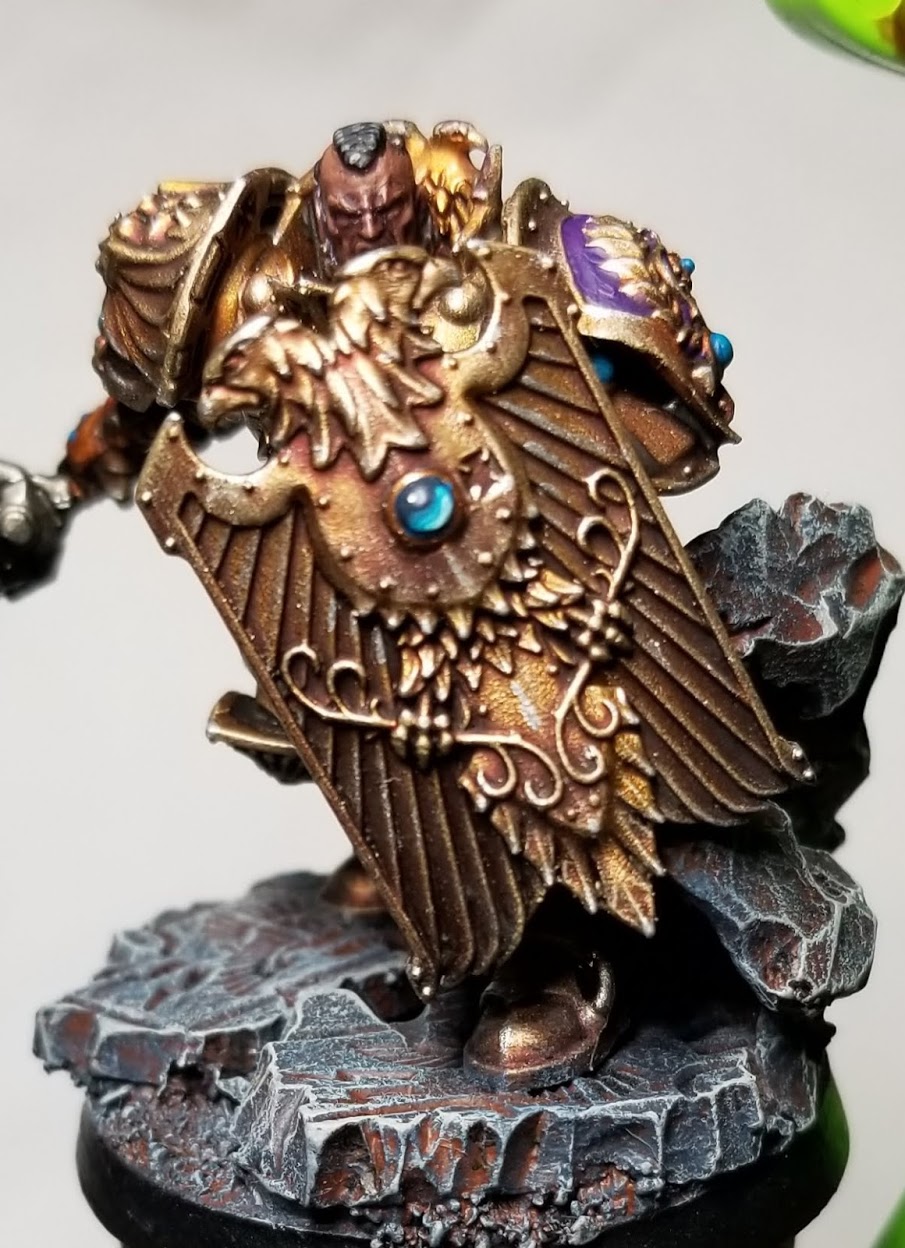
Evan “Felime” Siefring’s Method
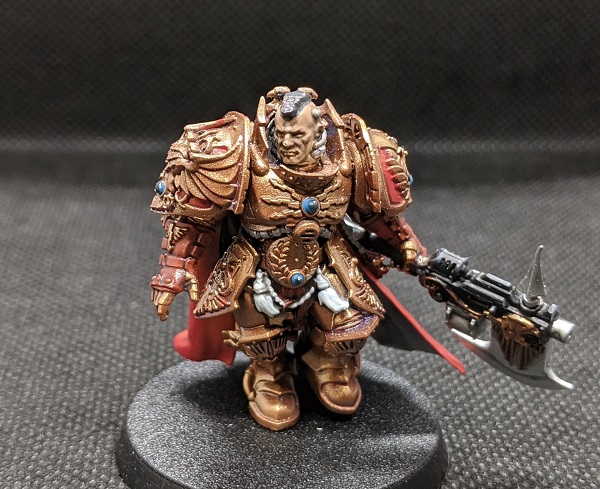
So, my Custodes area little bit more basic than the rest here, but honestly that’s one of the biggest strengths of Custodes in my mind. They look amazing with a fairly basic paintjob. As is my usual brand, I will be presenting the lazy way to paint models that still look pretty good on the tabletop.
For Caracalla, my shield captain here, it is very important to note that I painted the cape separately, and glued it on after I was done. This entire process is a huge pain in the butt otherwise. The head was also painted separately.
Step 1: The gold
Everyone has their own secret sauce for the gold on their Custodes. I wanted to go for a slightly more antiqued look from the usual bright retributor armor color. First, I airbrushed the entire model with Vallejo Game Color Hammered Copper, then did a zenithal highlight of Vallejo Model Air Gold. For those without an airbrush, you could easily paint the model in Hammered Copper and drybrush a gold over top. If you’re working with GW Paints, I’d recommend Screaming Bell or Brass Scorpion, then a drybrush of Liberator Gold or Golden Griffon.
The next step is the real secret sauce. I created a reasonably dilute wash with a mix of Golden High Flow Acrylics Sepia (pretty much a more concentrated Agrax Earthshade), Golden High Flow Acrylics Dioxazine Purple, and the product formerly known as Future Floor Polish (Now Pledge Floor Care Finish, unless they’ve changed it again.) I wash the entire model in this color, removing excess where it pools too much. If you are working with Games Workshop paints, a mix of Druchii Violet, Agrax Earthshade and water/lahmian medium will work just fine. You will, however, be spending a lot more money to wash an entire army of Custodes using this method. At this point the gold is complete. It’s simple, but has a nice rich depth and purplish warmth to it.
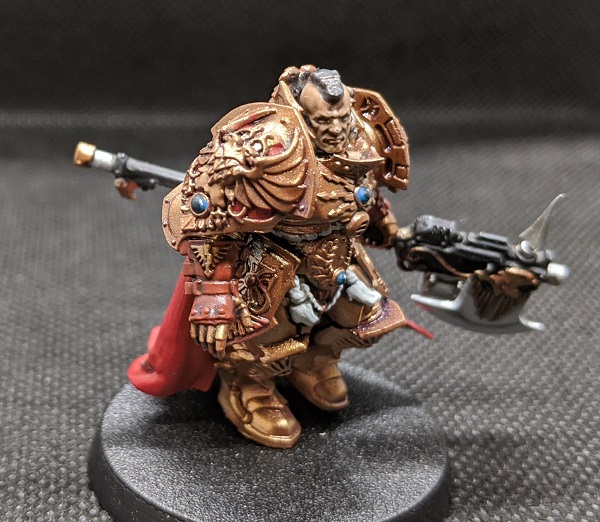
Step 2: Weapons and Steel Accents
The weapons are quite basic. I paint the entire weapon, EXCEPT for the large gold accents (Eagle, butt of the weapon, etc. The little filligree is hard to paint around, so paint that black too.) The black was then highlighted with Eshin Grey (Badly.) I then redid the filligree with my highlight gold color (VMA Gold in my case.) I then painted the steel portions with VMC Steel, an excellent paint for bright steel colors if you’re extremely lazy, as it covers in one coat. At this point I also painted the steel cables and vents with the same color. All of the steel got a nuln oil wash to finish it up.
Step 3: Reds
I went with red for the shoulder pad insets. For your conehead custodes, or any red cloaks, I do them in the same way. My process is pretty simple. I mix VMC Flat Red with black for by base color, highlight with VMC Flat Red, and then pick out deep shades with nuln oil. For the shoulders I did a dilute base color so it would flow more easily into the crevices, neatened up and removed any transparency in the center with the highlight, and covered up as many messy bits in the crevices as I could with the nuln oil.
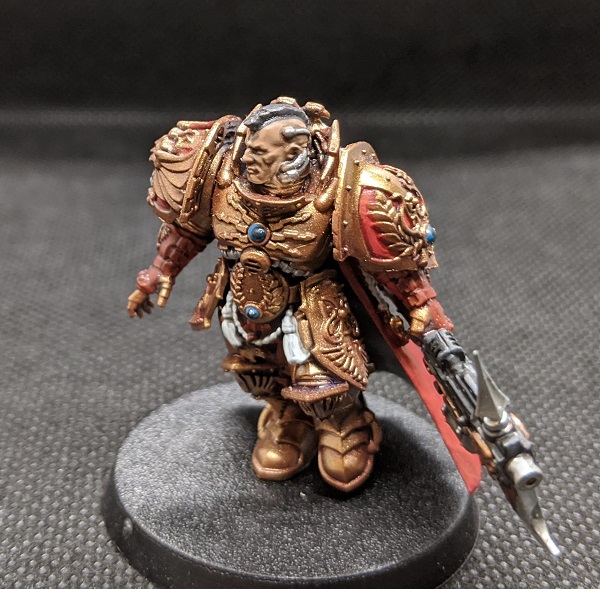
Step 4: Skin
It helps to paint your heads separately no matter what you do, but this is especially important for your skin, because you don’t want to get flesh tones on your nice finished armor color. For the flesh tones, I wanted something a bit greyer and more inhuman than your standard Cadian Fleshtone. I go into more detail in the HTPE: Human Skin article, but for Caracalla, the skin is VGA Dwarf Skin mixed with a mid/slightly dark grey. To highlight, I mixed in more of the dwarf skin, though the entire color range I used has a good proportion of grey in it. Instead of a flesh wash, I used diluted nuln oil to wash the skin.
Step 5: Leather
There is a lot more of this on your jetbikes. Here only the gauntlets are leather. I used VMC Cavalry brown, making sure to avoid the red cloth on the underside of his forearms and the gold detailing. I then washed the leather with Agrax Earthshade.
Step 6: Accents and Finishing Touches
Caracalla has more accents than most custodes, but I’ll go through an abbreviated method for all of them:
White Cords: VGC Wolf Grey highlighted with Ulthuan Grey
Green Laurels: VGA Goblin Green mixed with black, then highlighted with pure goblin green
Parchment: VMA Sand (Ivory) washed with Agrax Earthshade, then highlighted again with VMA Sand (Ivory) again.
Gems: VMC Turqoise Mixed with black, highlighting with a mix of more and more turqoise towards one edge of the gem. A little dot of white in the opposite corner to indicate a reflection.
And, with that and a coat of satin varnish, I call my custodes done. There are a lot more steps for the extra shield captain details here, but the basic custodes infantry go quite quickly. Most of the steps go fairly quickly, and the worst part in my opinion is carefully avoiding all the finished gold details while painting the weapons black. I hope this can help some of you get some custodes off your painting table and onto the battlefield where they belong.
Jack “BenBooley” Hunter’s Method
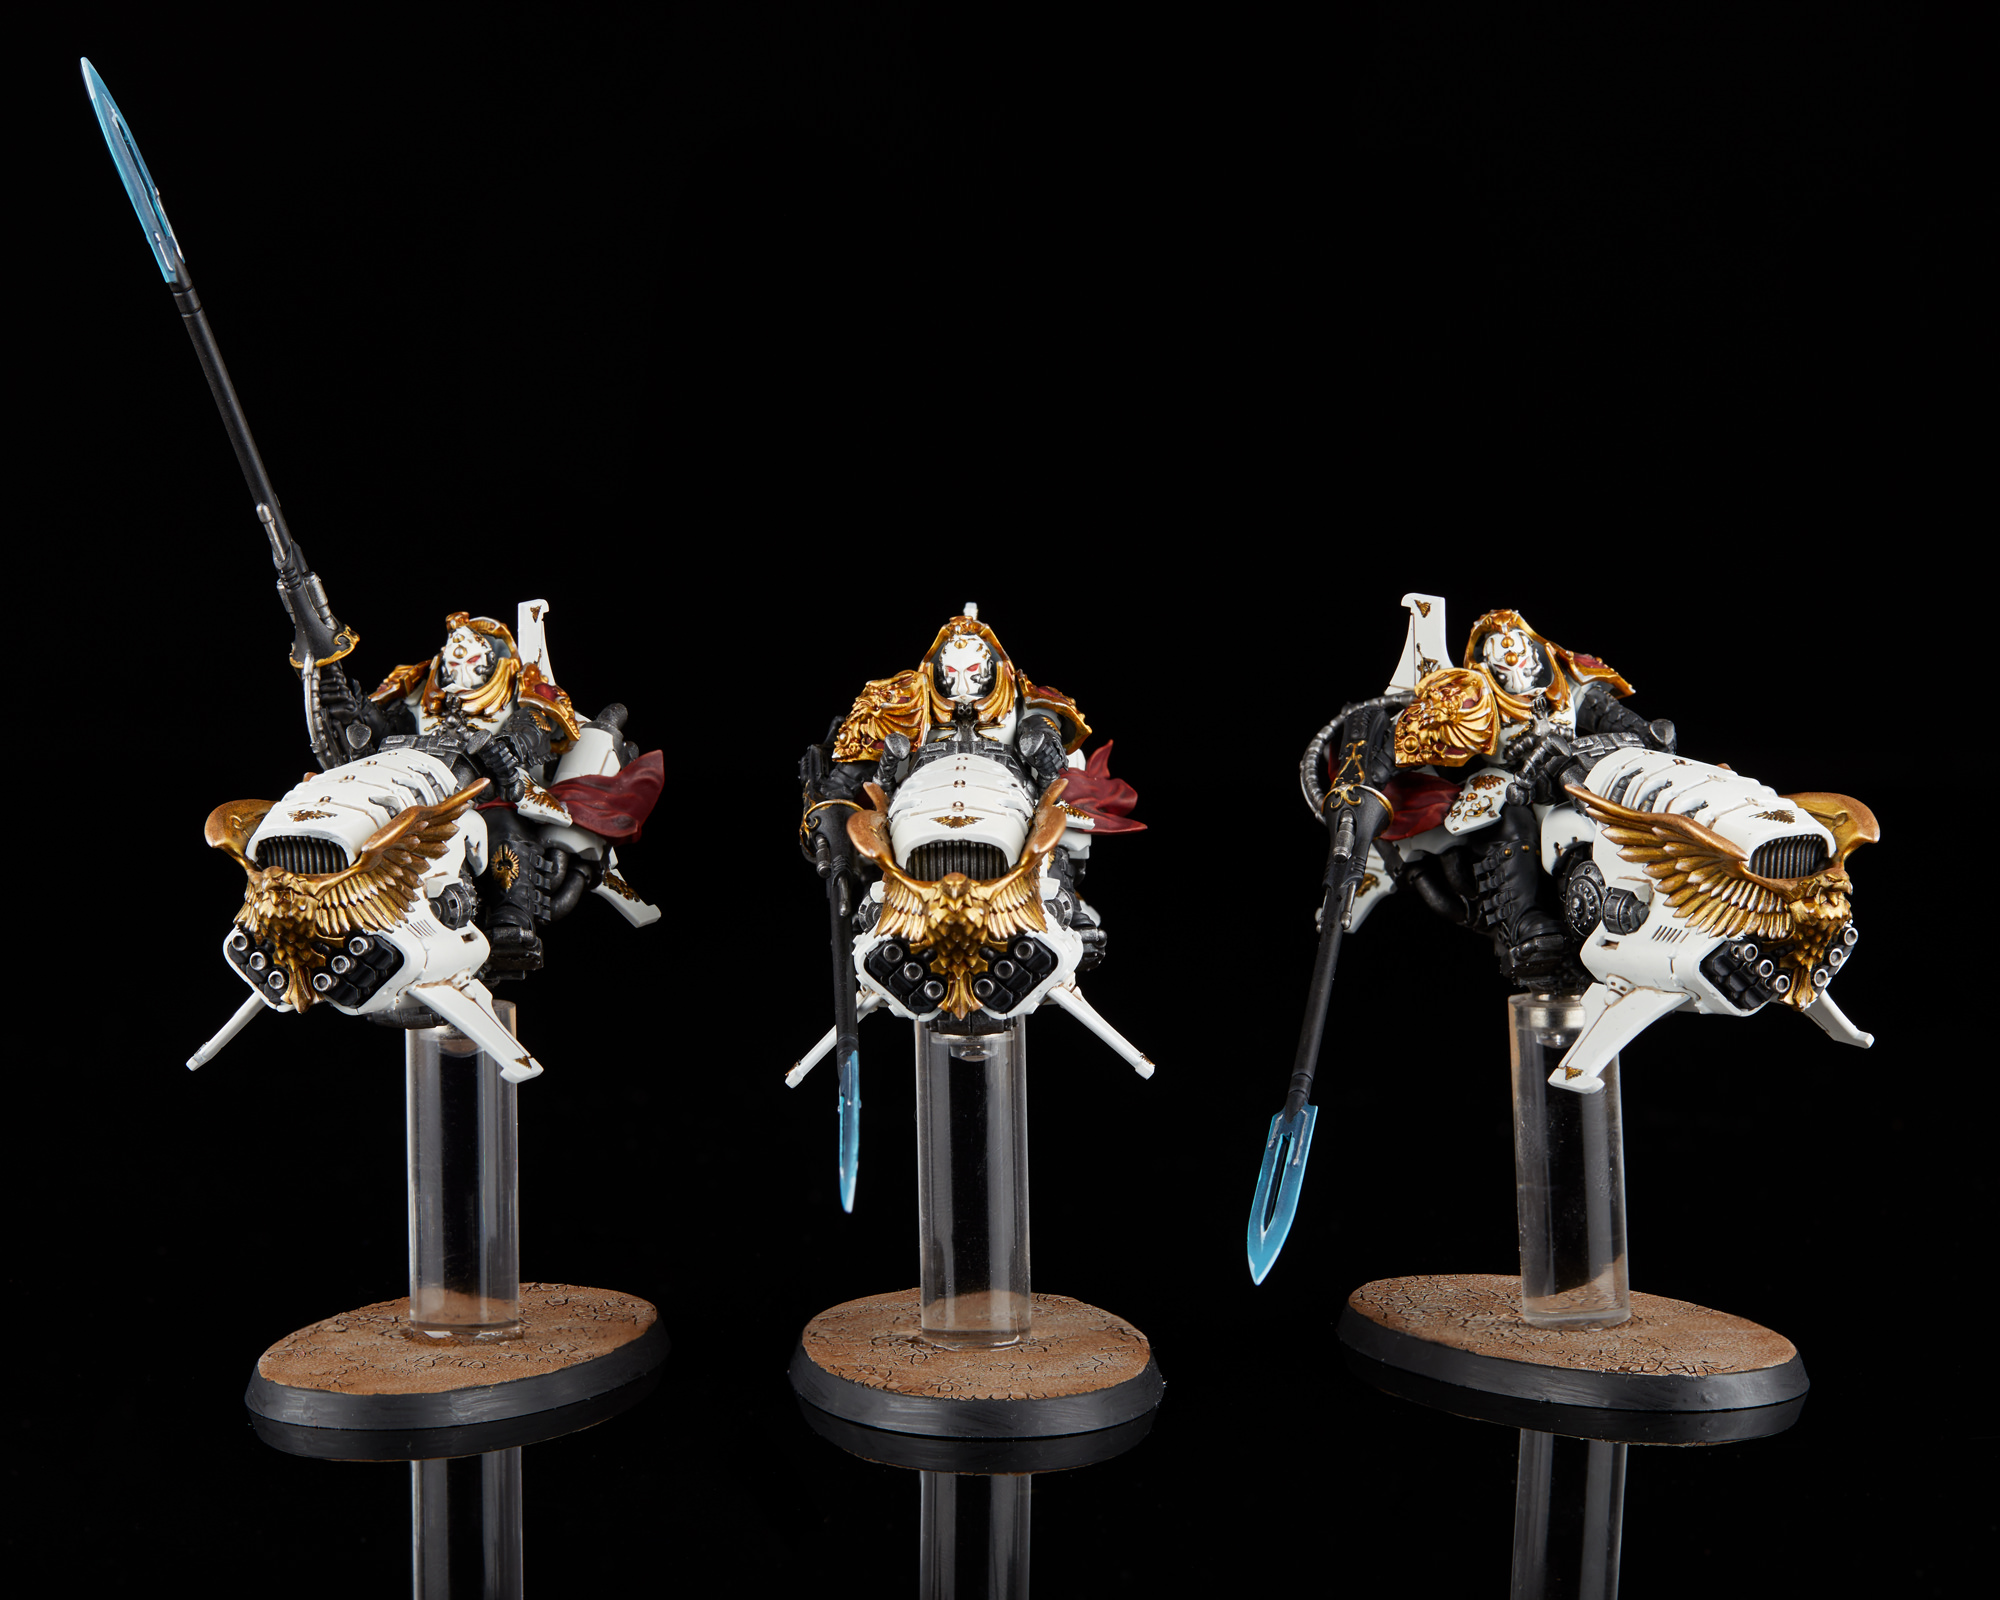
My first dip into painting Custodes was near the height of the popularity of Shield Captains – an easy drop into any sort of Imperium army. At the time, my only army was my Blood Angels, who already had a bunch of gold in the form of Sanguinary Guard, so I knew I wanted to avoid a complete match. The white armor of the Solar Watch was the most unique looking thing in the codex, and as a bonus it stands out cleanly from the reds, blacks, and golds of the Blood Angels, so they were a go. For the Vertus Praetors (or Shield Captains on Jetbikes) I’m demoing here you’re going to want to paint the rider separate from the bike. It’ll save a lot of headache trying to paint different materials next to each other.
- Prime white (or near white. You’re going to be covering this layer up.)
- Airbrush Vallejo Model Air Insignia White over the entire thing. You could also use your favorite off-white, I’m a fan of Insignia white as it’s very close and just a tiny bit warm.
- Gloss Varnish all the white.
- Carefully run Seraphim Sepia into the panel lines. The sepia picks up on the warm tint to the white without being overly contrasted as you could get with Agrax.
- Matte varnish it back down, then carefully highlight upper edges with a pure white.
- Block in anything that’s going to be either black, leather, or metallic with black. Only the areas that are going to end up black need a perfect coat, for other areas a single decently smooth coat will be plenty.
- Start the silver areas by painting any of the “machinery” with Vallejo Metal Color Magnesium, and any gun barrels or the metal areas on the lances with Iron Hands Steel.
- Paint Corvus Black over any leather parts. This brings in a tiny bit of a blue tint to contrast with the warmer white, and is just enough lighter than a true back that we can shade it.
- Wash all the metals and leathers with Nuln Oil Gloss.
- Drybrush the darker metal areas with Ironbreaker, and highlight the lighter areas with Scale 75 Heavy Metal.
- Paint all the red areas with Khorne Red.
- Wash the reds with Nuln Oil to darken the robes down more than an Agrax or Carroburg Crimson wash would do. We want some deep rich colors to set off the pale white.
- Highlight the reds in two passes, first with Mephiston Red and then with Wild Rider Red.
- Paint all the gold areas with Scale 75 Necro Gold.
- Wash the gold with Gloss Reikland Fleshshade. Necro Gold is a somewhat greenish gold, and the red tones in the fleshshade warm up the colors while retaining the darker tone.
- Highlight almost all the gold with Scale 75 Dwarven Gold, leaving the Necro Gold in just the recesses.
- Highlight the uppermost edges of the gold areas with Stormhost Silver or Scale 75 Speed Metal.
And there you have it. Add any further small details you may want, but they’re all ready to go slay the enemies of the Emperor.
Silks’ Method
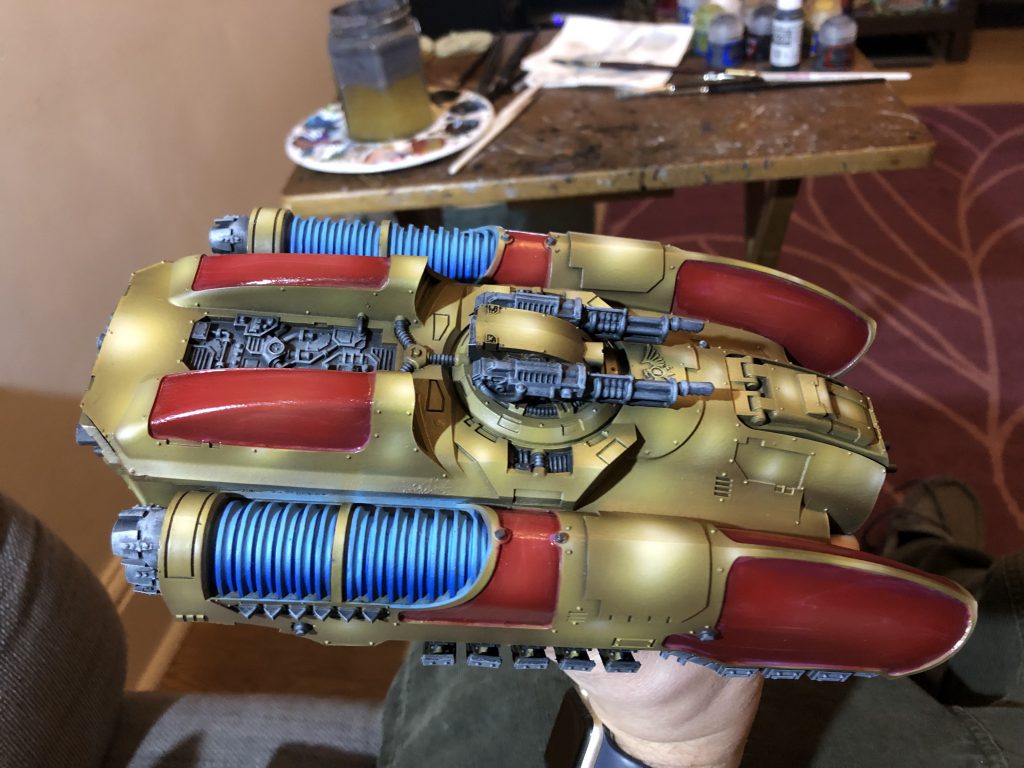
I wanted to do my Custodes in NMM (Non metallic metal) but also wanted something I could replicate across a whole army without losing the will to live. After many hours of watching people wet blend / glaze etc I came up with this. It’s not the most realistic gold but I think it looks good and most importantly doesn’t take too long. People have described it as “cell shaded” which I like. The process is the same for vehicles or infantry, I just use an airbrush on the vehicles (but exactly the same colours and steps). The steps are quite repetitive and it looks a mess almost right until the end so keep persevering with it
Golds
Step 0: Primer
Prime the model in Citadel Chaos Black primer
Step 1: Shadows
Cover the model in Dryad Bark Air. I use an airbrush for this but you can do it by hand, I still recommend the air paint as you can coat a model fairly quickly and not worry too much about paint thickness.
Step 2: Burnt Wood
Cover all but the deepest recesses in Rhinox Hide / Vallejo Burnt Umber (whichever you have to hand). Again, I do this with an airbrush for time’s sake but you can do this with a brush quite easily.
Step 3: Even more Brown
Start highlighting the majority of the armour in Citadel Mournfang Brown. This is where the process becomes a bit repetitive and this step is the most time consuming because you’re painting most of the model but being careful about leaving the previous stage showing at the bottom parts of the armour panel.
Step 4: the Brownening
Repeat step 3 but with Citadel XV-88 highlighting less of the armour. You want your highlights to be hitting the raised parts and points of interest.
Step 5: Starting to look ok now
Again, highlight with a brown, only this time use Citadel Balor brown. Again, highlight even less of the armour
Step 6: Oh, is it gold?
This is your last big highlight. Use Citadel Zamesi desert to hit all the spiky bits and points of the armour. Custodes have loads of these so there’s plenty to pick out.
Step 7: Let there be light
Mix some Zamesi Desert 50/50 with the white of your choice, I use Citadel White Scar. Use this to pick out just the very tips / corners of the armour.
Step 8: The final touch
Add dots of pure white over the previous steps. This is the bit where suddenly it looks like metal and it’s very satisfying. You really are aiming for small dots (unless it’s a vehicle then you can go for bigger patches.
Reds
Step 1: Khorne
I start by brushing on Citadel Khorne Red. If there’s any browns left I try to leave these showing in the recesses.
Step 2: Highlights
I airbrush Citadel Mephiston Red as a highlight. You can do this with a brush but this is why you buy an airbrush because it’s so much simpler with one.
Step 3: Wild times
Citadel Wild Rider Red is used to pick out things like hair strands and the edges of cloaks
Blue Glows
Step 1: Dark Blue
I start by painting the weapons with a dark blue such as Citadel Kantor Blue
Step 2: Electricity
I airbrush most of the weapon vallejo Electric Blue, aiming for more coverage towards the edges.
Step 3: Final highlights
I mix some white in with the previous step and highlight along the edges, again with an airbrush
Lupe’s Method
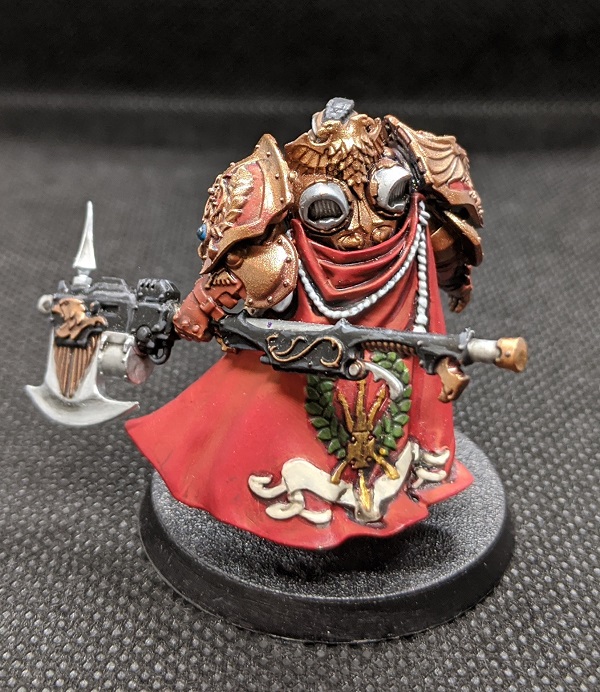
When I took on Custodes I was happy that the person who I painted them for wanted something other than the classic gold. As much as I love a really nice rich gold colour, I find it pretty overwhelming on the Custodes models. Instead, I went for a striking red-dominated scheme, with darker bronze metallics.
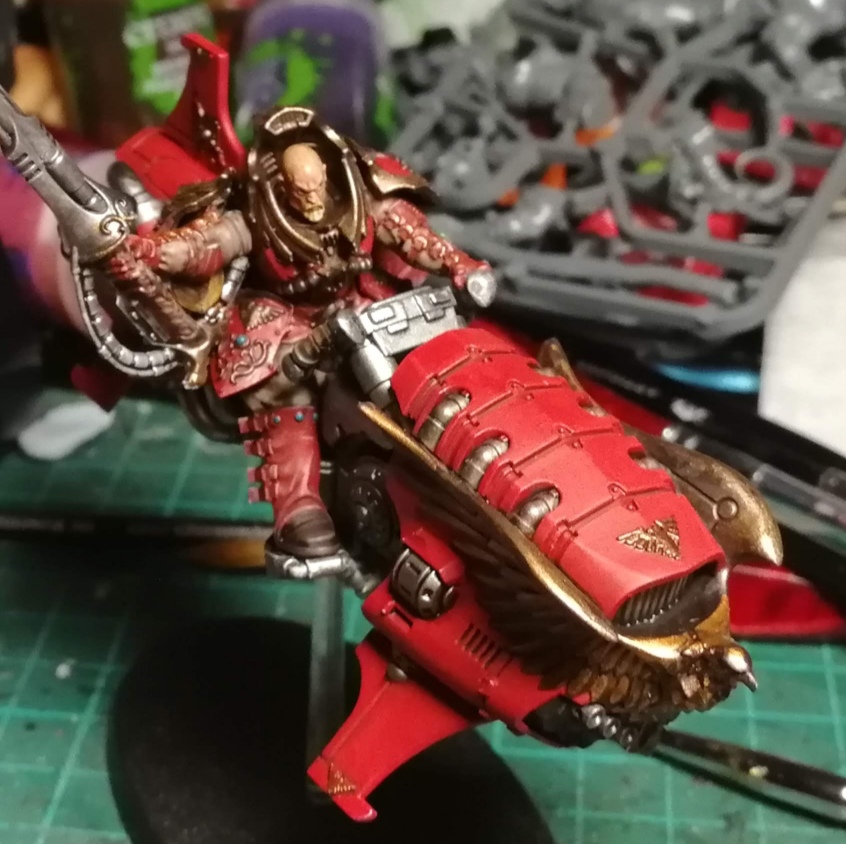
The bike itself was a pretty easy scheme:
- Paint everything Mephiston Red
- Panel line with Nuln Oil
- Lightly drybrush with Evil Sunz Scarlet
- Lightly drybrush with Squig Orange
For the metals, I went for:
- Basecoat Warplock Bronze
- Shade Nuln Oil Gloss
- Touch up Warplock Bronze
- Drybrush Brass Scorpian
Steel areas are a really fast recipe:
- Basecoat Leadbelcher
- Layer Ironbreaker
- Wash with Nuln Oil Gloss
Finally, it’s not very visible on the final model, but the soft leather/cloth like the seat was simply:
- Basecoat Rakarth Flesh
- Wash Agrax Earthshade
- Retouch Rakarth
- Highlight 1:1 Rakarth:Pallid Wych Flesh
The riders were a more complex proposition!
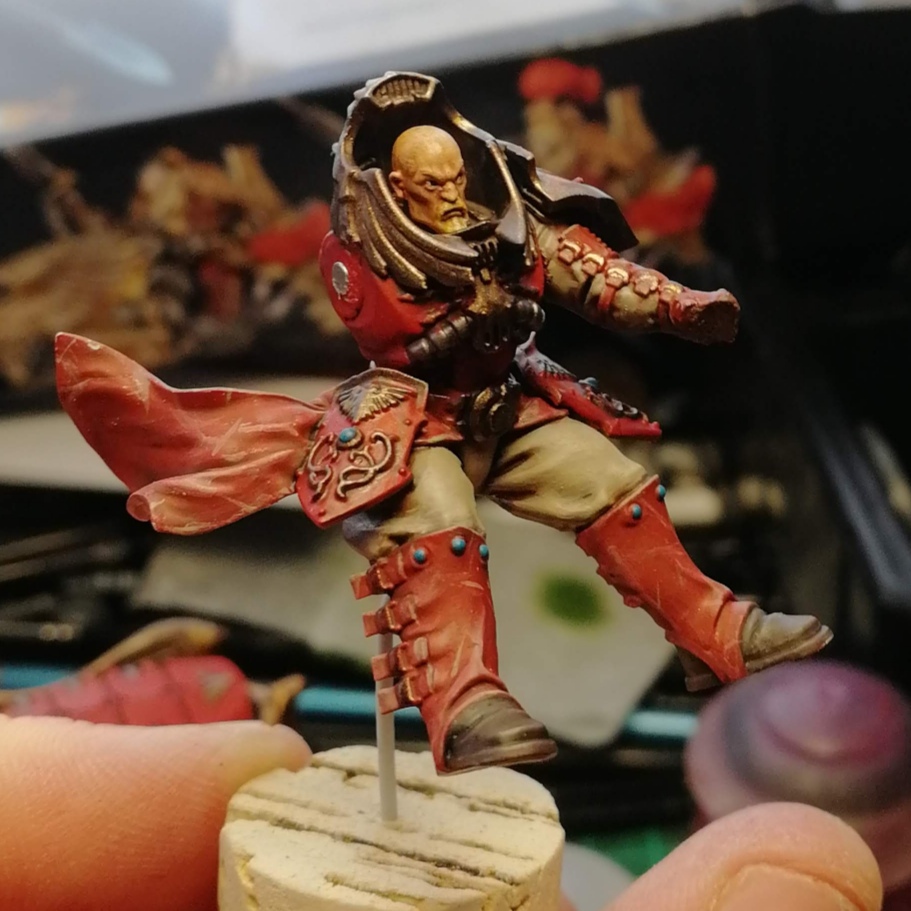
The main red armour panels were done just like the jetbike, and the cloths and metallics were done the same way too.
For the dark brown leather I went for:
- Basecoat Rhinox Hide
- Shade Reikland Fleshshade
- Highlight Karak Stone
For the red leather, the recipe was more complex:
- Basecoat a mix of 1:1 Mephiston Red:Doombull Brown
- Shade all over with Agrax Earthshade
- Layer back up with your basecoat everywhere except the recesses to brighten it up again
- Highlight with a 1:1 mix of you basecoat:Karak Stone
- Highlight and weather with Karak Stone. That weathering takes the forms of fine lines, scratches and cracks. If you were doing something to a higher level, you would go back and glaze the shadows of these lines back down to make them really feel aligned with the material
The blue stones were:
- Basecoat Thousand Sons Blue
- Highlight Temple Guard Blue
- Dot highlight Baharoth Blue
For the head I used my standard light skin recipe you can find in HTPE: Human Skin.
There’s just one last thing to show you for this scheme, the power lance blade. You could use this for any of the power weapons custodes wield.
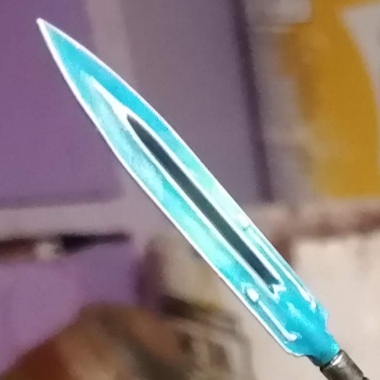
My scheme for this was as follows:
- Basecoat Baharroth Blue
- Make up a mix 1:1 Baharroth:White and thin it right down to a glaze. I used Vallejo mediums for this, but Lahmian Medium would work just fine. You want it pretty transparent. Softly highlight the middle of the blade in a band across it. If the blade is really long you might want to do one wide band like this and then one thinner one either side. Use strokes running along the angle away from the tip, this helps it look sharp
- Using pure white, edge highlight the blade, and the inner cleft of the blade, as well as the power nodes
Pendulin’s Method
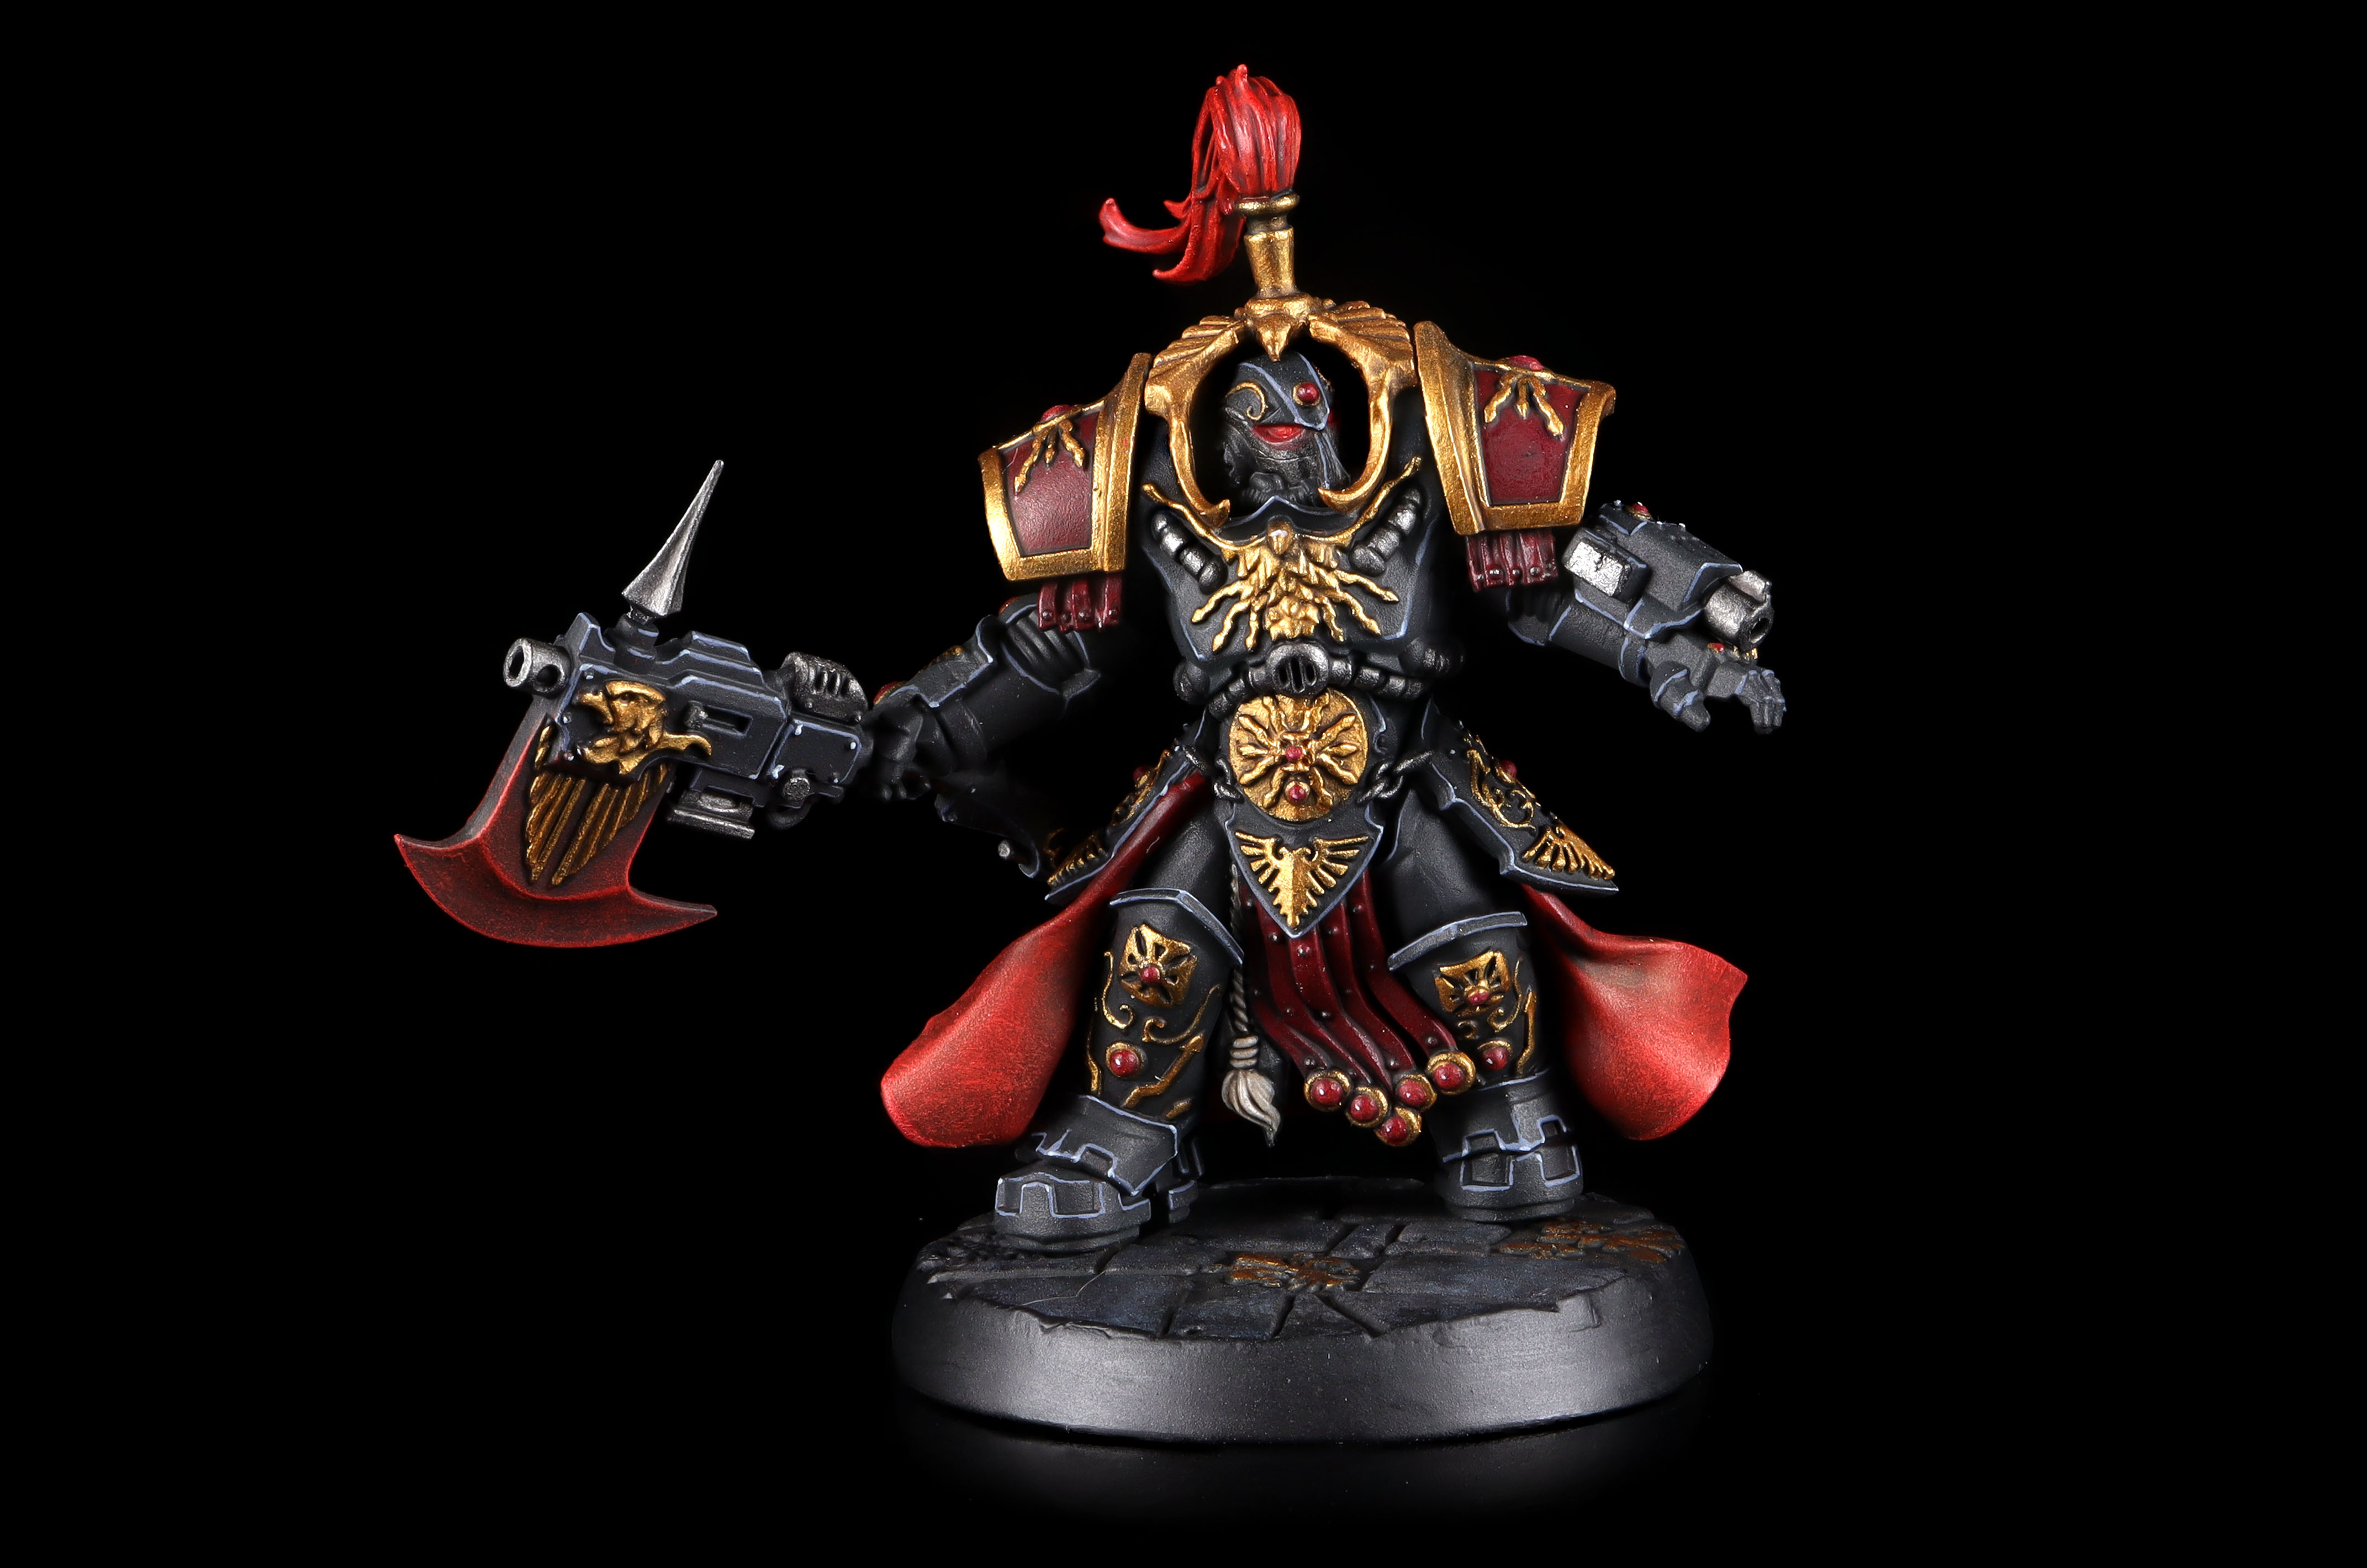
Pendulin’s Shadowkeepers scheme can be found in a separate article – How to Paint Everything: Adeptus Custodes Shadowkeepers.
From Golden Light They Came
That wraps up our look at the Adeptus Custodes. The Custodes are deceptively simple to paint, but making an army comprised of models that are primarily monochrome can still be a daunting task. Hopefully we’ve made that task a bit easier, and given you some options to consider. As always, if you have any questions or feedback, drop us a note in the comments below or shoot us an email at contact@goonhammer.com.
