
In our How to Paint Everything series, we take a look at different armies of the Warhammer universe, examine their history and heraldry, and look at several different methods for painting them. Today we take a look at the Craftworld Biel-Tan. The deep green and white armor and floral patterns of the Craftworld’s warriors make them a striking, if a bit intimidating, choice to paint.
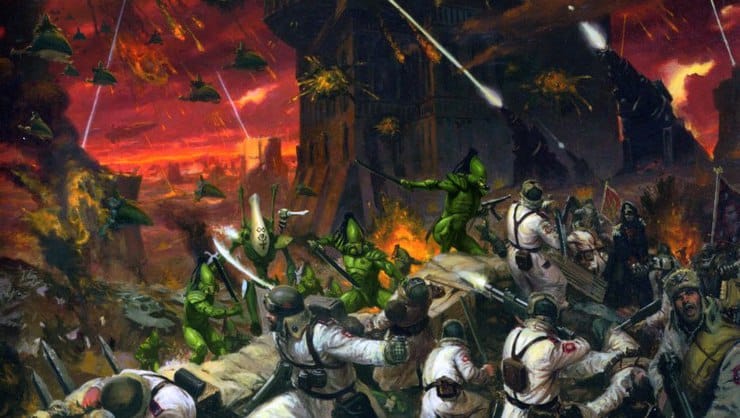
While all of the Aeldari Craftworlds employ militaries and encourage their citizens to defend their homes, Biel-Tan is known for being among the most militant of craftworlds, with the largest number of Aspect Warriors. They’re not big on cooperation, and see the other races in the galaxy as usurpers from whom the galaxy should be reclaimed. They’re particularly protective of the Maiden Worlds, and will violently attack any other races who inhabit them. They also have it in for the orks in particular, in part because once Orks settle on a planet it’s almost impossible to remove them. This makes them extremists among the Aeldari in a way, and their striking green color scheme makes them one of the more popular craftworlds for painters.
Biel-Tan saw its role in the fluff substantially elevated during the Gathering Storm saga; Yvraine, acting as an emissary of the still-sleeping Ynnead, traveled to Biel-Tan to muster support for her movement – a daring plan to birth the god of the dead without having to sacrifice the entirety of the Eldar race. While she was there, Biel-Tan was attacked by a massive force of Slaaneshi daemons led by the Masque, who invaded the craftworld’s Infinity Circuit and started going HAM on the Eldar souls within. Yvraine was able to expel the Masque by sacrificing many of the souls in the circuit to rouse Ynnead and summon the Yncarne, the god’s avatar. These events caused massive damage to the craftworld, forcing most of its inhabitants onto its fleet ships while the craftworld’s bonesingers attempt to repair the world-ship. Still, the Aeldari of Biel-Tan remain resilient and steadfast in their mission and have seen their ranks swell with new wraith constructs holding the souls of fallen brethren that can no longer be contained in the craftworld’s infinity circuit.
Where to Read More
The literature around Eldar is surprisingly thin for a faction as old and integral to the 40k storyline as they are. Howl of the Banshee by Gav Thorpe tells the story of Exarch Clyona and her sisters, Howling Banshees of Craftworld Biel-Tan. The Craftworld also features heavily in book II of the Gathering Storm Campaign, Fracture of Biel-Tan, which details the process by which the craftworld was split up and Ynnead, the Aeldari god of the dead was awakened proper and the Yncarne was first birthed into the 41st millennium.
Painting Biel-Tan
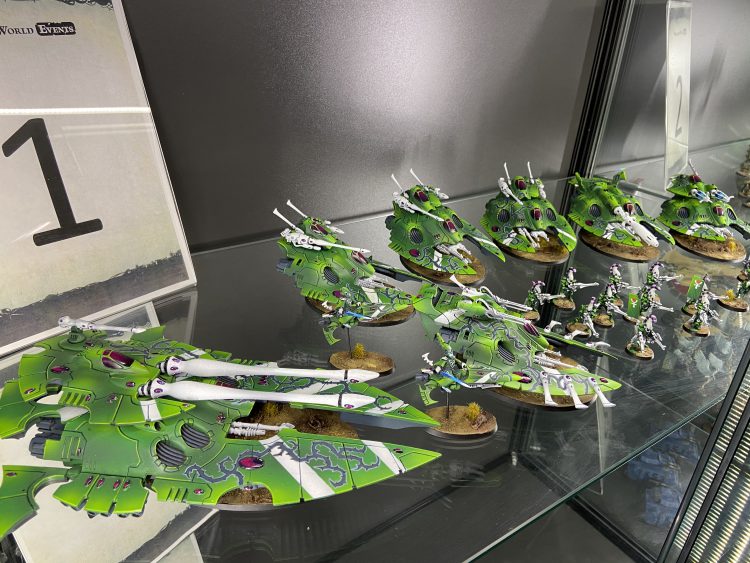
Painting Biel-Tan well means not only mastering painting white, but also being able to freehand the thorny vines that wind over their armor. It’s a daunting paint job particularly for new players, but the results can look spectacular.
Silks’ Method
I part assembled the models with as many pieces that were going to be white (weapons, probes e.t.c) seperate. The main sections were primed black and the white sections primed with Halfords Grey Primer.
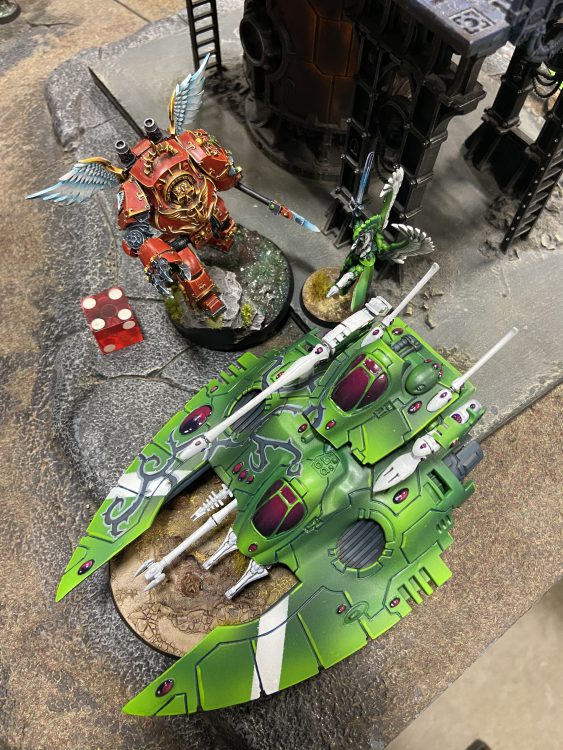
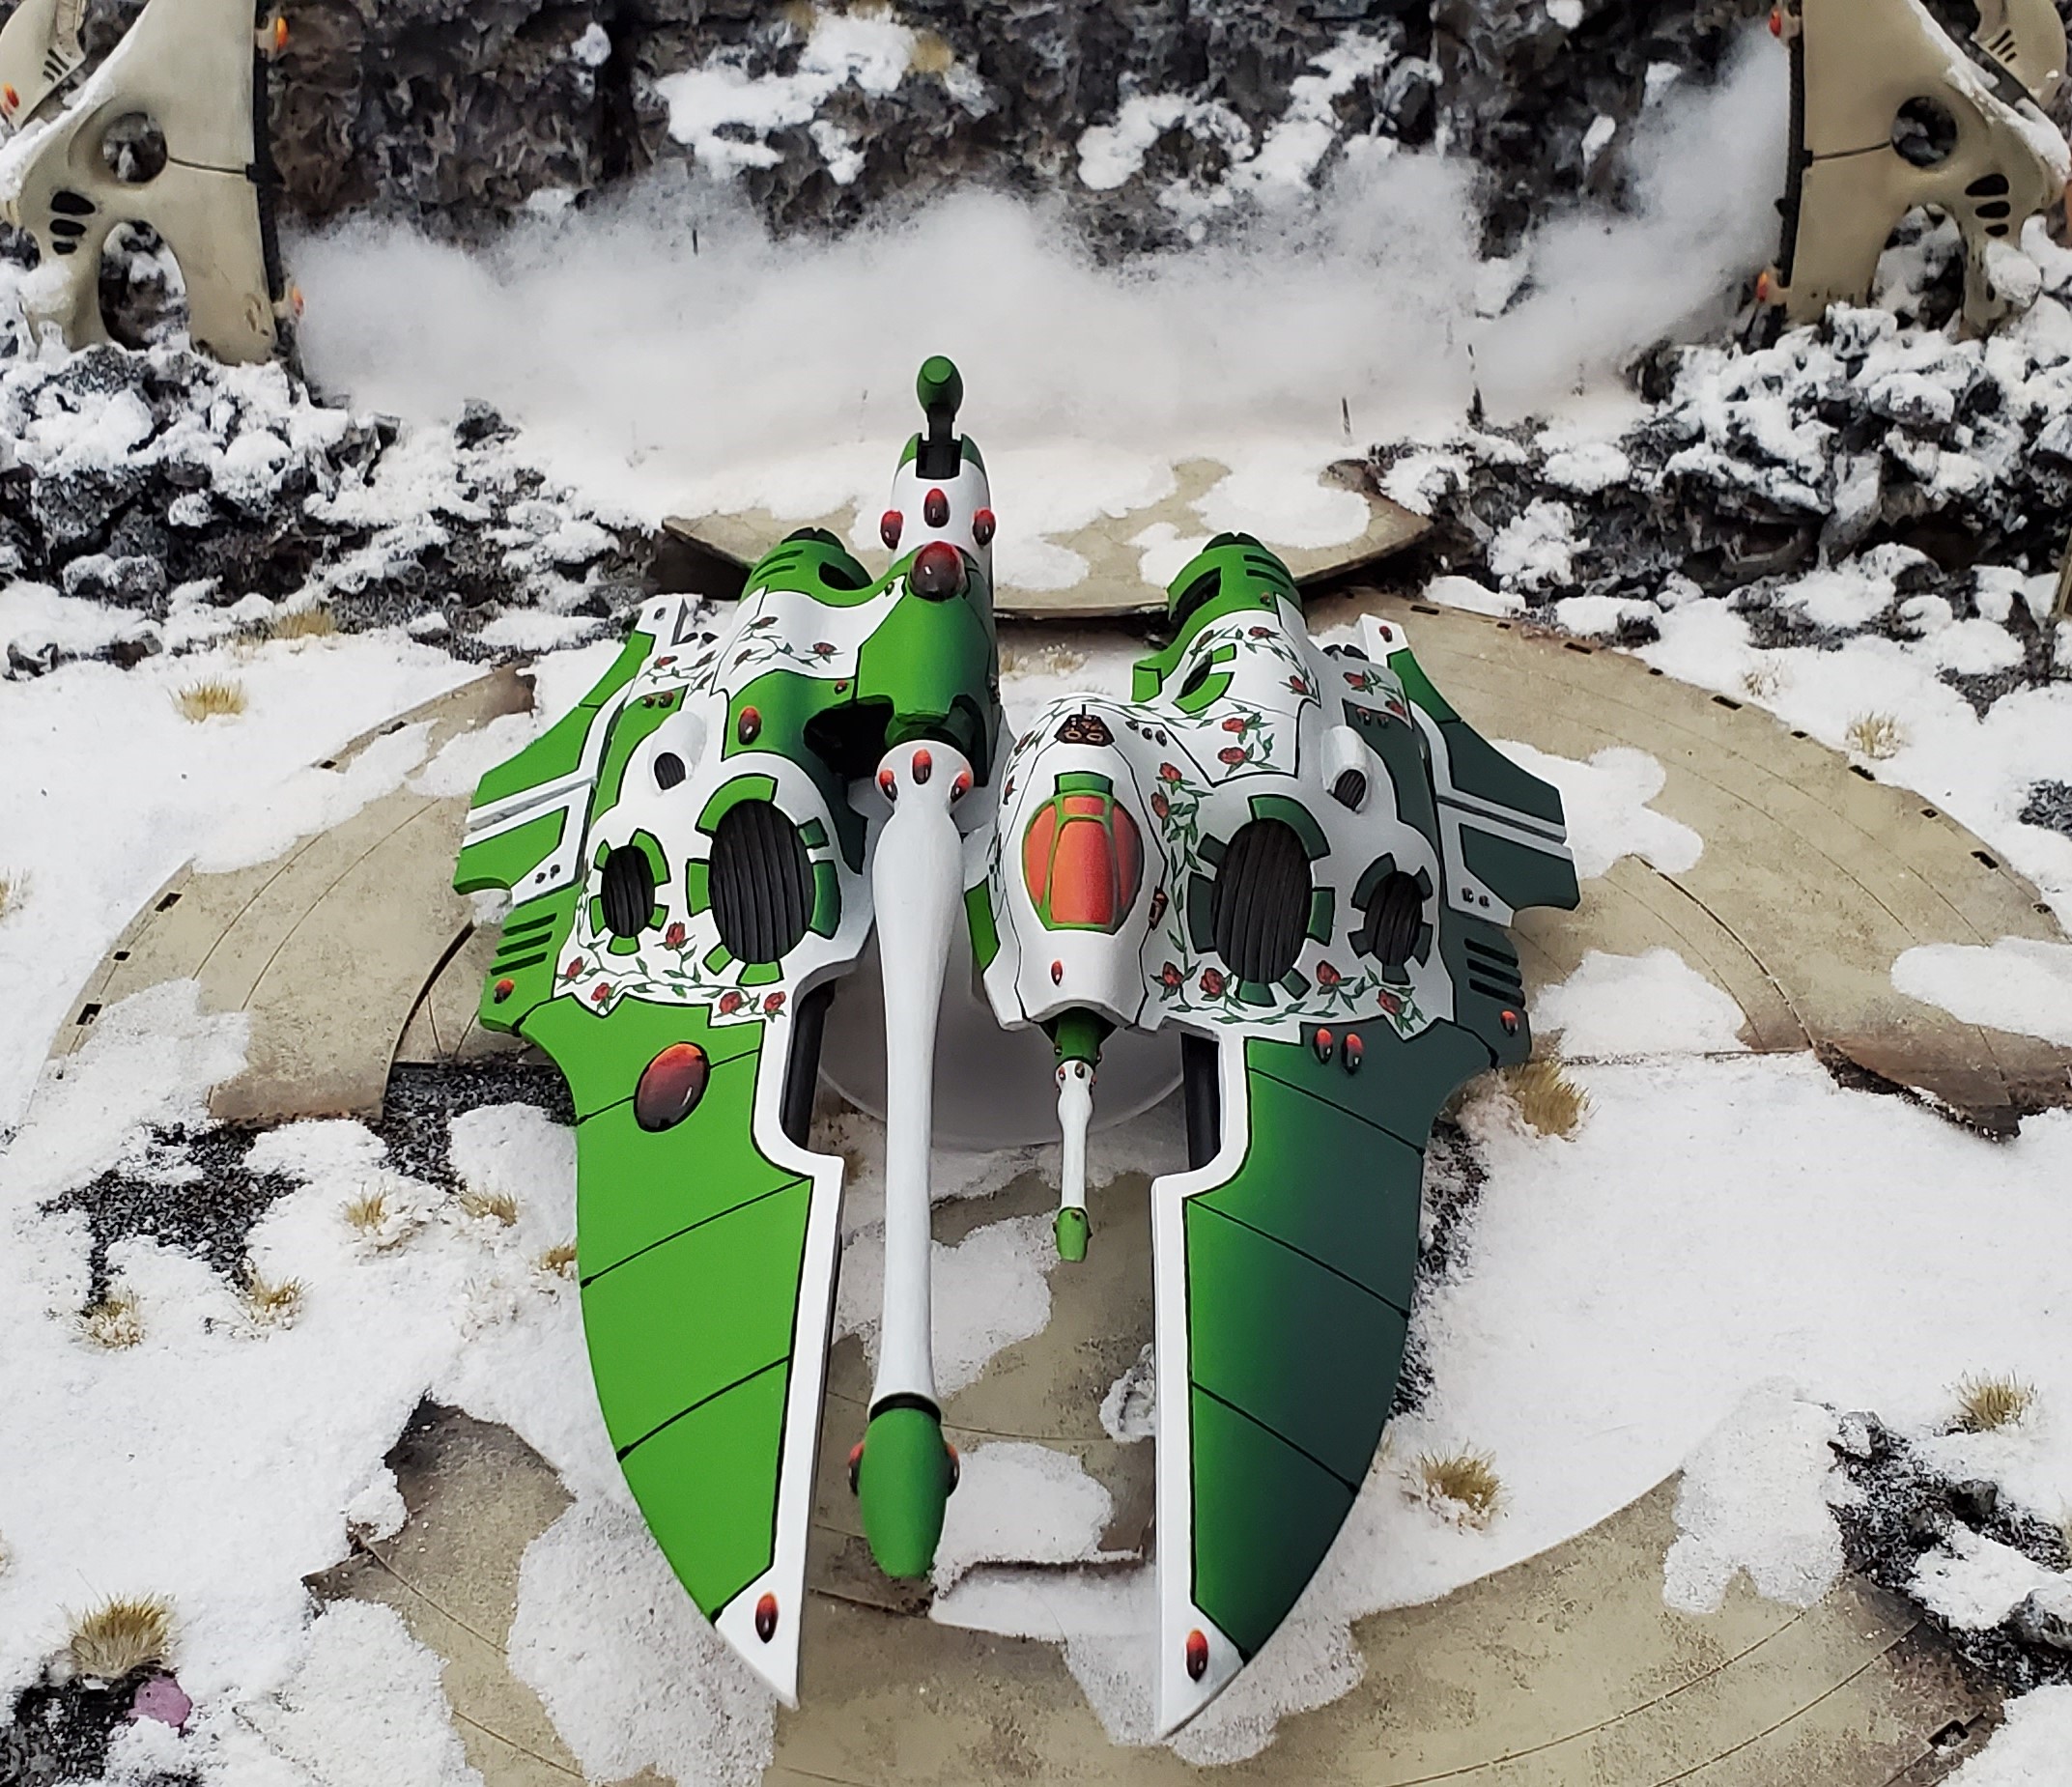
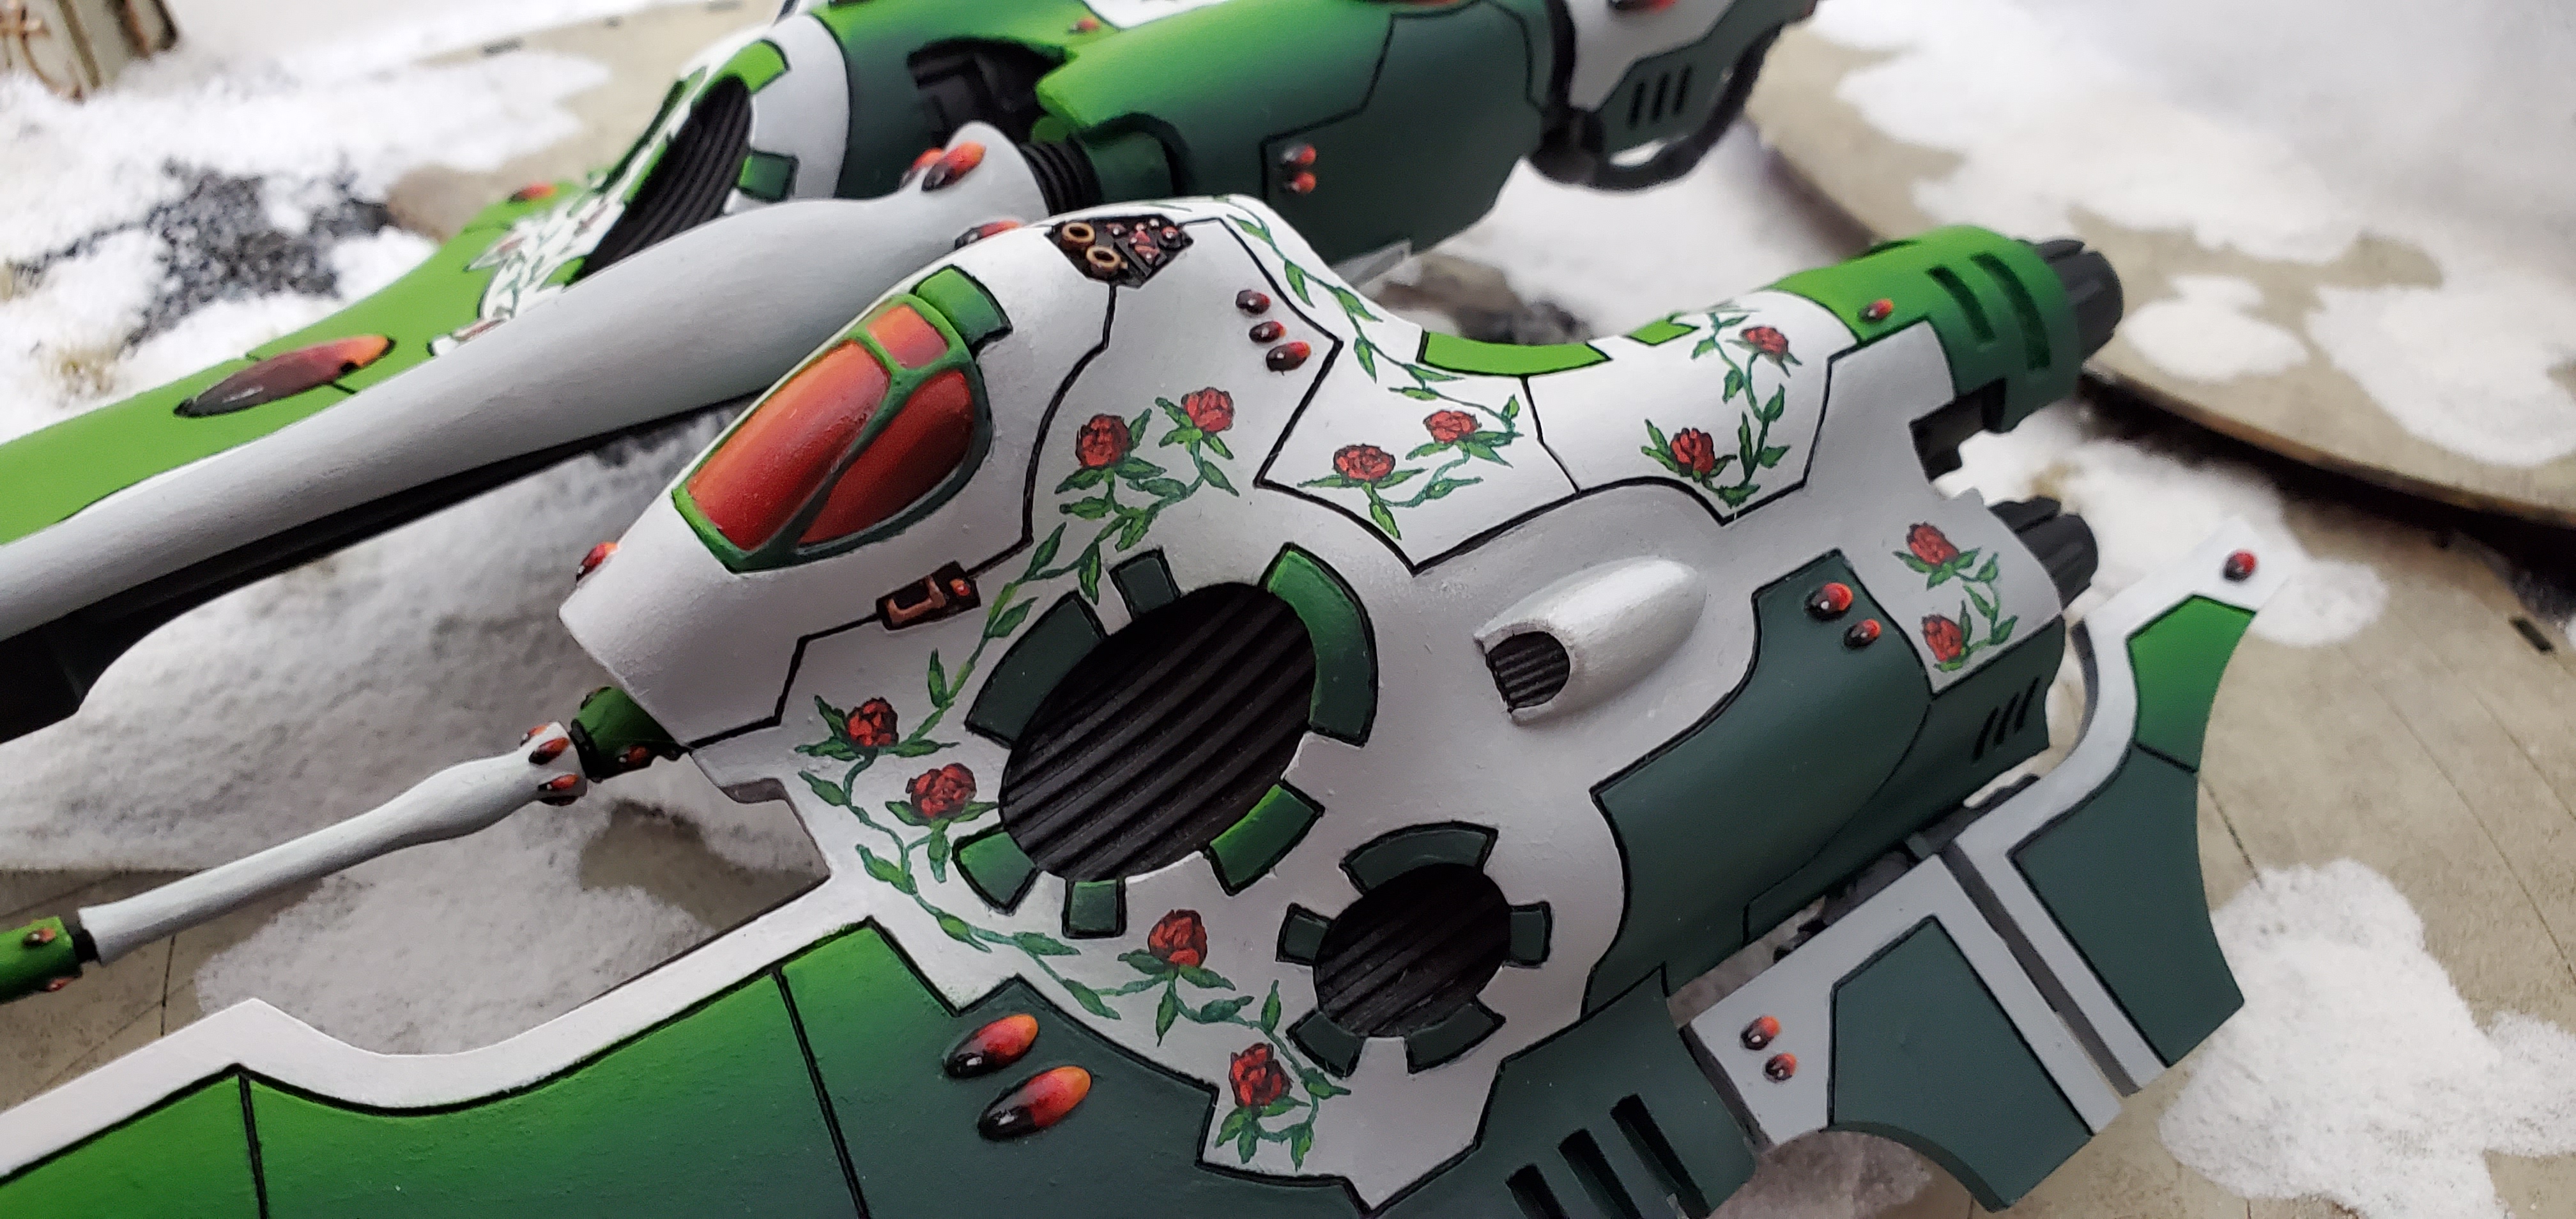
For the main “green” I started off by airbrushing the whole model with P3 Gnarls Green. I really like P3 paints through an airbrush, they have very dense pigment counts which means you can thin them without losing any real opacity. I then highlighted quite heavily with P3 Iosan Green (aiming for everywhere that wasn’t recessed). Then I used Necrotite Green on the sharp points, the edges and the raised bumps of the models. Lastly I mixed Necrotite Green 50/50 with GW Flash Gitz Yellow and did a very sparing last highlight with that mix.
In order to get some contrast I panel lined the models with GW Incubi Darkness, using a very fine tipped Broken Toad brush that had lost a few bristles, meaning it fit into the recesses perfectly. Lastly I edge highlighted almost every panel using the Necrotite Green / Flash Gitz yellow mix I used before.
For the white pieces I airbrushed them with GW Celestra Grey, then GW Ulthuan Grey and finally Daler Rowney white artist’s ink. I repeated the same process on sections of the vehicles that I had masked off using Tamiya masking tape. Each vehicle has a different set of markings meaning I didn’t have to try too hard to match them across the army! I then panel lined the white with black / nuln oil depending on the size of the recesses.
For the freehand I drew on some wavy lines with a propelling pencil, then painted over them with a thick line of Scalecolour EclipseGrey then added little triangles along the edges to create thorns. I then painted the middle of each line with Scalecolour Anthracite Grey and edge highlighted with Scalecolour Graphite. I used the same colours on the engines / intakes e.t.c but without the Graphite highlights. The background behind these markings is that they add a thorn for every important kill the vehicle makes, so I made sure to put more thorns on things like the Scorpion and the Hemlock compared to a Wave Serpent which had relatively few.
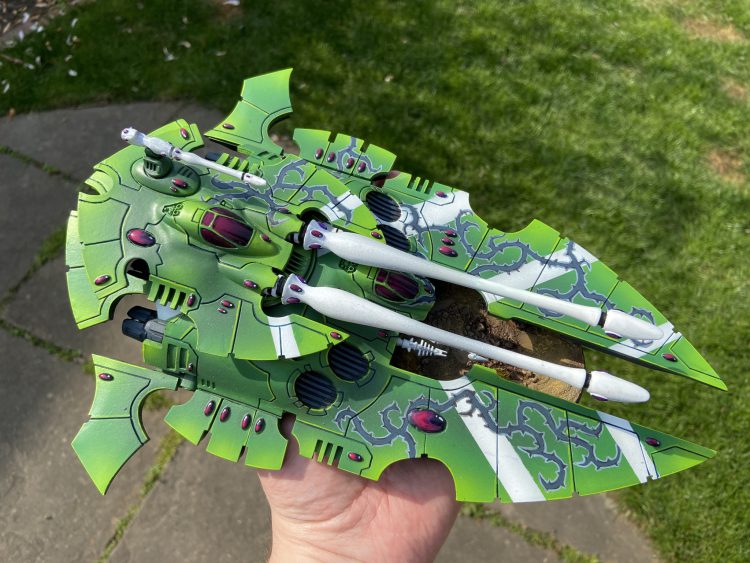
For the gems, I started with Scalecolour Elandil Violet all over the gem, then painted a crescent with Sunset Purple (making sure to match the placement on every gem). I then highlighted this with P3 Murderous Magenta and added a tiny dot of white in the top left corner. Lastly I gave them a coat of gloss varnish. For the canopies I did the same process but using an airbrush to create a gradient, then painted in the supports with Iosan Green.
James “Boon” Kelling’s Method
I am an extremely non-technical painter. I don’t often view hobby videos to improve my painting methods and I’ve never attended a seminar or anything like that. As a result I’ve developed my style over 20+ years of seeing things, experimenting, and slowly developing schemes over generations of new models… and I mean new in the sense that I bought fresh models because LOL the Craftworld range. This stubborn and pointless refusal to improve myself in an easy manner is also why I have never touched an airbrush – which makes the vehicle heavy Craftworld army a true nightmare when you really think about it.

For my scheme I like to give it a universal light source – all of my models will be brightly colored to the left, and fade to darker more muted colors on their right/interior as if a light was being shone from the upper left of the model. The direction of light is not perfect, mind you, but army-wide it does provide a striking appearance with a lot of blends – particularly striking on the green.
I start with a black undercoat before laying down my base (dark) colors. With each color I lay down, I’ll layer in two additional, lighter tints or hues that stop at the points where I’ll blend. The exception is white and black – white is based by just a single, light grey, and black is black. In the case of Biel-Tan Craftworld colored models, my paint list includes:
- Abbadon Black
- Caliban Green
- Warpstone Glow
- Moot Green
- Administratum Grey
- White Scar
- Mephiston Red
- Wildrider Red
- Trollslayer Orange
- Fire Dragon Bright
- ‘Ard Coat
- Balthazar Gold
- Auric Armor Gold
- Stormhost Silver
- Gorthor Brown
- XV-88
- Ushabti Bone
- Agrax Earthsade
- Screaming Skull
- Naggaroth Night
- Xerxes Purple
- Genestealer Purple
- Emperor’s Children

After laying down the base colors (including grey) and the brighter colors (including white), I’ll begin blending each section based on my left to right light source. This is infuriatingly time consuming sometimes, and on larger flat sections can be a bit tricky – if you don’t get it right paint will start building up as you try to smooth the blends. With practice though it becomes second nature and finding the right brush for the area you’re looking to blend is a big part of the fight. The hardest color to blend is actually the grey/white as it is easy to create stark breaks between the two if you’re not giving it a keen eye.
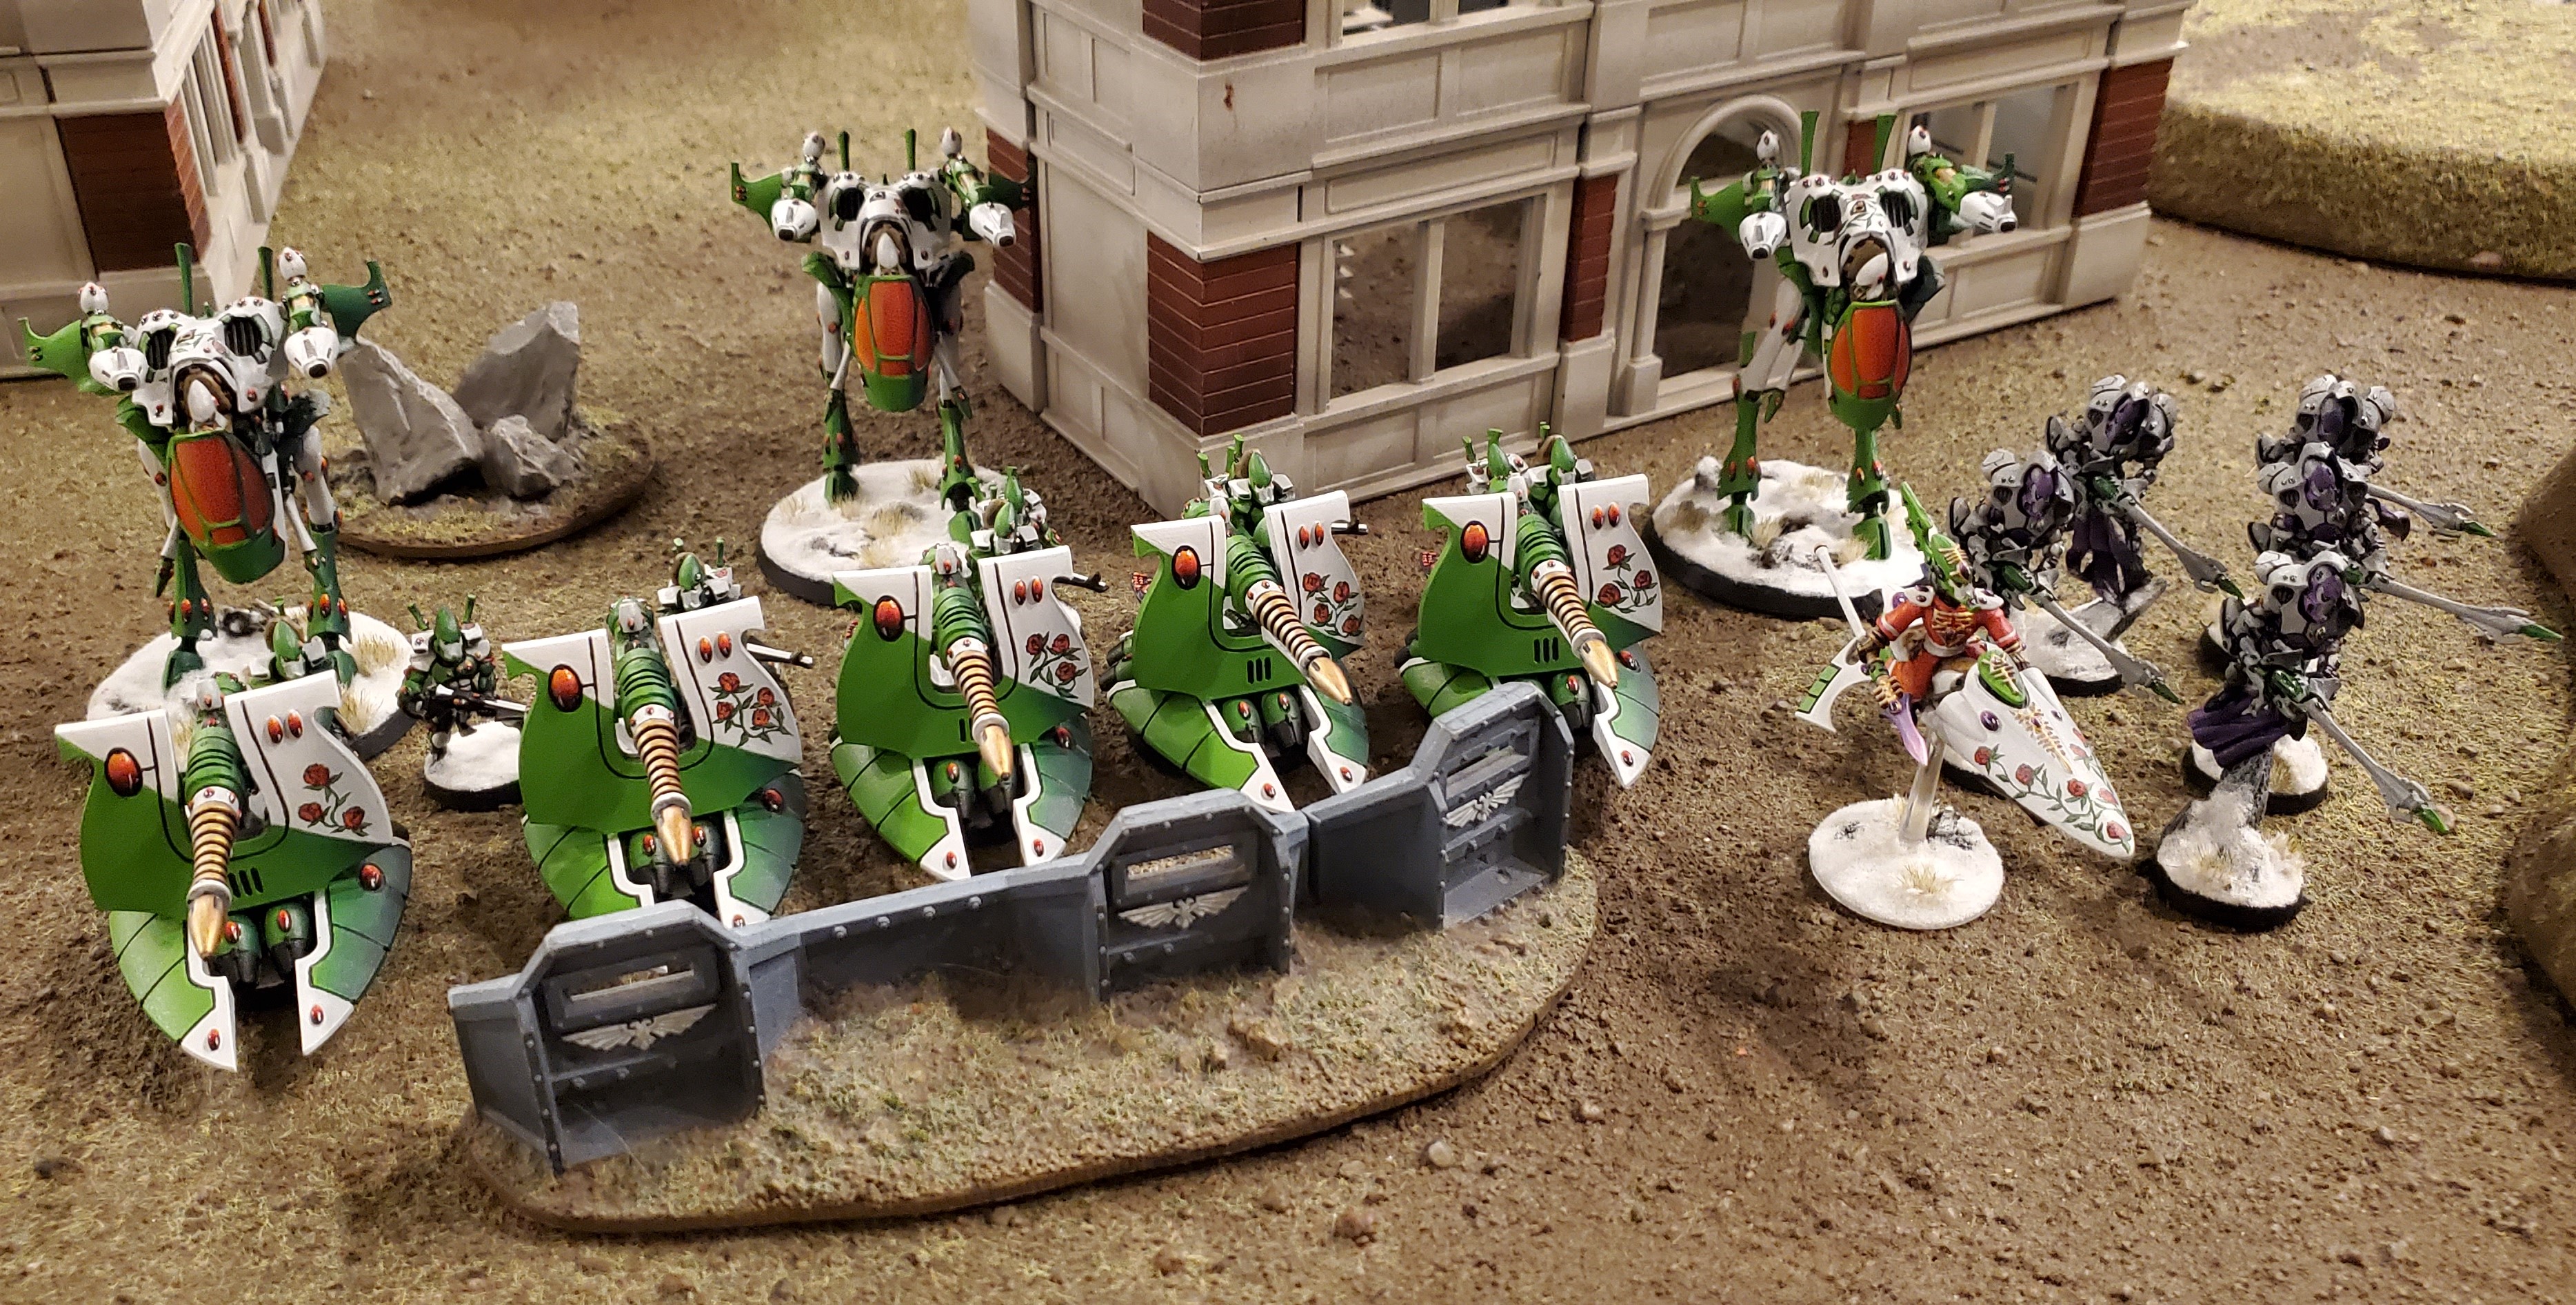
After each color has been appropriately blended, I’ll start to pick out specific details – gold stylings, [wraith]bone or leather, gems, etc. I’m one of those masochistic idiots who sees a bump on an Eldar model and thinks “that son of a bitch is a gem” so this is one of those painful steps – far more painful than the blending on most models. Looking at you ghostly bois.
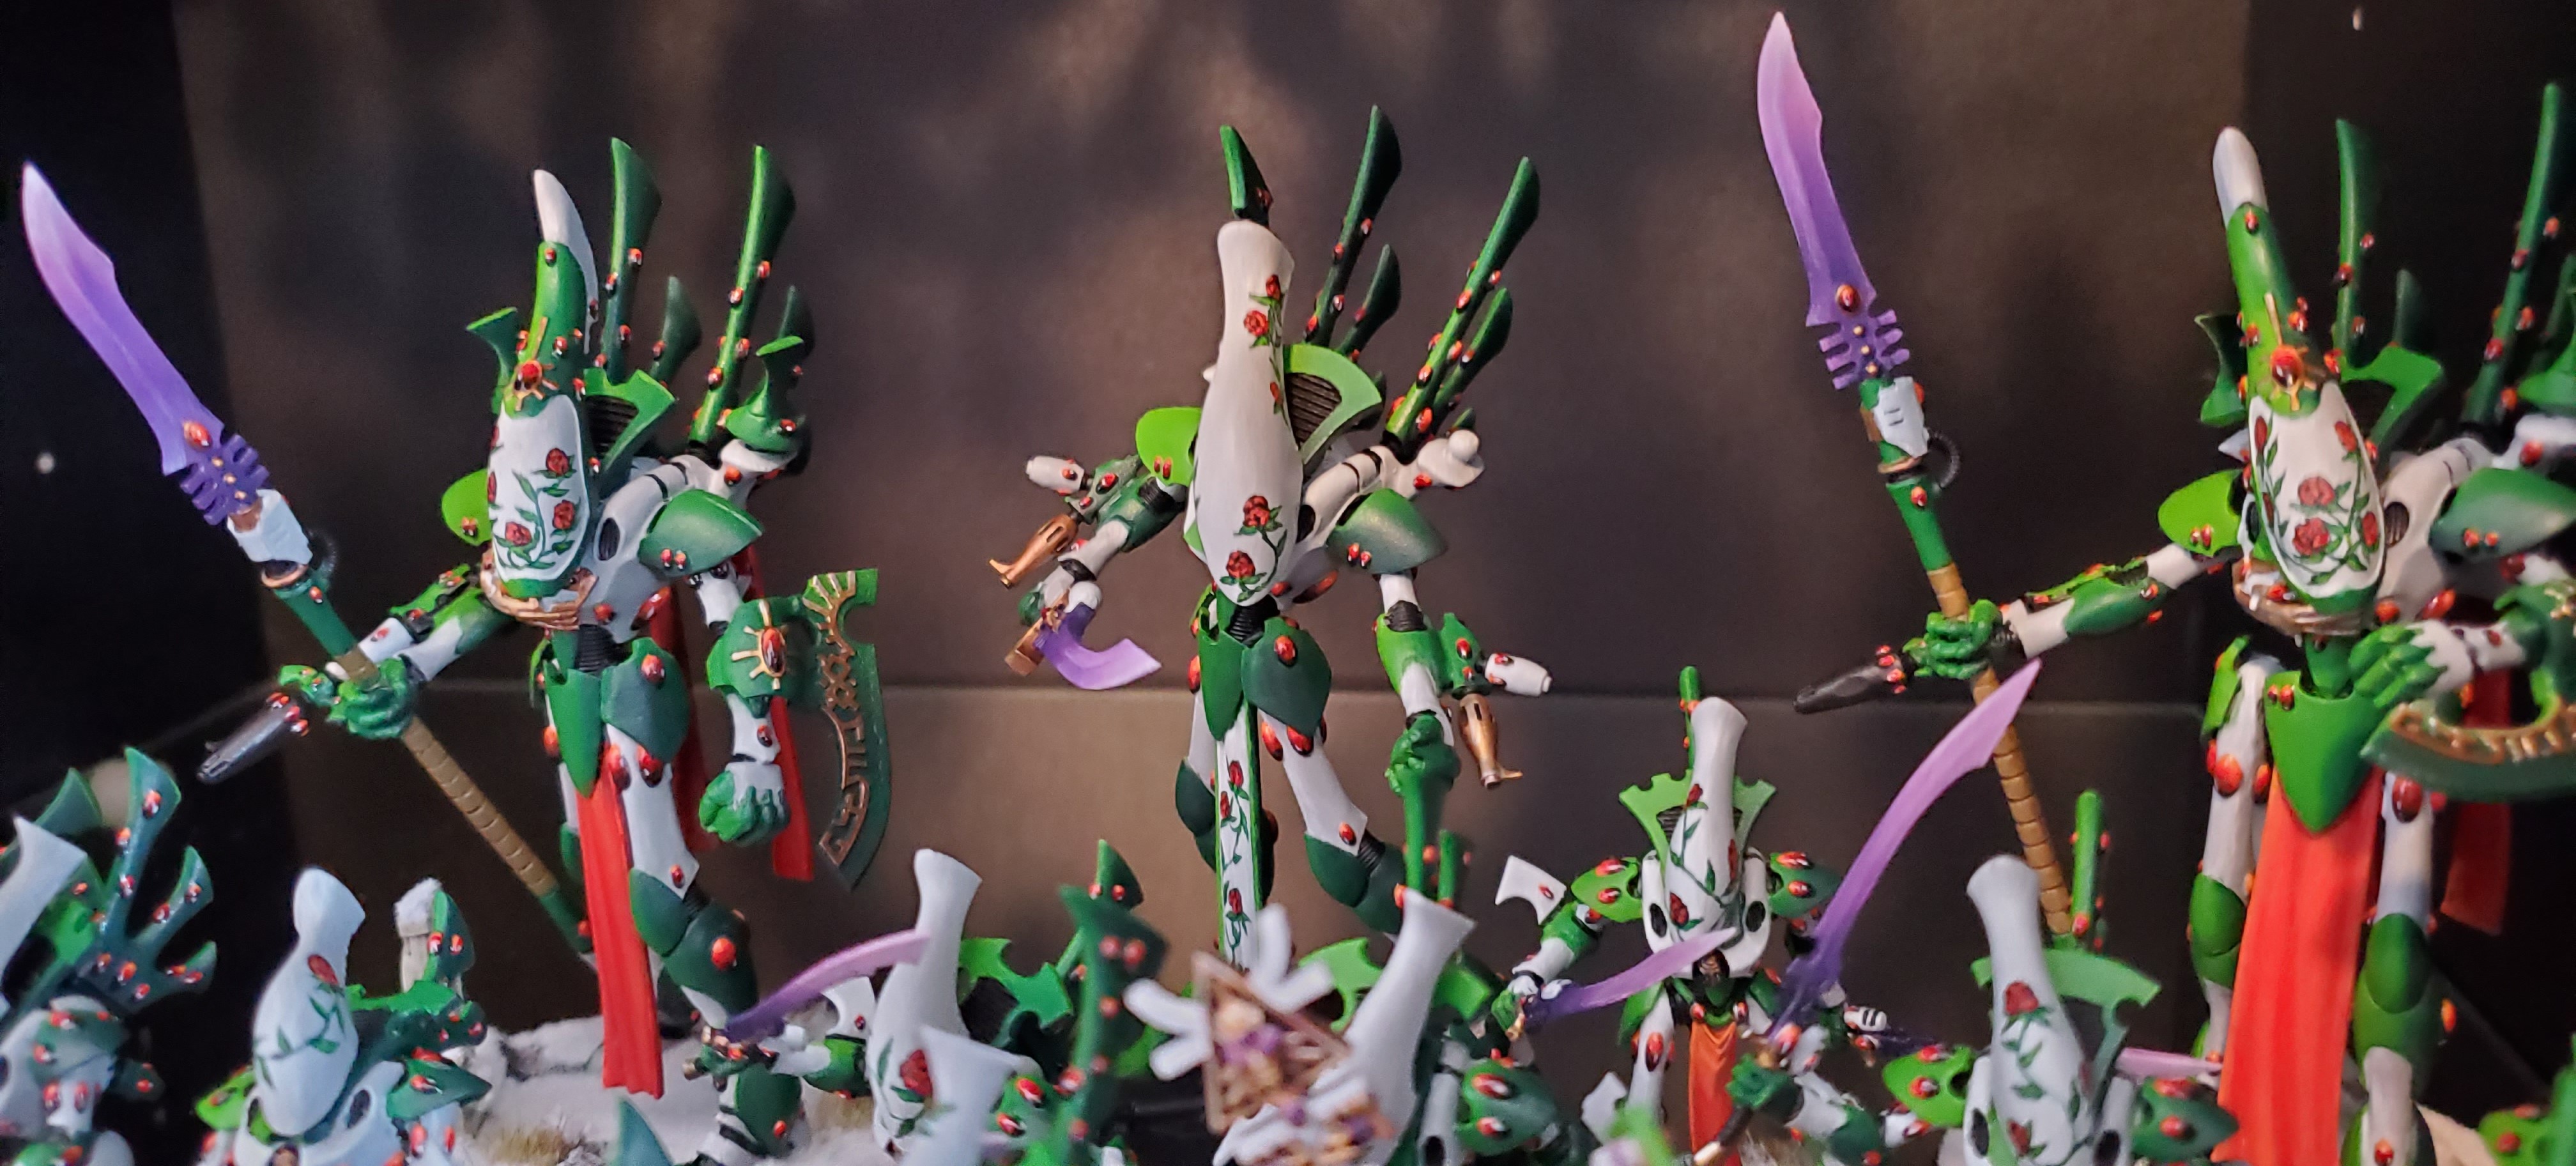
With the gems I target half of it to be black or black/red which will then blend up to Fire Dragon Bright at one tip – as usual I’ll lay down the layers or ‘layer it up’ from dark to bright, then blend them ‘back down’ from bright to dark. Afterwards I’ll place a white dot, or a thin dot + line in the black portion, depending on the gem. After the gems, I’ll start to lay down the roses. I decided to go with roses a long time ago – mostly because I hated the thorny vine look of the traditional Biel-Tan look but wanted to give it that Biel-Tan tie – so I one-upped the Craftworld and added leafy vines with roses. The roses start at the center with an upside down V and then I’ll work outwards with overlapping black lines. I’ll then fill in with Mephiston Red, highlight with Wild Rider Red, and then add the curvy vines with Caliban green and highlight with Moot Green. The nice thing about putting Caliban Green over the white of the hull is that Caliban Green doesn’t actually cover all that well, so Moot Green highlighting actually gives it a lot of depth between the darkest portions and the lime-like color of the Moot Green.
Finally, I’ll go through and touch up the model – clean up any lining (usually black), then clean up any overruns into the blends or white/green sections. Afterwards I’ll put a satin varnish to give it some enduring protection and one or two layers of matte to cut the glossy sheen – then I’ll apply any ‘Ard Coat to gems or glassy surfaces to give it that glassy appearance.
James “One_Wing” Grover’s Method
It’s been a while since I painted Biel Tan minis (what with last year mostly being a year of skeletons) but happily the last one I put together is one of my very favourites, and shows off my current technique nicely.
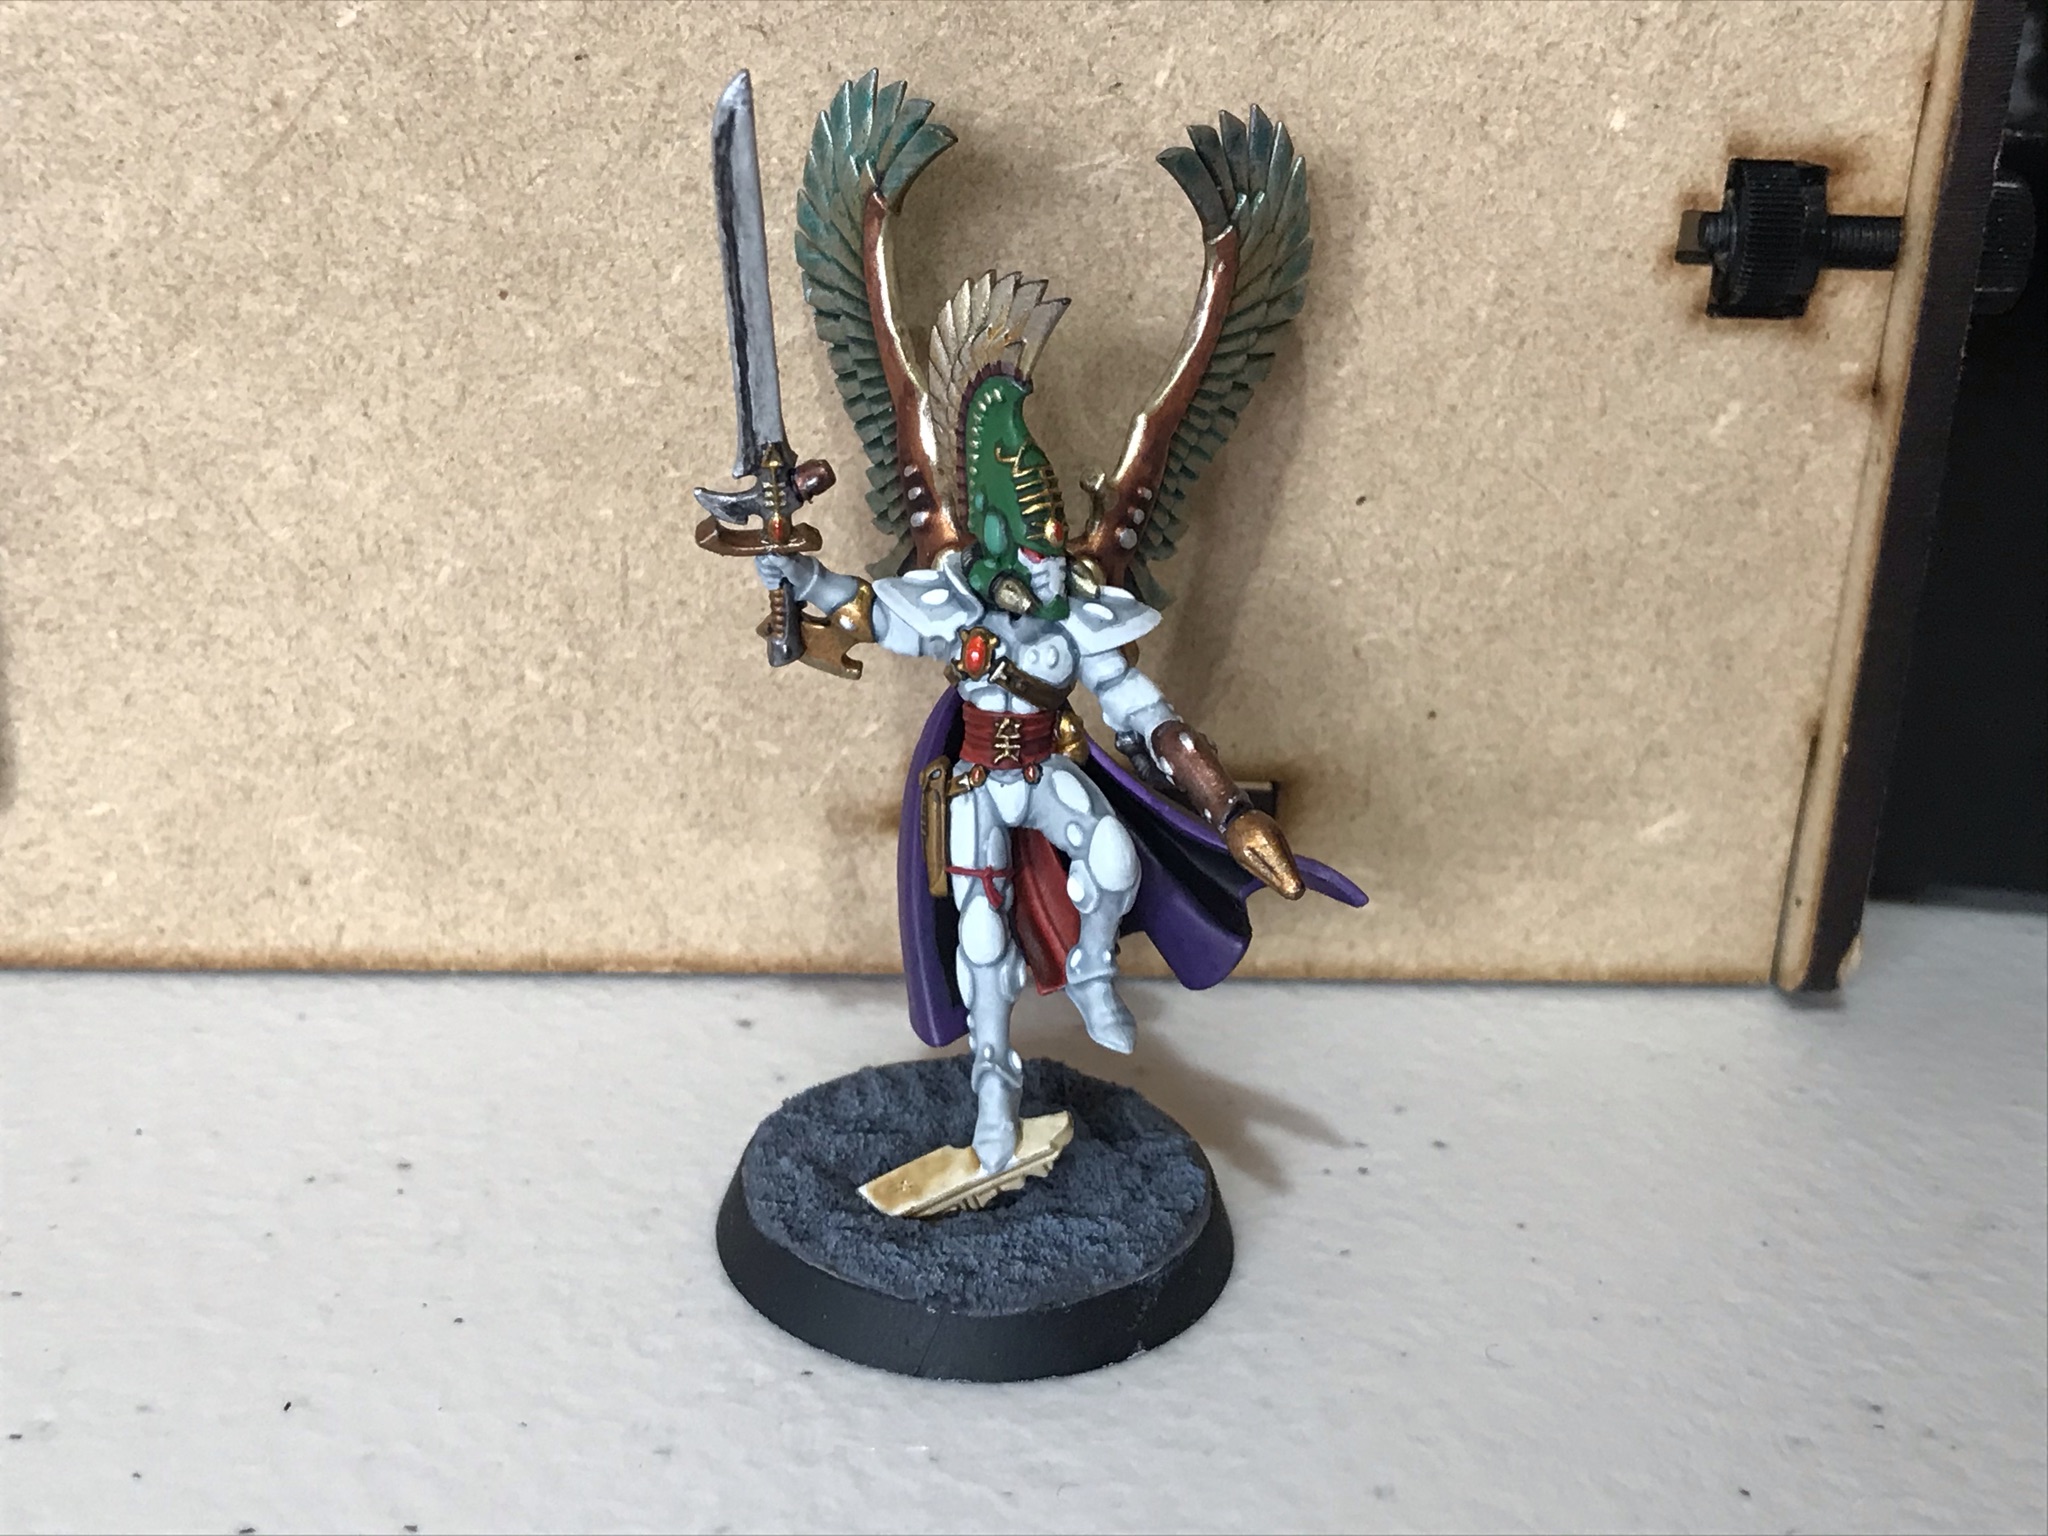
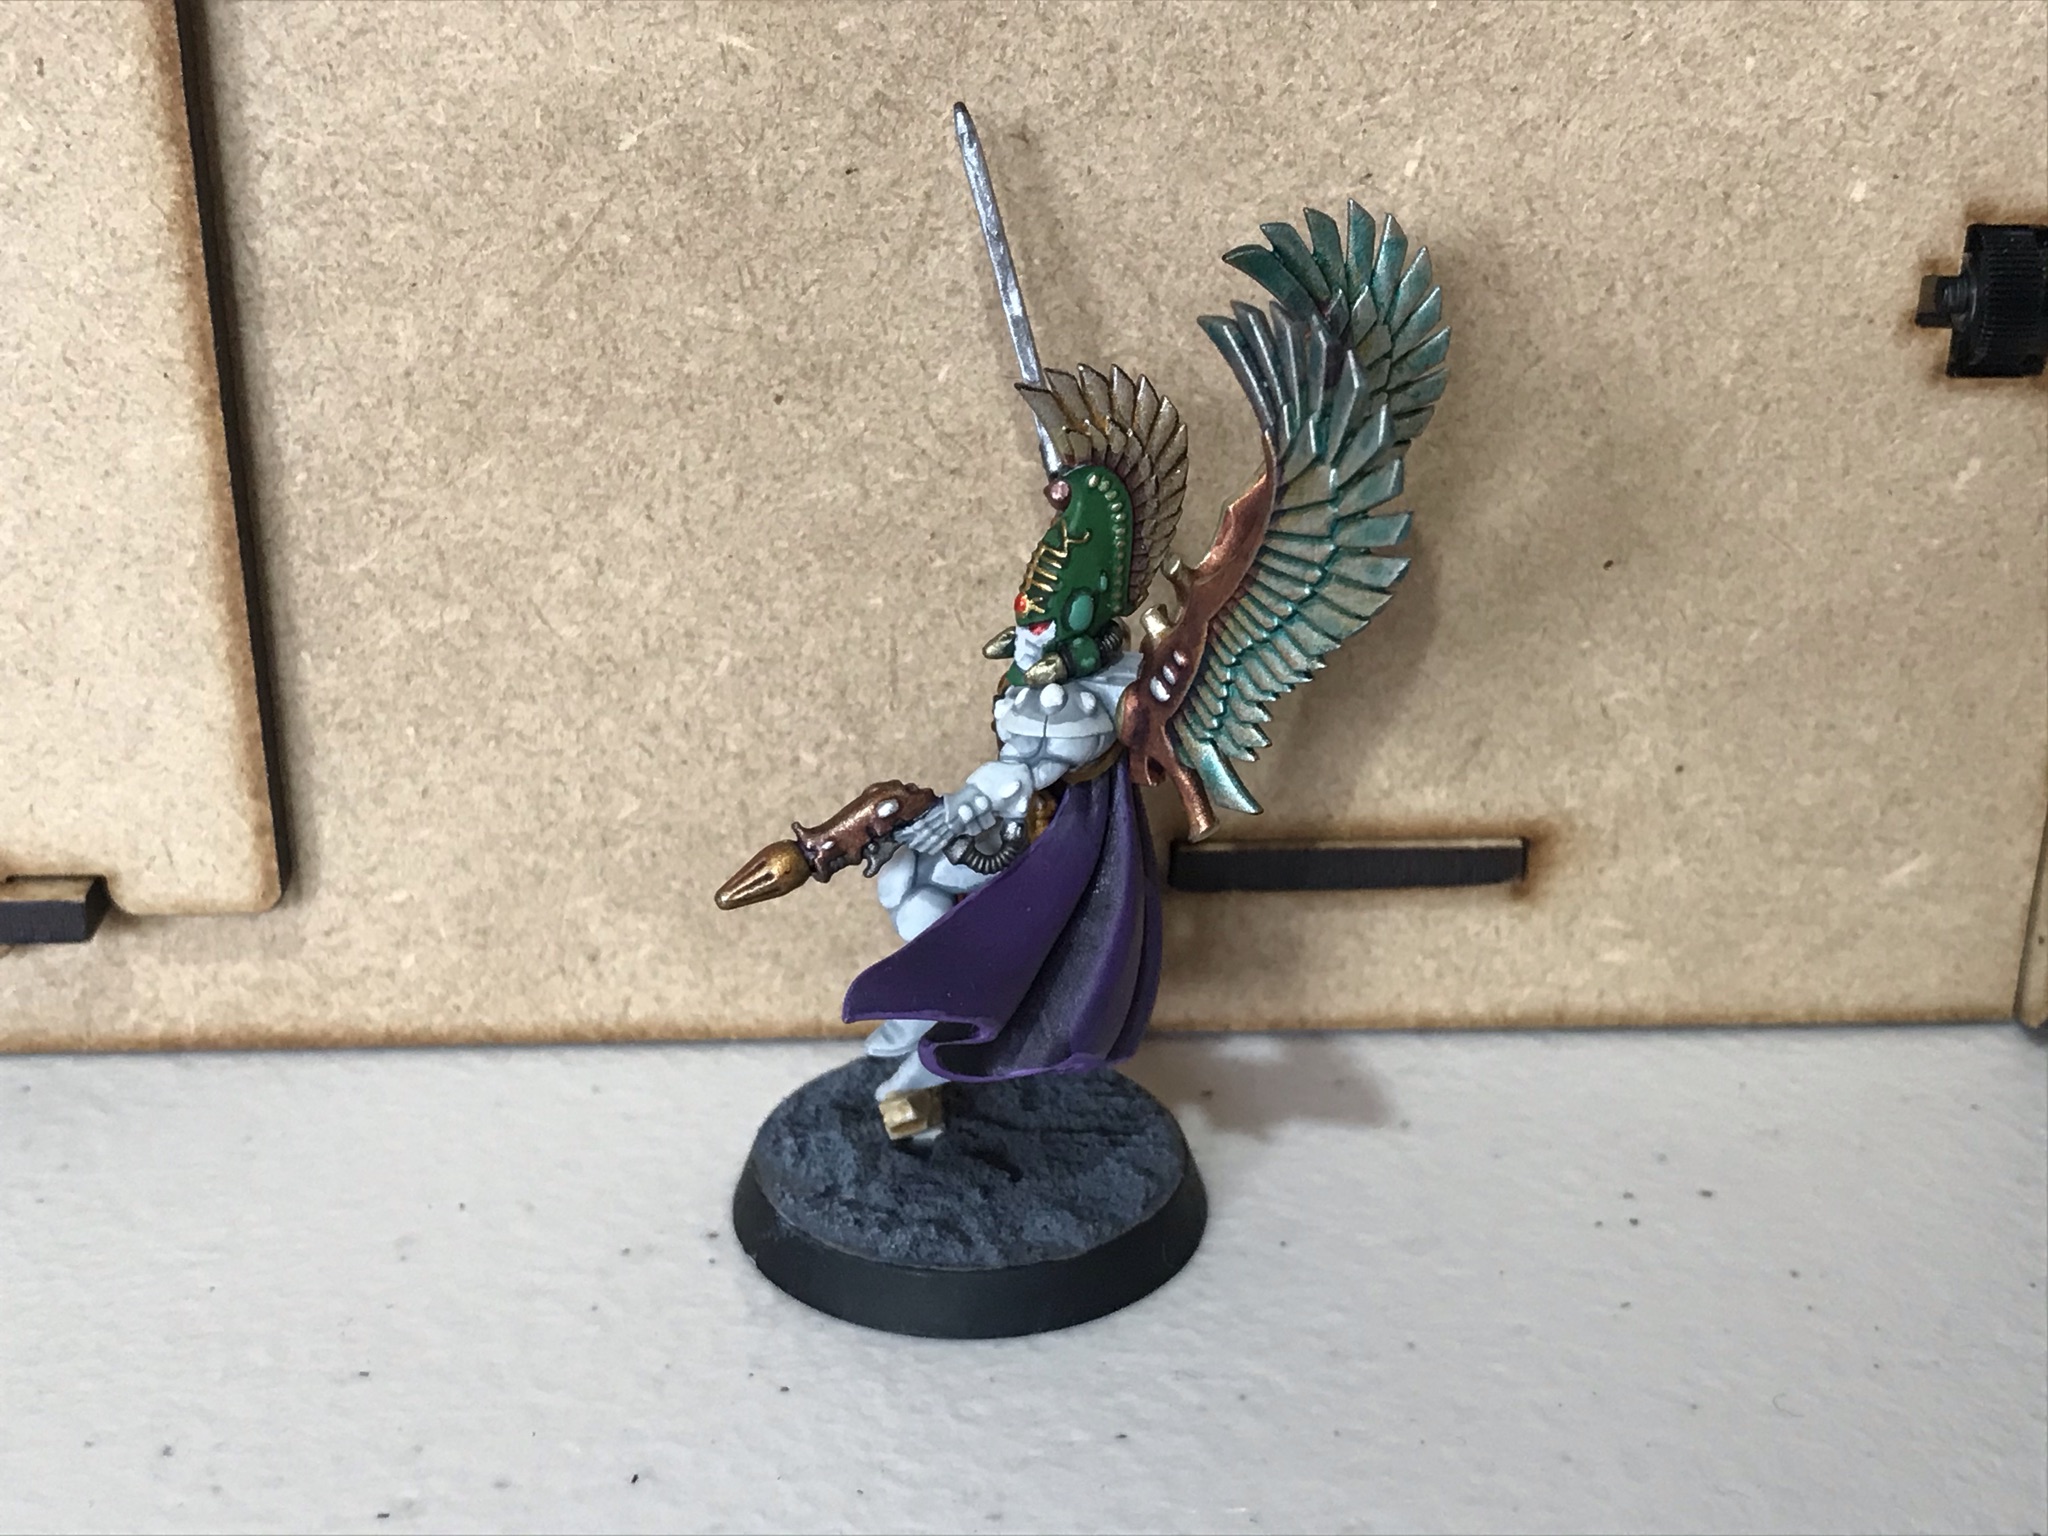
Thanks to the magic of contrast, it is also not super complicated. The process was:
1.) Assemble the body but leave the helmet, cloak and wings off. Spray this Grey Seer, then block in any future metals (i.e. the sword, the gun) with thinned Black Templar.
2.) Spray all other parts Chaos black.
3.) For the armour, use Apothecary White contrast, then highlight the plates, raised nodes and the edge of the shoulders with Lothern Grey. Optionally add some White Scar to anything you really want to pop.
4.) For the helmet, paint it in Waagh Flesh, then all over with Warpstone Glow. Wherever there are raised nodes or bits of rune detailing, carefully line around the edges with Nuln Oil to give a border. Use Sybarite Green to highlight the raised helmet nodes. For the face, I blocked in a few layers of thinned grey seer, washed with Apothecary White to darken the recesses, and then highlighted with Lothern Grey like the armour. The eyes are just Stormhost Silver > Blood Angels Red.
5.) For the sash and leg ribbon, literally just carefully paint with thinned Blood Angels Red Contrast.
6.) For the cloak, paint all over Naggaroth Night, wash Druchii Violet, highlight the protruding flat bits with Xereus Purple, edge highlight Genestealer Purple.
7.) Paint in the “light” gold with Retributor armour (gun nozzle, shield generator, plume, wings) and the “dark” gold (gun body, wing mounts) with Balthazar Gold. Wash all of this with Druchii Violet.
8.) Edge highlight the front of the wing mounts (and any other edges that protrude) with a 50:50 mix of Stormhost Silver and Retributor armour. Drybrush the plume with the same (I overdid this here, will probably re-wash this at some point).
9.) Wash the wings with Aethermatic Blue. I’ve done more playing with contrast since I did this model (see also HTPE: Yncarne) and if I was doing this again, I’d have done a gradual blend outwards from Akhelian Green to give a better effect.
10.) Paint the sword in Leadbelcher, wash all over with Basilicanum Grey, then paint the edge and the upper panel in with Stormhost. This is something else I’d like to improve – getting blades looking nicer is on my to-learn list when I return to an elf kick from Skeleton time, but what’s there now looks fine.
11.) Paint in the pouch and chest strat with Snakebite Leather, Retributor Armour on runes and gem mounts, Stormhost > Spiritstone on the gems themselves, Skeleton Horde on the hero rock and it’s all done!
Final Thoughts
Biel-Tan is a striking Craftworld scheme that can be a bit intimidating with the focus on the white – fortunately there are methods to mitigate this challenge with greys and patterning. The rich greens offer a great contrast and provide ample opportunities for you pick out and highlight details with a wide array of complementary colors or metallics. Hopefully this guide gave you some ideas for your own approach. As always, feel free to send any questions or feedback to contact@goonhammer.com.
