This article is part of a larger series on how to paint Space Marines. To return to that series, click here.

In our How to Paint Everything series, we take a look at how to paint well, everything, with different methods and approaches from different artists. In this article we’re looking at the Blood Angels, everyone’s favourite Renaissance goth space vampires.
The Blood Angels are one of the original Legions, founded by the Emperor himself for the Great Crusade. Known simply as the IXth Legion, they were pretty creepy before they found their vampire angel primarch on Baal, gaining a reputation as the “Eaters of the Dead” for their habit of eating corpses. Along with this unpleasant habit, they were well-known as shock troops who sometimes took things way too far – known for their hunger for blood and death, the IXth Legion were a force which seemed to encapsulate all the worst aspects of the Imperium.
This all changed with the discovery of Sanguinius. Sanguinius’ great project was to reshape his Legion in his own image, turning them from savage killers into the noble warrior-artists which will be better known to 40k players. From there the Legion took part in several important actions in the Great Crusade, including fighting a gigantic Hrud migration, the Ullanor Crusade, and the War on Murder, the battle which would lead almost directly to Horus’ fall from grace. The Blood Angels would play a pivotal role in the Siege of Terra, helping defend the Imperial Palace from Horus’ assault.
While his Blood Angels fought ferociously on Terra, Sanguinius and a small retinue teleported aboard the Vengeful Spirit along with the Emperor and Rogal Dorn. There they were separated, every individual warrior experiencing their own personal battle above Horus’ capital ship. Sanguinius had long known that he would meet his death at the hands of his brother Horus, but he pressed on anyway, and was the first to encounter Horus deep within the halls of the battle barge. The two fought a titanic battle, but Sanguinius was unable to harm the warp-fuelled Horus, and was eventually struck down.
After the death of Sanguinius, the Blood Angels began to experience the Black Rage more often and more terribly. The Legionaries began to have death visions of their Primarch, imagining themselves to be Sanguinius aboard the Vengeful Spirit, stalking its halls, battling Horus, and dying. When the Legion was forced to split into smaller Chapters, this curse was taken to their successors too, with some like the Flesh Tearers experiencing the Black Rage even more powerfully than their founders. Those Marines who became lost to the rage were formed into the Death Company, a combination of elite shock troops and fearless berserkers lost to their own madness.
Throughout the millennia that followed the Horus Heresy, the Blood Angels were tireless defenders of the Imperium, warring on all fronts. The Blood Angels fought in both the 2nd and 3rd Wars for Armageddon, battled multiple Hive Fleets, and took part in thousands of other wars. They’ve been led for over 1,100 years by Commander Dante, the oldest serving Space Marine who is not interred in a Dreadnought. Dante has taken part in many of the most titanic battles of the Blood Angels’ history, including the Devastation of Baal, when Hive Fleet Leviathan invaded the homeworld of the Blood Angels. Following the defeat of Hive Fleet Leviathan, Dante was named Lord Regent of the Imperium Nihilus, the part of the Imperium which lies behind the Cicatrix Maledictum, by Roboute Guilliman himself.
Covered in this Article
- How to Paint the Blood Angels, with different approaches to painting the red-armoured marines from different artists.
- Notes on the Heraldry of the Blood Angels and how to represent their companies on the battlefield.
- How to paint the Death Company, with their black armor.
- How to paint the gold armor of the Sanguinary guard.
- How to assemble and paint Mephiston, the Chief Librarian of the Blood Angels.

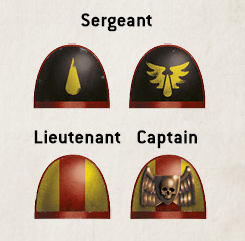
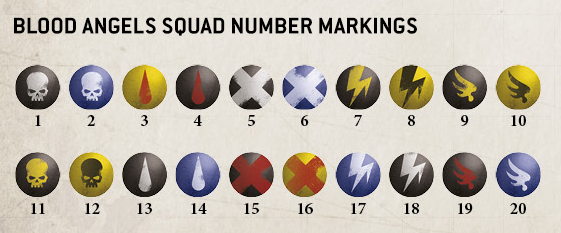
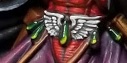
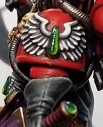
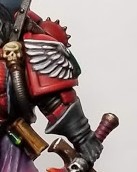
Blood Angels Heraldry - Click to Expand The Blood Angels have some interesting heraldry. They are, for the most part, a Codex-Compliant chapter with regard to company organization but they have a few unique exceptions. First among these is the Death Company, who have their own company and unique scheme and markings. The second are the Sanguinary Guard, veterans who wear armor of gold instead of white. Additionally, the Blood Angels do not paint their shoulder trim to denote company, instead putting a colored blood drop on their right shoulder pad to denote their company. As a result, the Blood Angels use an alternative scheme for denoting a unit’s battlefield role, while the all-red armor of the Blood Angels also means that they do not paint their sergeants’ helmets red. The color of a Blood Angels’ helmet is used to denote role and rank: Sergeants, Lieutenants, and Captains use additional iconography, with black shoulder pads for Sergeants and red bands on gold fields for Lieutenants and Captains. Finally, Blood Angels do not use numbers to denote their squad number in a company but instead use specific symbols, placed on the right kneepad.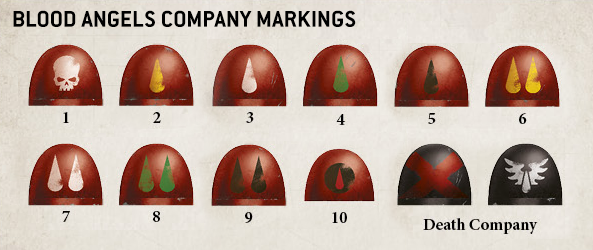
Painting Blood Angels
The Blood Angels are similar to the Dark Angels in that, while the army has a principle single color scheme, they also have multiple schemes within the chapter to represent different units of particular renown. Specifically, the black armor of their Death Company and the golden armor sported by their Sanguinary guard. This gives the chapter a ton of variety when it comes to painting them even after you settle on a method for painting their red armor.

Painting Black Armor - Click to Expand The Death company are unique in that they sport black armor, unlike the standard armor of the Blood Angels. You can find good tutorials on painting black armor in these articles: Additionally, if you’re not click-inclined, here’s a quick tutorial on painting black armor on your Blood Angels from Jack Hunter: Jack: The Blood Angels also have their black armored units – either Destroyers in the 31st millennium or Death Company in the 41st. My strategy for the black armor is based on some of the techniques I used on the red, specifically laying down highlights with the airbrush, blocking in details, then slathering the same wash over everything.

Painting Gold Armor - Click to Expand Similarly, Sanguinary Guard don gold armor before flying into battle. This isn’t necessarily difficult to paint, as shown in our guide below. Jack: The Blood Angels have some key units in gold, most notably Sanguinius and his Sanguinary Guard. It’s also used in large areas on the helmets of veterans. There are a ton of different tonalities that can be used for gold, but this is my favorite appearance for my army. I tend to use a lot more different colors on it than I might on other colors – all the models wearing gold tend to be important, so I want them to stand out. You can also find a good tutorial on painting gold armor in the GW approach to painting Thousand Sons, which you can find here.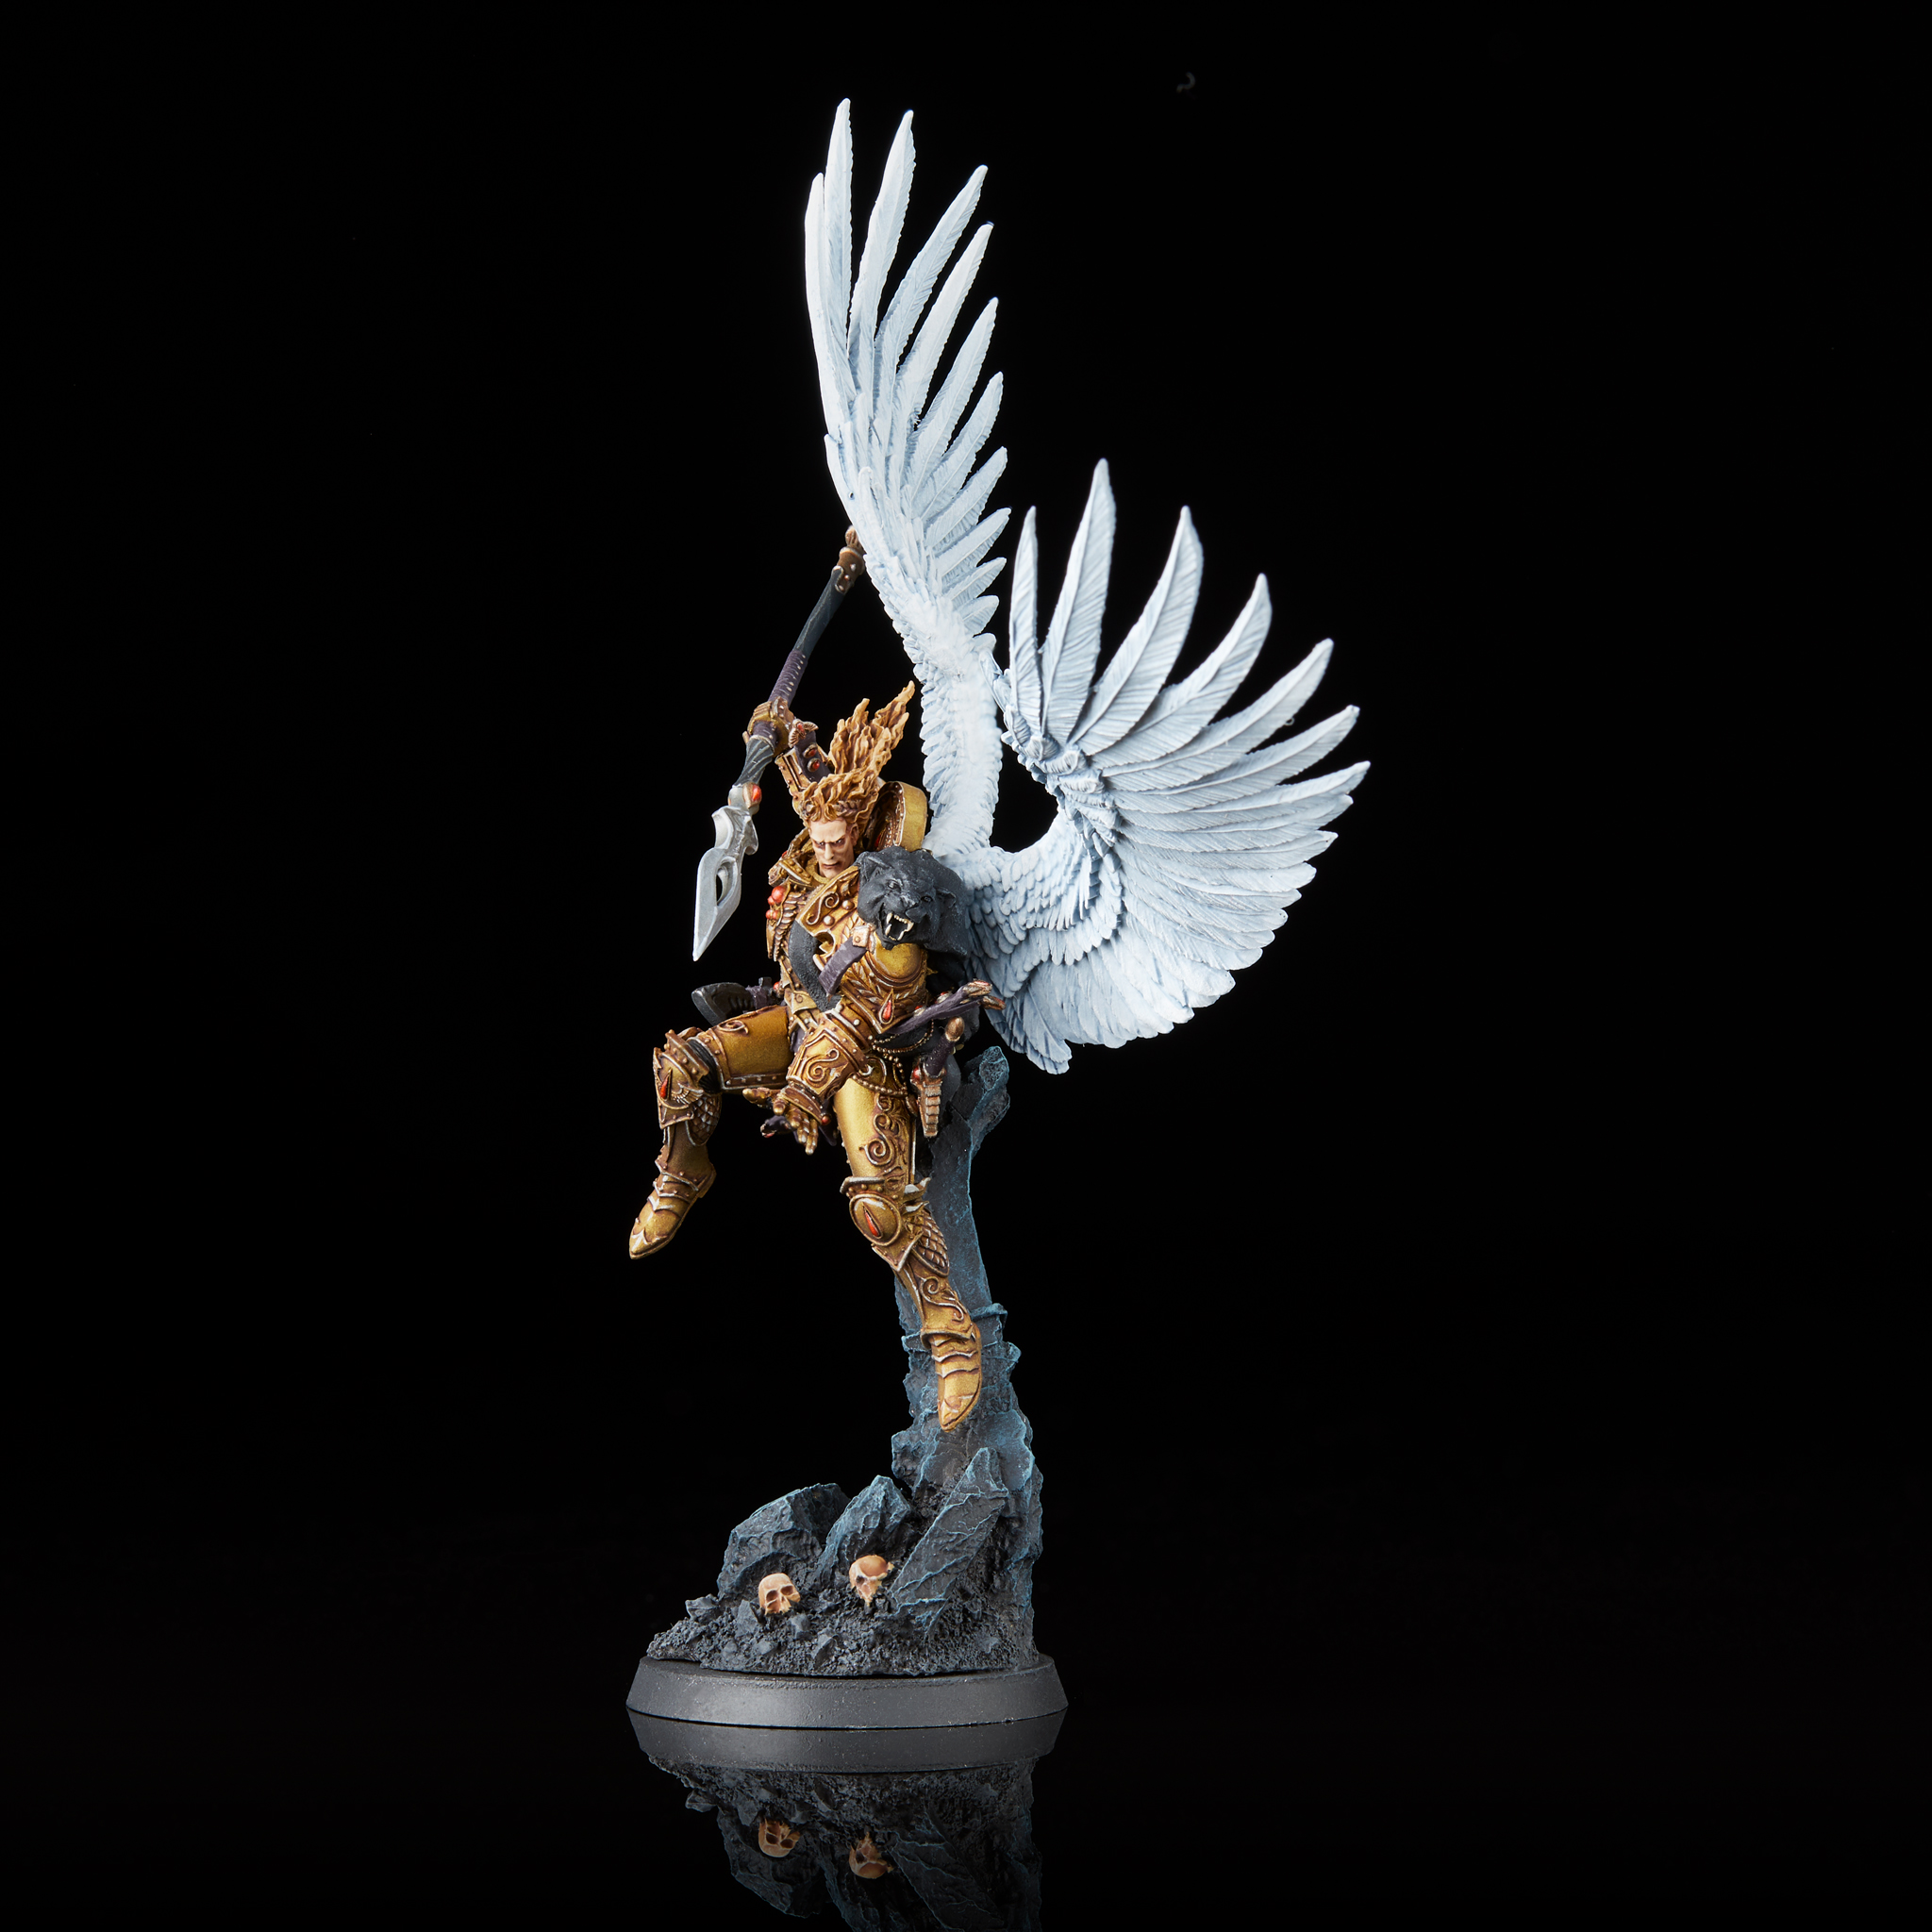


Jack's Method - Click to expand After spending a year painting my Imperial Fists, my return to Blood Angels was accompanied by a new paint scheme. Blood Angels were my first army when returning to the hobby with 8th edition, so I had followed the standard GW scheme that Duncan demonstrates nicely on YouTube. I wanted to push a lot more contrast into my scheme, and fortunately for me Luther over at The Mighty Brush had written an absolutely fantastic tutorial. I’m going to summarize it quickly here, but his site has a ton more detail, including photos of each step. He also sells an updated PDF version of the tutorial, using slightly different paints and methods, which I have yet to try – but even without using the specific the tutorial is absolutely worth it for his thoughts on how to get easy airbrush highlights and painting eyes. Prime with Vallejo German Red Brown. One coat is generally plenty, this covers well. Airbrush shadows with Vallejo Model Color Dark Sea Blue, or some other dark greenish-blue. Using blues in the shadows will eventually make them lean towards purple, which is some added visual interest and makes them seem darker by comparison to the reds. Airbrush white onto the raised areas, with shoulders being brighter than kneecaps. Airbrush VMA Medium Yellow over the entire model. The red we’re going to use leans towards magenta, so by undercoating in yellow we pull it back towards a very pure red. Airbrush VMA Red over the entire model. This is relatively translucent but still covers well – it picks up all the preshading we’ve done but I don’t find it needs multiple coats to get a consistent color. Gloss varnish, apply any decals, and carefully pinwash with nuln oil or a black oil wash. I used to use gloss nuln oil, but GW discontinuing gloss washes was one of their worst decisions ever and I no longer have enough to just coat the whole model in it. Once you’ve pinwashed everything, throw a coat of matte varnish down. I paint black details in Proacryl Dark Neutral Grey, and silvers in Proacryl Dark Silver, then both can be covered together in a wash of nuln oil. This gives me a pretty quick method of getting large units of troops ready, and with just a little bit more effort can have characters particularly stand out.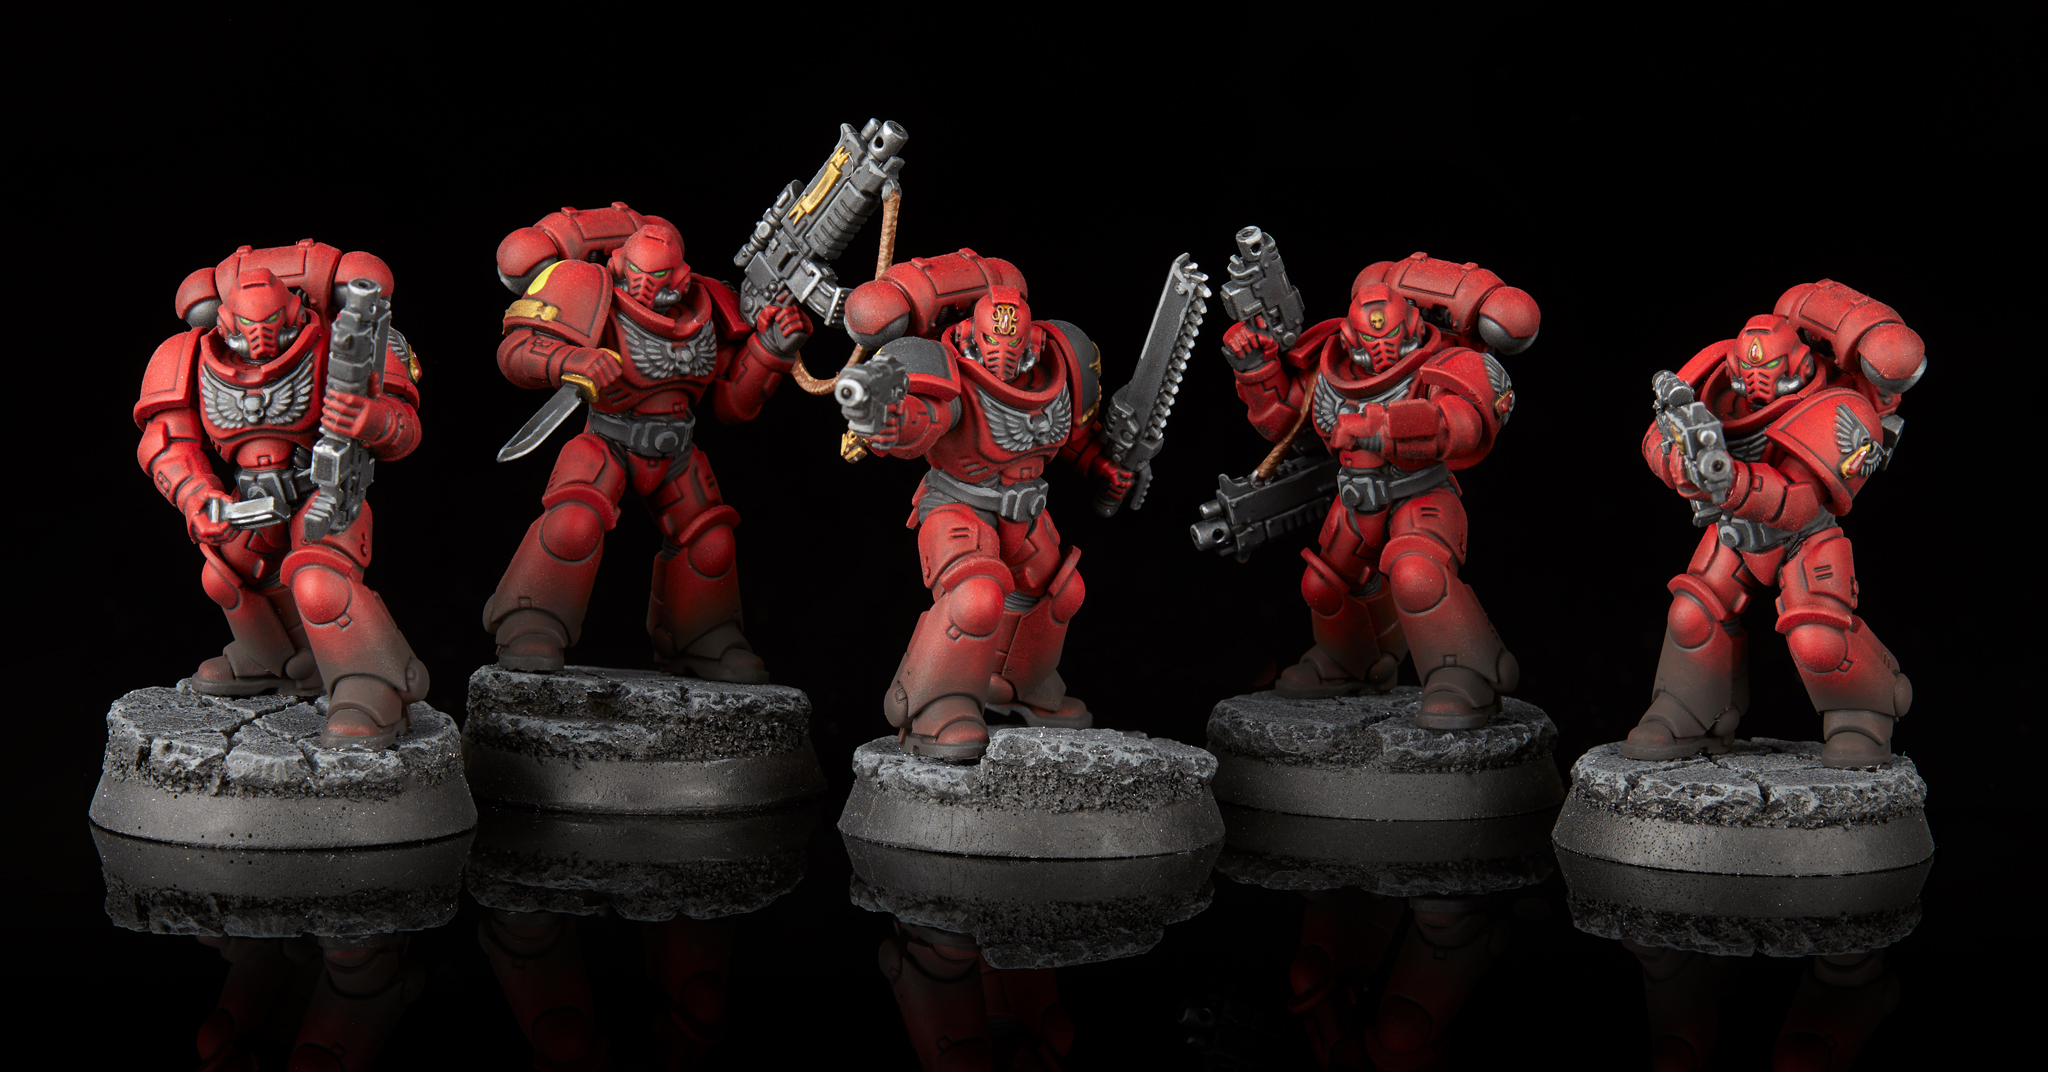
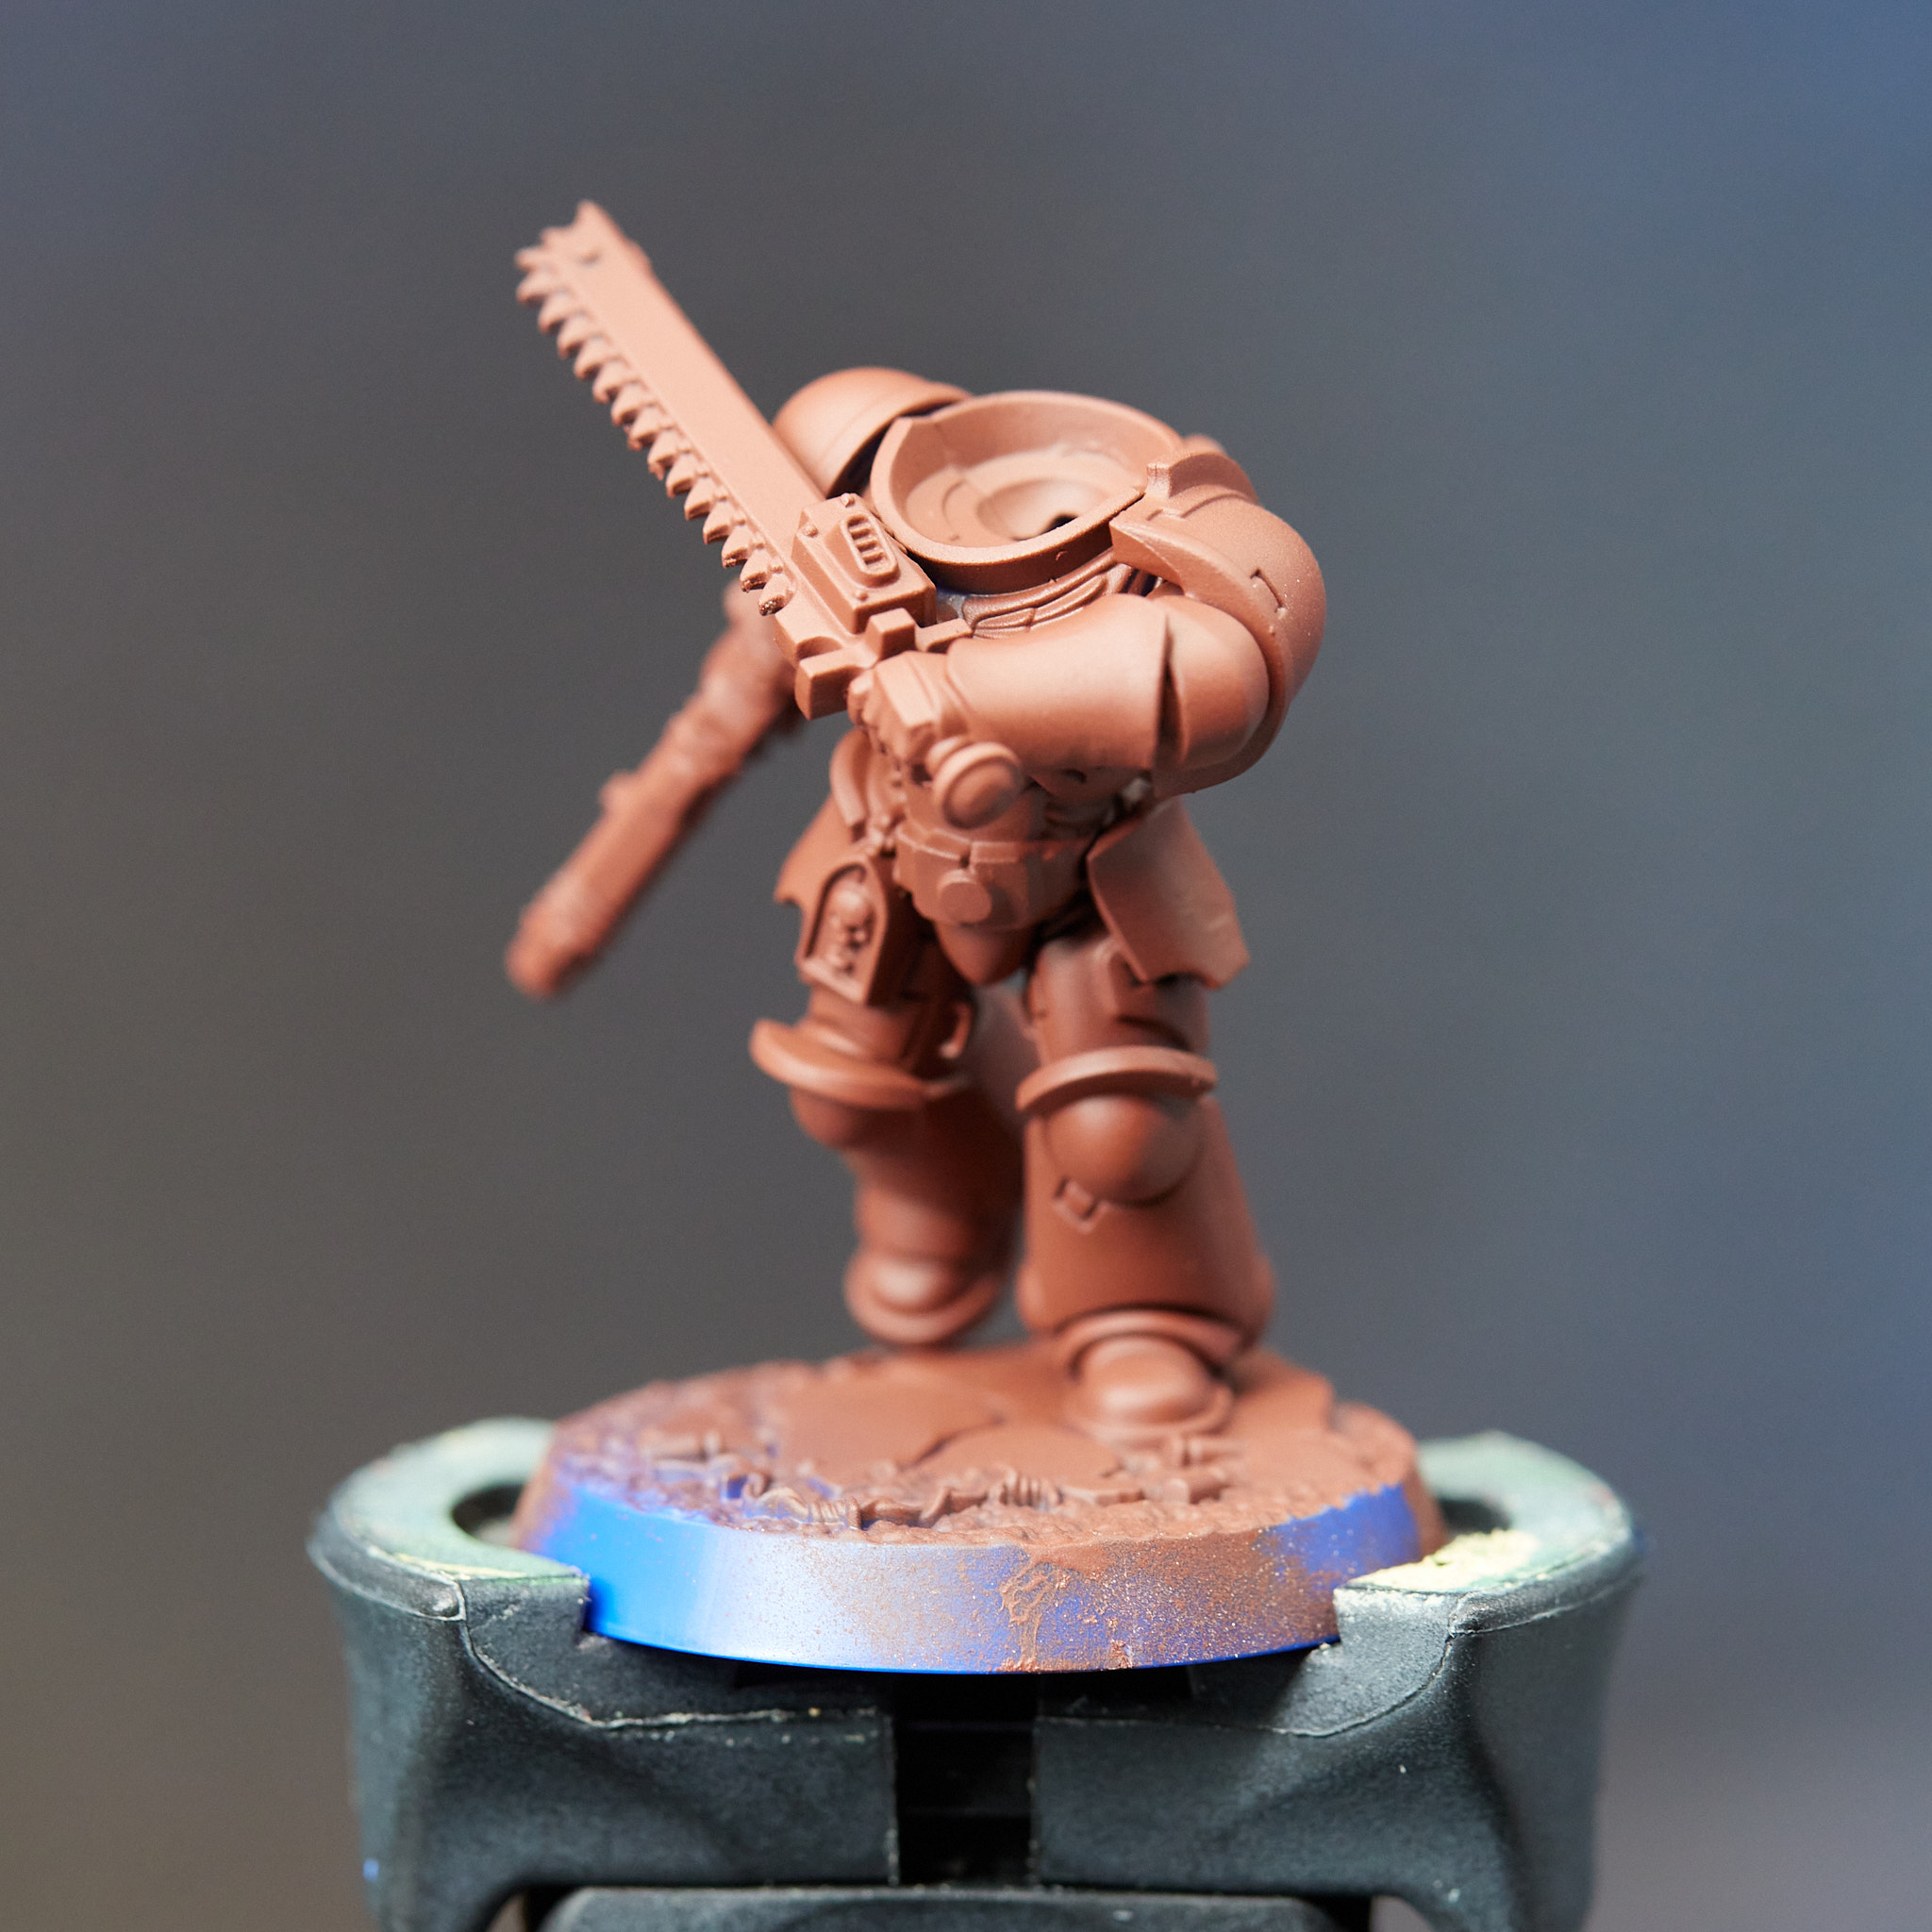 Step 1: Primer
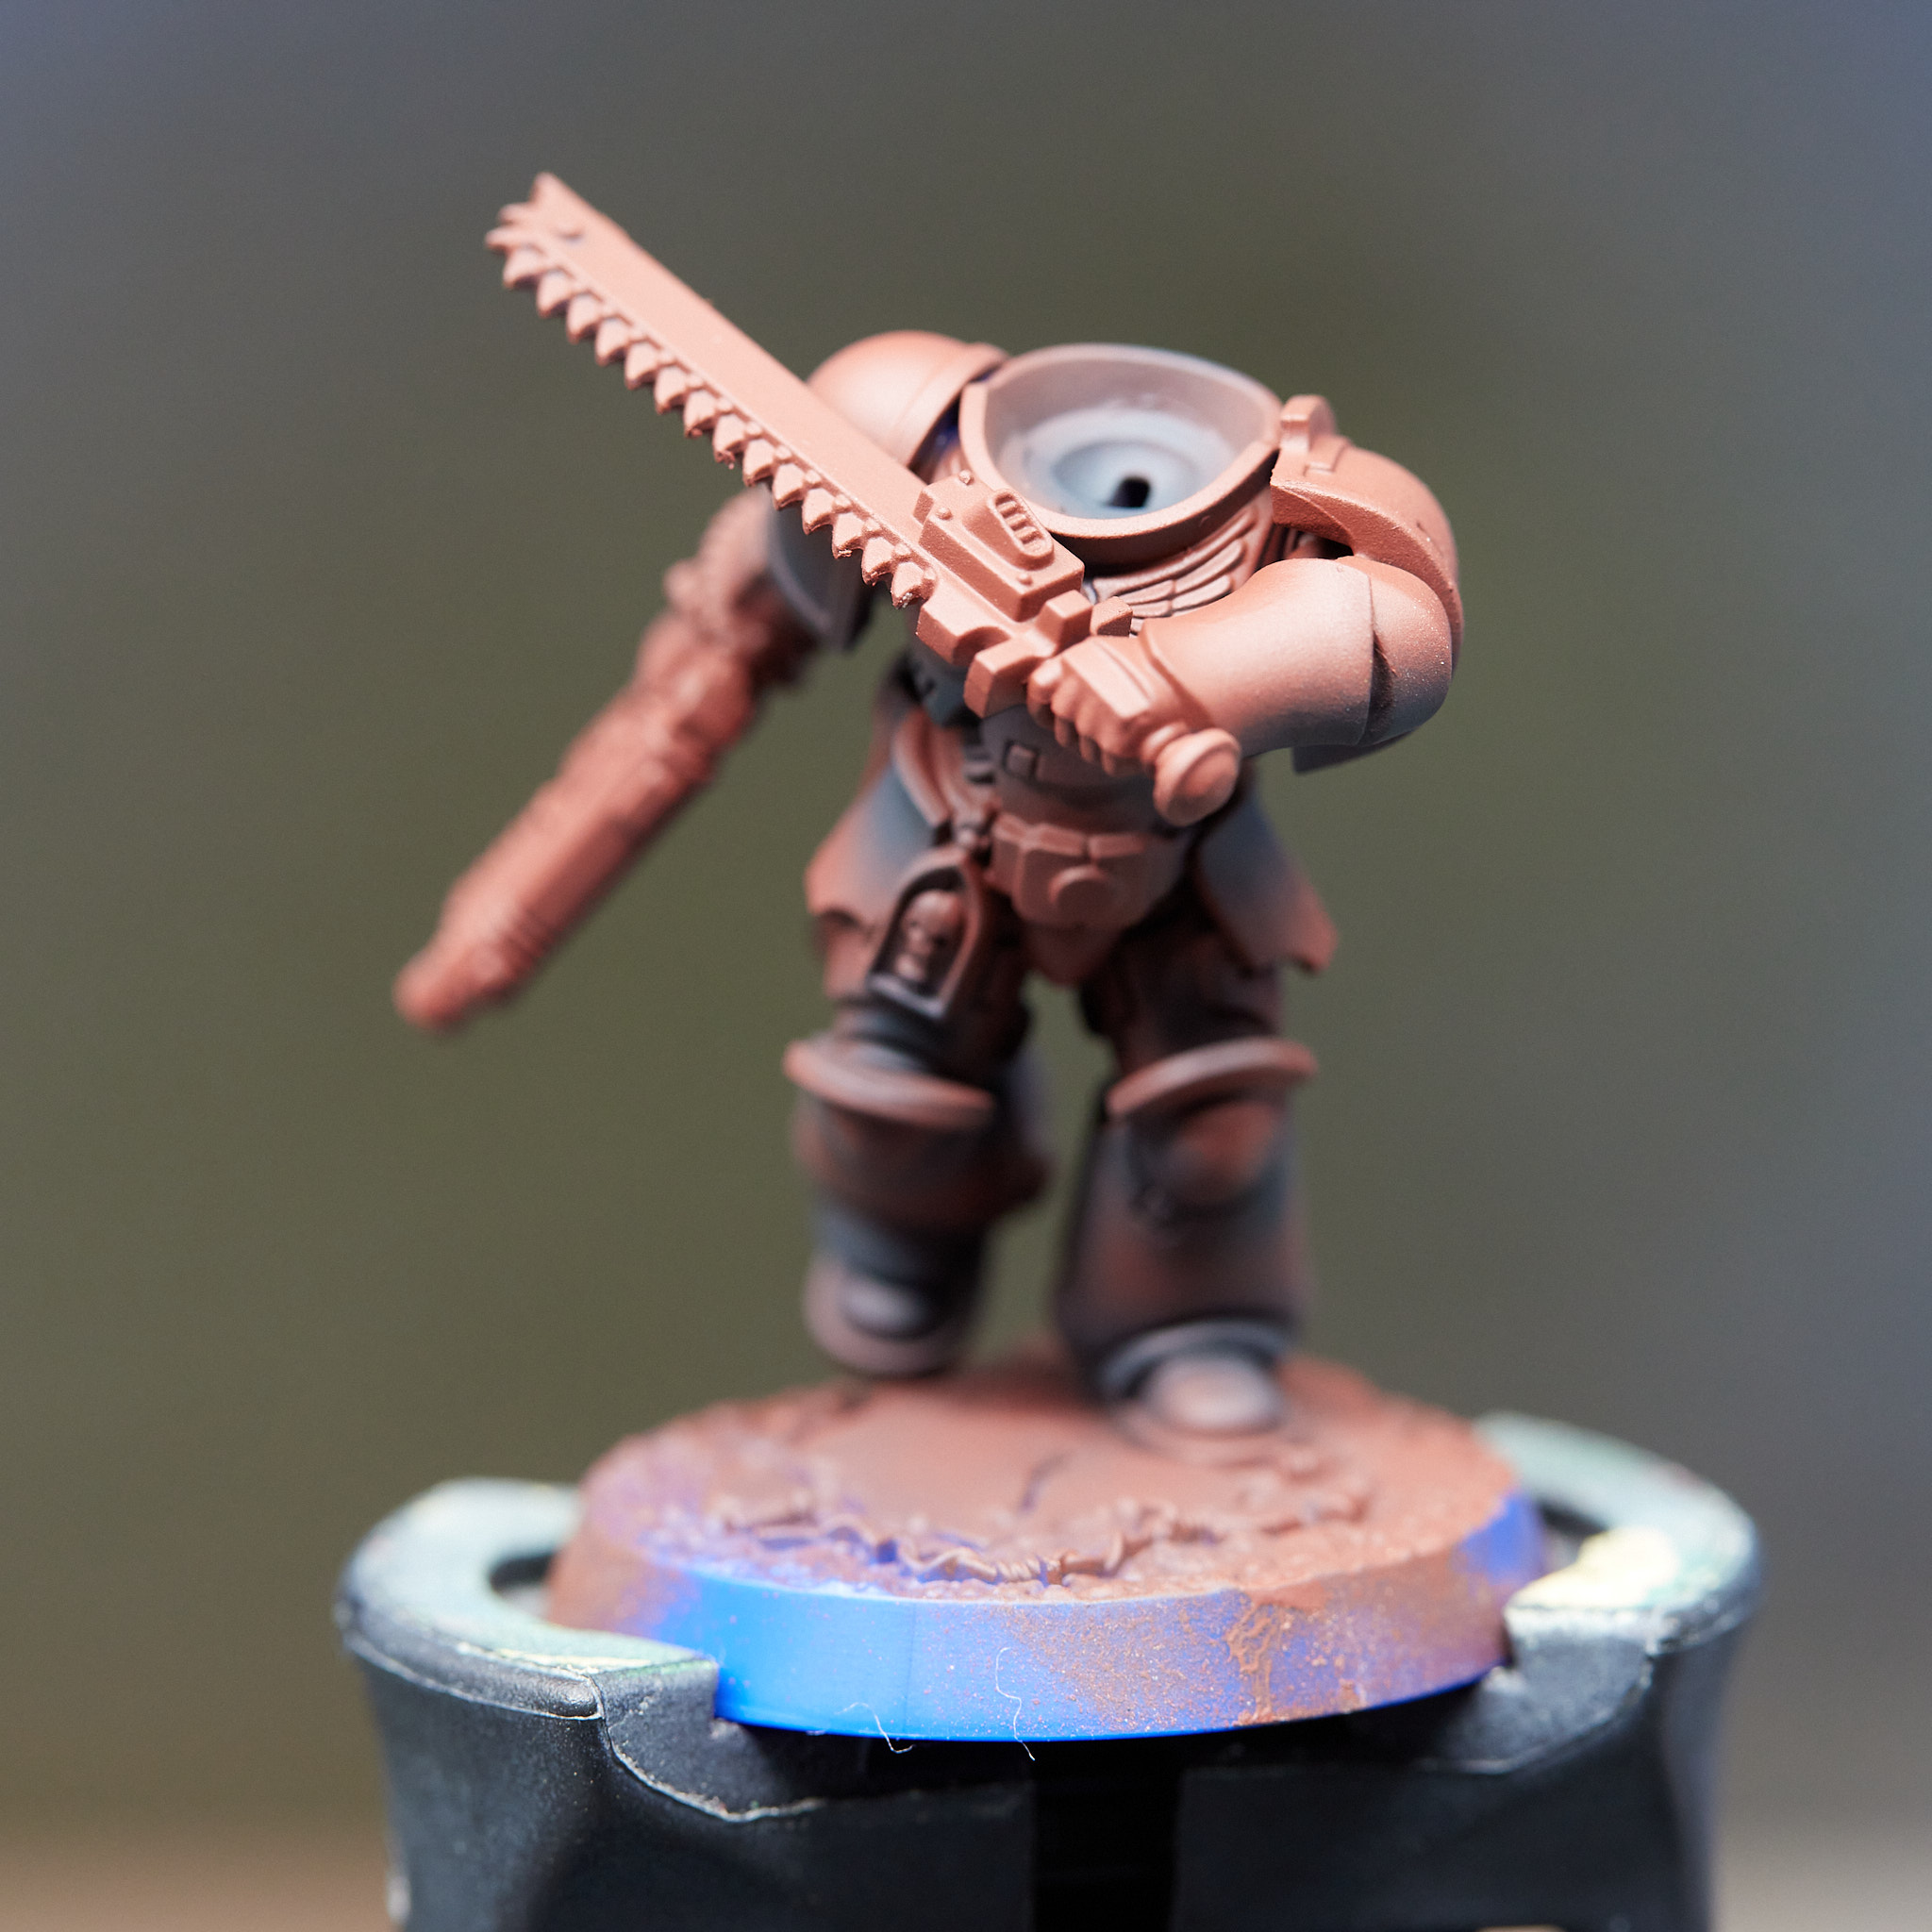
Step 2: Preshading
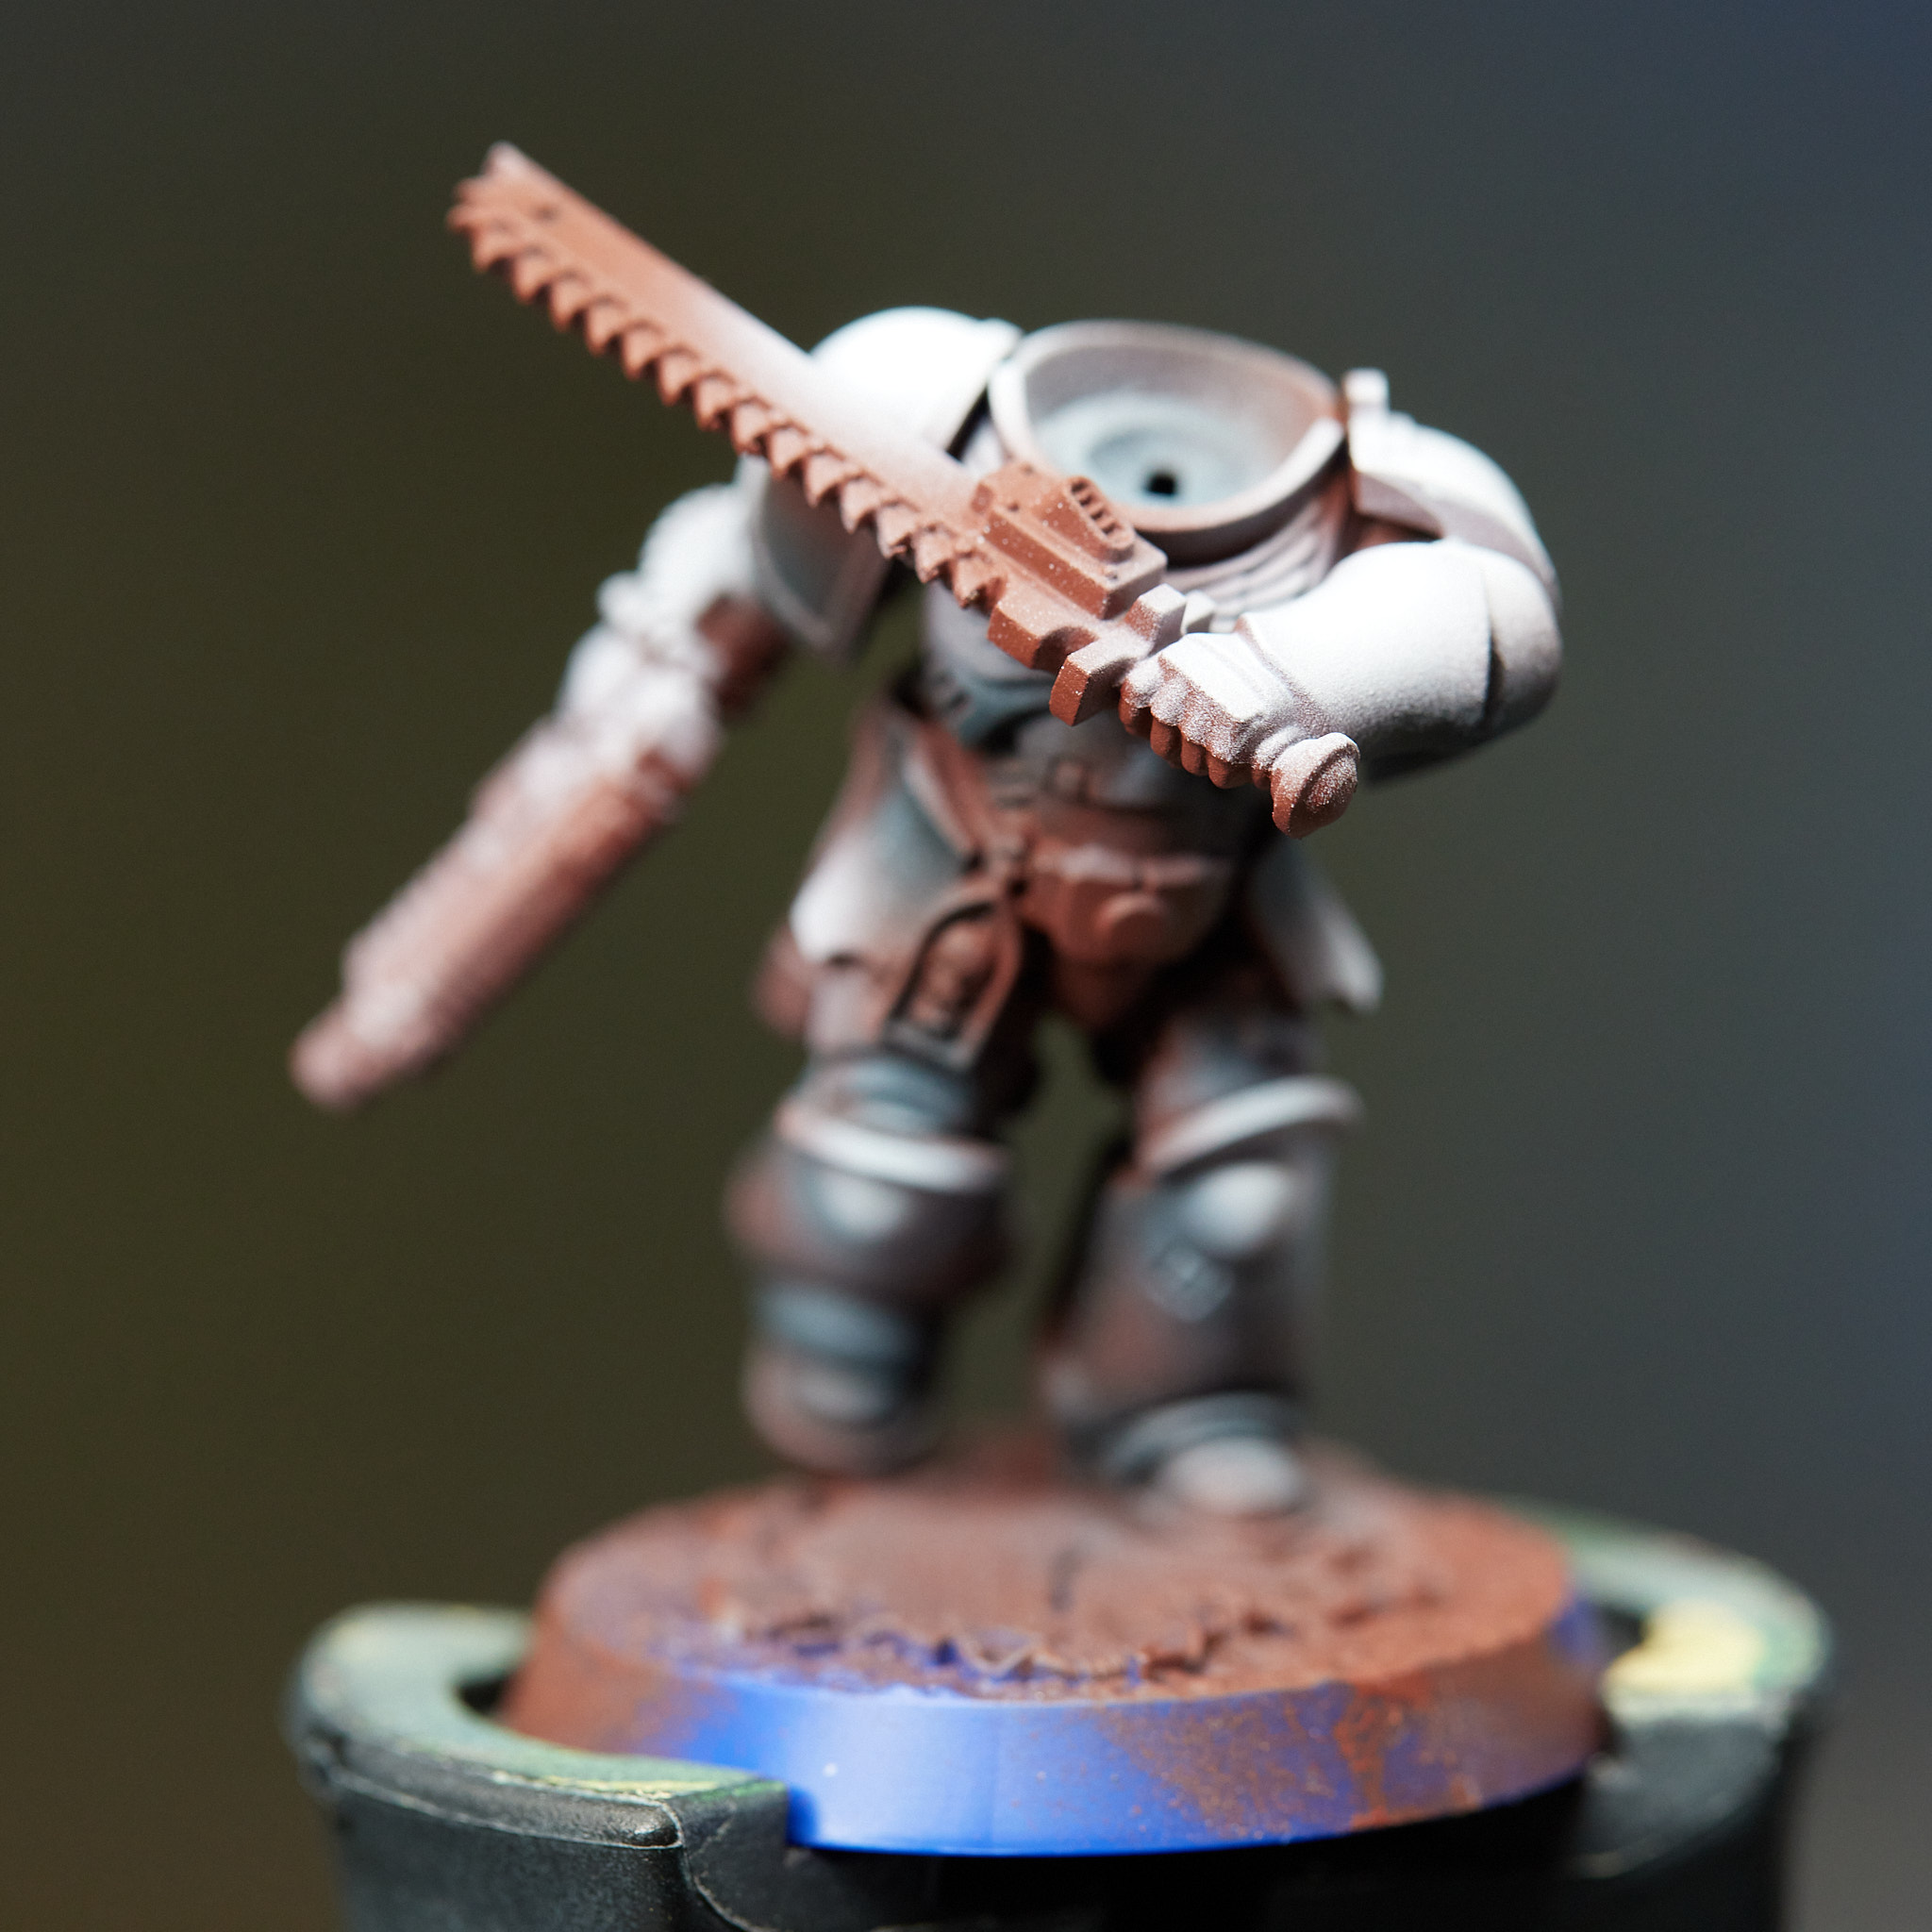
Step 3: Pre-highlights
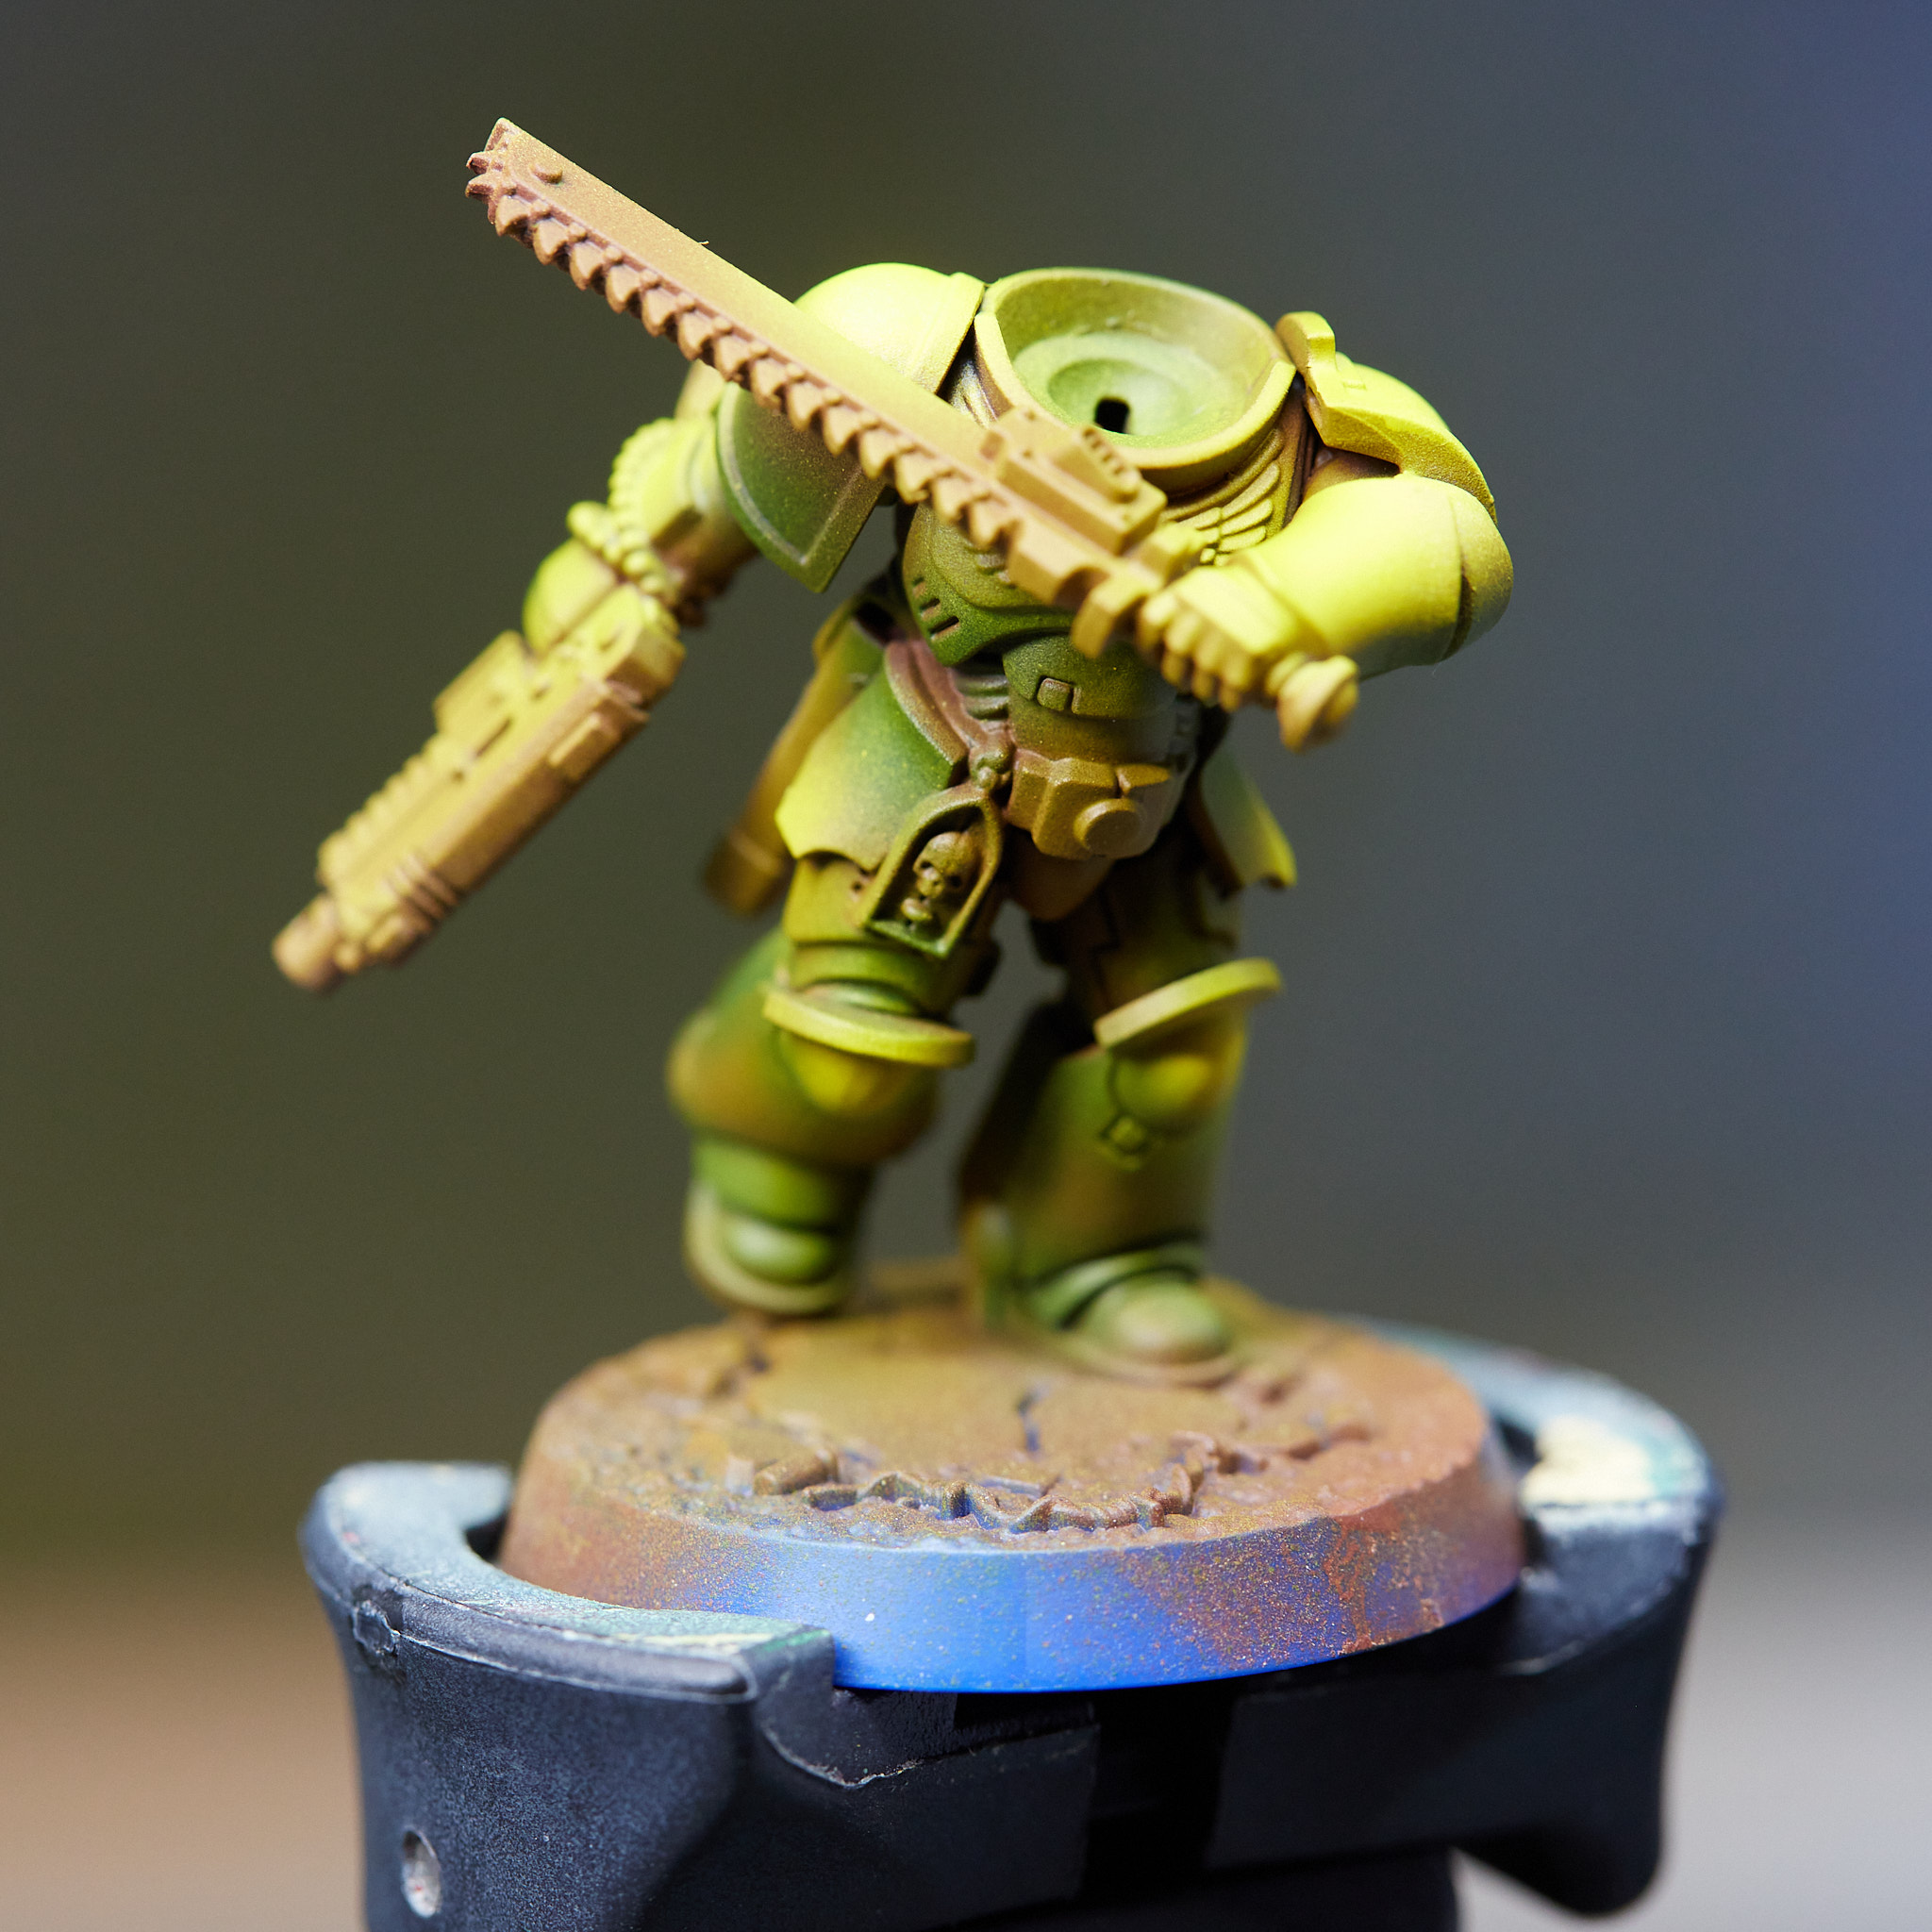
Step 4: Color tones
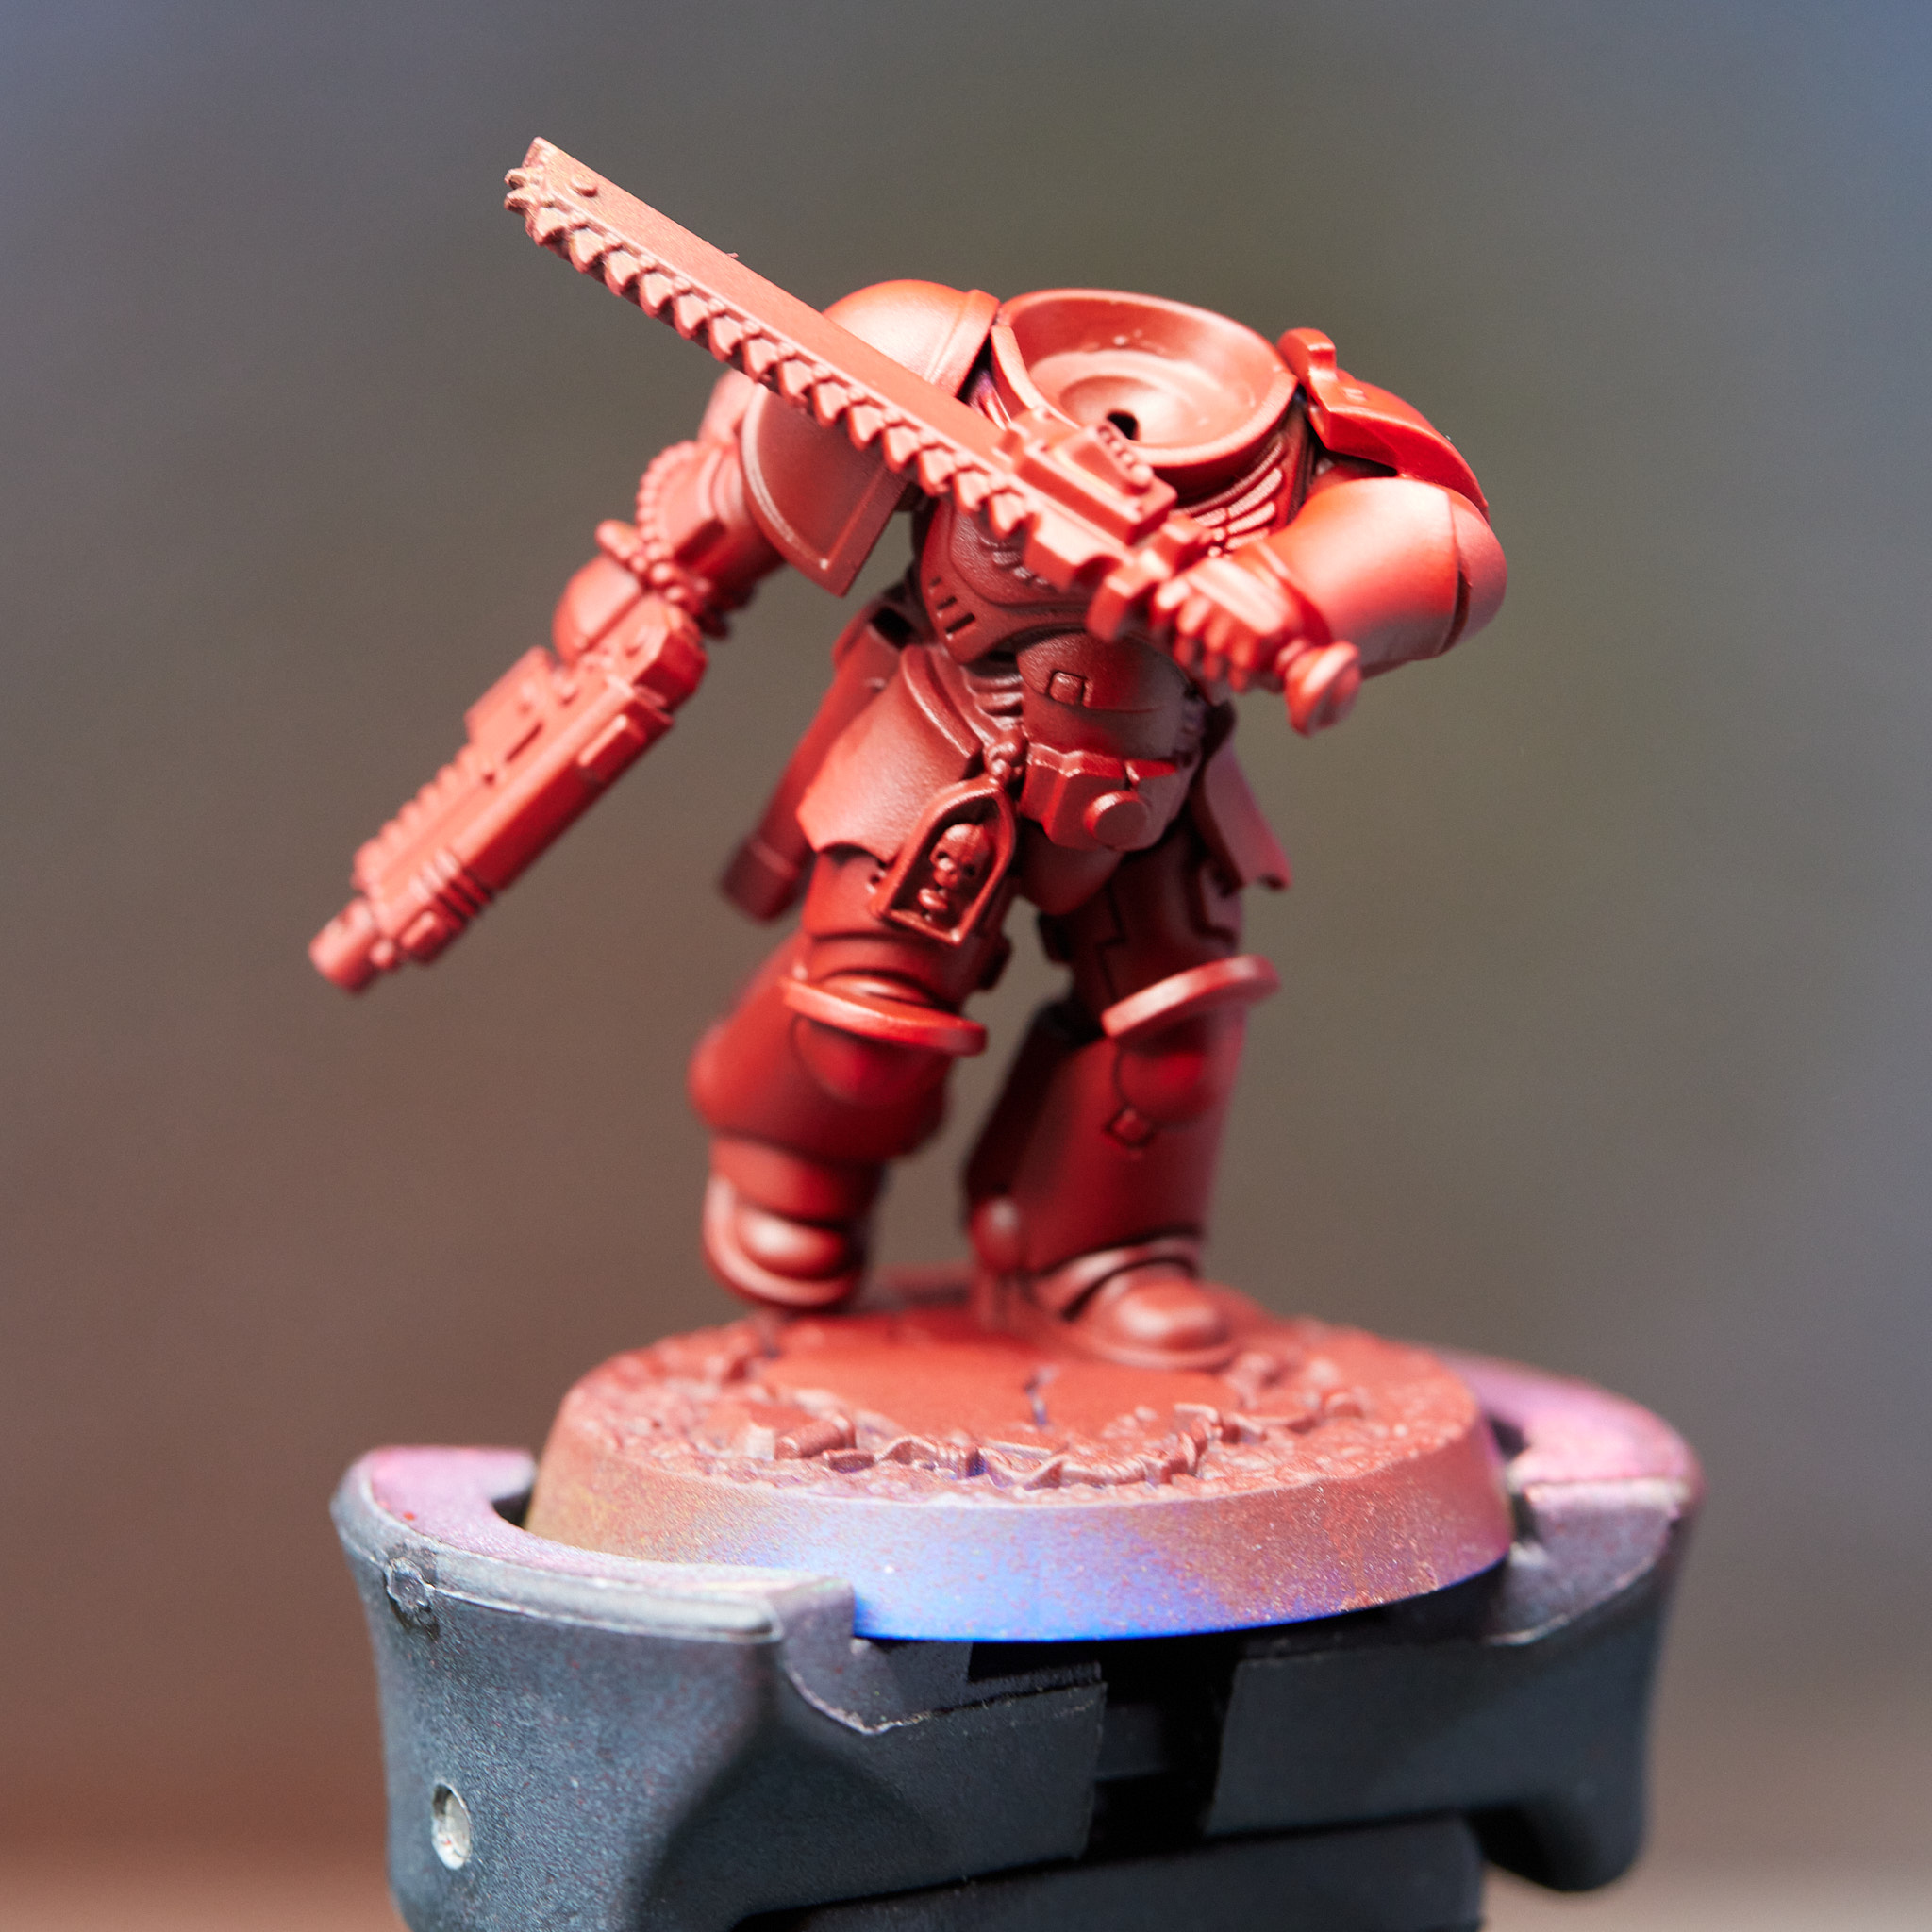
Step 5: Red
Step 6: Pinwashing
Step 7: The details

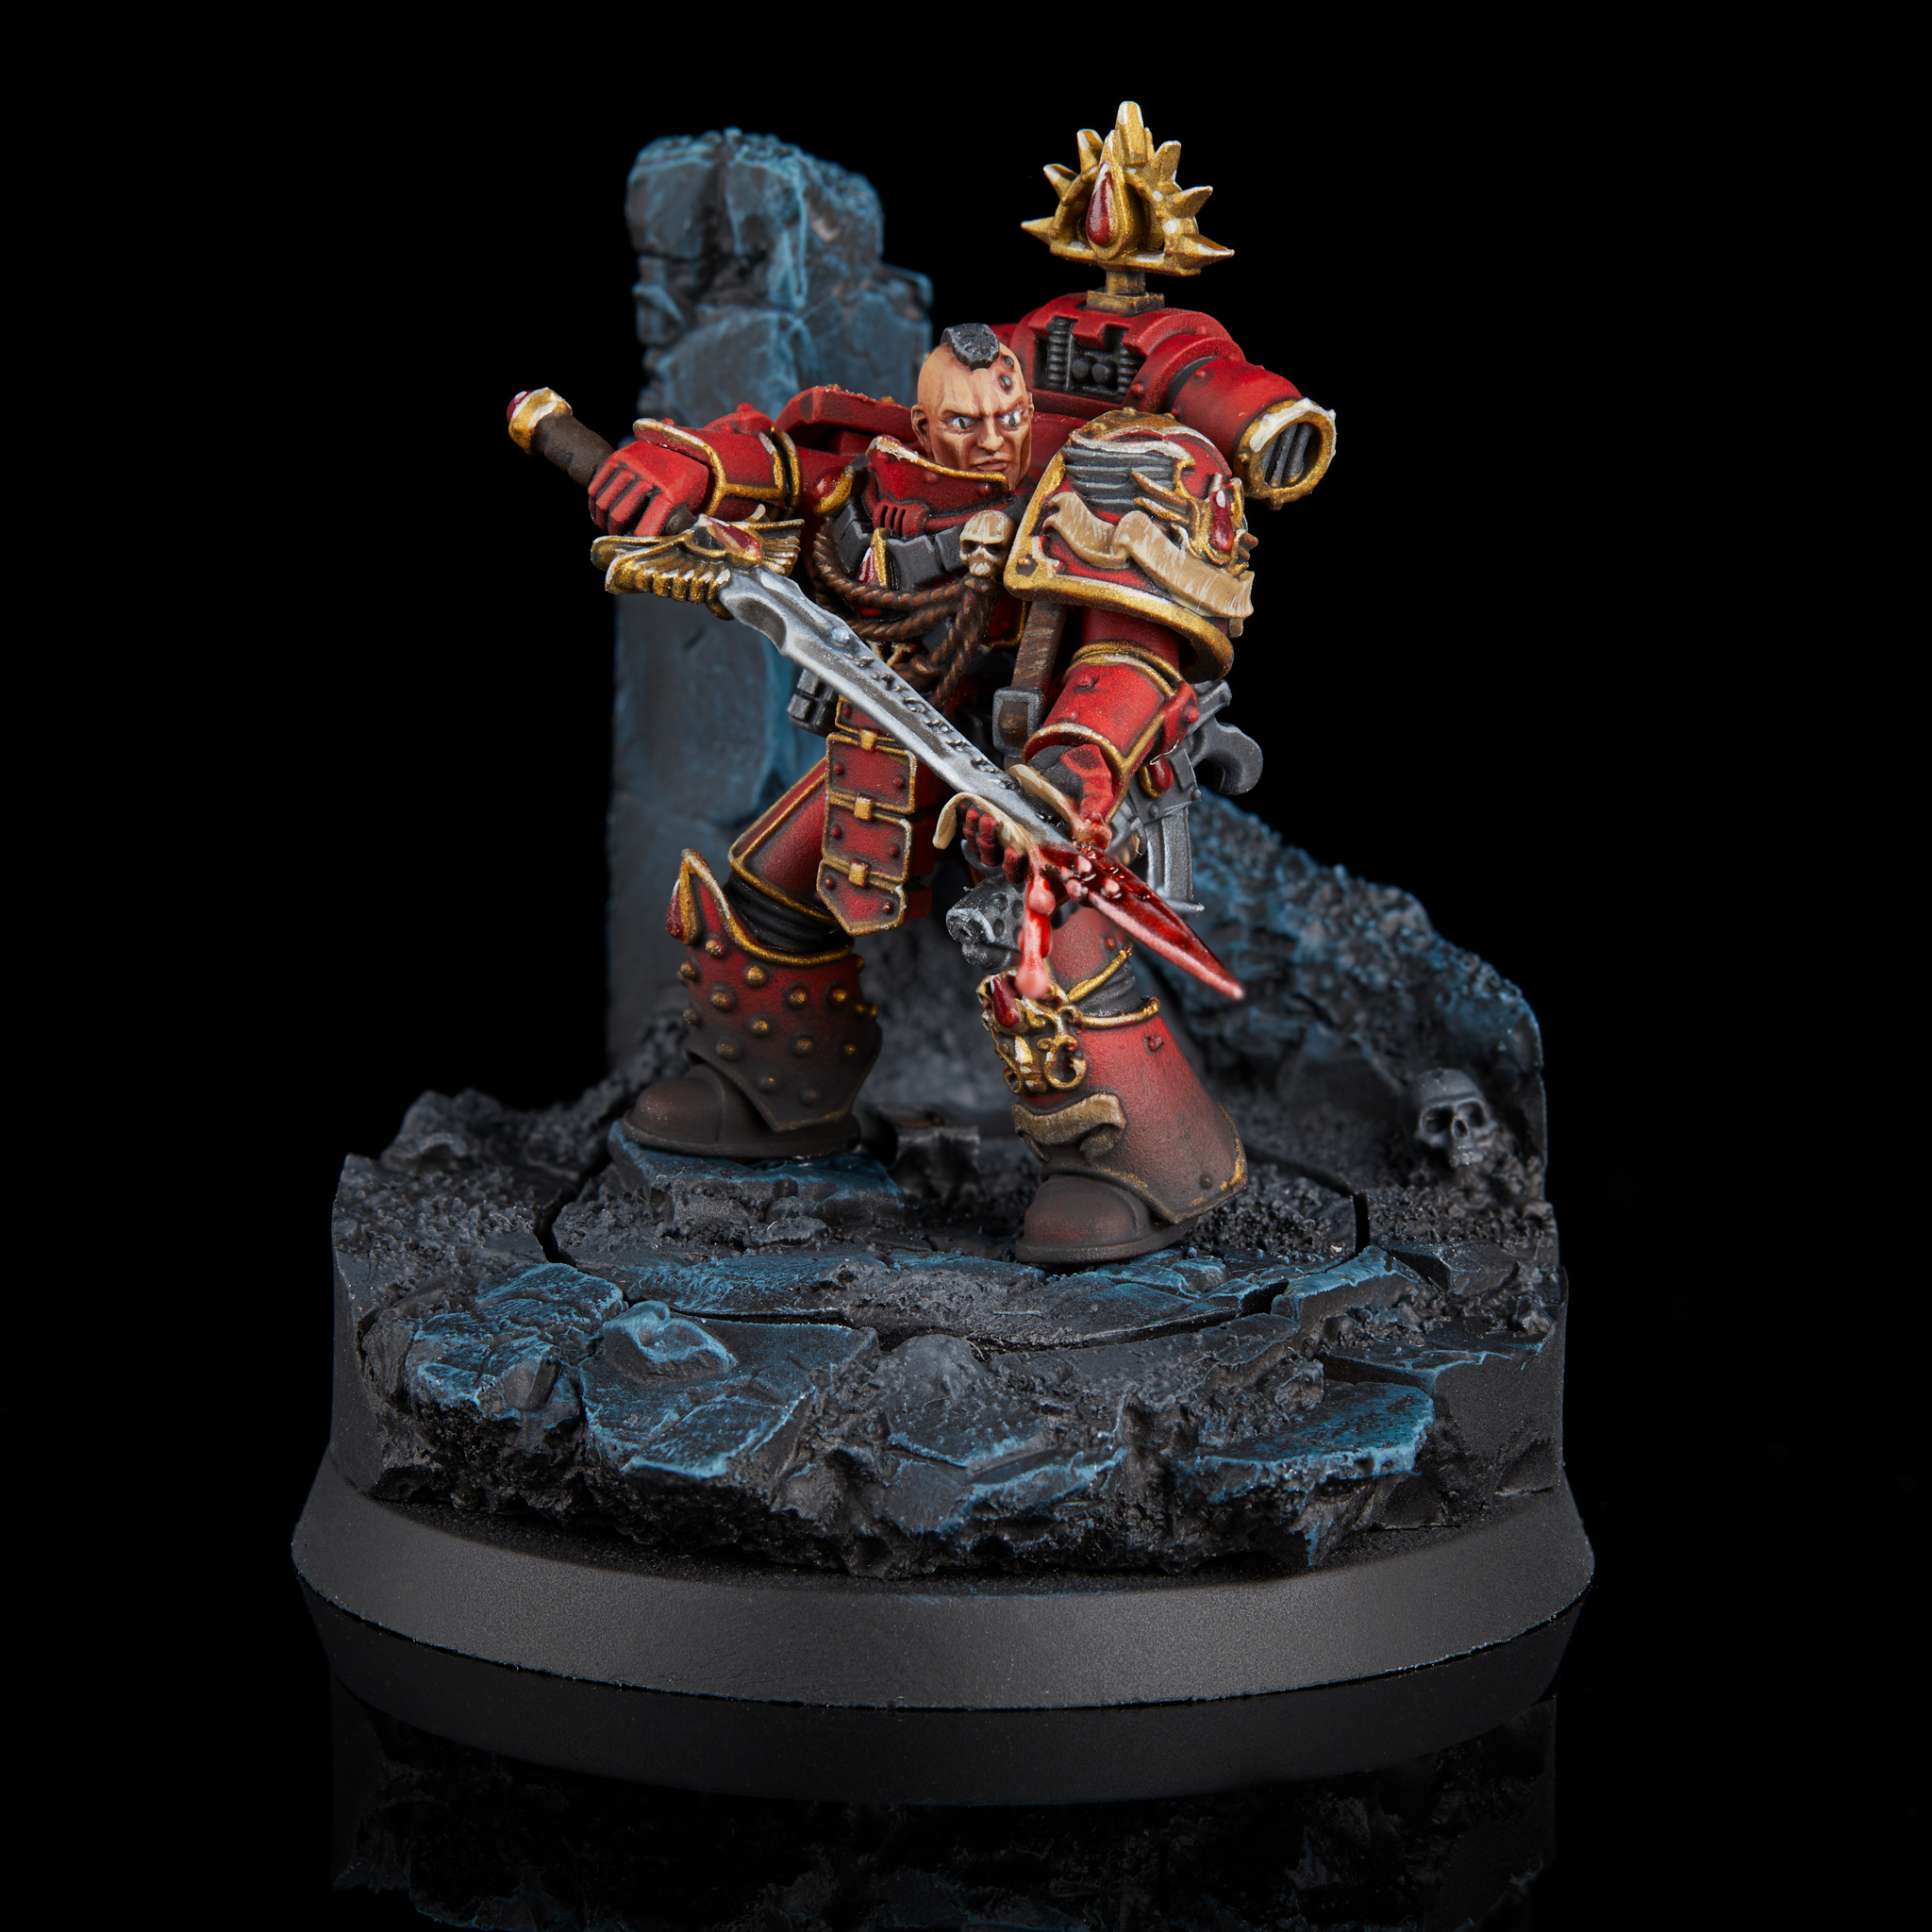
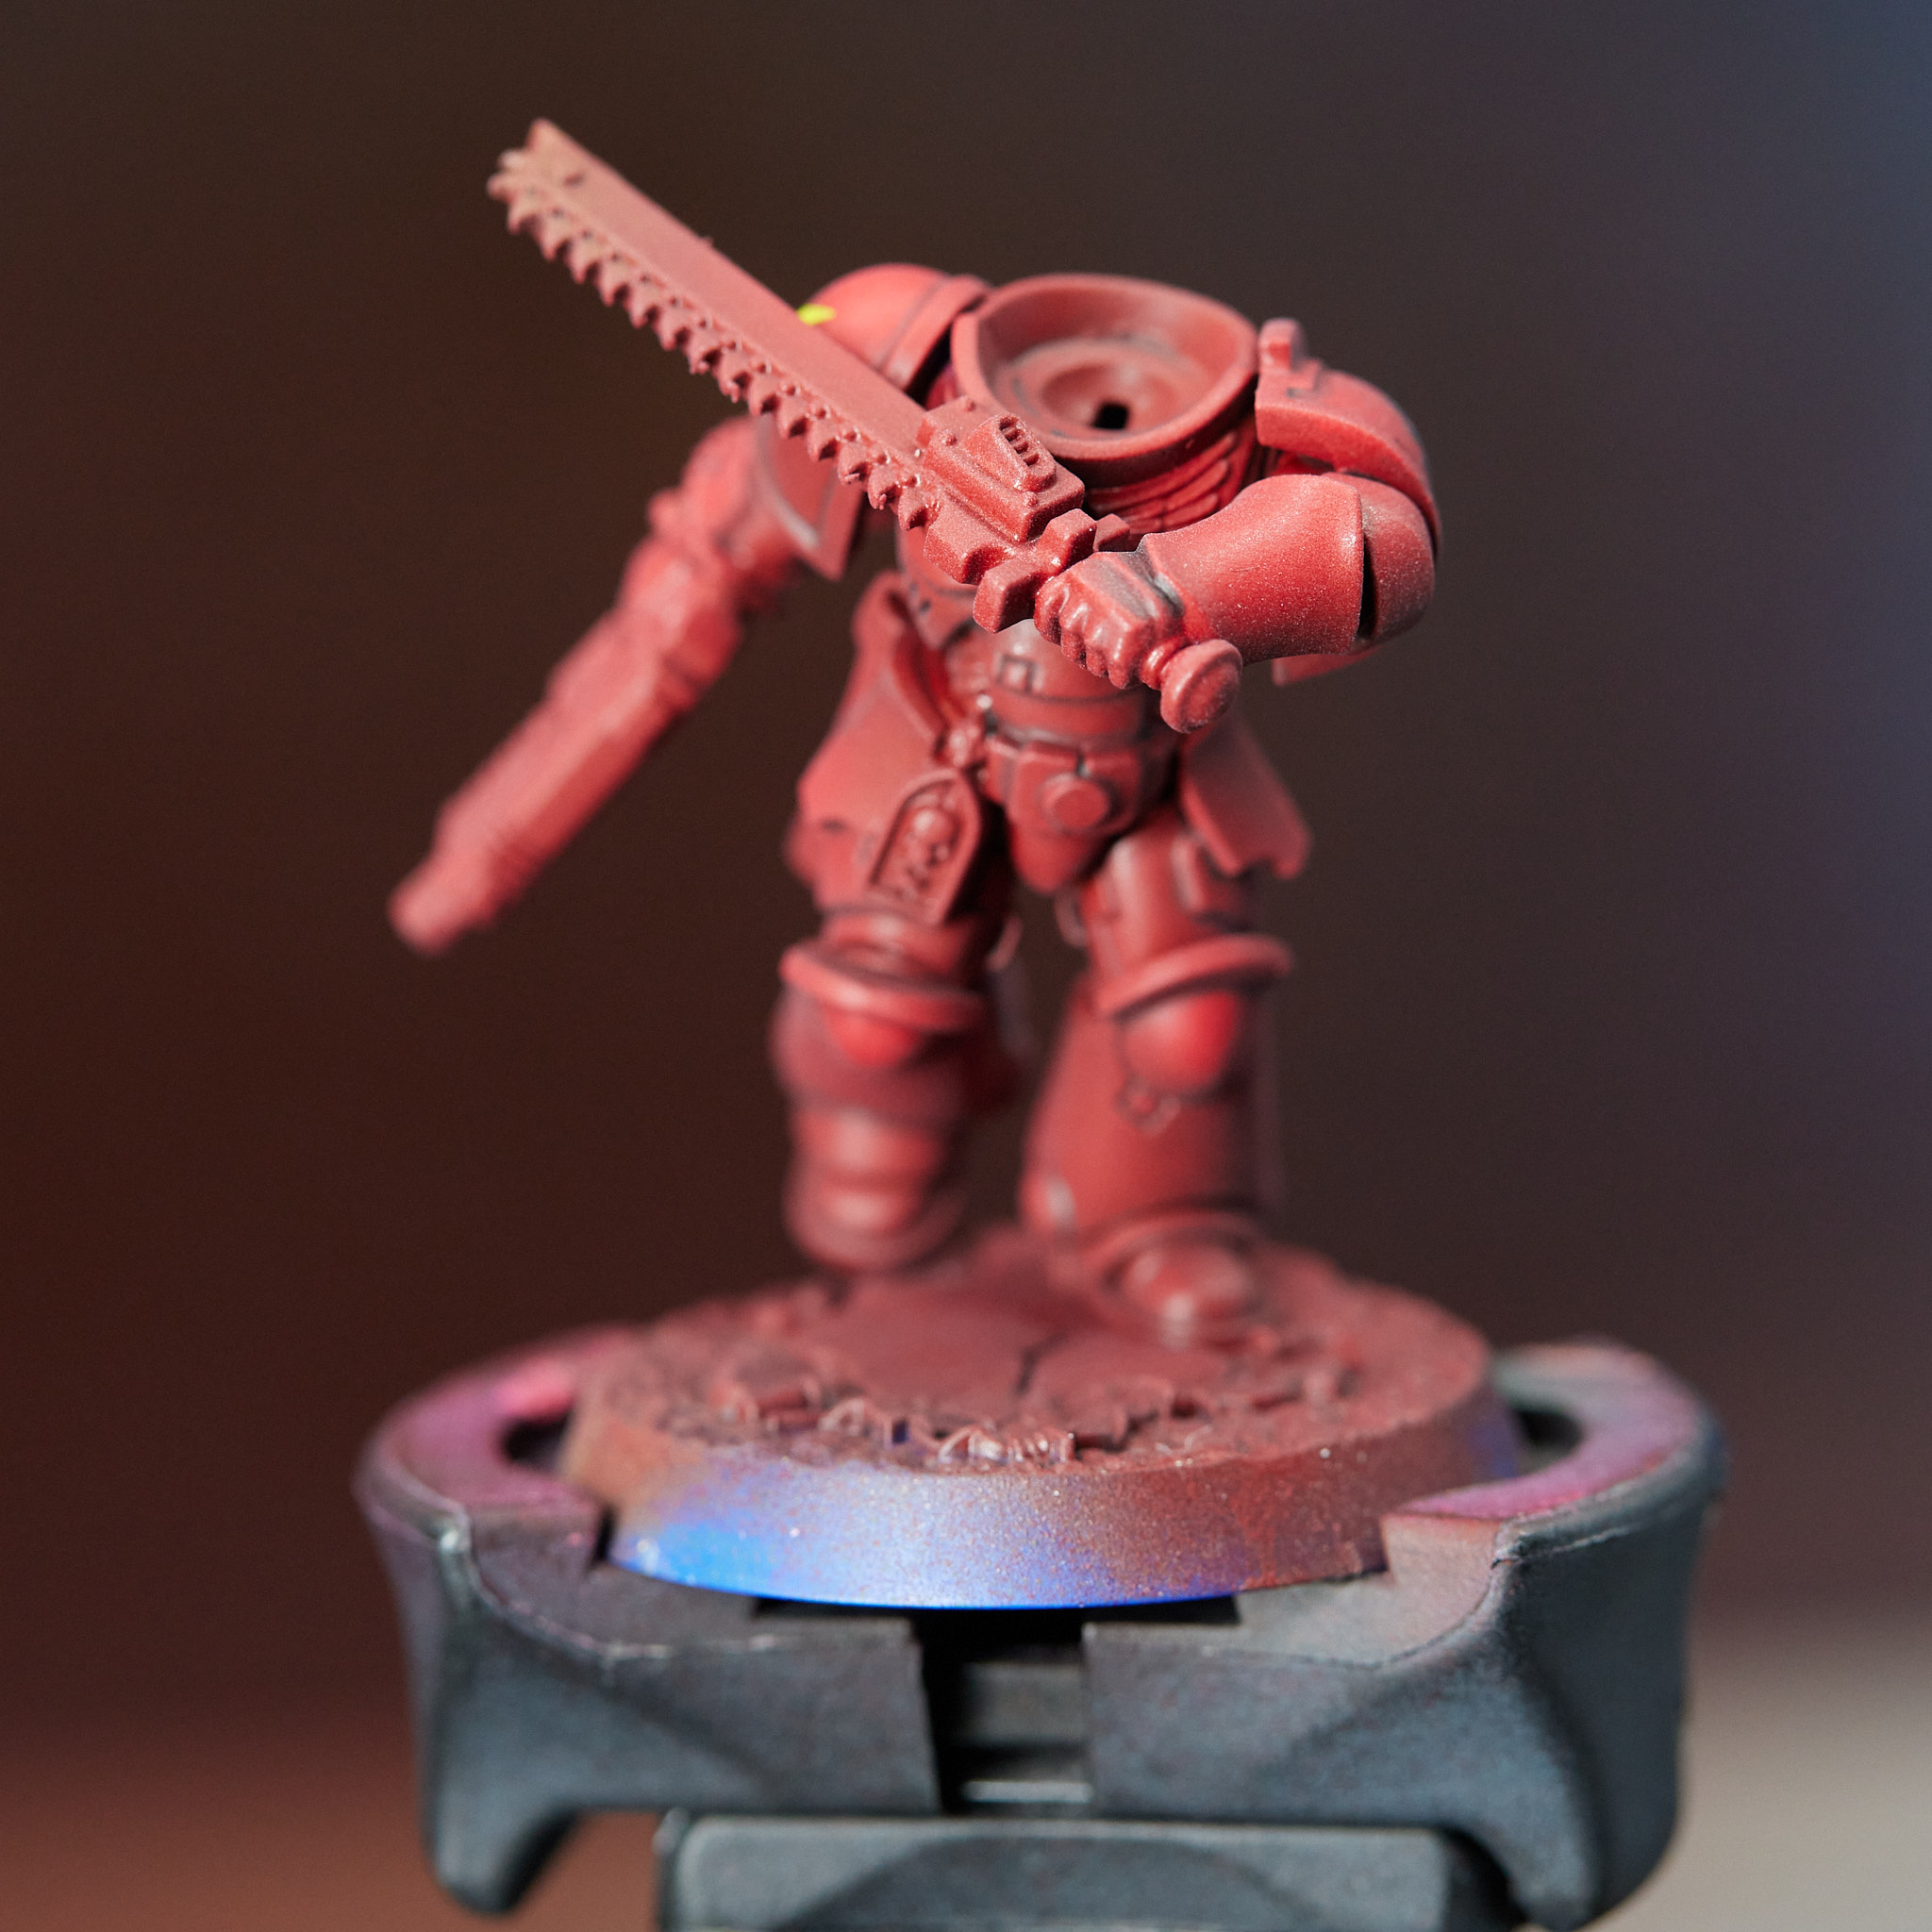
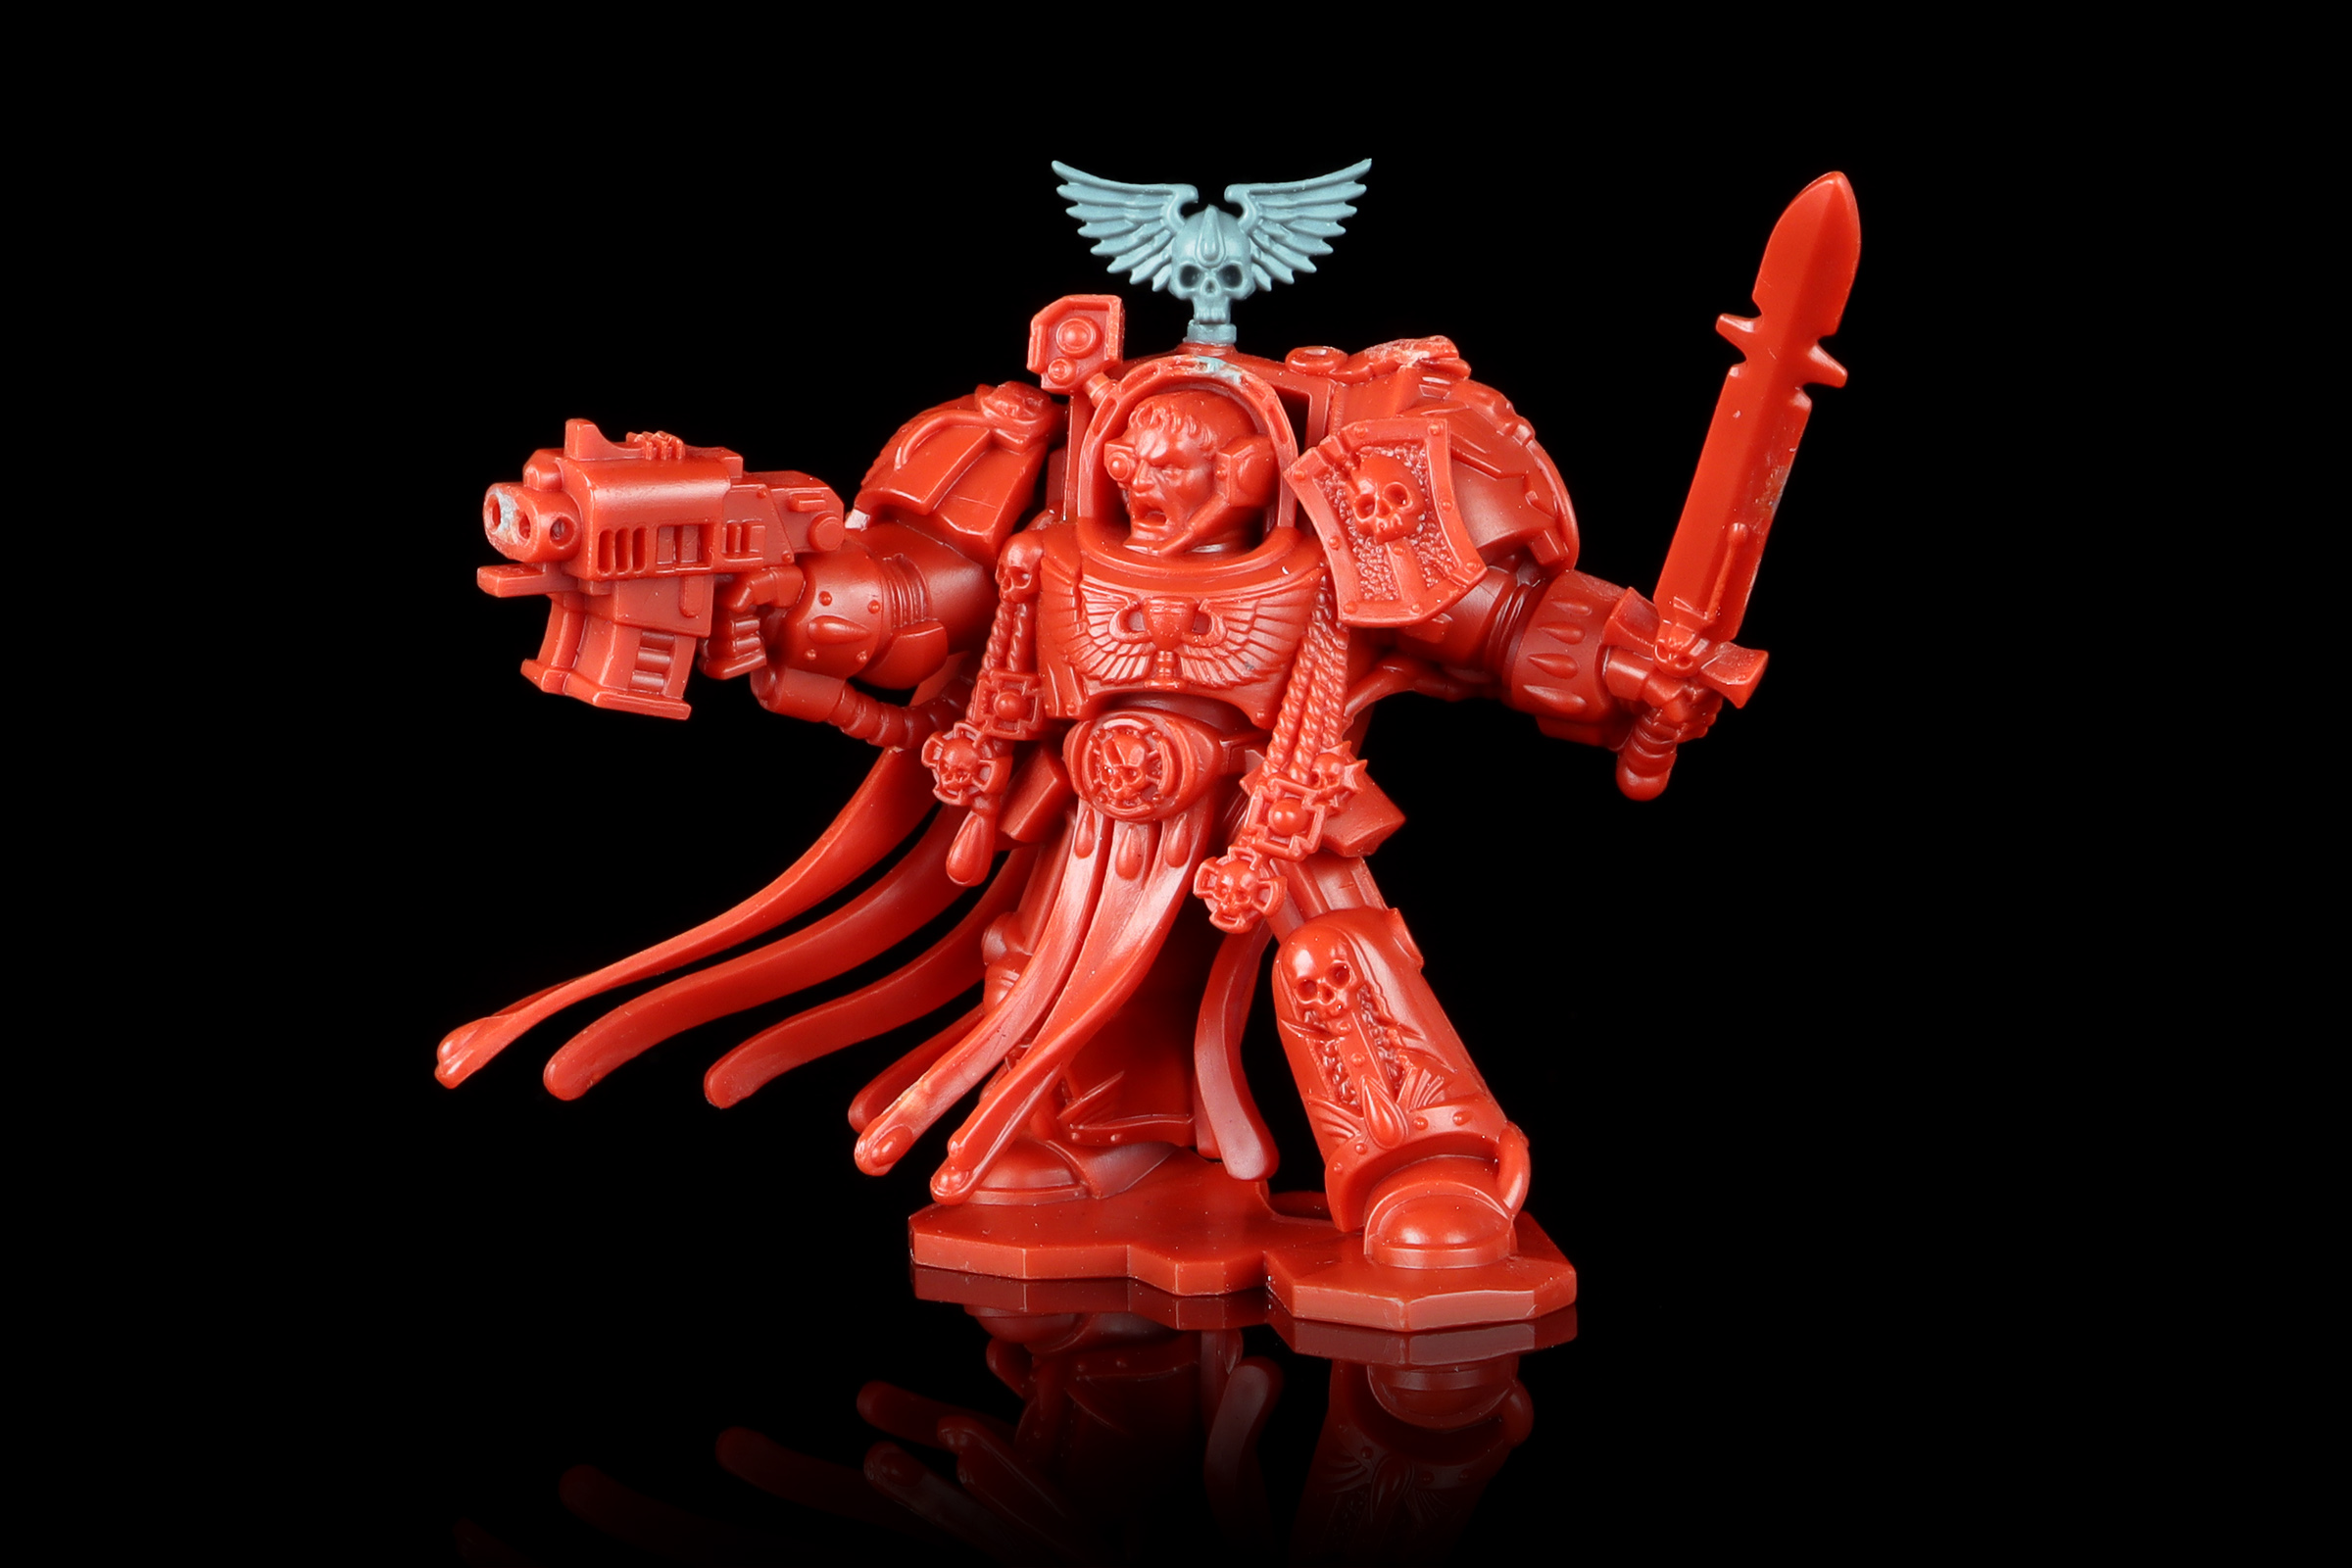
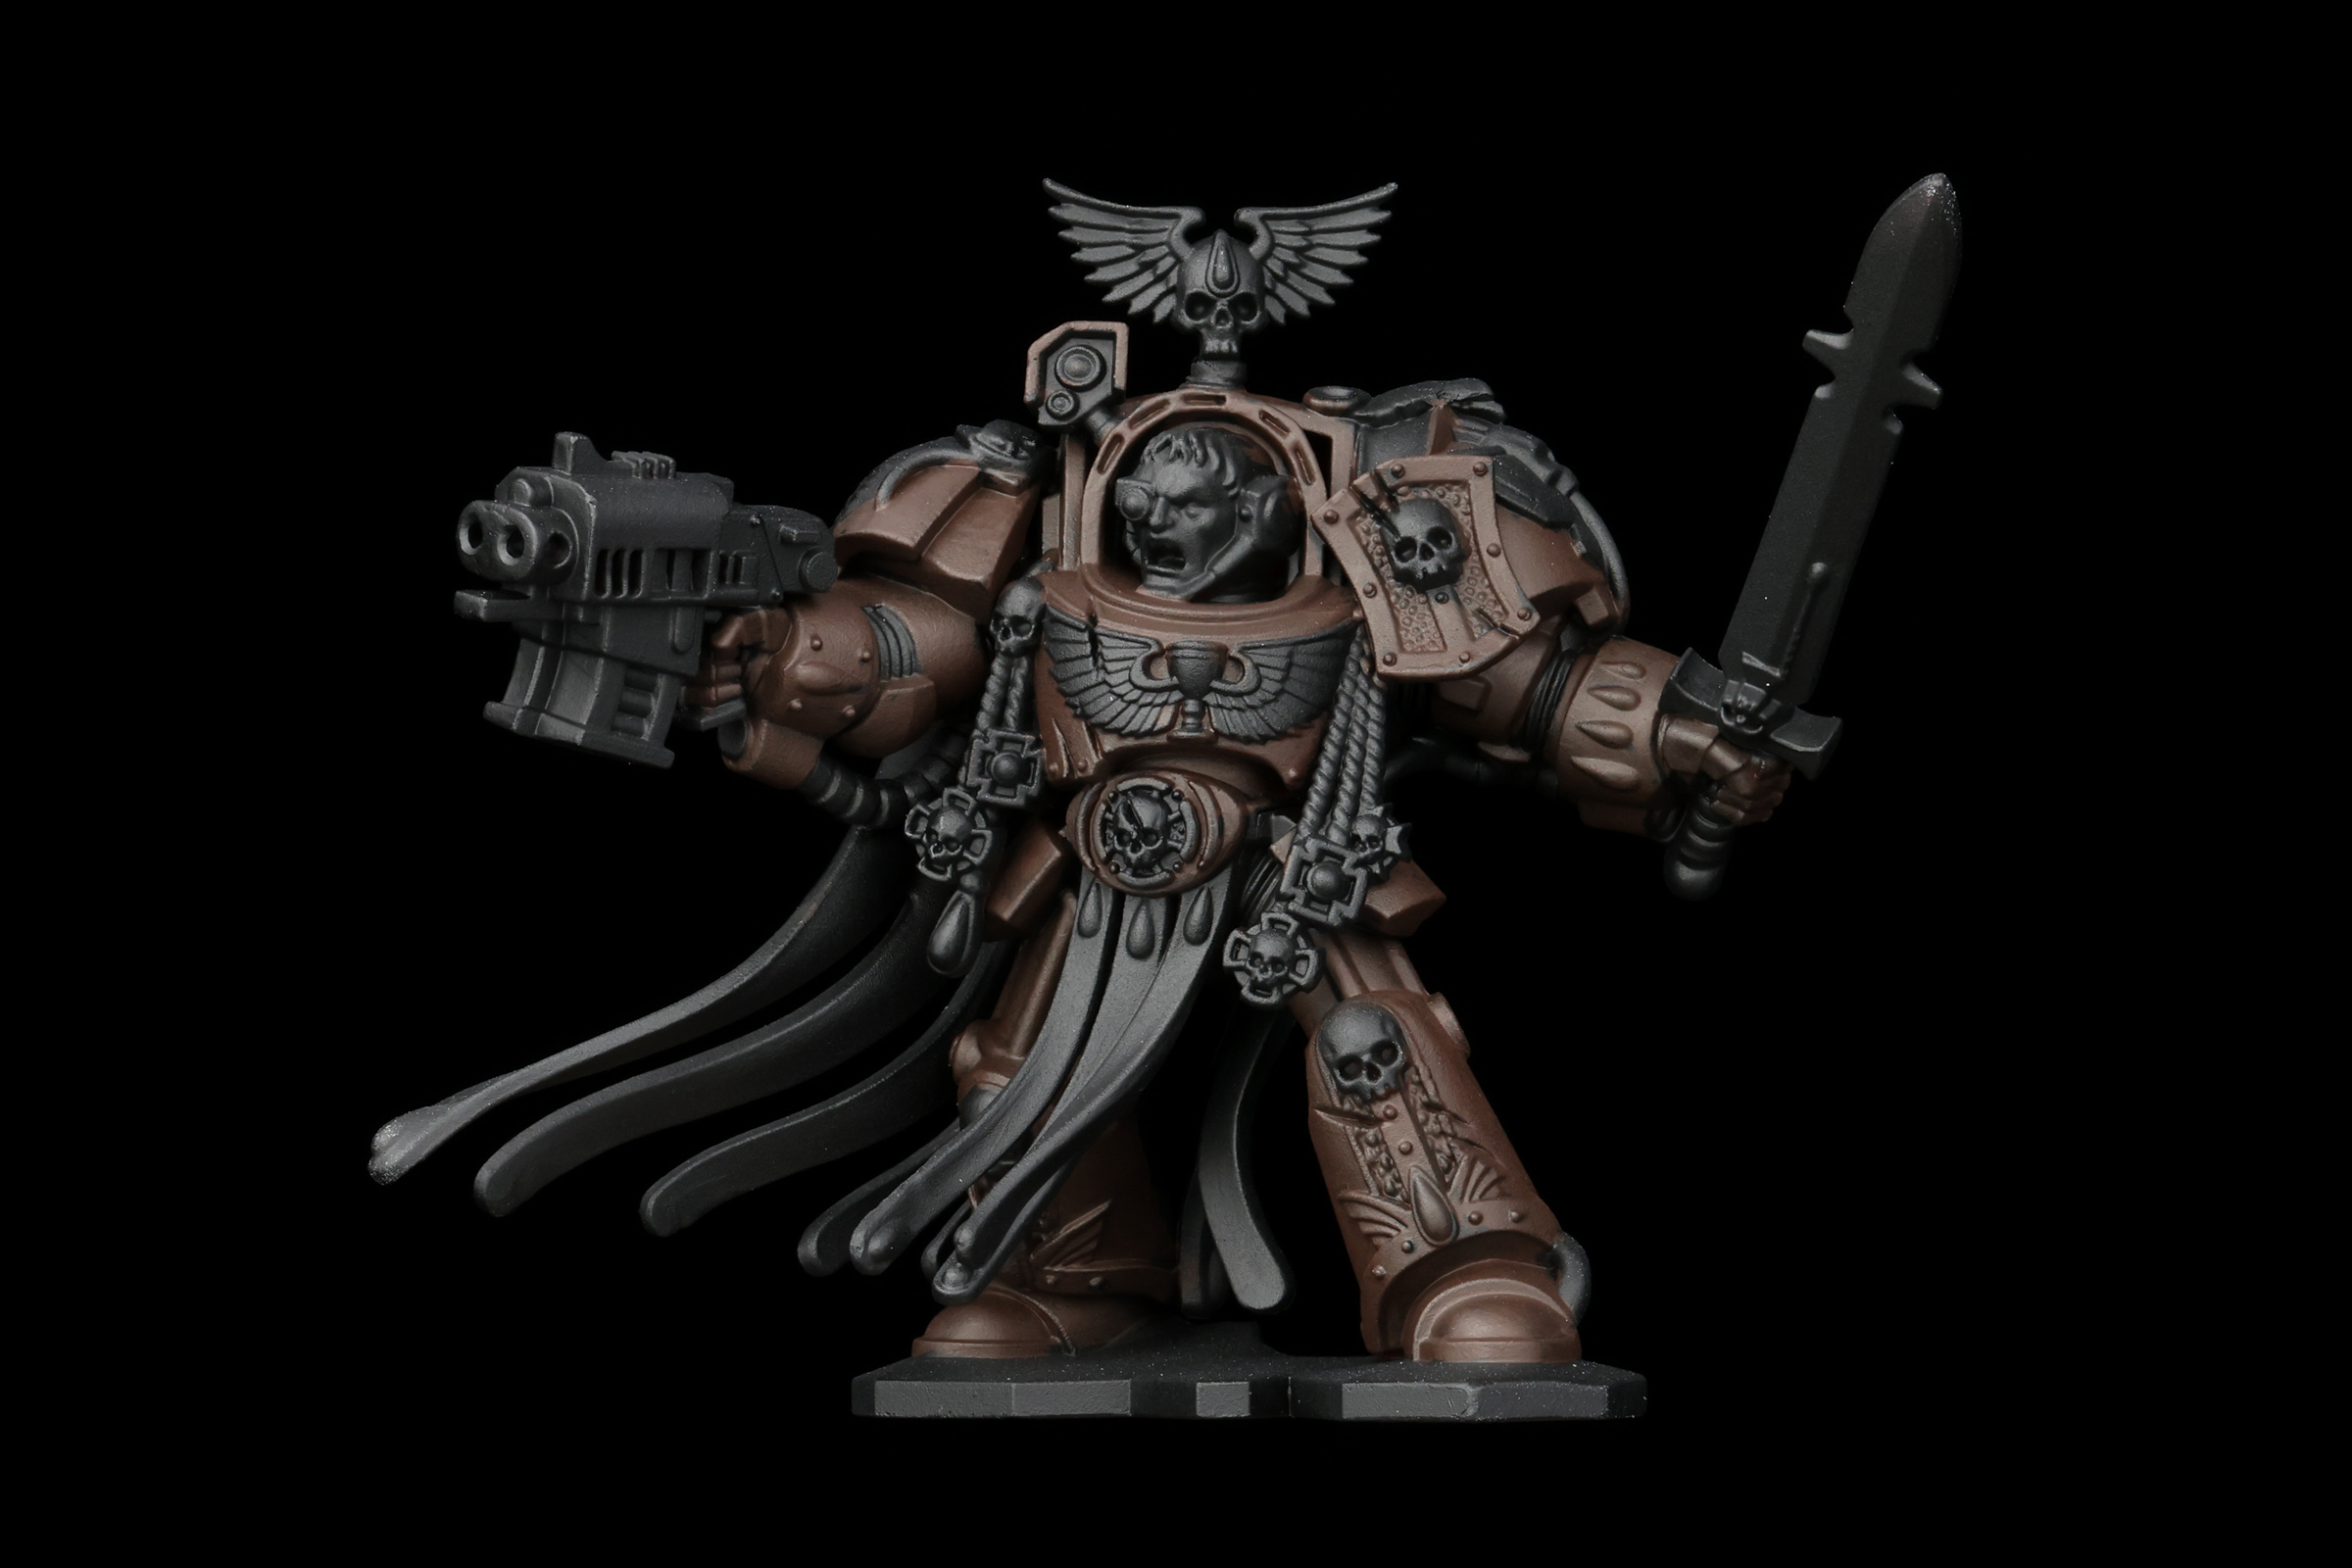
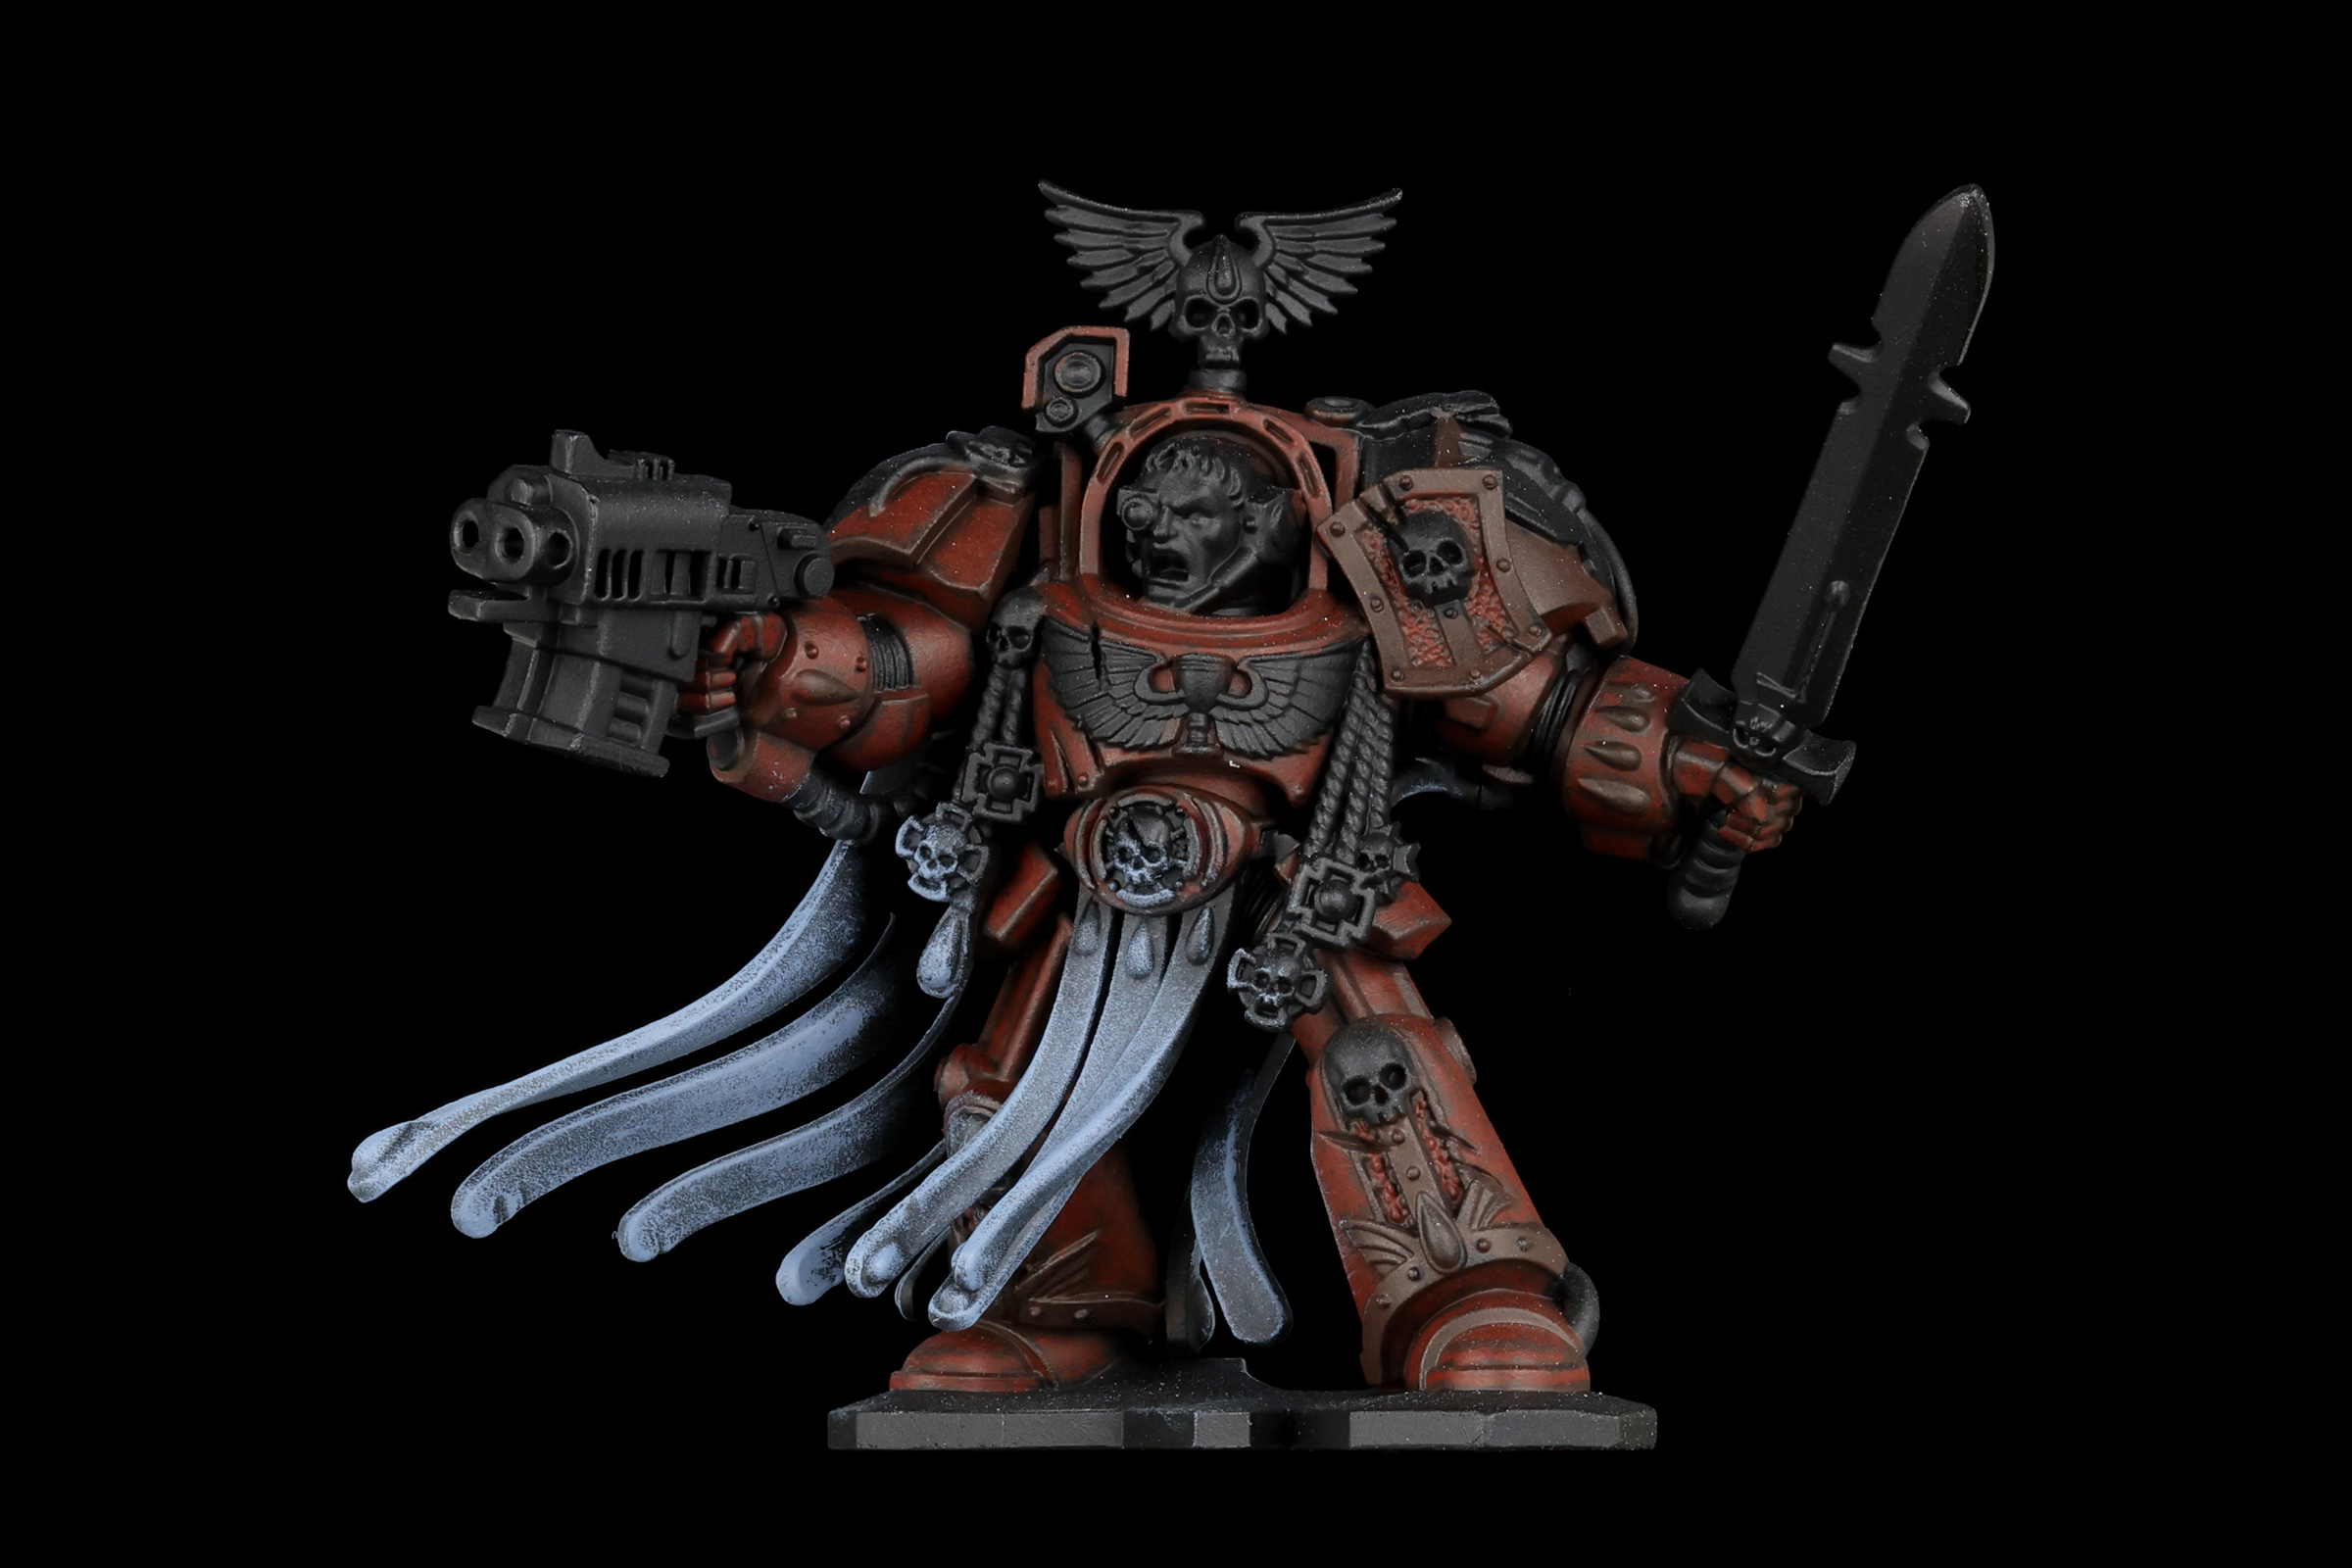
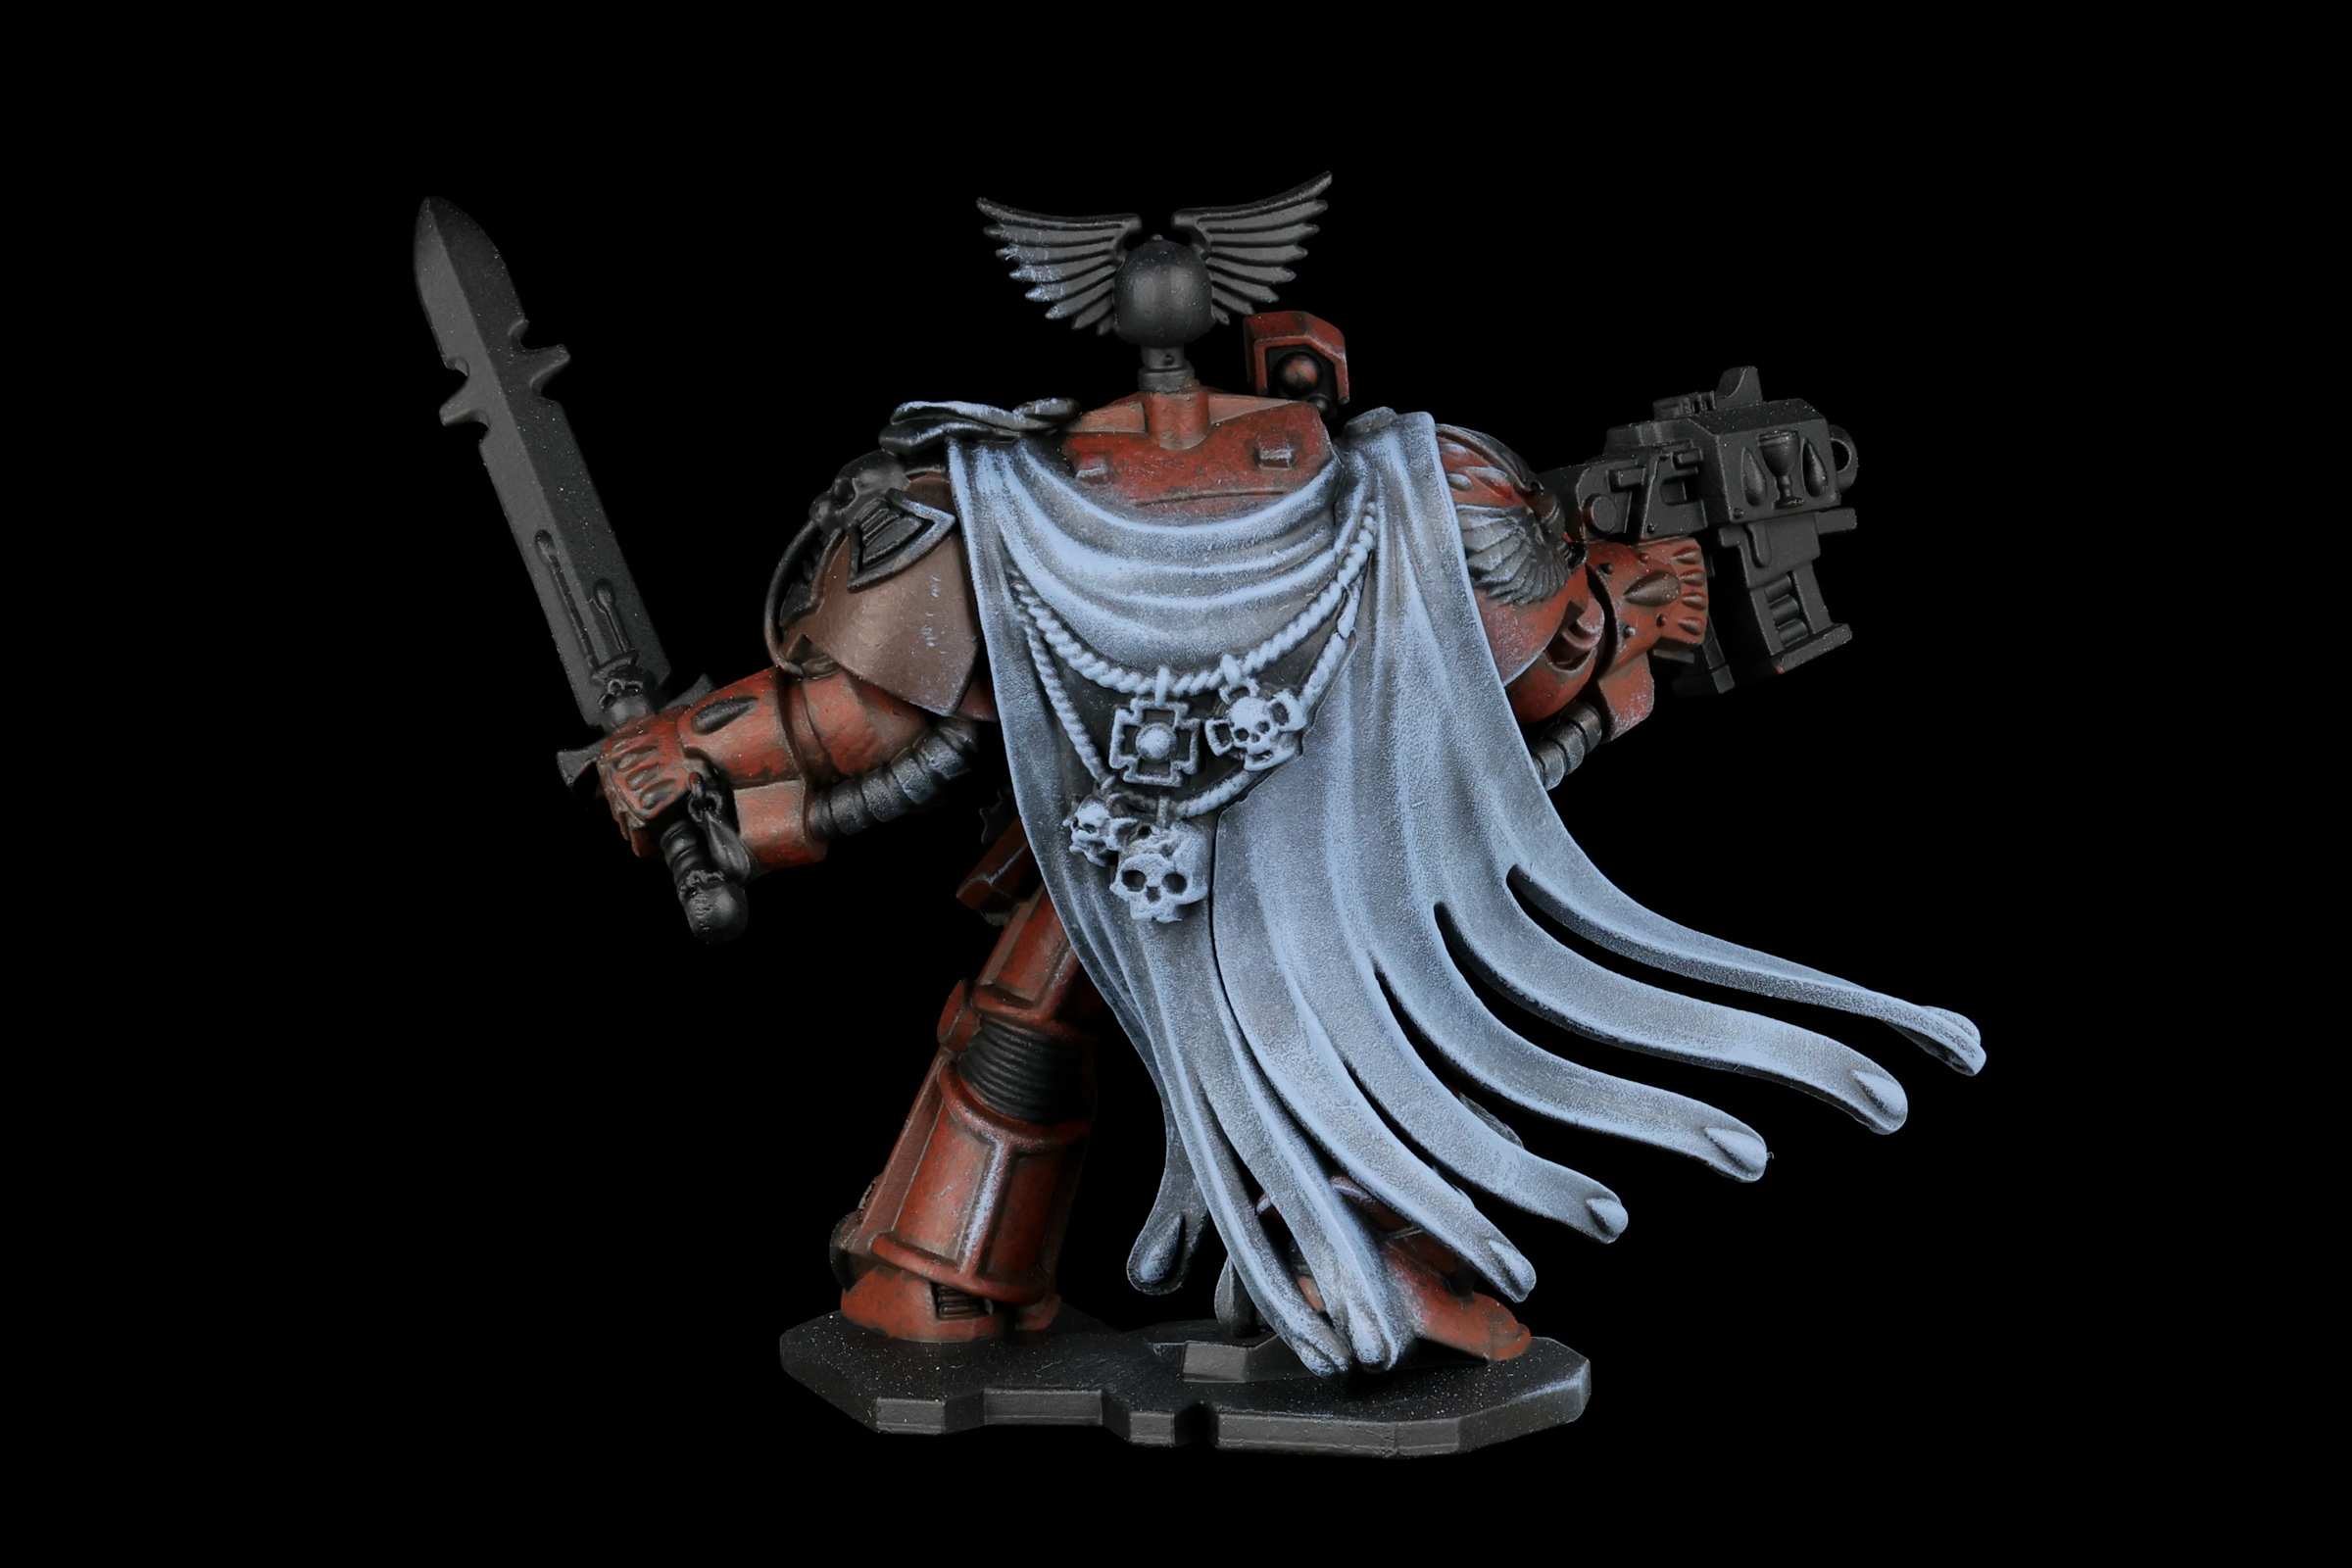
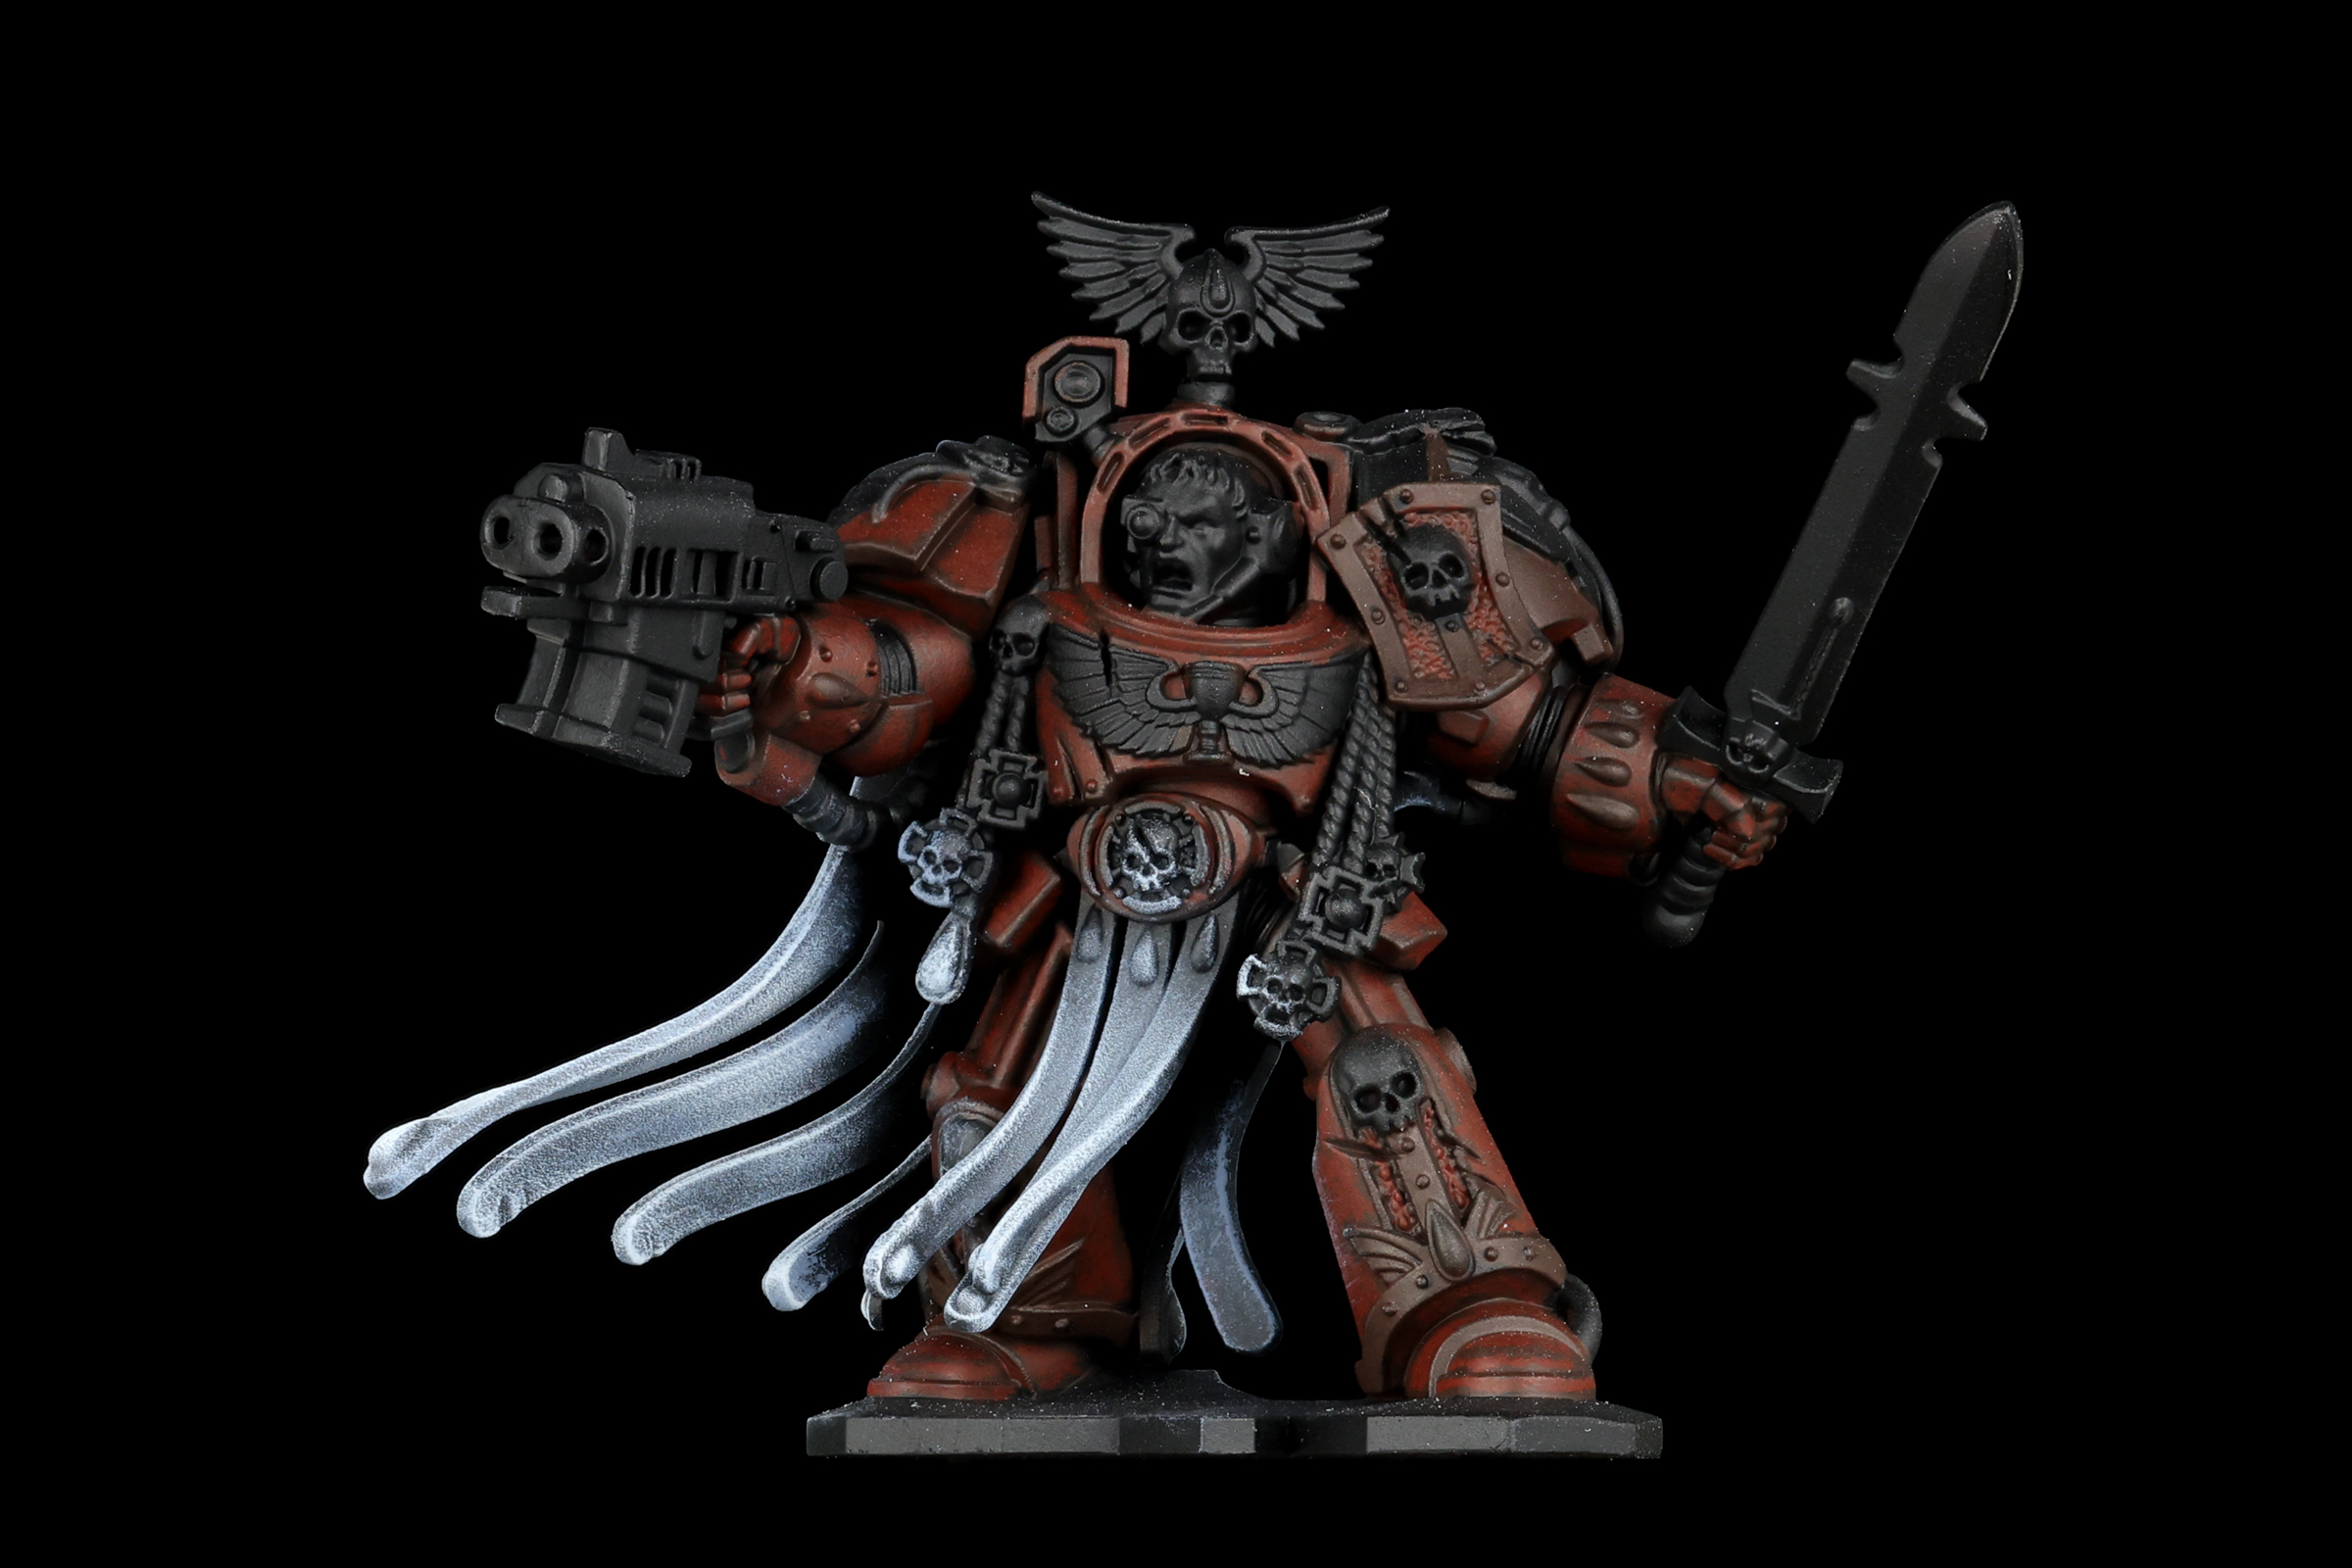
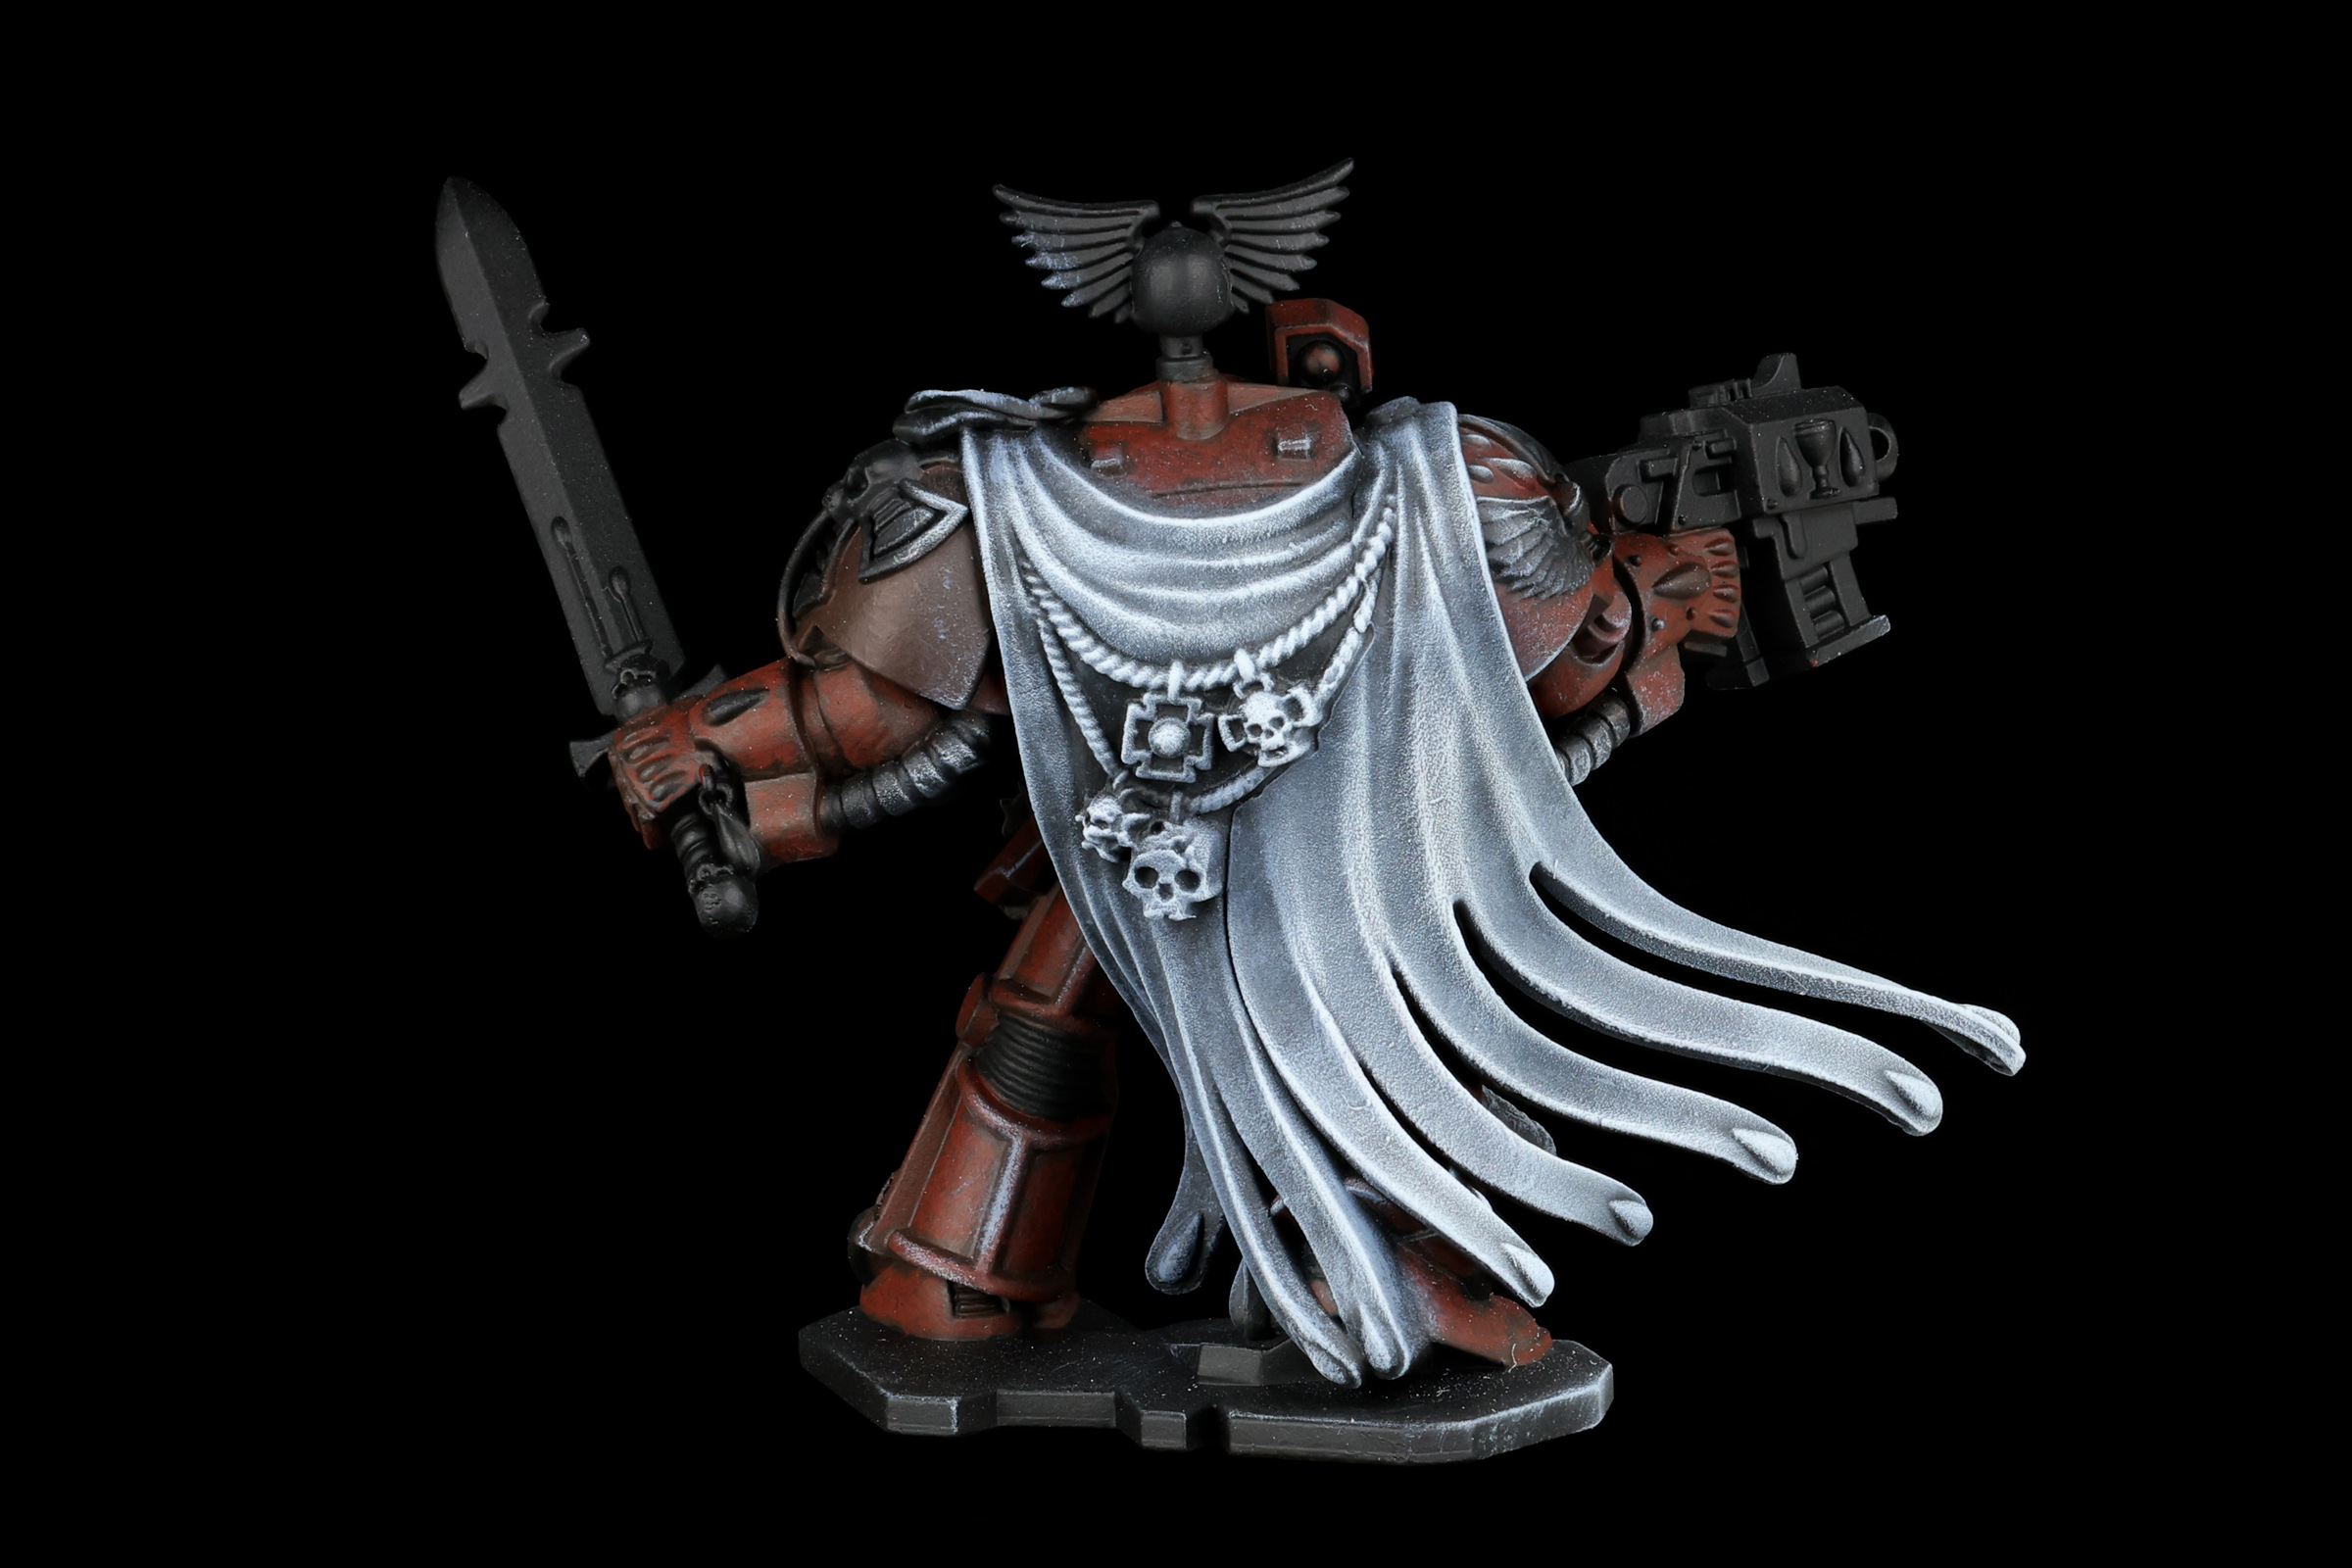
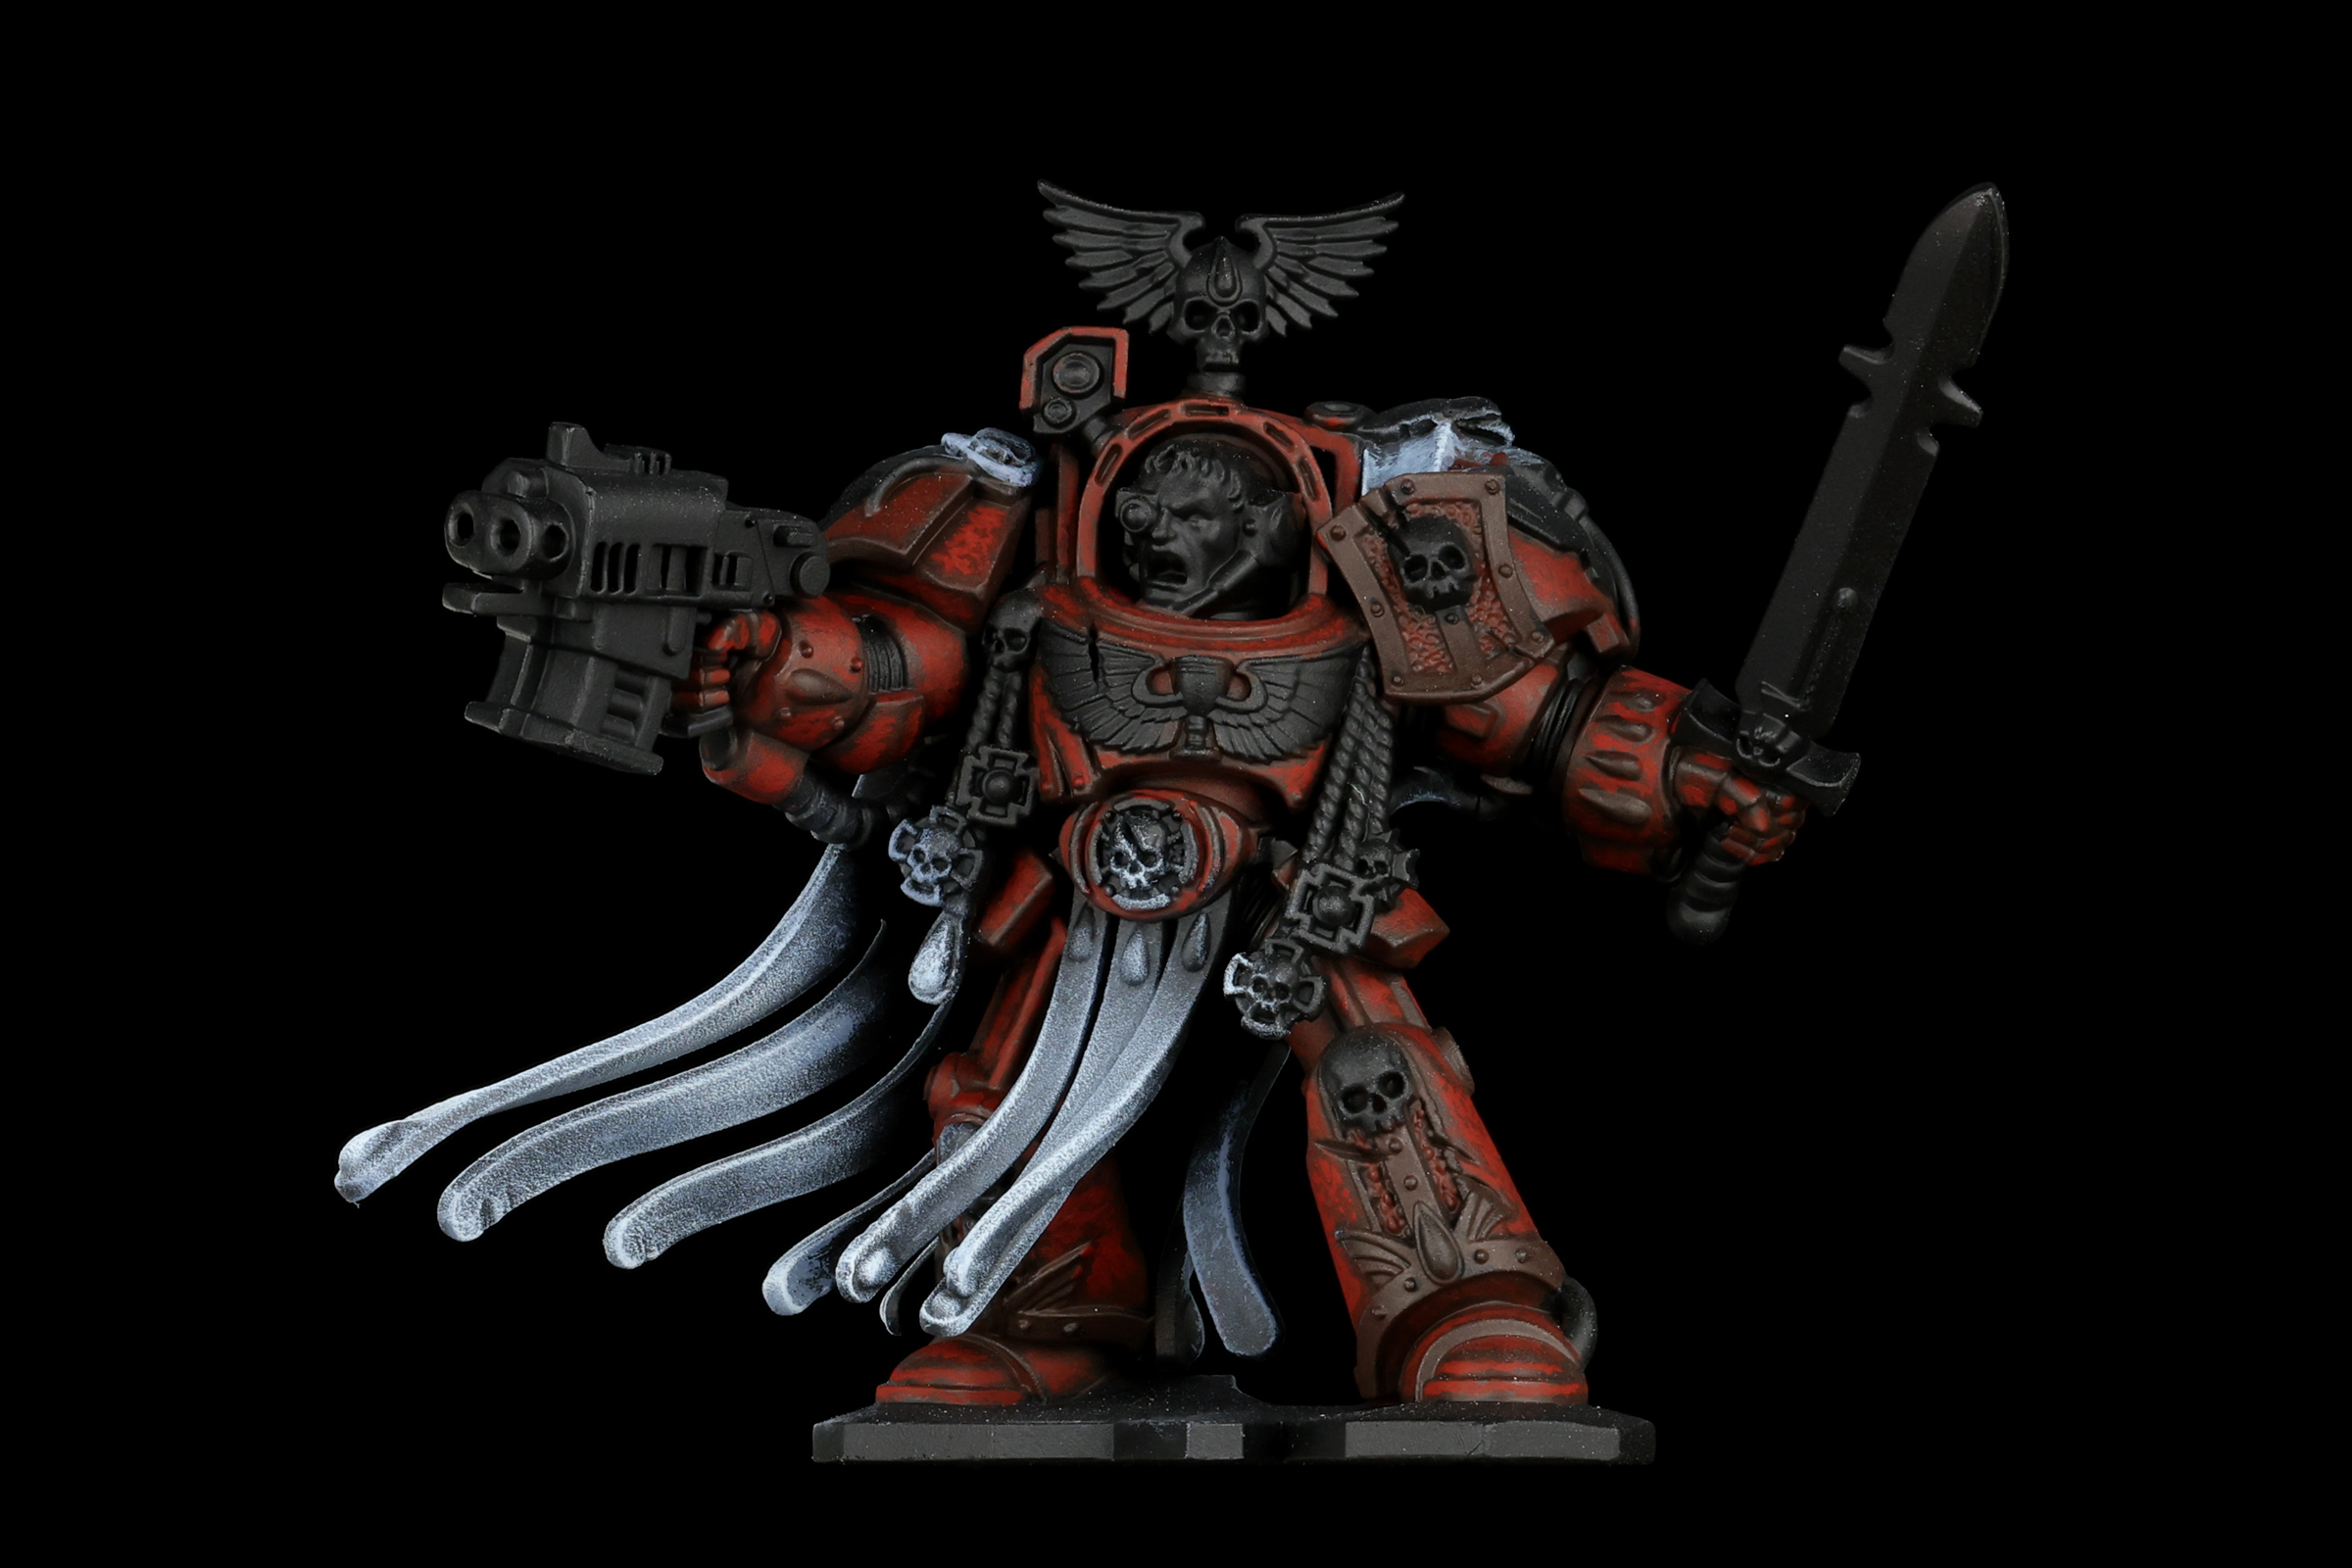
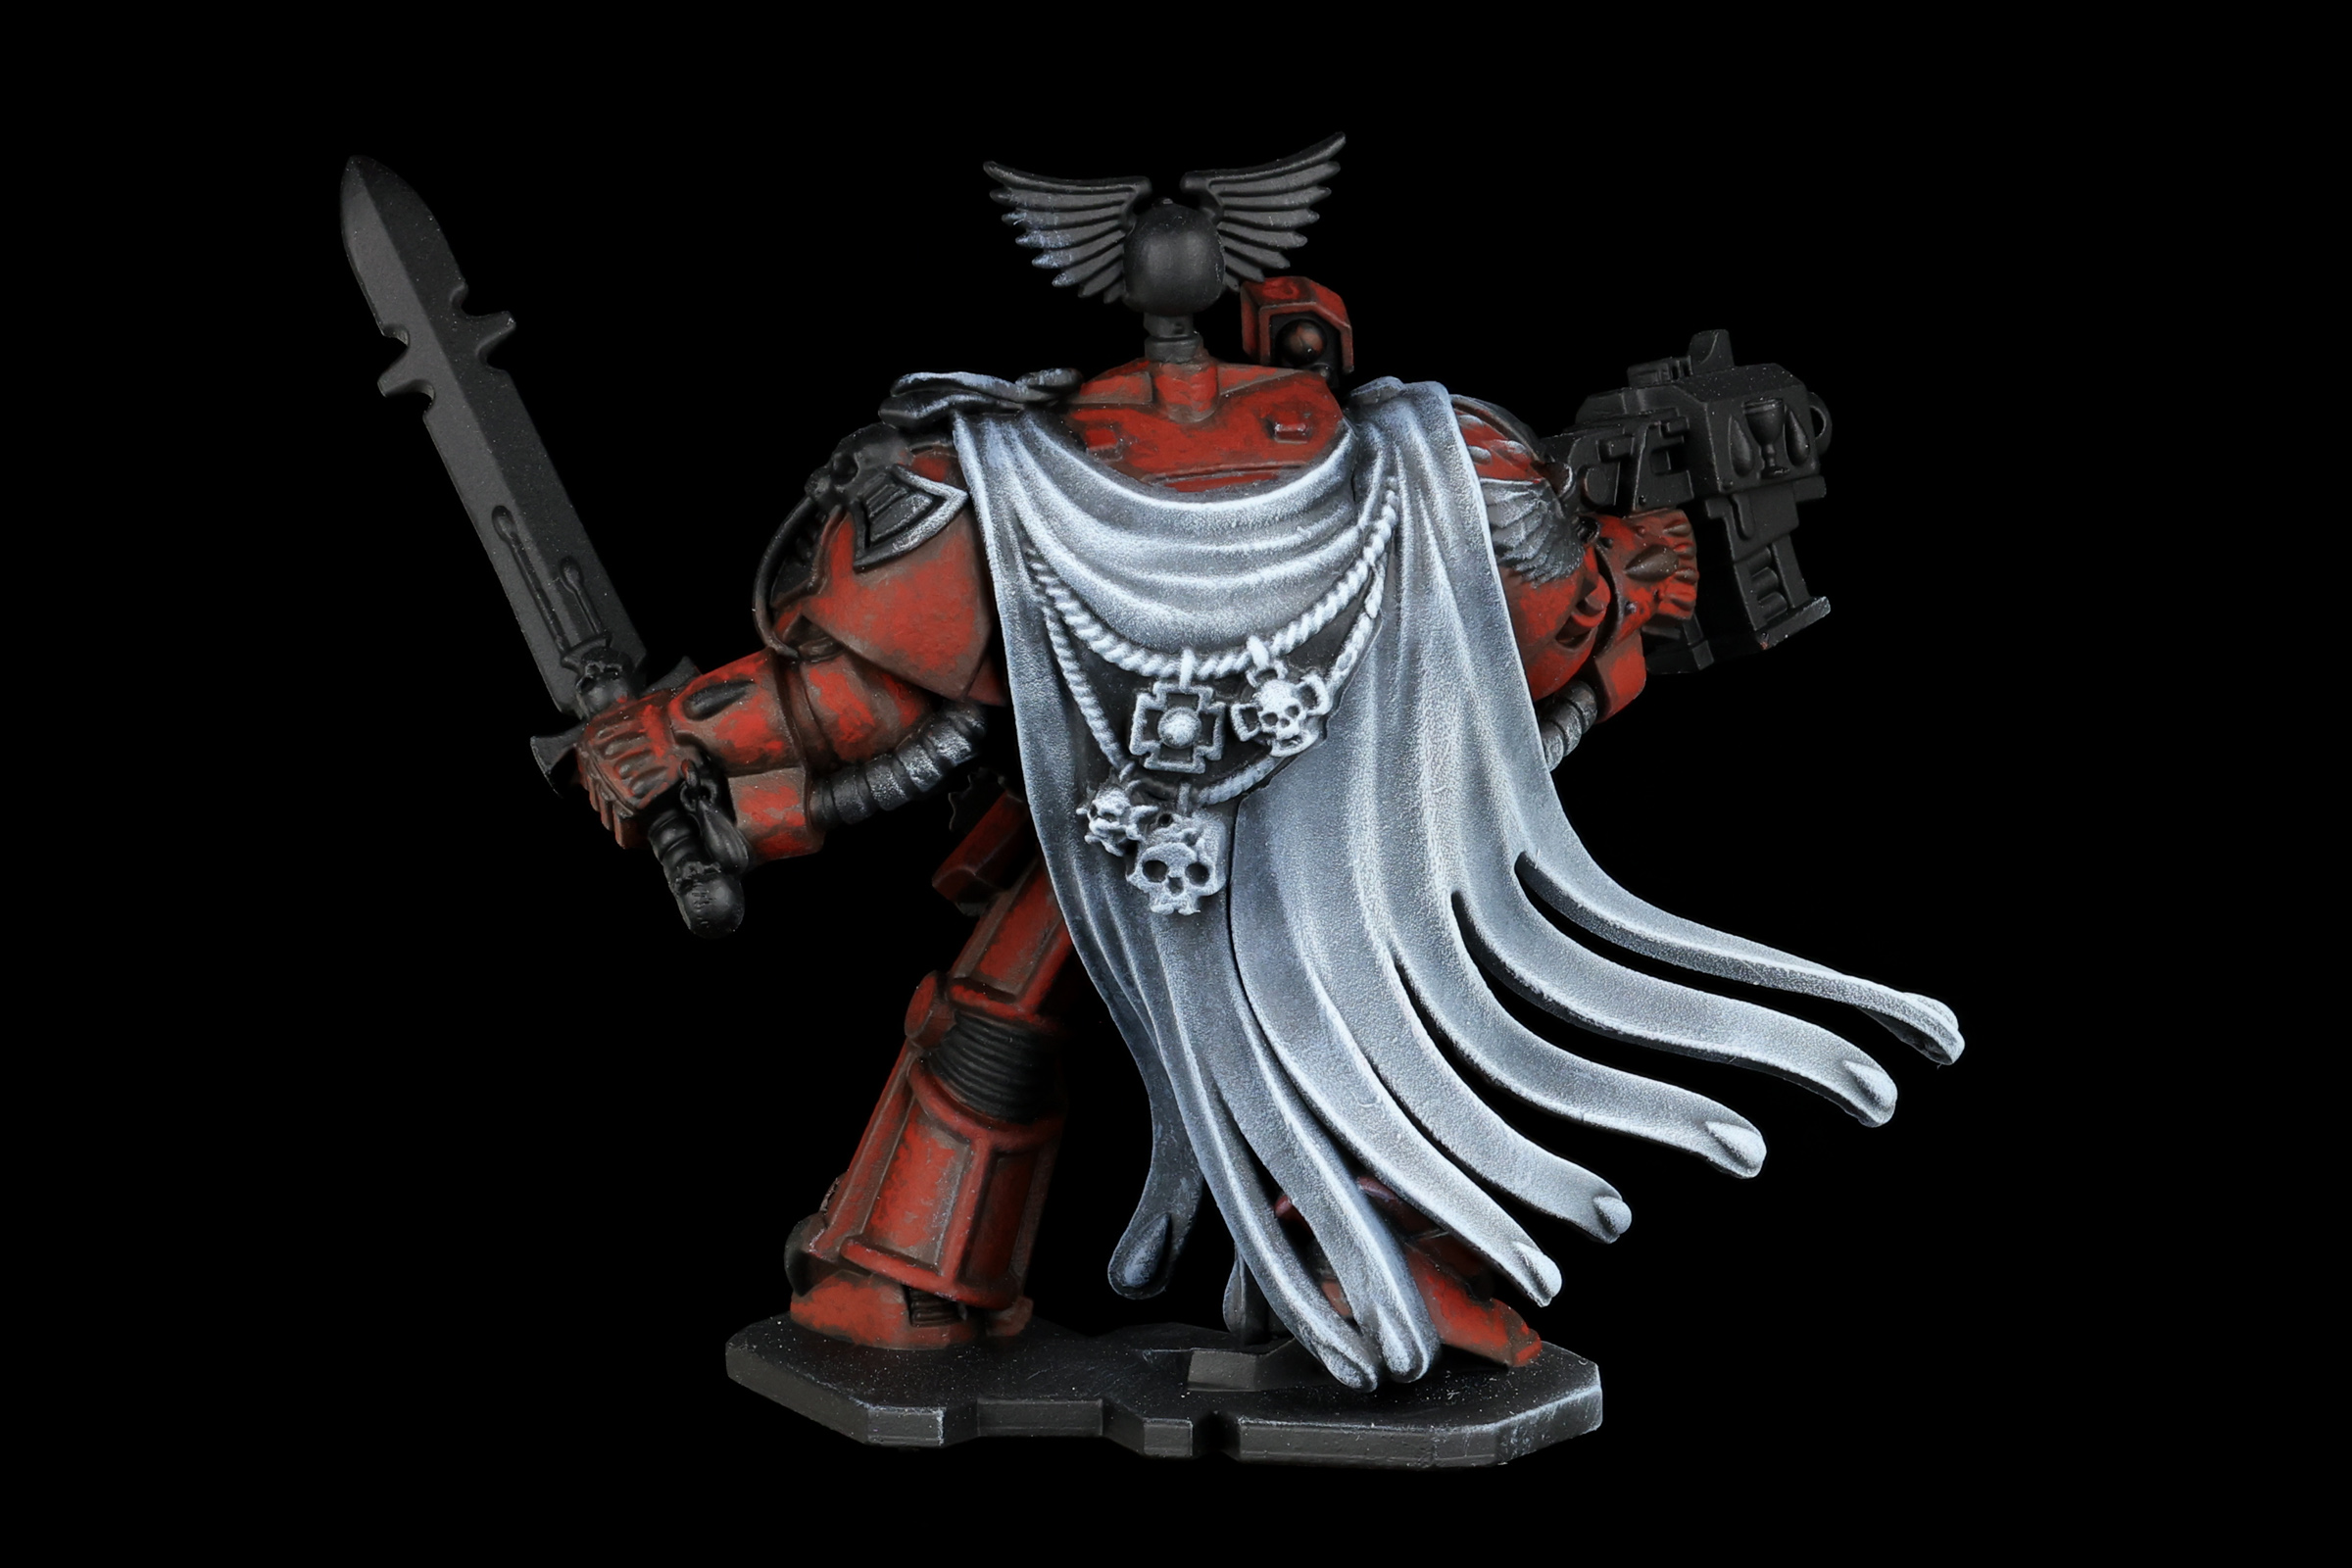
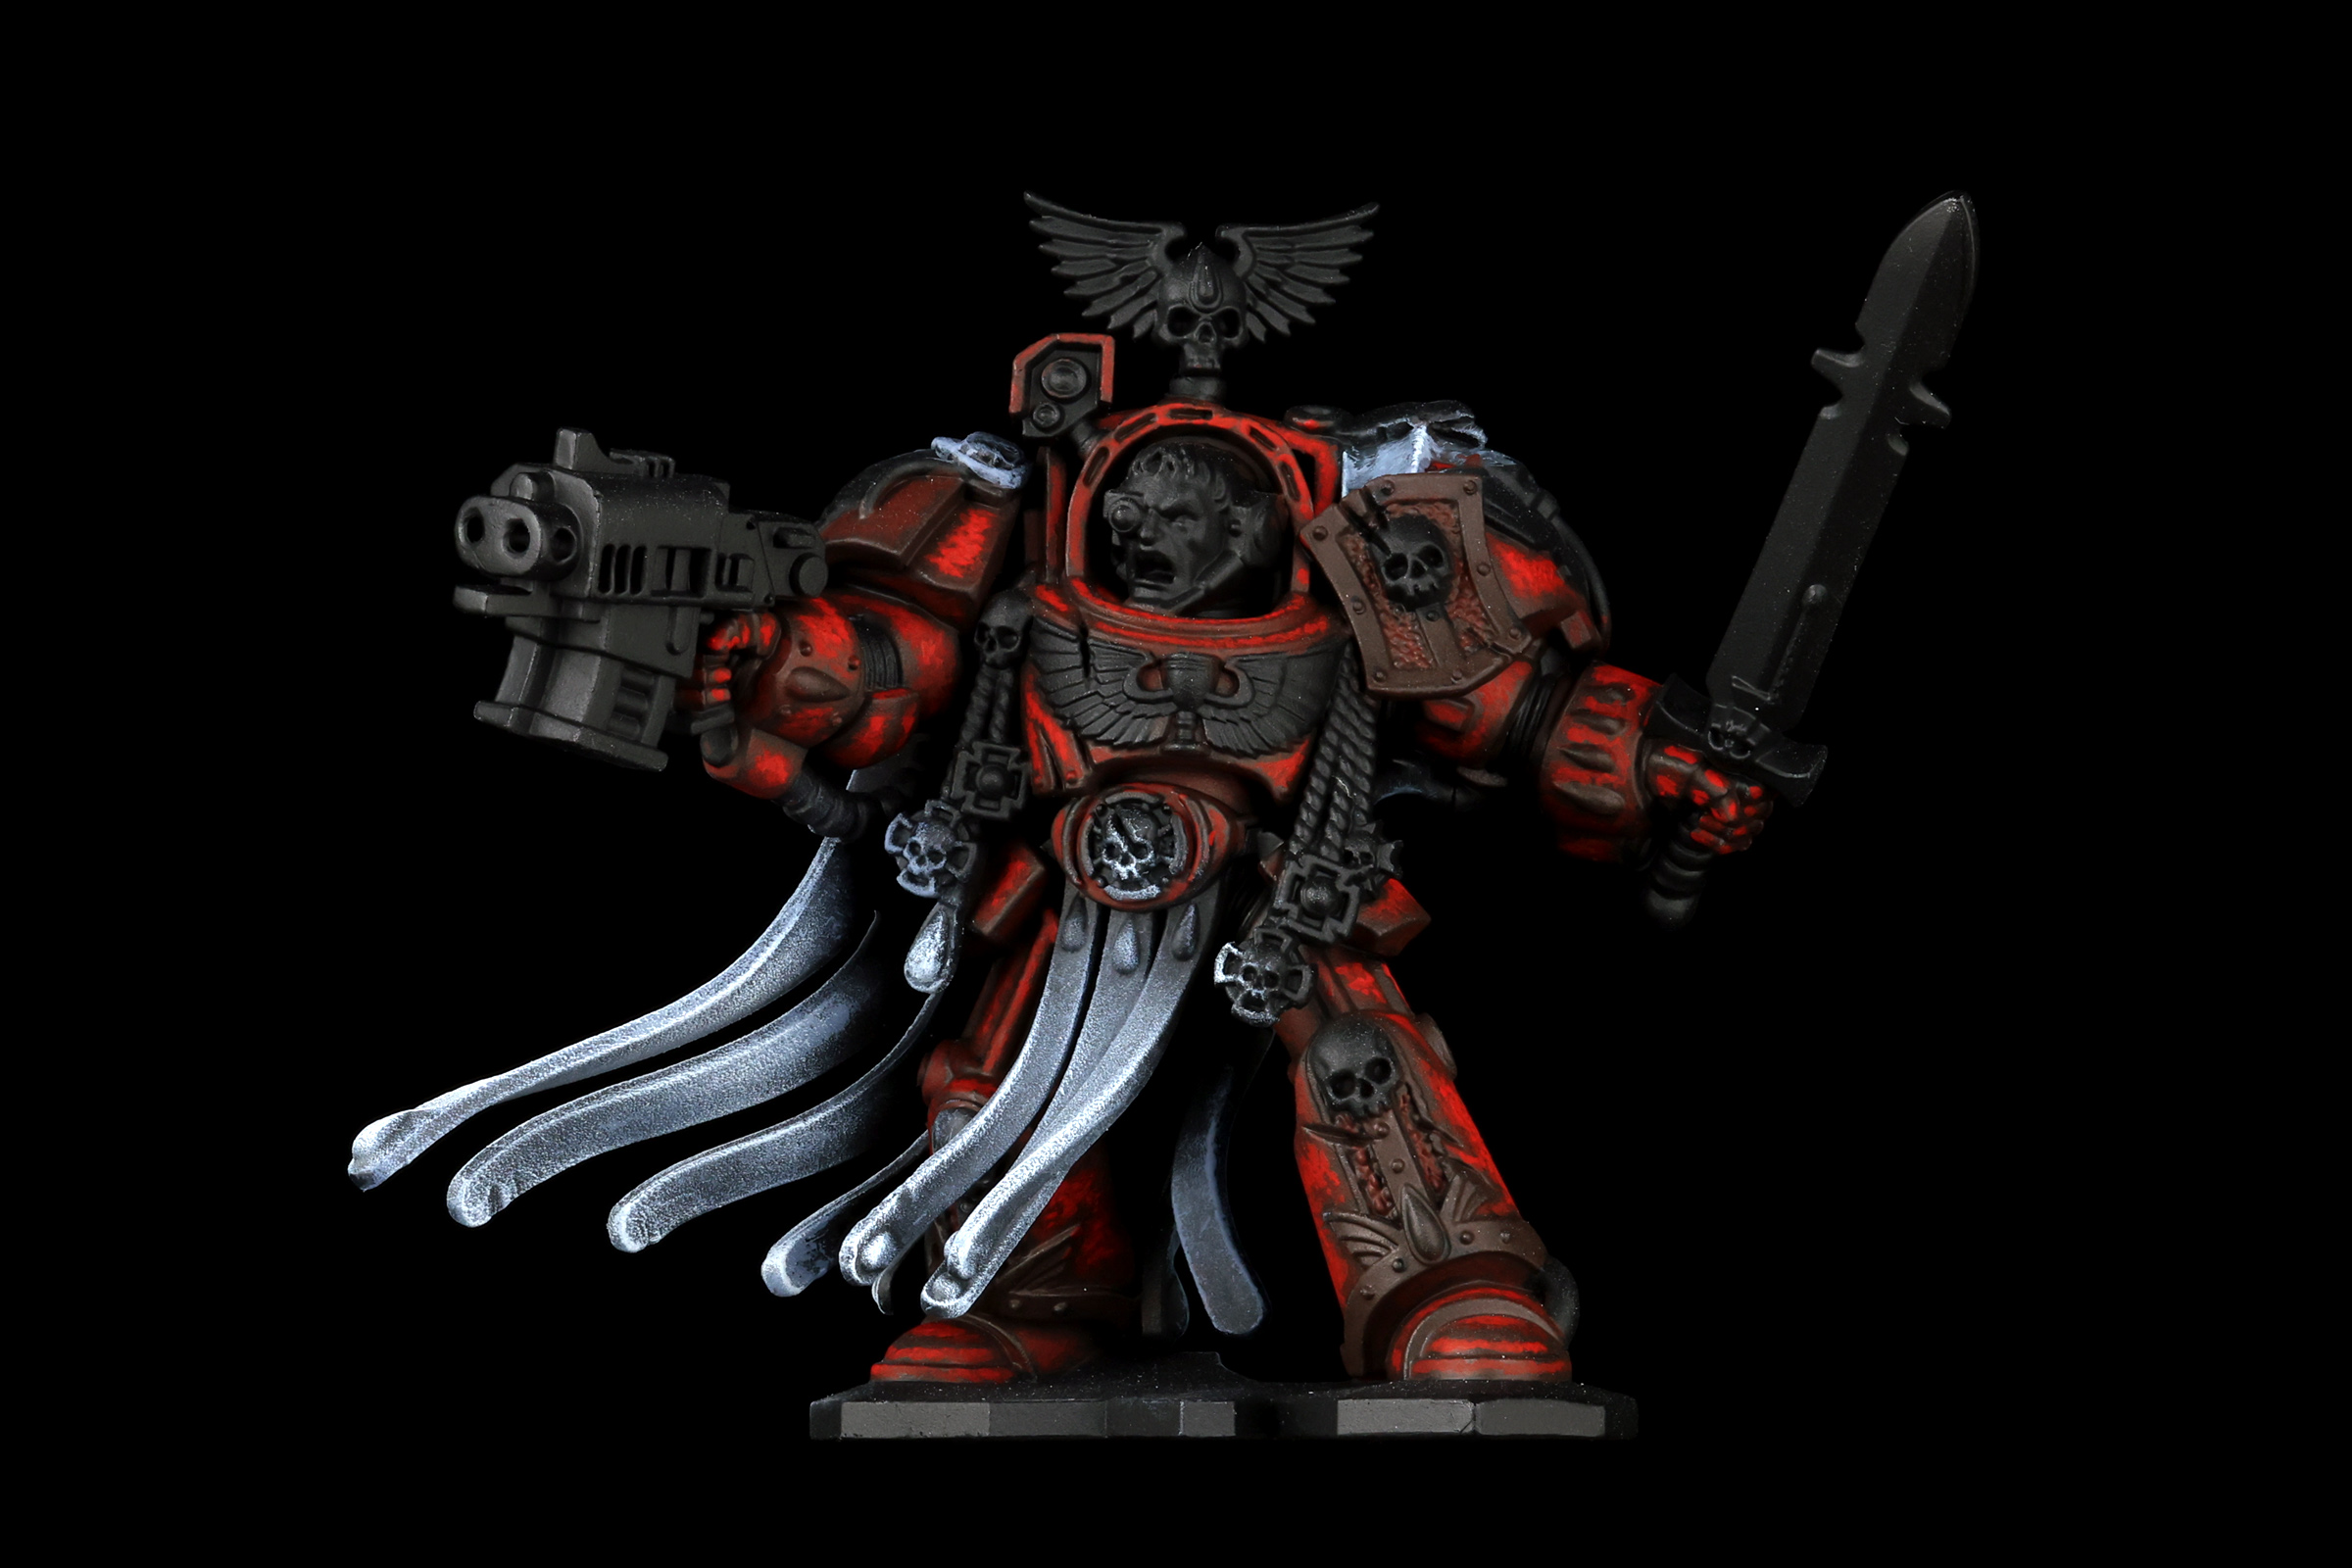
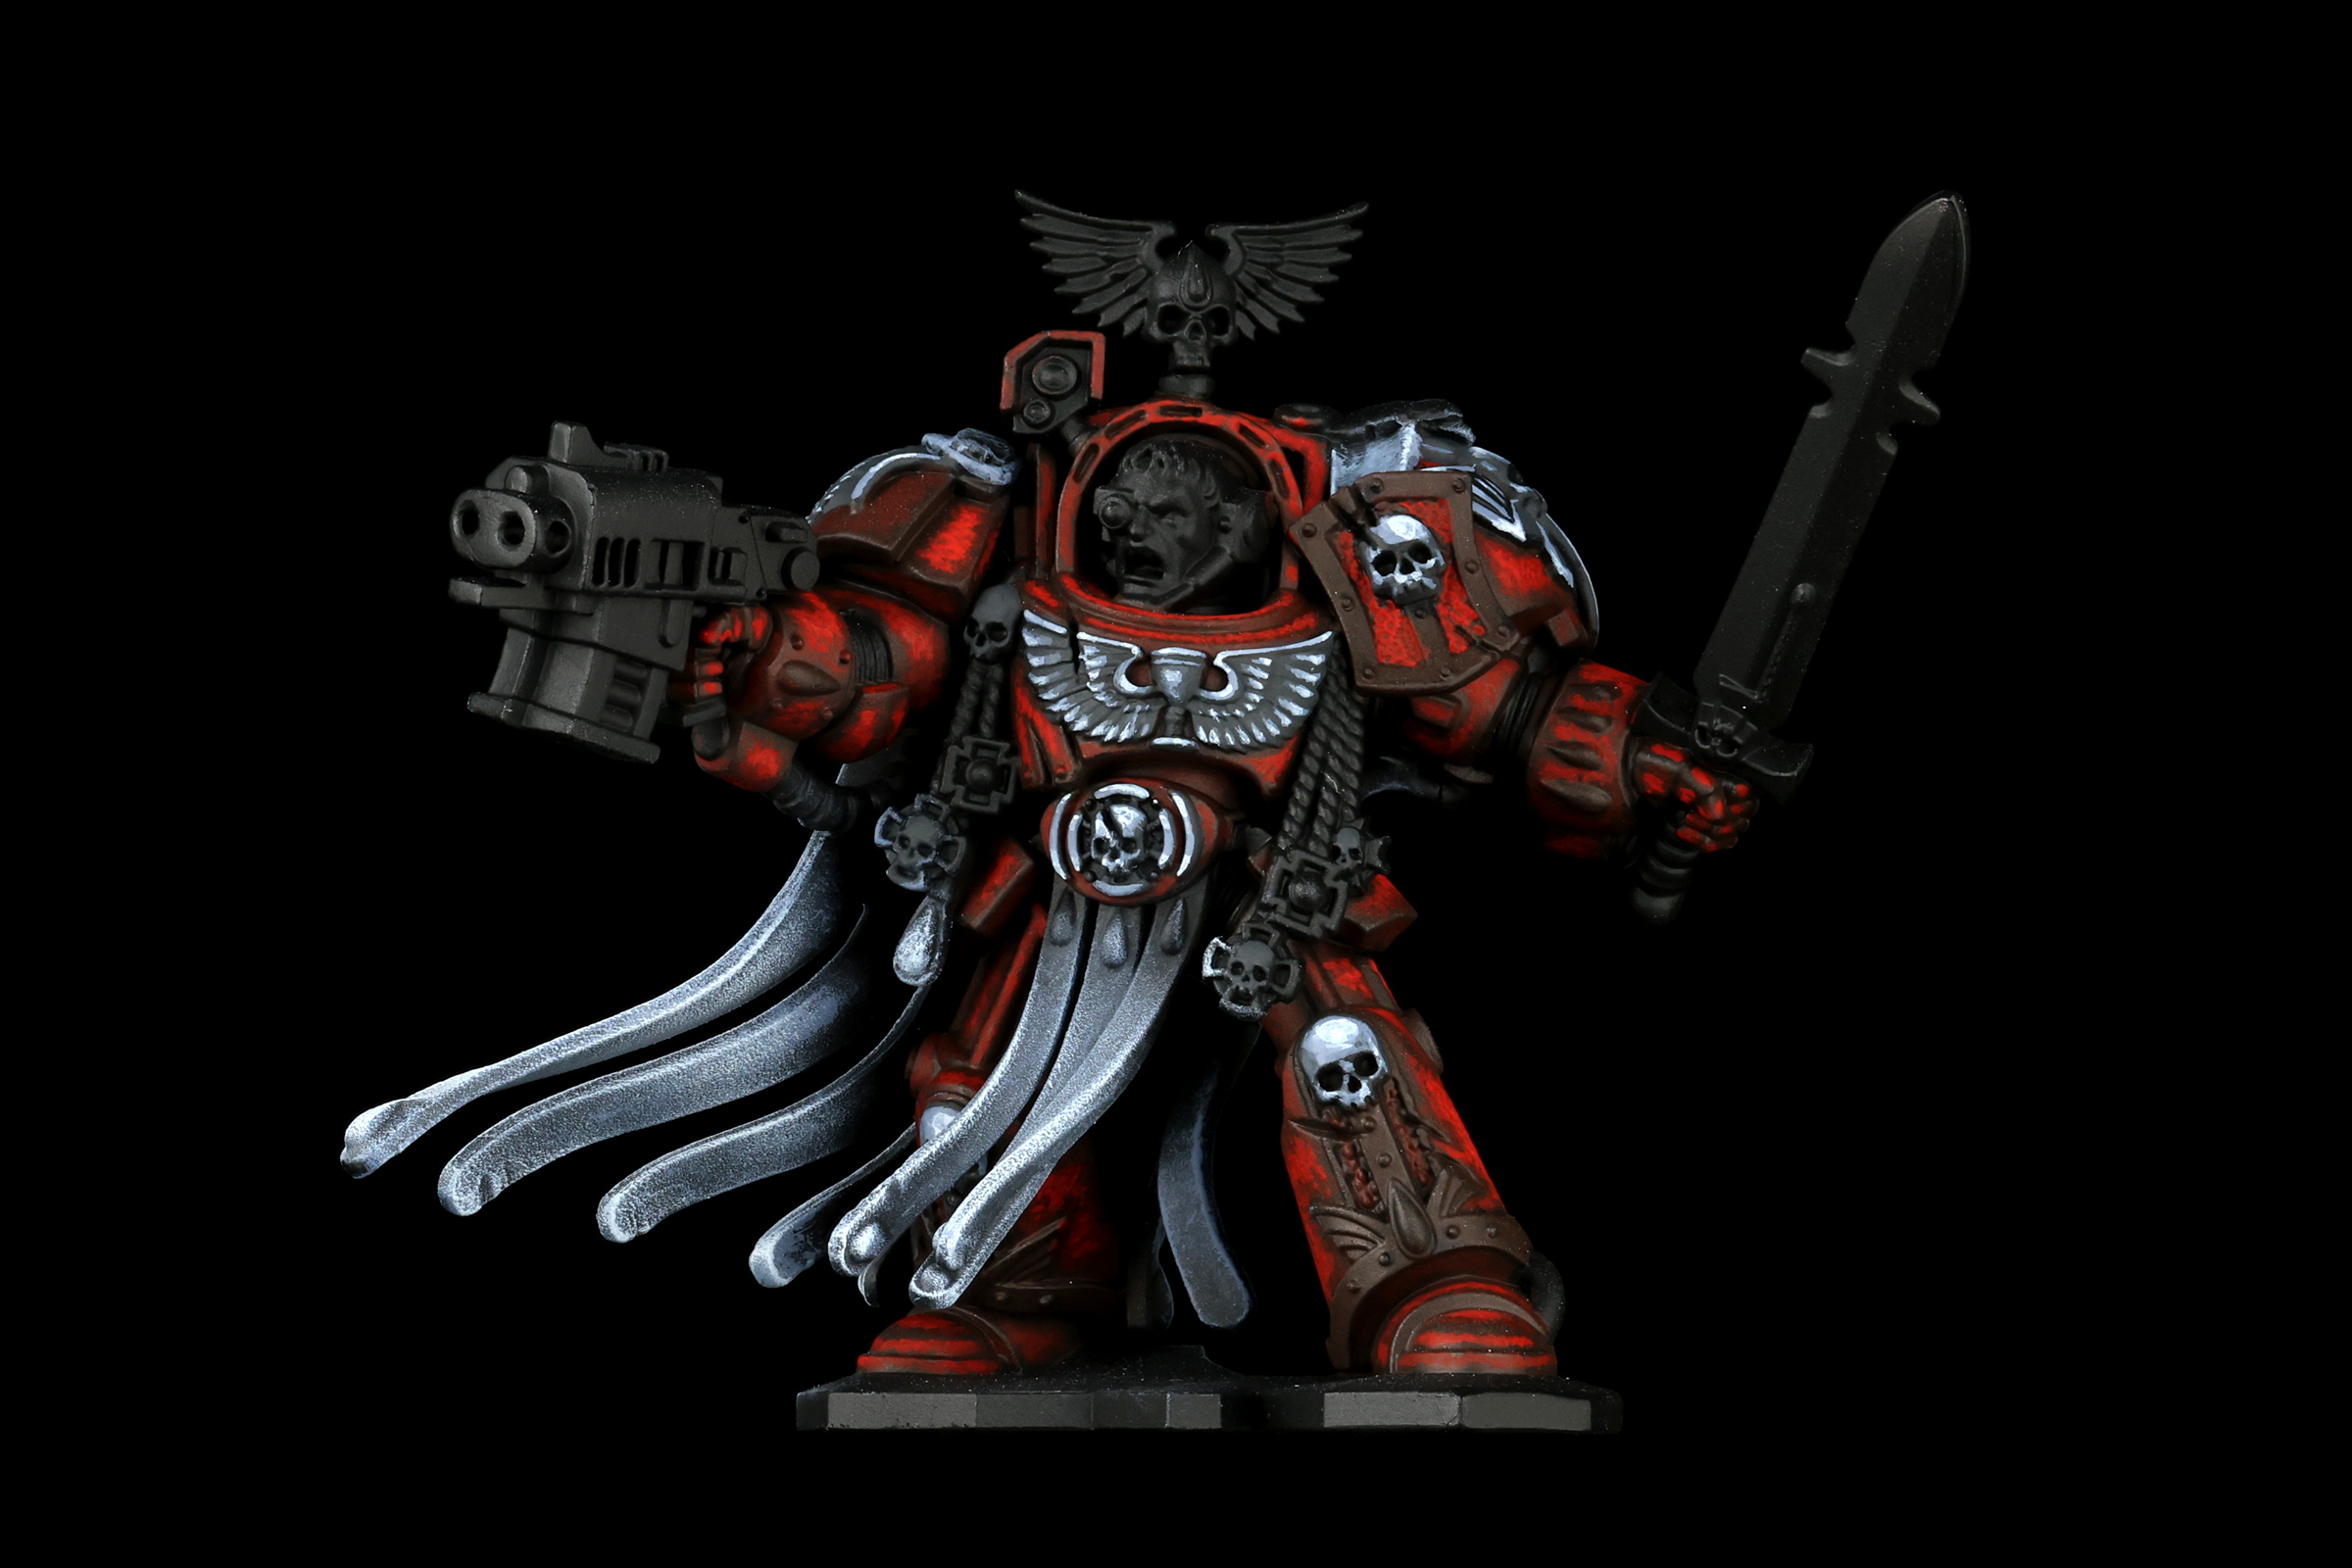
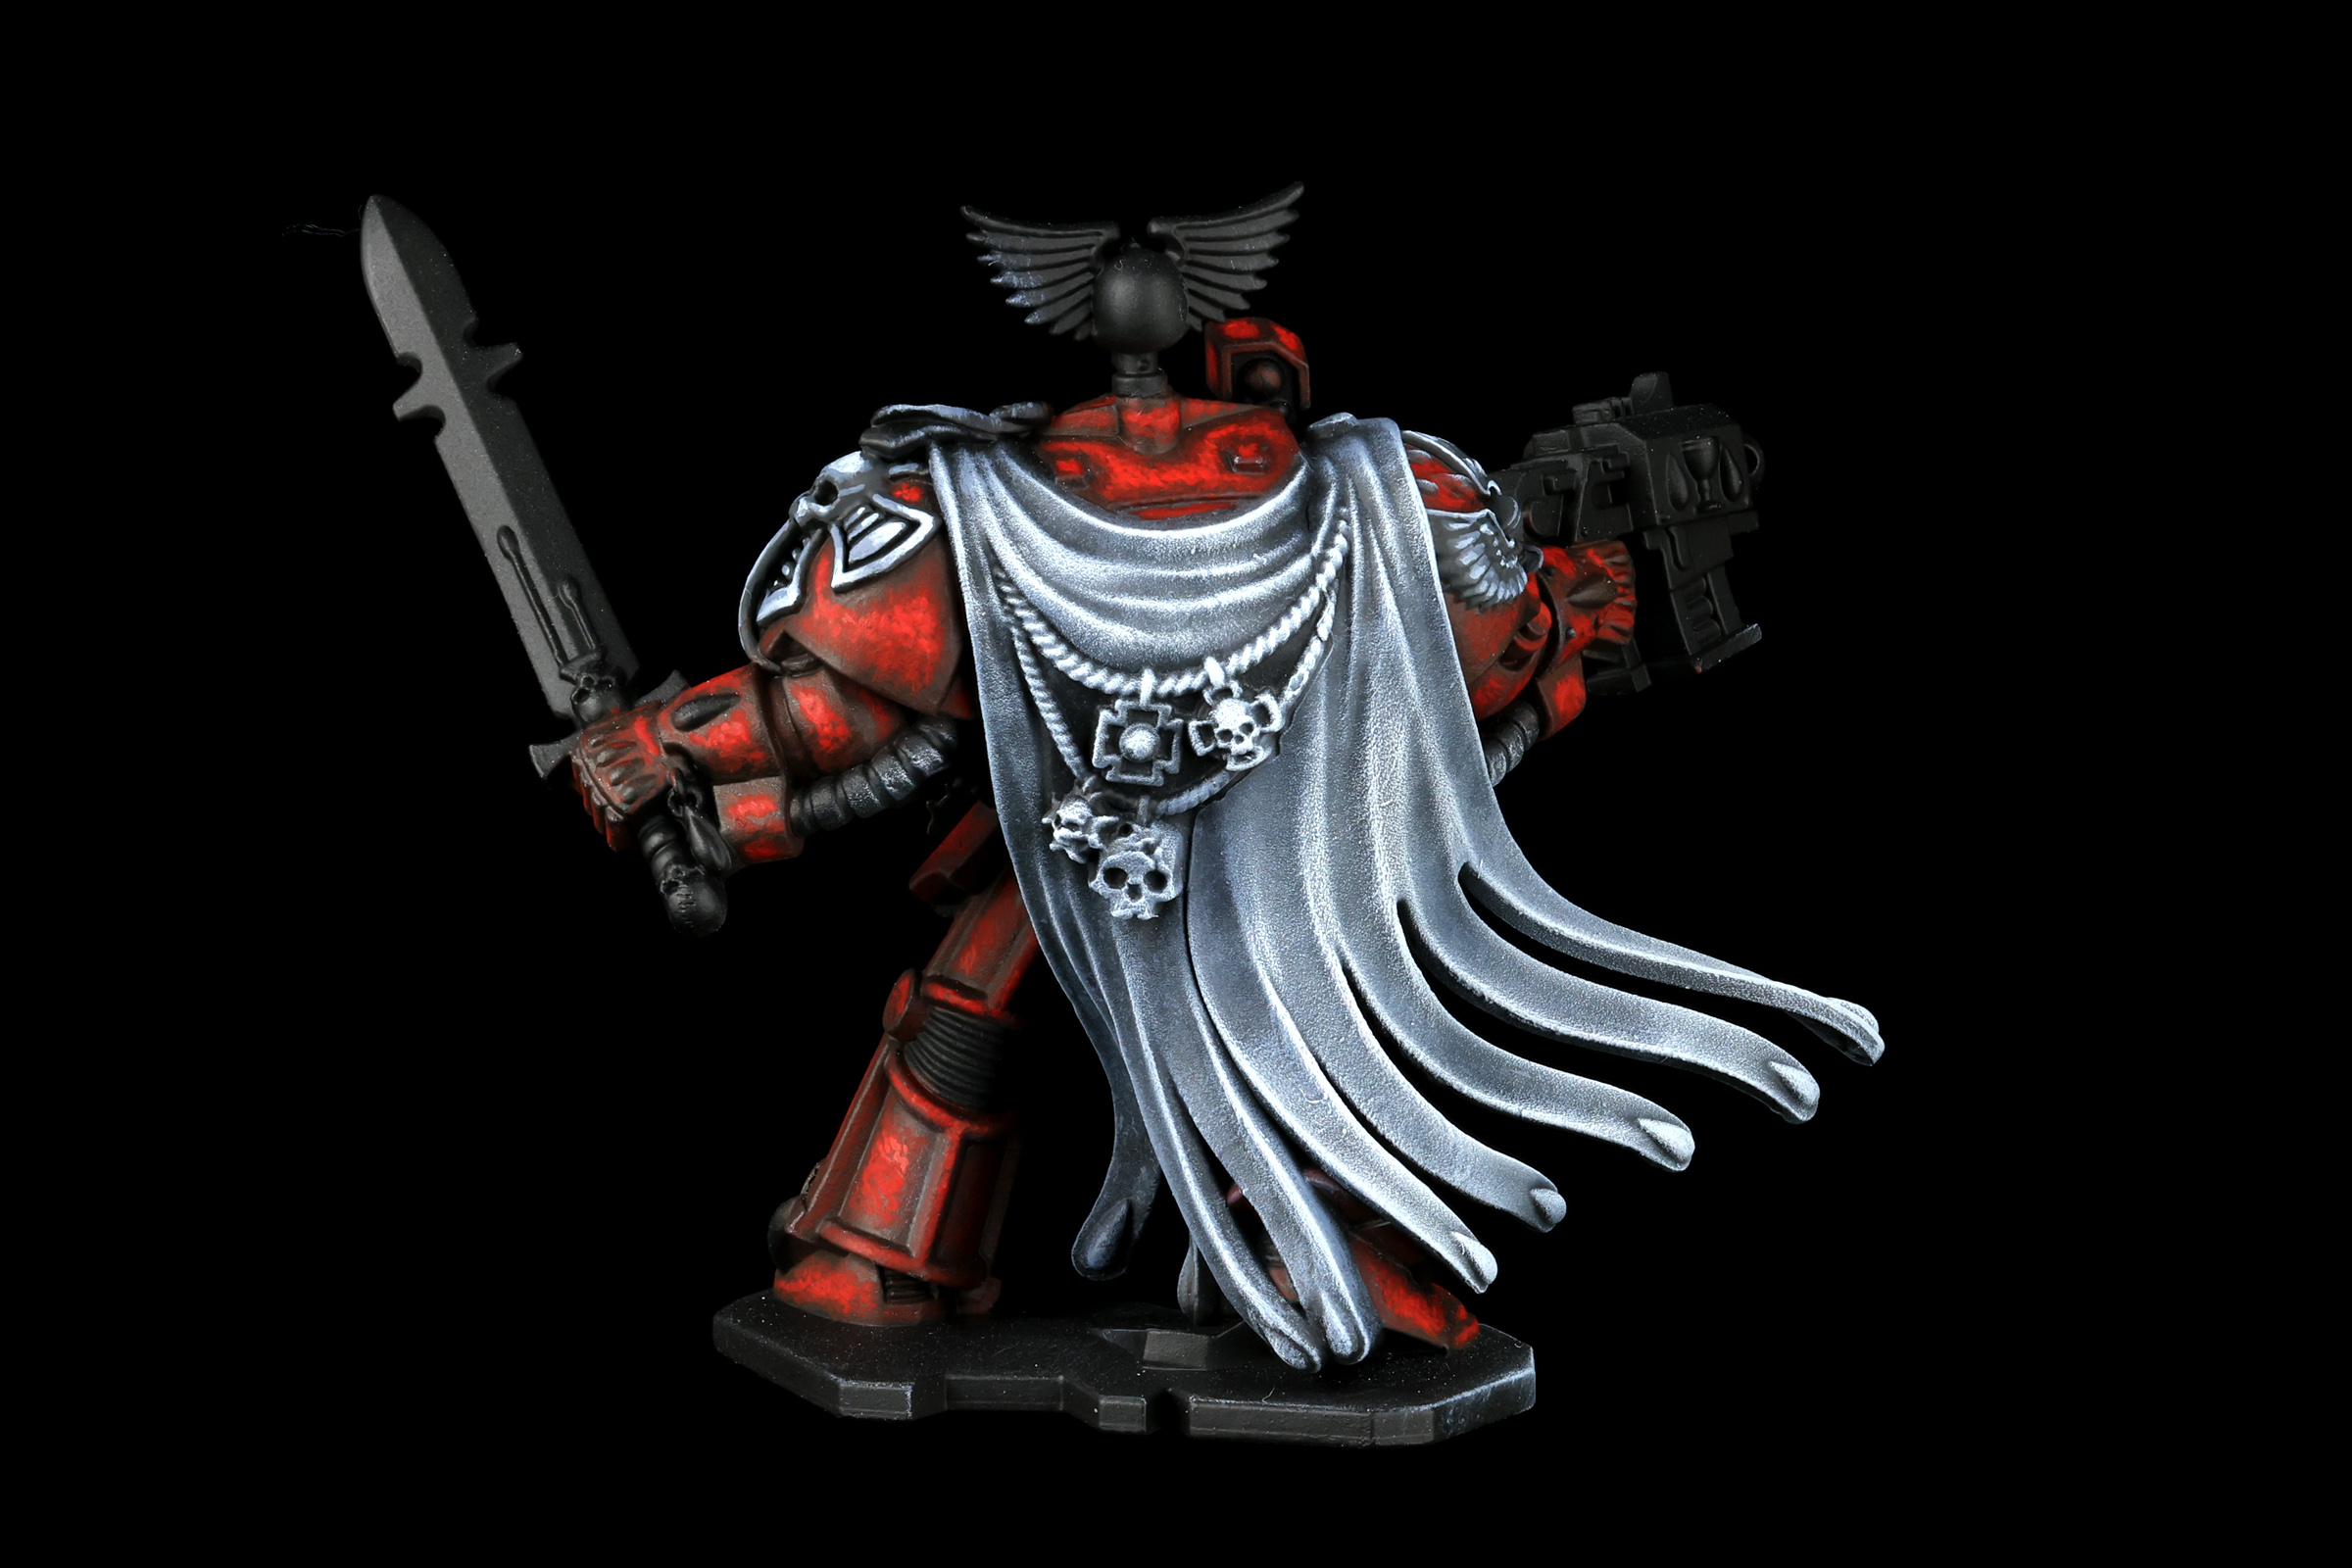
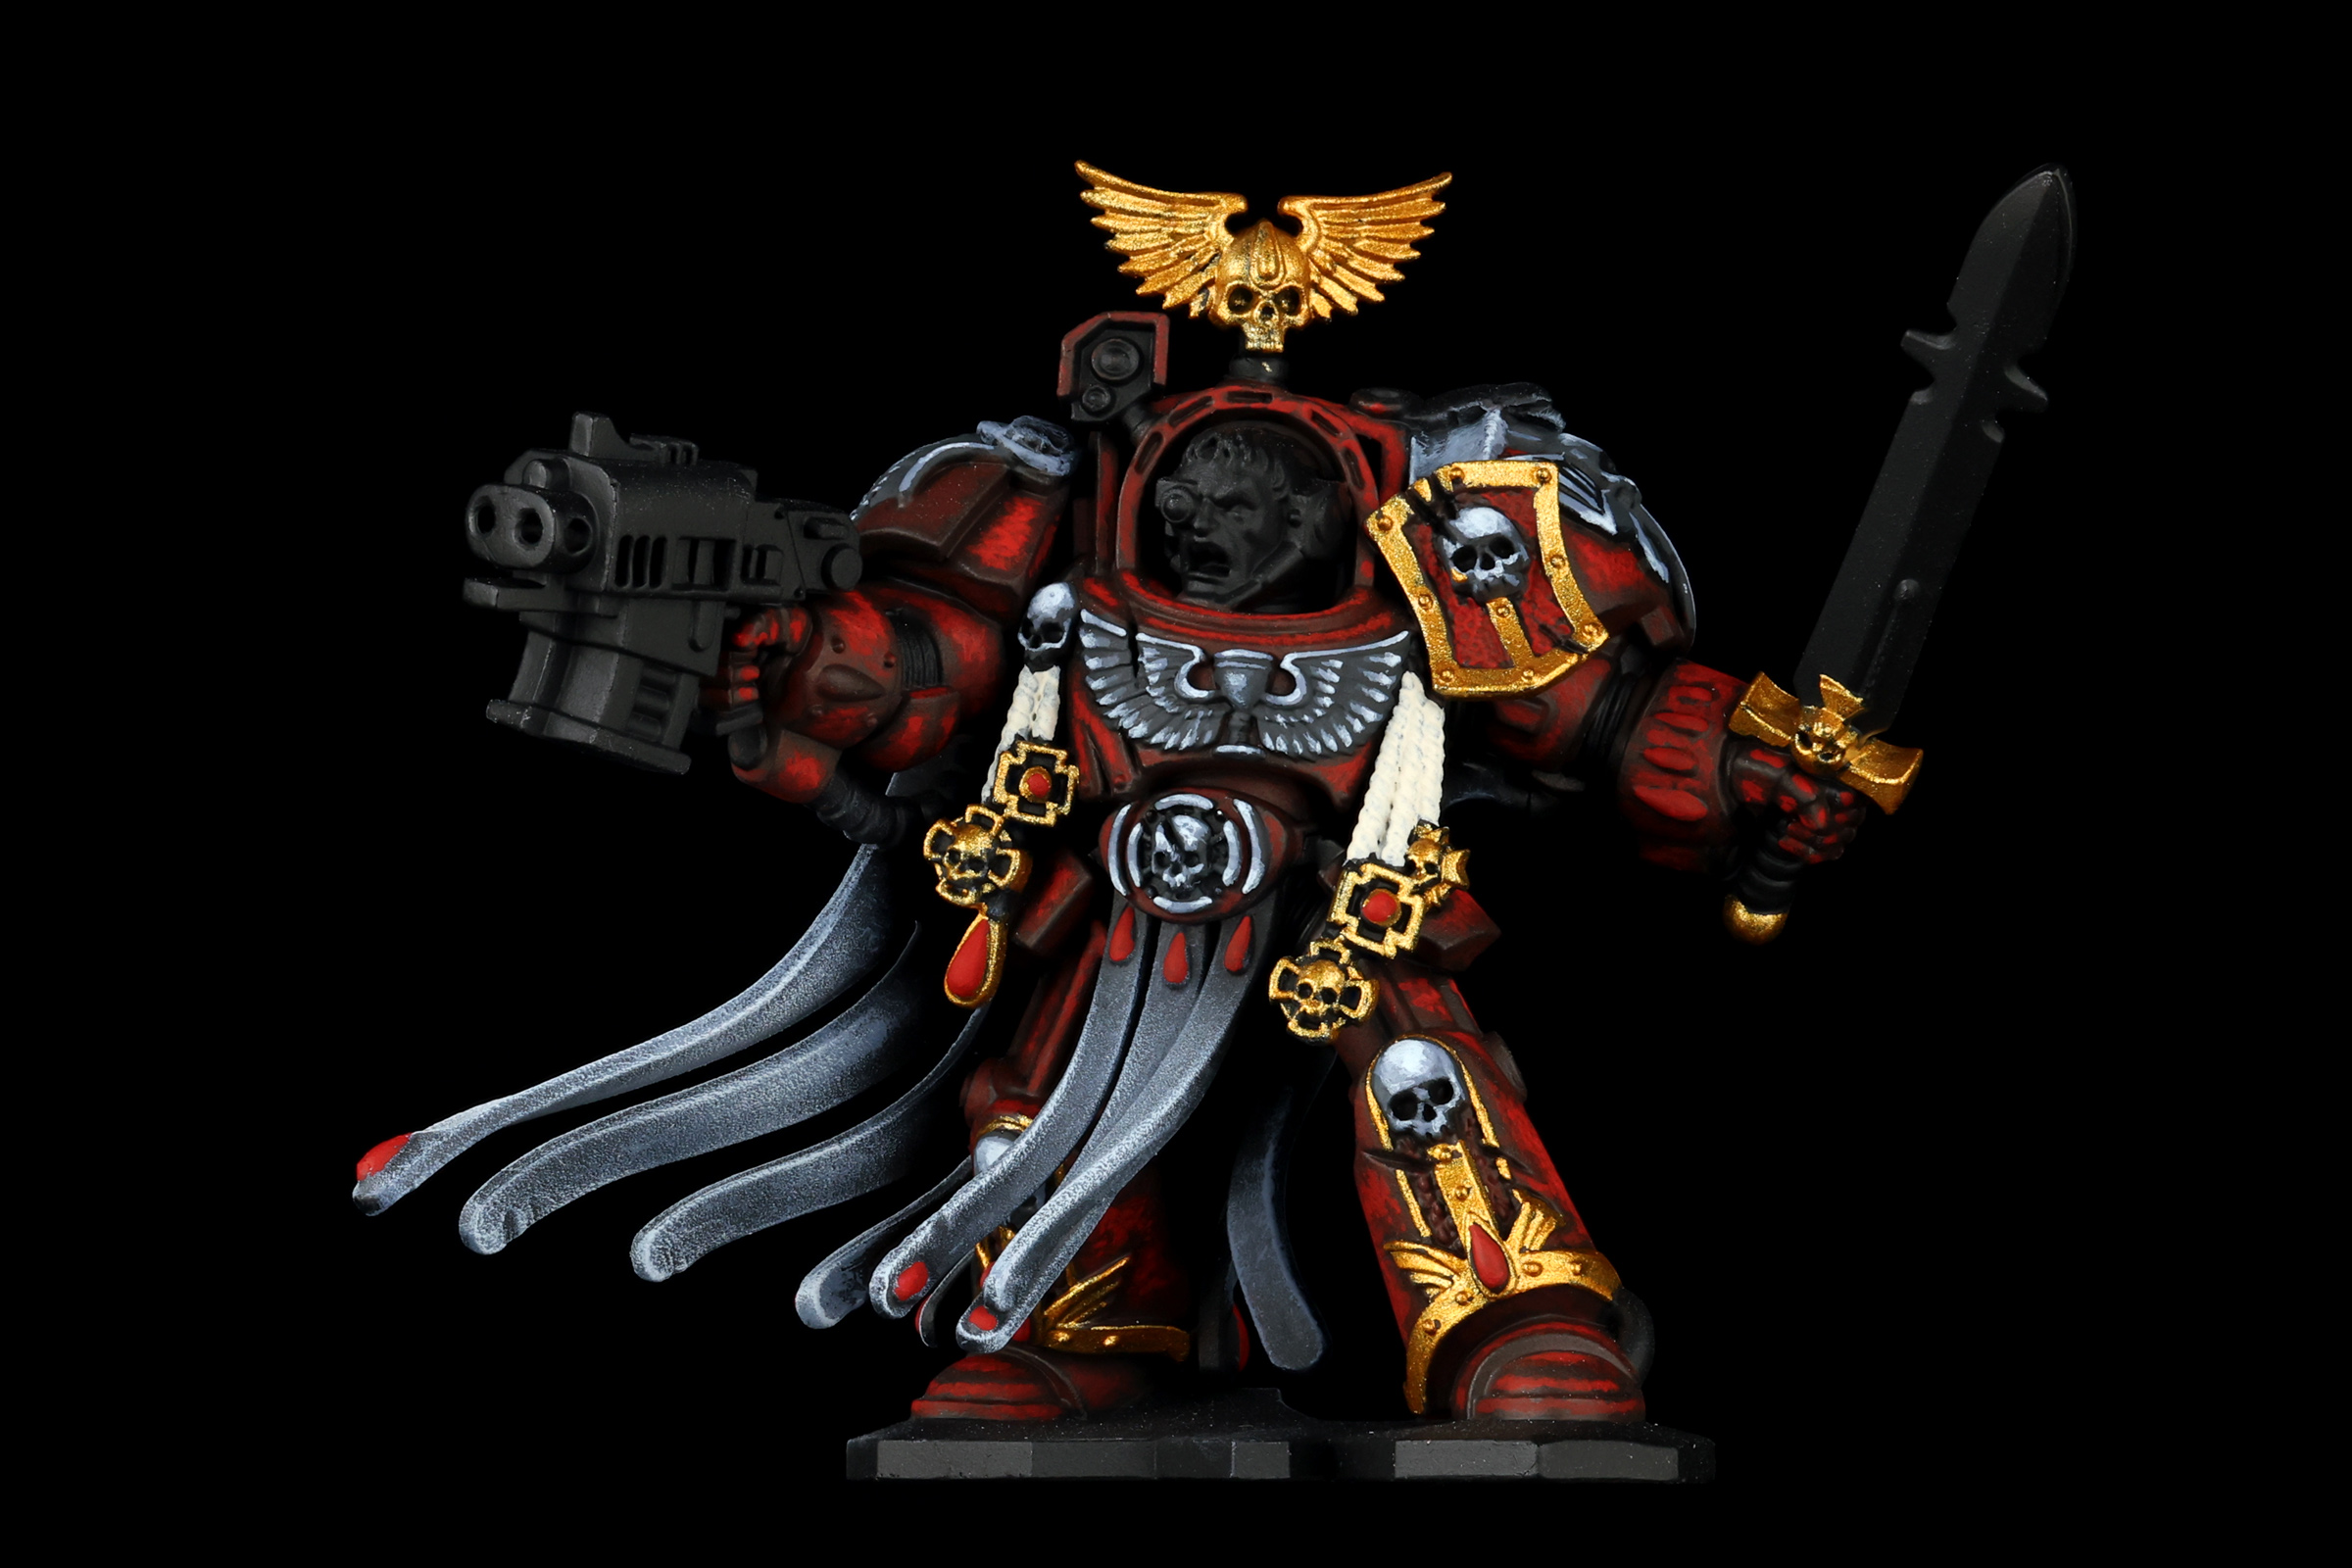
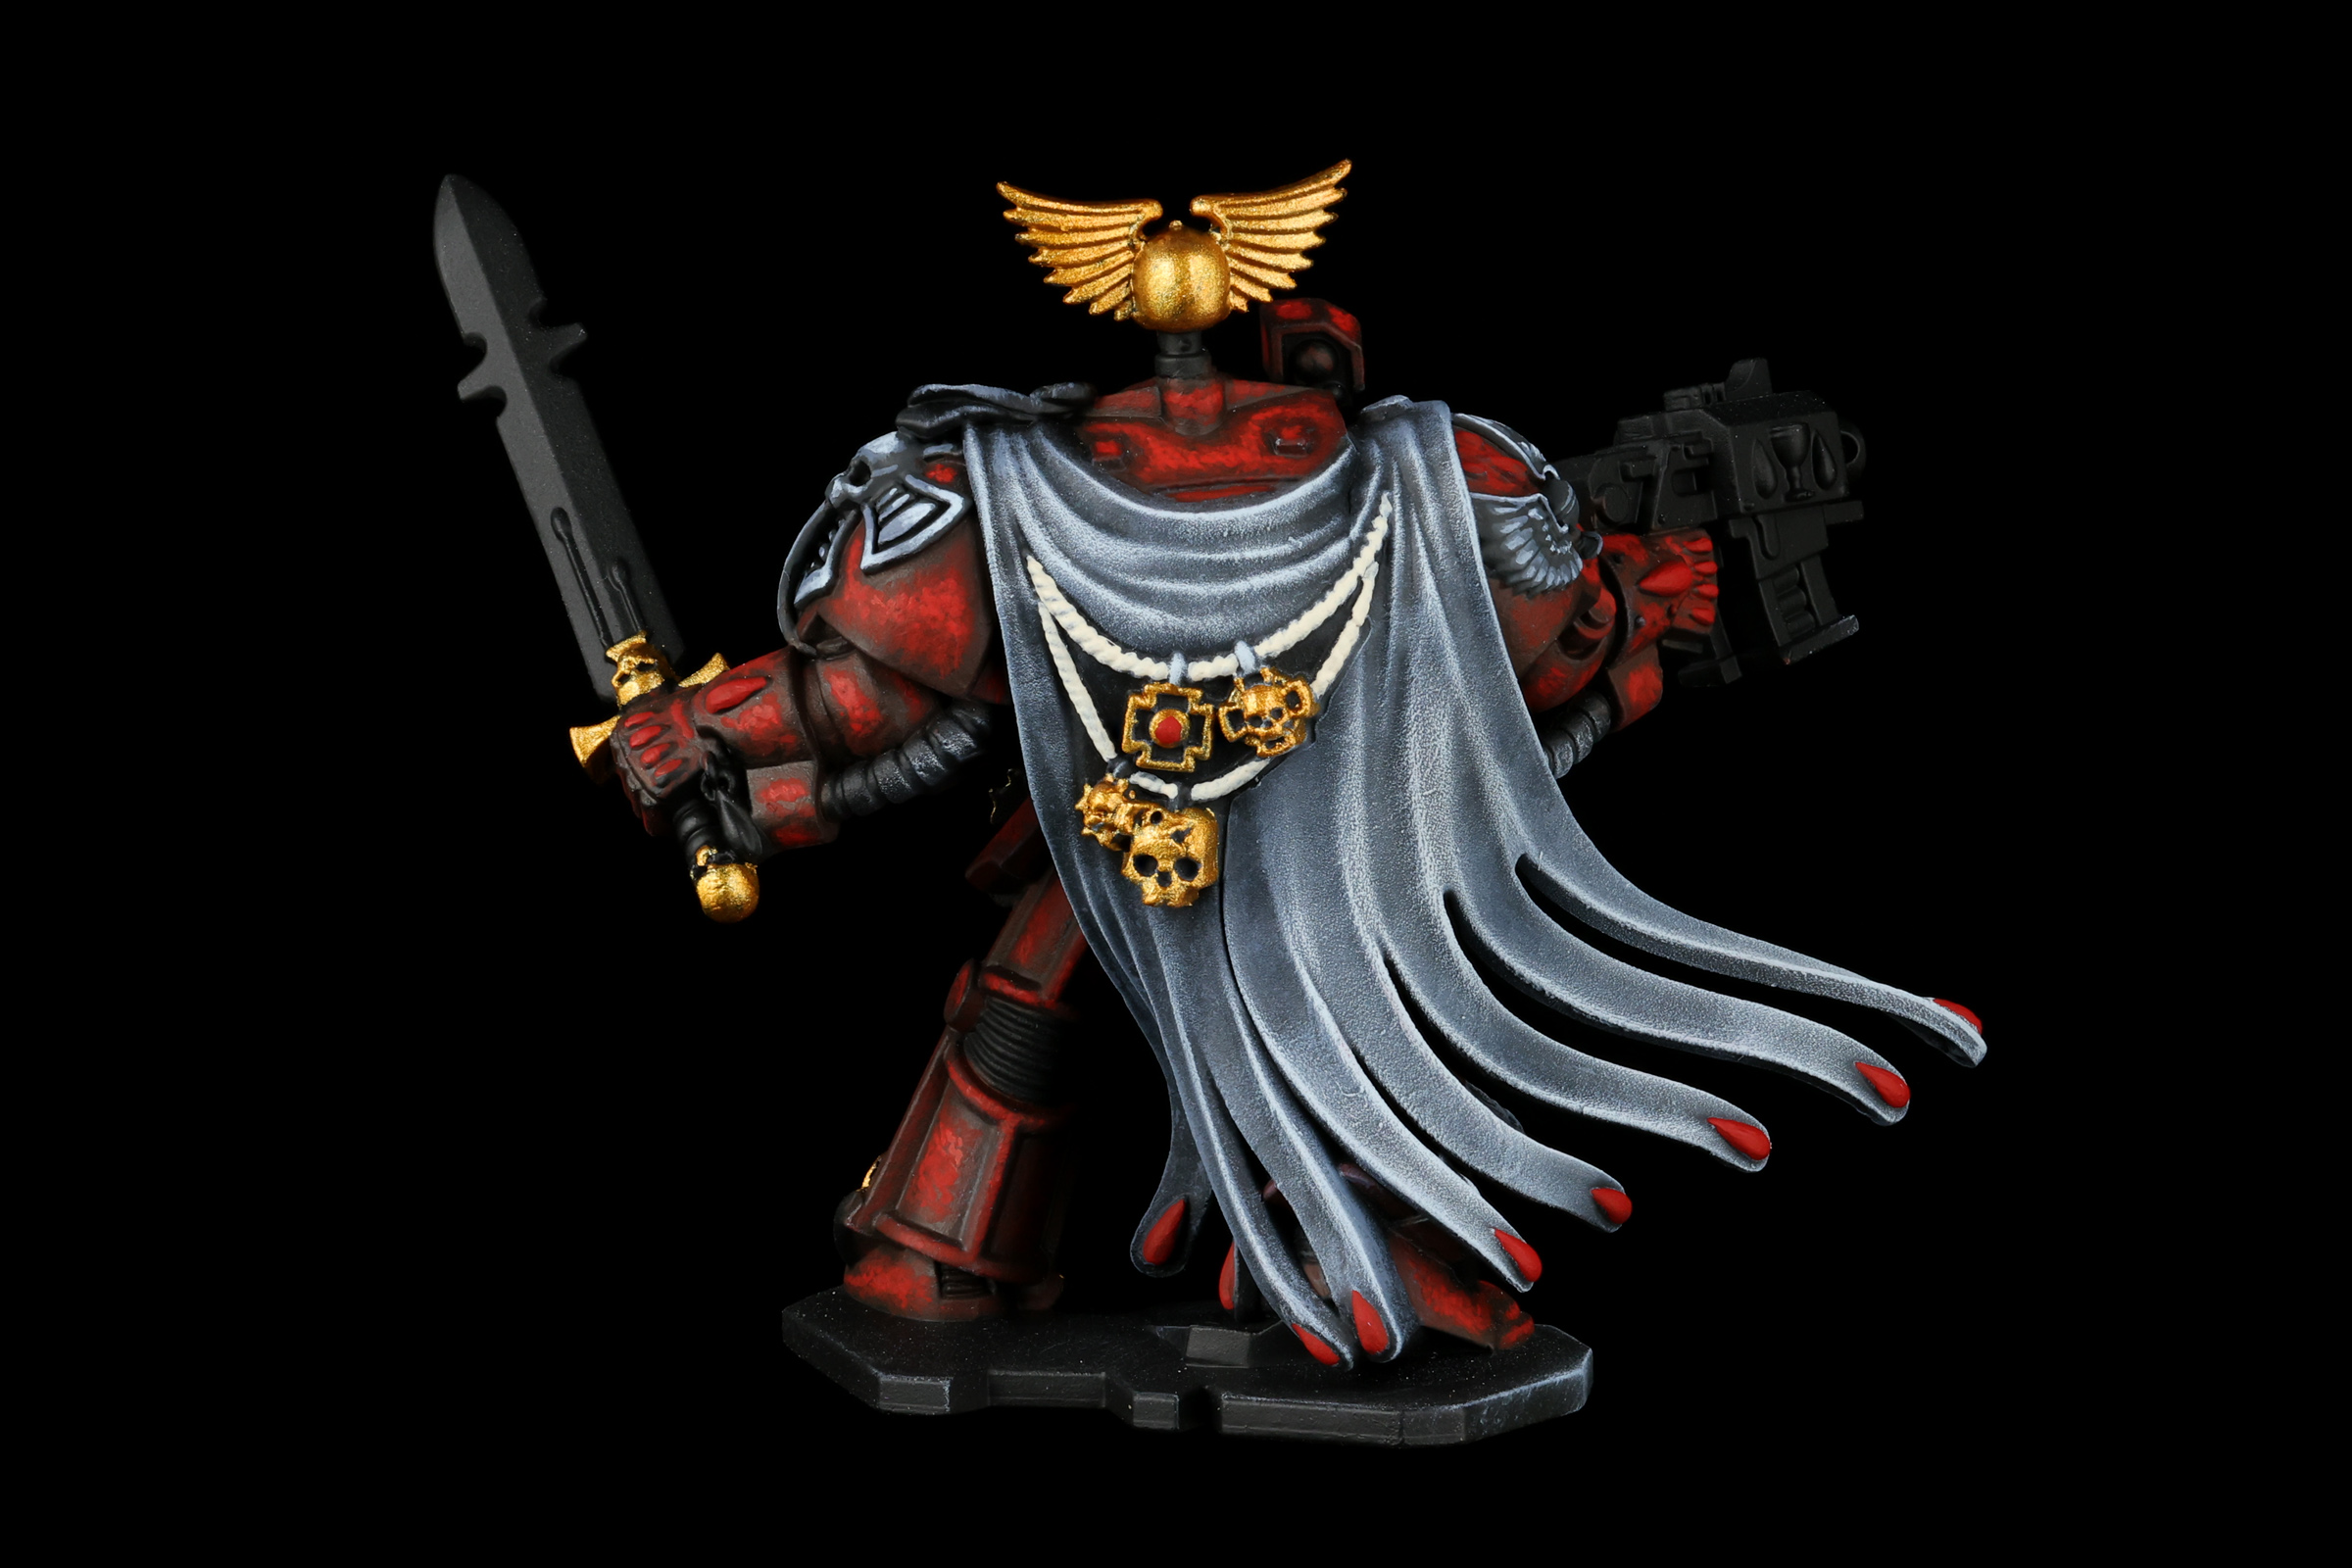
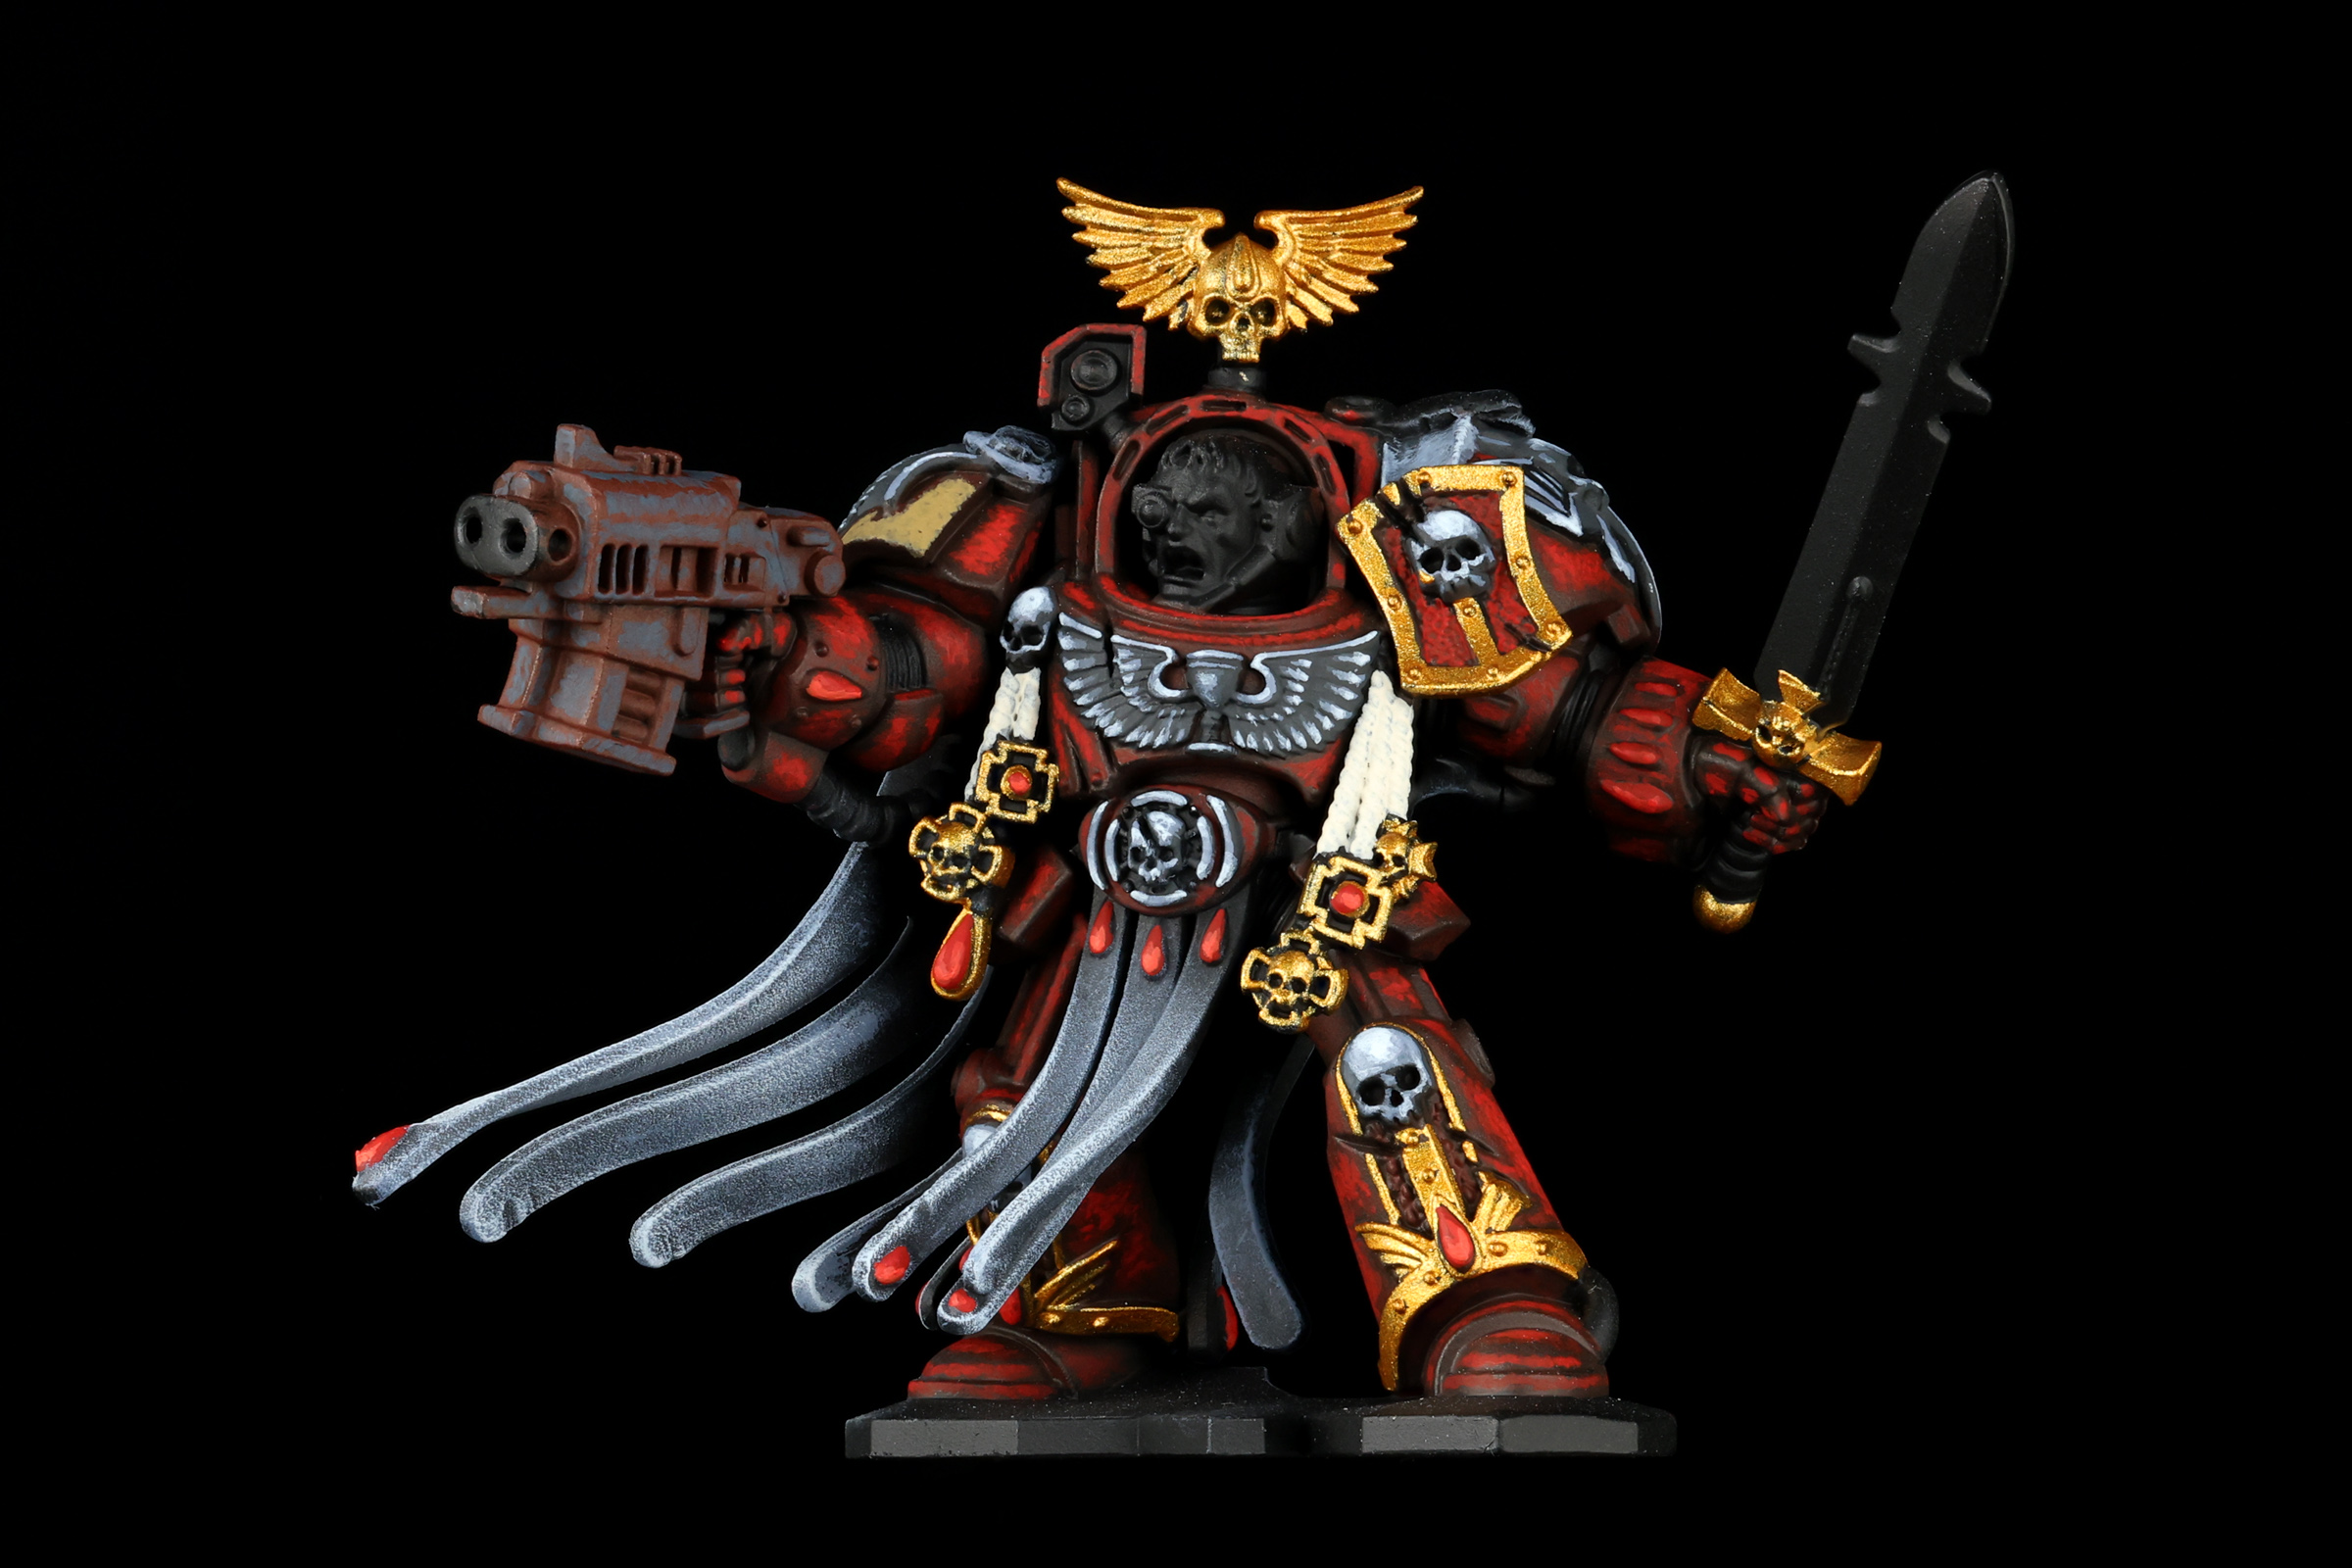
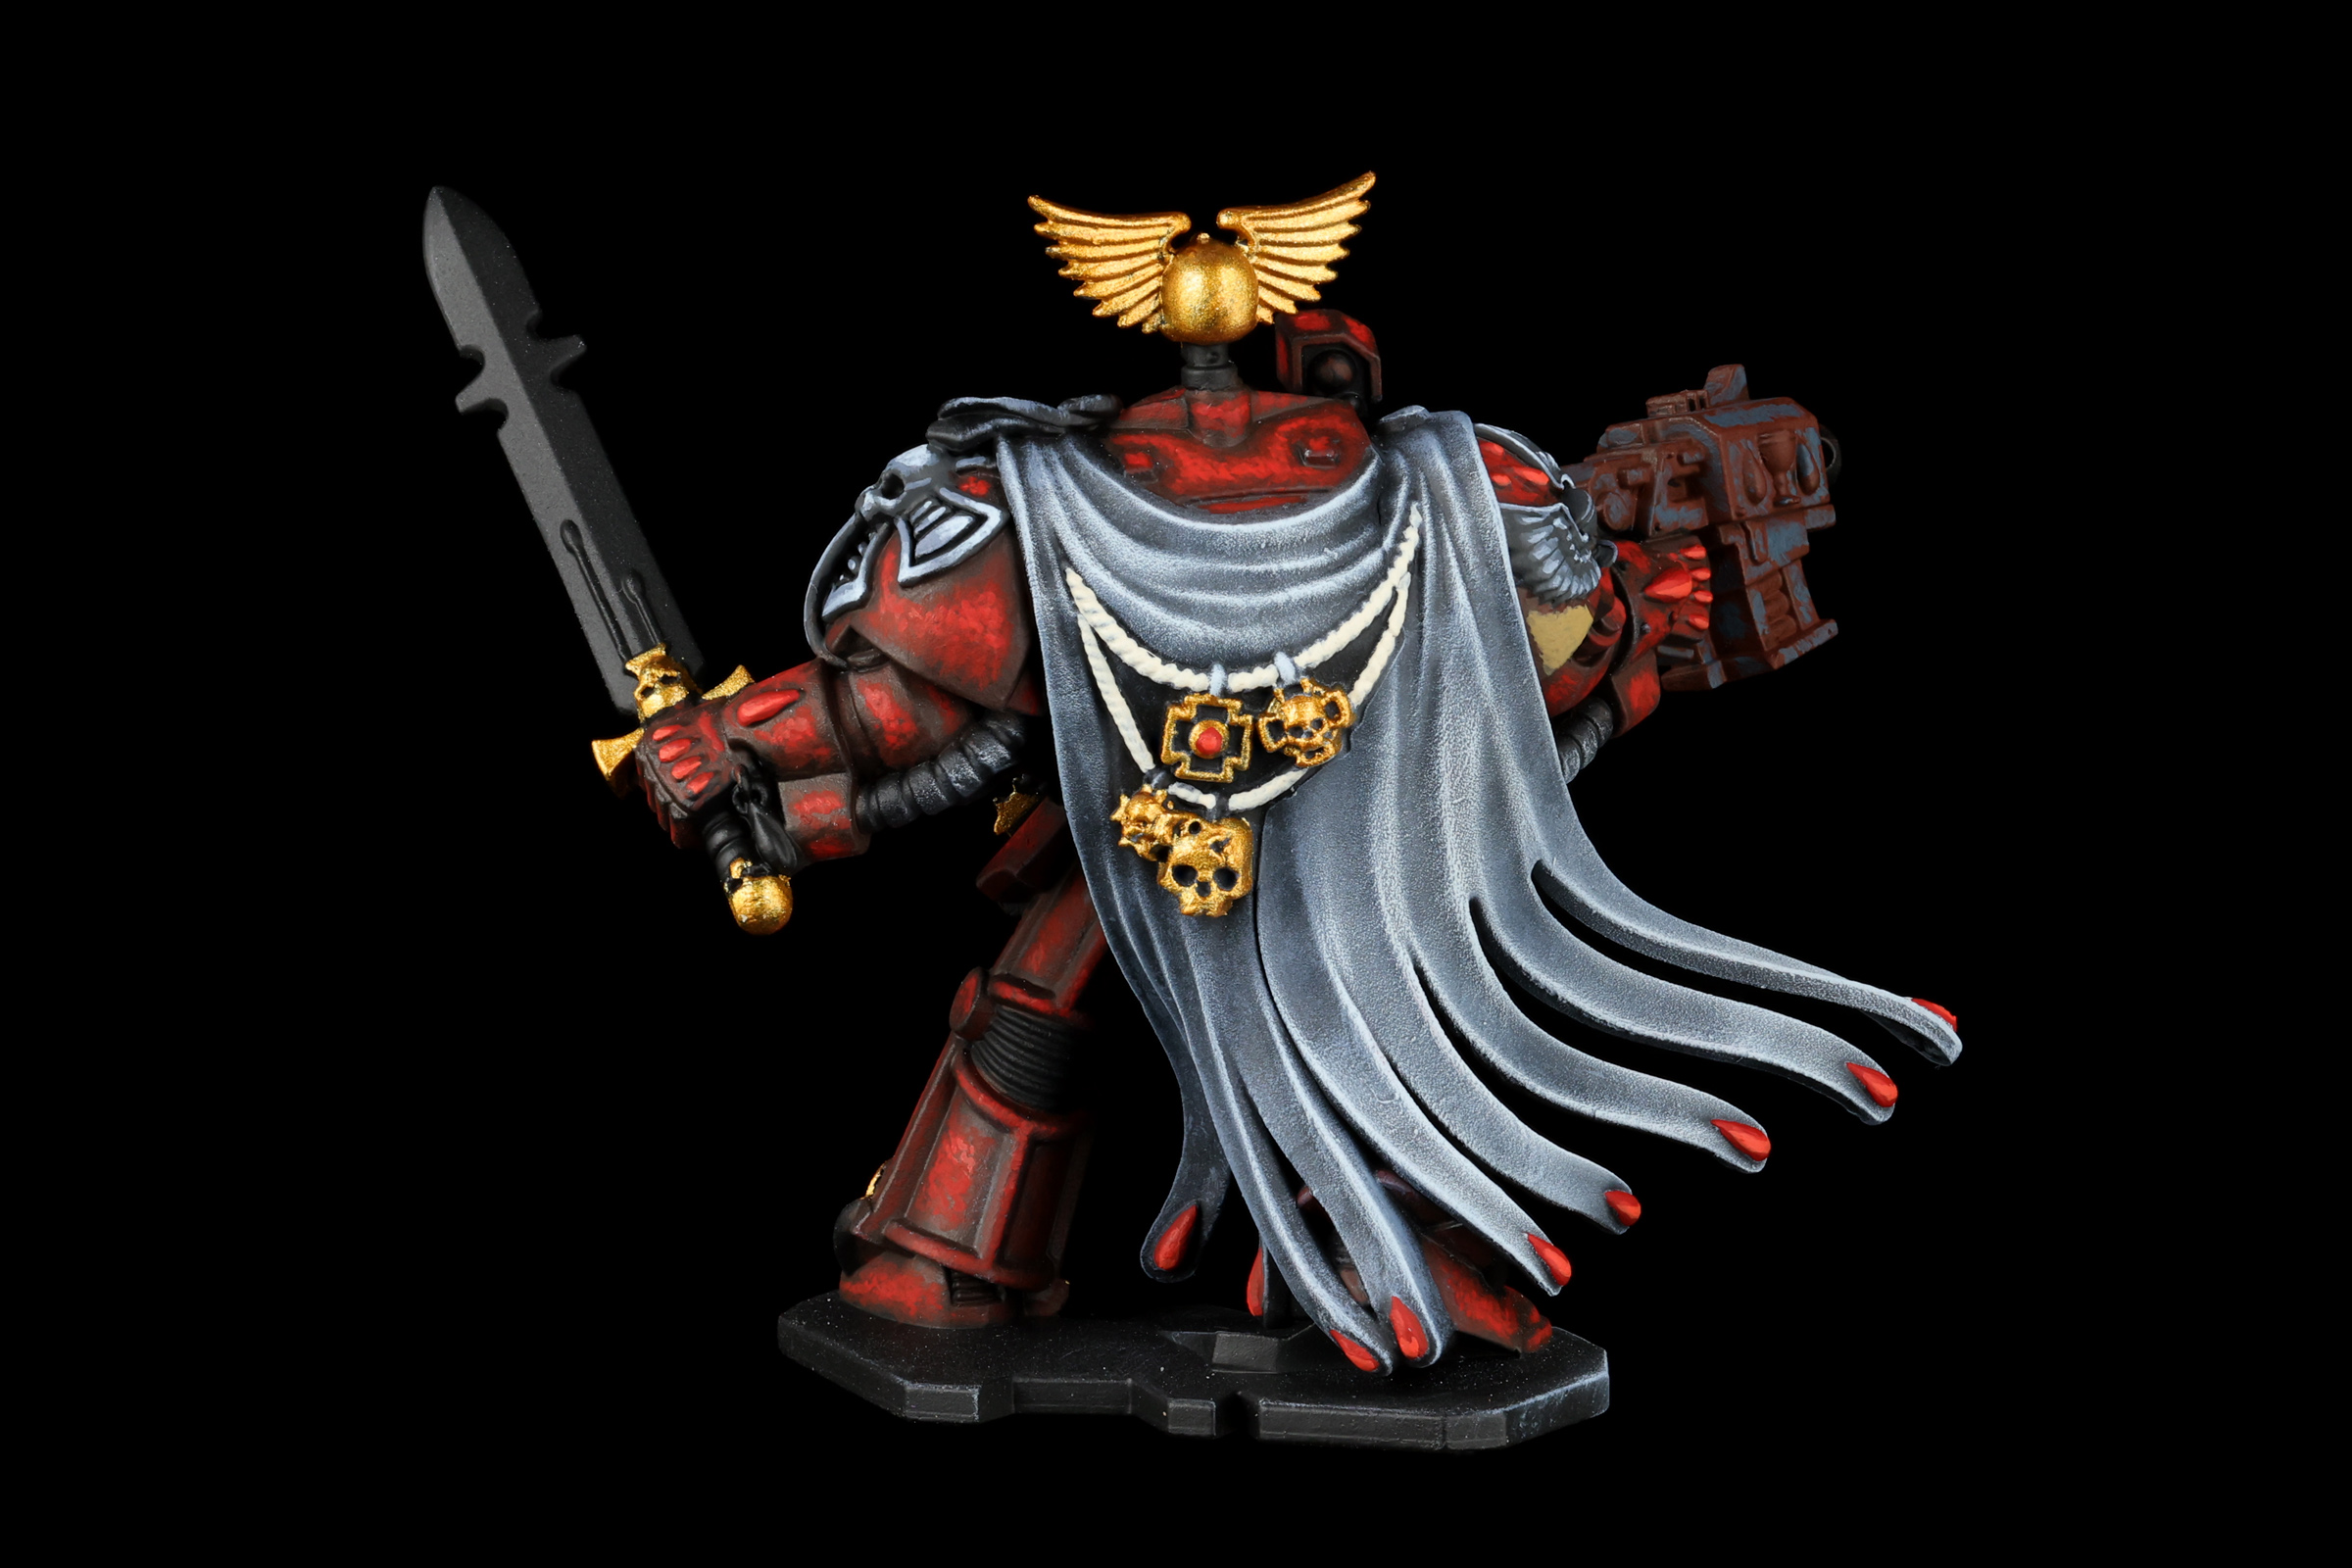
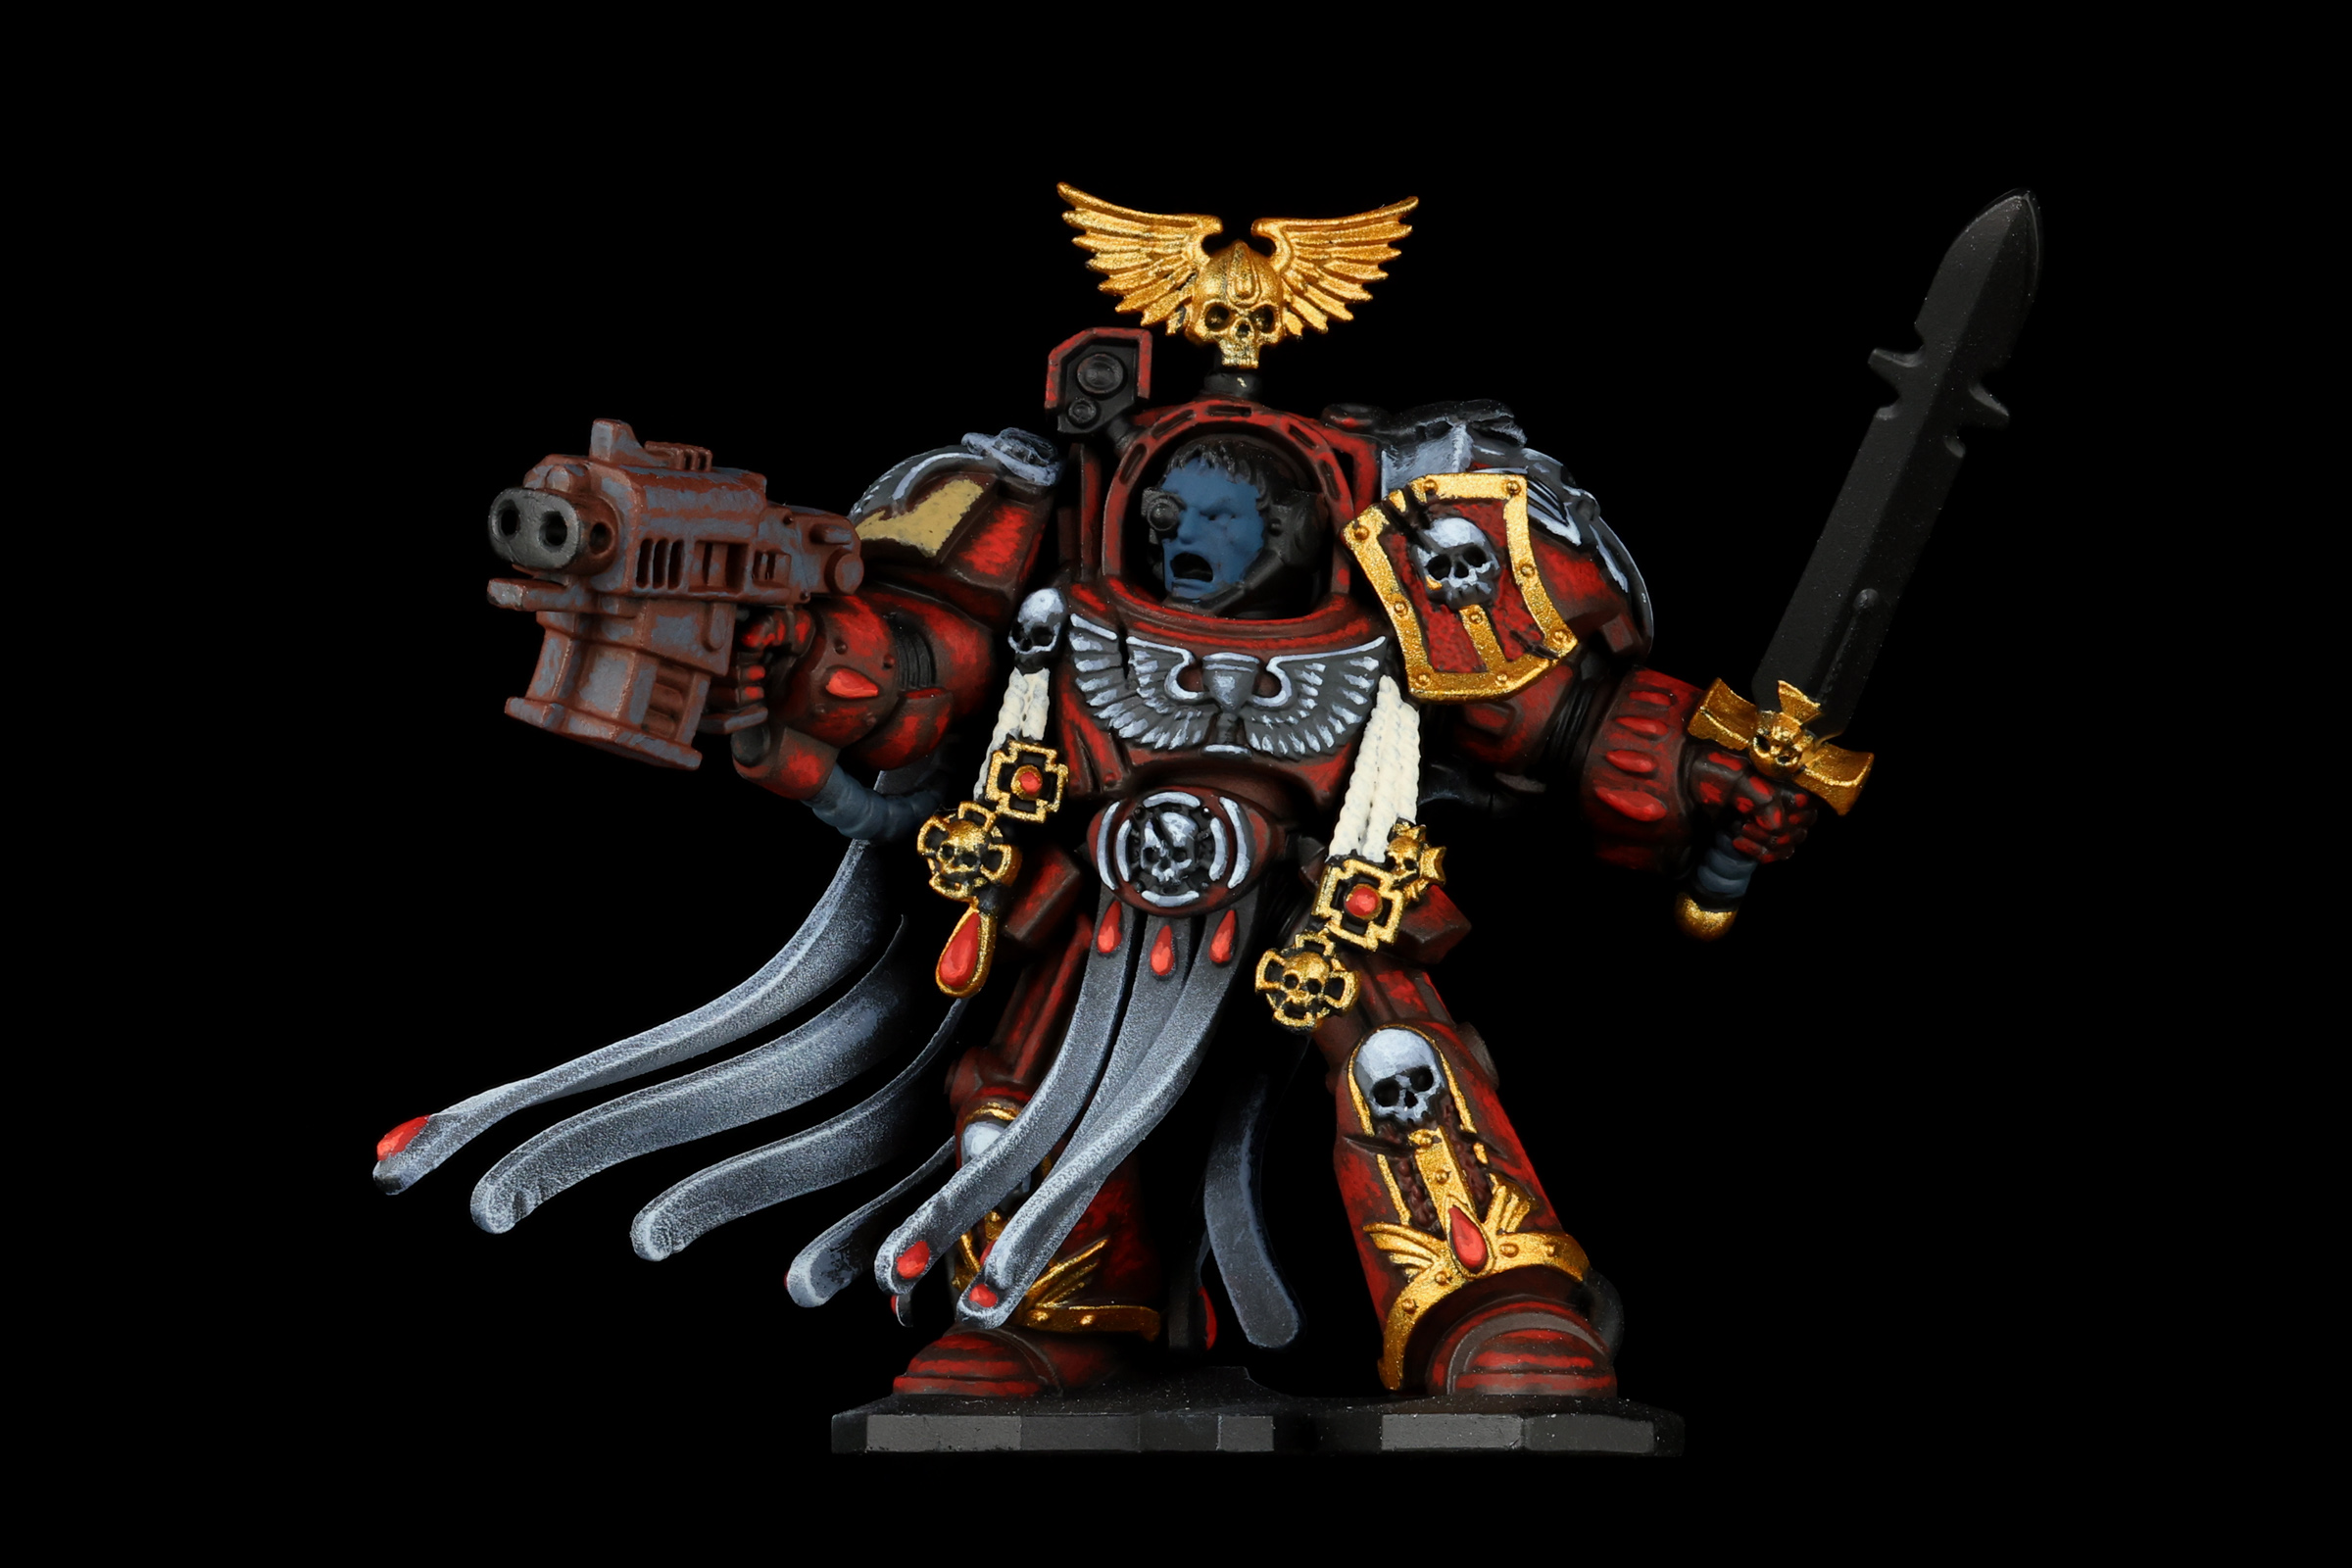
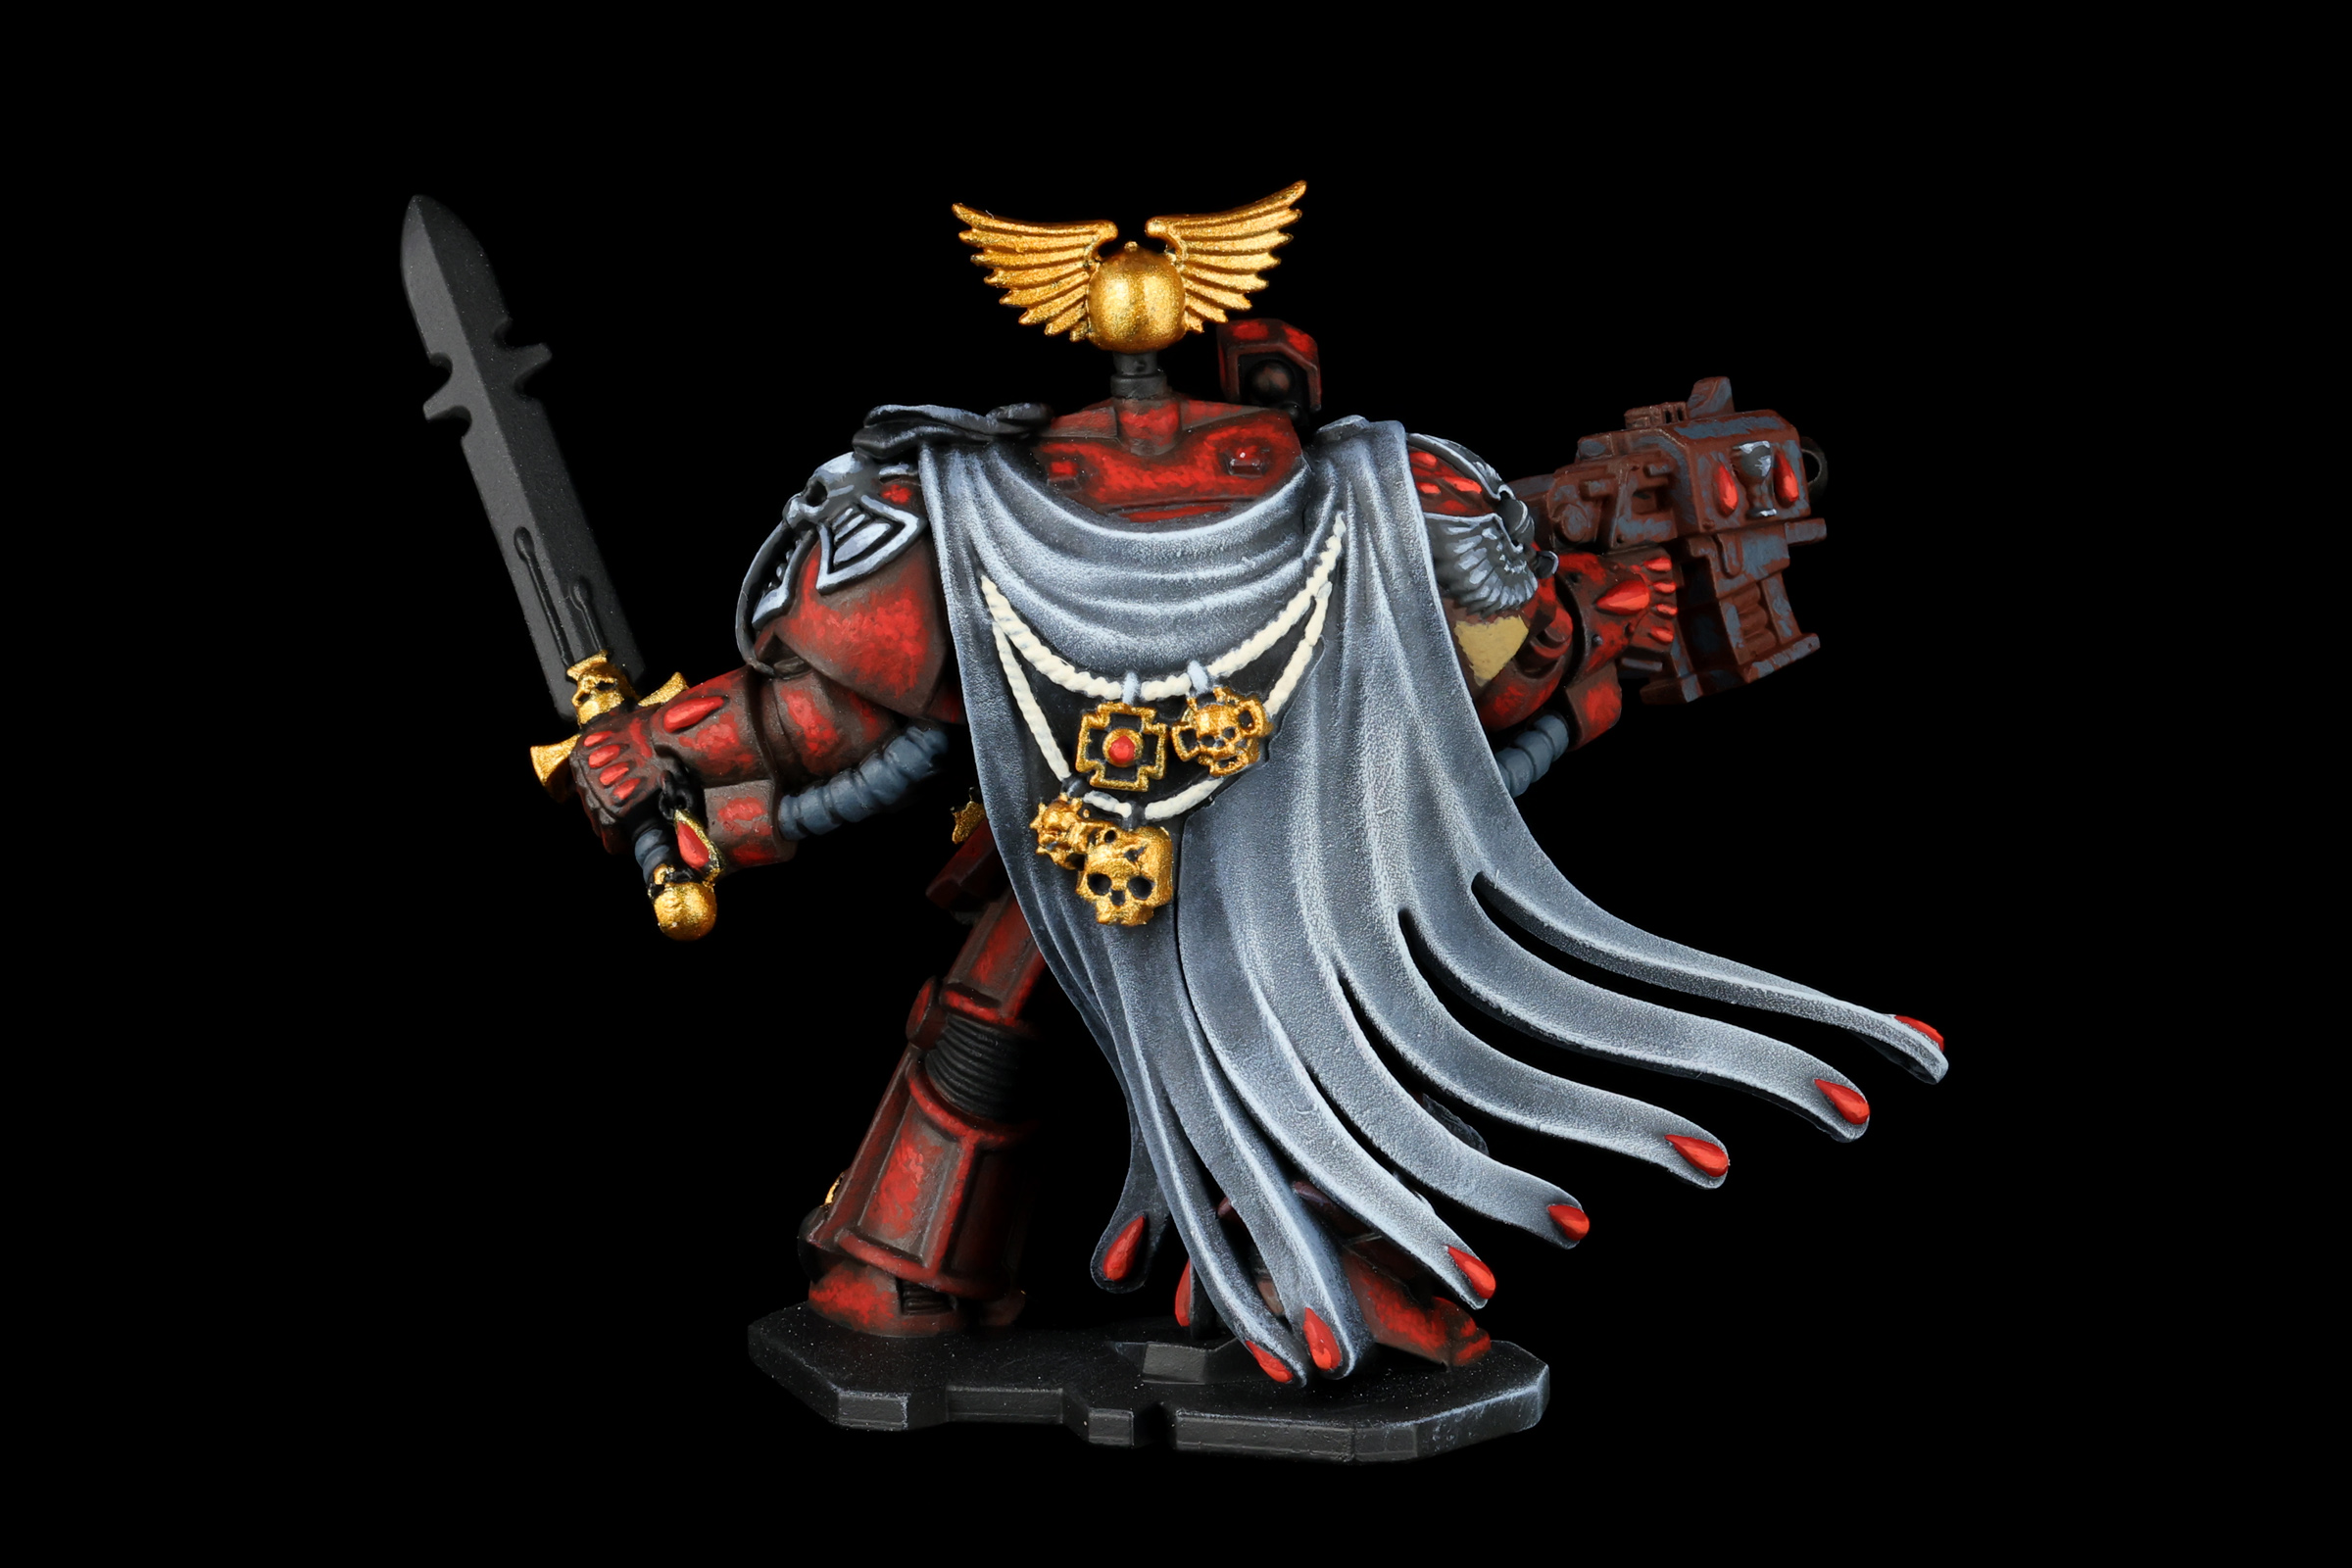
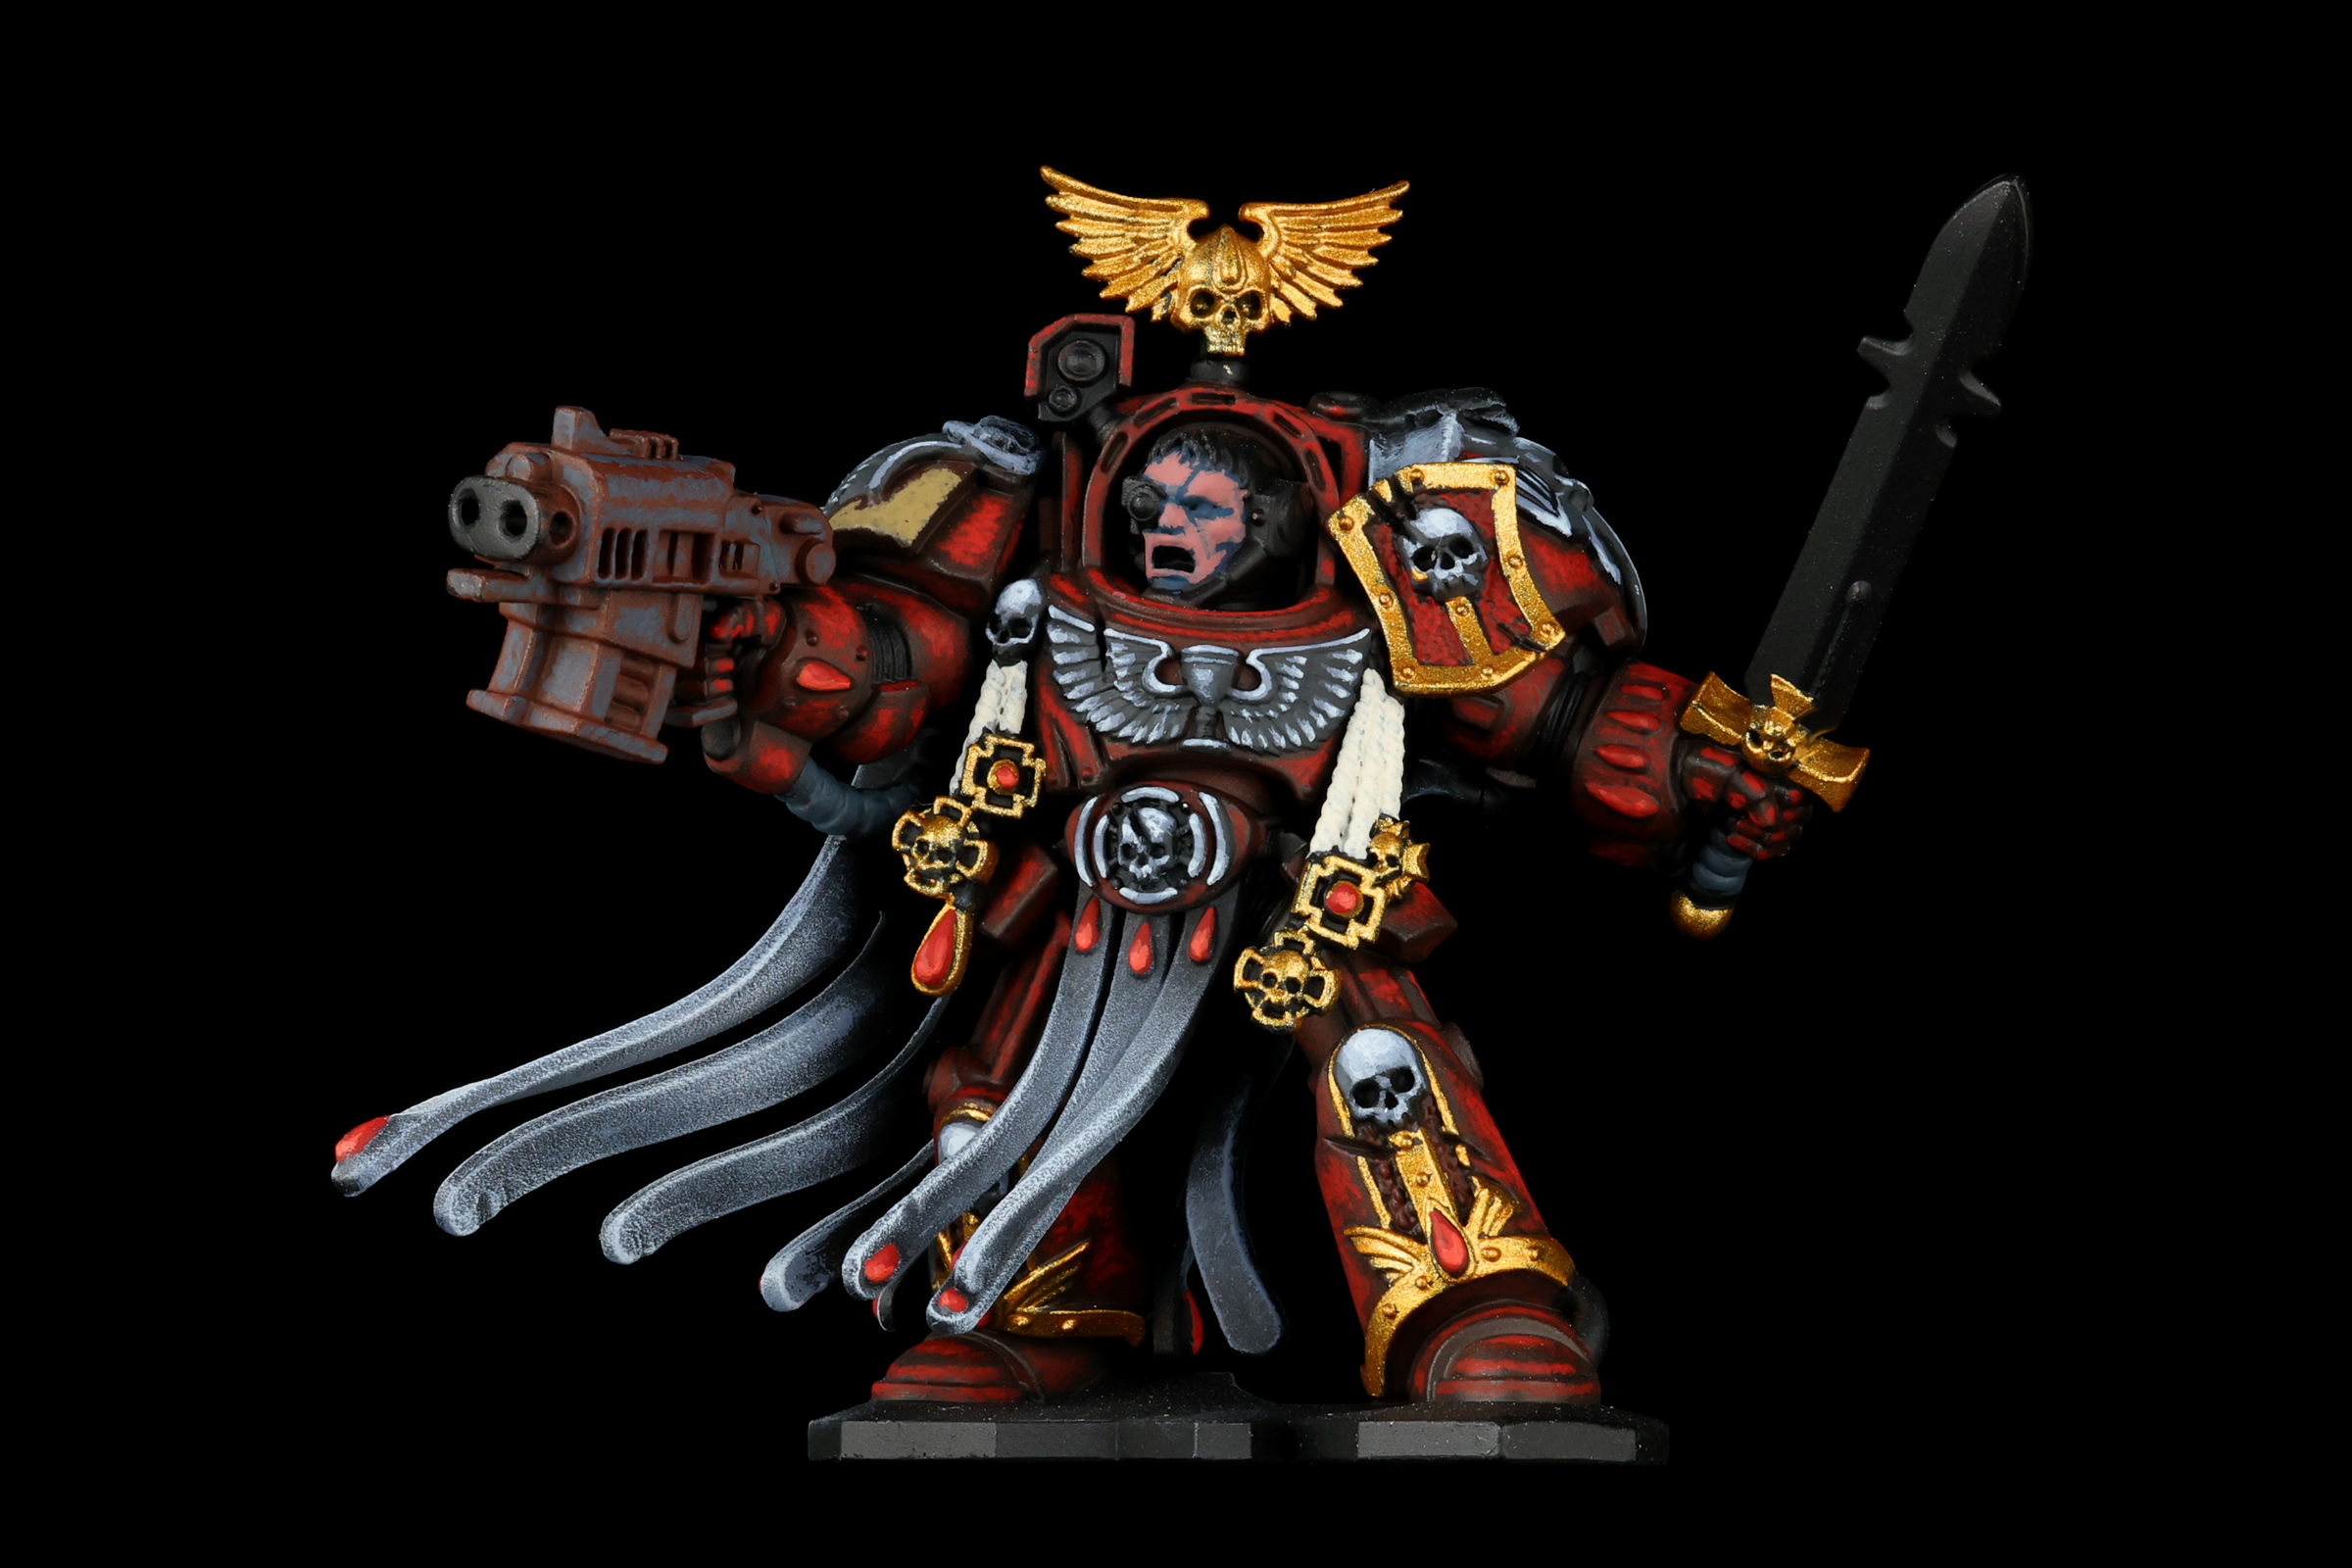
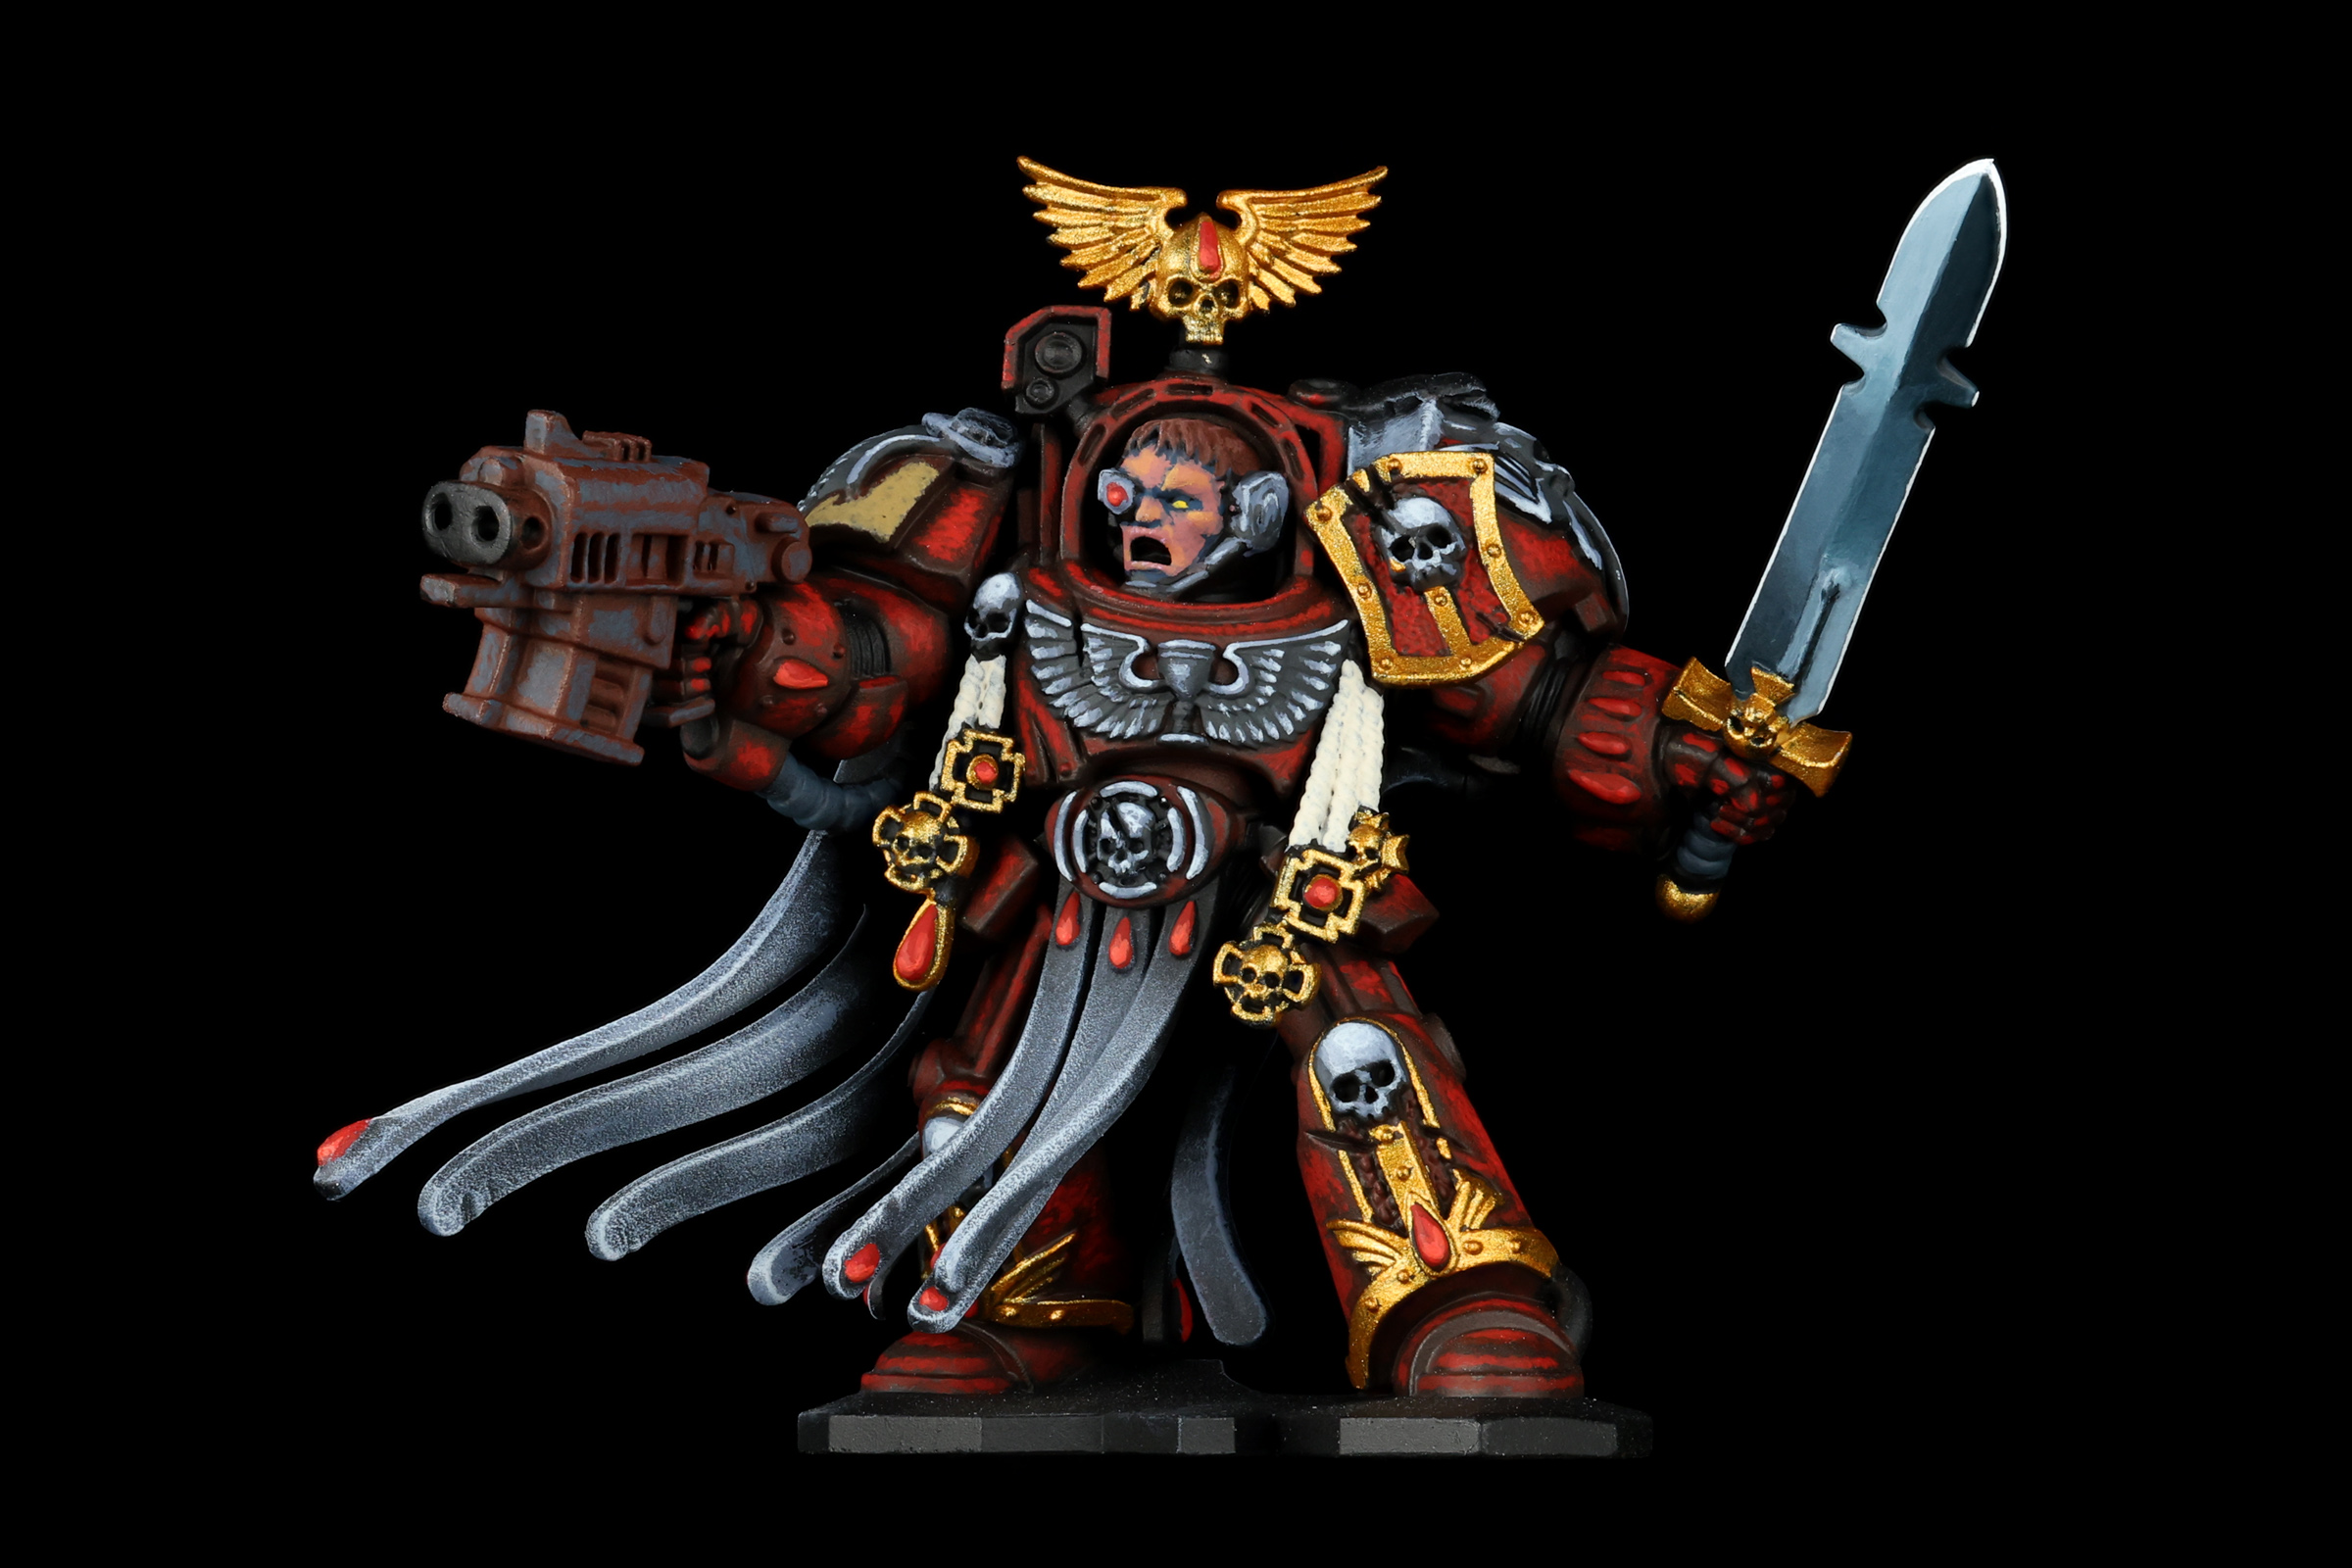
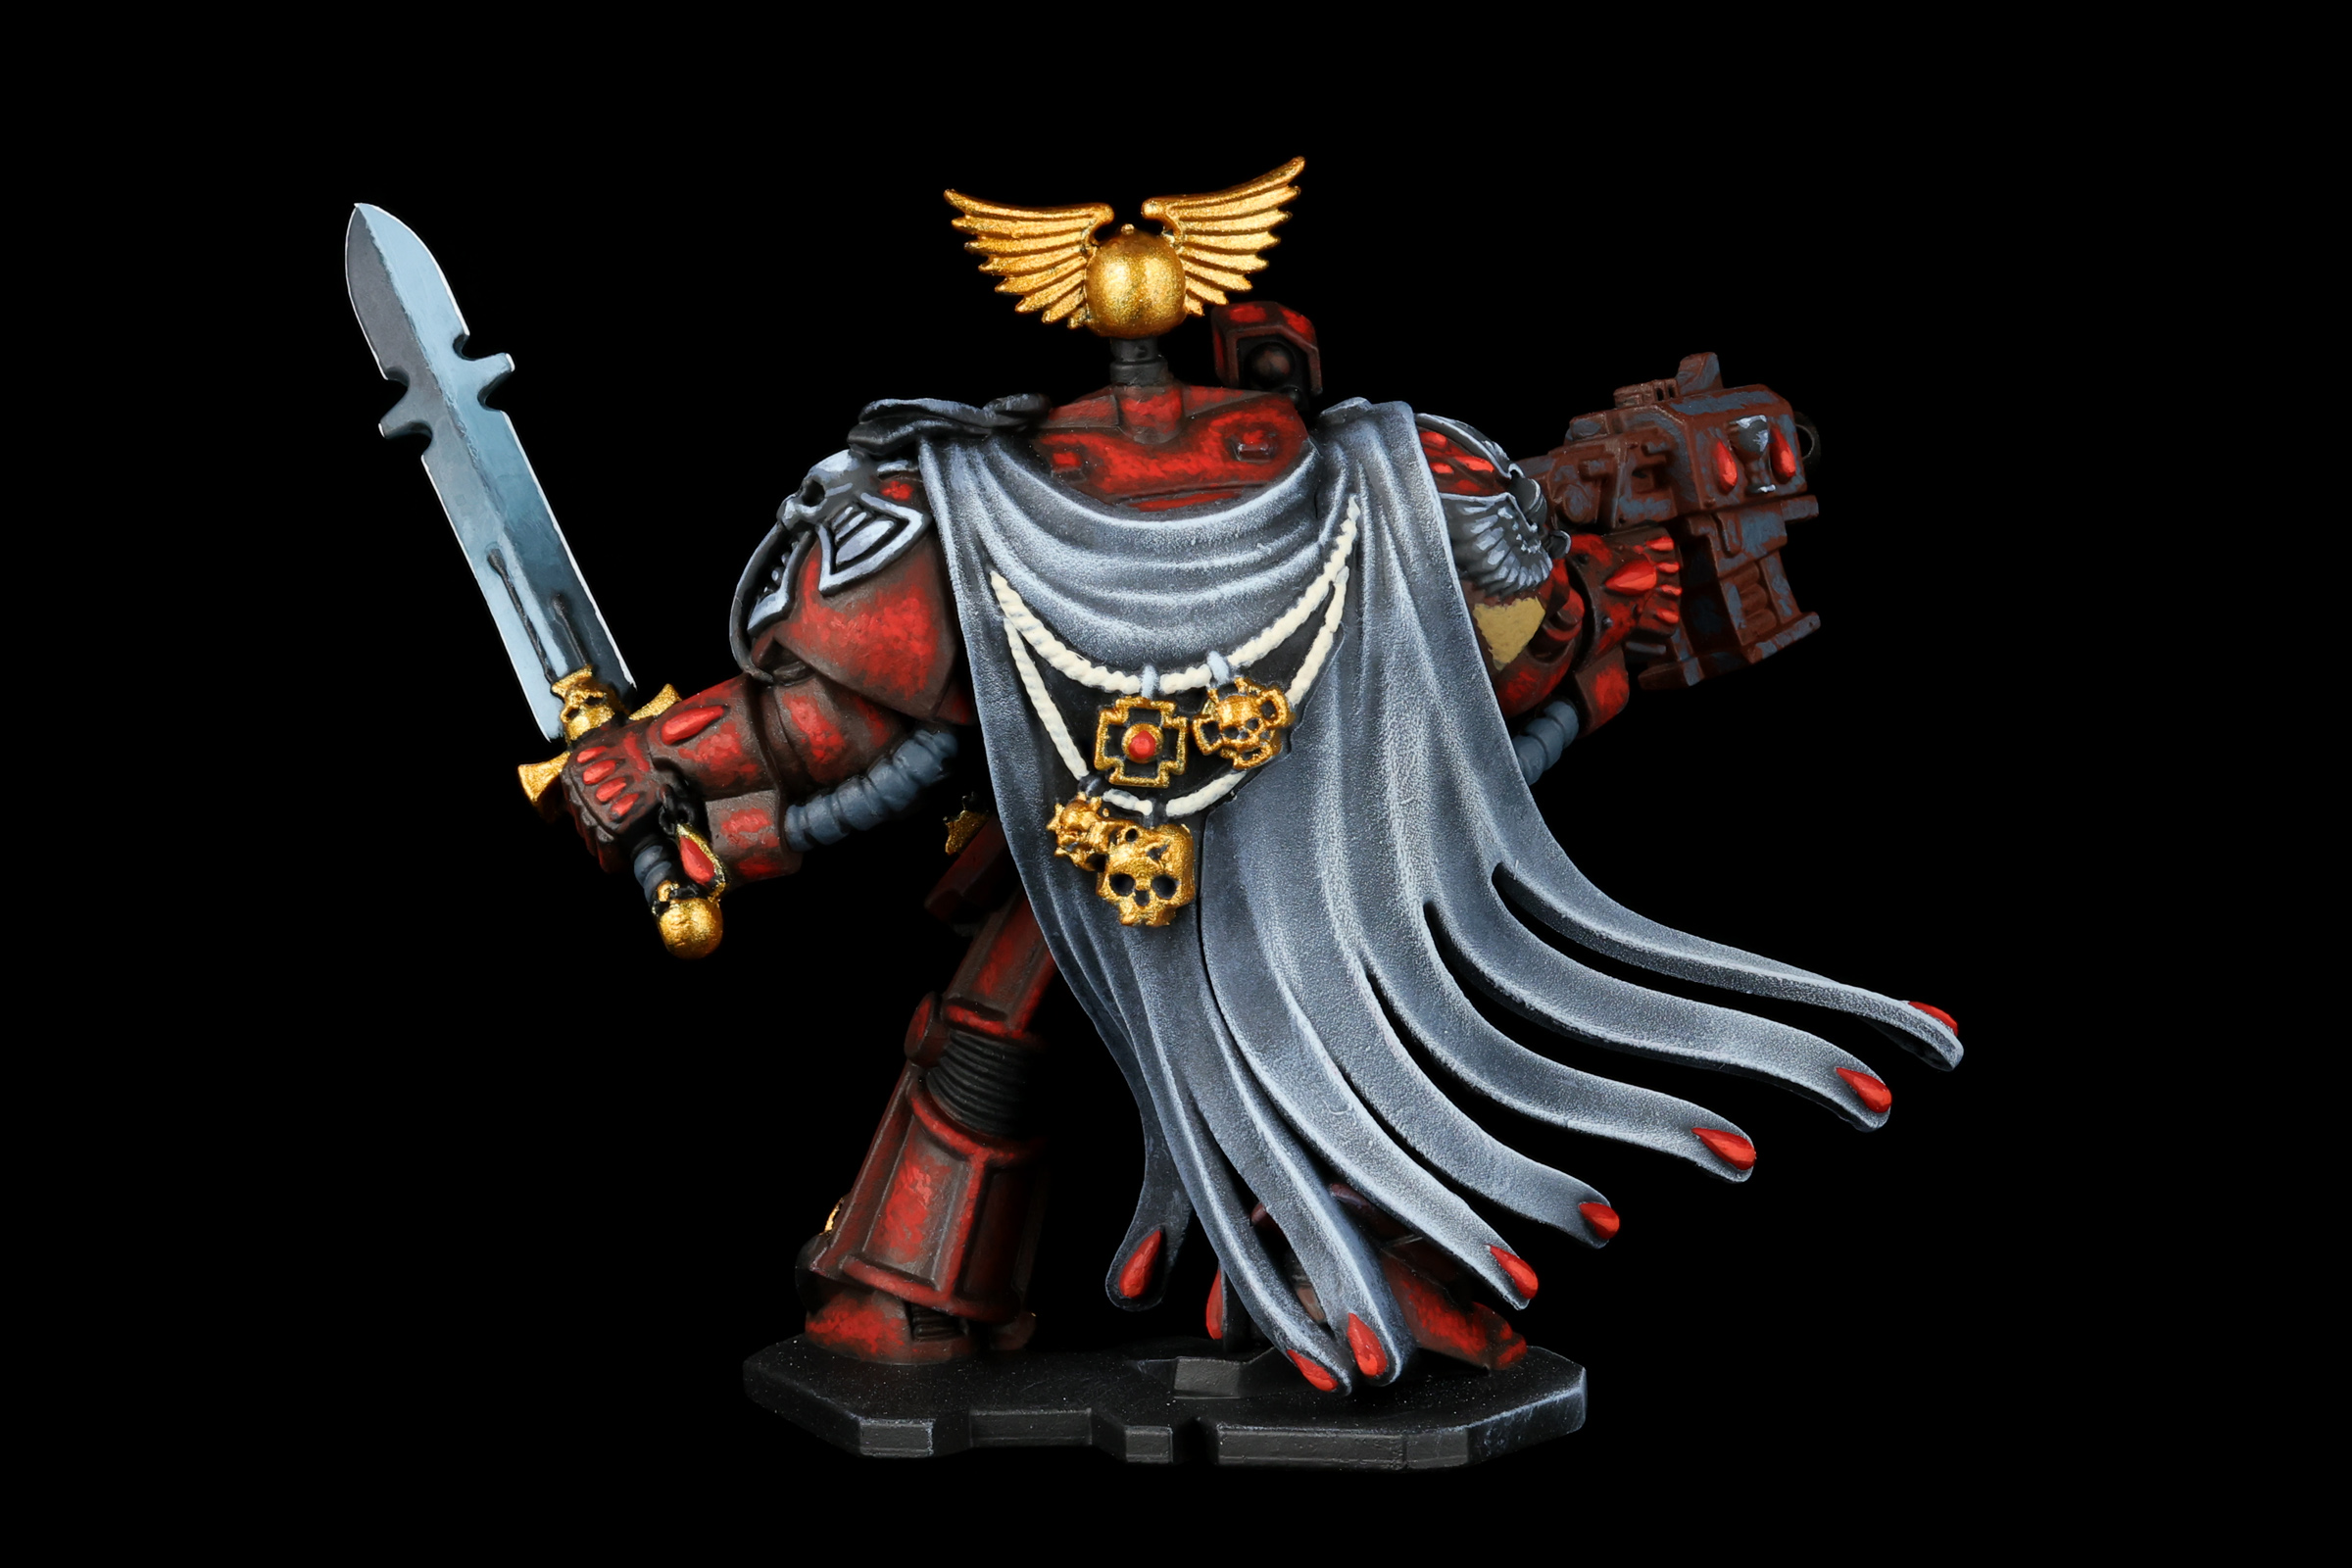
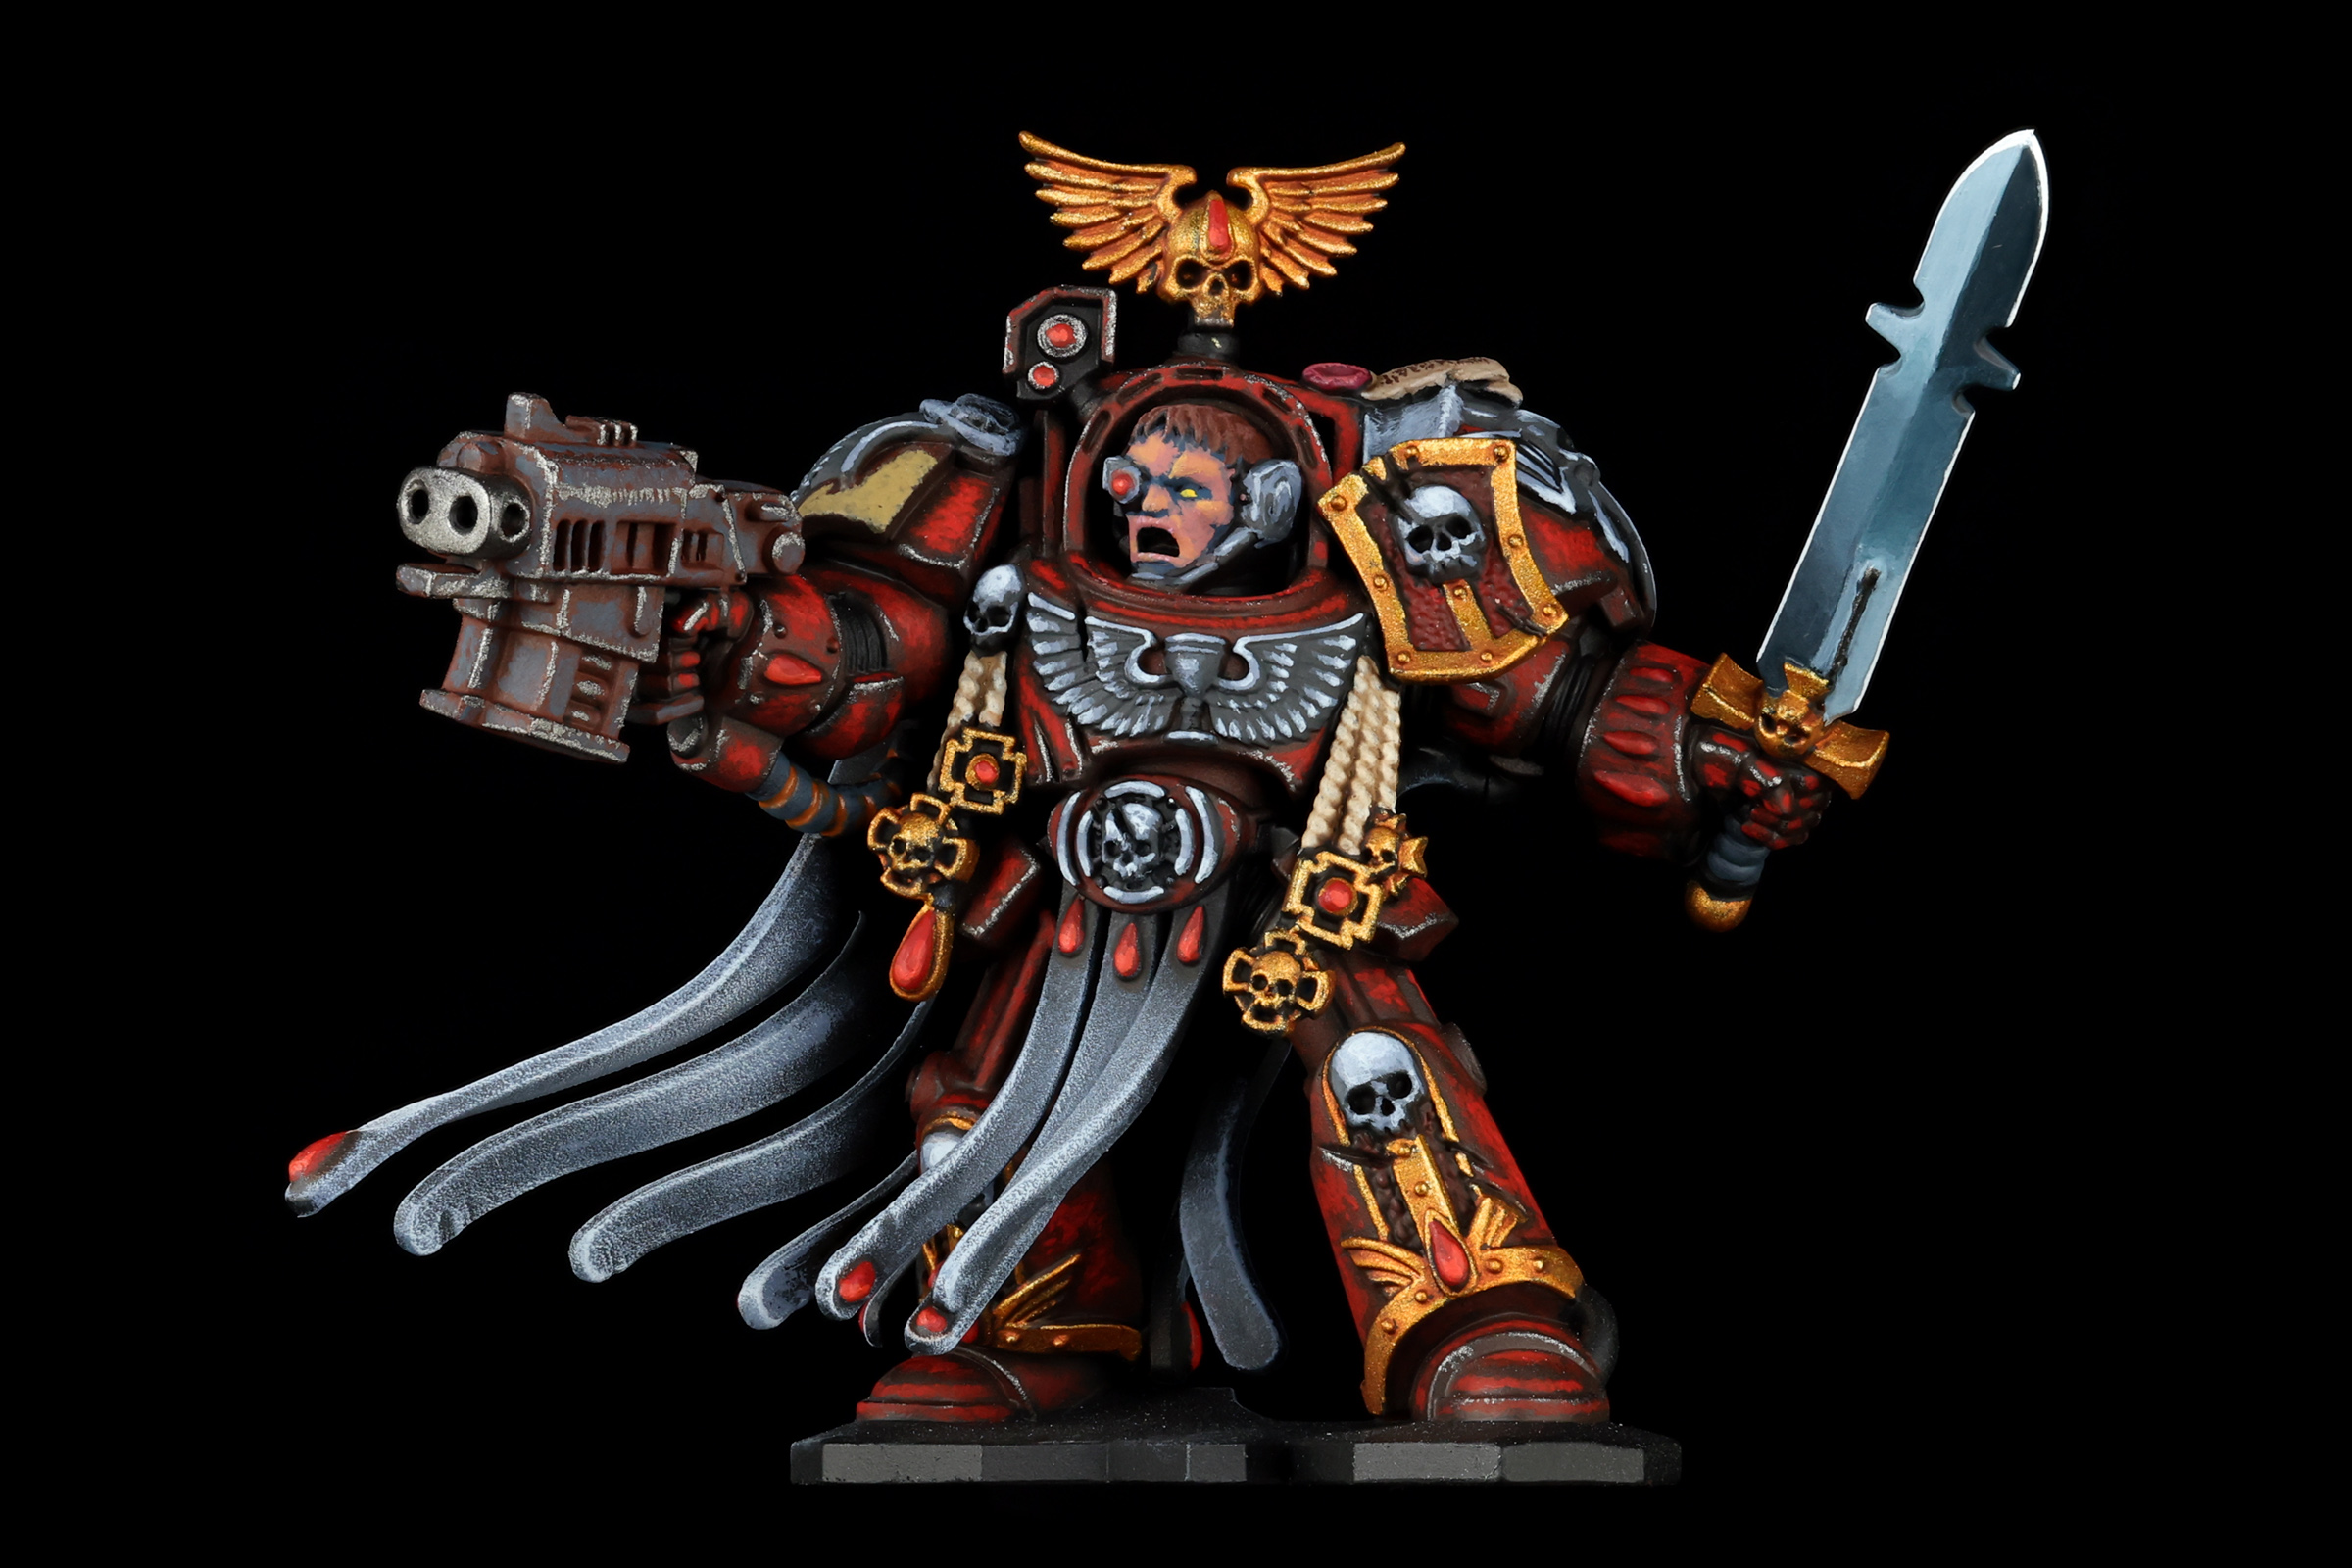
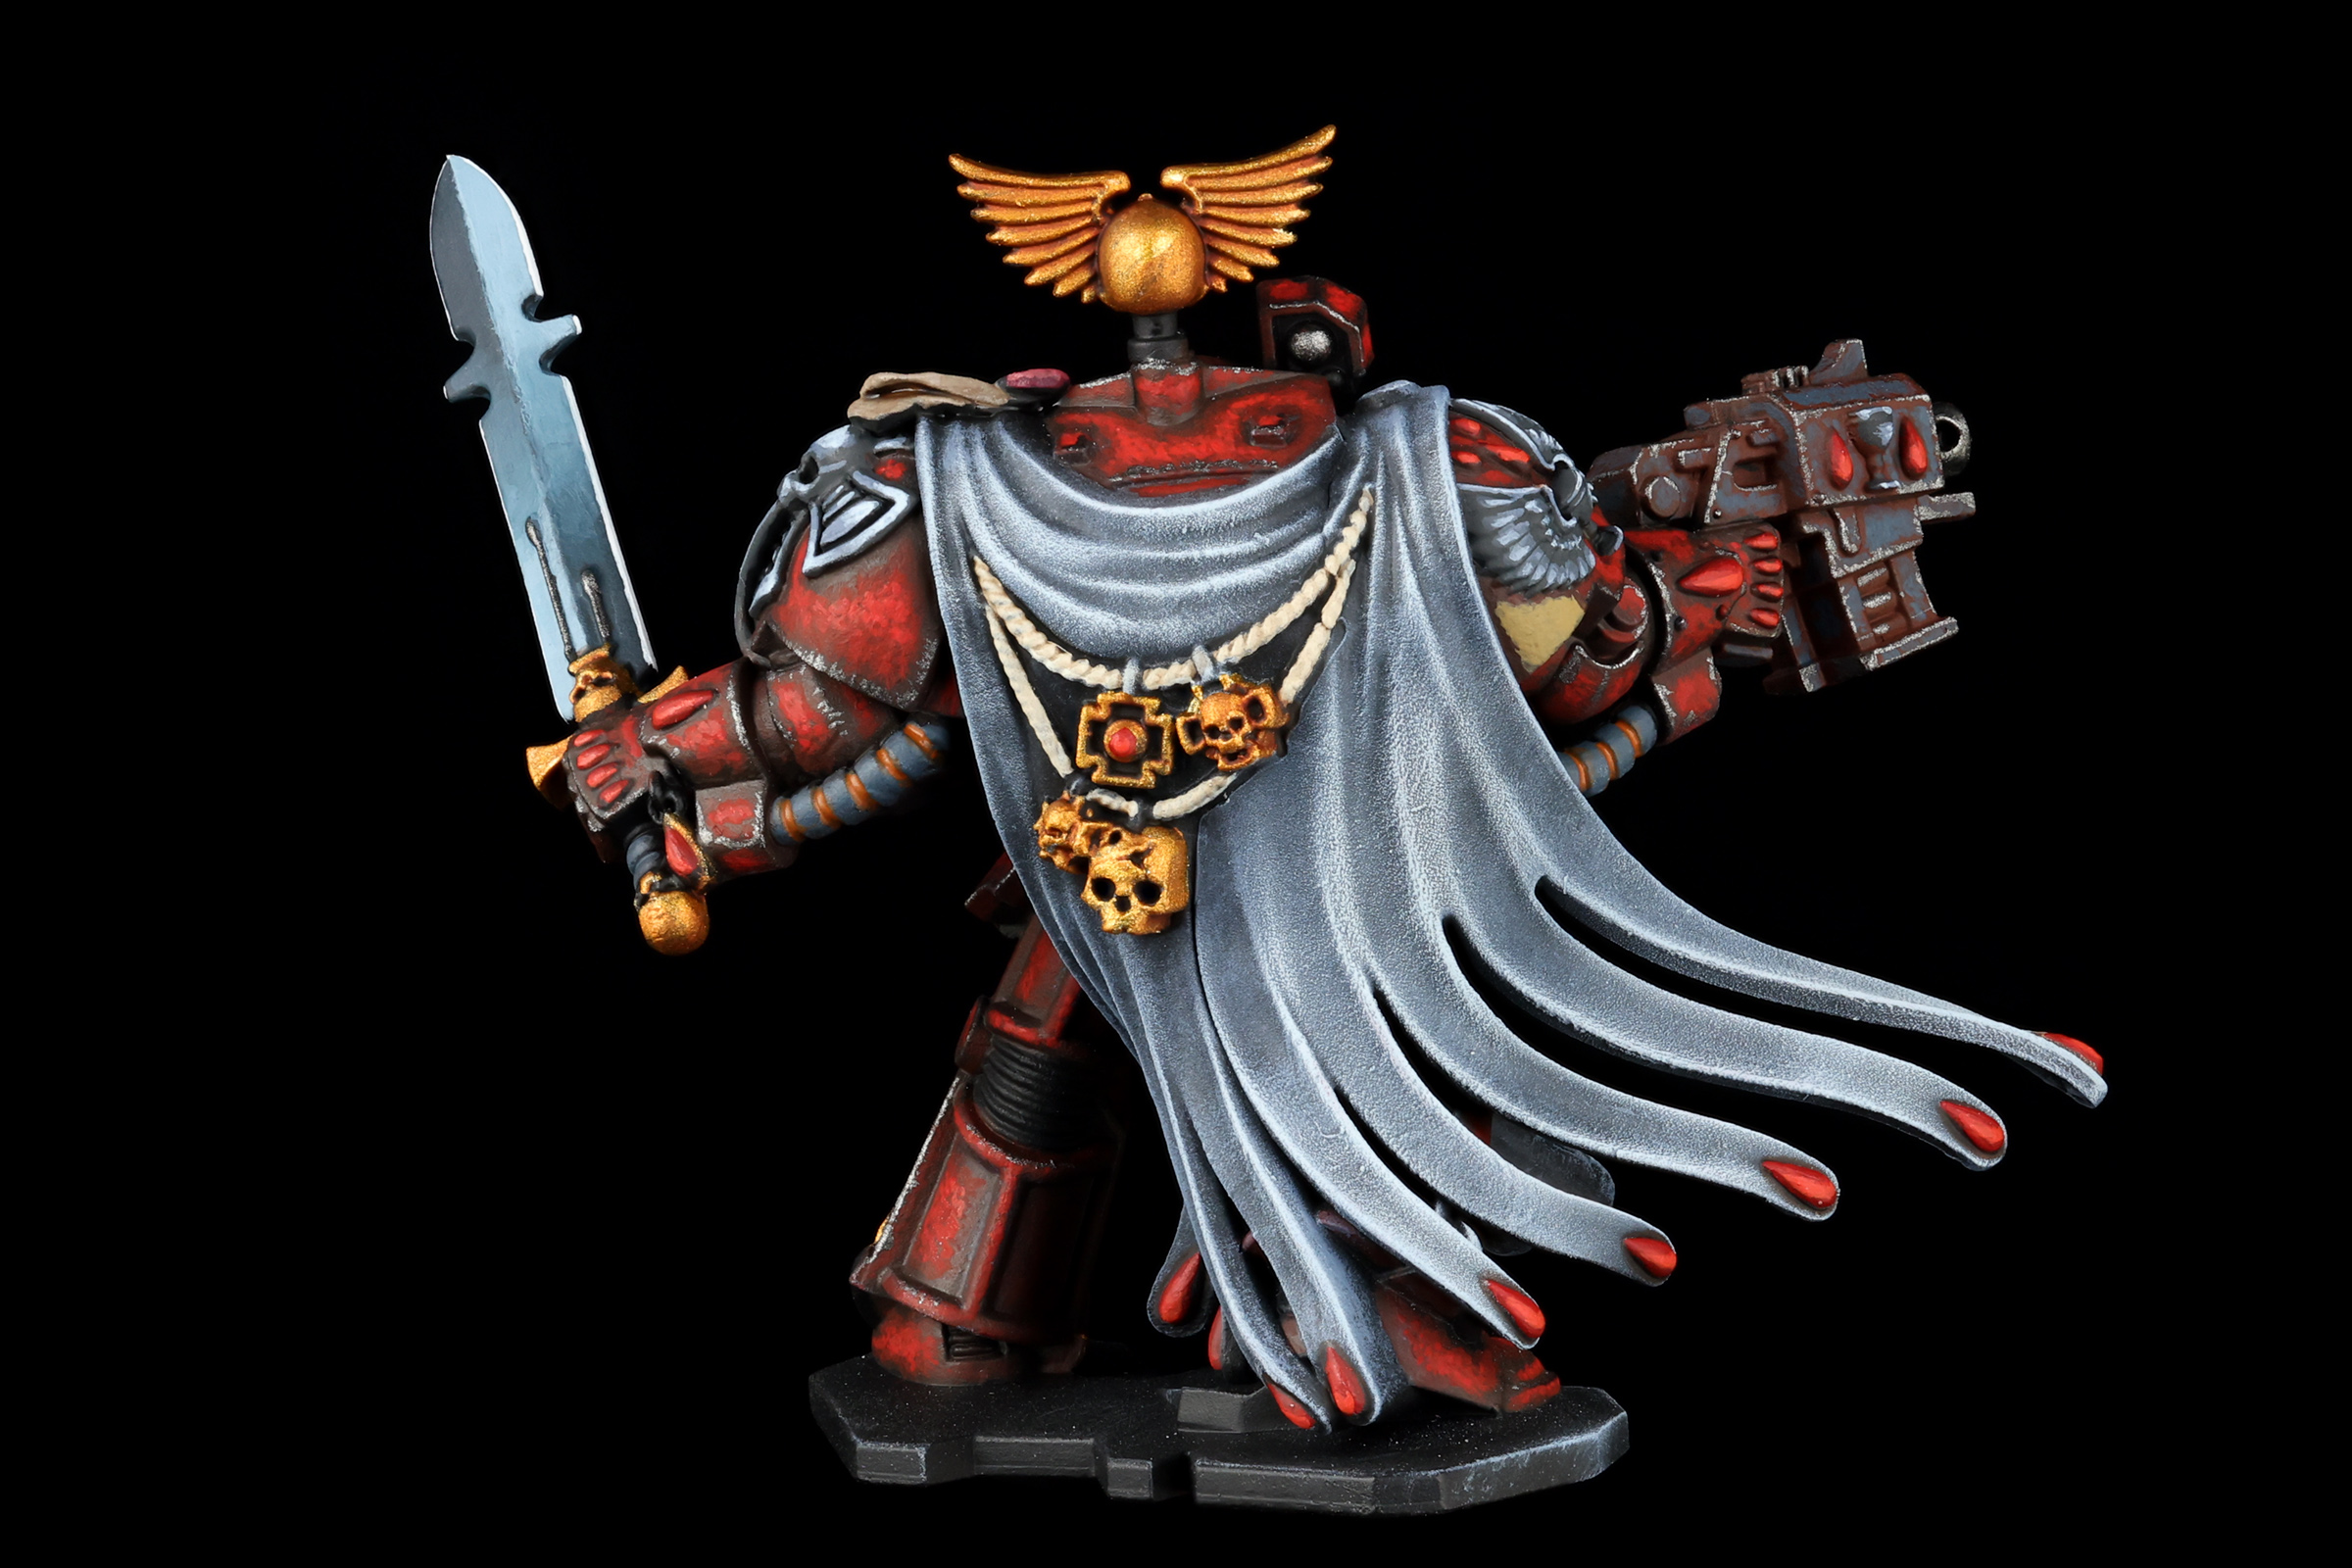
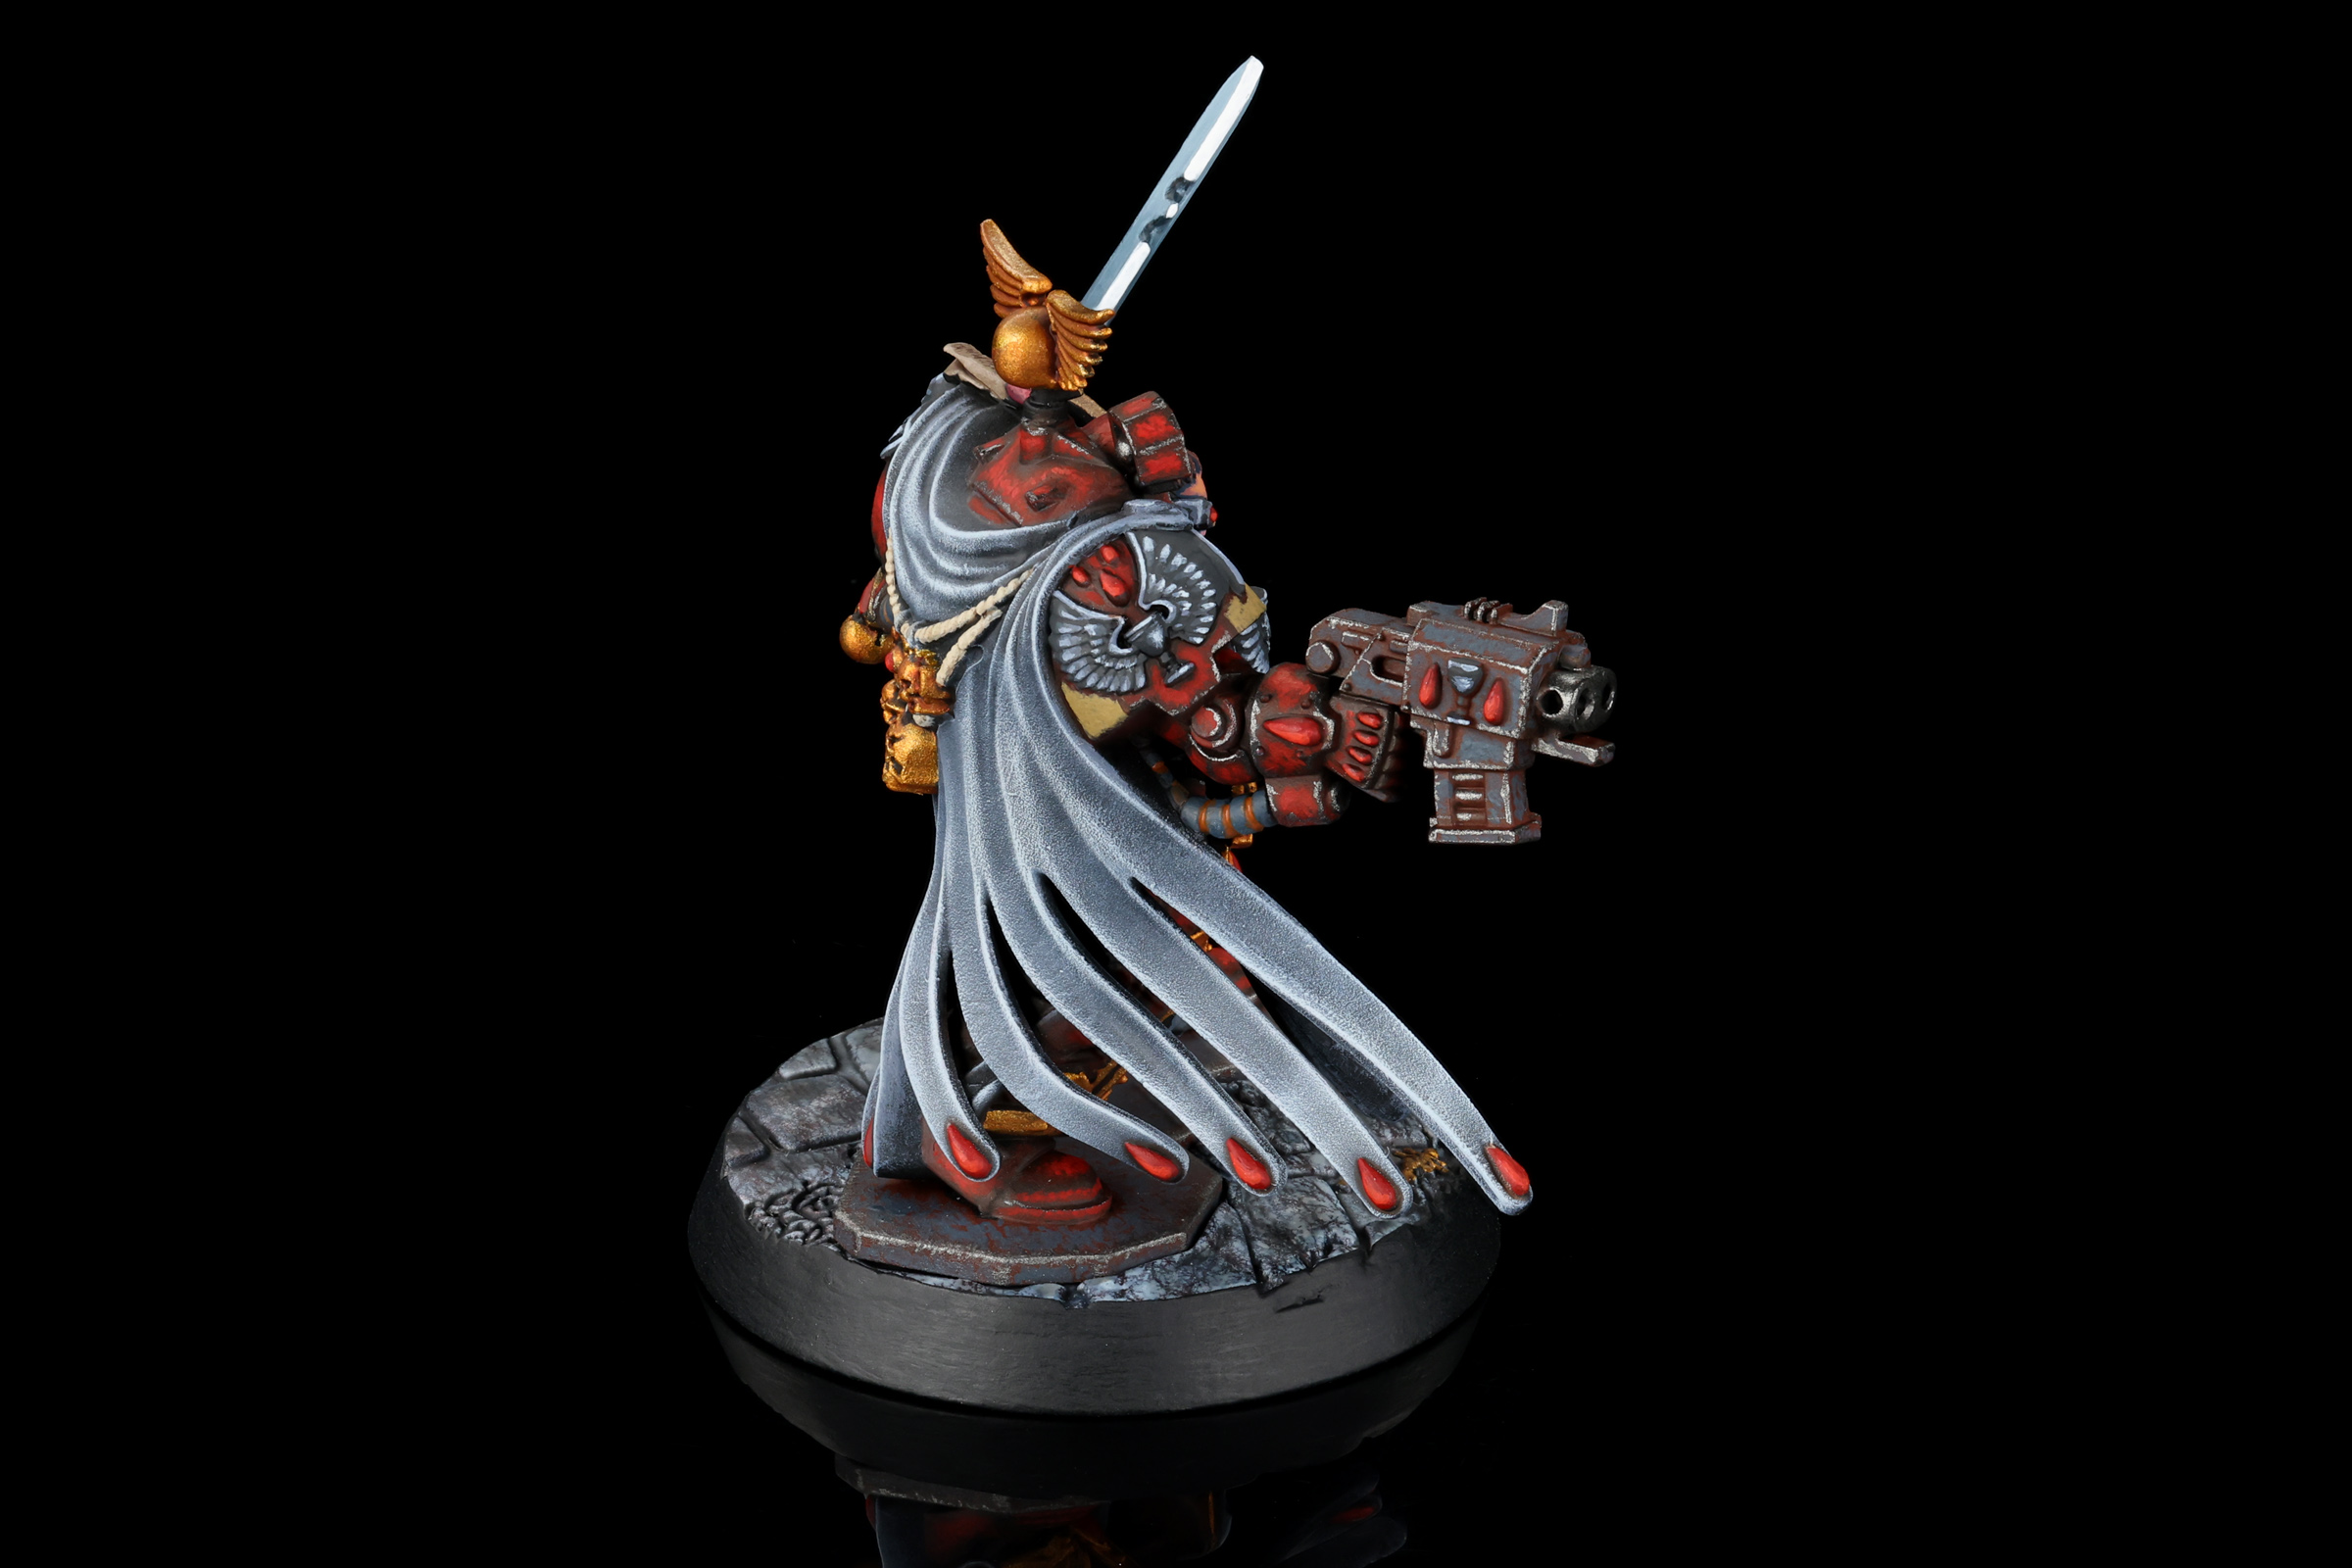
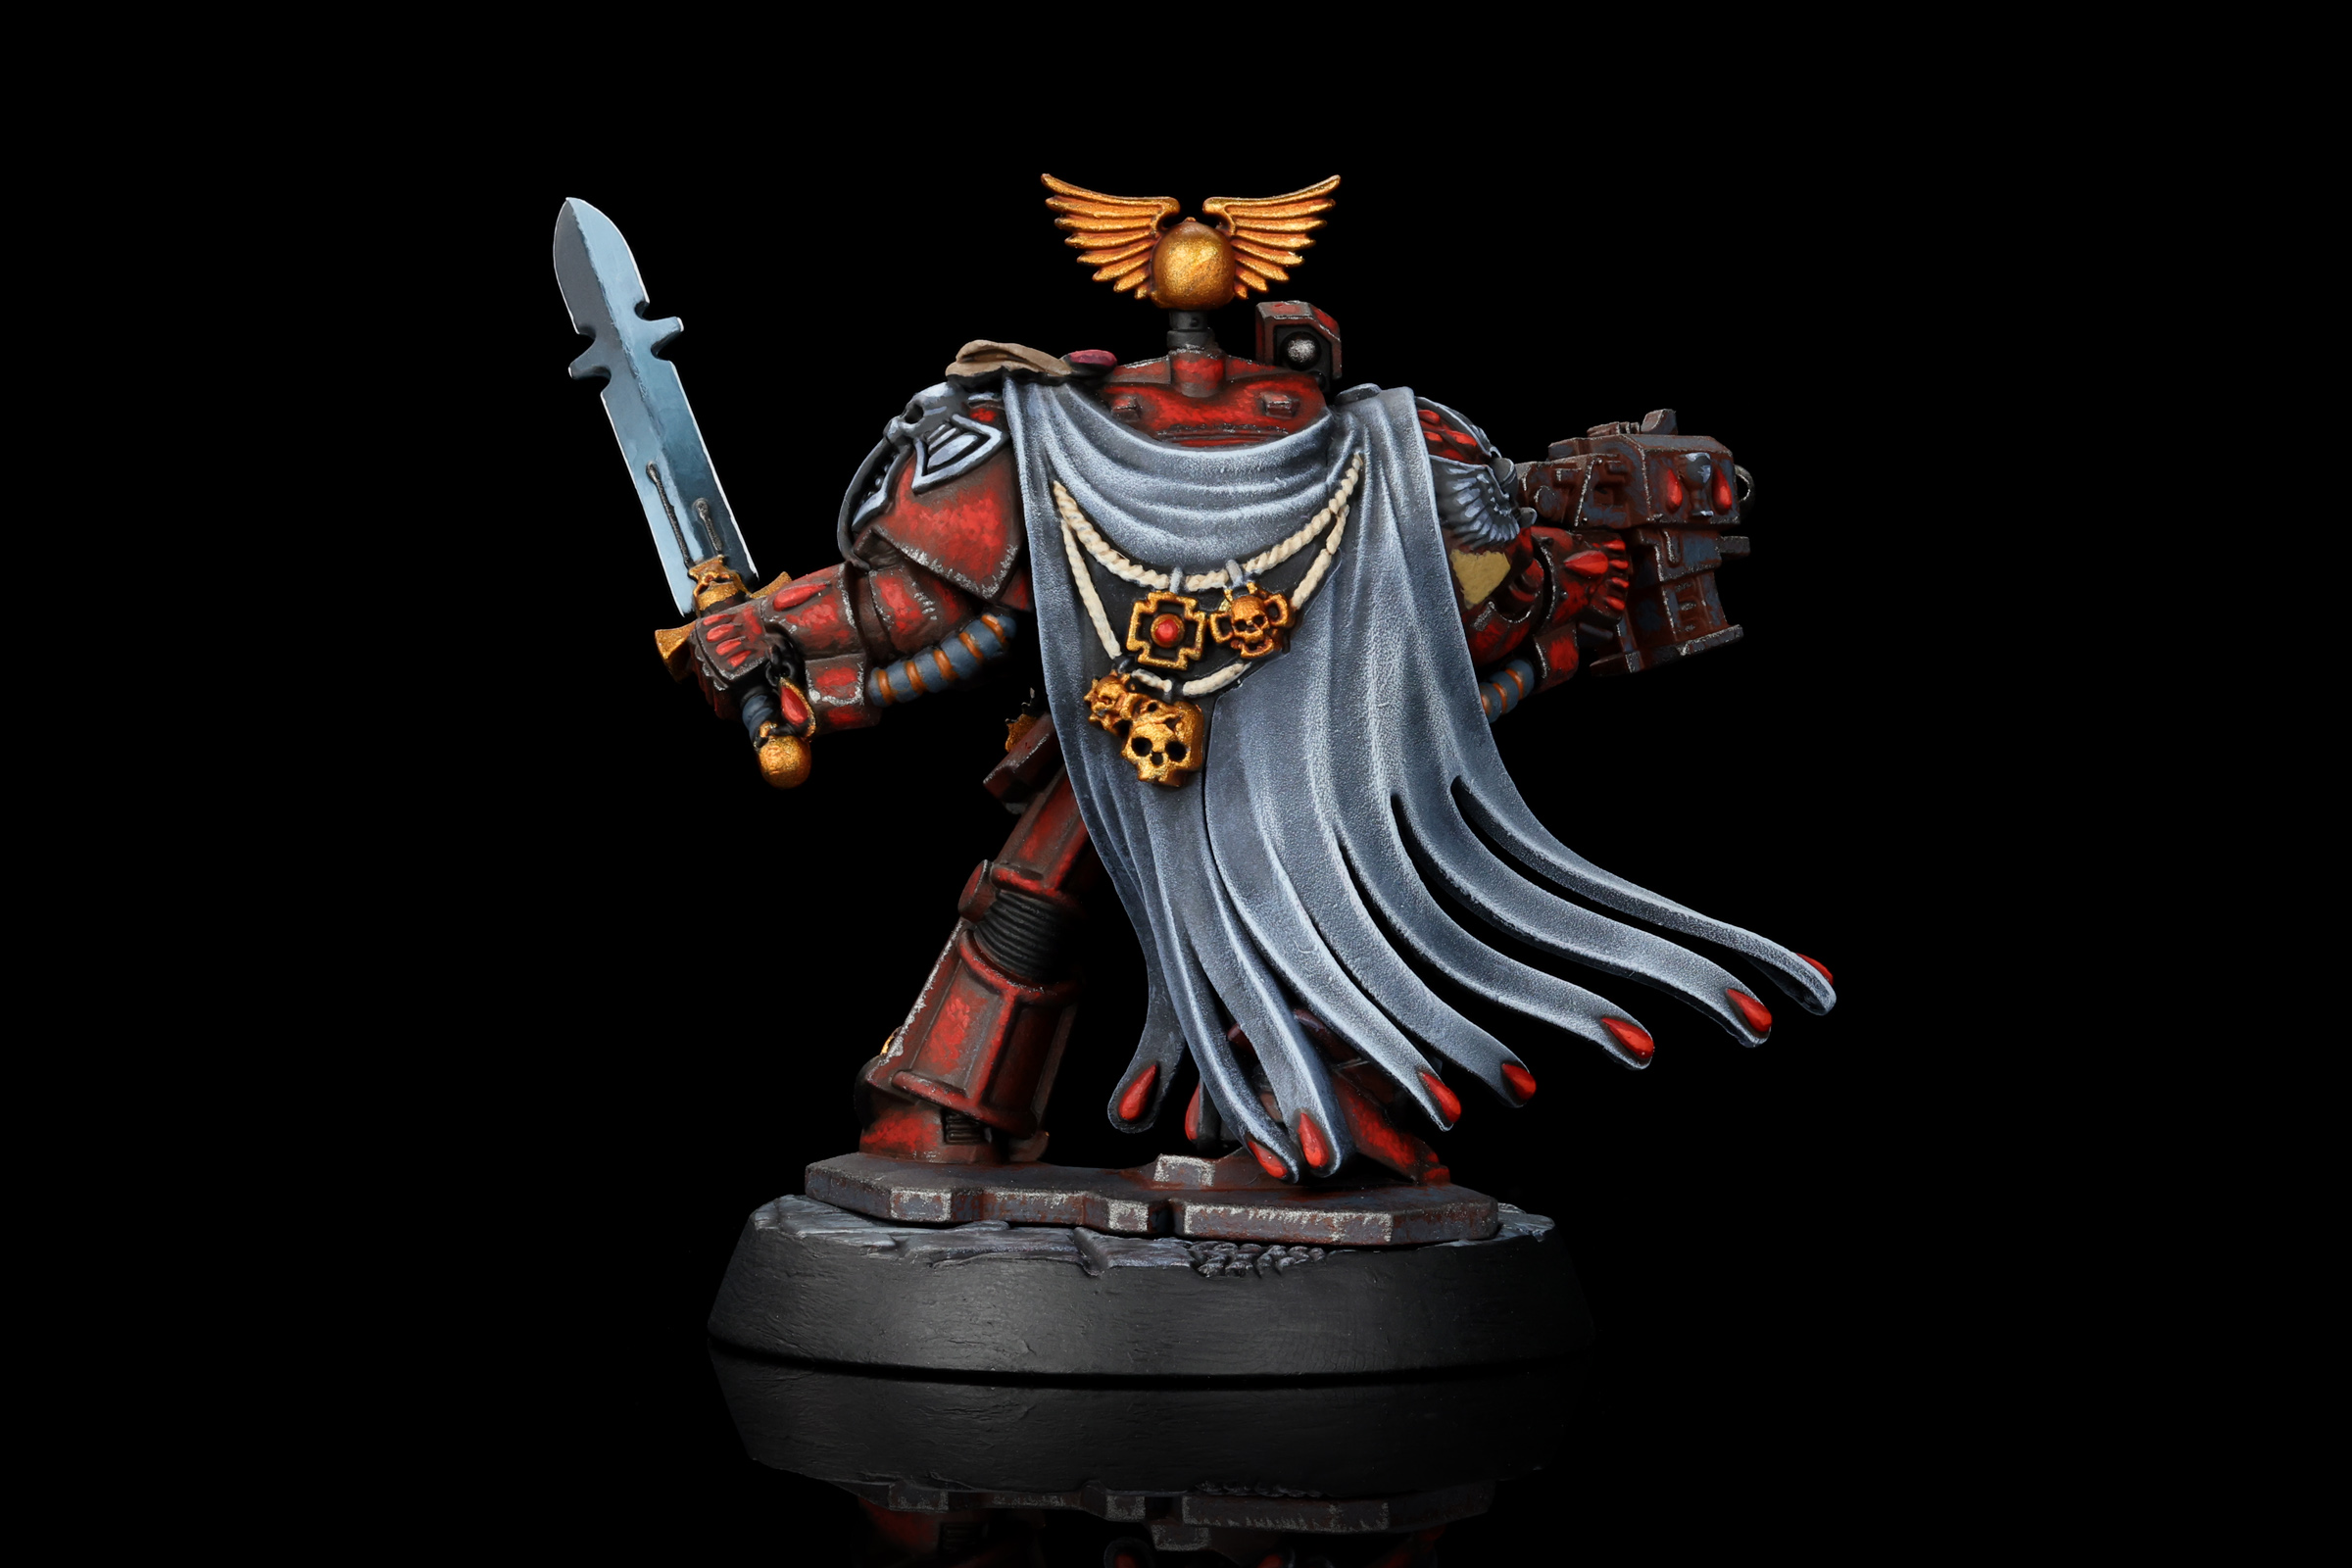
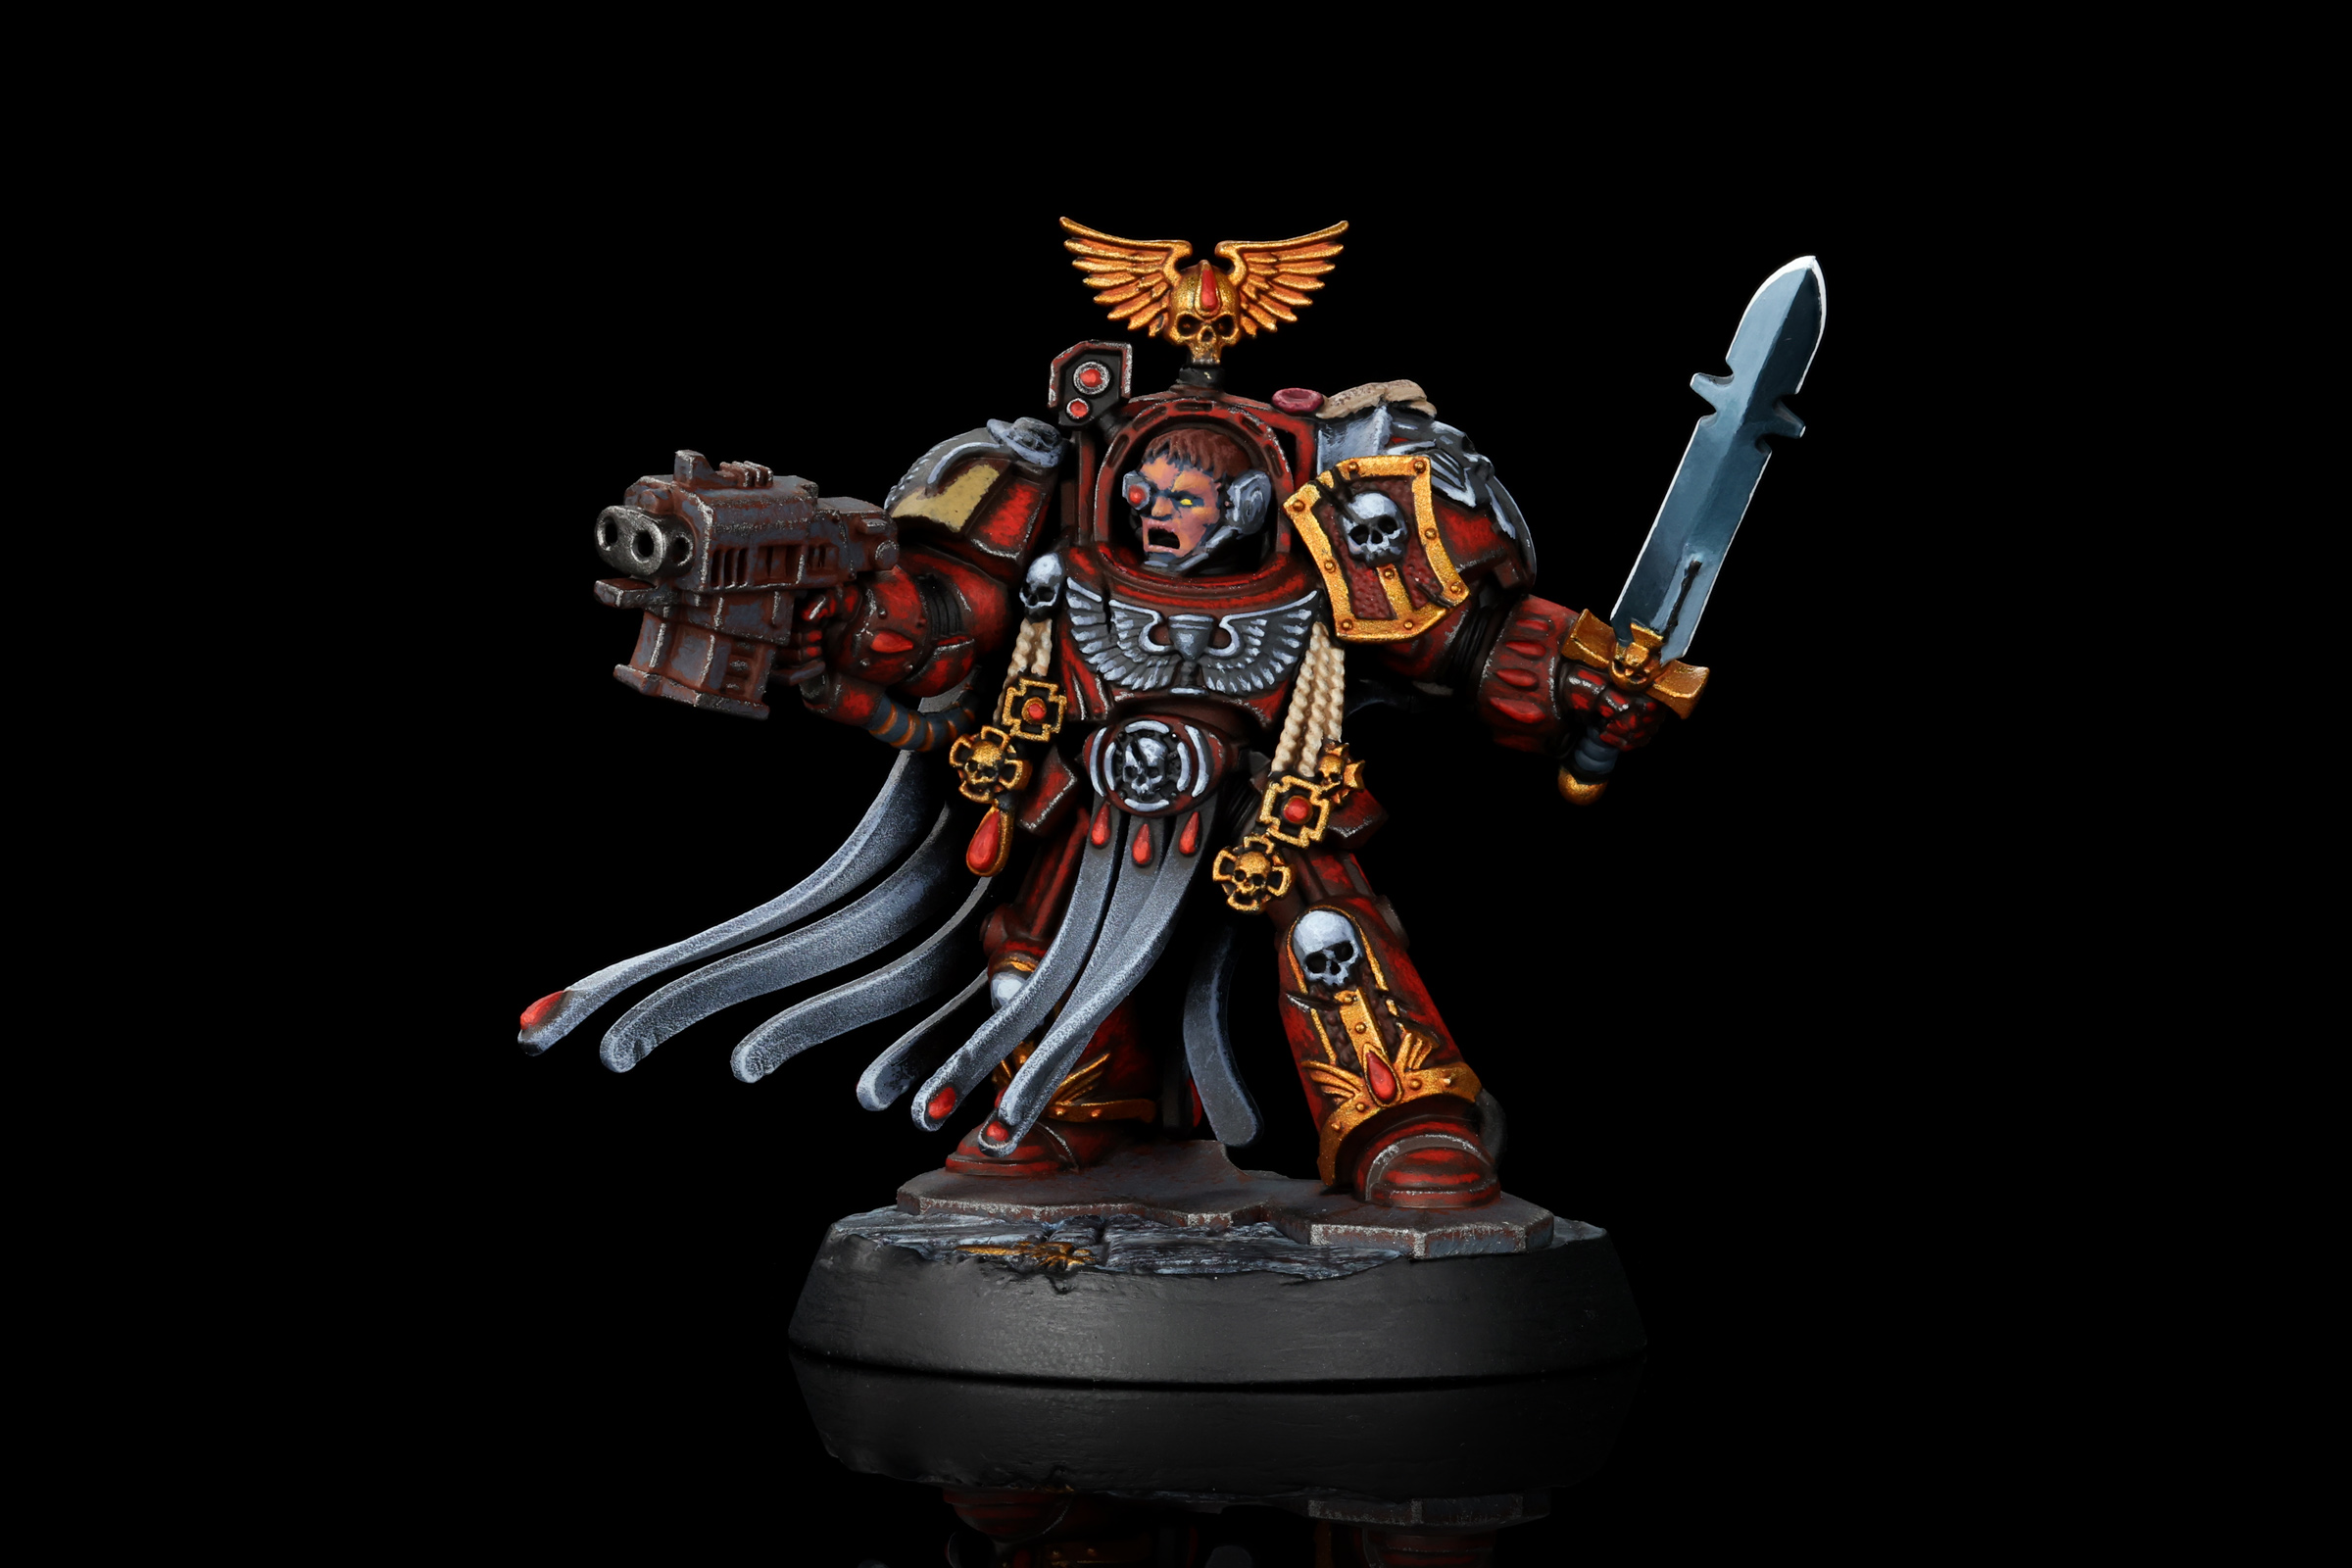
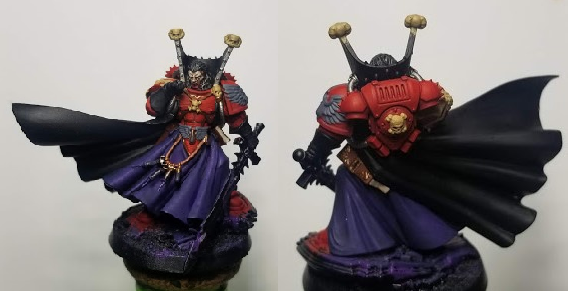
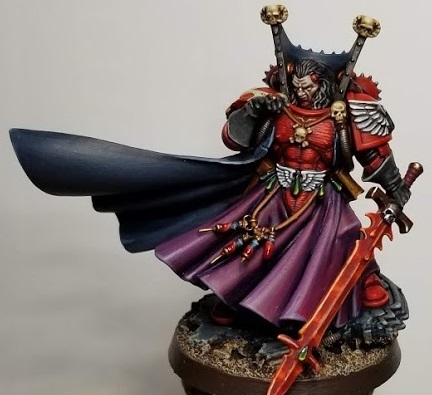
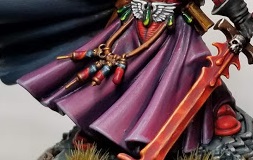
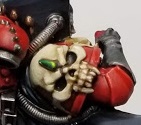
Pendulin's Method - Click to Expand Let’s go old school. Let’s go back to a distant Space Hulk, riddled with Tyranids and treasure, with Sergeant Lorenzo of the Blood Angels. But how did Sergeant Lorenzo get such great looking armor? Well, before we go the the grim darkness of the 41st millennium, let’s go back to unprimed plastic and work our way up. My copy of Lorenzo had some battle damage – the chalice at the top was missing, the holes on his bolter were cracked, and the armor above his head was chipped. Fixing those up gives us a clean place to start however. Start by priming black. I didn’t take a photo of just this because it honestly wasn’t that interesting. Just think of the above picture, with a layer of black primer on it. Very exciting. After priming, find all the areas that will eventually be red, and base with Rhinox Hide. Rhinox is a fantastic paint to work with, so this step is a breeze. After that, start mixing Rhinox Hide and Mephiston Red and stippling it on. You want to slowly add red to the brown, if you’re unfamiliar with stippling, just think of little tiny dots covering the entire model. This creates subtle differences in color that look more natural than flat brush strokes. It also takes a lot longer, so strike your own balance. Note: paint any cloaks before doing this, as explained below. Welcome to below. The reason for painting cloaks first is that I paint the cloaks with drybrushing, and that tends to be messy. If you paint them in the order I did, you’ll have to go back and clean up all the red paint you accidentally drybrush over. Not a huge deal, but it’s an optimization I’d recommend. If the model has a cloak, start by drybrushing Vallejo Sombre Grey. If you want it a little warmer, or have some interesting undertones, then before the Sombre Grey you can Drybrush it with Rhinox Hide, Dark Reaper, or Incubi Darkness. That’s not a critical step though, as the Sombre Grey will be an extremely dominant color. After that, drybrush Vallejo Wolf Grey. This is a similar hue to Sombre Grey, just a bit brighter, which is exactly what we want. Tangent on painting the cloak is finished, back to armor. Continue mixing more Mephiston Red with Rhinox Hide and stippling it on. You want the edges and corners of the armor to remain dull and brown, and all the flat panels to get brighter and more red. Eventually you want to go to 100% Mephiston Red to get that iconic Blood Angels color. After stippling on Mephiston Red, we actually want to go even brighter. This is because areas that would get direct sunlight should look even brighter. Fortunately, Evil Sunz Scarlet is perfect for this. So mix of Mephiston Red and Evil Sunz Scarlet and stipple it on. Eventually adding more and more Evil Sunz until you are stippling pure Evil Sunz onto the brightest areas of the model (the spots that would get direct sunlight). Alright, that’s mighty bright. Let’s now work on some other areas of the model. For the Terminator seals, markings, and skulls, use the same colors as the cloak: Vallejo Sombre Grey and Vallejo Wolf Grey. Couple more steps completed here. For the gold, I stuck with the classic Retributor Armour, on gems I used Mephiston Red, and for tassels I painted those with Wraithbone. Couple more steps here. For the gems, I painted on some Evil Sunz Scarlet in the lower half, and then a crescent of Wild Rider Red on the bottom. For the bolter, I based the whole thing with Reaper MSP Mahogany Brown. Then I stippled on Dark Reaper into the flat areas, leaving brown showing on all the corners. Additionally, if your Blood Angel scheme calls for any yellow (like the helmets on close-quarters units), use Tallarn Sand and maybe mix just a touch of Balor Brown for highlighting sharp corners. And we finally come to the arbitrary point in the model where I decide to paint the skin. An awkward start, but base the skin with Vallejo Abyssal Turquoise. Yeah, you red that right. Trust me, it turns out well. If your model has random cables, like the ones under Lorenzo’s arms, hit those with Incubi Darkness. Follow up the skin with Vallejo Succubus Skin. I honestly did a poor job blending them here, but I clean it up a bit in later pictures. Then mix a little bit of Vallejo Succubus Skin and Vallejo Plague Brown for your skin highlights. On his eyes, I did a little dash of Yriel Yellow for some Space Marine glowing eye coolness. I also painted the power sword in this step, because I got carried away. For that, start by painting the whole blade in Incubi Darkness. Then feather the Incubi Darkness to Thunderhawk Blue as the blade gets brighter. From there, feather it to Fenrisian Grey for the blade at it’s brightest. Hit the edge of the blade with white, either ProAcryl White or Vallejo Dead White or whatever you have handy. Blood Angel Terminator. Credit: PendulinLet’s get some shading in. Shade all the gold with Reikland Fleshshade to give it a reddish hue, and shade any white tassels with Agrax Earthshade. If you have gems whose edges don’t seem defined enough, especially when next to red armor, then trace a thin amount of Nuln Oil around their edges. This will create a nice dividing line between that separates the gem from its surroundings. In the photo below I also did some edge-stippling with Vallejo Metal Color Steel. You can most easily see this on the bolter, and the scratches to Lorenzo’s armor on his lower chest. But I applied this anywhere that light would be catching an edge to the armor. Also in the picture below I finished painting the cables below his arm. Not sure why it took me so long to get back to it, but whatever. Thin down some Skrag Brown and work it into the ridges of the cables. One last thing, below I also painted the purity seal on his left shoulder. This follows my standard recipe for purity seals: Rakarth Flesh paper, Screamer Pink wax, Pink Horror wax highlights, fine scribbles with Rhinox Hide for lettering, and finally wash with Agrax Earthshade. And that wraps up the model. Base it how you’d like, and you’ve got an awesome Blood Angel ready for the battlefield!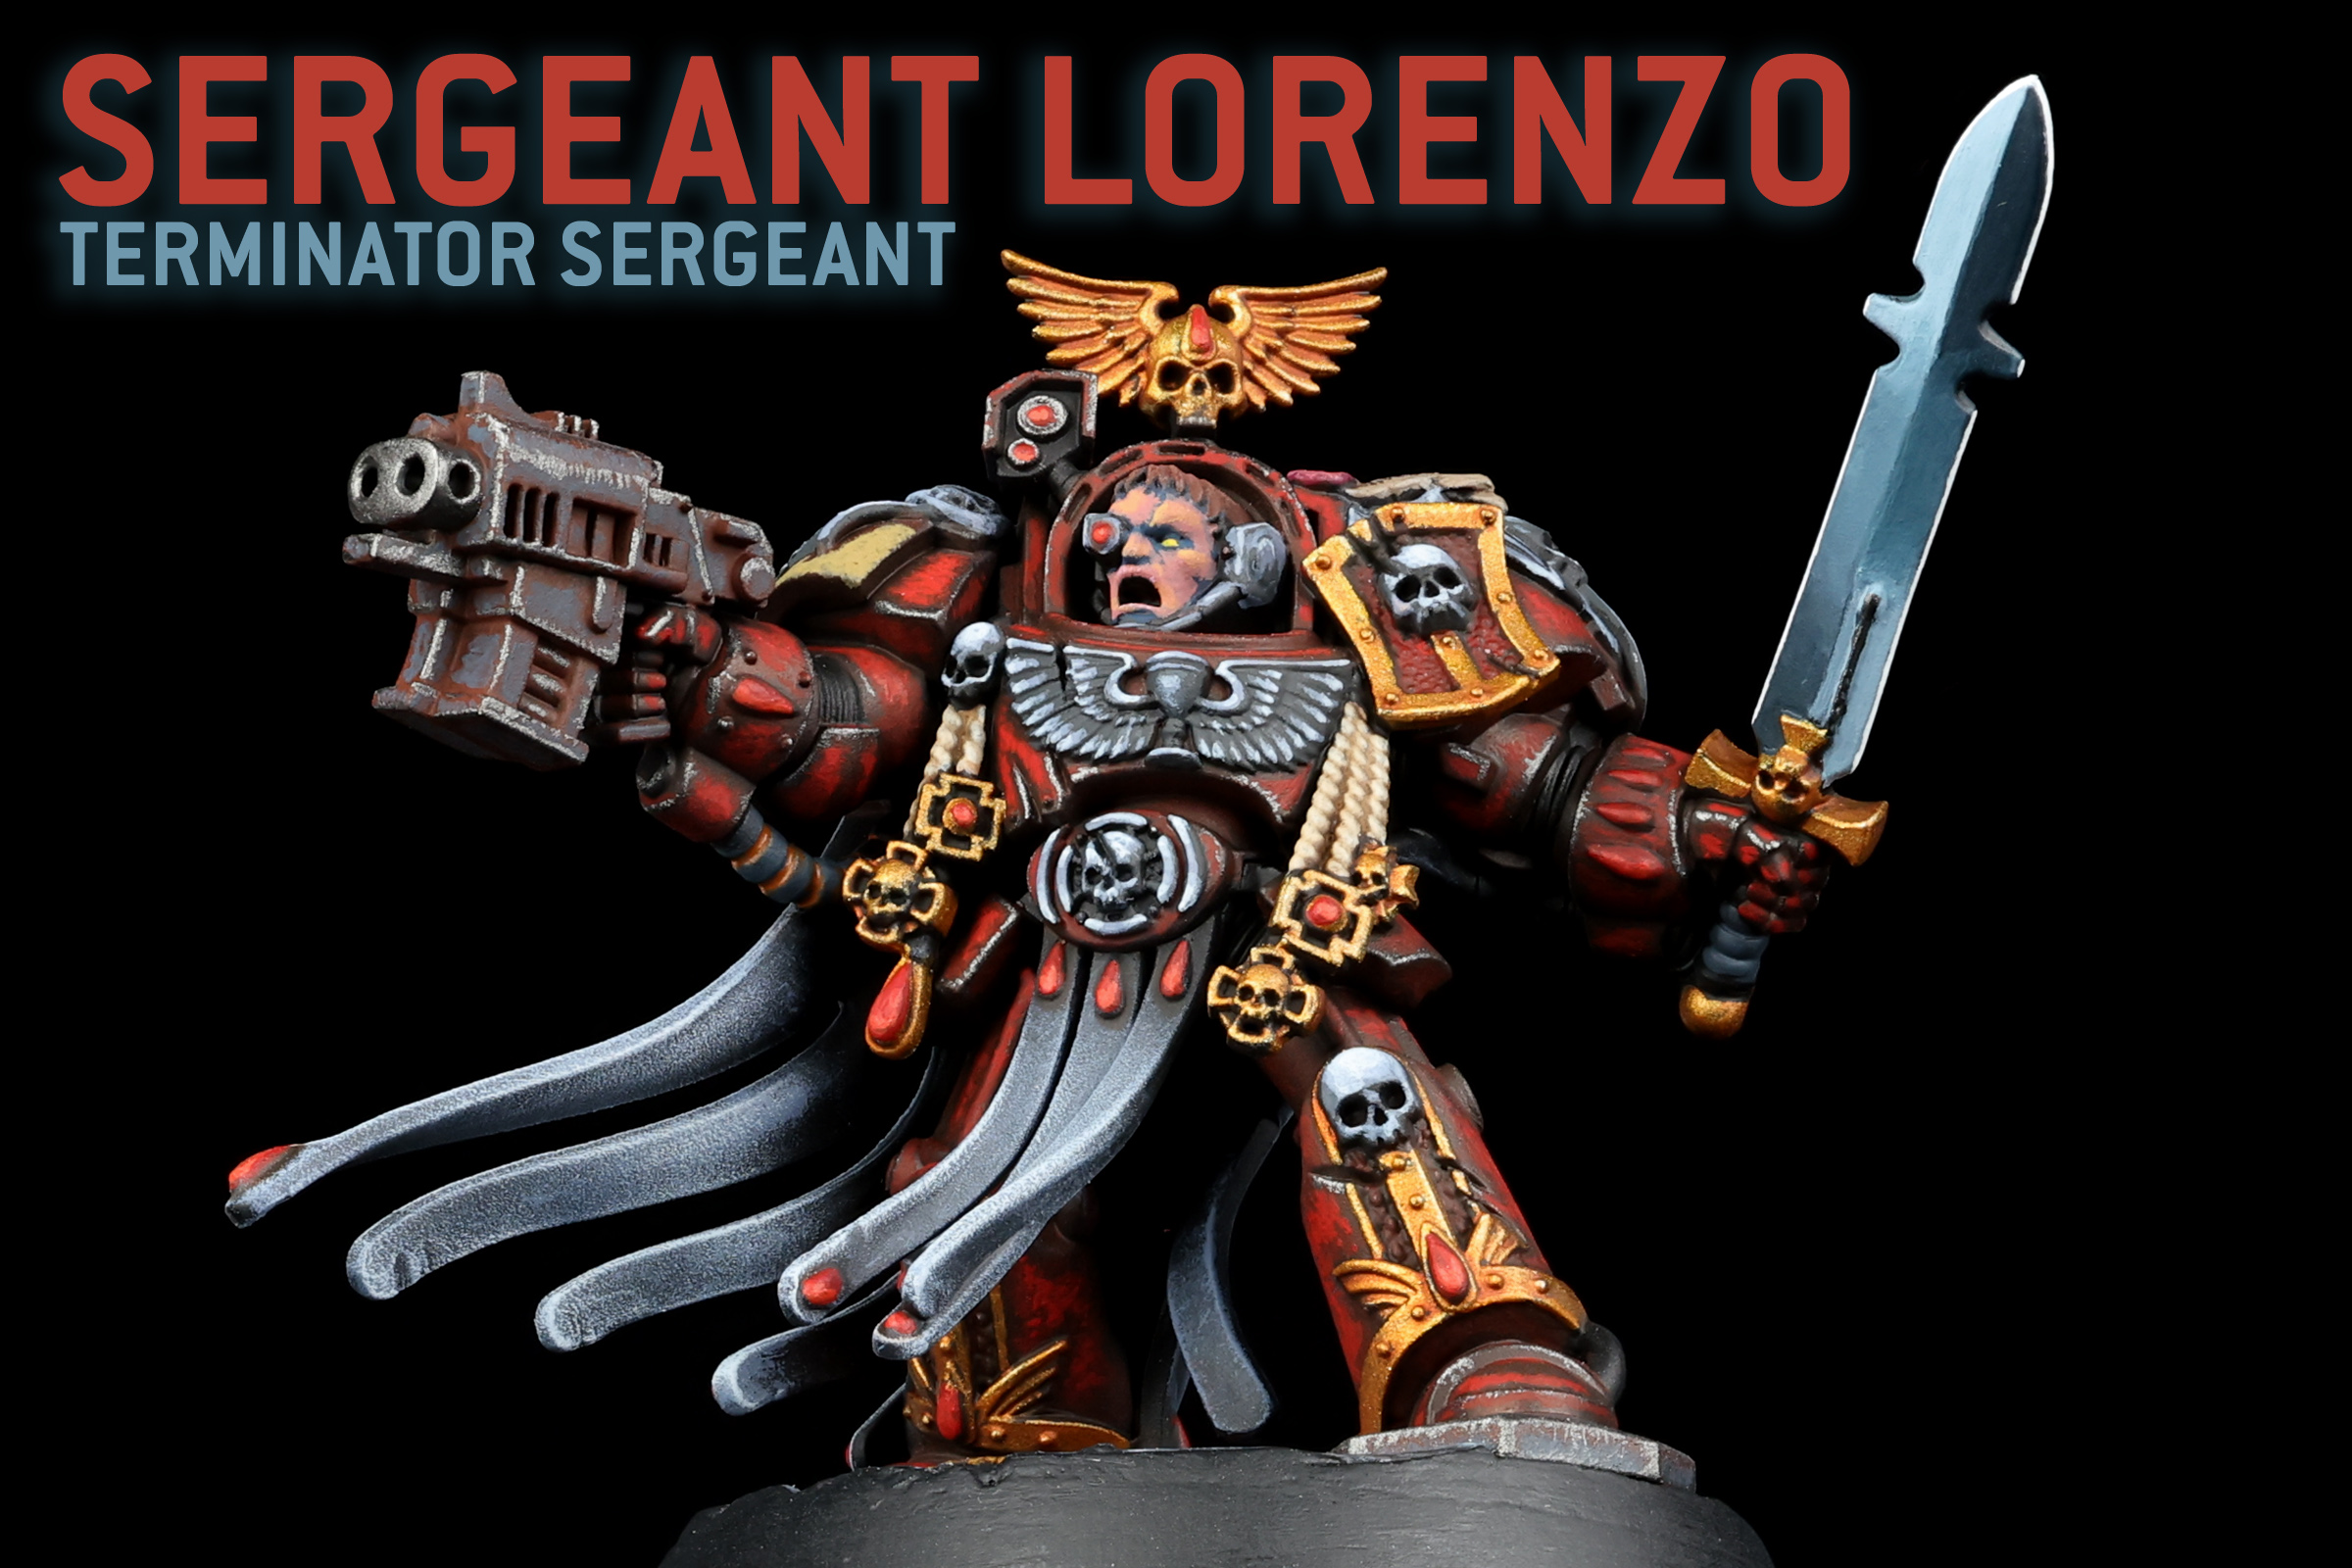


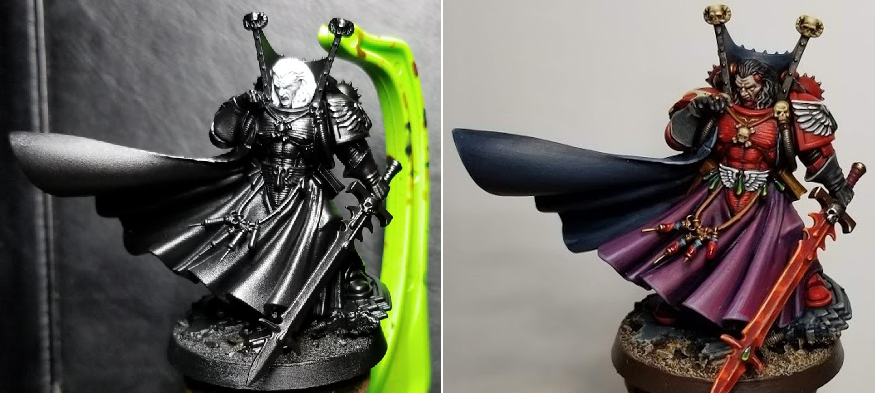
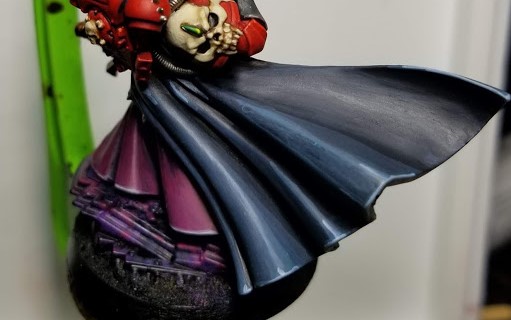
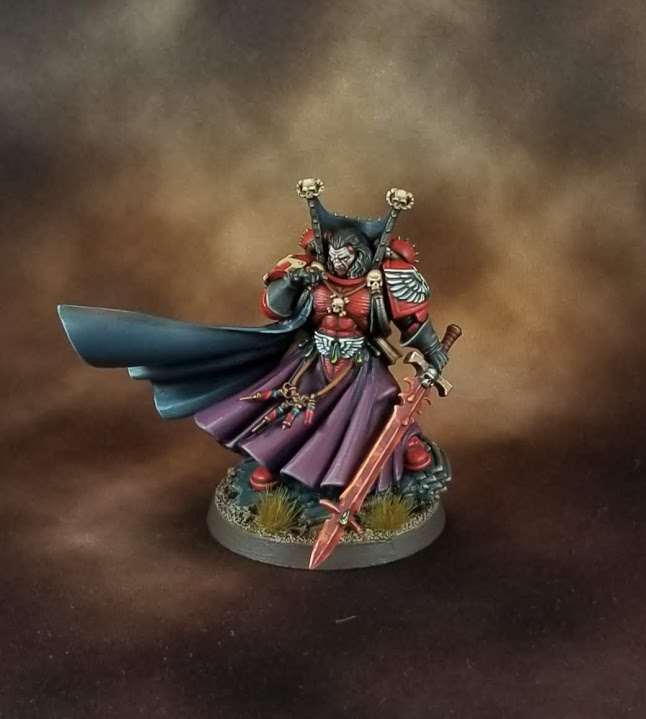
Crab-Stuffed Mushrooms' Method - Click to Expand I don’t collect Blood Angels, but Mephiston is such an iconic miniature. He’s frequently described as “sinister” in the background and I wanted the mini to reflect it: “…there are whispers that Mephiston paid a dreadful price for his resurrection, that when he mastered the Black Rage something altogether more terrible took its place.” The color scheme denotes him as a Blood Angel, but his skin is pale and his hair is no longer blonde. I went with blood stains on his mouth and glove, suggesting that he may be transforming into something darker (part of his Faustian bargain for conquering the black rage). If I could go back, I’d add the body of a fallen Death Company to seal the deal. Cool things I learned painting: Flesh Tearers Contrast Paint is great for glazing red. I should’ve gone brighter on the red highlights, first. Incubi Darkness is also great for blacklining red. Thanks to GW’s Darren Latham’s vid for both tips – check him out on YouTube! Wet palettes are one of the biggest game changers to how you’ll paint your minis. If you’re not using one. Get one immediately! You can make one yourself, but I recommend this one from Red Grass games. The acrylic paints we use are designed to dry quickly, faster than we have time to paint! Wet Palettes help you avoid painting “out of the bottle”, keep your paints lasting longer and keep your paint layers thin! Hobby Cheating: After priming your model, hold it under a bright light and take a photo. This will act as a “guide” for where you should place your highlights! I decided to paint Mephiston in “hard mode” and primed him with Chaos Black spray paint. This made it easier to ignore hard to reach places that I couldn’t paint easily with a brush! The head was primed separately with Grey Seer. I recommend you paint the first to keep yourself motivated. You can re-attach the face once you’ve painted the top area of the model. The secret to painting faces is watered-down, thin layers (mine were a bit chunky here). Go lightly when spraying primer so you don’t obscure detail. If you don’t get perfect coverage, that’s okay: Reminder: See ‘Battle-Ready’ for basecoats. Remember that photo we took of the primed model? We’ll use that as a reference for placing our highlights: Remember to use that photo you took of the primed model as a guide for placing the highlights. It doesn’t have to be perfect, but it will help guide your brush! The Trick to highlighting the cape will be leaving a sufficient amount of black showing: Try to keep the highlights limited to the “bottom-right” of the jewel. The “top-left” should remain Caliban Green: I used a different set of greys to differentiate the gloves from the cape: Try to make your sword highlights “uneven” along different parts of the flat of the blade.Assembly warning:
Wet Palette:
Why use a Wet Palette?
Undercoating / Priming:
Basecoating (“Battle Ready”)
Shading / Highlighting (“Parade Ready”)
Painting Mephiston’s Face

Painting Red Armor
Shading / Highlighting Mephiston’s Robes
Painting Mephiston’s Cape
Shading / Highlighting the Bone:
Painting the Jewels:

Painting the Wings:
Painting the Gloves
Painting Mephiston’s Force Sword Vitarus

Vengeance for Sanguinius!
Hopefully that gives you everything you need to start painting up your own Blood Angels, including the iconic Death Company and Sanguinary Guard. Blood Angels can be a very striking army on the tabletop, with their mix of red, black, and gold. If you have any questions about the methods here, or you’d like to share some models and methods of your own, shoot us a comment in the comments section below or send us an email at contact@goonhammer.com. We love to get feedback from readers, and if you’ve got a Blood Angels army of your own you’d like to showcase in one of our Army Showcase articles, feel free to tell us that too — we’re always looking for new armies to showcase.
This article is part of a larger series on how to paint Space Marines. To return to that series, click here.
