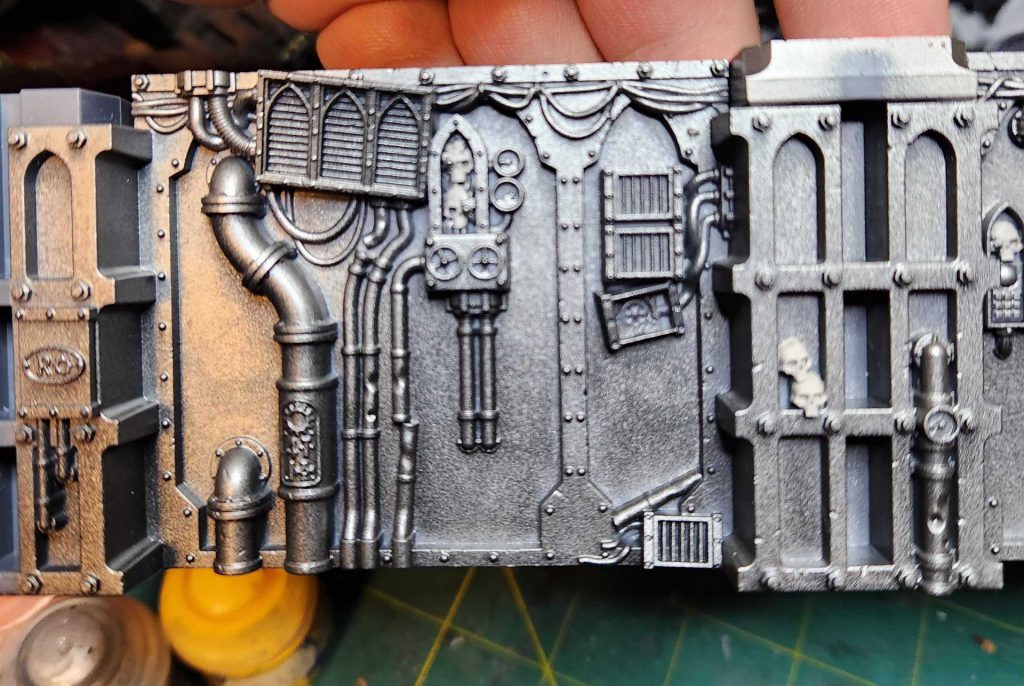
In our How to Paint Everything series we look at how to paint, well, everything, looking at different techniques and approaches along the way. Today we’re looking at how to paint the Gallowdark terrain used in Kill Team Into the Dark and Arks of Omen Boarding Actions games.
With the new Arks of Omen on the horizon, we figured now was as good a time as any to post a tutorial on the Boarding Actions terrain (previously available with Kill Team: Into the Dark and other Kill Team expansions set in the Gallowdark). This is some fantastic terrain with a ton of detail, but it can also be a daunting project, particularly for hobbyists who’ve suddenly found themselves sitting on two full sets for a Boarding Actions game.
One important thing to note is that for games of Kill Team and Boarding Actions you need to be able to disassemble your Space Hulk terrain and reconfigure it to match the layouts required by the mission. That means that while you want your terrain to look good, you’ll need to make some concessions for functionality, such as making sure you’ve sanded down corners that have to fit together and making sure the doors aren’t glued shut.
For this reason, we generally recommend assembling the terrain in its entirety and putting it in some configuration before you prime it. This will help keep the connections clear of paint and turning assembly into a nightmare.
For a method that uses a static layout and is designed to be much more aesthetically pleasing, check out our initial review of the Into the Dark terrain, where Dylan Gould offers his thoughts on the terrain and shows how to paint it.
Crab-Stuffed Mushrooms’ Method
I’ve kept the steps short and simple so folks can follow along. Although an airbrush was utilized, it is not necessary.
Assembling / Priming the terrain:
Do NOT do what I did and prime this on sprue. This path leads to madness and is ill-advised. Instead, you should use Peachy’s method from the Painting Phase, which I can’t recommend enough. If you’re too lazy to click, Peachy recommends assembling the terrain into two large pieces before priming.
But why?
If you paint the terrain without masking the connectors it will not fit. You can try forcing it, but trust me, it’s not worth it. It was so bad that I went back with a Dremel and sanded the paint away. So in short, don’t be like me and whatever you do (Rob), do NOT prime or paint the connectors.
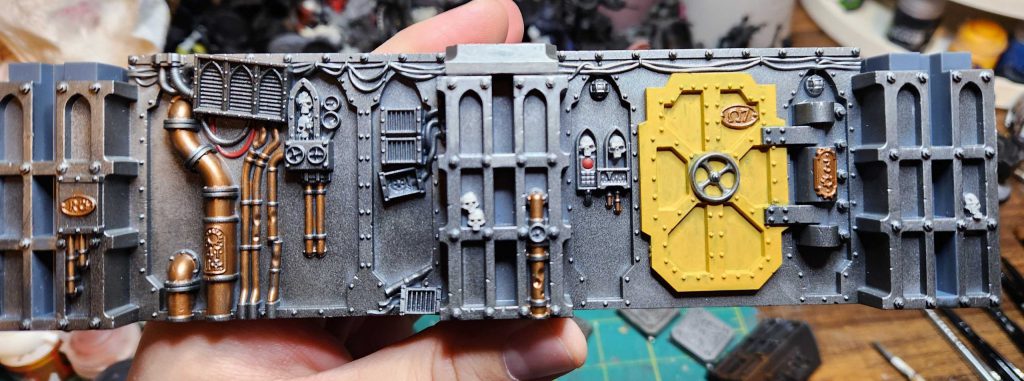
Leave the doors (and their hinges) off (you will glue these on later). This is important because the doors have an impact in the game and it’s in your best interest to paint them a different color so players can identify them easily.
Step 1: Apply the gradient:
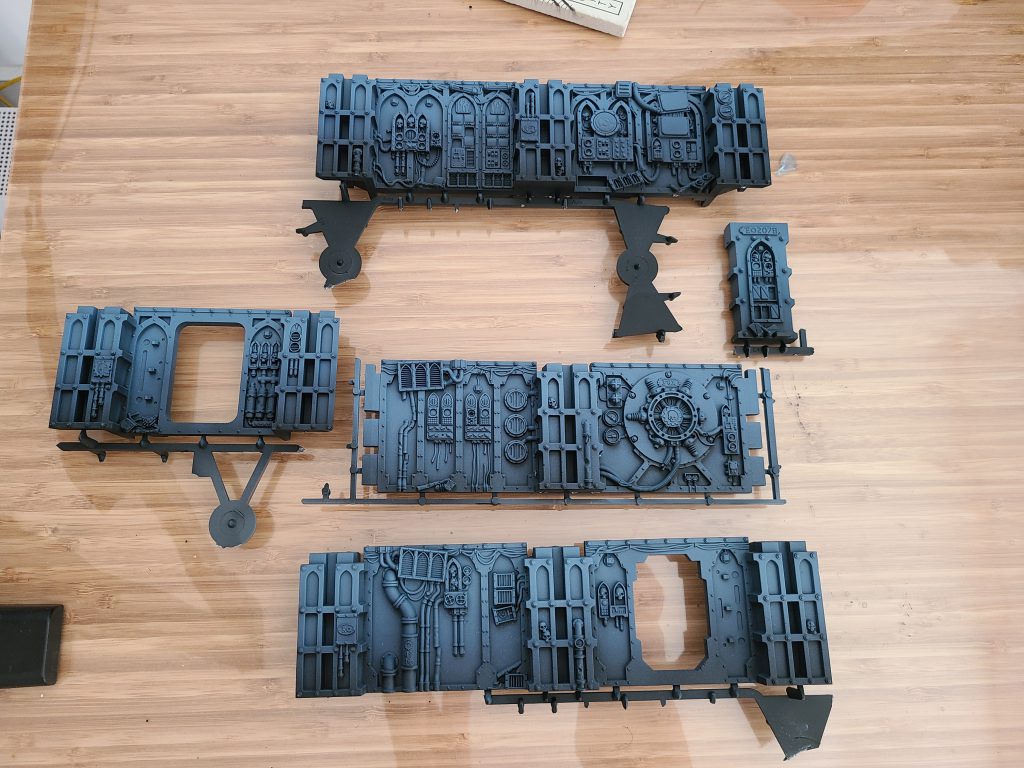
- Using an airbrush, I did a Zenithal highlight of the terrain (spraying at an angle of ~45 degrees), starting with The Fang, followed by Russ Grey.
- Try to leave the bottom of the terrain black if possible, this will help with the effect.
- Try to cover less space with each layer (e.g. start from the middle of the wall with The Fang and only cover the top quarter of the wall with Russ Grey.
- You can also spray the paint at a more direct angle when applying Russ Grey.
- (Optional) I painted the top trim with Corax white.
- Don’t worry about being perfect, we’ll be ruining this later.
If you don’t have an airbrush, you can get a similar effect with a spray can by spraying down at a 45 degree angle. I recommend a blueish grey paint such as Army Painter’s Wolf Grey (or GW’s The Fang if you can still find it).
Step 2: Sponging
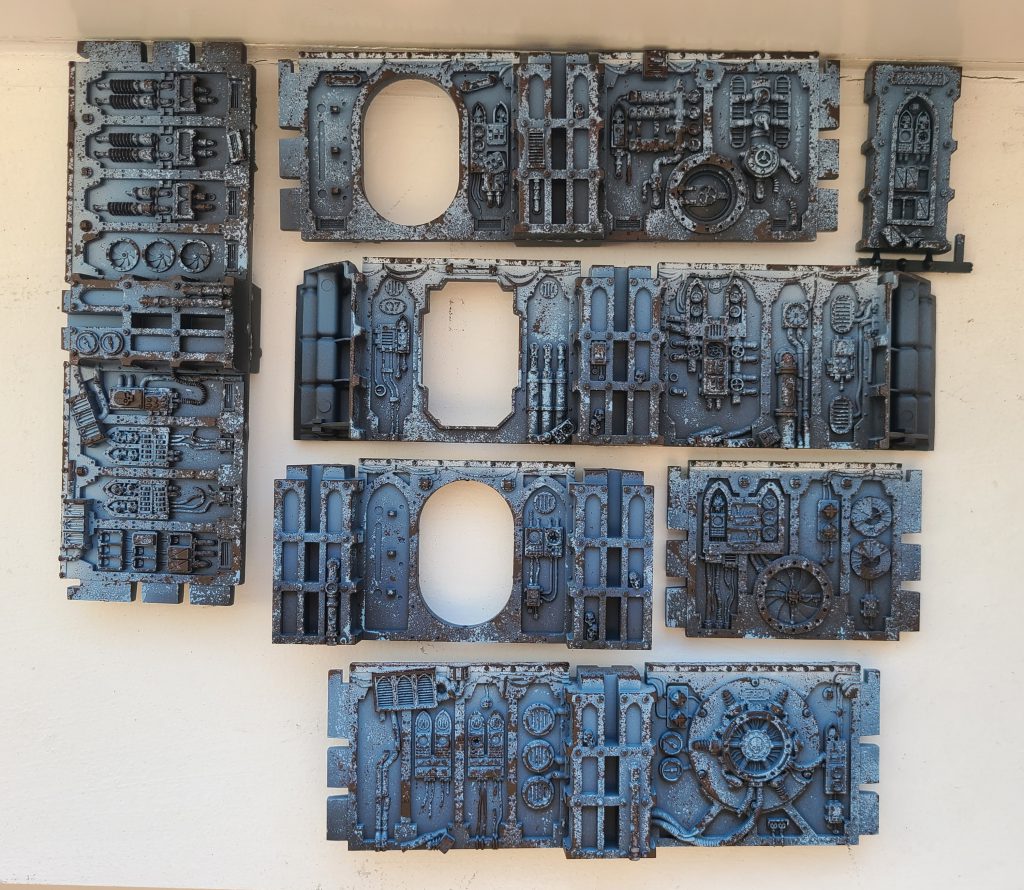
A fast way to create both highlights and texture is through sponge chipping. WarhammerTV has some good tutorials showing this method in action: Simply tear off a piece of foam (e.g. the foam from an old blister pack or spare foam from an army tray), ball it up into a little puff, dab it into some paint, and then dab off the excess paint before applying it to the edges of the model.
- Create texture by sponging Fenrisian Grey on the edges / corners of the wall. Keep this aimed towards the edges (i.e. avoid flat surfaces), but don’t worry if there’s overlap.
- Create wear and tear by sponging Rhinox Hide in random locations.
- Try not to cover too much of your previous layer: The Fenrisian Grey is your highlight, whereas the Rhinox Hide is meant to represent chip damage in random areas.
Step 3 (optional): Oil Wash
STOP. Before you proceed, I recommend varnishing the terrain with a protective coat of varnish. This will make it easier to remove the excess oil without accidentally wiping away your previous work!
Once you’ve created some texture (and protected it with a coat of varnish), you can wash the whole thing with a generous oil wash of Burnt Umber to make it dirty. People are often intimidated by the concept of an oil wash due to the use of thinners, mineral spirits and a bunch of other toxic stuff, but you don’t need any of that for this oil wash.
Instead, use Water Mixable / Water Soluble oil paints, these are oil paints that have been modified to work with water. Since we’re not creating works of art on a canvas, any perceived difference is negligible (i.e. it does not matter when you’re drowning your terrain in a wash). The water mixable oil paint dries faster than its traditional variant, often in a few hours (compared to waiting overnight for a traditional wash).
Mix the Burnt Umber 50/50 with water, and slop this all over the model. The more water you use, the less dirty the terrain will look, so feel free to play around with this ratio. This gets messy, so do this over a lunch tray or something similar (bonus: the tray will catch excess paint dripping off the model, which you can re-apply to later pieces).
Once dry, you can wipe off the excess paint with a damp sponge, I recommend using makeup sponges / applicator wedges – but a damp cloth or paper towel can work as well (note: the paper towel is likely to tear and get stuck on the model).
Painting the doors and pillar toppers
- I painted the door hinges using the same method as the walls.
- I primed the doors and pillar toppers black before applying a zenithal highlight of Corax White.
- You can skip the black and basecoat them with Corax White (or any light grey) if you prefer.
- I then applied a sponge highlight of pure white against all of the edges.
- I painted the gold and metal details with Balthasar Gold and Leadbelcher, respectively, followed by a wash of Agrax Earthshade (applied against only the metal parts).
- Once complete, I washed the whole thing with Burnt Umber water mixable oil paint, similar to what I did with the walls above.
- I then attached the doors to the walls.
Pigment Powder Weathering
I recommend varnishing the model again before this next step to avoid re-activating the oil wash that you applied previously.
- As a final touch, I applied pigment powder mixed with water to random areas of the model to simulate accumulated wear.
- There’s multiple ways to apply pigment powder, but I recommend using water as your medium because it’s the easiest to fix if you don’t like the end result:
- Simply add more water to remove the excess.
- Once complete, you can seal it with a coat of varnish to fix the pigment to the model.
- You’ll lose the “powder” effect due to the varnish, but it will keep the pigment powder from rubbing off.
ichibanpainting has a great tutorial of pigment washes in action.
I used a mix of dark brown, orange and bone-colored pigment powder to do this. I used the now-defunct Secret Weapon pigments, but AMMO by Mig Jiménez makes a variety of pigments you can choose from.
Try to apply the pigment/water mix to areas where dust and dirt might collect on the model. Don’t worry if you’re not perfect, you can can wipe off the excess with a damp q tip or wet brush.
Finishing Touches
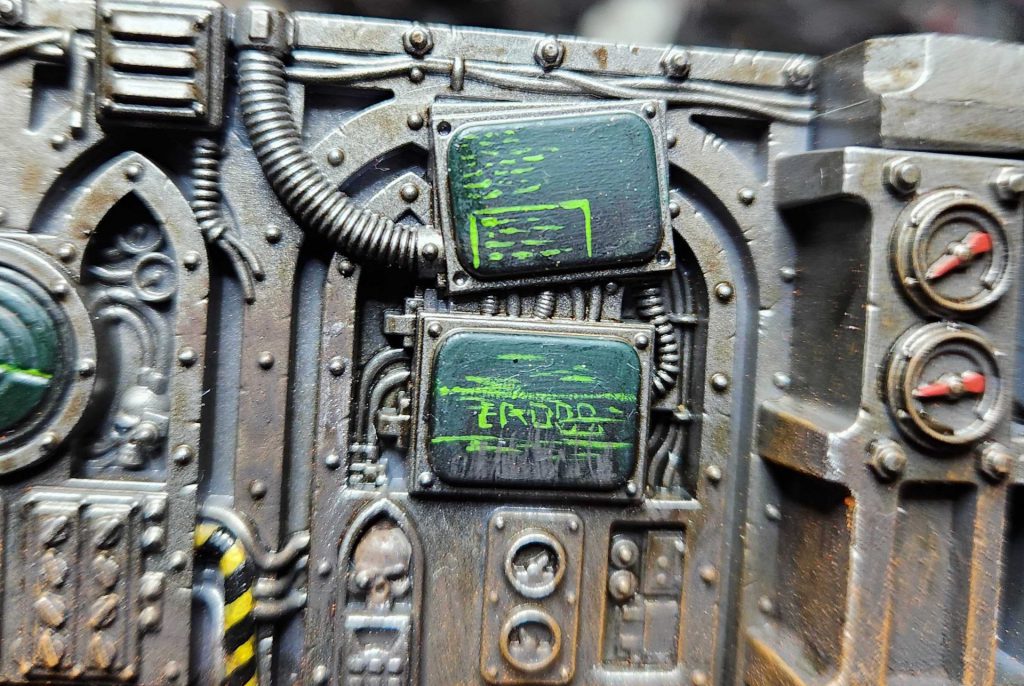
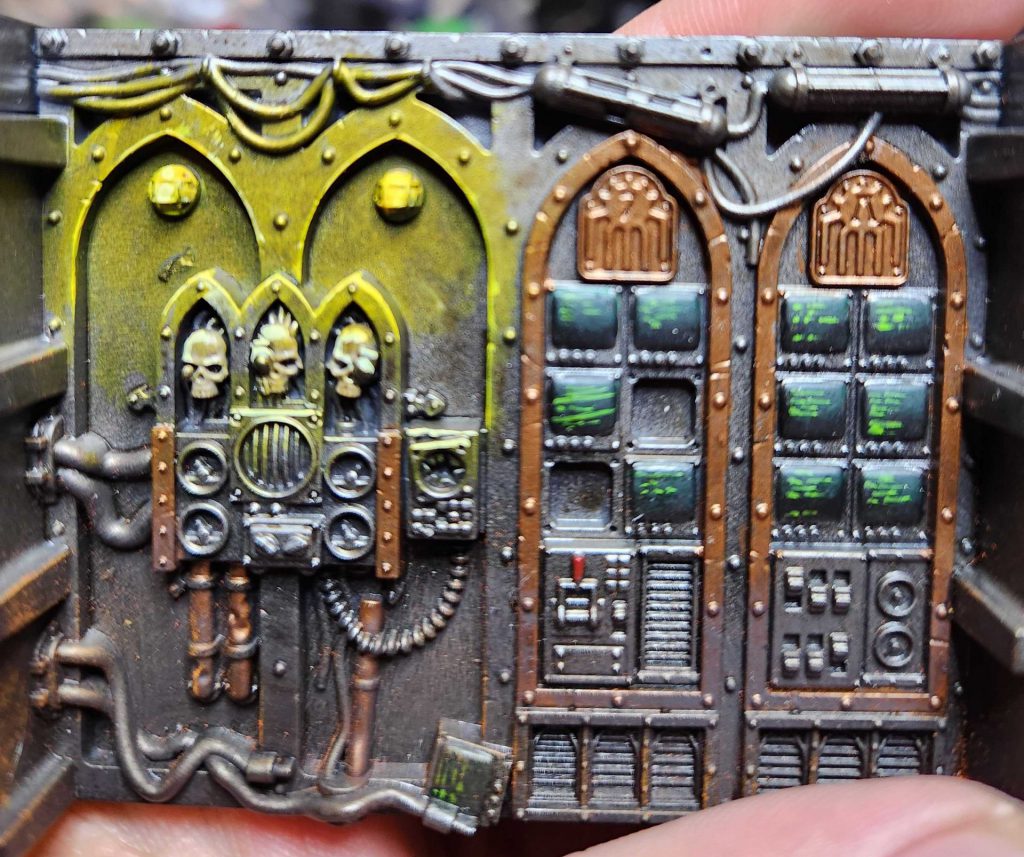
Trying to paint detail on these models is overkill. Most people won’t notice when they’re in the middle of a game and it requires extra time. However, I did apply some OSL to the lights and screens with an airbrush, which is perfect for this kind of thing. I basecoated the monitors with Calibran Green, followed by Warpstone Glow on the edges. I painted the lights with Baharroth Blue, followed by a smaller highlight of white in the middle of each light.
You can get a similar effect using a circular motion with a drybrush, but it won’t have the same gradient.
Scatter Terrain
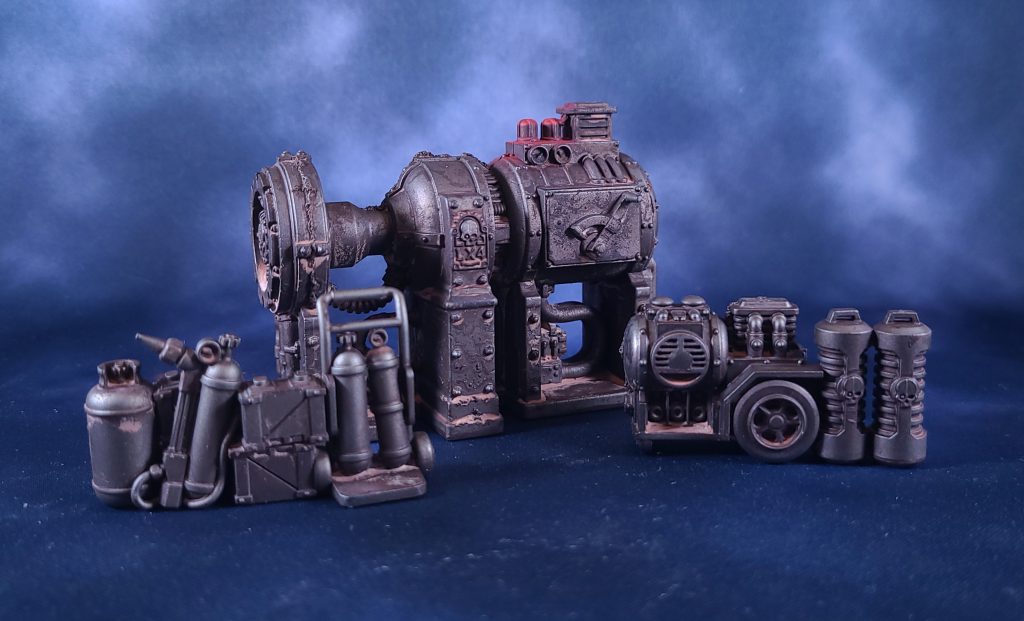
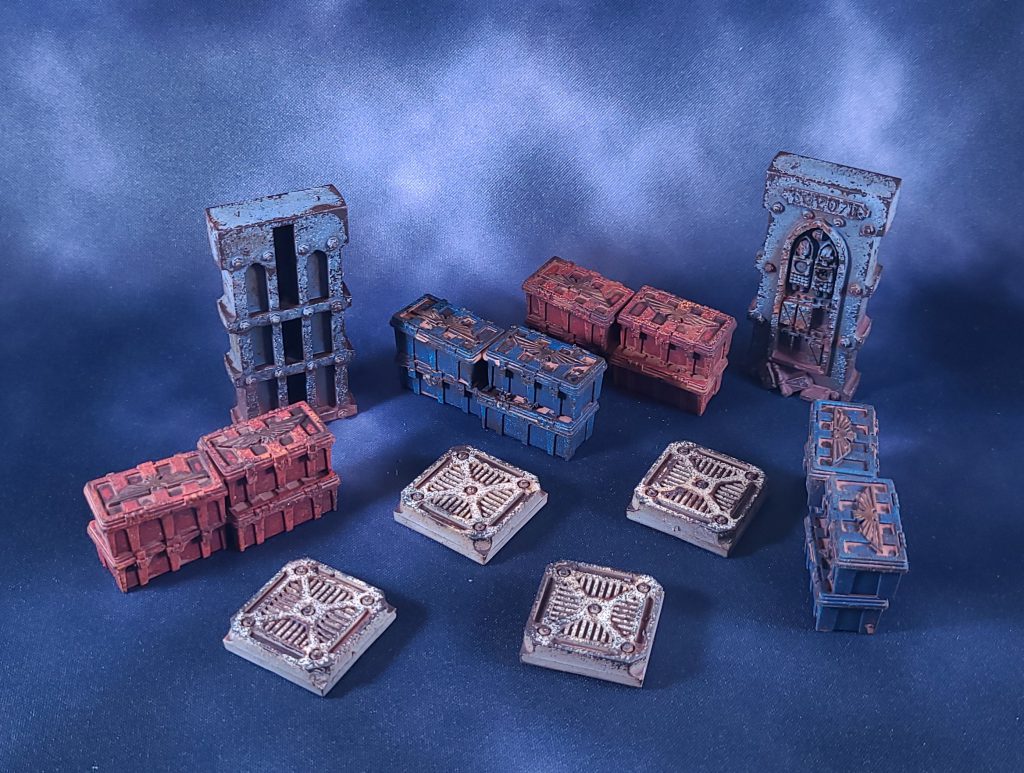
The majority of the scatter terrain was primed black, followed by a rough coat of Warplock Bronze and a final highlight of Leadbelcher. This was then covered with a wash of water mixable Burnt Umber, followed by a wash of water mixed with pigment powder similar to the methods above.
The ammo crates were sponge highlighted and washed similar to the larger terrain pieces.
Robert “TheChirurgeon” Jones’ Method
There’s a lot of terrain to paint for a single Boarding Actions game and to make things worse, it has to be interchangeable so you can reconfigure it quickly, which means doing different color themes on different walls can lead to terrain that looks mismatched in other configurations.
so my method is focused less on aesthetics and color schemes and more on what I can do quickly and functionally that will look good without taking a ton of time and energy. It also doesn’t require an airbrush, which is great because I don’t own one anyways.
Prep and Priming
The process starts with a thorough trimming, cleaning, mould line reduction, and I shave down the corners of every single wall fitting. Once I have those fit together well, I keep them in this built configuration – it makes doing the priming easier. Like Joey however I’m big on doing something semi-fade-like with the priming step, and I start by priming the whole thing with Abaddon Black, then repeat the process from the top with Leadbelcher spray. My terrain is primarily going to be metal, because that’s easy to work with.
That said, if you don’t want to do Leadbelcher, you can easily replicate this with another dark shade like Mephiston Red, or by using a brown primer and a yellow. I did a similar thing when I was priming my Sector Imperialis terrain to build a GW-style competitive table layout.
Pick out the Details
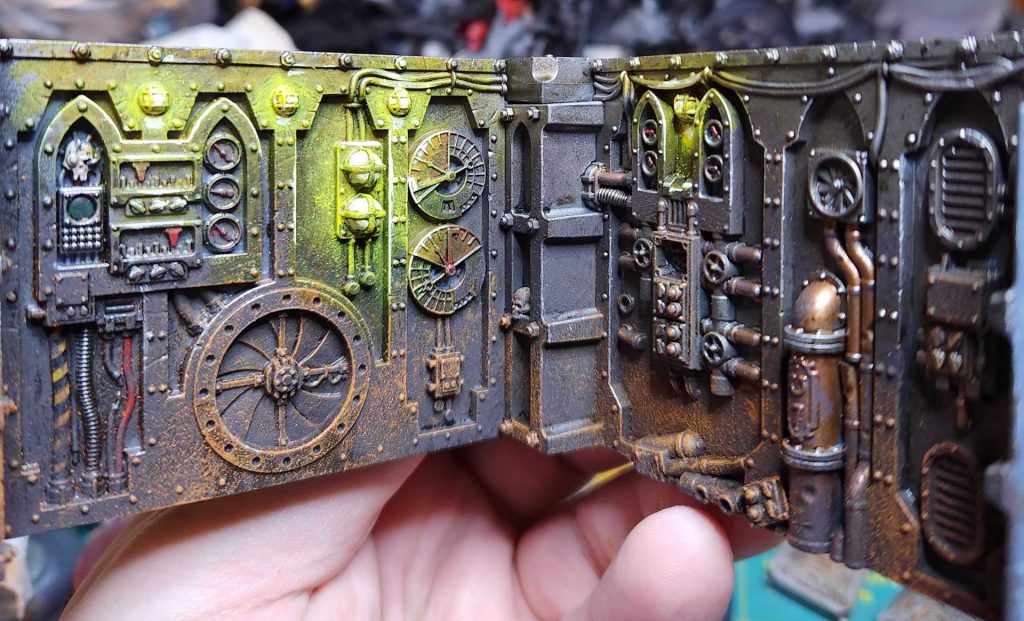
Next I pick out certain details with different colors, picking Balthasar Gold for the copper pipes and technical paints. I’m not going crazy here, just finding spots to paint other colors and create something that pops against a uniform background. This is also when I paint the doors and the screens. I tend to use brighter colors for my doors, and right now the colors I’m using for them as a base are Averland Sunset and Word Bearers Red.
This is also when I paint the screens and do hazard striping on cables. The Screens are Caliban Green that I shade with Corvus black, and the text and graphics on them are done in Moot Green.
Wash the Crap Out of It
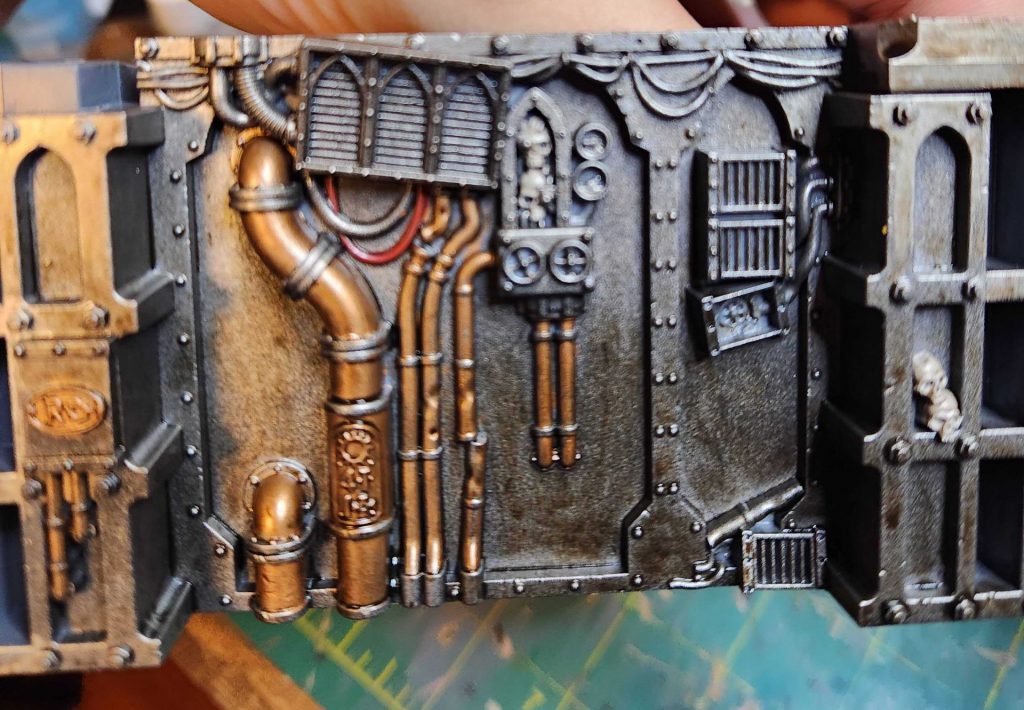 Cover most of the structure in Agrax Earthshade. This gives it a grimy feel and helps shade the copper and bone parts. This is also where I note that for the most part, I am only going to pick colors for my terrain that will work well enough when they’ve been washed with Agrax.
Corrosion and Rust
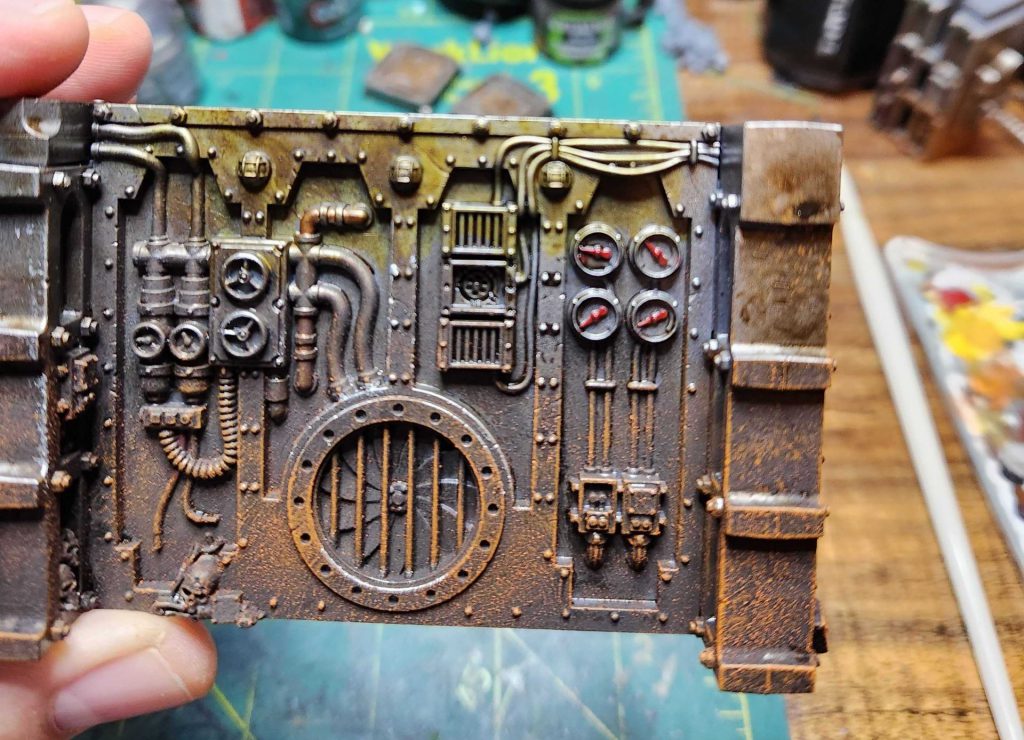
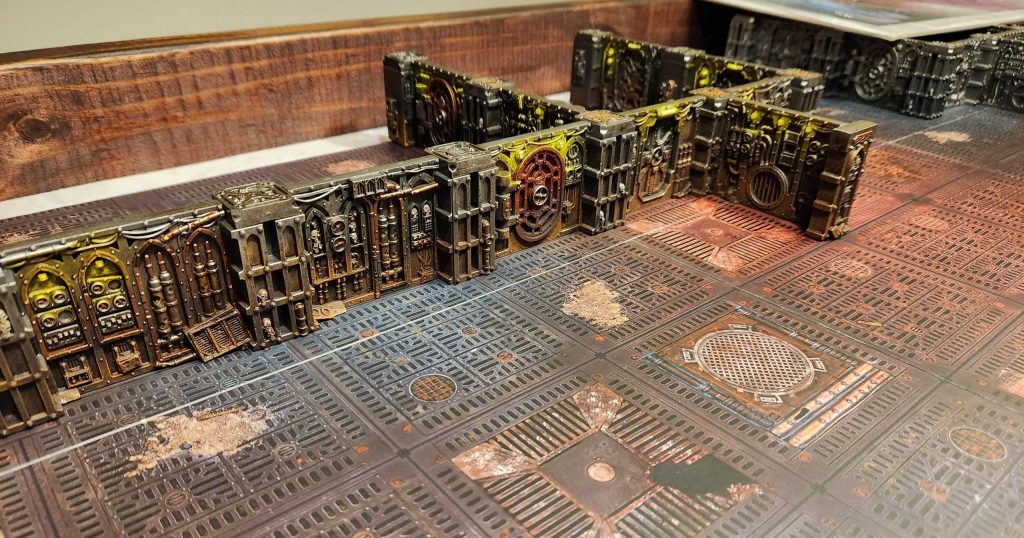
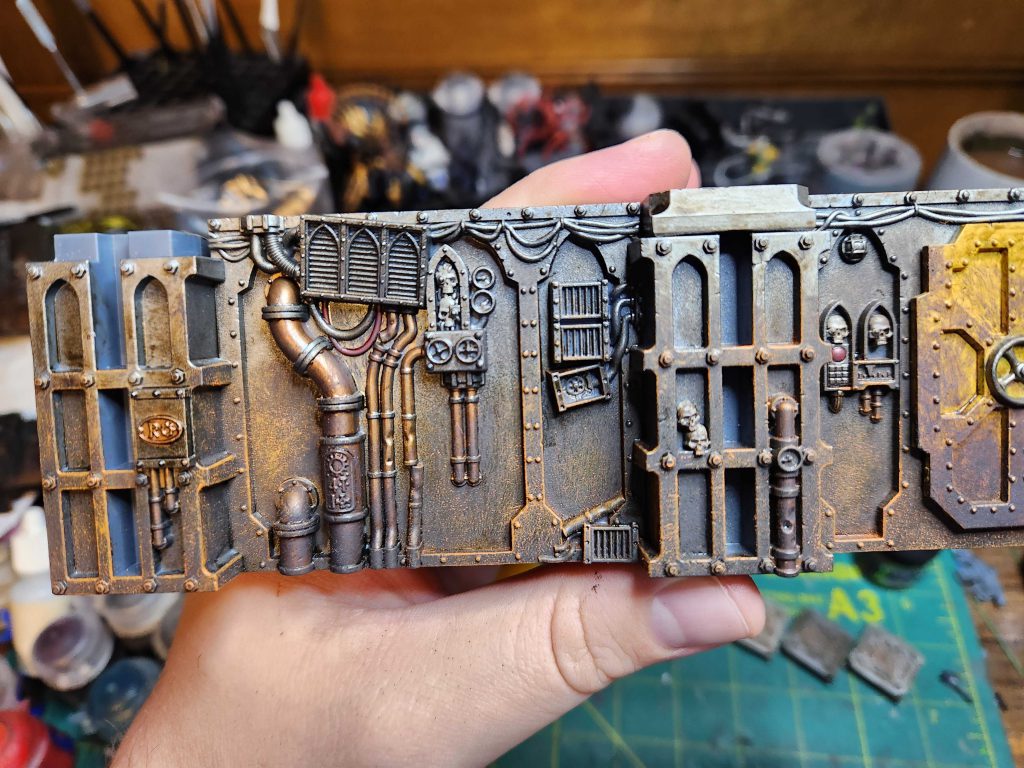 Things are looking good but now it’s time to make them gross and weathered, which is by far my favorite part. I basically paint the bottom half of the walls with Typhus Corrosion technical paint, which goes on dark brown and dries with a bit of grit in it. It’s great on its own but where it really shines is when you drybrush it with Ryza Rust, a bright orange dry paint. I hit the steel portions of the walls with a light drybrush of Ryza and it gives me the wonderful layered orange rust look you see above.
After that I touch up the corners and edges with some Runefang Steel/Ironbreaker to help those parts stand out and give it a more realistic feel, as though the corners have been nicked over time.
Time for Lights
If you wanted to call the pieces done at this point point, you’d be in good shape. They look fine and are perfectly serviceable. However I decided to add a little bit extra and do some yellow OSL on the lights. I’ve written about OSL before and done a better job of it; this is a much faster, simpler version designed to be done a few dozen times on terrain.
The first step is to paint large areas that I want to be illuminated with Cassandora Yellow shade. I want the least strong yellow wash I can here, and I’m hitting the basic illuminated areas.
I’ll then build this up with a layer or two of Iyanden Yellow and Imperial Fists Contrast Paints, since those go over much thicker. After that I’ll edge highlight the areas around the light most likely to catch light with Flash Gitz Yellow and use Flash Gitz to paint the lights themselves.
In the final step s I drybrush the area around the lights with Flash Gitz, then come back and hit the lights with Dorn Yellow and do a final set of edge highlights on the raised areas closest to the light sources. The whole thing is done pretty quickly and haphazardly but the ned result looks very solid and gives the whole thing a great sense of ambiance.
Final Thoughts
Painting a full table’s worth of Gallowdark Terrain is a daunting project but doesn’t have to be – hopefully with this guide we’ve shown you some easy weathering and painting techniques for painting your own that will make the whole process a breeze. Just remember to keep your terrain unglued and cover it with a layer or two of varnish after you’re done so you can avoid scuffing it up when you have to take it apart and force it back together for another game.
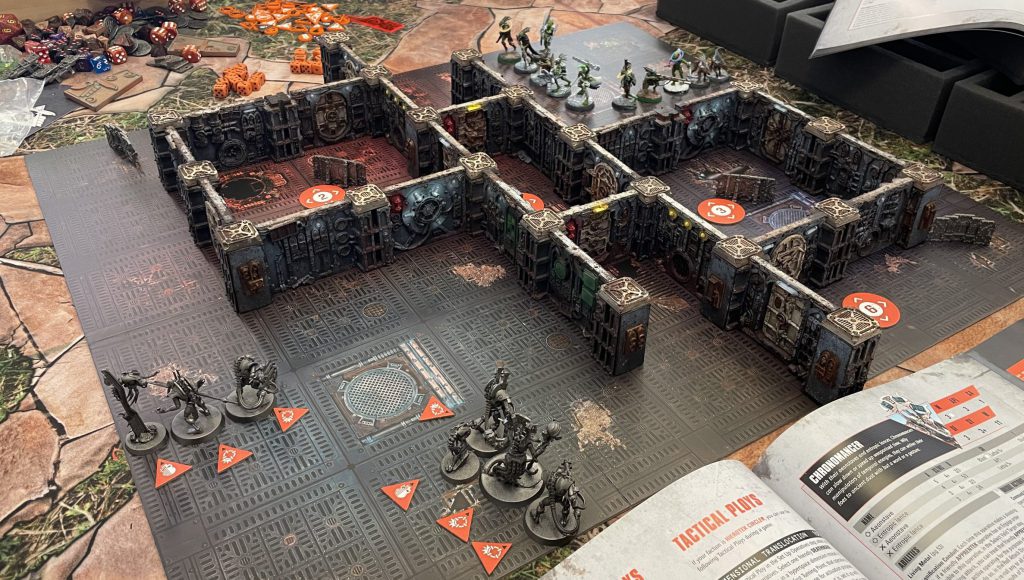
Crab-Stuffed Mushroom’s Terrain
Have any questions or feedback? Drop us a note in the comments below or email us at contact@goonhammer.com.


