
In our How to Paint Everything series we look at how to paint well, everything, with different techniques and approaches. This wee we’re looking at how to take on an airbrush-based approach to OSL painting for a large number of models in Conquest.
This is my speedpainting OSL method for Conquest’s Old Dominion faction. Conquest is a regimental rank and flank game, and while the model count is much more manageable than something like Warhammer Fantasy, I still anticipated needing to paint large numbers of various ghosts, legionnaires and various monsters. The goal for the scheme was to be able to rely heavily on the airbrush to get the bulk of the work done, leaving relatively few steps for brushwork and letting me get regiments done in days rather than weeks.
What is an OSL paint scheme?
For those unfamiliar, ‘OSL’ is an acronym for Object Source Lighting – a technique where sources of light are painted on a miniature. Goonhammer has an article on simple OSL methods that explains the basic idea. Once you have access to an airbrush, you can use the directional spray of the airbrush to create large glowing or lit areas, which opens up the possibility of a two-tone paint scheme that can be painted primarily with an airbrush for very quick turnaround.
Since a pure OSL scheme will be a two-tone scheme, comprised mostly or entirely of two different colours (representing illumination from two different sources of light) plus any areas in shadow, it’s important to pick two primary tones that work well in this kind of scheme. My concept was an army under an moonlit sky, lit from underneath and within by the glow of the animate dead and chunks of some unholy crystal in the earth. As such, the two colours I chose were a faded blue light from overhead, and an orange-rose colour for the accent colour nee unholy glow. Areas of shadow would be a dark blue-purple.
It’s worth emphasising that using OSL as the sole basis for a colour scheme is not going to give you as visually interesting or complete a look as a true colour scheme that incorporates OSL as one of its elements. However, if your goal is speed, this method is fast. Even entire regiments can be batch-painted to a state of table readiness very quickly.
Step Zero: Assembly, Basing and Priming
Assemble and clean as normal. Your model needs to be based before we start painting, so base using your method of choice. I went with simple martian ironearth and would add the glowing crystals as the final stage.
Black primer works best with this method – if you miss anything, it’s probably an area of darkest shadow, so black will hide your sins.
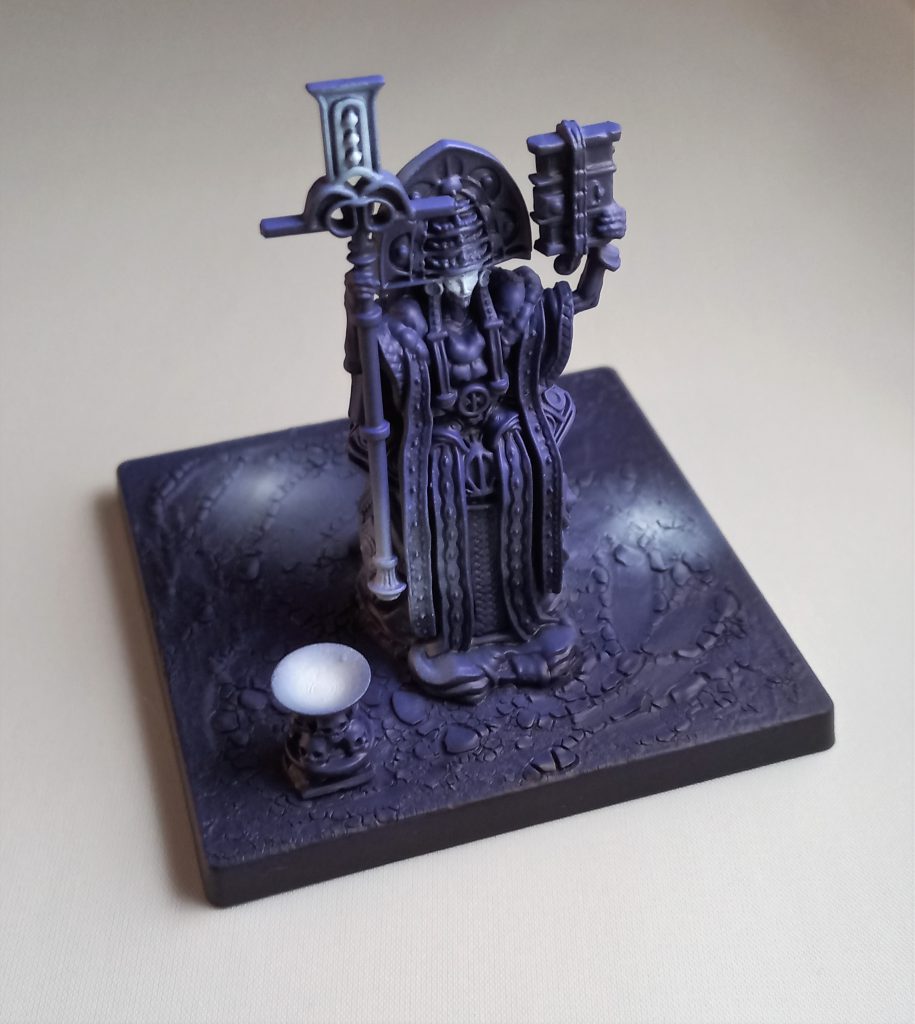
Step One: Basecoat
The first step is a simple basecoat and zenithal to establish the shadow tone and primary colour of our miniatures – moonlight from above. For this I used a basecoat of Vallejo Model Air Blue and Vallejo Game Air Hexxed Lichen. Applied directly over the black undercoat, these colours will give you very dark shadows.
Next, do a zenithal highlight (a highlight from above, using the airbrush’s ability to apply paint from a single direction) adding Vallejo Game Air Alien Purple to your existing Blue and Hexxed Lichen mix. The goal here is to make the model’s general shape and form visually understandable at a tabletop distance, and lay down the basic moonlit colour of the model.
As an optional step, for characters and larger monsters, add an additional highlight during the zenithal step – increase the lightness of the zenithal on the model’s highest points by adding white or a very light blue to the existing colour mix.
Here’s how it looks after this first stage. It’s simple and flat, , but the model’s shapes and form are visible. Now to add the glow.
![]()
![]()
Step Two: Sketch the Glow
Applying airbrush OSL to an existing miniature is a two-step process that relies on a technique called ‘underpainting’. Here, we’re going to apply a white underpaint to the glowing areas and sources of light, then apply a glaze of our glow colour over the top.
Use a very thin white applied at a low pressure, slowly building up to near-saturate white at the brightest areas. This requires some patience, and won’t look good at this stage, but it will lay a foundation that lets the light really pop when we apply the glaze.
For this model, my plan is to have some glowing crystals on the earth and in the brazier lighting the model from beneath, glowing eyes, and a glowing staff. I sketch out all these areas, and where the light will fall, onto the model.
Remember to make use of the airbrush’s ability to apply paint in a spray from a direction. For example, I know the brazier will hold a source of light, so I can spray white ‘through’ that space onto the model to simulate where light will fall.
It doesn’t look great at this stage, but we’ve laid the foundation we need for the next step.
Step Three: Apply the OSL Colour
The third step is to apply the glaze over the top of the sketched areas to add colour to the light. As before, this works best with very thinned paints, applied slowly to build up colour. You’re looking to tint the model, not paint it – if you over-apply paint at this stage, you’ll lose the visual effect of an inner glow.
For the tint, I used primarily Army Painter Lava Orange, with a tiny amount of Army Painter Dragon Red mixed in to move it closer to a rosey tint. These aren’t airbrush paints, so were thinned heavily for this step.
When applying the glaze, apply it quite intentionally beyond the borders of the area we sketched out with white. For example, on the model below, I’ve extended the colour of the illumination onto the model’s shoulder pads. The white underpaint gives us our brightest areas, and applying the glaze more broadly allows us to diffuse the coloured light naturally across the miniature.
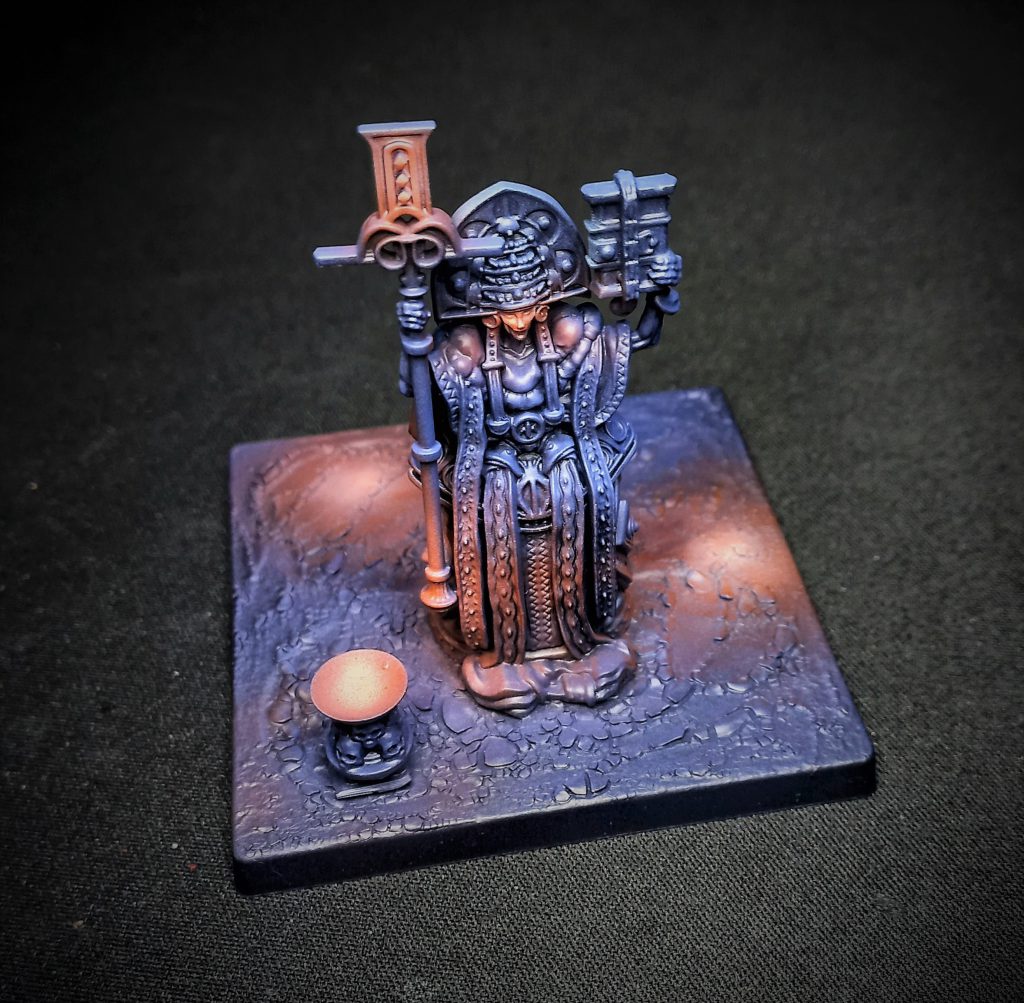
To note, I’ve switched to a black background for this and subsequent photos mostly because it lets the phone camera catch the OSL better. The camera’s filters are pumping the shadow and highlight a little, which is part of what we’ll be manually improving in the next stage.
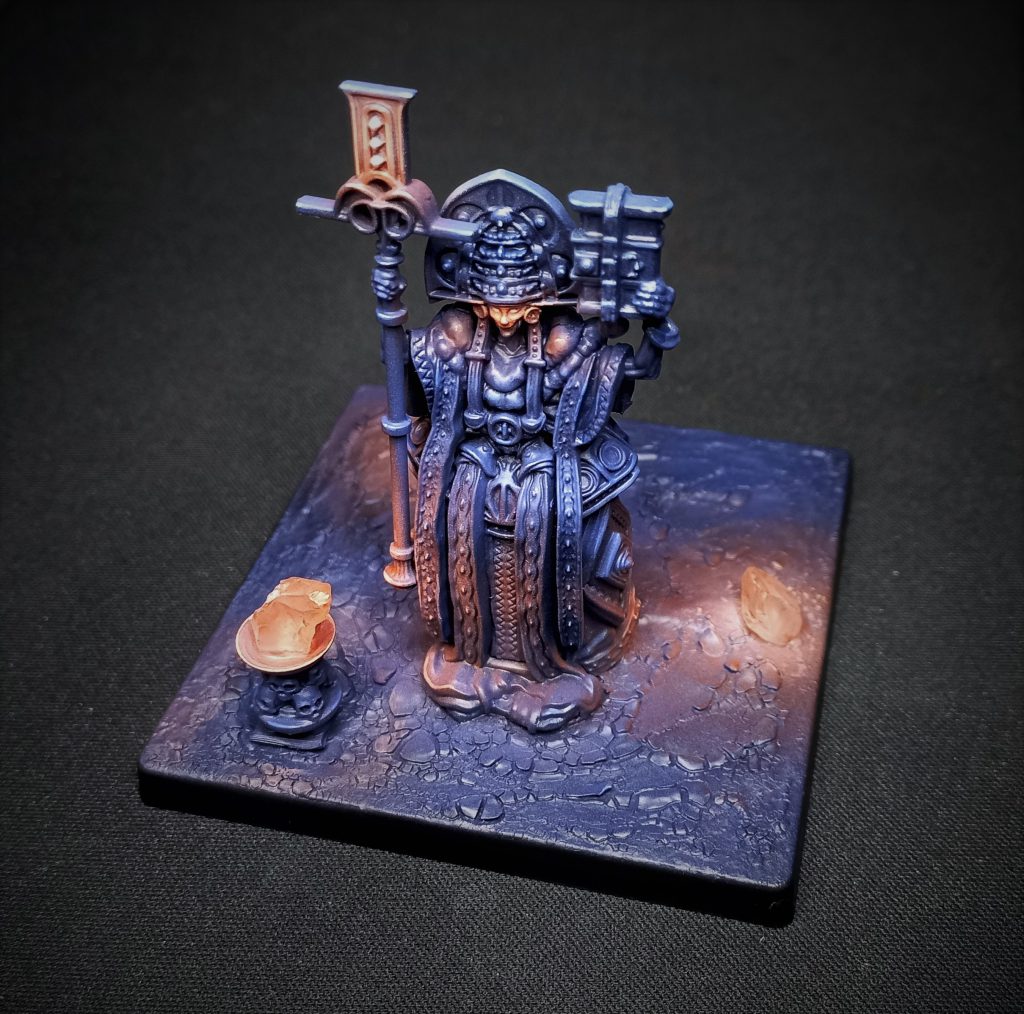
This is the part where the scheme has properly come together. For rank and file regiments, you could skip to adding in the physical light sources if they aren’t already represented on the model, but as with every scheme, highlights do still make a lot of difference in the final result.
Step four: Brushwork – edge highlights, washes, finish basing
Until now, the entire scheme has been done with an airbrush in one sitting. From here, you need to break out the traditional brushes. At this stage you’ll be looking to increase the contrast and visible legibility of the model, and finish the basing.
Firstly, selectively apply a very thinned down wash of the base blue + hexed lichen colour with a little added black, to re-establish the very deepest shadows where needed. The crackle paint I’ve used on the base is a good candidate for this, as are some of the deepest recesses and areas that are overhung by other elements of the model.
Next, edge highlight the model. For areas lit by moonlight, use either the zenithal colour, adding white or a light blue (like Vallejo Glacier Blue) to the mix as needed for the sharpest edges, metals, or any other part of the model with a lighter value.
For the OSL colour, add white to the orange + red mix, focusing on edge highlighting those edges that light will be reflecting off. This won’t always be the highest point on the model – for example, where a source of light is lighting it from beneath, highlight those edges facing the light source.
Finally, paint the edges of the base black and add the sources of the light if they aren’t already present on the model. For this miniature, I’ve used shards of shattered safety glass (purchased from Zorpazorp terrain supplies), which I’ve tinted by applying a glaze of the orange + red mix combined with Vallejo Glaze Medium.
And with that, you’re done! This model took about 30 minutes to airbush as part of a batch that included a couple of other models, and another 45 minutes to edge highlight, apply the basing and varnish (plus drying time for the glaze on the safety glass shards overnight).
