
In our How to Paint Everything series, we take a look at different armies of the Warhammer universes, examine their history and heraldry, and look at several different methods for painting them. This week we’re looking at how to paint Drukhari, the Aeldari pirates and raiders hailing from Comorragh.
Who are the Drukhari
A degenerate society of raiders, torturers, and slavers, the Drukhari are the dark kin of their Craftworld cousins, headquartered in a massive subdimensional city in the Webway known as Commorragh. They’re also a living history, the closest example you can find of what Eldar culture was like before the fall and birth of Slaanesh. When the Aeldari homeworlds were engulfed in the psychic storm known as the Eye of Terror during the birth of She Who Thirsts, many Eldar fled into the webway network, taking refuge in the city of Commorragh. These Eldar were not spared from the ravages of Slaanesh, however – their souls began to drain away, drip by drip, into the Warp, and into the waiting maw of Slaanesh. As such, all Eldar fear death, a point when their souls will be consumed by She Who Thirsts, and each culture has come up with its own way of avoiding its fate. For Craftworld Eldar, this means putting their souls into soulstones and infinity circuits. For the Drukhari, they found they could stave off the slow decay of their souls by inflicting suffering on others instead, transforming them into a race of sadistic parasites.
Thousands of years following the fall the Drukhari are the closest example of what Eldar culture was like prior: They’re arrogant, decadent, and self-consumed, constantly searching for new sensation through narcotics and pleasure cults. However their focus on causing pain to reinvigorate themselves and stave off their own decay has made them into a society of sadistic hunters, constantly looking to feed on the misery of others. Although fractured themselves among a number of Cults, Covens, and Kabals, the forces of Commorragh frequently team up to form massive realspace raiding parties that venture out of the webway to inflict pain wherever they can find it. The most powerful of these kabals is the Kabal of the Black Heart, led by Archon Asdrubael Vect.
Where to read more
Drukhari tend to be an “antagonist faction” in 40k fiction; they certainly make good villains, after all – but have had the opportunity to take center stage a few times.
- The foremost of these is the Path of the Dark Eldar trilogy, written by Andy Chambers and consisting of Renegade, Incubus, and Archon. These books chronicle the exploits of Asdrubael Vect as he consolidates power in Commorragh.
- Jain Zar by Gav Thorpe also features the Drukhari in significant fashion and gives them some real show-stealing scenes.
Playing Drukhari
If you want to know more about playing Drukhari, we have a few sources for you. Those players new to the faction should check out Getting Started: Drukhari, while more serious competitive players should refer to Skari’s articles on the faction, which start here.
Painting Drukhari
The Drukhari palette tends to include a lot of dark colors with bright edge highlights, and many of the factions’ models will be caked in gore or flayed flesh. Expect to see a lot of dark blues, greens, purples, and reds in the tutorials here.
Swiftblade’s Method – Painting Wracks
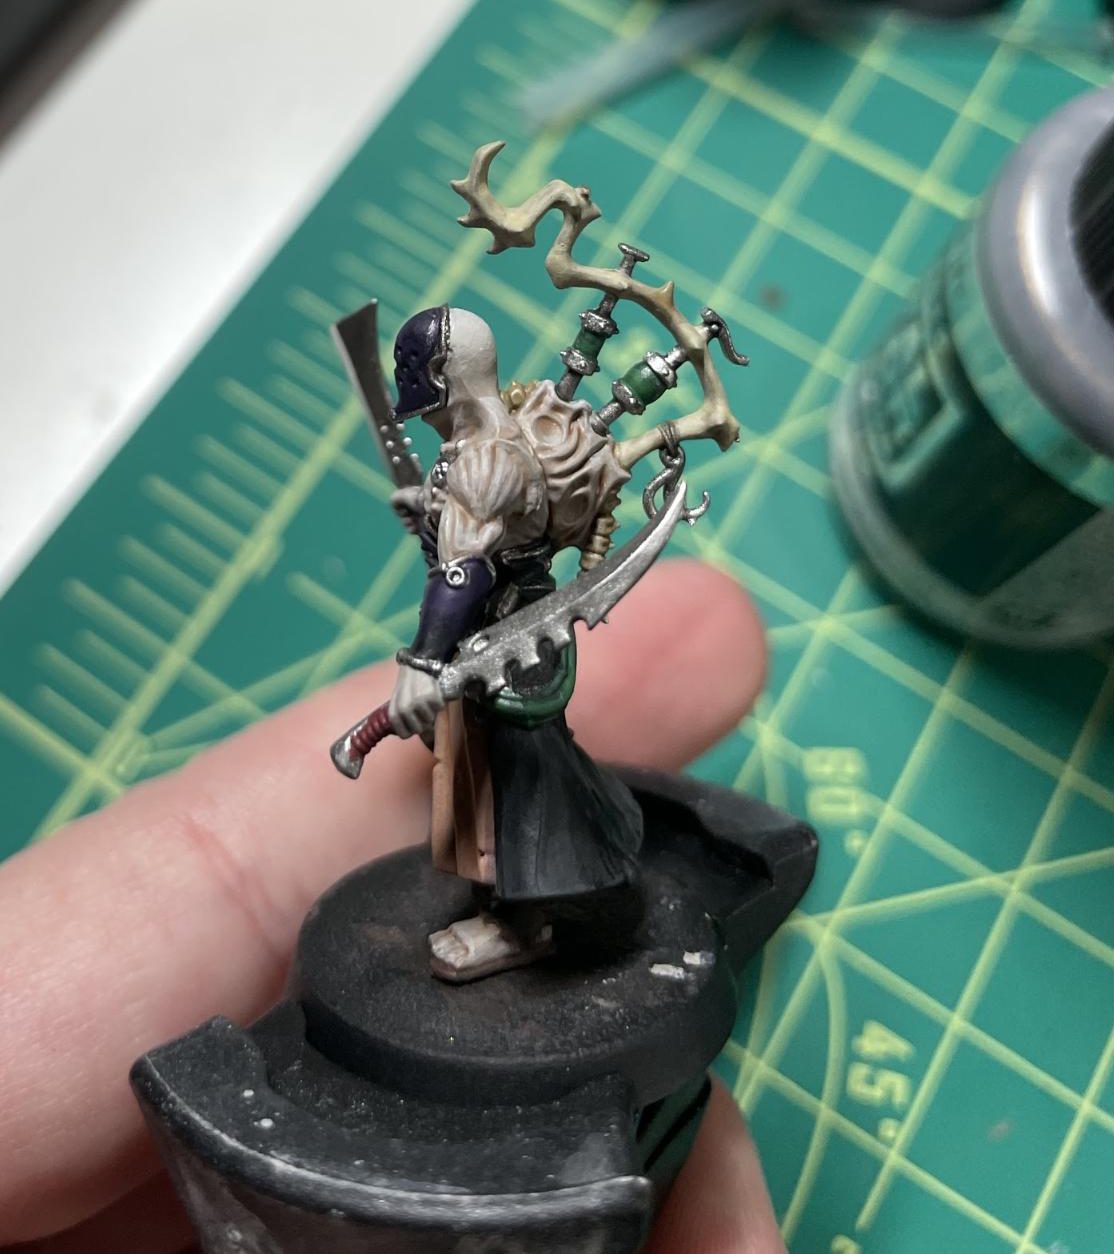
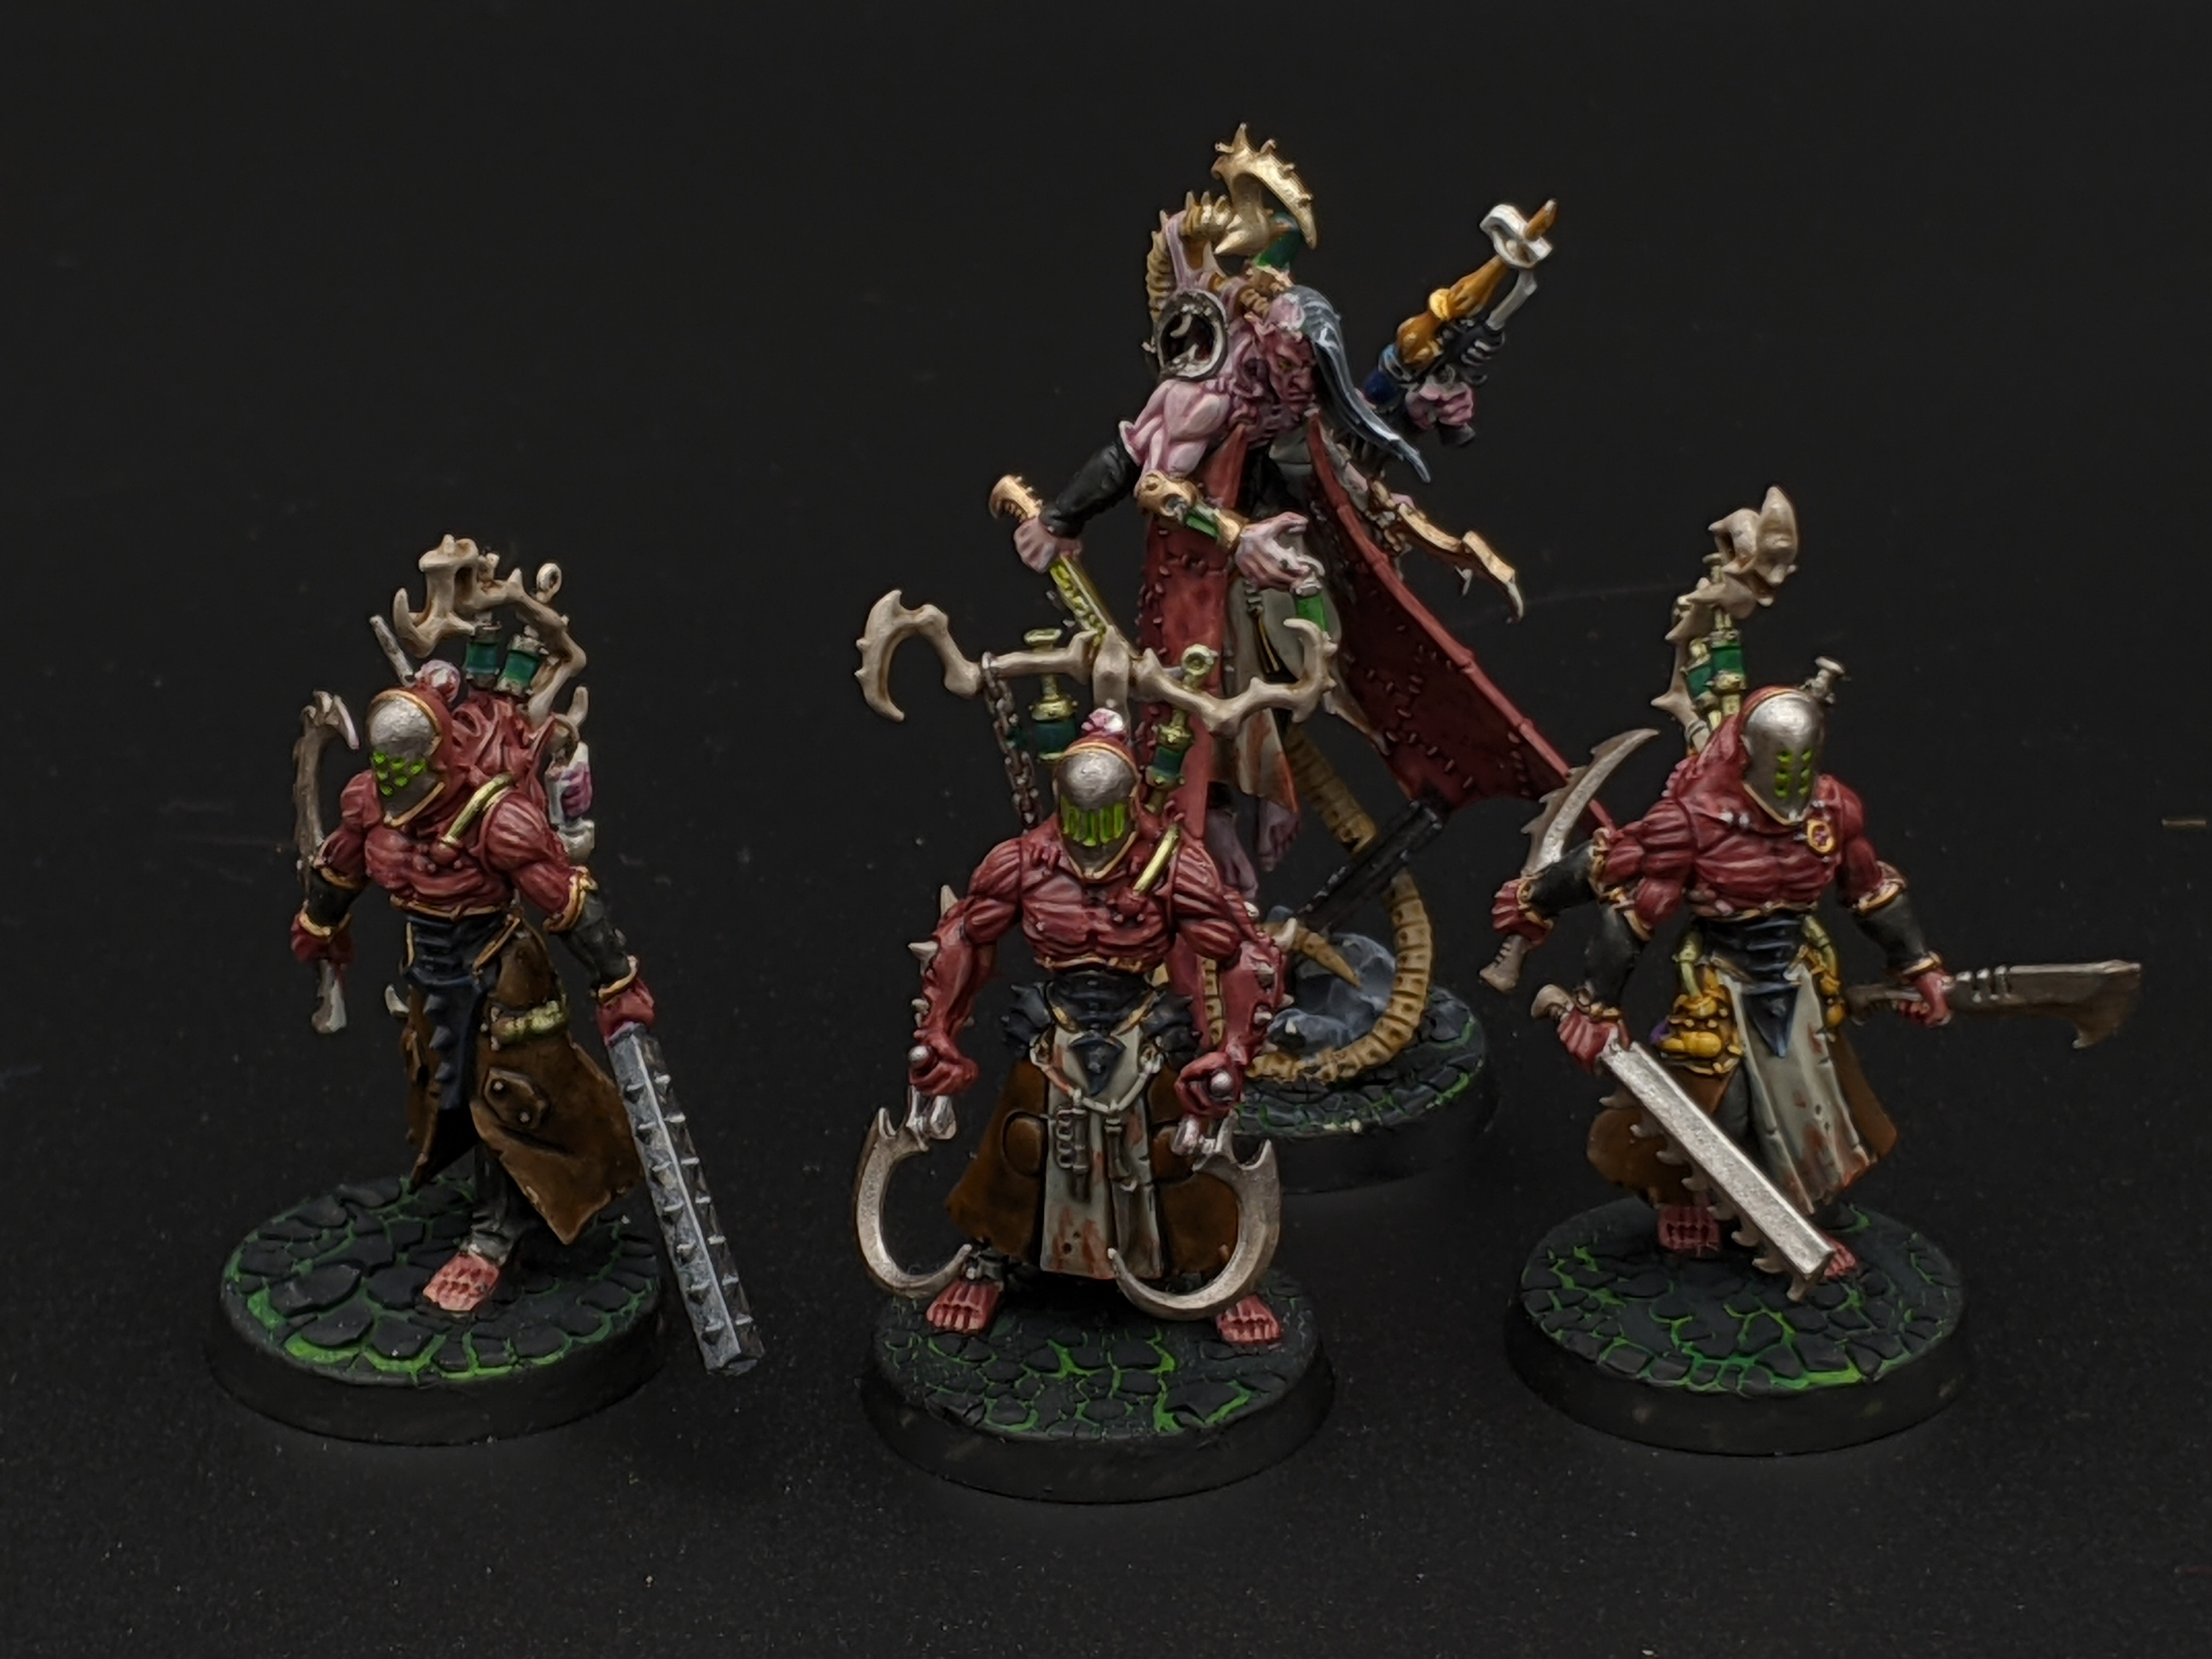
Well well, once again you come to me to ask for advice on how to paint Drukhari? Oh don’t worry, prospective and current Archon’s of the Dark City, I will guide you. I hope you have your most hammy evil monologues at the ready and a glass of wine to swirl menacingly, you’ll need it.
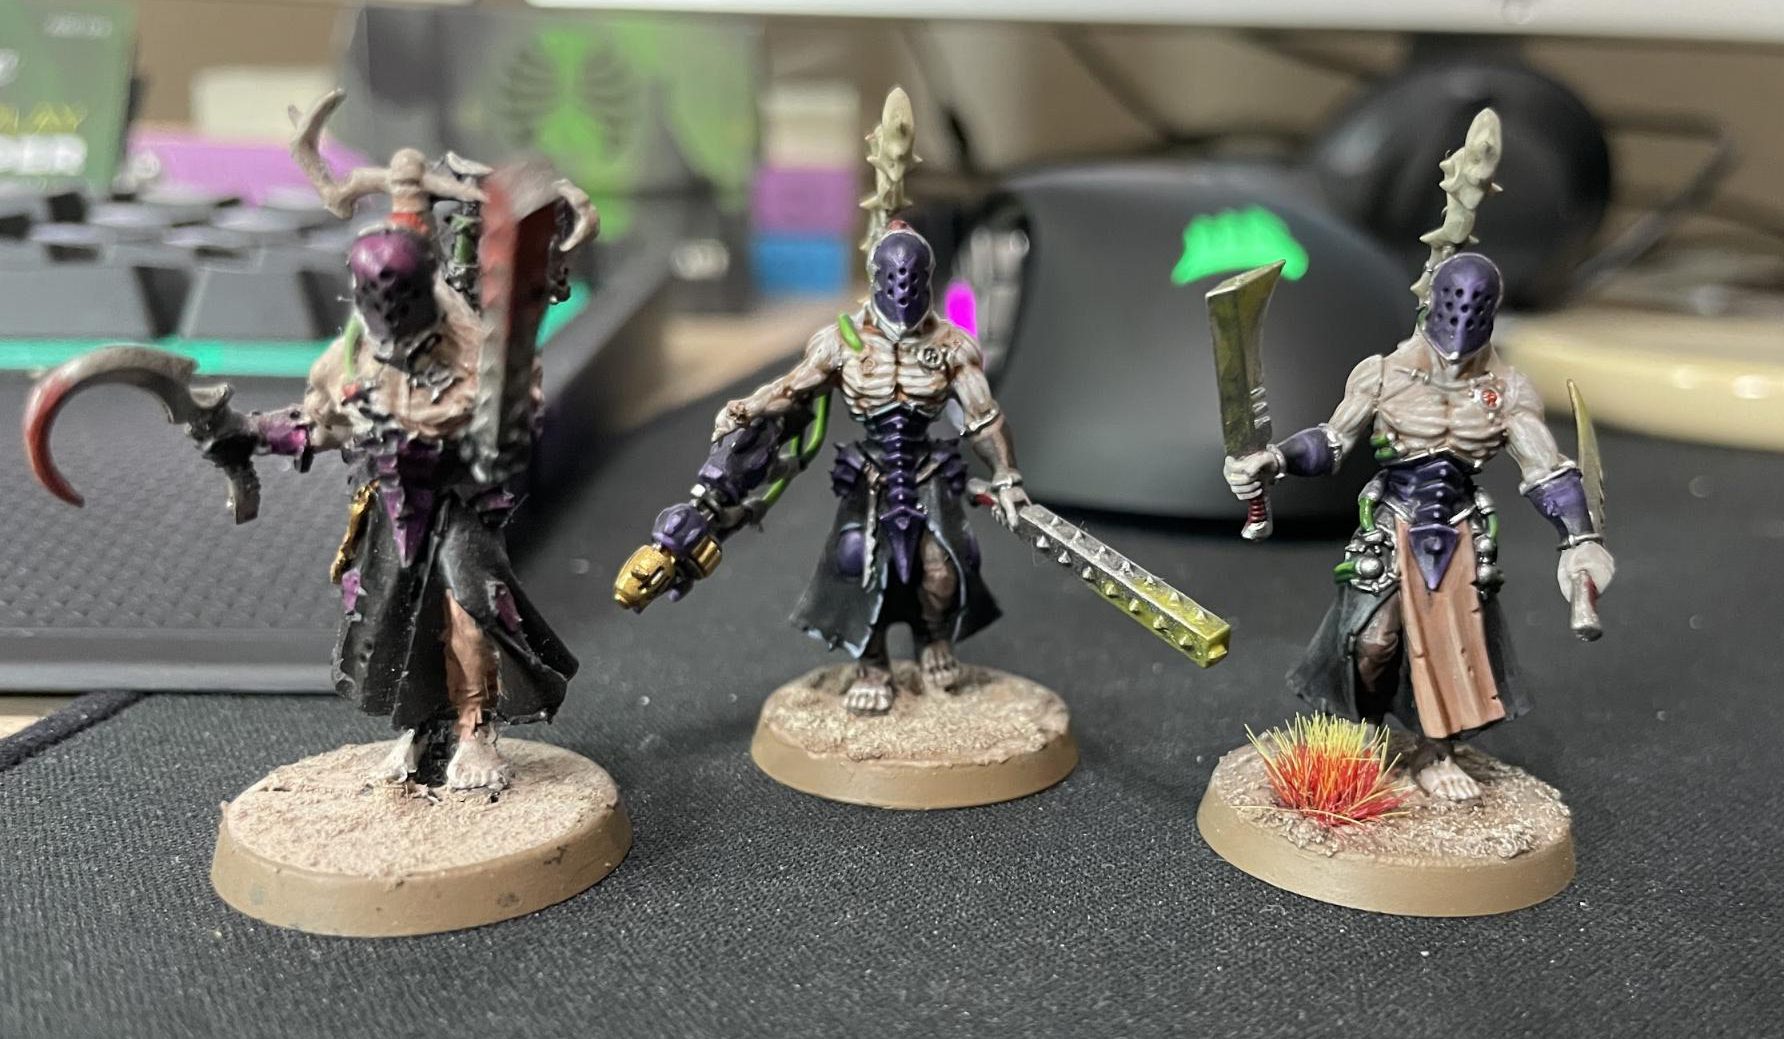
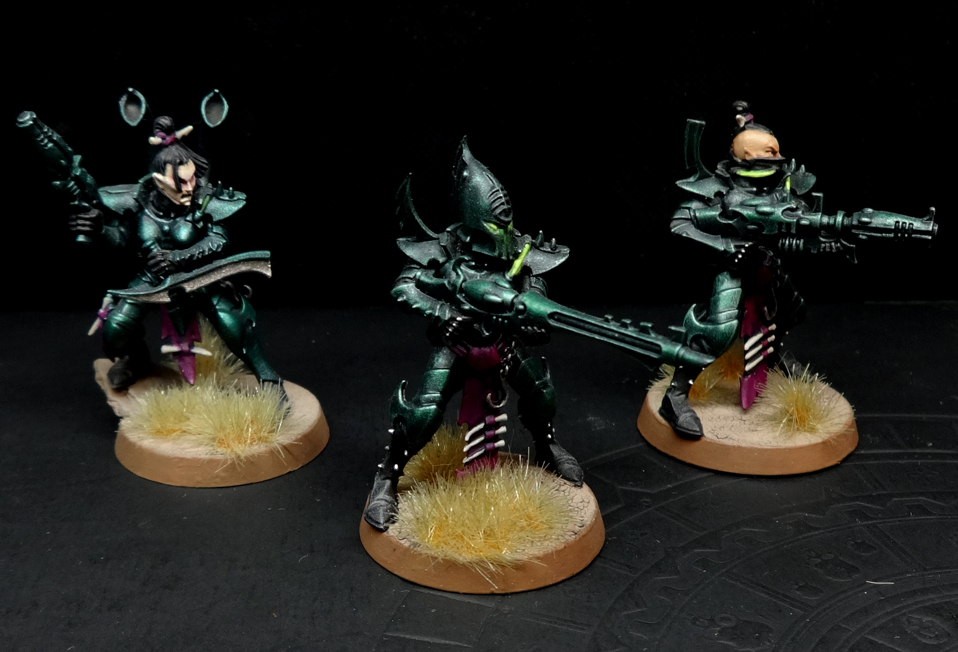
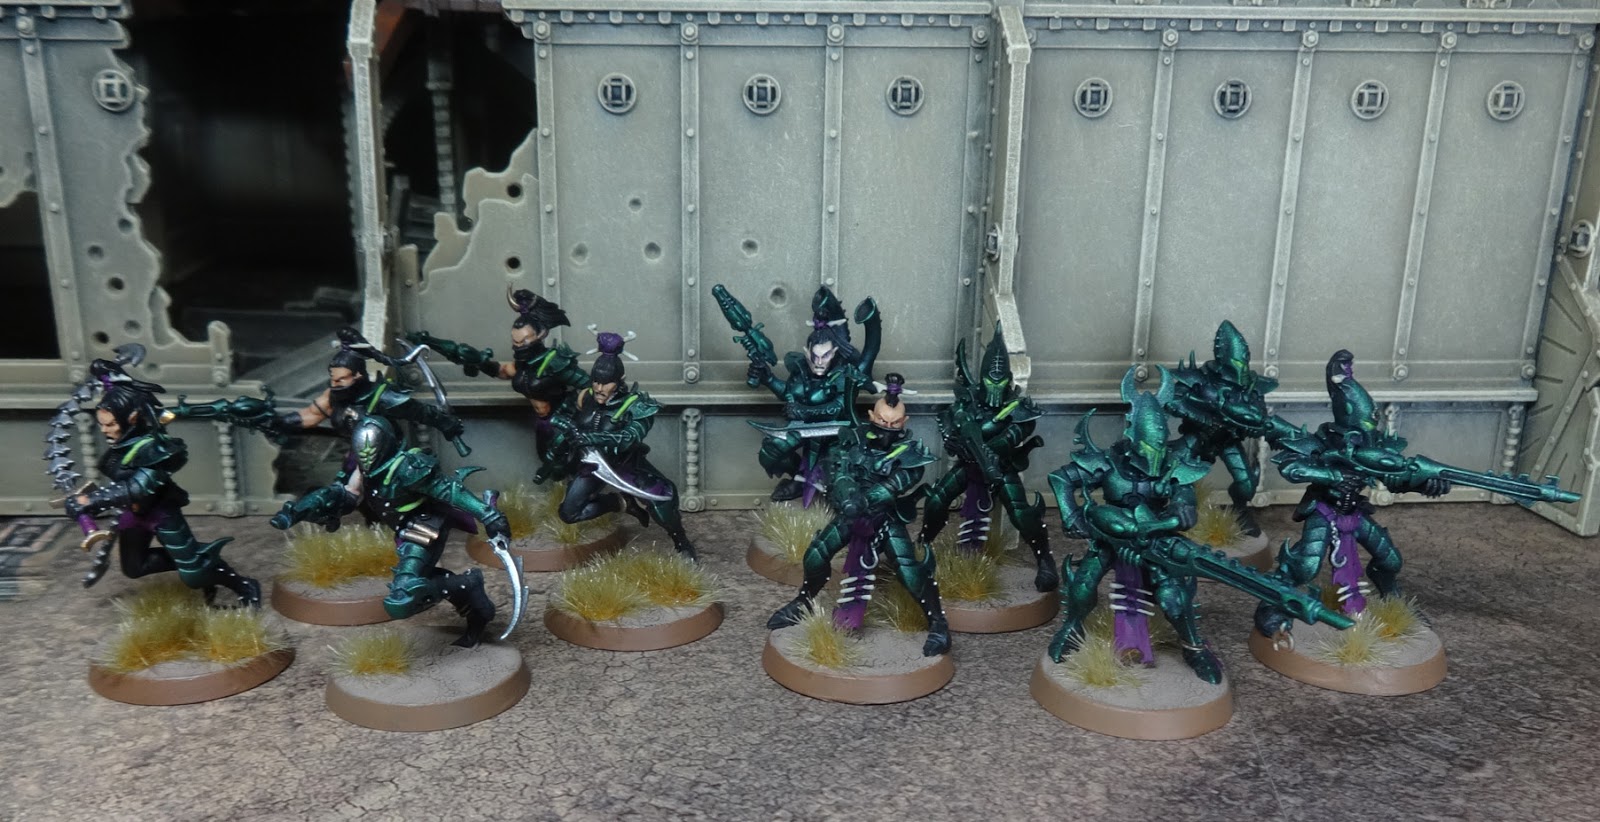
With that out of the way, thank you again for having me here Goonhammer! It’s always an honor to be asked to contribute to one of these, especially for my beloved Drukhari. I’ve been collecting Drukhari since fifth edition, and one of the really neat things about collecting an army over such a long period of time is to be able to look back and see how you’ve improved as a painter over the years. Here’s a few samples of Coven, Wych Cult, and Kabal unit’s I’ve painted for my collection.
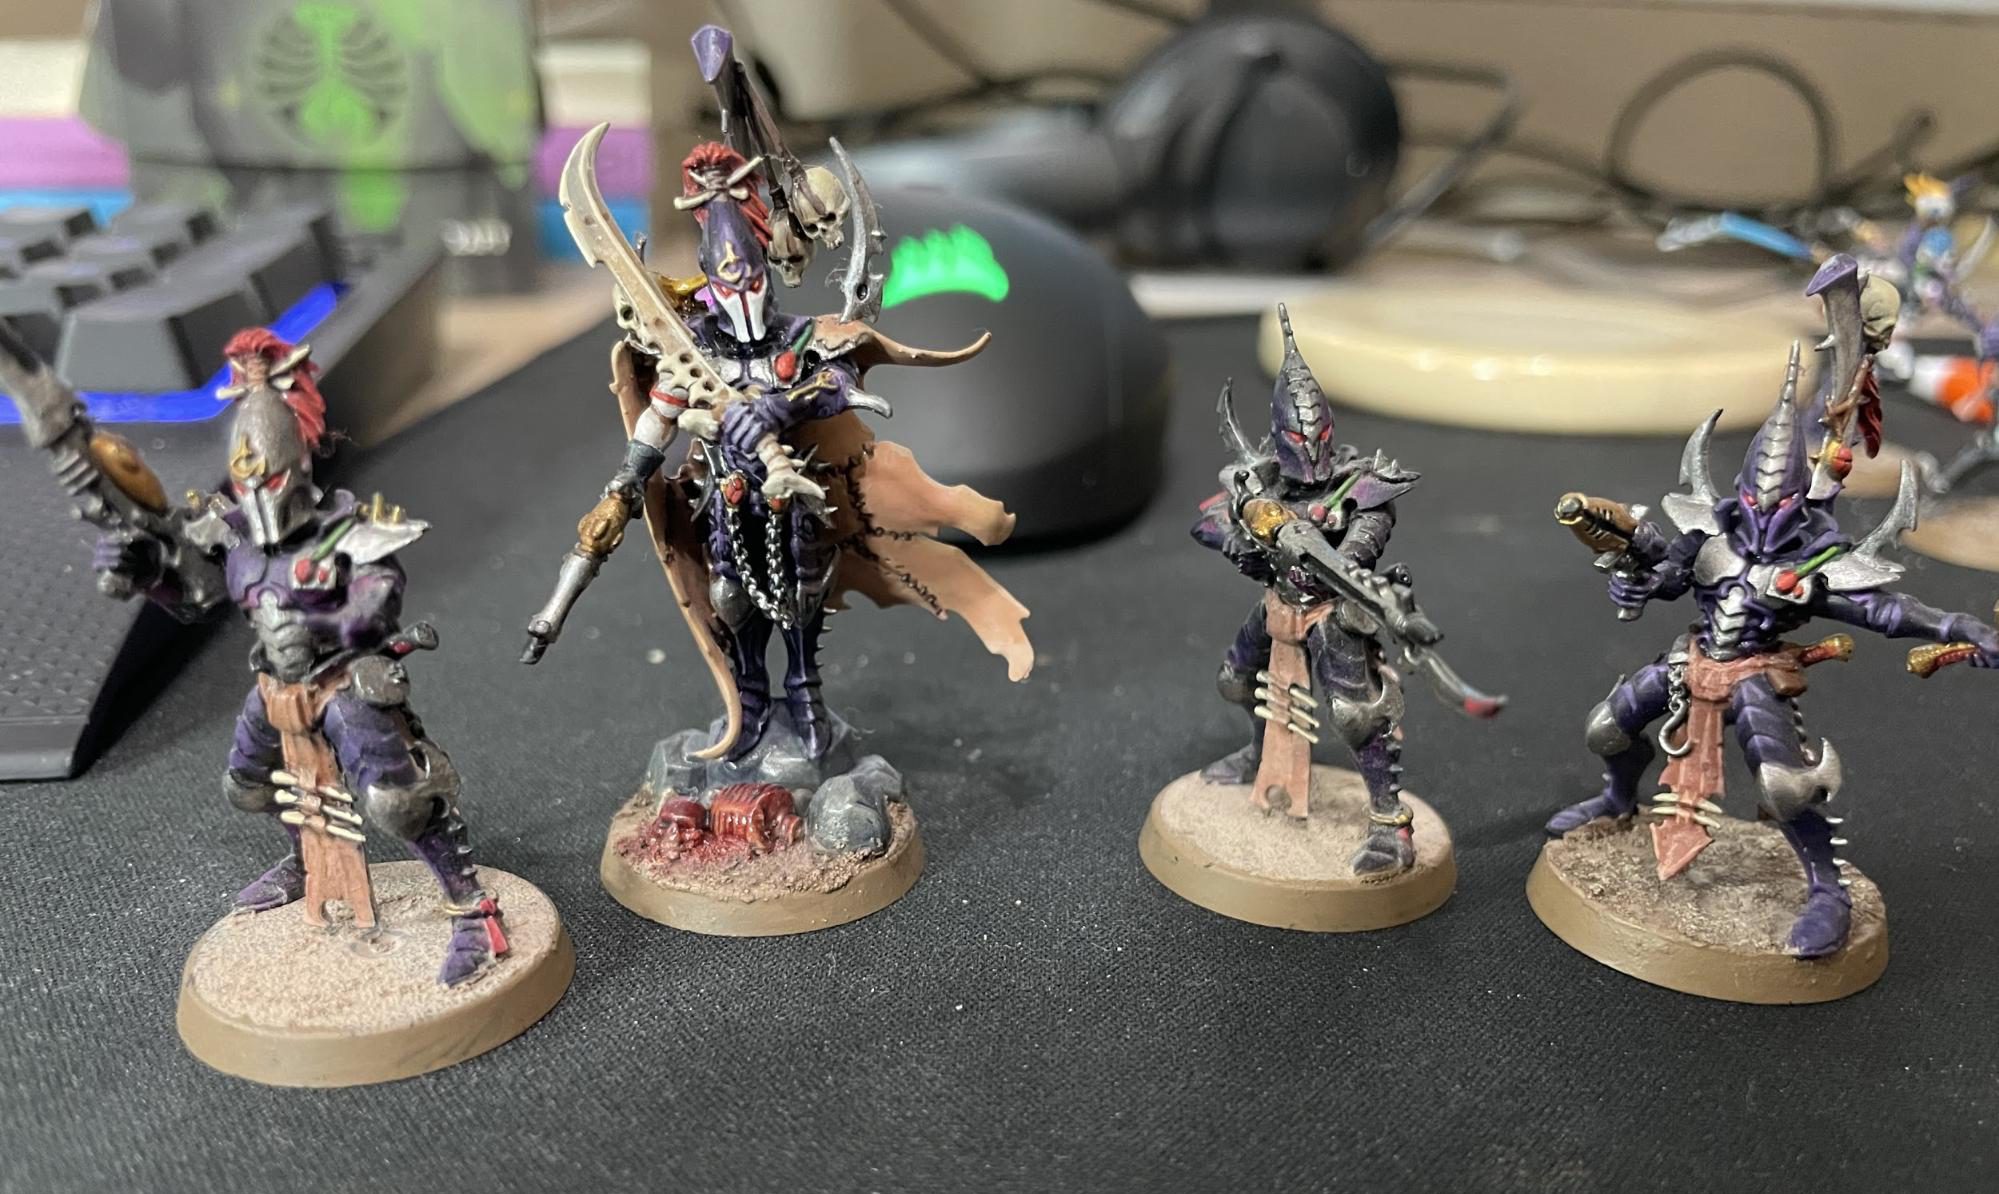
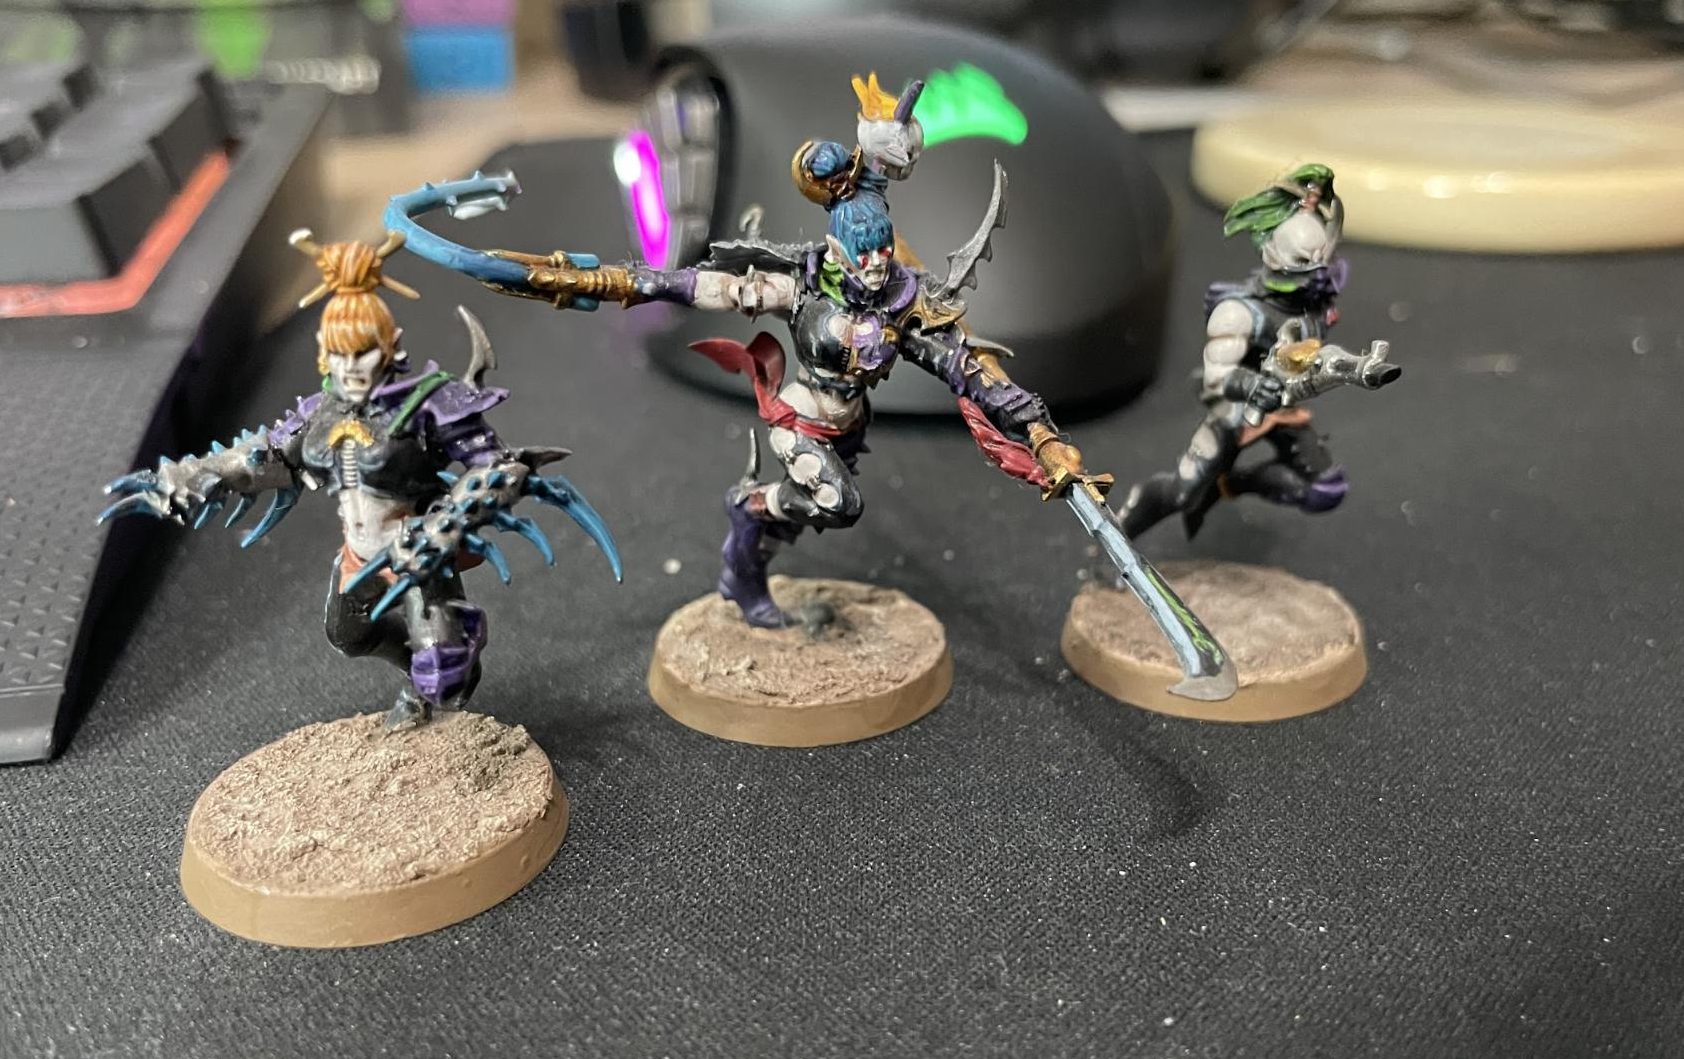
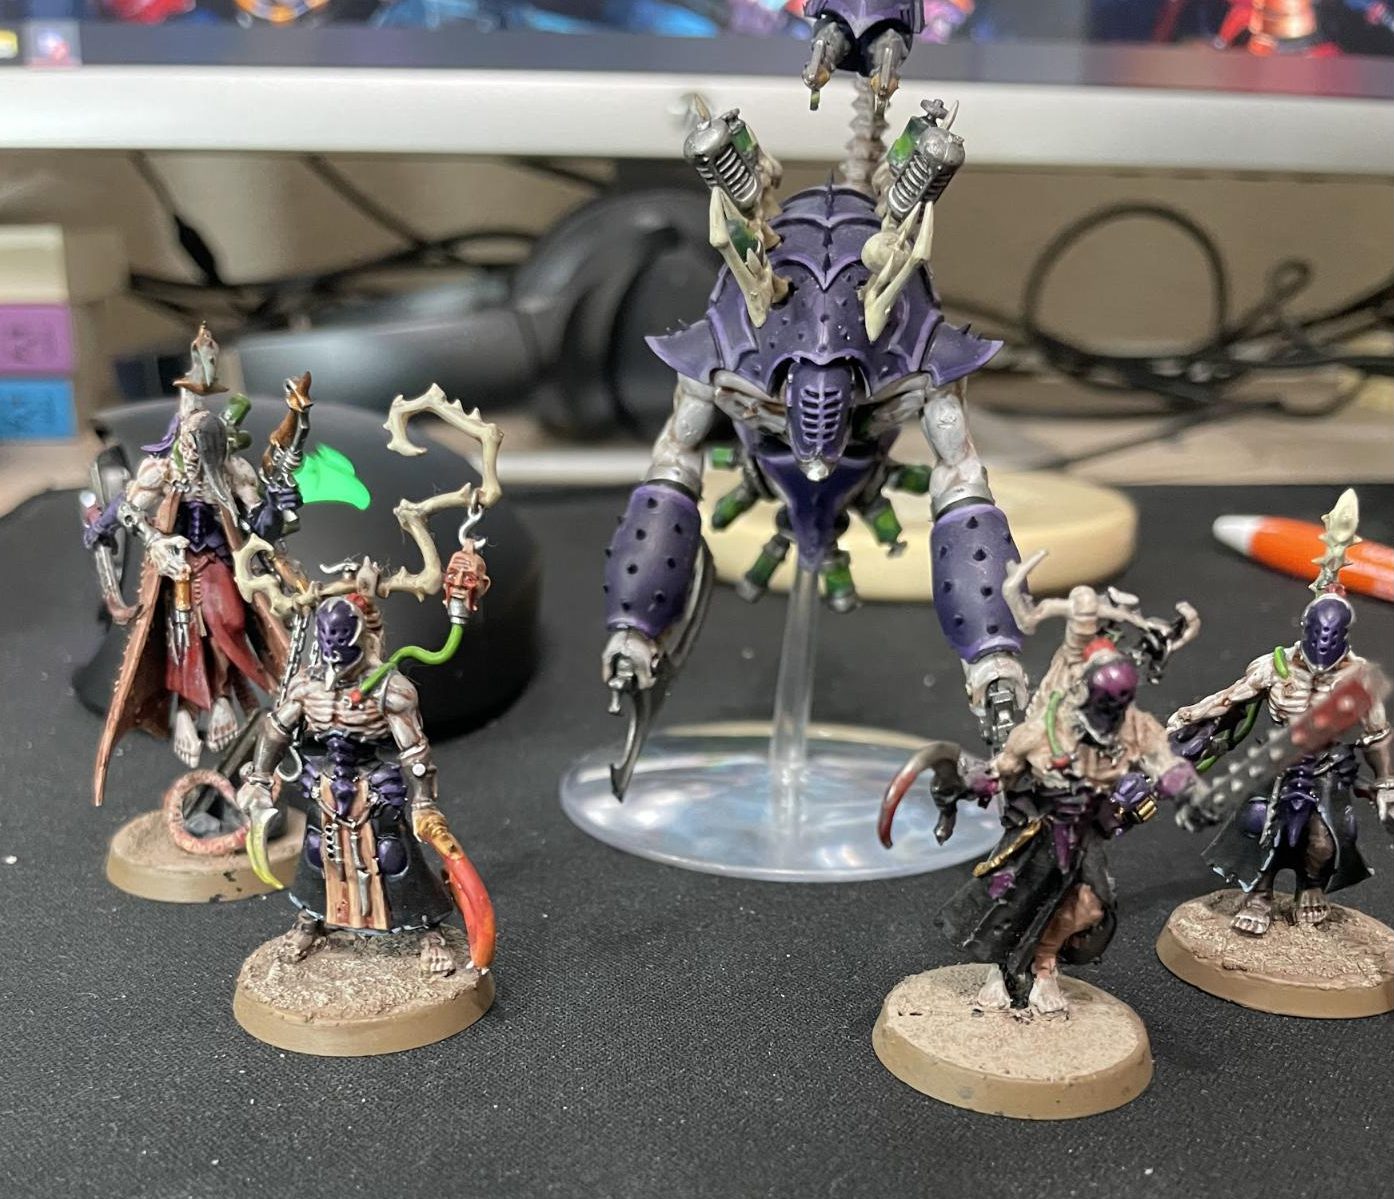
As you can see, some of the motifs have been around since the very old models, like the purple and silver scheme, but I went all around the painting block before I started to really start to find the way I wanted these models to look, and then hone the skills to see that through.
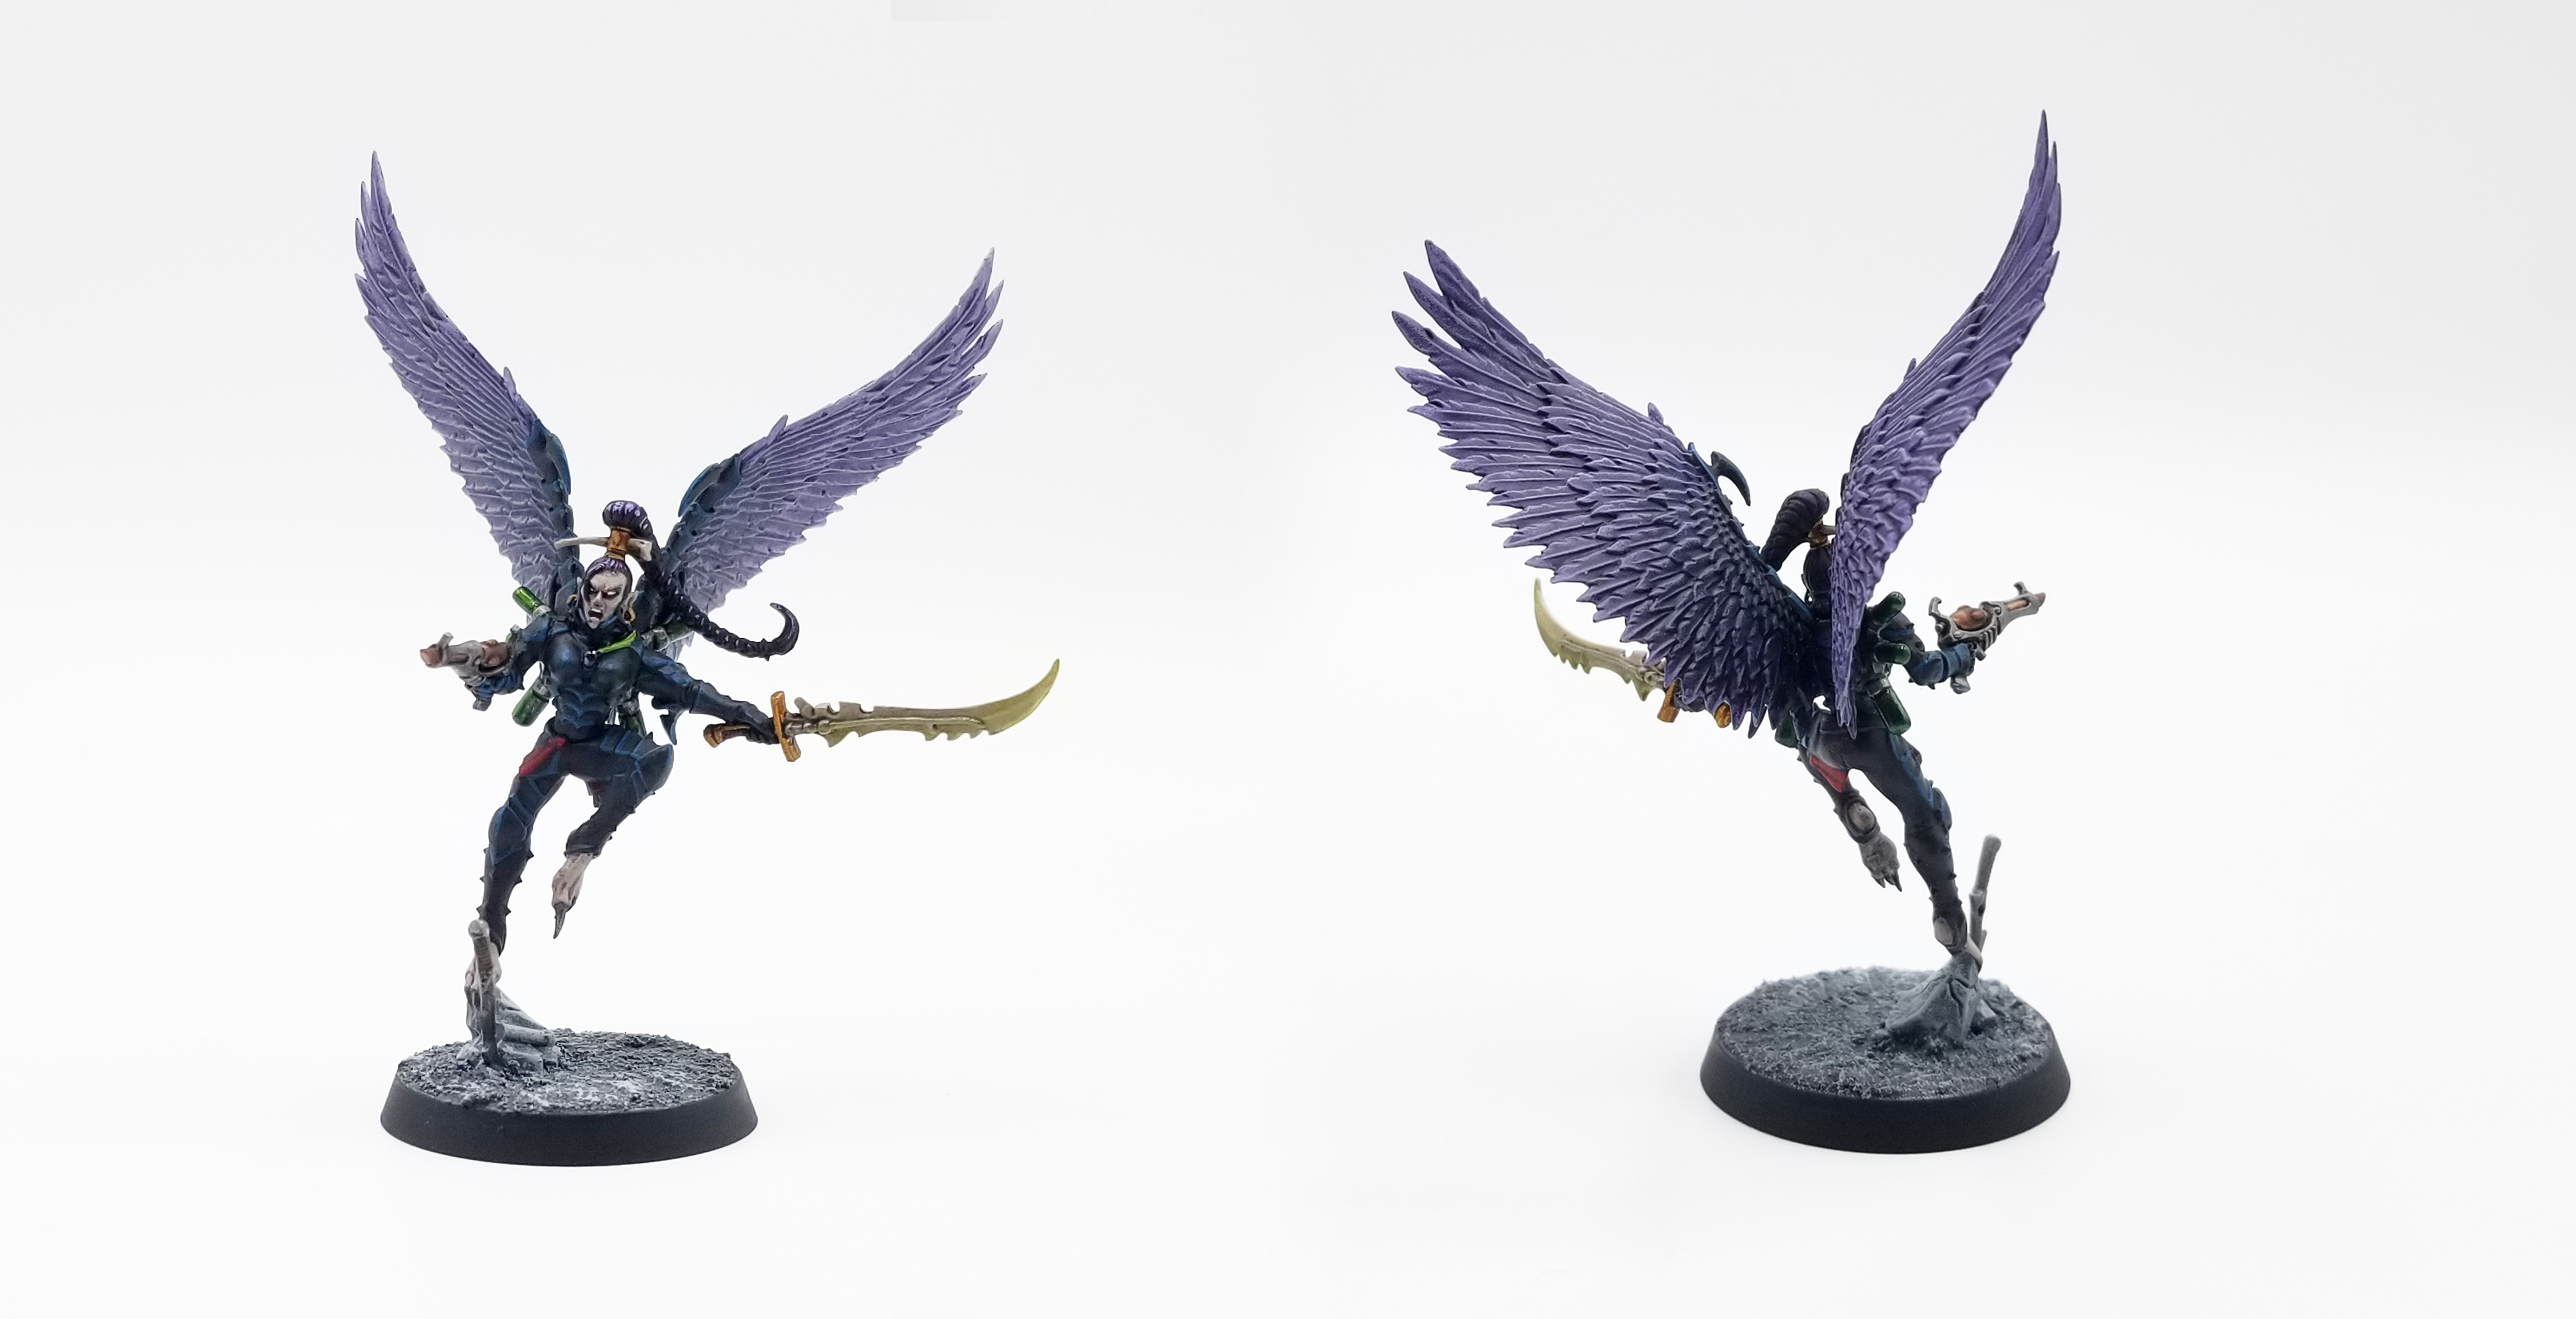
All of that really culminated in when I painted Drazhar, Master of Blades last year.
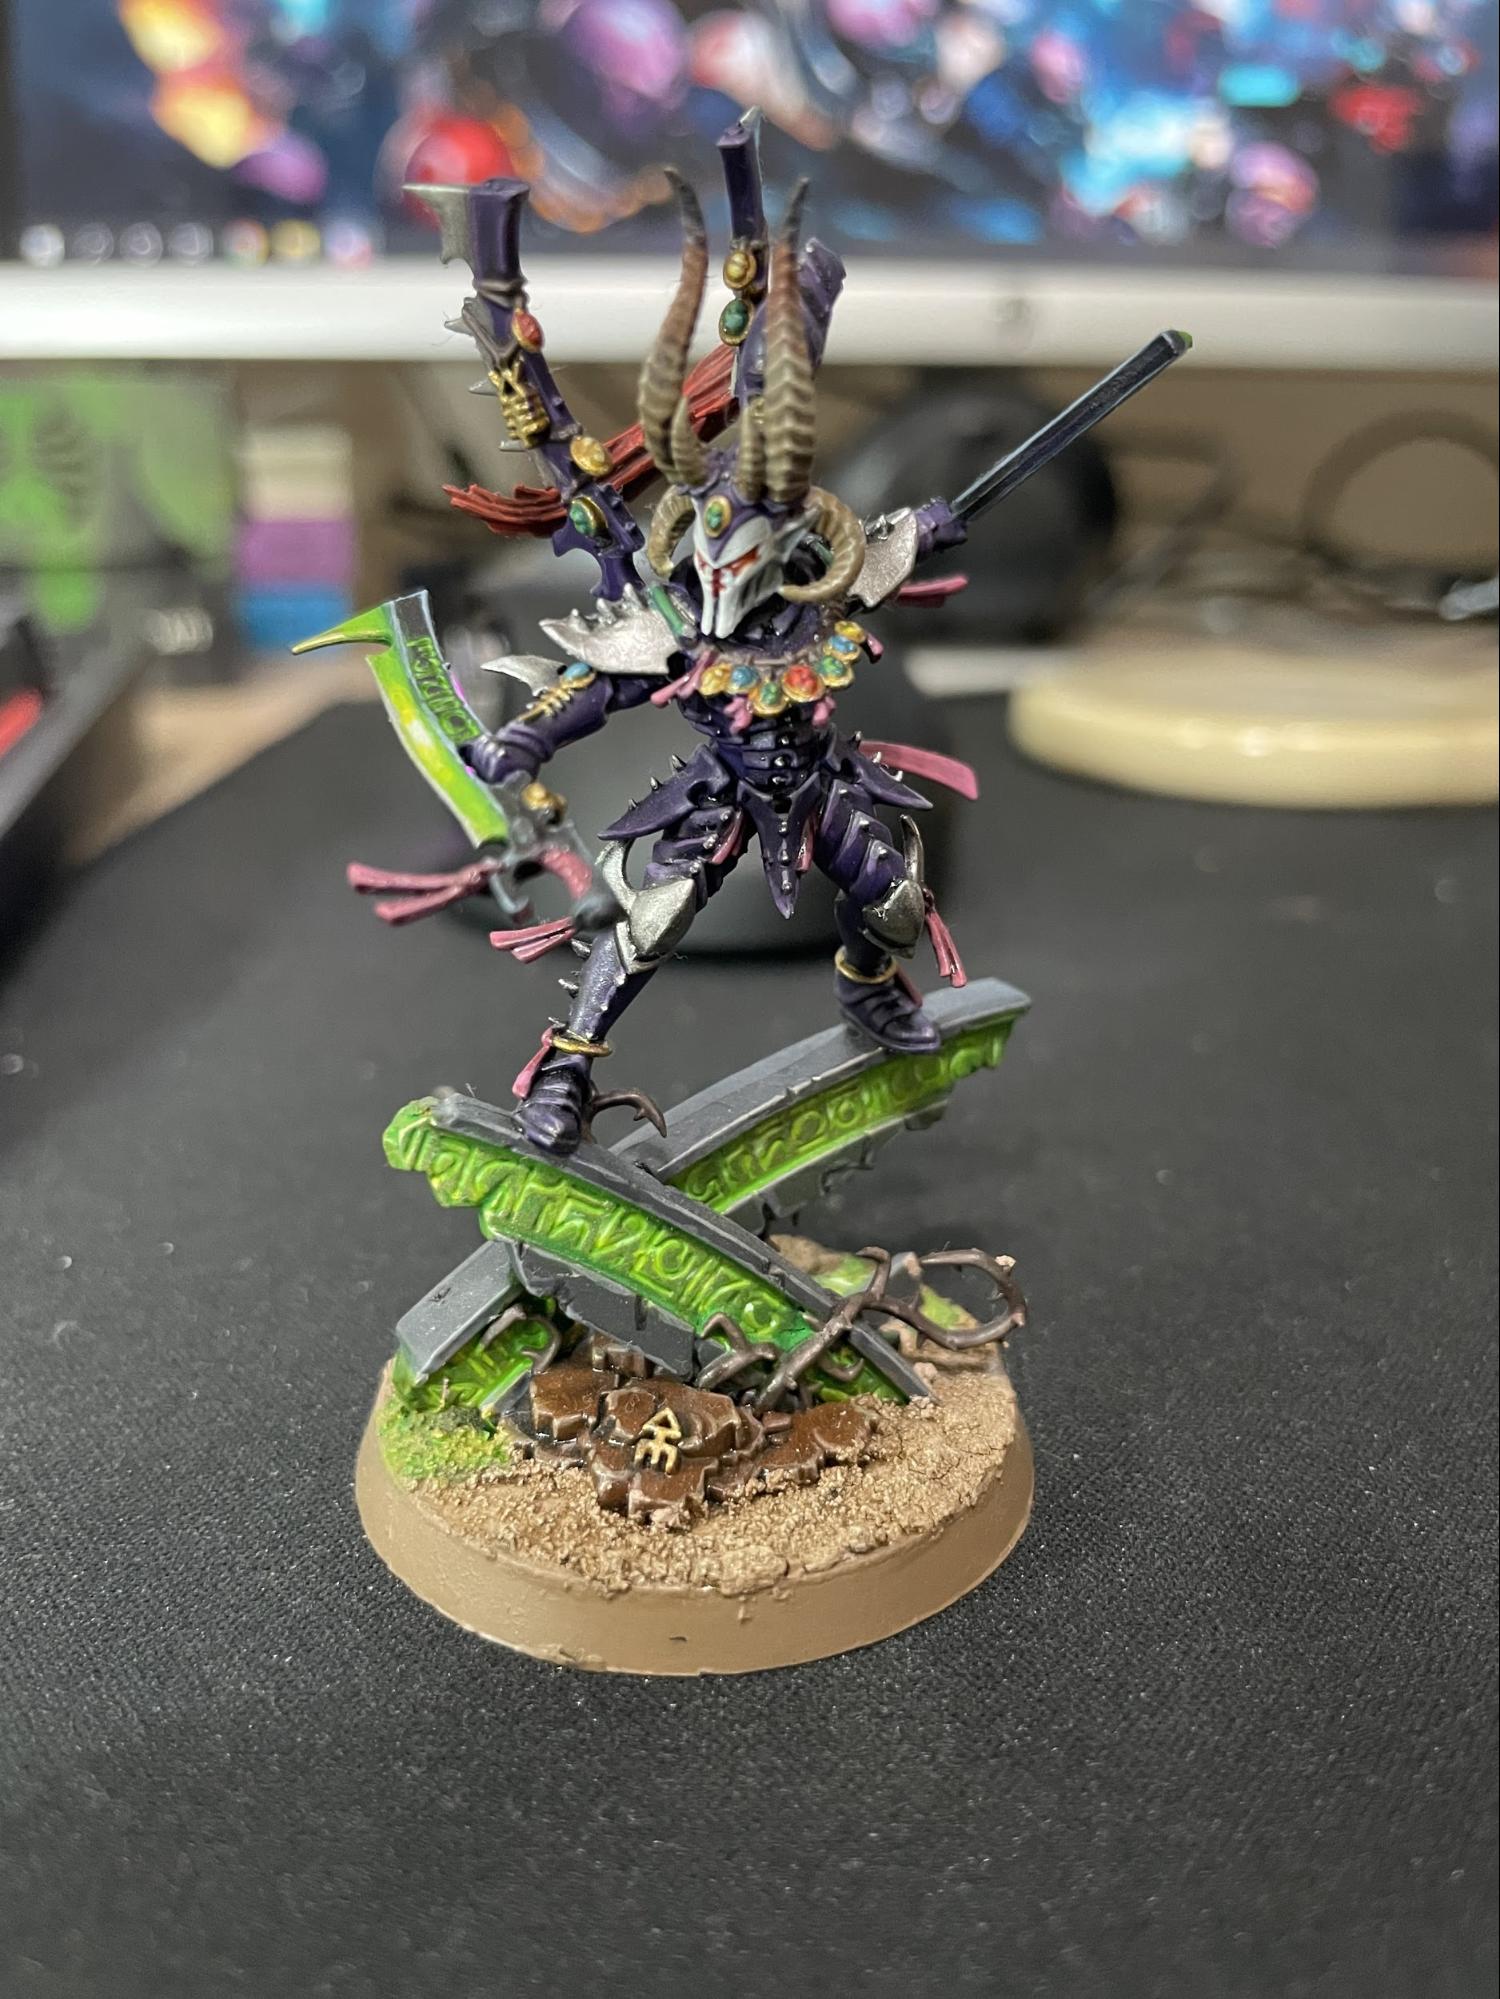
Drazhar is a beautiful model, maybe my favorite in the entire game, and was an absolute joy to paint as well. I won’t talk about him too extensively here, since I already wrote an article for Goonhammer about some techniques I used to paint him. If you are curious though, you can read that article here. Long story short, Apothecary White and Tesseract Glow are your friends.
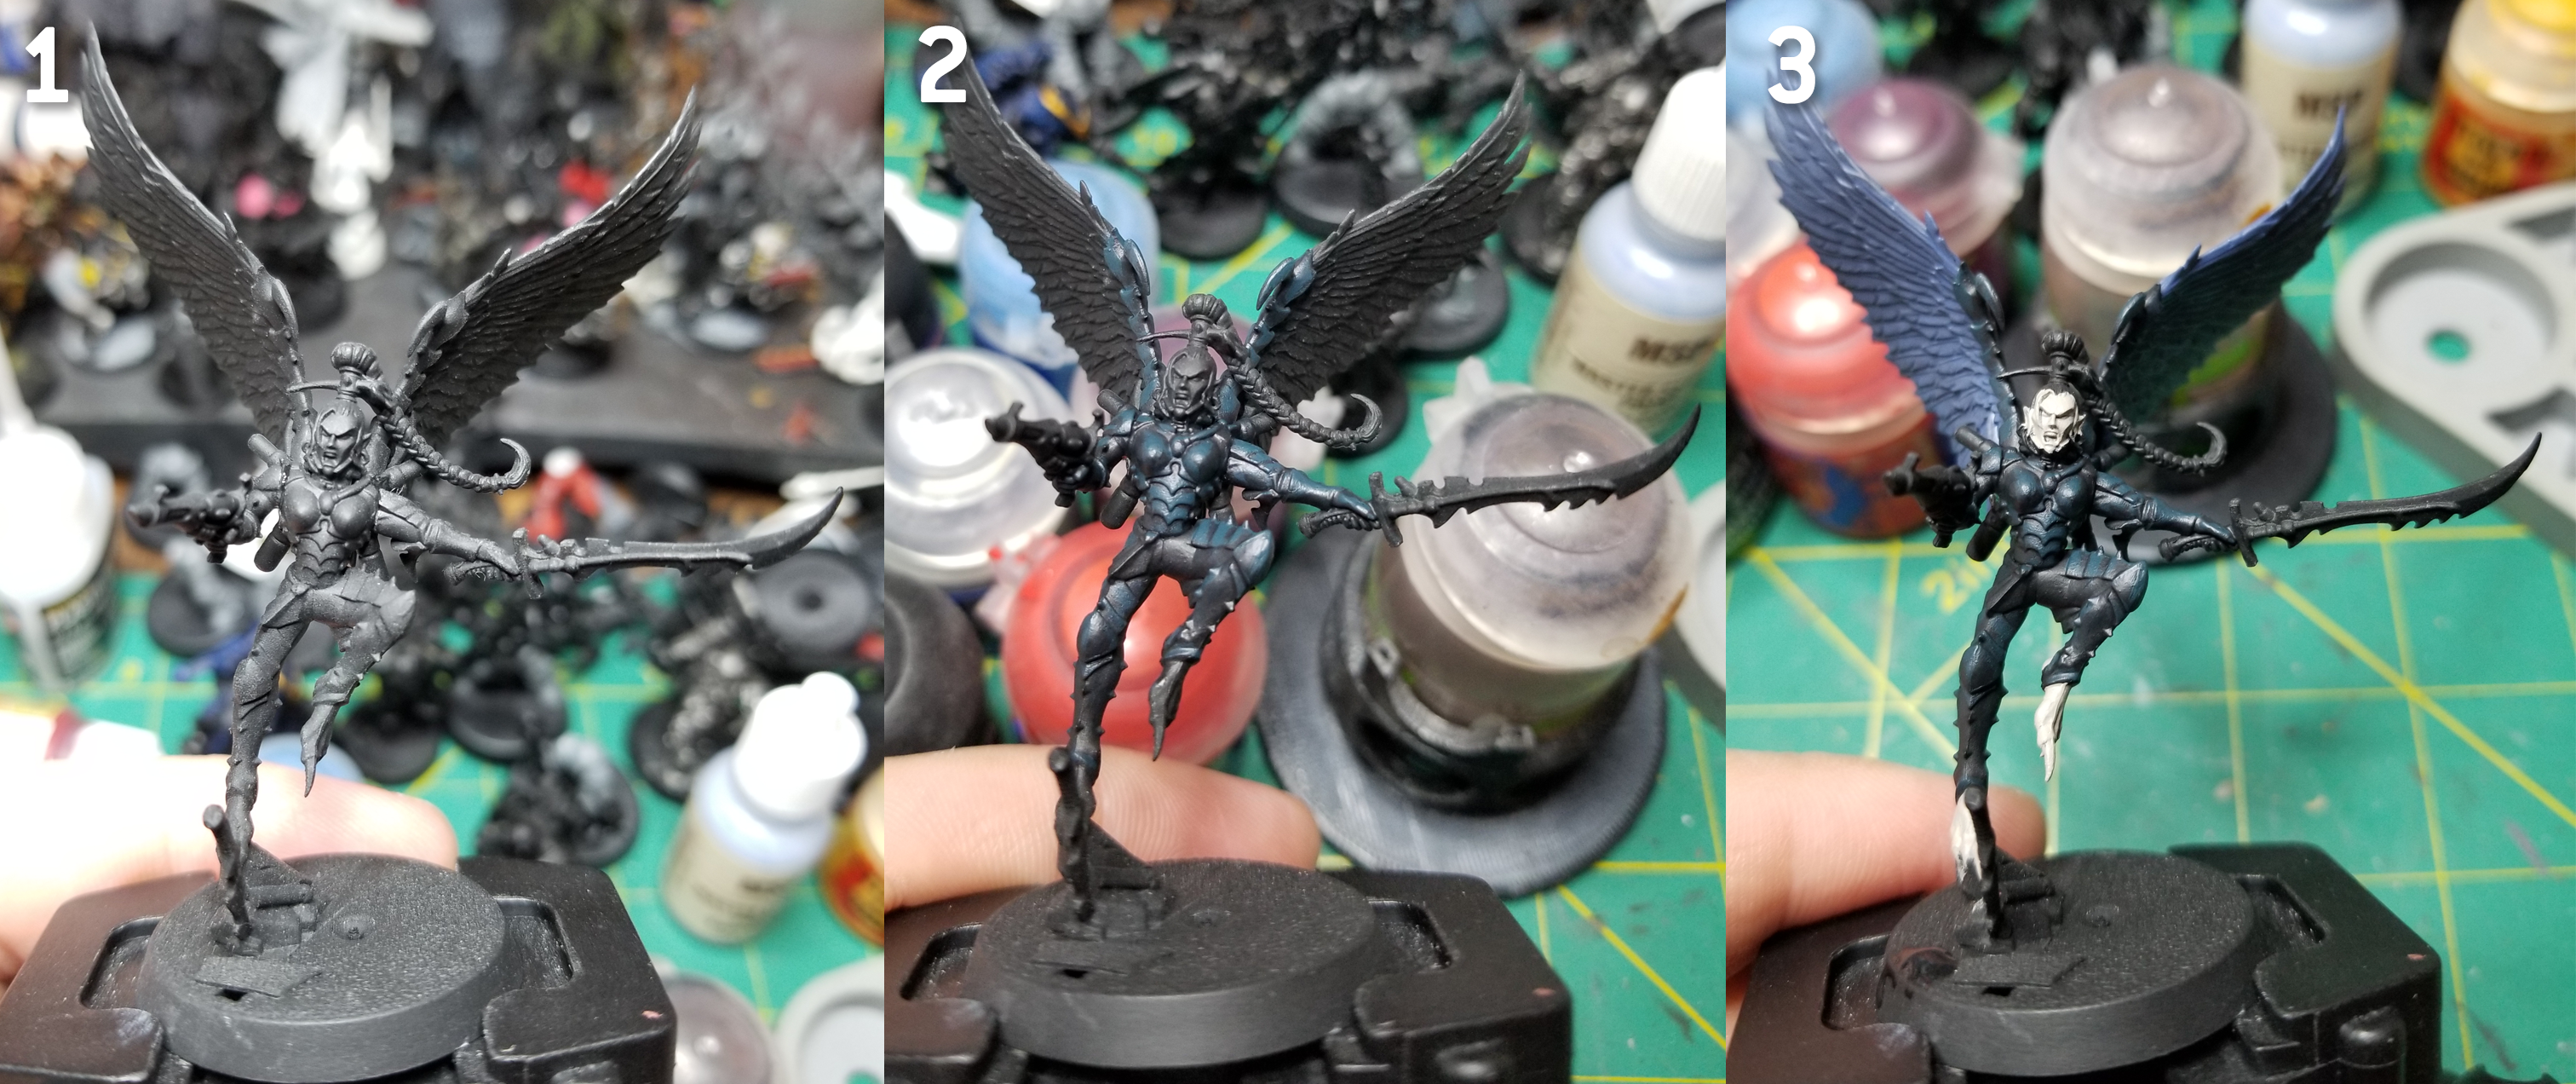
Today I want to go over some stuff I learned over the years and walk you through how to paint a Drukhari Wrack model. I think the wrack is a great place to start when painting Drukhari, since many of the things you’ll want to learn about a scheme you can get from painting a Wrack, and it’s a great opportunity to practice how to paint flesh for your evil space elves. Plus, with Dark Technomancers, I hear they are pretty good.
So, over the course of two evenings, I quickly got one painted up for a nice little guide on how to paint a Wrack for how to paint Drukhari..
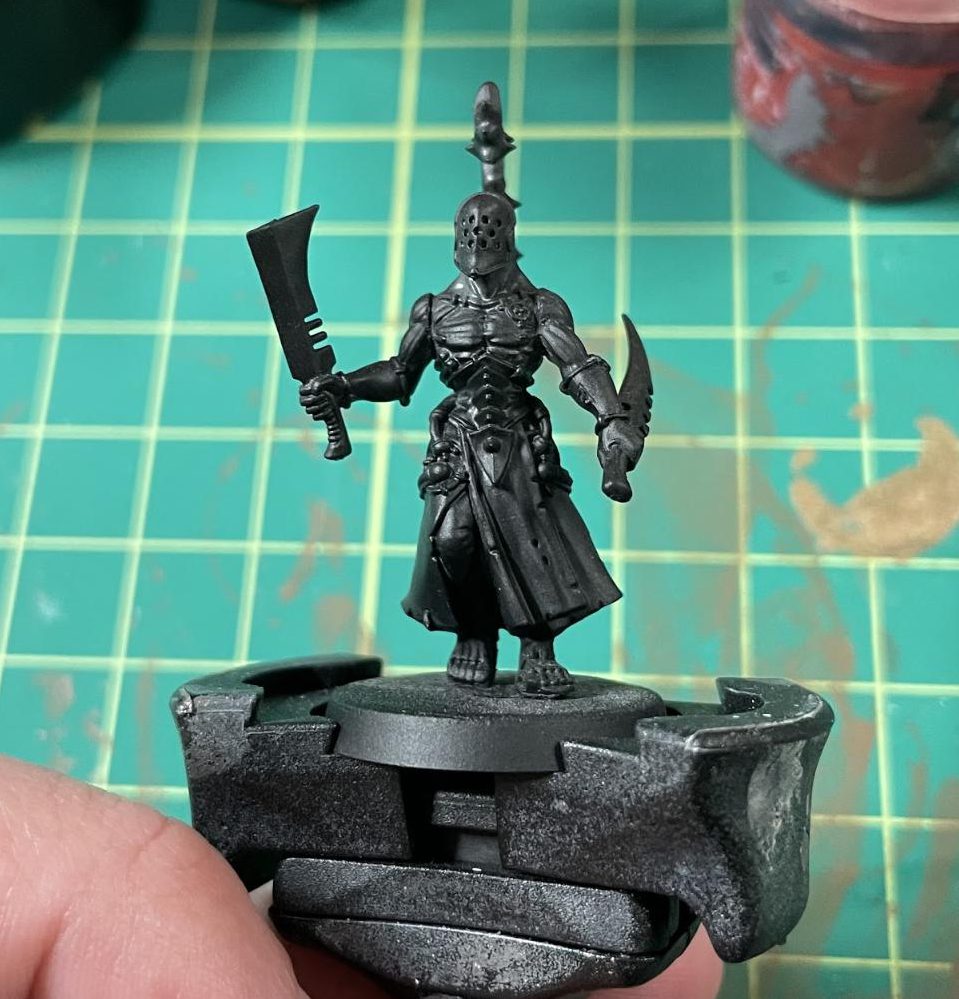
So lets start with the wrack in question, which I have chosen to prime black with the GW Chaos Black Spray.
After this, we go to our base coating, which is pretty simple. I hit the flesh with Rakarth Flesh for a nice pale gray tone. I go for Naggaroth Night for my purples, Leadbelcher for the silvers, and Zandri Dust for my bones. I start dark on my little evil Drukhari tubes all over the model with Dark Angel Green and hit the tabard with Bugmans Glow. Finally, the pants get a coat of Dryad Bark. The end result is a nice jumping off point for where we want to go with this model.
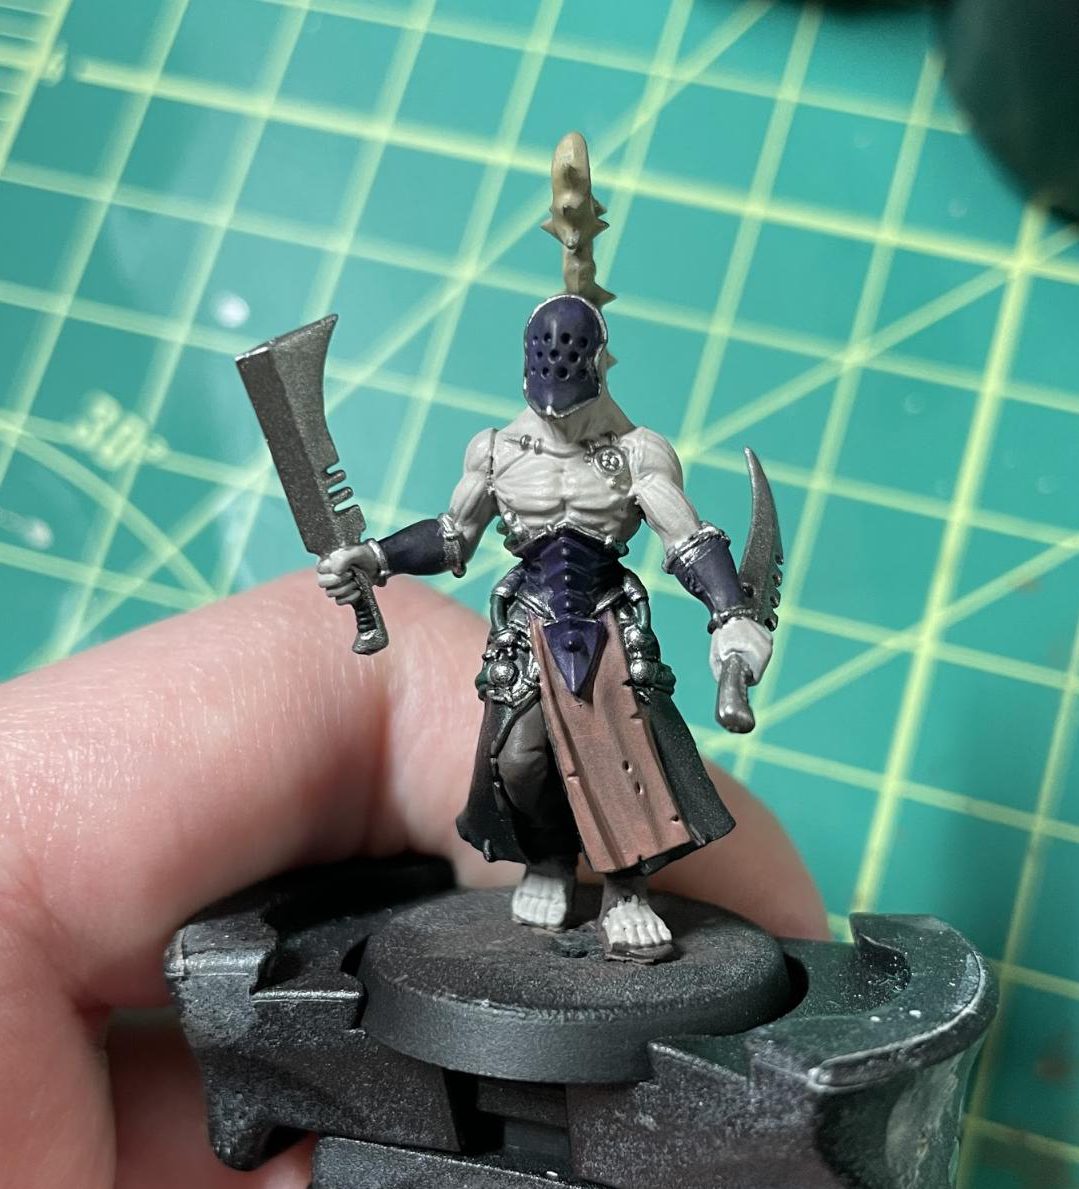
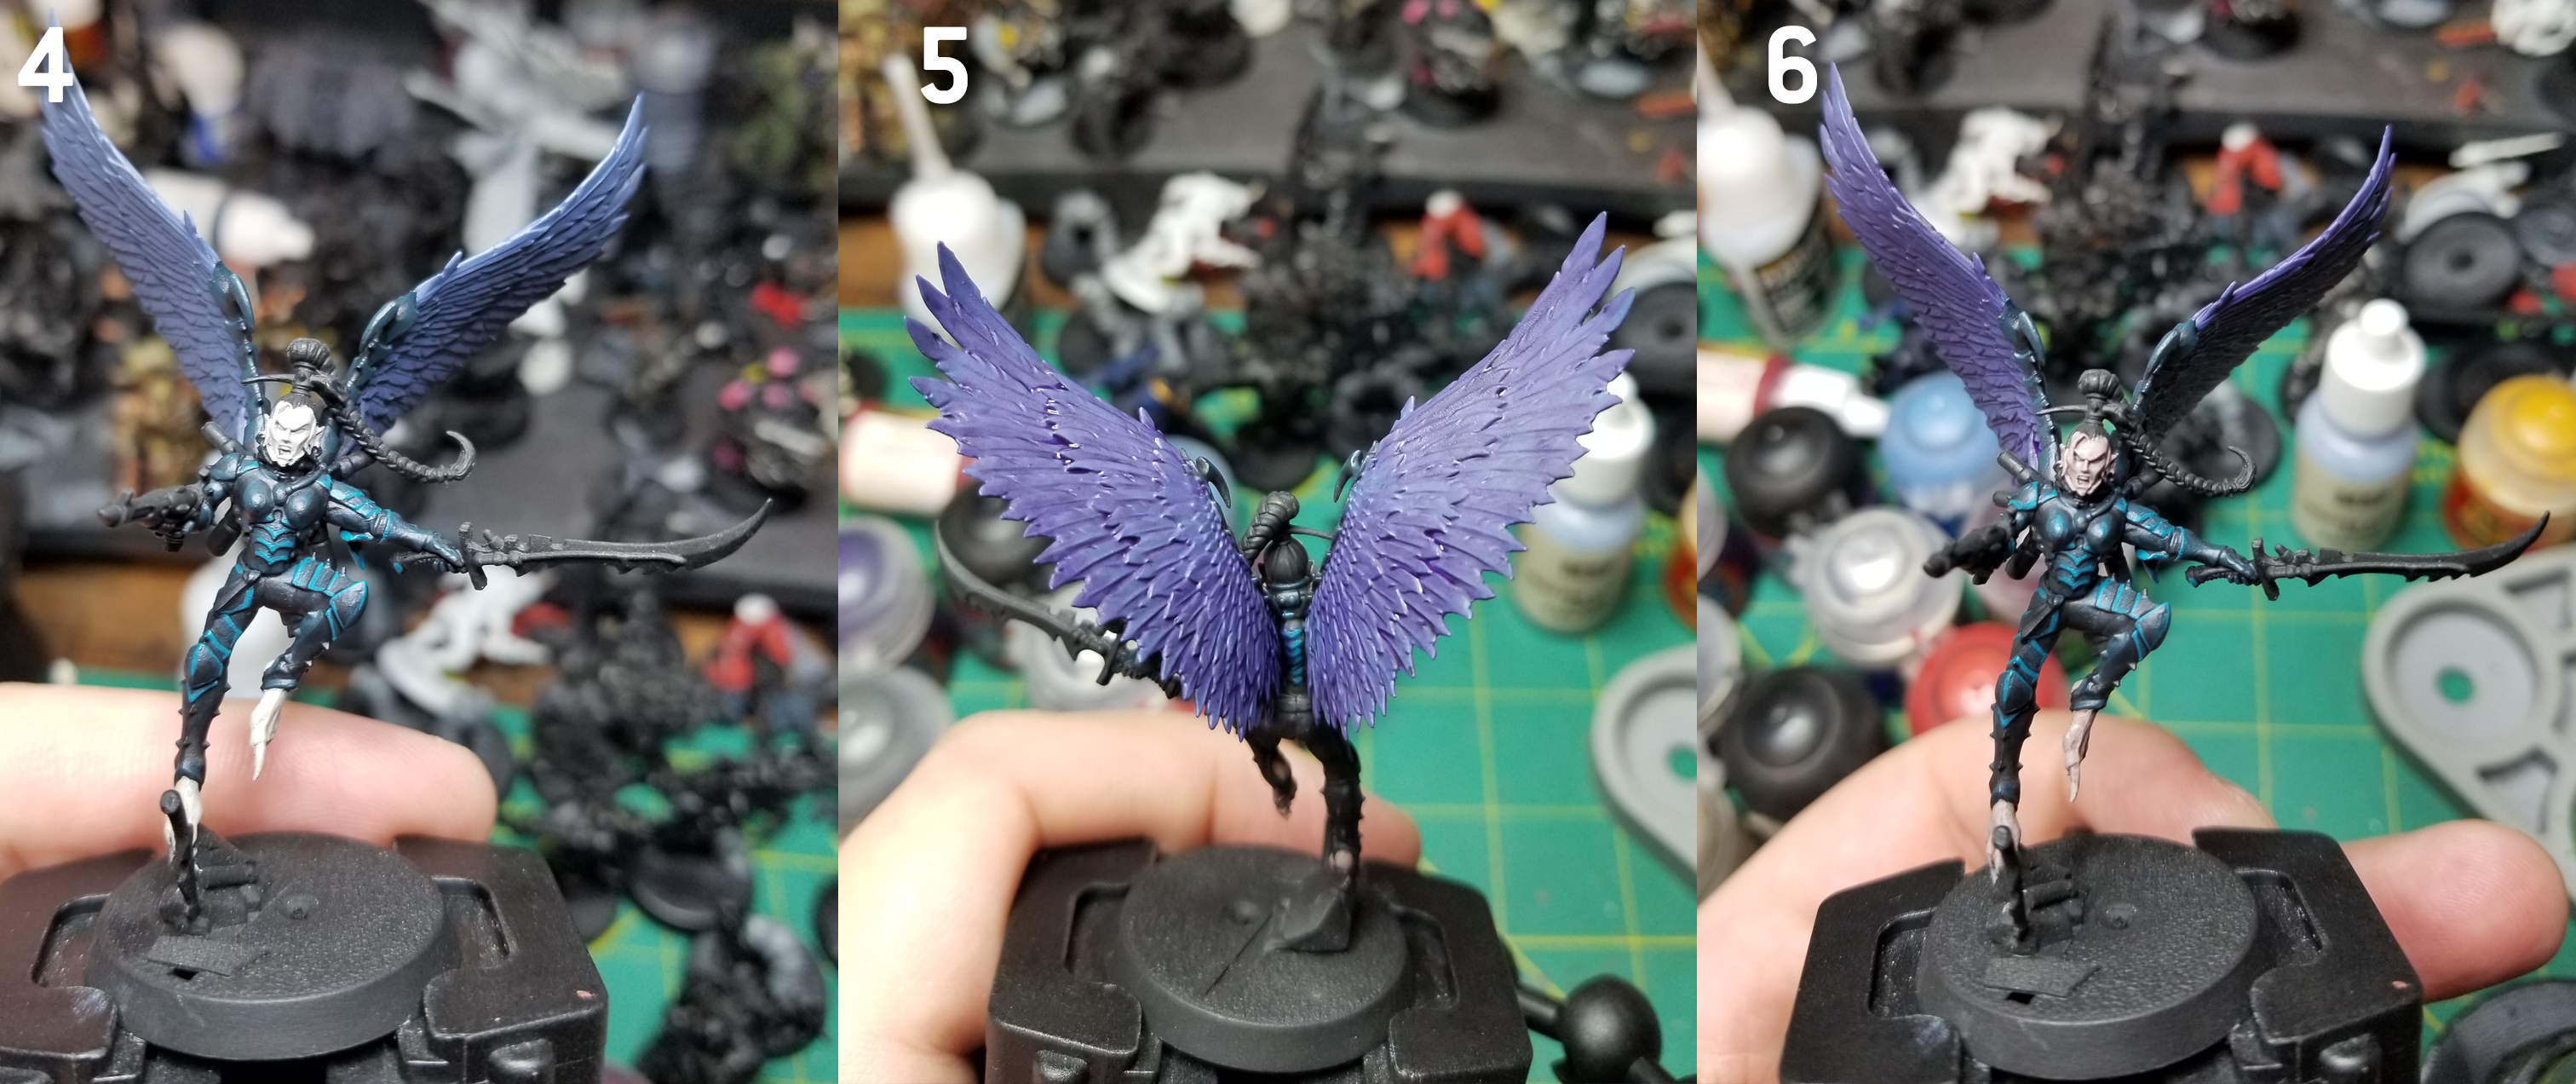
Following the basecoat, I go into my first shade. For my shade, I use Guilliman Flesh Contrast Paint thinned down about 2:1 with Contrast Medium. In retrospect, I think this left the shade a bit too light and I had to hit some areas an extra time, so a 1:1 mix would also probably work.
I use my thinned Guilliman Flesh on the bone, tabard, and the skin. The flesh of a wrack is very striated, so using a smaller brush than normal to shade you can get the paint right into the low points of the muscle. After that dries, I clean up the flesh with a very thin layer of Rakarth Flesh and apply Cadian Fleshtone to the tabard all over with another round of Guilliman Flesh on it.
Now back to the skin itself, one of my biggest difficulties in learning how to paint skin and flesh tones was that whenever I would highlight it after shading, it would look bad. This is something I found particularly frustrating when I used Palid Wych Flesh over the Rakarth Flesh, as the brighter white of Palid Wych Flesh would overwhelm that really great desaturated tone that I love about Rakarth Flesh.
Skin tone is hard to paint when the first way of highlighting most hobbyists I’ve known (including myself) learn is drybrushing and edge highlighting. An edge highlight stands out against the color around it very starkly, and on skin that sort of highlight looks really unnatural. Plus, most bodies don’t have the kind of hard angles, raised surfaces or long lines that make edge highlighting or dry brushing work really well. So for highlighting our skin on this Wrack, we are going to use a technique called glazing.
I’m sure the great people of Goonhammer have talked about glazing in the past, but as a handsome yet evil overlord of Commoragh I’m too busy being a cartoon bad guy to do things like read. So in case you haven’t read any of the painting articles on this website that talk about glazing and glazes, let me tell you about it here.
Glazing is when you use extremely thin paint to highlight a surface over a few thin coats. The idea is that using a paint medium like Lhamian Medium (or water), you can get a paint thin enough that the color underneath the layer will still come through, and you can gradually build up these very thin glaze layers to make a smooth highlight. If you look at some paint I put on my thumb here, you can see that the color of my fingernail still comes through the paint. The thinner the paint, the more the color underneath will come through and the more layers you will need to build up to the true color. This glaze here is pretty heavy for a glaze layer, but it will still do exactly what I want it to do here.
Once you have the glaze mixed, use a small brush to put just a little bit of the paint on the tip. Since the paint is so wet with thinner, if there’s too much paint on the brush it will run and we wont have the kind of control we want. Use your nail, the base of the model, or the pallet to test it a bit to make sure you have good control over the paint coming off the brush.
Now with my glaze of Pallid Wych Flesh ready, I go over the raised muscle of the skin to make it stand out against the rest of the flesh, but not enough to make it too much of a bright white color to overwhelm the Rakarth Flesh.
If you do find yourself in a situation where you don’t like a glaze layer, or if it’s gotten too bright or didn’t blend well, the good news is that you can blend the previous color on top of it to smooth out the highlight. Here, the side of the wrack’s head is a little too bright and the transition isn’t as smooth as I’d like, so I go over it with a couple rounds of Rakarth Flesh as a glaze to fix it.
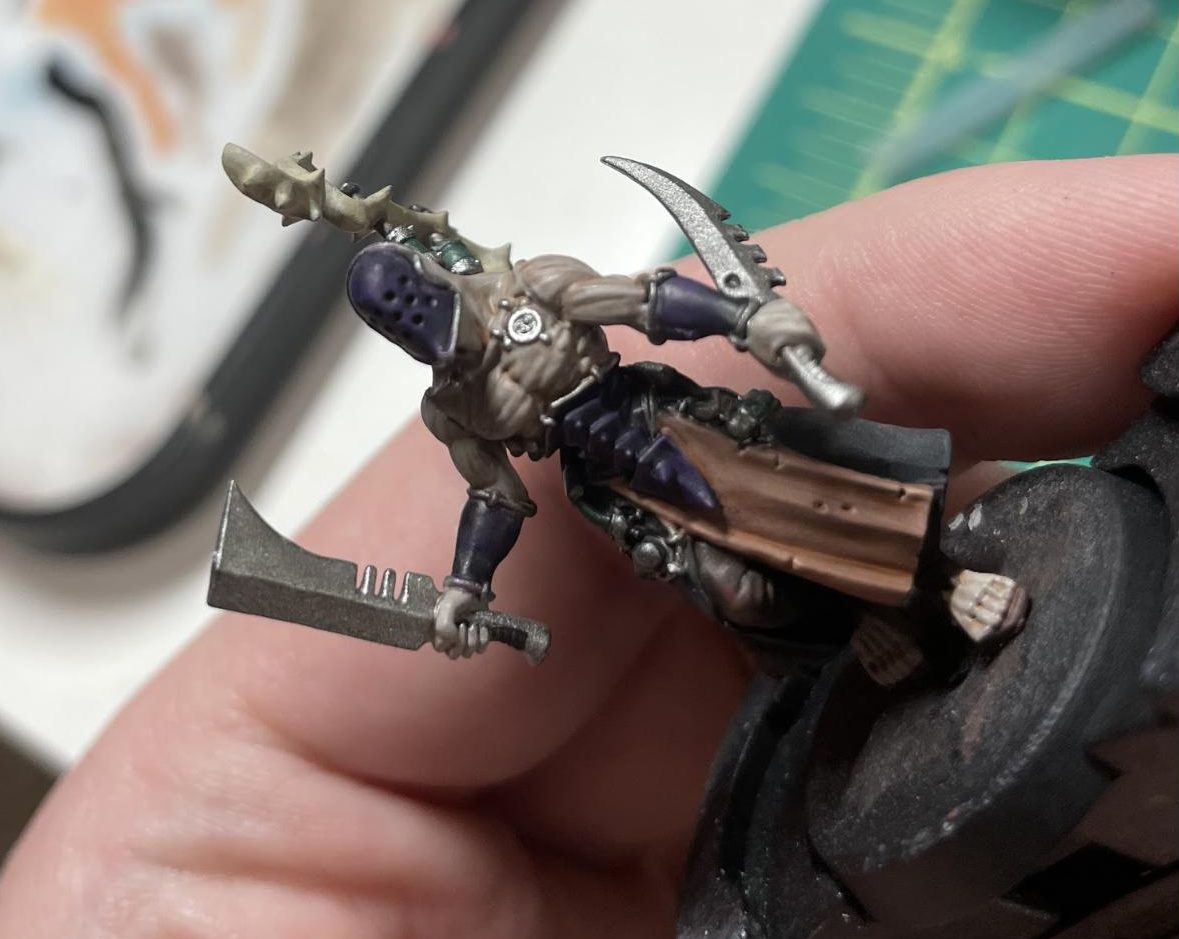
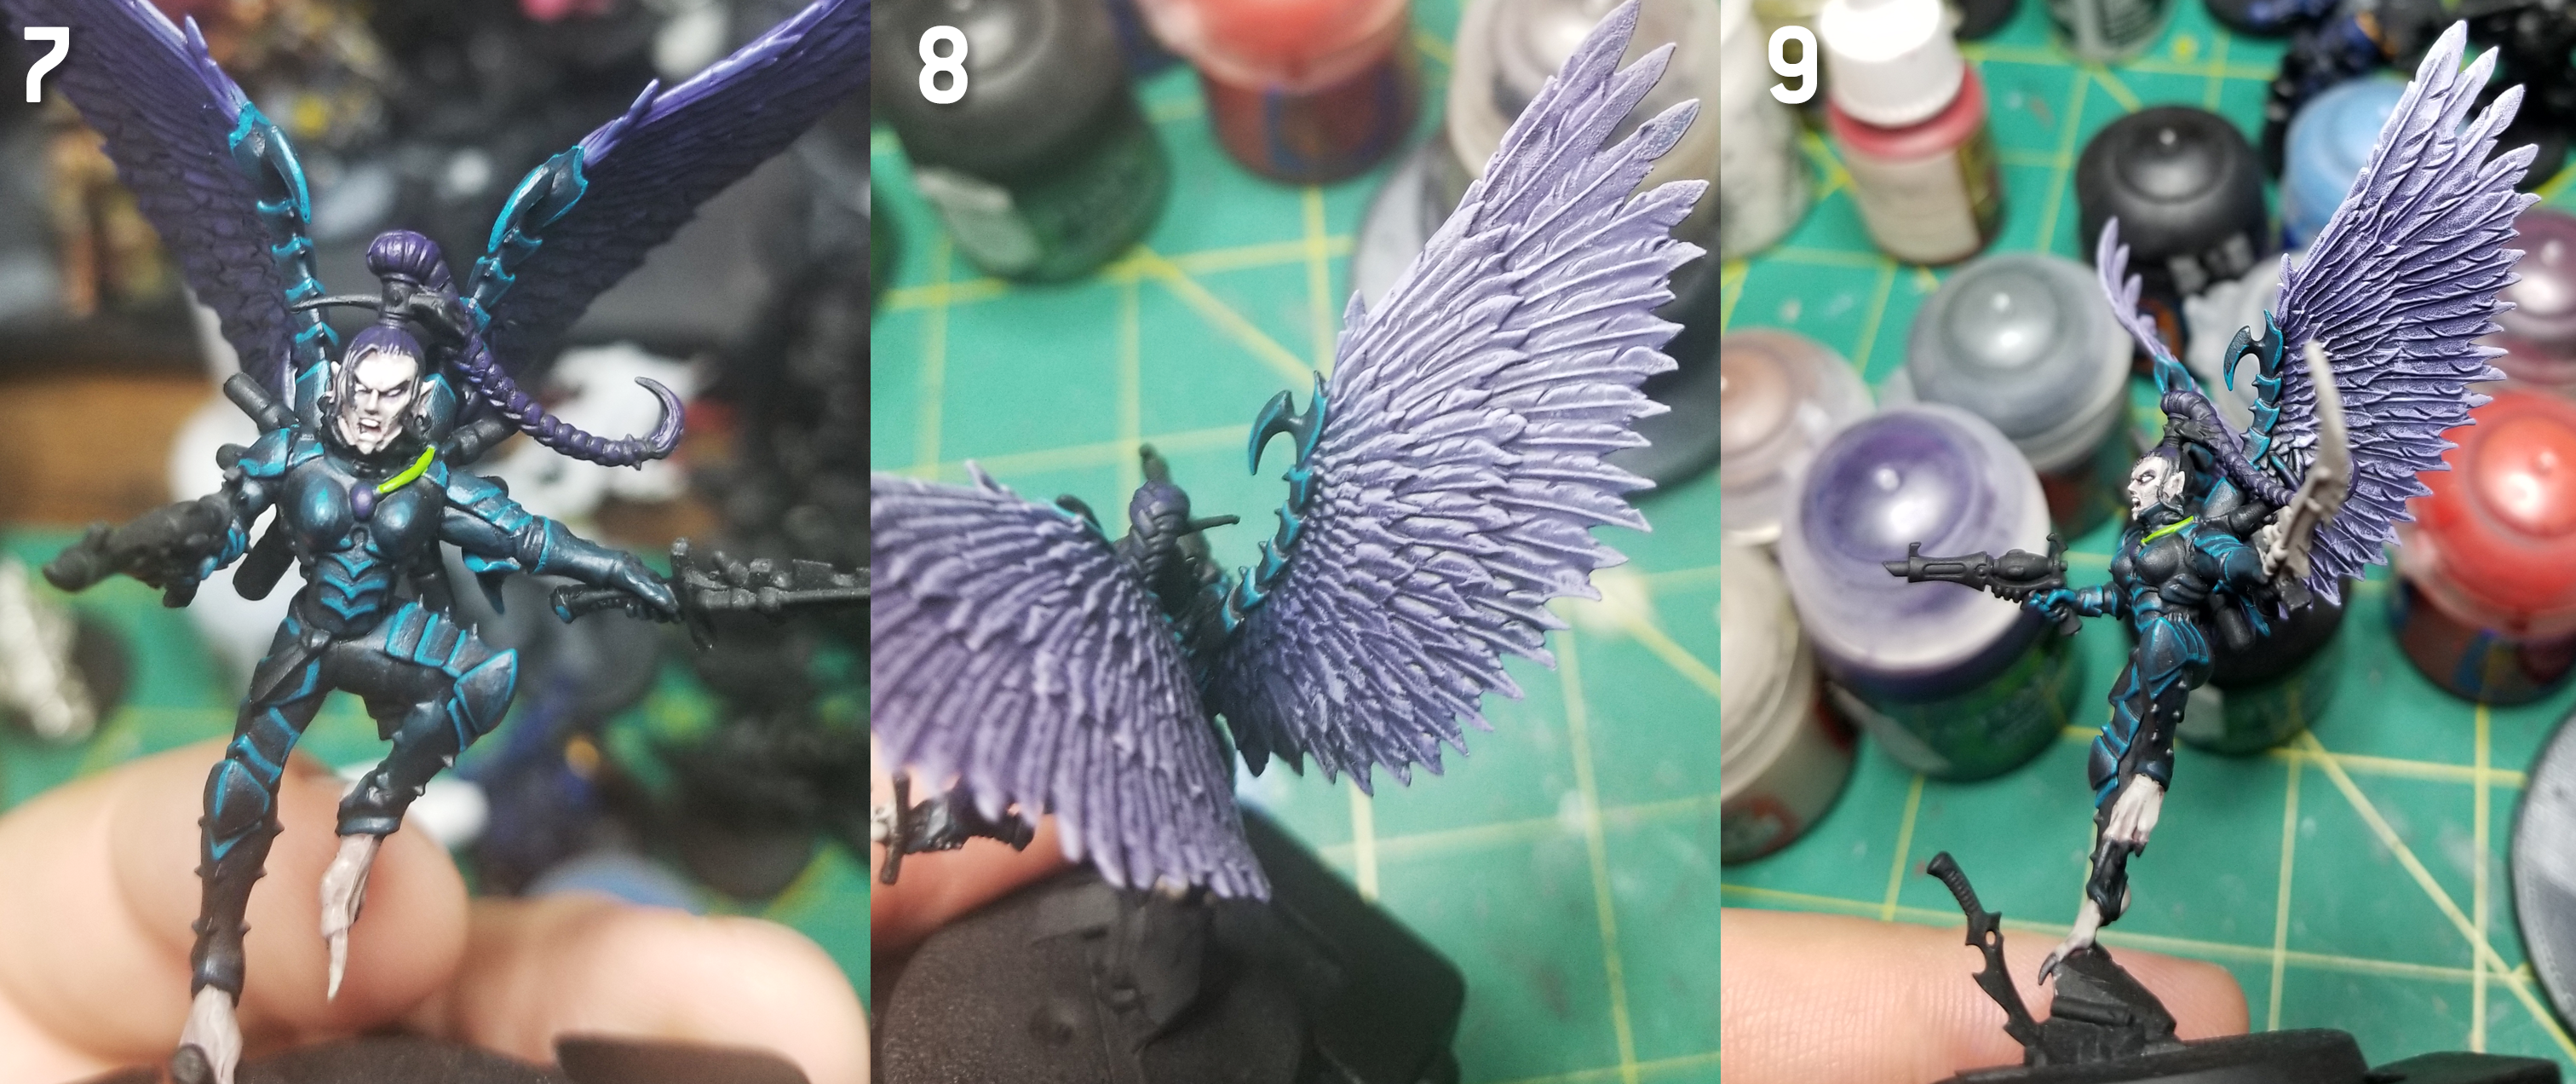
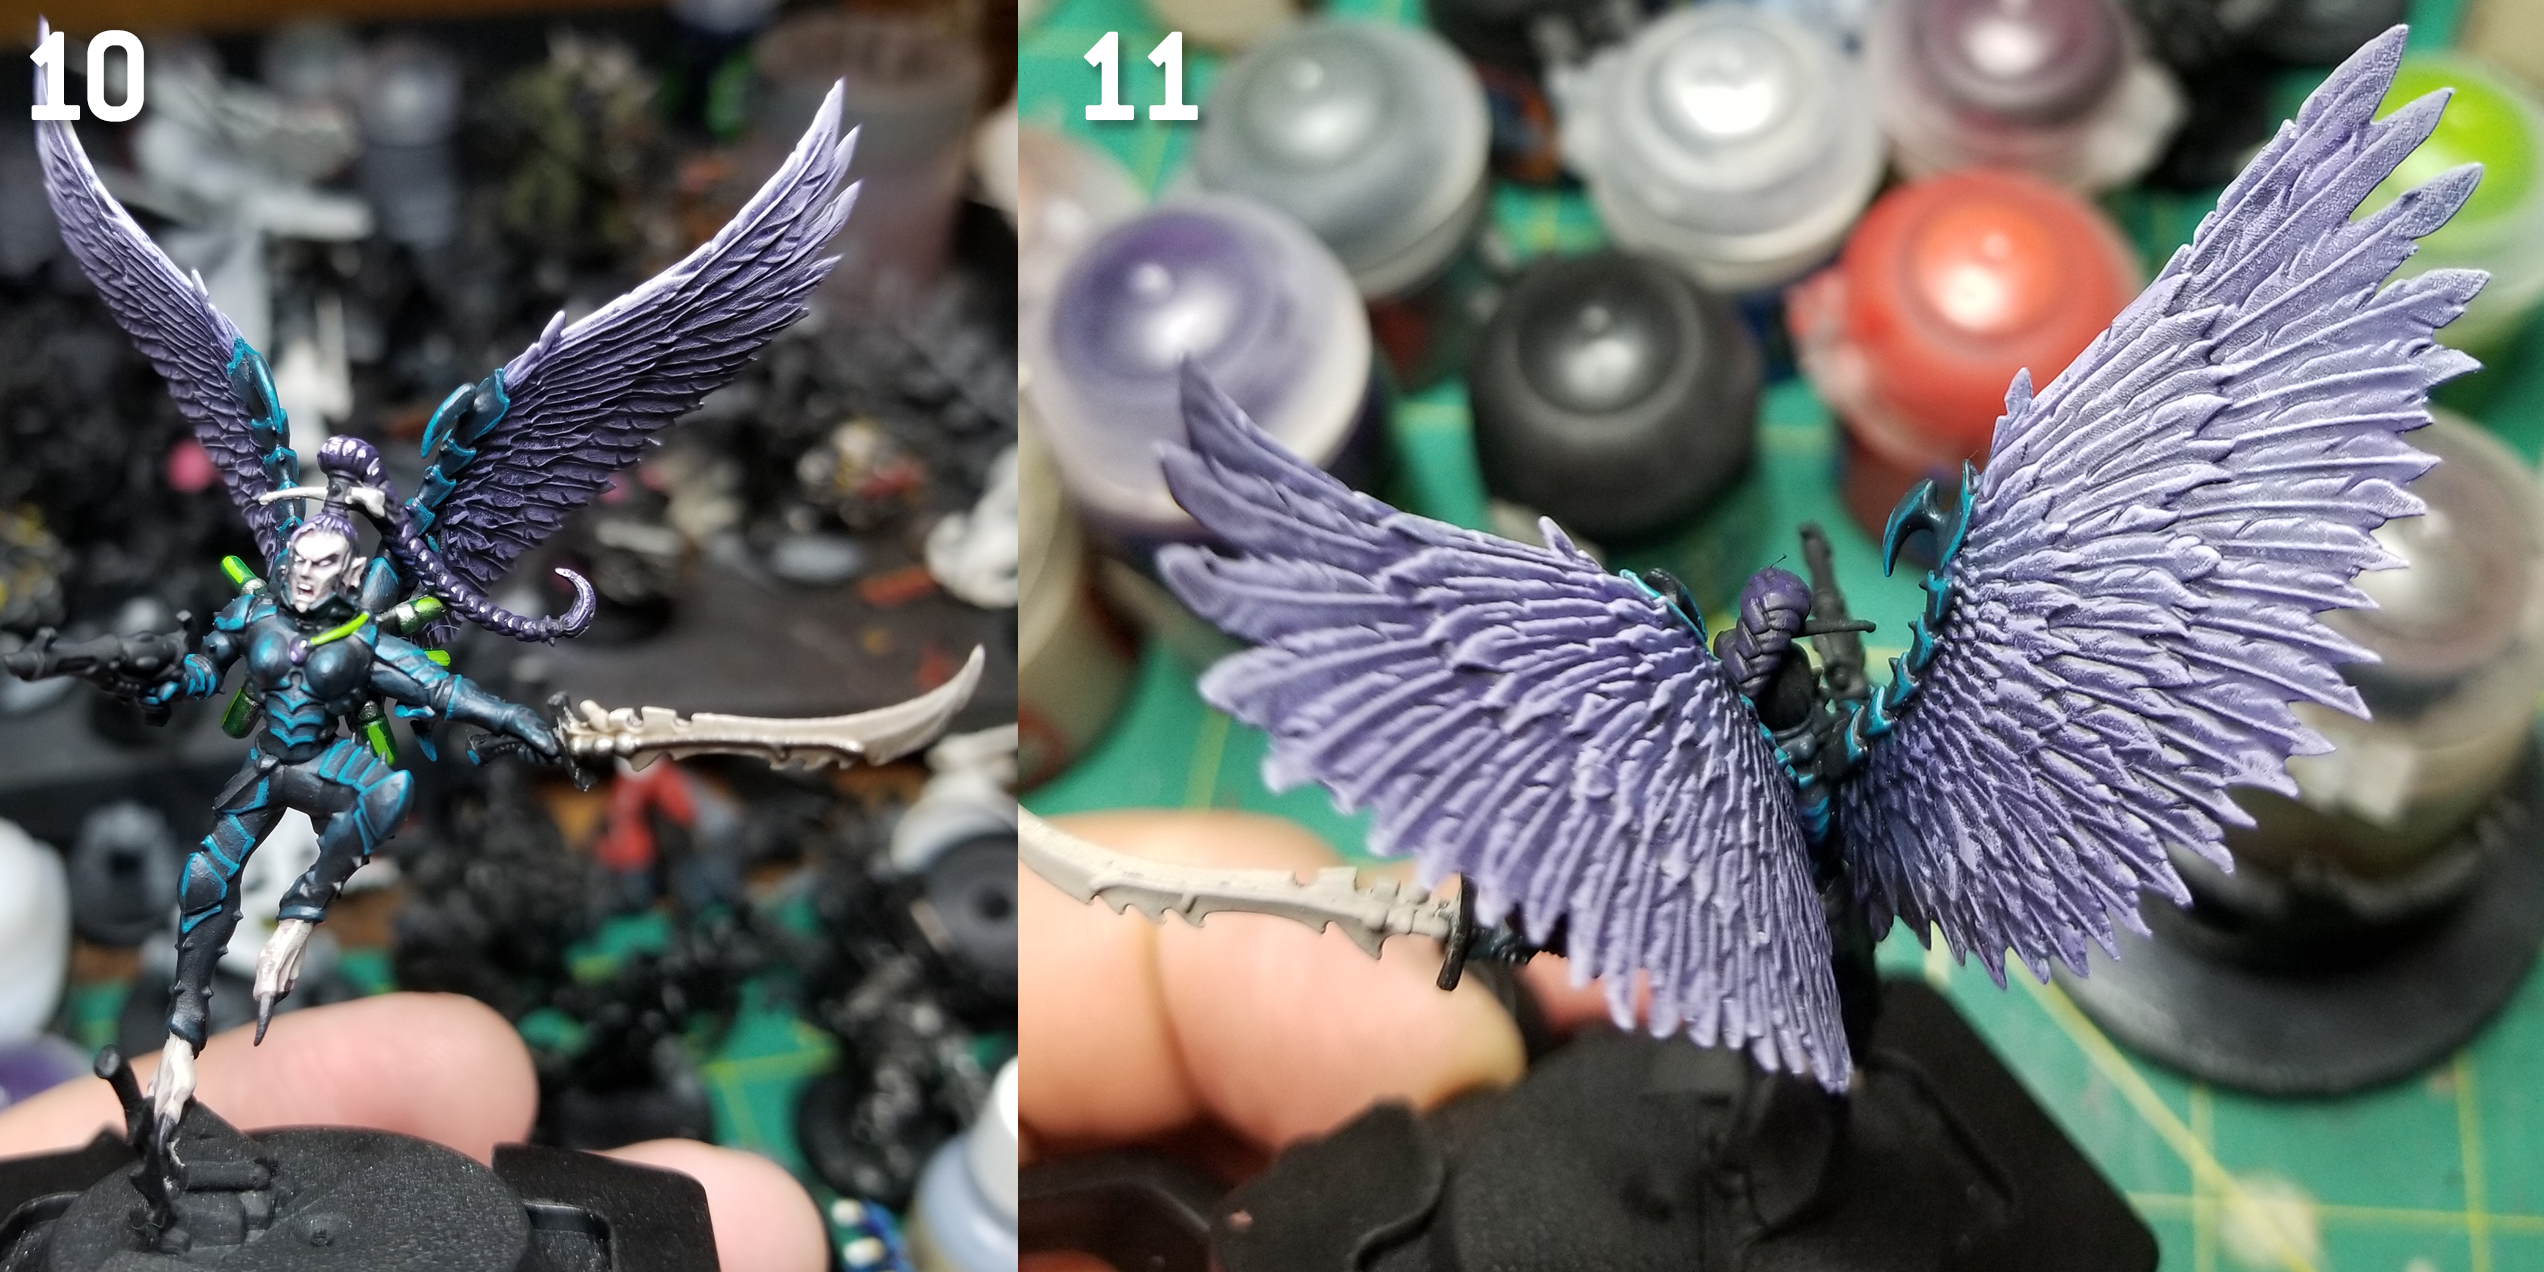
For the rest of the model, I hit the purple areas with two shades: the purple Druchii Violet and at the darkest parts I use Black Templar to really make the purple pop. I then do a careful edge highlight of Xereus Purple. For the black of the cloth round the wrack’s waist and legs, I go right back to glazing and start using very thin layers of Skavenblight Dinge, especially near the bottom to make the cloth look dirty, fitting for the flesh creations of the Covens. I hit my silvers with Vallejo Silver for a nice bright sheen and my bones get a highlight of Ushabti Bone. The green tubes get a highlight of Warpstone Glow and the pants get a little shade of Agrax Earthshade and a highlight of Bloodreaver Flesh.
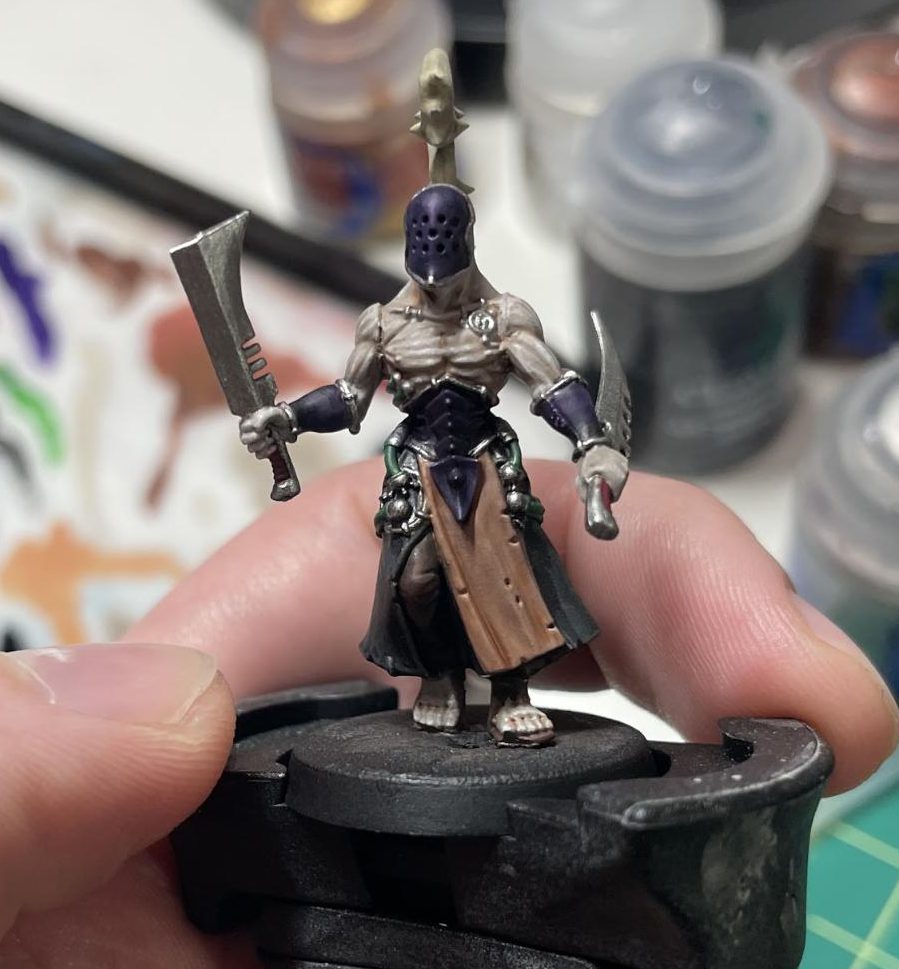
For finishing touches, I do a very careful glaze of White Scar on the very edges of some of the muscles for an extra bit of contrast. On the purple I do an edge highlight of Genestealer Purple and an even smaller edge highlight of Kakophoni Purple to make the edges have good contrast. I do a highlight glaze of Kislev Flesh on the tabard and a similar highlight glaze on the black with Stormvermin Fur. I use the ruby red technical paint GW puts out called Spiritstone Red for easy gemstones and another technical paint, Nurgle’s Rot, to make the poisoned weapons of the wracks look, well, poisonous. A quick highlight of Screaming Skull on the bone, Gorthor Brown on the pants, and Moot Green on the tubes leaves one last thing before I put base this bad boy: a little bit of Tesseract Glow on the green because I can’t help myself and some Black Templar on the top back tubes to make it look like there’s liquid inside.
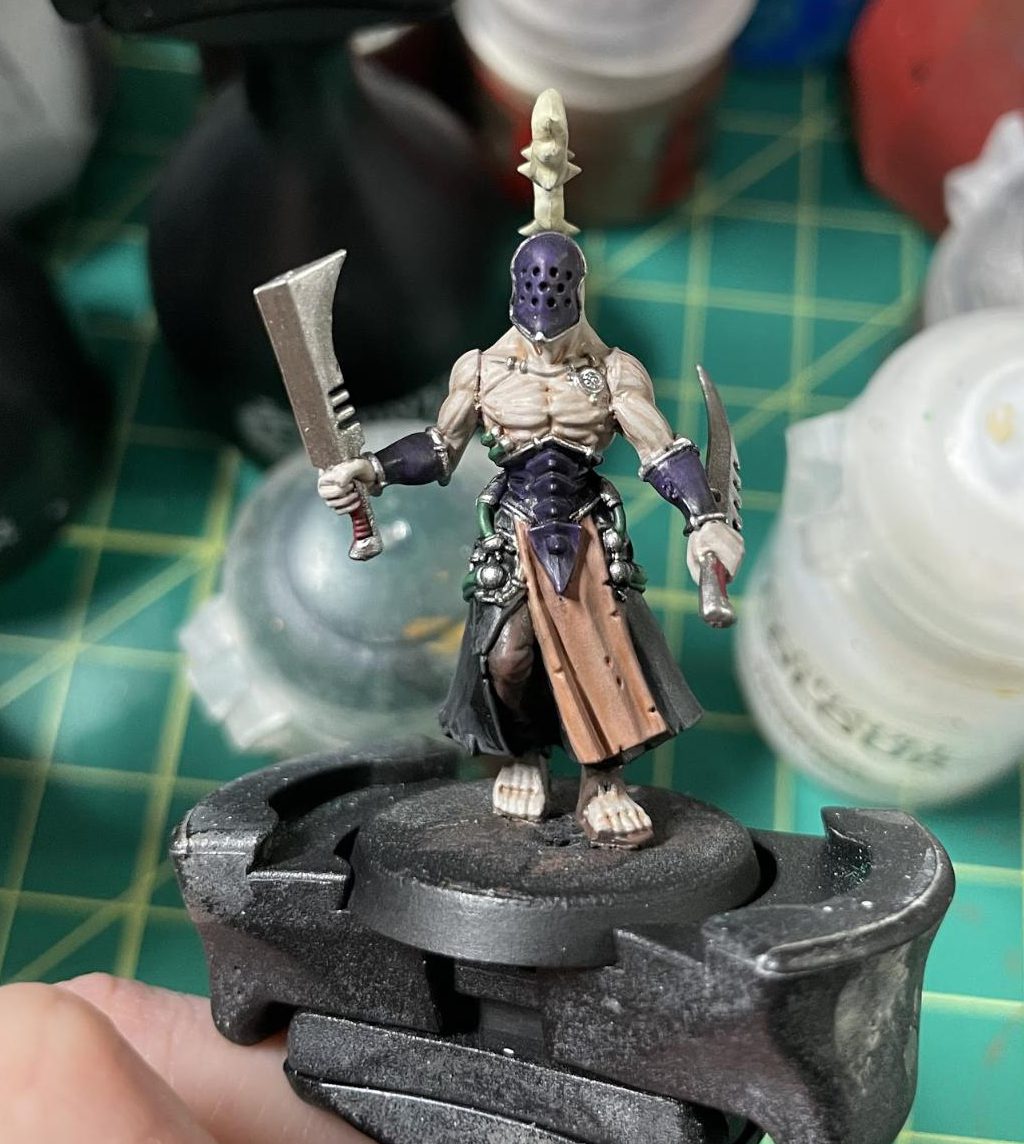
And one whole base later, he’s ready to go!
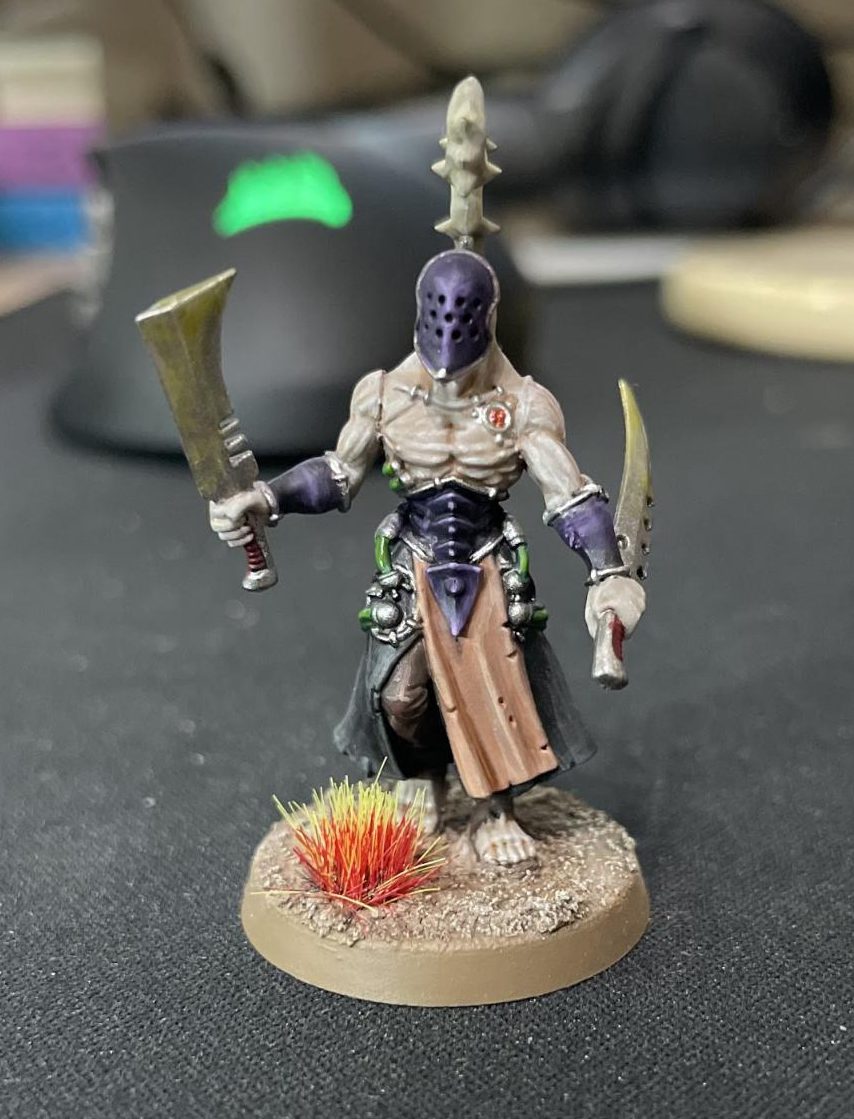
Comparing him against my older models, I love seeing how I’ve improved over time as a painter. For future Wracks, I may go a little heavier on the Guilliman Flesh for extra contrast on the muscles, but it’s much easier to fix going to light with a shade than going too heavy.
I hope the advice on glazing on the wracks skin tones was helpful for you, glazing is a technique I didn’t find out about for a very long time and is extremely helpful in painting good skin or bare heads on models. Bare heads can especially be intimidating for a new hobbyist and are common in the Drukhari model range, so the large areas of skin on a wrack without having to paint a face is a great place to practice painting flesh before the bare head model big leagues.
Thank you for reading this, and thank you again for letting me write another guest article about Drukhari on Goonhammer! That’s all for me for now, I’m being told I need to leave before I spill more wine on the carpet from all the villainous wine swirling. Have fun painting those Drukhari, reader!
TheChirurgeon’s Method – Scourges
I love the Drukhari models but I’m too far deep into my personal brand of being “The Chaos Guy” for Goonhammer and that means I’m working on Death Guard right now. Still, there’s one specific area where these overlapped, and that’s in my loose project to model and paint the characters from Aaron Dembski-Bowden’s Black Legion series. This includes Khayon and his companions, one of whom is a Drukhari Scourge named Nefertari. So here’s my process for painting her.
1. Prime Black. Always black.
2. Basecoats. I hit the body with a layer of Abaddon Black then highlight that with Corvus Black, and it’s time to start doing the armor. I really like Incubi Darkness, so that’s the main color I’m using here. I do a 50/50 mix of Incubi Darkness and Corvus Black on the raised parts of the armor plates, then hit them with full Incubi Darkness, working for a gradient look toward the outside of the plates.
3. More basecoats. The wings get a coat of Nagaroth Night and the skin is Rakarth Flesh.
4. The armor plates get edge highligting with Sotek Green, completing the classic Drukhari look, albeit with a more blue tint.
5. I want the wings to be much more muted and less saturated, so I start by washing them a few times with Nuln Oil, doing more layers toward the base of the wings, and going lighter toward the edges, to give the wings a bit of a fade as they go out.
6. More washes. I want to retain a pale look, so I washed the flesh bits with a 50/50 mix of Agrax Earthshade and Druchii Violet, then I did a couple thin coats of Druchii Violet around the eyes and a ring of Nuln Oil to give the eyes a smoky, shadowy look on her face.
7. Time for some details. I start on the gemstone – this is gonna be a standard gemstone job, with Naggaroth Night, swoosh in the lower left of Xereus Purple and a 50/50 mix of Xereus and white, then a spot of black in the upper right and a dot of Reaper Pure White on top of that. Cover with ‘Ardcoat to make it shiny. I’m also starting on the hair. I want black hair with a purple set of highlights so I cover that with Corvus Black and start doing small bits of Naggaroth Night. I’ll do a final highlight with a mix of Naggaroth and pure white later.
8. Time for the wings. Here I’m just going to get away with drybrushing. I do progressively lighter mixes of Celestra Gray and Xereus Purple here, which helps give me a much more muted tone on the wings.
9. For the sword I go with a bone look – Rakarth flesh washed with Agrax – and I paint the tubing Moot Green.
10.Time for some more final details. The gun I paint with Leadbelcher and Balthasar Gold, and wash it with Nuln Oil and Agrax. The tubes on the back are Leadbelcher and I covered the emajor parts with Contrast Warp Lightning, then highlighted with Moot Green. I did the sashes Khorne Red, washed them with Carroburg Crimson, and then highlighted them with Mephiston Red. The topknot is Retributor Armor and Agrax wash.
11. The wings can get some final edge highlights but that isn’t super necessary, especially if you have more than one model of these to paint.
That pretty much covers it. I’m happy with the final model and it wasn’t nearly as much time to paint as I expected it might take.
Charlie’s method: extra speedy, extra… not detailed – Kabalite Warriors
The Drukhari range is beautiful, and you could spend as long as you like getting into the details. Unless, like me, you have a terrifying last-minute rush to paint 11 of the bastards the night before you GM a skirmish game. After actual years of um-ing and ahh-ing trying to think of a scheme for these guys, I had to pull it out of my ass at the last minute. Sometimes panic bears undeservedly tasty fruit. This is definitely a basic option, but it’s fast. Painting the whole squad as a batch, it clocks in at about 30 minutes per model (probs more like 45 for the wyches?), made faster by having helmets where available.
Condit’s Method – Red Drukhari
For my Drukhari, I wanted to make clear that these are three separate subfactions who cooperate, and that they aren’t really a single army. To that end, I chose some color schemes that stand out next to one another, but have a coherent threat that joins them together.
The Kabalites are painted as Kabal of the Flayed Skull, the Coven units are Coven of Twelve, and the Wych Cult is a custom scheme I put together myself – while I could have painted them red grief, the black bodysuit with red armor wasn’t quite enough red to fit in with the rest of the army, so I decided to come up with my own scheme.
Kabalites
- Prime Wraithbone
- Block in the base colors:
- Khorne Red on the armor
- Incubi Darkness on the green cloth
- Zandri Dust on the kneepads, helmets, and anything else that we want to be the bone color
- Corvus Black on guns, other stuff that’s black
- Darkstar Baroque on knives/etc
- Darkstar Royal Gold on gold bits
- Lay down shades, all thinned about 50/50 with Lahmian Medium:
- Agrax on the armor
- Coelia Greenshade on the green cloth
- Seraphim Sepia on the bone bits
- Nuln Oil on black bits
- Agrax on knives/etc
- Druchii Violet on gold bits
- Highlights:
- Evil Sunz highlight with Wild Rider edge highlight on the extreme edges of the armor
- Sybarite Green where it makes sense on the cloth – this is a bit of an art, but you want to put some lines to give it some definition. You can push these further with Skarsnik Green if you want
- Lay down a thin layer of Vallejo Model Air Light Gull Gray on the bone bits – you want this to be thin and ever so slightly inconsistent to give the effect of weathered and bleached bone
- Put some Contrast Talassar Blue in the channels on the splinter weapons to give it a nice glow effect
Covens
- Prime Wraithbone
- Paint basecoats on armor, skin, and bone:
- Corvus Black on armor
- Bugman’s Glow on skin
- Zandri Dust on bone
- Darkstar Baroque on helmet, knives, etc
- Incubi Darkness on vials
- Darkstar Victorian Gold on pipes that I want to look a little weird
- Contrast on cloth:
- Black Templar on leggings and armbands
- Wyldwood on cloaks
- Apothecary White on aprons
- Spot detail on aprons with Blood for the Blood God – get a beat up brush, and just sort of smear it around
- Washes, again all 50/50 with Lahmian Medium:
- Carroburg Crimson on skin
- Nuln Oil on armor
- Agrax on helmet, knives, etc
- Hexwraith Flame on vials
- Agrax on aprons
- Thin down some Mournfang Brown aggressively, then put it on the cloaks everywhere but the recesses. It should be so thin that it goes on sort of transparent – you’re really just using this to smooth out the Contrast effect so it looks nice
- Highlights/trim:
- Dark Reaper highlight followed by Fenrisian Grey highlight on armor
- Darkstar Blackened Bronze on trim around helmet and armbands
- Tesseract Glow in the eyes – don’t worry if this spills out a bit, it’s fine
- Kislev Flesh on raised bits on the muscles on the skin
- Wash the skin again with 50/50 Carroburg Crimson, then a mix of 25% Druchii Violet, 75% medium
Wyches
- Prime Wraithbone
- Basecoats:
- VMA Dark Sea Grey on the armor that will be white
- Mephiston Red on bodysuit/armor bits you want to be red
- Darkstar Steel on knee armor
- Darkstar Baroque on weapons
- Corvus Black on guns
- Darkstar Royal Gold on gold bits
- GW Black Templar on the bodysuit parts you want to be black
- Layer up the armor – this will give a nice white armor effect with shading that is actually visible but that still reads as white:
- VMA Light Gull Gray
- GW Apothecary White
- VMA Light Gull Gray everywhere but the recesses
- Dahler Rowney white ink on the flattest areas, staying well clear of the recesses
- Wash the red armor bits with about 40% Agrax, 60% Lahmian Medium, then touch up any pooling marks with Mephiston Red
- Talassar Blue in the glow bit on the splinter weapons
The bases are the same across all three subfactions, helping to give some cohesion to the force as a whole. This is really simple: lay down some various greens and swirl them together while they’re still wet. Then, once it’s dry, slather on some Mordant Earth. Clean up any spillover, tidy up the rim with some Abaddon Black, and you’re there.
Corrode’s Method – Kabalite Warriors & Wych Cults
Easy to Paint Kabalites/Wych Cults
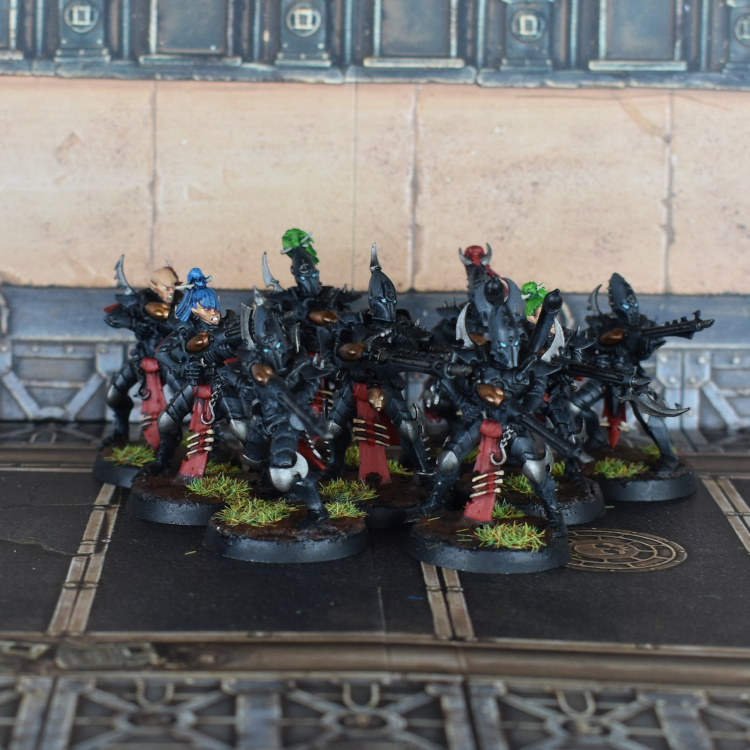
The basic Drukhari troops are very flexible models, allowing you to put a bunch of time and work into them or just fire them out quickly. For this scheme the latter was the main goal – they’re primed black, then heavily drybrushed VMC Black Grey and then Mechanicus Standard Grey. The metals are picked out in Leadbelcher and the loincloths in Khorne Red and then Mephiston Red, and the bones in Screaming Skull. The splinter pods are Brass Scorpion, and then once that’s done all the armour and metals are washed Nuln Oil and the splinter pods Seraphim Sepia, and then that’s pretty much it apart from picking out the eyes in Baharroth Blue. For those with skin, I just added a Cadian Fleshtone -> Reikland Fleshshade -> Cadian Fleshtone -> Kislev Flesh step, and picked out the hair in a variety of colours. This worked for me for both Wyches and Kabalites, and was an easy way to get them on the table fast.
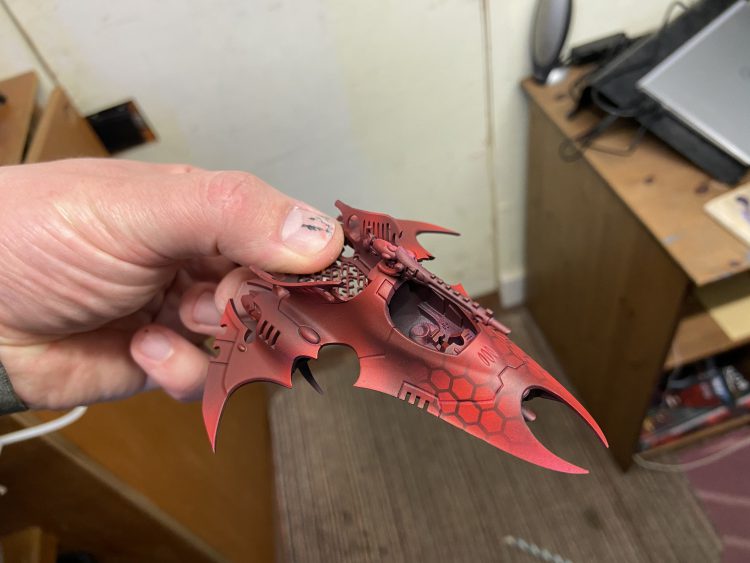
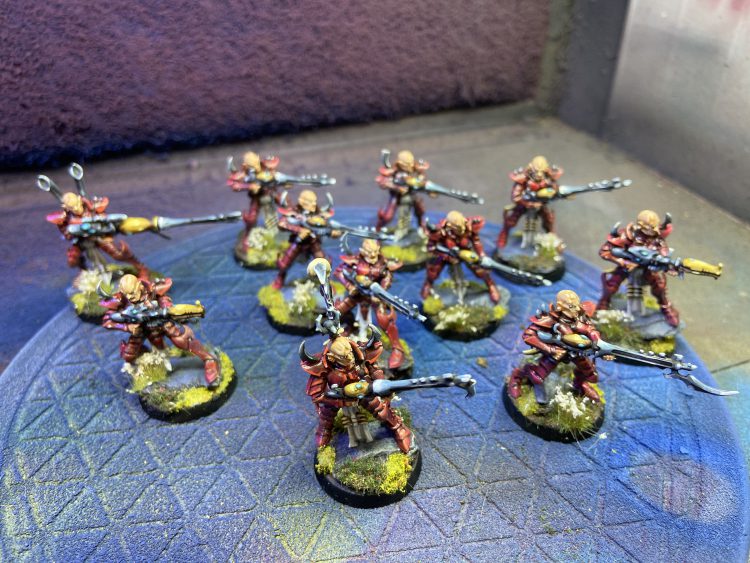
Silks’ Method – Raiders
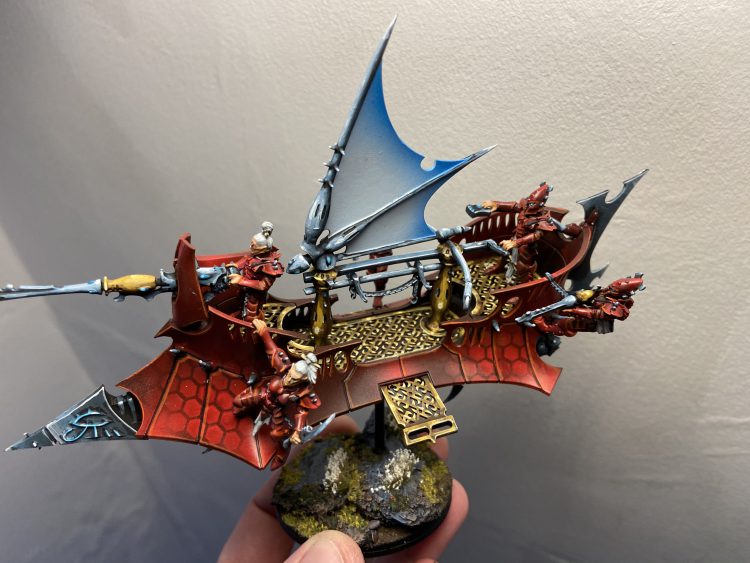
I start off by priming with Colour Forge Matte Black. This is an amazing primer for this sort of project as it has an excellent finish which replicates the black paint I use. I then highlighted the model with Vallejo Air Dead white, aiming for the sharp points of the model (which isn’t hard on Drukhari) to create a greyscale look. On the vehicles I then used Fallout Hobbies Hex Mesh stencils and dead white to create the Hex pattern.
Once the models are all grey scale, I gave them several very thin coats of Vallejo Game Air Gory Red
Once the red was done I gave every model several thin coats of AK Interactive Gloss Varnish. This makes the red look much nicer and also makes the next step a lot easier!
I use Contrast paints for pinwashing, in this case Black Templar. The Gloss varnish helps it flow into the recesses and I don’t even have to be that careful since I just wipe the surface with my finger and it removes any overflow and leaves a nice dark recess. Then it’s onto edge highlighting using Scale 75 Beherit Red.
Once all that was done it’s time to start on my favourite bit – the Non Metallic Metal! I start by giving everything metal a coat of Scale 75 flat black, effectively restoring the black primer and giving a gorgeous dull black to work up from.
The gold is the same as I’ve used in countless of these HTPEs, Rhinox Hide > Mournfang Brown > XV-88 > Balor Brown > Zamesi Desert > Dorn Yellow
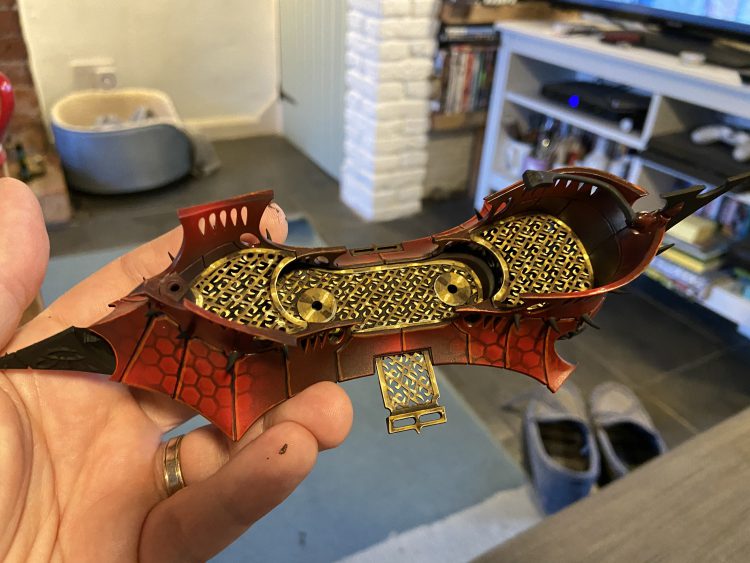
The steel is a new recipe for me using Scale 75 Eclipse Grey > Scale 75 Anthracite Grey > Scale 75 Behring Blue > GW Fenrisian Grey > Scale 75 White
Whilst I do try to think about the placement of light, I must admit that my NMM tends to be focused on replication and speed as well as rule of cool. Basically, it doesn’t make sense all the time but I can knock out whole armies of it without going mad and I think it looks nice
From there it’s just a case of picking out some details like gems and sigils and you’re ready to glue it all together (you did sub assemble didn’t you? Please say you sub assembled these boats…)
It’s much the same process for infantry, however with the red mostly done in a bulk airbrushing session there really isn’t much left to do once you’ve pin washed and edge highlighted
Conquering Comorragh
That wraps up our look at how to paint Drukhari, a faction that offers a lot of variety and opportunity to try different colors and combinations, as well as a bunch of the most visually distinct models in 40k. As always, if you have any comments or feedback, or just want to share your own Drukhari with us, then hit us up on Facebook or Twitter or e-mail us at contact@goonhammer.com.
