
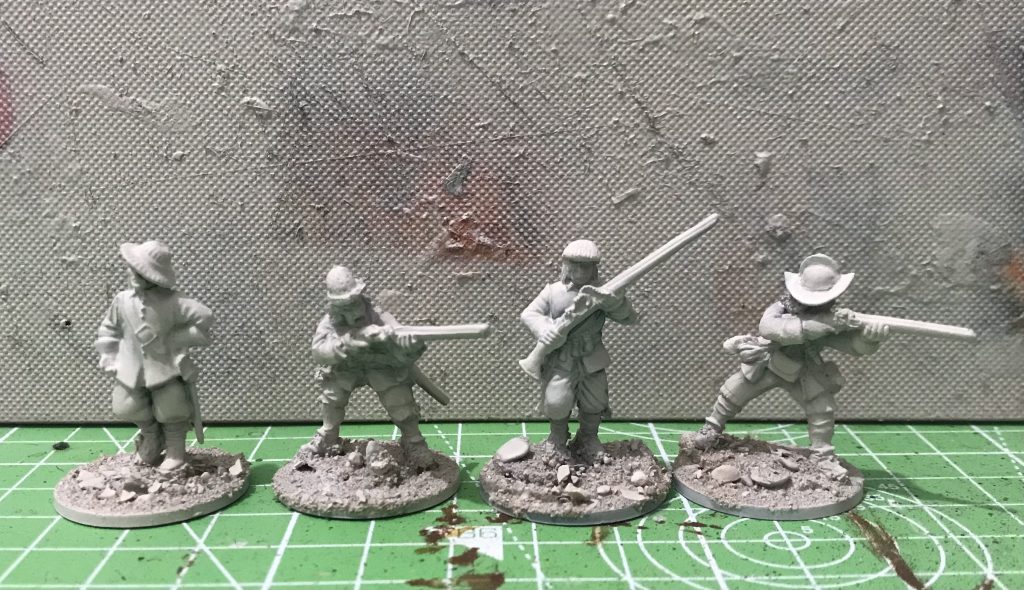
In this week’s Goonhammer Historicals we take a look at how to paint some of the most iconic uniforms of the English Civil War.
When we think about what the English Civil War looked liked, it’s usually more-or-less identical sides, dressed in similar colours and distinguishable by either long hair or severe puritan scowls. There are a few iconic colours out there – the classic brown buff coat, or the first Redcoats in the New Model Army – but a lot of the time, we don’t have a set mental image of what colours we should be painting. Both on the table and in real life, there was (and is) a fairly bewildering array of colours you can paint your pike and shot.
Like most Historicals periods with uniforms, the actual colours soldiers wore in each regiment and army are nowhere near as set and, well, uniform, as painting guides would have you believe. A regiment’s colours were based on how much the man in charge felt like paying – the “redcoats” only existed because Venetian Red dye could be bulk bought at low cost – and uniforms were not always centrally provided. Even details like the wooden powder and shot charges draped around musketmen – the “Twelve Apostles” – that you’d think would be uniform, you can see reliably depicted as white wood, dark wood, pipe clay, blue, even metal (this is crazy, you’d have self-immolating musketmen in no time). Resupply being expensive or even in cases impossible, trousers, stockings, bags, hats, turnbacks and cuffs were all produced with the essential criteria being “looks similar-ish to the guy next to him, is cheap”. Think local and readily available dye colours and you’re in the right area.
Consequently you can do a huge range of historical regiments by mixing up the placement of five core colours. Most of this is to do with the dyes that were readily available at the time. Once you have a good Red, Blue, White, Brown, and Leather recipes you’re pretty sorted for most historical armies and regiments, so it is a period that rewards getting good at quickly and effectively getting these core colours onto the right places. This suits my mass battle painting philosophy, that there are two ways of painting a force. You can strain yourself to paint every model perfectly to the image in a book or other research, or you can pick some core colours, pick a speed you want to go at and crack on. I tend towards the latter.
All skin tones in this article – and those in my entire army – were done loosely following the great How to paint everything article, using mainly but not exclusively paler tones.
Core Colour: The New Model Army
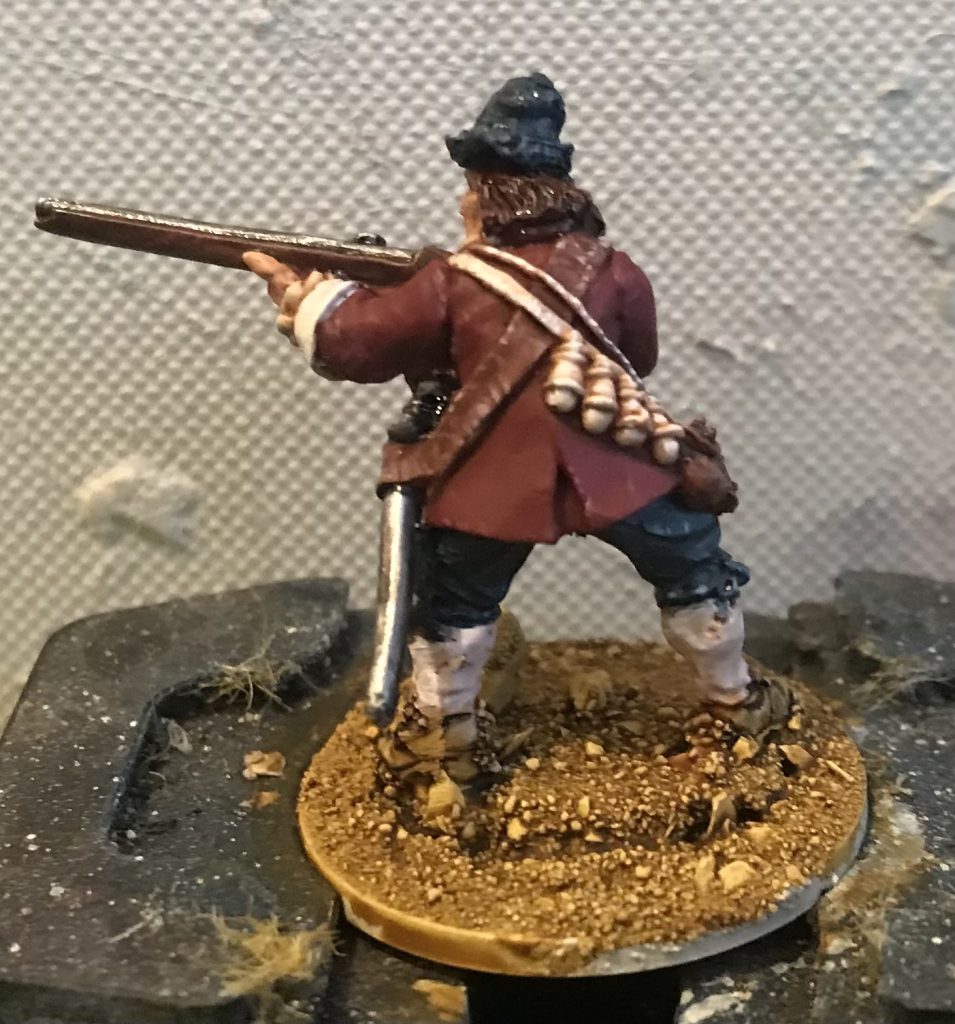
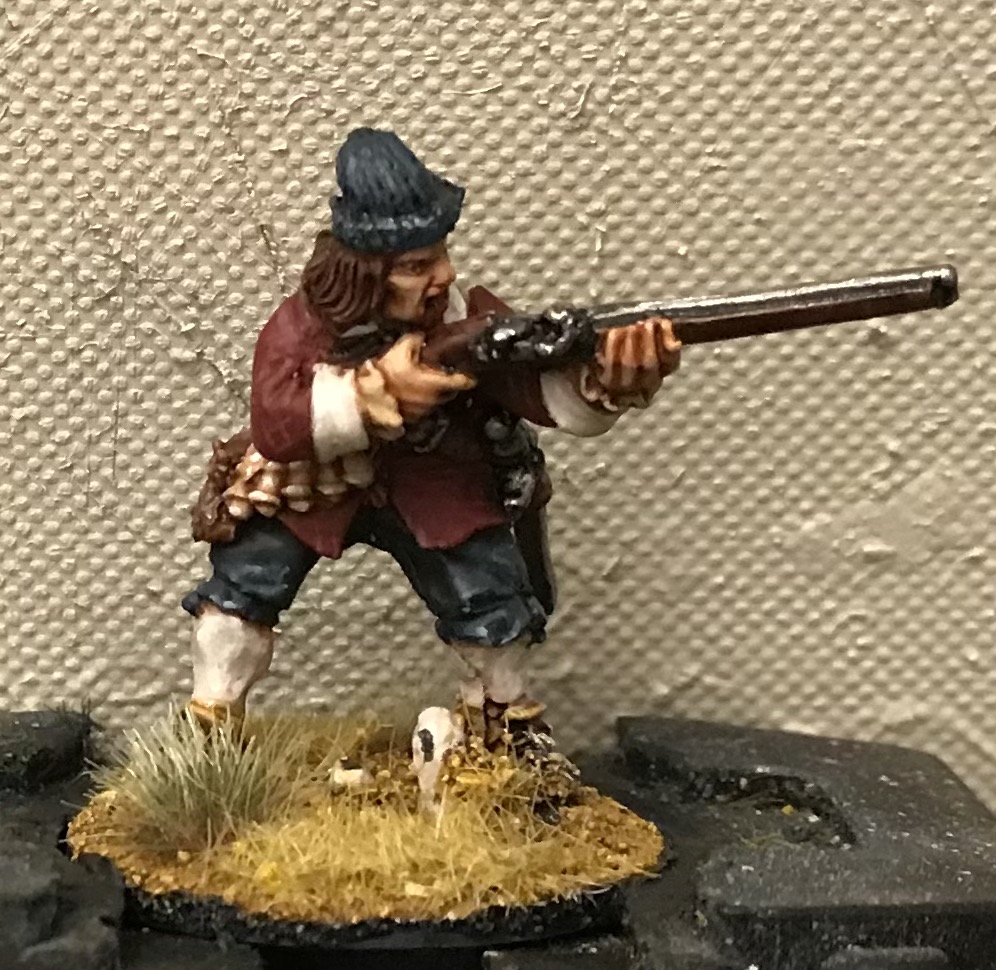
You’d think that with a name like that you’d be able to find a consistent uniform and colours for the 22,000 men of the New Model Army, but all the above still applies. The New Model Army are classically depicted in red coats, white cuffs and stockings, blue-grey trousers and a fantastic variety of headgear. The exact shade is not only a matter of some discussion but wouldn’t have been consistent from regiment to regiment, man to man, hell even day to day. I’ve decided to go for a deeper red, a highly saturated blue grey and a fairly muted palette. The example model here is a Warlord New Model Army musketeer.
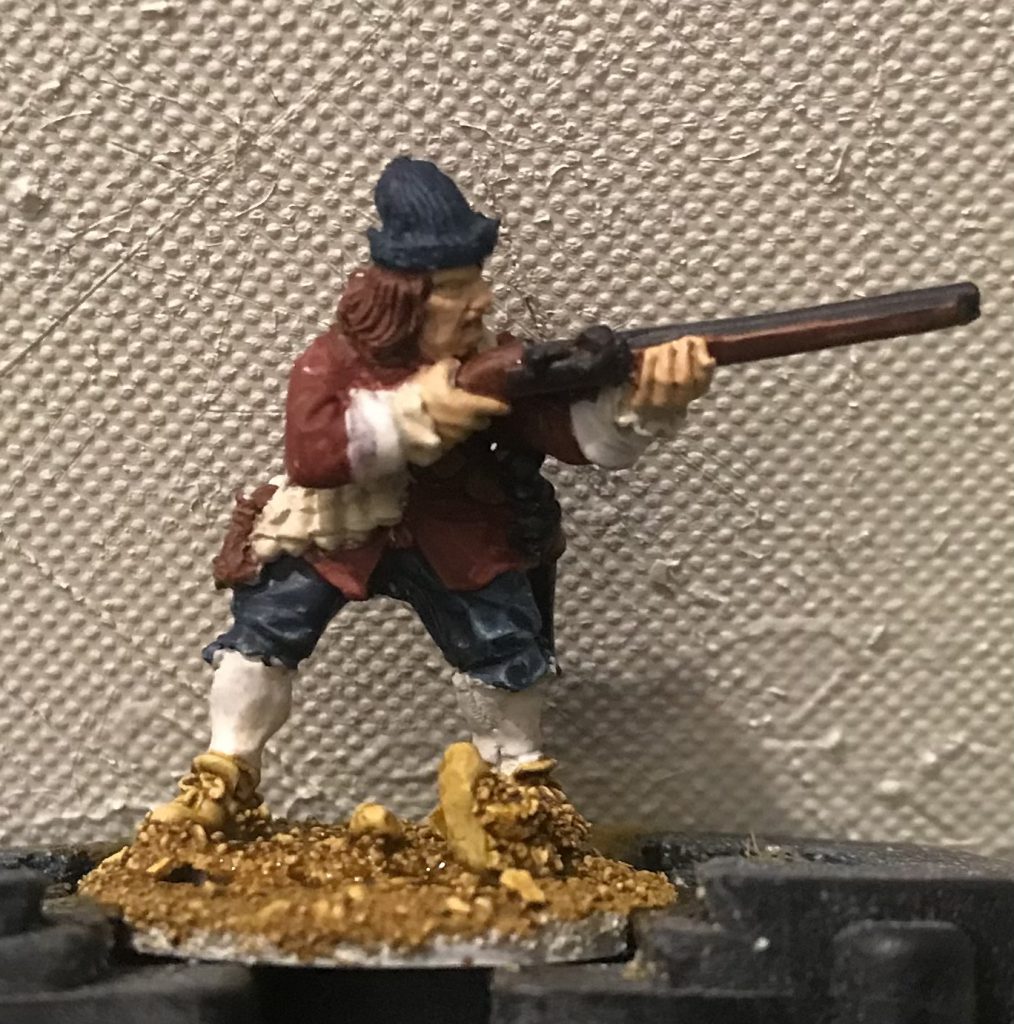
First off, basecoats:
Red Areas: Citadel Word Bearers Red 50:50 with Vallejo Game Color Dark Fleshtone, then layered with thinned Word Bearers Red
Blue areas: Citadel Stegadon Scale Green 80:20 with Citadel Thunderhawk Blue
White areas: Citadel Flayed One Flesh
Leather areas: Vallejo Game Color Dark Fleshtone
Gun wood: Vallejo Game Color Beasty Brown
Flesh and powder canisters: Citadel Kislev Flesh
Metal: Black, then Citadel Boltgun metal
All that is hit with a wash of Citadel Reikland Fleshshade with some Citadel Lahmian Medium.
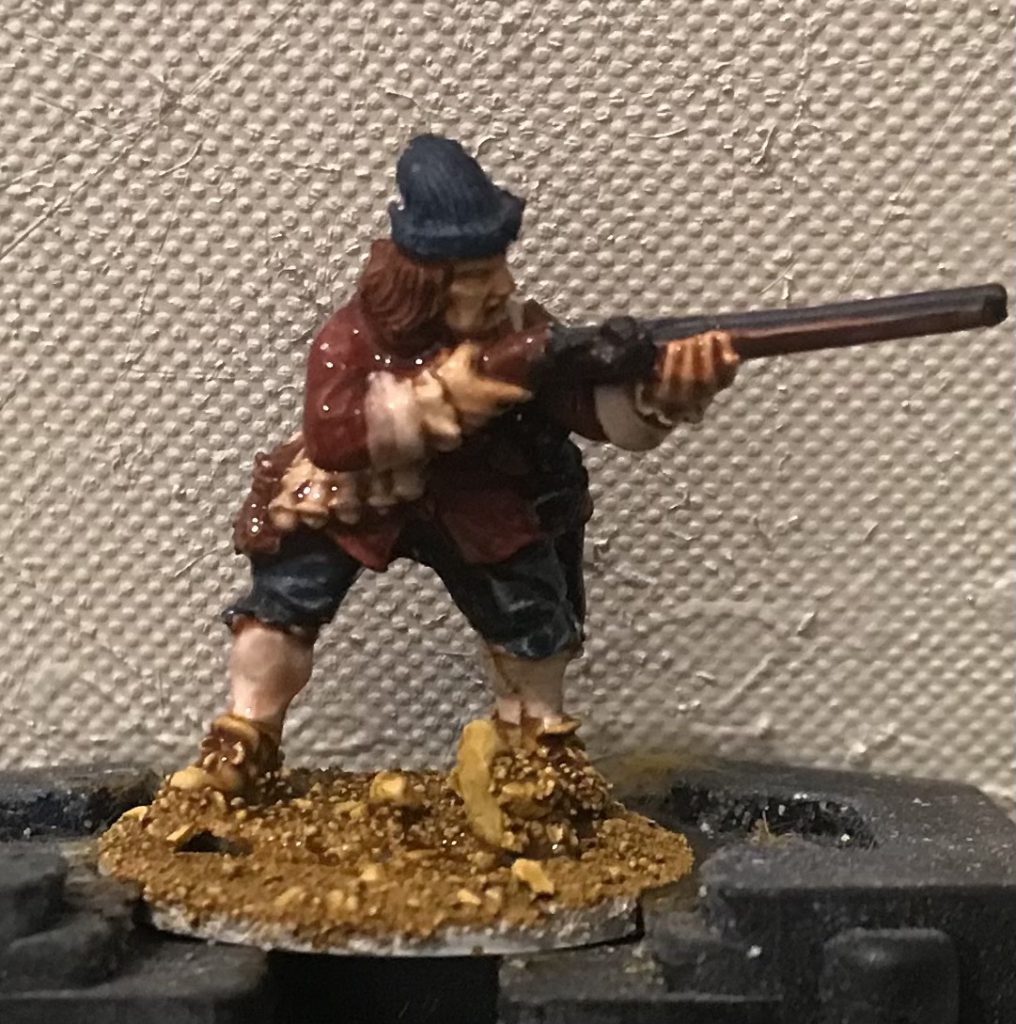
If I was painting 60+ of these guys under time pressure they’d be based and ready before the wash even dried. Since I’m not, everything then gets two highlights and a glaze:
Red Areas: Citadel Word Bearers Red 50:25:25 Citadel Khorne Red and Lahmian Medium, then 50:50 Khorne and Flayed one Flesh
Blue areas: Stegadon Scale Green 20:80 with Citadel Thunderhawk Blue, then an extreme spot highlight of Thunderhawk and Vallejo Arctic White
White areas: An ancient pot of Citadel Pallid Witch Flesh, and then very thinned Arctic White
Leather areas: Kislev flesh 50:50 Dark Fleshtone, then speckled with Flayed one Flesh
Gun wood: Vallejo Game Color Beasty Brown 50:50 Citadel Wraithbone
Powder canisters: Contrast Aggaros Dunes wash, then quickly painted over with thinned flayed one flesh
Metal: Straight up Citadel Stormhost Silver, because I weirdly hate painting muskets, then a thick oily wash of Army Painter Dark Tone for the sticky gloss finish ]

The glazes on everything are made using a hugely thinned mid tone – Khorne for the red, Thunderhawk for blue etc. For the very final finishing touches, I add a little cross hatching or stippling of washed out pale versions of the core colours to represent fraying, wearing or particularly on leather, poor maintenance. At that point our doughty musketeer is ready for basing.
Basing
Not so much on the multi v single base point (ably covered for Napoleonics by Lupe and SRM), but on what I want the bases to look like. I want to depict the final mopping up of Royalist forces in the South of England – perhaps even repelling a Charles II led counter-historical French Invasion. The nice thing about historicals basing is you can look at actual places and their soil to get a good idea of what to do.
So I want light brown mud with boulders of chalk and flint. That’s fairly easy. I use a sharp sand casually scooped up off a local building site, wraithbone spray and thinned Contrast Snakebite Leather. Pick out a few larger pieces in white, knock them back with a wash if they’re too bright and then add some black spots to represent exposed flint. Tufts and grass complete the effect nicely.
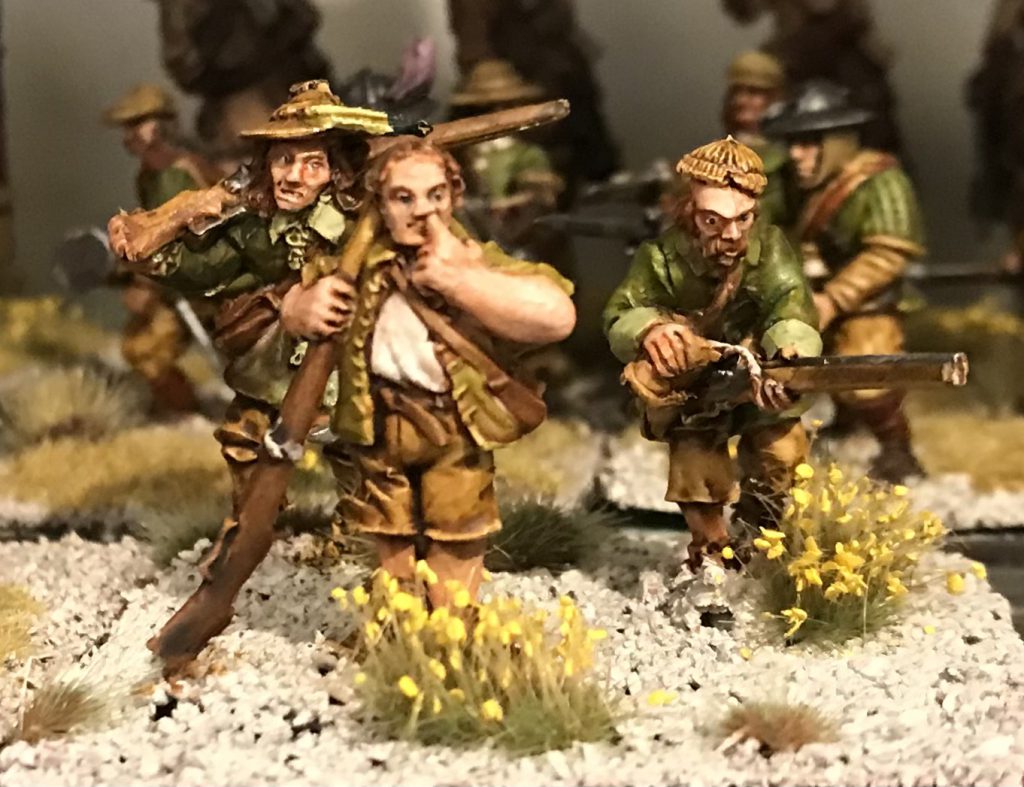
Buff Coats
The buff coat is one of the classic looks of 17th century conflict – a leather coat, sometimes with sleeves and often undyed. Predominantly but not always worn by cavalry, it is THE English Civil War garment, and so for good looking minis you need a way of doing a buff coat. I often see these done either a light brown or a very dull orange. The “right” colour won’t be uniform or the colour buff. These were off whiteish leather working garments, so creases, patterns, varicolour and wear would have been the order of the day.
I go quite light, and work my buff up from a flesh basecoat. The quick version is Pallid Flesh followed by Aggaros Dunes. Under severe time pressure that would do for me for a solid effect. For a more involved and realistically worn and battered look, I add Flayed One Flesh to a Kislev flesh base and very lightly draw a finely pointed brush over the coat, repeating this with pure Flayed One, and then a tiny amount of Wraithbone. I try to weather and highlight this kind of worn leather in the same way I would metal – lighter on the edges, with occasional scratches and areas of more concentrated wear.


I added red sleeves, white turnbacks and collar and blue trousers, making this model a pikeman from the London Trained Band who has temporarily mislaid his big stick.
Earl of Newcastle’s Regiment
We can go from the New Model Army and London Trained Band to one of the more bad-ass Royalist Regiments, the Earl of Newcastle’s “Whitecoats”, who died almost to a man holding the line at Marston Moor (heroic, but pointless). Their classic image is White coats, white cuffs, Brown trousers. When white is the major element I go a bit darker on the trappings – powder flask, apostles, bags and swords etc – to let the very very simple way I do white stand out a bit more.
The white is worked up from the basecoat via Citadel Apothecary white, giving that nice blue-white feel. Otherwise the same approach from the New Model Army guide applies. I’ve left the metal a little shinier than I normally would – poor buggers need to have something going for them, and it complements the white.


Fun with Pikes and Paint
As uniform colours depended on whatever the Man in Charge felt like purchasing, you can and should get creative and make up your own colours for your regiments. We don’t even know what many of the men fighting this war even wore, let alone what colour it was, so be interesting and go for something different. My own lads are based hugely anachronistically on the Derbyshire Flag, something made up in 2006 that I’ve projected centuries backwards because I quite liked the green.
In order to keep an ECW feel to the models though, that green is applied in varying shades and intensities and partnered with the classic buff colour. If you’re thinking of your own styles and army colour schemes, I think keeping one of the classics: buff, off-white, red or blue in one element of your uniform gives it a solid anchor to mess around with. Mix it up! Go crazy! Include Thirty Year War Landsknechts with big puffy sleeves!
Have any questions or feedback? Drop us a note in the comments below or email us at contact@goonhammer.com.
