
In our How to Paint Everything series, we take a look at different armies of the Warhammer universe, examine their history and heraldry, and look at several different methods for painting them. The first to cross the Rubicon Primaris was the great Ultramarine hero, Marneus Calgar, and today we look at how to paint this fantastic model!
Who Is Marneus Calgar?
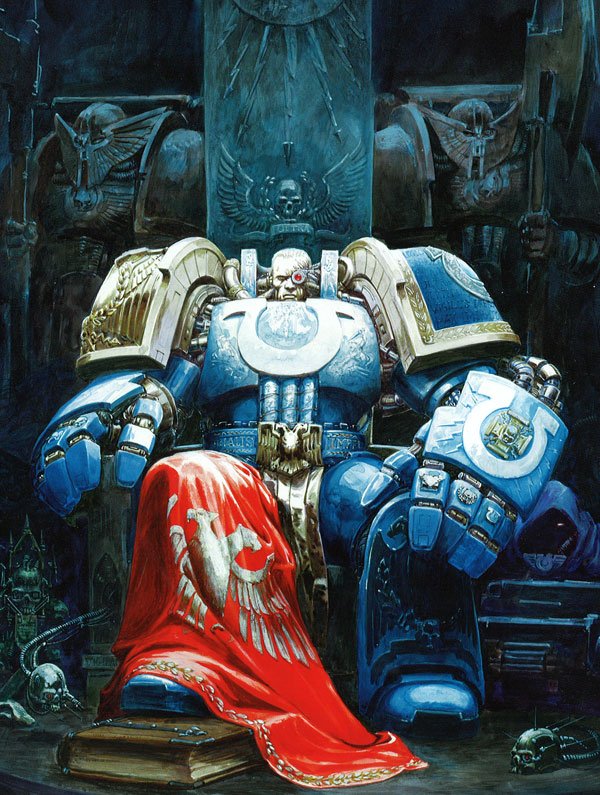
What can be said of Marneus Calgar that has not already been said of this storied hero of the Imperium? Lord of Macragge, hero of Ichar IV, Zalathras and a thousand other battlefields, first to cross the Rubicon Primaris, Marneus Calgar is the one and only Chapter Master of the Ultramarines, first among the Space Marines.
We know little of Calgar’s days prior to ascending to Chapter Master but he’s held that title for hundreds of years at this point and fought in way too many battles to count. In the process, he’s nearly died dozens of times, lost multiple limbs and an eye and seen the Chapter through some of its darkest days such as when Hive Fleet Behemoth invaded Ultramar.
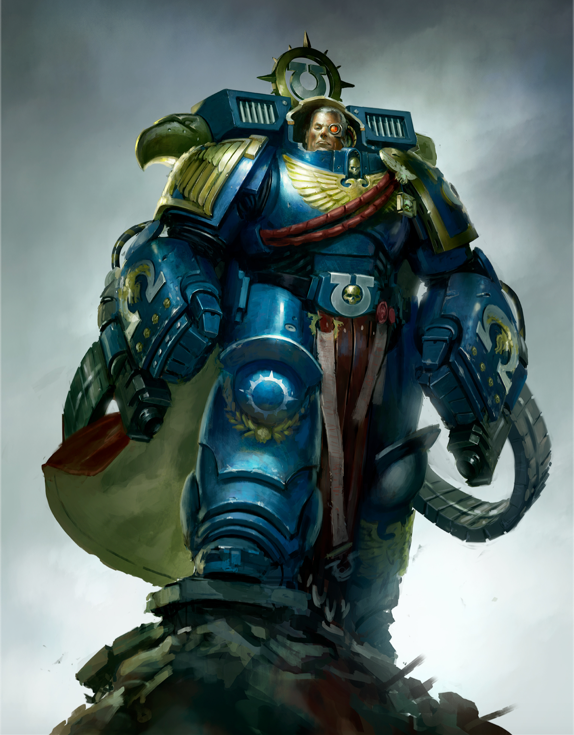
Having already served as the Chapter Master of the Ultramarines for centuries when Roboute Guilliman woke up Sleeping Beauty-style and simultaneously Cawl Ex Machina-ed shiny new Primaris Space Marines, Calgar faced potential obsolescence and so braved the 33% odds of dying on the operating table as part of a procedure to become the first Squatmarine-Turned-Primaris, crossing what would then be called the “Rubicon Primaris”.
Fully upgraded, Calgar somehow managed to super-size his armour and gauntlets as well and then rushed off to Vigilus to defend the planet from a simultaneous multi-xenos and chaos incursion. Who knows what else awaits him in the divided galaxy and what other heroic deeds he will accomplish.
Where to Read More
Paul Kearney has written two great books about Marneus Calgar, Calgar’s Siege and Calgar’s Fury. The first of these expands on this fluff blurb in the codex:
“He single-handedly held the gate against waves of Orks at the Siege of Zalathras.”
It’s a very fun book that fleshes out Calgar and his Victrix Guard while providing some great heroics. The second book takes place on a Space Hulk and has Calgar matching wits with a Mechanicum Magos, which is a pretty interesting and unusual setup. They’re both great reads and I highly recommend them.
Calgar of course shows up in a lot of Ultramarines fiction as a supporting character but his other most notable inclusion is in Guy Haley’s Dark Imperium that provides some perspective on Calgar after Guilliman’s return and the beginning of Primaris Supremacy (but before Calgar himself was biglified). It’s interesting to see how Calgar reacts to the return of his Primarch and what that means for his own role within the Chapter.
Playing with Marneus Calgar
Marneus Calgar is great in 40K. As the first Primaris Special Character, he makes a great addition to any Ultramarines army not just as a force multiplier but as a scary beatstick. We talk a bit about Marneus in our Ultramarines Codex Supplement Review so here we’ll share a few perspectives from Goonhammer Ultamarines players who use him often.
JD: Calgar is great because not only is he basically a two CP save on the chapter master stratagem but a two CP bonus basically making him a 4 CP model in your standard list. It’s worth pointing out that Calgar’s damage output is considerably less than other named characters like Tor Garadon and Adrax Agatone due to his fists only being d3 dmg. This puts him in a unique position since he is rocking 6 base attacks. This coupled with his higher toughness and half damage trait means Calgar is better used as a character duelist or tank than a deletion missile like say a jump pack captain. Don’t expect him to slay Knights in a couple rounds of fighting, but if you bring him with his bodyguards you have some real staying power on the table.
Alfredo: Not only is Calgar an incredible model, but he’s awesome on the tabletop. Particularly paired with his Victrix Guard, he’s incredibly hard to kill and can make a solid foundation for a foot-slogging character deathball that can mulch huge amounts of enemy infantry. One of my most notable games at NOVA was tabling a 100+ model Ork horde and the majority of that was Calgar punching greenskins to death. I agree with JD that he’s probably not who you want punching tanks or Knights to death but he does really well against any kind of infantry or characters and with a bit of support (say a Librarian casting Might of Heroes, or a Lieutenant to provide wound re-rolls) he practically feels like the books and fluff make him out to be.
SRM: Marneus Calgar answers the age-old question, “What if a monster truck had fists, but also took public speaking classes?” As far as Marine beatsticks go, he’s pretty much unparalleled. With the sudden boost in Marine melee combat thanks to Shock Assault, he turns your already defensible Space Marine Battle Pile™️ into something wholly more lethal. I’ve found the best way to use him is like a Captain +1, centering him in the middle of your force to dish out as many rerolls as possible, and stepping him out to take on whatever you want dead in assault. He also has the added bonus of taking half damage with T5, great saves, and a boatload of wounds, so he can be relatively exposed to snipers and survive.
One of my favorite tricks Ultramarines get is the T’au-lite Defensive Focus stratagem, which lets up to three other units fire Overwatch within 6″ of the unit being charged. Marines want to be close to take advantage of aura abilities, so I’ll pretty reliably get an absolute torrent of Overwatch fire (with rerolls from Calgar!) at whatever is fool enough to charge my lines. In a recent game I used this to gut what would have otherwise been a pretty devastating turn 1 charge from a horde of Genestealers. Turns out a supporting round of fire from an Overwatching Repulsor with rerolls makes bugs go away. Who knew.
With Calgar providing rerolls to everything, he’s a prime candidate for the Inspiring Command stratagem. I’ve had to spread out and found the added +3″ to his aura ability to be a lifesaver. Suddenly those Hellblasters I left on the objective back there can Overcharge safely, or that bracketed Repulsor can still take advantage of Calgar’s reroll bubble.
As an added bonus, you’ll get a load more CP to play with his Adept of the Codex Warlord Trait in addition to the bonus 2 CP he grants you to begin with. This makes him a curiously good support character, despite being a (Primaris) man-sized bulldozer.
Painting Marneus Calgar
As always, there’s more than one way to do things, and so we’ve put together notes from several authors on how to tackle this model. There’s no “right” way to do things, so pick the method that works best for you.
Alfredo’s Method
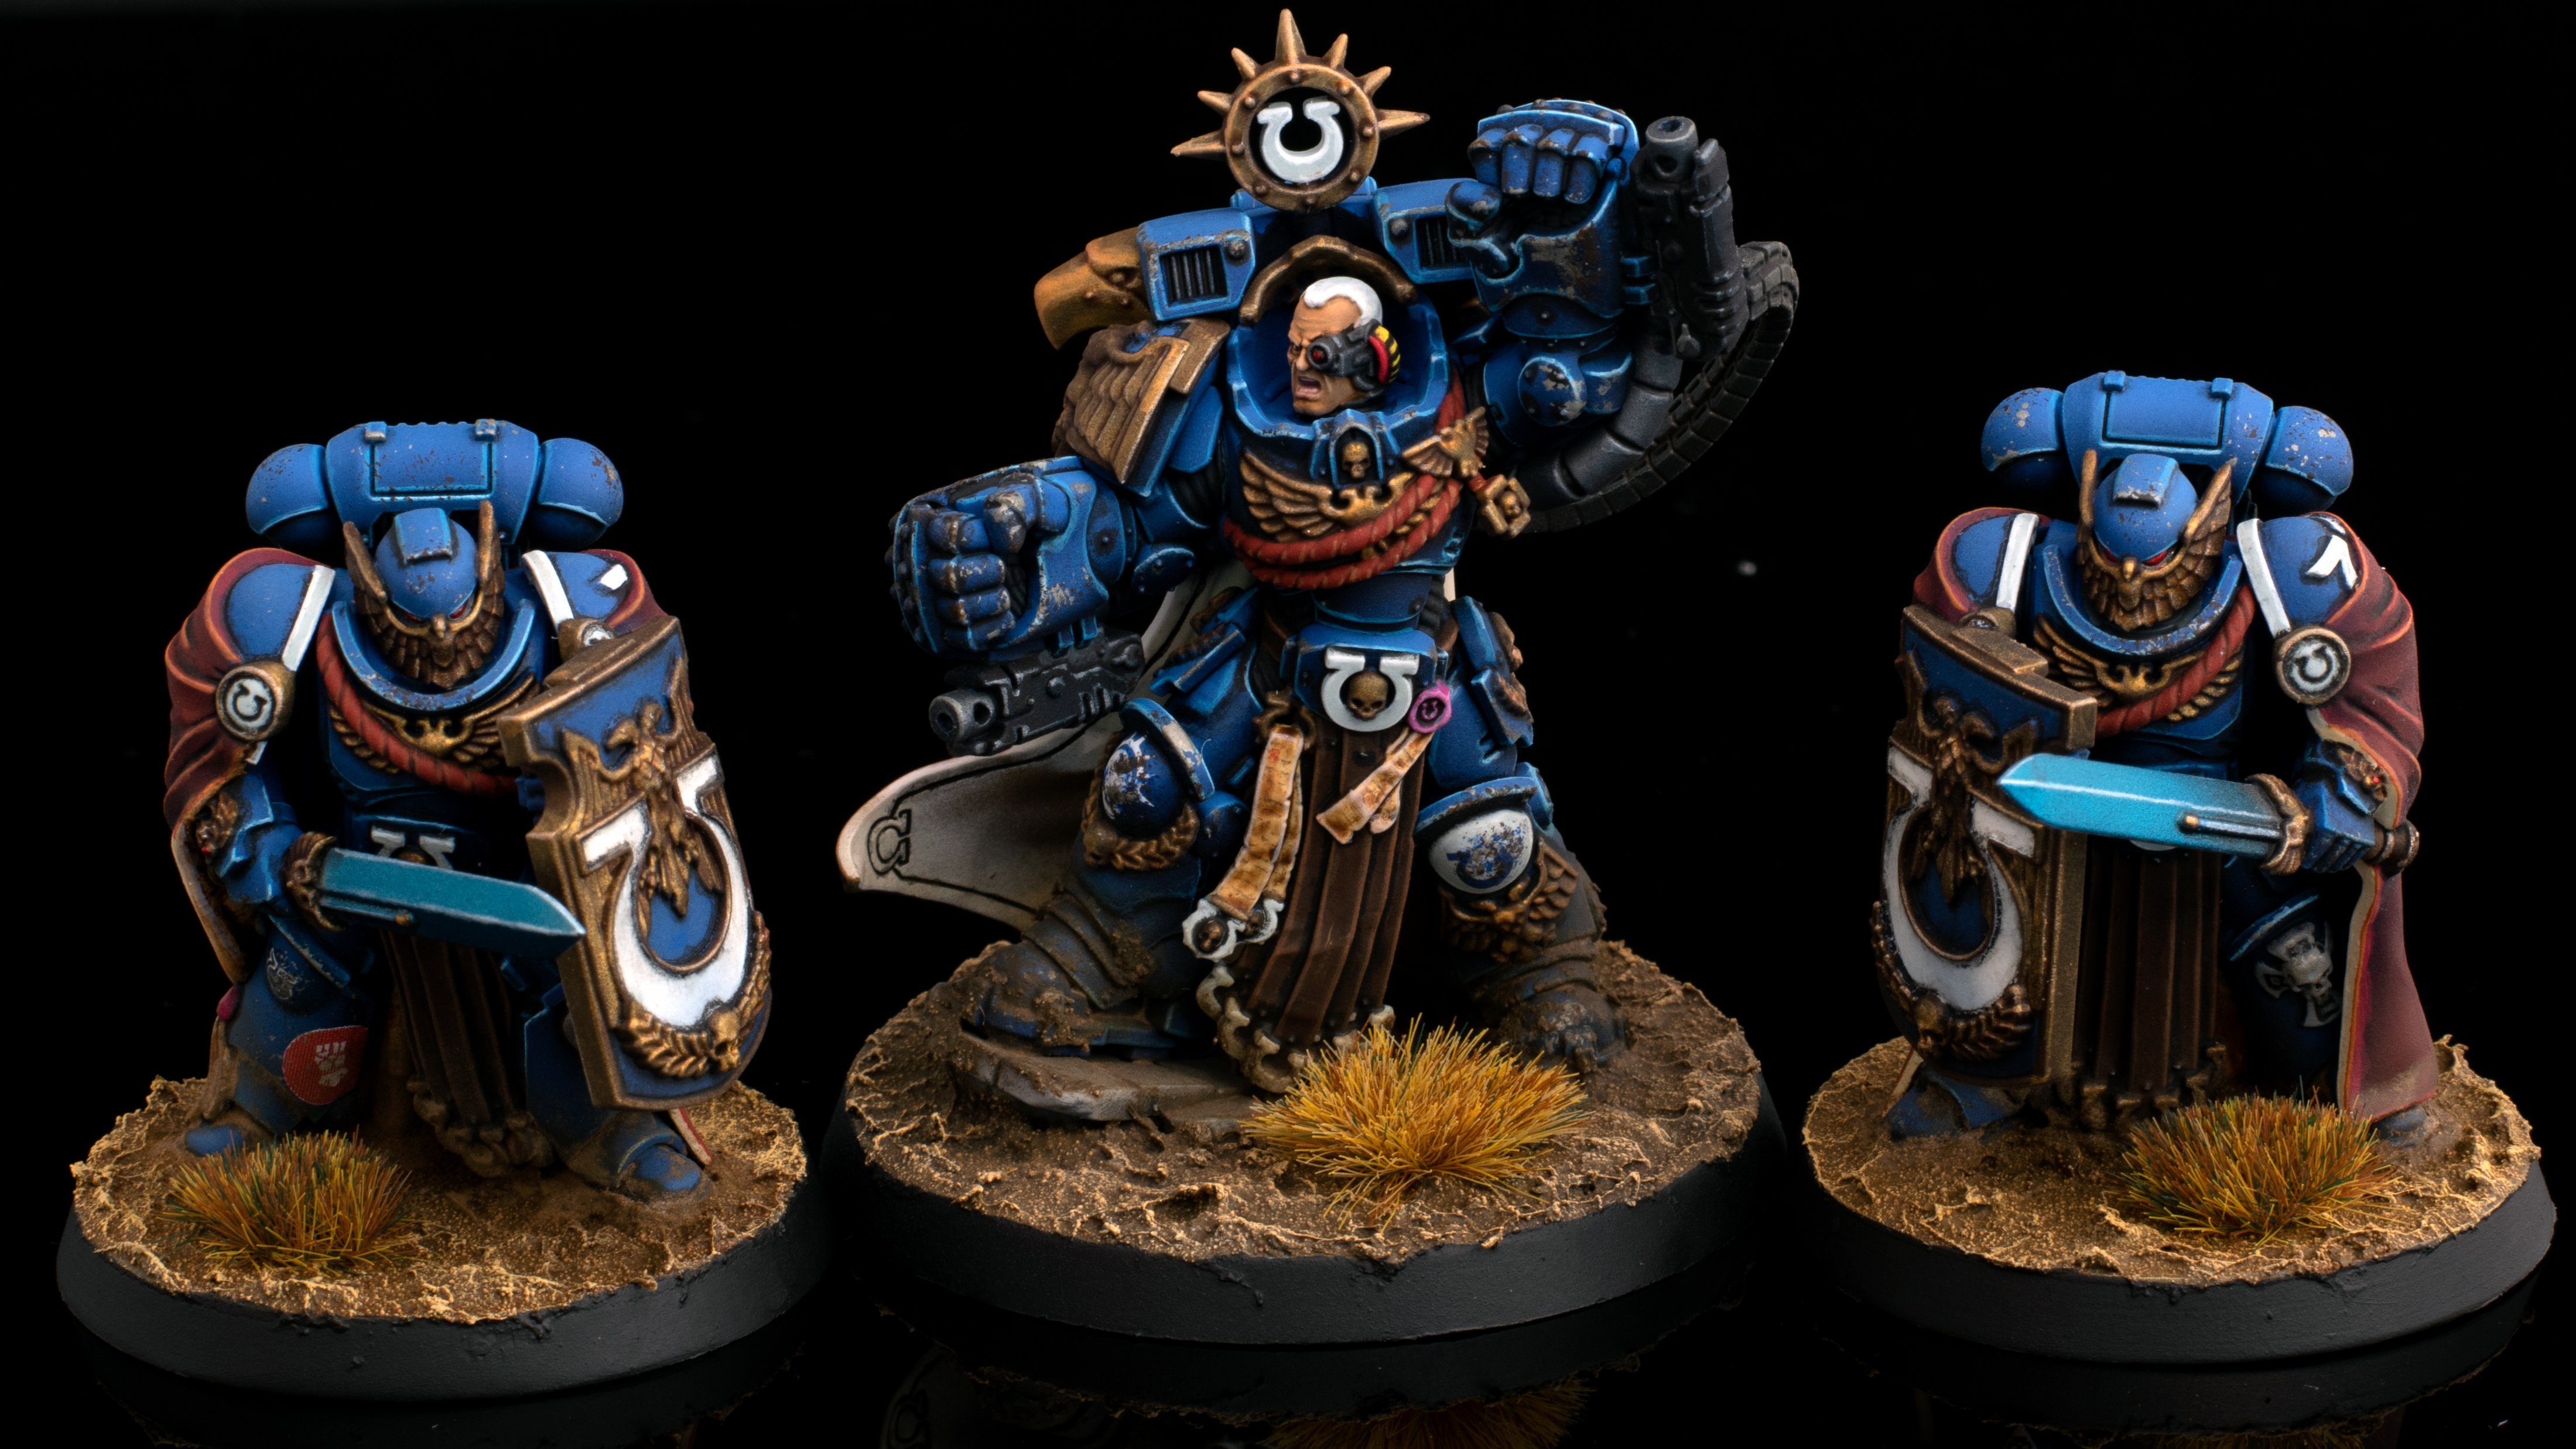
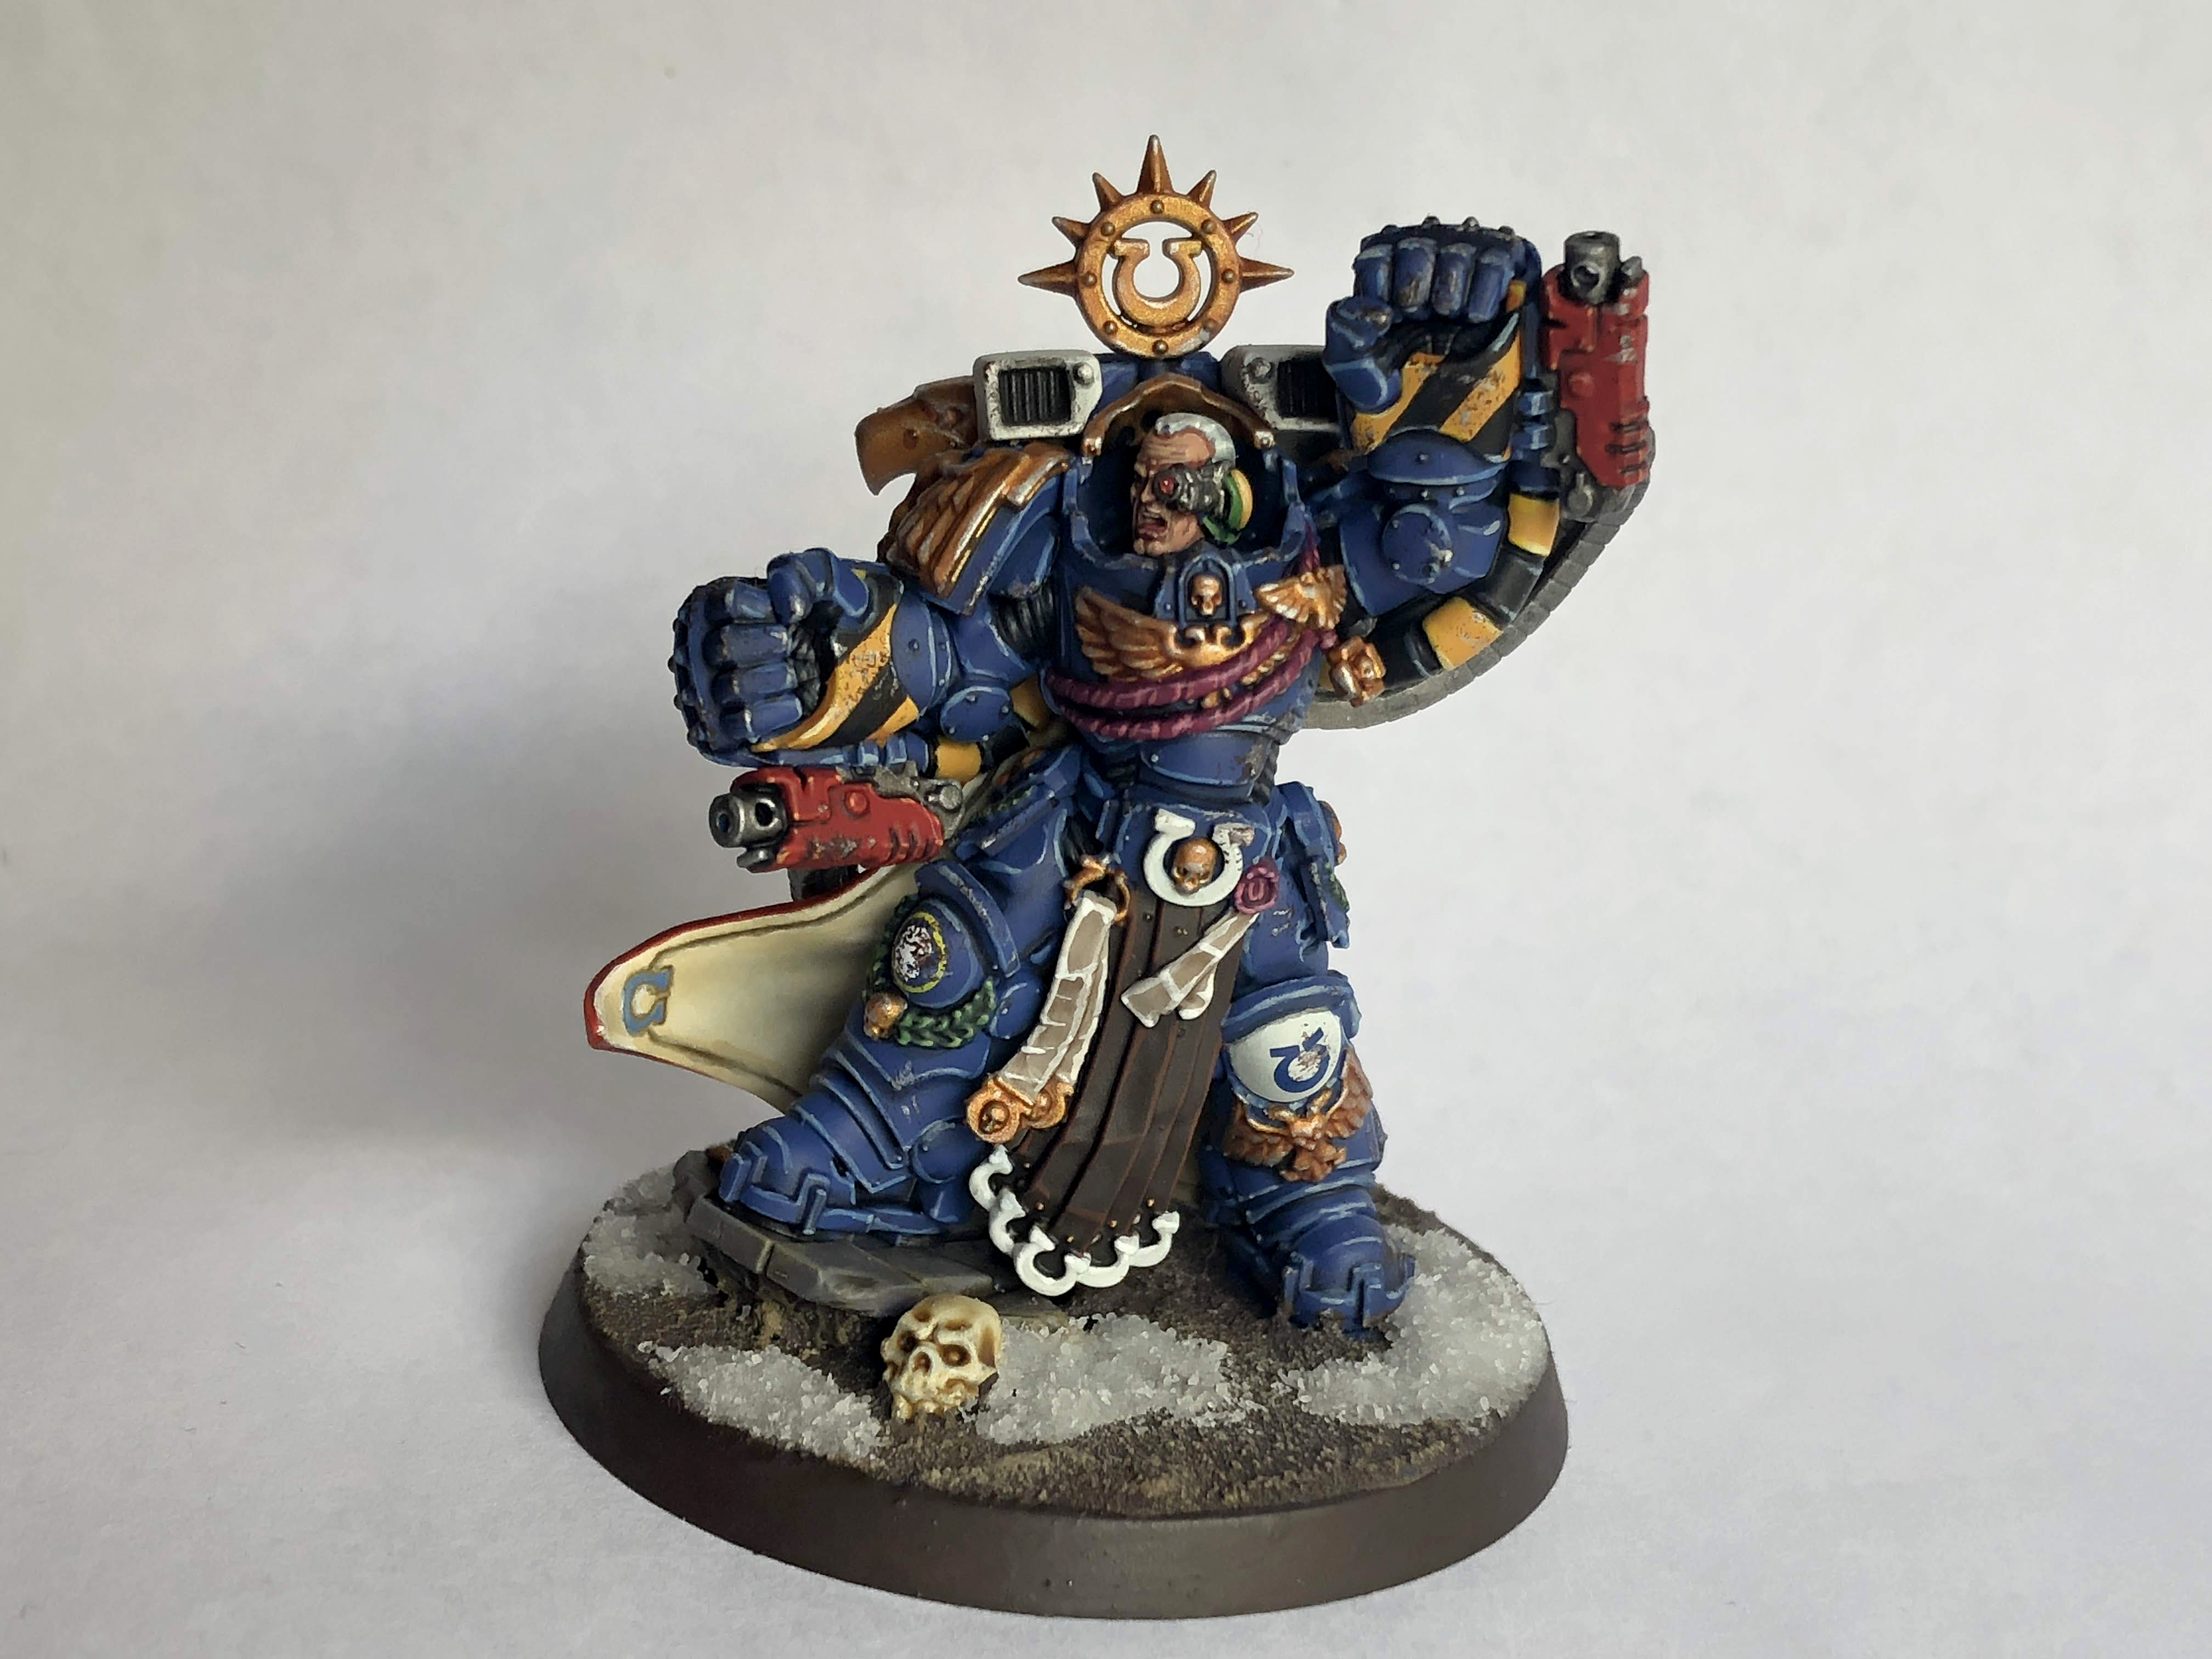
My approach to Ultramarines is already covered in How to Paint Everything – Ultramarines (which specifically show the Victrix Guard even!) so I’ll focus here on the bits that make Marneus unique.
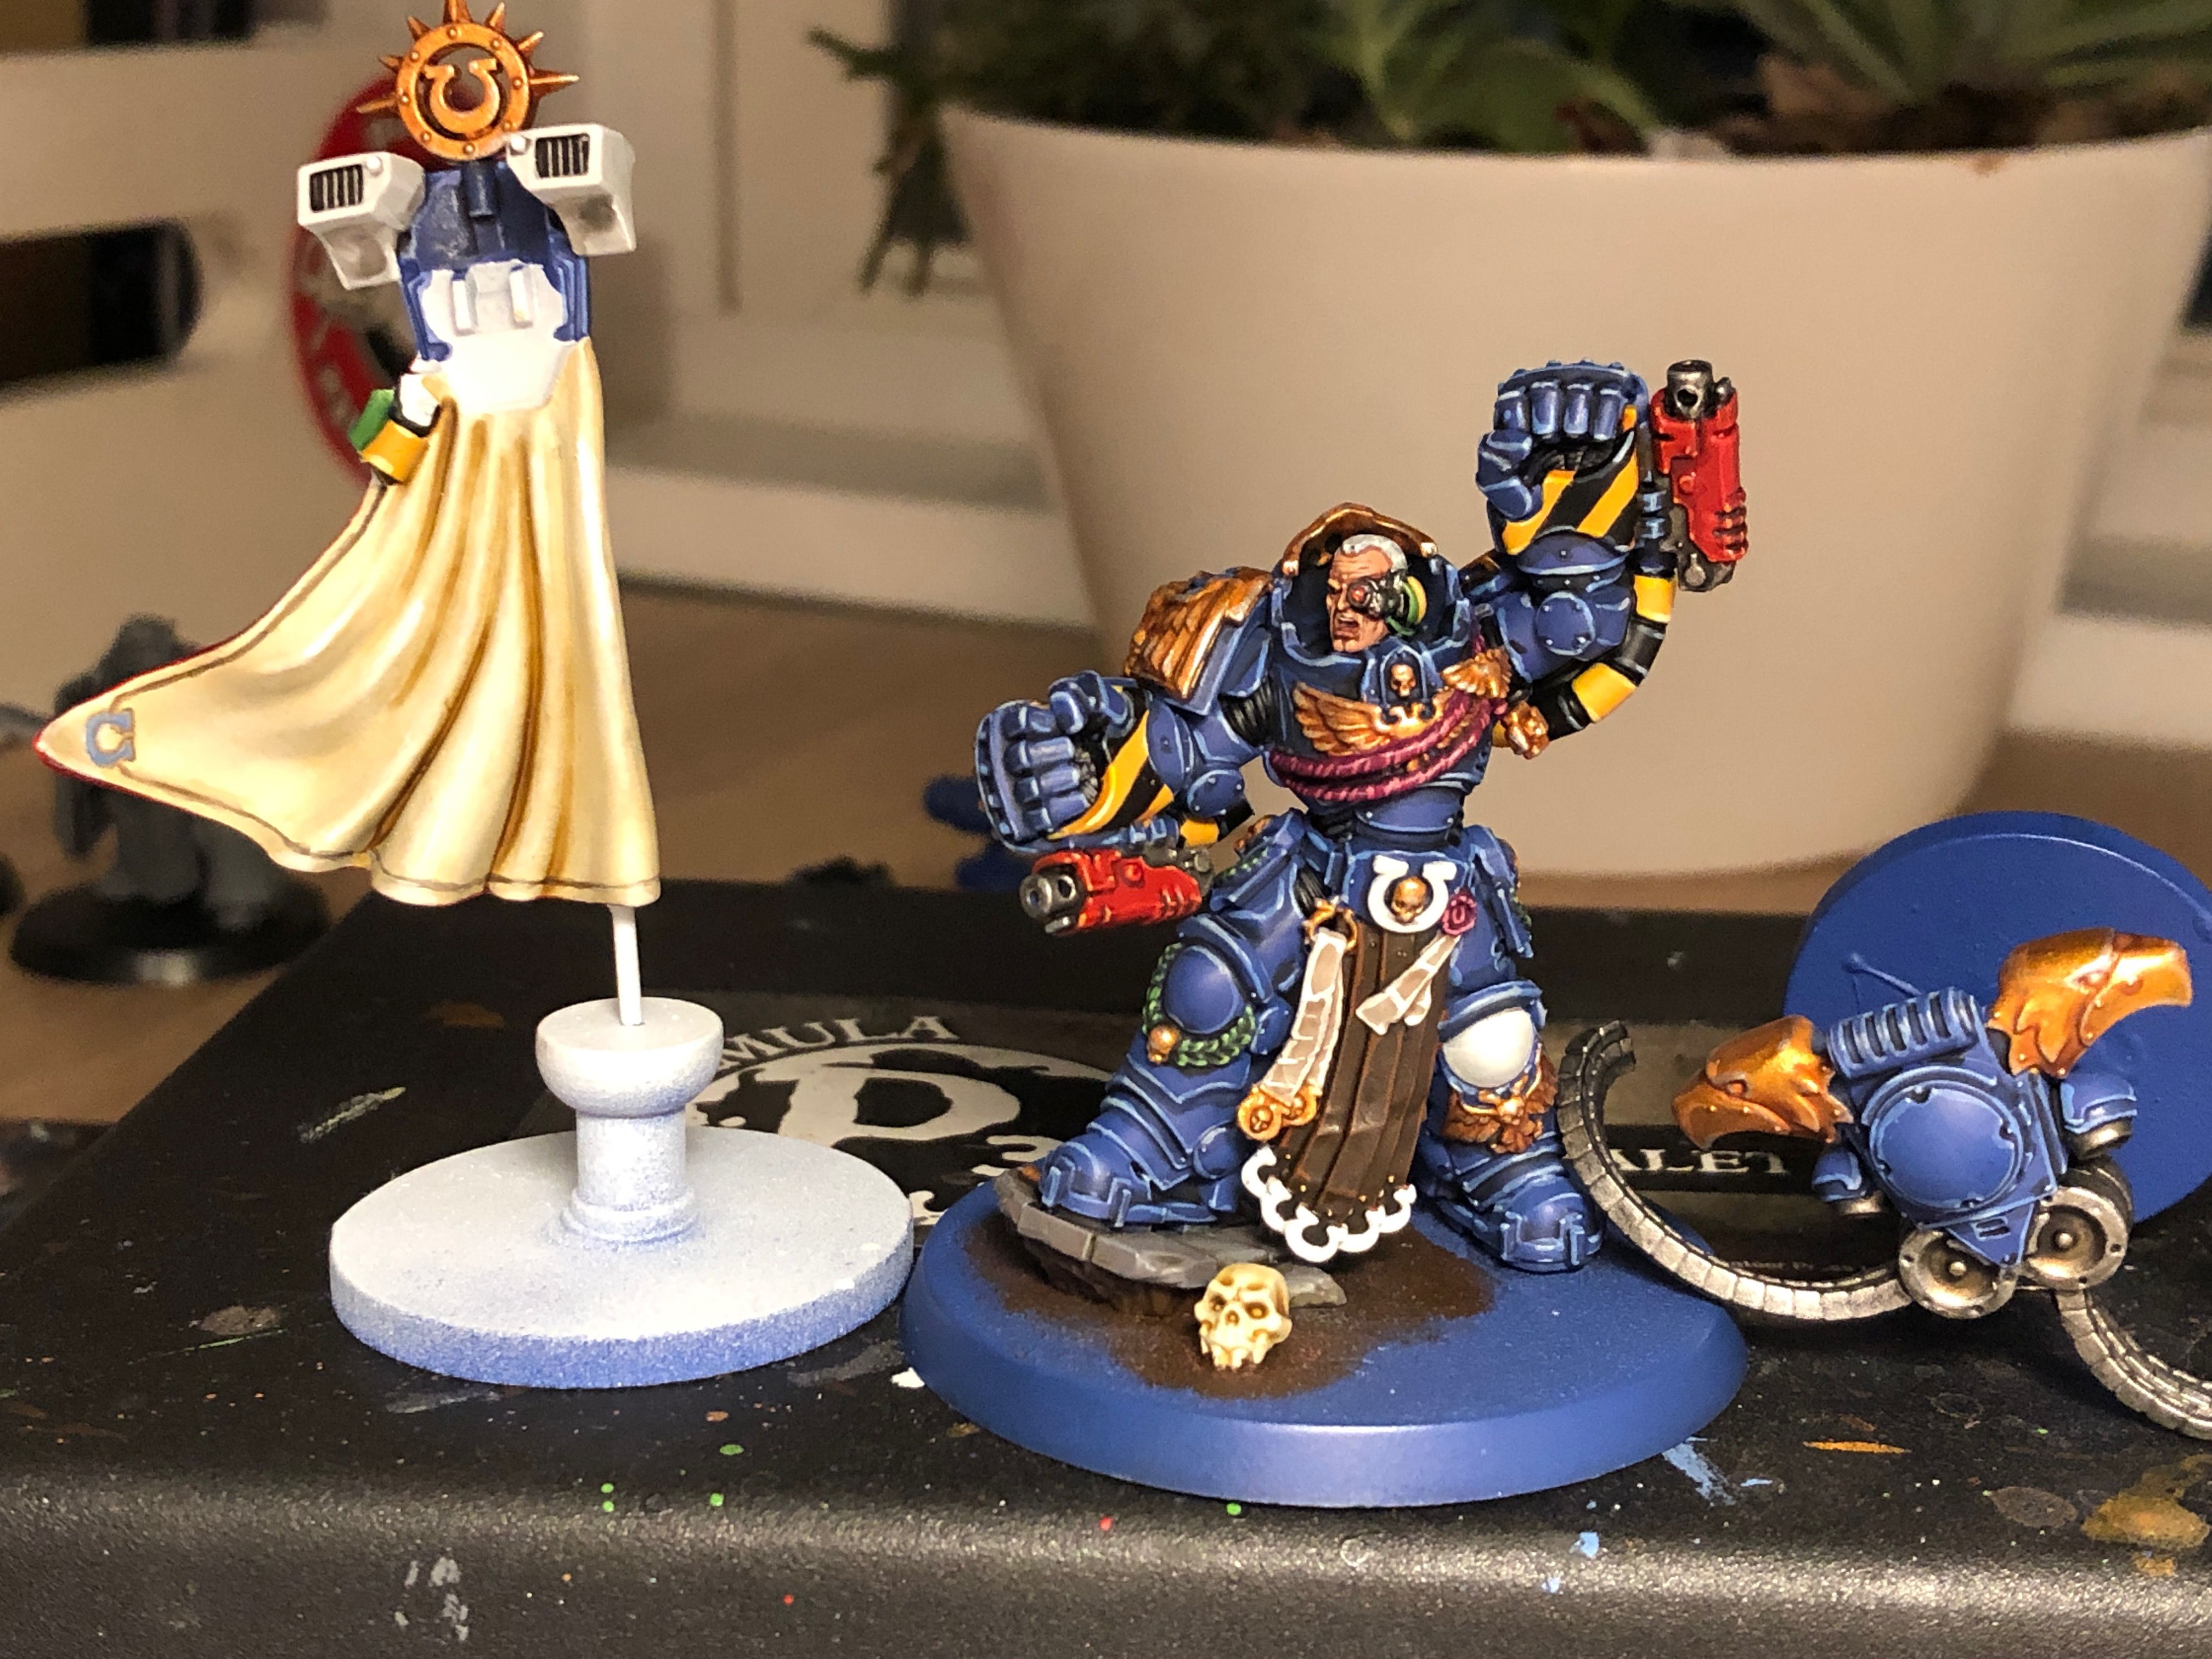
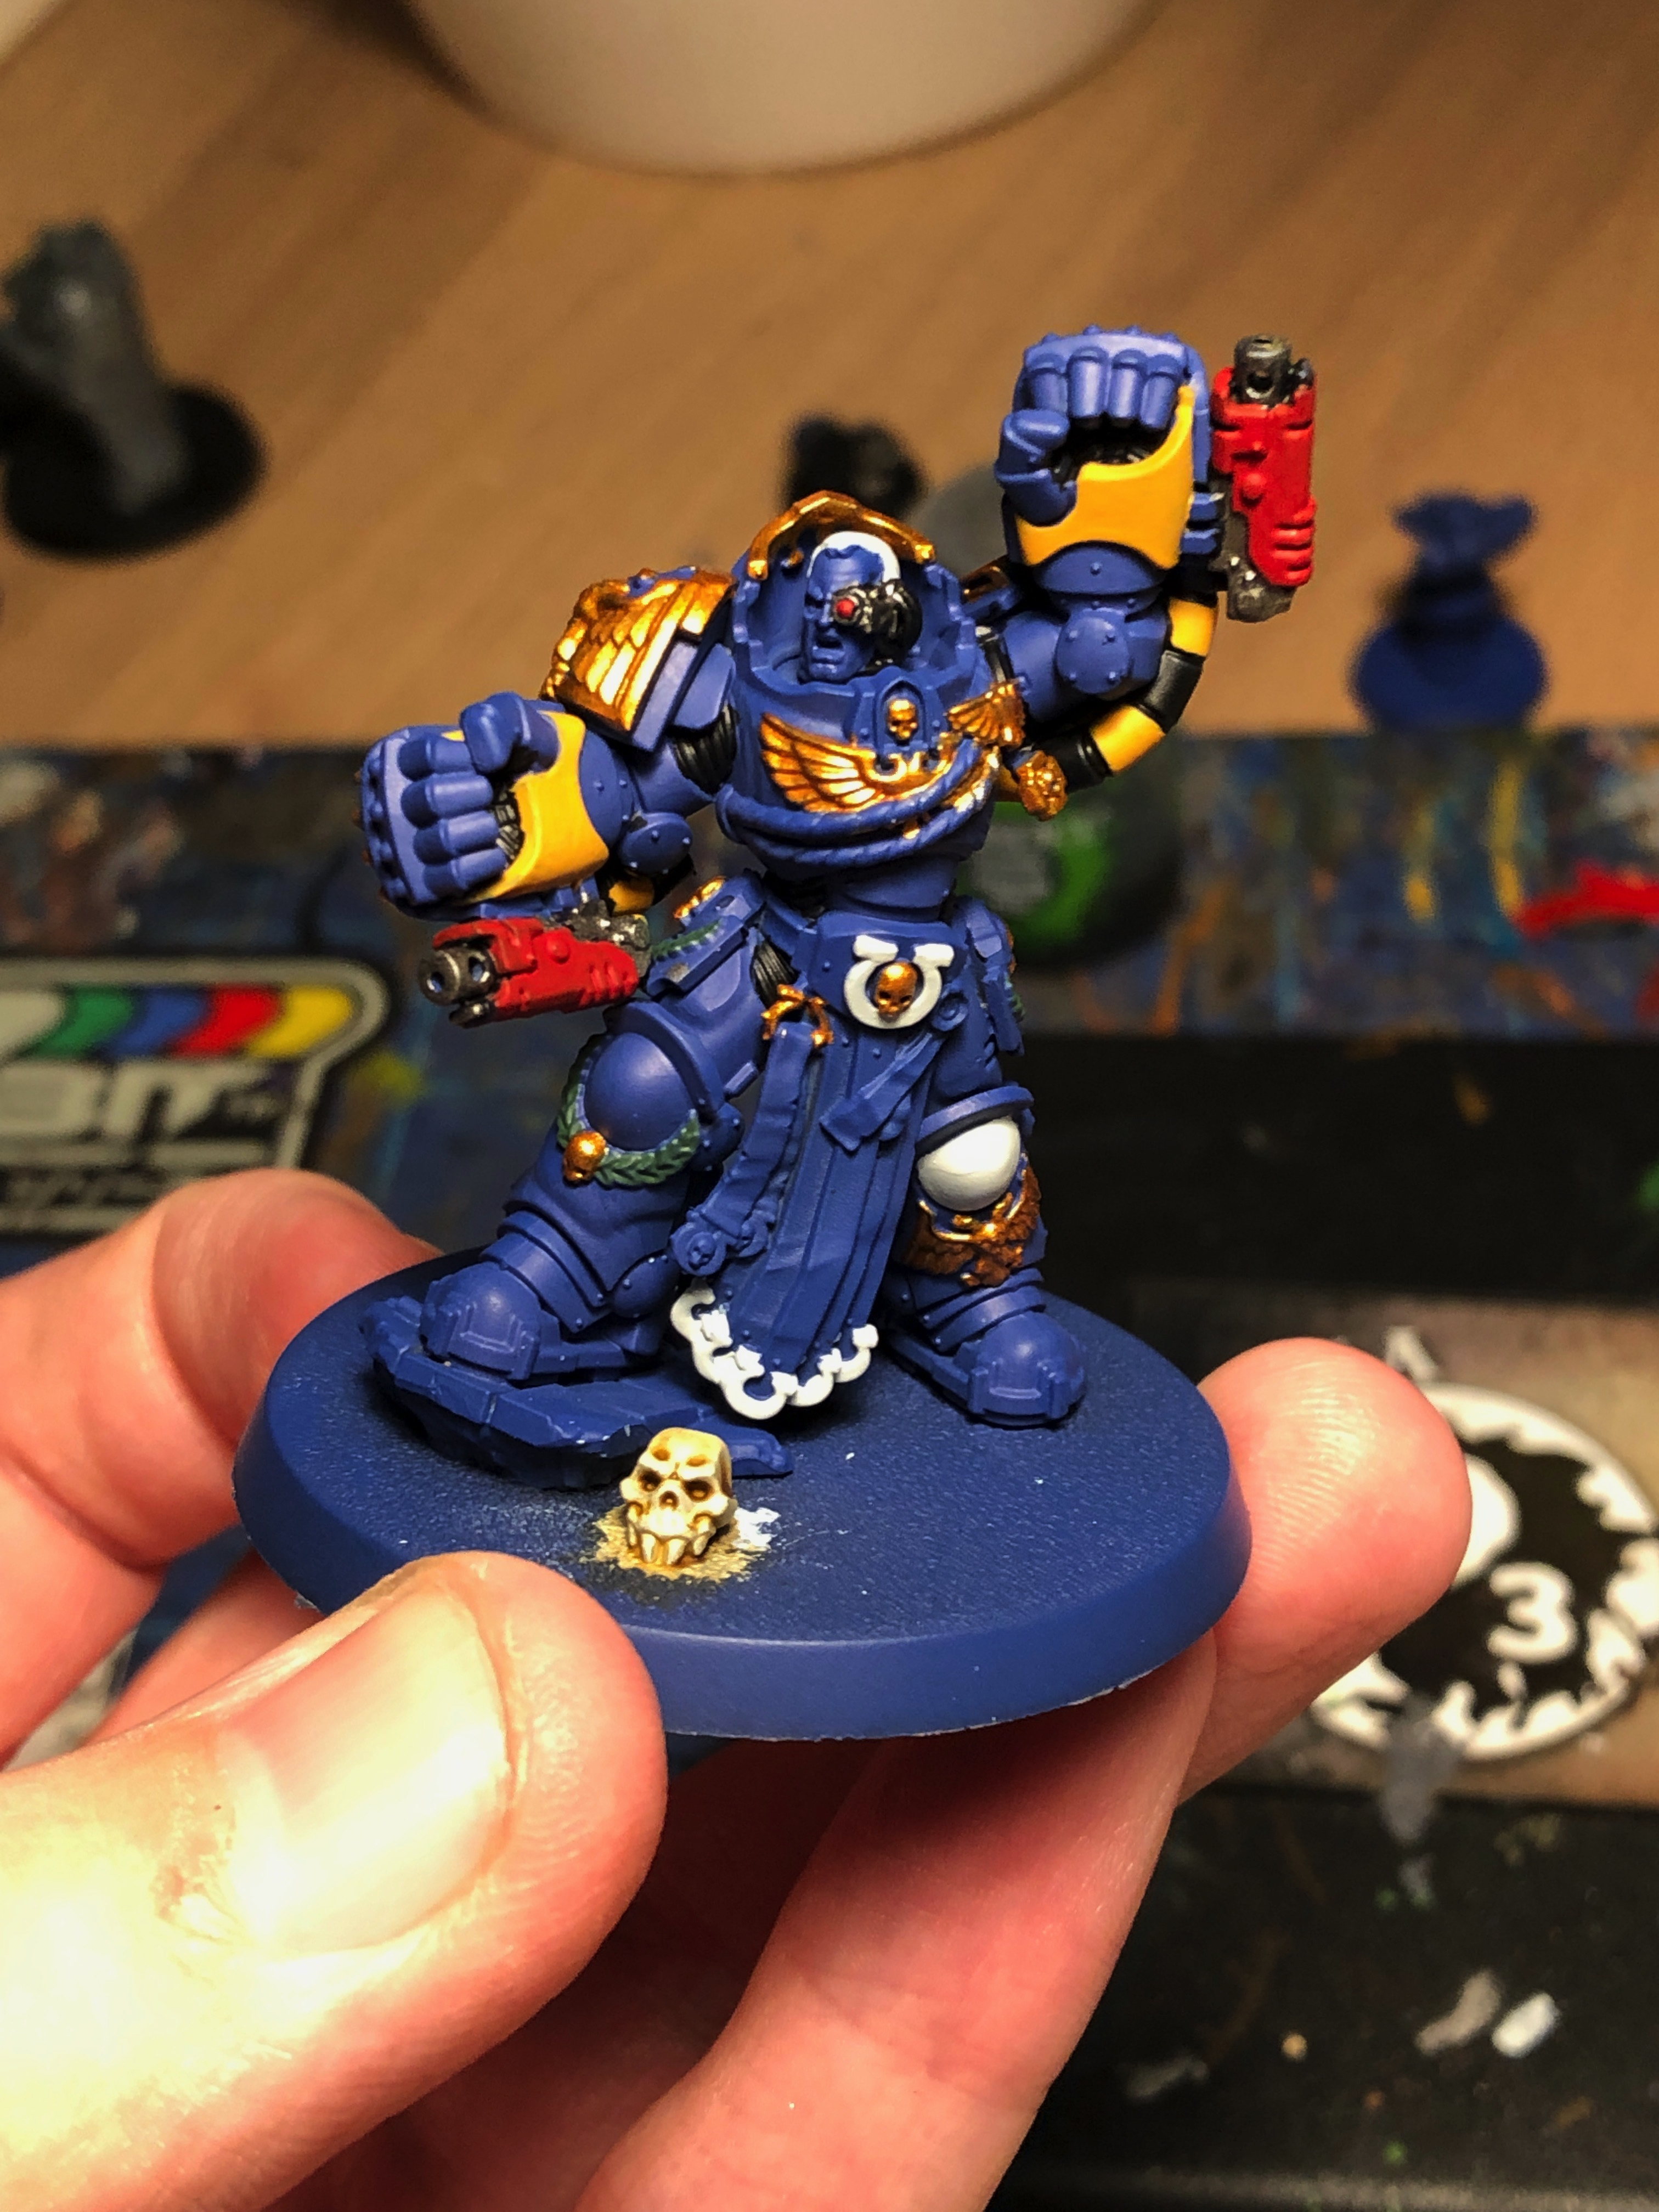
 Marneus Calgar WIP Credit: Alfredo Ramirez
Planning
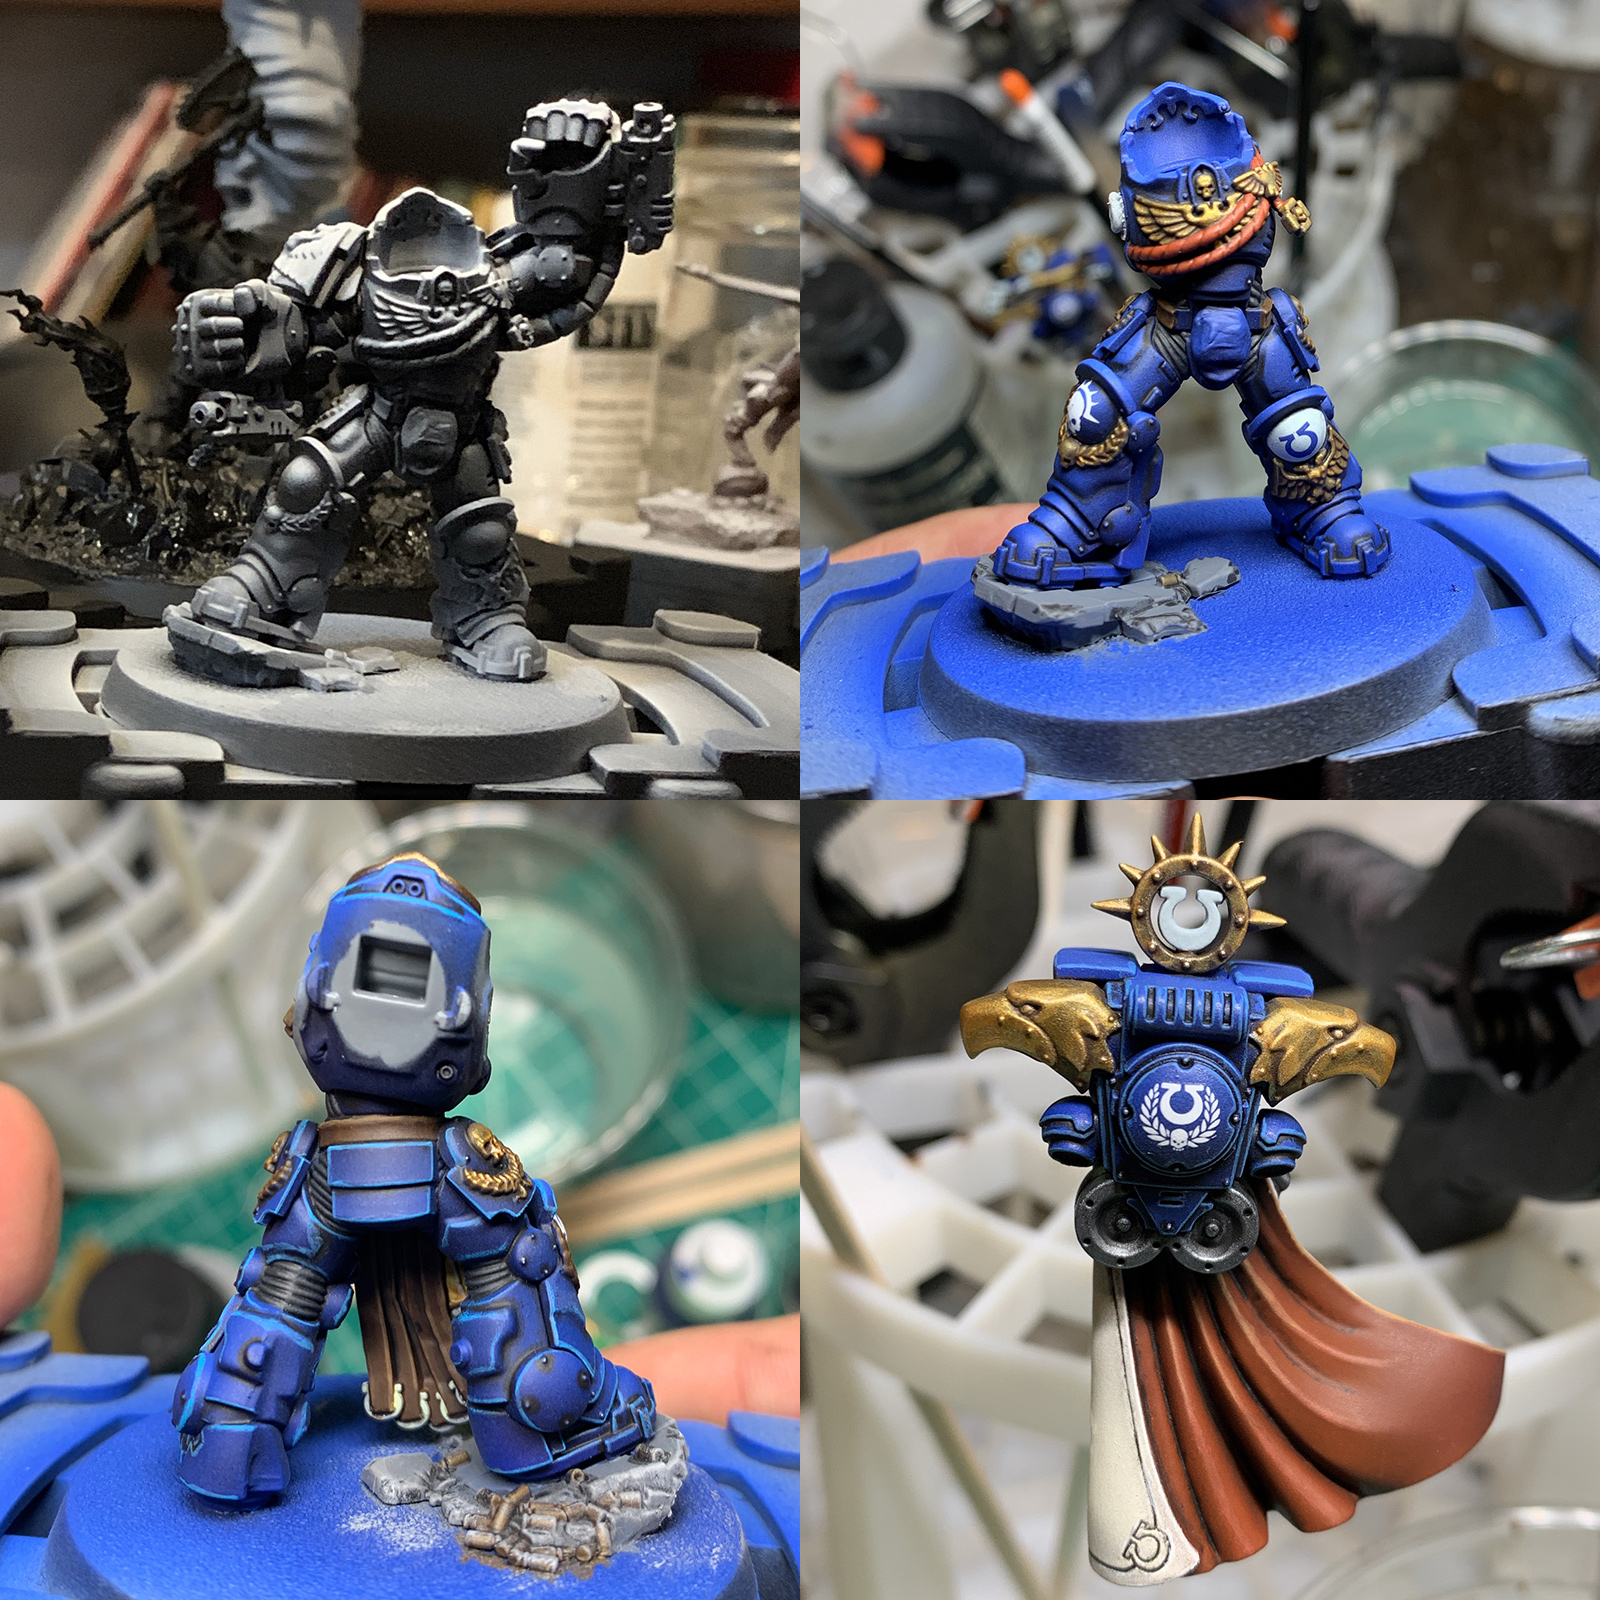
When tackling a complex model like Calgar, whom you likely want to be an army centerpiece, you have to think carefully about assemblies and order of operations. Like his Victrix Guard, Calgar has two large areas of color: his armour and his cape. As such, I absolutely wanted those painted separately in order to be able to spray the cape the same way I did the Victrix capes and get smooth airbrush gradients on that large surface. Unlike the Victrix, Calgar is unhelmeted (unless you’re a coward) and his face is going to be the natural focal point for the viewer, so I also wanted to paint that separately and prime it differently. I also decided it would be easier to paint his pteruges separately and left them off. Lastly, while his pose is fairly open, his arms still create some harder to reach areas that are nevertheless quite visible, so I decided to paint his arms separately as well.
When painting in sub-assemblies like this, you’ll want to ensure to plan where you later contact areas will be (once you glue things back together) and keep those surfaces clean if possible (like with blue tack). Even the thin layers of paint and varnish can affect the fit of parts as well as making it difficult to bond surfaces together. As we’ll see, re-assembly of Calgar can be a bit tricky and I actually ran into some issues.
An unavoidable challenge is sticking the ammo feed on at the end. Unless you build the whole model together (which not even Duncan does on Warhammer TV), you’ll have to glue the ammo feeds on after everything else is assembled, since they connect from the arms to the backpack and cover areas of the cape, etc.
Priming & Basecoating
While I painted the arms separately and did not glue them on, I did stick them on with blue tack when priming. This was so I could get the right zenithal effect and ensure that the arms were occluding other parts of the model as they would once fully assembled. I went with a pretty stark black and white zenithal effect to create nice contract on areas like the knees, feet, etc.
Basecoating followed my usual process for Ultramarines, which you can see elsewhere. I sprayed the armour blue and for the backpack I then did some minor masking and sprayed both the inside and outside of the cloak in cream and red respectively, following the same recipes I used for the Victrix Guard. Everything else then got base-coated by hand.
Everything Else
I followed my standard process after base-coating of gloss coats, decals and oil washes followed by a matte coat before highlights.
Of note is the face, which I wanted to play special attention to.

I started with a pretty dark fleshtone for his face and then highlight via airbrush. It got washed and then several progressive highlights in order to create a broad range of contrast. In the black and white close-up above, you can see how the face ranges from nearly pure black in the shadows of his eyes to very nearly white on the highlights of his mouth folds or nose, with a whole range of greys in between. Miniature painting is all about contrast and with the face being the most important part of the mini, you really want to push that contrast as much as you can there.
My approach to eyes is pretty simple. Before washes, I paint the eye black. I then dot either side of the pupil with ivory. I want the pupil to extend from top to bottom of the eye, and I want it roughly centered but closer to the nose. Sometimes this works in one try, sometimes it takes a couple. Calgar has the benefit of only having one eye, which was nice.
Highlights & Re-Assembly
I tend to do highlights and re-assembly somewhat together. I like to do first stage highlights while disassembled and then second stage and beyond on the assembled model once I have a better sense of where light would fall and provide sharper highlights. For Calgar, the order of operations was important. After highlighting all of the armor, I could then do full highlights on the pteruges and glue them on. As you can see, I highlighted all of the back of the model, including parts that would be covered by the cape, because of reasons. This really isn’t necessary but it is worth keeping in mind when occluded parts may still be visible at some angles and highlighting them appropriately. Once the pteruges were on, I could add the cape and backpack as well. And then the arms. Unfortunately, the right arms gave me trouble and I could just not get it to line up properly with the cape and body and ultimately I ended up with a bit of a gap, though in practice I’ve never noticed it. Sometimes you don’t have to do things perfectly and they still look just fine. The ammo feeds were also a bit of a pain to put on and the only part of the model I assembled with super glue, but they ended up being reasonably forgiving.
Final Weathering
With everything highlighted and assembled, I went through my typical weathering process, focusing on the feet and fists. I did a combination of sponge weathering and mud with a mix of texture paint, wet pigments and dry pigments.
And the final result:
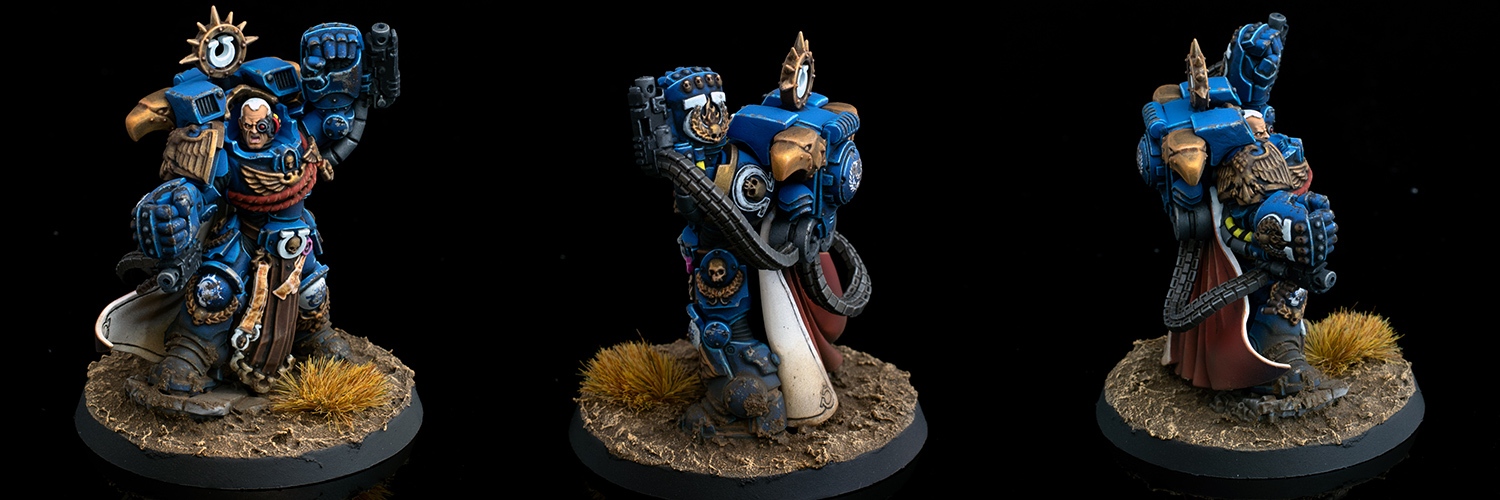
And here he is with his friends:
SRM’s Method
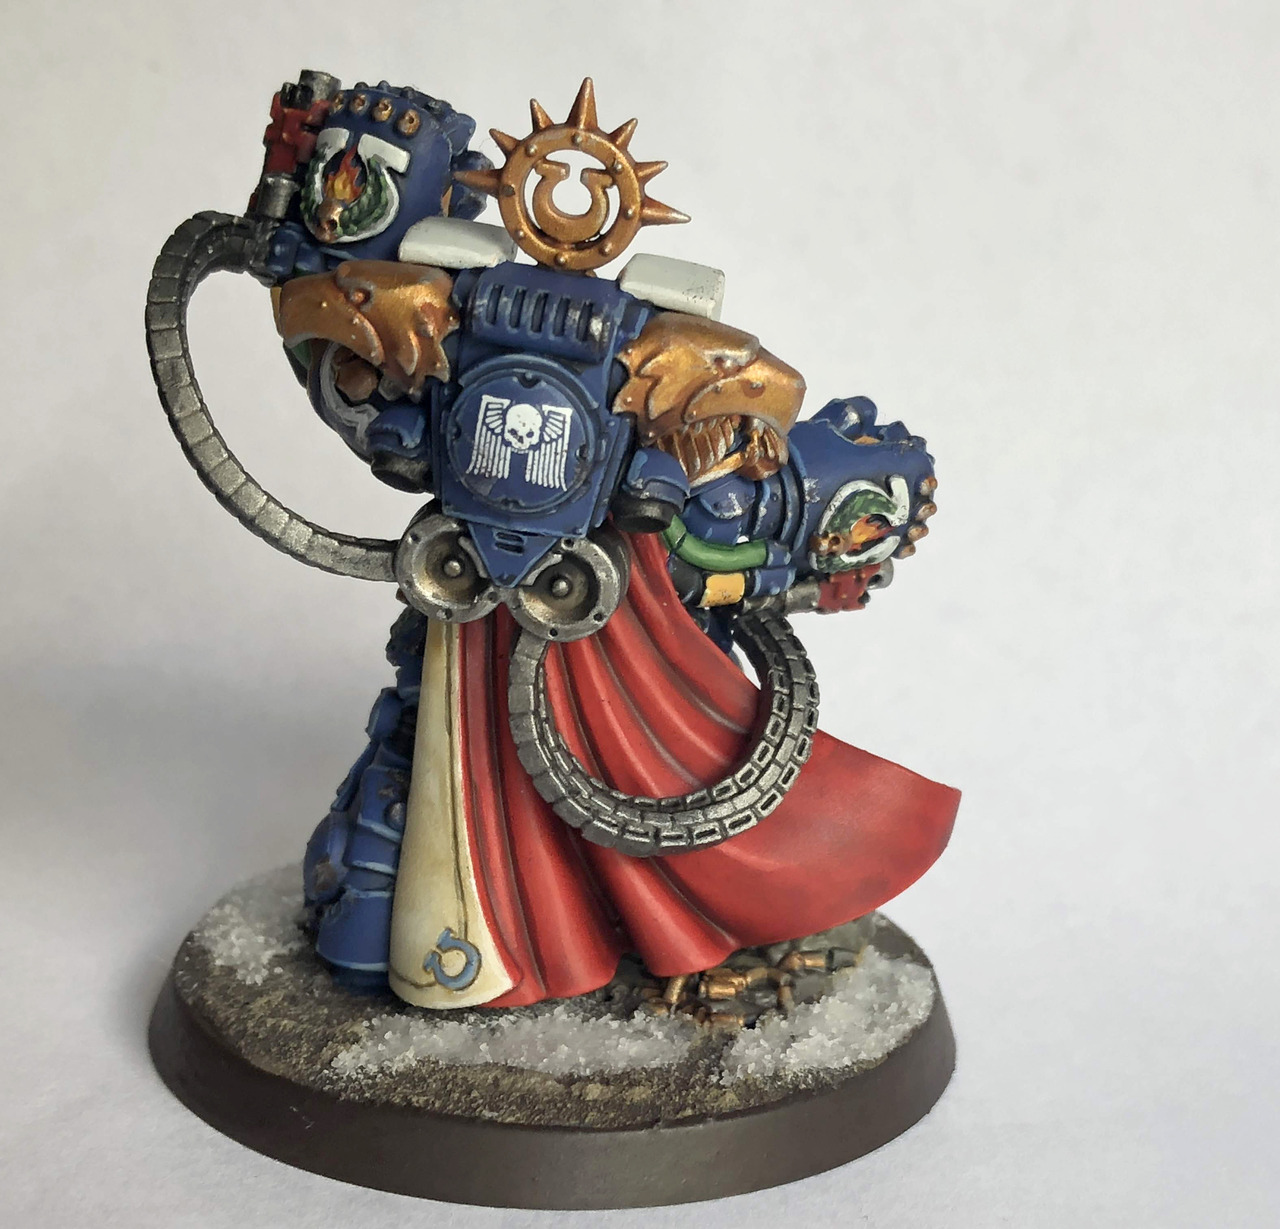
My first thoughts on seeing Calgar’s new model were “Fuck!” and “Yes!” in an order I’ll leave up to the reader. My second thoughts were “How am I gonna paint this big lug?”, a question I wasn’t able to answer until a few months later when I finally cracked open the box and built him. I built him in three sub assemblies, but I could have left his head separate as well:
First, I built the whole body, guns and all, and stuck that on its base. I primed this blue and went ahead painting him more or less like the rest of my Ultras, which you can see in my section of How To Paint Everything: Roboute Guilliman.
As with most of my Primaris Ultras, he needed to have some extra color on him. The Gauntlets of Ultramar were an obvious choice for caution stripes, and I painted the little flames on the back like actual flames in a nod to his old back banner. I also painted the cabling like caution stripes because why not. This was Averland Sunset with a recess shade of Fuegan Orange then highlights in Yriel Yellow and Dorn Yellow at the very edges.
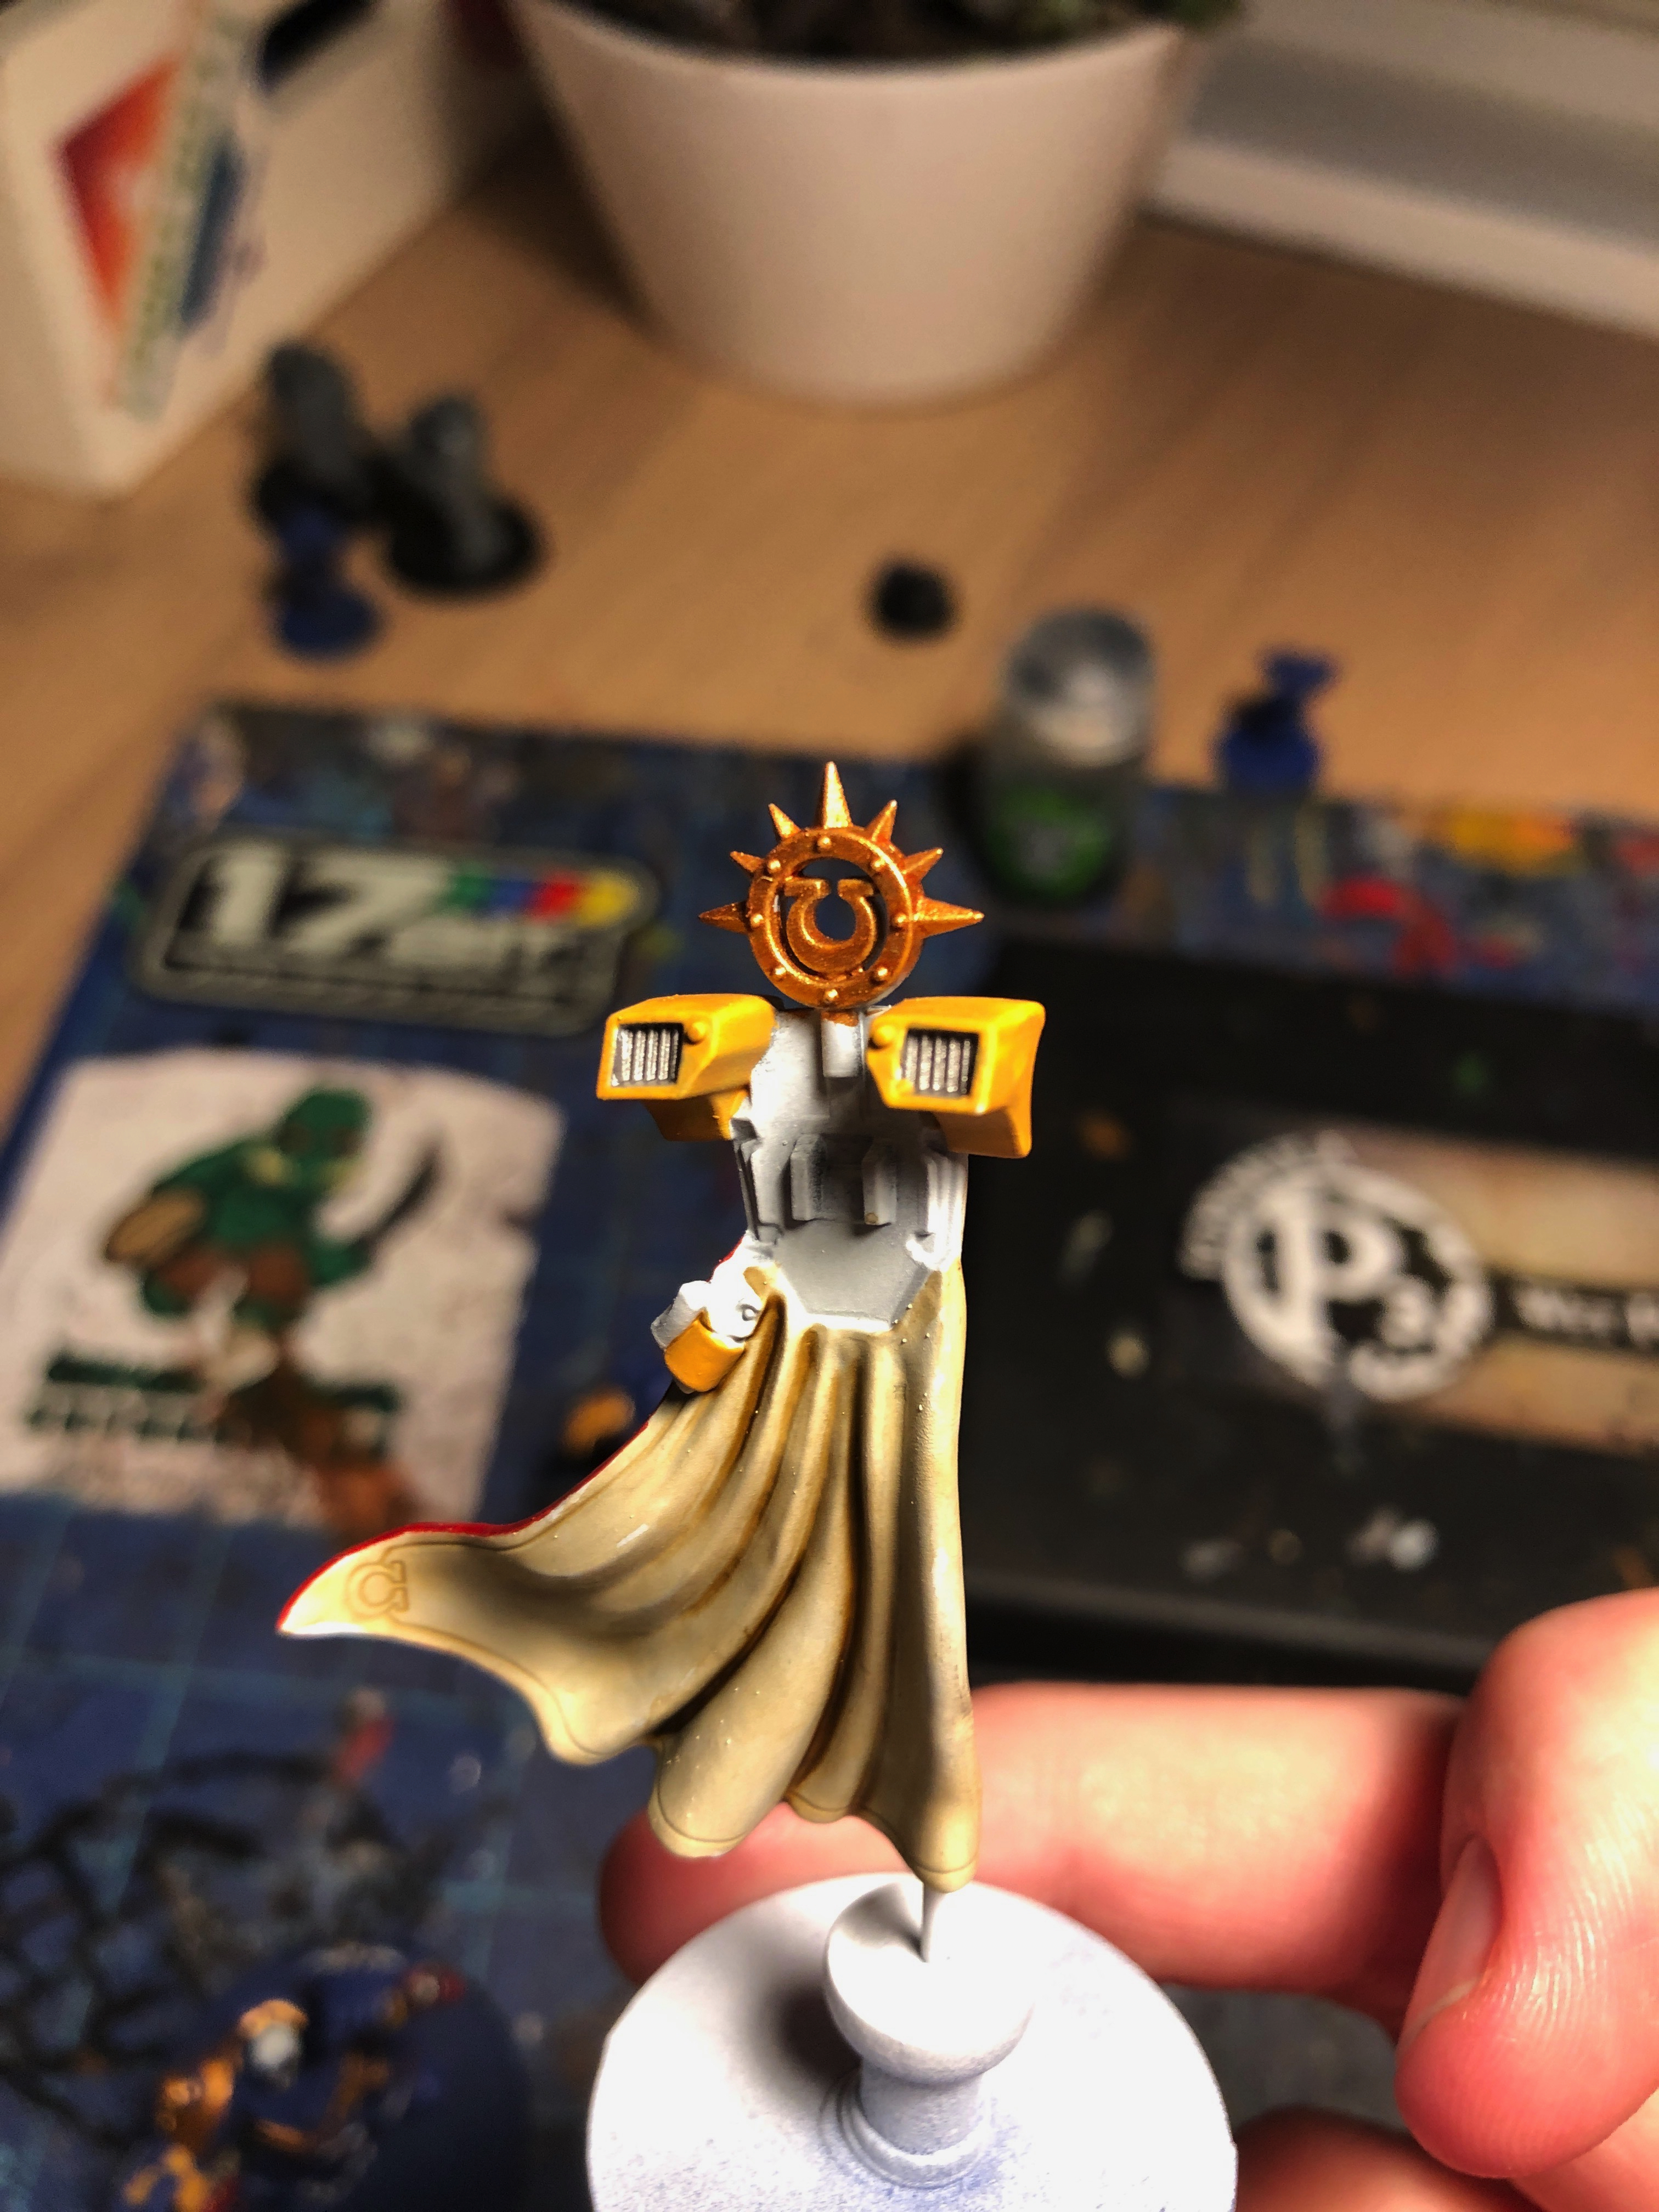
The cape and vents came next. I primed these white as I wanted to use Contrast on the fabric and keep the vents bright. I was going to paint the vents caution striped as well, but thought it would cause too much visual confusion and painted them white instead. For the interior of the cape, I used Contrast Skeleton Horde and did a highlight of Pallid Wych Flesh and called it a day. The keyline was lined with Nuln Oil then cleaned up with Ushabti Bone.

For the exterior, I did two coats of Contrast Blood Angels Red, with a bit of Contrast Flesh Tearers Red in the recesses. I highlighted this with a color I mixed for the occasion, using Mephiston Red and Fire Dragon Bright for a custom color.
The backpack and ammo feeds were left separate. I pinned this bit in the back so the hole would be on the inside of the model. I painted the blue as detailed in the Guilliman article, and used my typical gold recipe for the eagle heads, vent ultima, and everything else on the model. I start with a base of Retributor Armour, do a recess shade of Reikland Fleshshade, highlight up with Liberator Gold and finish it off with Stormhost Silver at the very edges. The red for the boltguns was Mephiston Red, Nuln Oil in the recesses, then Wild Rider Red highlights and a Fire Dragon Bright highlight on the very edges.
With that, my large adult son was more or less complete! Some basing, details here and there, and Marneus Calgar was ready to punch dudes to death in the name of The Emperor.
Bonus Booley Method – Converting Calgar to a Gravis Captain
As a bonus, we are including Booley’s fantastic conversion of Calgar to an Imperial Fist Gravis Captain. You can learn more about how Booley paints his Fists in How to Paint Everything: Imperial Fists or use any scheme you want for a similar conversion!
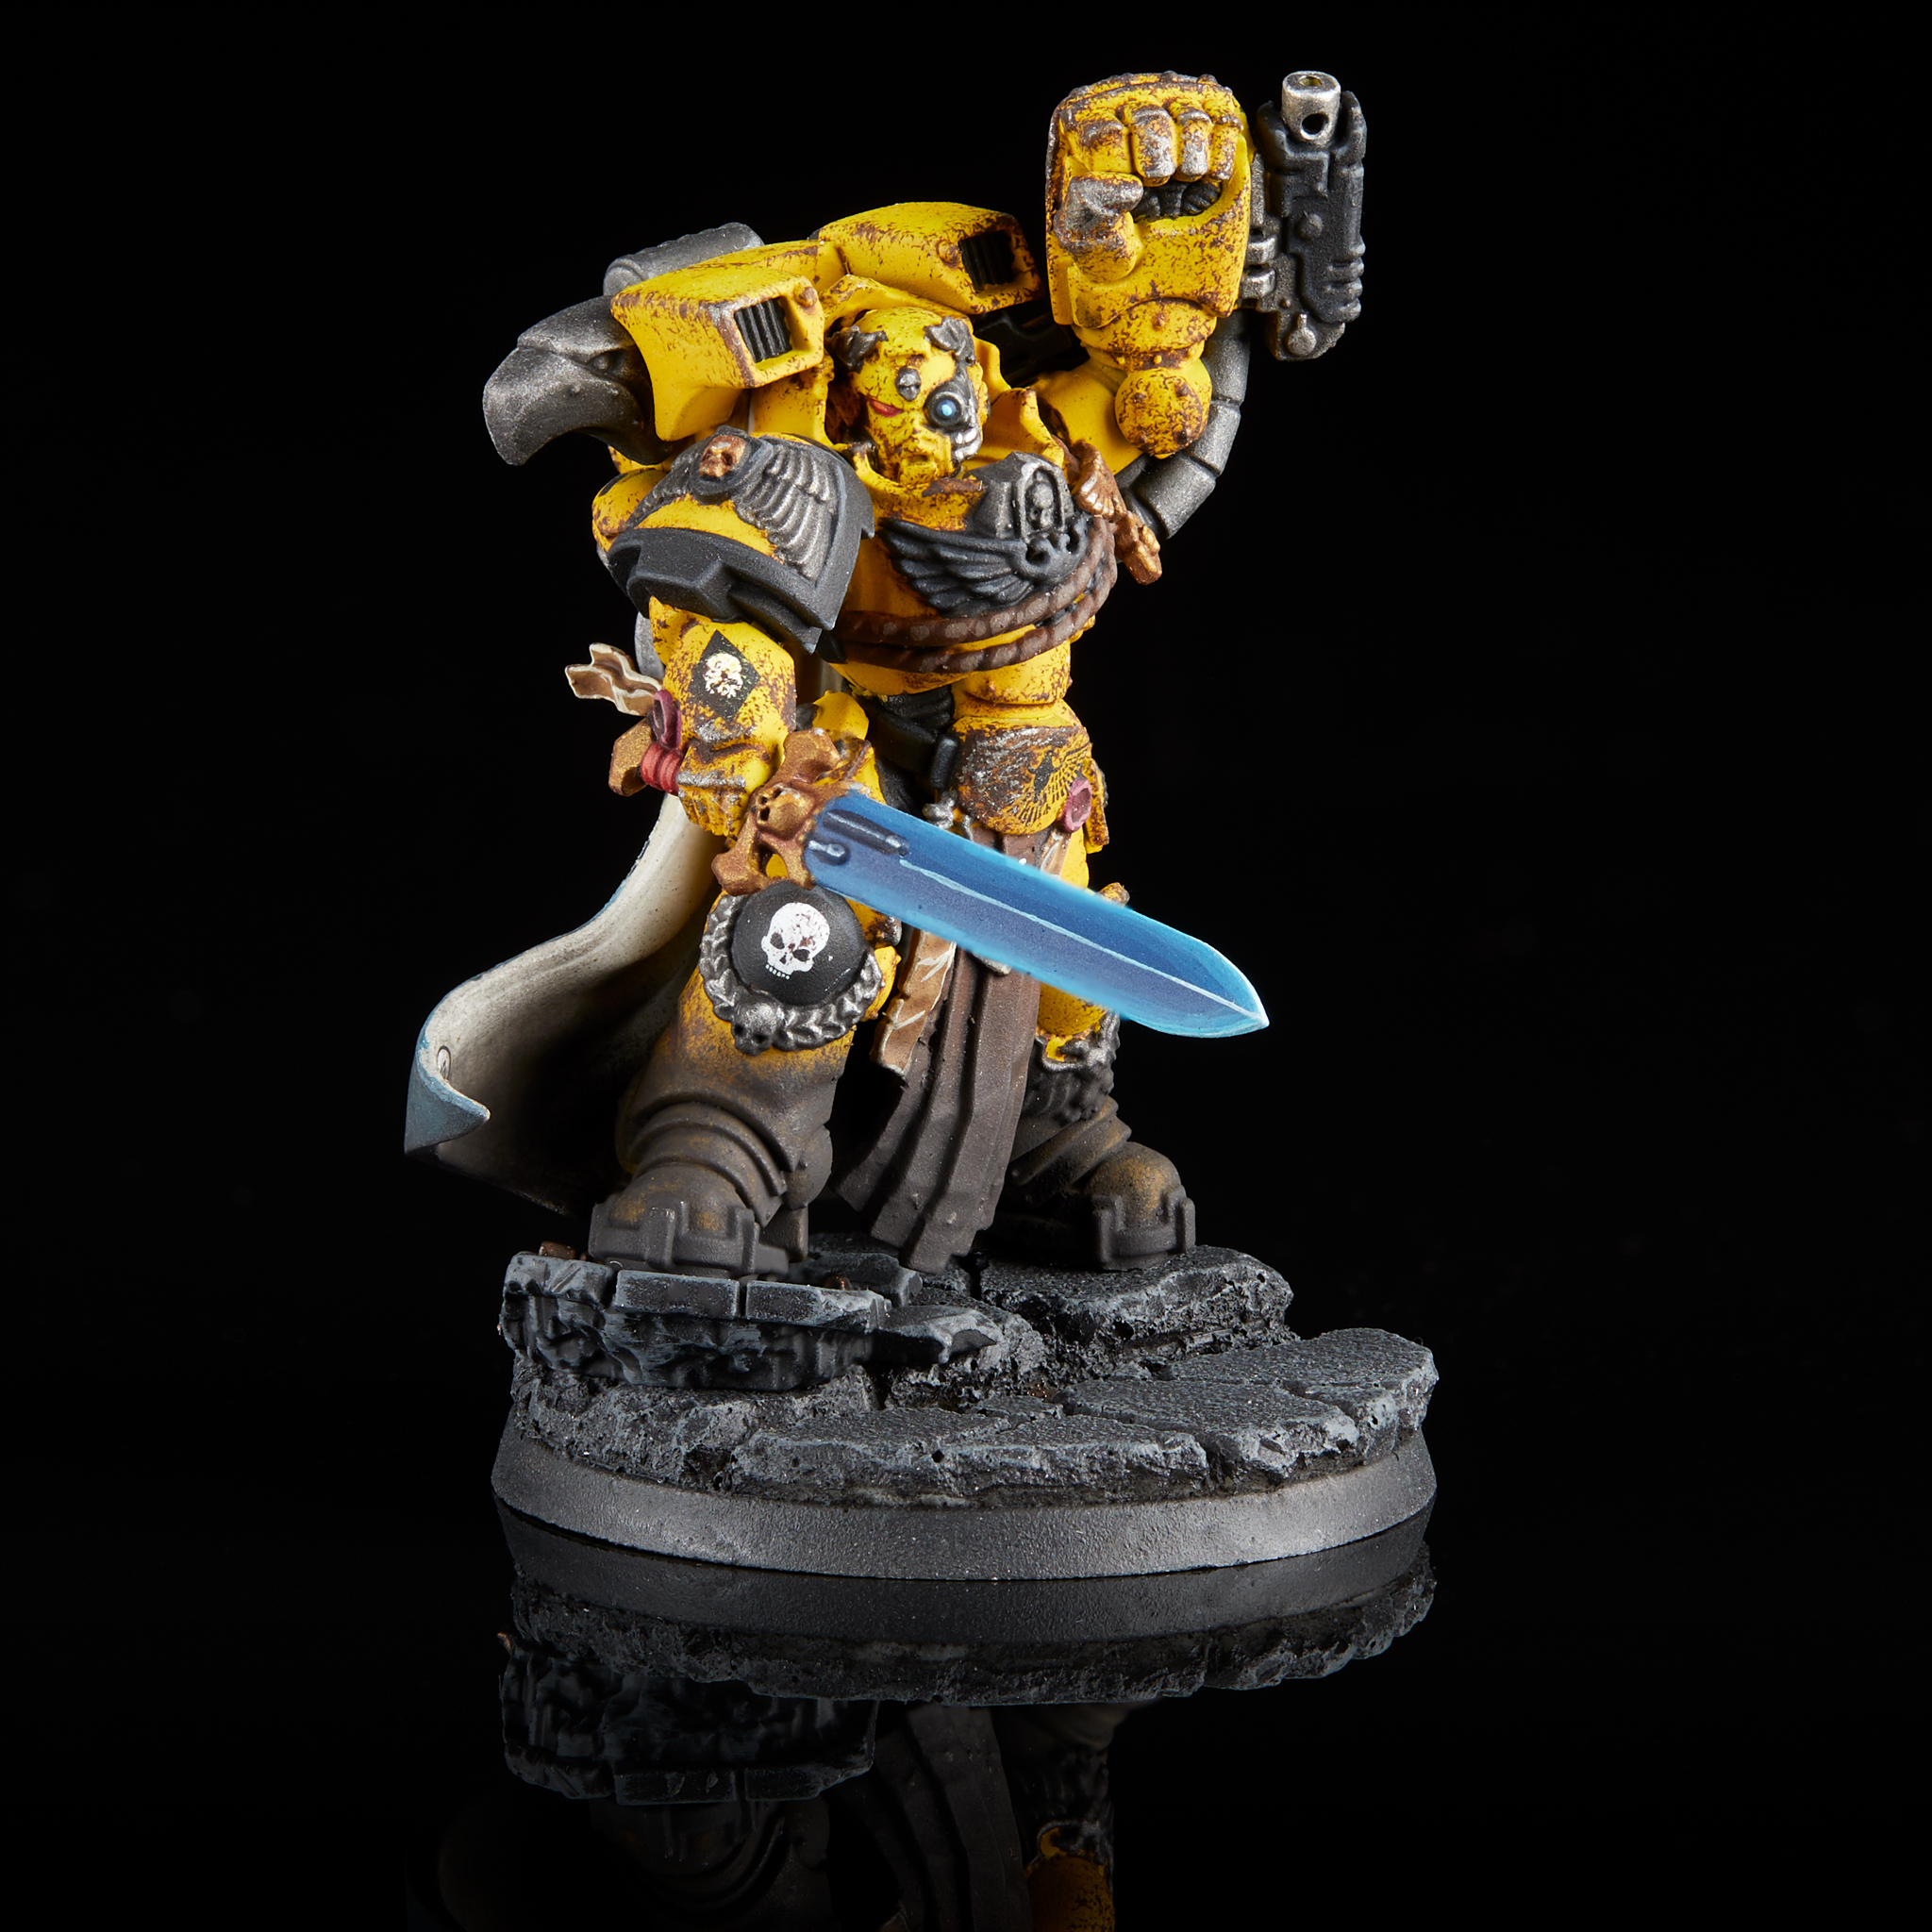
I try to do at least minor conversions on all the characters that I include in my army. GW produces really wonderful, expressive poses for most characters, but because they’re so striking they’re also very memorable, and I want my army to be something unique. Sometimes this is as simple as a quick weapon swap, but sometimes to get what I want requires a little more effort.
I’ve always felt that a Gravis Captain is a very thematic character for an Imperial Fist army, but because it only existed as the Dark Imperium monopose and used distinct weapons from any of the other units that also wore Gravis Armor I didn’t have many options to convert him, and postponed working on it. When Calgar was announced I was immediately drawn to the pose, which looked like something I could hack apart into a unique take for my army. I started out by simply removing all the Ultramarine iconography. Some, like the belt buckle, were pretty easy, while others were much harder (the damn ultras on all the bottom of all the tassles…). After I took care of the icons, I grabbed my trusty Dark Imperium sword arm and started fiddling with it on the shoulder of Calgar. Pointing it upwards like on the Gravis Captain made him look like he’s cheering, so with a little carving and a little green stuff I was able to position it held lower in a commanding position. Once I got the arm on everything else was fairly straightforward, just clean up any leftovers like the sculpted trim on the cape and slap some point on. He now features as my warmaster in Rob’s Astradus campaign, and makes it into most of my army lists.
Final Thoughts
The new Marneus Calgar model is a fantastic sculpt full of character that presents great opportunities to render this storied hero as a centerpiece of your army. Not only that, but hopefully you’ve seen how you can use him as a canvas for creative techniques and heraldry or even as base for conversions into other characters in your non-Ultramarines army! Sculpt aside, Calgar is great fun on the tabletop and we hope this article will help you get a fabulously painted model on the tabletop and punching things to death in no time! We’d love to see your own takes on Calgar, share below or send us your pics to contact@goonhammer.com!
