
In our How to Paint Everything series, we look at how to paint well, everything! We look at different models and techniques and have multiple approaches to specific models. In today’s article, we’re looking at how to paint your heroes in under an hour!
Every year around the holidays my family insists I’m impossible to shop for, while simultaneously ignoring me running around saying things like “BOY I’D SURE LOVE THAT MARVEL CRISIS PROTOCOL GAME AVAILABLE AT THESE FINE RETAILERS”. This usually means I wait until the new year and get myself a little present. A New Year’s treat. This year it was that Marvel Crisis Protocol game.
We’ve been covering this superhero game of tactics, including another recent HTPE article talking about how to paint all the terrain in the core box, so I decided to put together a squad of X-Men and live my 90’s childhood dreams at Adepticon. Unfortunately for me, my slow detail-painting speed meant I’d have to figure out how to paint these quickly.
I’ve dabbled a bit with Contrast paints, but my mind immediately went to the article Darcy Bono wrote with us on the 2nd wave of Contrast. The 2nd wave of Contrast paints are heavily pigmented and full of bright colors: perfect for superheroes. As I also received a pile of those paints I figured it was time to see what they could do. Well True Believers, they’re amazing.
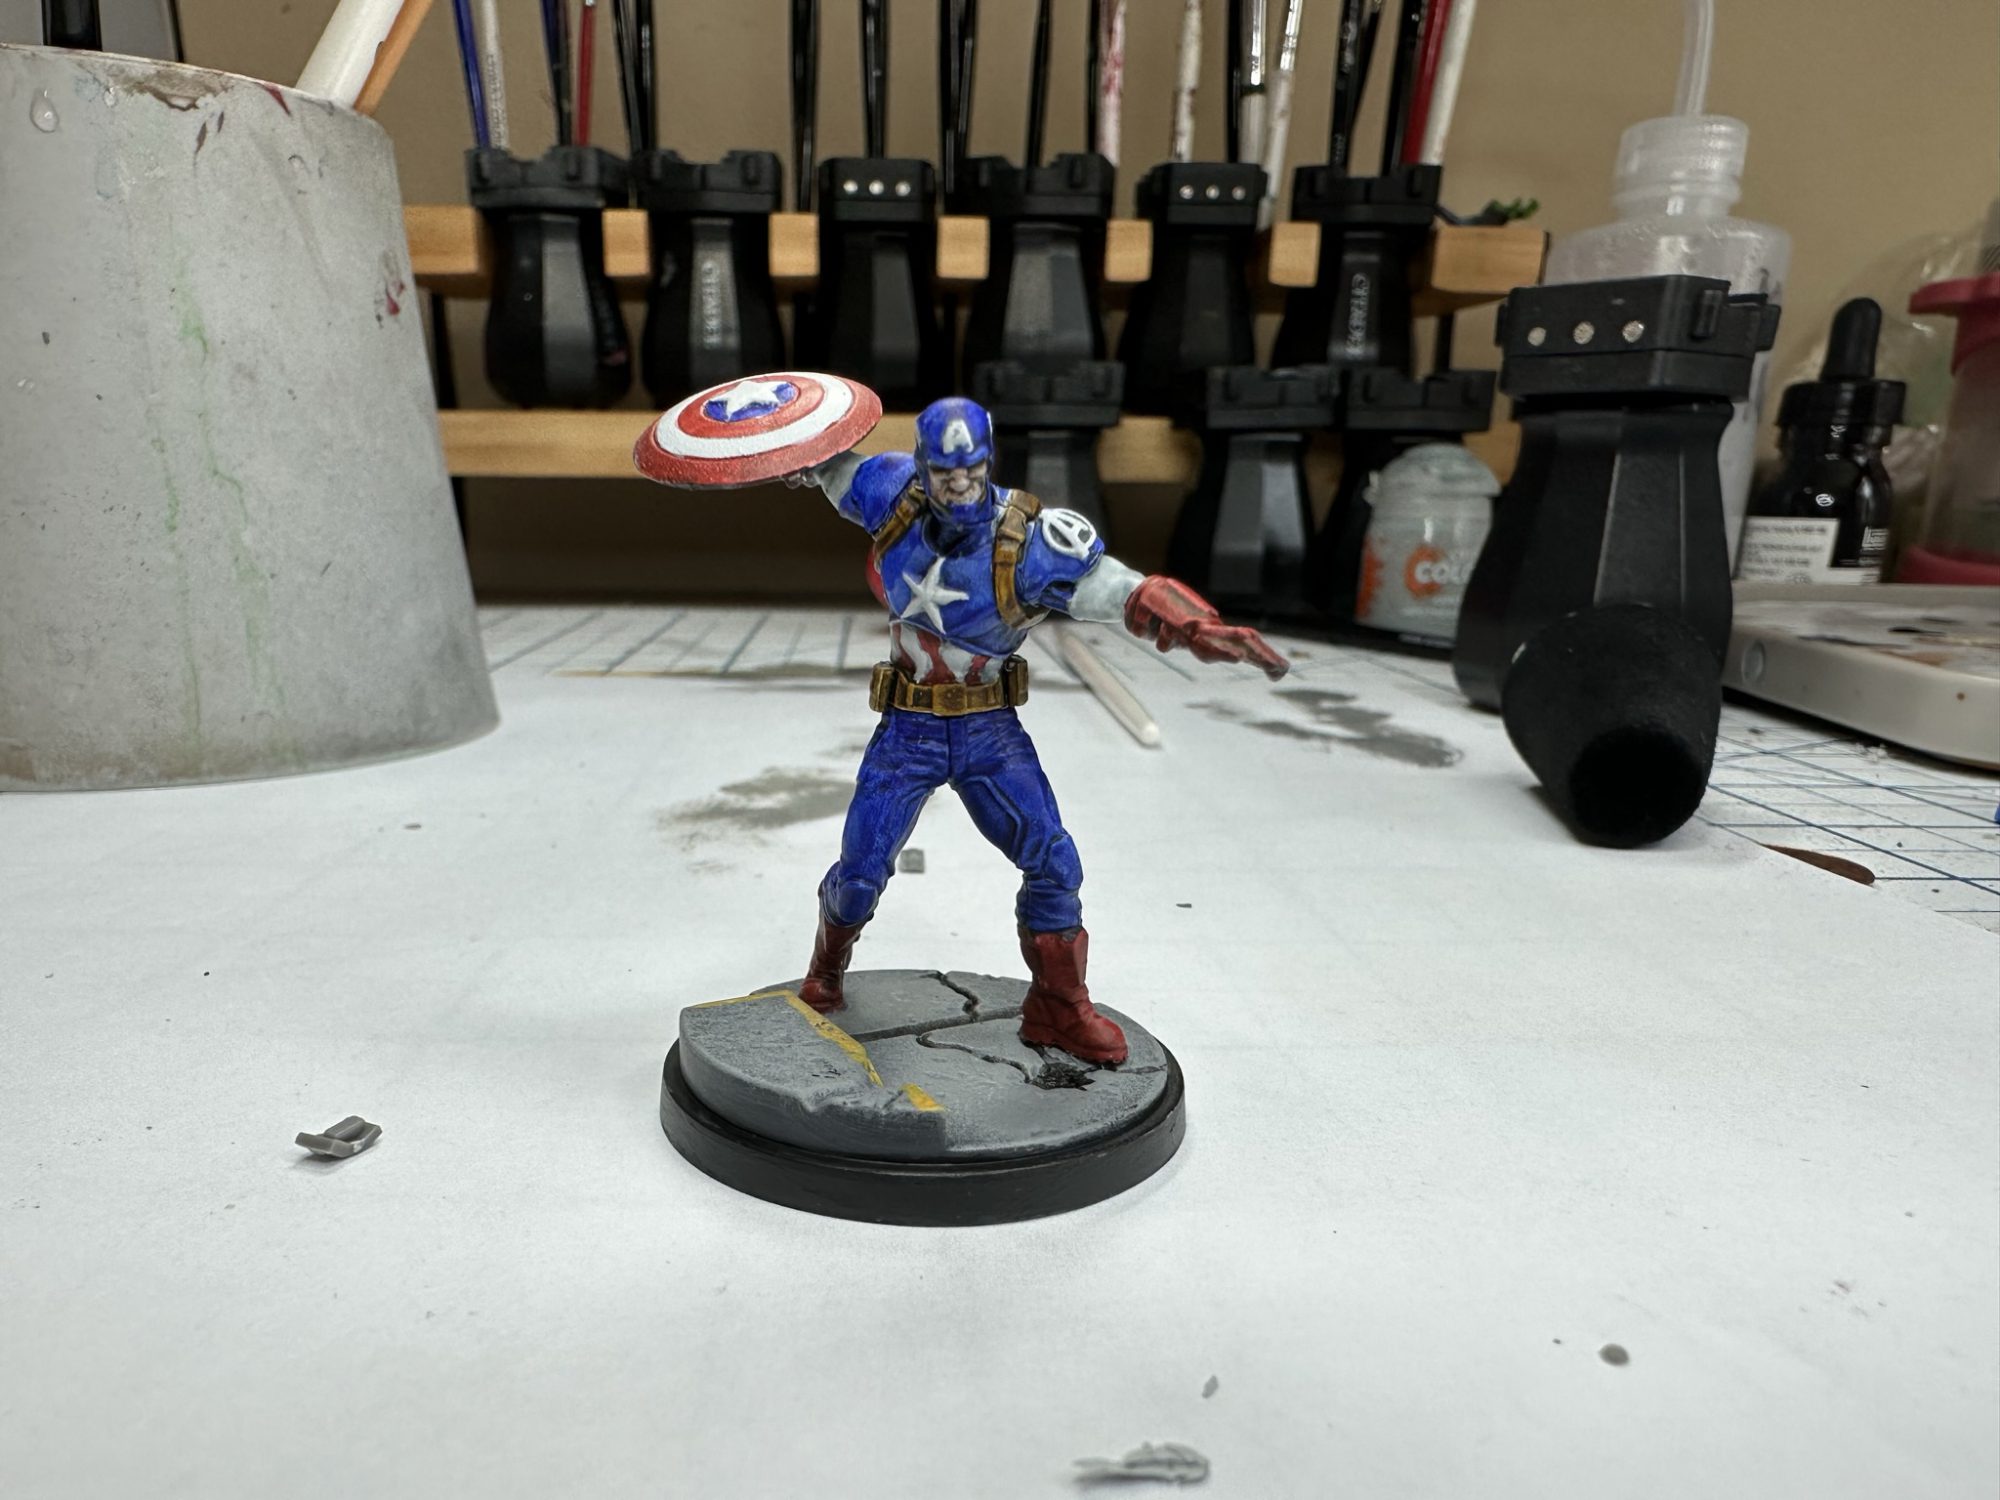
These heroes are slightly larger scale than your average GW humanoid and have far fewer bits and bobs hanging off of them. They are relatively clean models, making them perfect for Contrast. In this article I’ll walk you through an easy way to paint Captain America from the core set in just about an hour, share recipes for all my Uncanny X-Men, and show the steps for my quick and easy bases.
Captain America
We’re going to start all these models off with a zenithal prime. For a detailed look into the theory and concepts of underpainting you can check out our expert level article, but for this tutorial we’re going to do it quick and easy. For the unfamiliar, a zenithal prime is a prime using multiple shades from black to white in order to sketch our shadows and highlights onto the model in greyscale. You can use multiple cans of spray paint primer, an airbrush (as I did for my X-Men), or simple dry brushing. We start with a black prime, and I’m keeping Cap’s shield off for ease of painting.
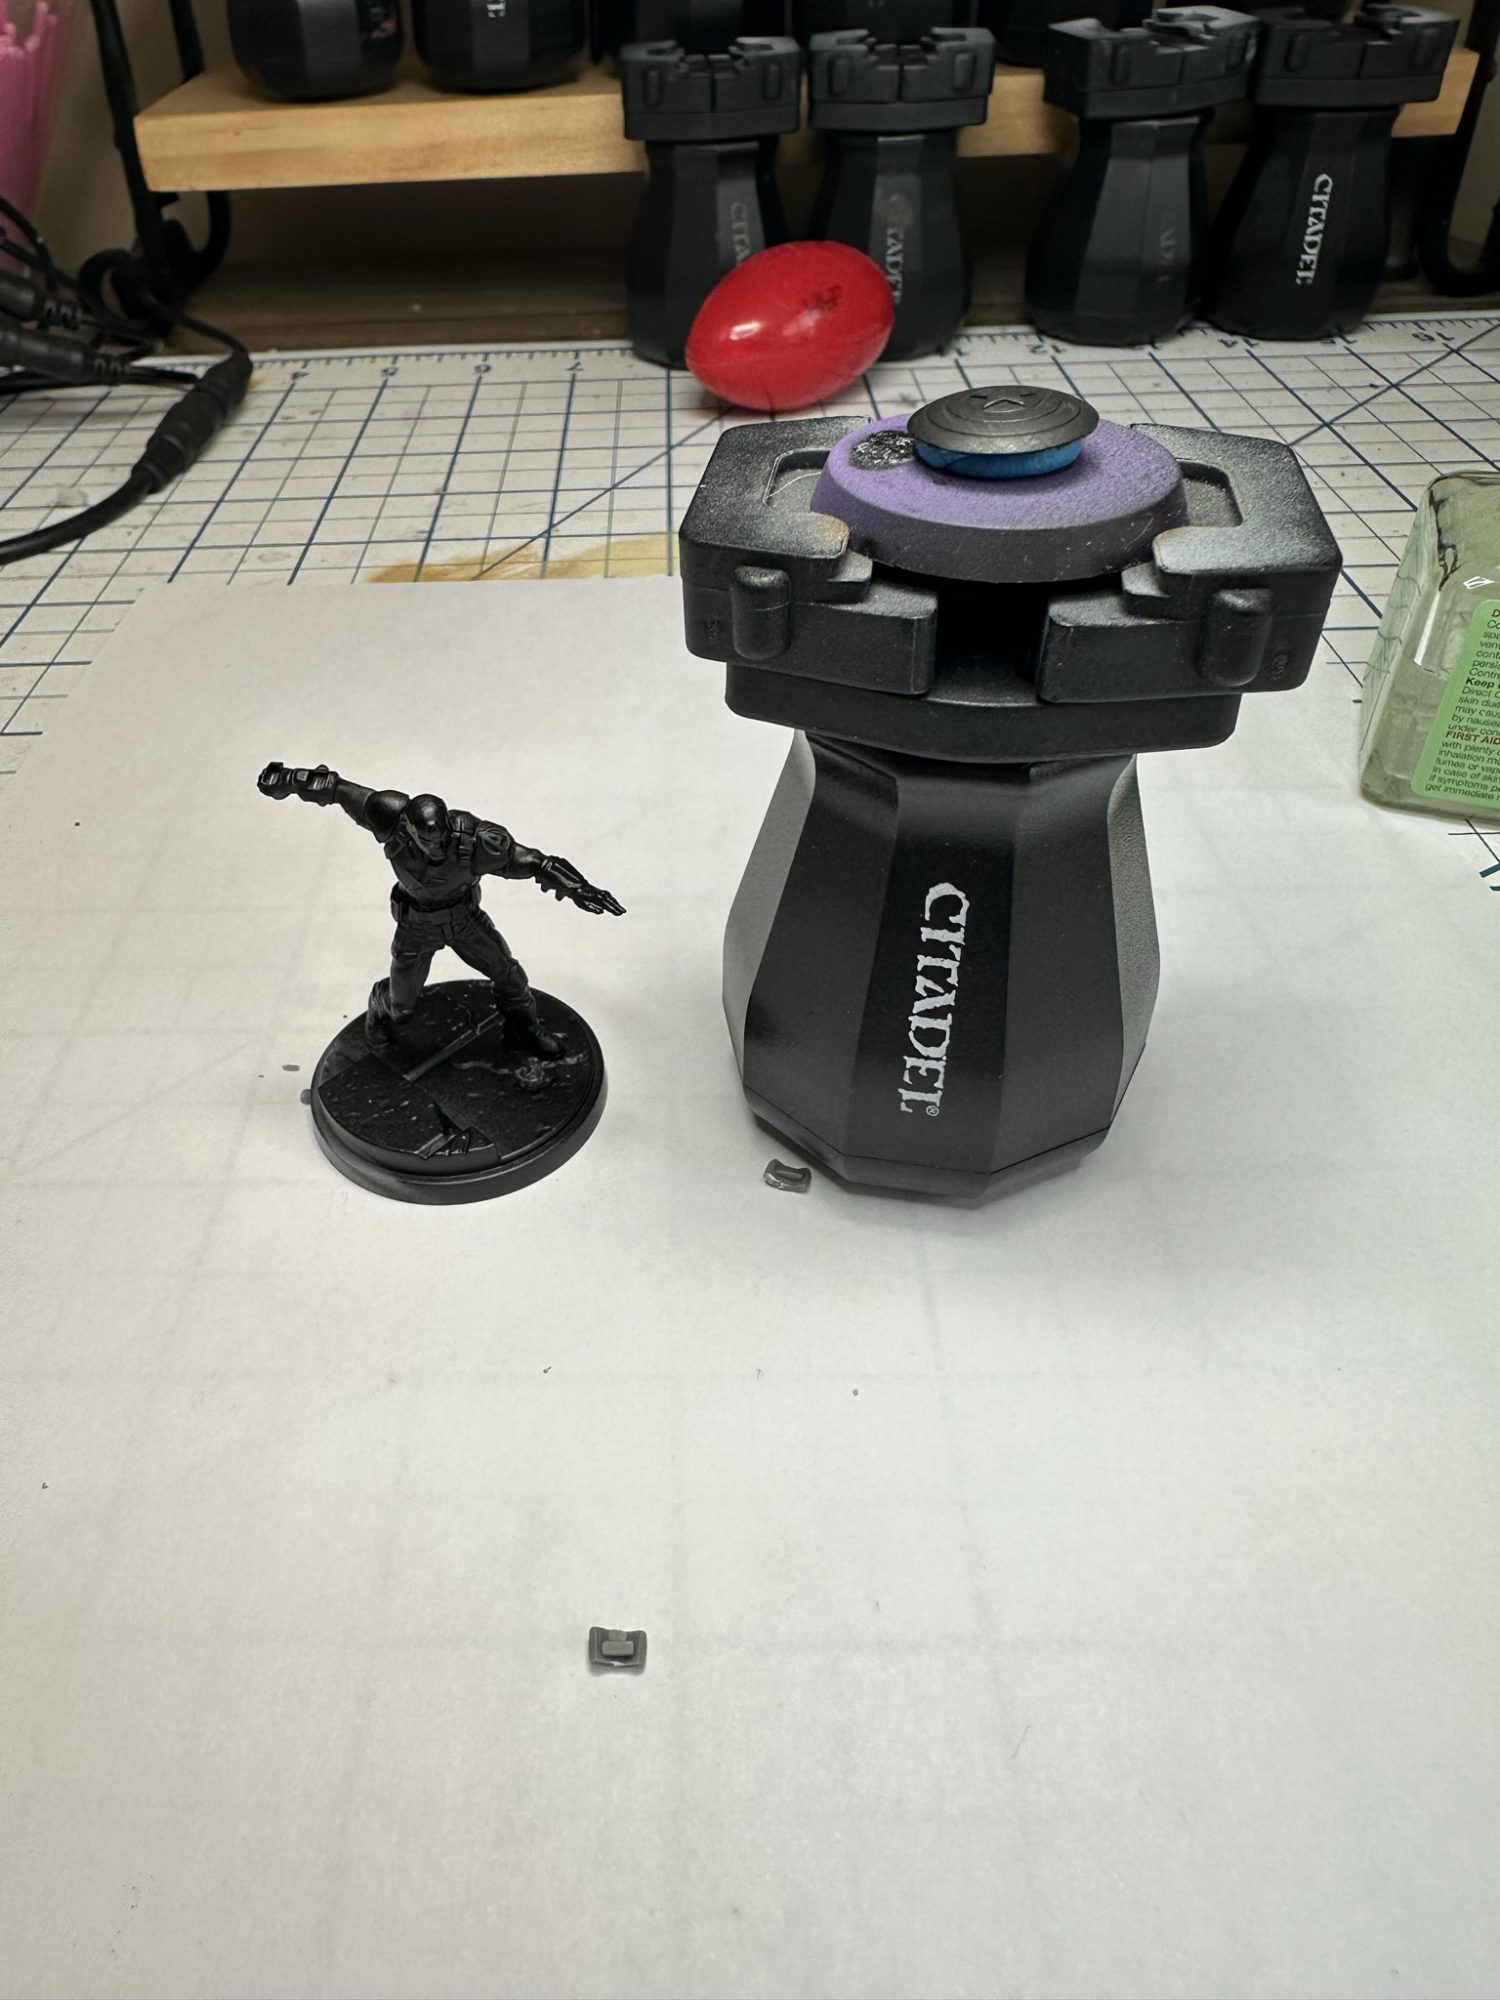
Next we do a very heavy drybrush of a dark grey. I used Citadel’s Eshin Grey, and covered nearly every bit of the model. You can see that he is clearly lighter than the base, but still quite dark.
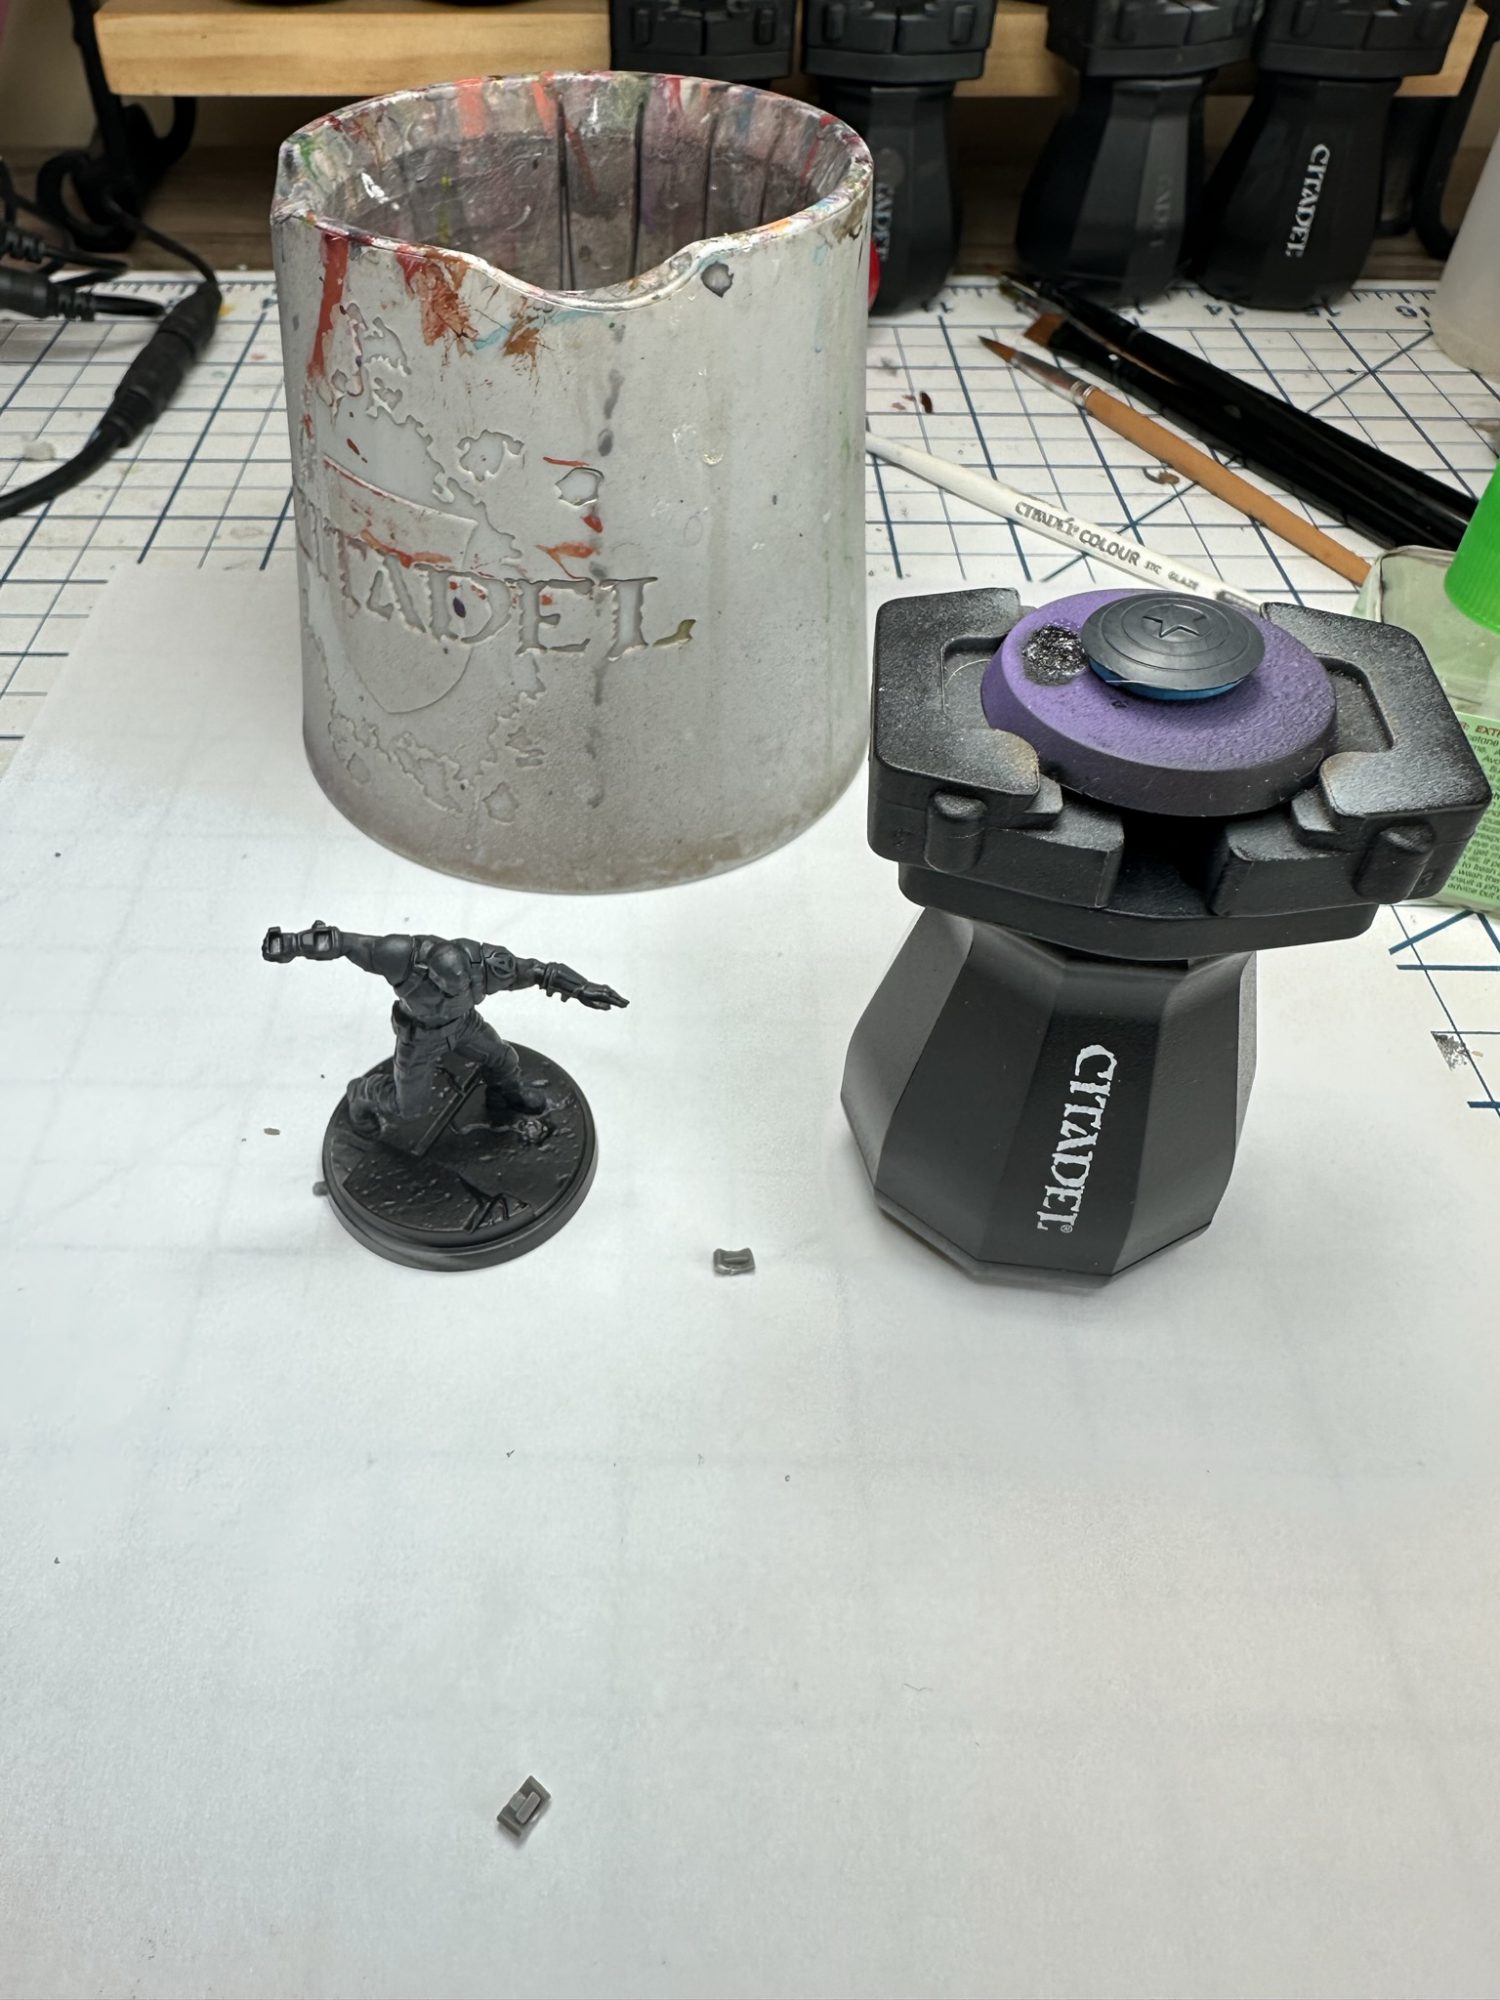
Up next is a heavy drybrush of Dawnstone. I still went mostly all over, though left a touch of Eshin in the deepest recesses. A lighter drybrush of Corax White followed immediately
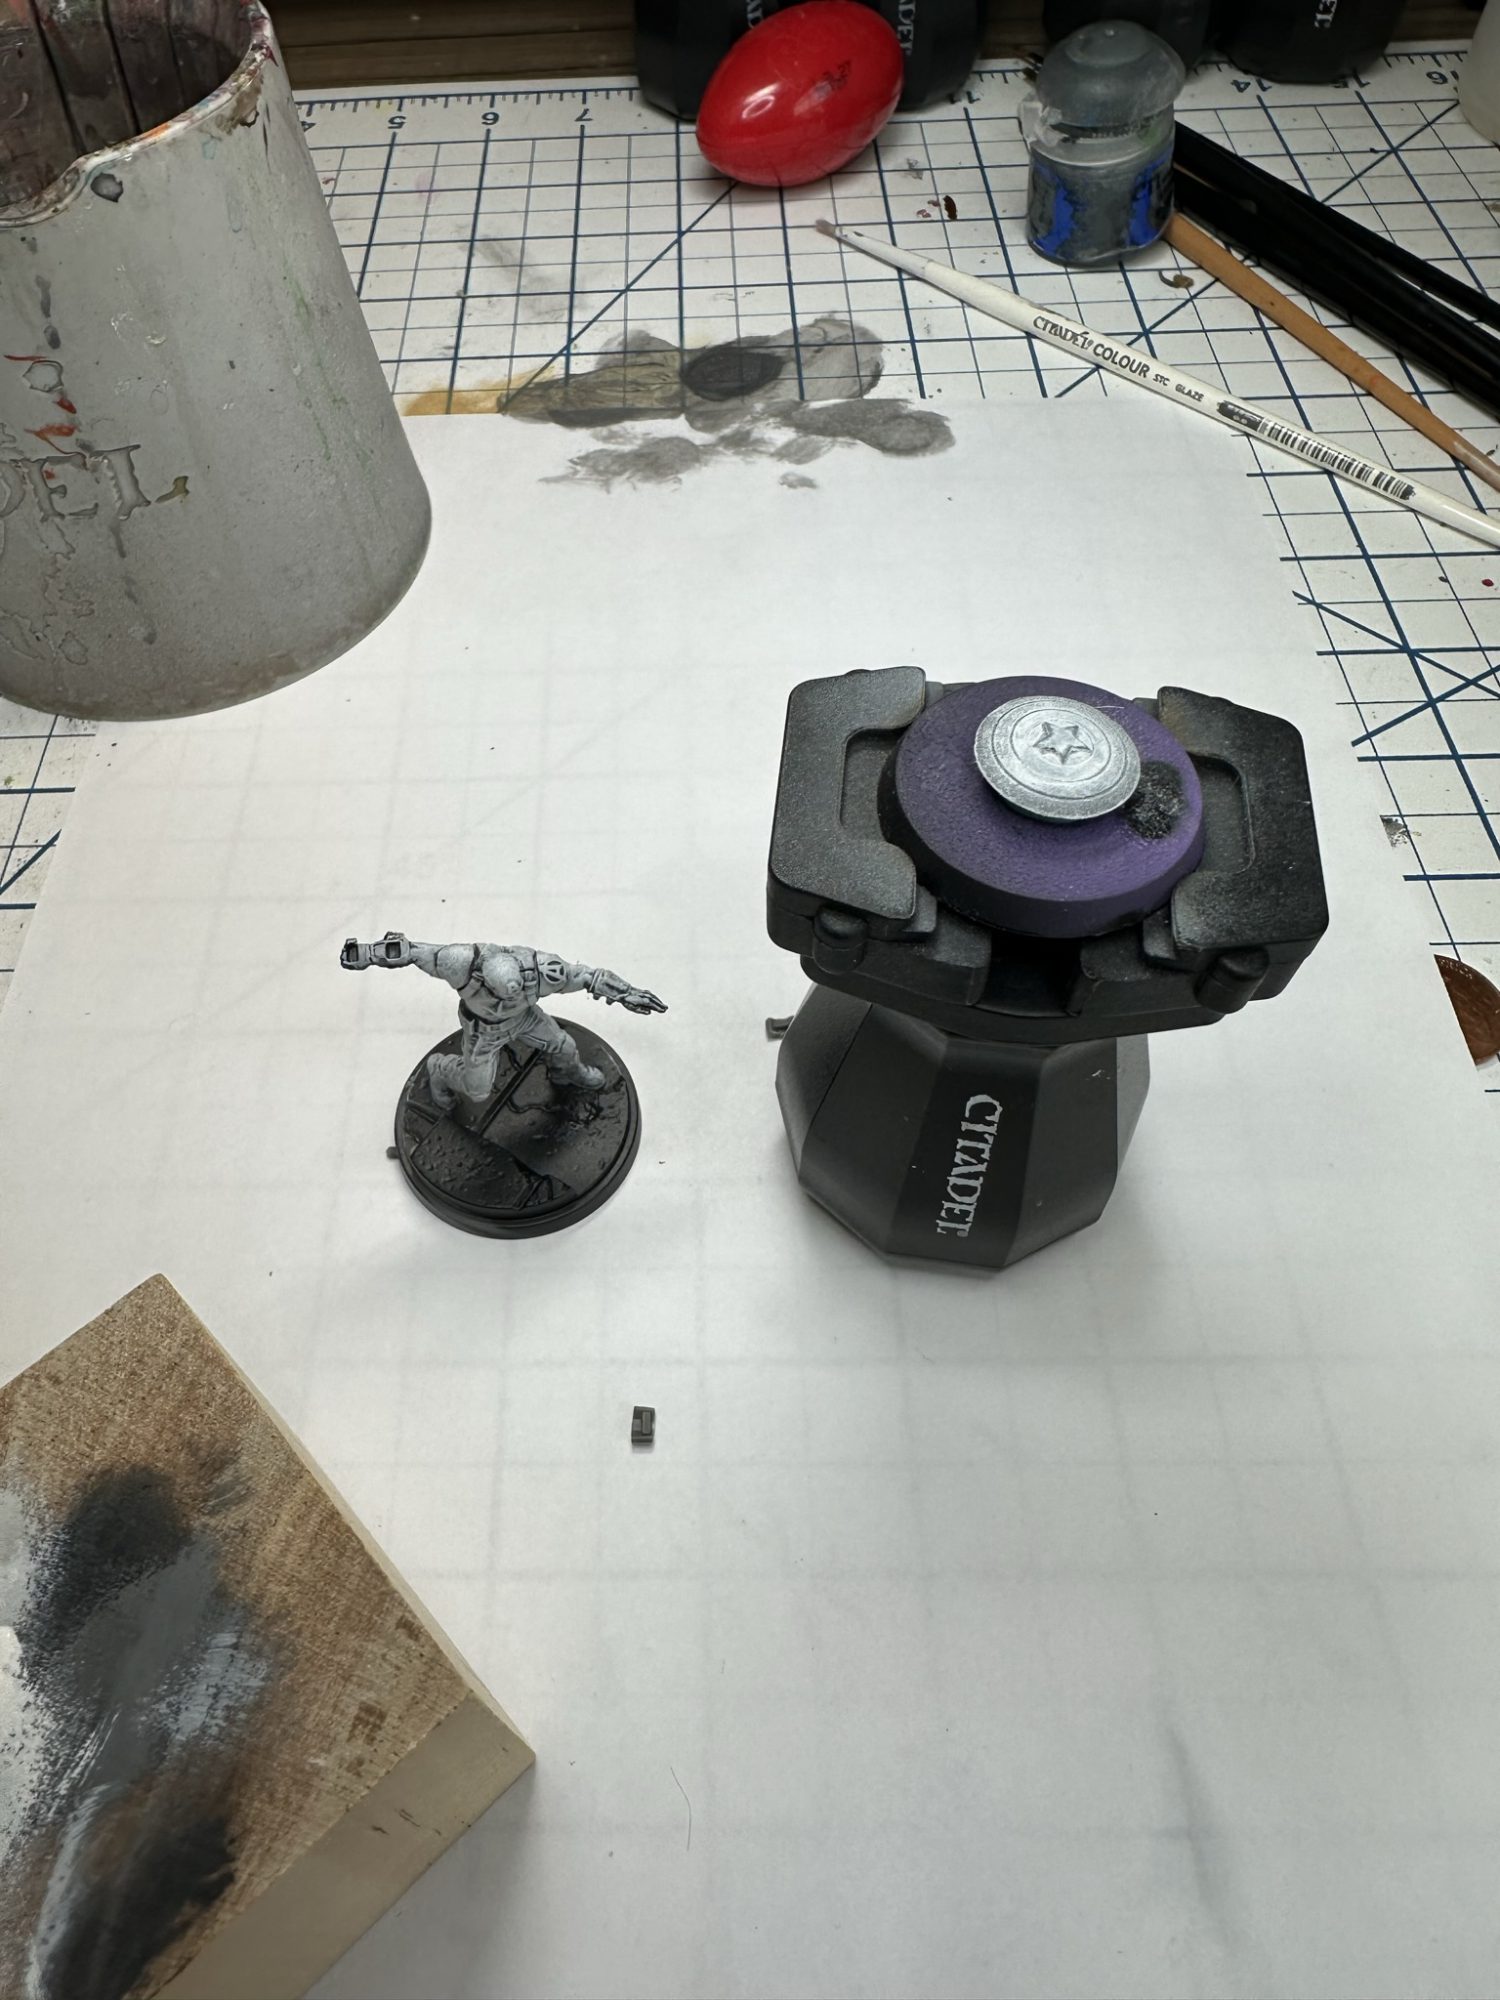
In this final picture I added stark White Scar highlights, again with a drybrush.
I want to note that you do not have to do this many steps. Black->Grey->White is sufficient. Even going straight from black to white with a spray can will give you decent results. What’s important here is that model has heavy shadows and bright highlights. This will accentuate Contrast’s effects.
The shield has red and blue on it, and for simplicities sake I will use the same red and blue on Captain himself. Below we have a single coat of Baal Red Contrast paint on the rings of the shield. As you can see the outer ring is darker, an effect that comes from limiting my lighter color drybrushing to the center of the shield
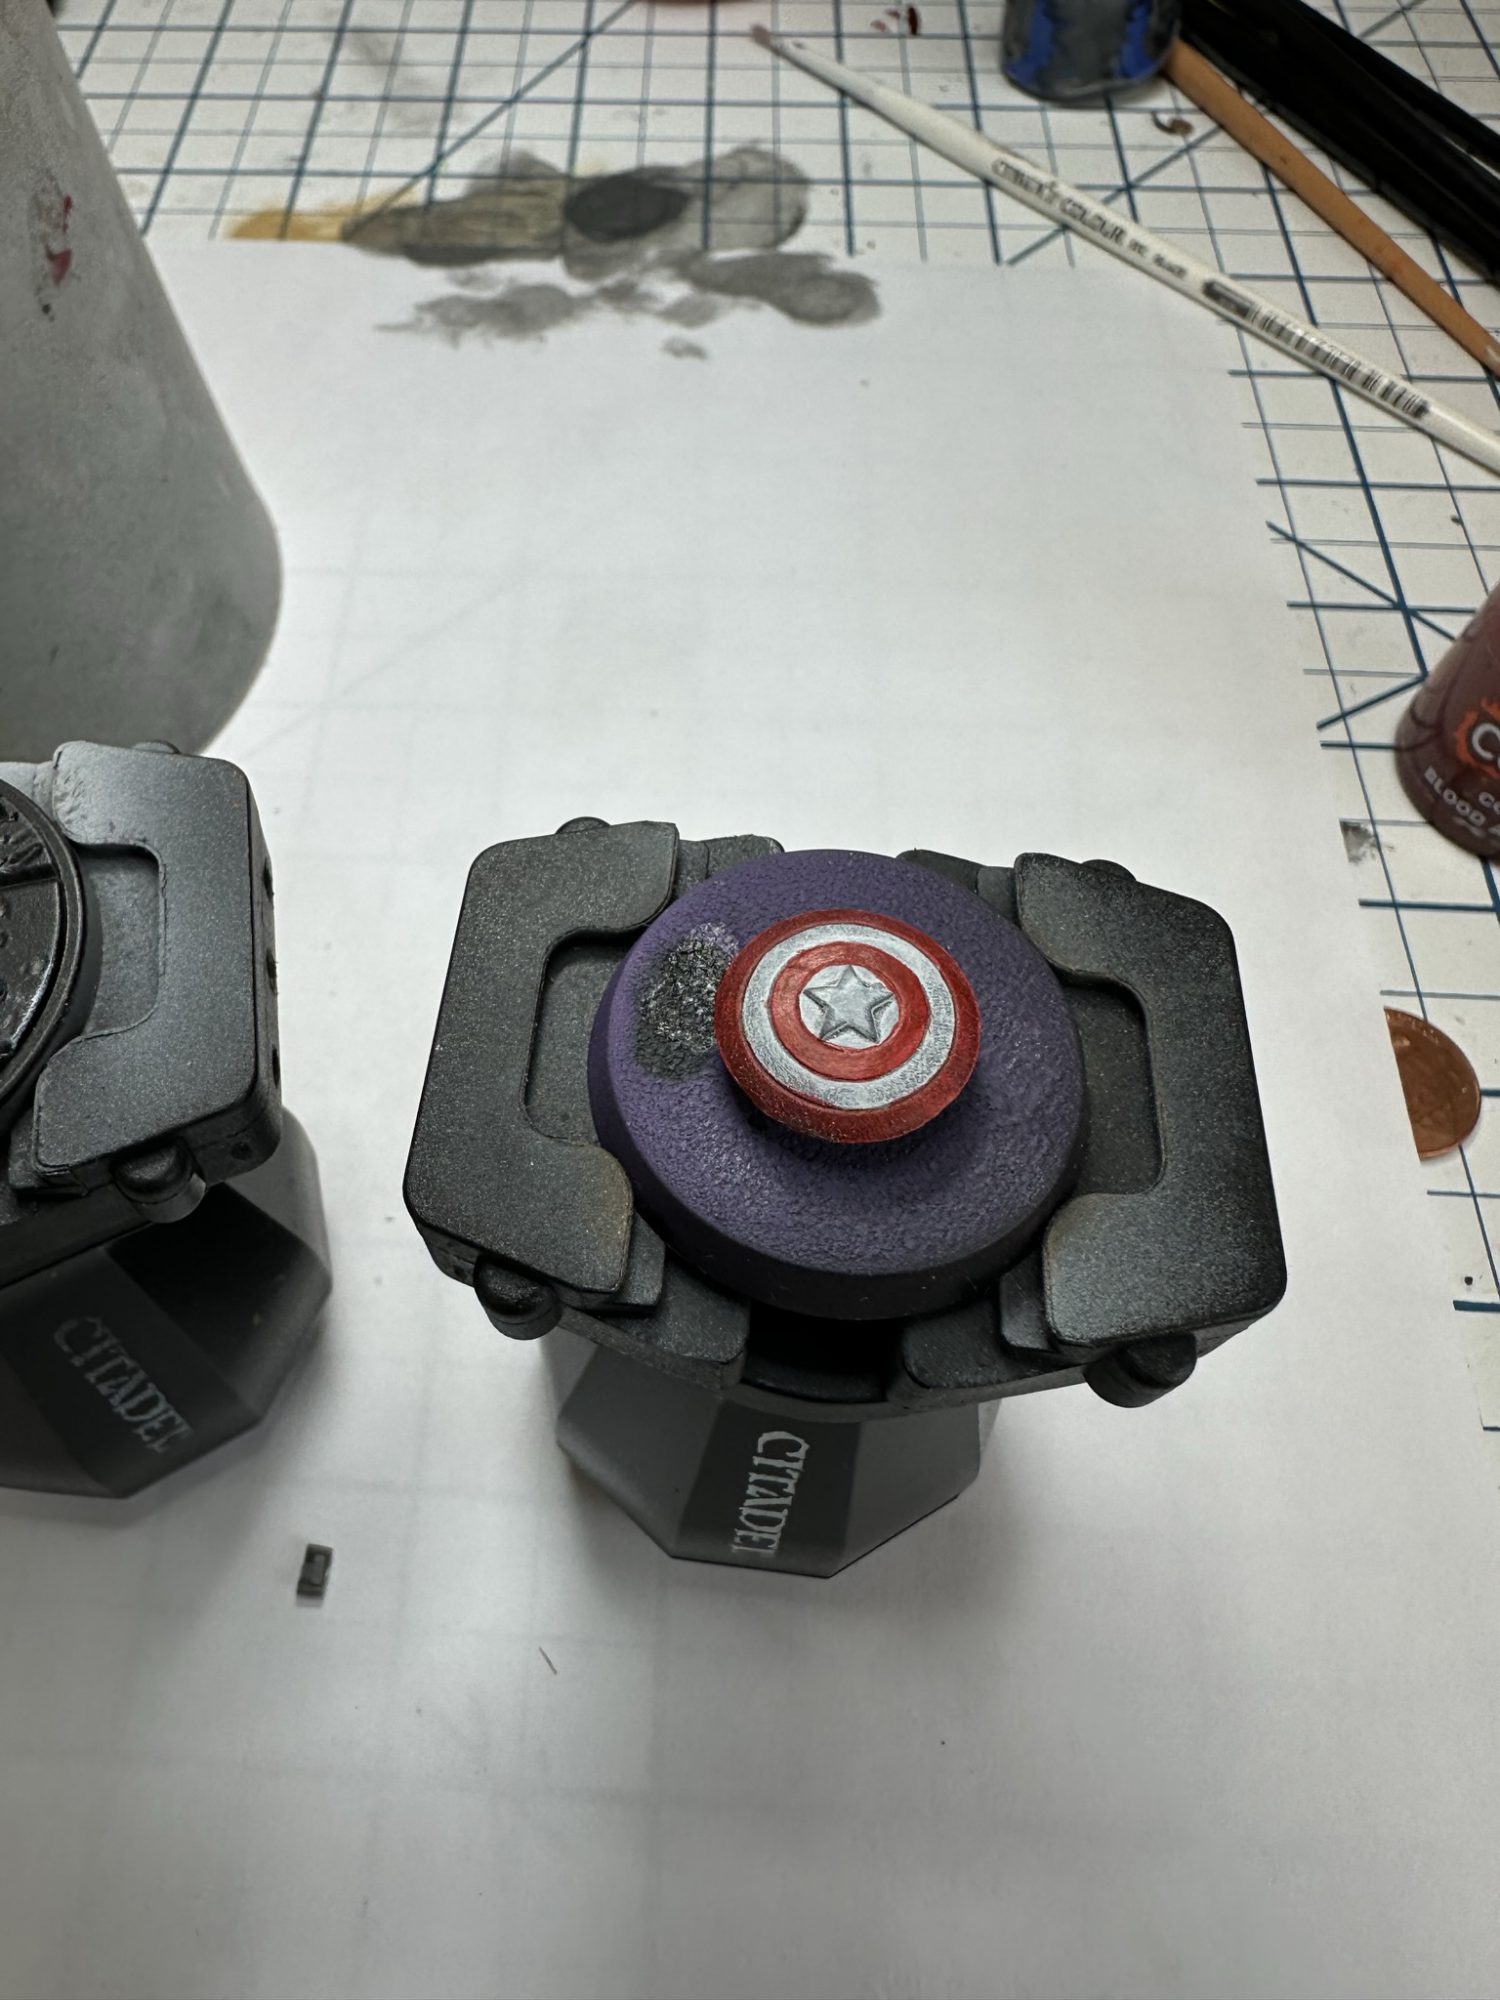
For the blue I used Celestium Blue Contrast paint. It’s a bit bluer than Cap’s normal outfit, Stormfiend Blue is a closer direct match. However, it’s also a little trickier to use and Celestium Blue is more universal for other models in the core set (Spiderman!) so if you have to pick one go with Celestium.
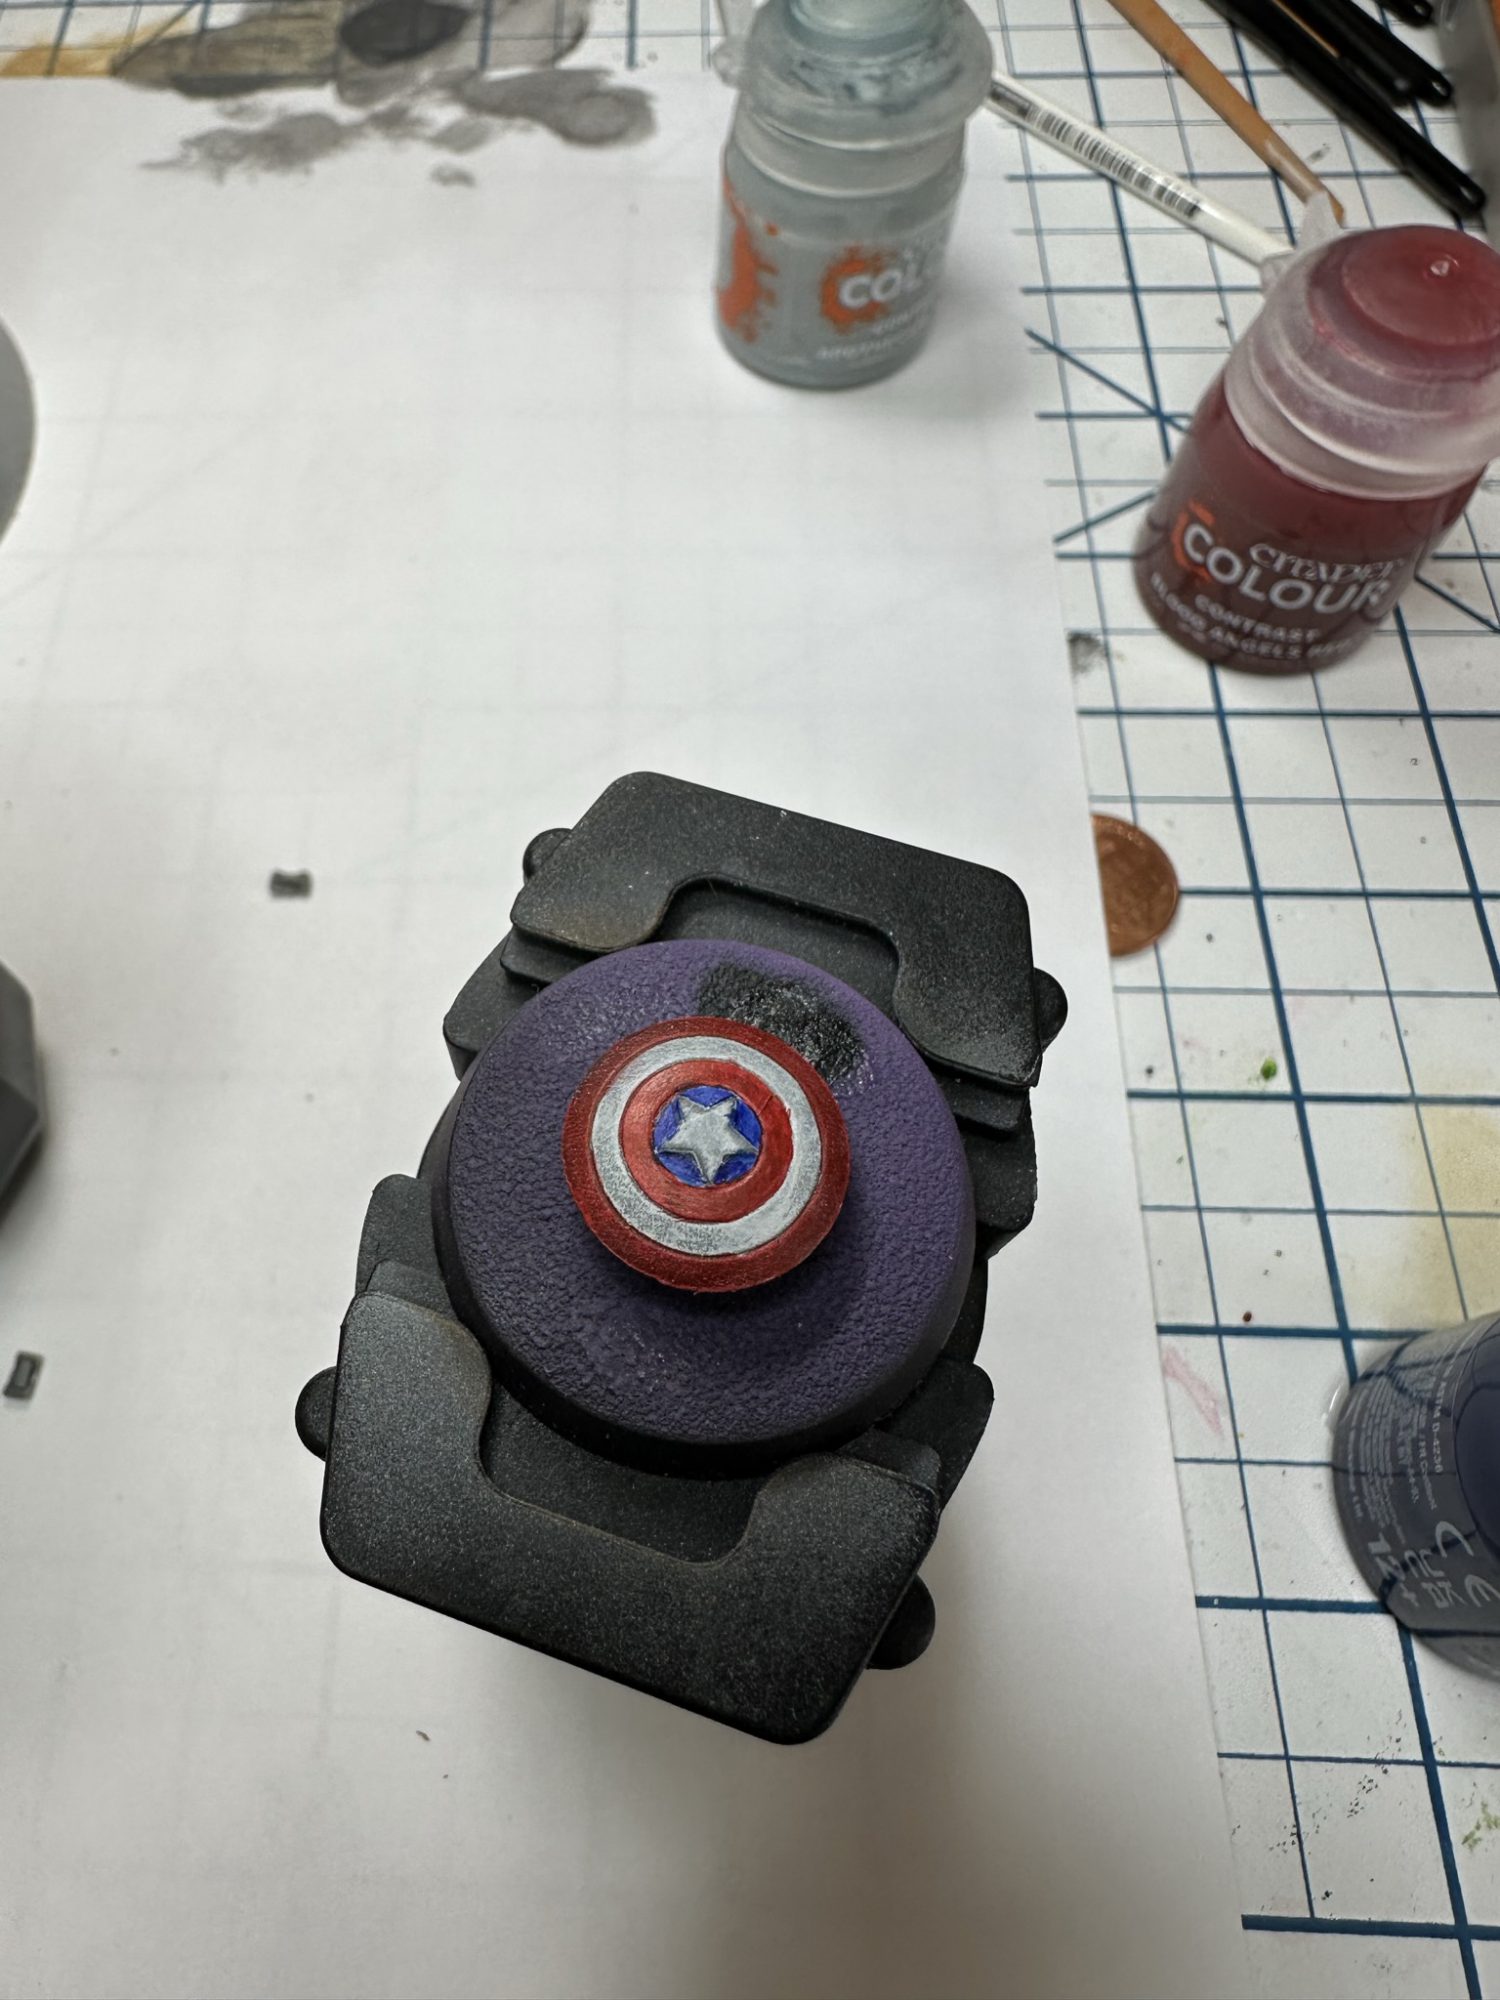
Again that is simply one coat of Celestium Blue on the shield. At this point you can leave the white or clean it up with Corax White if you want a smooth look.
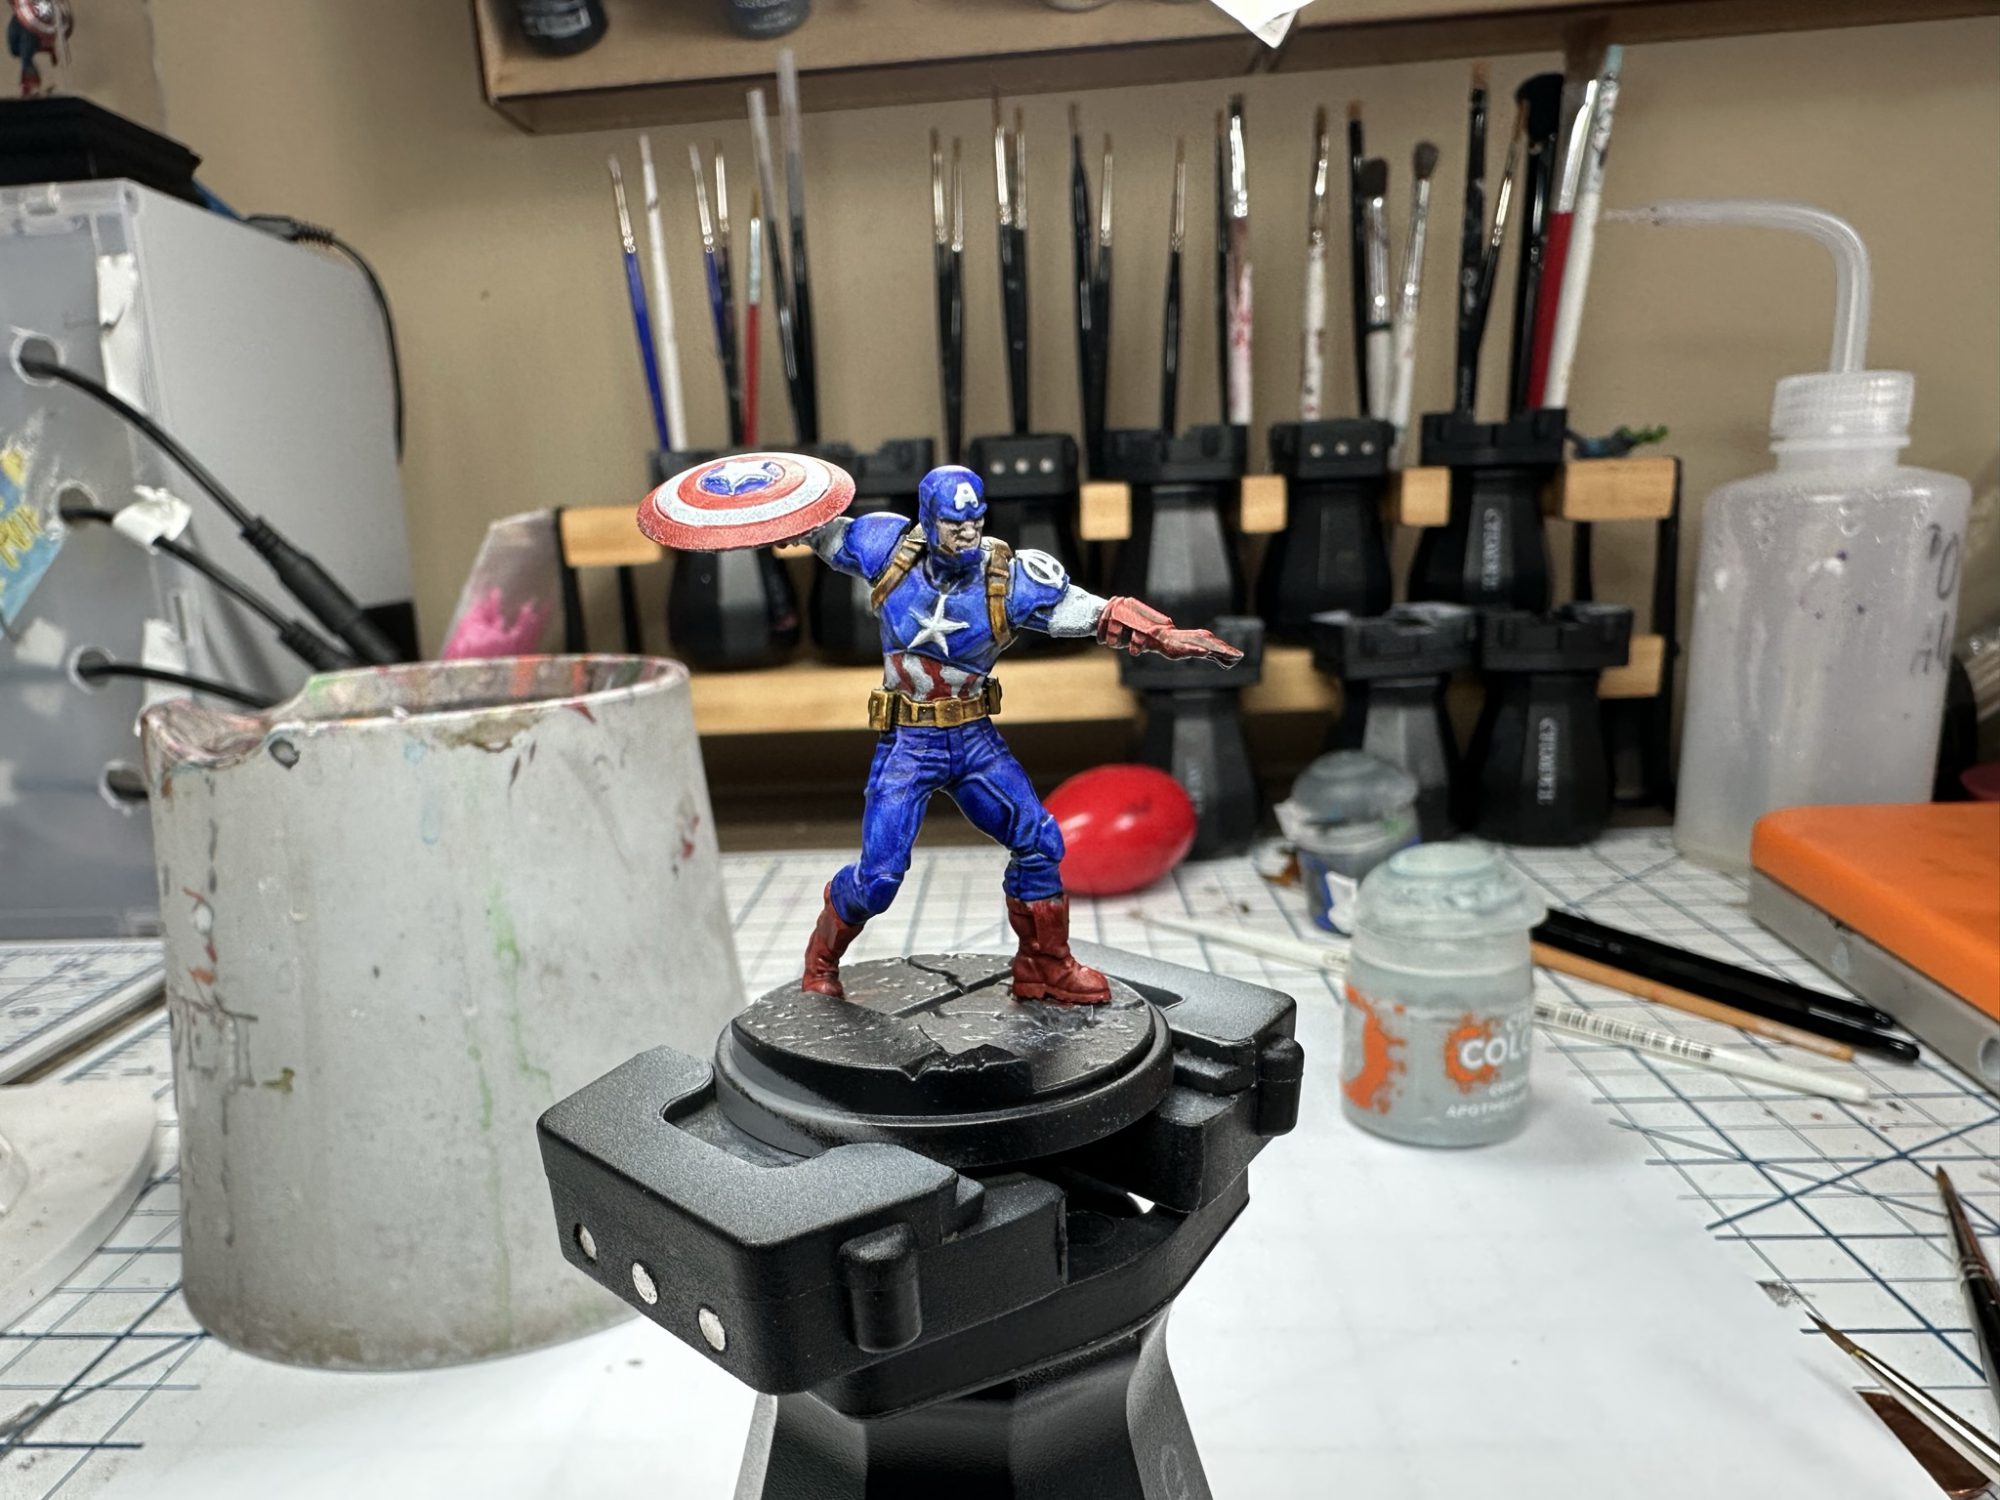
And that is all there is to this process. I apologize for things appearing to take a “Draw the Rest of the Owl” turn here, but there really isn’t much to show other than where to put which color. In order I painted:
- Boots/Gloves: Baal Red
- Costume: Celestium Blue
- Red Stomach Panels: Baal Red (use a smaller brush)
- Leather Straps: Snakebite Leather
- Optional Cleanup: Corax White on arms, stomach, shield, letters.
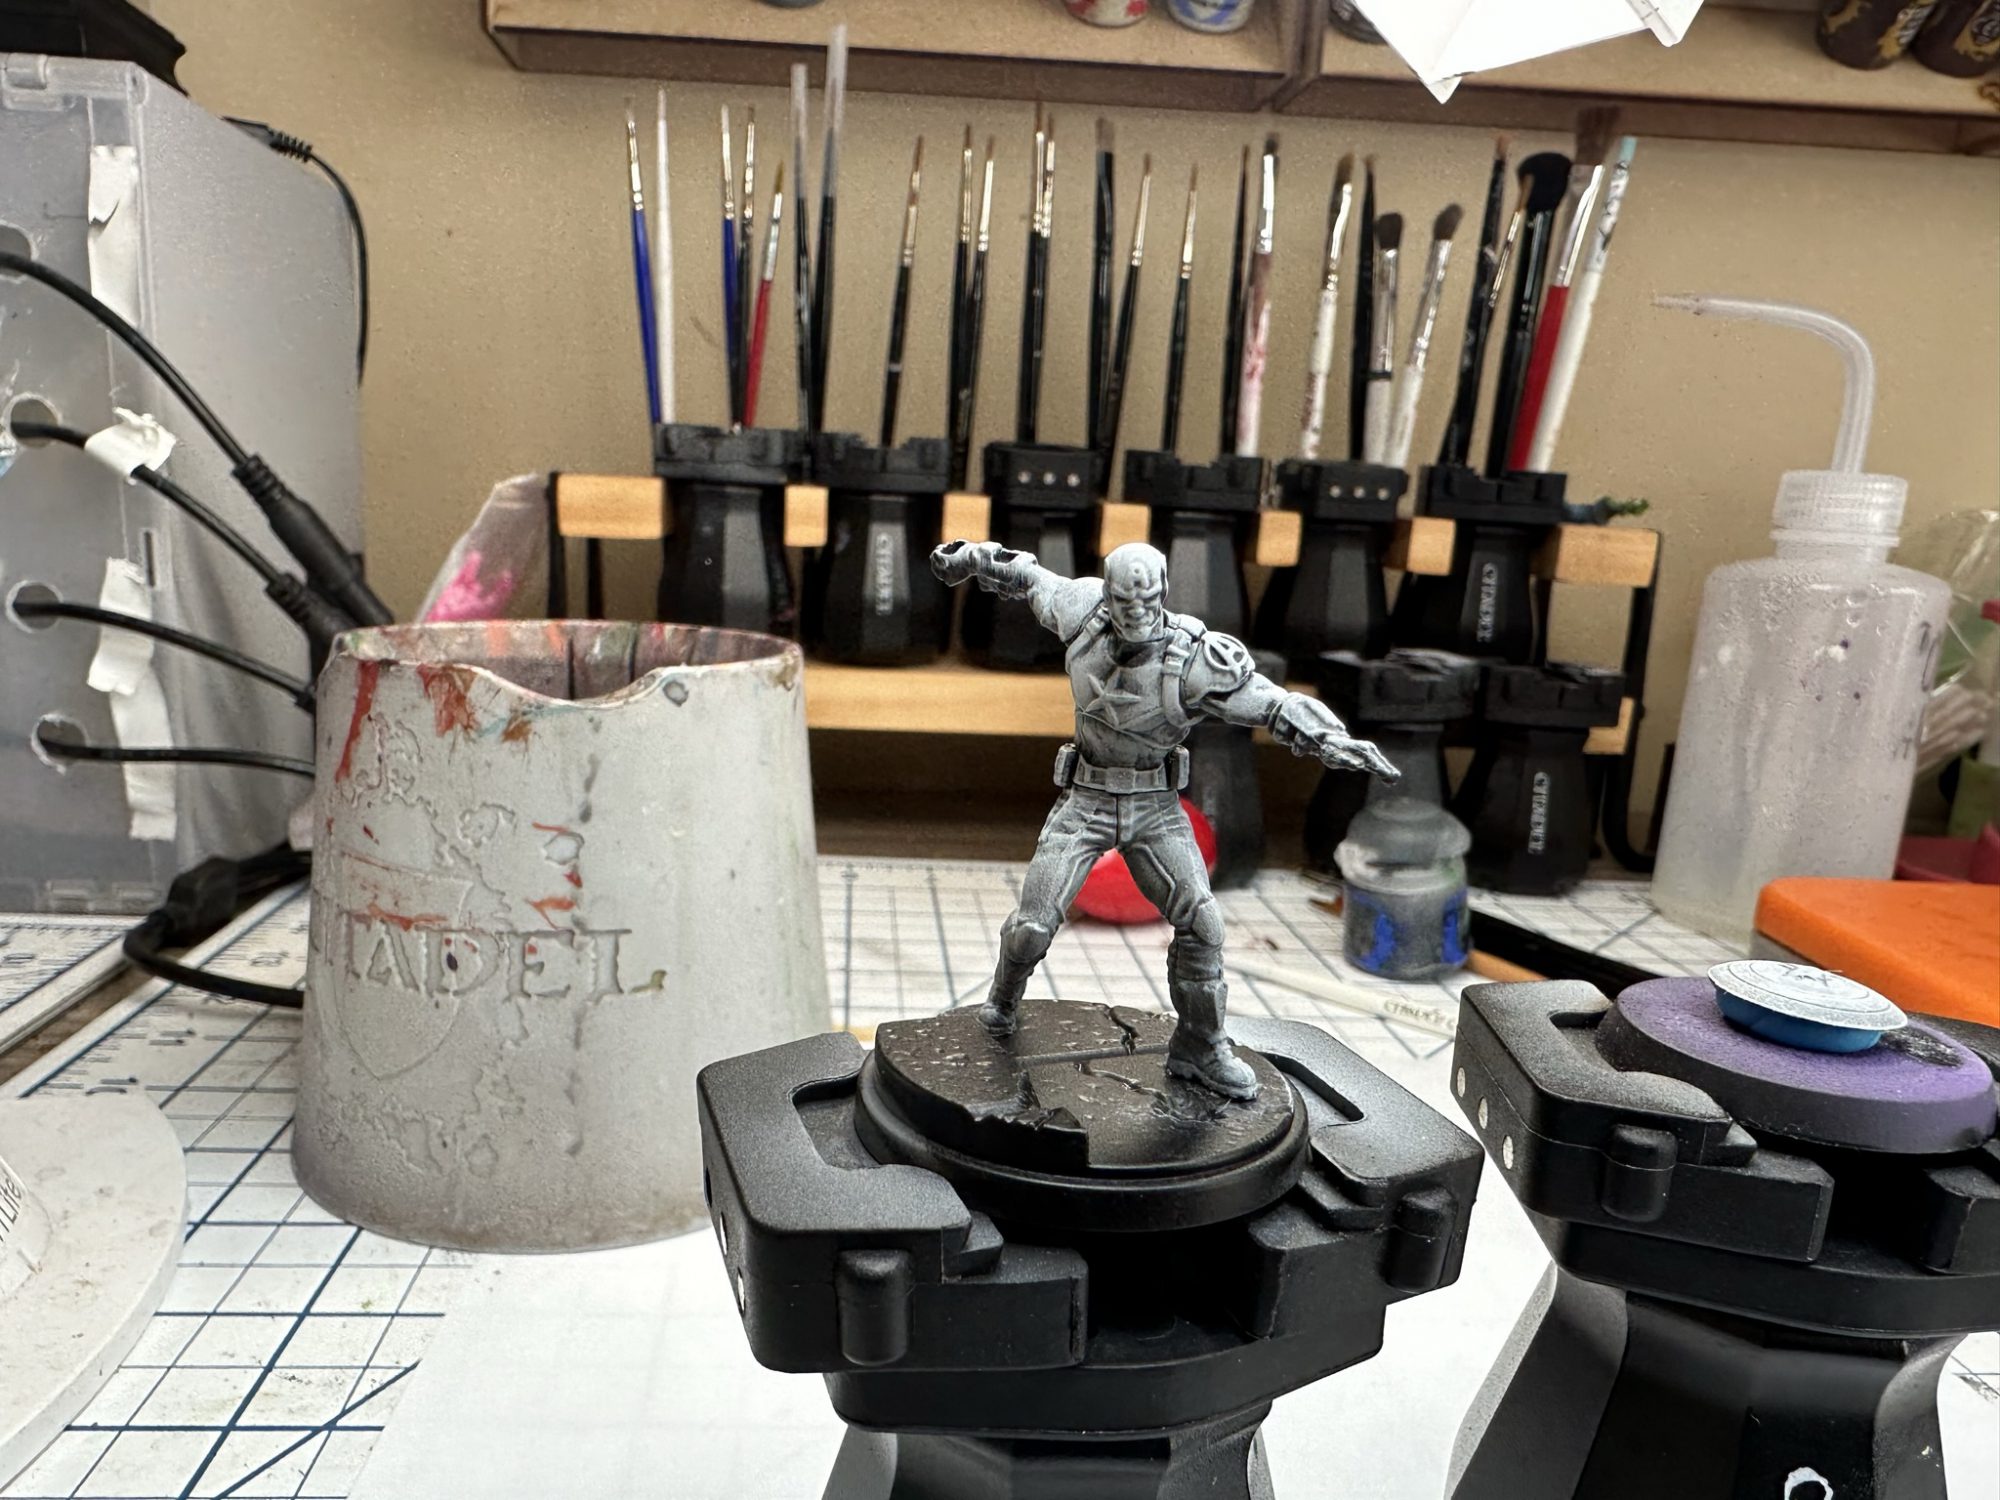
Just one coat of each color straight out of the pot is all you need. Total time about 1 hour after spraying the black primer.
I’ll now share my recipes for each of the X-Men, and then at the end show my method for all the bases. All paints are Contrast unless otherwise noted. Note: all of the X-Men were given their zenithal prime with an airbrush, using air paints. This gives them a smoother gentler shading layer.
Wolverine
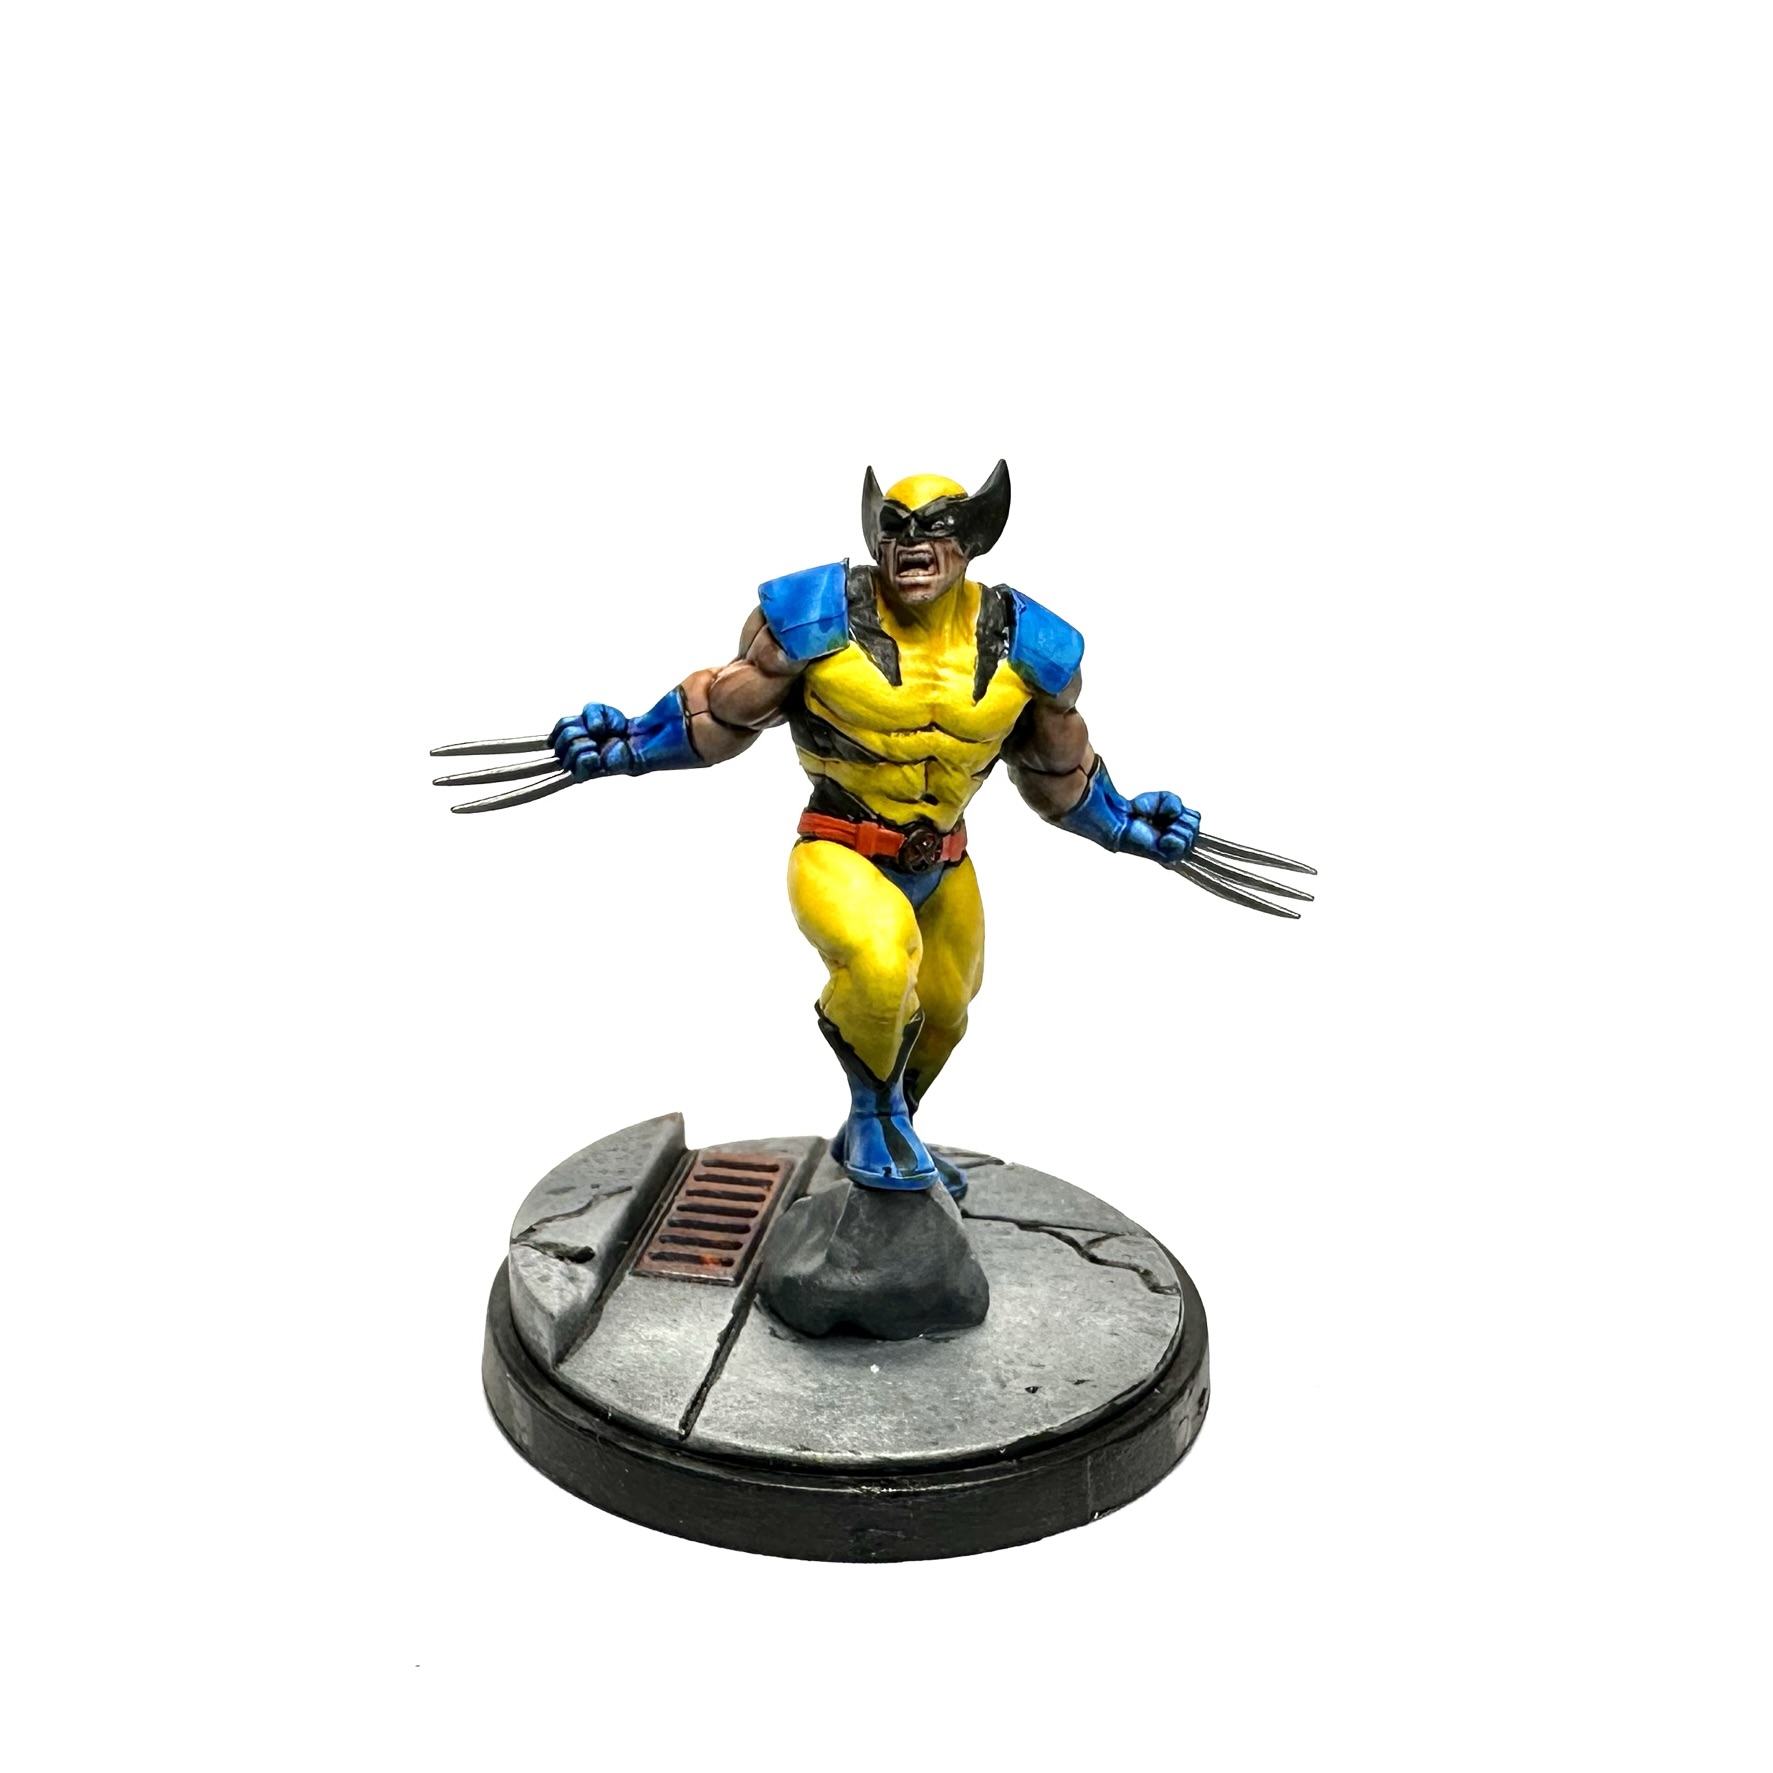
- Boots, gloves, shoulders: Asurmen Blue
- Costume: Bad Moon Yellow, Casandora Yellow (Shade)
- Black stripes and details: Black Legion
- Face: Guilliman Flesh
- Belt: Magmadroth Flame
- Claws: Scale75 Black Metal and Thrash Metal
Rogue
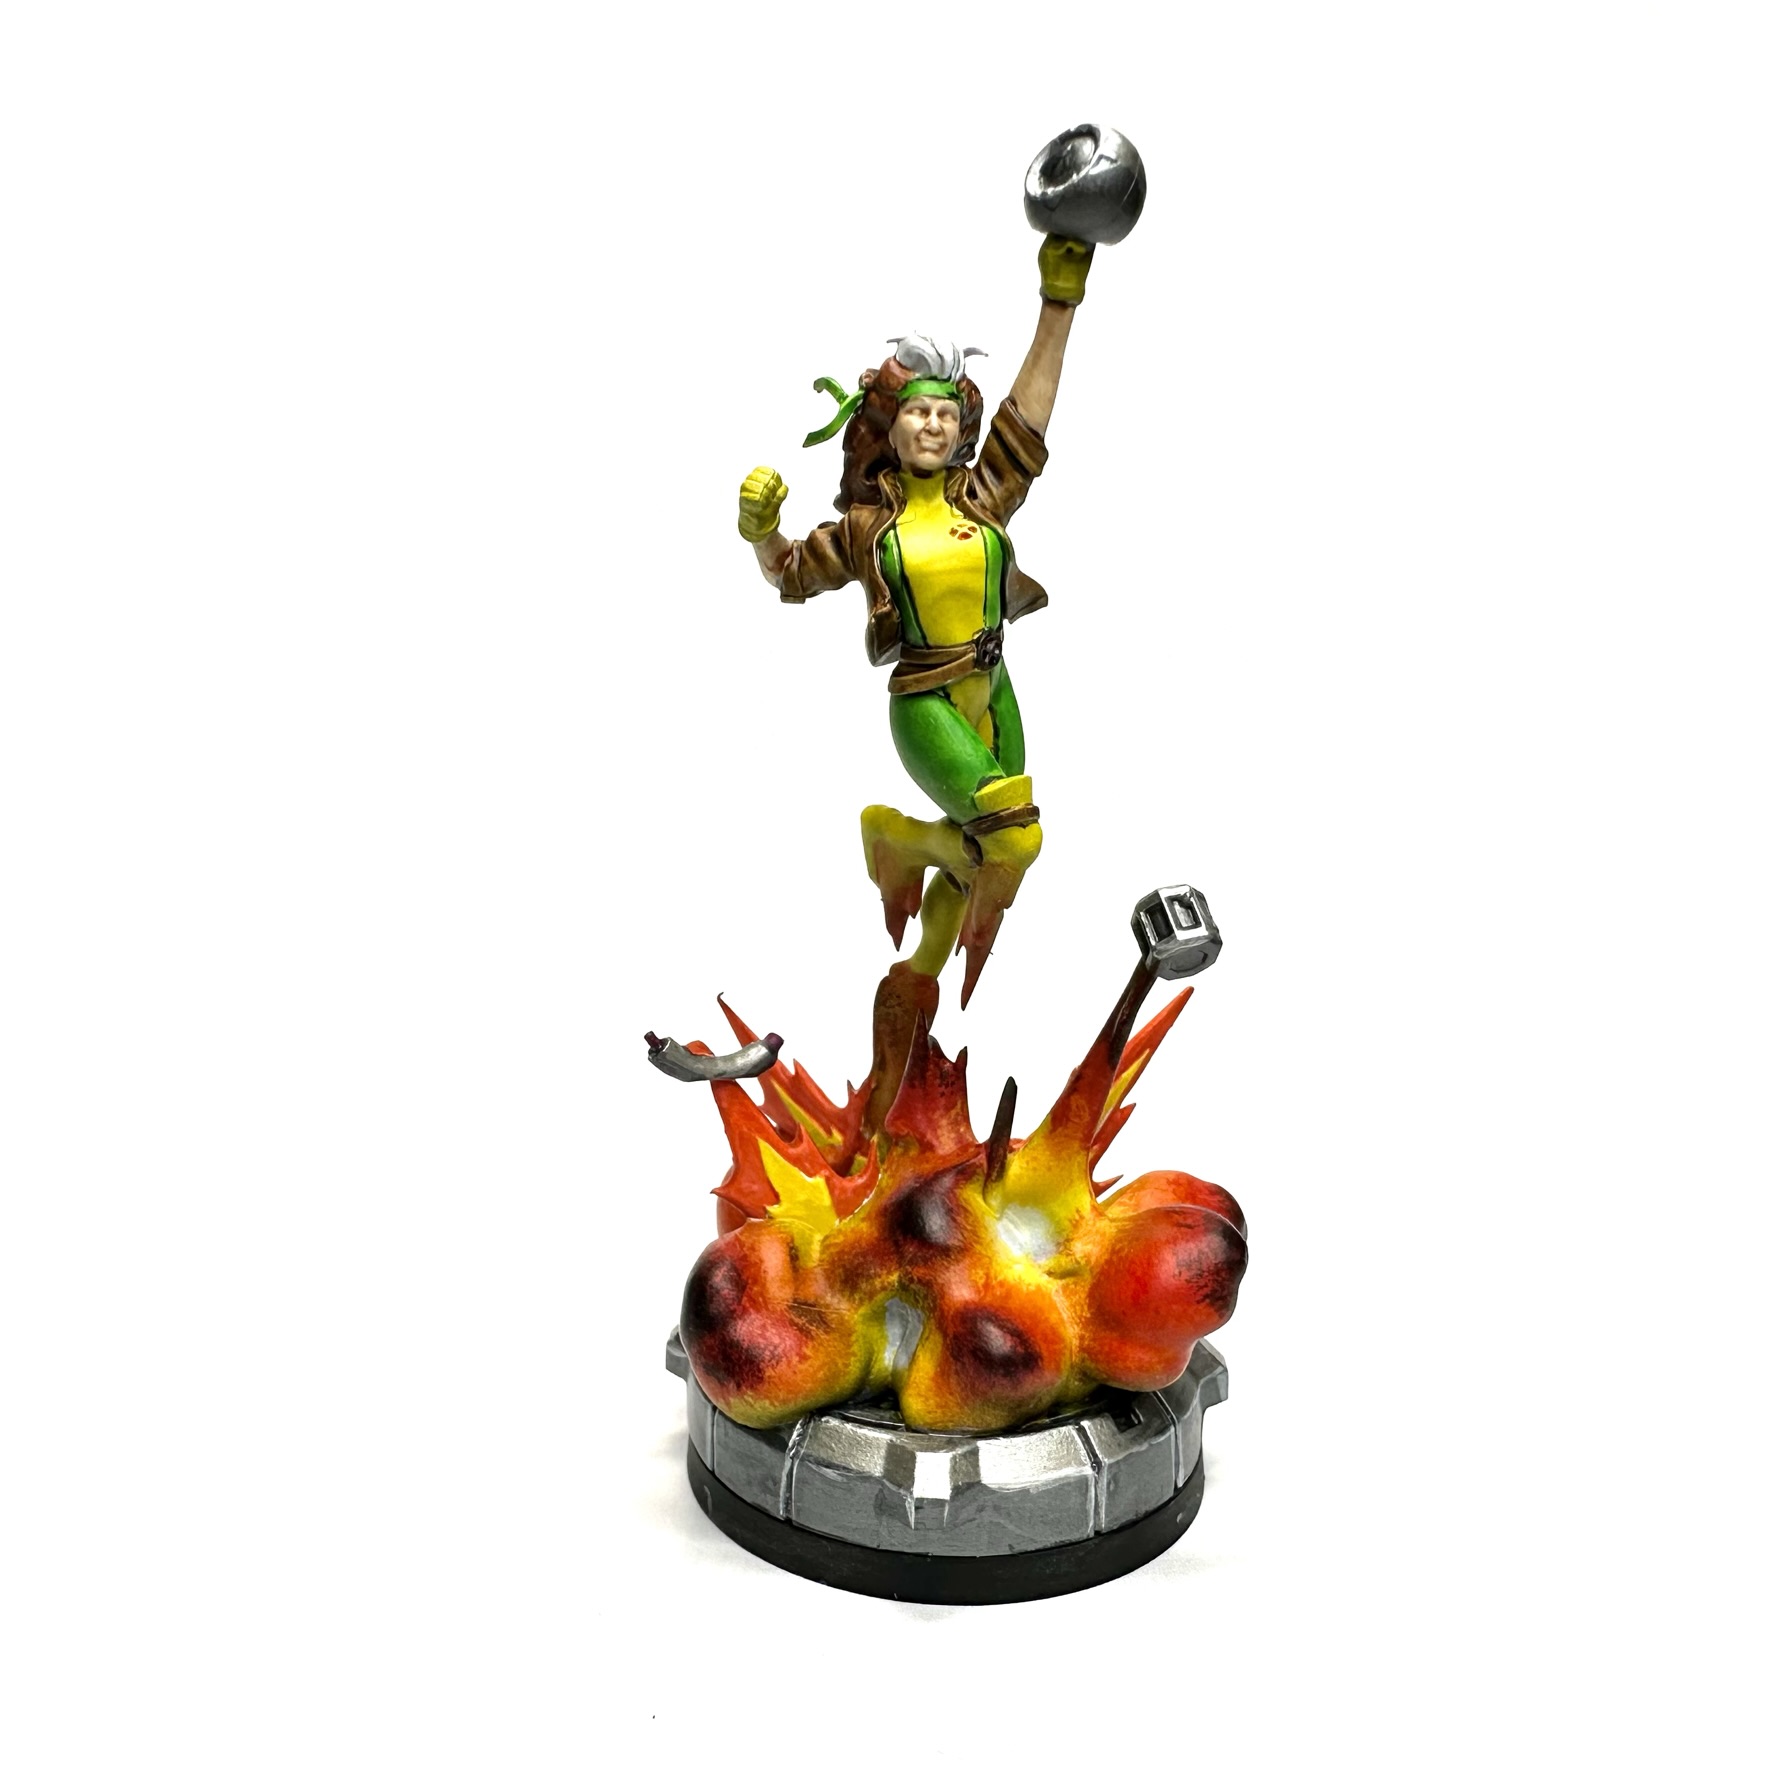
- Boots, Gloves, Chest: Bad Moon Yellow
- Legs, Sides: Karandras Green
- Belt, Jacket: Snakebite Leather
- Hair: Goregrunta Fur
- Metallics: Scale 75 Black Metal and Thrash Metal
- Explosion: Bad Moon Yellow, Magmadroth Flame, Blood Angels Red, and Black Legion. Applied via stippling with a drybrush.
Beast
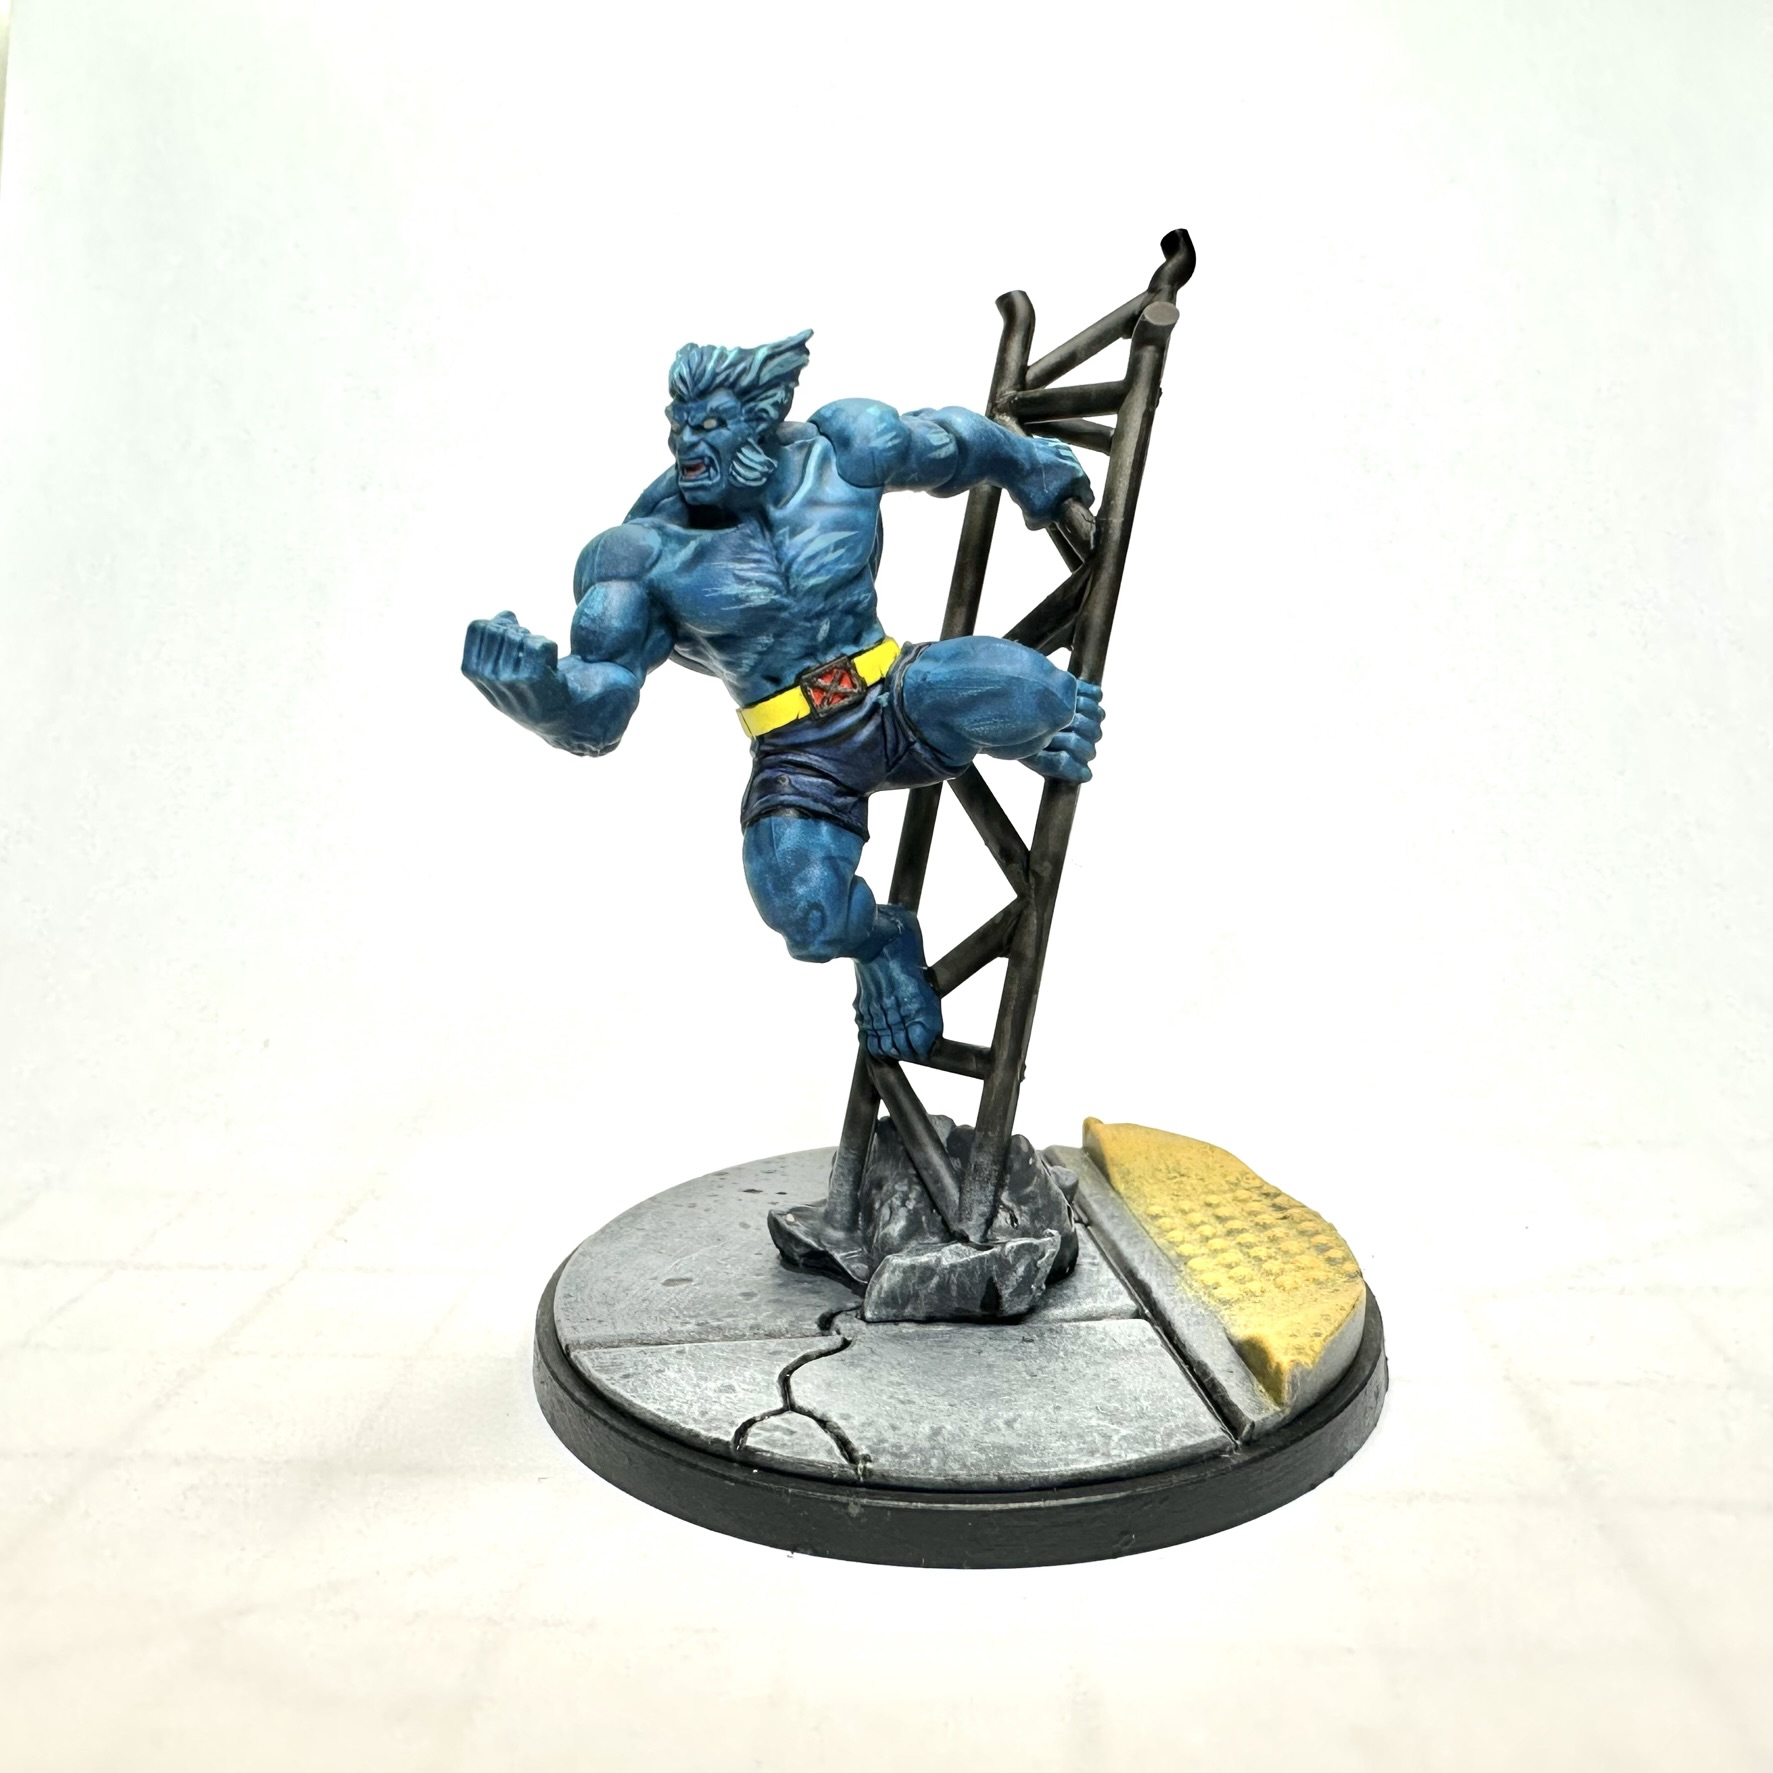
- Body: Stormfiend followed by Citadel Lothern Blue (Layer) edge highlight/hairs
- Pants: Leviadon Blue
- Belt: Bad Moon Yellow
- Buckle: Magmadroth Flame and Black Legion
- Mouth: Volupos Pink
- Girder: Ratling Grime.
- I did not bother with eyes/mouth on the other X-Men, but Beast needs a little more contrast. Same reason I added the Lothern Blue highlights.
Cyclops
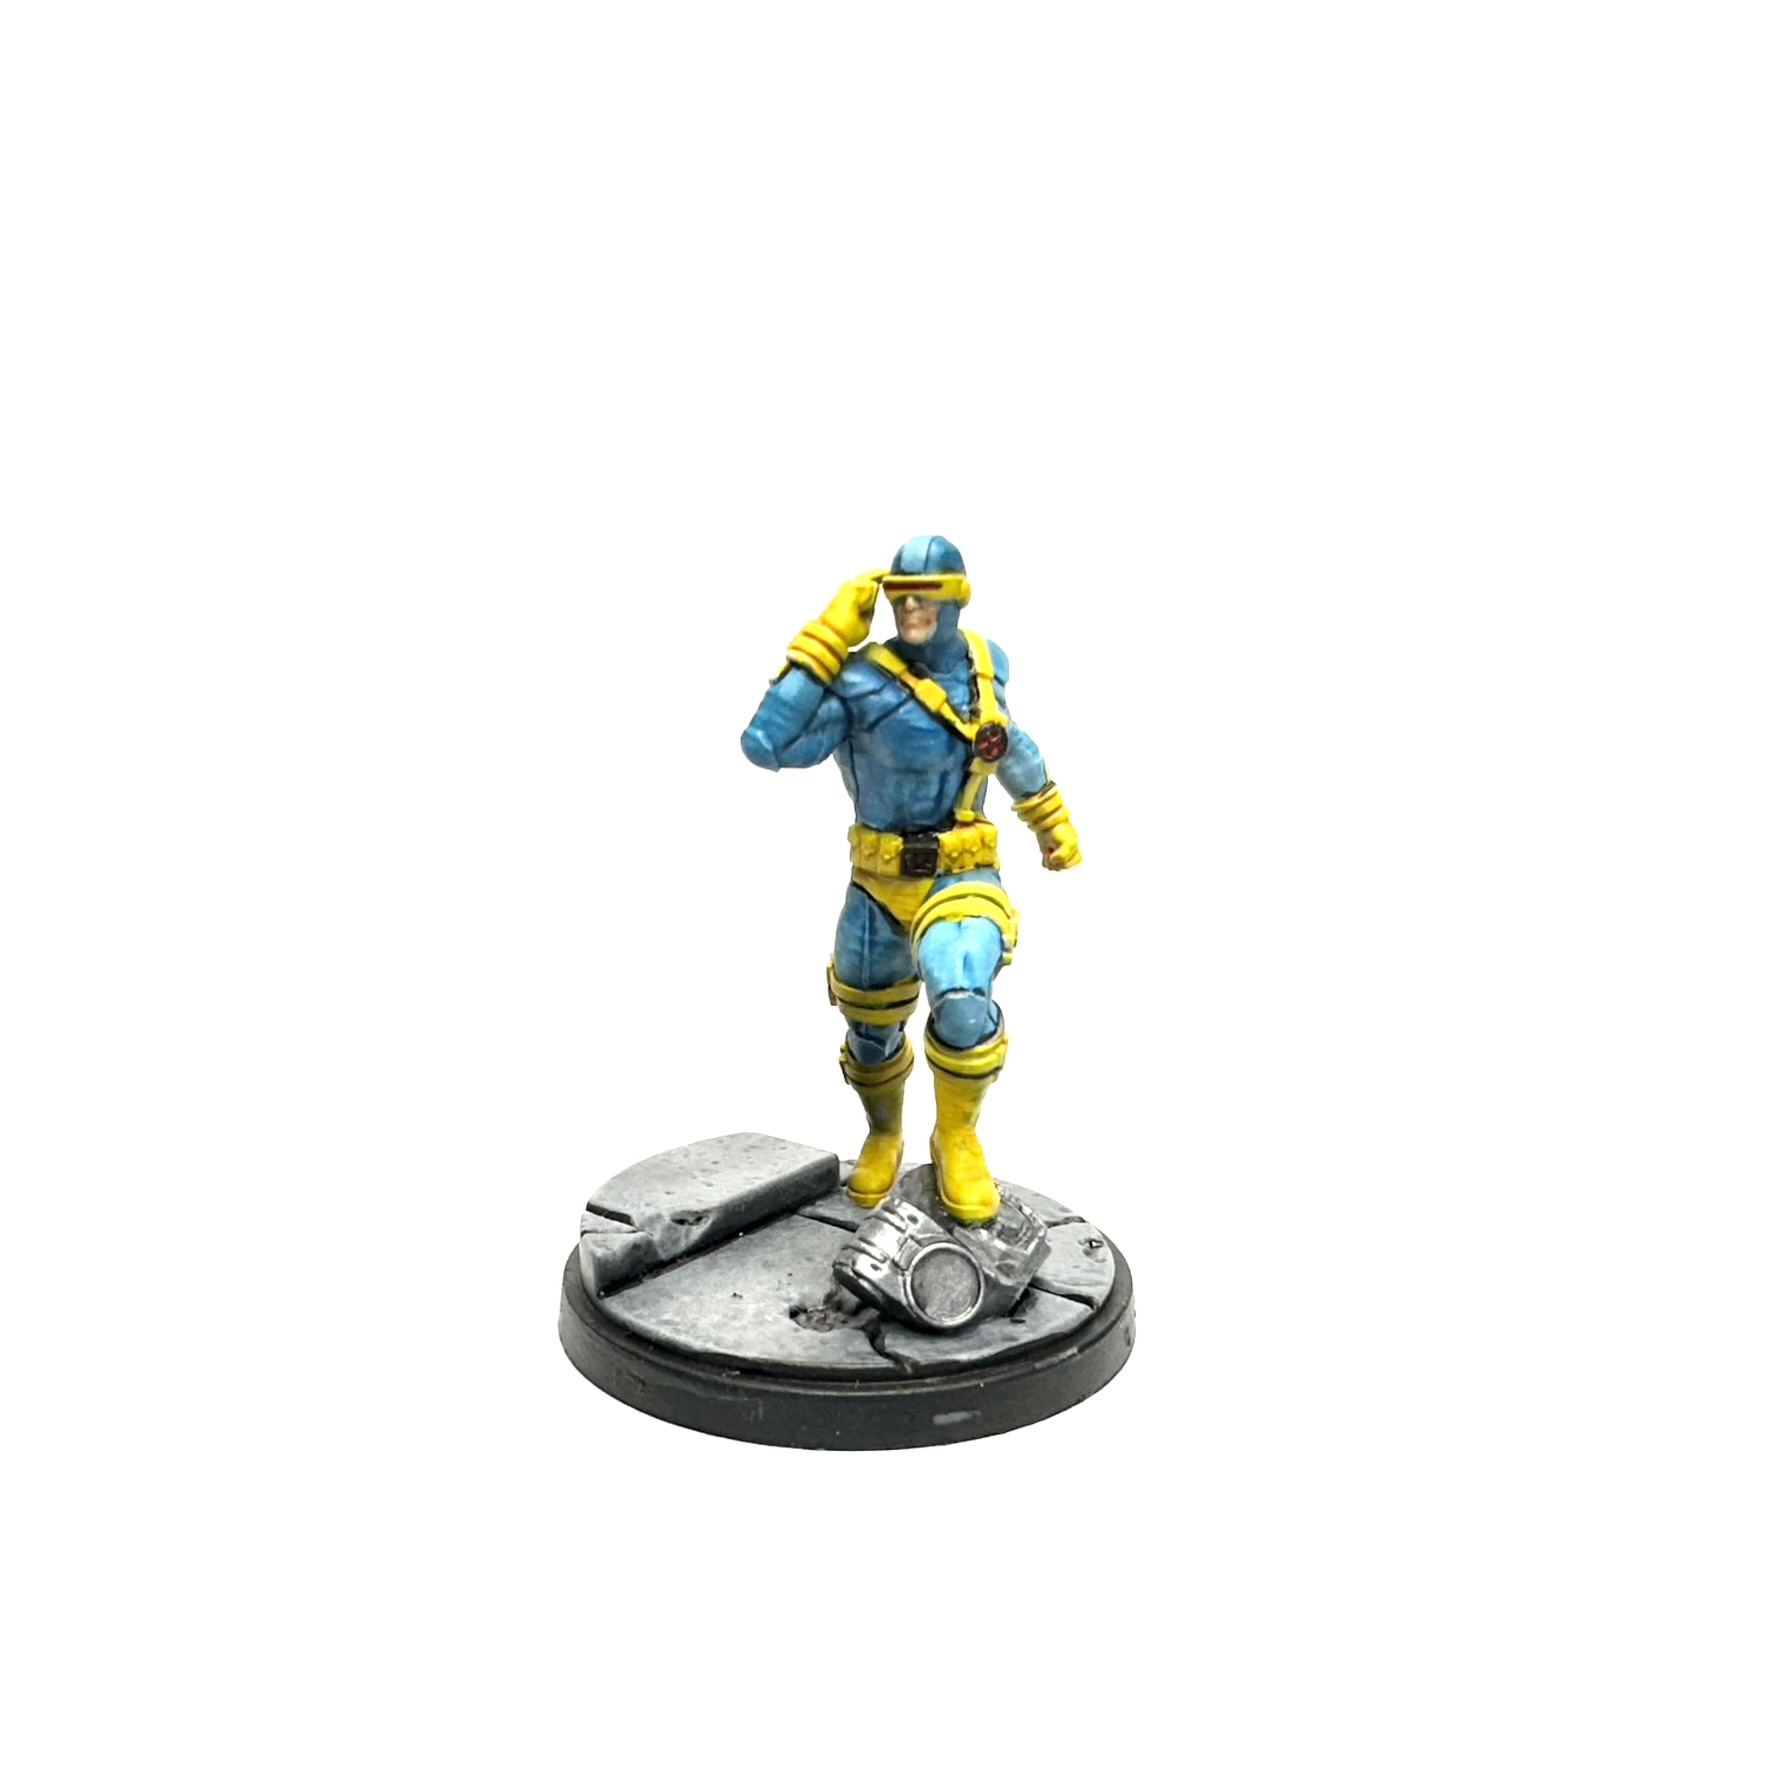
- Boots, Gloves, Visor: Bad Moon Yellow
- Costume: Stormfiend thinned 50:50 with Contrast Medium
- Belt Buckle: Black Templar
- Laser, X-Men Logo: Magmadroth Orange
Gambit
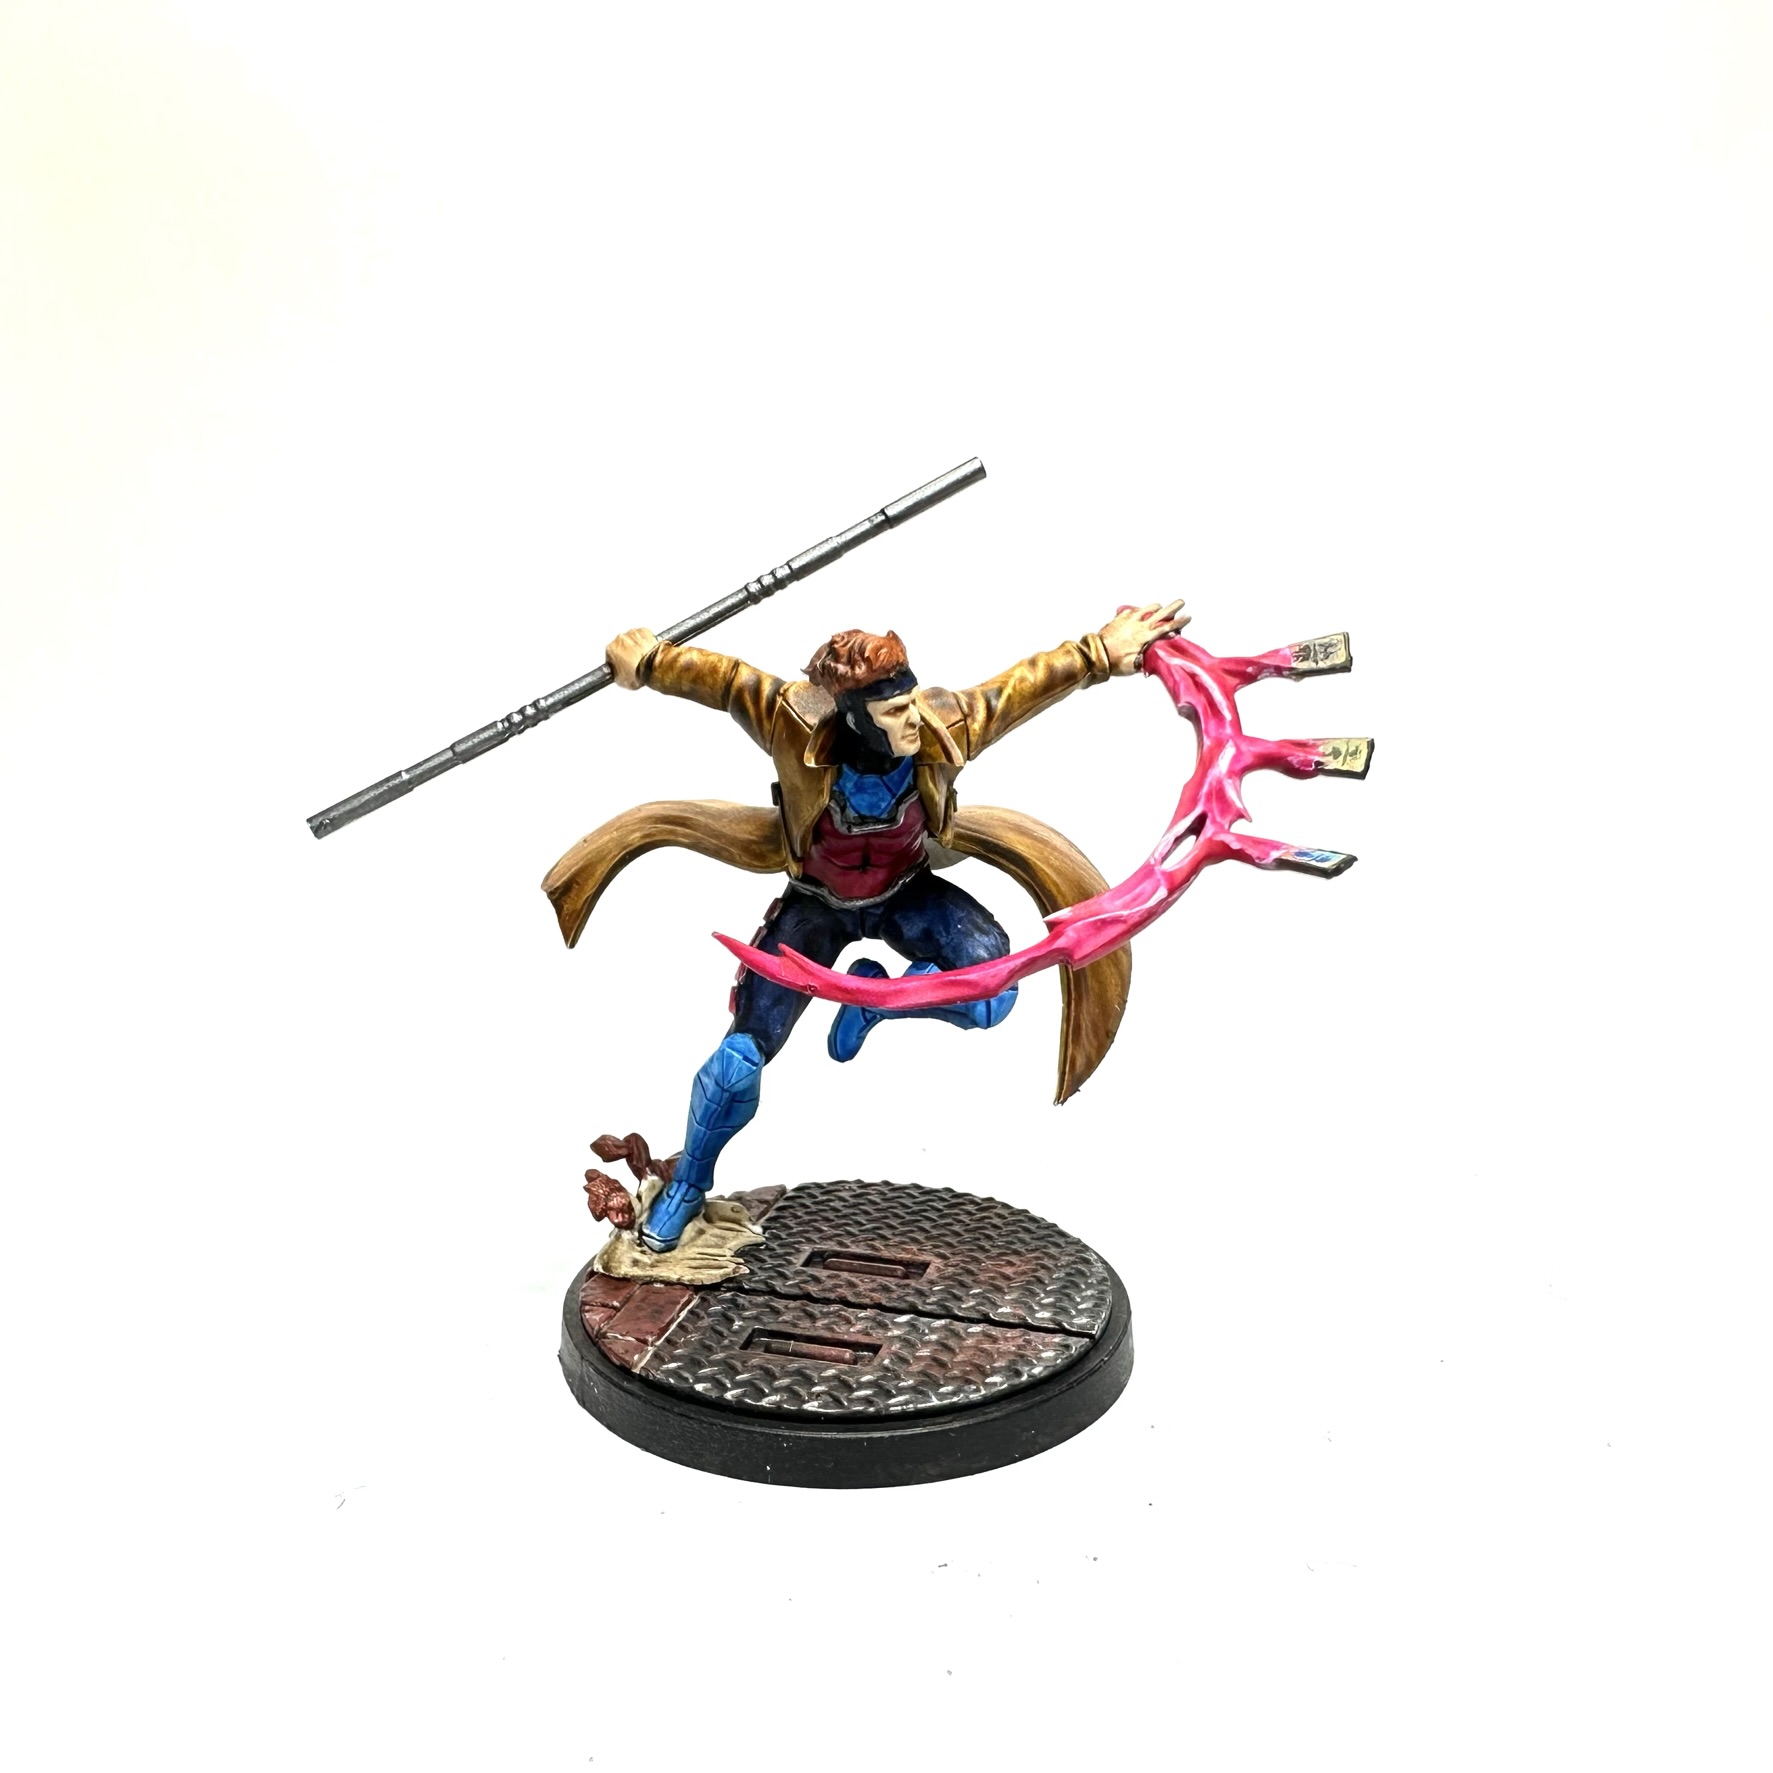
- Boots, Upper Chest: Asurmen Blue
- Pants: Leviadon Blue
- Jacket: Snakebite Leather
- Hair: Goregrunta Fur
- Face Hood Thing: Black Templar
- Face: Citadel Flayed One Flesh (Layer) and Citadel Reikland Fleshshade (Shade)
- Thrown Energy: Doomfire Magenta, with areas wiped away with a wet brush
- Staff/Metallic Trim: Scale75 Thrash Metal
Storm
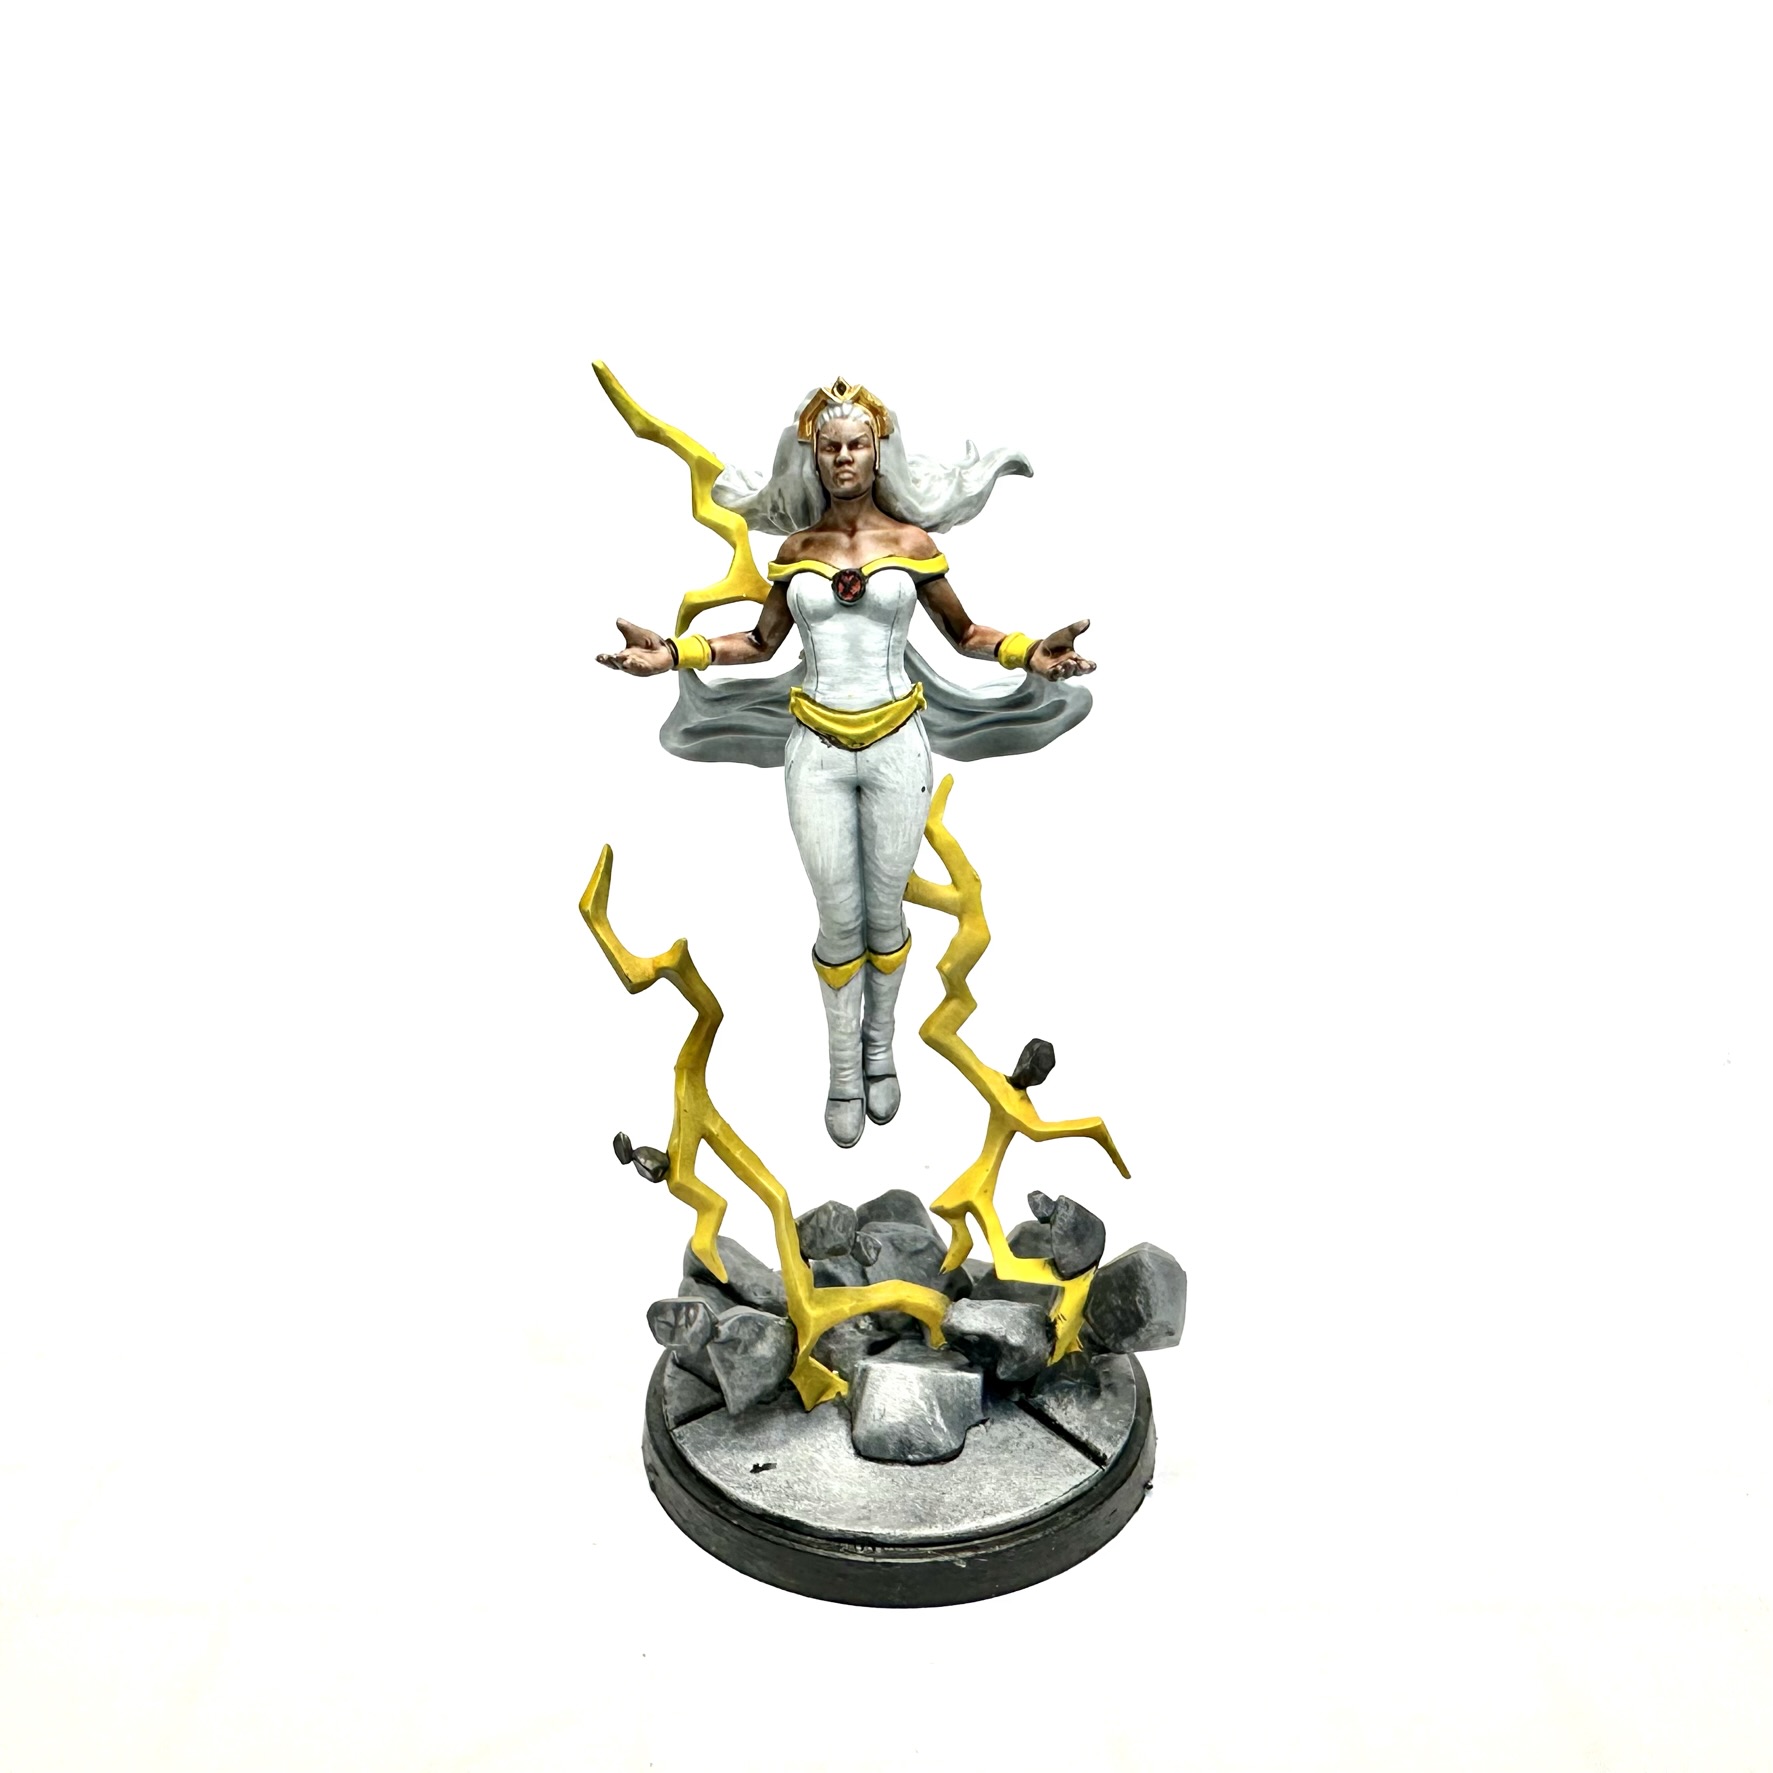
Because I wanted to use her 90’s TV Show costume (and yellow lightning) Storm’s recipe involves a bit more work and different paints.
- Lightning: Bad Moon Yellow and Imperial Fist
- Outfit Trim: Bad Moon Yellow
- Skin: Guilliman Flesh and Citadel Agrax Earthshade (Wash)
- Outfit: Apothecary White, followed by Citadel Corax White (Base) and White Scar (Layer) highlights. Then Citadel Soul Blight Grey (Shade) and additional Corax Highlights
- Hair: As above, only left brighter.
Marvel City Bases
I use the same recipe for all of my Marvel bases and it is very easy, done mostly with stippling and drybrushing. The key to this is to apply all the colors first by stippling (repeatedly stabbing straight on) before drybrushing the same color when most of the paint is off the brush. This builds up a rough texture for each subsequent highlight layer.
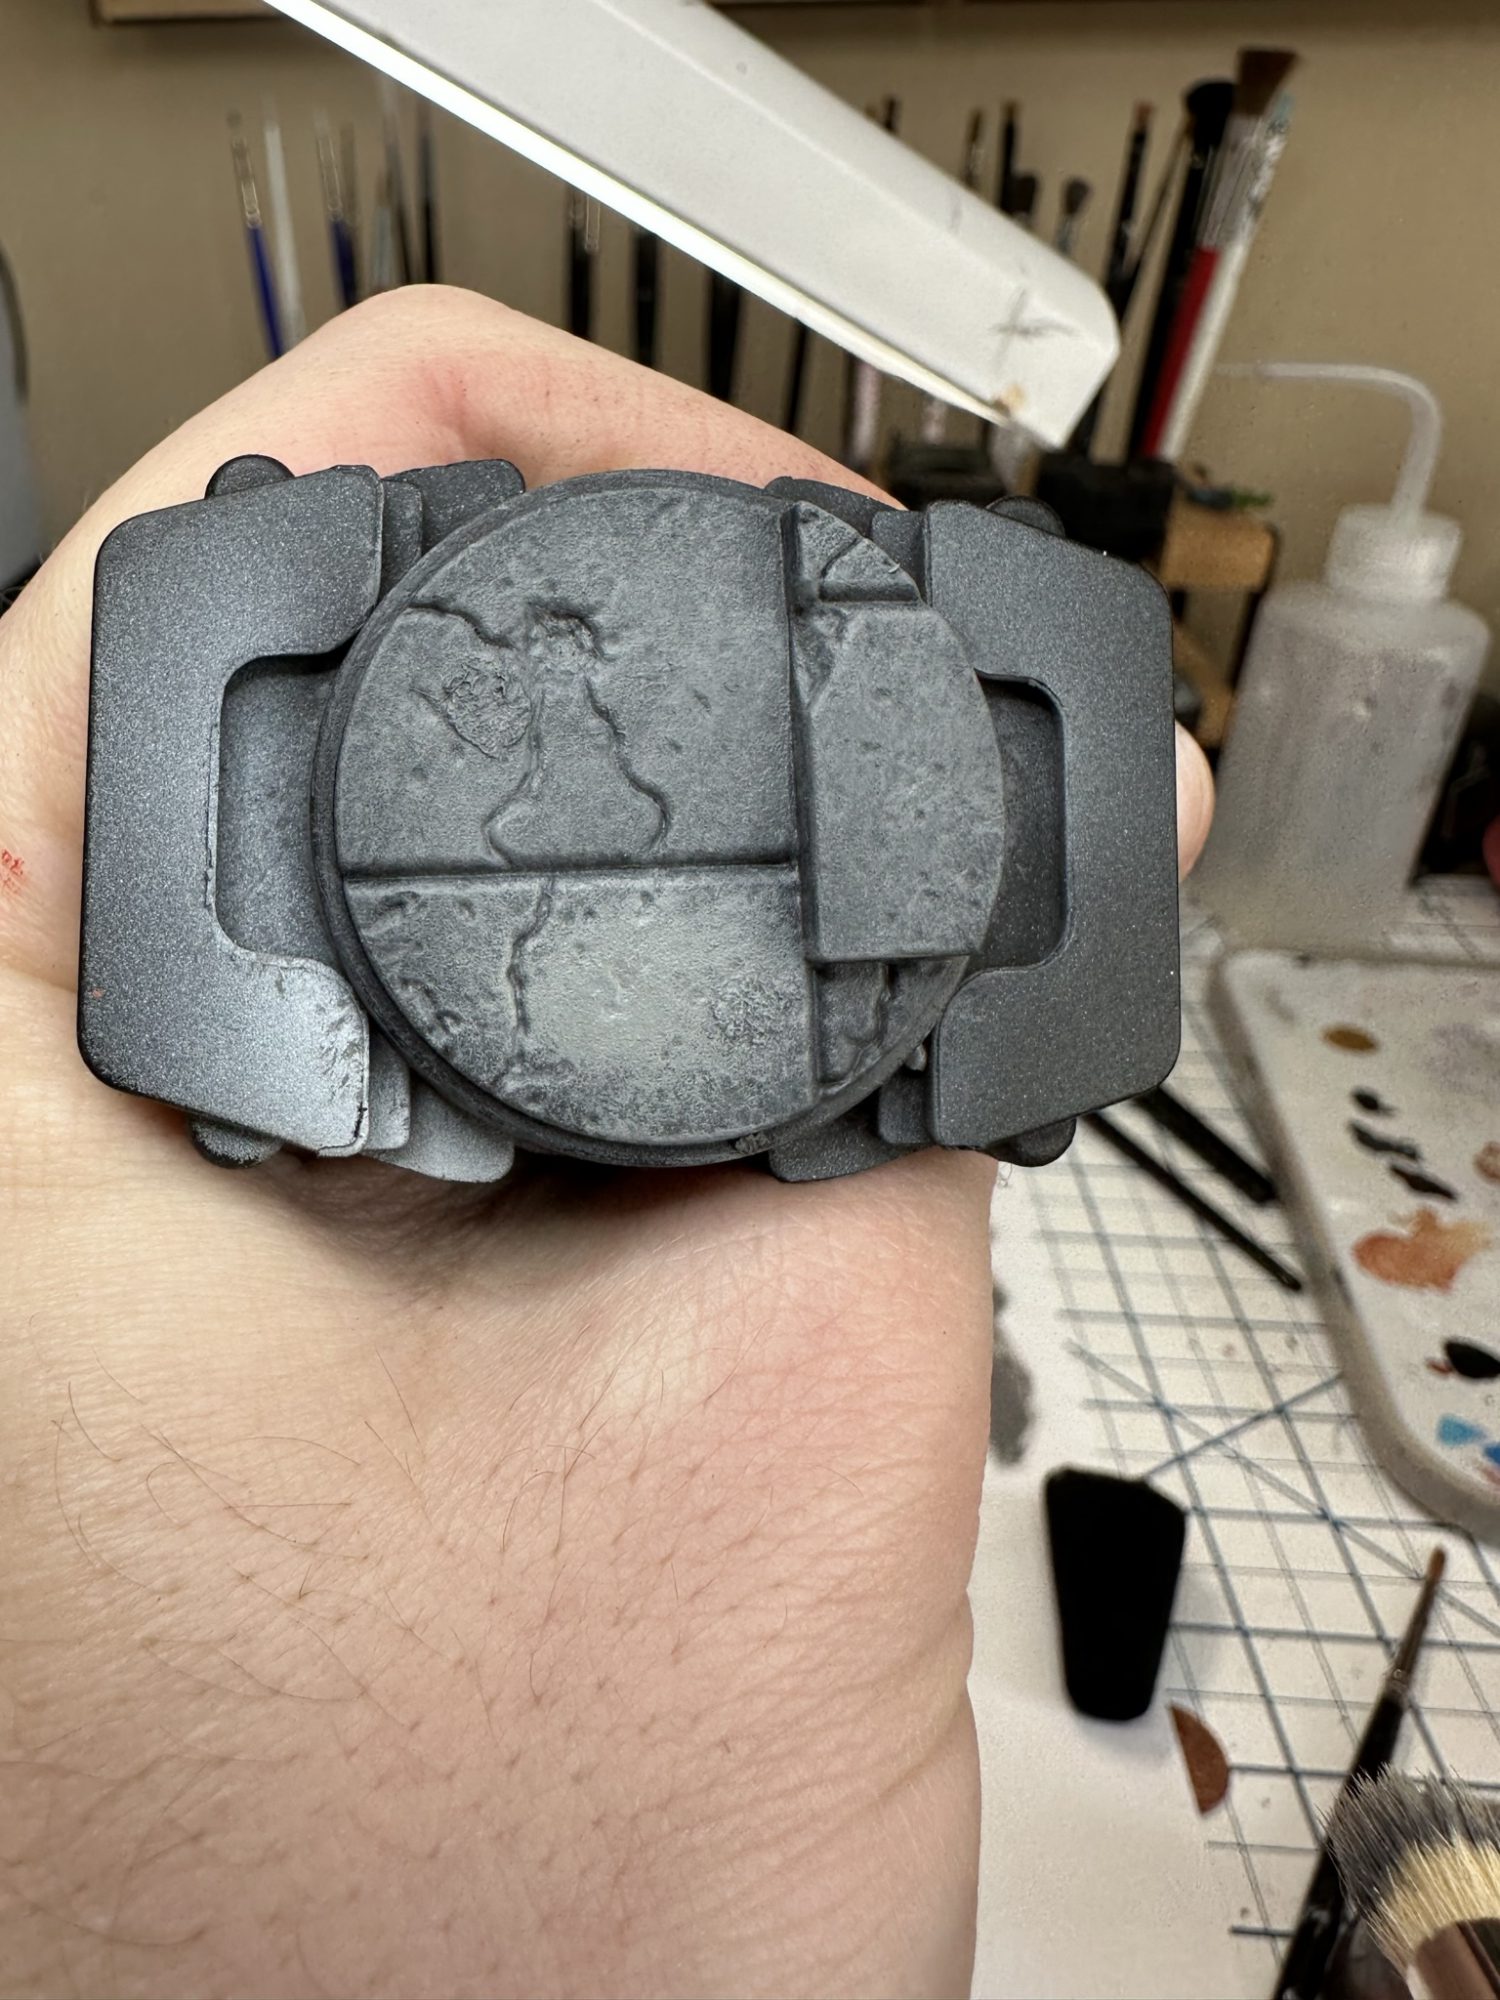
Up first, straight black prime.
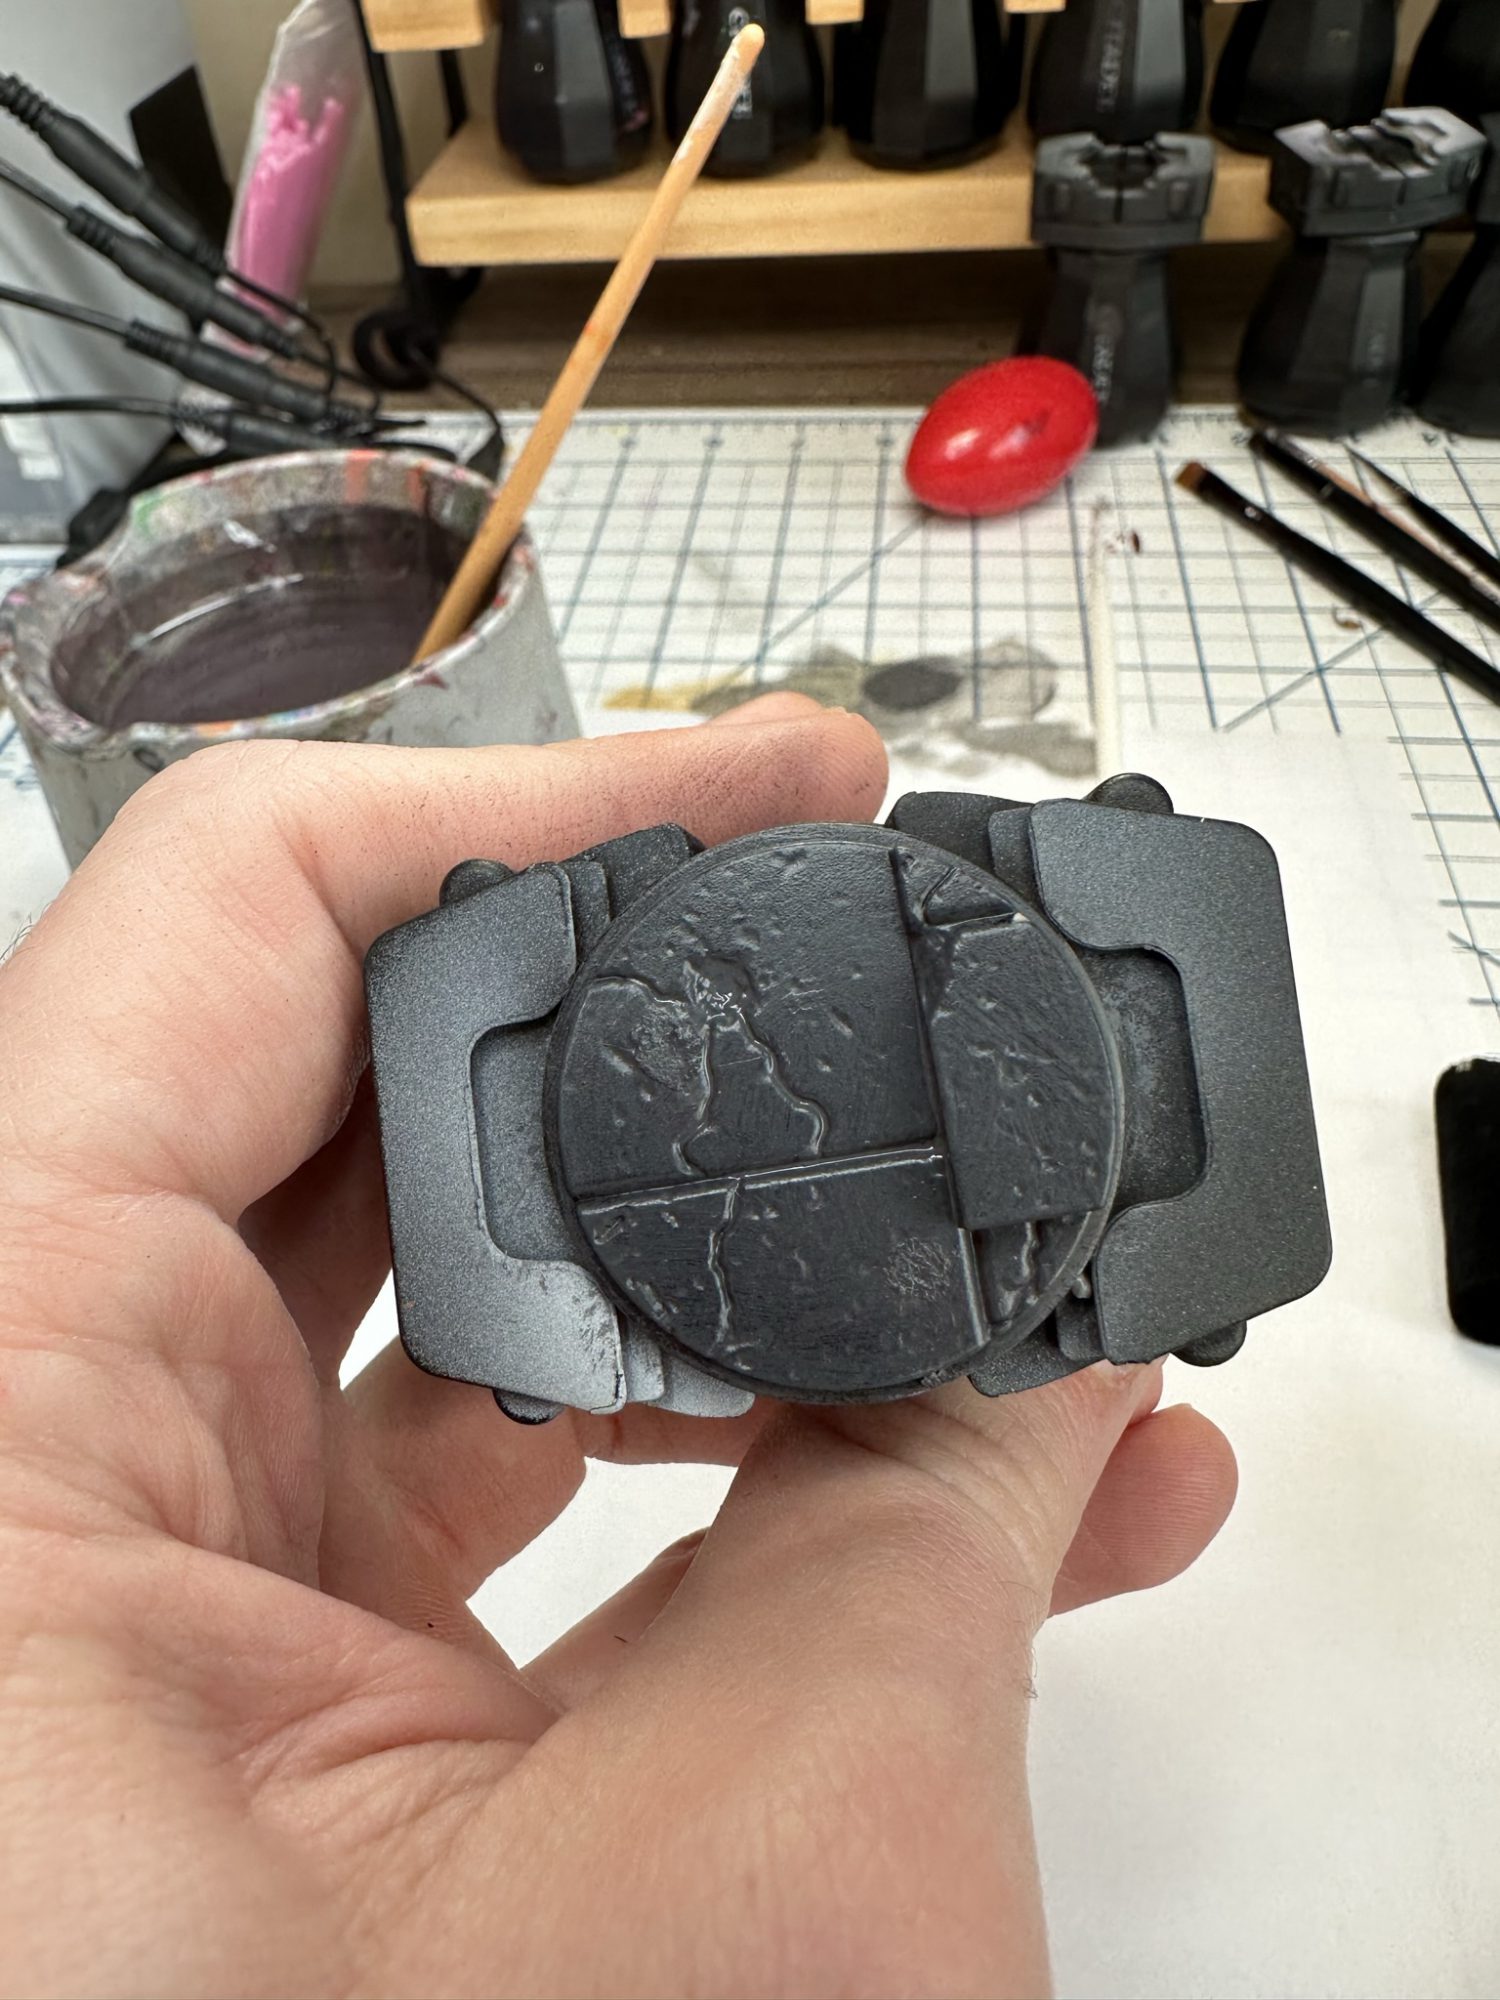
There are two steps in one picture below. The top sidewalk panel is just Eshin Grey, applied via the stipple/drybrush method below. The lower sidewalk panel has the subsequent 50:50 Eshin Grey:Dawnstone layer applied so you can see the build up of texture.
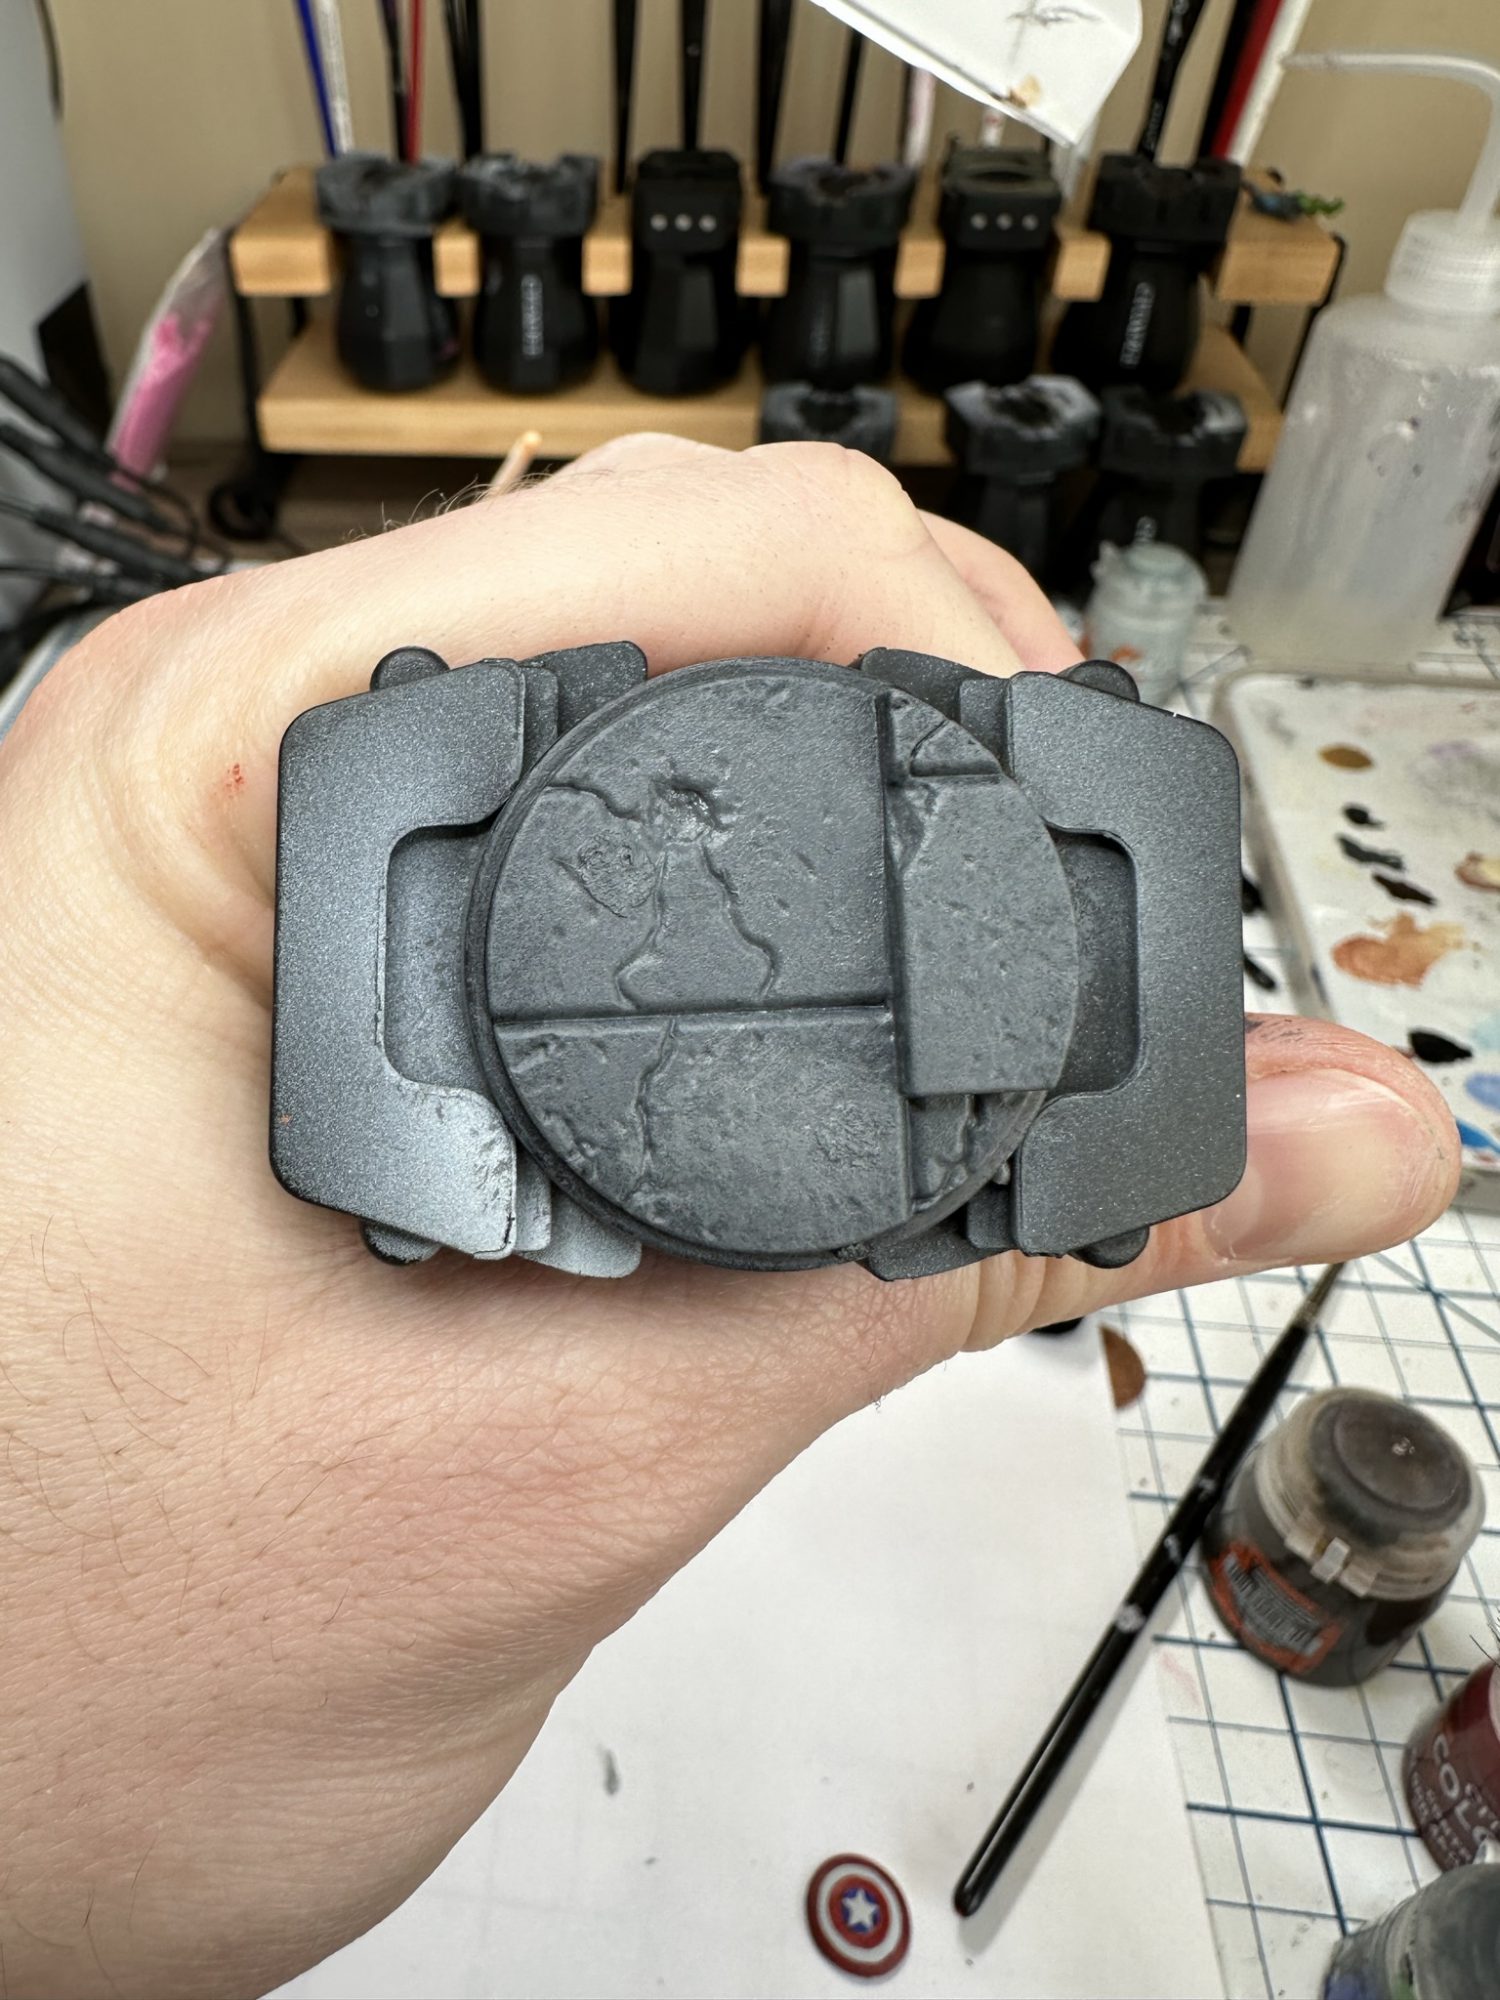
Again two steps in one picture. The top panel has now been stipple/drybrushed 50:50 Eshin Grey: Dawnstone, and the bottom panel has had pure Dawnstone applied stipple/drybrush.
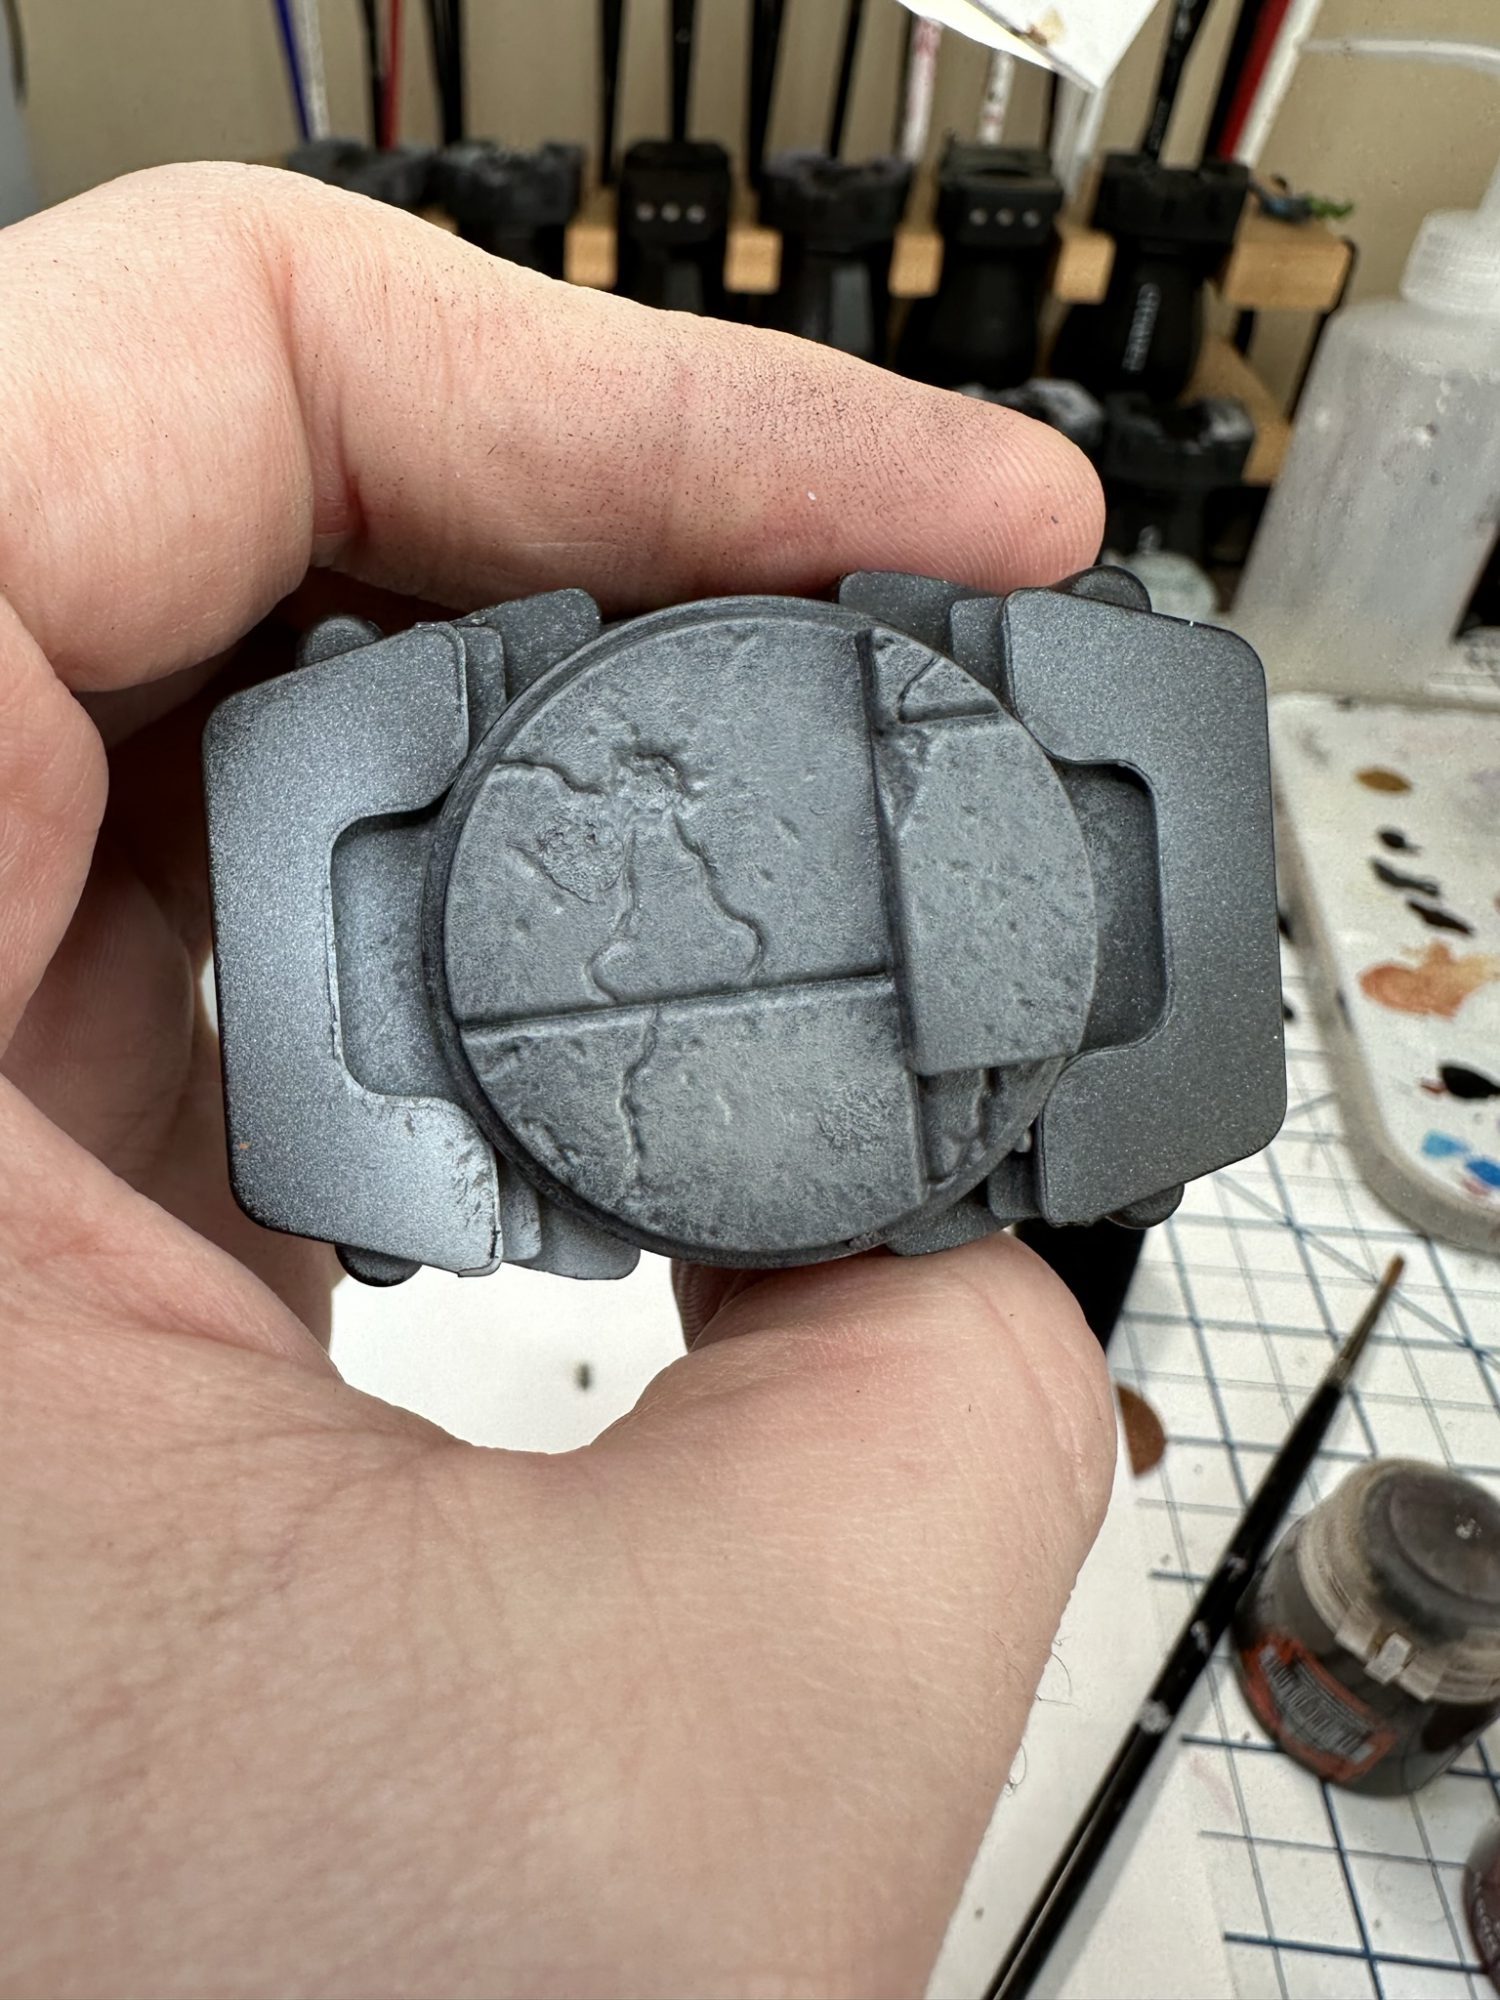
Once more, the top panel has now had the straight Dawnstone applied while the bottom panel has had another layer of stipple/drybrush this time 50:50 Dawnstone: Screaming Skull.
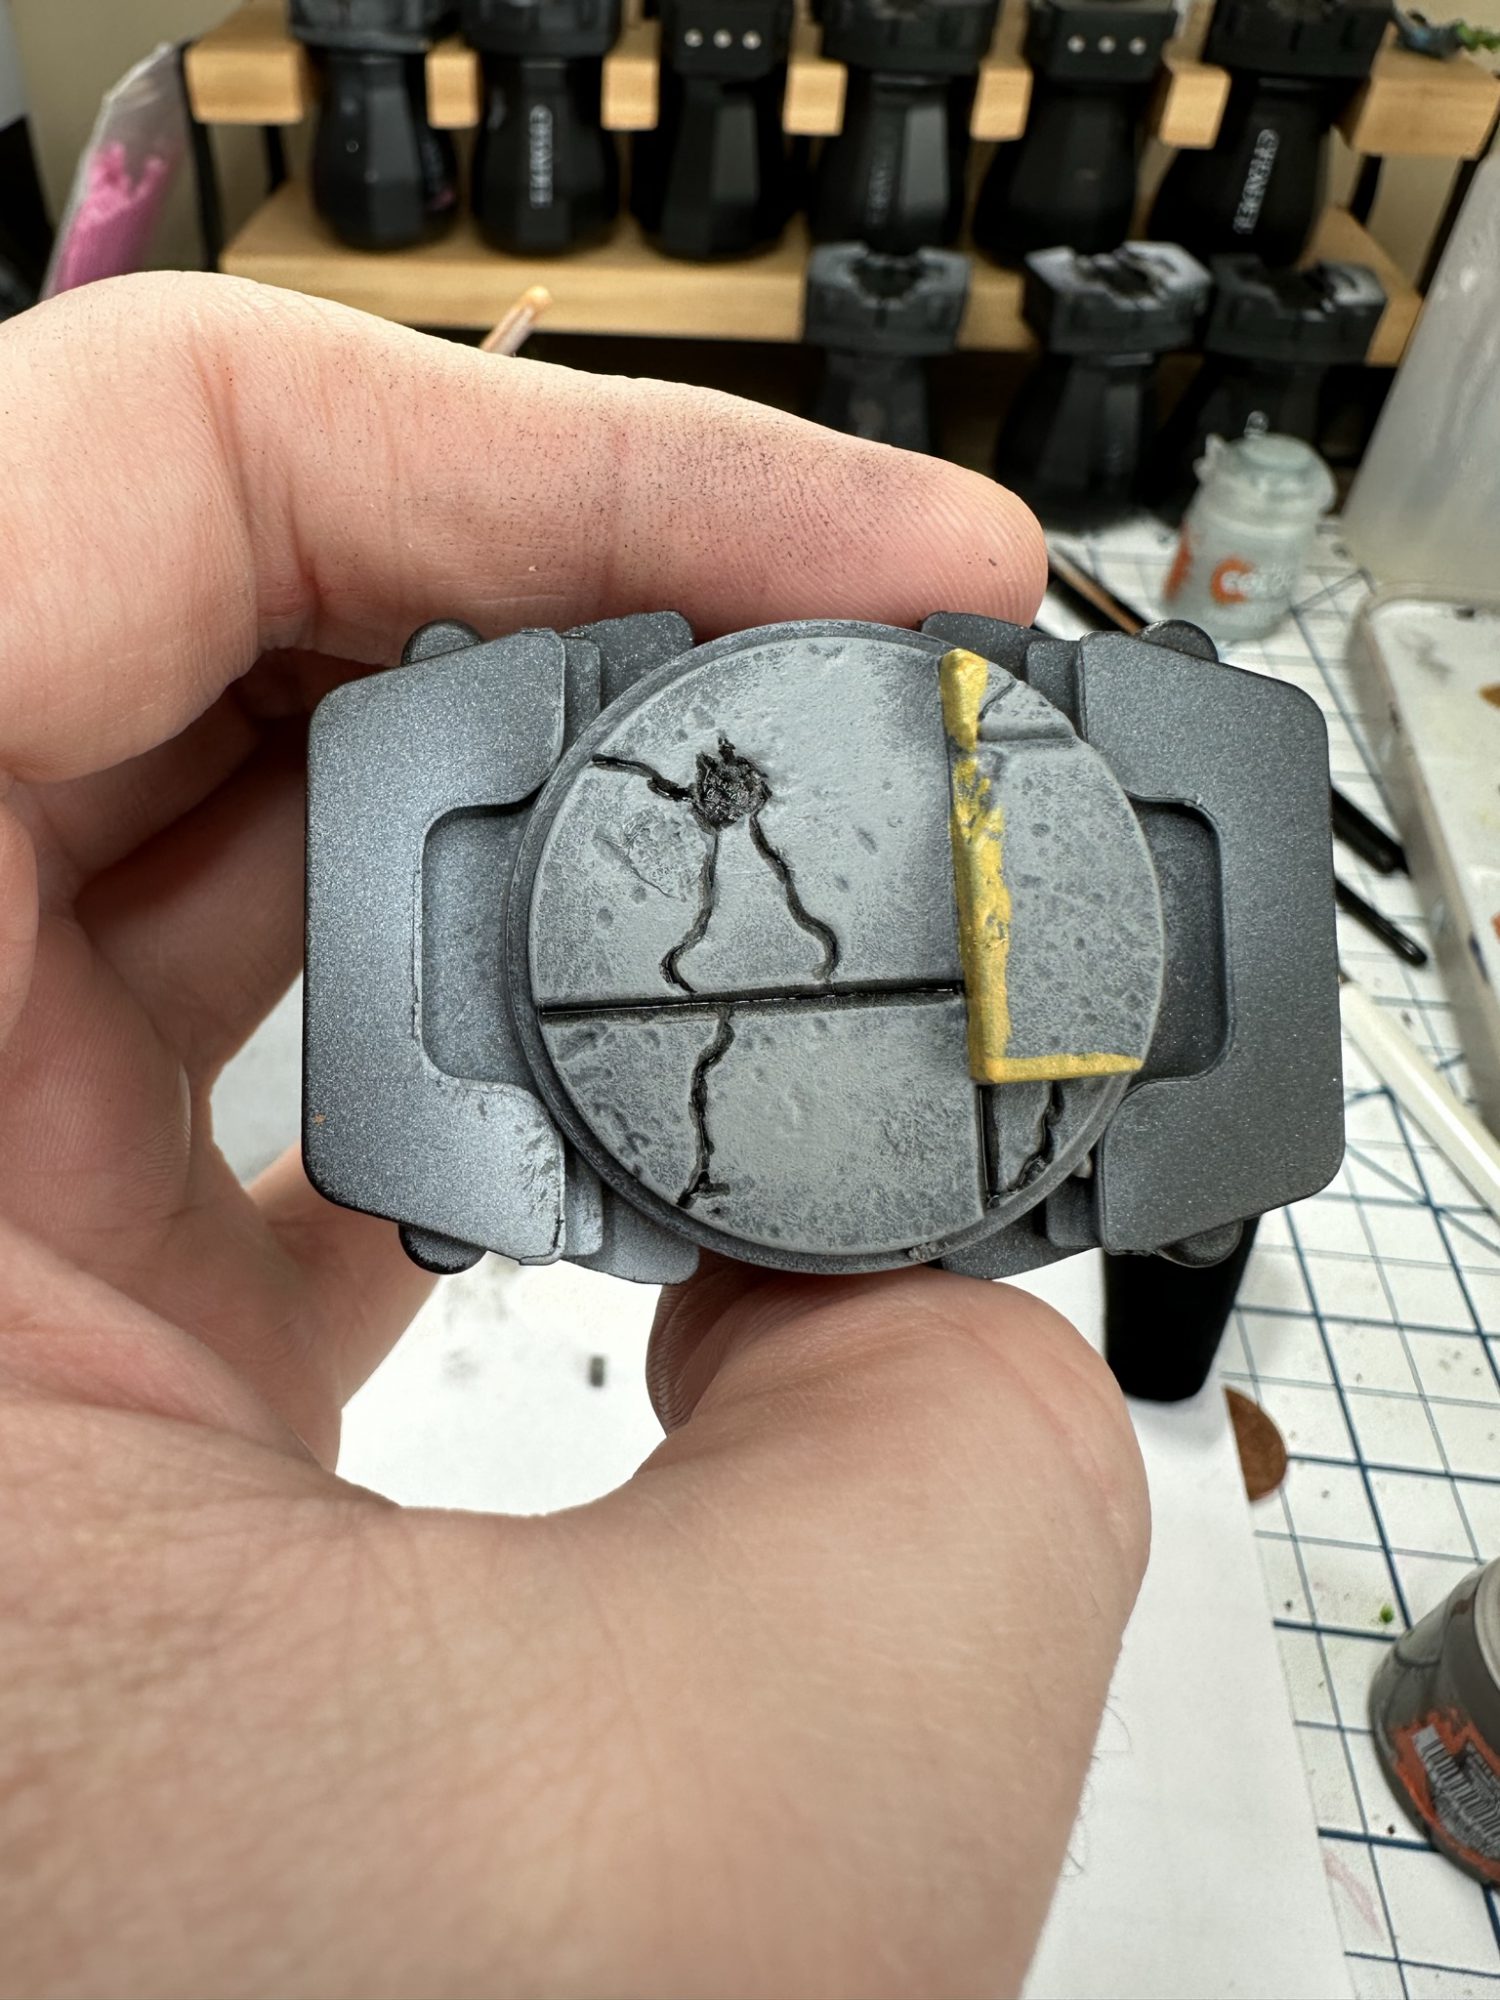
And finally it gets an all-over light drybrush of Screaming Skul followed by Averland Sunset yellow curb details and a black line shadow with black ink.
Here you can see Captain America installed on his new base, ready to take to the streets.
Have any questions or feedback? Drop us a note in the comments below or email us at contact@goonhammer.com.
