
This article is part of a larger series on how to paint the Death Guard. To return to the parent article, click this link.

Motarion is one of the bigger and more complex/detailed kits that Games Workshop produces, so generally hobbyists want to take their time to get things right. While the Death Guard (and Nurgle Daemons) are generally pretty forgiving to paint, since they can be messy, sloppy monstrous things, there are a lot of details and finer points on Mortarion to consider.
I’d had Mortarion for a while – ever since the model was released – but didn’t get around to painting him until last summer, when I was stuck at my parents’ house on lockdown. I didn’t stray too far from the general scheme offered up by GW – I knew I wanted to keep the purple cloth – but I wanted to try something a bit more involved with the wings.
Mortarion’s Armor
I primed Mortarion Black – and I assembled the model in full before priming. Mortarion’s main body and armor pretty much followed my standard procedure of painting Castellan Green and then highlighting that up with Death World Forest, Death Guard Green, and Ogryn Camo before washing with Agrax Earthshade and coming back to do highlights with Death Guard Green and Ogryn Camo.
Most of this is nothing special, and can be found in my write-up for painting Death Guard in the guide to my method for painting Death Guard. Pretty much all of the techniques in that guide are in use on my Mortarion, with the real departure being his wings.
 The Wings
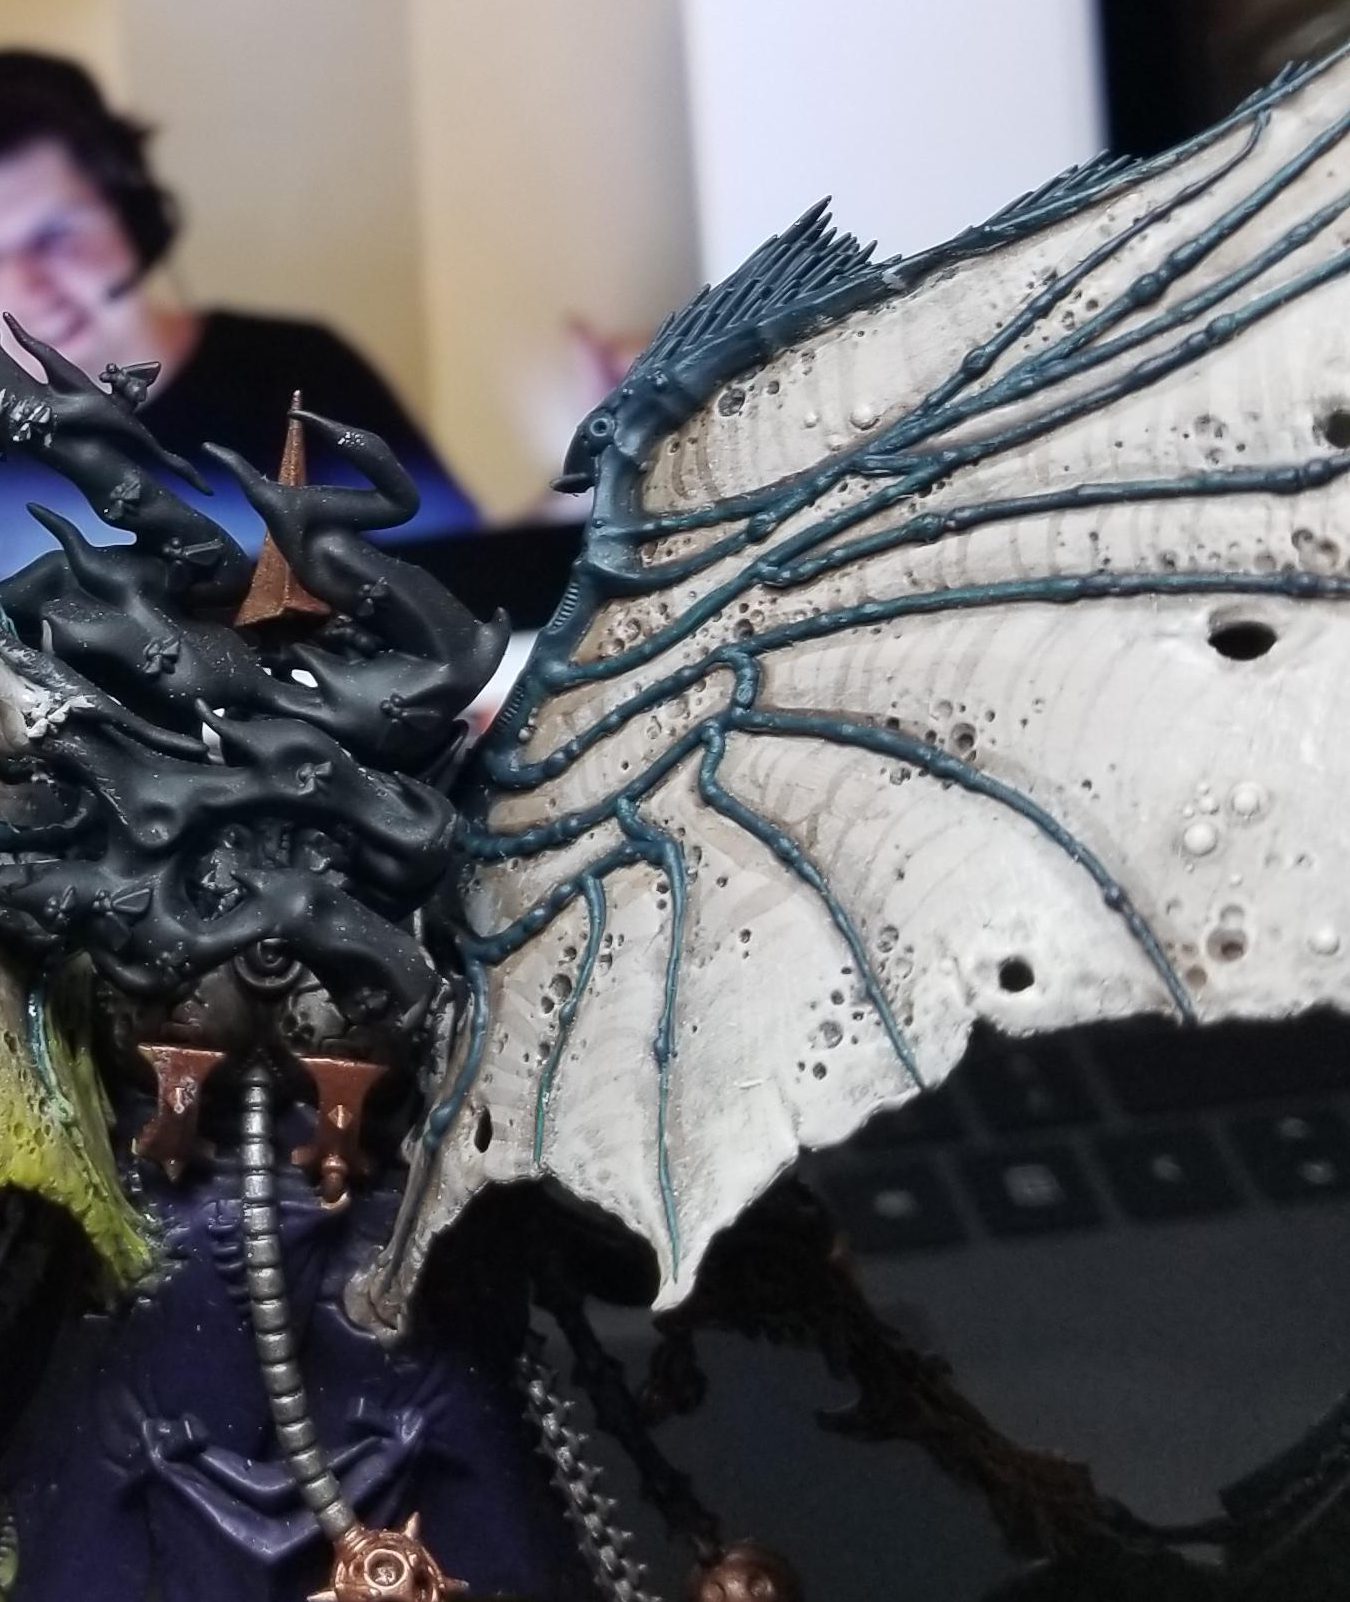
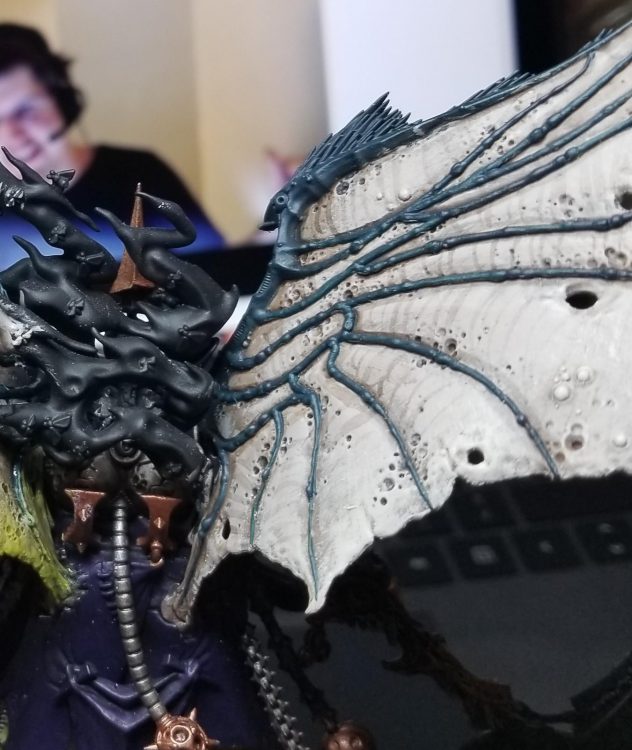
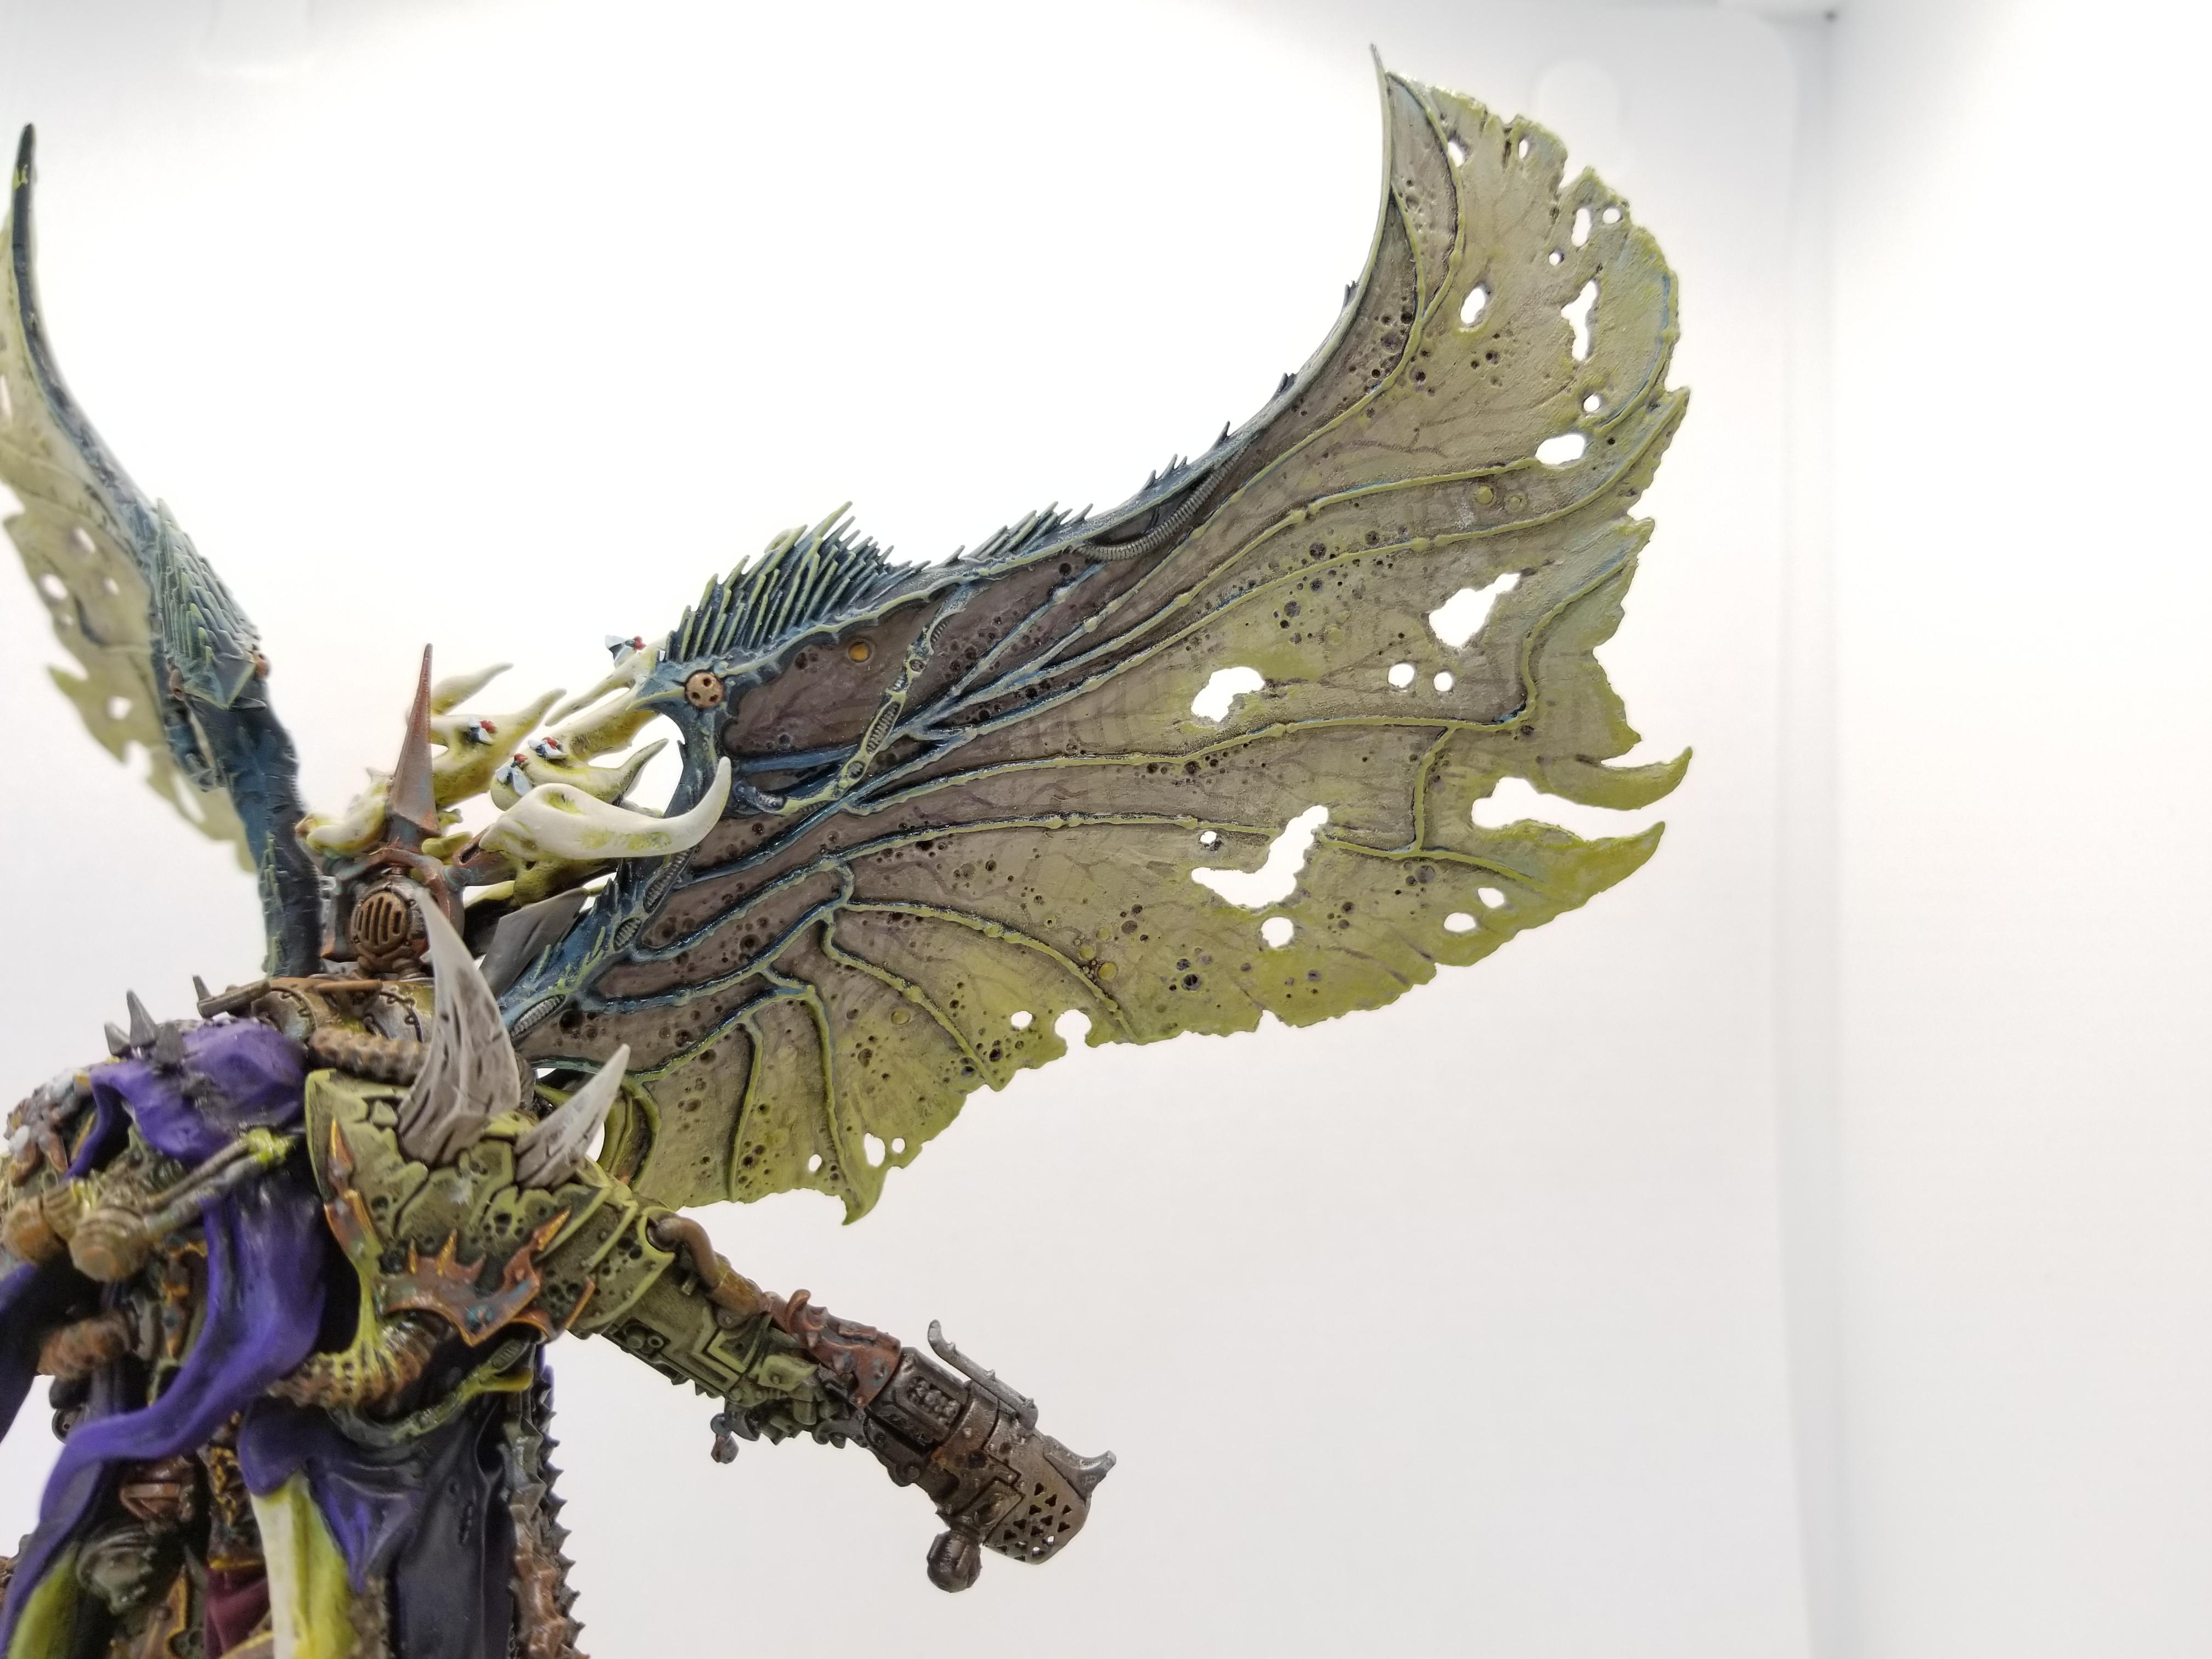
Let’s talk about the wings. I started by painting the wings liberally with Rakarth Flesh, then drybrushed that up, working outward, to Reaper Polished Bone. Then I painted the ribbing and bone parts of the wings with Incubi Darkness, the same color I use on my Nurgle bugs. Next I came back and shaded the recesses with Agrax Earthshade and also used it to paint lines going across the wings between the veins/fingers/whatever that run throughout the wings. The goal here is to add texture to the wings and make them feel more organic. I’m also going for a look that goes from a darker shade further inside on the wings and got lighter toward the outer edges.
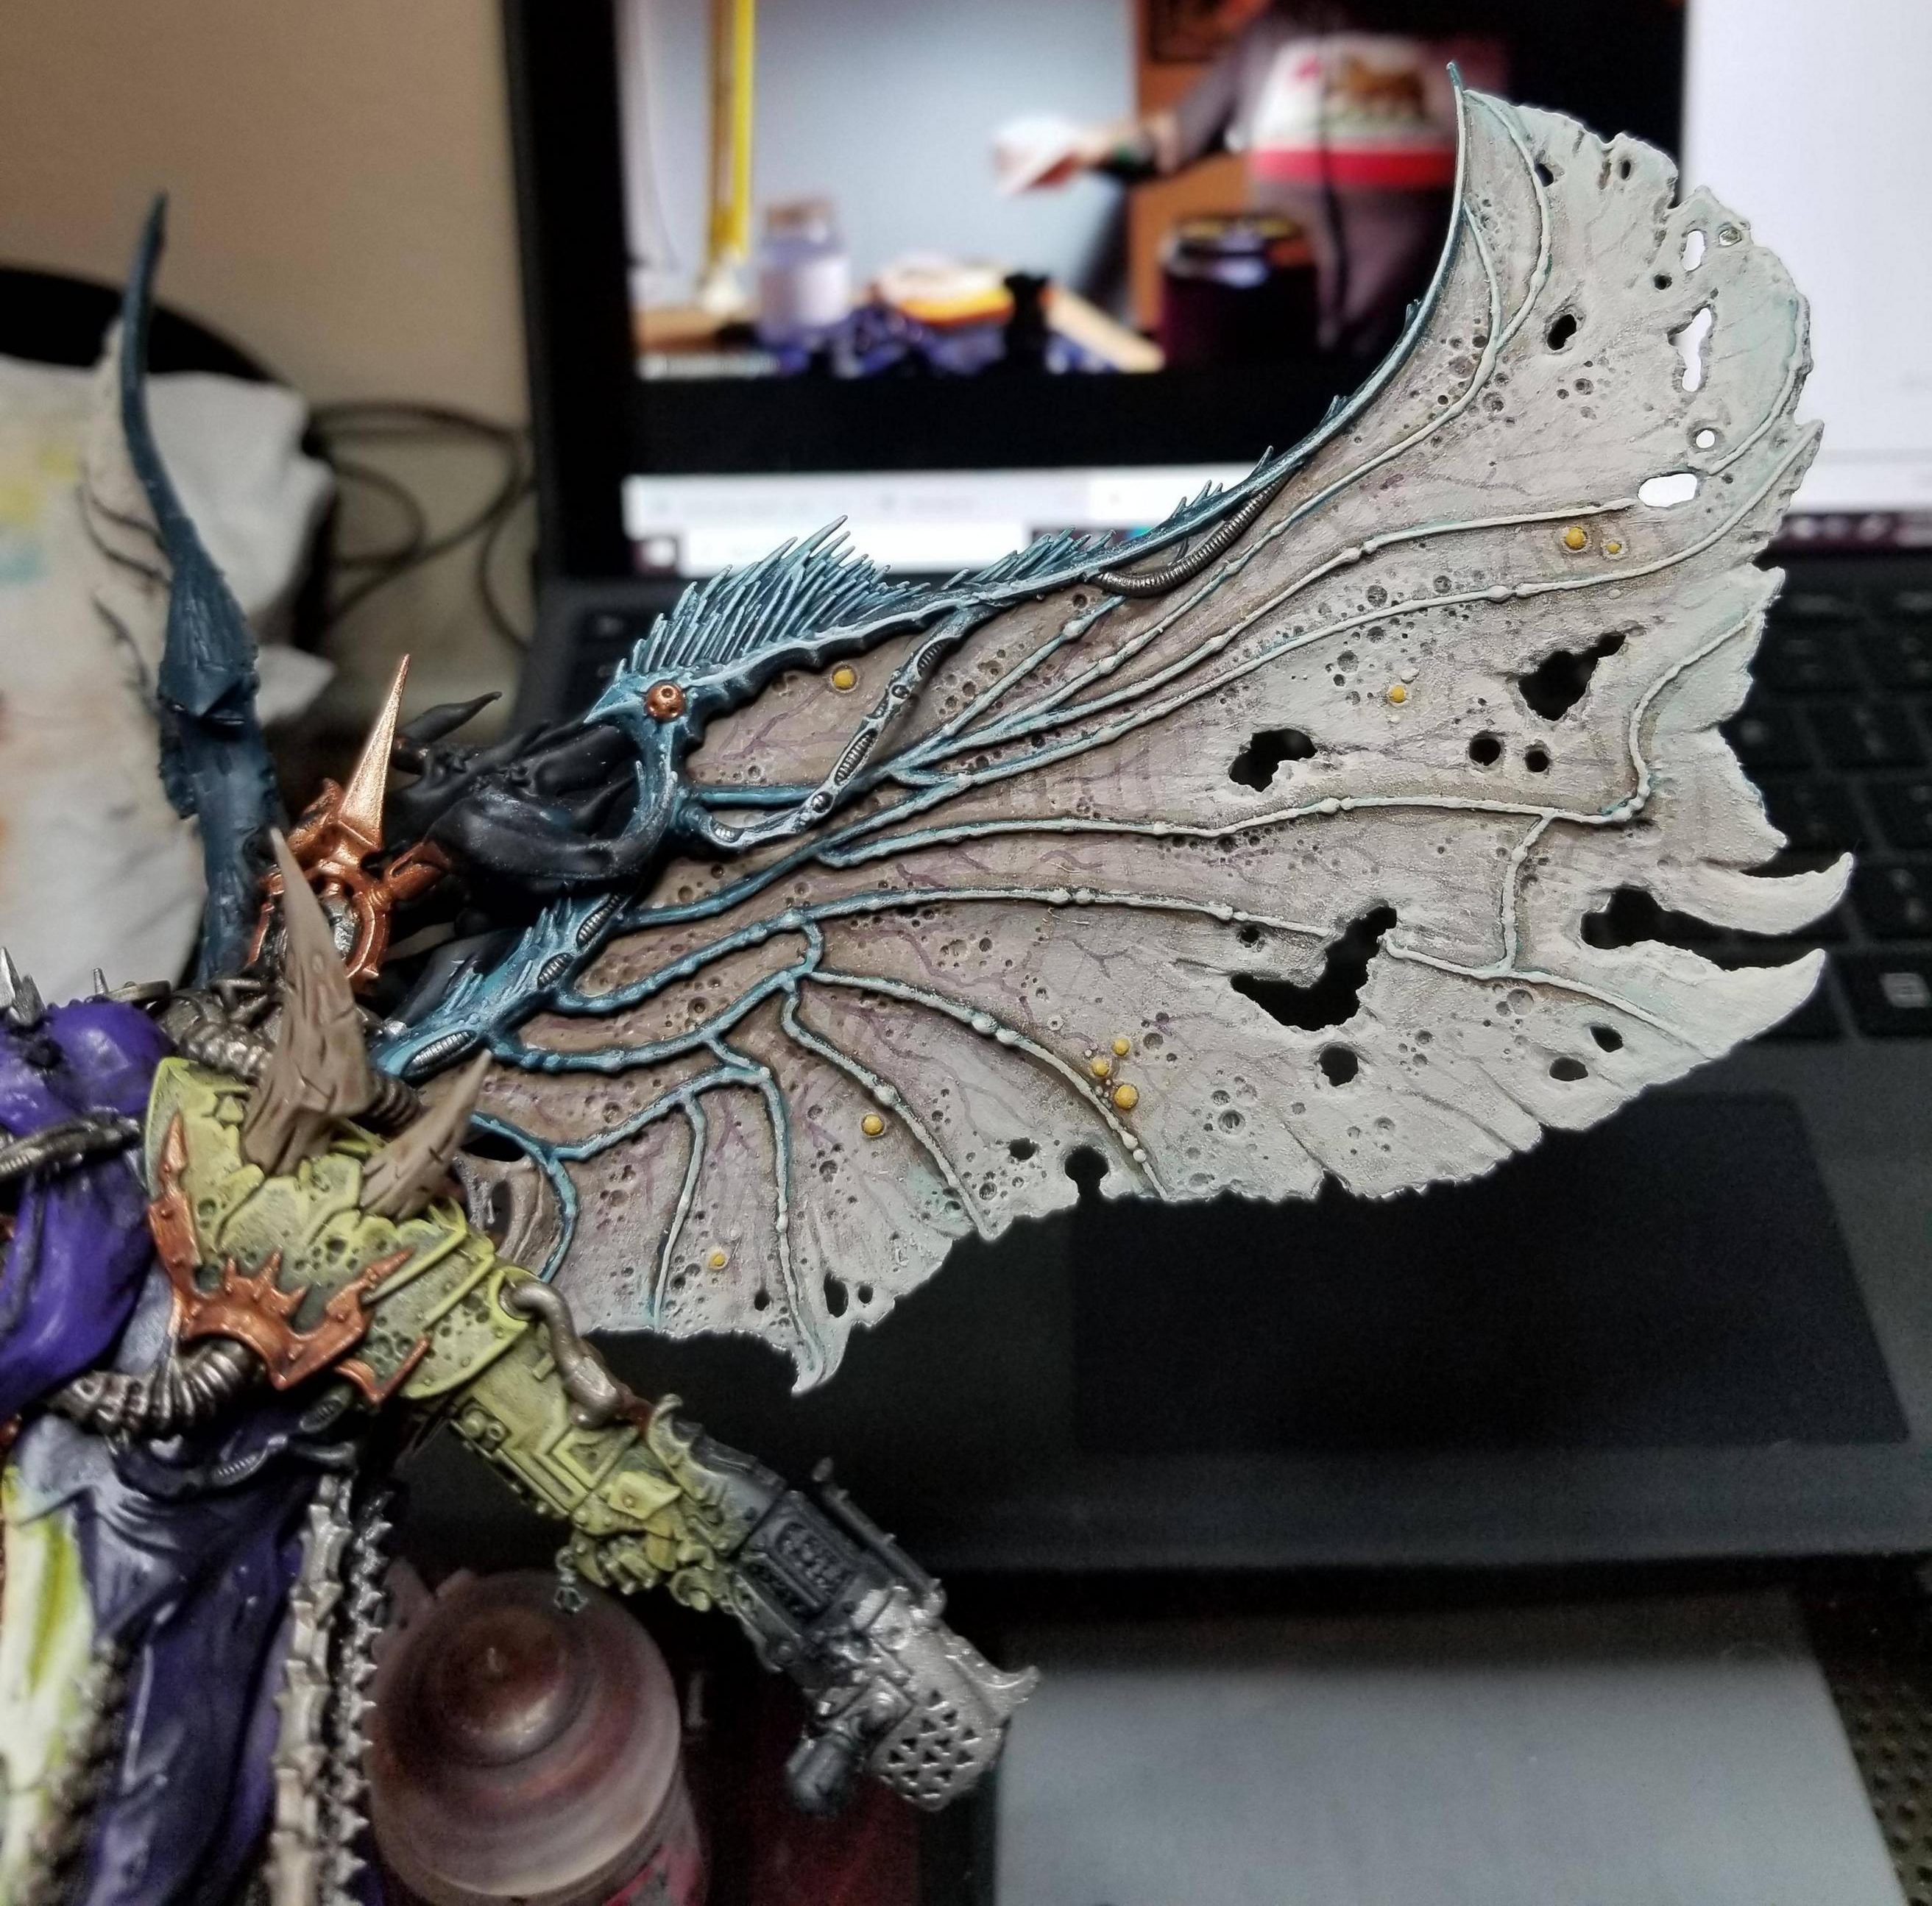
The next step was adding additional detail – I drybrushed the dark blue parts with a couple of progressively lighter mixes of Incubi Darkness and Reaper Ghost White, though white or Ulthuan Grey will work fine here, and I drybrushed the outer portions of the wings, covering the veins, to help blend them from a matching bone color to the blue further in. The pustules I painted Averland Sunset with a plan to coat them with Nurgle’s Rot later, like I do for all my pustules. Finally the big details here are the veins – they’re just freehanded with Duruchii Violet. Start at the base and work your way out, letting your paint run out and your brushwork get lighter as you go. Go back and add some forks/branching and you’re set. Don’t overthink it. Working with an ink helps ensure your work will be light.
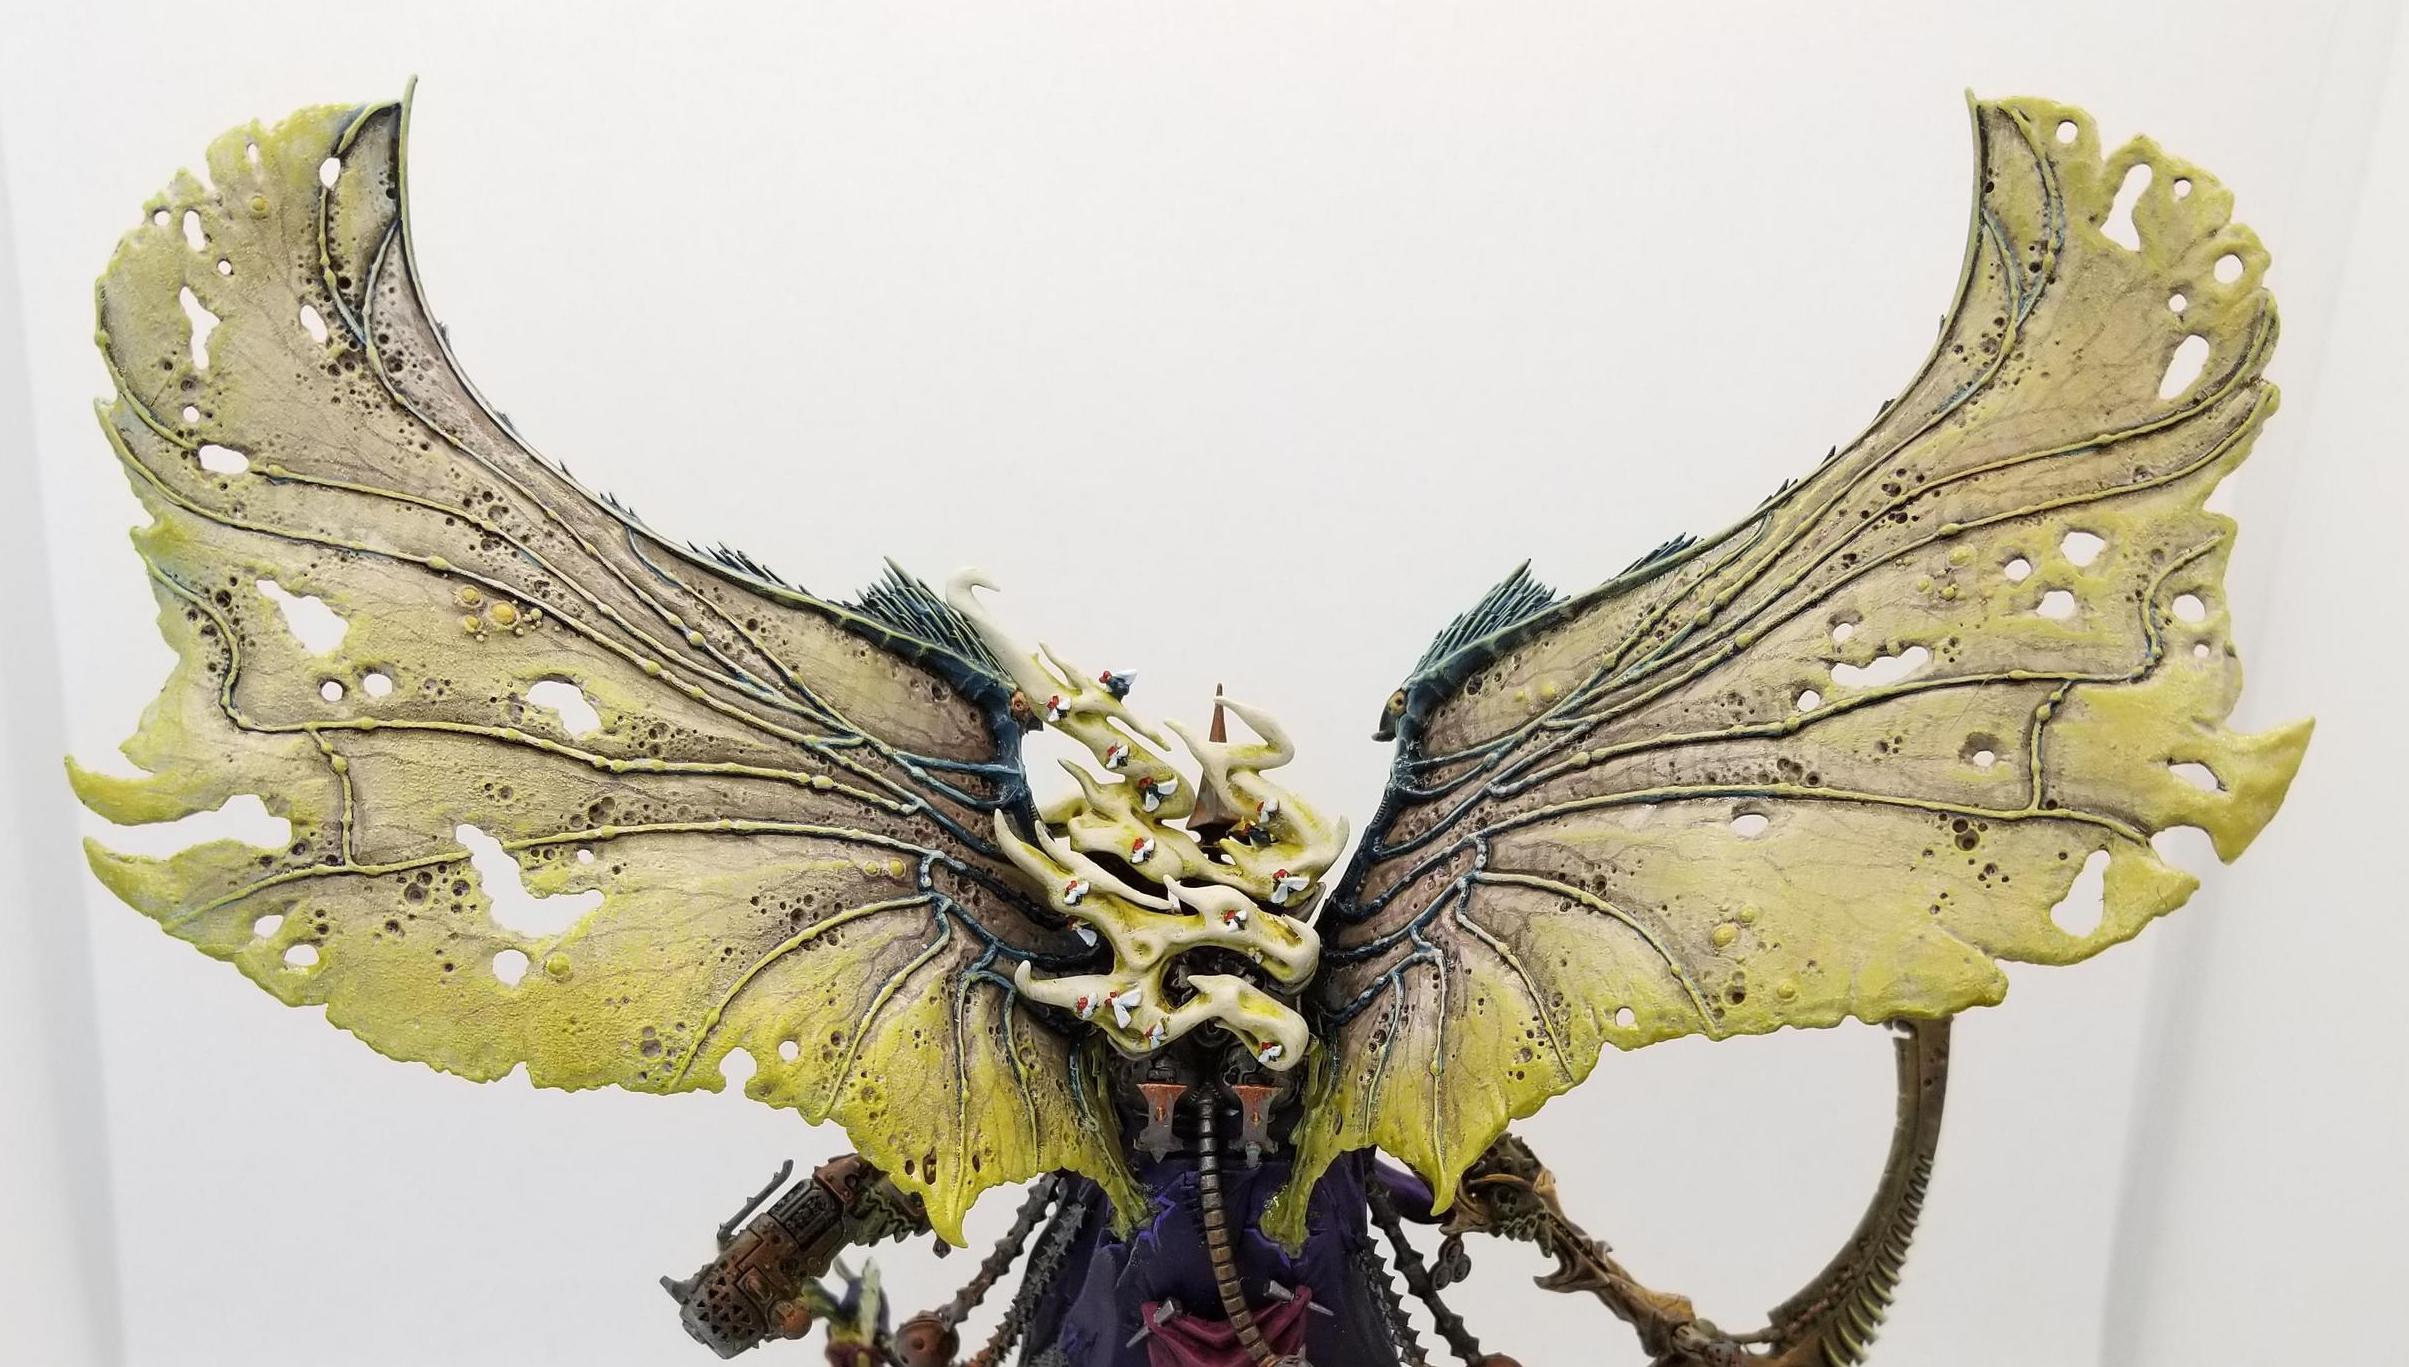
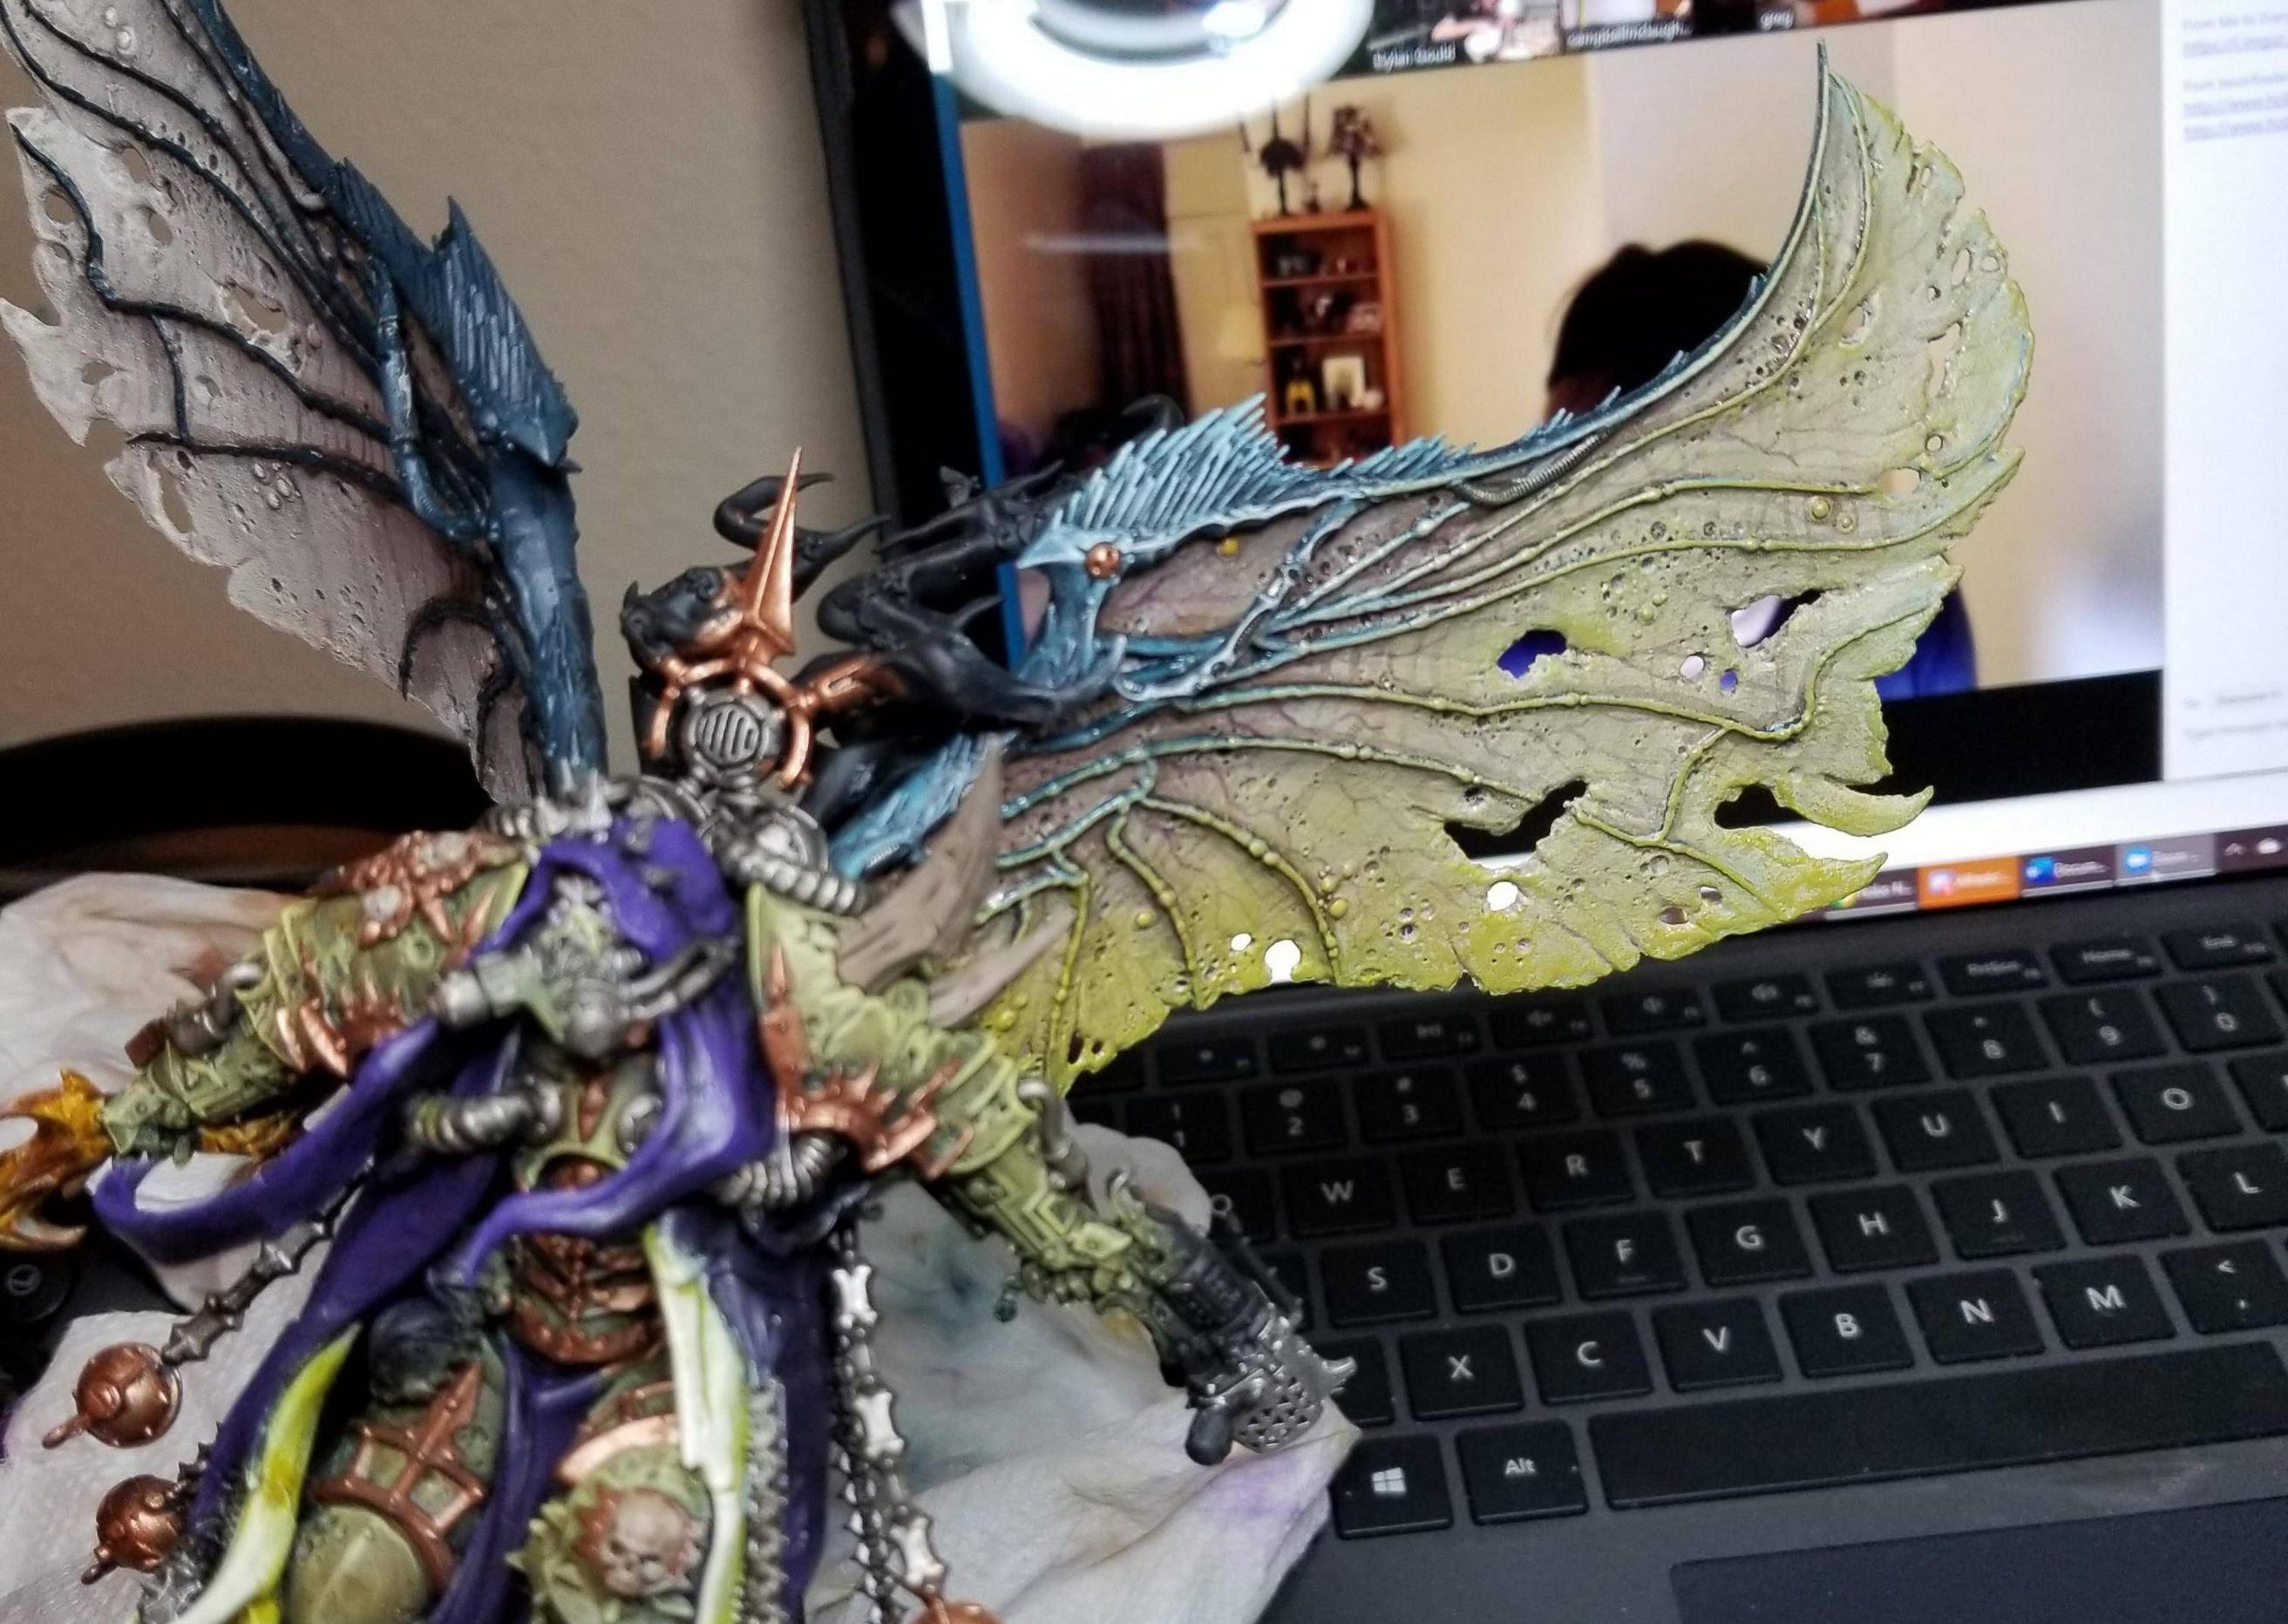 I initially played around a bit with some other shades before deciding I just wanted to go with a lighter green on the wings. So I did some light drybrushing toward the outsides and edges of the wings with Ogryn Camo, to give them a greenish tint toward the edges. I did a light drybrush of Ogryn Camo on the veins going inward to give them a bit more of a greenish tint as well. Then I came back and hit the wings with Nurgle’s Rot, hitting the pustules and the lower parts of the wings. The wings are dripping slime, so I want the slimy, glossy, snotty parts to be toward the bottom edges, where it will pool before dripping off.
In the final step I coat the leathery portion of the wings that wasn’t coated in Nurgle’s Rot with ‘Ardcoat. This gives them a glossy, wet sheen and is exactly what I’m going for. It’ll also make the veins pop, and give the wings more a translucent feel.
The final result is pretty solid, and I’m still happy with it more than two years later. It’s detailed enough to be impressive while not requiring a massive investment of time and energy that some freehand approaches can take. The ‘Ardcoat here also helped ensure they’ve kept paint.
 Final Touches

The wings are by far the most time-consuming part of painting Mortarion, but here are some quick notes on the other parts:
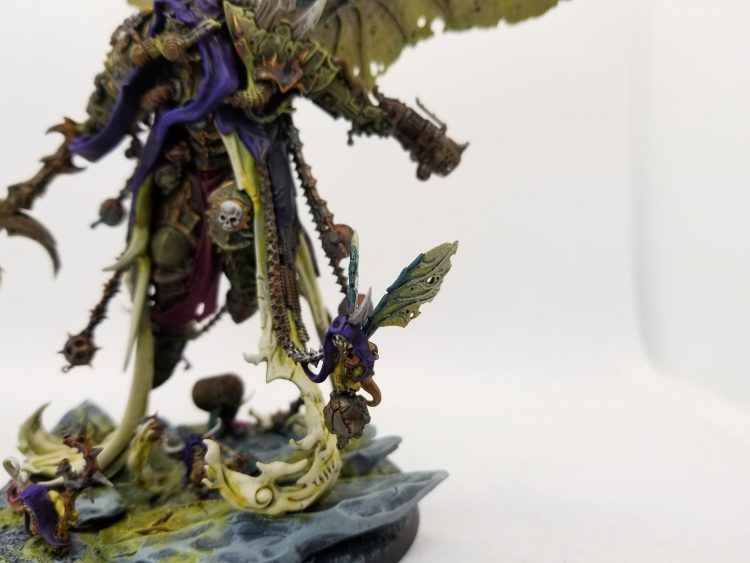
- Poisonous Gasses: I started by painting those parts with Wraithbone and then shading them with Contrast Plaguebearer Flesh and blending that with Reaper Polished Bone.
- The cloth: This is basecoated with Naggaroth Night and shaded with Nuln Oil for the cold purples while I used Screamer Pink shaded with Duruchii Violet for the warm purples.

- The rusted metal I do by painting a basecoat of Leadbelcher, which I wash heavily with Nuln Oil and Agrax Earthshade, then I coat it with splotches of Typhus Corrosion and then drybrush that once it dries with Ryza Rust.
- The brass parts are done with Balthasar Gold shaded with Agrax Earthshade, then washed a bit with Nihilakh Oxide and then edge highlighted in parts with Retributor Armour.
- The snot parts I do by painting them with Ogryn Camo and highlights of Averland Sunset and Flash Gitz Yellow, then I coat them in Nurgle’s Rot.
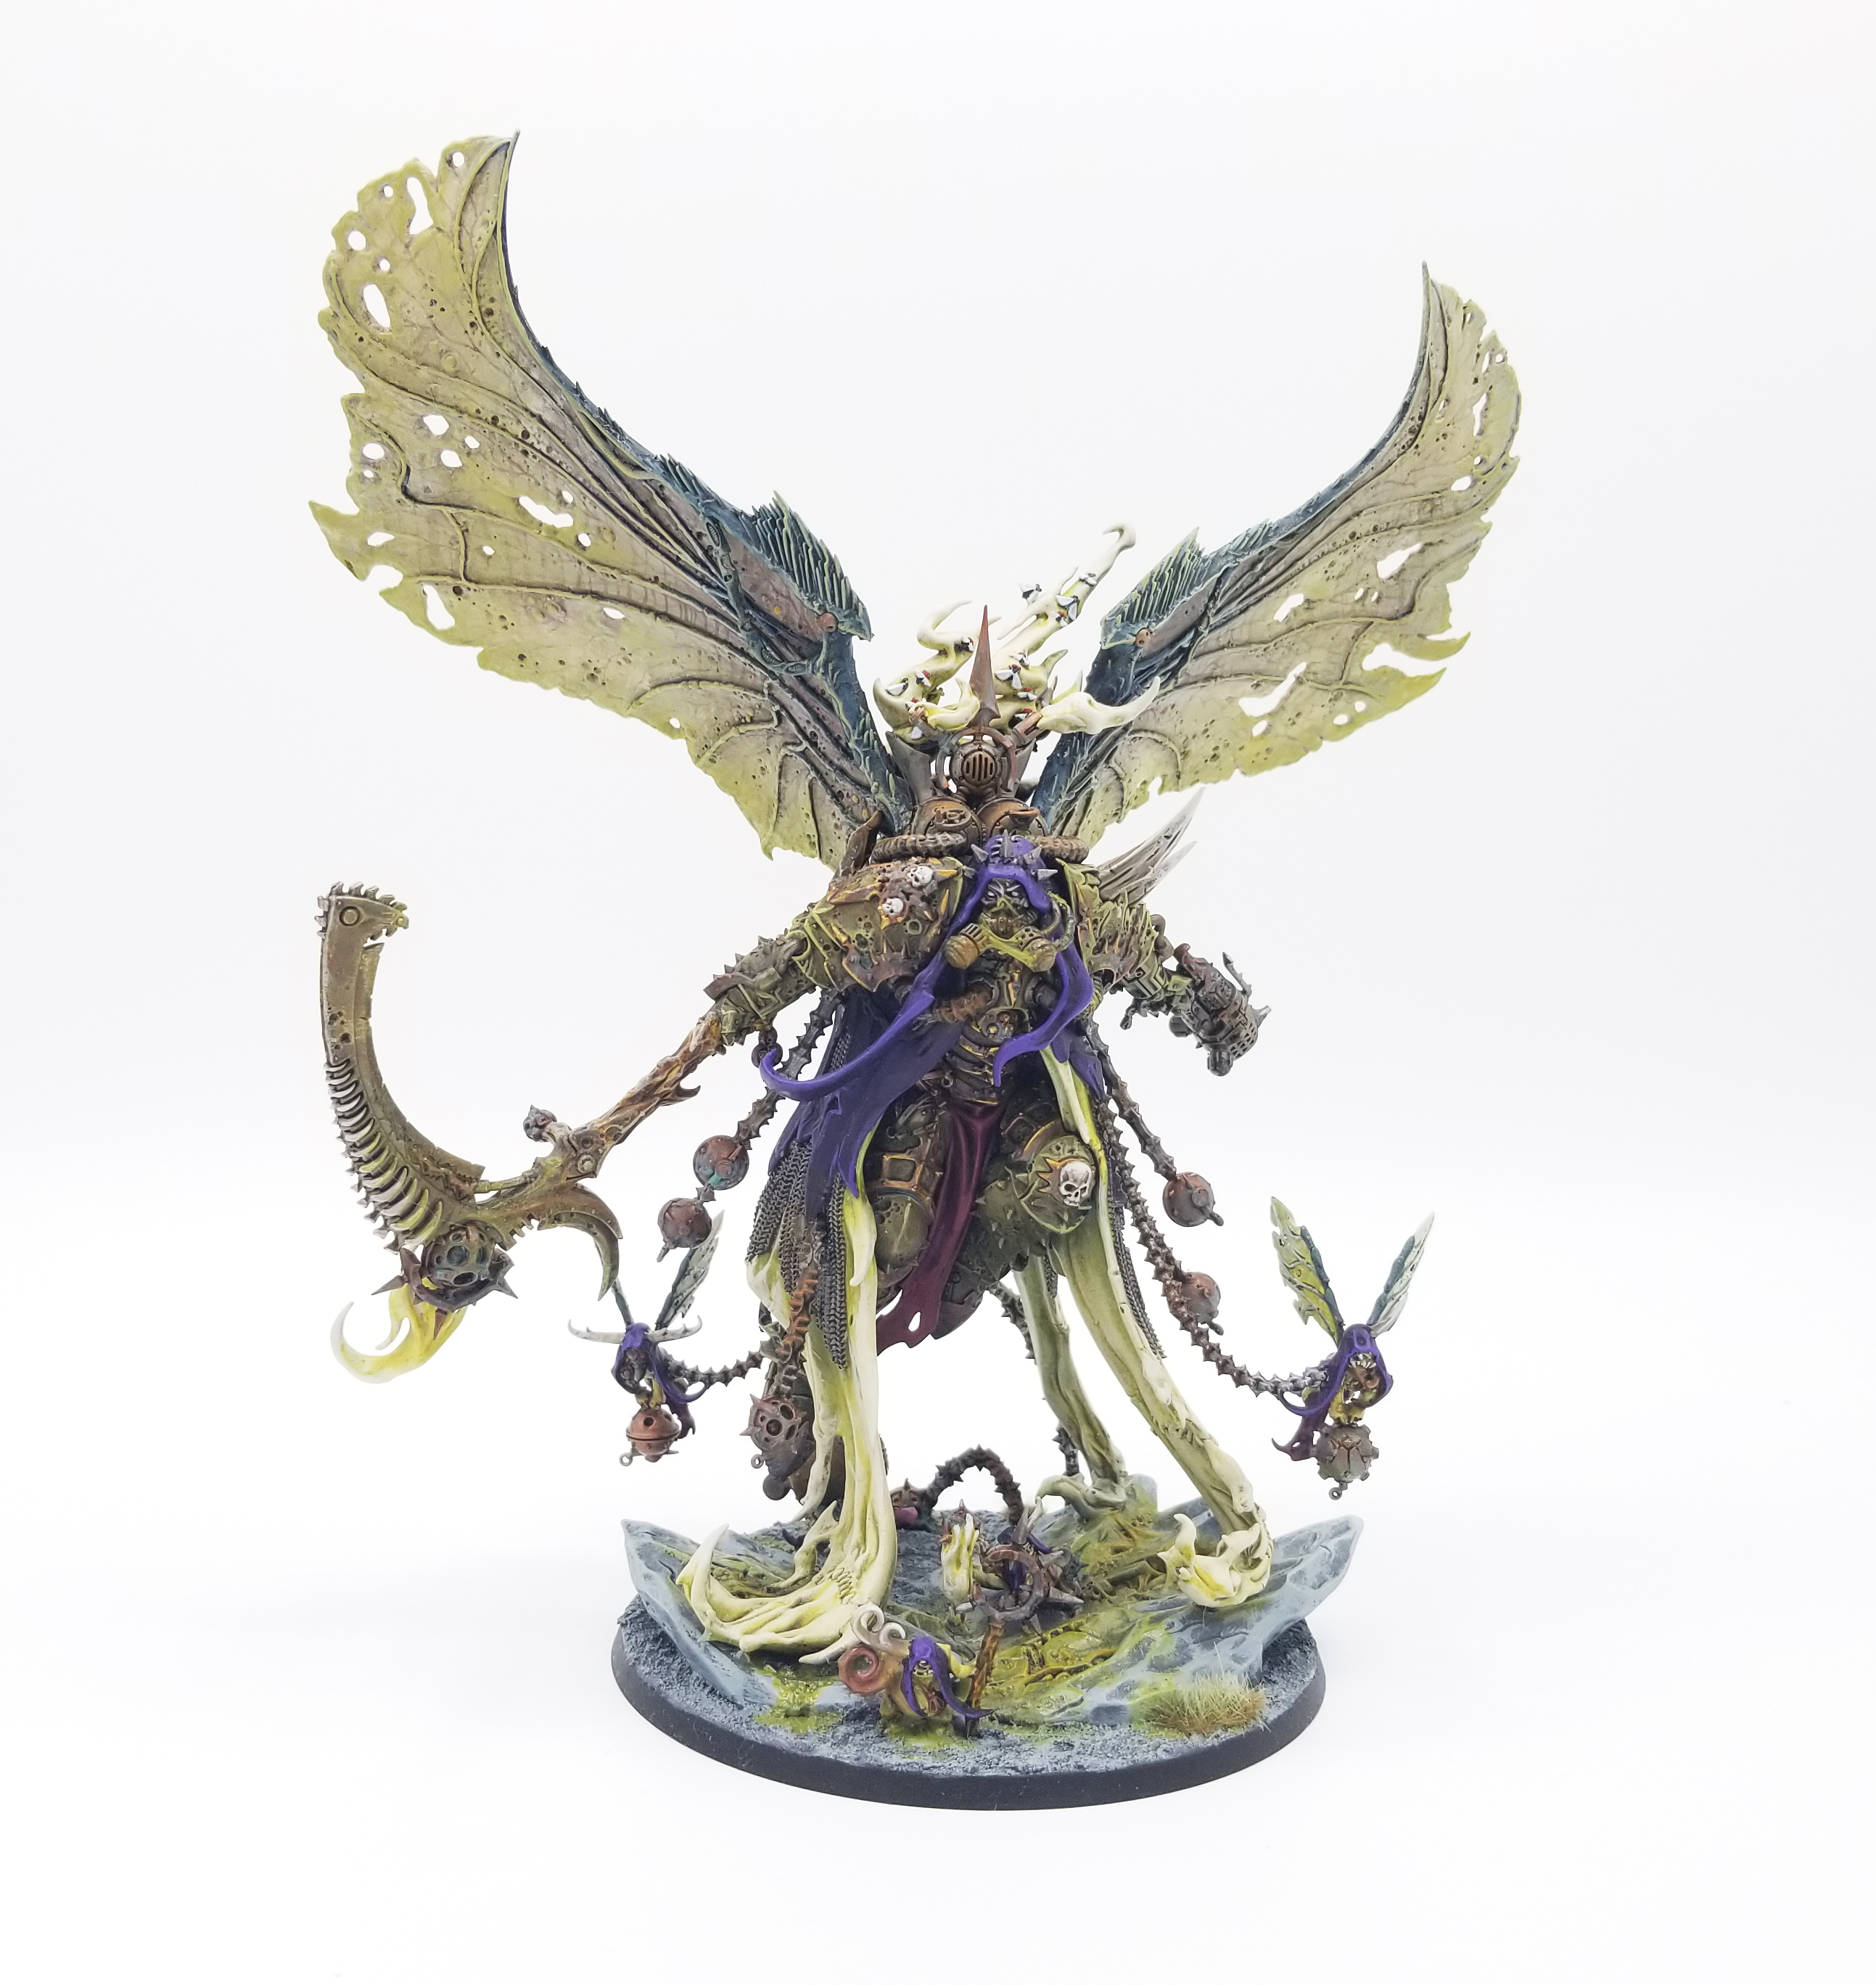
The end result is something I’m very proud of, and is pretty close to the GW scheme, but has a lot of little tweaks to make it fit with my army.
This article is part of a larger series on how to paint the Death Guard. To return to the parent article, click this link.
