This article is part of a larger series on how to paint Space Marines. To return to that series, click here.

As one of the original 20 space marine legions, the Space Wolves hail from the planet Fenris, where their primarch, Leman Russ, was discovered after being raised by wolves. After being taken in by one of the human kings of Fenris following his capture by a hunting party, Russ learned the ways of war and became a capable leader, drawing the Emperor’s attention. The Emperor arrived on Fenris and instead of paying homage, Russ challenged the Master of Mankind to a series of contest. Only after besting Russ in combat did he swear fealty.
The Space Wolves were widely renowned for their ferocity and combat prowess and were often called upon to fight against other space marine legions, with Russ acting as the Emperor’s Executioner and Enforcer. It is also hinted at in the lore that Russ may be responsible for the fates of the two forgotten primarchs. This was also the case when the Space Wolves were called upon to wipe out the Thousand Sons legion following Magnus’ attempts to use sorcery to warn the Emperor of Horus’ betrayal. The Space Wolves descended upon Prospero and attacked the Thousand Sons, ultimately cementing their turn to Chaos and kicking off a bitter rivalry that would endure for millennia.
During the Horus Heresy, the Space Wolves stayed loyal to the Emperor, fighting back against their fellow marines with ferocity. Russ himself was responsible for a desperate attack against Horus that almost killed the traitor Warmaster but ultimately failed, leaving a wounded Russ in a comatose state. Following the Siege of Terra, Russ was one of the primarchs who opposed Guilliman’s Codex Astartes and ultimately the Space Wolves would deviate heavily from the tactics therein, and sire only one successor chapter prior to the Ultima Founding, the ill-fated Wolf Brothers.
The Space Wolves are a hardy and proud warrior chapter, with many visual cues taken from Norse iconography and mythology. They suffer from a peculiar genetic trait, which in extreme cases causes violent mutations into wolf-like creatures referred to as the Wulfen. These ferocious fighters are a terror on the battlefield, and their mere presence can incite fury in nearby Space Wolves.
Covered in This Article
- How to paint Space Wolves, with a look at different approaches for painting the faction’s blue-grey armor.
- Notes on Space Wolves Heraldry, and tips on how to paint it.
- How to paint key elements of the Space Wolves, from frost axes to wolf pelts.

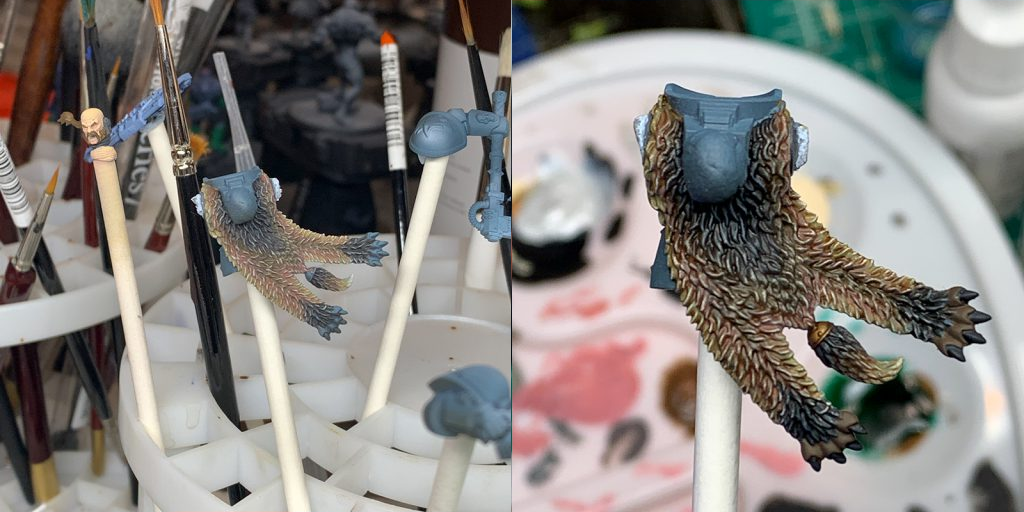
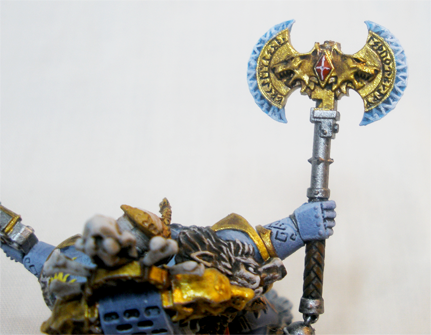
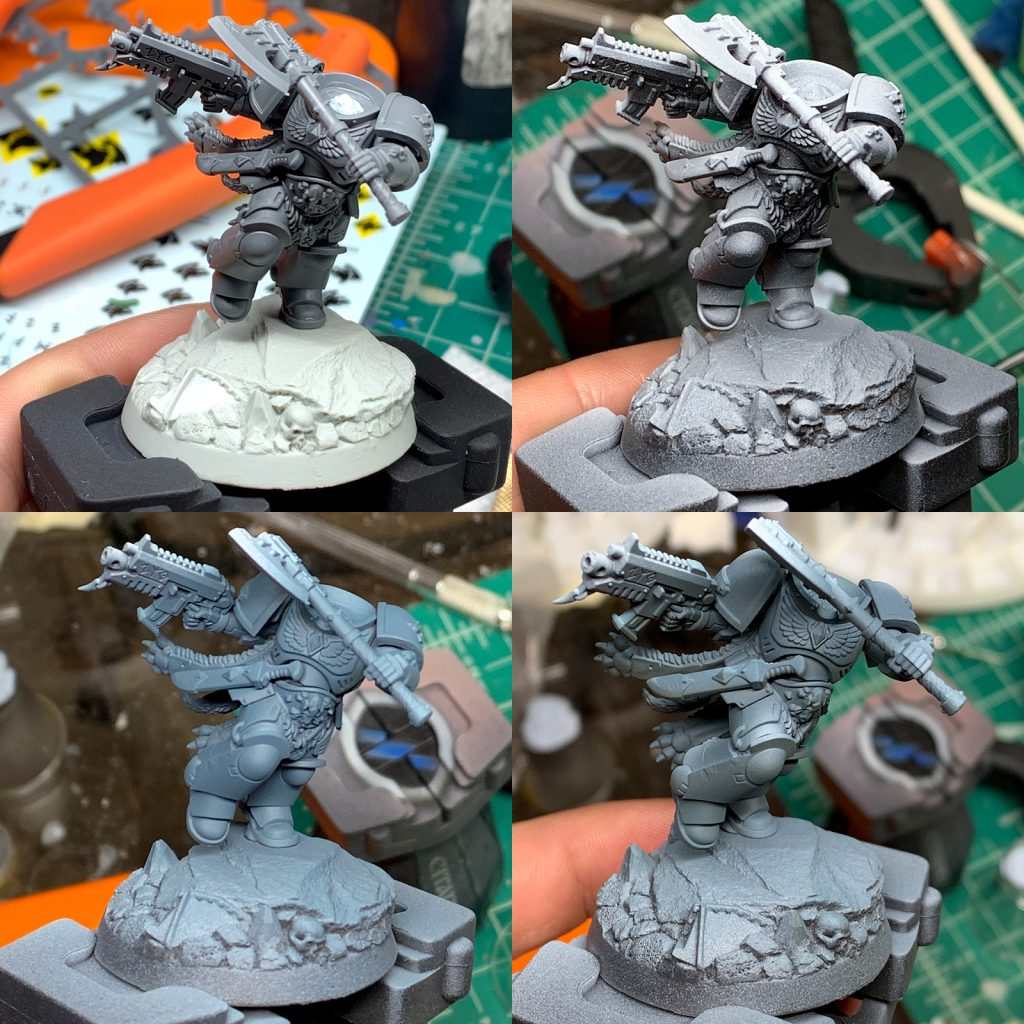
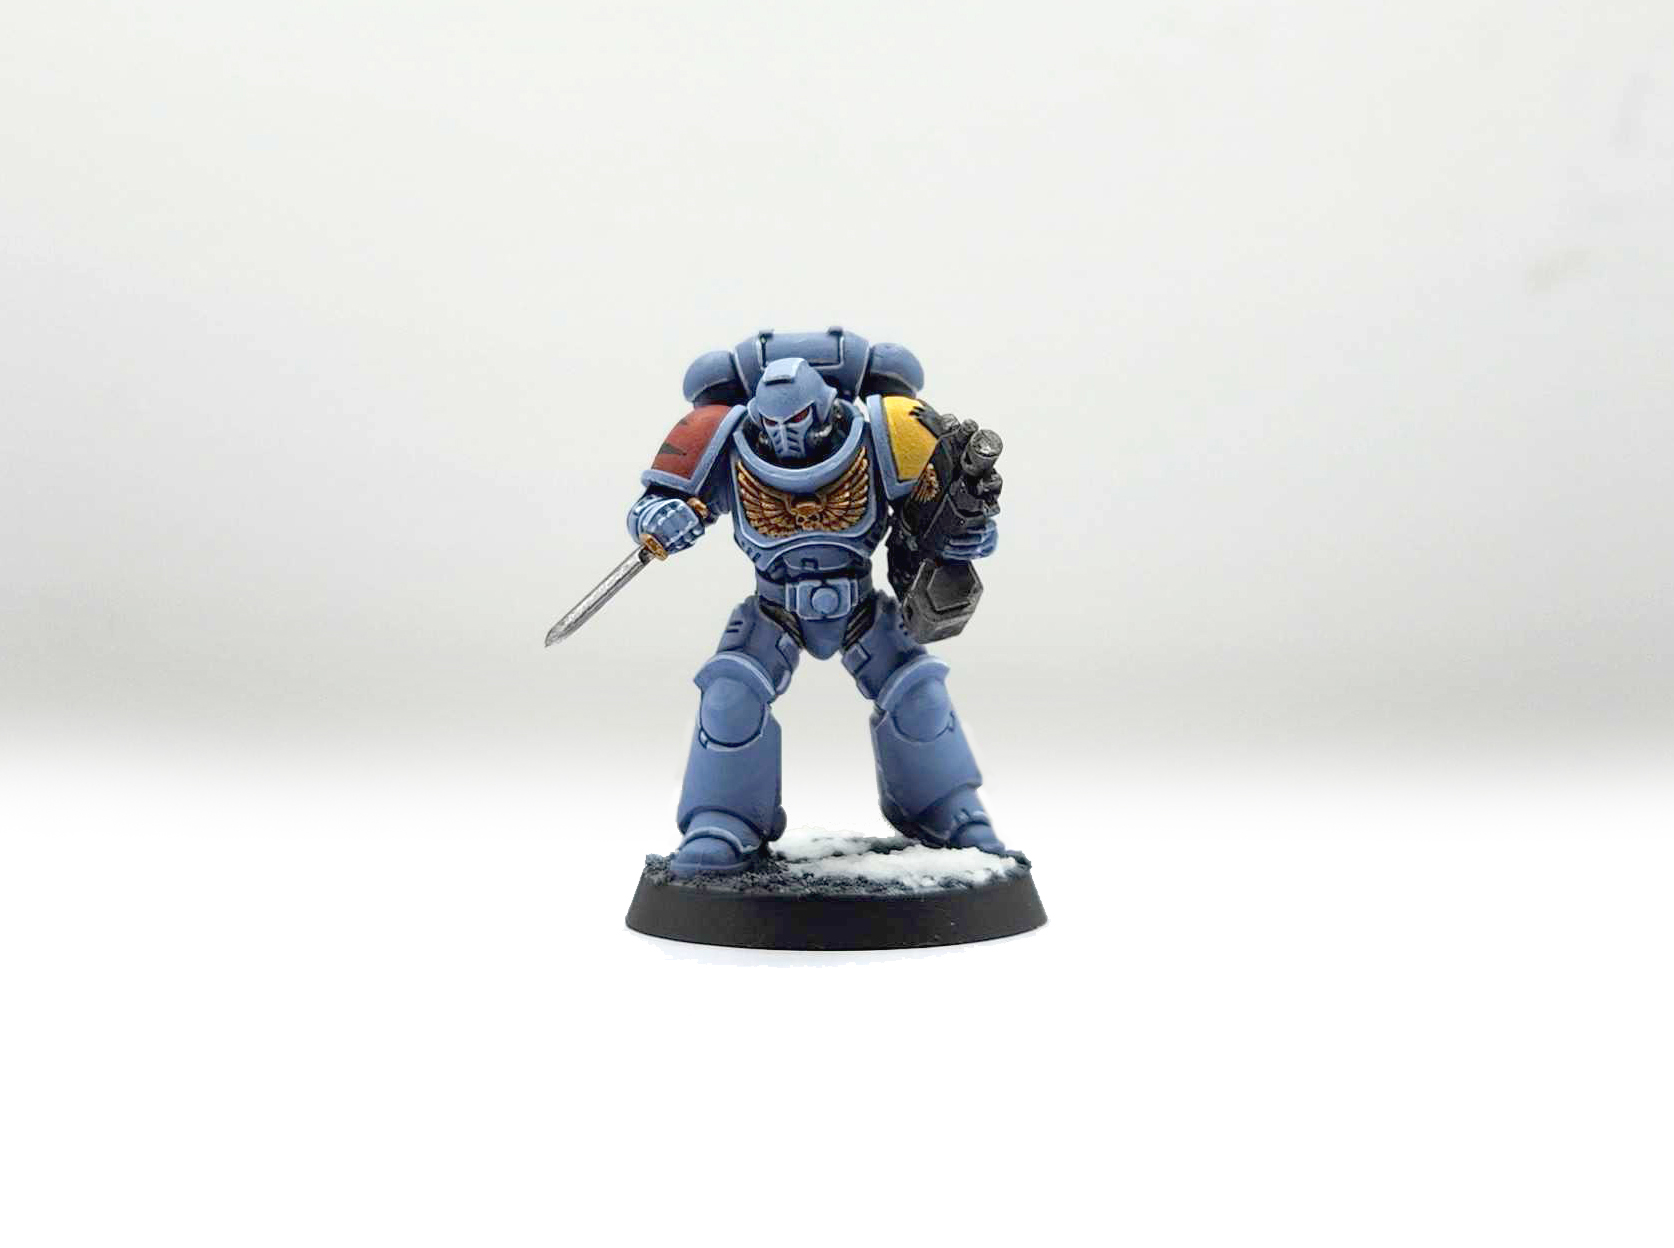
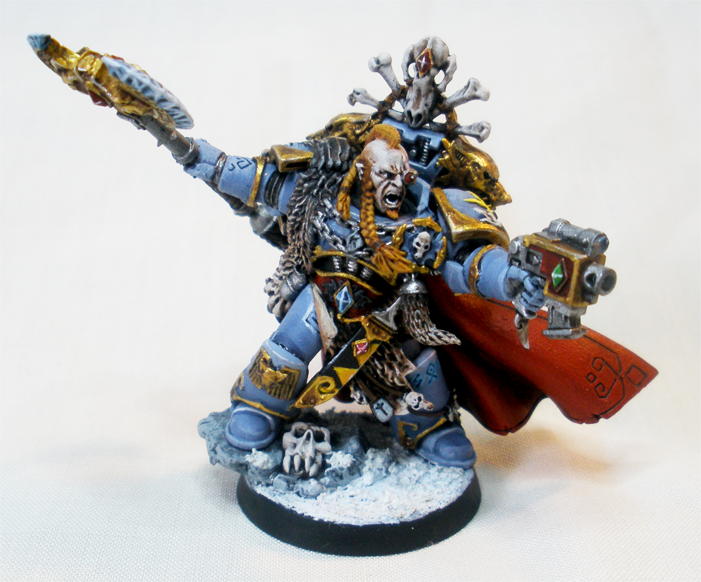
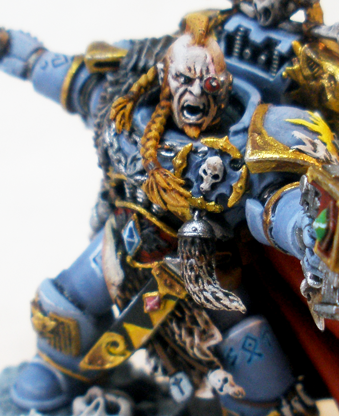
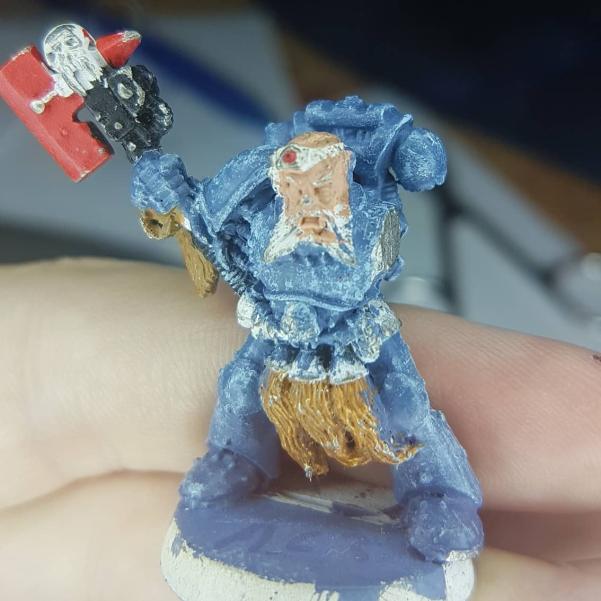
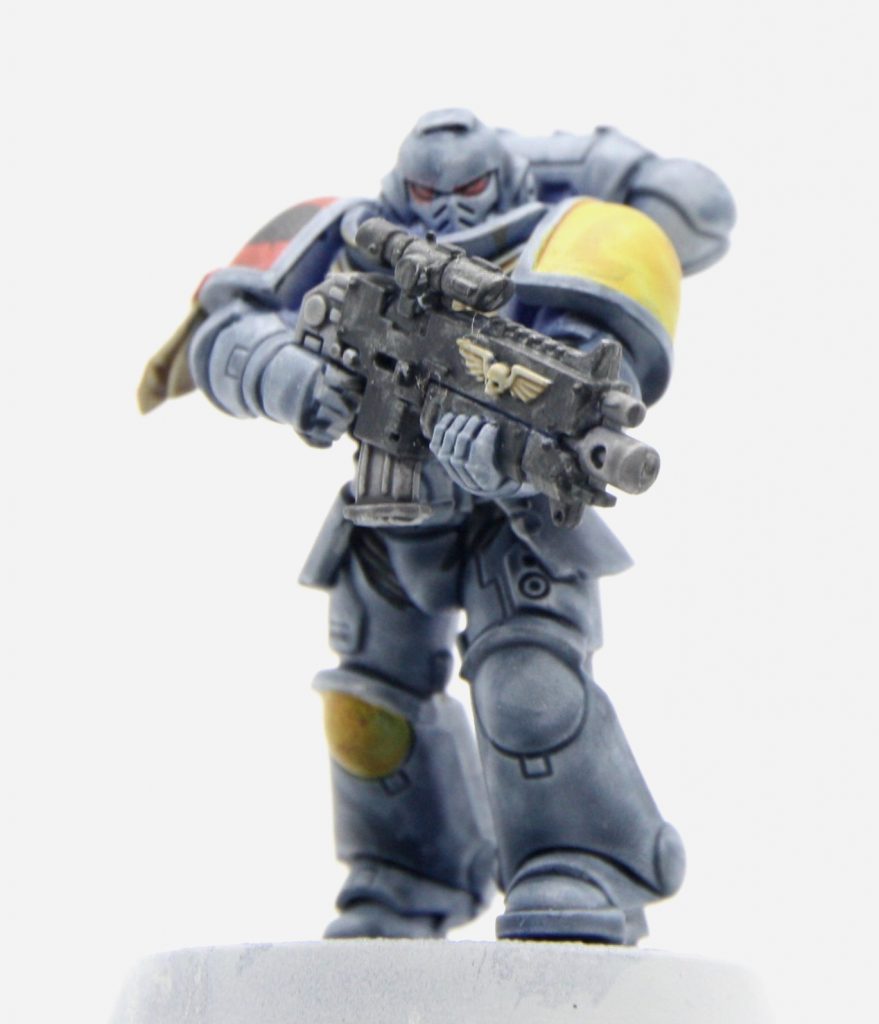
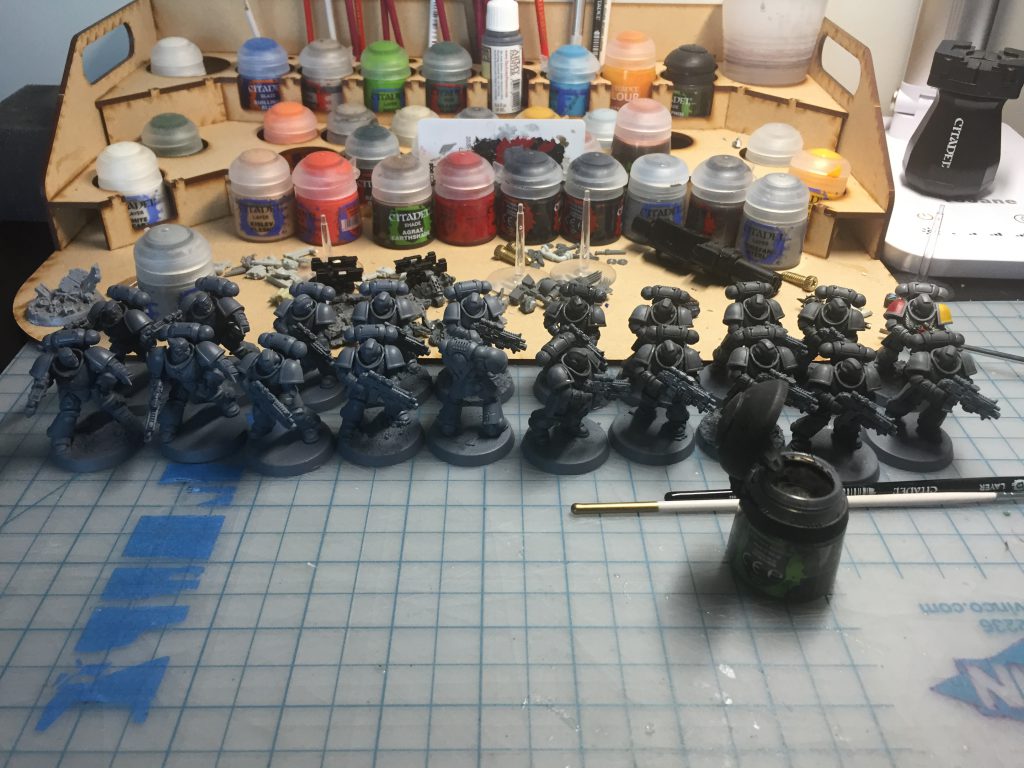
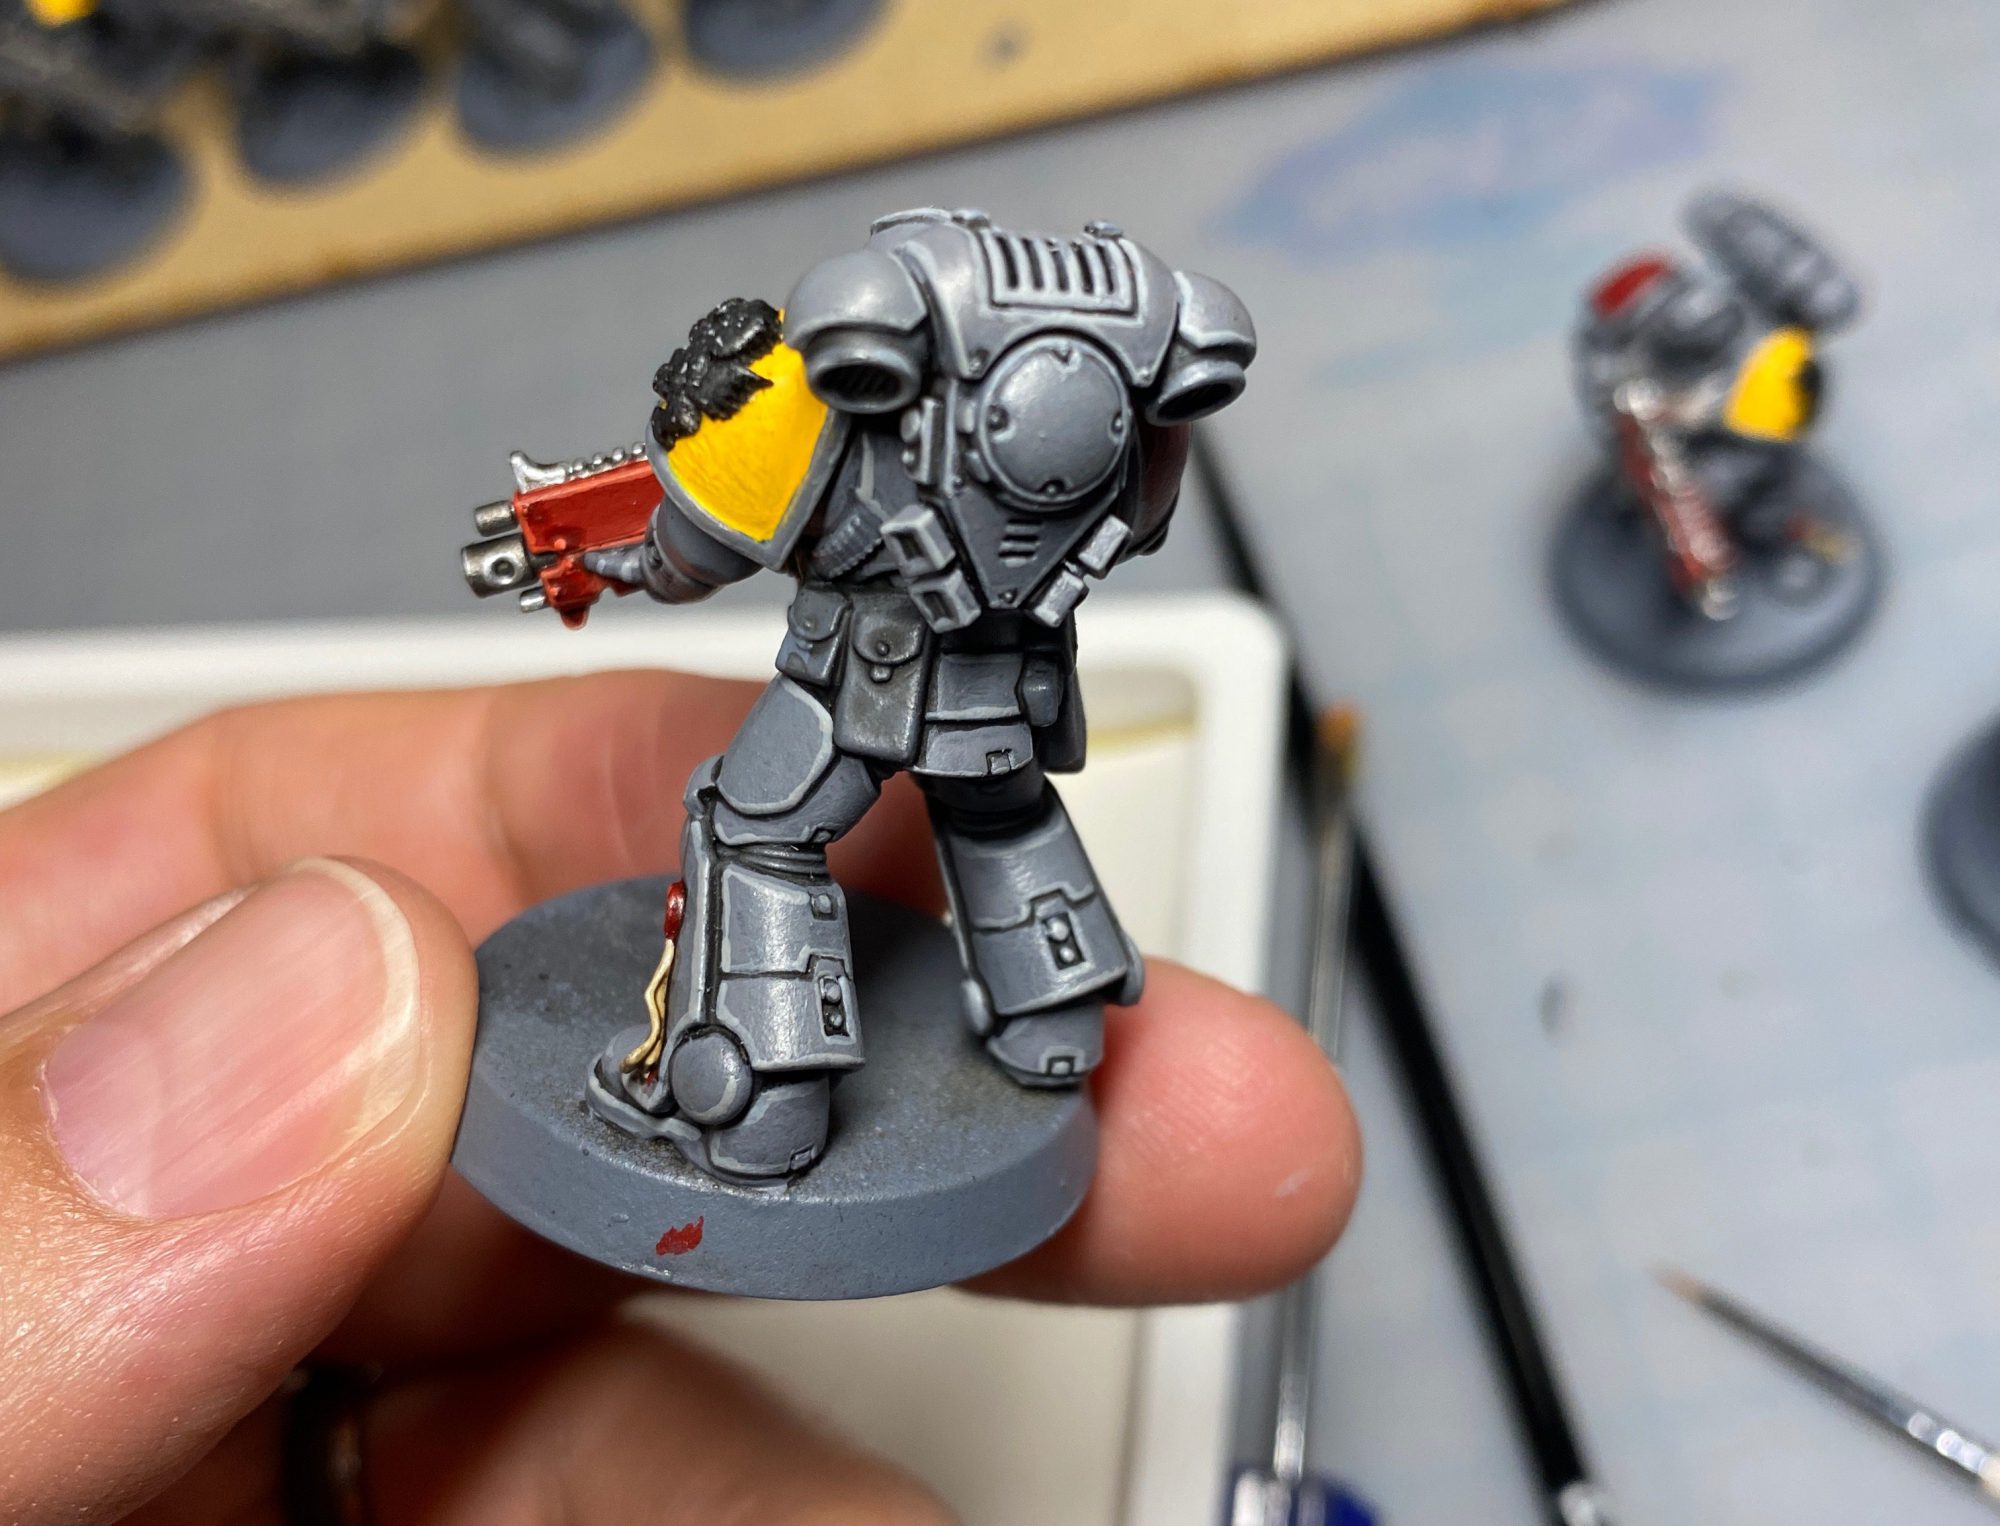
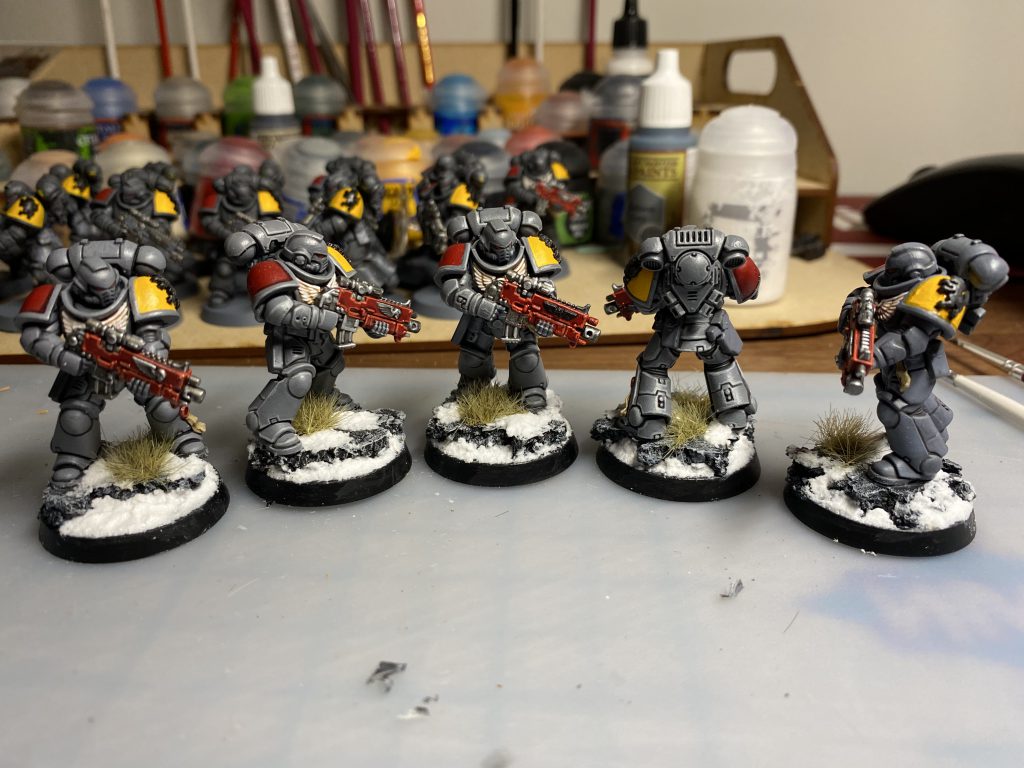
Space Wolves Heraldry - Click to Expand The Space Wolves are a proudly non-Codex Compliant chapter, with their primarch Leman Russ having been adamantly opposed to the sundering of his legion following the heresy. The wolves instead split into a series of great companies, and have only recently begun to have successor chapters. As such, Space Wolves have some complex and non-traditional heraldry that can add a lot of visual interest to your models. Of particular note is that rather than a chapter emblem on their left shoulder pad, Space Wolves wear the insignia of their Great Company. While 99% of the painted models you’ll see bear the yellow and black of Ragnar Blackmane, keep in mind that you have a lot of other options. These functionally act like companies for the space wolves but in practice act more like chapters in their own right. Space Wolves use a number of special markings to mark their packs (squads), with the colors used to denote the battlefield role. Red and black denote Grey Hunters/Intercessors/Battleline units, Wolf Scouts and Reivers are marked in grey and black, assault and close support units marked in red and yellow, and devastator/fire support units are marked in black and white. Wolf Guard and veterans are marked in yellow and black. Finally, Wulfen are marked in red and white. Most of the Space Wolves’ pack heraldry is marked with triangles or lines in some arrangement or another, so while there aren’t really transfers for them, they’re fairly easy to freehand – just lay down your outlines first, then pain the interior of the shapes. Why paint Space Wolves instead of some other flavor of Space Marine? For one, they have a lot of material variety on their models that helps break up the normal Space Marine armor. Bone and Fur are particularly common and the latter is a very fun thing to paint, with a lot of room for creativity and interesting patterns. Frost weapons is another cool reason, as they can make for an eye-catching and striking effect. They also have the best beards in the Space Marine range, so take that into account. Fur and Pelts - Click to Expand Space Wolves miniatures are different from other Astartes models in that they can often feature a ton of wolf pelts and fur details to paint. Alfredo: Fur is a big characteristic of Space Wolves models so it’s worth taking care when painting it and going beyond the typical “basecoat one color, then wash, then drybrush” approach you sometimes see. It is nevertheless relatively simple and forgiving to paint, even with a more complex approach. Frost weapons - Click to Expand Thechirurgeon: Unique to the Space Wolves are frost weapons, basically replacing power weapons on some of their models with weapons that are multifaceted. These are, on the whole, easier to paint than standard power weapons, because most of the work you do on them goes into the edge highlighting process. Here are the basic steps I use: Alfredo's Method - Click to Expand Haldor was a very fun model to paint with a variety of materials and a fun, dynamic pose. As usual I went for a clean ‘eavy metal look but decided to alter the color scheme somewhat. Going in, I decided I didn’t want to do the typical baby blue armor scheme for Space Wolves. I’ve seen people do the Heresy Scheme on primaris before and like that but wanted something in between. So I settled on a dark blue grey for my primary armor color and chose Scale75 Anthracite Grey for that. I also decided I didn’t want to go with yellow as my spot color but instead something darker and decided on desaturated brown-red, leveraging Vallejo Model Color Cavalry Brown and Hull Red. I went with a heresy style set of markings, insignia and trim. Everything else was fairly standard, I wanted a reddish gold to contrast with the grey-blue of the armor so chose Scale75’s Viking Gold. My two other areas of spot color were going to be the frost axe and the weapon handles. Since the axe was going to be a greenish-blue, I went with orange-y leather for the weapon handles, using Vallejo’s Red Leather. I followed my usual general process for this one: As you’ll see below, while I primed the model mostly assembled, it’s actually held together by Blue Tack. I actually kept almost everything separate, including the torso and legs so that I could more easily paint the inside of Haldor’s pelt. I still like to prime assembled so I can get highlights and shadows where they are supposed to be.\n* I primed with a standard zenithal going from black to grey.\n* The main armor basecoat was many thin layers of **Anthracite Grey**. I then applied sparing highlights **Arctic Blue** using the airbrush.\n* To create some additional contrast, I then sprayed the model from below with Sepia Ink, which contrasts quite a bit with the blue grey.”} –> I’ve noted before that fur is a big characteristic of Space Wolves models so it’s worth taking care when painting it and going beyond the typical basecoat one color then wash then drybrush approach you sometimes see. It is nevertheless relatively simple and forgiving. The axe is mostly just a lot of washes. I base-coated with a very light blue grey and then hit it with Akhelion Green Contrast paint. After that I applied a blue and a green wash (saturated blue, like Guilliman’s Glaze* and dark green like Athonian Camoshade). Finally I drybrushed the whole thing white. People often tell me my paintjobs are very “clean”, which sometimes confuses me when I’ve done a weathered model, but that really all comes down to neat edge highlights. So get a pointy brush and some thin paints and have at it. The armor highlights are of course the most important and for this I used Scale75 Bering Blue and Artic Blue which helped create some really sharp definitions. For the red, I highlighted it with a desaturated ochre and this included the markings on the shoulder and knee to help really pop the patterns out. To finish off the model, I used Valhallan Blizzard to add snow to the base and also to add an ice effect to the frost axe. A coated both of those areas in gloss varnish afterwards to up the shine. TheChirurgeon's Method - Click to Expand I don’t really play Space Wolves myself, but I’ve painted more than a few wolves in my time, both for my Deathwatch and for my friend SD47. This particular model was painted just for this article with an updated version of the scheme I used for Krom. I started by priming the model with Grey Seer primer, though if you’re interested in doing a proper zenithal undercoat, doing Mechanicus Standard Grey first and a zenithal hit of Grey Seer is a good way to do it. After that I painted the model with a couple of thin coats of The Fang. If I were doing pre-heresy wolves I might stop with the Fang, or do a less blue gray color, but I need something lighter so next I do a coat or two of Reaper Snow Shadow over the Fang, and blend it in areas where I need some darker tones. This is where I do any additional blending and start to apply some washes. I use Drakenhof Nightshade to do washes in all the major recesses and then use Snow Shadow to clean them up any edges where I go over. Time to start hitting the other parts of the model. I hit the metal parts with Leadbelcher while the gun gets coated in Black Legion Contrast paint. The aquilas I paint with Retributor Armour gold paint, and I’ll hit the eyes with Mephiston Red and a highlight of Evil Sunz Scarlet. The shoulderpads need their own colors. I do the left shoulderpad with Averland Sunset and then blend that up to Flash Gitz Yellow. The right shoulderpad is painted Mephiston Red, shaded around the edges with Carroburg Crimson, and then blended up to Evil Sunz Scarlet. I also will end up freehanding the shoulder markings. This is done with Black Legion Contrast paint. You start by carefully drawing the outline of where you want your scar patterns to be, then just paint inside those lines. If you want to get fancy, you can highlight those areas with some Corvus Black. There are quite a few parts to this stage, but they’re all pretty simple. The metal and black bits are shaded with Nuln Oil. I’ll highlight the gun with a bit of Corvus Black, then edge highlight it with Mechanicus Standard Grey. The gold parts are washed with Agrax Eartshade, then highlighted with Retributor Armour again. Finally there are the edge highlights – I hit pretty much the entire model with edge highlights of Reaper Ghost White, a nice very light off-white which goes well here without being as overpowering as pure white. And that’s it! This guy was on the whole pretty easy to paint and I’m very happy with how he turned out. This particular model was a gift for SD47 when he started playing Space Wolves. I really liked the Krom Dragongaze model and used it as an excuse to paint one up. Color-wise, I tend to go with lighter tones for the Space Wolves I paint. Krom’s a pretty complicated model with a lot going on, but I ended up using only a handful of colors when painting him. I primed the model black and then basecoated the armor with The Fang, doing two thin coats. From there I did a coat of Reaper Snow Shadow, doing some blends with The Fang where I wanted the armor to be a bit darker. The final edge highlights are done with with Reaper Ghost White, a very light bluish off-white. For the gold trim, my current method is to base coat with Retributor Armour, then wash with Agrax Earthshade, touch up with Retributor Armour again, and then edge highlight with Runefang Silver. The Wolf Pelts are base-coated with Dryad Bark, then I drybrush them in progressive layers with Mournfang Brown mixed with increasing amounts of Reaper Polished Bone. The Gemstones are Altdorf Guard Blue washed with Drakenhof Nightshade and highlighted along the edges with Reaper Snow Shadow and Ghost White for the blue, while the red are Mephiston Red washed with Carroburg Crimson and edge-highlighted with Reaper Pure White mixed with a little Mephiston Red. The Bones and Bone Details are painted with a base layer of Rakarth Flesh, then washed with Agrax Earthshade before I go back over and pick out the raised details again with Rakarth Flesh. Then I pick out the final details with Reaper Polished Bone. Krom’s Hair was painted with a base coat of Averland Sunset and then washed with Carroburg Crimson to give it a redder hue. Then I went back and painted the raised areas with Averland Sunset again to give it that blonde look. The Cape is just Mephiston Red as a base washed with Carroburg Crimson, then I work up from that in layers mixing Carroburg Crimson with Mephiston Red to get a more gradual color transition, and highlight wit a little Evil Sunz Scarlet. The Frost Axe is Altdorf Guard Blue washed with Drakenhof Nightshade and then highlighted with Reaper Snow Shadow and Reaper Ghost White along the very edges. Beanith's Method - Click to Expand I’m back once again, this time to relive the joys of my very first army that I started collecting and playing all the way back in 93 with the joy of lead models and plastic arms that always fell off. The young Bean cared little for painting as you can see here. I tried painting some of them but I soon found I didn’t enjoy paint so I quickly fell to the Dark Grey Horde side. Since then many winters have passed and then Contrast came and brought me back into the Light and I found I actually enjoy the time spent painting in the evenings and the pride in having a painted army to face off against my friends. All that aside, here is my quick and fast Contrast method for churning out those Troops you’ll want to carry Ragnar to Victory! I tried painting some of them but I soon found I didn’t enjoy paint so I quickly fell to the Dark Grey Horde side. Since then many winters have passed and then Contrast came and brought me back into the Light and I found I actually enjoy the time spent painting in the evenings and the pride in having a painted army to face off against my friends. All that aside, here is my quick and fast Contrast method for churning out those Troops you’ll want to carry Ragnar to Victory! Bosh, one Intercessor that could be awaiting transfers and base details but in my case, counts as ready for the tabletop… after the isolation ends so get back there and finish the other 14-29 that you’ll want. Nick's Method - Click to Expand The Space Wolves were my first army which started way back in 3rd edition. After years of growing as a painter there was a noticeable difference between the first models I painted and the last. I felt the army needed a restart. So, I spent a few weeks stripping the paint off all my models and was ready to start the process all over again. I knew I wanted a different look than the GW powder blue. I started to see more and more examples of their 30k color scheme make its way onto 40k models and I loved this look. I also saw some examples of how painting their weaponry red weaponry contrasted this darker armour choice very well. Let’s not forget the distinct yellow shoulder pad that screams space wolves and the snow base for these fenrisian warriors to finish the model off. The Process: base, wash, highlight. Breastplate\n\n1. Base with **Citadel – Ulthuan Gray**\n2. Wash with **Citadel – Agrax Earthshade**\n3. Highlight with **Citadel – White Scar**\n\n### Gun – Metal\n\n1. Base with **Leadbelcher**\n2. Wash with **Citadel – Nuln oil**\n3. Highlight with Sharpie – Silver Metallic\n – Yah I said it, it couldn’t be easier to use and looks great!\n\n### Gun – Body + Eyes\n\n1. Base with **Citadel – Mephiston Red**\n2. Wash with **Tamiya Panel Line Accent Color – Black**\n3. Highlight with **Wild Rider Red**”} –> Space Wolves are a fun interpretation of the “savage, but honorable” warrior trope and this translates into miniatures that tend to be very dynamic with lots of interesting materials to paint aside from grey ceramite. Hopefully this has given you some good ideas for painting your own Space Wolves models but as always, drop us a line at contact@goonhammer.com with feedback and your own works of art! This article is part of a larger series on how to paint Space Marines. To return to that series, click here.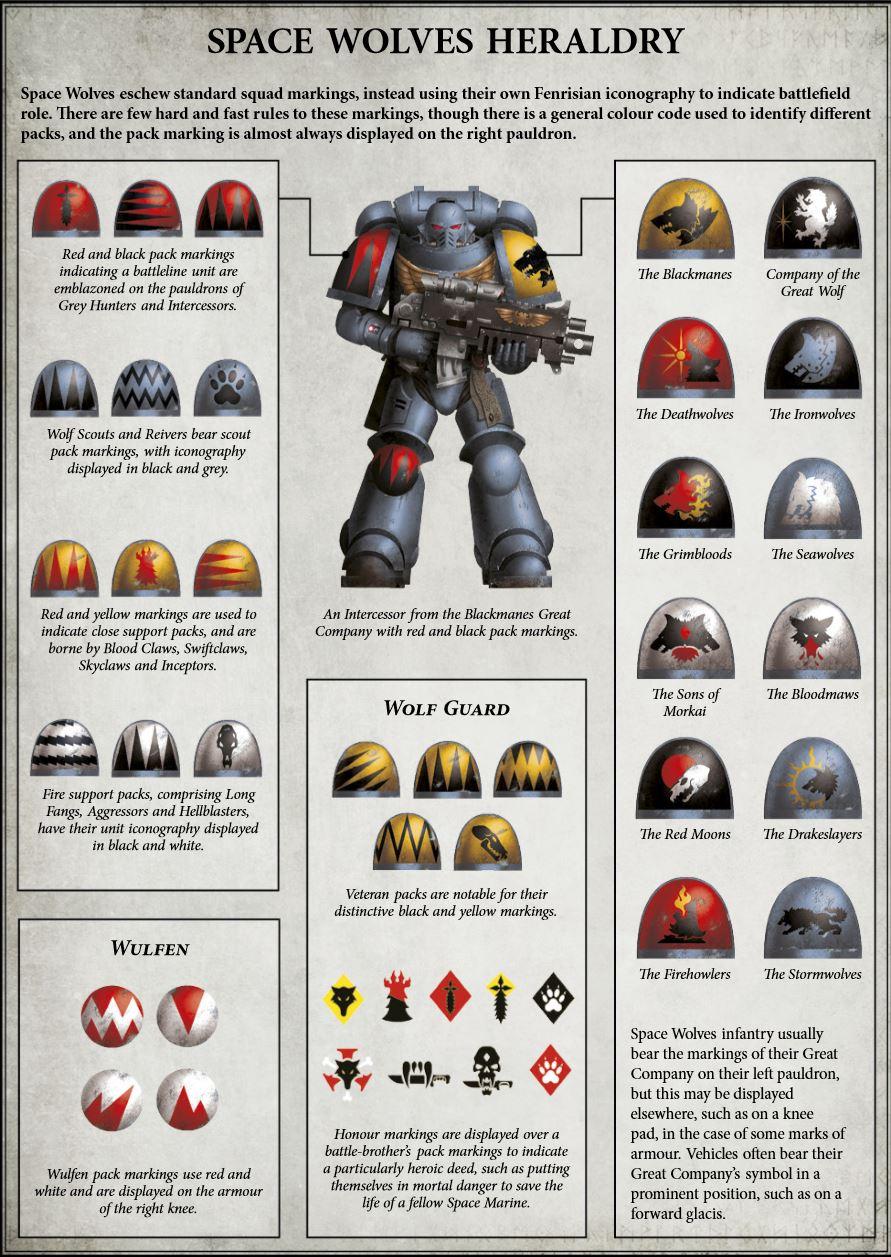
Painting Space Wolves


The General Process
Assembly, Priming and Basecoating
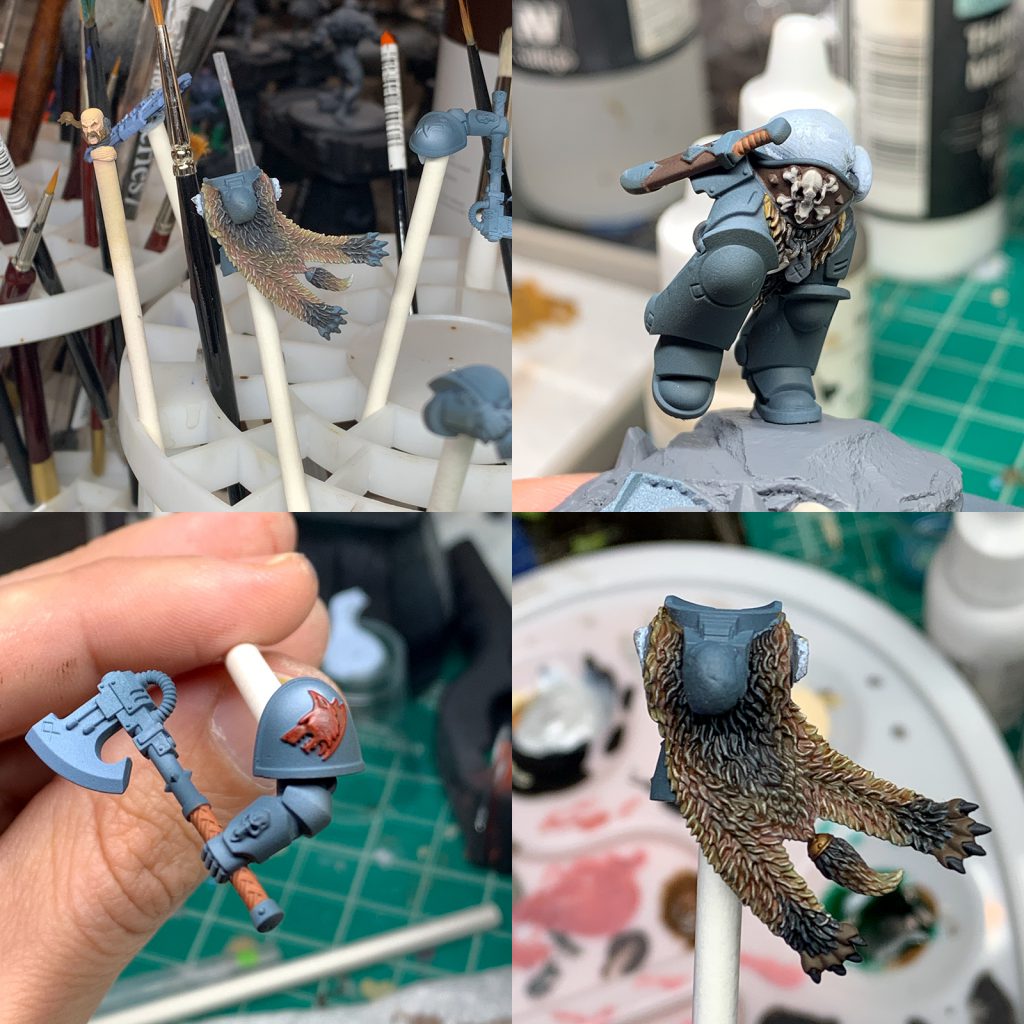
A Note on Fur
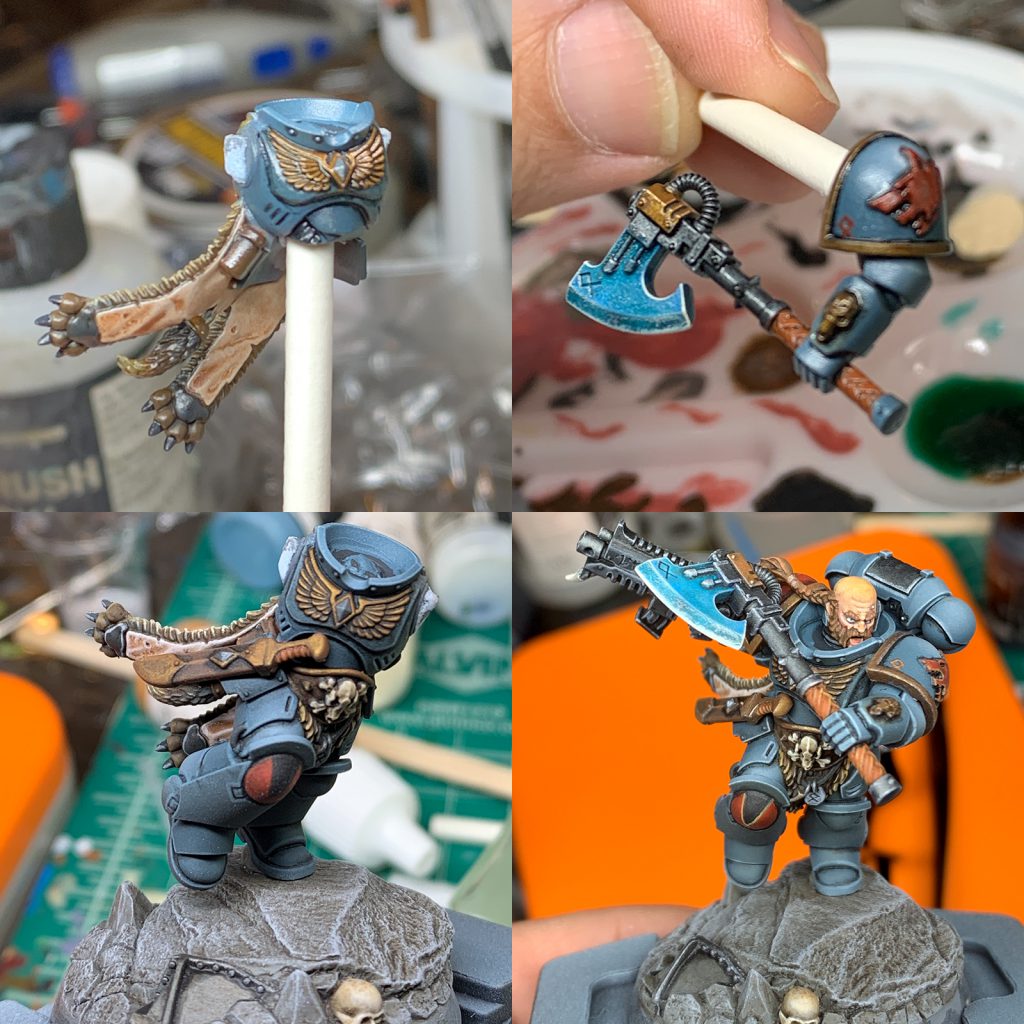
The Frost Axe
Edge Highlights
Final Details


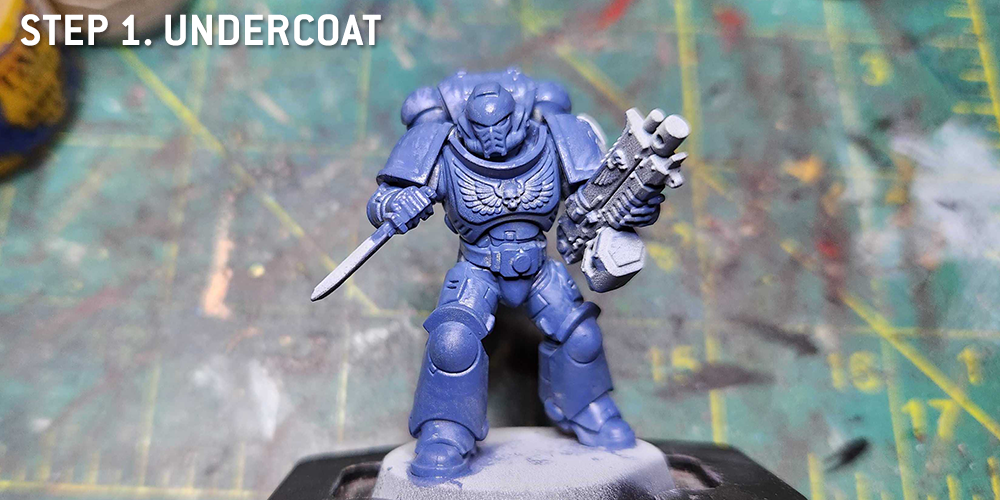
Step 1. Undercoat
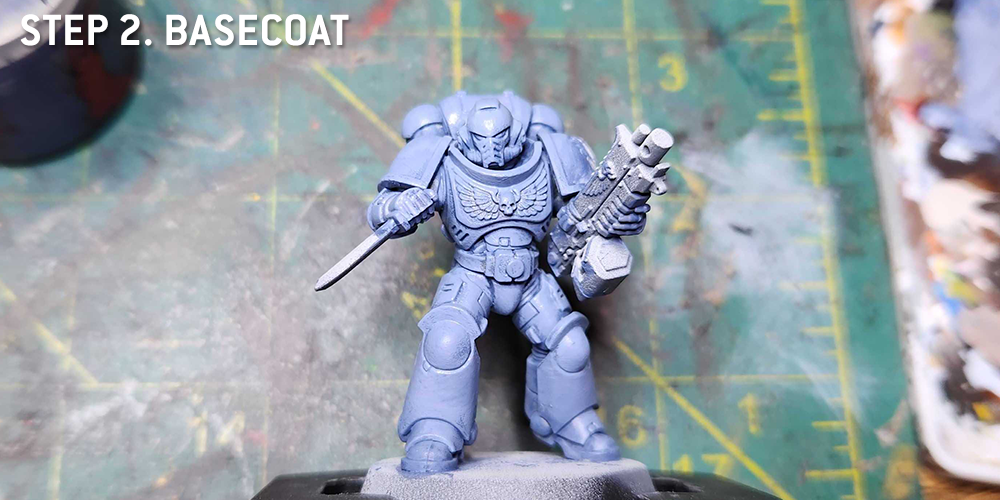
Step 2. Basecoat
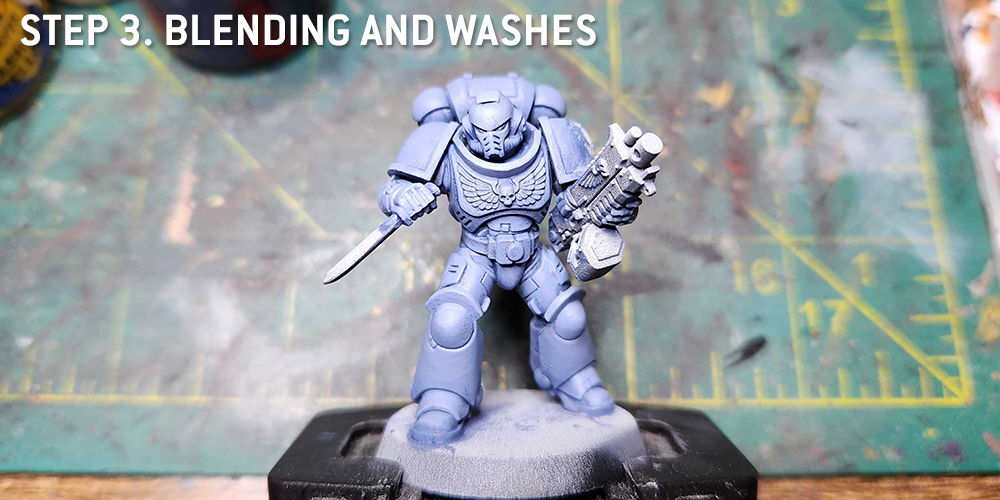
Step 3. Blending and Washes
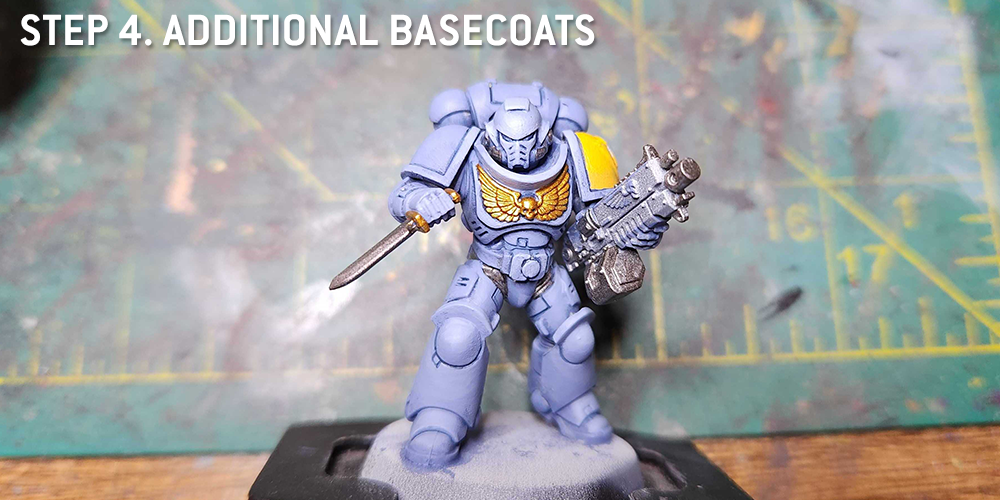
Step 4. Additional Basecoats
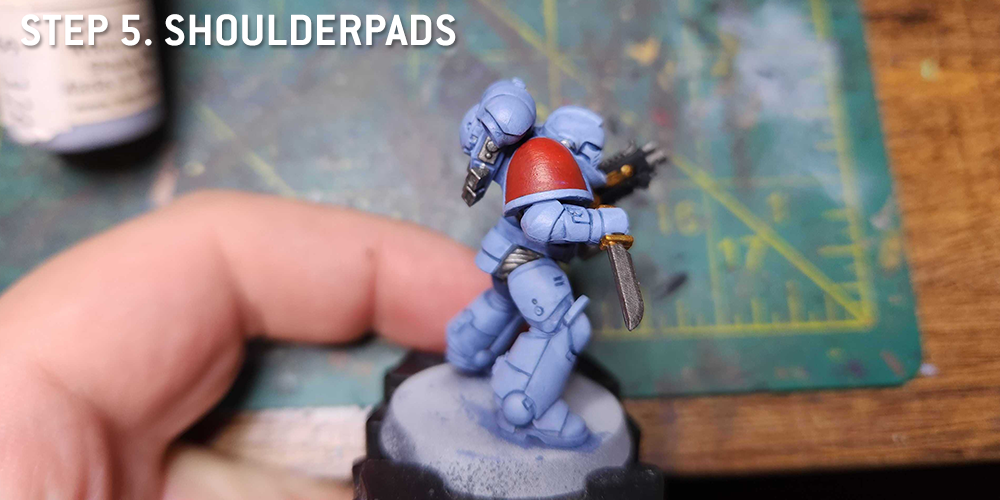
Step 5. Shoulderpads
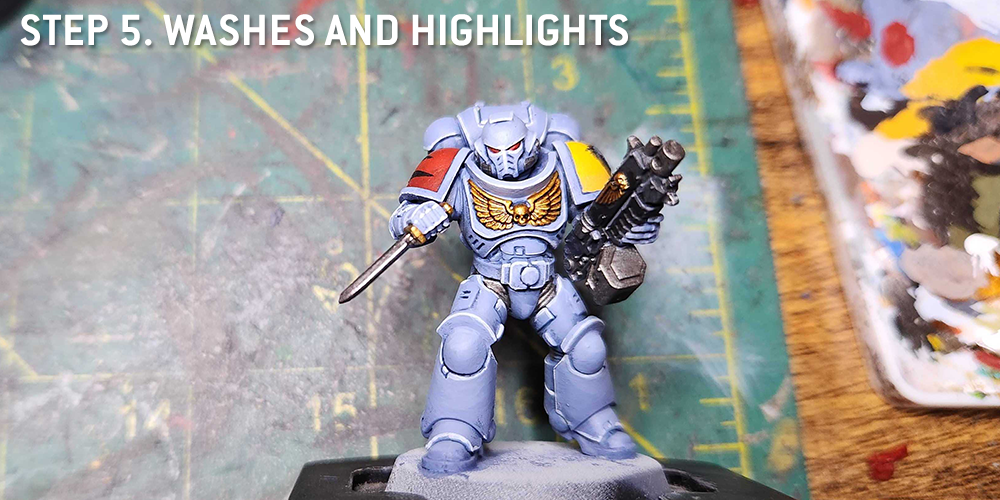
Step 6. Washes and Highlights
Bonus: Krom Dragongaze
The Armor Basics
Adding Details

Strip all of your Iron Hand Primaris Marines.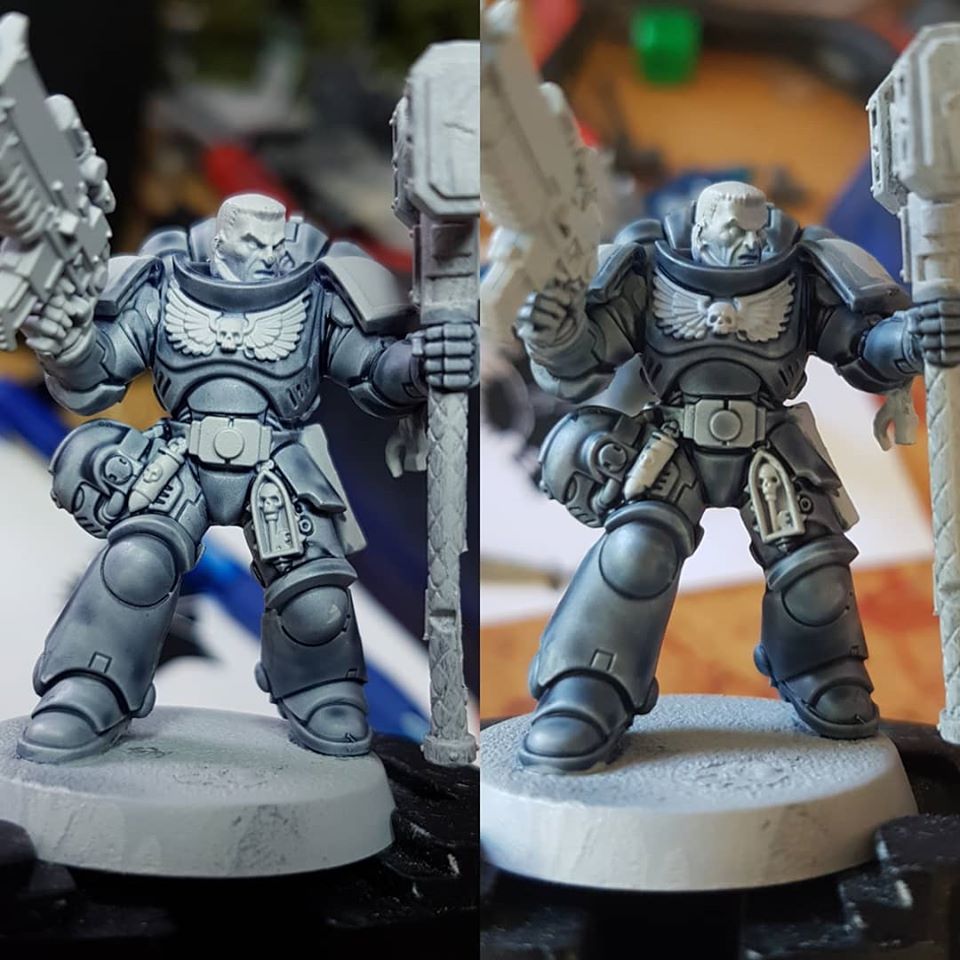

Armour
Breastplate
Gun – Metal
Gun – Body + Eyes
Right Shoulder Pad and left knee
Leather
Base
Final Thoughts
