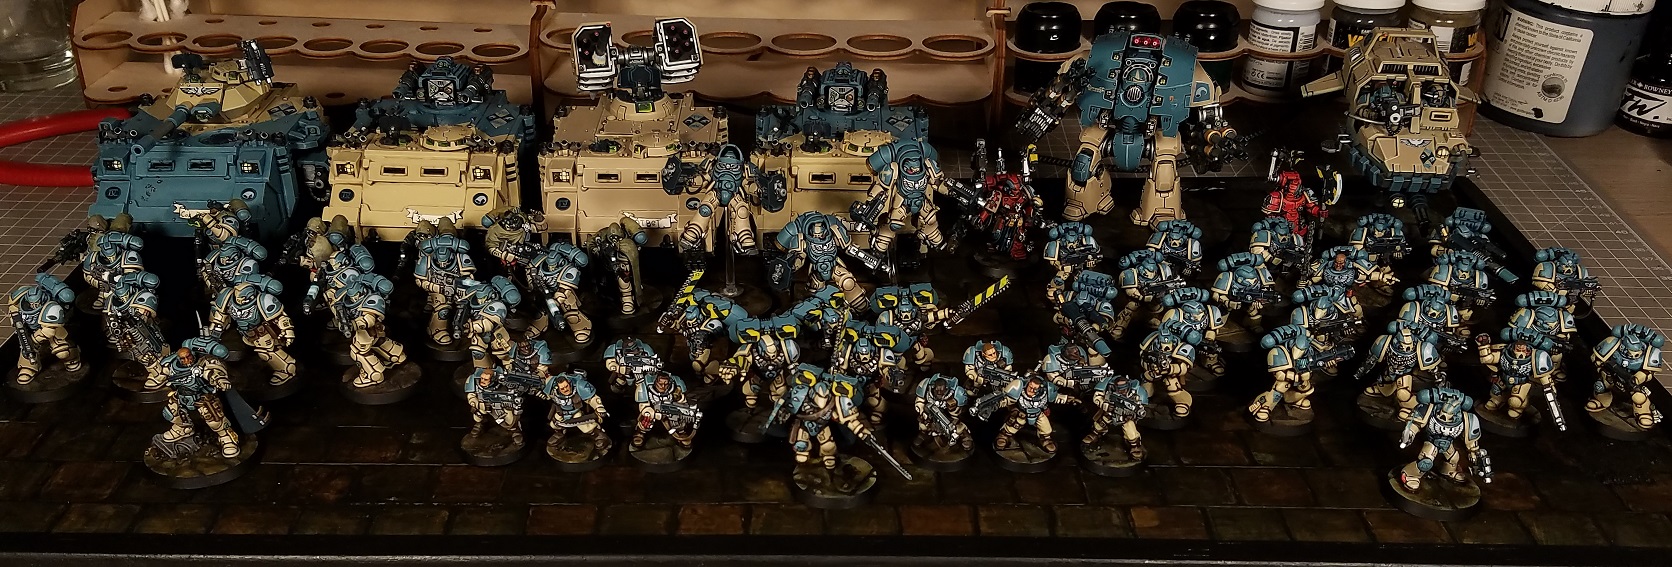
Greetings!
With the release of the excellent 8th edition Space Marine Codex Mk 2 (check out our review series on the book here: Part 1, Part 2 and Part 3), Games Workshop has brought back the coolest part of the 4th ed codex: Making your own chapter and giving it rules.
In this article we will literally go around the world and see some cool successors and talk to their creators about how to paint them. Also to blatantly pad it out, we are going to look at some famous canon successors.
Before we start, here are the chapters featured in this article for your quick reference if you return here for wisdom. If we do an expanded HTPE for them I’ll throw a link in to that article into this list:
The White Panthers, a snazzy 1997 era retro-codex-compliant-scheme chapter by TheChirurgeon.
Excoriators, guardians of the Eye of Terror and Imperial Fist successors by Skails.
The Regal Skulls, a product of the Something Awful Chapter Challenge by Kevin Genson
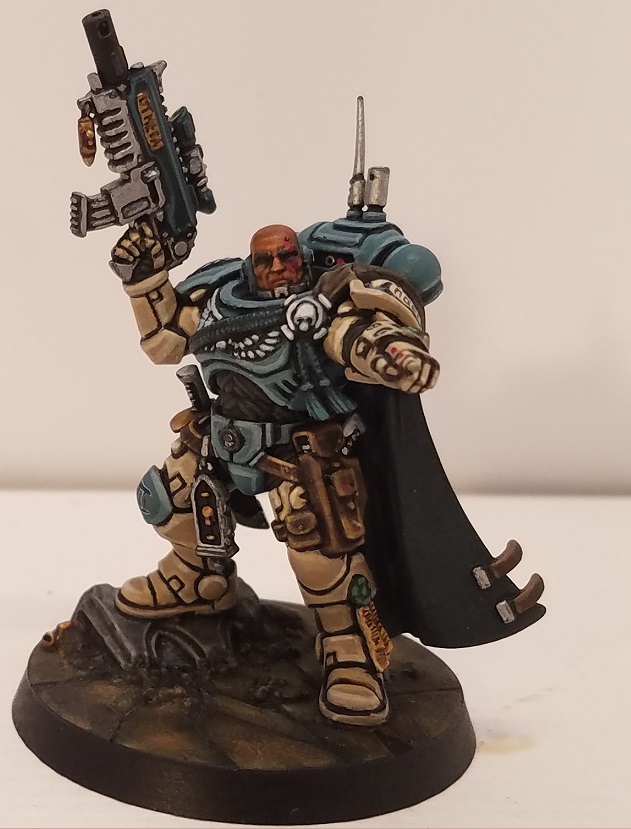
Swords of Davion, overly reckless sword duelists with jump packs by Tyler “Coda” Moore.
Ot Neba, the tan and blue heroes by Eifert.
Blood Ravens, those guys from that computer game detailed with a slick contrast method by RichP.
In addition here are some HTPE articles for successor chapters we have already done:
Black Templars, Dorn’s somewhat misguided and very, very angry sons by Alfredo Ramirez.
Emperor’s Spears, The last guardians of Elara’s Veil by Tyler “Coda” Moore.
Actually.
Before we start.
Let’s take a quick second to think about what makes a *good* successor, homebrew or not.
For me it comes down a few things. Namely:
A kicking rad colour scheme.
Let’s face it. This an easy 60% of the pull of doing your own chapter. Without this the entire idea isn’t going to float, so we need to start here. A few good ways to come up with a scheme is to pick your fave colour and find what works with it, steal an idea from history (medieval knight heraldry really works here) or find a scheme that’s already out there and tweak it to make it yours.
I’ve done this a few times. For the Swords of Davion, I had a paint I really liked and made up a scheme to make it work. The 20 years of Coda project? I had to colour match a green steam train. My chapter challenge boys? The band Slayer provided the colour palette for one marine, Roman Praetorians the other.
A theme, not just an excuse
Simply put, a solid theme that shows through and informs army list creation (and for the new codex, successor tactics).
For example picture an Imperial Fist army in your mind’s eye.
What do you see?
Bolters everywhere. Siege tanks. Thunder hammer terminators. Iron Cages.
Blood Angels?
Assault Marines. Death Company. Red armour. Gold armour. Nipples, so many nipples. Lots of cups.
What do both of the above have in common? A hella strong brand identity.
So. We need to manufacture our chapter’s identity. Once again there are a number of ways to do that. You can mine history for an idea or base the theme around your fave unit. Maybe you have a specific style of gaming you want the chapter to excel in? Does your colour scheme inform this? Do you need to change elements of your scheme to make it work?
Once you have those you can dive deeper and find your successor tactics and pick your primogenitor.
Examples? Well look no further than the Swords of Davion.
I’ve built this chapter to express my undying love for all things jump pack and have picked a bunch of my fave units to support this theme.
Assault Marines. Check.
Vanguard. Check.
Vindicators. Check.
Power swords? CHECK.
Over time my background for these little reckless boys has evolved from there. Rules wise they have piggybacked off the Black Templars traits for a few years; with the advent of the new codex I’ll be looking at Hungry for Battle, Whirlwind of Rage and the Ultramarine codex supplement to represent them on the field.
With this in mind, if you are coming up with new chapter, try to fill out this:
Chapter Name:
Who is dad?:
Speciality:
Background in one sentence:
Colour Scheme:
Chapter Symbol:
Squad Marking:
Other Markings:
From there the rest will flow. Seriously take a crack at it, it’s a barrel of fun times.
I normally say this spiel at the end, but if you have your own successors please share them with us. They are my fave part of the hobby and I love seeing people’s homebrew. If you want to show us your dudes, send a message my way on Twittar, insta or drop us an at email us at contact@goonhammer.com for the chance to be featured in our mailbag series!
With that out of the way, here are Goonhammer’s Finest.
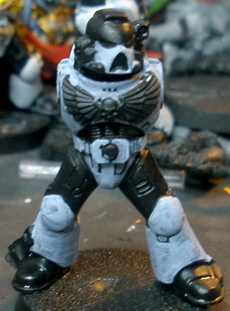
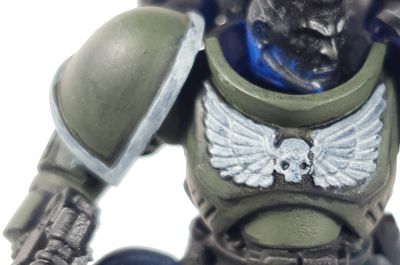
The White Panthers
By Robert “TheChirurgeon” Jones
The White Panthers first appeared as a successor chapter in the 2nd edition Codex: Ultramarines and have shown up now and then in the fluff several times. They’re a Codex-Compliant chapter with white and black armor. Most recently, they were mentioned in the 5th edition Codex: Space Marines, in a blurb detailing the death of their former Chapter Master, Jorus Shadowmaw.
I first saw them in an issue of White Dwarf in 1997, and I loved the color scheme so much I wanted to do an entire army of them.
How to Paint it
Color List
- Reaper Snow Shadow
- Reaper Ghost White
- Reaper Pure White
- Averland Sunset
- Flash Gitz Yellow
- Rakarth Flesh
- Agrax Earthshade
- Nuln Oil
- Abaddon Black
- Mechanicus Standard Grey
- Leadbelcher
- Ironbreaker
- Mephiston Red
- Carroburg Crimson
- Evil Sunz Scarlet
- Reaper Polished Bone
I prime everything black. I do this because I hate having to cover up white primer and because my models are incredibly grim. That means painting white armor can be a real chore. So I don’t paint things white, I paint them off-white, which works better for shading anyways. This is also a relic of when the only white paint I had in high school was the awful Games Workshop white, so it was also born out of necessity.
Painting the White Parts
Step 1: two thin coats of Reaper Snow Shadow
The goal here is to get a decently consistent coverage of all of the areas that will eventually be white.
Step 2: 2-3 thin coats of Reaper Ghost White
Ghost White is going to be our “white” on this model. It’s an off-white blue that will look white to an observer if it’s not being compared to something pure white. It also leaves us room to edge highlight with pure white.
Step 3: Edge Highlight with Reaper Pure White
Go back and hit the recesses/lines with black as needed.
The Aquilas
The Aquilas are Averland Sunset with highlights of Flash Gitz Yellow. I try to paint the feathers individually but if I mess up, I’ll hit it with a coat of Agrax Earthshade.
The Eyes/Gemstones/Gun
I do these with Mephiston Red, then shade them with Carroburg Crimson. Then I do edge highlighting with Evil Sunz Scarlet. I paint the eye lenses and belt circle like gemstones.
Tubing/Cables
Leadbelcher with a Nuln Oil Wash and Ironbreaker highlights.
The Black Parts
Abaddon Black with Mechanicus Standard Grey edge highlighting.
Purity Seals/Skulls
Rakarth Flesh with an Agrax Earthshade Wash and Reaper Polished Bone edge highlights. I use a .005 Micron black pen to do the lines on the seals to make it look like they’ve got writing on them.
Shoulder Pad Rims
The rims of the shoulder pads are Averland Sunset blended up with 3-4 layers to Flash Gitz Yellow, then edge-highlighted with Flash Gitz Yellow.
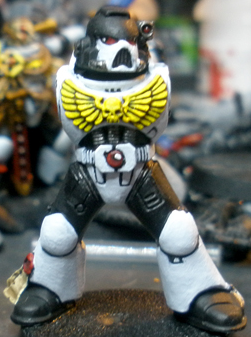
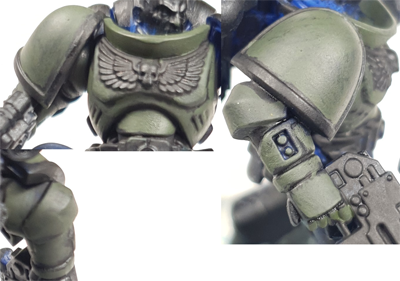
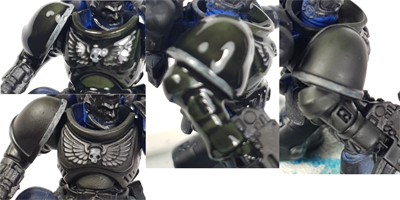
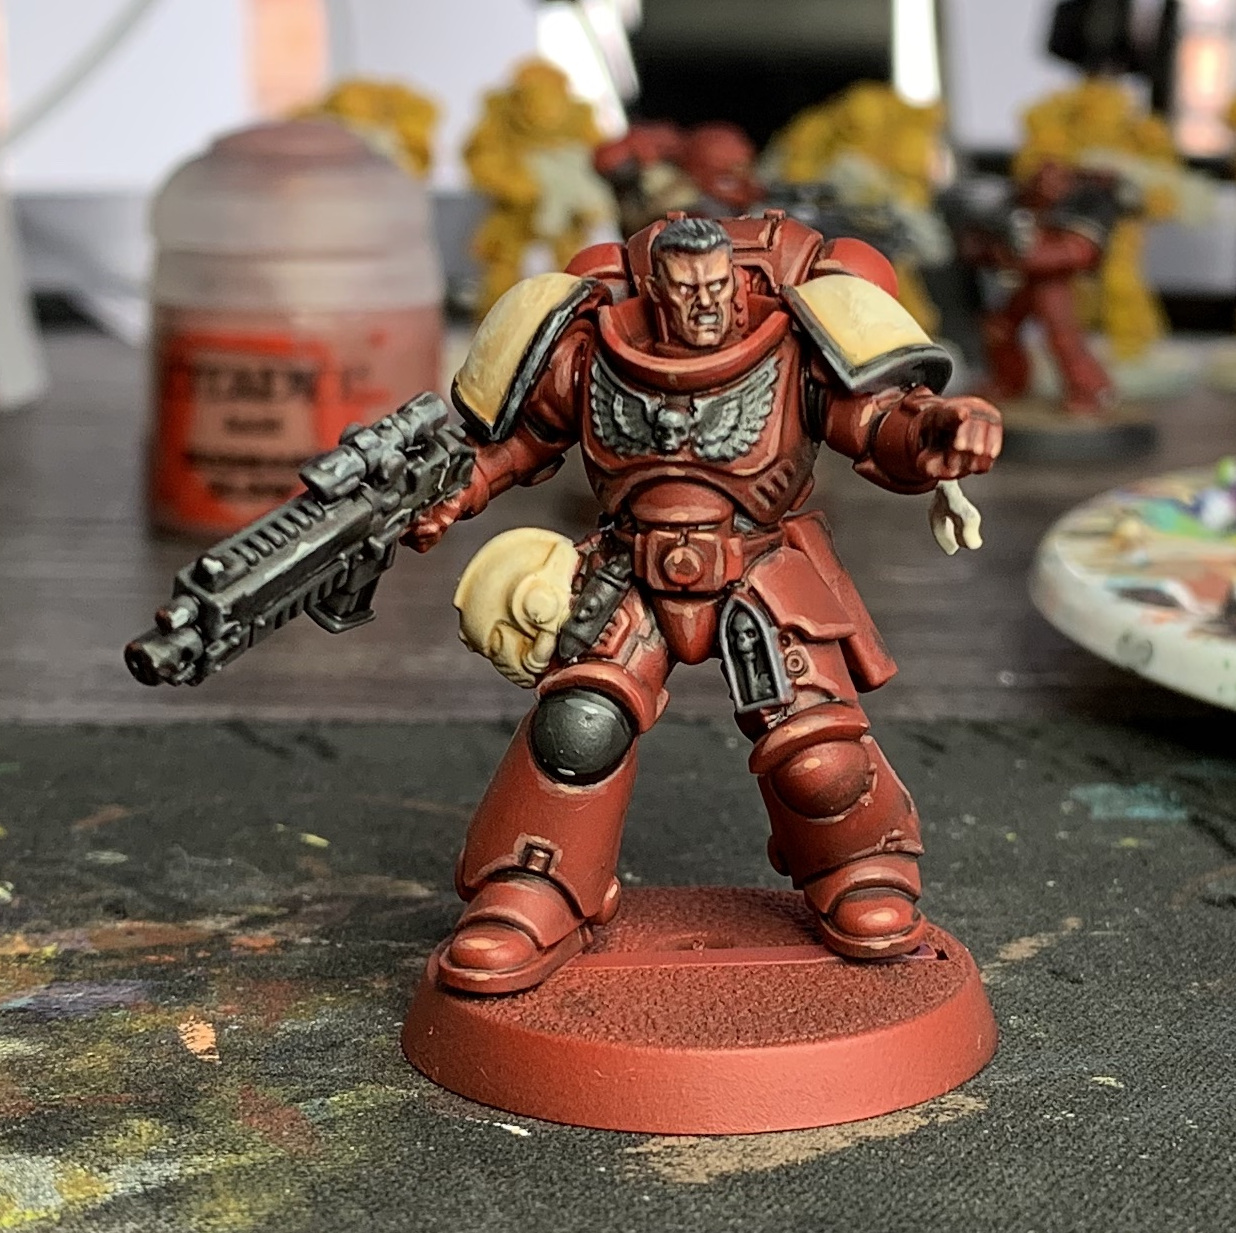
Excoriators
By Skails
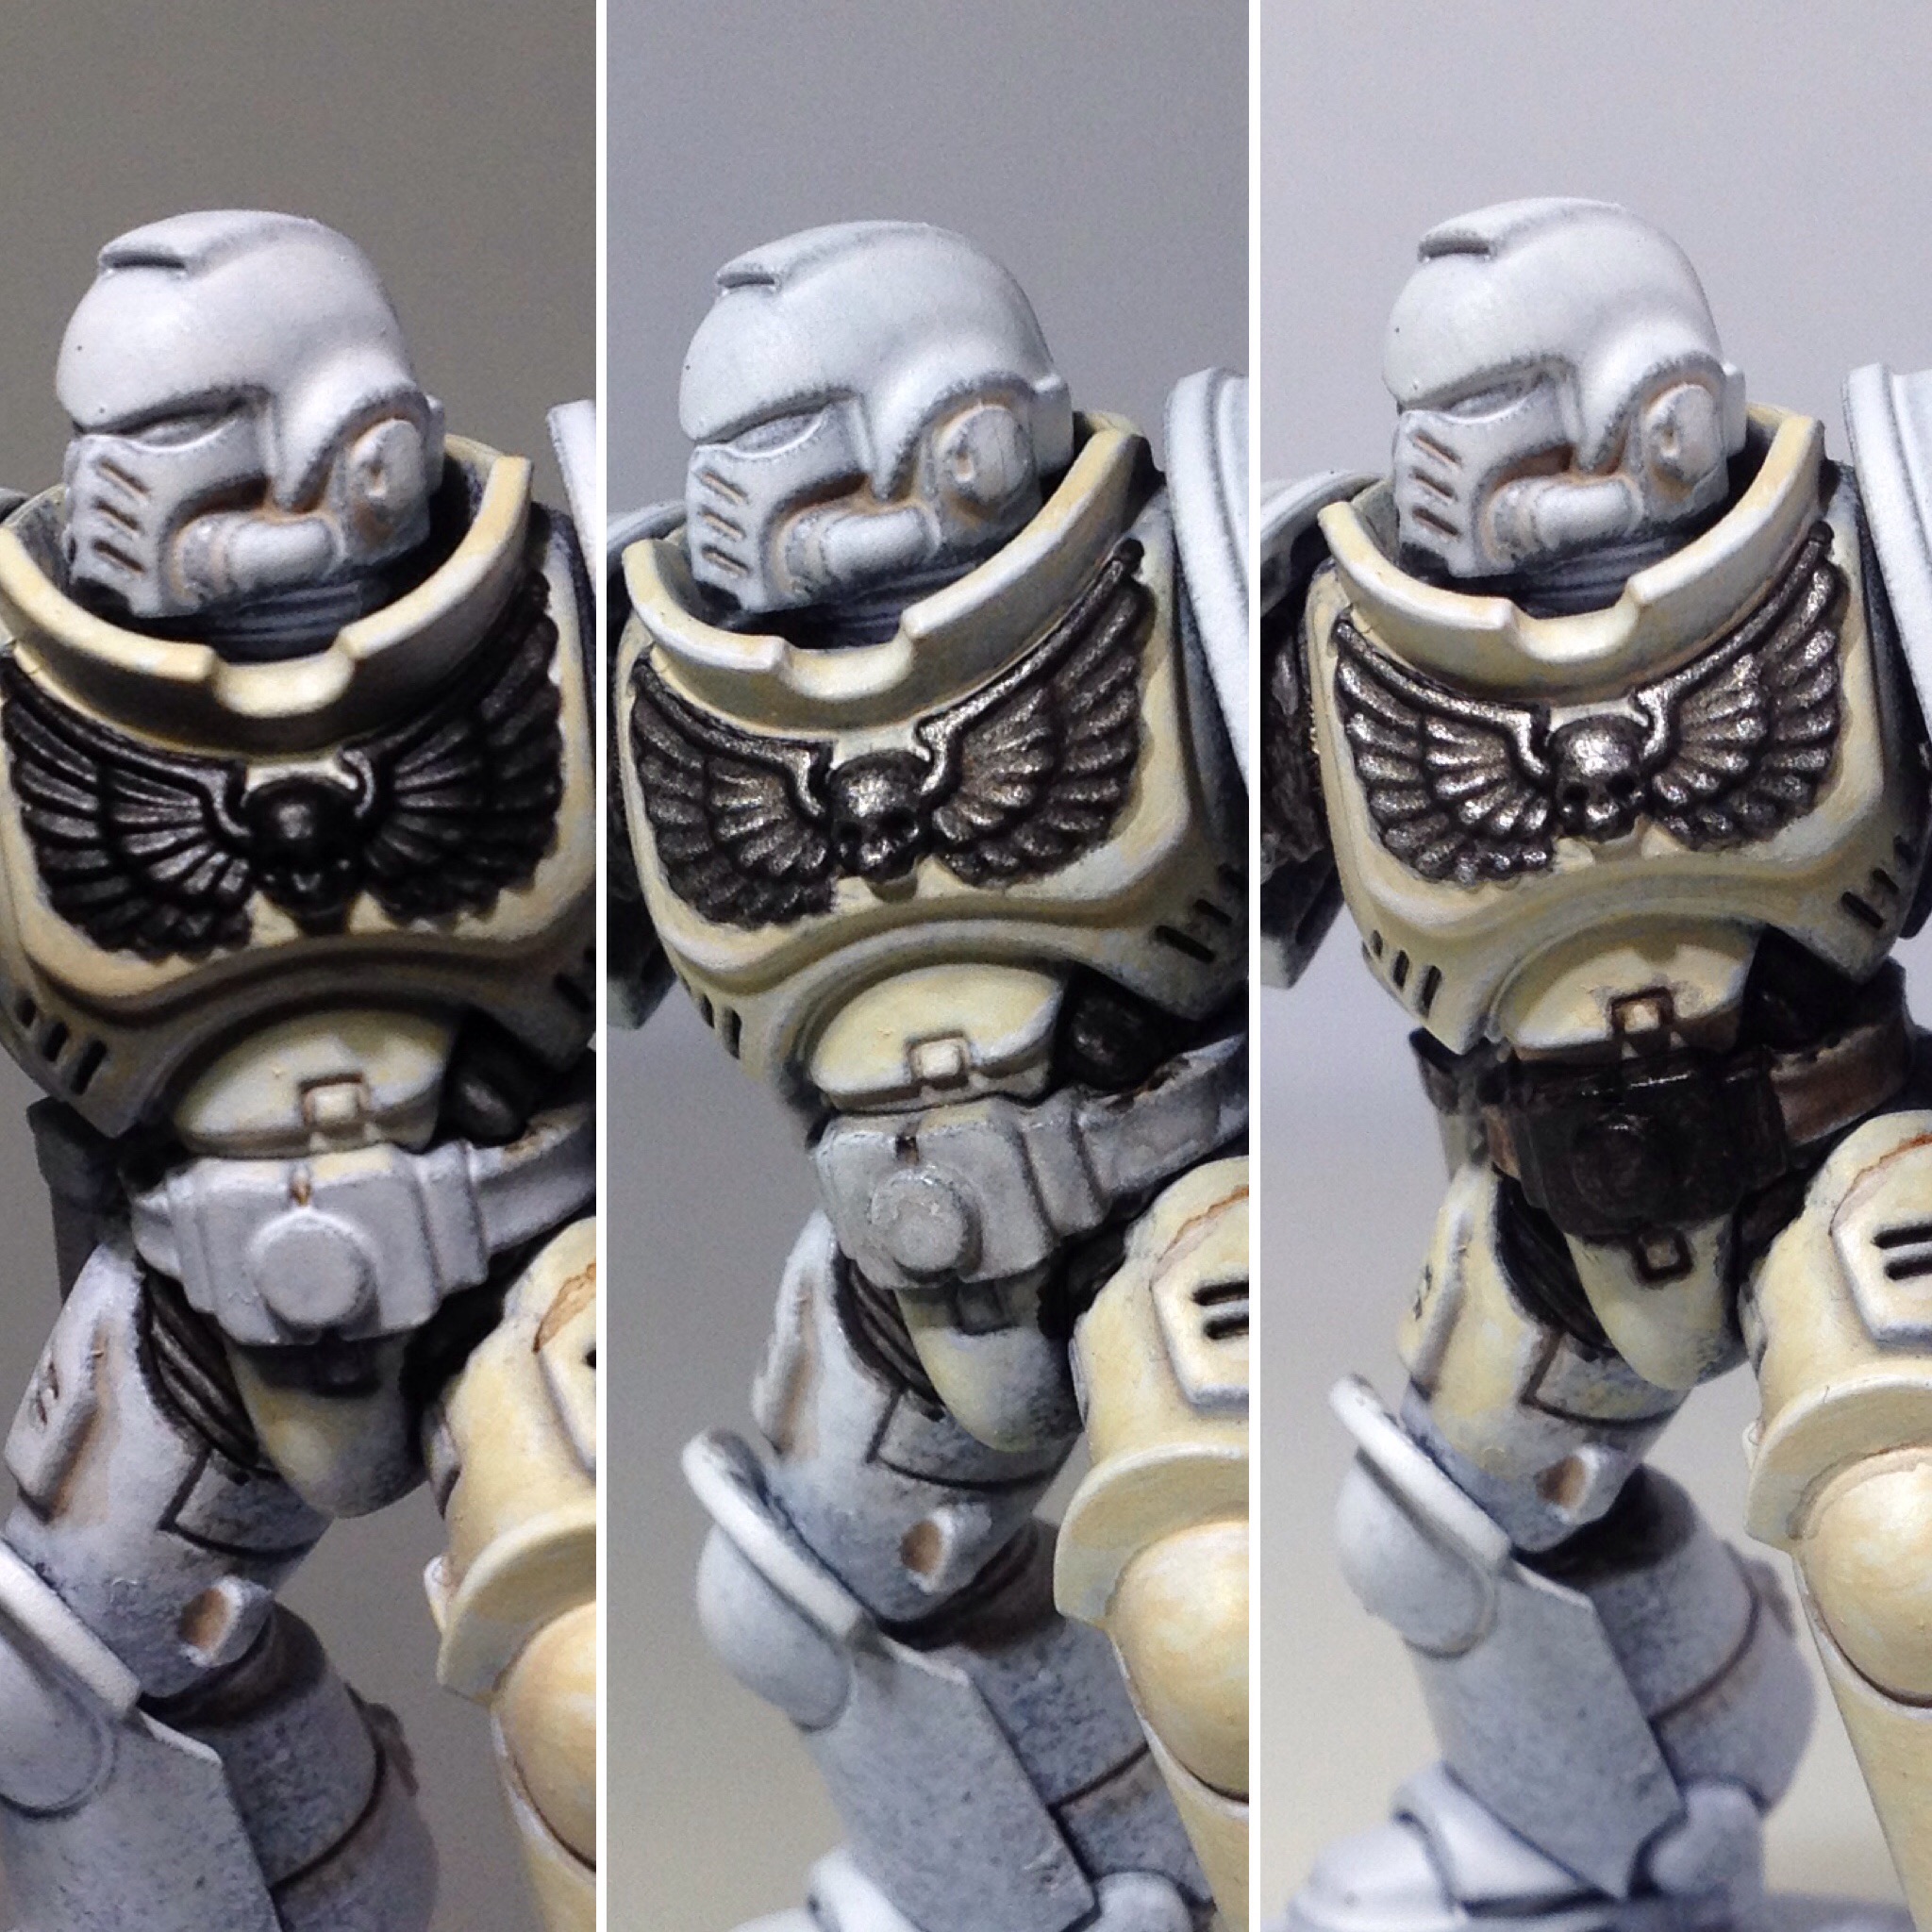
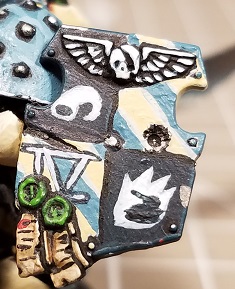
The Excoriators are first mentioned during third edition in Codex: Eye of Terror. They are referenced as one of twenty chapters known as the Astartes Praeses founded for the sole purpose of guarding the area around the Eye of Terror. Excoriators are a second founding successor chapter to the Imperial Fists. Black Library author Rob Sanders eventually wrote several books detailing their culture and notable events they took part in. They are a codex compliant chapter in cream colored armor. I chose them as the chapter to paint my marines because I wanted to paint mostly white armor with black accents, and picked them out of one of the big illustrated poster lists of chapters. They also had the added bonus of enshrining battle damage on their armor with the date and world of incident, which I took as a fun challenge to try out some detailed freehand work. The black rims on shoulders and quartered field both are indicators that they are fourth company. I chose to put yellow in the field as a nod to the Imperial Fists.
How to paint it

How to paint the armor
I prime these models white. For the next step I thin Agrax Earthshade with a little bit of Army Painter Quickshade Medium (Lahmian Medium would probably work too), and paint it very carefully into the recesses. This will take a little longer than slopping it on, but will save a lot more time on cleanup later. Then do a base coat of liquitex heavy body unbleached titanium. By using a wet palette and a dropper bottle with a mix of water and a small amount of flow improver + matt medium, I can thin the heavy body paint to a mini painting consistency. If I were trying to replicate the color using the Citadel Paint line I would use Screaming Skull.
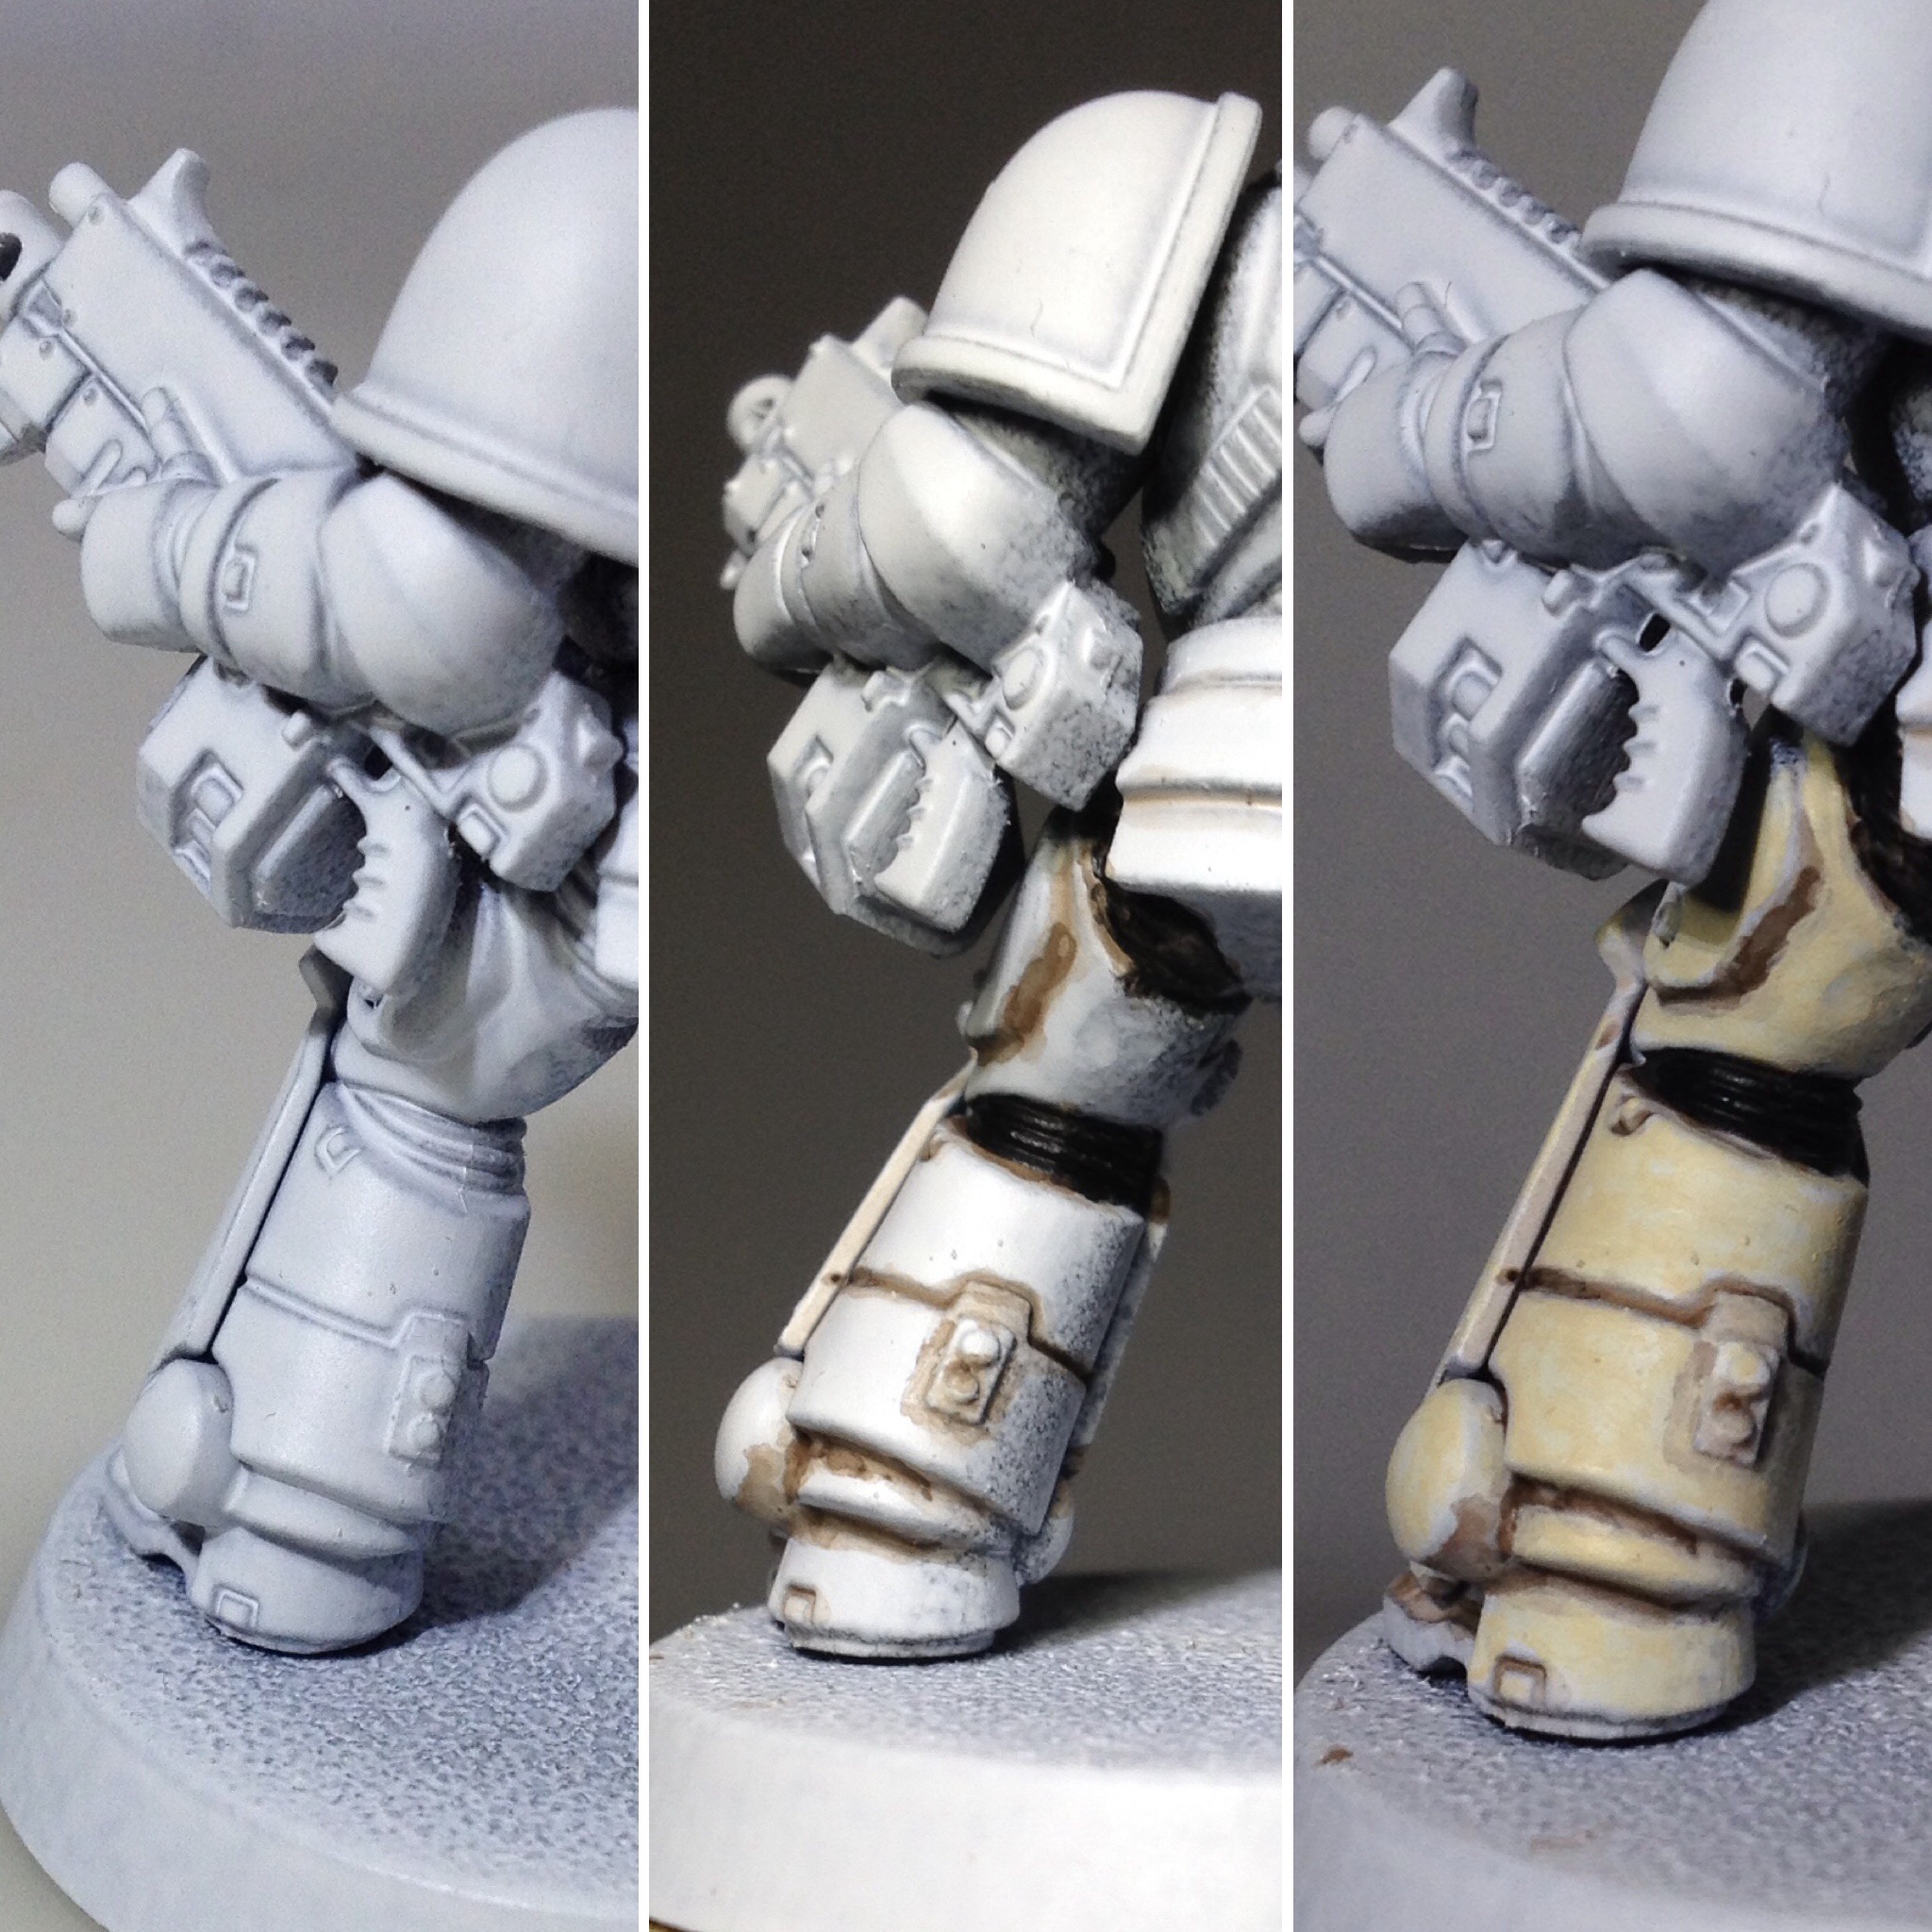
This next image shows the process of doing a two stage highlight-
The first is a chunky highlight of 50/50 mix of unbleached titanium and pure white.
The second is a finer highlight of pure white.
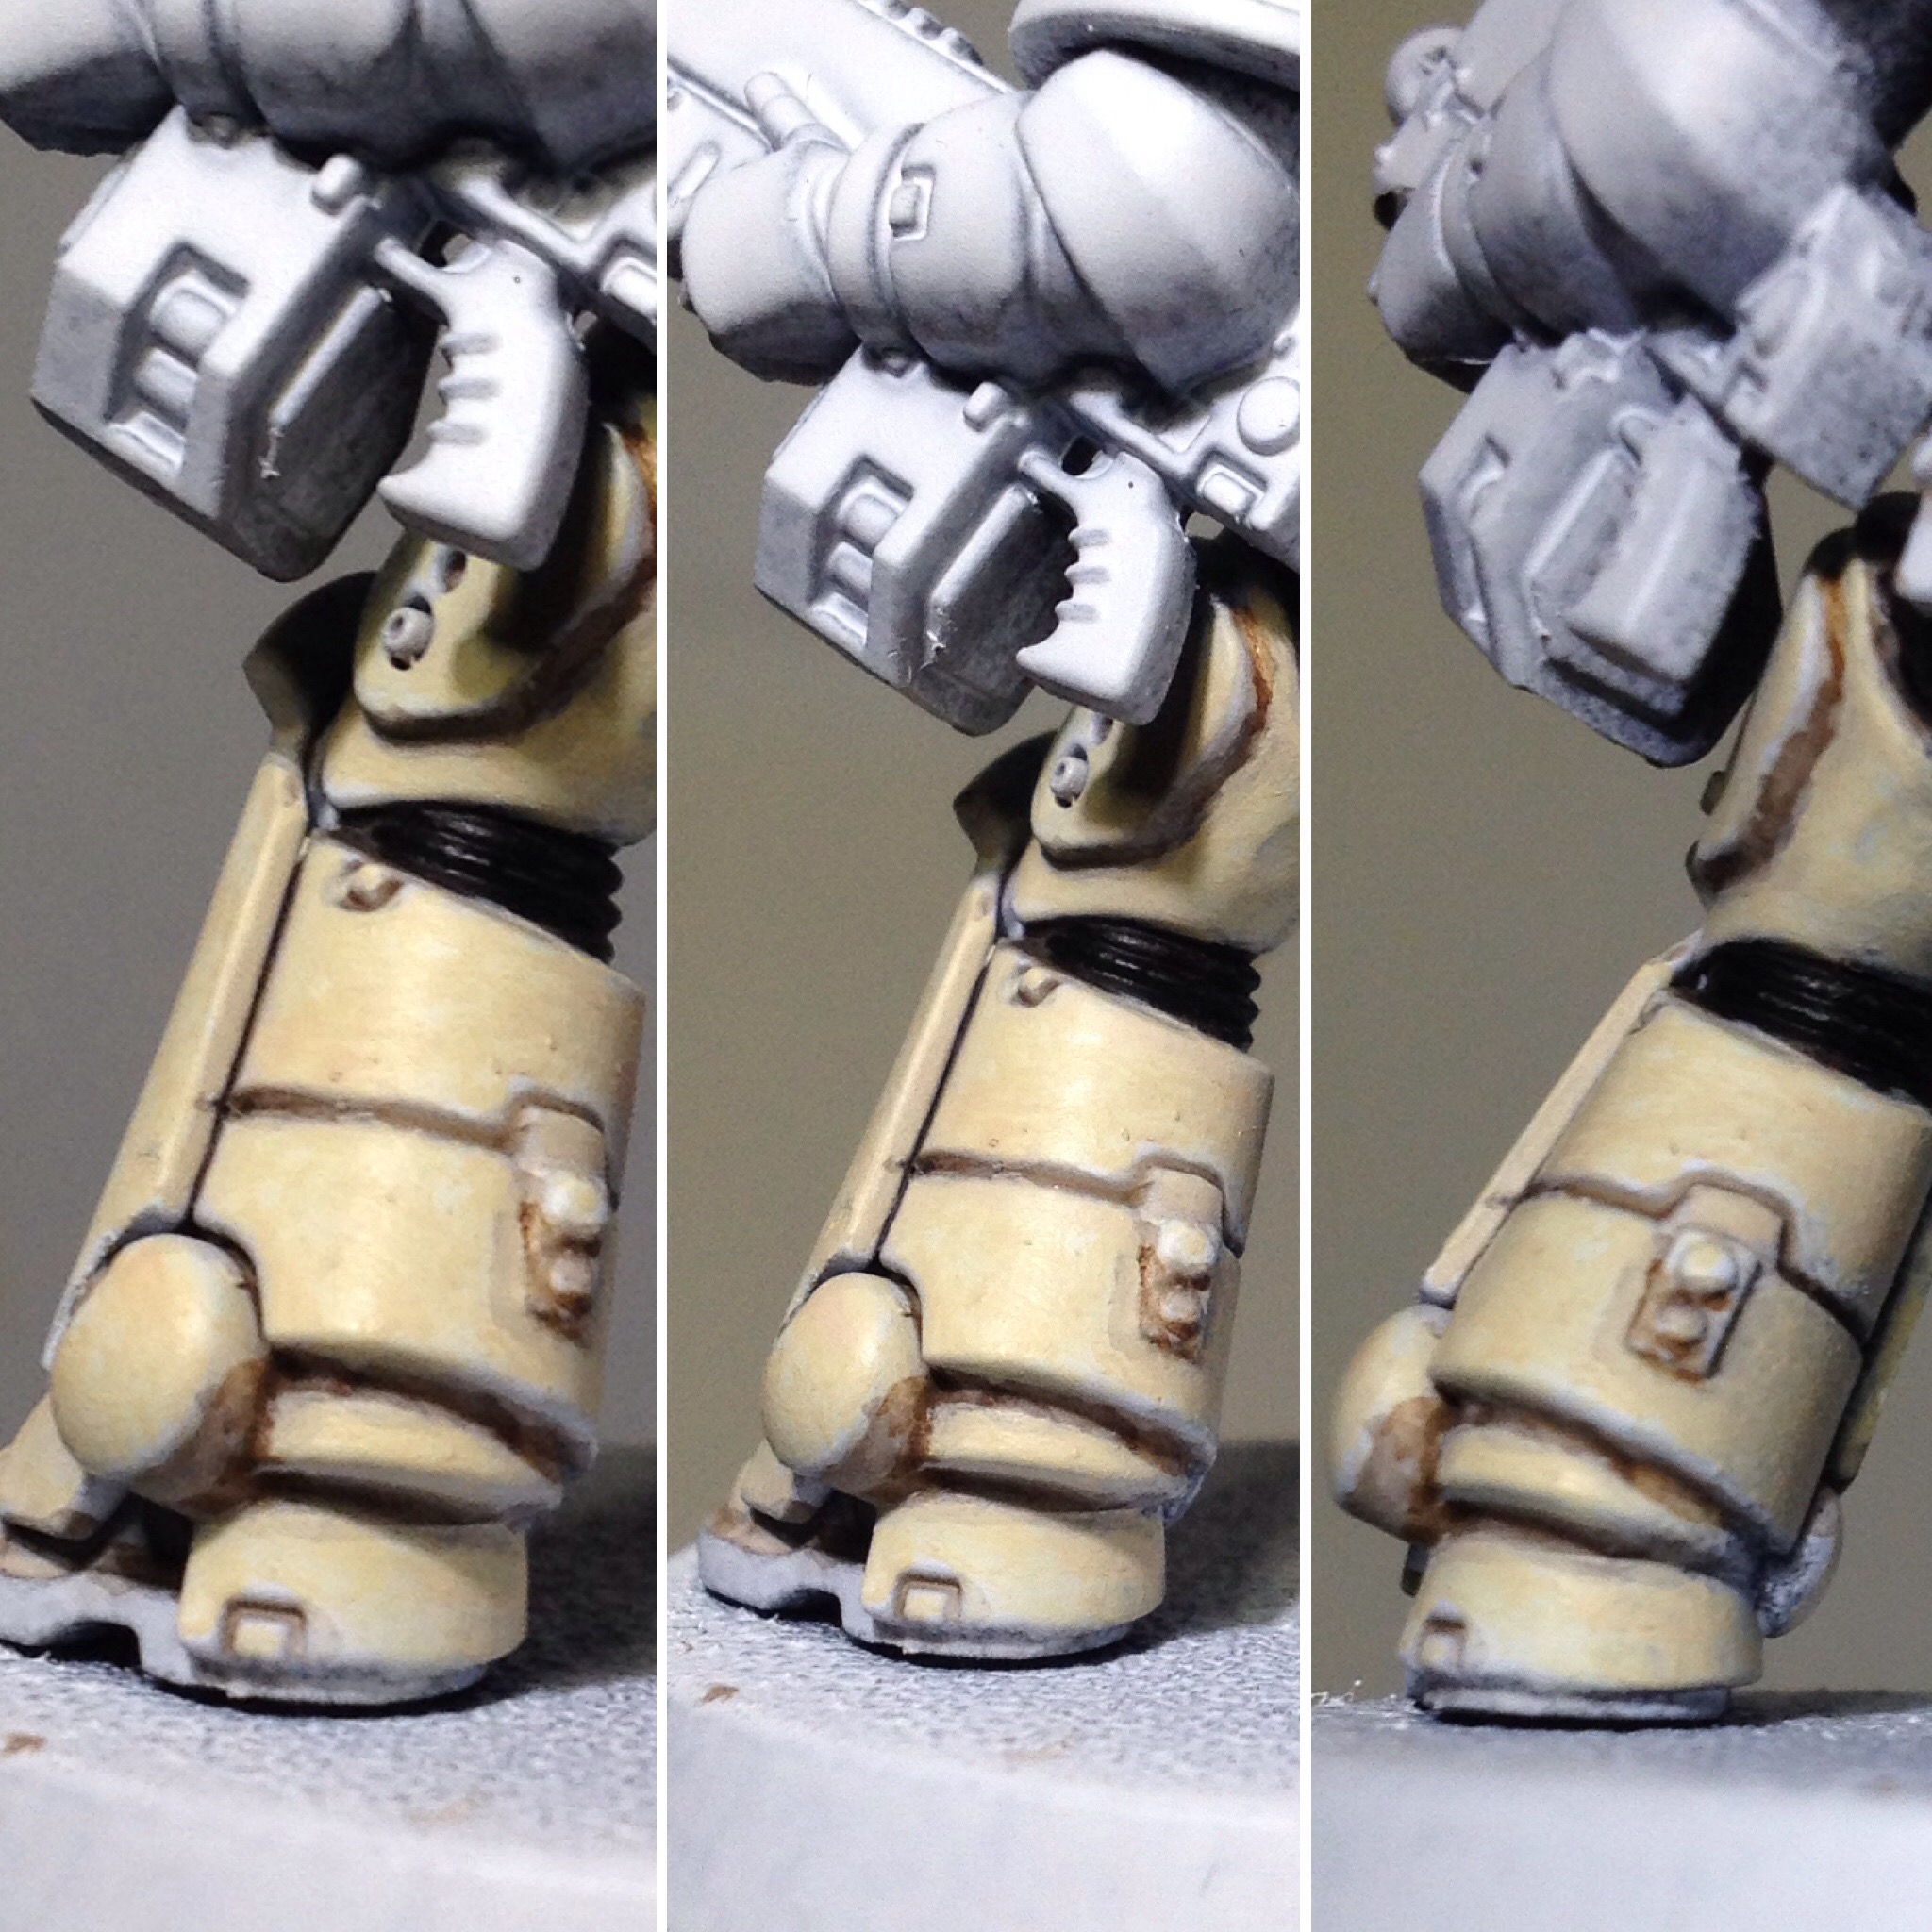
The change is barely perceptible in the photos, but it makes a difference. I have also painted this armor with pure white highlight along the flat surfaces where top down light would be hitting it, to good effect.
Undersuit/Shoulder trim/Tubing
All these parts are done basically the same. Start with a black base coat. Then a thin line of a medium blue color is put along upper side or edges of the surface. Next a mix of that medium blue and a bit of white is added in the middle of the first blue line. I like using blue instead of grey in this case because it adds a little pop of contrast with the warmer base armor color.
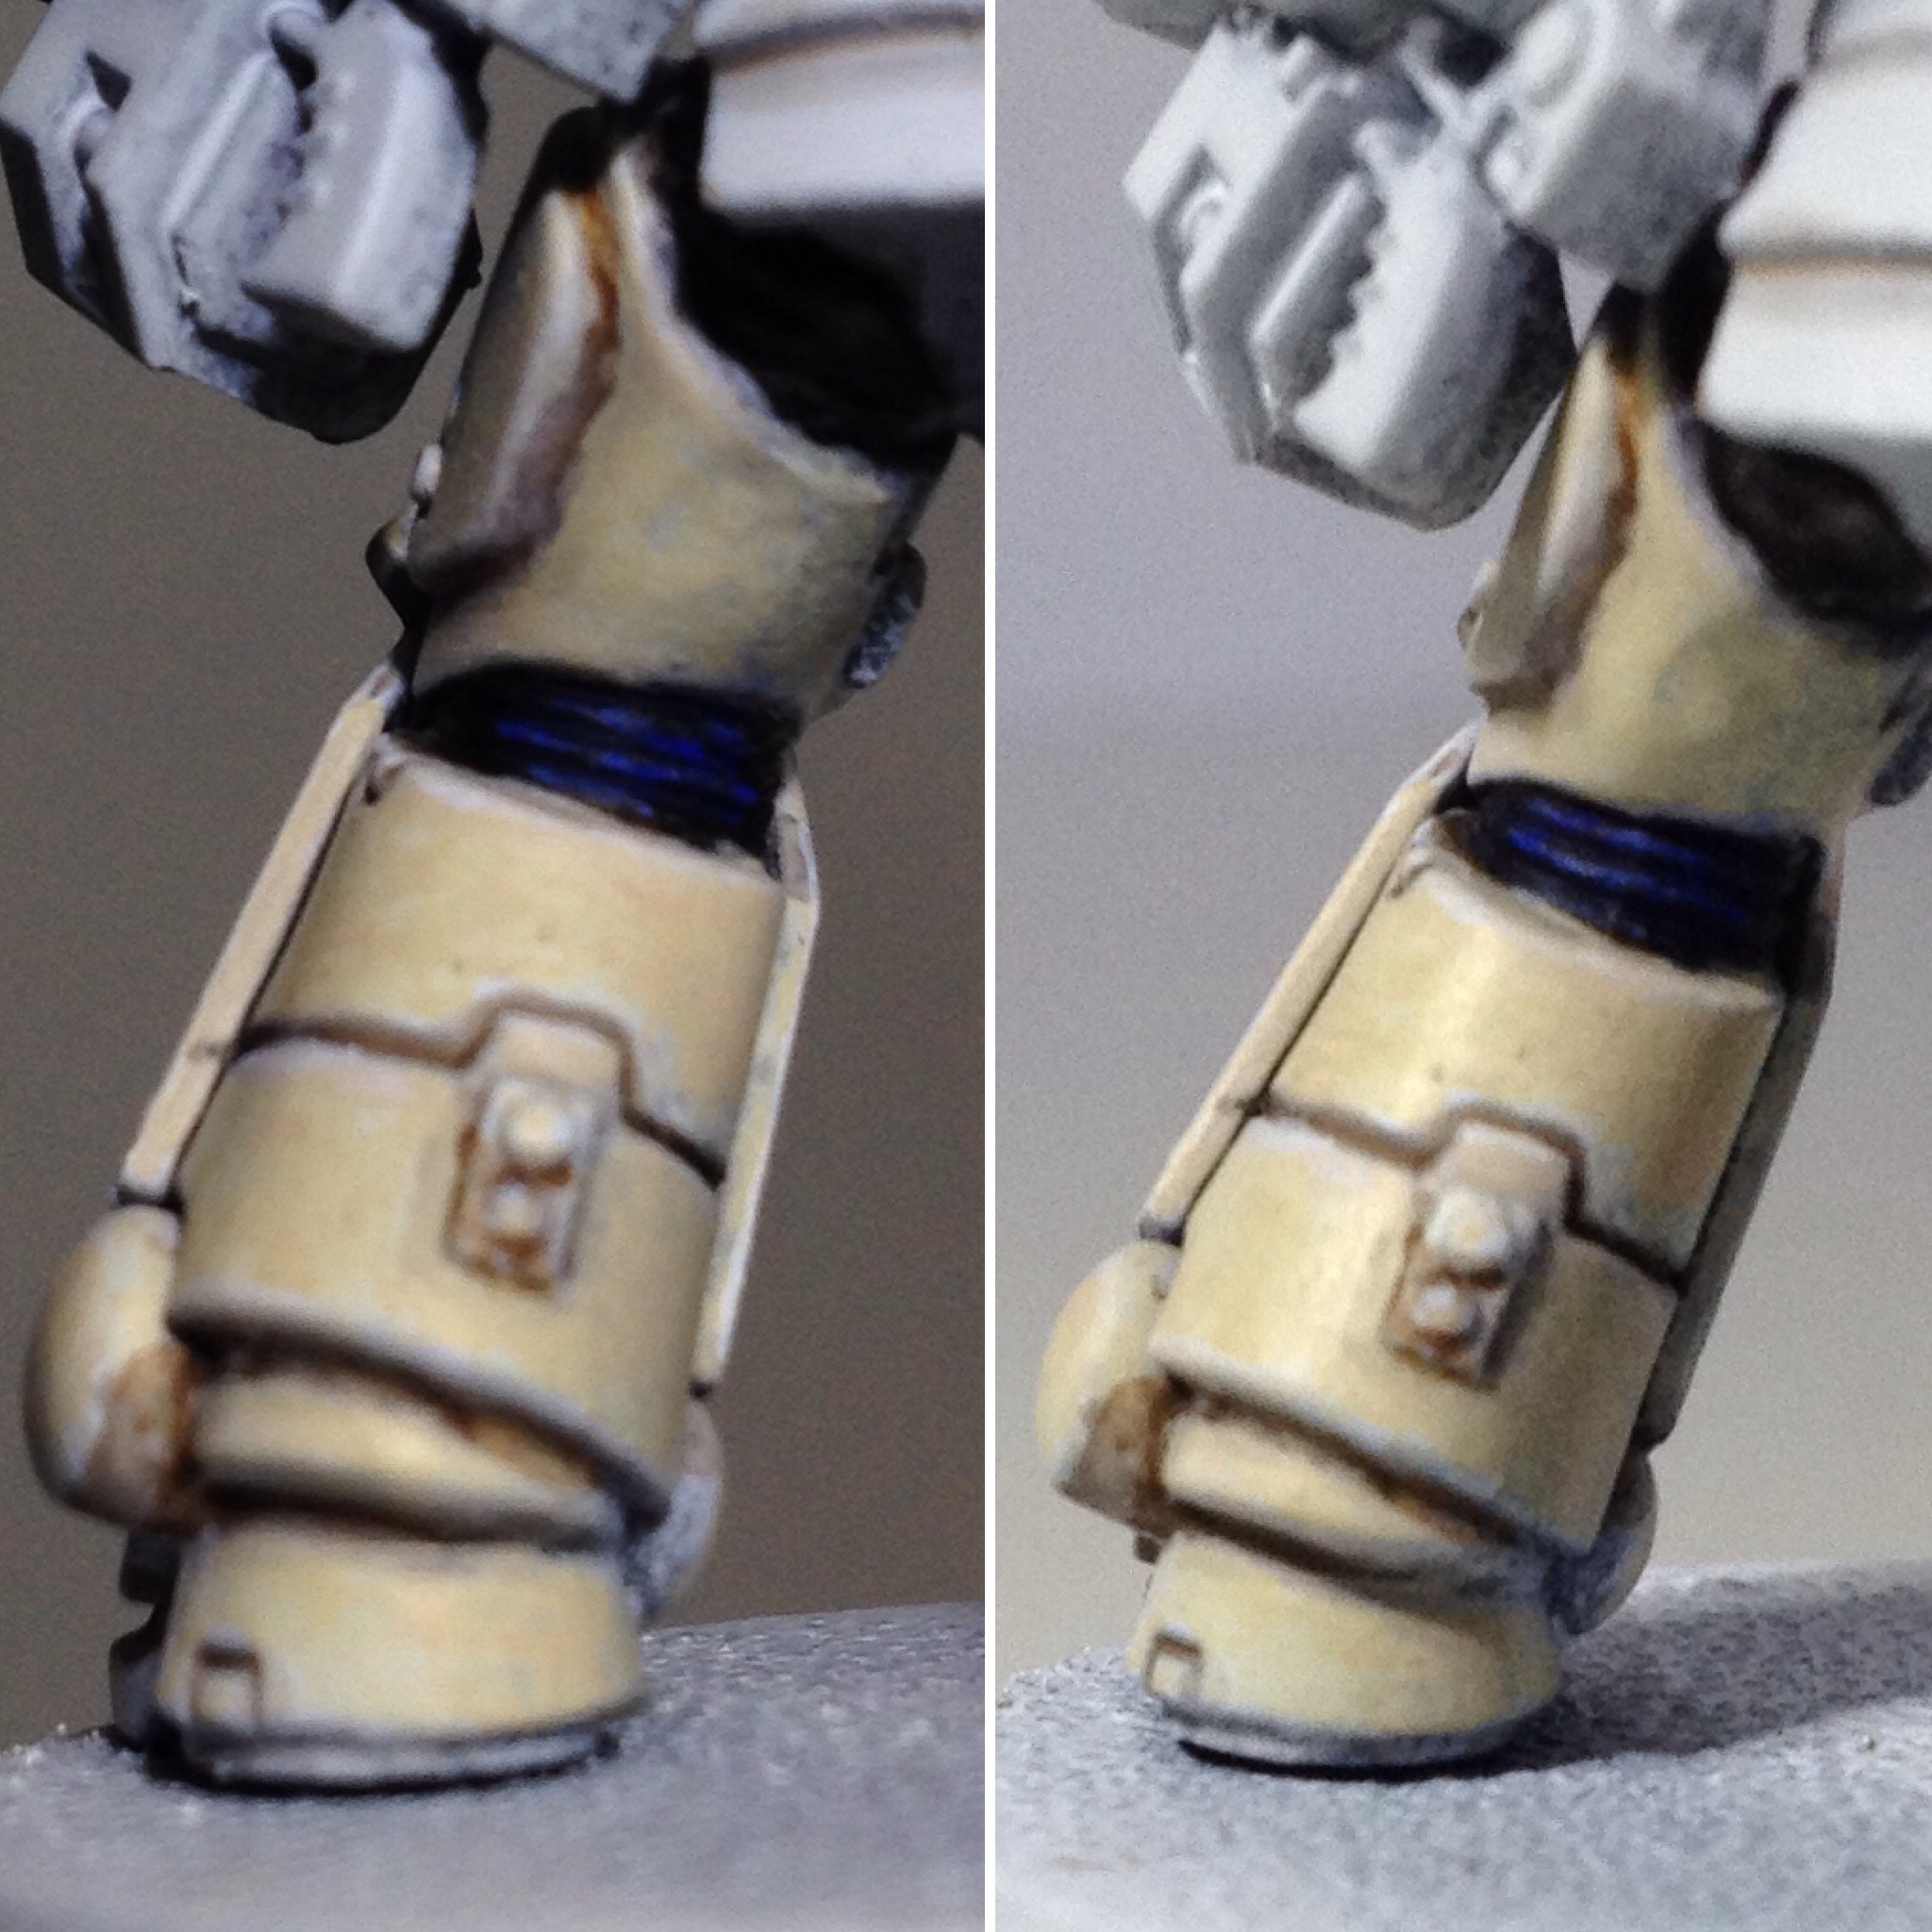
Aquilas/Metals
The process here is base black, cover with Leadbelcher. Then two coats of Nuln Oil and highlight the very edges of feathers and top of skull with Runefang Steel when dry.
Here you can see the overall effect:
Battle Damage
Every Excoriator needs to memorialize when they put themselves between the Emperor and the weapons of his enemies so jump on over here for some step by step breakdowns of battle damage: https://www.goonhammer.com/tag/Painting-Damage
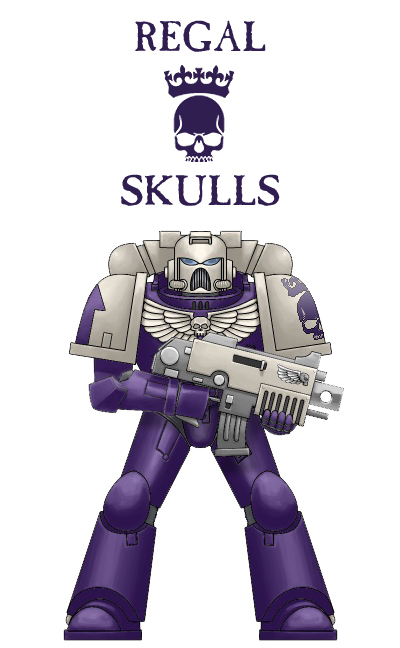
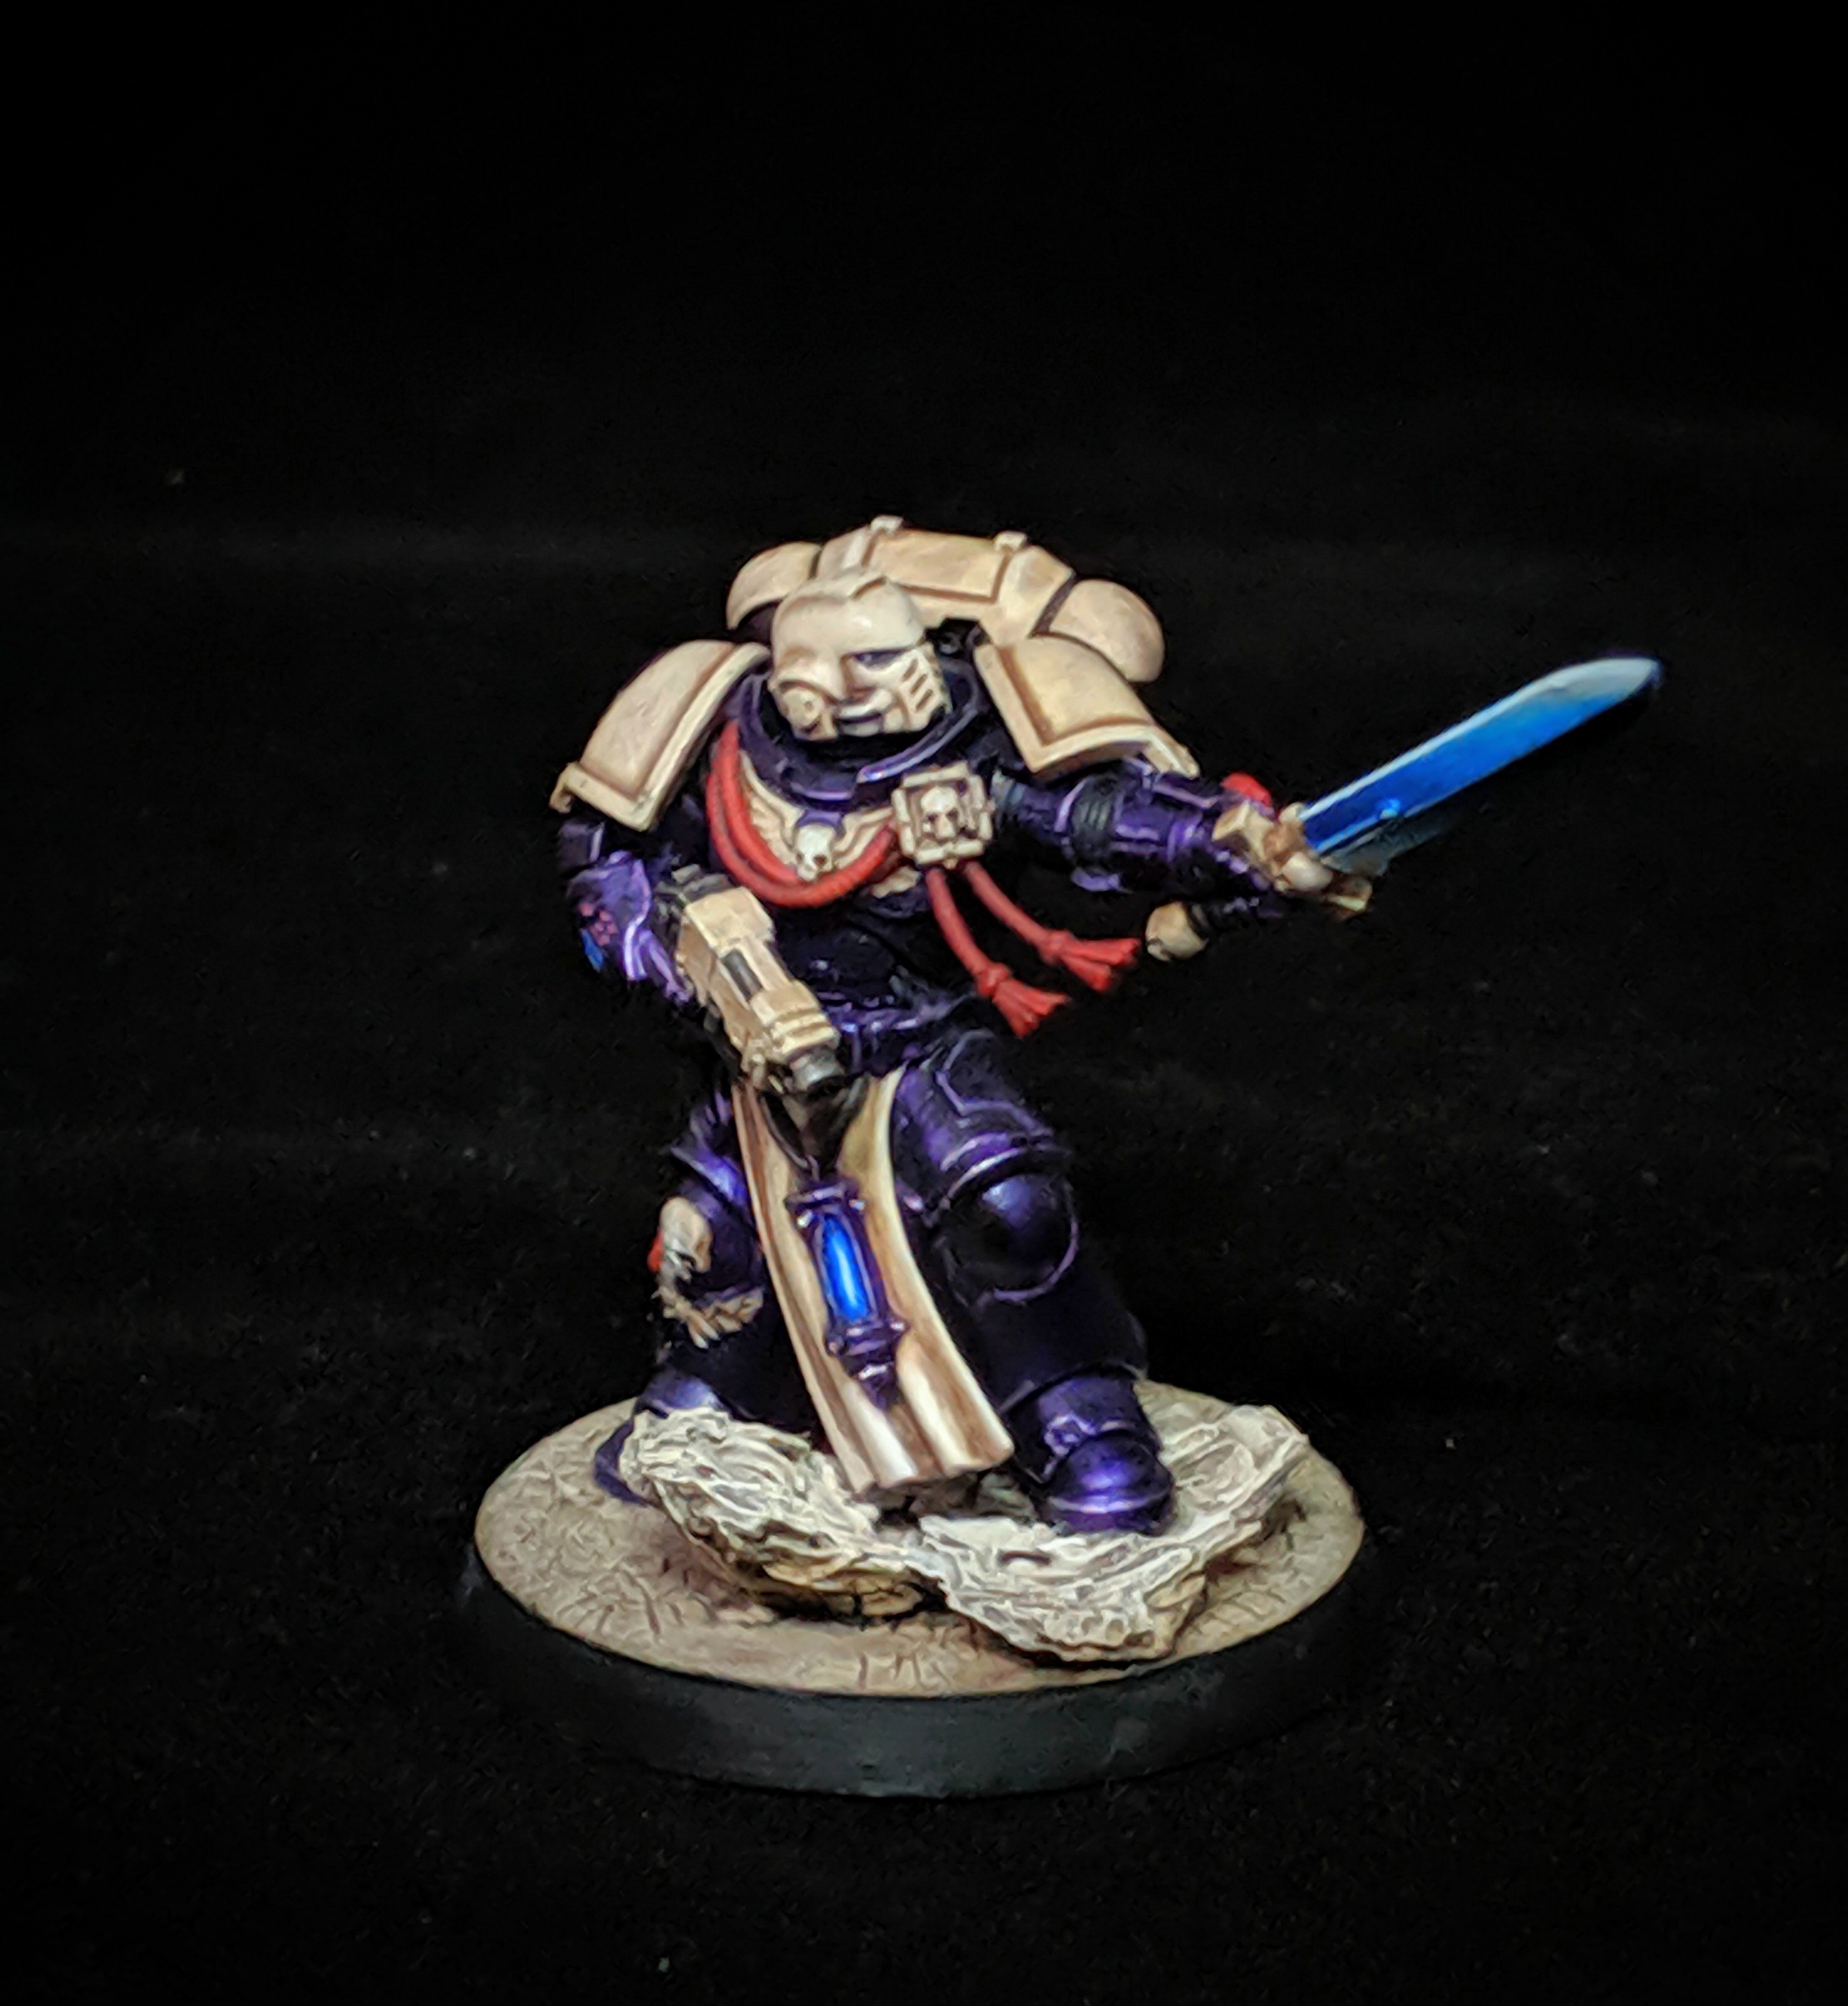
The Regal Skulls
By Kevin Genson
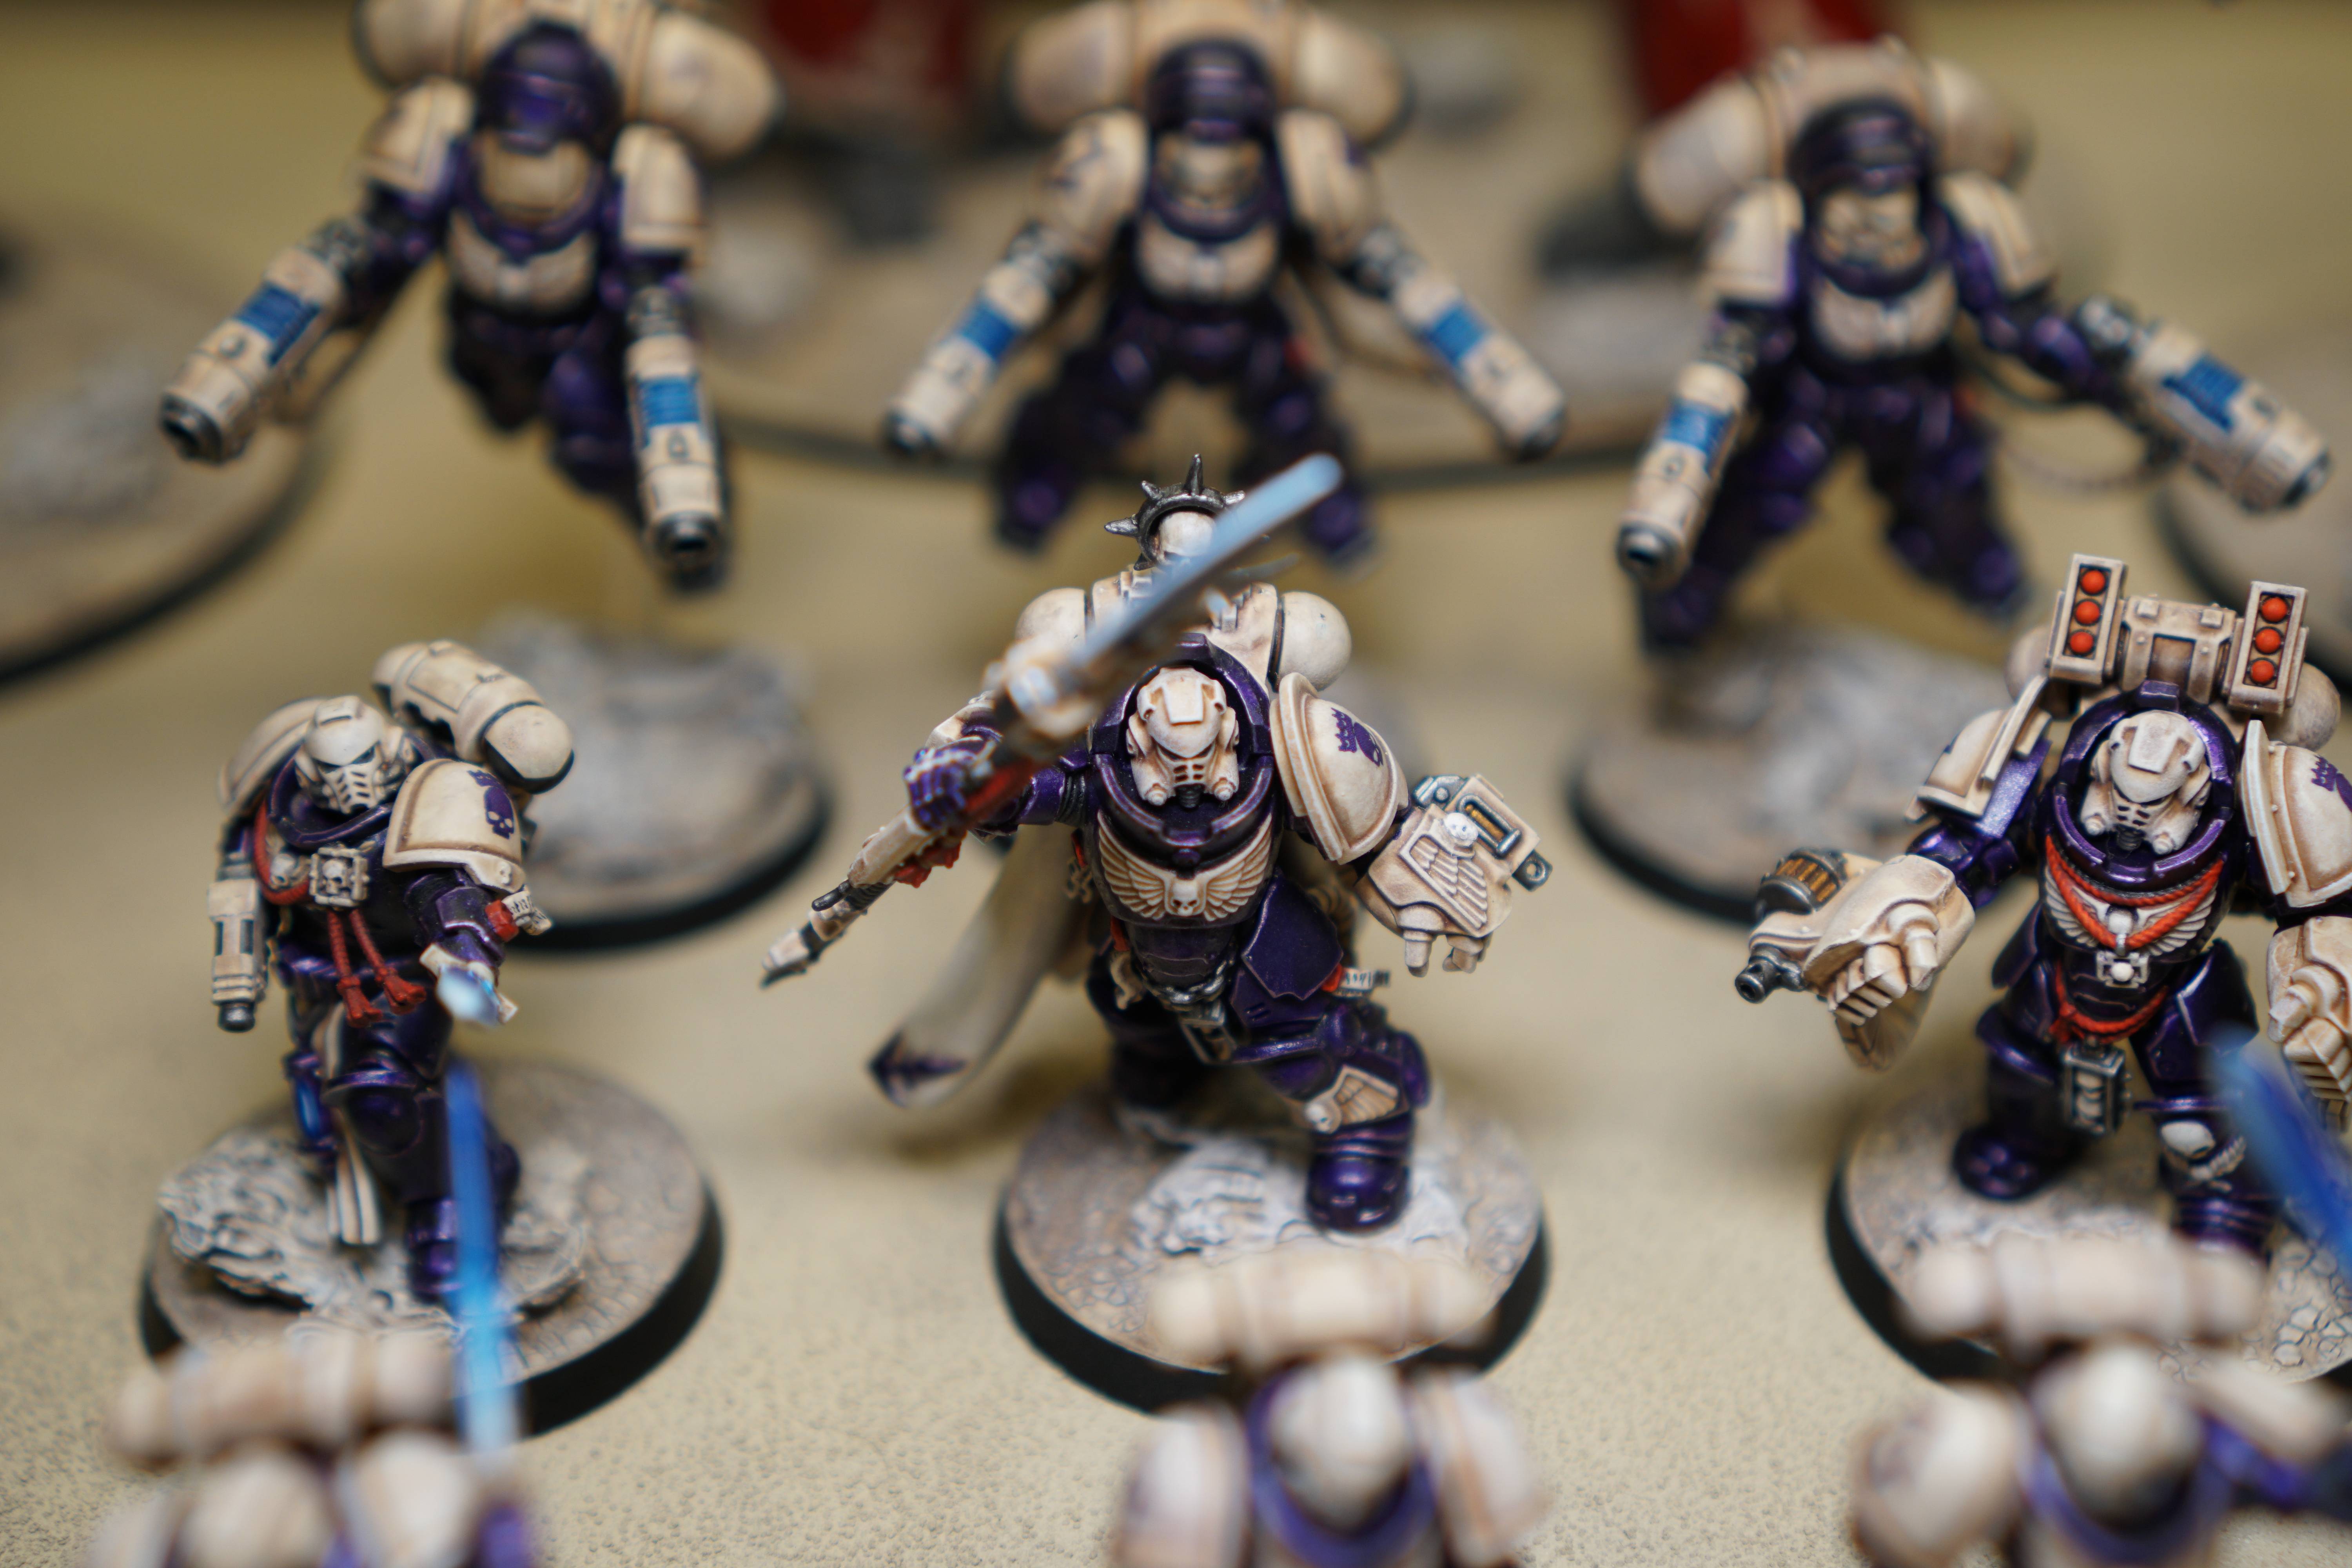
A few years ago on the SomethingAwful forum we conducted a “Chapter Challenge” where everyone received a name from a Space Marine Chapter Name Generator (http://www.bolterandchainsword.com/liber/CantinaChapterCreator.html) along with a color that they had to use. From there everyone had free reign to do whatever they wanted. I received the name “Regal Skulls” and the color purple. After a healthy amount of wasted productivity thought I came up with the color scheme below.
From there it was a question of translating the image to reality. I knew that I really wanted to experiment with both a variety of colors but also materials, so I decided to combine a metallic purple with a very pale bone. My painting style involves an extensive use of inks and washes to achieve depth, so this approach may not necessarily correlate to the “traditional” Games Workshop system. I encourage you to take what you can from this and make it your own.
How to Paint It
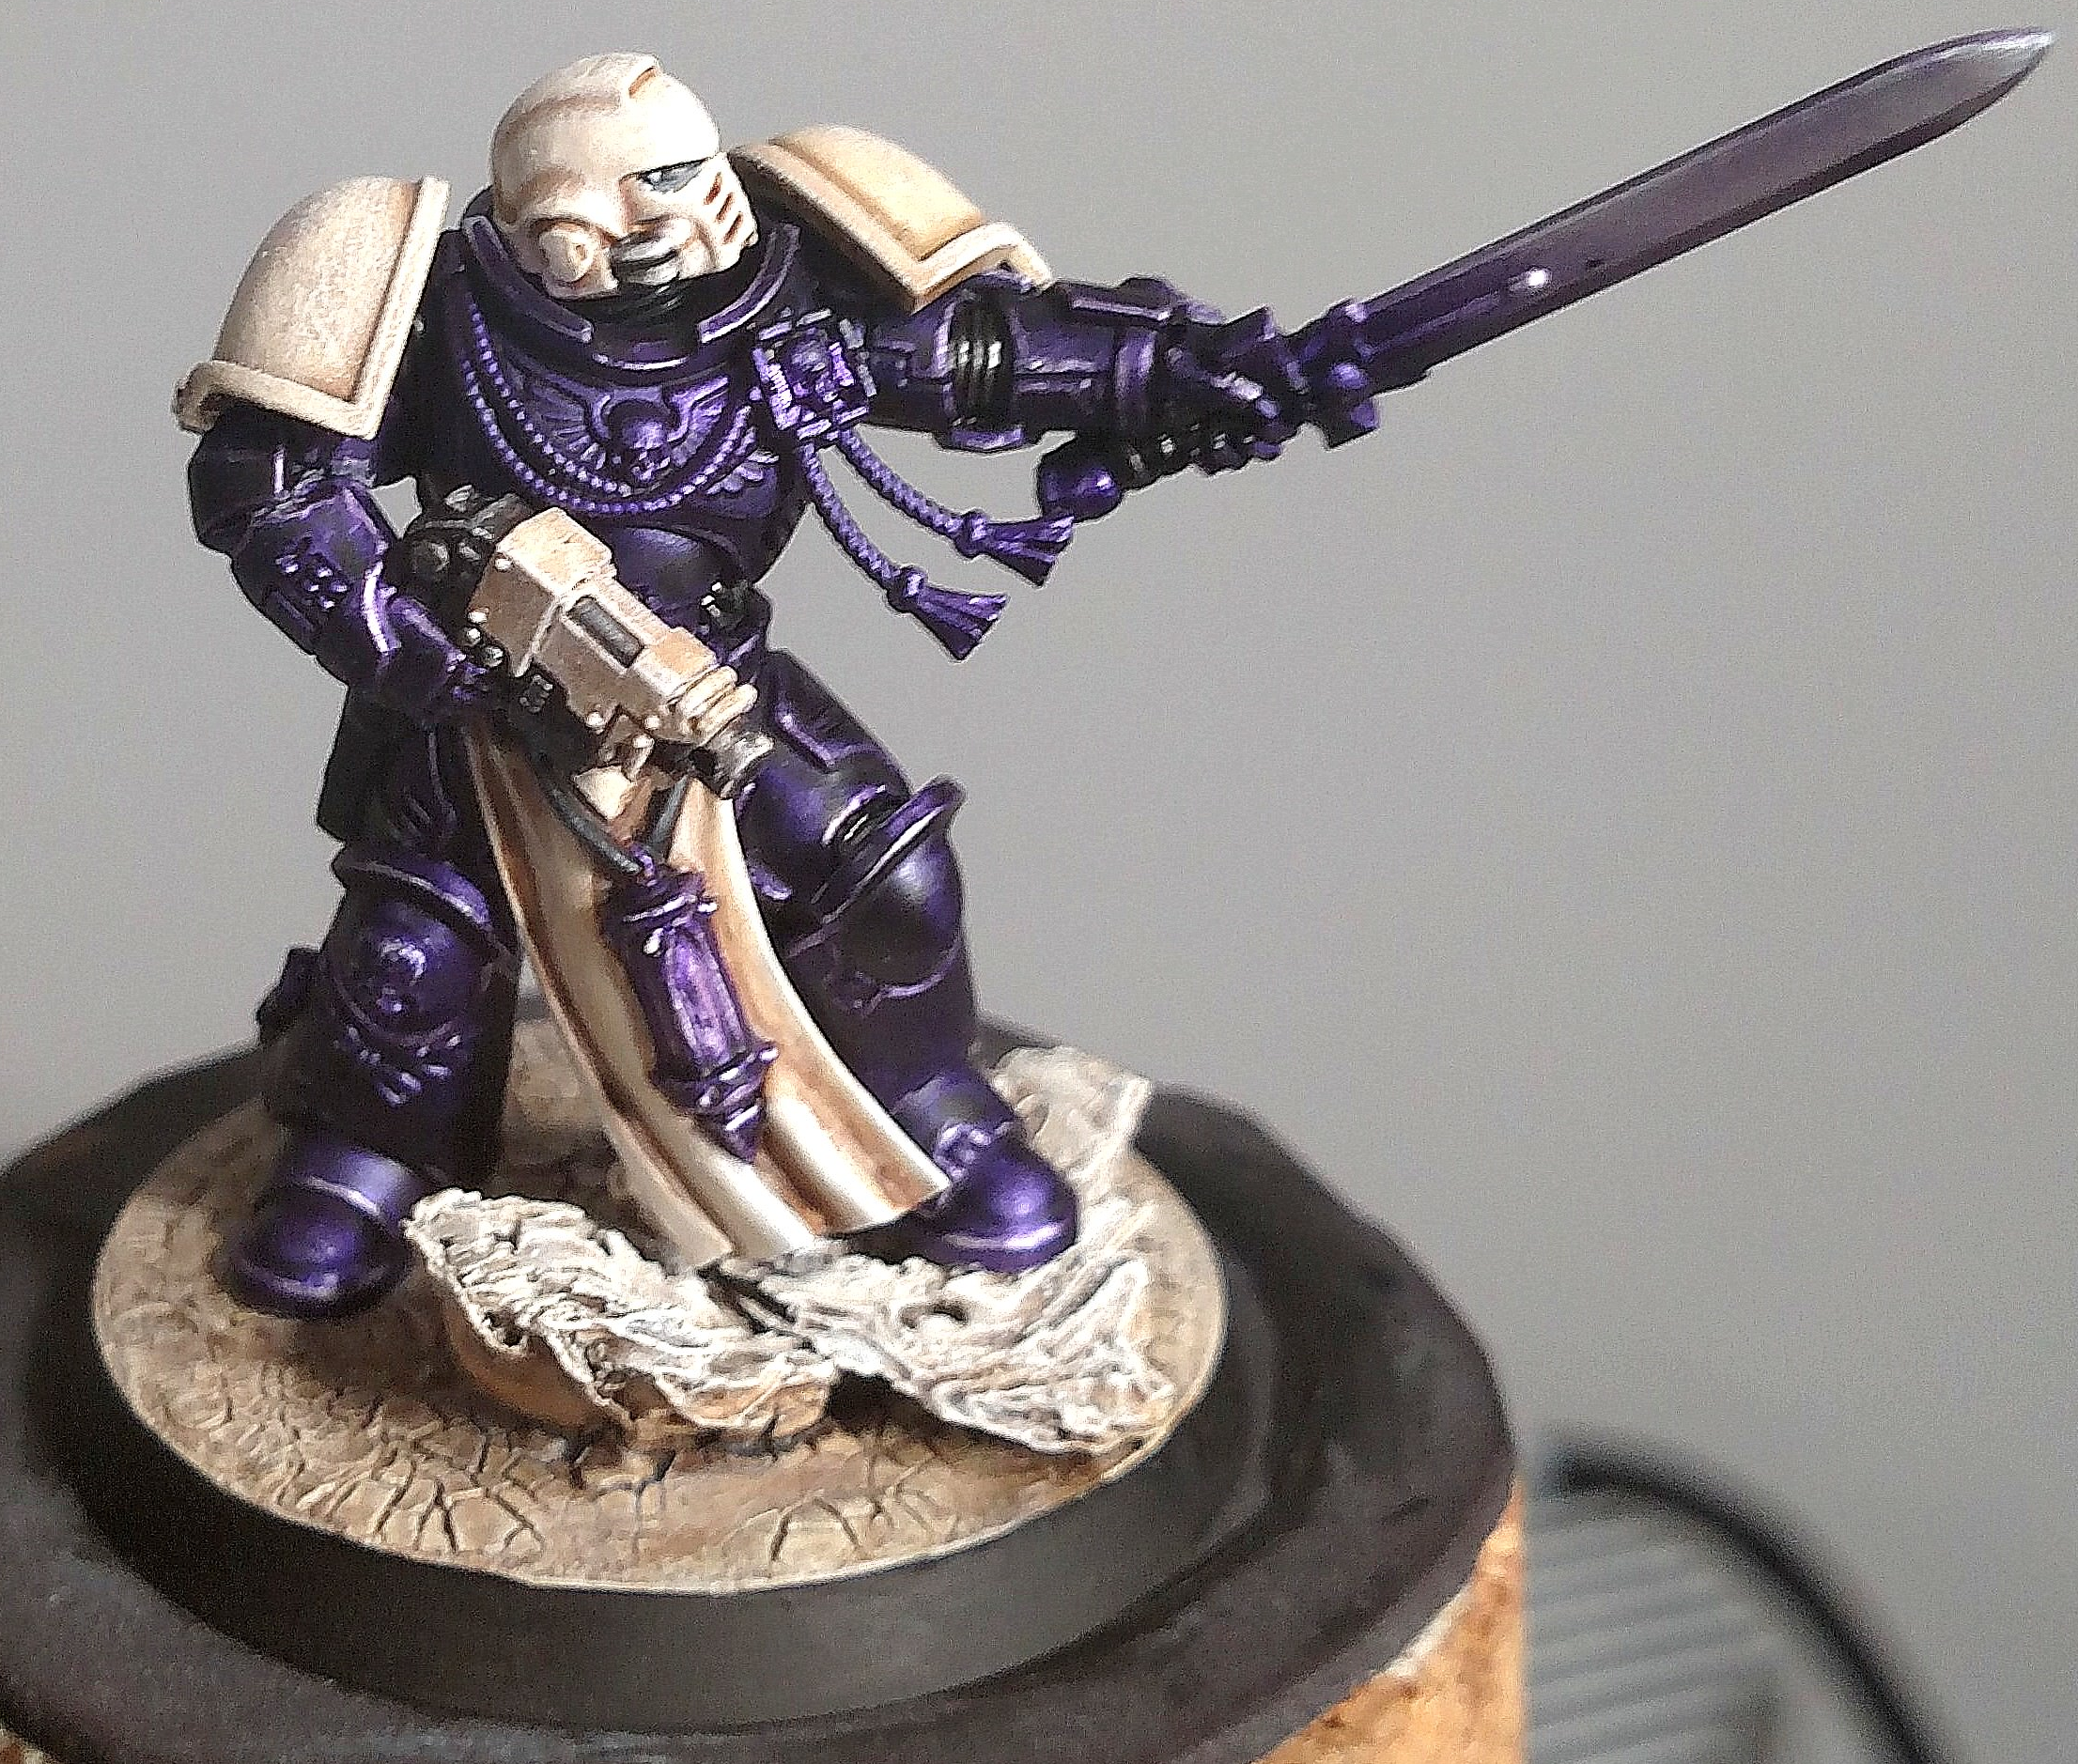
For priming I use an airbrush and I love Badger Stynylrez in gray for this purpose. It goes on very smoothly, has no issues with clogging the brush, and once cured serves as an excellent foundation. You’ll notice from the photos that I’m a big fan of subassemblies as they make it easier to paint and do batch processes.
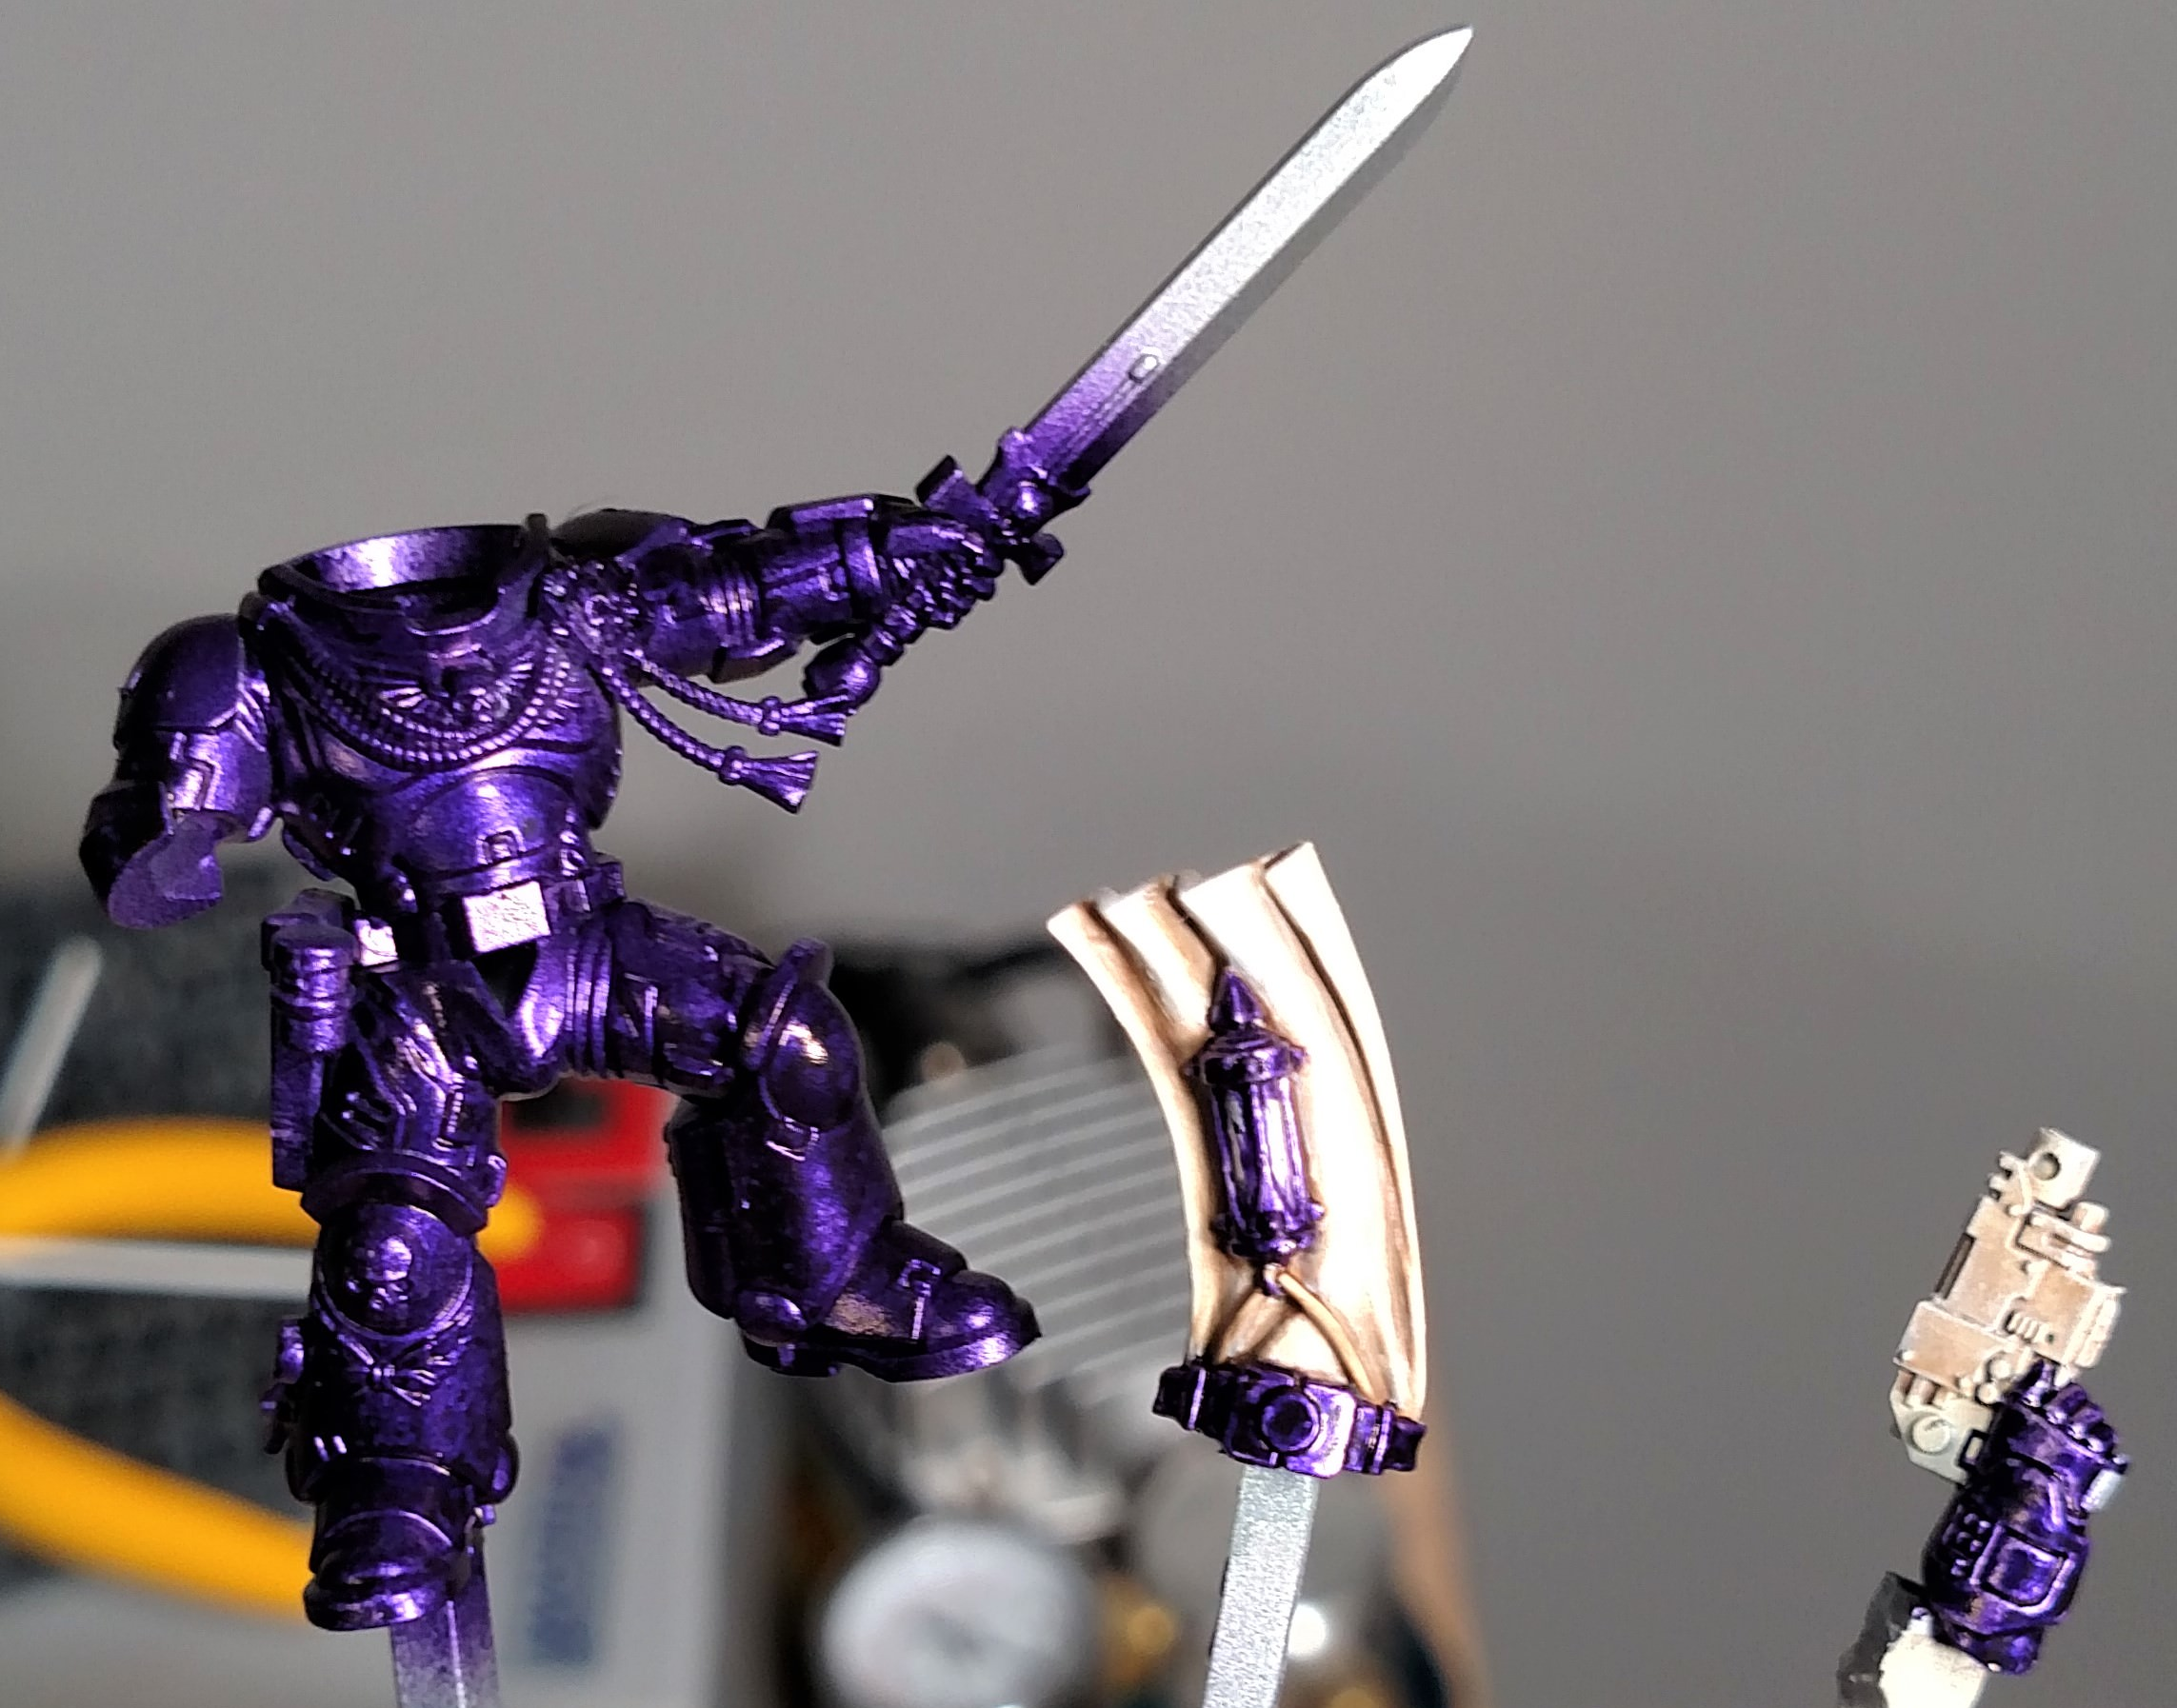
The two primary colors featured on the model are a very deep, rich purple and the ceramic bone color. They use very different techniques to achieve very different, yet complementary results.
Purple
The purple starts off as a 1:6 ratio of Vallejo Model Air Silver to Liquitex Dioxazine Purple acrylic ink, which in the US you can buy in various craft stores. I generally use airbrush paints because they come pre-thinned, which allows for a very nice consistency. In this case a single coat serves as the underlayment. The edges are then highlighted in a single pass of VMA Silver before two coats of Army Painter Purple Tone was is applied. Army Painter washes are fantastic; they provide an interesting balance of contrast and tinting which works very well for my application.
Bone
The bone starts as a base layer of Vallejo Game Air Bonewhite, which I generally airbrush to ensure an even coat. One recommendation; always thin your paints (even air paints) with Vallejo Flow Improver. The flow improver slows the drying process and minimizes the risk of your airbrush getting clogged. I use this both when airbrushing and doing brush work (with the exception of washes, glazes, and dry brushing). Once the base layer is applied I apply a wash of Army Painter Soft Tone, after which I dry brush the VGA Bonewhite. Drybrushing with an air paint is an interesting process; the thinned paint provides an interesting combination of tint and edge highlighting effect which adds a lot of depth to the model. After the Bonewhite pass I dry brush with Vallejo Model Color White (any white will likely do). Note that this is not with an air paint; I want this stage to primarily hit the edges and brighten the whole model. It’s possible to be too aggressive with this stage; if it gets too bright apply a thin layer of Bonewhite mixed with AP Soft Tone to bring it down.
The deepest recesses of bone (such as the eyes of the skulls and the vents in the helmet) are lined with Liquitex Transparent Burnt Umber acrylic ink. Less intense shadows such as the interior of the shoulder pad rim is pin washed with AP Soft Tone.
Base
As with the rest of the model I paint the base separately. After marking off the location of the model’s feet by cutting a cross-hatch pattern into the plastic, I placine broken bits of oyster shells in an interesting pattern. Oyster shells work great because they’re cheap (I got mine for free), and they have a lot of really interesting features and detail that translate well to the scale of the model. Once the base is secured using Gorilla Glue Super Glue Gel and green stuff where needed, I apply a layer of Citadel Agrellan Earth to obtain the cracked earth appearance. I should note that Citadel Agrellan Earth is not required; any crackle paint will suffice. The base is then airbrushed with VGA Bonewhite, washed with AP Strong Tone, and then drybrushed with VGA Bonewhite and VMC White. I apply a heavier drybrush of white to the oyster shell pieces so that they stand out more.
Detailed Brushwork
The rubber pieces such as the leg joint are base coated with VMC Dark Grey and then covered in a layer of Liquitex Carbon Black acrylic ink. That’s it. The ink provides a very, very intense shade to whatever it touches and should be used carefully.
Metal is done with a base of VMA Gunmetal, edge highlighted in VMA Silver, and then washed with AP Dark Tone. Any deep recesses like the barrel are touched with Liquitex Carbon Black.
The tabard is brused using the same colors as the ceramic bone pieces but with care taken to ensure an even blend. This is where multiple layers thinned down with Vallejo Flow Improver work so well. I even thin down the AP Soft Tone where needed. It takes time but the end result is very satisfying. I use the same approach on purity seals as well.
The leather is a base of VMC Dark Grey edge highlighted in VMC Basalt Grey and then washed in AP Dark Tone. I find that washing after edge highlighting does a wonderful job of smoothing out the lines and works well on a variety of applications.
Lenses are done in a fairly simple gem pattern with a black base and a few passes of VMC Dark Grey and VMC Basalt Grey with a white dot in the upper corner. For most models I tend to only use a single pass of VMC Basalt Gray since it’s such a small detail, but washing in AP Dark Tone before you apply the white dot can also be helpful.
The red is a base of VMC Vermillion washed in Liquitex Pyrrole Red followed up with a wash of AP Red Tone. This also works well on purity seals.
The glowing blue effect from the power swords and lantern is achieved by starting with a base of white, and then steadily blending successive layers of Liquitex Phthalocyanine Blue (Green Shade) acrylic ink mixed with white and Vallejo Flow Improver. Because the ink and flow improver container drying retardants a really nice blending effect can be achieved. Be very careful once you’re satisfied with the end result; it will take a long time to dry and is very fragile in the interim.
The decals were custom made using a color laser printer onto decal paper. To ensure a high quality result I painted a layer of gloss varnish on the model and then used Microscale Industries Micro Set. After the decal was adhered I applied Micro Sol to soften the decals and provide a tight fit to the curves of the model. This is particularly challenging on the shoulder pads. If necessary consider cutting the edges of the decal to provide some relief.
Once the model was complete I varnished using my airbrush. I first apply a layer of Vallejo Mecha Air matte coating (thinned with water if needed), and then brushed on a 50/50 mixture of Liquitex Satin and Gloss varnish to the purple areas. This significantly adds to the depth of the metal pieces and serves to differentiate them from the dry, ceramic bone components even more.
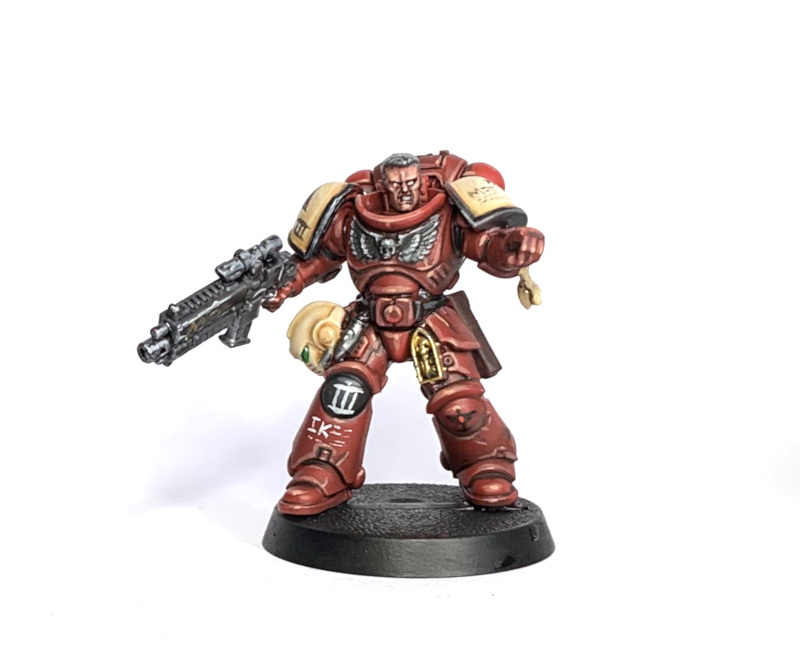
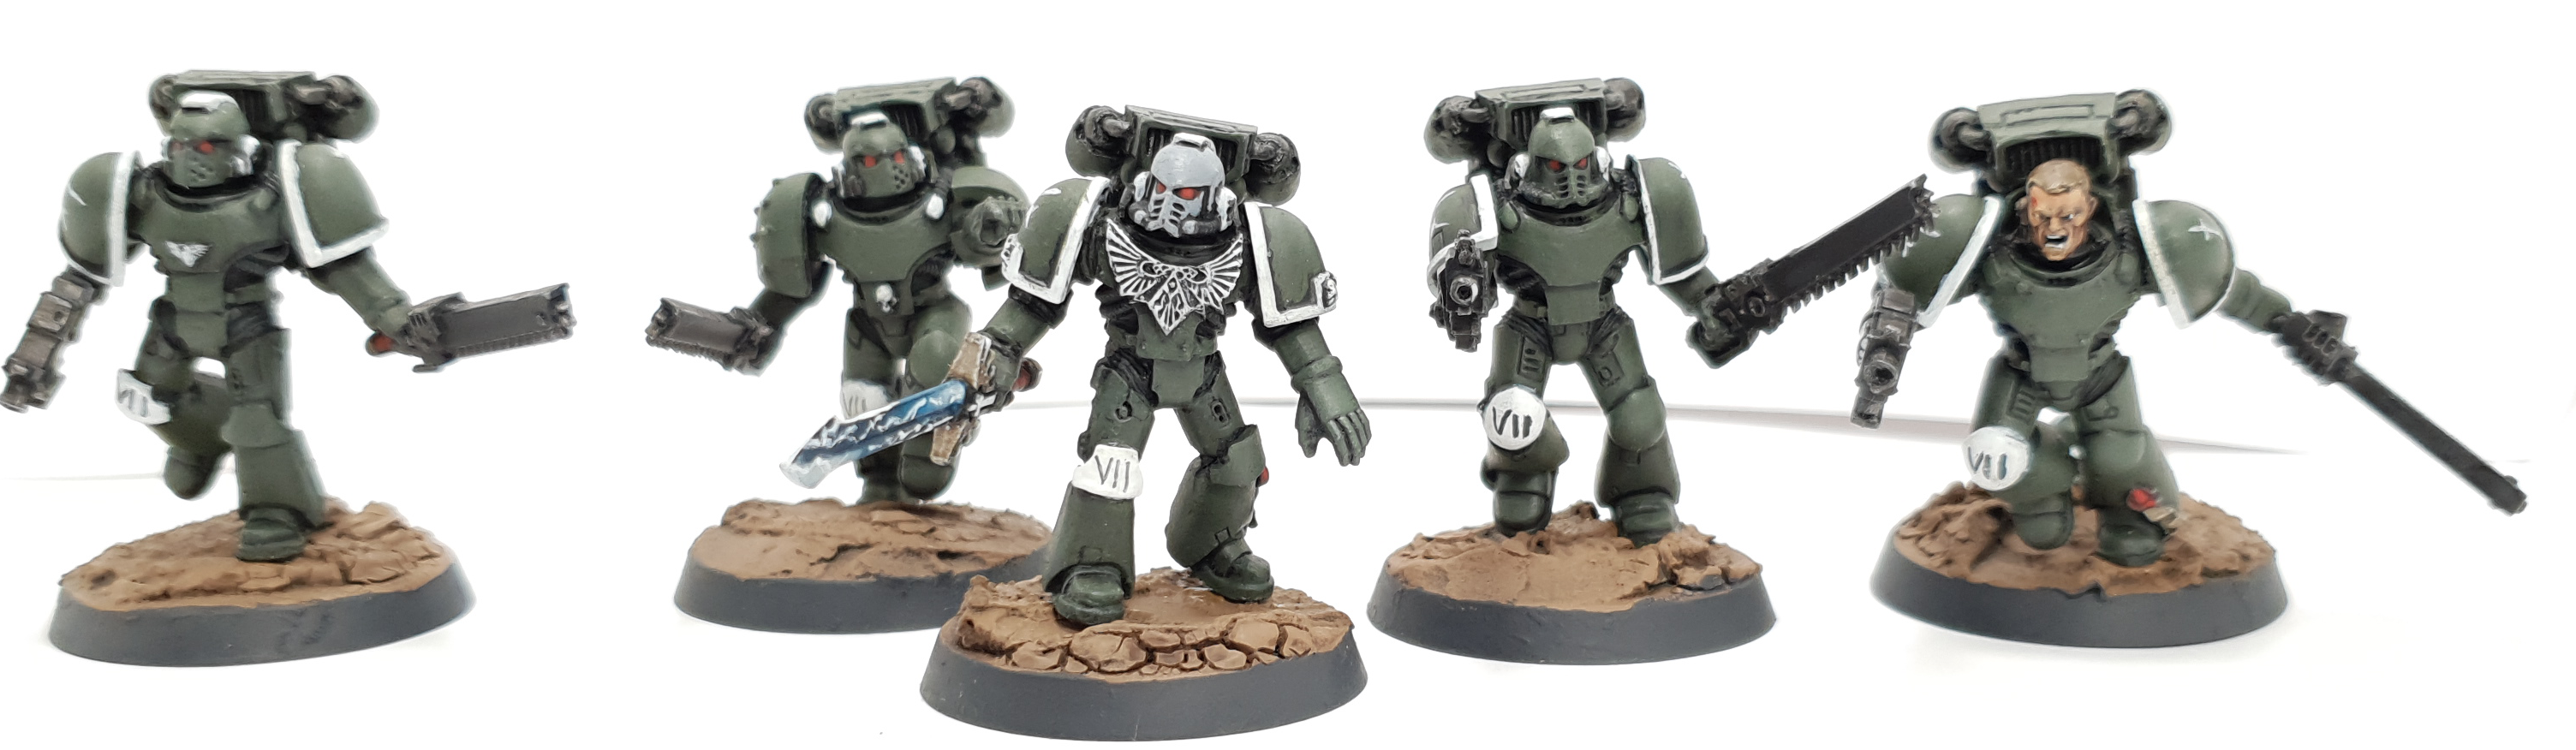
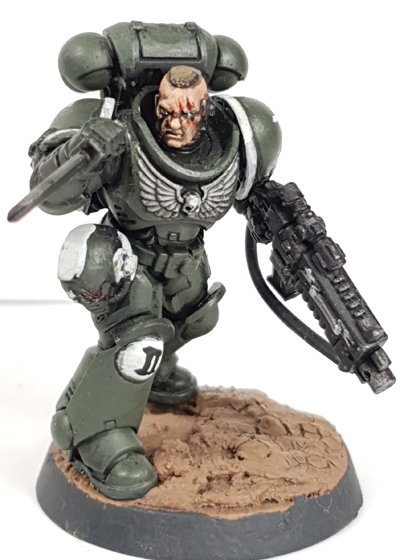
Swords Of Davion
Tyler “Coda” Moore

Ah, my beautiful, reckless, sword obsessed jumpy bois. Long may they jump into close combat with things they shouldn’t.
Before the great rift opened, the Swords of Davion were a young, brutalized, but recovering chapter tasked with defending an area of space known as “The Imperial Davonic Republics”, a hard to access area of the Eastern Fringe. Recently armed with a treasure trove of Heresy era kit thanks to a ‘lucky’ find, the chapter was on the upswing, scoring a string of successful crusades against the forces of Chaos and the xenos threats in the sector.
The events of the 13th Black Crusade changed this.
Instead of wrapping up their mission to secure their home and crusade onwards, the Swords find themselves with a sector besieged and attacked from within. Faced with an impossible choice, they have evacuated as many souls as they could from the planets lost to the great enemy, fighting a long and hard battle to the true Imperium.
As such, Chapter Master Tiberius Rex finds his troops spread thin fighting to save the Davionic Refugee convoys, battles to win favour from the Imperium and endures the insane combination of an unrelenting defensive action/ insurgency in the Davonic Republics themselves.
Time will tell if these brave swordsmen have the skills and endurance to not only liberate their worlds but secure the help they need from the Imperium to achieve the impossible.
How To Paint It
“They will appear to desire only to take the heads of the most powerful of the foes arrayed against them. Ignore this. It’s a lie.
They want you to underestimate them.
They want nothing more than to lure you into a trap of your own hubris.
They will attack you head on, seemingly throwing reason and tactics to the wind. Seeking a doomed duel to the death…. all the while driving a knife in the dark towards your kidneys.
That is what it is to fight the Swords.” – ++<<REDACTED>>++
Paints Required:
Vallejo Model Colour Black – Undercoat touch ups
Vallejo Model Colour Black Grey – Gun casing, tubing and soft armour/undersuit details
Vallejo Model Colour Yellow Olive – Our base paint. It’s as lovely green.
Vallejo Model Colour Iraqi Sand – To mix into our base paint for highlights/drybrushing
Citadel Celestra Grey
Citadel Ulthuan Grey
Citadel White Scar – These form the base of our white paints
Citadel Leadbelcher – Metals
Vallejo Model Colour Carmine Red
Vallejo Model Colour Dark Vermillion
Vallejo Model Colour Vermillion – Anything red
Citadel Troll Slayer Orange – Mix with VMC Vermillion for our final eye lense highlight
Army Painter Dark Tone – Black ink. Nuln Oil can substitute. You will need a lot of this.
Army Painter Strong Tone – Brown ink. Agrax can substitute. Mainly for purity seals and the like.
This army is really easy to paint and is designed to hit the table quickly with minimal effort while still looking rad.
Step One: Undercoat Matte Black

Grab your fave spray can and go to town. We need really good coverage here to get this scheme to work so don’t be afraid to touch up your spray job with VMC black.
Step Two: Basecoat that green!
Apply one thin coat of VMC Yellow Olive. Yes. Just one. It’s a good idea trust me. You’ll be fine. Leave the black showing though on the panel lines, under the chest armour segments and near the shoulder pad trim.
Step Three: Basecoat white and all the other colours
After the green is done, lay down a thin coat of Celestra Grey on the trim and the fabric part of the purity seals. Again, just one thin coat here.
After this:
Drybrush your metals Leadbleacher
Reds are VMC Carmine Red
Boltgun, chainsword casings, undersuit details and helm tubing get a snappy coat of VMC Black Grey
With this done, allow all those colours to dry. Seriously. Let them. They will need to.
Step Four: Drown the model in ink
See that Army Painter Dark Tone? Slap that on everywhere. Be liberal with it. See the photo for what I’m talking about.
Drown that model in inky blackness.
Could you speed it up by targeting the wash?
Maybe.
But who has time for that really?
Step One: Oh god there is too much black ink, send help. 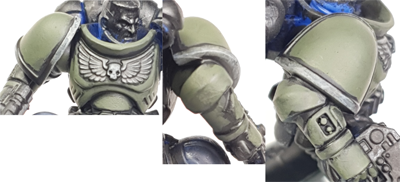
Repaint in the yellow olive with a thin coat. Don’t repaint everything, preserve the shading from the dunking of Nuln Oil. Then do a second thin coat but cover even less area.
Step One: Clean it and send it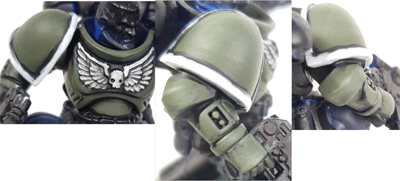
Grab your pot of Ulthuan Grey and do two thin layers on the trim, then drybrush the eagle feathers, and layer it on the eagle ‘bone and SKULL. Then do the top bit of the bends, most of the eagle bone and highlight the SKULL with white scar.
Now go back to the reds, and highlight with VMC Dark Vermillion, highlight that with VMC Vermillion. For the eyes, do a futher highlight with a smigon (like 10~15% vol) of troll slayer orange mixed in.
After that, do a roughly 90:10 VMC Yellow Olive:Iraqi Sand drybrush of the green, then a second drybrush/minor edgehighlight of Yellow Olive/Iraqi Sand.
At this point the Sword of Davion is battle ready and good to charge into something he definitely shouldn’t. If you want to take it further, add in more Iraqi Sand to the mix to do some edge highlights.
Ot Neba
Eifert Posting
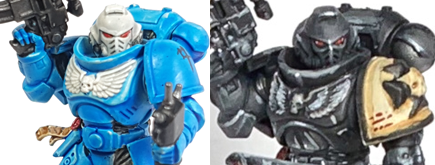
Back in 2007 or so I was looking to finally accomplish my long-standing goal of actually finishing a fully painted army. Since I was about 12 or so (~1998) I had bought at least one unit of almost every army. I had about 800 points of Tau that were painted to a tabletop standard but was looking for something else as I didn’t like the scheme. After a lot of waffling I went for Marines as I liked their tanks the best. I decided to launch from this old picture from a previous edition’s codex:
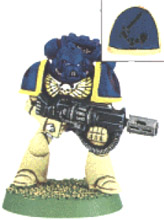
At the time I was studying Russian in college and wanted to come up with something slightly different. I named the Chapter “Ot Neba” (From Space) and came up with the lore that they were a secretive fleet-based chapter who communicated through a long-dead language. I have done a lot more with the personal fluff of the Chapter, but that’s the sum of it. I experimented with several test models and quickly latched on to P3’s Jack Bone and Trollblood as warmer and more interesting colors than whatever that is in the above photo.
Painting Ot Neba Marines
Eventually, over painting off and on again for a decade plus, I settled in on a painting scheme and (more importantly, in my opinion) a style of using it that was meant to be more impressionistic or illustrative rather than gritty or realistic looking. I have already done a pretty comprehensive tutorial for Goonhammer, So instead of rehashing that have some photos:
Note: Nova attendees, I will be at the Narrative with a bunch of pauldrons painted in my scheme for Deathwatch folks. If you run Deathwatch and would like to field one of my boys seek me out.


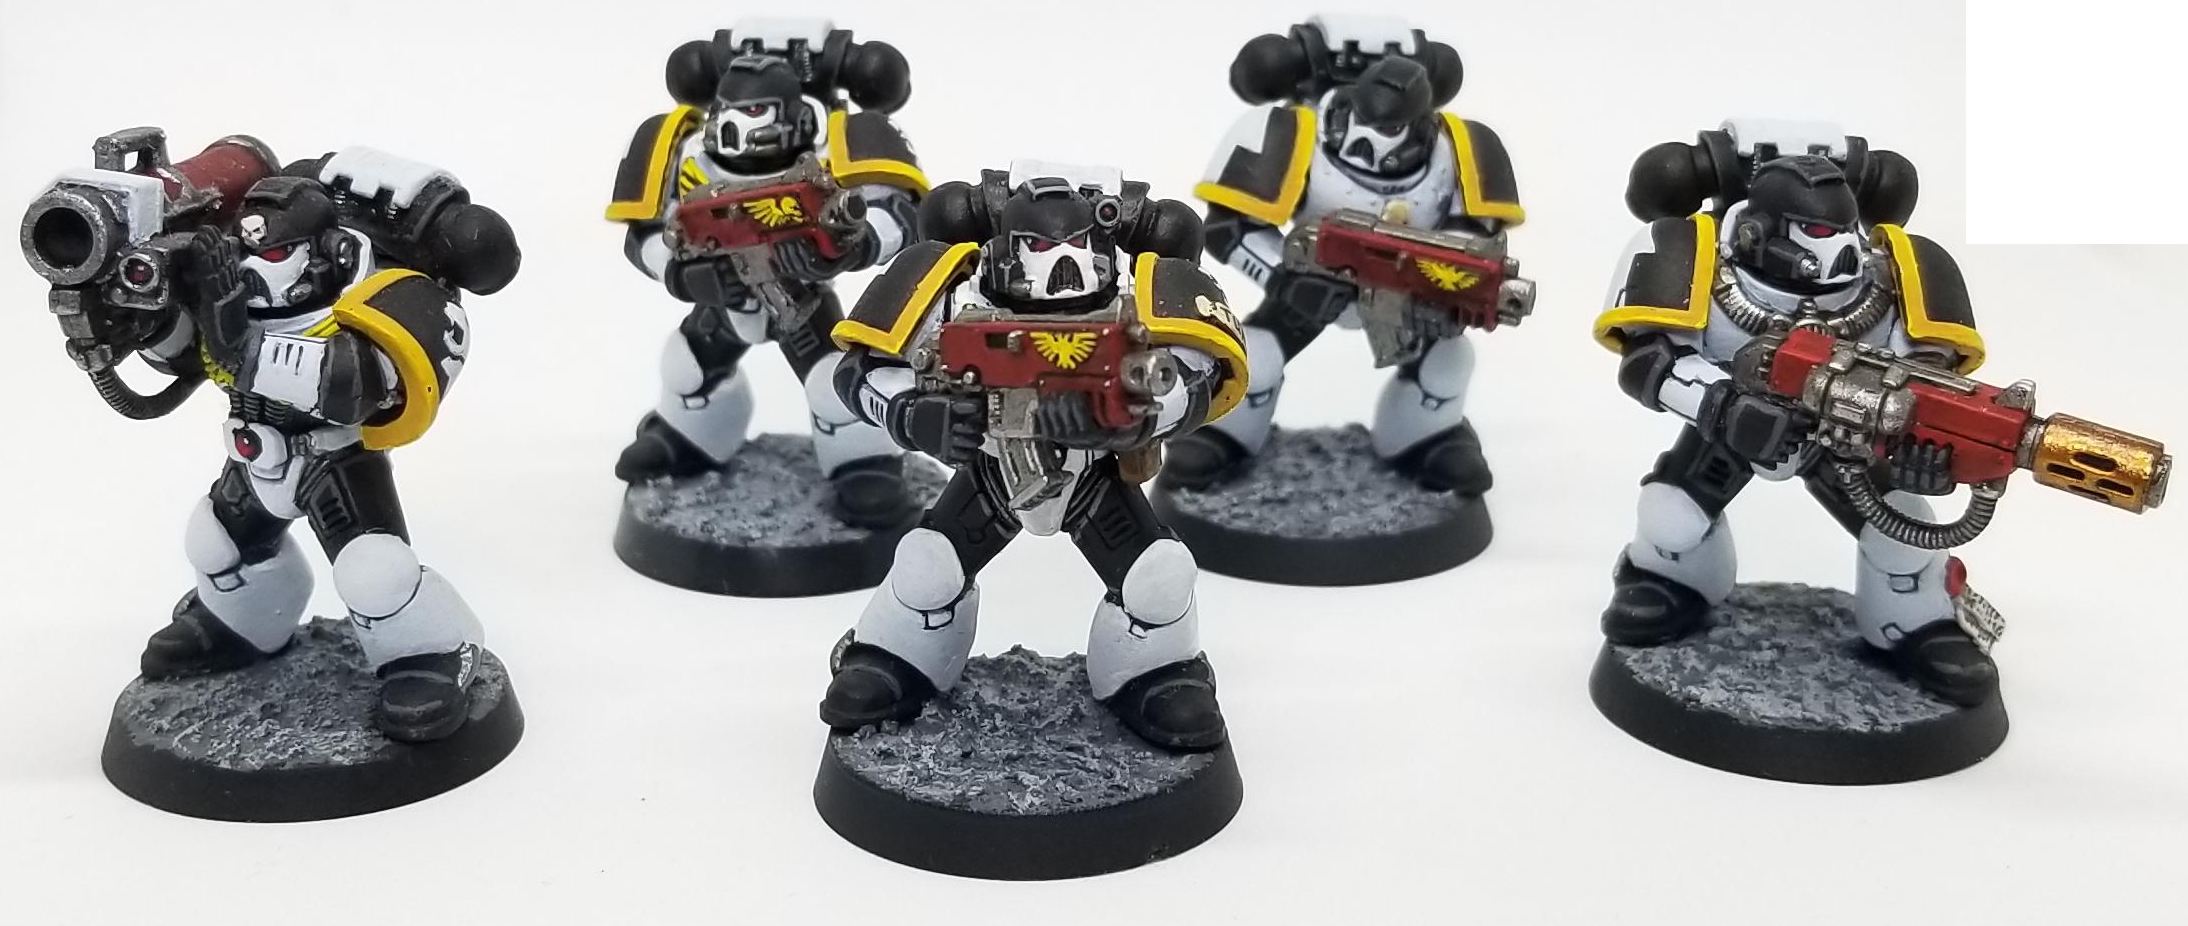
Blood Ravens
By RichyP
A few weeks prior to painting this model I did another Blood Raven using traditional paints. While quick at 90 minutes from start to finish, I figured it could be done faster with red primer and Contrast paints. You’ll see the old guy in some of the step by step shots as I used him as a benchmark. About 8 years earlier I did some even older Blood Ravens, these guys:
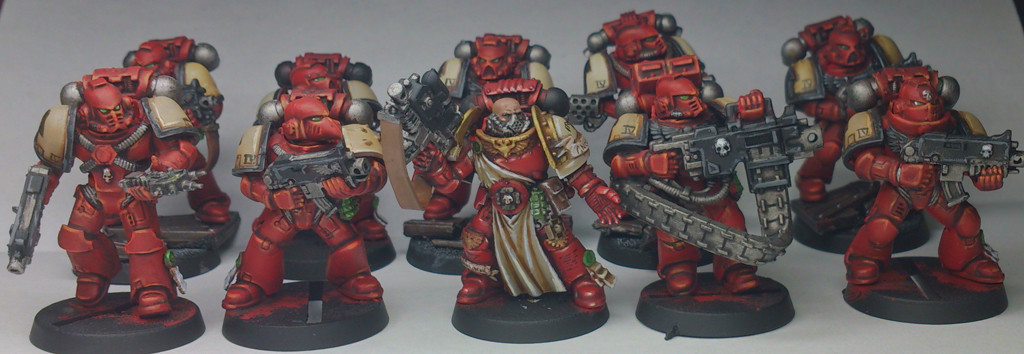 I miss those guys… Anyway on to the Contrast version.
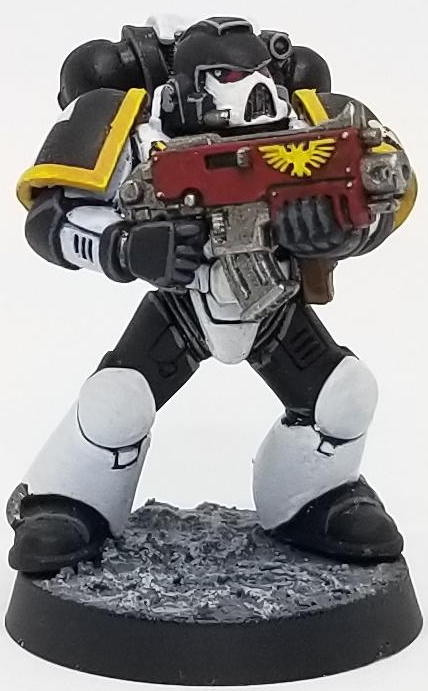
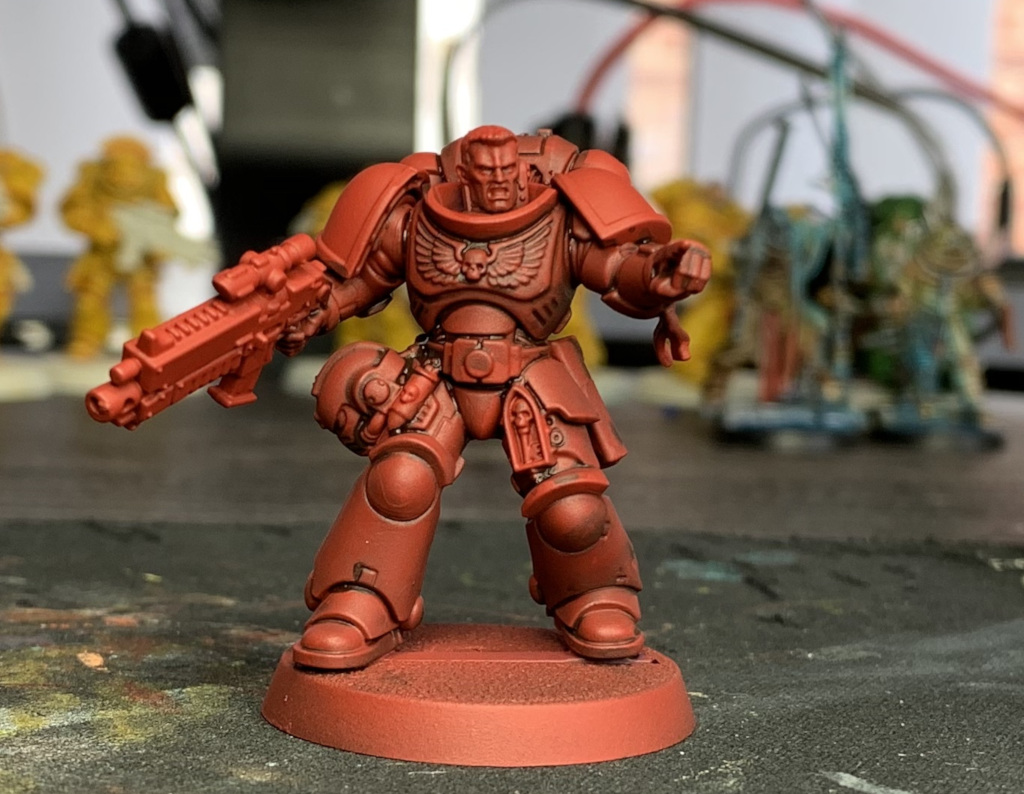
Step 0
I didn’t get a shot of this step, but it’s a Primaris Sergeant primed in Mephiston Red Spray.
Step 1
Mix up Wyldwood Contrast with Contrast Medium about 1:2 (1 part paint to 2 parts medium) and cover the entire model
 Step 2
Apply the same mix to the recesses and face, highlight sharper edges with Tallarn Flesh
Step 3
Apply Cadian Fleshtone to the insides of the previous highlights and over the face (leaving a bit of the red/brown contrast mix in the edges.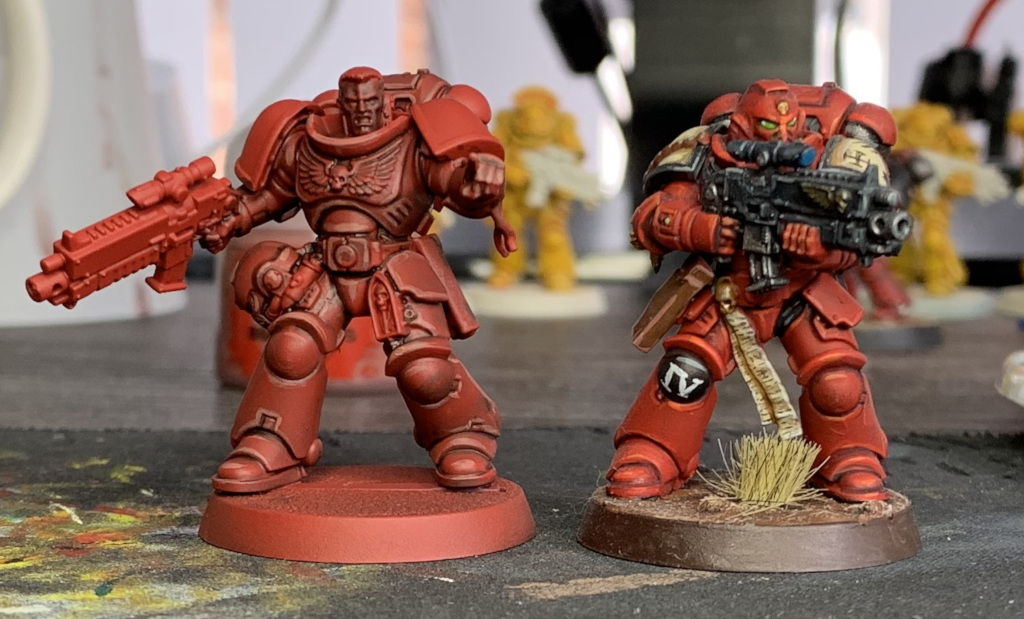 Step 4
Paint Wraithbone on the shoulderpads and the sergeant’s helmet (I dotted the eyes with it too), and Dawnstone (of War) to the shoulder pad rims and an areas that will be black i.e. hair, gun, chest Aquila and knee pad. Highlight the face (cheeks, ridges, chin, nose and under eyes) with Kislev Flesh.

 Step 5
Mix Abaddon Black and Contrast Medium (1:1) and paint it over the grey areas, in the case of the shoulder pad rims, use a line of neat Abaddon Black in the centre leaving the grey lines on the edges. After this has dried, do an edge of Dawnstone and then Ulthuan on the black areas to make the black pop (I didn’t photo the steps between the black and this stage but trust me it works). Paint Skeleton Horde over the bone areas.
 Step 7
Paint on markings using white on the black and red areas, and black on the bone coloured areas. For the eye lenses use Warp Lightning Green, then add a dot of white to the back of them. Add a bit of Wraithbone to the teeth, then apply a tiny bit of Drakenhof Nightshade to both the teeth and the eye sockets. Then stop the clocks you’ve probably beaten the 90min version.