
In our How to Paint Everything series, we take a look at different armies of the Warhammer universe, examine their history and heraldry, and look at several different methods for painting them. The Emperor’s Spears – from Aaron Dembski Bowden’s wonderful book, Spear of the Emperor – are one of our favorite marine chapters.
Created during the 25th Founding, the Emperor’s Spears make their home on the ocean world of Nemeton, and were one of three chapters – along with the Celestial Lions and the Star Scorpions – sent to defend the region of the galaxy known as Elara’s Veil. Although an Ultramarines successor chapter the Spears share very little in common with their parent chapter, with a highly triablistic culture and an emphasis on melee combat and drop strikes.
The Emperor’s Spears have a reputation for being hot-headed and difficult to work with and fiercely independent, almost to the point of unreliability. They’ve been chastised on multiple occasions for not coordinating with other Imperial forces during key campaigns and have clashed with loyalist space marines on more than one occasion. In particular, they clashed with the Aurora Chapter (another Ultramarines successor) over the Eukari Resurrection and who would get credit for winning the campaign after a series of what may be the pettiest set of actions form a space marine chapter I’ve ever read. This led to them being rebuked by the Ultramarines, and they’ve been mad about it ever since.
Where to Read More
Pick up Spear of the Emperor by Aaron Dembski-Bowden. It’s the novel for reading about the Spears and it’s pretty great. You can check out our review of it here.
Covered in this Article
- The Heraldry of the Emperor’s Spears – how they’re organized and how they separate themselves as a chapter.
- How to paint Emperor’s Spears marines, with multiple methods from different artists.

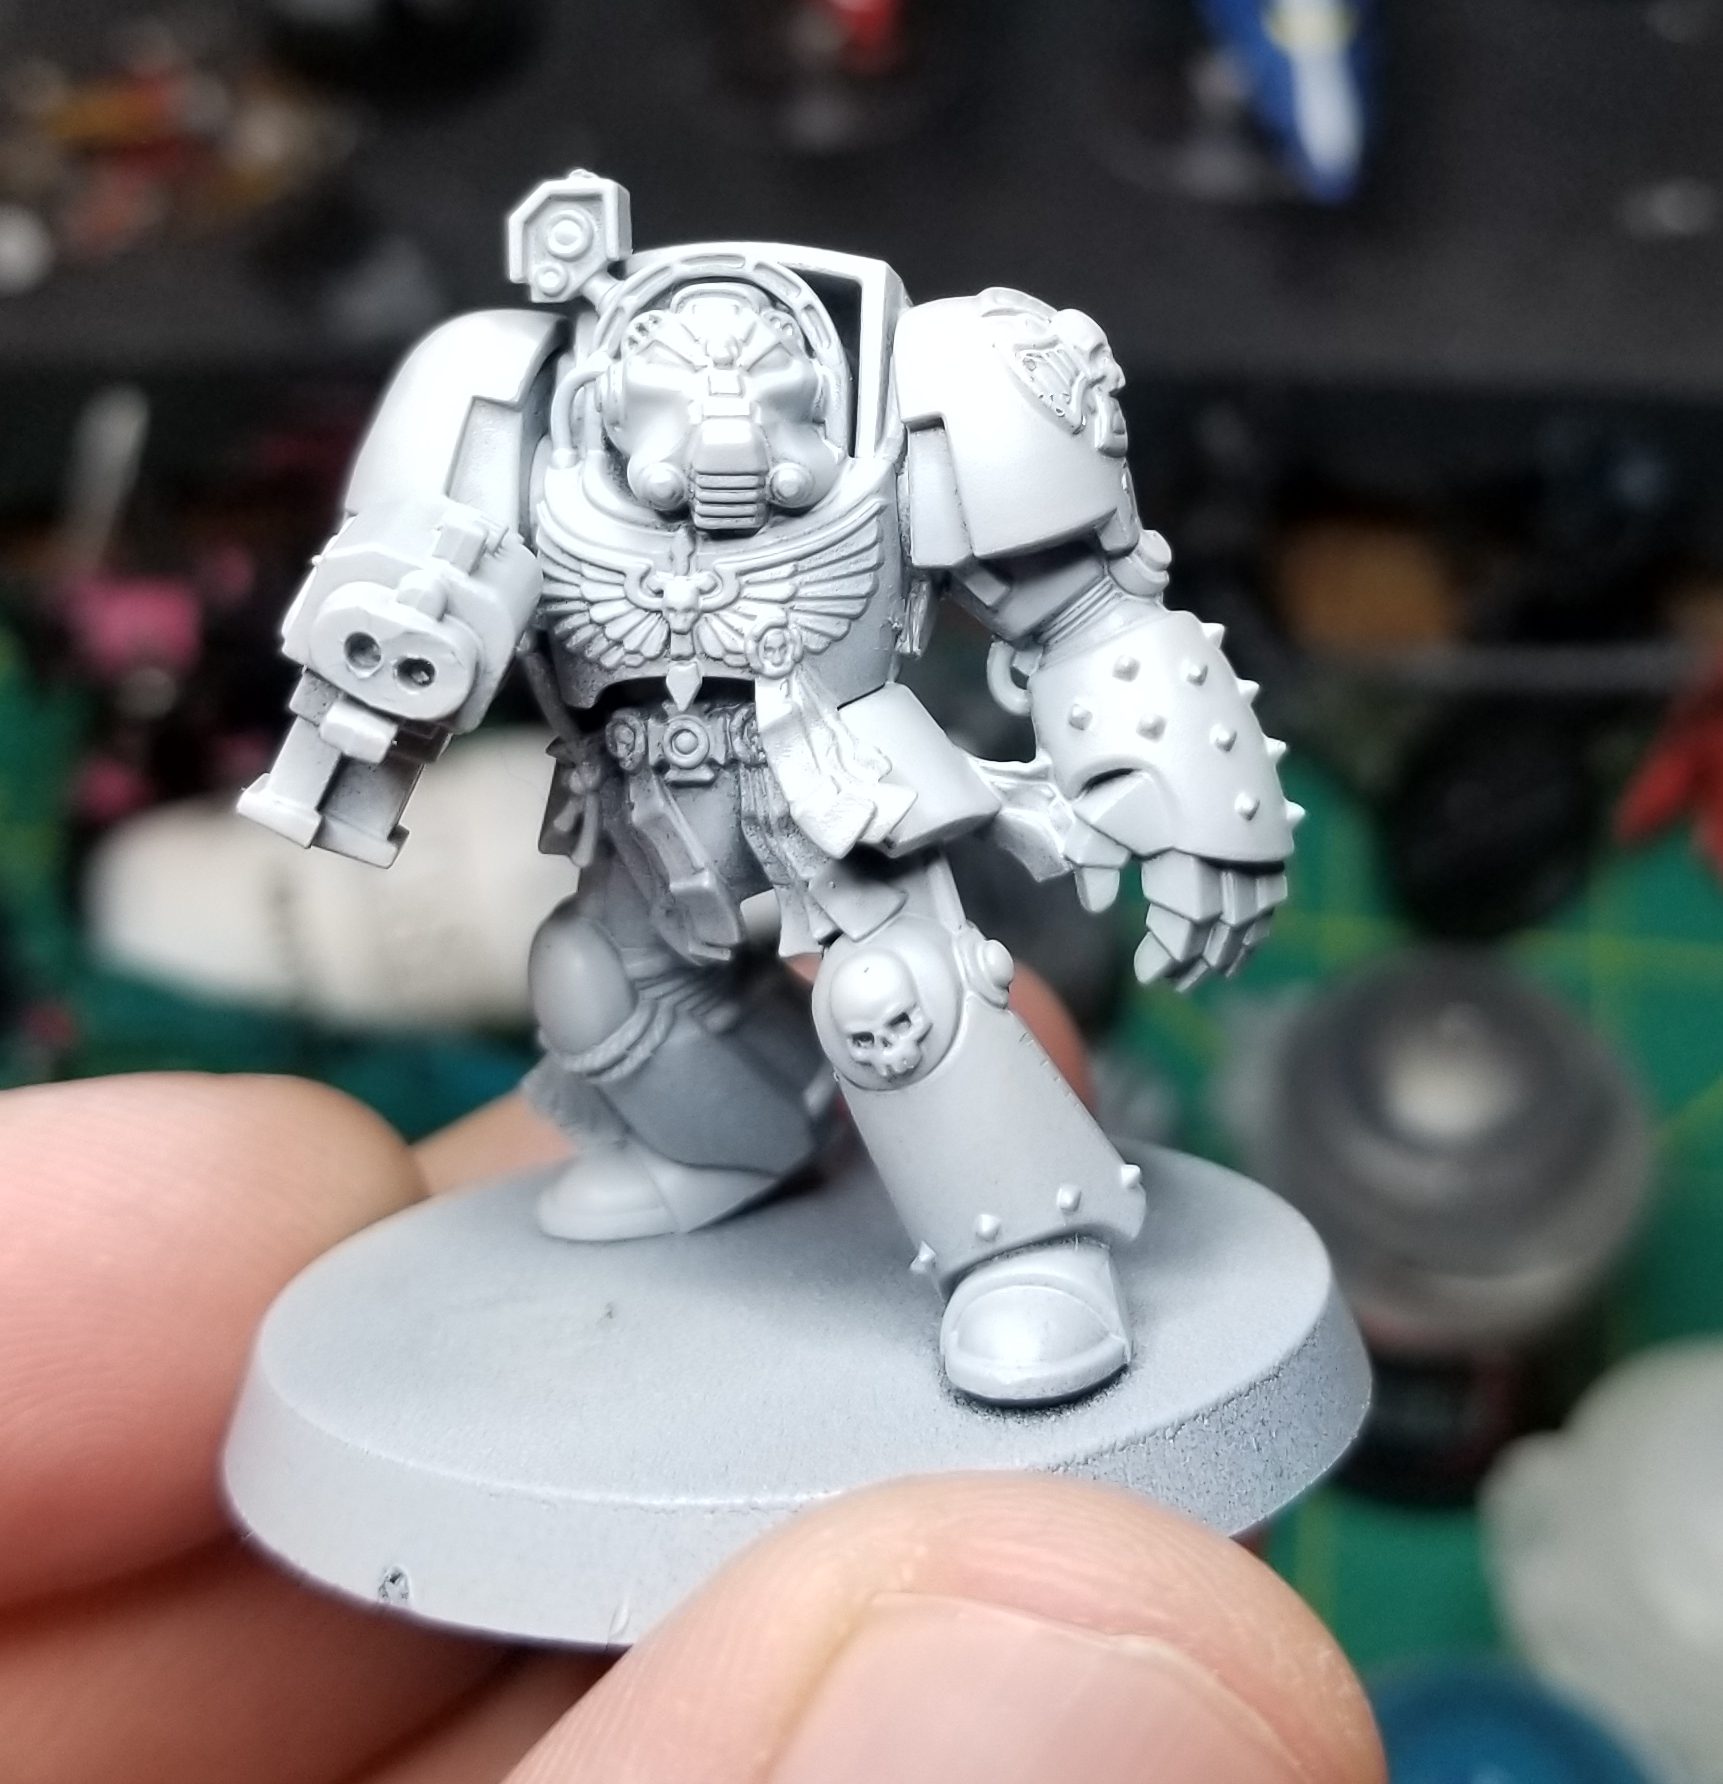
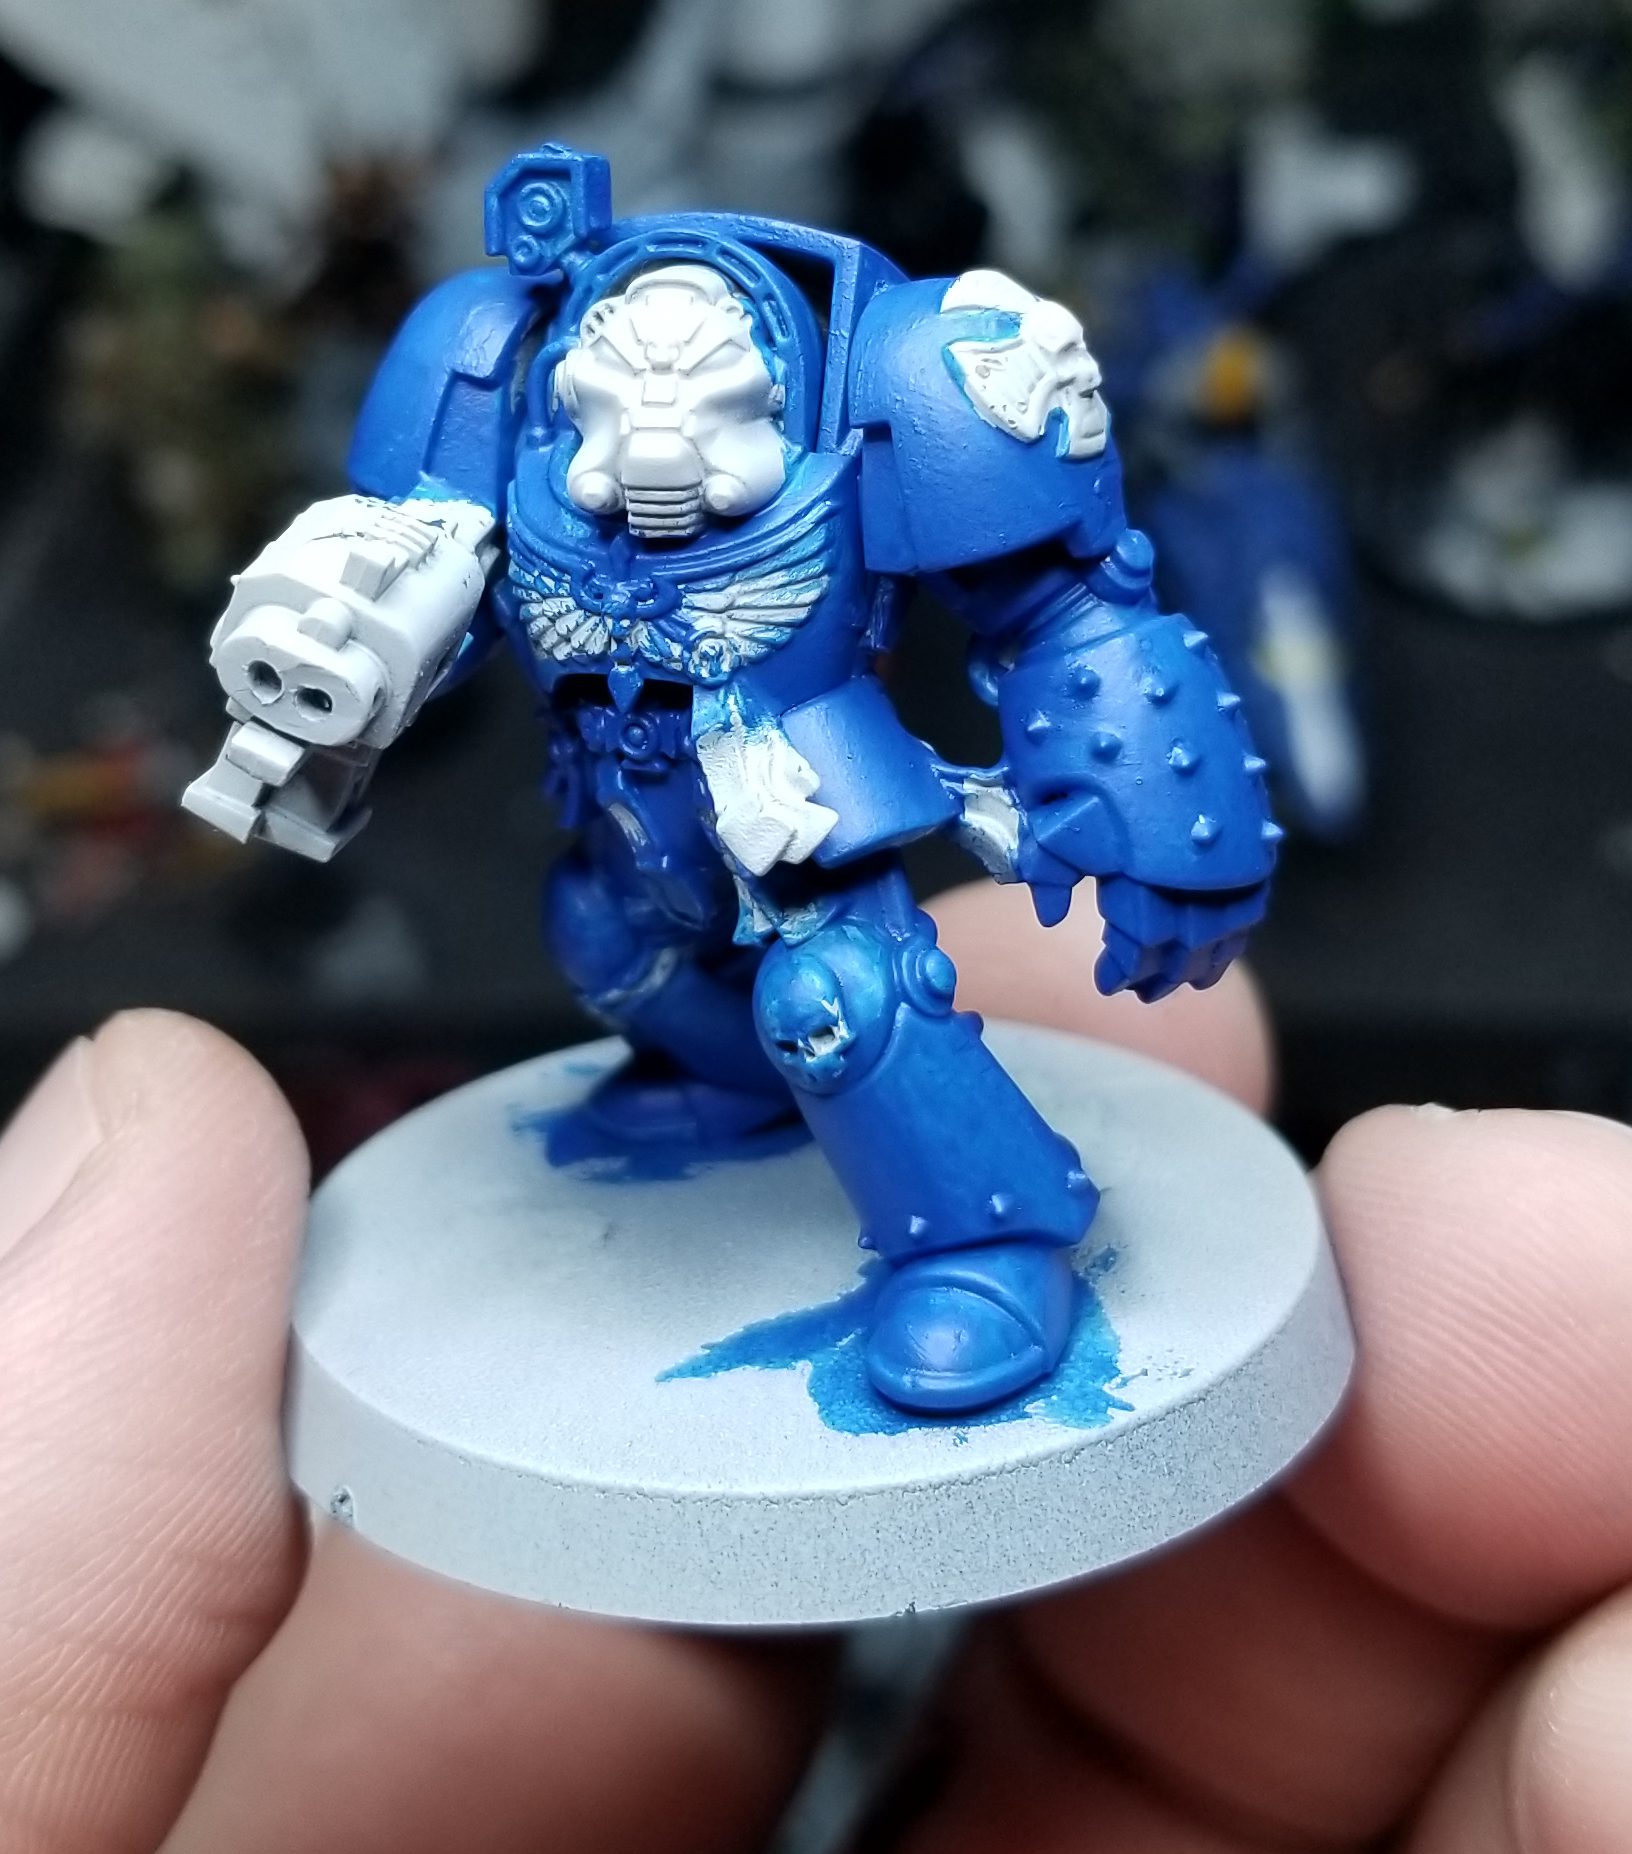
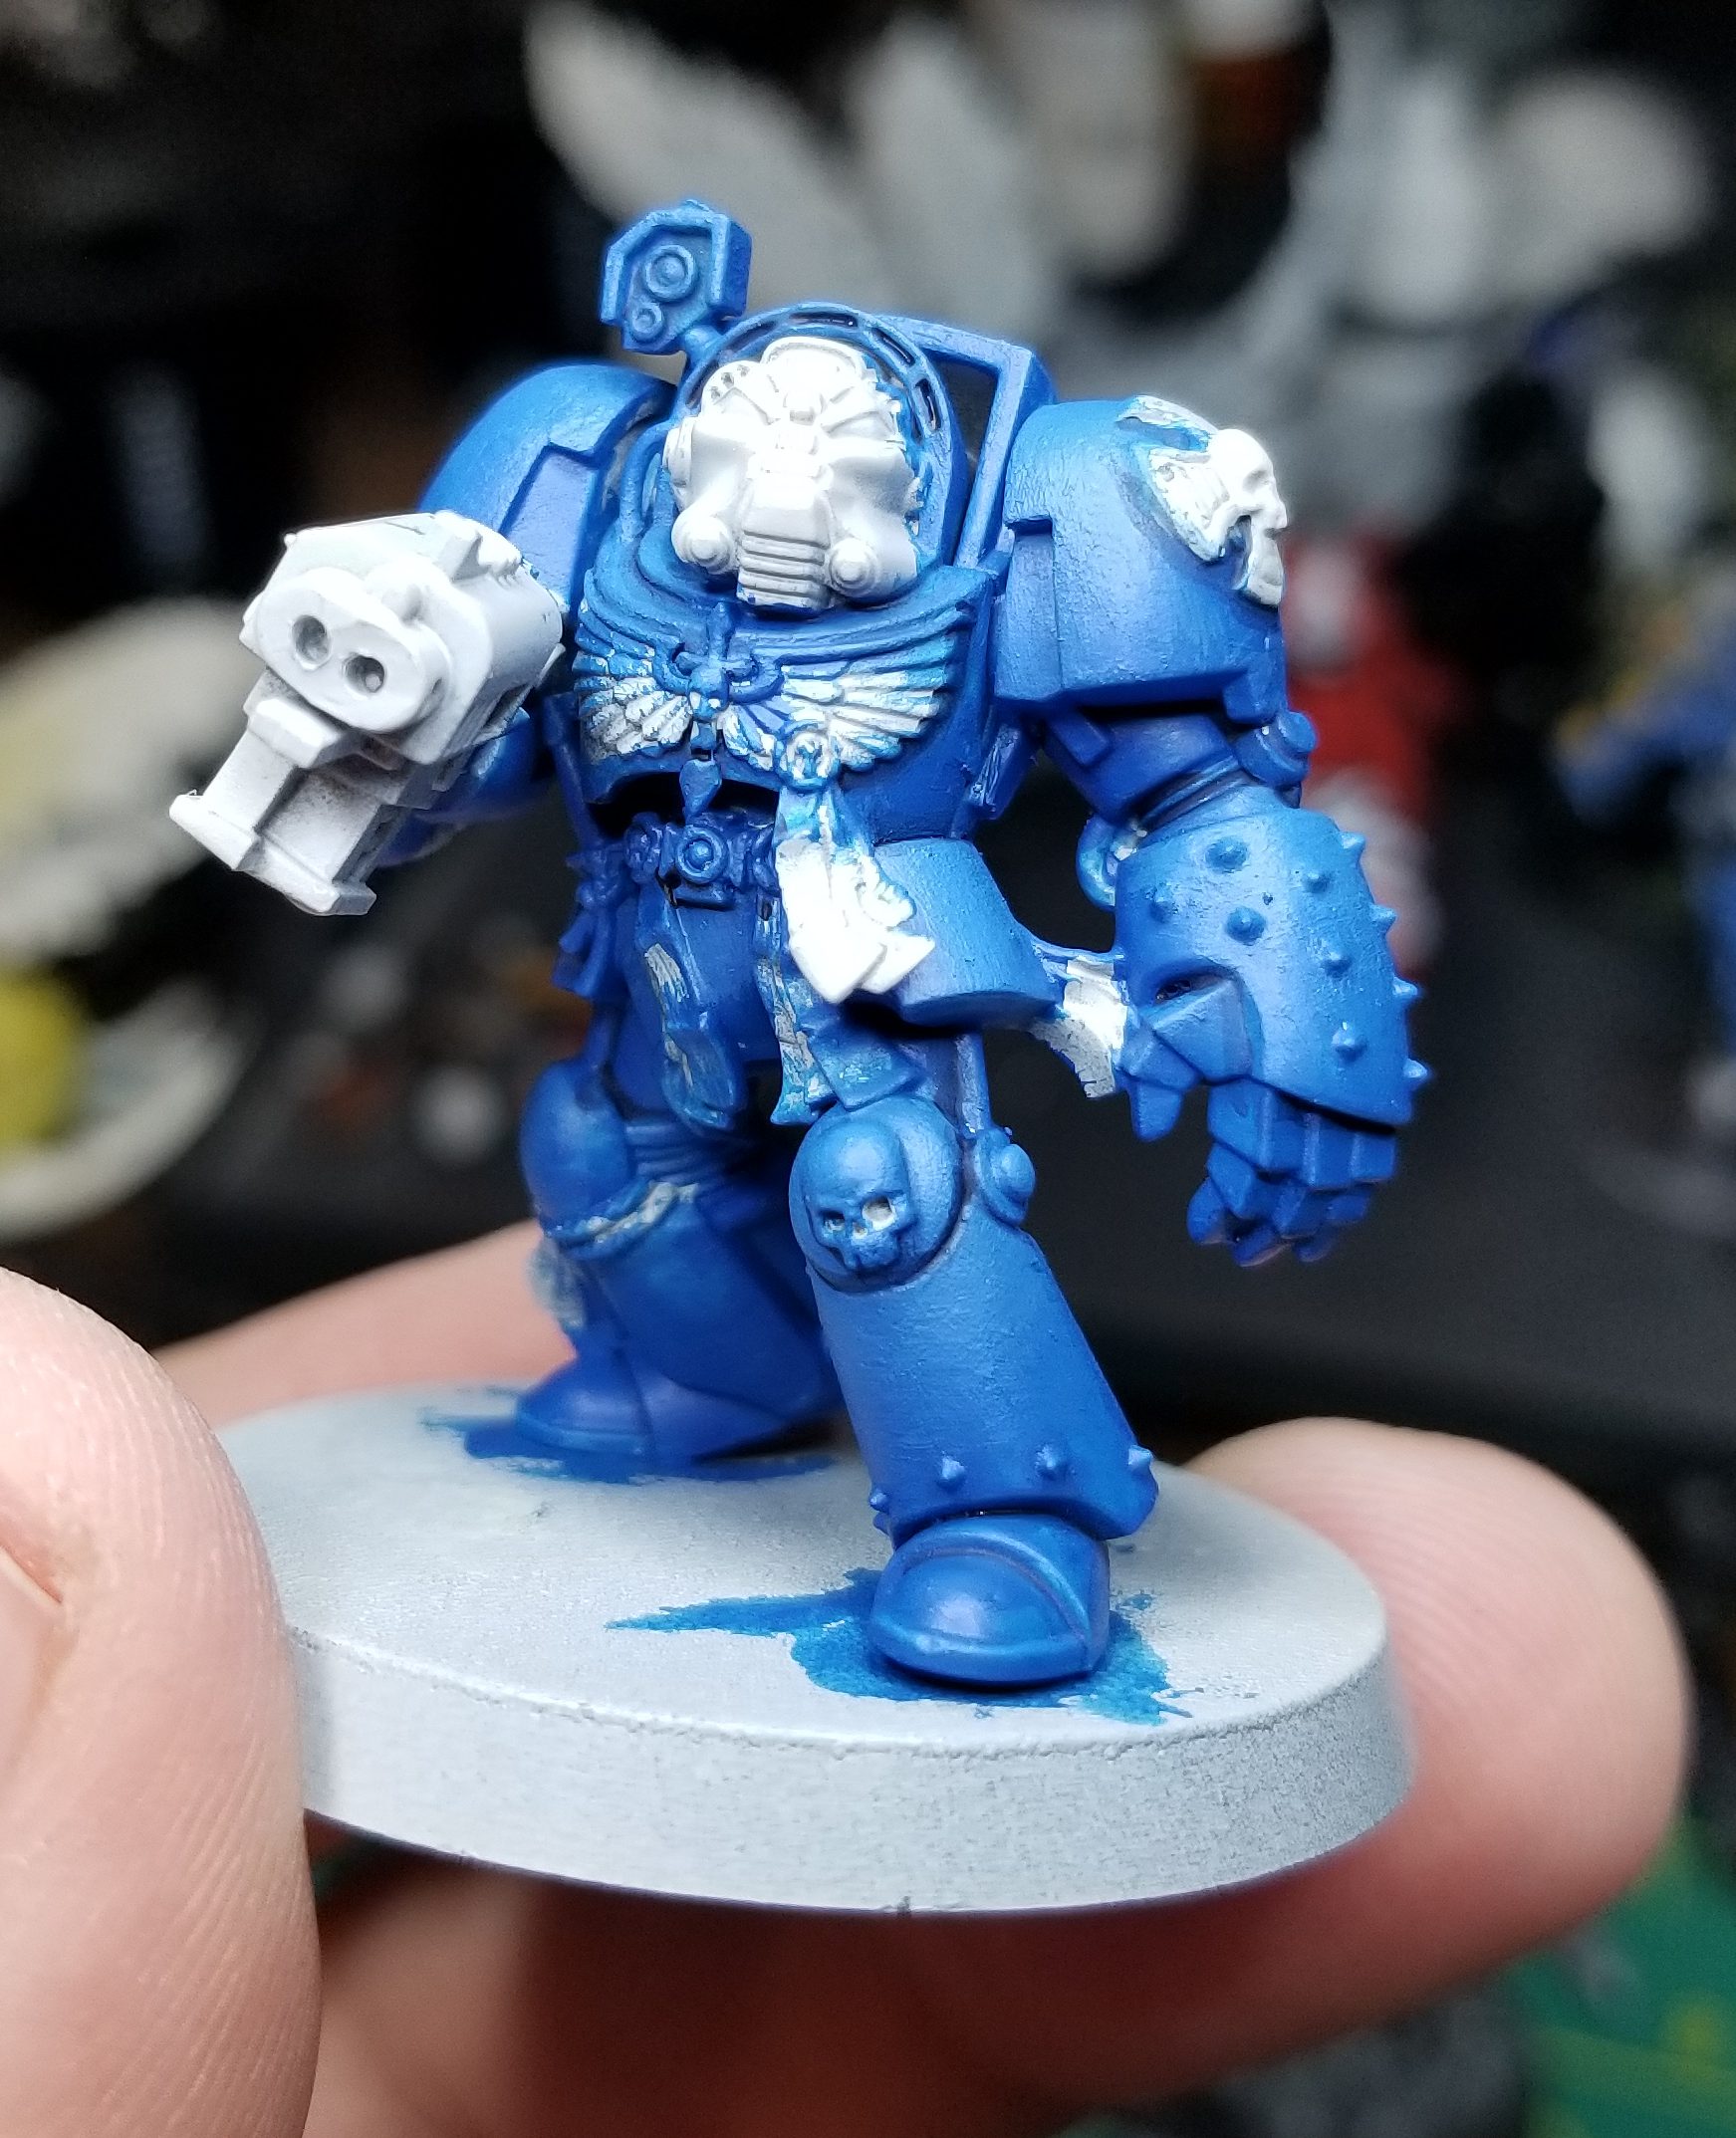
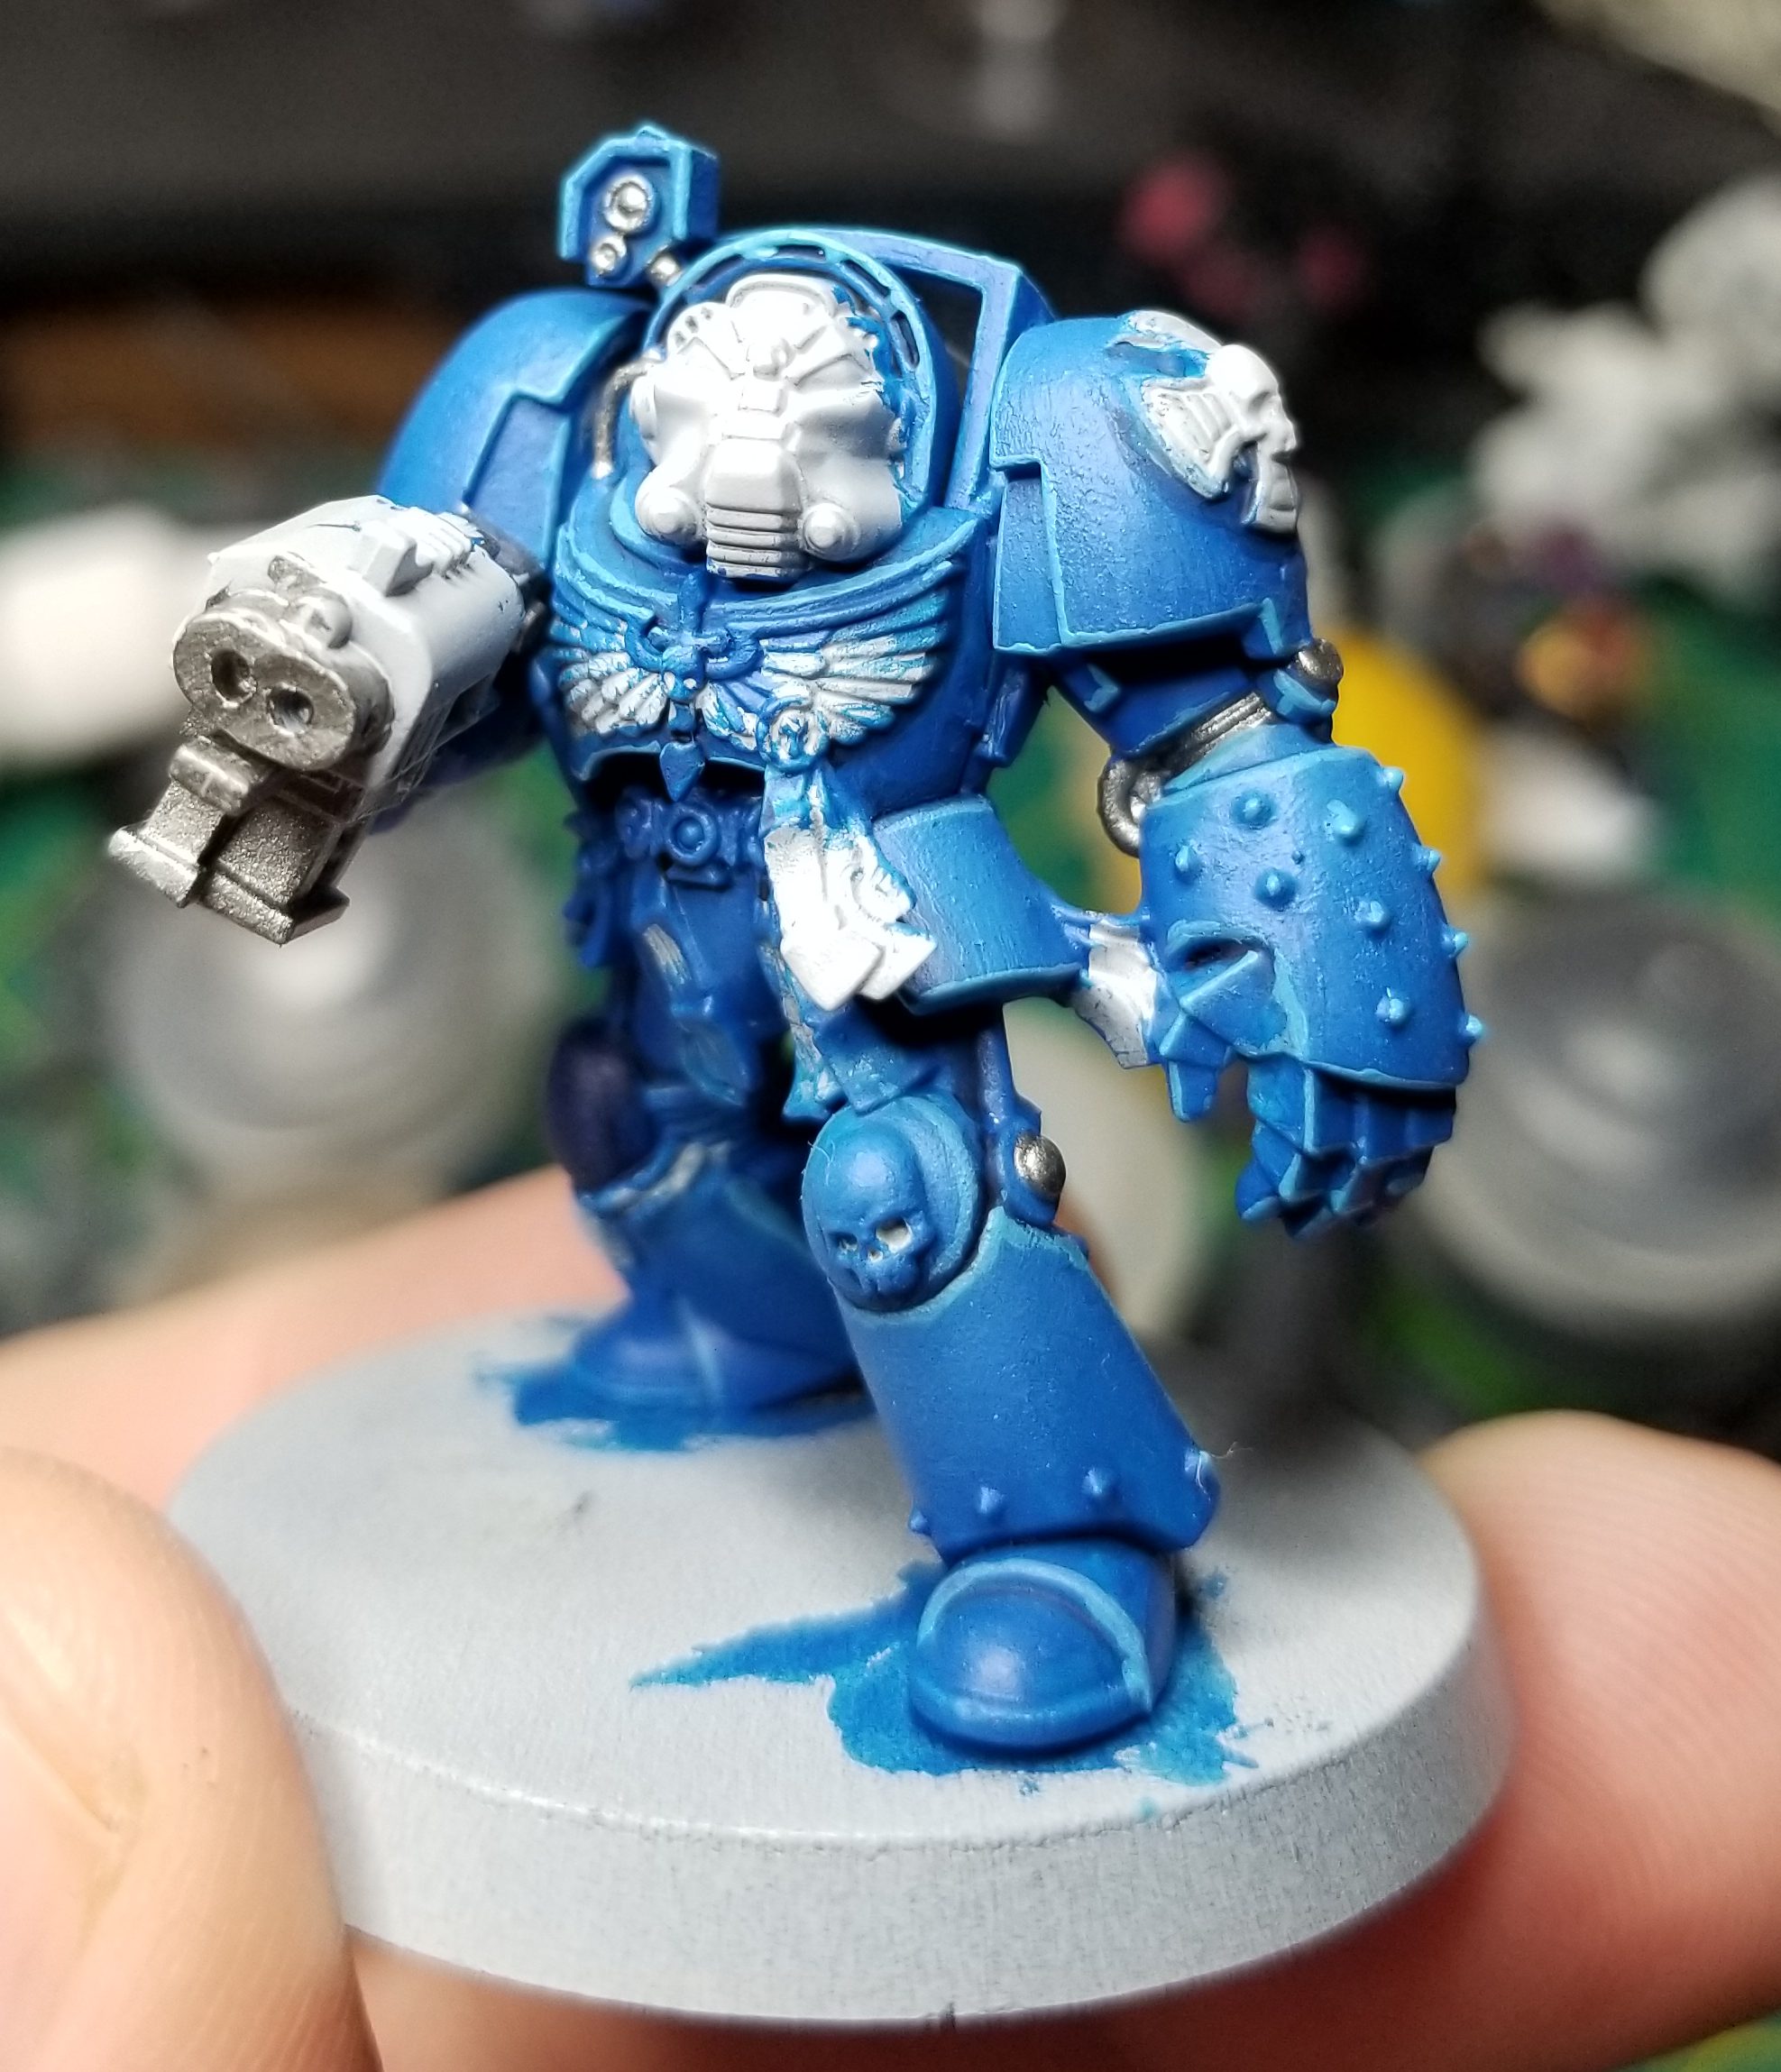
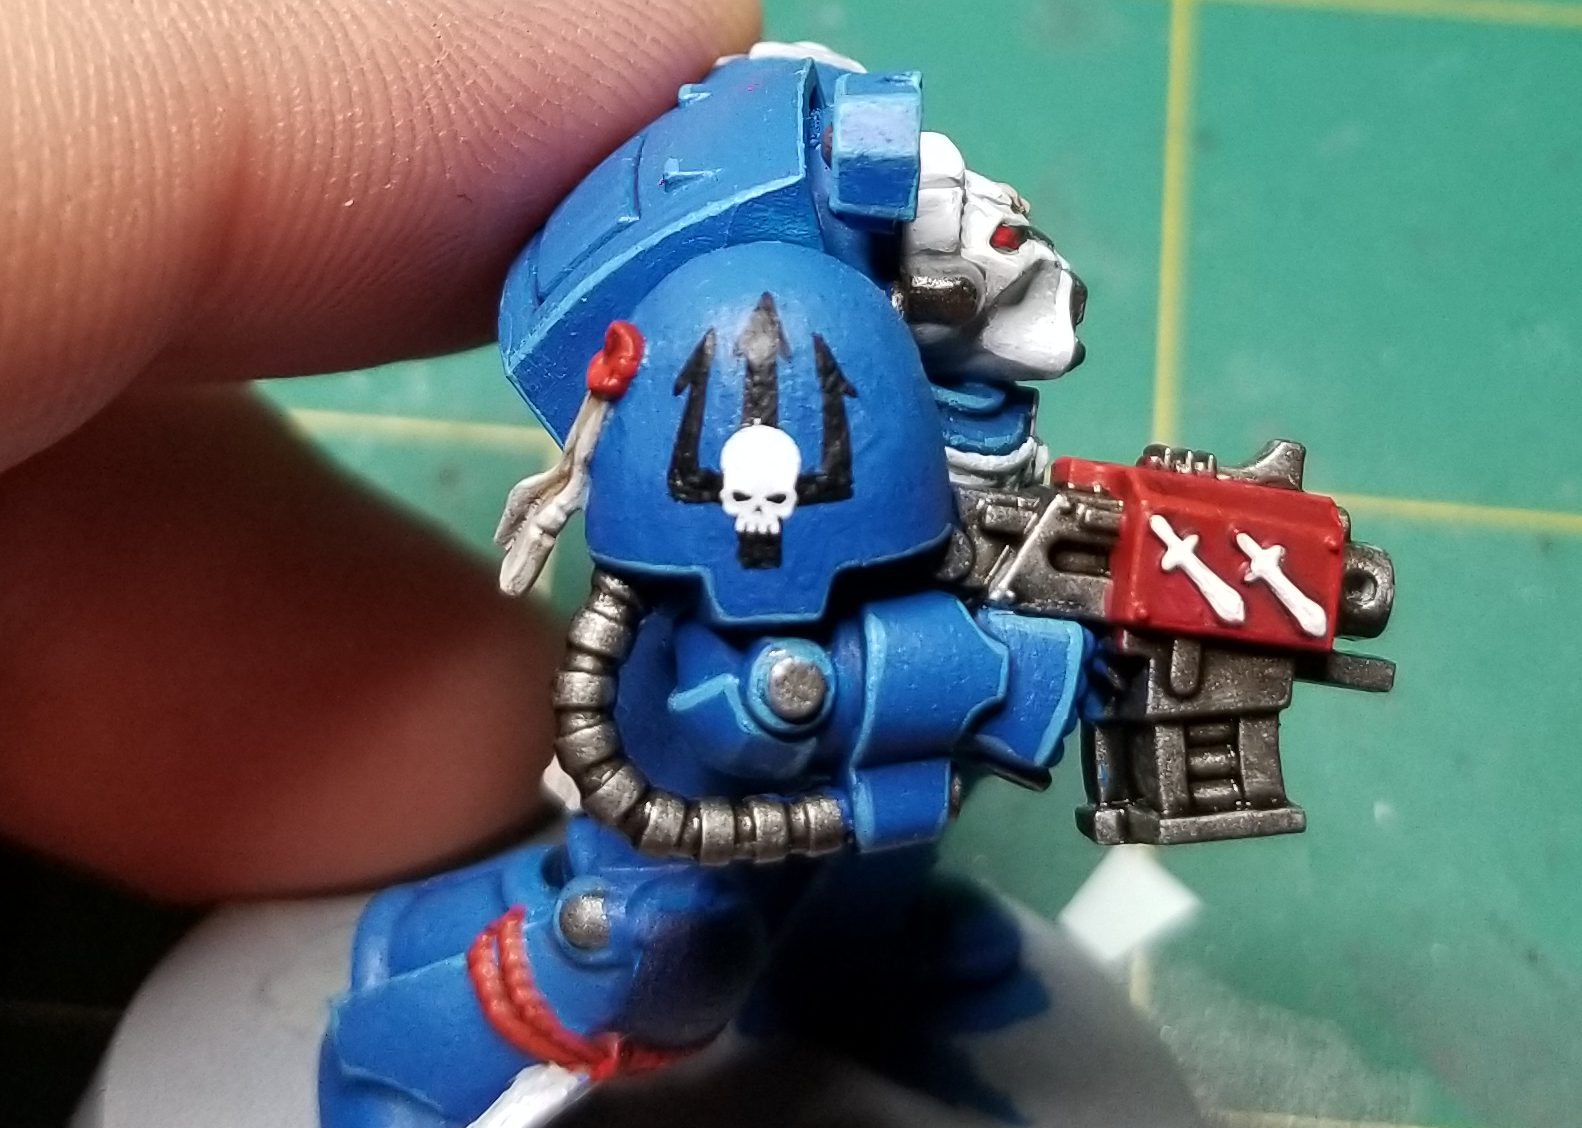
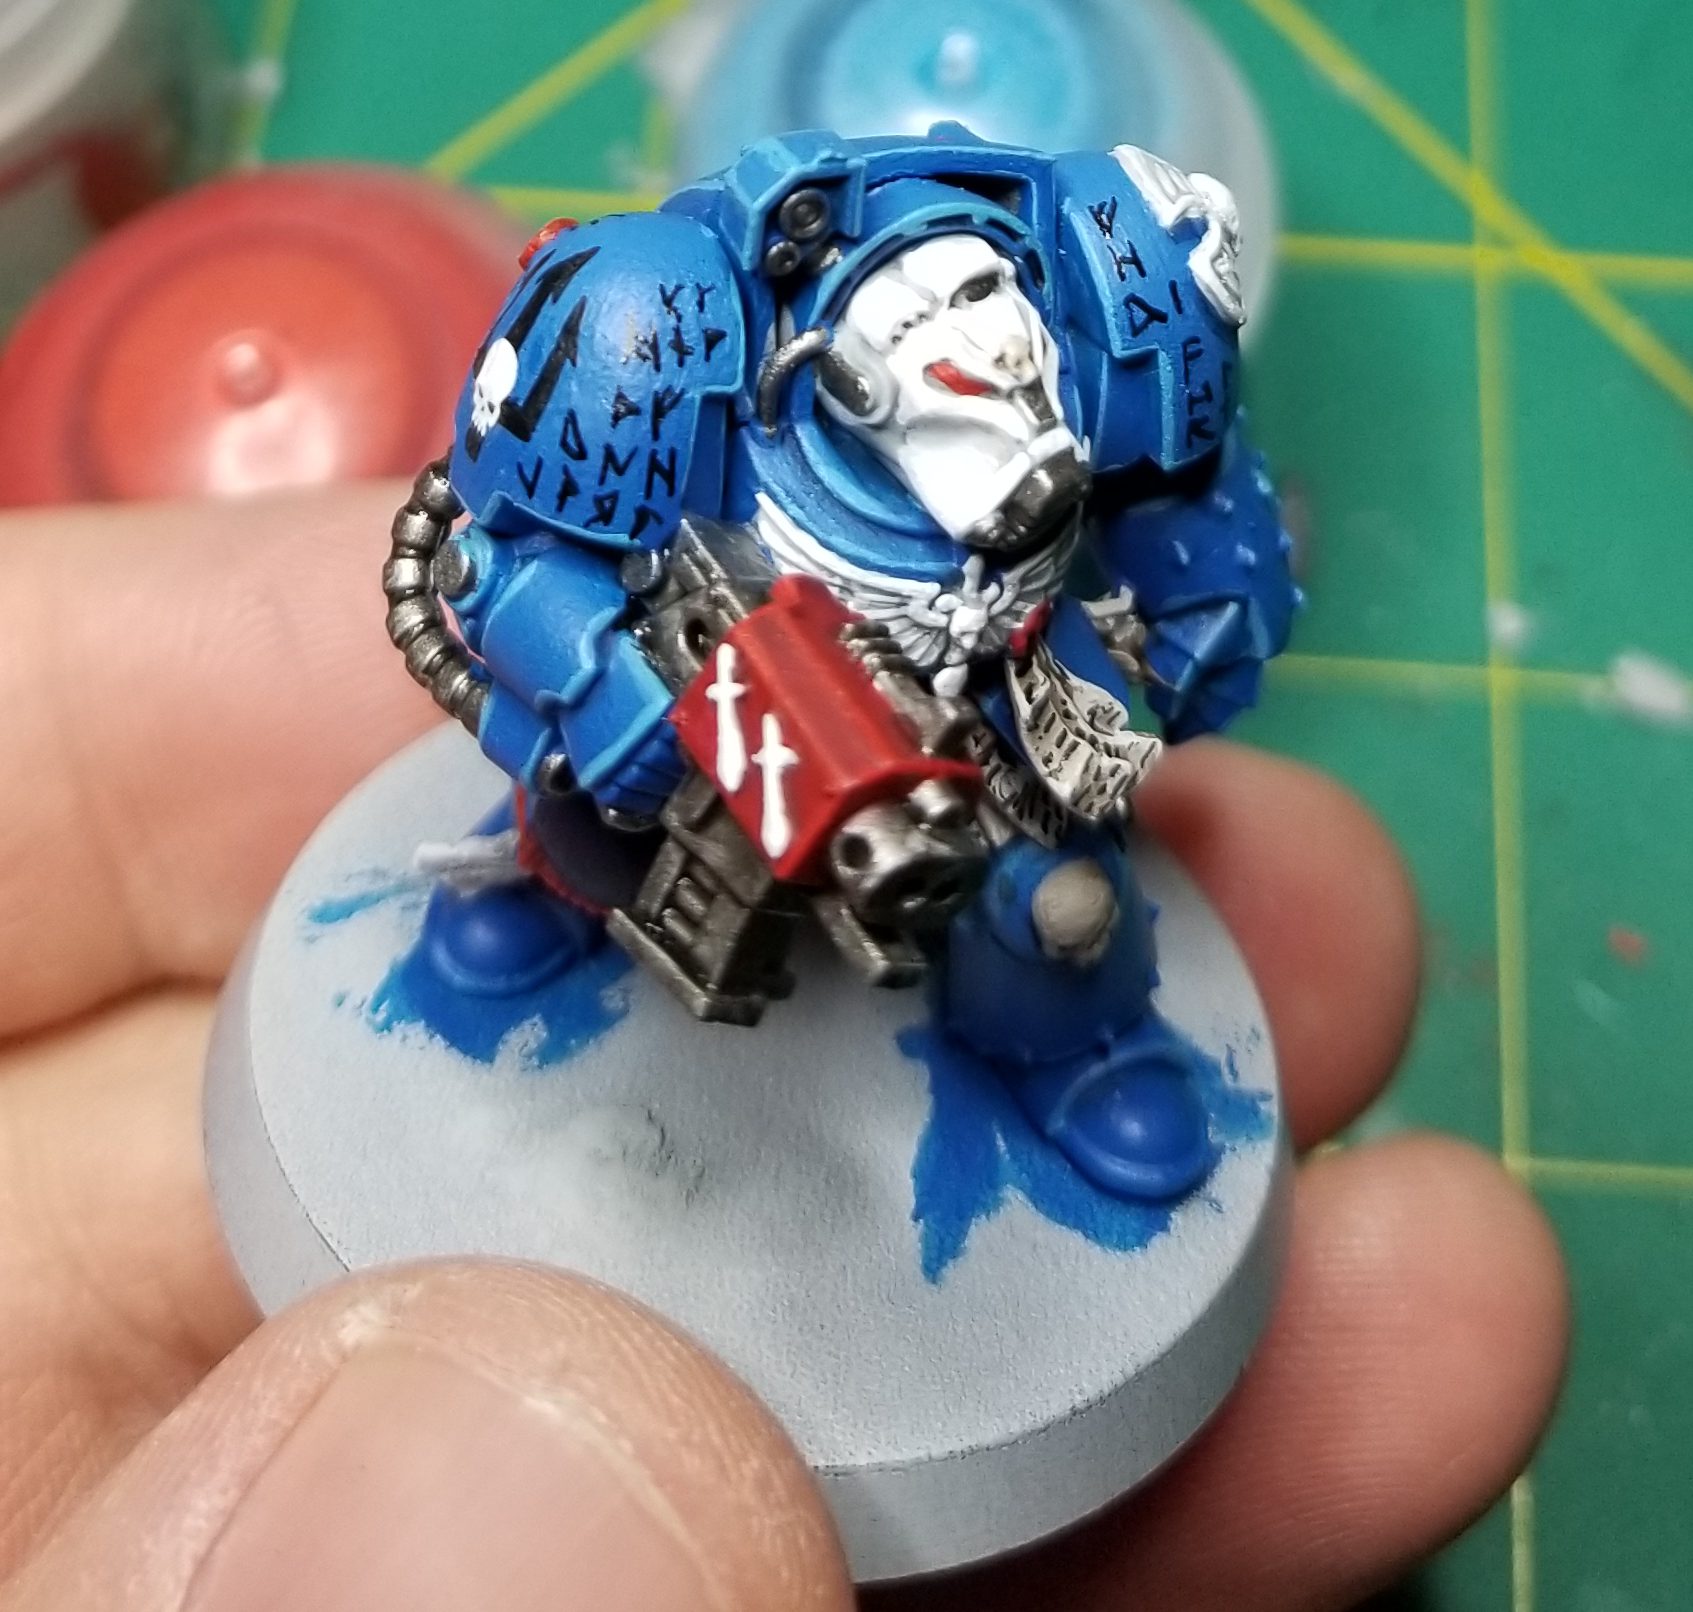
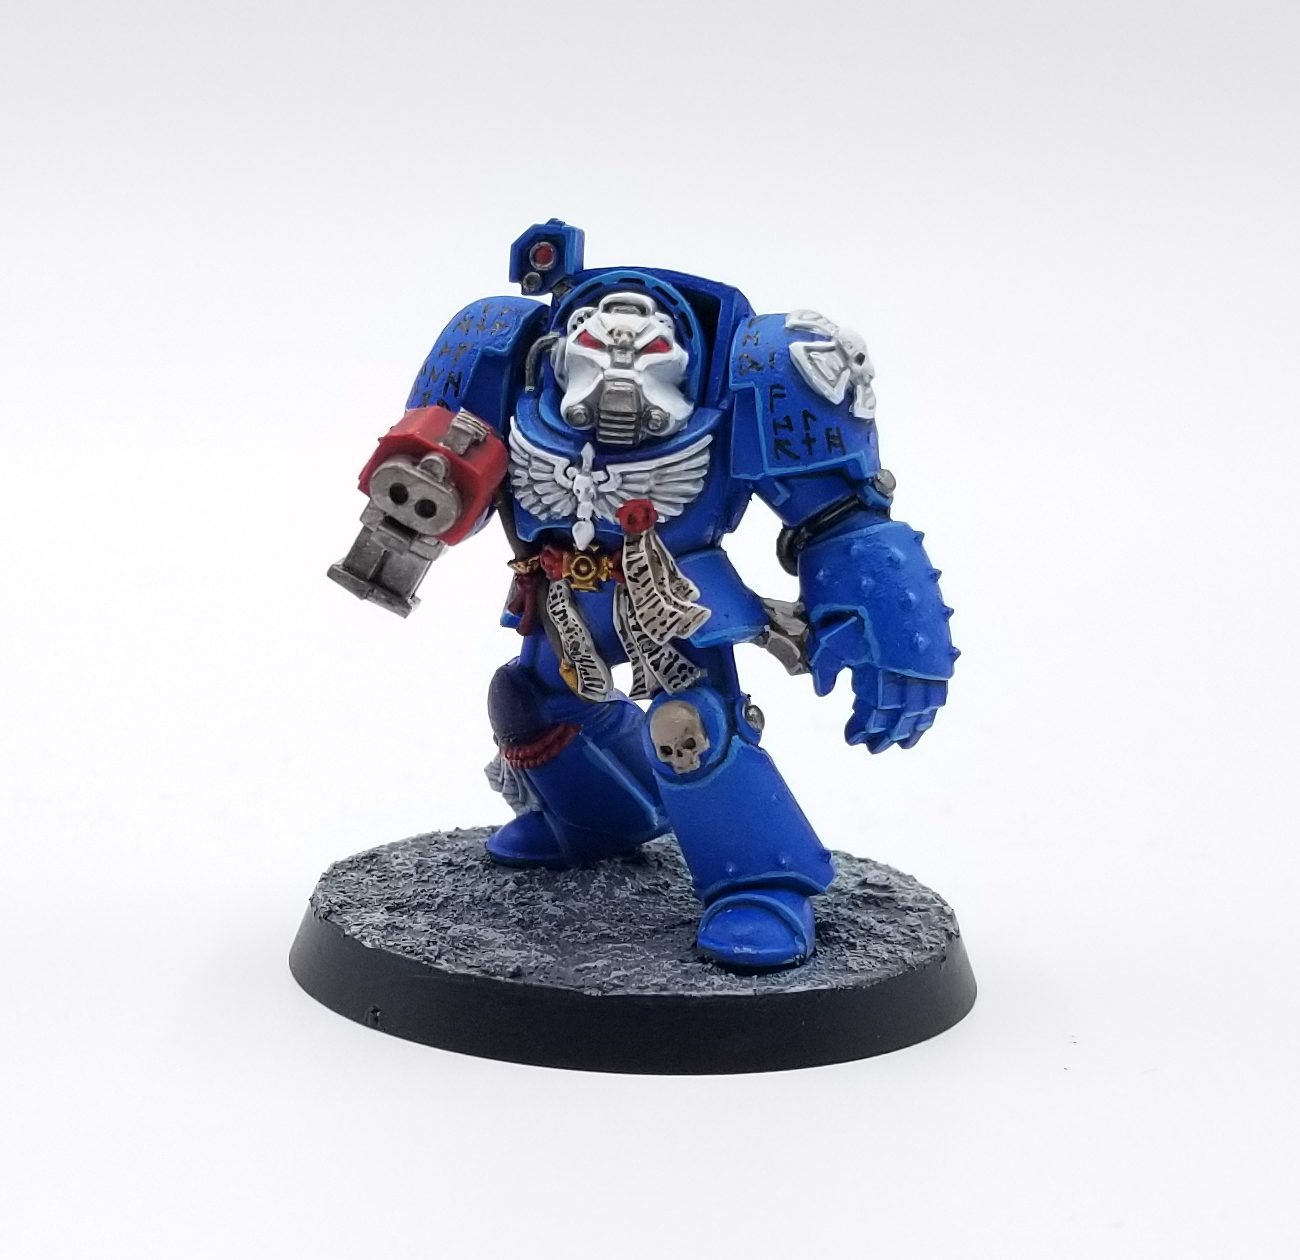
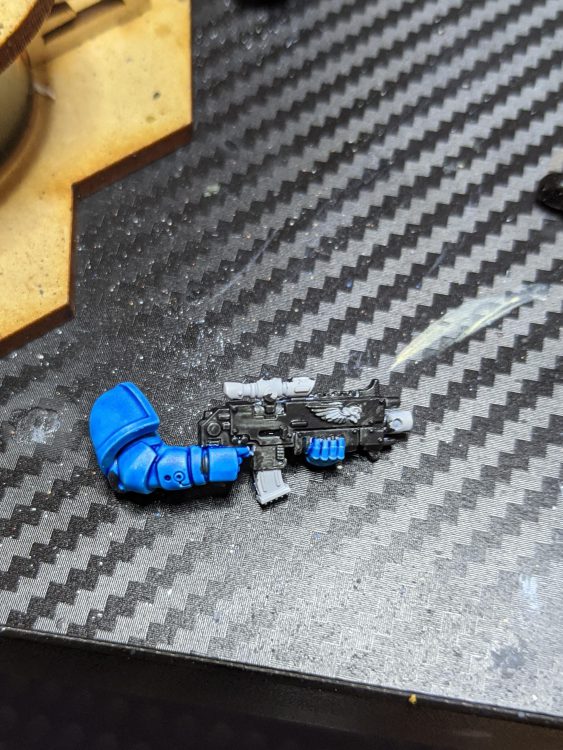
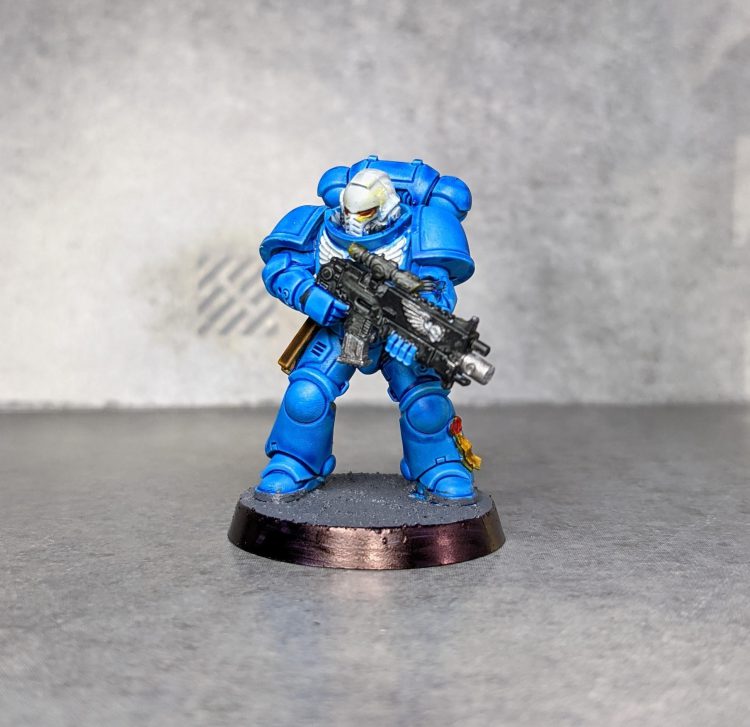
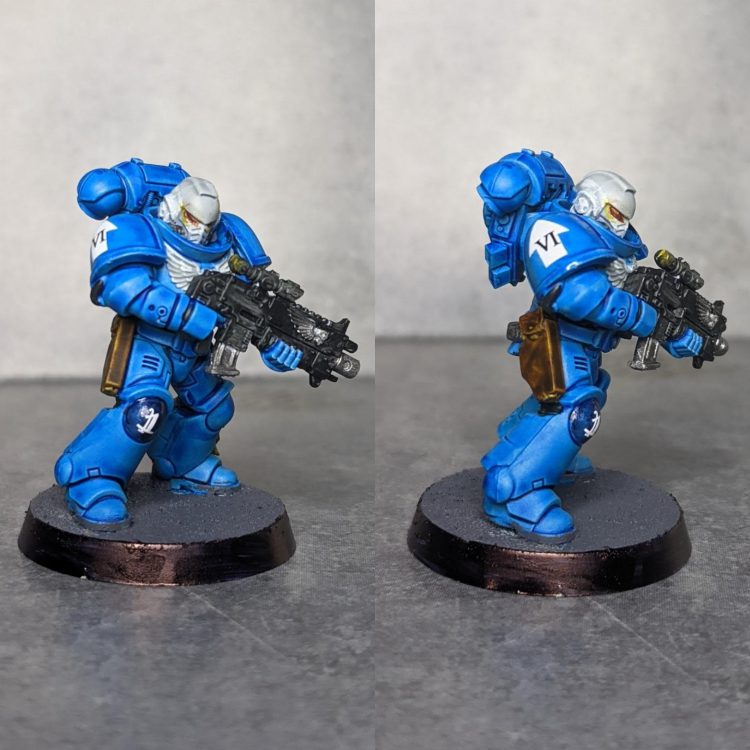
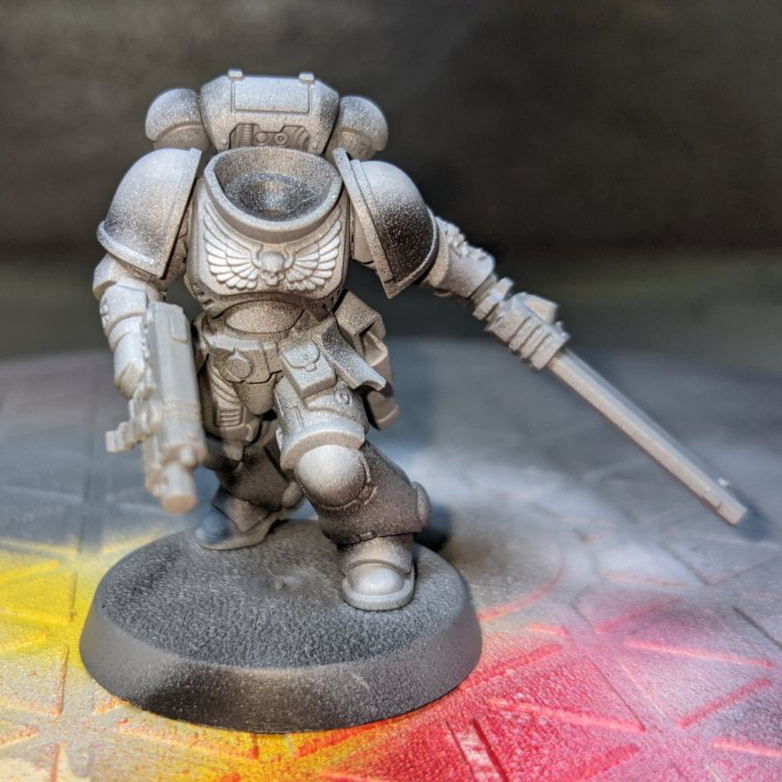
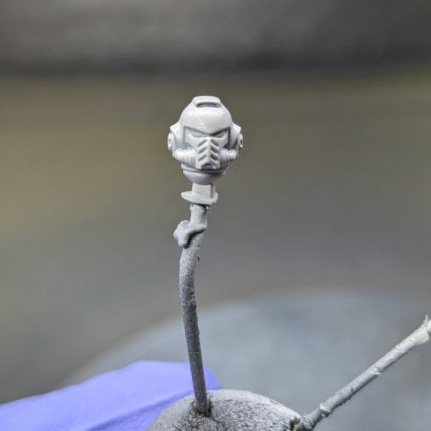
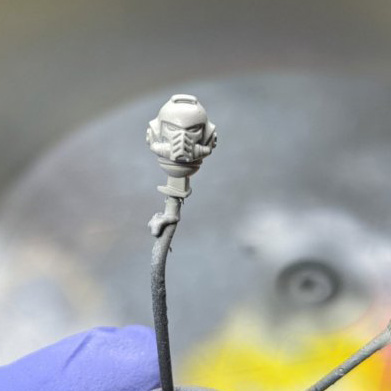
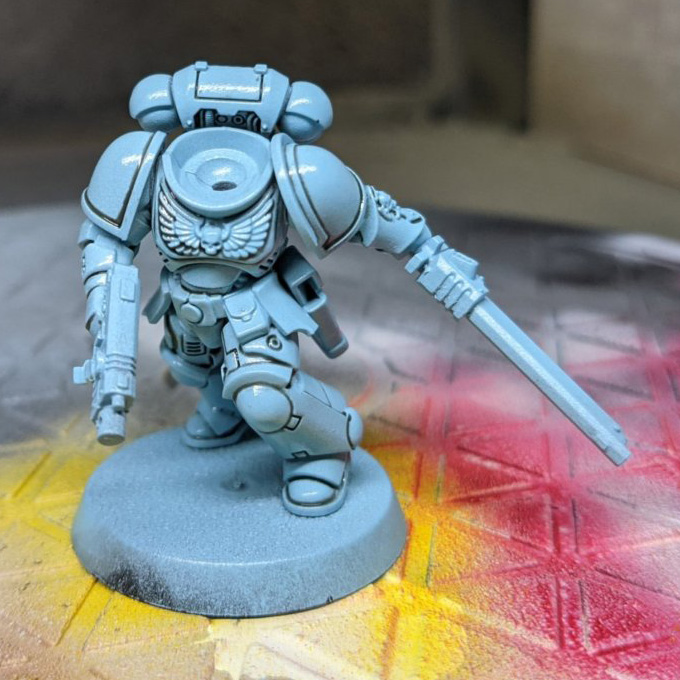
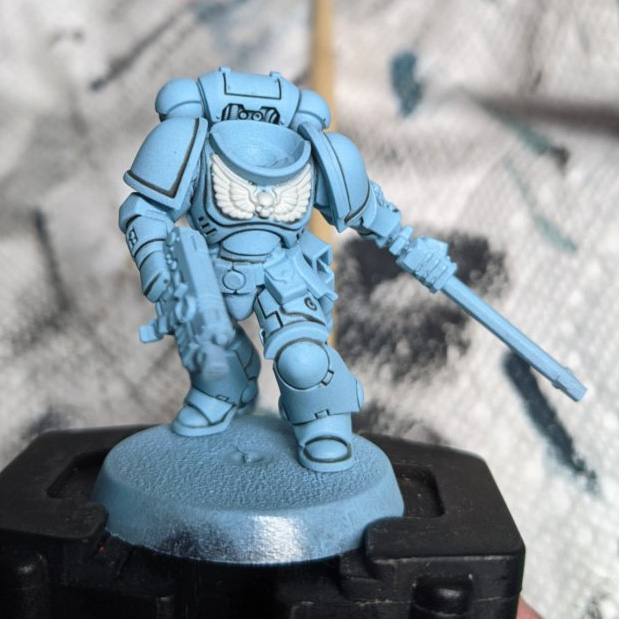
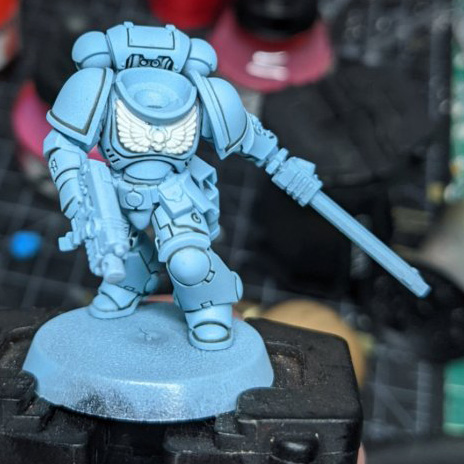
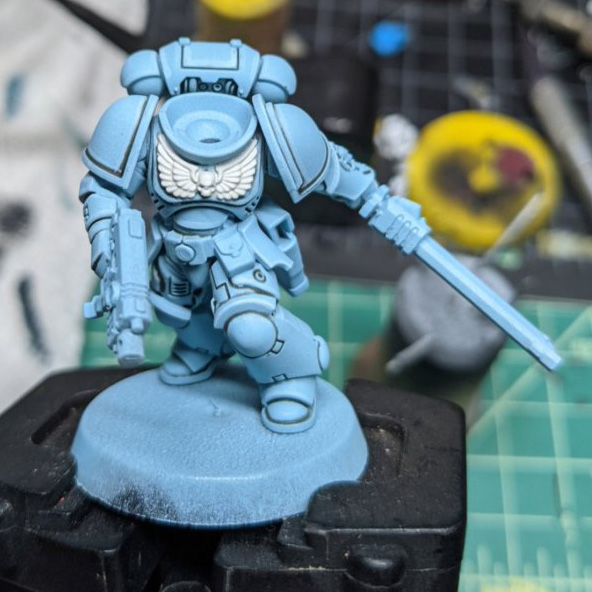
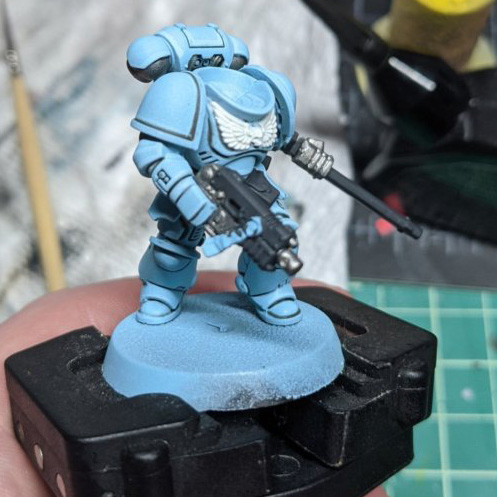
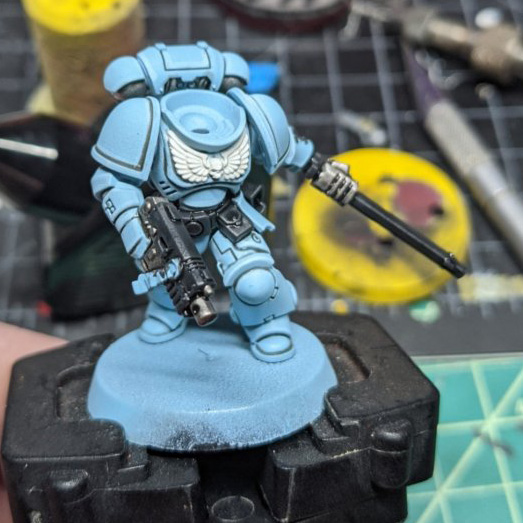
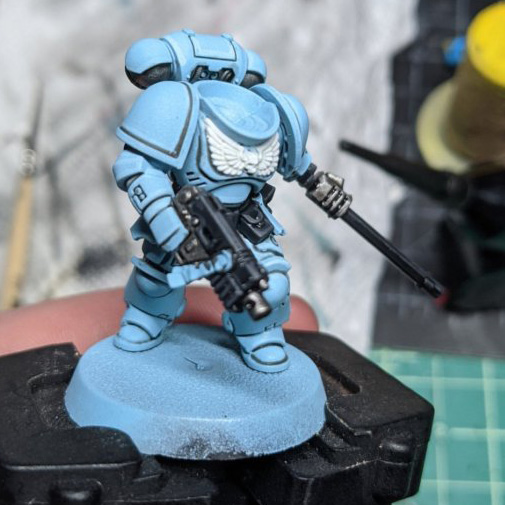
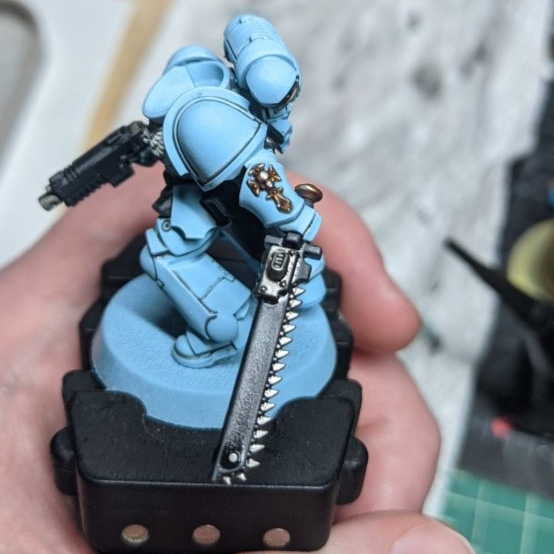
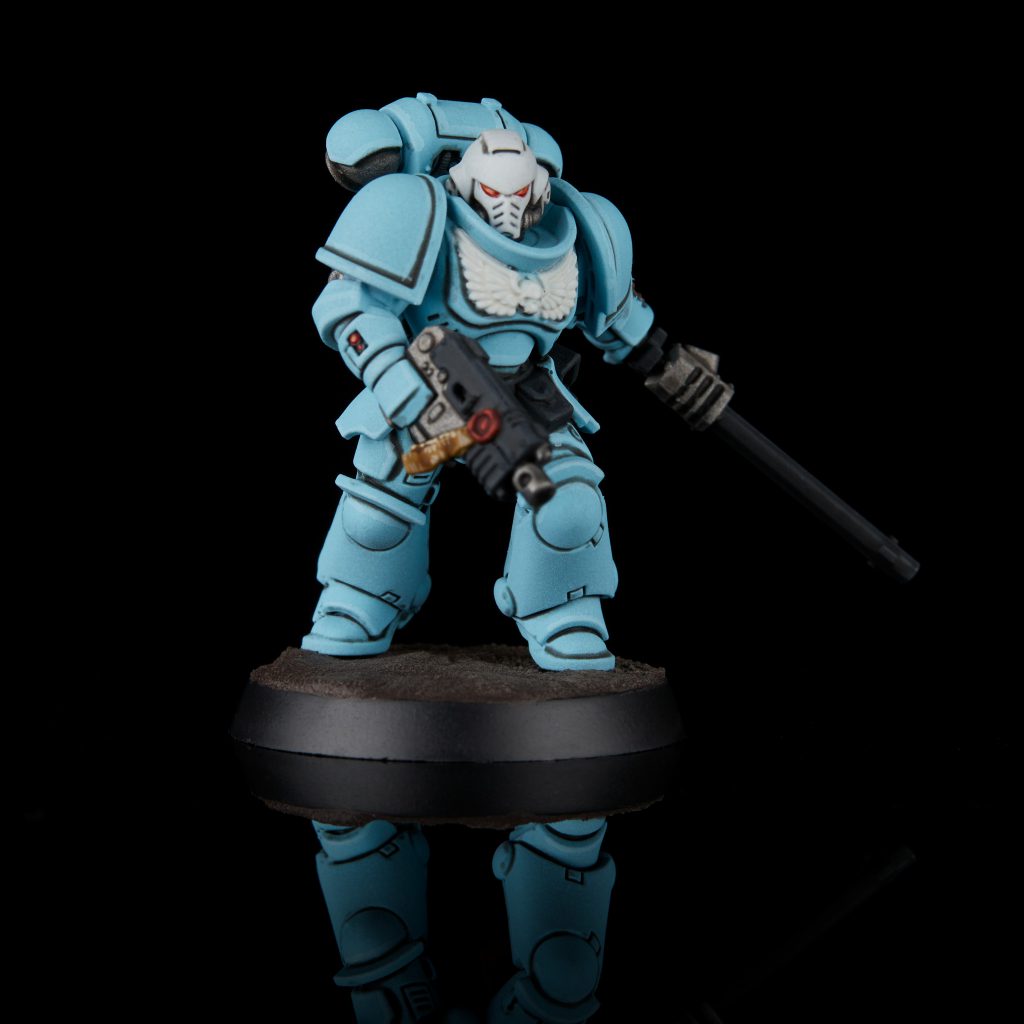
Heraldry - Click to expand Although mostly a codex-compliant chapter, there are a few quirks that set the Emperor’s Spears apart from other chapters. The first is that rather than companies, the chapter organized into mostly autonomous groups called Warhosts, and its first company is comprised of exalted warriors called Paragons who no longer advance in the ranks but instead hone their martial prowess and focus on taking out enemy leaders. While Warhosts are largely the same size as marine companies, they do not use any standardized markings. Emperor’s Spears marines can put personal heraldry on their right kneepad. Emperor’s Spears marines use the gothic script numbering for their Squad number designation. As the entire chapter employ white helmets already, officers in the Emperor’s Spears are instead marked out by tall helmet crests, with colors corresponding to their rank. Sergeants have transverse crests (red for sergeants and red and black striped for veteran sergeants), while Lieutenants and higher ranking officials have longitudinal crests, as shown in the image above. Lieutenants have red and black striped crests while captains have white and black and the High King (chapter master) has a pure white crest. Otherwise the Emperor’s Spears wear light blue armor and tend to have white helmets. Their heraldry tends to have Celtic influences, with lots of runic markings and fur pelts. TheChirurgeon's Method - Click to Expand I’ve been working on an Emperor’s Spears model for my Deathwatch Bladeguard Veterans but that didn’t really seem like a good fit for a How to paint Everything that very much wanted to have the chapter’s signature blue armor. So I dug around in my bitz box and found an old Dark Vengeance Terminator that didn’t have too much Dark Angels stuff on it, filed off the shoulder pad icon, and got to work on a real Emperor’s Spears paint scheme. I decided to start this model off with a coat of Grey Seer primer. I’m still not a big fan of white or off-white primer coats for my models, but this model’s going to be much lighter so it didn’t make sense for it to have a black primer coat. Next comes the basecoat. I’ve seen a lot of very teal Emperor’s Spears on the net and while I respect that, I’ve always seen them as having a deeper blue armor color, particularly if you look at the GW art in our lore section above. So the basecoat here is a couple of thin coats of Caledor Sky. Time to start shading this bad boy up. The next step is 3-4 layers of a progressively lighter mix of Caledor Sky and Lothern Blue, which has a bit of a more that greenish/tealish tint to it. Once that’s done I trase back over the recessed parts and under areas with Drakenhof Nightshade to add some additional depth. You can most visibly see where I’ve done this under the kneepad and under the Crux Terminatus on the shoulder pad. Edge highlighting time! I use Lothern Blue for y edge highlights here (I’ll come back and touch up some of the rougher areas later), and paint the right kneepad with a coat of Night Lords Blue to give a darker matte color. Time for some details! The helmet, Crux, and Chest Emblem get painted with a coat of Grey Seer, then washed with Apothecary White and then highlighted with Reaper Pure White, which I follow up with some Nuln Oil in the cracks/most recessed parts. The Gun, ropes, and purity seals will be Mephiston Red washed with Carroburg Crimson and then highlighted with Mephiston Red and Evil Sunz Scarlet. The skulls and purity seal parchment are Rakarth Flesh washed with Agrax Earthshade and then highlighted with Rakarth and Reaper Polished Bone. The metal bits are just Leadbelcher washed with Nuln Oil. Time for the shoulder pad. I freehanded the trident – start by sketching out the basic shape by doing the three lines, then thicken them up and add the spearpoints on the trident – then rather than try and freehand a small skull, I just cut one out of the transfers on the Ultramarines transfer sheet. This can be a bit of a paint, since that requires cutting away the yellow circle around it (or painting over that part, but also keeps the profile of the skull pretty small so it’s easy to apply to a curved surface. Finally it’s time to add runes and text to the purity seals. I normally do these with a .005 black micron pen but I could only find a .01 today so I used that. It worked fine on the runes but the purity seals are a bit sloppier than I’d like. Just take your time on this, and work in rows, going bottom-upward. My runes are mostly Norse-inspired, but it helps to look at some reference materials before you get started so you’ll have an idea of how your shapes will look. Add the base details and we’re done – In this case his base is just a coat of Astrogranite drybrushed with Celestra Grey. Beanith's Method - click to expand Or as I like to think of it, “how to quickly smash out a Marine” in between Milestones in Satisfactory. Because I had a backlog of Research queued, I took my time and pretended to know what the hell I am doing by painting this model in subassembly. I’ve started out with a coat of Grey Seer primer and then I smooshed the model with Contrast Talassar Blue. I then went through and picked out all the joints and hoses with Contrast Black Templar. After that I did a quick tidy up with some Corax White and picked out some details with Army Painter Plate Mail and then picked out the lenses and seal with Contrast Blood Angel Red and the leather pouches with Contrast Snakebite Leather. After that I slapped down some Technical Astrogranite. One Battle-Ready Emperor’s Spear good to go! I slapped the photos of that bad boy down on TheChirurgeon’s desk and went back to my great work of “building a train floating up in the sky because I can’t be arsed to build around little things like rocks, trees and mountains.” Some time later, TheChirurgeon finally broke through the barricade that had accidentally been made on my side of my office door and gently prodded me into adding a little more polish to the model. So I added a touch of Contrast Ultramarine Blue to the knee pad, applied some transfers, and made a ham-fisted attempted at some highlights with a drybrush of Corax White before a wash of Contrast Apothecary White. Jack's Method - Click to Expand This ended up quite a bit more teal than I was looking for, but I still like how bright it is and how well it’ll stand out on a battlefield.
That wraps up our look at the Emperor’s Spears, a dynamic chapter with some very cool visual style. As always, if you have any questions or feedback drop us a note in the comments below or email us at contact@goonhammer.com.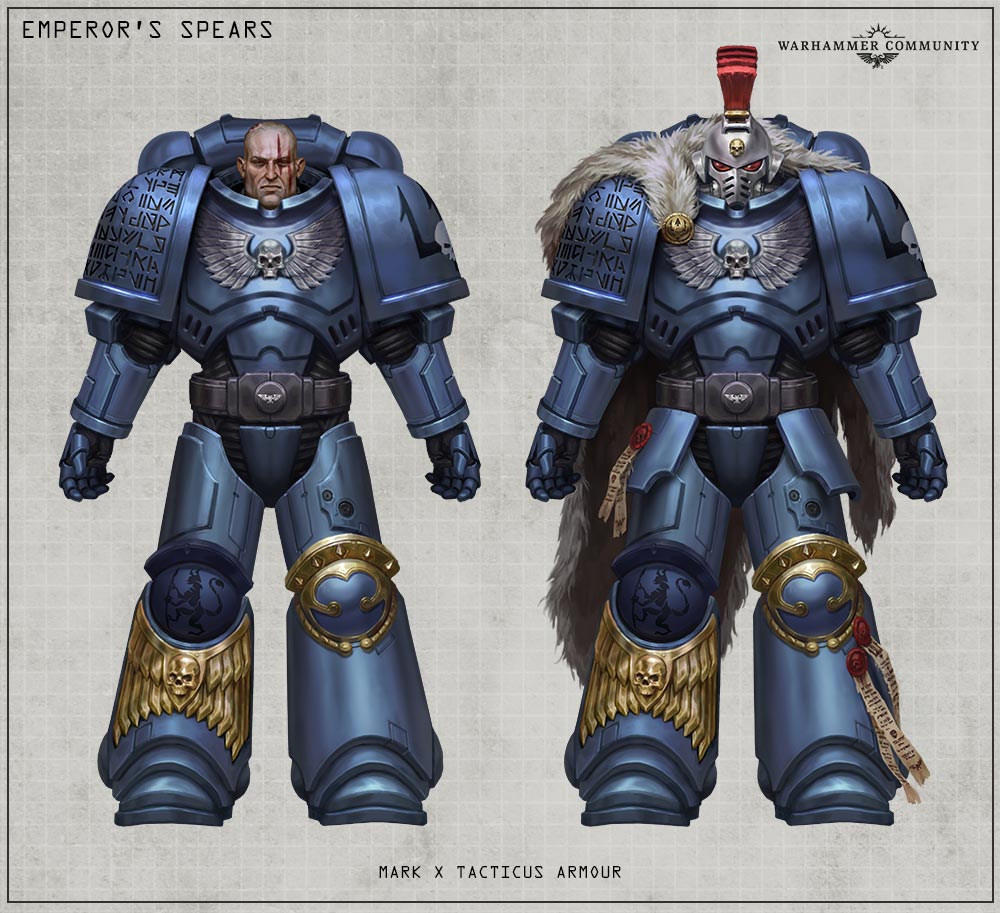


Beanith’s Smooshy Method for Getting Your Spears Battle-Ready


Wrapping Up
