In our How to Paint Everything series, we take a look at different armies of the Warhammer universe, examine their history and heraldry, and look at several different methods for painting them. With Halloween fast approaching, we’re looking at how to paint the spookiest monsters around. In today’s HTPE, we’re looking at how to paint the teen heartthrobs of the monster universe, werewolves
Werewolves originate in European folklore, and references to people shape-changing into wolves date back as early as the first century CE, when Gaius Petronius Arbiter wrote a story about a companion who changed into a wolf under the light of the moon. In Medieval Europe, this affliction became known as lycanthropy among Christians, and the concepts of werewolves were fairly widespread and traveled with colonialists to the New World. And by “concepts,” I mean “beliefs” – people used to full-on believe in werewolves, and around the same time women were being accused and tried under suspicion of being witches, the same thing was happening with werewolves, most notably in Switzerland, France, Austria, and the regions that would become modern Germany. After the trials eventually ended in the 1800s, werewolves were taken up by Gothic Horror writers during the Romantic era, with authors across Europe writing stories about seemingly stand-up people by day who transform into terrors by night.
Werewolf stories continued to gain steam and the concept exploded with popularity in the 20th century as these stories of wolf-people in the public domain became fertile grounds for making movies and tv media. Universal pictures is responsible for perhaps the most formative of these depictions with their massively successful 1941 hit, The Wolf-Man, which would go on to spawn four sequels. Since then, werewolves have been in and out of media with different interpretations, though perhaps one of the more enduring aspects of them was introduced in Anne Rice’s vampire novels and further popularized in White Wolf’s World of Darkness games, which positioned werewolves as rivals to vampires, locked in secret conflicts that regular humans neither see nor understand. This, along with the idea of varmpiric shadow governments (and not so much Werewolf: The Apocalypse’s treatment of werewolves as ecological defenders), became much more pervasive in media, seeing similar concepts thrown out in series like Underworld and Twilight. On the surface, it makes sense; vampires and werewolves are ostensibly competing for the same food source, so of course they’re at odds with each other. Also, they both have supernatural powers, and so watching them fight is rad as hell.
Where to Read/Watch More
Despite being mad old and having some pretty cool powers, werewolves don’t really have the same impressive library of fiction that Vampries and Zombies enjoy. Like all of these things, they’re a metaphor for something else, usually humans’ struggles with their own worst impulses and destructive natures. That they also end up making a painful transition to another, hairier shape makes them a great metaphor for puberty as well, and as a result werewolves are potentially overrepresented in the YA genre, with notable entries like multiple iterations of Teen Wolf.
- Cristophe Ganz’s Brotherhood of the Wolf comes from that late 90s/early 00s period of modernizing gothic horror stories and presenting them as opposed to rational men of the time (see also: Sleepy Hollow). It takes place during the French Revolution and features some sick fight coreography as a pair of investigators look into some bizarre attacks in the French countryside.
- Teen Wolf stars a young Michael J Fox coping with being a werewolf in high school. It rules, mostly because it involves a werewolf playing basketball.
- John Landis’ An American Werewolf in London basically wrote the book on modern depictions of werewolf in media, following an American tourist attacked by a werewolf and cursed with lycanthropy. Its most notable for its very detailed, very painful-looking shapeshifting special effects, which still hold up well today.
- The Werewolf of Paris, written in 1933 by Guy Endore, is a classic of the genre and was out of print for like 50 years.
- Werewolf books I’m told are good but haven’t read myself: Sharp Teeth and Nicholas Pekearo’s The Wolfman.
Painting Werewolves
Painting werewolves and wolfmen usually means painting a lot of fur or furry surfaces, and so that means even when those surfaces are smooth on the model you’ll want to consider how you can add texture to those surfaces to give them the appearance of fur. The heavier furry parts that are like hair will give you less trouble, owing to them being much more forgiving and generally being something you can drybrush in a pinch.
Evan’s Method – Sick Wolf Fadez
So, first things first. This tutorial uses an airbrush. The same or a similar result could definitely be achieved through blending, stippling, glazing, or a wide variety of techniques, but it’s just massively more convenient and quicker to use an airbrush. You’ve been warned.
Secondly. Wolves come in various patterns and colors. I took inspiration from Eurasian wolves with their grey backs, hints of red brown color in the middle, then off white bellies and chins. The same techniques can be used for any wolf coloration, just the paints used will be different. Google some pictures of wolves to get a good idea of where different colors show up and copy one you think looks cool.
The core of this method is basically to lay down the basic fur patterns and colors first, then overlay a wash and drybrush to add the shadows and highlights, leaving the pattern in most places.
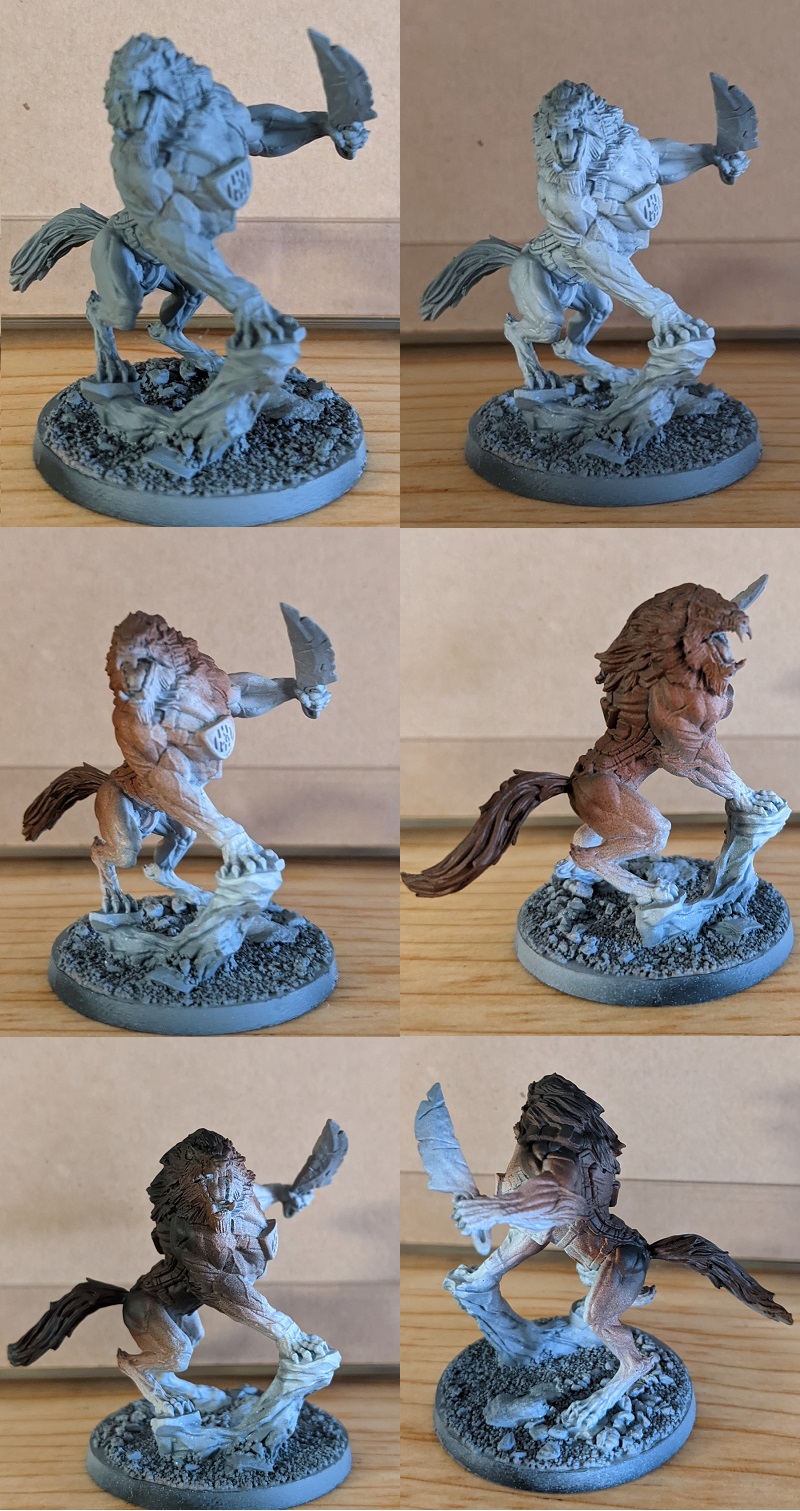
To lay out the fur patterns, I took the grey primed wolf and sprayed it with white from below (Liquitex White Acrylic Ink in this case). Then I applied VMA Burnt Umber along the wolf’s back, fading out as it got lower, and making sure to leave the bottoms of the legs, underbelly, and chin area white. Then I hit the shoulders, back, and along the top of the head with VMA Panzer Dark Grey and finally, the top of the shoulders, along the spine, and the top of the head got a tiny spritz of VMA Black.
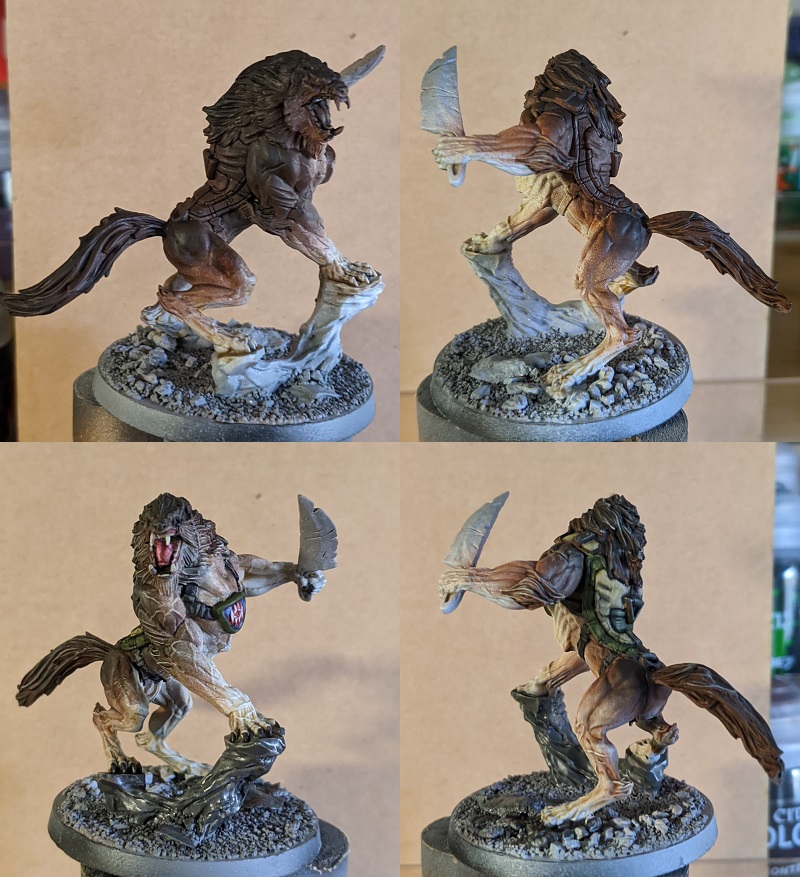
Next come the washes. I’d definitely recommend letting the airbrush coat dry for an hour or three before doing this step. I was impatient and had to touch up a few spots where I pulled up the thin coat of burnt umber on the legs. Luckily that paint is easy to thin down and glaze on, mostly hiding my mistakes!
I did a more advanced wash technique here. The white portions are washed with thinned down Skeleton Horde Contrast, Thinned with about 2 parts contrast medium to one part paint. The brown areas got Agrax Earthshade. It doesn’t really matter if the skeleton horde is still wet or not. You can either blend the two wet, or run the agrax earthshade slightly into the white portions to blend the transition. Finally, the black and grey portions got Nuln oil, blending slightly into the brown portions. I also used the Agrax Earthshade to pick out some of the tufts and little details, helping them stand out slightly on the model.
Once all that has dried, I drybrushed everything lightly with VMC Pale Sand to pick out the details and brighten up the tips of his footsies. After that it’s just basing and the non werewolf details and you’re done!
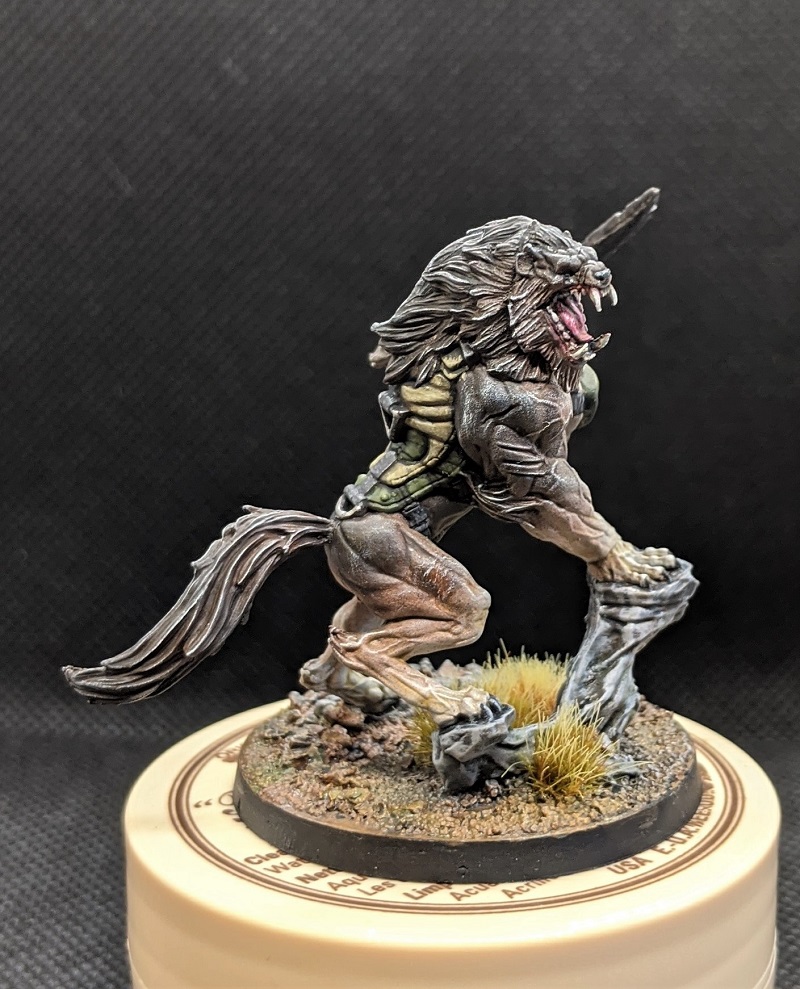
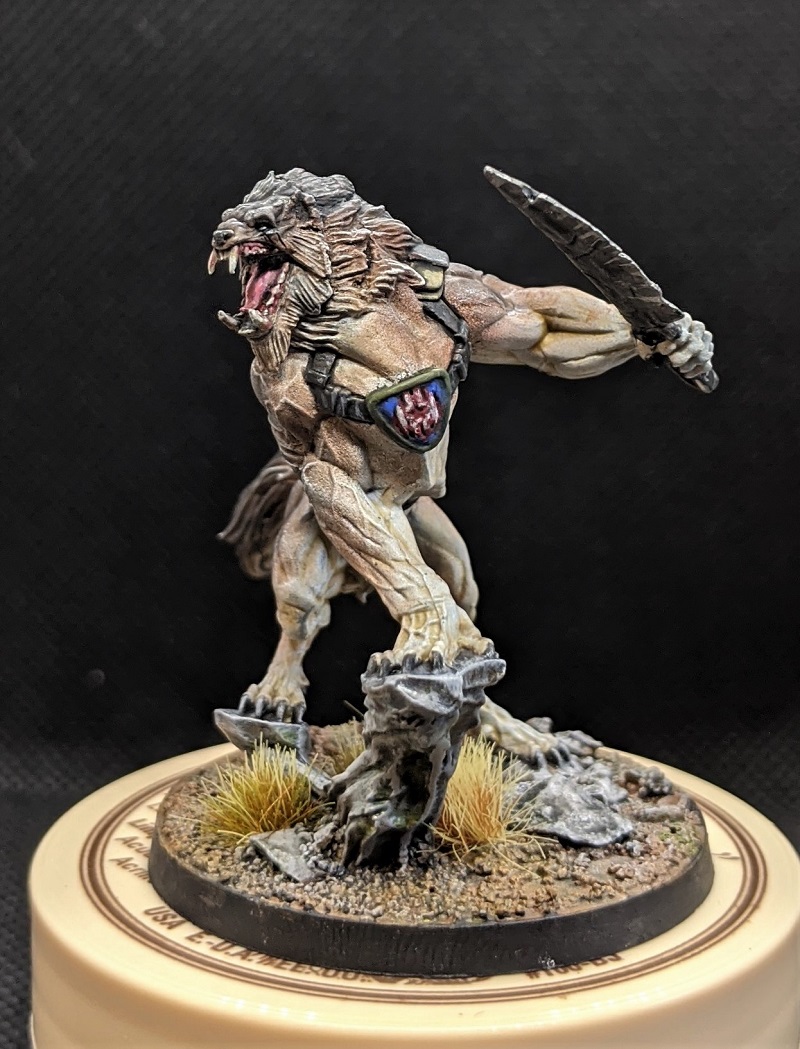
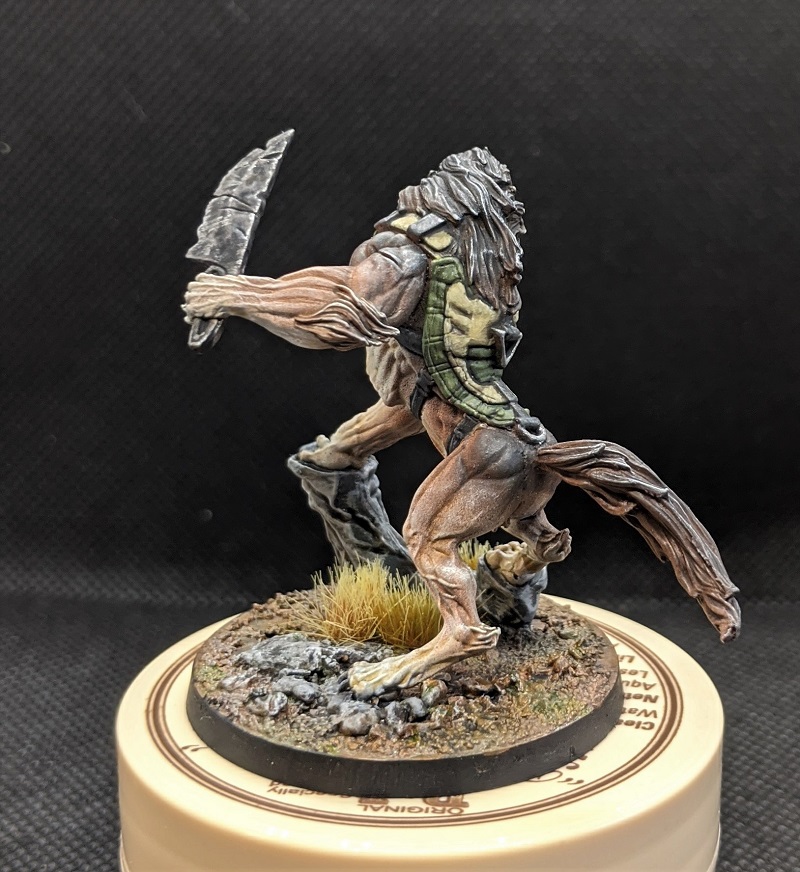
For reference, this is an Ariadna Antipode K-9 from infinity, specifically the one from the army box. Painting recipes for the various non werewolf sections are summarized below:
- Cleaver: Vallejo Mecha Air Dark Steel washed with Basilicanum Grey and a little bit of Nuln Oil to darken sections, then edge highlighted with Vallejo Mecha Air Steel. The little D rings on his back were done with the same colors, skipping the Basilicanum Grey.
- Olive Vest Sections: VMA Medium Olive washed with Nuln Oil, rehighlighted with Medium olive, then highlighted with Medium Olive mixed with a touch of whatever light color was handy on my palette. In this case I think I used the Khaki from the other vest sections.
- Khaki Armor: VMC Khaki. Wash of Nuln Oil and rehighlight with Khaki. Final highlight of Khaki mixed with VMC Pale Sand
- Grey Straps: Basecoat VMC London Grey. Then realize that’s way lighter than you want the straps to be and throw Nuln Oil and Basilicanum Grey at the problem until they’re sufficiently dark. Mix white or light grey into the basecoat for an edge highlight.
- Little Captain America Shield thing: Paint everything VMC Dark Prussian Blue. Paint the sections further in with VGA Ultramarine. I painted the entire Central Roundel with VMC Flat Red and washed with Nuln Oil then did a really bad job of painting all the raised portions with Ulthuan Grey. Luckily all the shotty work on that step disappears when you’re looking at it from a foot away.
- Mouth: The tongue and gums were done with a mix of VMC Burnt Red and VGC Warlord Purple, then I mixed in some white to the warlord purple to highlight with. The teeth are just picked out with the VMC Pale Sand I used earlier.
- Claws and Eyes: These were just painted black, then highlighted with black mixed with a tiny bit of white.
Zuul the Cat’s Werewolf? Therewolf!
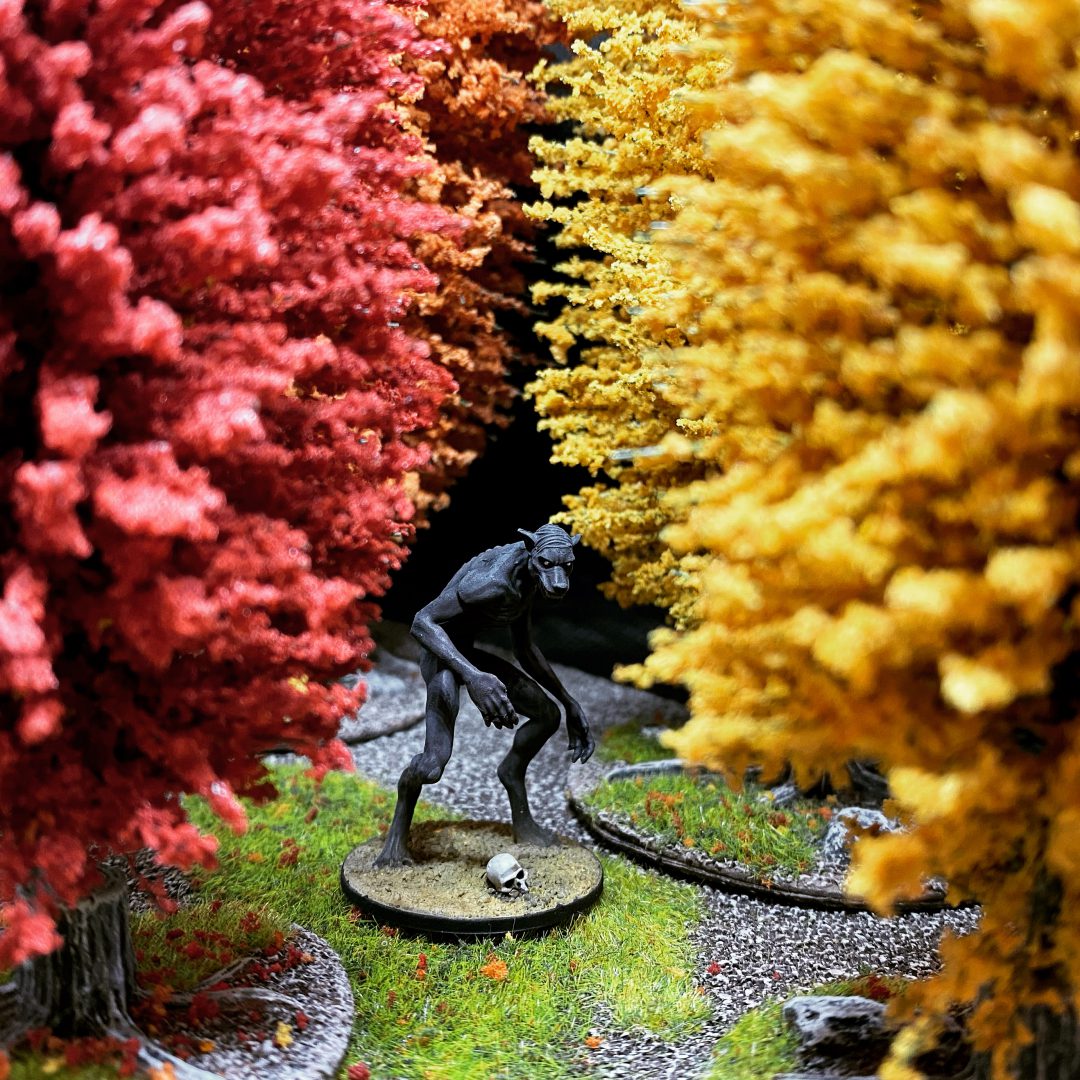
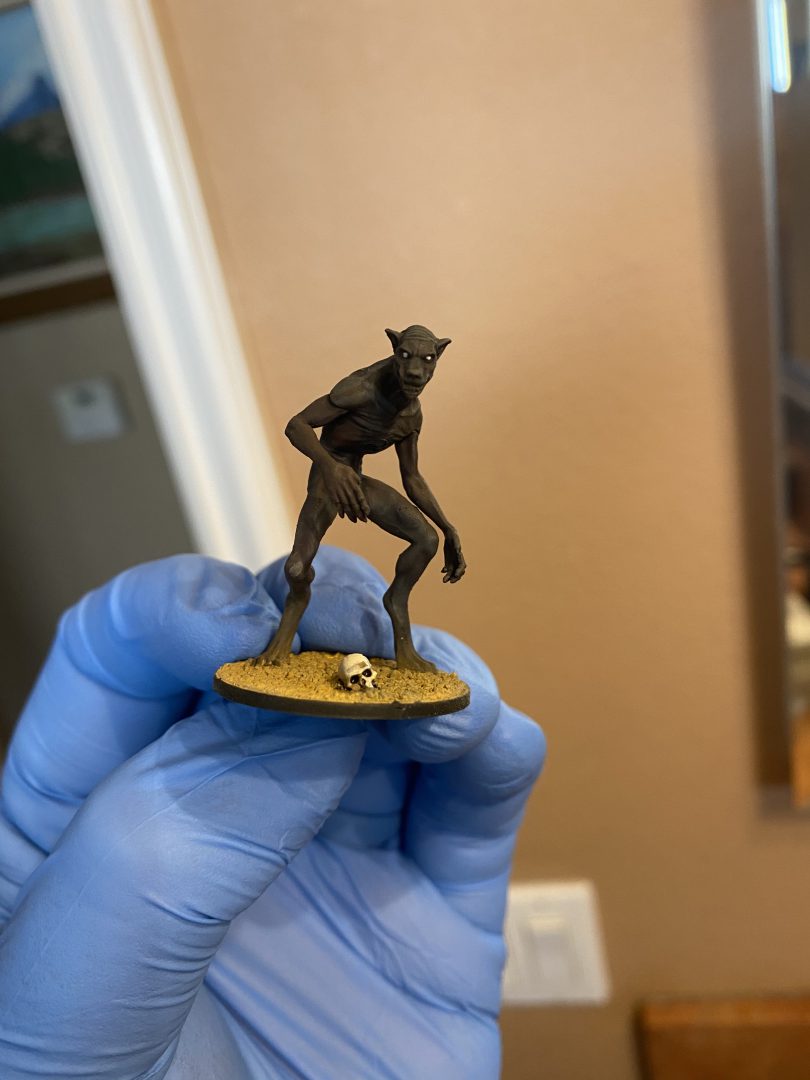
My core gaming group has recently been on a big historical trend and we picked up Dracula’s America. I decided to go with The Forsaken as my posse who are 7th cavalrymen that are cursed with uncontrollably turning into werewolves.
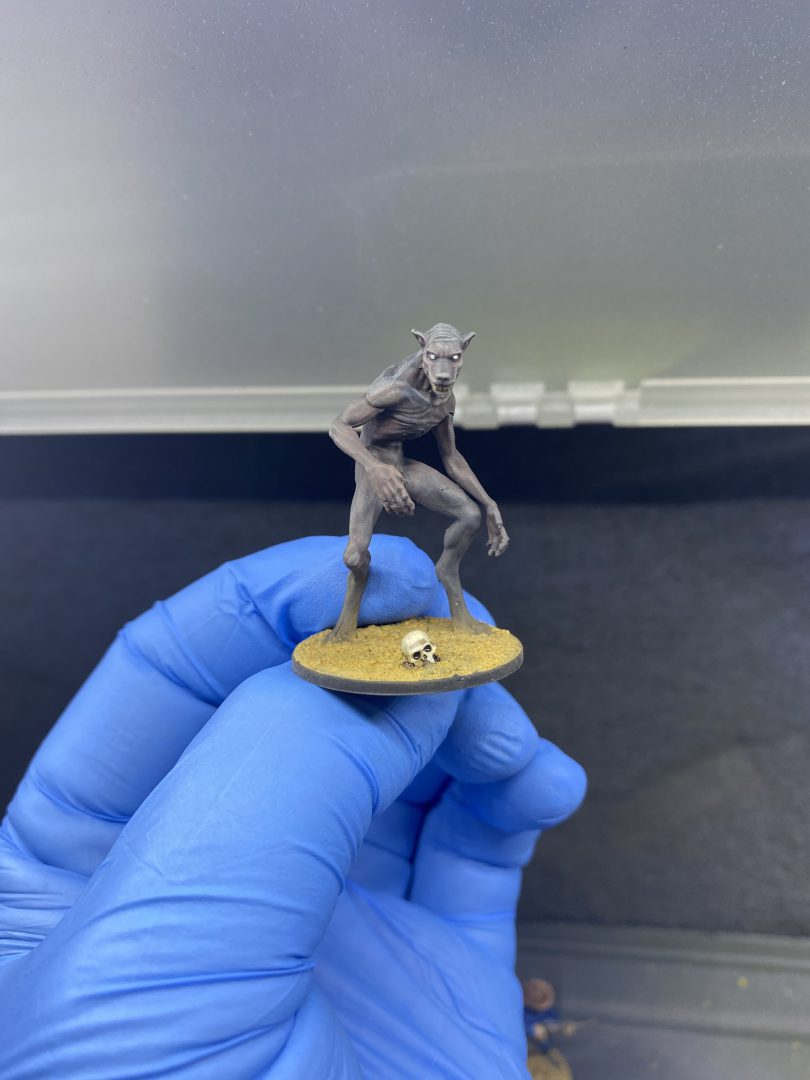
I’ve had a slightly hard time finding a good werewolf model that I found creepy and humanoid enough, but discovered that the Professor Lupin model from the Knight Games Harry Potter Miniatures game works perfectly.
My method for painting these was very simple. After basing them, I went ahead and did a reverse zenithal highlight. This means that instead of spraying grey & white from the uppermost region where the light would hit, I wanted it to look like the model was being lit from below. Once the highlight was done, I used my airbrush to spray the front of the model with Vallejo Model Air Ferrari Red, to help give the skin some warm tones. The next step was to simply spray the entire model, including over the red, with Vallejo Model Air Dark Grey Blue. Once that dries, I picked out the teeth and eyes (just two small dots) with Citadel Corax White. The entire model then got a wash of Nuln Oil (over the body) and Agrax Earthshade (over the white). I allowed that to fully dry then drybrushed Citadel Eshin Grey just to bring out a little bit of the highlights.
The result is a very stark model that stands out on the table top, especially against a lighter themed base & table.
Kenji’s Method: Brushing on Them Beautiful Browns, Baby!
My method does not use an airbrush, as I don’t own one, so all of this tutorial can be replicated by hand. Also, non-GW paints are fairly uncommon in my area, so aside from my primer and the metallic silver, all of the paints used on this model are Citadel paints. If you have Vallejo in your area (or Army Painter, etc.) or just prefer to use non-GW paints, many of these colors are easily replaced using color comparison charts like this one.
For my wolfman, I had wanted a reason to paint up Bâtard from Infinity, and this gave me the perfect excuse. However, I didn’t feel like painting him in the studio scheme that focused on greys, so I decided to also pursue an Eurasian theme, mostly the Iberian Wolf, which has some interesting patterns and colorization, most notably a white jaw-line, dark markings on their legs, and a mottled brown/black/white coat.
One thing that I also wanted to focus on is the fact that Werewolves are, well, werewolves and not just wolves, so I felt that the areas that didn’t have fur would likely have a more constant, skin-like tone. I also wanted to try and bring out the colors of a wolf in the parts that had fur/hair, particularly building off of the face and the mane in the back. Regardless of the type of wolf pattern I picked, I wanted to focus on the monstrous element of the Werewolf, as a mixture of human and animal, rather than just painting a wolf. So I set out with a somewhat simple idea: focus on the head, mane, and tail to carry the “wolf” colors, and make the arms, as the most obvious ‘human’ feature, look more like his ‘human’ skintone, but blending the colors together using a simple pallete (almost everything here is a various shade of brown, white, or black) so that one area wouldn’t look unnatural compared to the other.
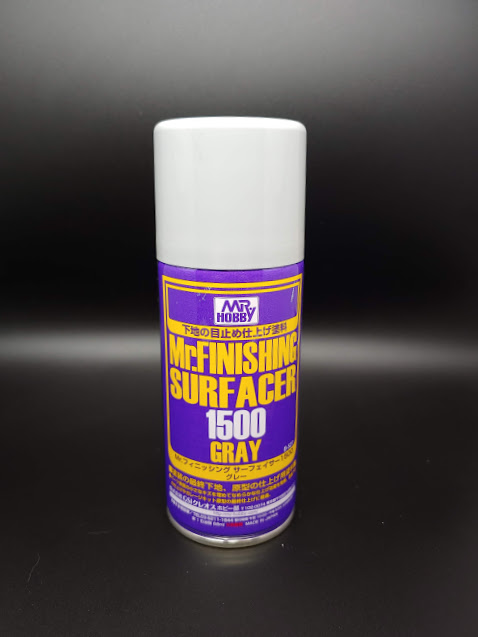
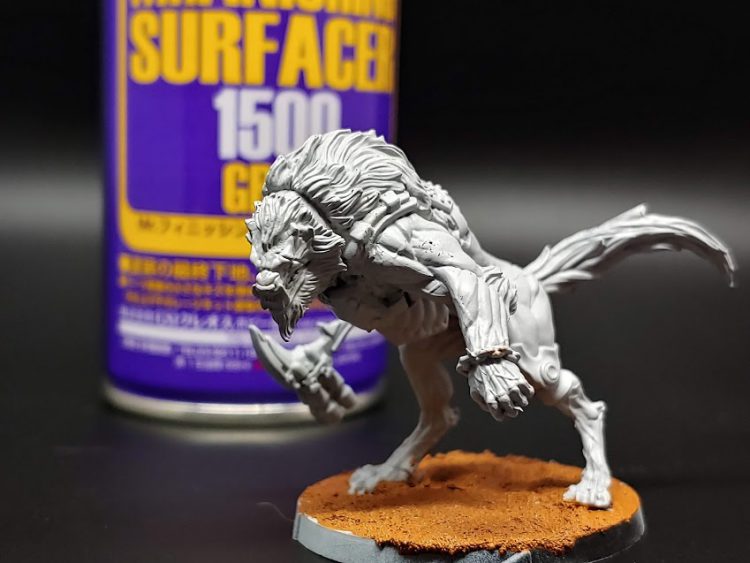
To start, for the primer I chose Mr. Finishing Surfacer 1500 Gray. This is a Japanese brand that you’ll sometimes find in stores that sell a lot of Gunpla, and I’ve actually been surprised to find it in places like RC and train hobby stores. If you’ve never used it before, the key selling point to me for Mr. Finishing is the particulate it sprays out, which actually changes based on the number. You can find it in various levels (from 500 to 1500) and colors, and there are even brush-on/airbrush versions (I use the brush-on one in emergency cases when I cannot prime outdoors, which is often). The 1500 level has the finest particulate and leaves an incredibly smooth, consistent coat that paints over easily. If you are primarily a contrast painter, I have found that the gray base coat here reacts very similar to Grey Seer, meaning that it has a slightly bluish tint when you apply things like yellow contrasts to it. I also put on some Vallejo Earth Texture after priming, but you can base however you like.
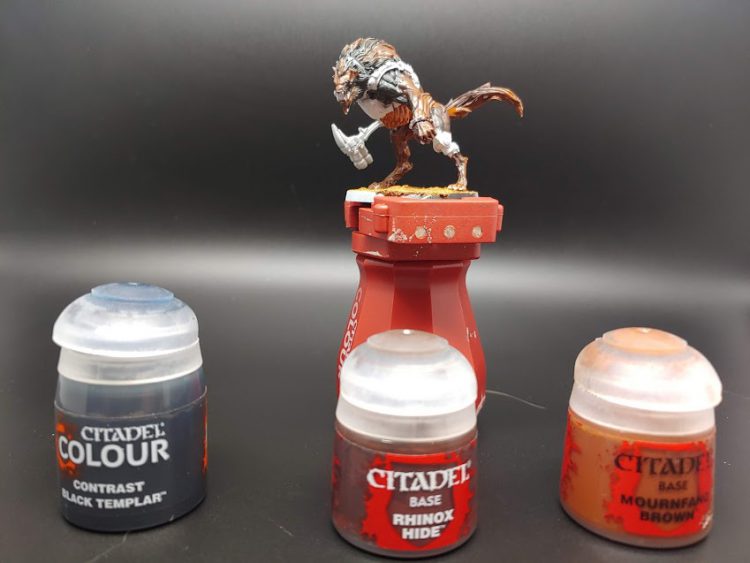
The base coat step involved 3 primary colors: Black Templar contrast, Rhinox Hide and Mournfang Brown base paints. My goal here was to simply block out the places I wanted to transition colors to over time, with a focus on the black being primarily near his shoulders, and radiating to lighter colors the more I moved away from his center of mass. I also wanted to make it easier to transition from very dark colors to lighter colors later, so I used Mournfang to start picking out those places now.
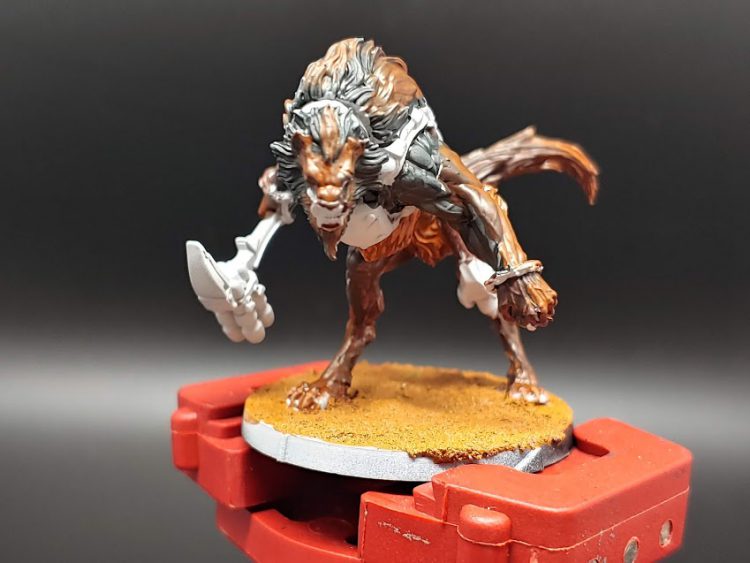
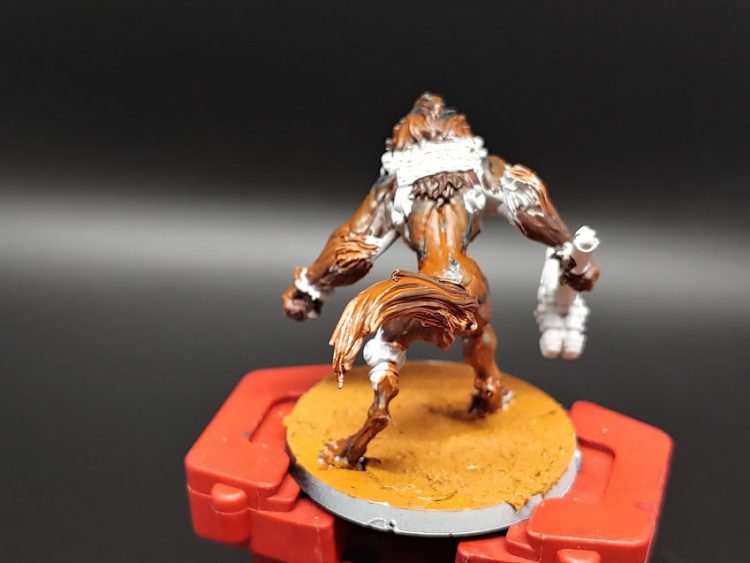
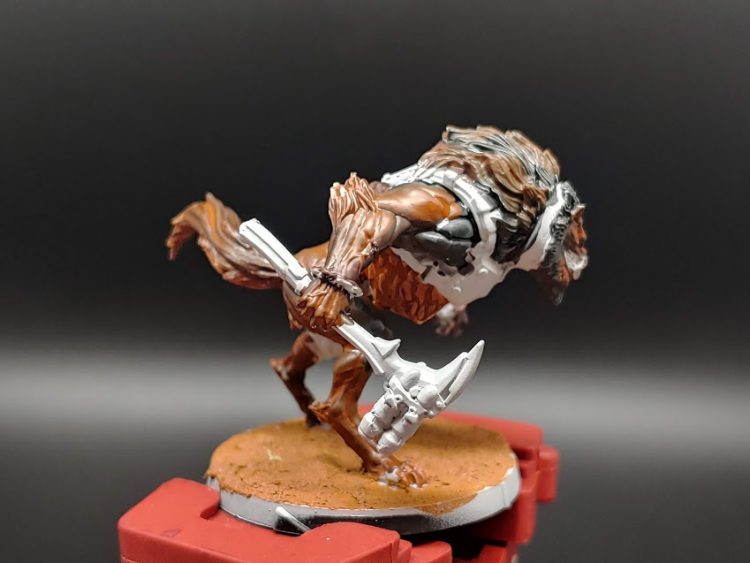
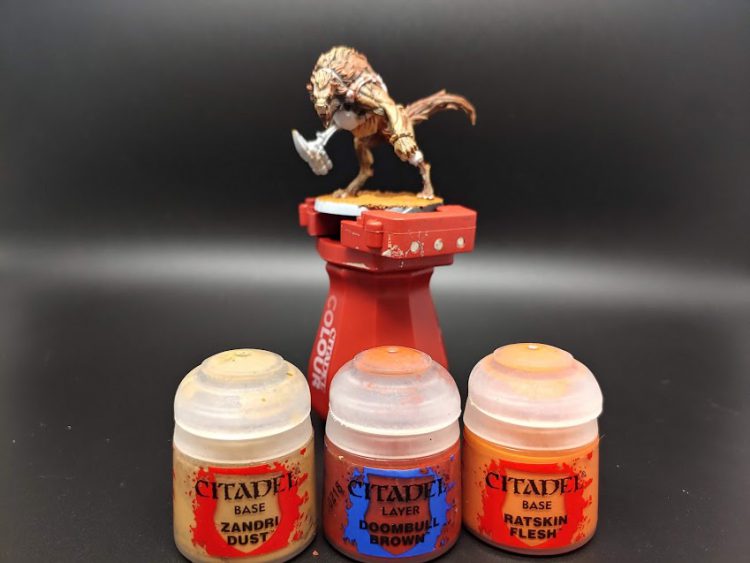
The next step was the use of Drybrushing/Overbrushing. I will admit right away that I am actually not very good at this, so I tend to actually overbrush more than I actually drybrush, but the end goal here was to quick start to change his colors from the weird, patchy base coats into something more distinct. For this step I used Zandri Dust, Doombull Brown, and Ratskin Flesh, again moving from the darkest color (Doombull Brown) to lighter colors, with Zandri Dust on his arms especially as they are furthest away from his body. I also took this moment to help block out his facial features more, as the Iberian wolf has a fairly distinct facial pattern of dark, black eye areas separated by browns and white.
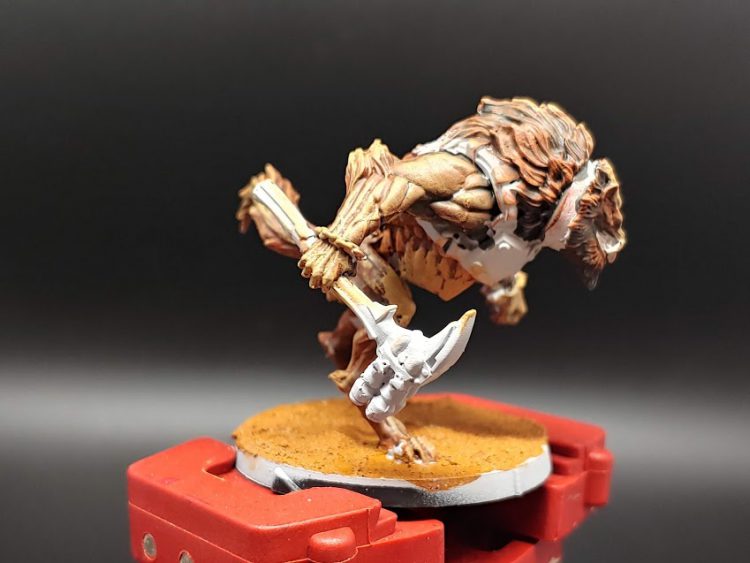
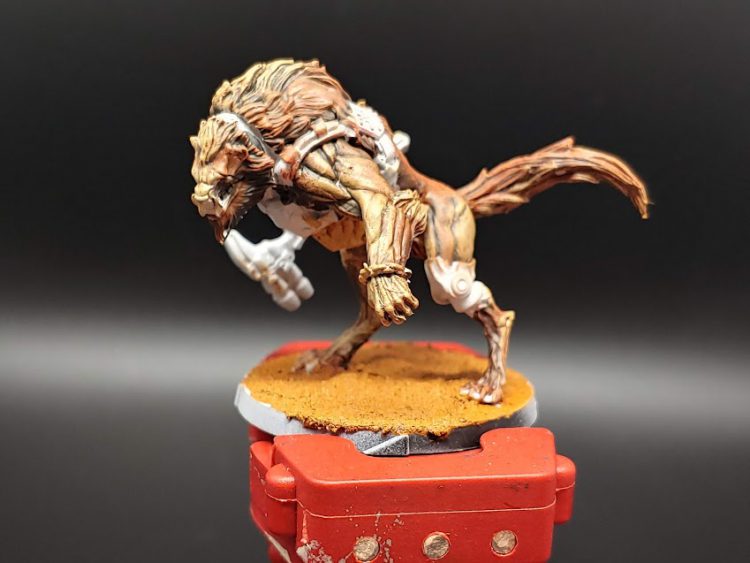
This next step is sort of a “draw the rest of the owl”, but I started with various mixtures of Mournfang Brown using wet blending. I first mixed Mournfang Brown with Ceramite White and Abbadon Black, and then started to blend these colors across his body. I then went back and used Celestra Gray on his stomach, before hitting it with a layer of Ceramite White and Celestra Gray mixed, and used the same along his face to pick out the white parts. I hit the entire model with a smooth Nuln Oil wash, and then painted on the rest of the colors I had not yet done (the greens on his harness are a mix of Death Guard Green and Waagh Flesh, and his metallics are Vallejo Metal Color Duraluminum, which is amazing and brushes on super well). Finally, I used a very light version of my Mournfang Brown mix to block high-light all of his muscles and features, which thanks to his sculpt were easy to define and made highlighting a breeze; I normally do not like highlighting and find it looks patchy and weird. I also took this opportunity to work on the patterns of his fur. In this particular model, I realized that he didn’t really have a consistent “furry” body, but had 2 major areas: his head, and his tail. So, instead of trying to create painted on patterns, I used a mixture of established colors and painted various strands of in a sort of alternating sequence, to give the look of a mixed coat effect.
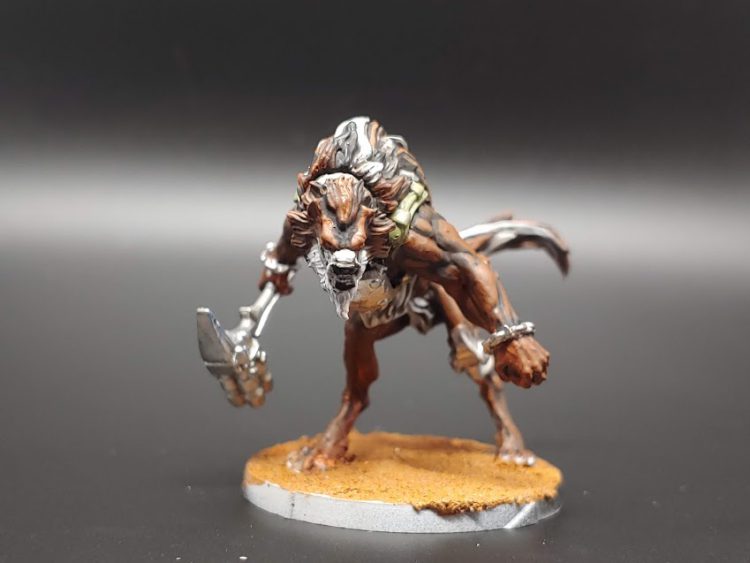
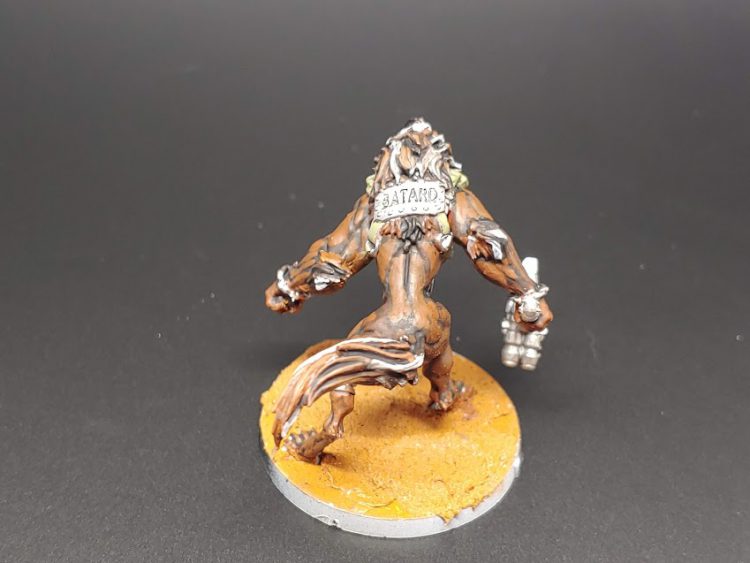
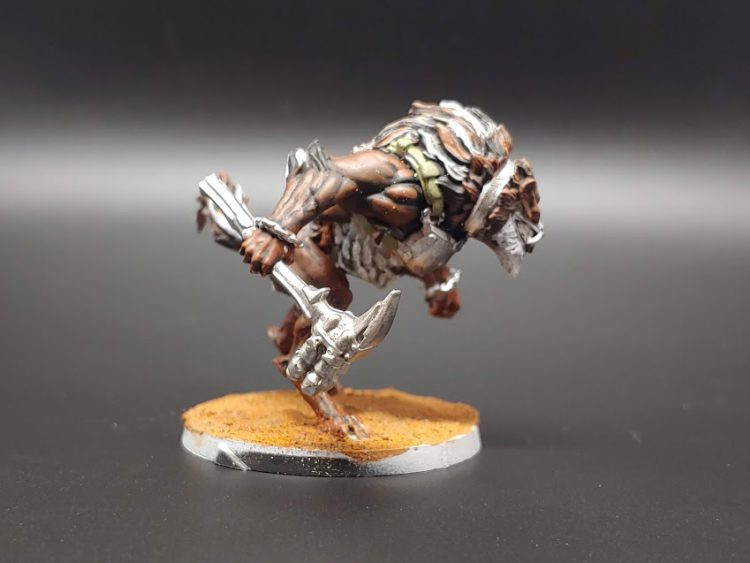
The last few steps were to use various colors I’d already established to brighten up or fix areas that were too dark from the Nuln wash, as well as to make his metallics look more distinct. For this, I used Cryptek Armourshade Gloss and then highlighted some of those areas with Canoptek Alloy and some fresh Vallejo Duraluminum, and used Nuln Oil to shade over some of the pieces of his hammer and gingerly inked in his nameplate with it to make the lettering stand out, as it felt like a defining feature of his back. The final step was to make sure his fangs stood out a bit, so I coated them with some Ushabti Bone before moving on to filling out his base. Although you can stop here, for the basing I chose a mixture of red and light ballast and some modelling rocks, as well as 2 small Army Painter flower. Because the model is very dark, I wanted the flowers to add a little bit of contrast to the model, and tried to make the base a bit more reddish than he was.
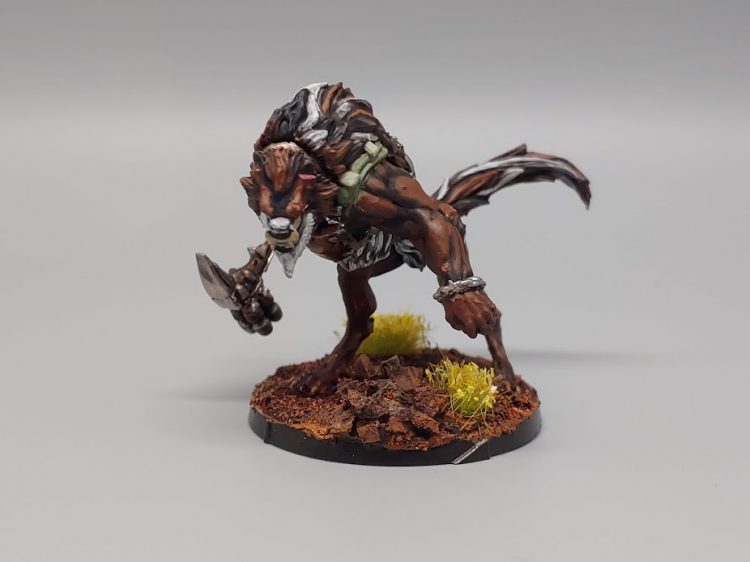
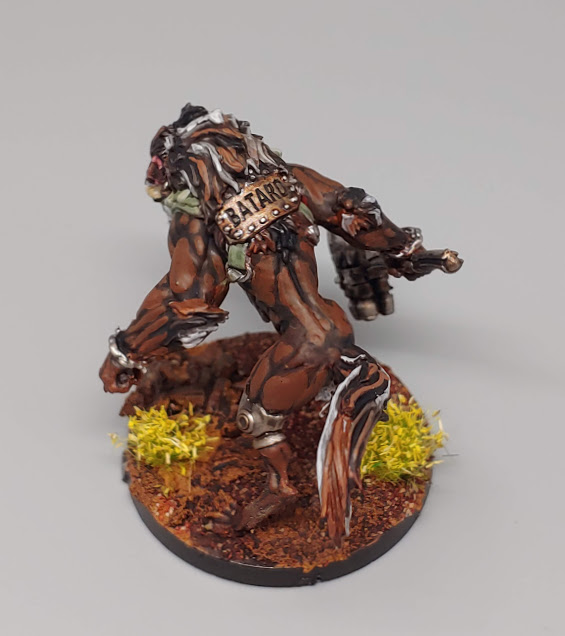
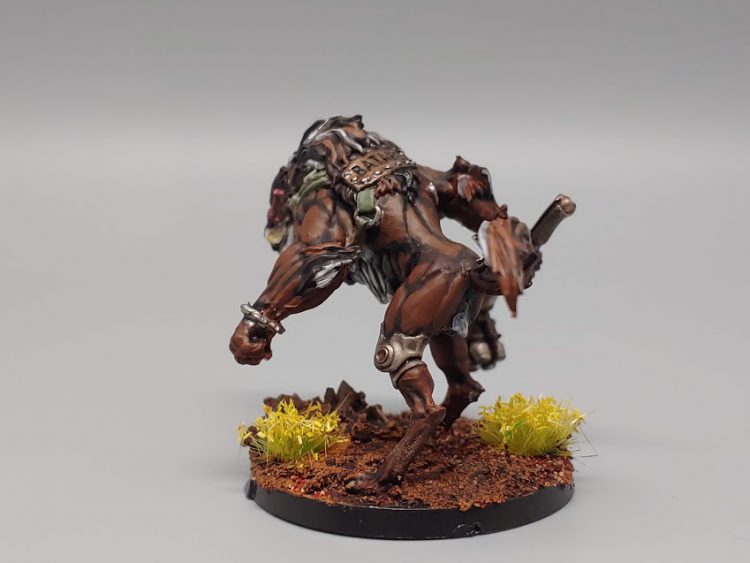
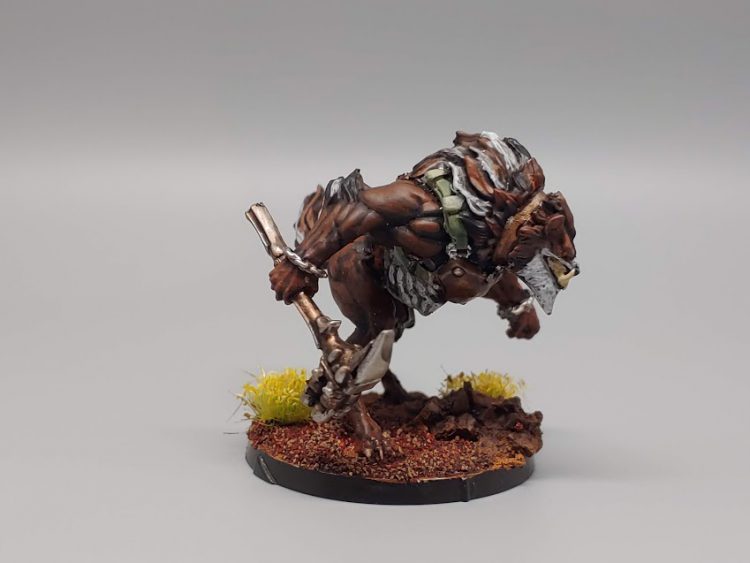
In the end, this model came out with an almost ‘comic book’ style to it thanks to the highlights and shading, and really sold the idea I was going for of wolf-like, or at least animalistic, color patterns combined with a dark human skin-tone.
Fowler’s Evil Sidekick Scheme
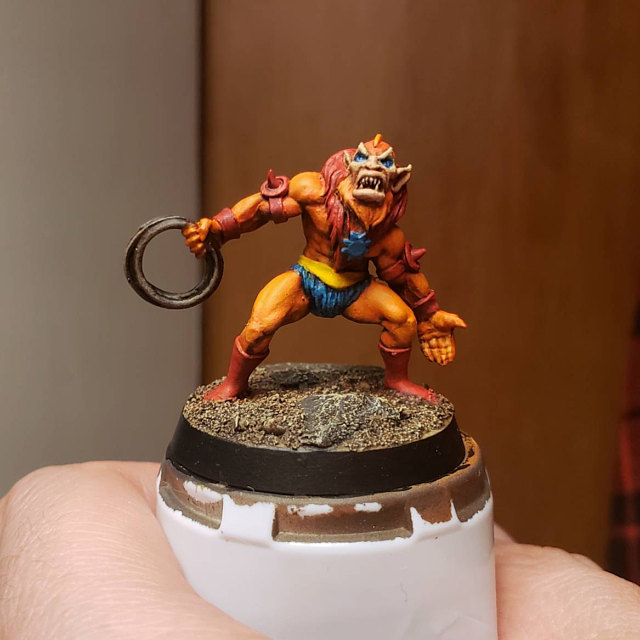
Another great figure from Quest Miniatures! I’m going for a mix of classic show appearance and first-run figure here. Prime black and apply a generous zenithal coat of white. Skin (along with the “beard”?) is Jokaero Orange, washed with Reikland Fleshshade, layered up to Troll Slayer Orange and Fire Dragon Bright. I left the helmet at Troll Slayer and brought the little forehead nub up to Fire Dragon. Boots, armor, and mane got Khorne Red, washed with nuln oil and highlighted with a bit of Wazdakka Red. The belt is Flash Gitz Yellow, with some nuln oil run into the recesses. The underoos and chest icon are painted with Thousand Suns Blue, washed wtih Nuln Oil and Highlighted with Ahriman Blue. The Rope is Wyldwood Contrast with a light drybrush of Baneblade Brown. Skin is Kislev Flesh, with a Reikland Fleshshade wash and layered back over with Kislev. Eyes were painted white and glazed with a very thin coat of Ahriman Blue.
Unleash the Beast Within
That wraps up our look at werewolves, wolfmen, and other wolf-like creatures.
Have any questions or feedback? Drop us a note in the comments below or email us at contact@goonhammer.com.
