In our How to Paint Everything series we look at how to paint well, everything, with different techniques and approaches from different painters. In this article we’re looking at how to paint the blood-crazed warriors of the XII legion, the World Eaters.
The World Eaters were already known for their savagery before the discovery of their Primarch, Angron. As the War Dogs they were brutal warriors known for their combat prowess and emphasis on violence over finesse. After the discovery of their primarch, they were renamed the World Eaters in honour of Angron’s former gladiator compatriots, who had been called “the eaters of cities” during their rampage across Nuceria. Under Angron’s leadership, the legion descended further into violent madness. They began implanting warriors with their own crude versions of the Butcher’s Nails, arcane technological devices which connect directly into the pleasure centers of a warrior’s brain and drive them to violent impulses.
When Horus rebelled the World Eaters were quick to follow and descended upon the Imperium in a bloody frenzy, destroying worlds and butchering their former comrades. Following the fighting on Terra, the World Eaters retreated into the Eye of Terror with the other legions. When infighting broke out, the World Eaters finally splintered during the fighting on Skalathrax thanks to the actions of Kharn the Betrayer. Since then they’ve operated as a series of warbands.
Covered in This Article:
- Several methods for painting World Eaters, including a pre-heresy scheme using their white and blue armor.
- How to paint notable elements of the World Eaters, including gold trim, marks of khorne, and skulls.
- A link to our How to Paint Angron article, so you can paint the legion’s impressive Daemon Primarch model.

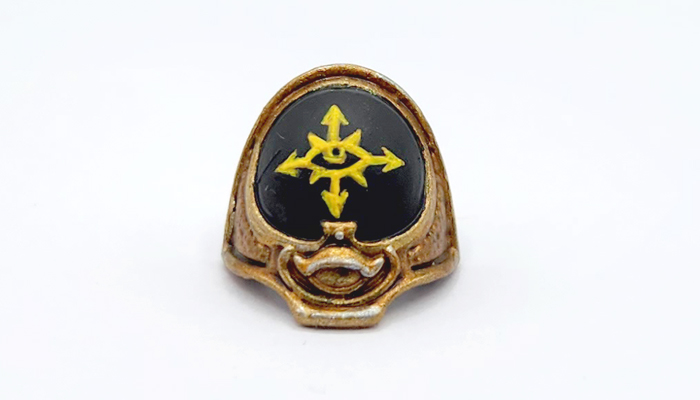
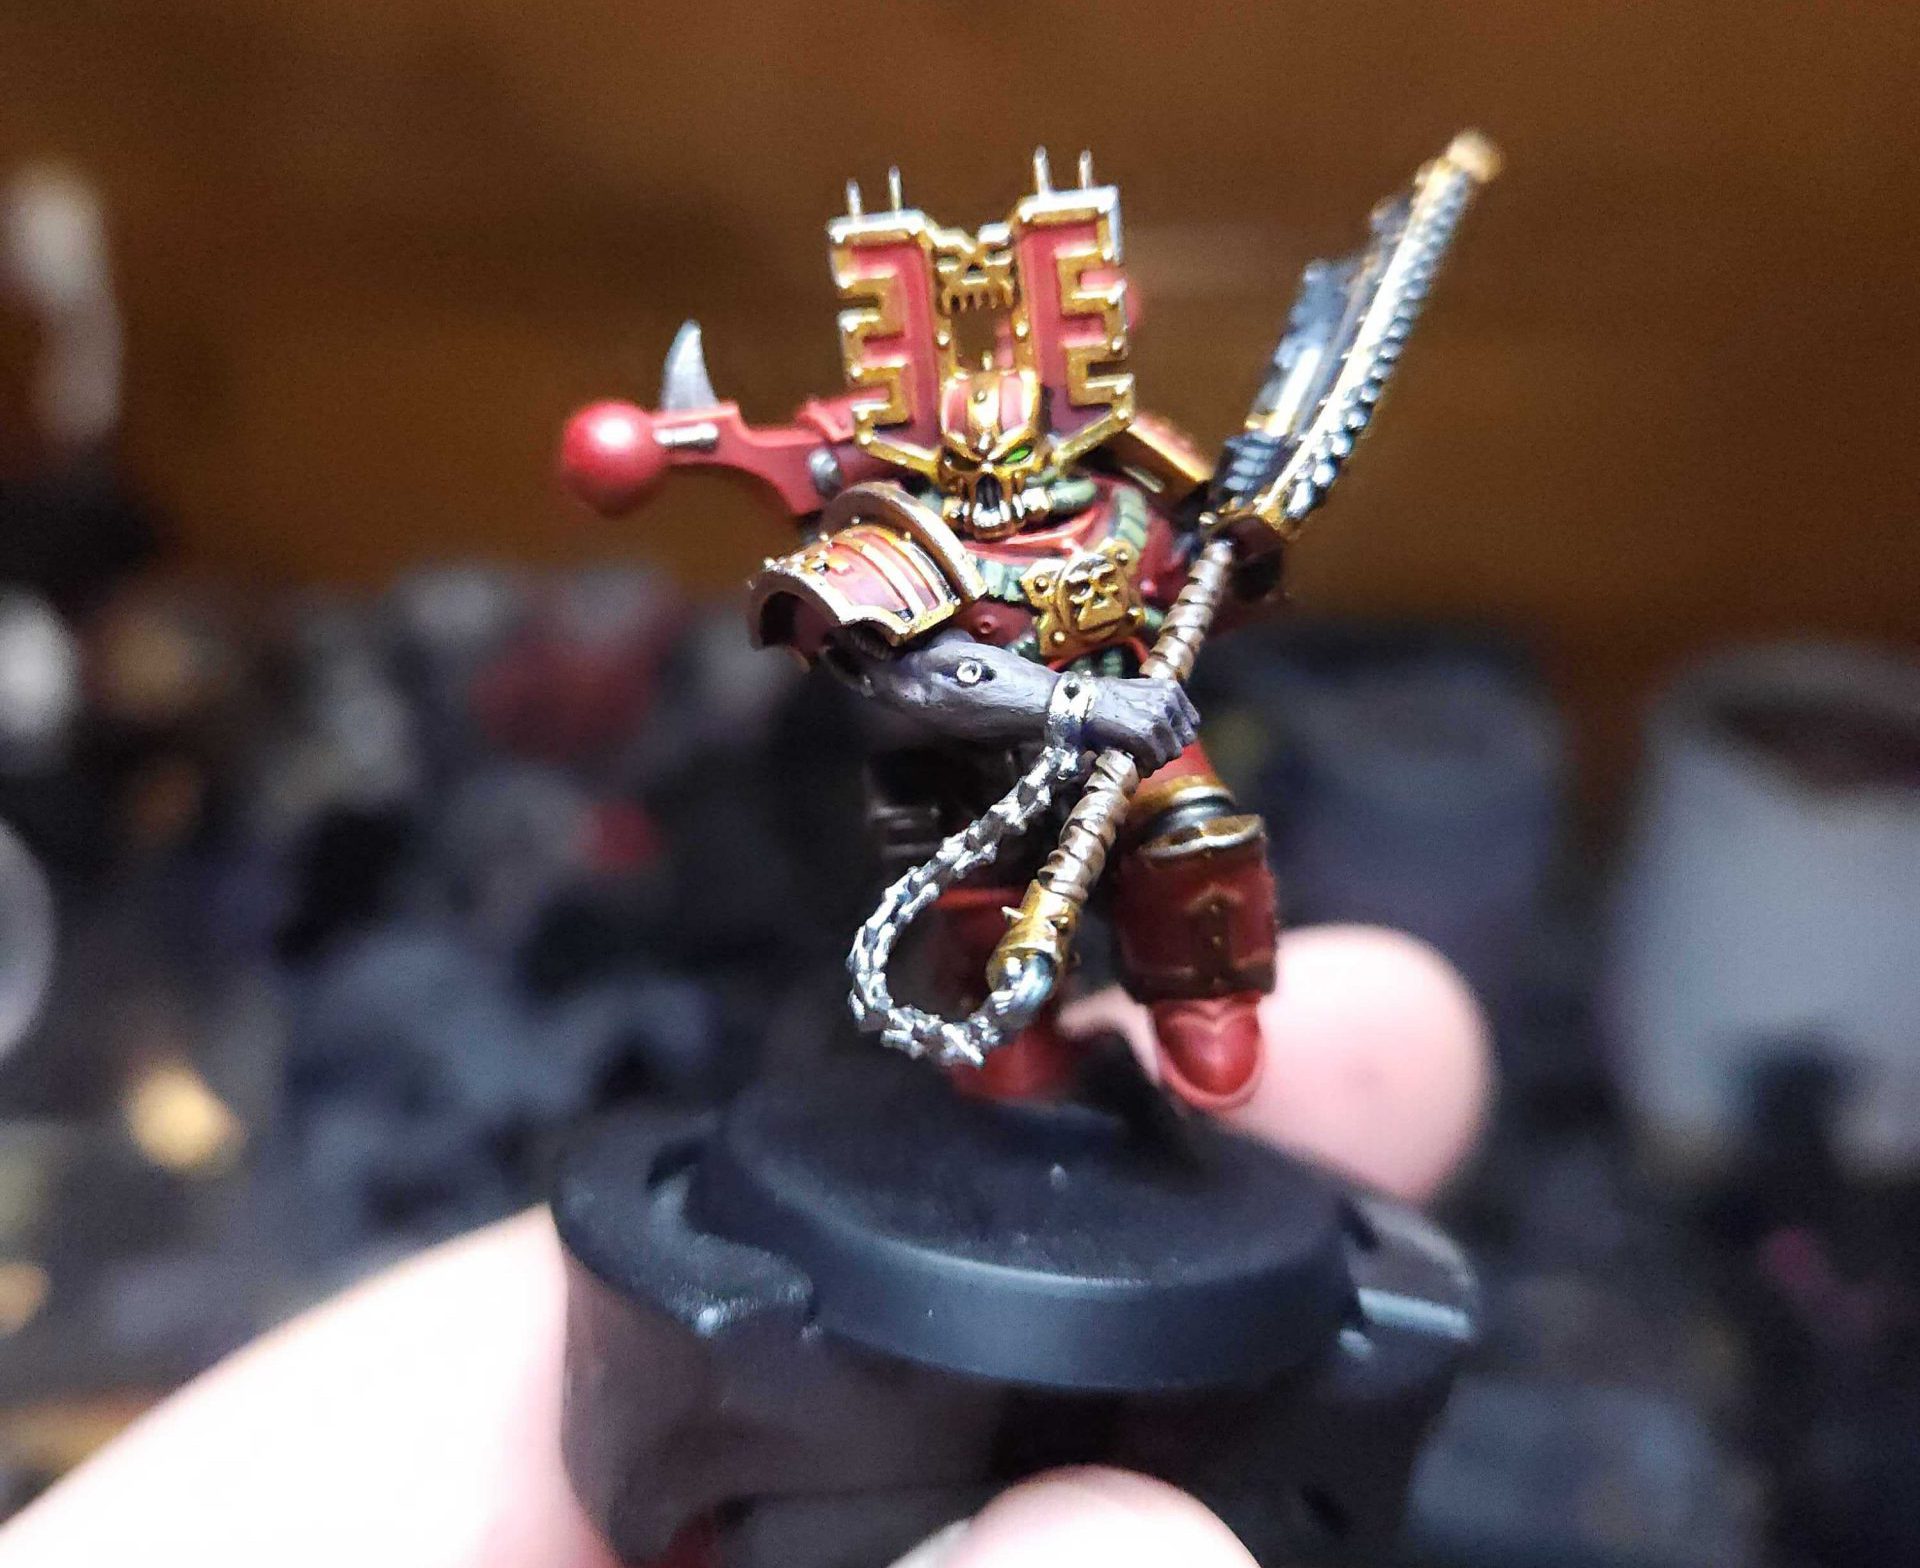
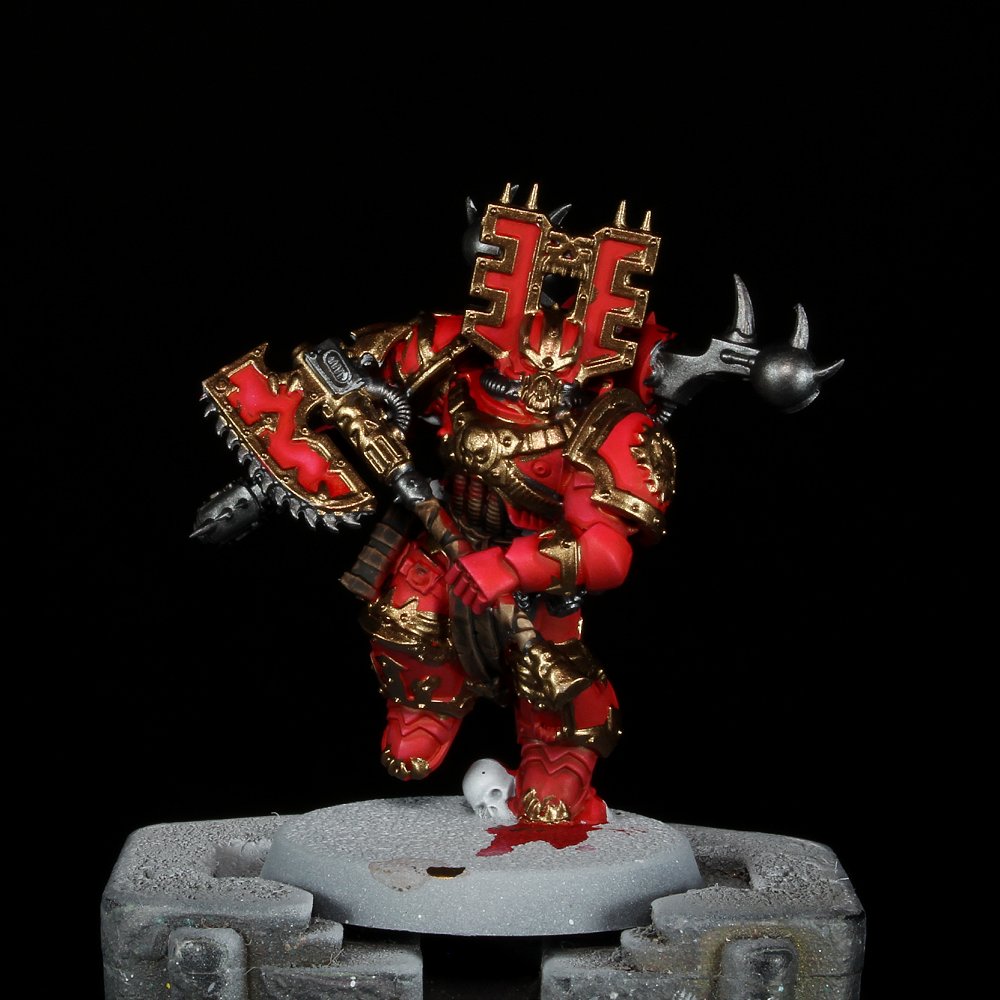
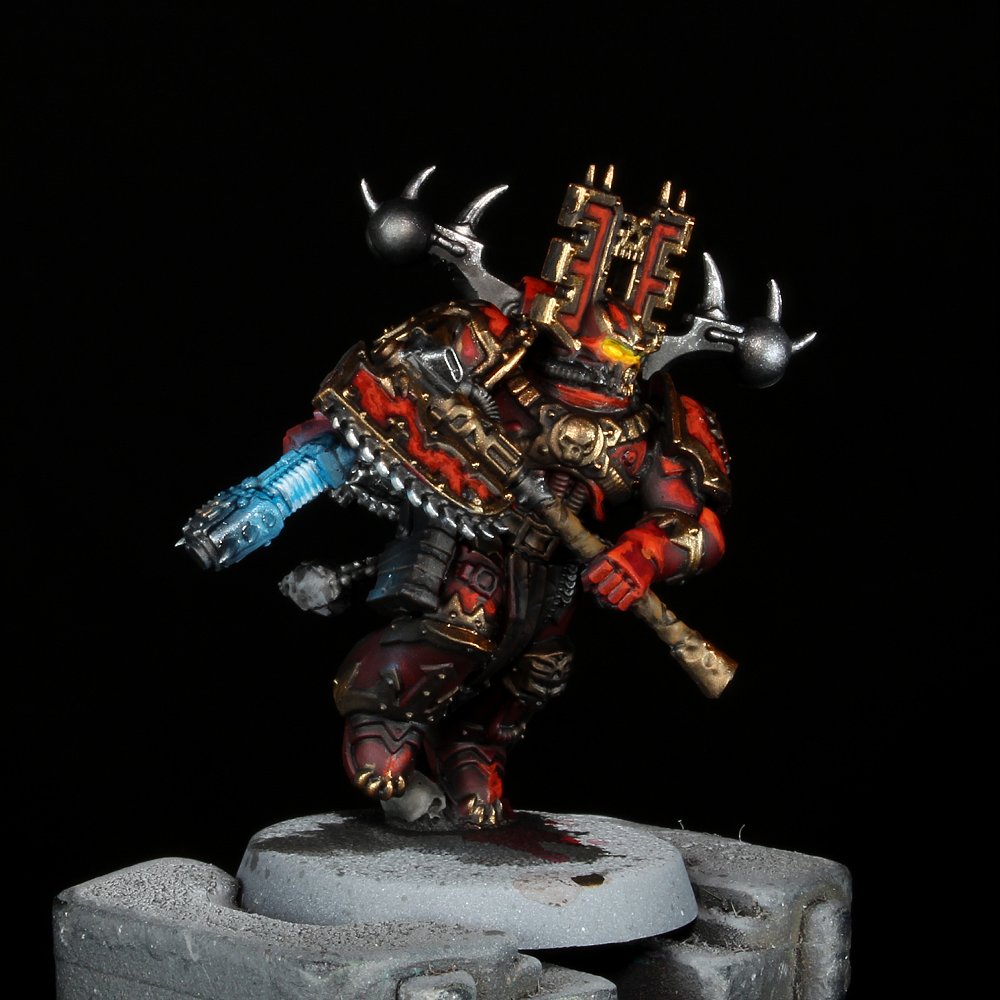
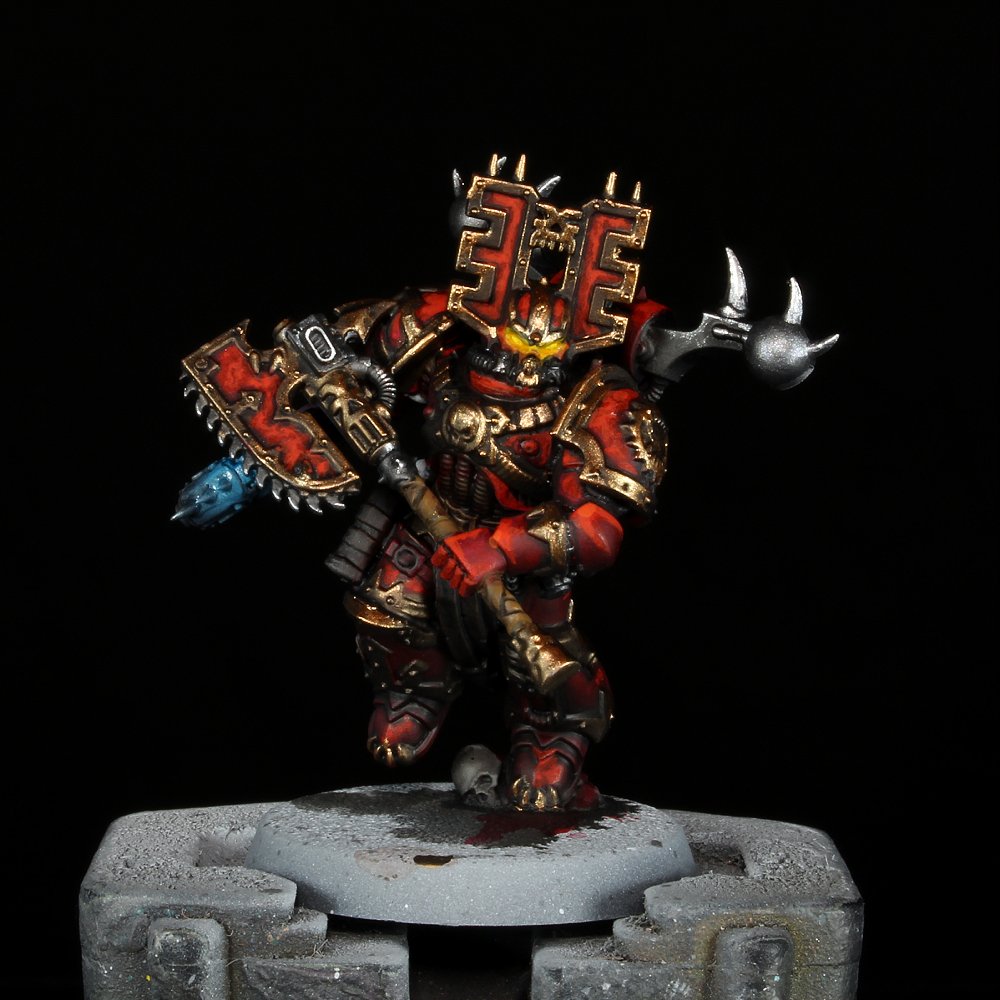
Heraldry - Click to Expand The World Eaters don’t waste a lot of time on their heraldry these days, preferring instead to spend that time adding more skulls to the skull throne. They wear red armor with gold or brass trim, though the shades of red and brass may vary by warband. They may bear markings on their armor to denote their kills or victories in battle, such as skull trophies and trophy racks, or kill counts. The World Eaters made one of the biggest visual transformations from the Heresy era of the founding legions – in their original incarnation they wore white armor with blue pauldrons.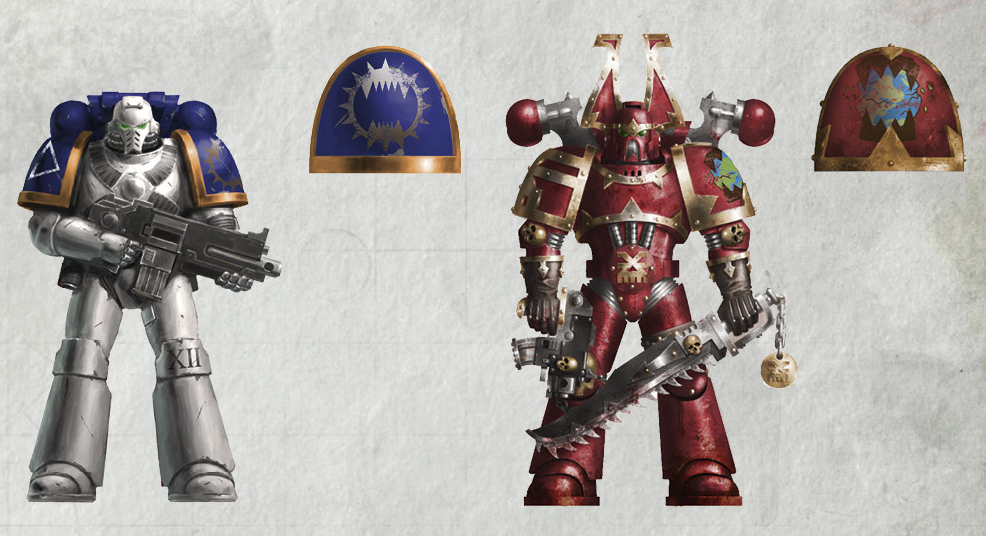
Common Visual Elements of the World Eaters
Although the World Eaters don’t spend a ton of time on their heraldry, there are still a number of common elements that unite them visually. Rather than cover each of these in detail in our tutorials, we’ve included a number of them here for you to reference when painting your blood-crazed murderers.

How to Paint Skulls - Click to Expand If you’re painting World Eaters, you’re going to be painting a lot of skulls, ostensibly for that big Skull Throne everyone is always going on about. My standard method for these is to paint Rakarth Flesh, wash with Agrax Earthshade, then highlight with Rakarth and Reaper’s Polished Bone, but if you’re looking for more detailed methods, we have an entire article on painting bones and skeletons – you can find it here.

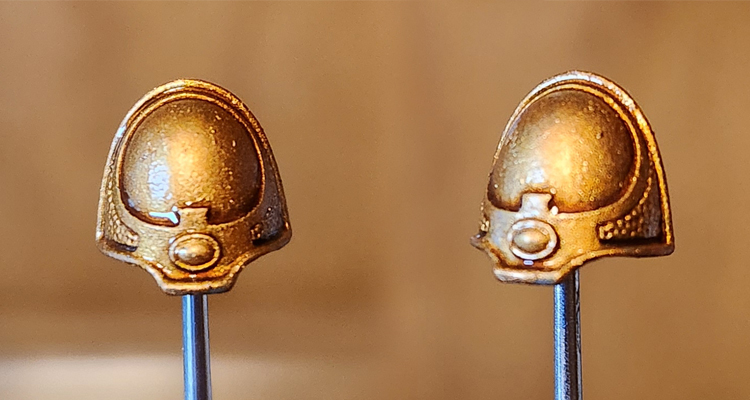
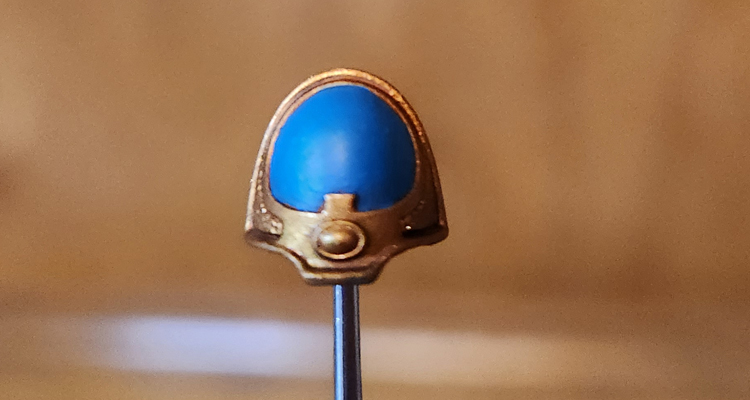
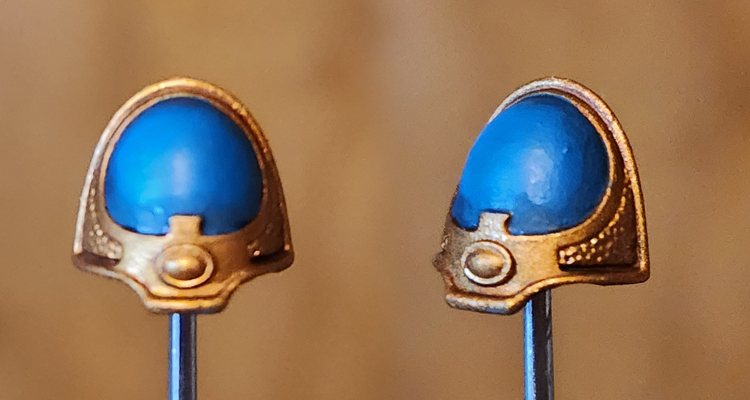
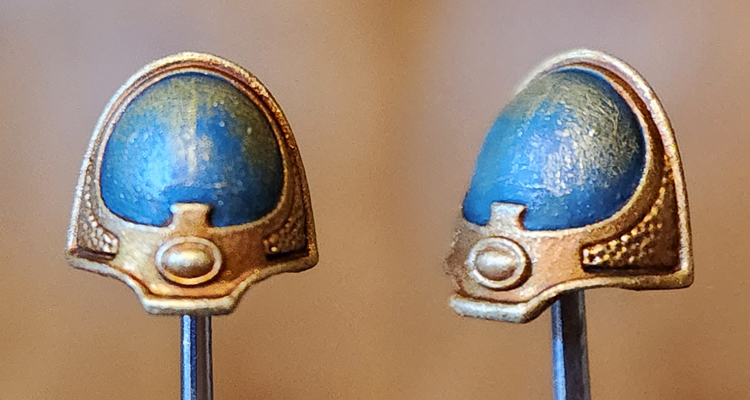
How to Paint Gold Trim - Click to Expand Another major element of World Eaters is the copious amounts of gold trim on the models. If you’re looking for a guide on painting Gold Trim, you can find our full guide here, with a variety of techniques and examples. These tend to start with Retributor Armour, which works great for World Eaters, but if you want to start with a darker shade you can begin with Balthasar Gold for more of a brass look. If you’re in more of a hurry, here are two quick examples based on how you want to undercoat and prime the model. There’s a certain train of thought that it’s easier to paint models like Thousand Sons and Chaos Space Marines with lots of trim if you prime them the color of the trim, then fill in the armor colors later. This idea has particular weight if you’re going to be painting the armor a flat color, and aren’t liable to hit the trim and require a lot of clean-up. The easiest part of this. Prime the model whatever gold you’re looking to use. In this case I used GW’s Retributor Armour. Clean up any spots that need a bit of extra gold. The next step is applying a wash to the gold. This will shade the gold, but also tone down some of the shininess, giving it a more burnished look. We can bring that back up later, but for now we want to create dark recesses in the gold parts of the model. For the GW’s Thousand Sons studio scheme they use Reikland Fleshshade here, though I tend to use Agrax Earthshade, as you’ll see in the example below. Reikland gives the gold a redder, warmer appearance. Next comes blocking in the panel color. You don’t have to be super-precise here but make sure you don’t hit your trim – you can leave some small gaps between the panel and trim if you want, as we’re going to color those in during the next step. For the GW scheme, the color to use here is Thousand Sons Blue. Now it’s time to wash the panels. We want to use a black shade for this – the GW method uses Nuln Oil – to create dark, black recesses between the armor panels and the gold trim. You can go over a bit here, but the important thing is that your wash pools in the edge between trim and armor panel. In this next step we’re going to drybrush the trim with a lighter gold. The GW method uses Sigmarite but I used Liberator Gold here, and those are basically the same color, just with different consistencies. The goal here is to catch the raised edges – you can go over the panel color as you do this, just make sure you’re avoiding the dark recesses we just painted. After that’s done, go back and recolor the armor panels, making sure to leave your dark lines between the panels and the trim. After this you’ll want to add details like transfers or painting the gemstone, and if you’re careful, you can add some highlights to the armor panels. Though if you’re planning to do more gradient work with the armor panels, I’d suggest painting the trim second. If you’re looking to do more involved work with the armor panels, like giving them a gradient, then you’ll want to paint the armor first and do the trim later. In that case, prime the model whatever color works best for your basecoat. In this example I’m painting a Rubric Marine shoulder pad for the Black Legion. I tend to do some subtle gradients here, mixing up from Abaddon Black to Corvus Black, which is a more like a cool dark gray. If I do this for the whole model, it’ll be done quickly with a larger brush, and I won’t worry about the trim at that stage, making it ideal to come back and paint the trim later. In this case I usually do four mixes/shades: Pure Abaddon Black, 2:1 Abaddon:Corvus, 1:2 Abaddon:Corvus, and pure Corvus. I tend to do panel lining highlights before I do my gold trim. This gives me room to clean things up before the trim goes down. For black armor I do a thin line of Mechanicus Standard Grey. If you’re going to wash your trim around the edges or paint the recesses, you’d do it here as well. Time to paint the trim. For this trim I’m using GW’s Retributor Armour. If you want a darker gold there are ways to get there with shades and washes, or you can start with something more brassy, like Screaming Bell. This is also where you want a steady hand – you want to paint the trim without touching your armor panels. Take your time here and use multiple thin coats. Next we need to wash the trim. This will give it a deeper, burnished look and darken the recesses. This both gives the trim definition and also will make the highlights pop that much more. For this example I’ve used Agrax Earthshade. The final step is three stages of highlights: First I hit raised areas that are larger spots with the base trim color, in this case Retributor Gold. You can most easily tell where I did this on the upper eyelid on the lefthand side shoulder pad – I don’t want a blotch of Agrax wash sitting there so I came back and painted the whole lid. Stage 2 is edge highlighting> First I hit the edges with Liberator Gold and then I hit the very tops and corners with a silver, in this case Runefang Steel. This gives the gold a very shiny look and really makes the edges pop.
Method 1: Priming the Model Gold
Step 1: Prime the model gold
Step 2: Wash the gold
Step 3: Block in the Panel Color
Step 4: Wash the Panels
Step 5: Drybrush the Trim
Step 6: Finish the panels
Method 2: Priming the Model Any Other Color
Step 1: Gradients

Step 2: Panel Lining
Step 3: Trim Basecoat
Step 4: Wash the Trim
Step 5: Highlights

Exposed Skin - Click to Expand The World Eaters show off a lot more skin than your average space marines, with lots of exposed arms and bodies on models like Berzerkers, Eightbound, and Jakhals. We have a whole guide to painting human skin of every shade and variety, which you can find here.

Khorne Daemons - Click to Expand World Eaters armies frequently charge into battle alongside Khorne Daemons. We have a separate article for painting those, which you can find here.
Painting the World Eaters
The World Eaters have a fairly simple paint scheme – red armor with brass or gold trim. They don’t sport any complex heraldry, or really any heraldry at all – at best, they have legion iconography and marks of khorne, and that’s about it. That said, keeping the army interesting visually with a simple scheme can be a bit of a challenge.

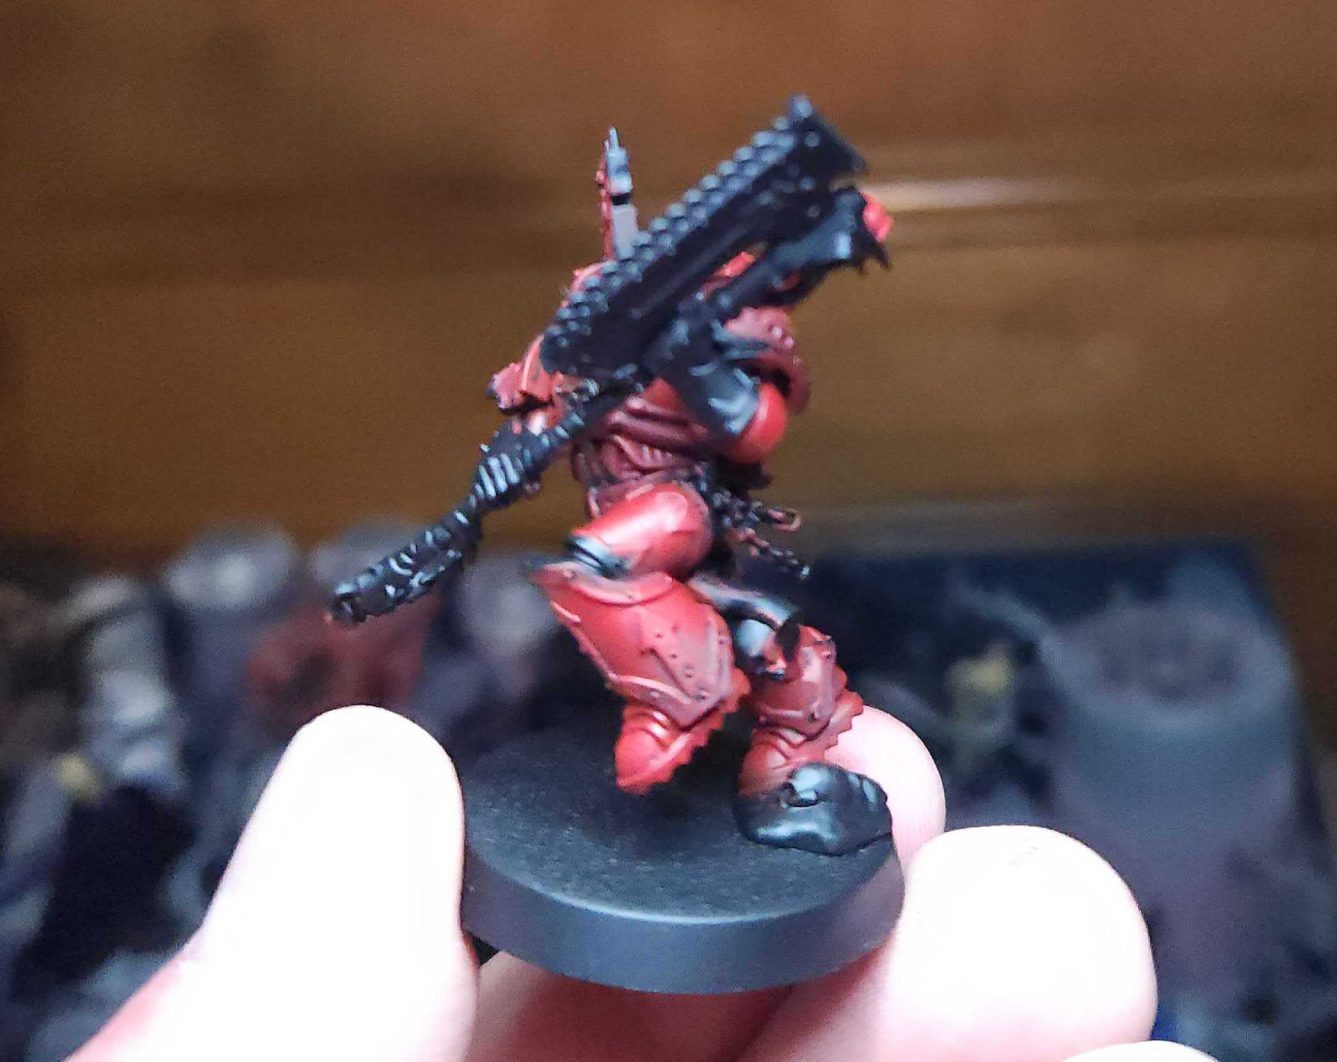
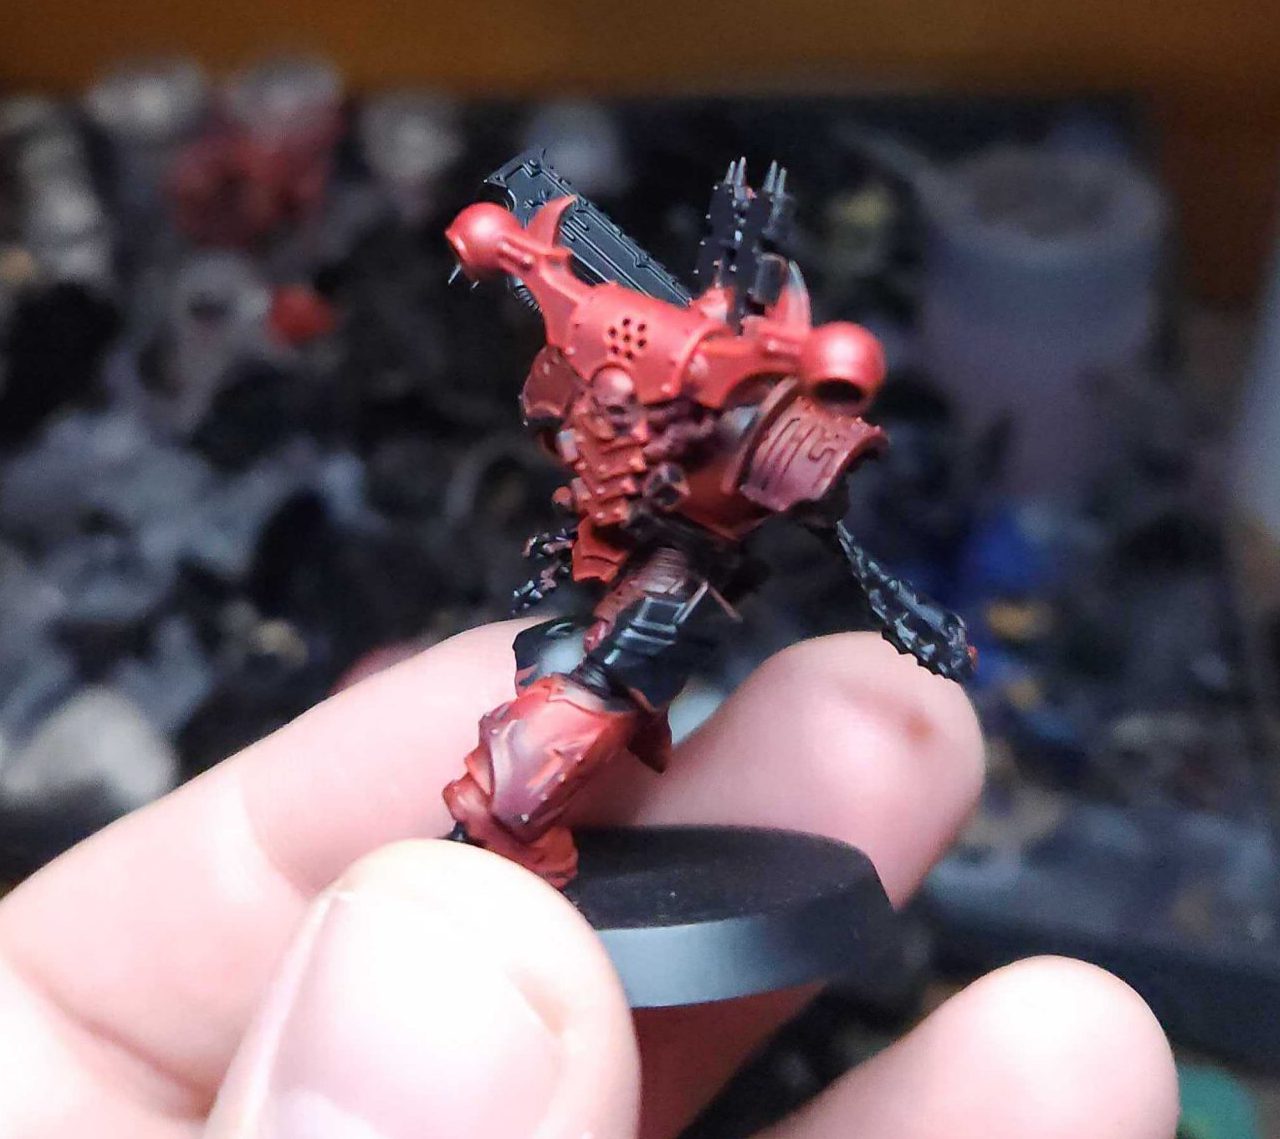
TheChirurgeon's Method - Click to Expand My World Eaters scheme is pretty simple, and it resembles the older 2nd edition scheme in some ways – namely that I like to do green power cables. Otherwise it’s pretty straightforward, and uses a deep red. I start by priming the model black, then painting the armor panels with Khorne Red. This is the base color I use for the armor and my goal is to work it up to a brighter color. So my next step is to add a layer of Mephiston Red, then wash that with Carroburg Crimson, then highlight again with 2-3 thin coats of Mephiston Red again, working up to a brighter color. My goal here is to get a nice fade going on the models. I’ll then use Carroburg to darken the edges around the armor trim. Next comes highlights. In my first round of highlights I do edge highlight with Evil Sunz Scarlet, doing both edges and a thin line around the trim on the armor. Once that’s done I’ll do a second pass, hitting some of the corners and most extreme areas with a thin line/touch of Wild Rider Red to add a second level of detail. The cables I do green. Specifically Castellan Green washed with Coelia Greenshade and highlighted with Castellan Green, then Death World Forest and Death Guard Green. Next comes the gold trim. This is just Retributor Armour washed with Agrax Earthshade and highlighted with Runefang Steel (or any other light silver color). After this it’s just some odds and ends. I did Gorthor Brown with an Agrax wash for the leather parts and Leadbelcher for the metal bits. On my World Eaters I usually add Blood for the Blood God to their weapons to create some gore effects. And that’s pretty much it! Paint the rivets, edge highlight a bit more, do the base, and you’re done. It’s a relatively easy scheme to pull off, and the real value comes out of making that Khorne Red -> Mephiston fade work.


ThatGobbo's Method - Click to Expand ThatGobbo uses a similar deep red armor look but uses a different method to achieve the effect, and starts with a brighter shade of primer. ThatGobbo: This paint process is based on the official scheme using a mix of Contrast paints, oil washes, and opaque metallics for a quick efficient workflow. I start off with a zenithal prime using a gray base and white sprayed from above. With the primed miniature I use Baal Red Contrast paint for armor to start with a really bright basecoat. This will get darkened when I use a black oil wash after the basecoats. Baal Red gives a great saturated red but has a tendency to come out looking pink if it’s diluted at all with water. A second coat can fix any issues with that. For the basecoats of the metallics I use Pro Acryl Bronze and Pro Acryl Dark Silver. These have amazing coverage and go down in one coat over white with no issues. Lastly is the leather details which I paint with Wyldwood contrast paint for a nice dark brown. Now that the basecoats are finished I wait for everything to dry and then give a generous oil wash of Tamiya Panel Liner Accent Black. There were some areas that were flooded so a bit of dabbing with a clean brush helps pull that excess wash away. I turn on a desk fan to blow over the wet model and wait for the oil wash to dry. Once the model is dry I need to spray a topcoat before I can go back in and paint the highlights in acrylic. Without a topcoat over the oil wash acrylic paint has the tendency to bead up. I use Vallejo Premium Satin Varnish. With the model now prepped for highlights I use a series of red paints to highlight the armor. Areas without edge highlights, like the axe and helmet, get a mix of stippling and uneven brush strokes that fill the space. This texture helps give the impression that the armor is rough after decades or centuries of battle. The red paints I used in order of brightness are Pro Acryl Bold Pyrrote Red, Vallejo Model Color Vermillion, and Vallejo Game Color Hot Orange. The metallic highlights used were Pro Acryl Copper and Vallejo Game Color Chainmail. For these I wipe a bit of the paint off on a paper towel before running the brush against the upper surfaces of the metals areas. It’s similar to a drybrush technique. The leather bits were highlighted with Vallejo Flat Earth. I wanted to do some fun glow effects for the eyes and the plasma pistol. For the eyes I used a thinned Pro Acryl Titanium White on the eyes and the surrounding areas then painted over it with Imperial Fist contrast paint. Using a small brush I go over the eye lenses again in white and a thinned layer of the yellow contrast in order to make them brighter than the glow. Similarly with the plasma pistol, I first paint the plasma coils in white. Then with my detail airbrush I spray white around the coils (you can also do this by hand with thinned white paint). I spray Frostheart Contrast paint over the area. I go over the plasma coils again in white and a thinned layer of the blue contrast so that it’s brighter than the surrounding area. Finally I highlight the corners of the plasma coils with white. There’s other little details that can be painted but this is my stopping point for a non-display miniature. This is the general workflow I use for most of my miniatures and I find that it is a nice mix of speed and detail for me.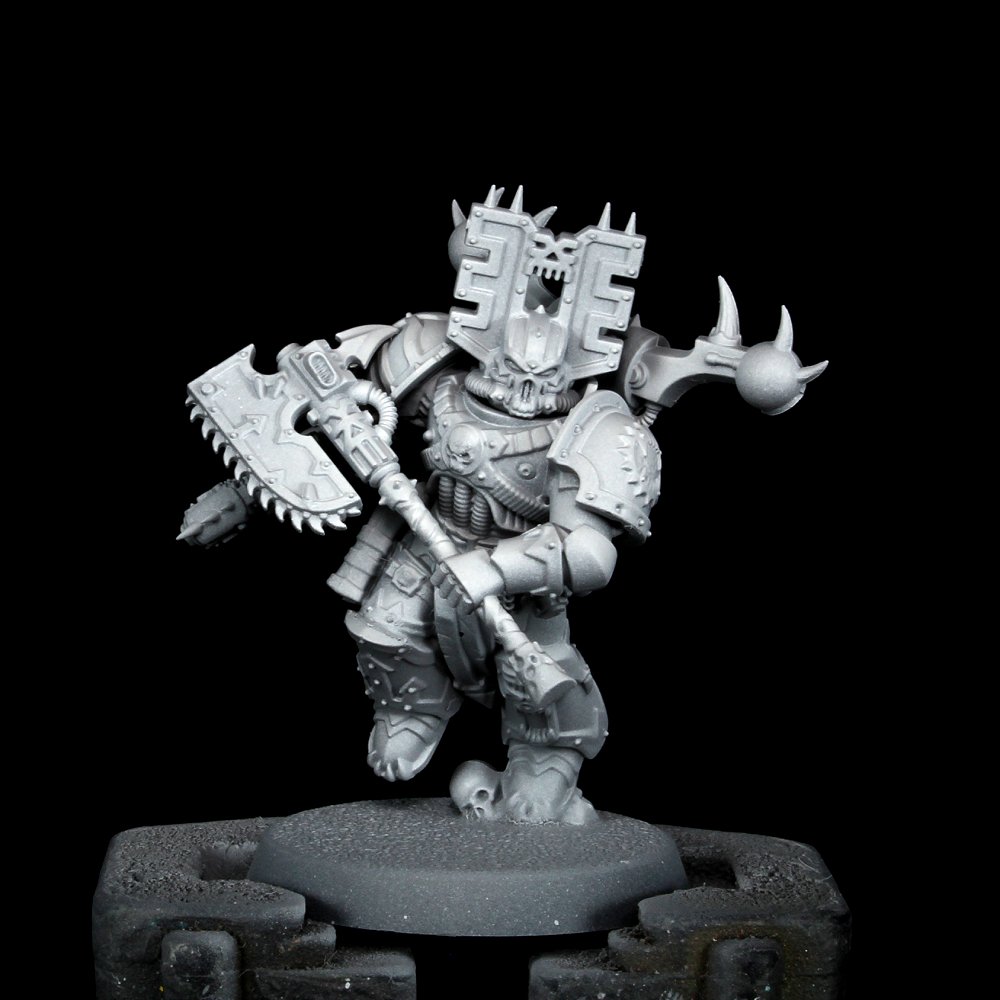


Dylan's Method - Click to Expand Dylan’s got a much more retro style that follows the classic ‘Eavy Metal paint scheme from the 2nd edition Codex: Chaos Space Marines. This paint scheme is notable for featuring much heavier amounts of black, often opting for black trim with gold rivets, and heavy use of an olive green accent color.

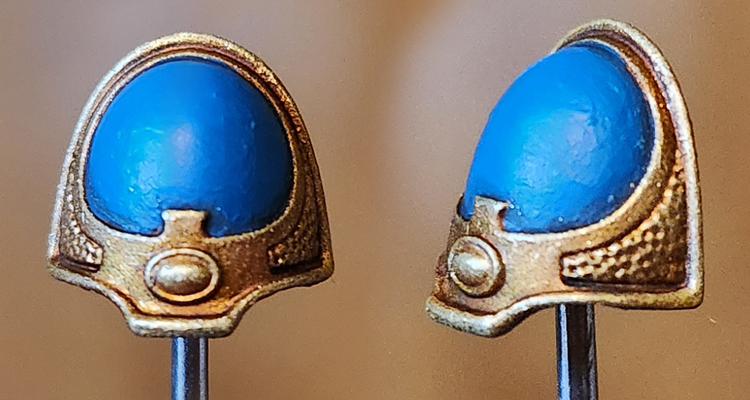
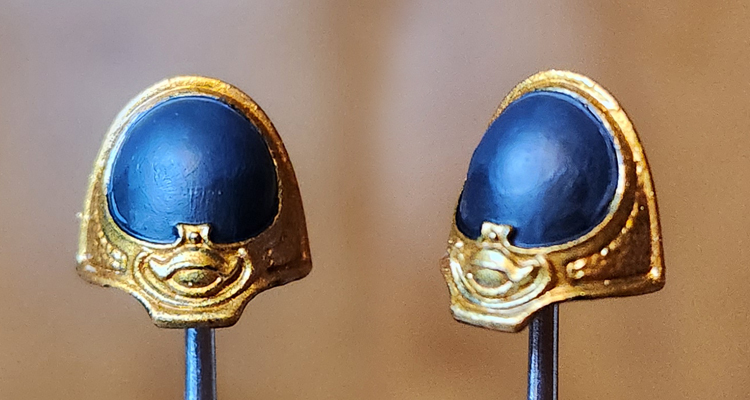
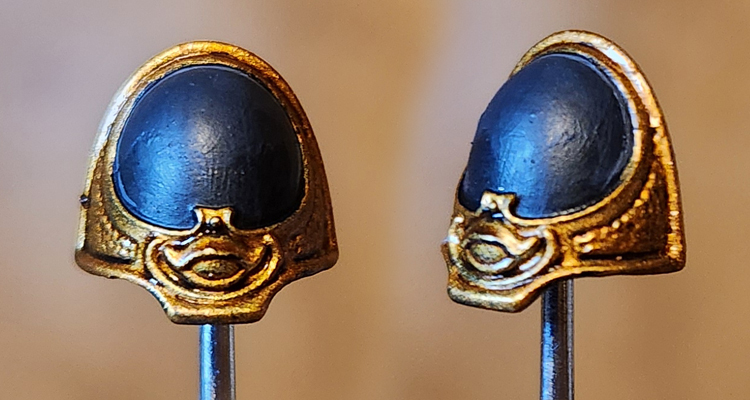
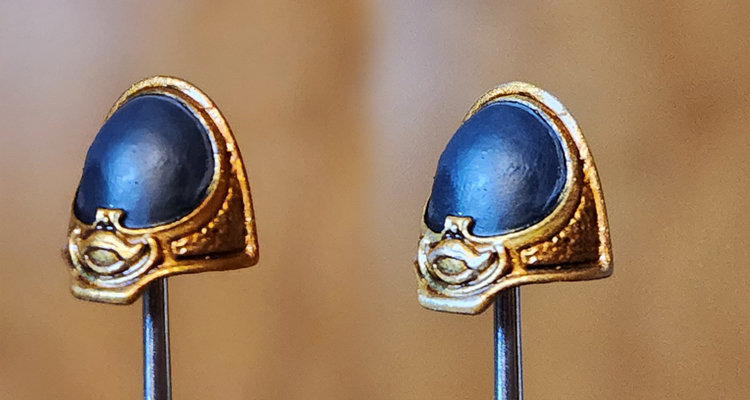
Jack Hunter's Method - Click to Expand The classic Heresy-era paint scheme for the world eaters isn’t red, it’s white with blue pauldrons. When Jack picked up the Legionaries kill team from Kill Team: Nachmund, he chose to go with a more classic look. I started out by keeping the shoulder pauldrons separate during assembly, as this would let me airbrush them a different color than the armor without needing to do any annoying masking. I primed the pauldrons black, then basecoat them with Reaper Ultramarine Shadow. I covered almost the entirety of the pauldron with Reaper Ultramarine Blue, then most of the pad with Reaper Ultramarine Highlight. As the pads don’t have any seams on them, I didn’t need to wash them with anything – a little overspill when I wash the trim or spikes will accomplish all the separation I need. The white armor got primed with Stynylrez Grey, and an initial coat of Vallejo Model Air White Grey was applied. I built up highlights with Vallejo Model Air Insignia White and Vallejo Model Air White (using the final pure white only very sparingly). If I was doing these again I’d probably use ProAcryl Titanium White instead. It’s not a different color, but it’s the nicest white I’ve used and I need to sing its praises everywhere. I hit them all with a Satin Varnish at this point – you can make satin by mixing gloss and matte roughly 50:50. After the airbrushing, I did a rough oil wash of Burnt Umber with a tiny bit of Lamp Black mixed in. I kept it fairly thick, thin enough to spread easily but I didn’t want it completely flowing off surfaces. After some dry time (about an hour, but this will vary substantially depending on temperature, humidity, thickness of your wash, and your thinning medium) I took a lint-free rag and buffed most of the wash back off. The satin varnish ensured a bit stuck around to tint the surface, but it was mostly back to white. My goal here was to end up with a very warm toned white to contrast with the cool blues of the shoulder pads. I then weathered the hell out of them with Rhinox Hide on a sponge, hitting both the shoulder pads and the white armor, concentrating on wear areas – knees, hands, and elbows mainly. With the white armor and blue pauldrons complete, I first painted the trim black, then with Scale 75 Victorian Brass. All the trim got a wash with Agrax Earthshade, then was built back up with another pass of Victorian Brass and highlighted with Scale 75 Citrine Alchemy. Leather and wood areas were painted with Vallejo Model Color German Camo Black Brown, an Agrax Earthshade wash, then streaky edge highlights in Vallejo Model Color Burnt Umber and Vallejo Model Color Flat Earth. With that, all the key areas were done, and I could move on to painting all the random small details, trying to mainly stay in the warmer tones and leaving cool tones for the shoulder pads.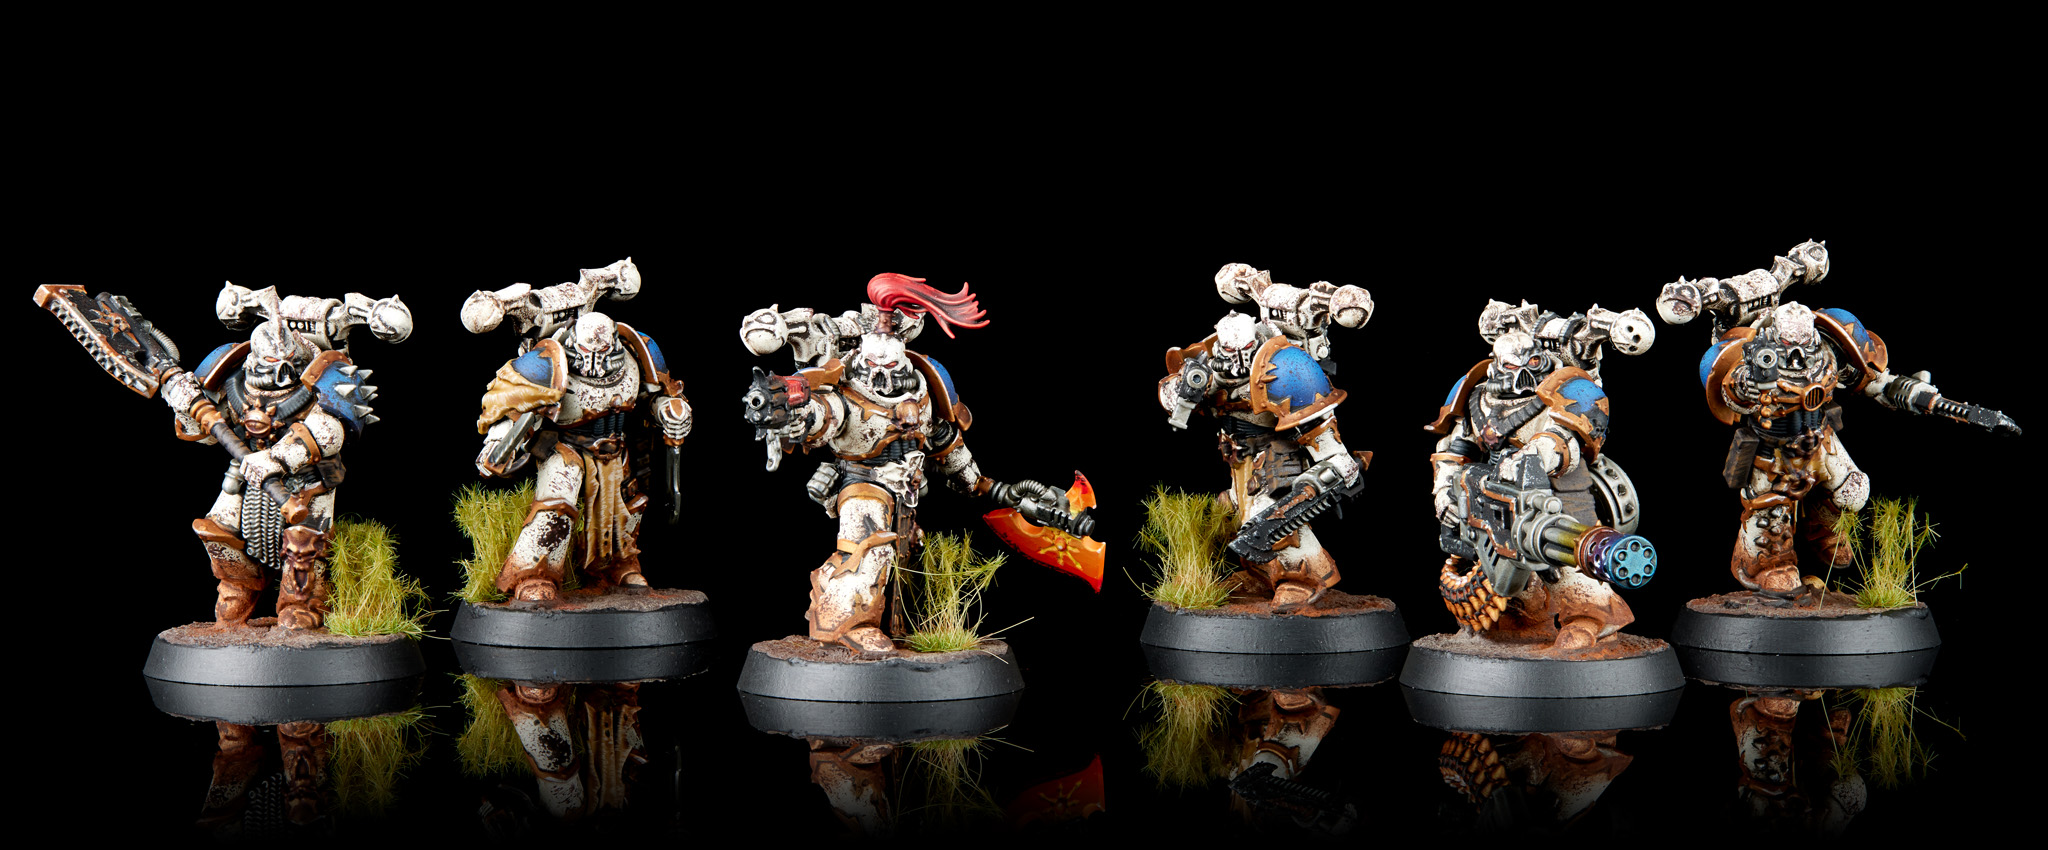


TheChirurgeon's Heresy-Era World Eaters - Click to Expand If you’re looking to paint Heresy-era World Eaters, then this tutorial will give you a pretty quick and easy way to do that. Even without gold trim, they can be a pretty visually interesting legion choice, and look great spattered with blood from their enemies. I started by priming this model with Grey Seer. It’s going to be the basecoat, though if you went Corax White that’s fine too. If I’d painted this white I’d have spent time doing a coat of Apothecary White Contrast on it to shade it. Instead I left the Grey Seer pretty visible. Two major elements to paint here: The Pauldrons and backpack get painted with Kantor Blue, while the metal bits get painted with Leadbelcher. I’ll blend highlight the blue parts later. I’ll also freehand a blue stripe down the middle of this guy’s helmet with Kantor Blue. Later is now. I highlight the blue parts by blending Kantor Blue with Caledor Sky, working on creating a gradient going from dark to lighter blue at the raised areas. This is also when I add some dark elements – I paint the gun casing with Corvus Black, and I use a small brush to paint Nuln Oil into the cracks and crevices of the white armor. These will be eaxy to fix later with edge highlights, but for now they give the armor some much-needed definition. I use Nuln Oil to wash the steel parts and then highlight them with Leadbelcher again. The white armor gets an edge highlight with Reaper Pure White, and I paint the eye lenses red, using Mephiston Red as the base with a spot of Evil Sunz Scarlet as a highlight. Some final bits to finish the model off. I edge highlight the pauldrons and blue parts with Lothern Blue and paint the armor studs with Leadbelcher. The metal bits get a slight highlight of Runefang Steel, and the coils on the backpack get a coat of Balthasar Gold. And that’s it! Pretty easy, and it looks solid on the table. You can definitely do more highlighting work with the white, but I don’t know how much of that you need to do if your next step from here is adding a lot of dirt, grime, and gore – adding those messy details will make the off-white shade much less noticeable.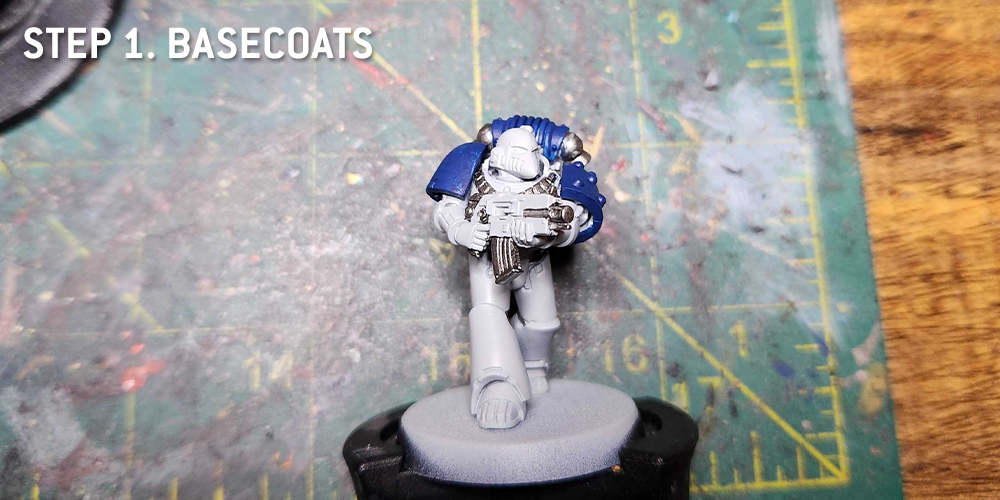
Step 1. Basecoats
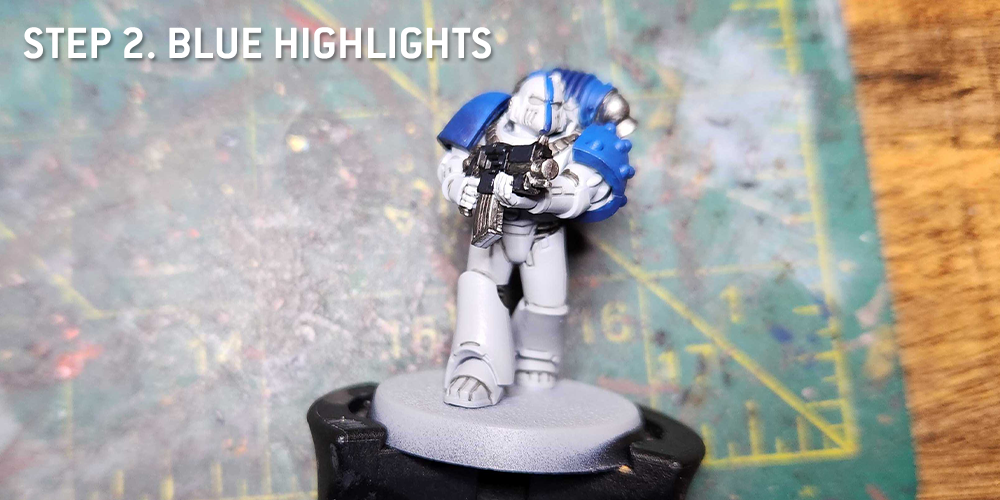
Step 2. Blue Highlights
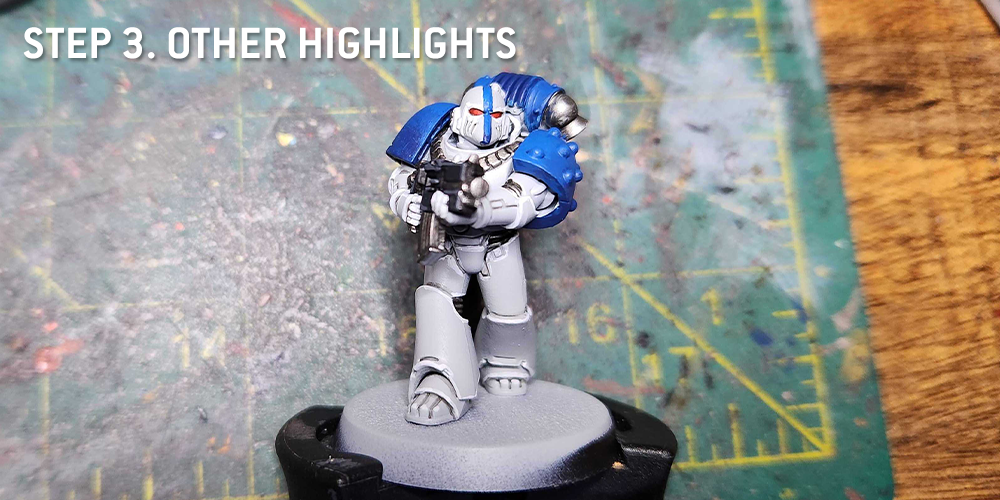
Step 3. Other Highlights and Shading
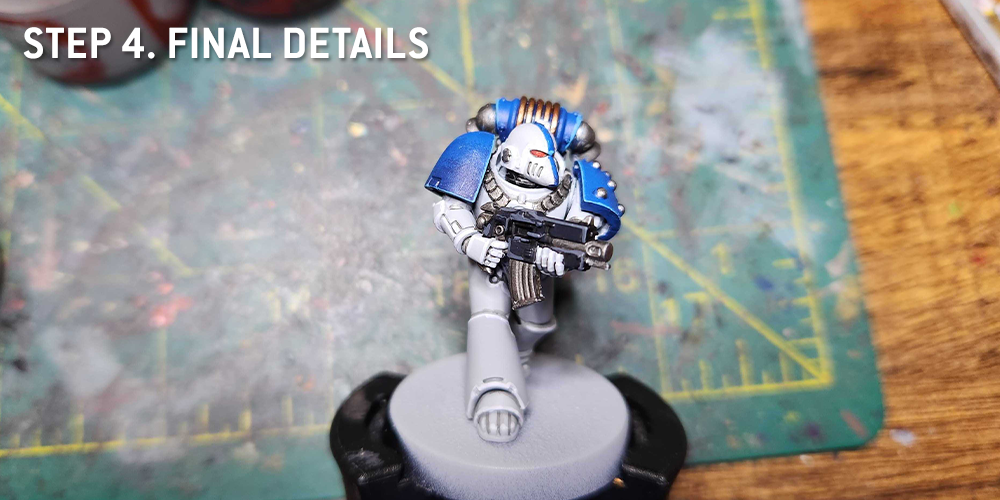
Step 4. Final Details

Finally there’s one particularly special model in the World Eaters range who deserves his own article. Specifically, the legion’s Daemon Primarch, Angron. For our detailed guide on assembling and painting Angron, click on the banner below.
Have any questions or feedback? Drop us a note in the comments below or email us at contact@goonhammer.com.
