
Italy might have had a relatively minor part to play in WW2 compared to many of the staple armies you see on the gaming table but they have a remain one of the bigger factions in Wargaming and quite recently have been given some love by Warlord Games. Given the potential influx of new Italy players, it seems a given that we should show you how to paint your Italians.
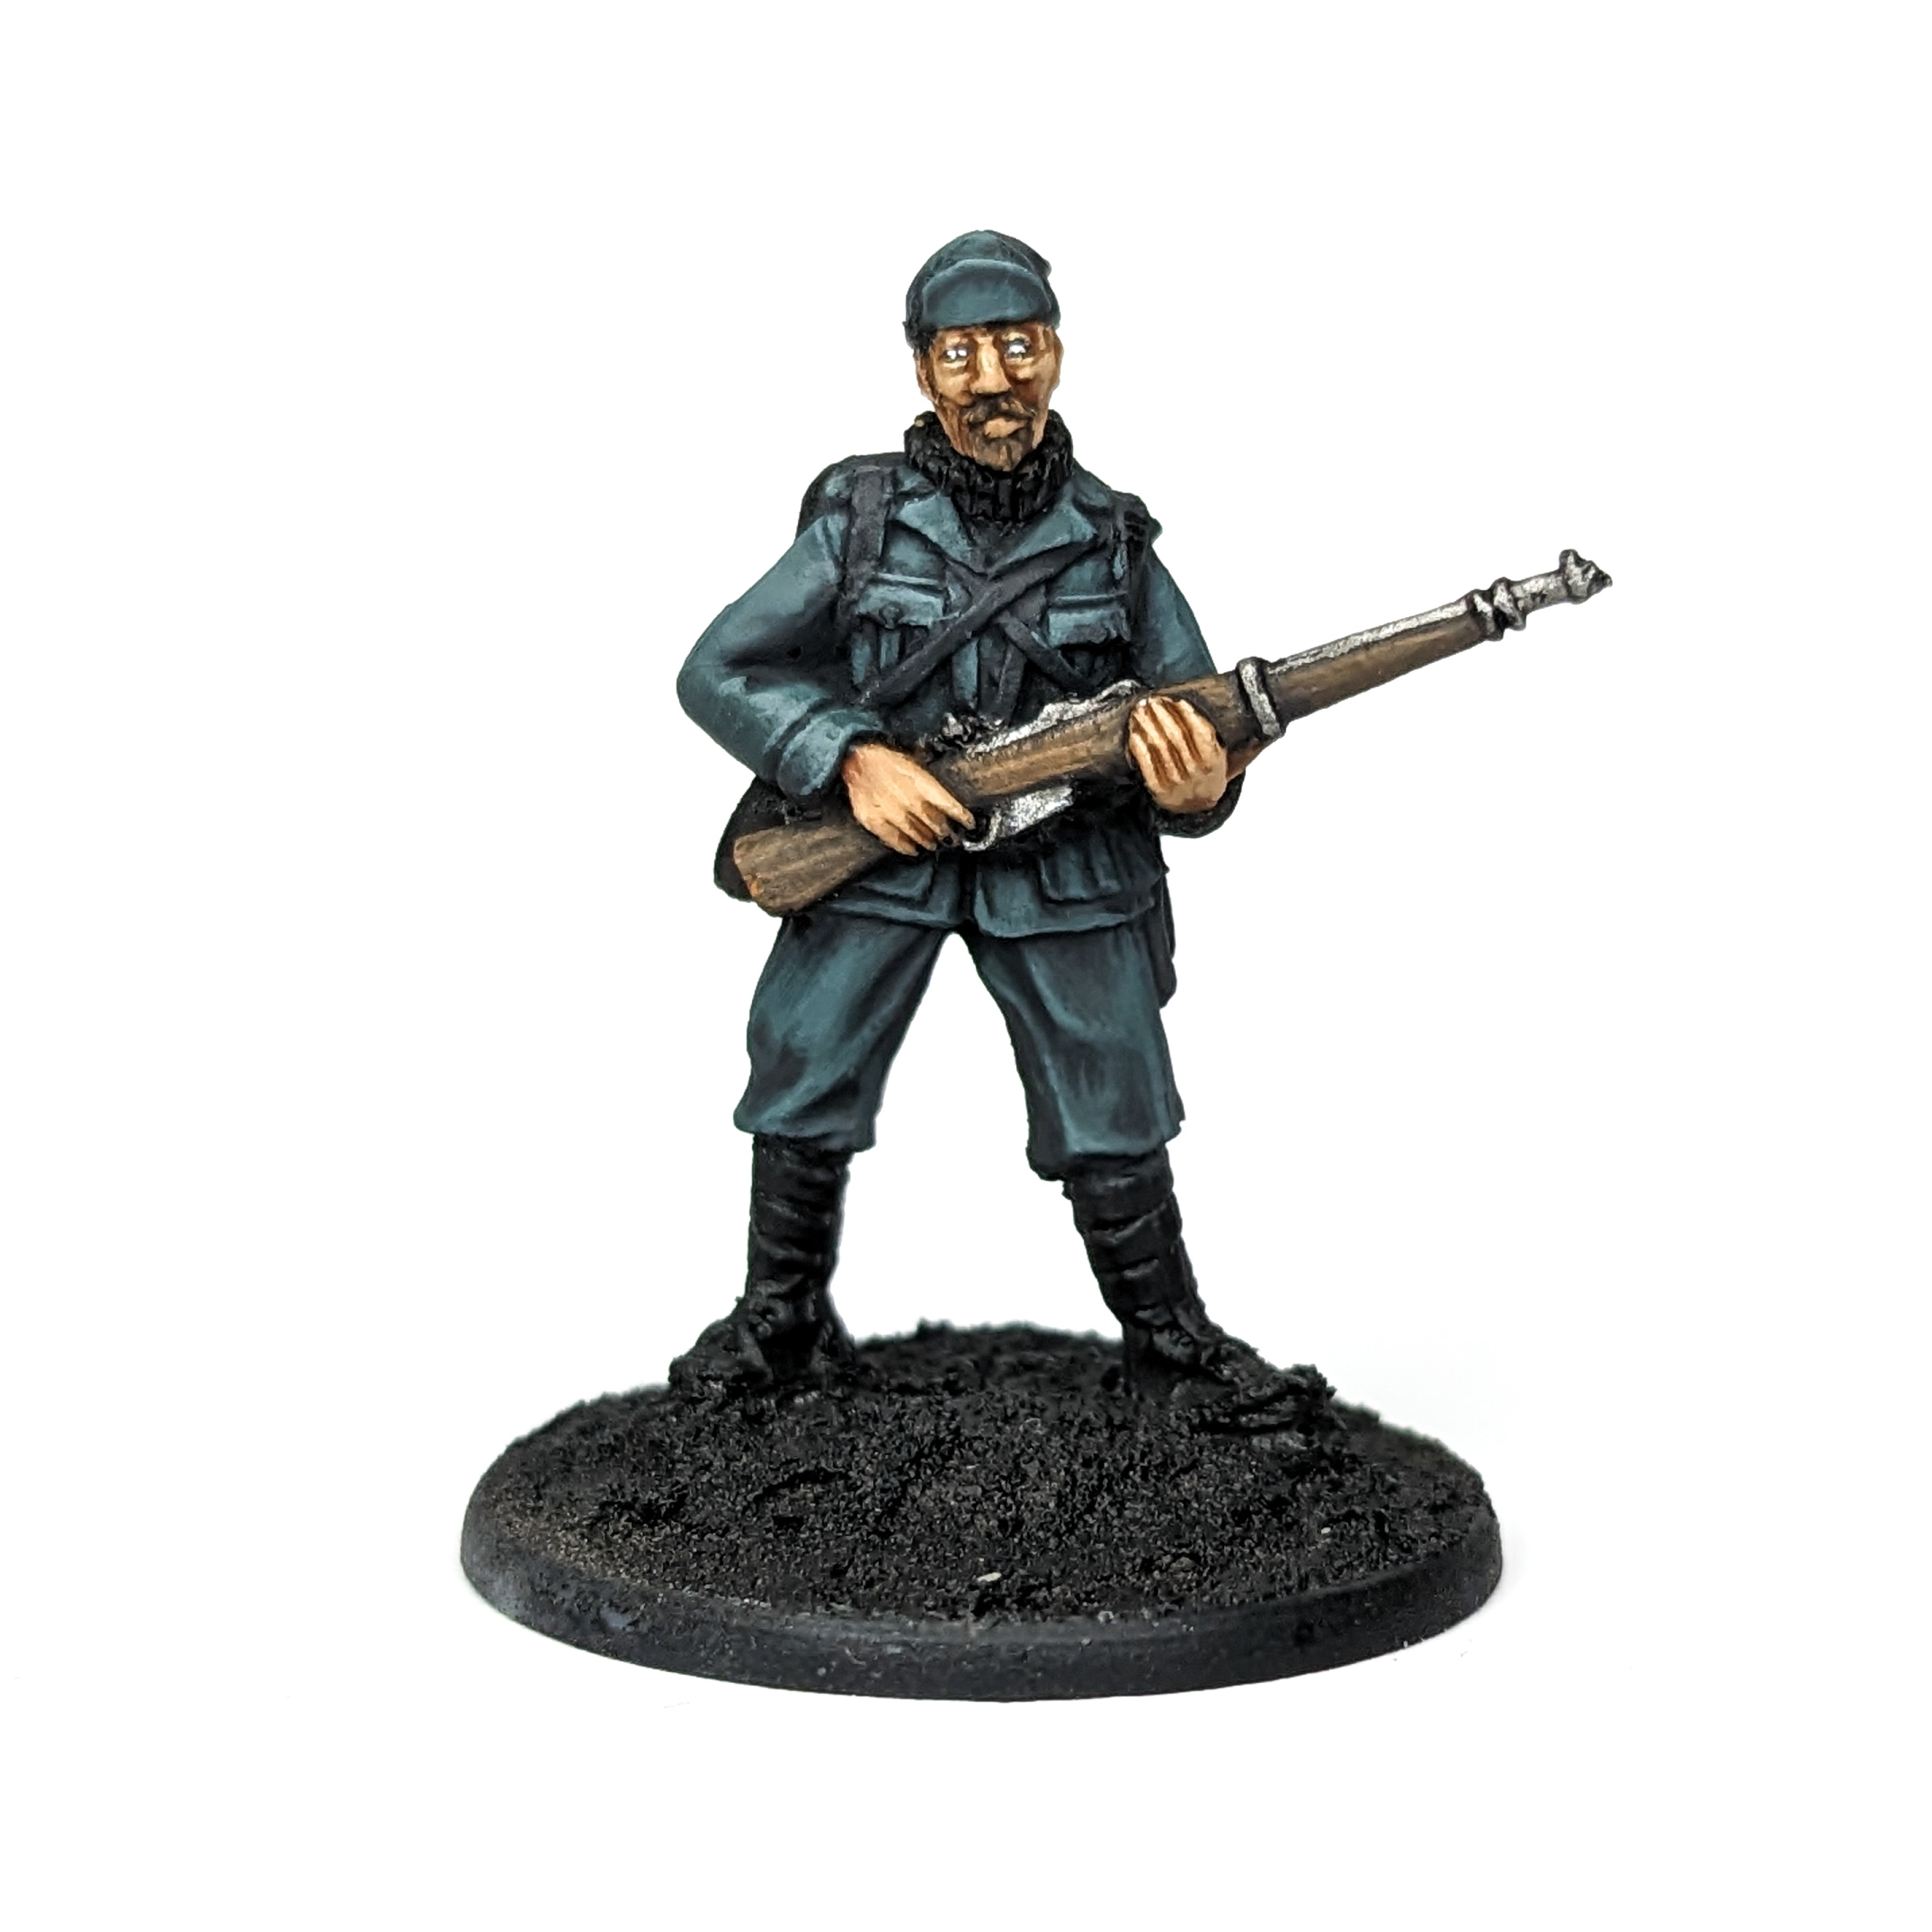
When it comes to the Italian Uniform, there was quite some variety and online examples can be conflicting. So let’s set things straight: this Tutorial will show you how to paint the classic Grigio Verde Uniform which comes in a variety of hues, we imagine this example is still mint condition, perhaps a riflemen avoiding combat at any cost, or one yet to get bloodied. If this tutorials finds a big enough audience, we might do a tutorial on how to paint the Italian’s tropical uniform as well.
It’s always handy to pick up a guide or two for inspiration. There are plenty out there but always-reliable Osprey has an excellent series on Italian uniforms.
Before we even begin painting you will need to mix up two paints:
Italian Fatigue Shade: Vallejo German Grey 4:1 German Uniform Italian Fatigue Light: German Uniform 1:1 Oxford Blue
I just went and bought the Army painter empty bottles to mix these up, but I’m sure there’s plenty other brands if the pots are two small for your needs. Why do I ask you to mix these paints up? Well if you plan to paint roughly 20 to 30 infantry men and the odd officer, you want to have these paints on hand instead of having to mix them up anew every time you sit down to paint, especially the light mix is integral as it does most of the heavy lifting for this paint job.
Now we start our Italian Rifleman by priming him in black, what black primer you want to use is up to you, for my soldier I’ve used Vallejo’s spray primer. Optionally you can already paint in the skin and rifle as I have done.
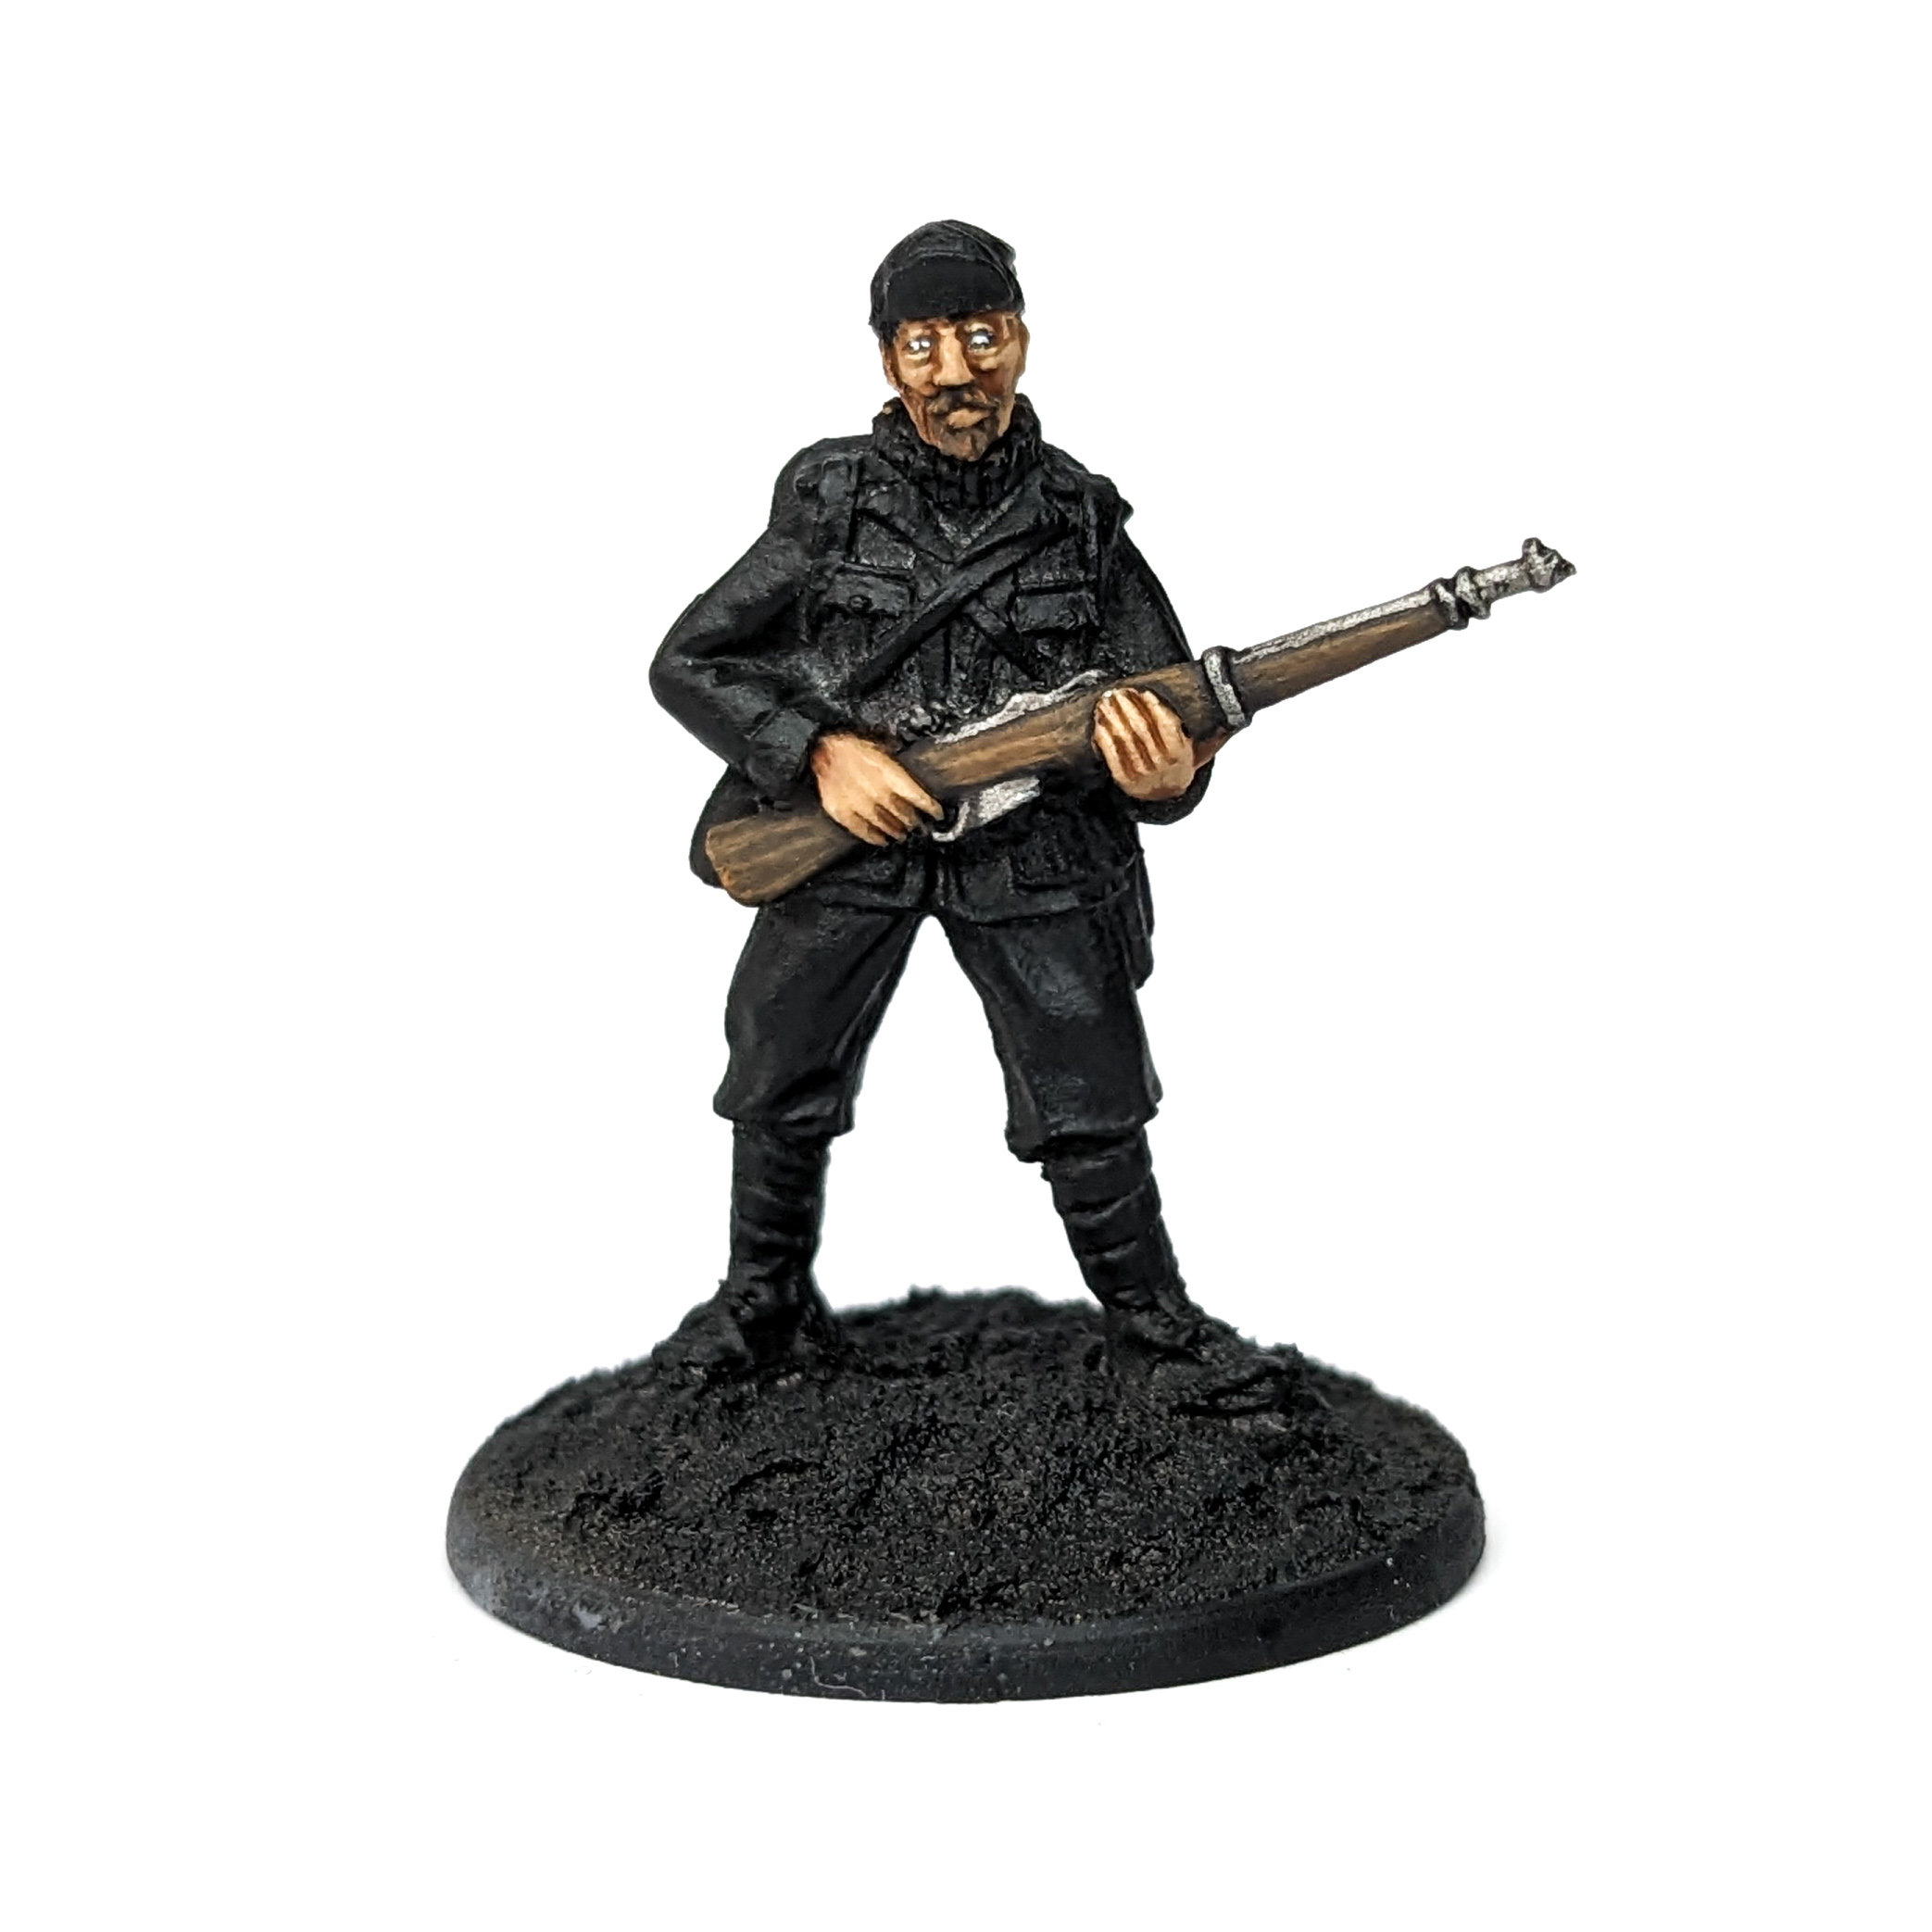
As the basecoat we apply the Italian Shade mix to all of the fatigues, depending on the headgear of your soldier, you also want to apply it to the cap.
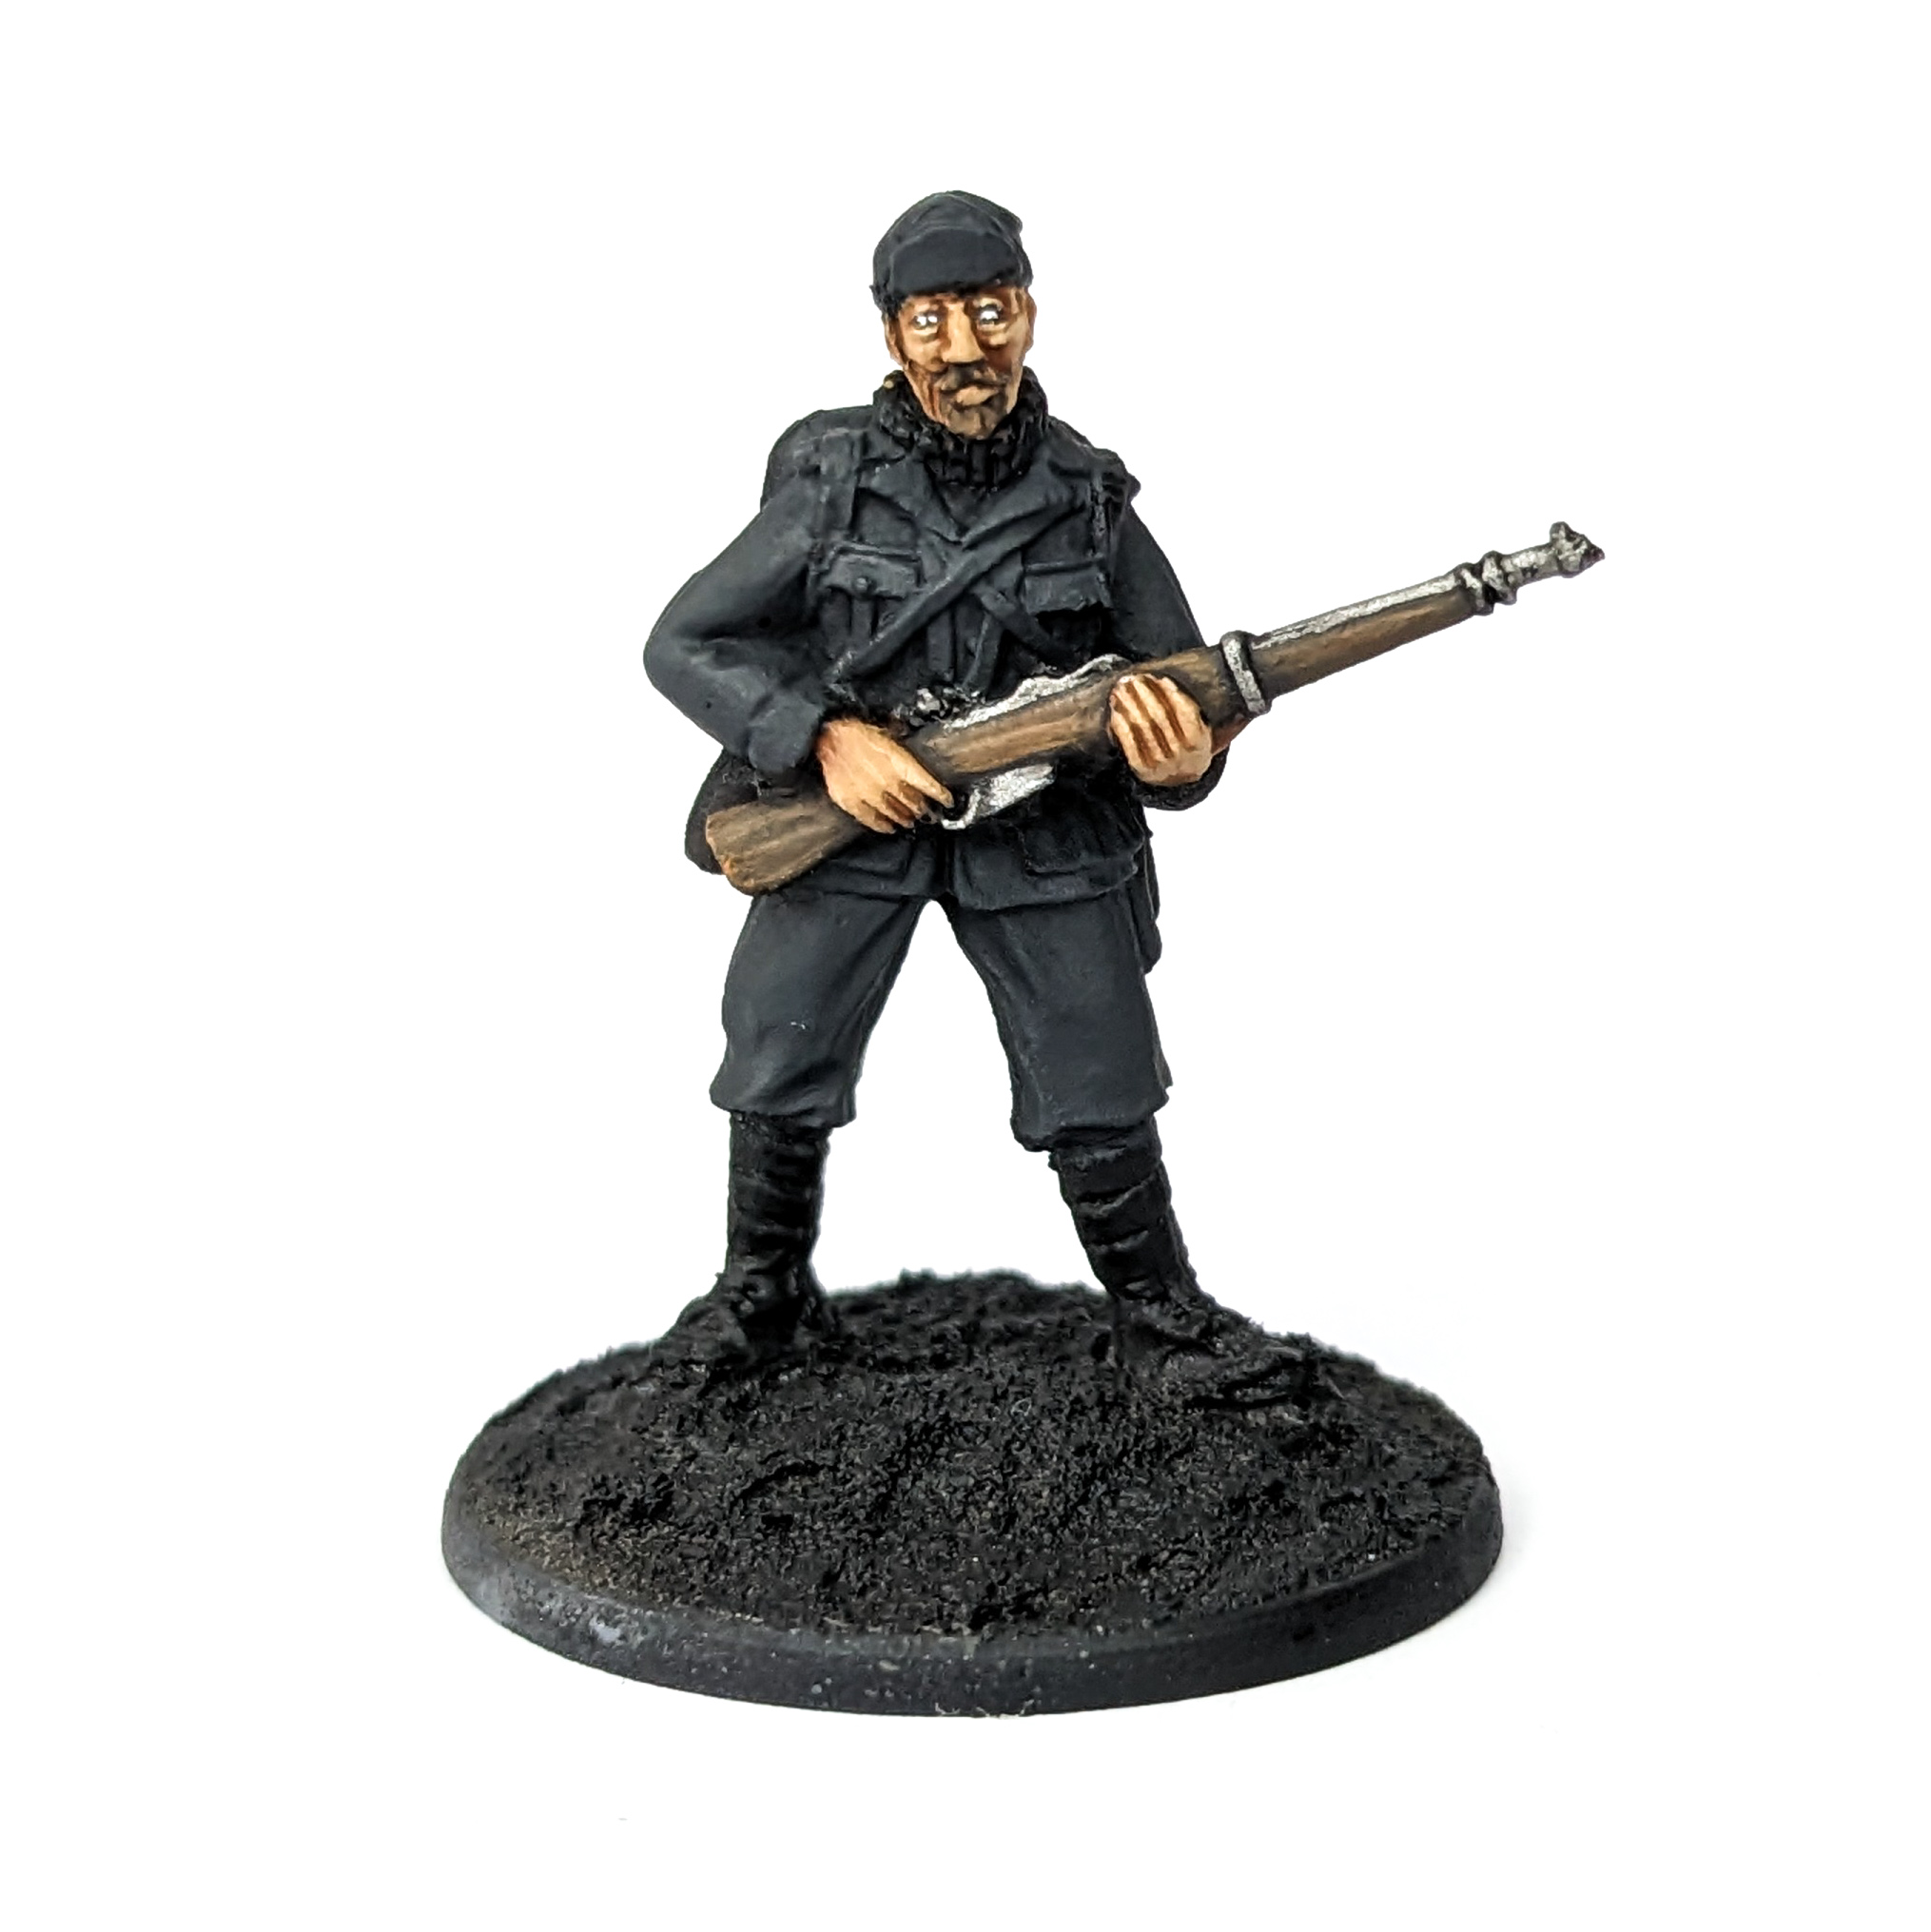
Next we layer on a 1:1 mix of the two custom paints to set the rough volumes, paint all the areas except for the folds, creases and shaded areas, basically you’re defining all the areas you’ll be working on from here on out.
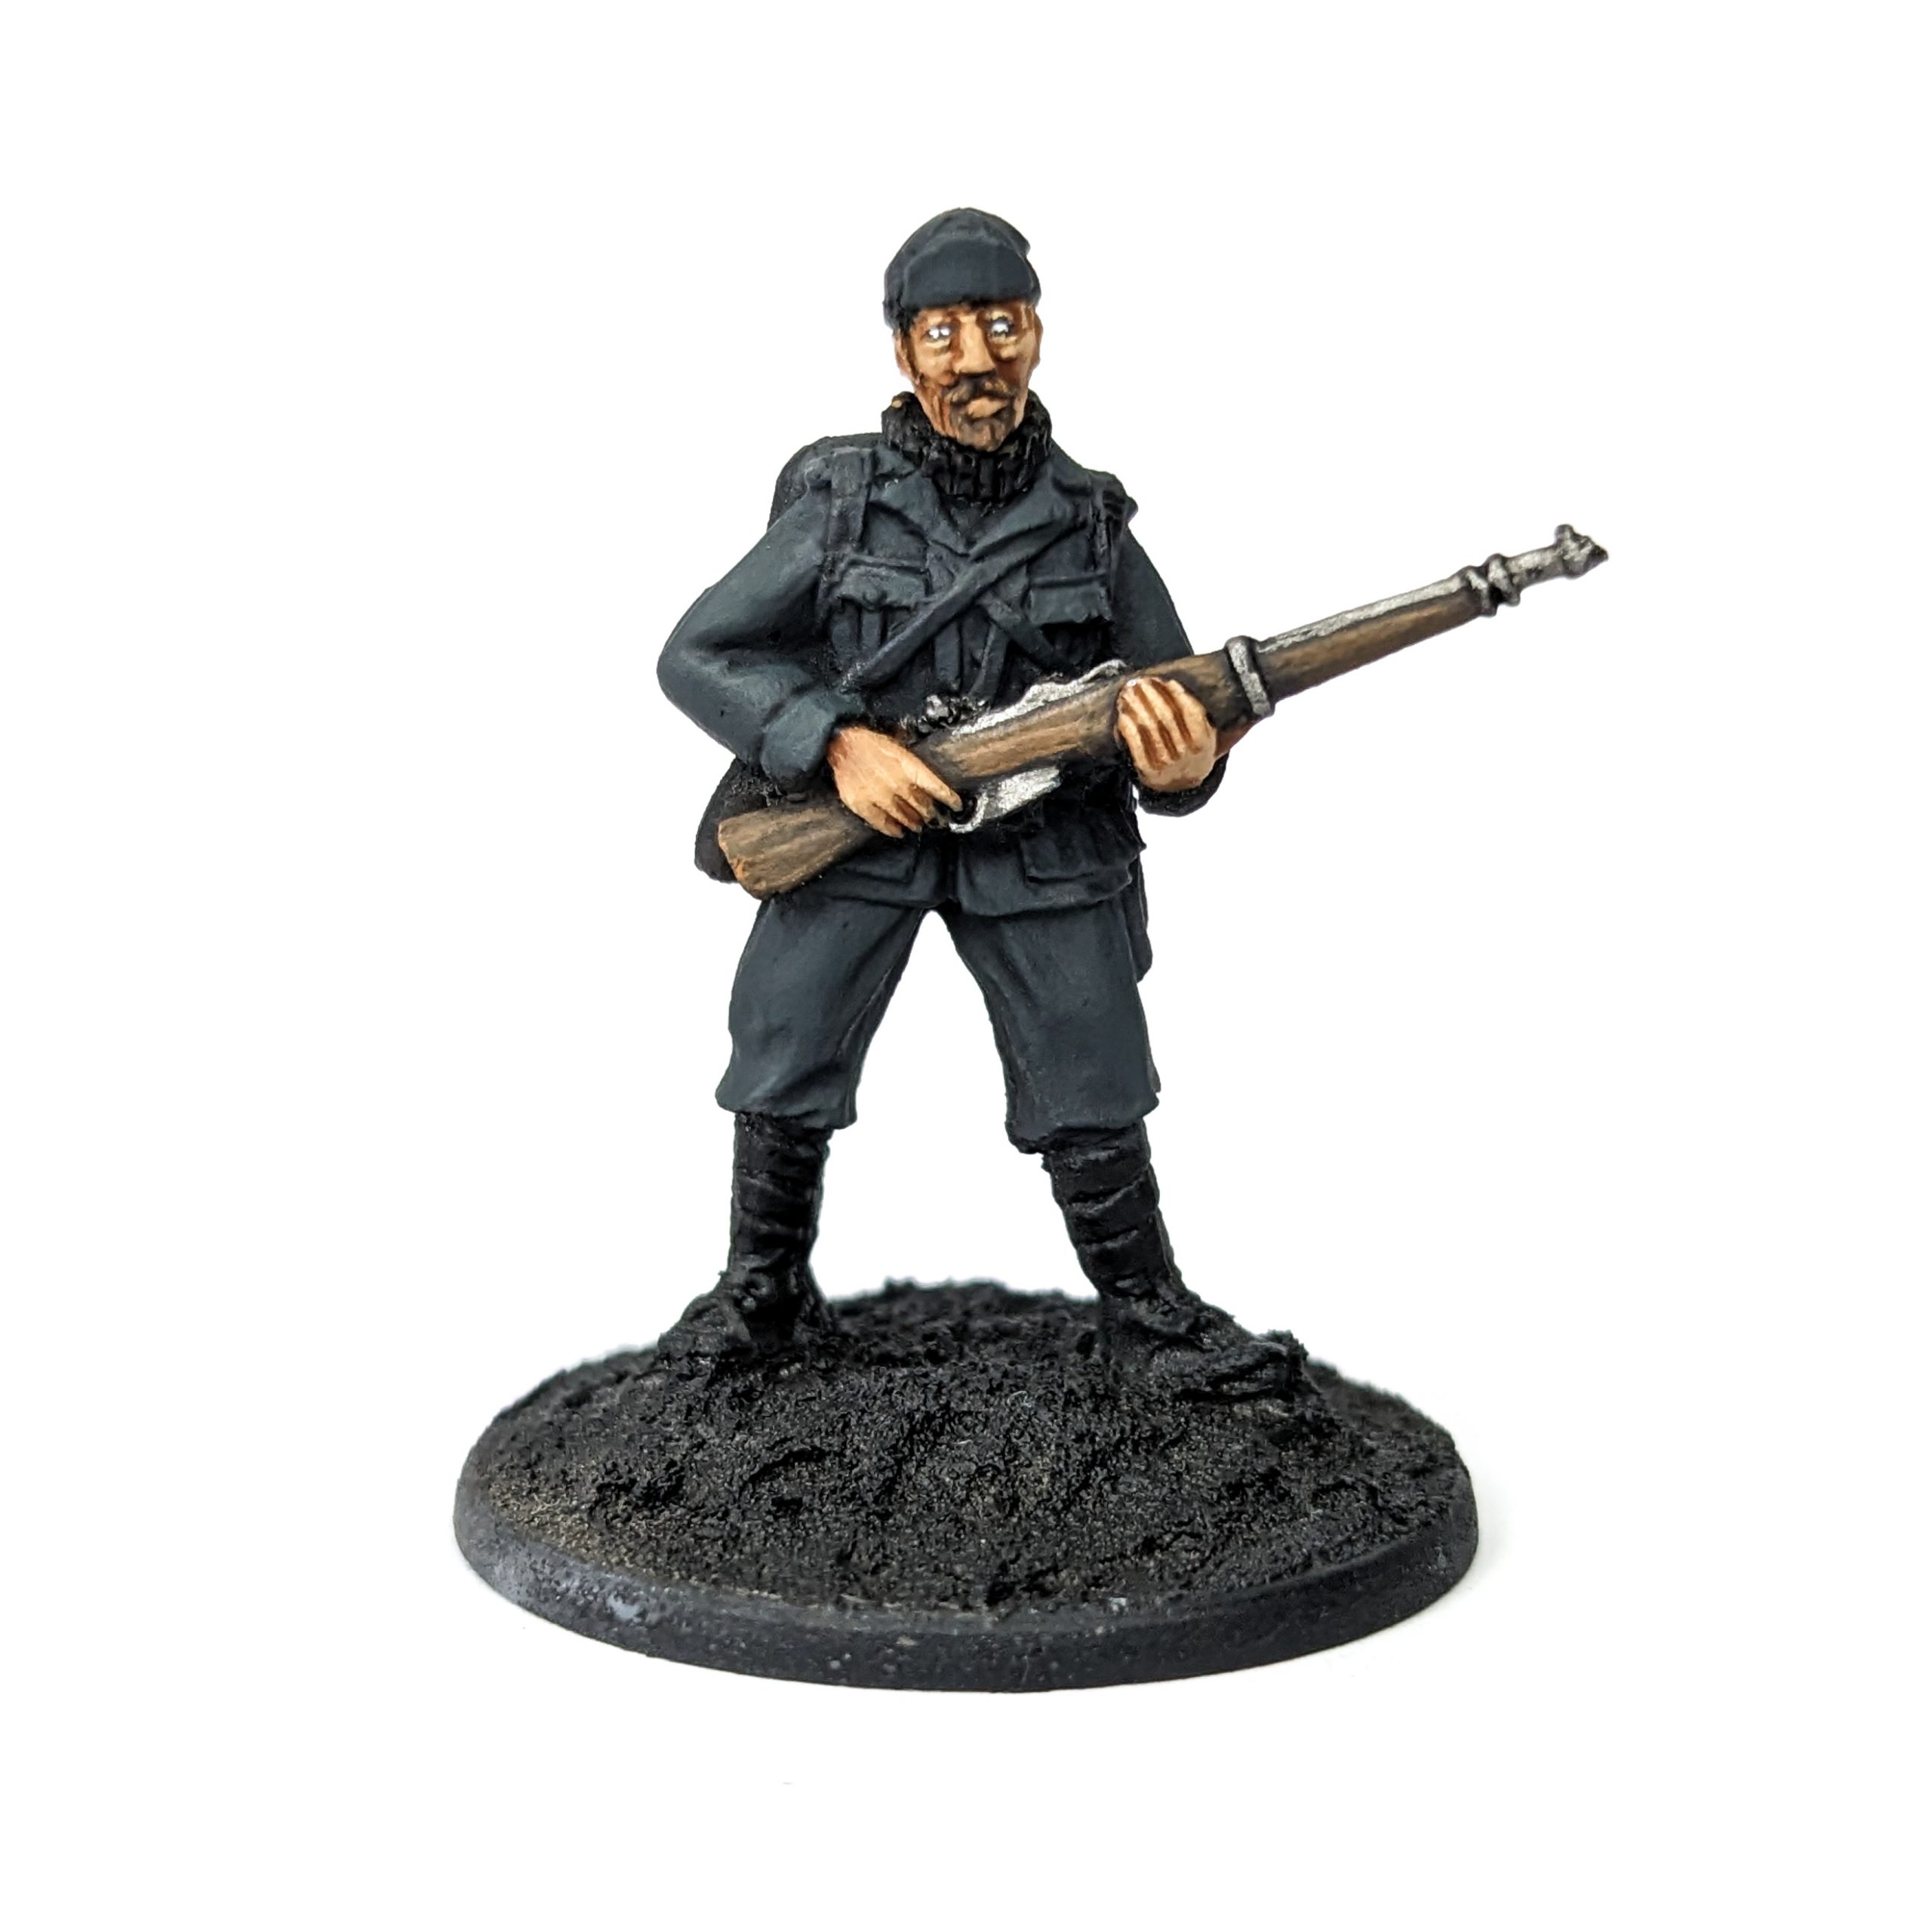
Time for some actual colour, layer pure Italian Light mix across the model, leaving out the starker shadows and little recesses, specifically on the pants and cap, there’s ample opportunity to define much softer shades, which wouldn’t show as much if dry brushed for example. In general, painting uniforms is a great practice for painting fabric and doing softer layering, learning to thin your paints to the right consistency and the brush techniques.
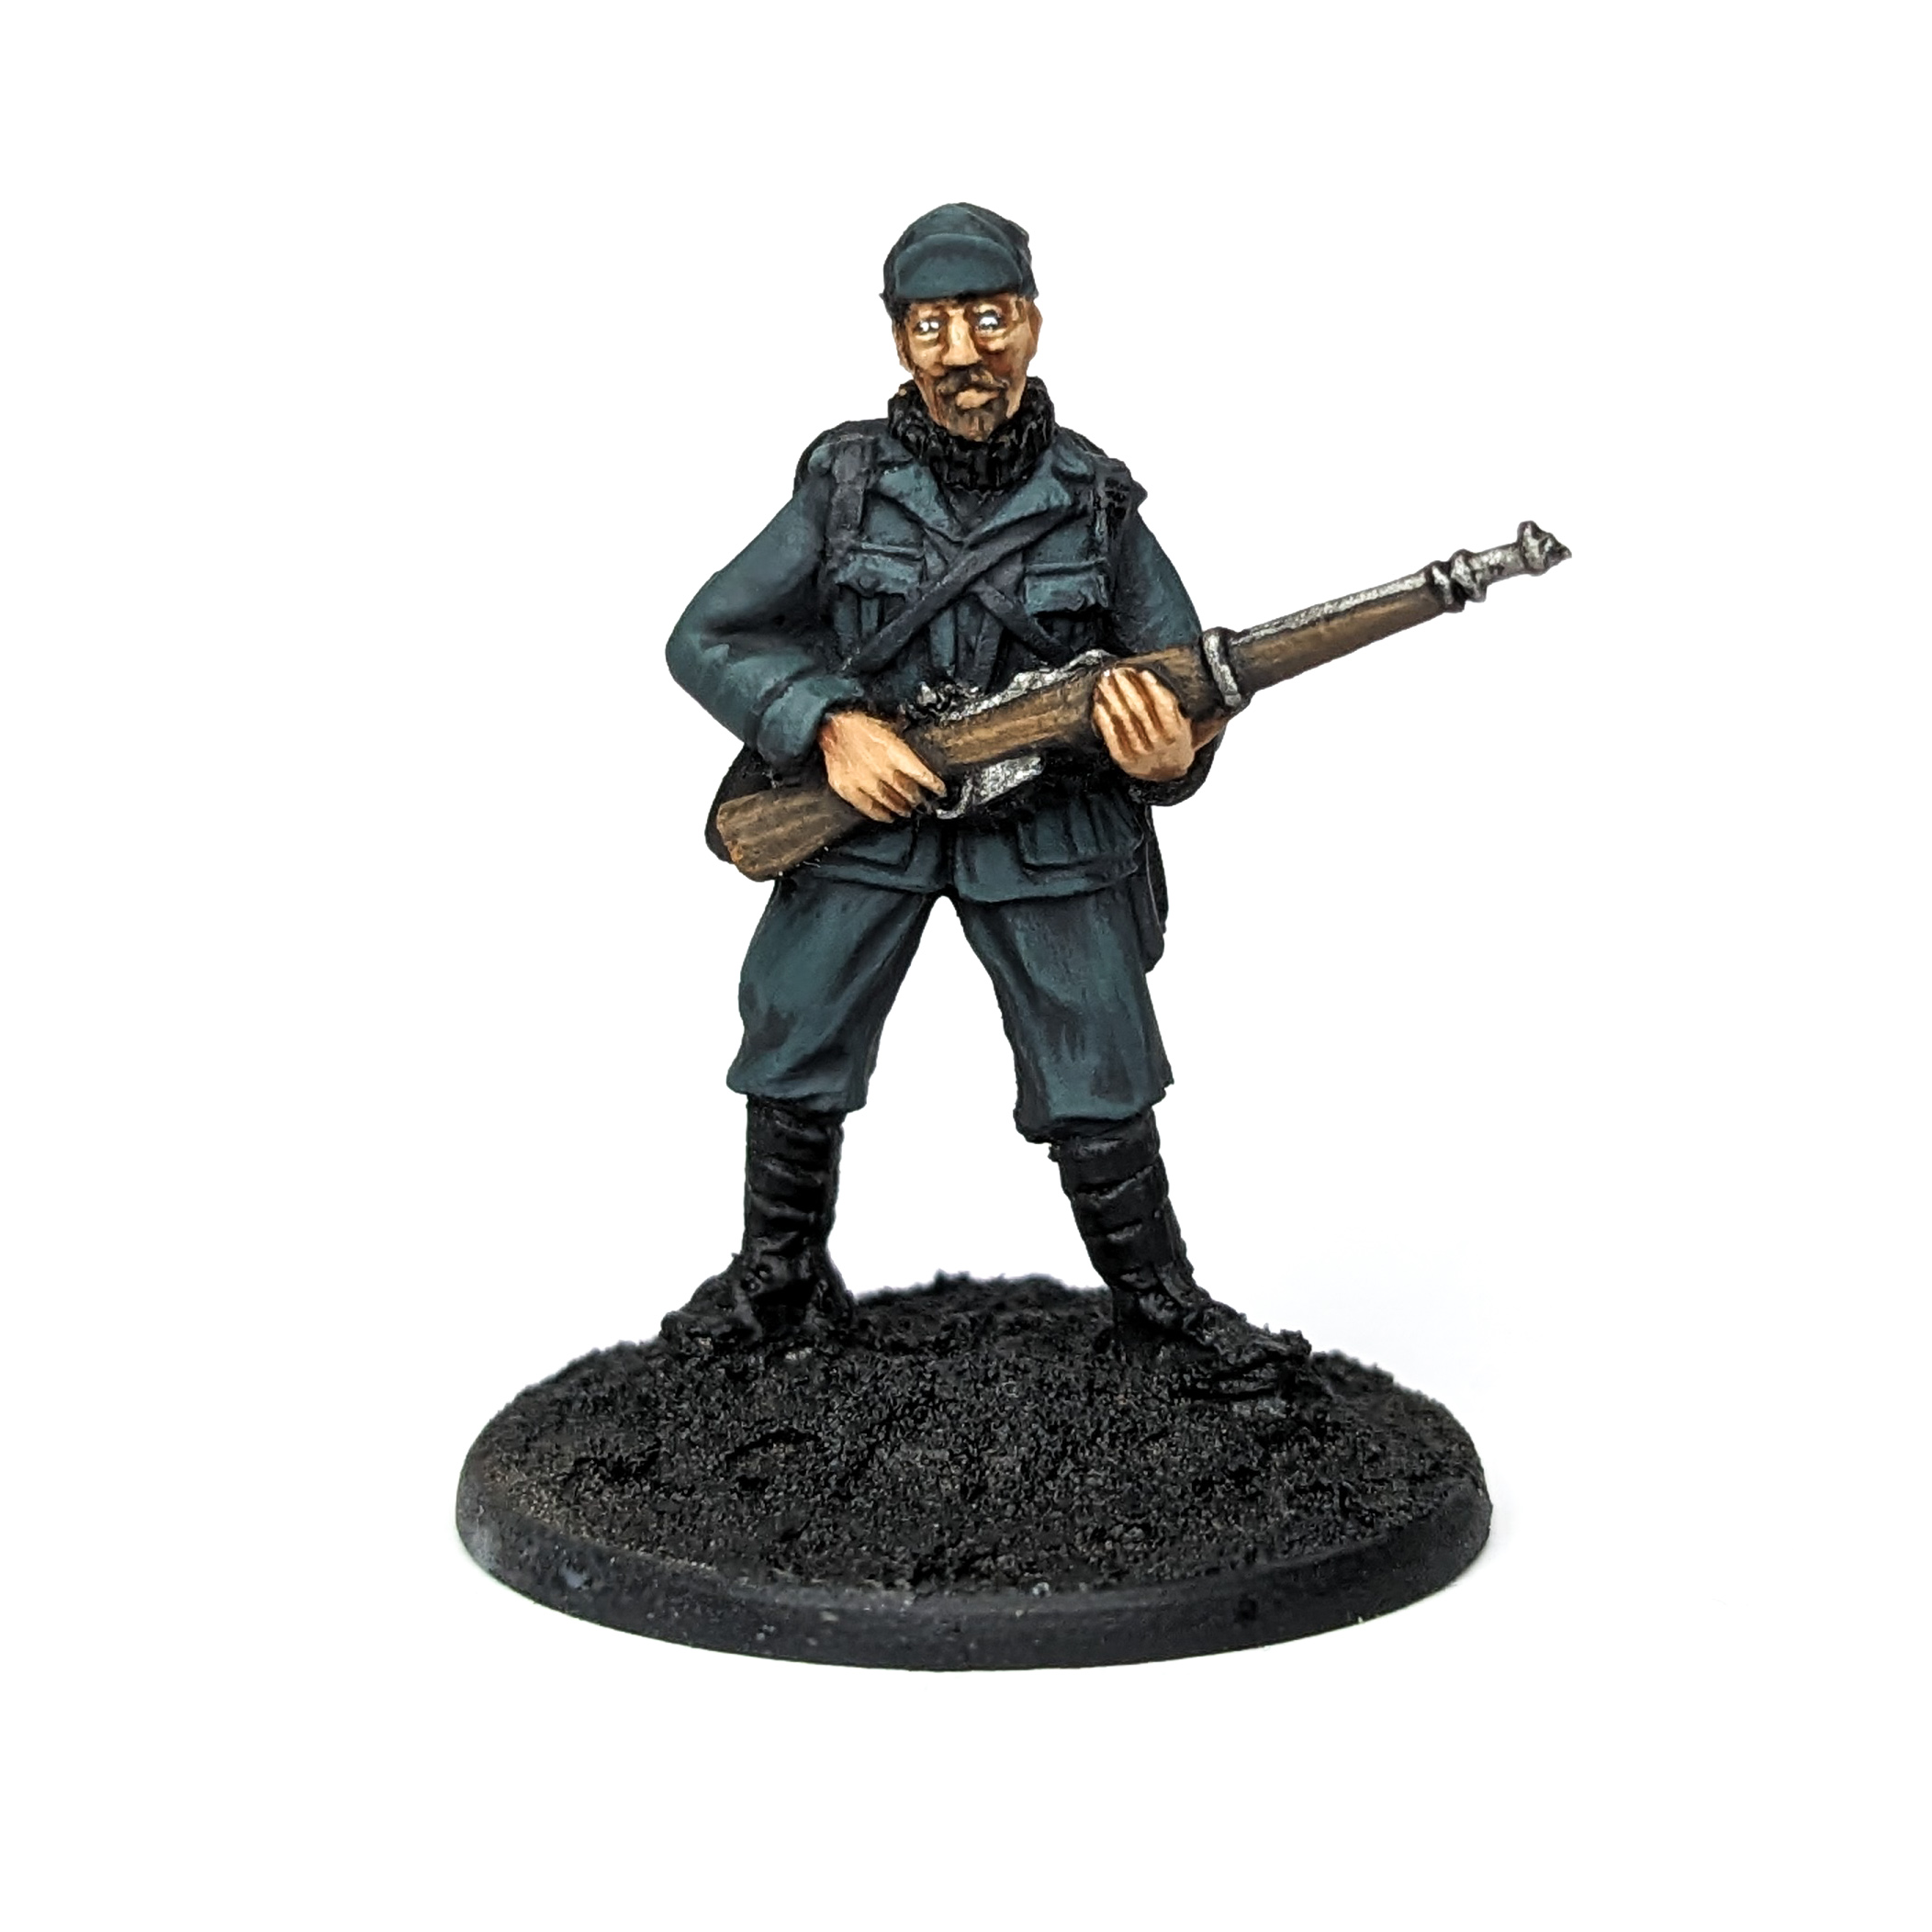
We layer once again, this time mixing Italian Light 2 drops to 1 drop blue grey pale, make sure to thin this layer down quite a bit and apply it across all the light areas, shrinking the area of application by a bit. for more sharper edges, a simple edge highlight will always suffice. If you feel up to it, you can also try some glazing instead.
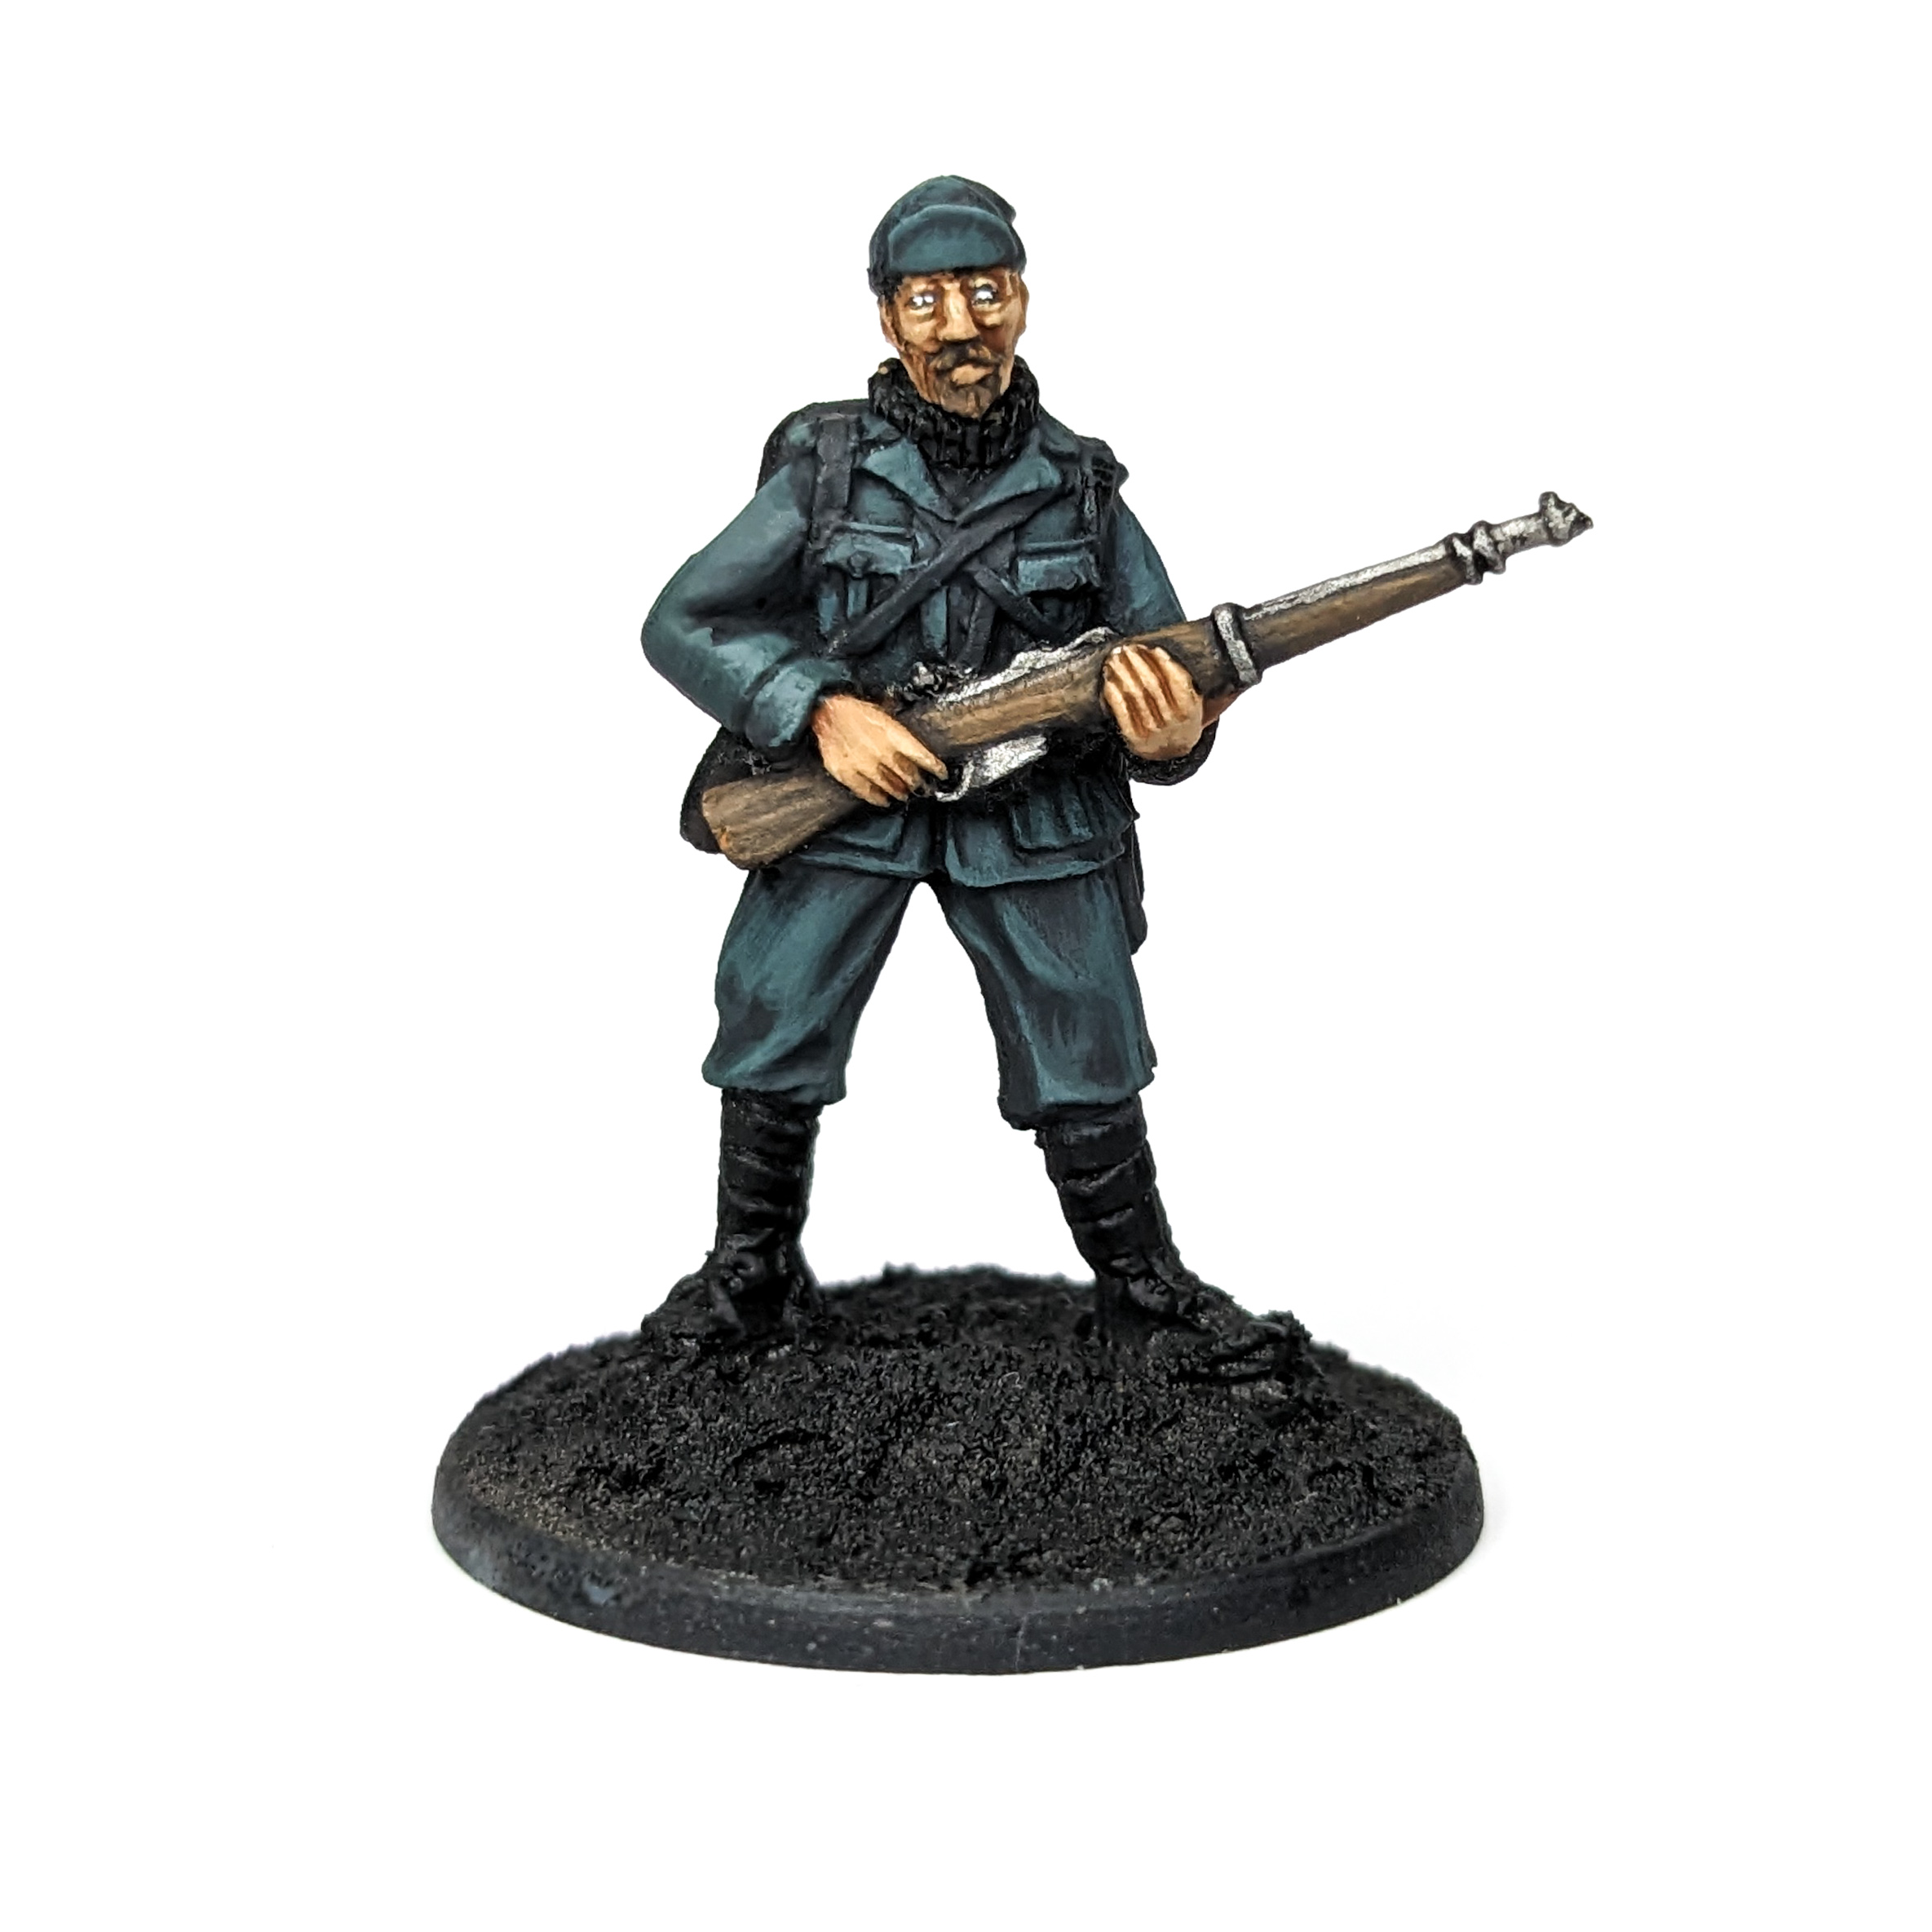
And as some last edge highlights we mix Italian Light 1 to 1 with blue grey pale and highlight all the edges, if you want to go for a more worn uniform, you can try a sort of scratchy effect with the highlights, I’ve not done it here, but I can see how it would make for a pretty neat look.
That’s our fatigue colours done and we’re ready to move onto the belts and webbing. Look out for our tutorial on how I paint the rifles soon! I hope you found this little painting guide useful and I’d be excited to see your models if you do decide to try this guide for yourself.
