
In today’s installment of Goonhammer Historicals, we continue our focus on the North African campaign. For this article, Marc “Ilor” Renouf describes his methods for painting vehicles for tabletop battles fought in this forbidding and oft-overlooked theater of the war.
Vehicular Warfare
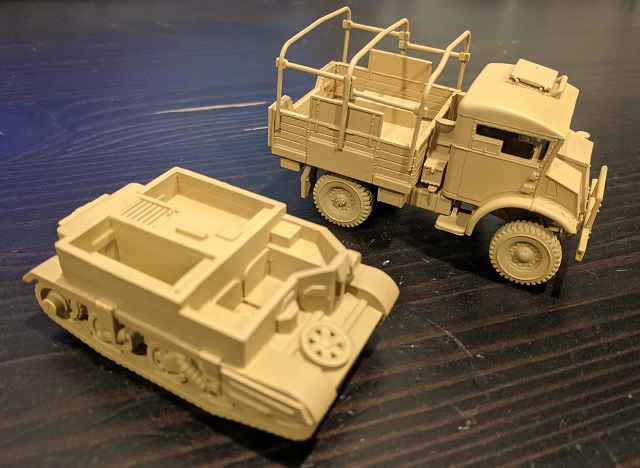
The distances and environments involved in the various North Africa campaigns virtually guaranteed that armored vehicles would play an important role. In particular, the “Western Desert” provided long lines of sight and little natural cover, perfect conditions for armored warfare. Most peoples’ minds immediately leap to tanks, but half-tracks, trucks, and jeeps all played hugely important roles in transporting men supplies across the vast, open desert. Today we’ll be looking at a couple of quick and easy paint schemes that will have your vehicles looking perfect for desert warfare in no time.
For the Western Desert campaign, the British 8th Army, Italian Ariete Division, and German Afrika Korps all used single-color paint-schemes for their vehicles. The sort of two- and three-color camouflage patterns (including the striking, angular, blue-grey scheme employed by the British in later battles) that came into use in Tunisia are still over a year away. In the Western Desert, pretty much everything was some shade of tan, so vehicles were painted with that lack of environmental contrast in mind.
The Triad
The problem with single-color camo schemes is that if you paint your vehicle model as a single color, it looks flat and unrealistic. You can get around some of this with a zenithal style of painting (more on this later), but what you really need is some visual texture or color variation – especially for large, flat panels. So even though we’re trying to evoke a single color, we’ll do it using multiple hues. This will make the surfaces look right at scale, which is the important part. To achieve this effect, we’ll be using an approach based on three colors – a darker base coat, a middle-toned “texture” coat, and a lighter highlight color. For the purposes of this article I’ll be using British vehicles as an example, but towards the end we’ll talk about how to apply this same approach to the vehicles of other combatant nations.
Priming
As a side note, I prime pretty much everything with flat gray Rustoleum primer out of a rattle-can. It’s cheap, it’s easy, and it’s a tonally neutral to whatever goes overtop it. Because we’ll be painting fairly light tones, I’d recommend against starting with a black primer. If you wanted to create lighter tones (say to easily capture sun-induced fading) you could start from a white primer base, but white primers come with their own special brand of challenges.
Base Color
Your base color is exactly what it sounds like. It’s the color that will set the overall tone of your color scheme. For British 8th Army vehicles of this vintage, I like to use Vallejo Green Ochre as my base coat. I apply this with an airbrush, usually in two coats. I find that the time I spend setting up and tearing down my airbrush more than makes up for the time saved actually using the airbrush, especially if I’m painting several vehicles at once. If you don’t own an airbrush or are working on very small-scale vehicles and don’t want to bother, you can absolutely do this with a regular brush, but I find brush-painting vehicles to be slow and often require more coats to get nice, even coverage. Tonal variation is going to come from the other layers in our triad, so it’s important to get smooth coats at this stage.
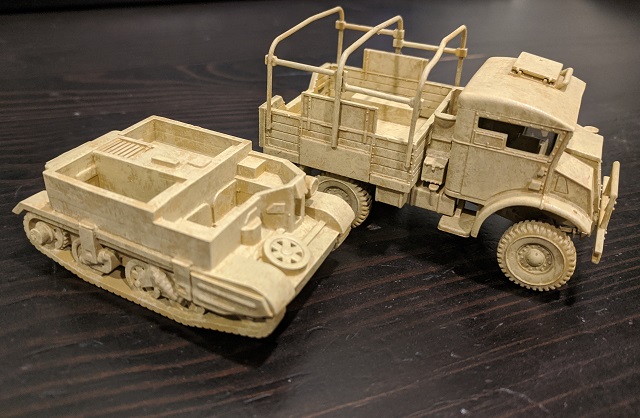
Texture Color
Your texture mid-tone is going to be the color that your eye sees when you look at the finished vehicle, and for this stage of the process, I use Vallejo Dark Sand. This color is applied all over every surface by stippling.
Stippling works kind of like dry-brushing, where you’re dipping your brush into the paint and wiping most of it off before applying it to the model. But unlike dry-brushing, where you’re moving laterally across the surface to just catch any raised areas, stippling involves pushing your brush straight onto the model, making a sort of a “splat” pattern. By repeating this process in an irregular way, you introduce a sort of faux “texture” to your model. And when I say “irregular,” I mean that you should just sort of randomly splotch it on, taking care to vary not only how much pressure you’re applying each time but also rotating your brush as you work to avoid having the same (or similar) “splat” patterns right next to each other. You’re looking for strong overlap, but not complete coverage. Shoot for 75% and you’re in the right ballpark.
If you look at the mini and think, “Dear gods, what have I done? This looks like a mess!” then you’re probably in good shape.
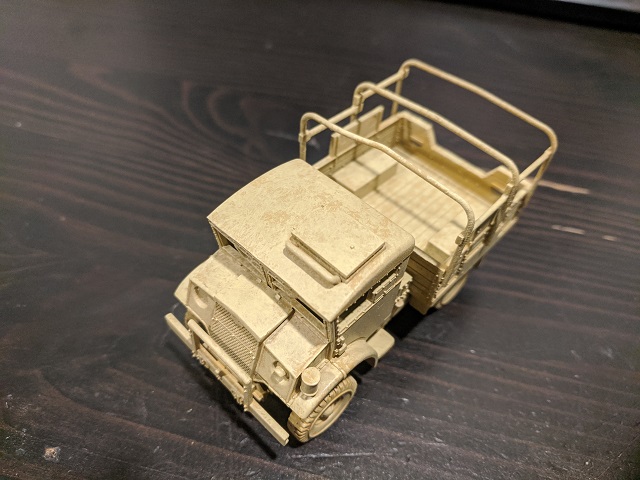
Highlight Color
Your highlight color is going to catch all of your edges, rivets, and other raised detail and will add another level of visual interest to your model. For this stage for British vehicles I use Vallejo Pale Sand. This is straight-up dry-brushing, no frills. The one caveat is that you want it to be a very light drybrush. You’re not looking to massively change the underlying tone, you’re just trying to accent your edges. Wiping almost all of the paint off your brush will help you to produce the sort of subtle effect you’re going for.
If you’re new to dry-brushing and want to practice a little bit before you apply it to an area of the model that matters, a really good way to do so is to try it out on the vehicle’s tracks or wheels, as they generally have lots of texture and you’re going to paint them black in a later step anyway. This lighter effect on your raised details ties together the sort of mottled effect of the first two layers.
You may also find that you want to use this highlight color to edge-highlight any particular panels or hatches that you feel need a little bit of extra visual definition.
At this stage, if you wanted your model to represent a vehicle that was freshly painted or new to the theater, the “camouflaged” parts of your vehicle are done.
Panel Lining
Depending on the level of detail your model has, you pay want to consider applying a “panel liner” at this stage. Panel liners are very thin oil or alcohol-based paints that can be applied very precisely to a crack and will flow easily into the recess. They’re a great way to darken a line between two adjacent body panels (hence the name) or add contrast around small raised areas like rivets. For my Western Desert British, I use Tamiya brown panel liner. It does exactly what I want and is super easy to apply because the bottle cap has a fine applicator brush built in. Just make sure you shake it really well before using, as over time the pigment has a tendency to settle to the bottom of the bottle.
Tracks and Tires
Next we’ll want to handle all of our metal track links, the rubberized bits of road wheels, and tires, all of which you’ll want to go in and give an even coat of flat black. For rubber bits, you’ll want to then give this a light drybrush of a fairly dark gray (I use Vallejo Dark Gray), just enough to bring out the edge detail. If your tank has road wheels, painting these black and giving them a quick edge highlight of dark gray around the rim is another easy way to give visual interest, especially in tight areas where it can be hard to apply drybrushing effectively.
For tank tracks, a drybrush of a steely metallic color is perfect, as these surfaces are in continuous contact with sand and grit and are more or less constantly worn down to bare metal. I use Citadel Boltgun Metal/Leadbelcher for this step.
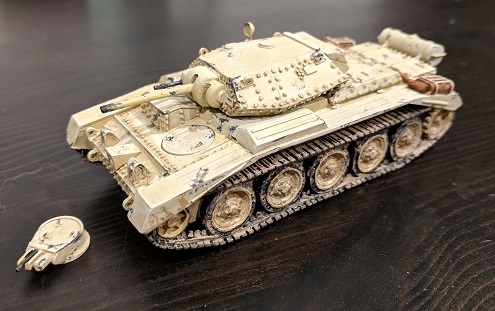
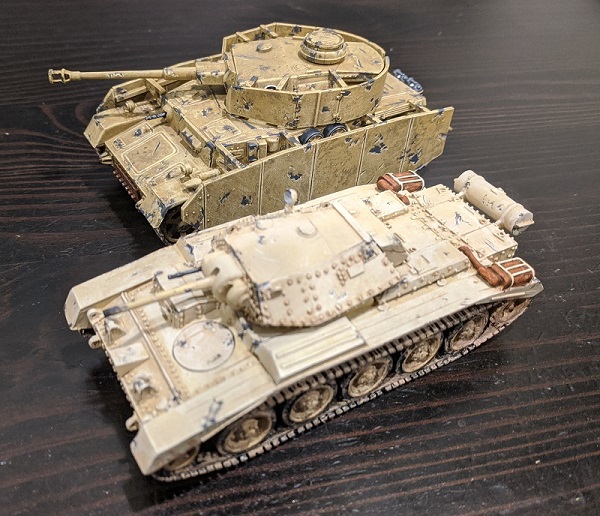
Importantly, you don’t usually need to be too fussy about highlighting tracks and tires overly precisely, as you’re likely to give them a pretty solid amount of dust or caked-on sand later (see the above British Crusader tank for an example).
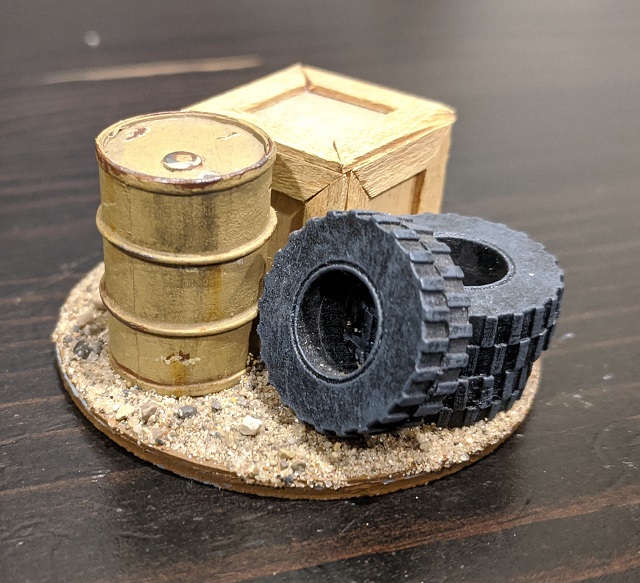
Utility Tools
A lot of military vehicles come equipped with a wide variety of tools – picks and shovels for digging out of mud or holes, jacks and wrenches for changing tires, or pry-bars and hammers for swapping out bogeys or fixing broken track. Many of these kinds of tools are stowed on the outside of the vehicle. For tools, I paint any wooden parts (usually tool handles) Vallejo Flat Earth. Once this is dry, I’ll give the handle a quick wash with Agrax Earthshade. For any metal bits that are likely to be unpainted (or have the paint worn off), I’ll base coat these with Vallejo Dark Gray and give them a drybrush of Citadel Leadbelcher. These will often get an additional rust treatment (see below).
Then, there are the ubiquitous jerry cans. In fact, the term “jerry can” itself stems from this conflict, as the Germans (aka “the Jerries”) had a standard form-factor, full-seal gas can that was the envy of the British army (who used a ridiculous variety of bespoke receptacles, some of which didn’t even have latching lids). Additionally, the Germans used the exact same cans for both gas and water, distinguishing them with a very simple visual design: water cans were painted with a large, white cross on both sides. For the most part the British painted their gas cans the same color as everything else, but the Germans tended to keep their gas cans in the same dark gray as their early-war vehicles, as this helped keep visual contrast with the white crosses of those cans carrying water. For British gas cans, I use exactly the same process as the vehicles themselves, only in miniature: base coat, stipple, highlight. For the German cans, I paint them a base coat of Vallejo Dark Gray, then highlight with Vallejo Neutral Gray. Finally, if I want to depict a water can, I paint on the obligatory white cross.

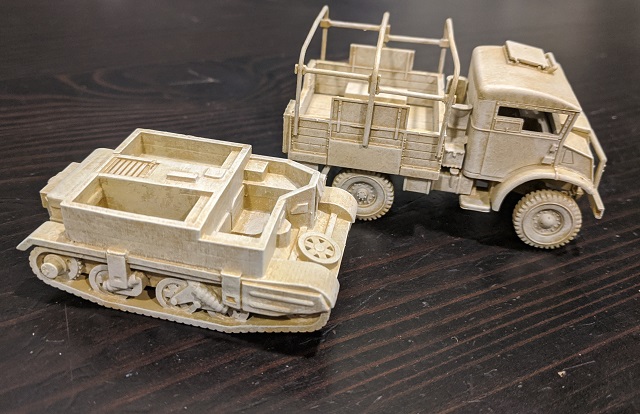
Weathering
At this point, your vehicle is fresh off the factory floor and ready to be fielded. But the desert is an incredibly harsh environment. The cruel sunlight has a bleaching effect on most paints, which leads to the colors fading to progressively lighter and lighter tones. Low humidity leads to large swings between daytime and nighttime temperatures, which in turn leads to significant expansion and contraction of metal vehicular body/armor panels. This repeated expansion and contraction causes paint to chip and peel in fairly short order. Added to the ever-present abrasive effects of blowing sand, vehicles can go from freshly painted to alarmingly worn in weeks if not days.
So if you want to give your vehicles a “gently used” look (or even a “beaten to hell” look), here are a few techniques you can use to make your vehicles look a bit more lived-in.
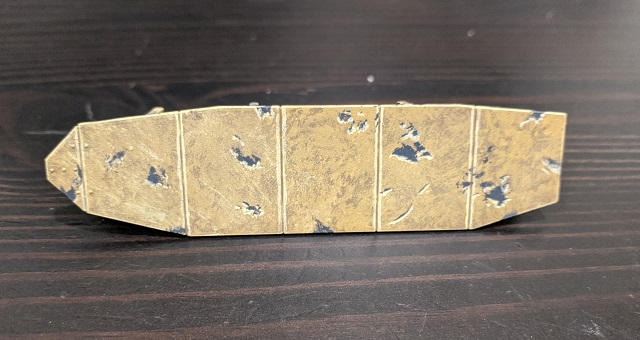
Paint Wear/Chipping/Scratches
While purists may tell you to paint your whole tank rust colored first and then use chipping fluid, I think that this is both overkill and often gives an unrealistic looking effect. Unless it is a fresh scratch or getting constantly abraded or polished by sand (as is the case with tank tracks themselves), bare metal often has a very dull gray look. As a result, I like to use my trusty Vallejo Dark Gray as my chipping color of choice.
To apply this in a way that looks realistic, you can use a couple of different approaches. Lots of folks swear by sponge-painting (essentially stippling with a small chunk of sponge rather than a brush), but I find that stippling with a small bush generally works just as well and gives me a little bit more control. The important part is that you want to concentrate your paint chips in areas that will see the most contact, friction, or abrasion. Anywhere someone is going to regularly put their hand or foot when clambering on or into the vehicle is a good spot, areas like running boards and door handles. Hinges are another area you’ll want to focus on. Similarly, front bumpers and the leading edges of fenders are other good areas for wear, especially for vehicles that might have been moving in convoys (where the vehicle in front is throwing up dust and grit). Generally, wear is usually concentrated at edges rather than in the middle of panels, but that’s not to say it doesn’t occur there – if you have a big, boring, flat panel somewhere on your tank, consider putting a little dent or scratch on it.
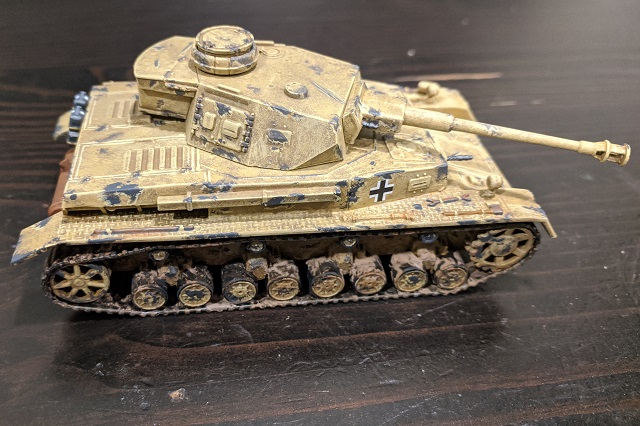
This is the stage at which you can give some visual clue as the age or condition of your vehicle. When I am painting British vehicles, I tend to keep the chipping or wear more reserved, only applying a few spots here or there and limiting it largely to “high-traffic” areas of the vehicle. That’s because the British supply lines throughout the North Africa campaigns were largely intact, and vehicles could be repainted regularly to keep them in good shape. For Italian or German Afrika Korps vehicles – especially as the war dragged on into ’42 and ’43 – the same could not be said, and I tend to weather these very heavily to reflect this difference. But ultimately, the level of chipping is up to you. Do what looks right to your eye.
Once you have the dark gray base down, it’s time to add some visual depth. We’ll do this by “underlining” the chipped part using the same color you applied as the vehicle’s highlight color. With a very fine brush, simply paint an irregular line along the bottom edge (and only the bottom edge) of the worn section. If a particular chipped section is on a perfectly horizontal surface, you can either ignore this step or pick an arbitrary lighting direction (I usually treat the front of the vehicle as “down” for these cases). This underlining effect gives the impression of depth to the area, evoking the idea of scratches or dents.
Finally, for areas of very fresh wear (things that get touched or stepped on constantly), consider taking a small brush and edge highlighting he most exposed edge with a steely metallic color. You can also highlight an edge with a graphite pencil to achieve a very similar effect quickly and easily.
Grime
The desert is a dirty place, and exhaust-belching vehicles bring their own dirt with them. And when the vehicle is exposed to water all of that dirt and grime gets carried with it, forming streaks of filth. For this effect, it’s really hard to go wrong with oils. MIG makes a great product called “Oil Brushers,” which look like little mascara tubes and come in a variety of colors. And like mascara tubes, the cap has a fine-tipped internal brush you can use to apply them. But really almost any fairly thick oil-based paint will do. To make a really nice, convincing oil or grime streak, just apply a tiny dot of the oil paint at the top of the region you want the streak to cover. Then, using a flat brush dampened with mineral spirits, gently swipe downwards. The spirits will thin the oil paint and draw it along the path of the brush. A couple of quick swipes and you’ll have gorgeous filth and oil stains.
When using oils, subtlety is key. It really does only take a tiny dot to make a decent streak.
Rust
It actually does rain in the desert – part of the British stealing a march on the Germans during the opening day of Operation Crusader was the result of a raging thunderstorm that pounded the Libyan desert. And where there are water and metal, rust forms.
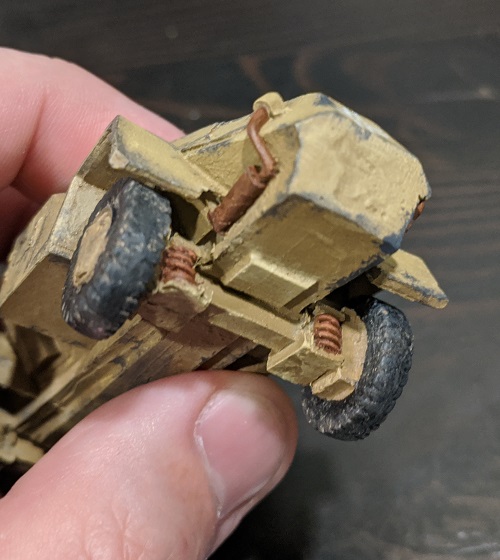
Rust is hated by militaries everywhere, and part of any good maintenance doctrine is going to involve rooting out and destroying all signs of corrosion. But some areas are harder to protect than others, and I’m going to focus on two of them: springs and exhausts. Springs are basically impossible to paint as they are by definition constantly compressing and extending. They are also usually found on the undersides of vehicles, where mud and moisture can accumulate without being dried out by the harsh sun. As such, they rust quickly and completely.
Similarly, mufflers and exhaust pipes are subject to regular high temperatures, which accelerates the chemical reaction that creates rust. It doesn’t take long before these features are completely covered in rust.
When creating rust effects, you have to consider whether you want to depict new rust or old rust. New rust is going to appear as a reddish tinge on an otherwise metallic surface. Remember all those tools strapped to the outside of our tank? Let’s say we have a shovel and the blade is exposed metal. This will get a very light wash of rust color, in my case usually a tiny amount of MIG Ochre Rust dry pigment mixed with water. This lets the metallic color show through, but gives it a reddish orange tint that is a harbinger of corrosion to come.
For old rust, I start by painting the part a medium brown. Something like VMC Flat Brown works well. Once this is dry, I give the part a much heavier wash with the same rust mixture as before, only with more pigment and less water. It should have the consistency of thick paint, and you’ll apply a decently heavy coat of it, concentrating on the raised areas.
You might think that mixing dry pigments with water sort of defeats the purpose, but this is not the case. Without any kind of acrylic medium, after the water evaporates the pigment goes back to being dry pigment, and as such it has a very different physical texture (and thus look) than an ordinary layer of paint. It looks rough, uneven, and mottled, which is exactly what you want for a rusty old muffler. And if you feel like you’ve overdone it, you can tone it down by just rubbing over it with a stiff-bristled brush – a small drybrush does the trick nicely here.
Dust
Fine grit and dust are a fact of life in desert environments, and are another easy way to show weathering and wear on your vehicles. Again we’ll be working with dry pigments here, and MIG Dry Mud is my go-to pigment of choice for this application. Here I’ll apply it either dry just like you would for any other weathering powder, or wet like the rust for a thicker layer of dried mud or caked-on sand. In either case it helps to hit it with a drop of mineral spirits to act as a fixative. This is super easy to do, just dip a paintbrush into the spirits and gently touch the very tip of the damp brush to the pigment area. Capillary action will do the rest. Regardless of which approach you choose, concentrate your dust effects in crevices, tires, tracks, and horizontal surfaces.
If you plan to varnish your vehicle using a clear-coat (and you should), you’ll want to be aware that if you’re using clear coat from a rattle-can (a la Testors DullCote) if you’re not careful the pressure of the spray can blast your dry pigments off the model entirely. This is less a problem the thicker the application of the powder (that is, using the wet method), so if you want to keep your dust effects subtle you might want to apply them after you’ve applied your final varnish layer.
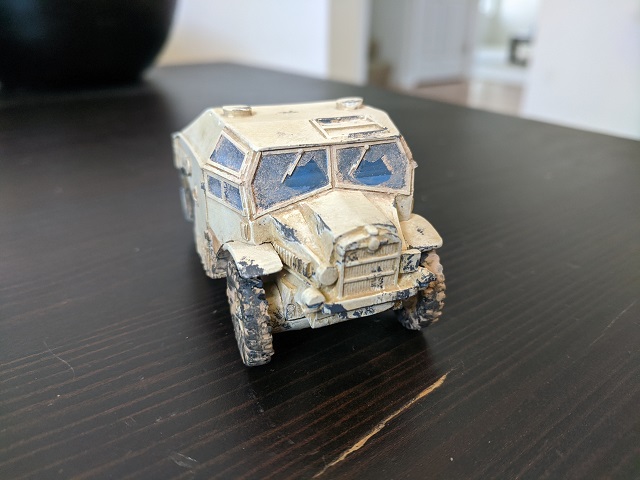
Windshields
One of the most fun effects for desert vehicles is doing your dust effects on the windshields such that you can see the wiper patterns. This is actually surprisingly easy to do and looks really cool.
To achieve this effect, simply take a small piece of clear cellophane tape (Scotch Tape or the equivalent) and stick it to your cutting mat. Using a sharp hobby knife, cut out the arc shape you want for the cleared area of your windshield. This might take a couple of tries to get right (especially if you’re doing multiple windows at once and trying to get them to be a consistent size), but that’s OK, tape is cheap.
Once you have the shapes cut to your satisfaction, use your hobby knife to gently lift them off your cutting mat and position them on your vehicle’s windshields. Now apply your dry dust pigments to the windshields right over the tape, and apply mineral spirits to them as a fixative. Once your fixative has fully dried, carefully use your hobby knife to life the tape off the windshield. Voila, a clear spot on an otherwise filthy windshield!
Quad-Tones
If you have an airbrush and really want to bump up your game, you can consider adding a fourth color tone between your base coat and your texture color. This color is applied after the base coat and is done using zenithal shading. All this really means is that you are spraying the color from the top down (or at a shallow angle off vertical). This has the effect of tinting all of the upward-facing surfaces slightly, while leaving recesses or undersides with just the base color. The stippled texture color is applied over the entire vehicle as usual, but the lighter undercoat will result in a subtle “sun-faded” effect on the upper surfaces. This adds another step to the process, but if you already have your airbrush out for your base coat, you might consider giving it a try.
Other Vehicles
The color triad I’ve outlined here is the one I use for 8th Army vehicles and reflects the extremely pale, almost white color that British vehicles of this era had. But the exact same approach can be done for German vehicles simply by applying a different color triad. For Afrika Korps vehicles of this era, I use a base coat of Vallejo US Field Drab, stipple on Vallejo Green Ochre, and drybrush highlight with Vallejo Buff. You’ll notice that the Afrika Korps mid-tone is the same color as the British base coat, which results in a darker color that’s a really nice match for the German “Dunkelgelb.” Italian vehicles of this era have a browner coloration, so my triad is Vallejo Flat Earth for the base coat, Vallejo Tan Earth for the stipple, and Vallejo Iraqi Sand for the drybrushed highlights.
The methods described here are very quick and easy to apply, and will let you produce very realistic looking vehicles for your North Africa battles in no time at all. Better still, these methods can serve as a stepping-off point for more complicated camouflage schemes. By airbrushing some brown and green stripes or splotches over the Dunkelgelb before you apply any weathering, you’re well on your way to having a very effective German 3-color camouflage seen later in the war on both the eastern and western fronts. Similarly, some angular patches of a blue-gray over top the British triad described here would look great on 8th Army tanks rolling into Tunisia. There are lots of possibilities, and these techniques will mean you’ll never have to worry about flat, featureless panels of armor ever again.
