
In our How to Paint Everything series, we take a look how to paint well, everything. We look at models and effects and look at several different methods for painting them. We’ve recently been getting into Infinity in a big way, and the Goonhammer crew have been painting up models from every faction. In today’s HTPE, we’re looking at how to paint the Yu Jing.
The Yu Jing are an Asian spacefaring civilization and the second largest/most important nation in the sphere. Yu Jing is a nation obsessed with securing its primacy over PanOceania through whatever means necessary. Formed following a Chinese Cultural Revolution that saw the reinstallation of ancient Chinese values and the imperial throne and the renaming of the country to Yu Jing, the country expanded rapidly throughout east Asia, annexing countries like Japan and South Korea. When PanOceania expanded into deep space exploration, Yu Jing was slow to follow, though eventually they’d discover a system of their own and place their capital on the twin world of Yutang. They now compete against their colonial rivals – PanOceania, Haqqislam, and Ariadna – for dominance, whether through intrigue or by force.
How to Play Yu Jing
If you’re looking for more information on how to play Yu Jing, check out our Faction Focus article on them covering the Imperial Service.
Painting Yu Jing
Mike’s method
After spending far too long eying up basically every army in Infinity, I wanted an easy onramp so I opted for a CodeOne compatible army. This left me with a few choices and I just couldn’t get over how cool some of the Yu Jing models were. Fast forward a month and I have an ever growing collecting of Yu Jing models, and Nomads on the way!


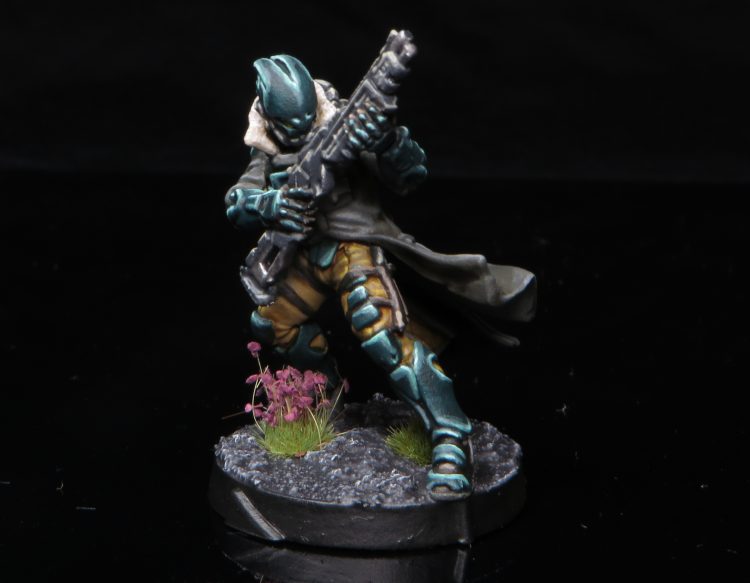
This was my first time attempting eyes and really putting more effort in to faces in general, so I had some mixed results with some slightly surprised looking models and overly harsh highlights. For the flesh I did my best to follow the guide for East Asian skin ZIVth provided in our HTPE: Human Skin guide. Working from a Basic Skintone up through to Ivory at the very highest points with an intermediate wash of Seraphim Sepia and Reikland Fleshshade. And this was where I left the models for a while but I couldn’t help feeling like they needs a little more punch.
It was at this point that I revisited them with a gloss varnish followed by a targeted oil wash using a dark brown/blue. This provided some much needed contrast between the orange and leather. I figured with the models varnished and out of the display case, I may as well get some weathering powders on them, building it up over successive layers between thin coats of varnish.
Rockfish’s method
So I caught the infinity bug after one of the discords I am one got really excited about the game, unfortunately the models are also really fun to paint so I might end up poor due to those fucks.
I am used to working on 40k armies where even a “quick” unit is a bunch of repetitive and surprisingly large models, so its a nice change of pace to be working on small and relatively unique sculpts.
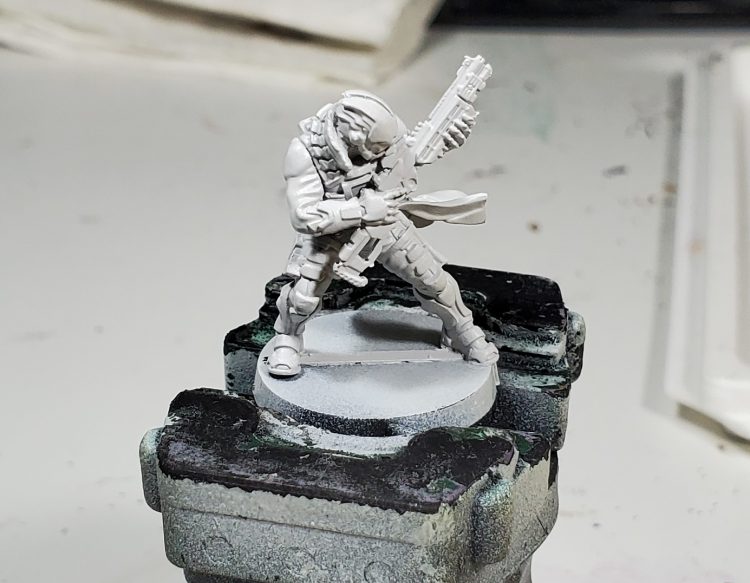
I began with a “grey” vallejo mech primer, which lets be honest is just off a white. I find it a bit strange in how patent and slow you have to be in the application compared to the black primer, but it still seems to work ok.
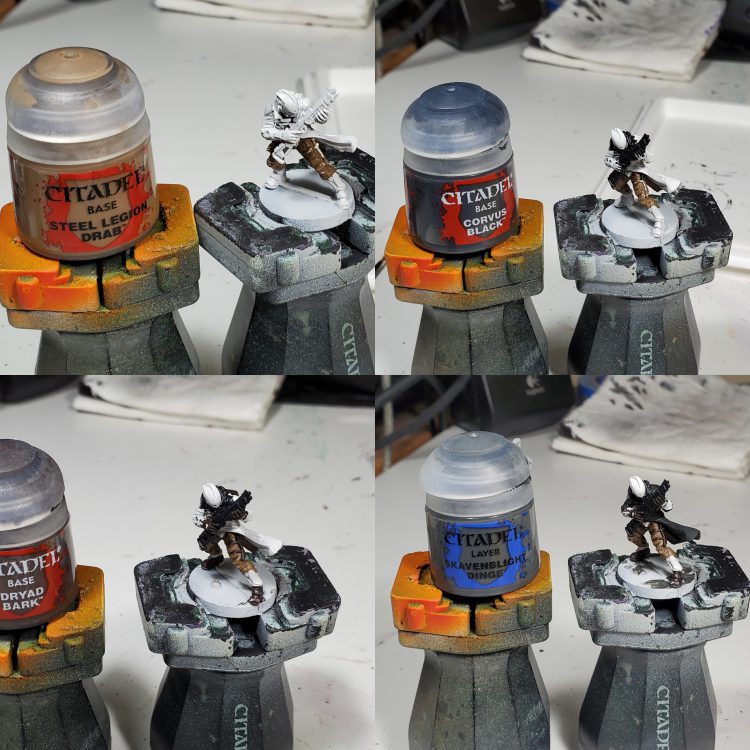
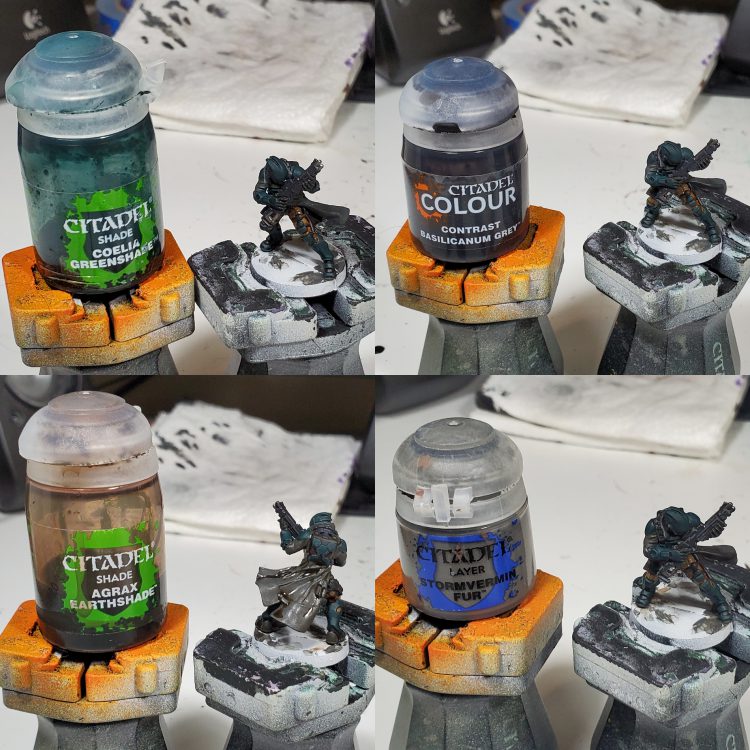
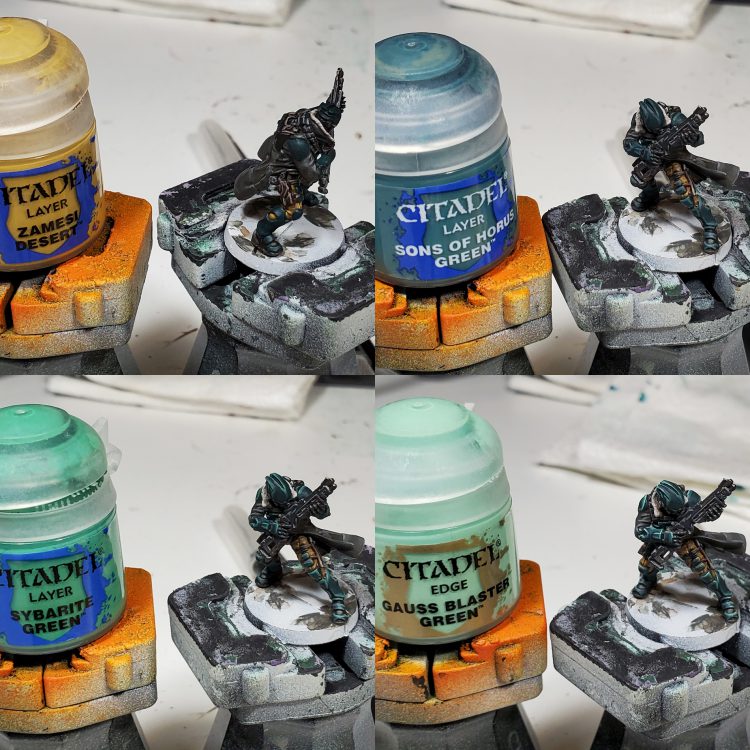
I would always suggest from the inside out with stuff with this many small details, as I always will accidently splotch the other colours I did first. These initial colours are also pretty earthy because I like grounding it provides with the sea green.
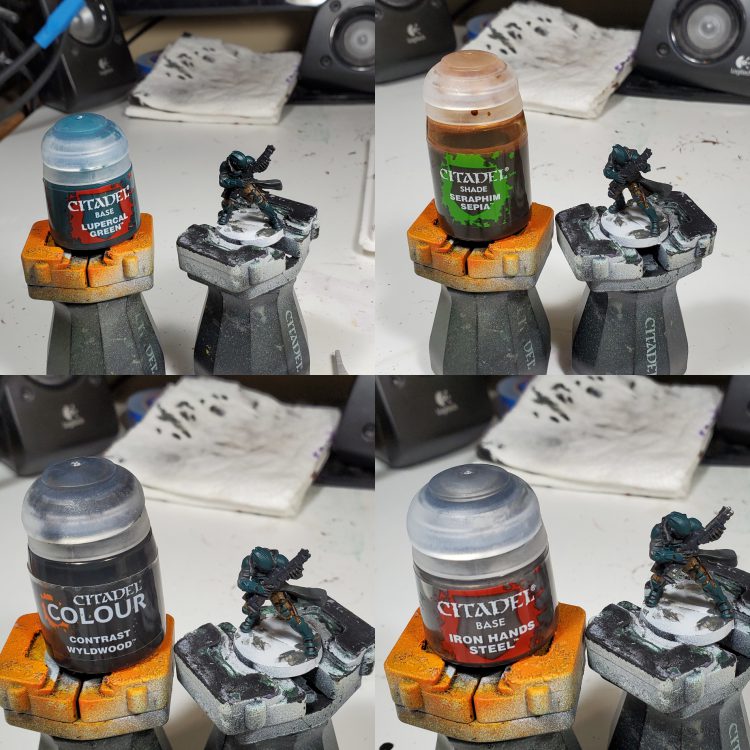
I totally did not forget that I needed to paint some metal in this scheme, but that’s a easy fix. You will notice that I fairly often use contrast paints as a very dense wash, while a bit thicc in application I quite like the results as they often result in a nice rich colour.
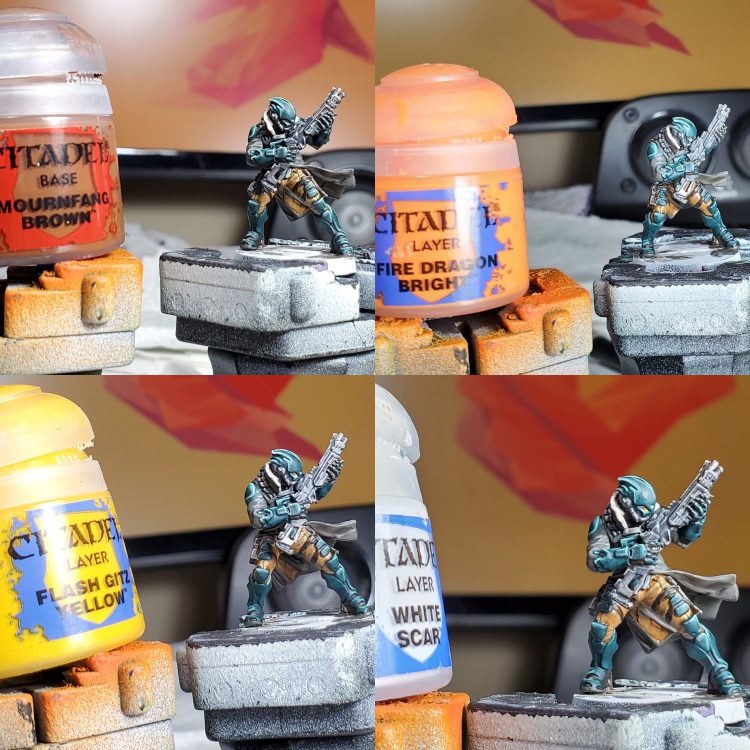
After a few more washes I started working on the highlights, beginning with the gun where I used a slightly brown grey as a highlight. I usually don’t highlight black with a more “plain” white/grey as that’s pretty rare in real life and can feel very cartoony to me.
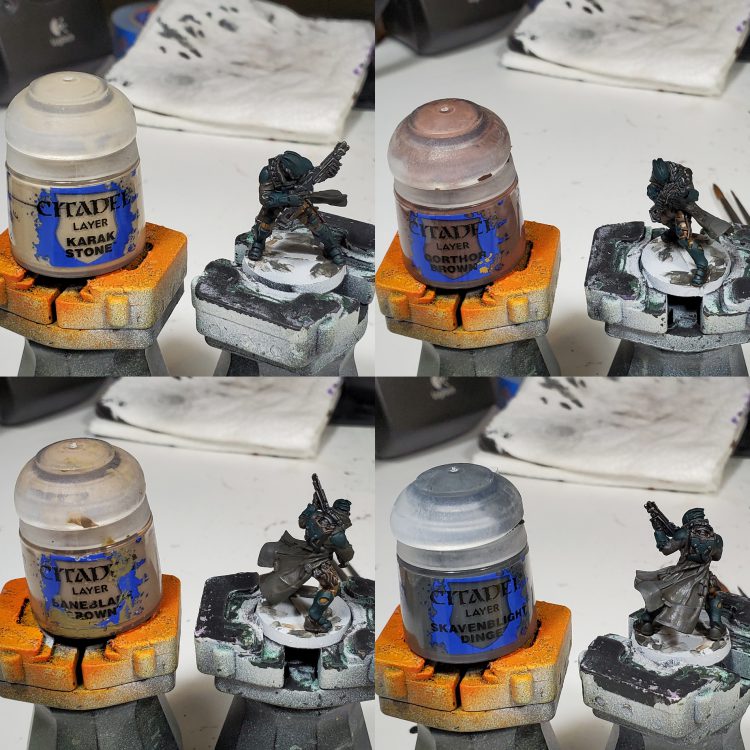
For the leather I used a fairly conventional set of highlight colours, but it can be helpful to remember that usually as leather wears the undyed leather will reemerge so a final highlight of a fleshy/light brown can work well as double purpose wear and highlight.
At this point I went back to base coat the fur lining, it can be nice to wait on stuff like this till later to make sure it does not get dirty when doing messy large areas.
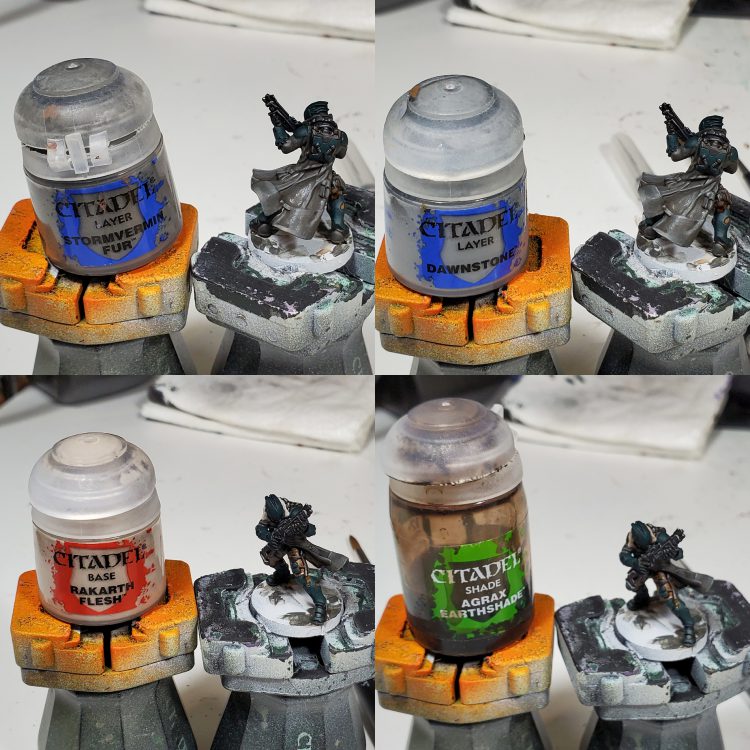
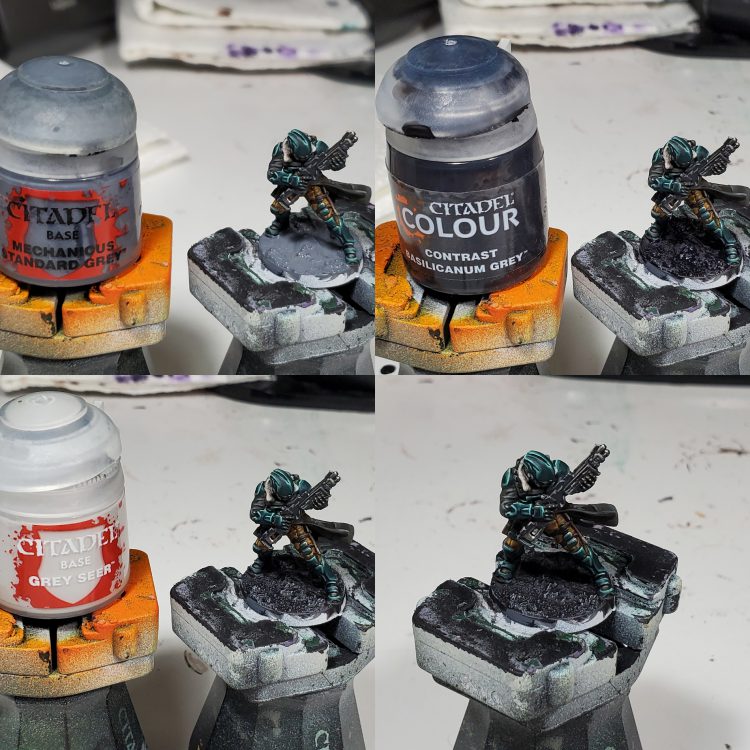
While I usually don’t do this on my usual 40K models as it can be a bit too subtle, I reused the base coat colour to provide a slower transition into the highlights.
I gave the armour panels the most stark highlights to make them really pop from the rest of the model as they are the most identifiable Yu Jing characteristics.
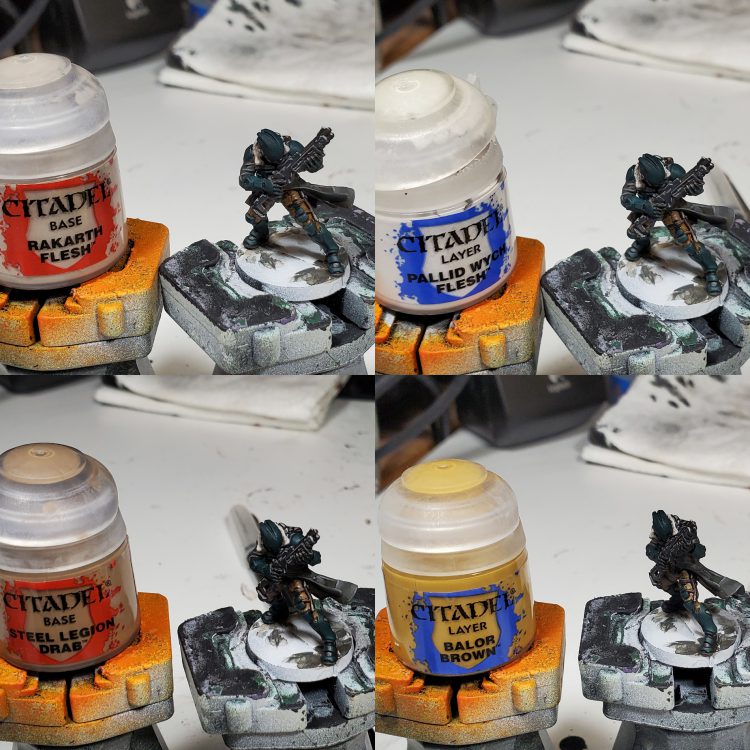
While you can barely see it in the final model due to the angle, I did in fact paint in the teeny tiny eye lenses.
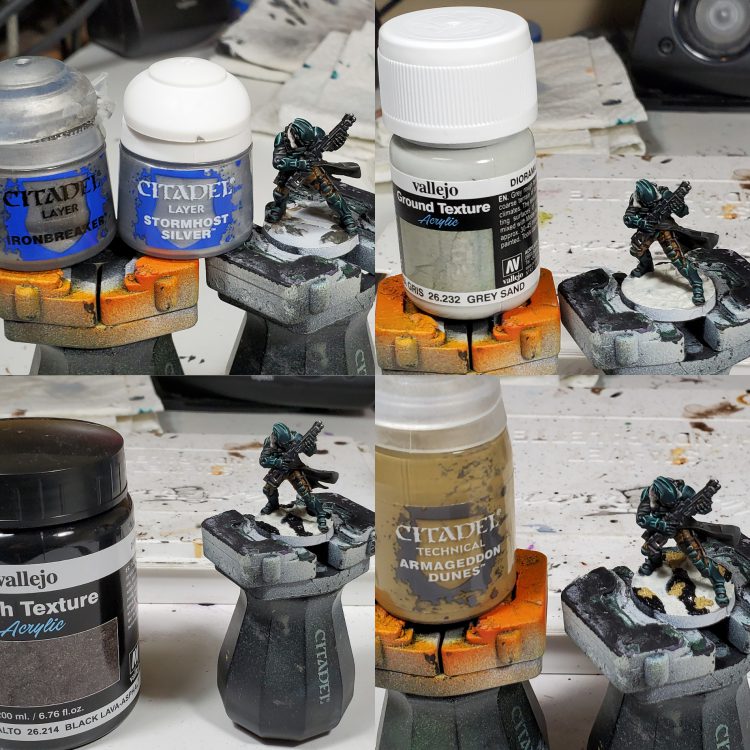
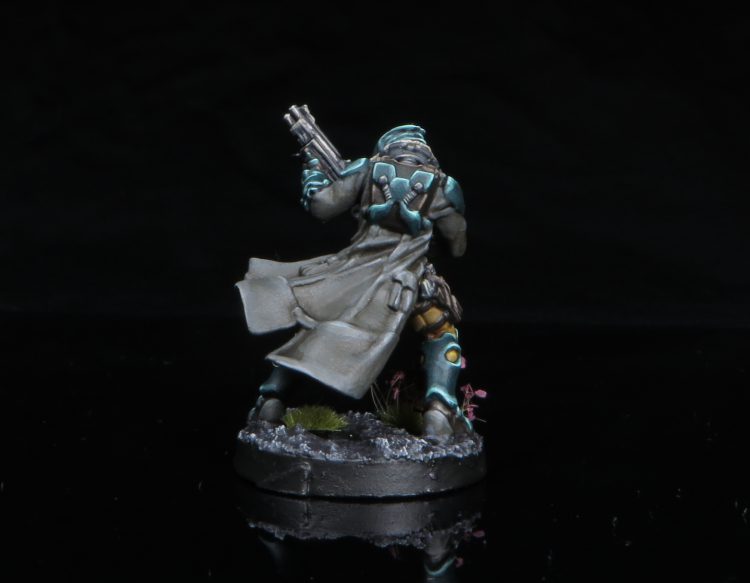
I was previously just using stormhost as a metallic highlight in this scheme but I decided it was a bit stark for my preferences, so I went back to pull back the highlights with some larger areas of ironbreaker. For basing, I recently found that using a mixture of different basing pastes to get the implication of different sizes of gravel and rocks can really work with smaller models to get away from models looking like they are on a uniform plane from a distance without having to add a bunch of distracting stuff.
Once I finished painting the base I threw on some vallejo mecha matte varnish, then it was just hitting the base rim with Abaddon Black and adding some gamers grass tufts! For the scheme I have used the following tufts Green 4mm, Dry Green 2mm, Lavender and White Flowers, but feel free to use whatever you prefer instead.
PaintVagrant’s Method
Hey y’all, Brian here (AKA PaintVagrant on the SA forums/discord) to introduce myself and show my content. My channel focuses on a large variety of games, and I have started creating painting tutorials as well during the quarantine.
Here are my first two full timelapse videos – how to paint Yu Jing in the classic yellow scheme, in a style similar to the official Corvus Belli miniatures. I would describe the the difficulty for these models to be around 8/10. The videos include airbrush, edge highlighting, NMM, and other intermediate concepts.
Check them out here, enjoy and stay safe!
That wraps up our look at the Yu Jing. Happy painting, and as always, if you have any questions, comments, or feedback, drop us a note in the comments below or email us at contact@goonhammer.com.
