This article is part of a larger series on how to paint Necrons. To return to that series, click here.

Who is Illuminor Szeras?
Szeras is the chief scientific mind among the Necrons, having been the one responsible for building the mechanisms and conducting the biotransference that converted the Necrontyr from tumor-riddled flesh-and-blood bodies into immortal robot skeletons. He’s the largest and most revered of the Necron Crypteks, and is in a lot of ways the faction’s Fabius Bile, embarked on a never-ending quest to discover the secrets of life and the soul. For this work, he requires a never-ending supply of fresh biological material to experiment on and harvest for his own needs. As he is not beholden to any one dynasty, Szeras’ services are in high demand and often come at the cost of supplying him with new material, though recently his services have been pledged to the Silent King once more. Szeras’ involvement in the Pariah Nexus has likely been as an architect, helping design and construct the pylons that would close off the warp in that space. For Szeras, the biotransference is but one step in a long process of transition from flesh and blood to transcendent beings of pure energy, and while many of the Necrons who retained sentience post-transference resent their new forms and wish to return to flesh and blood, Szeras is looking further, toward the next step in their evolution.
Assembling Szeras
RichyP: Illuminor Szeras is in my opinion one of the trickier builds (not Spirit Hosts tricky, but tricky none the less), mostly due to the separate sections that all have to line up in the latter stages of assembly. The final step in particular (step 11) requires that one of the leg sections that is built in the previous step and is the one attached to the victim on the base lines up with the socket on the torso of Szeras. The same Torso that may be at a slightly different height and angle as it too is assembled separately from the other legs etc..
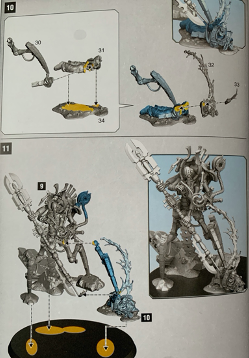
In my case when I got to step 11, and tried to line up the leg it was a full 1cm out and wouldn’t sit flush with the base and the socket, luckily the glue was still wet on the torso and I was able to prise parts of the model apart to refit them.
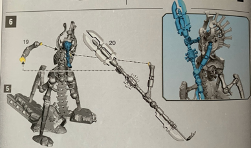
The other section that proved tricky was lining the staff arms up and having to find something to support them while the glue dried. I had a Necron Immortal at hand and used his Gauss Blaster to prop up the lower arm and an Overlord with Scythe’s… Scythe (trying saying that fast 3 times while waiting for glue to dry) to prop up the upper part.
Now that the building is covered let’s move on to the fun part…

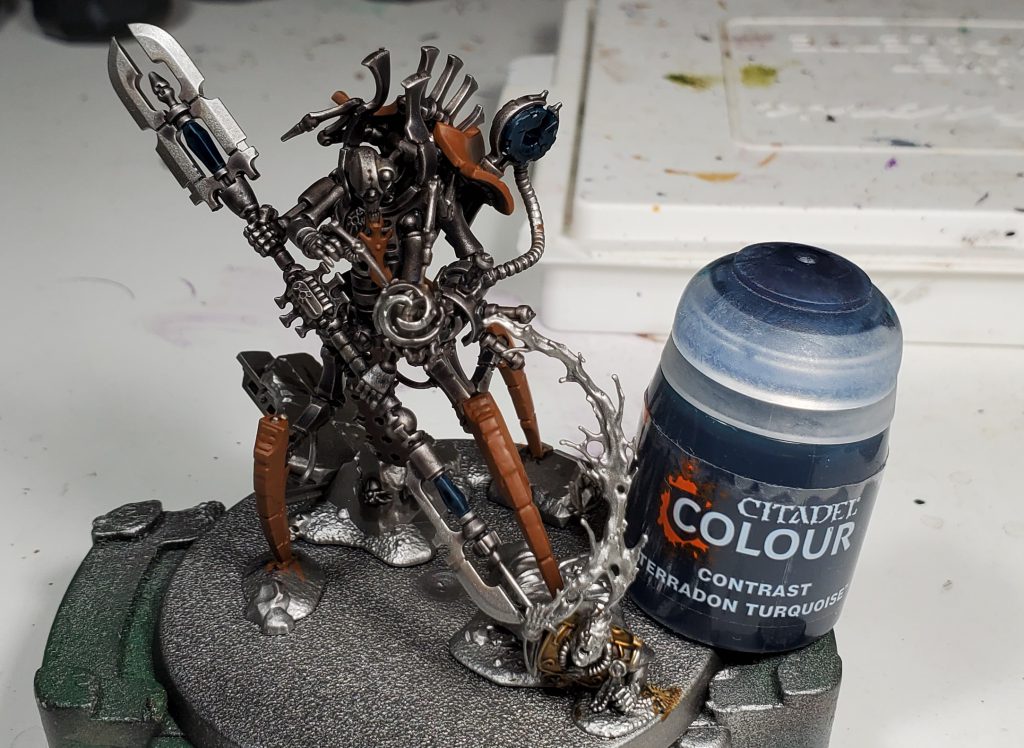
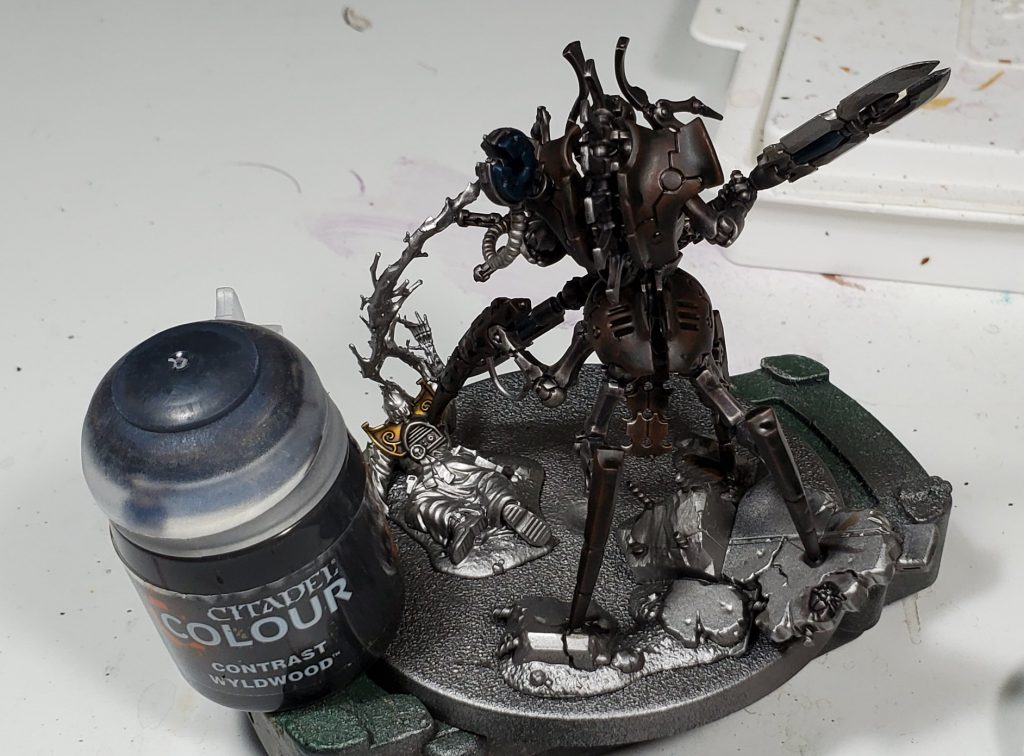
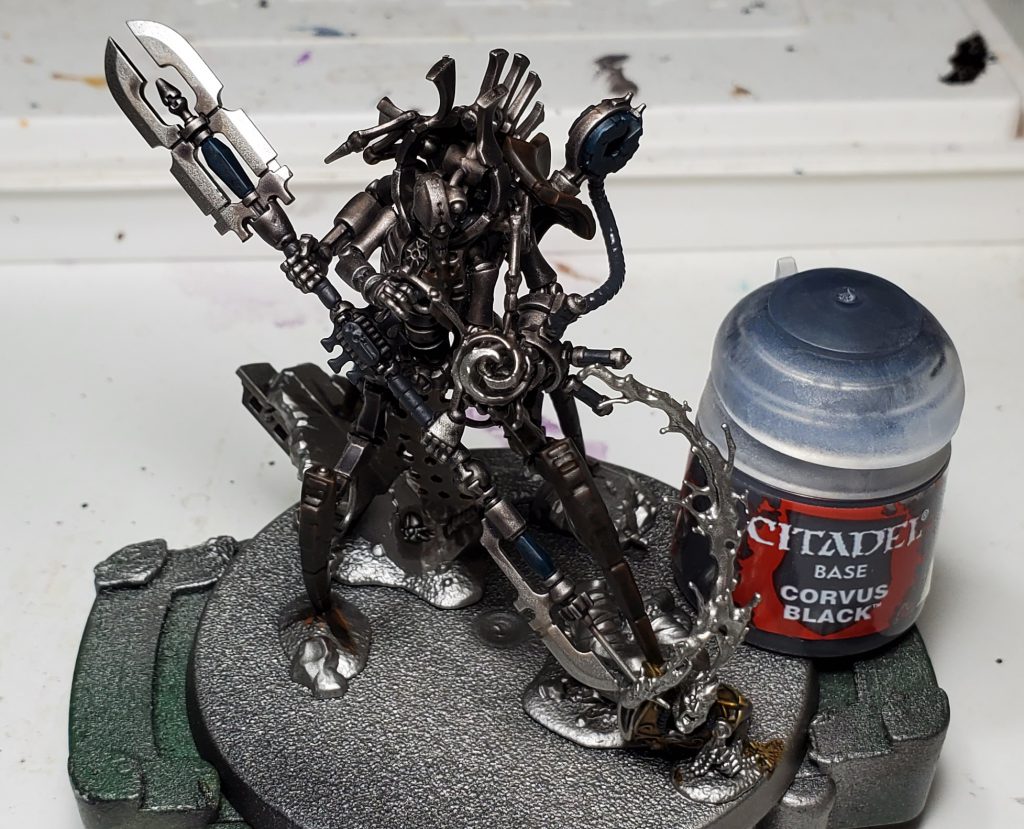
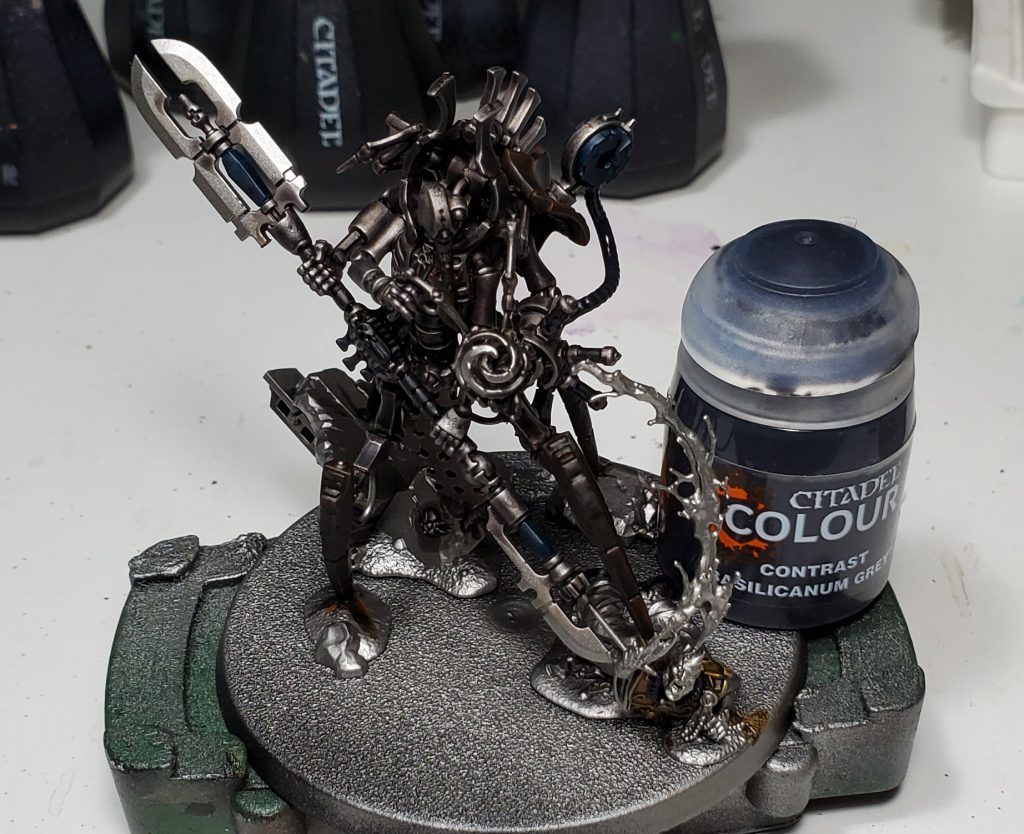
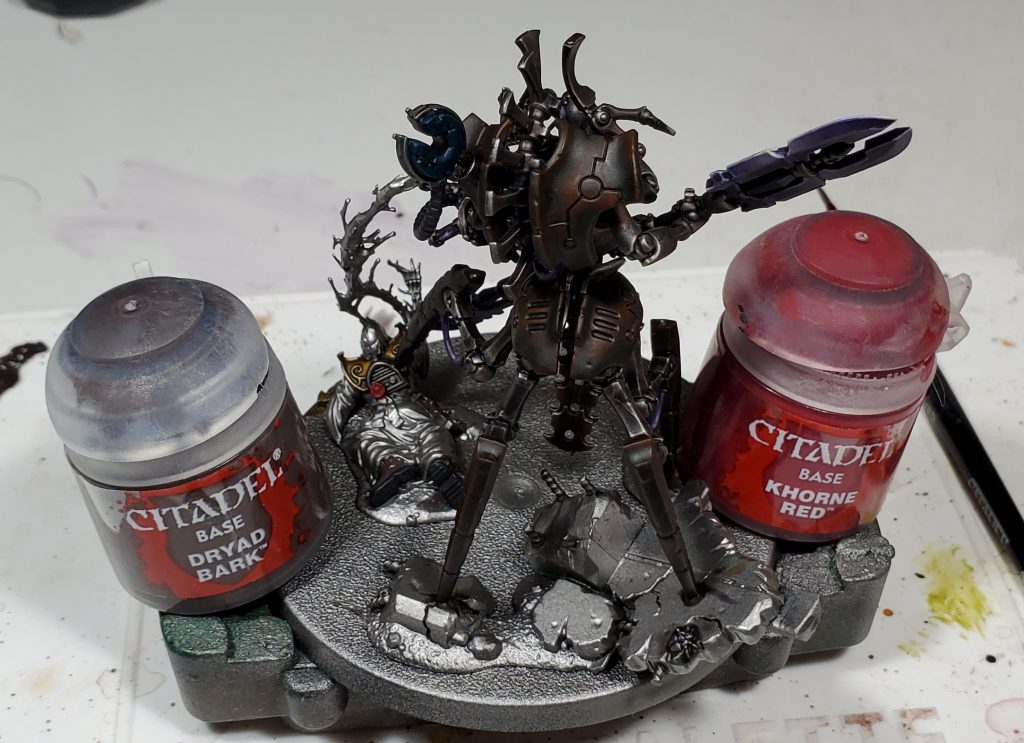
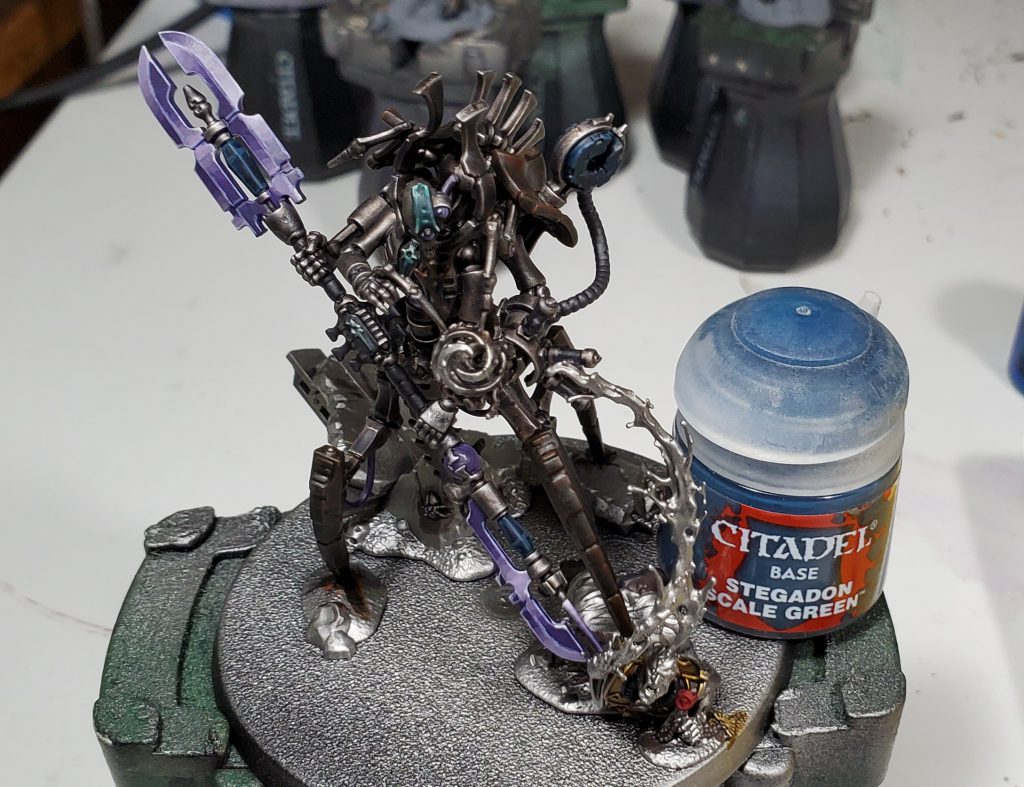
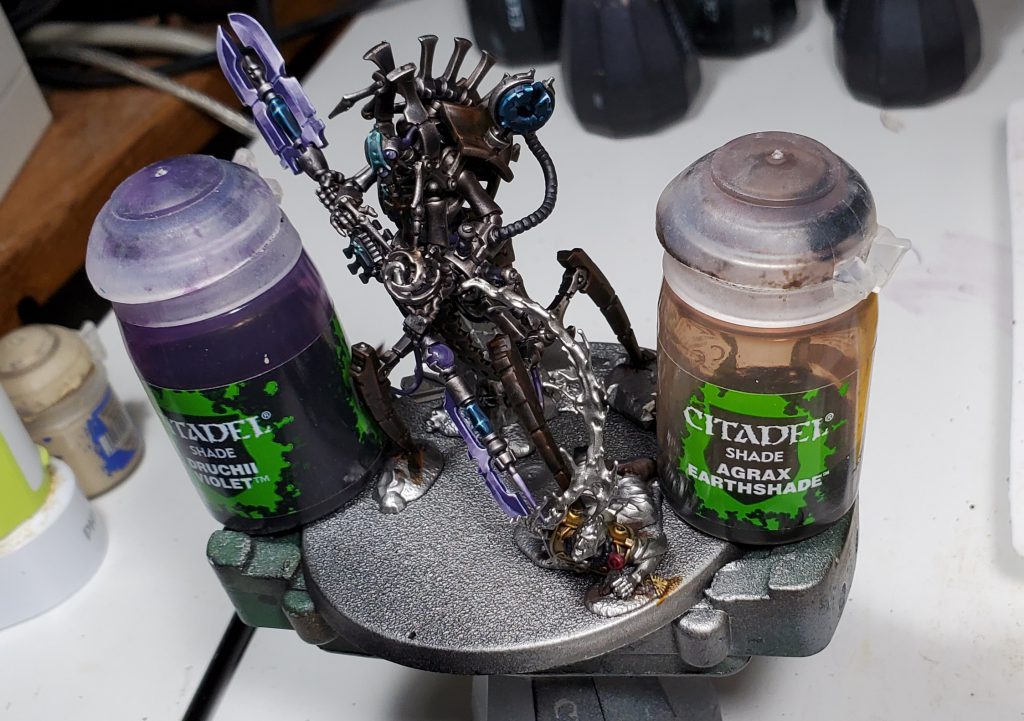
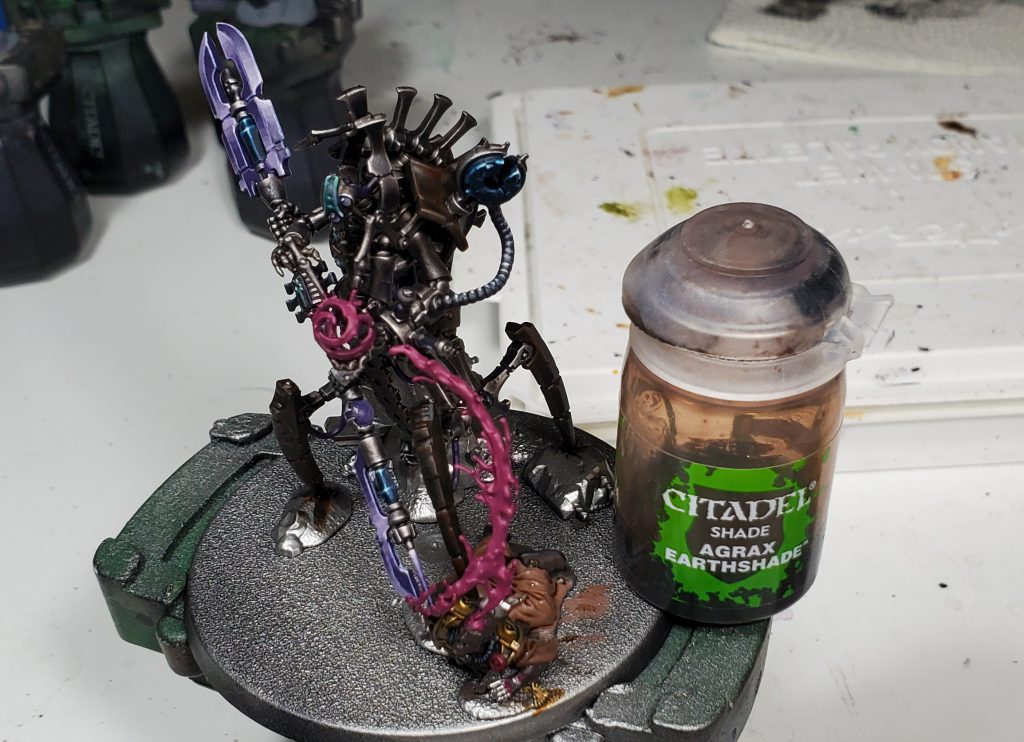
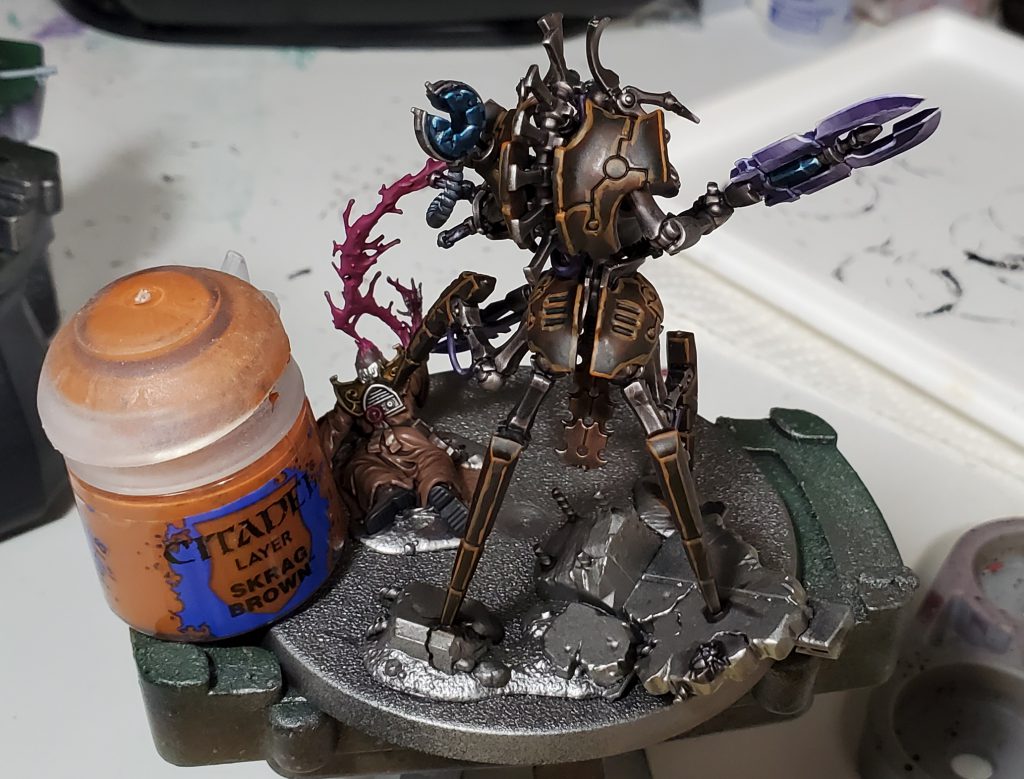
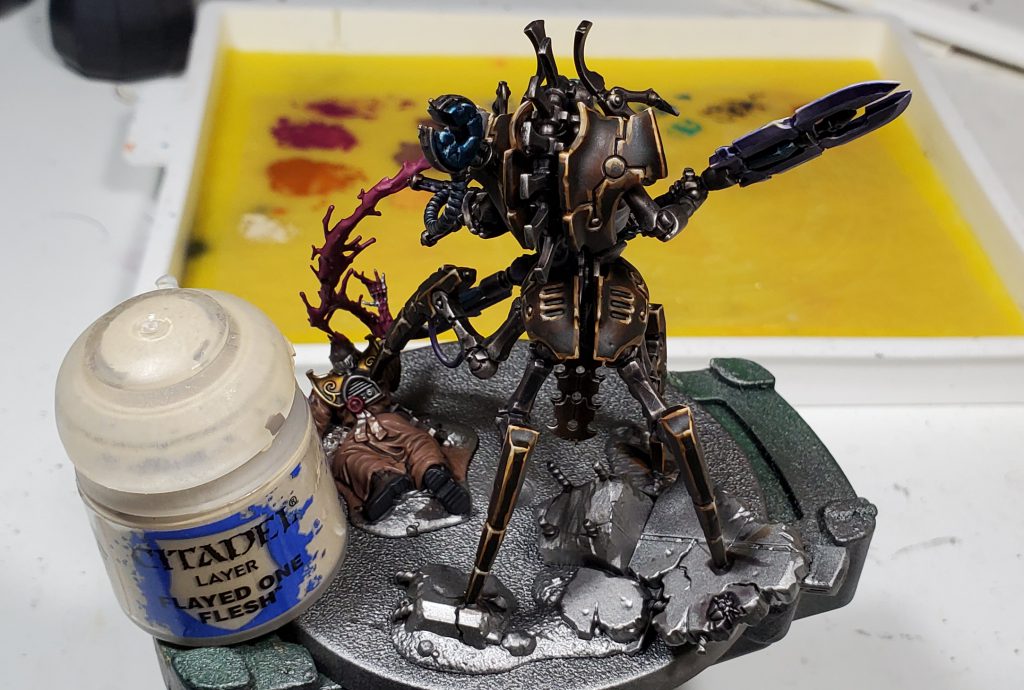
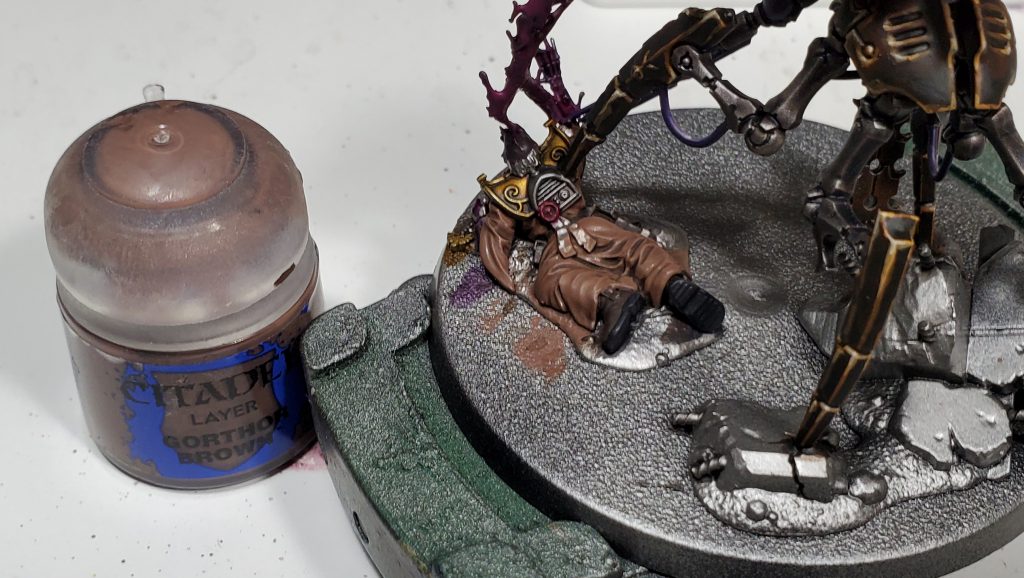
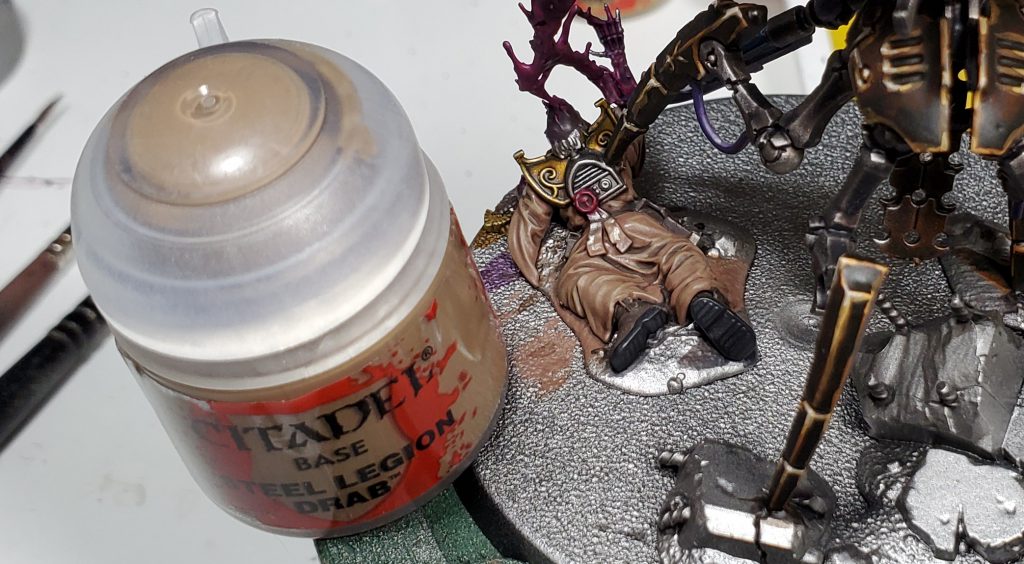
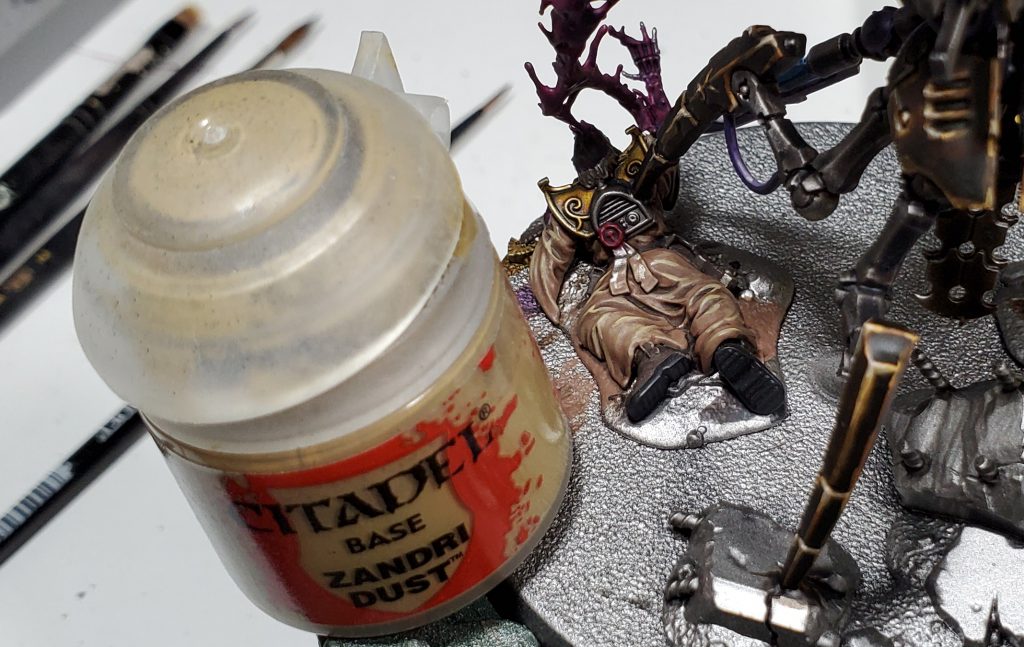
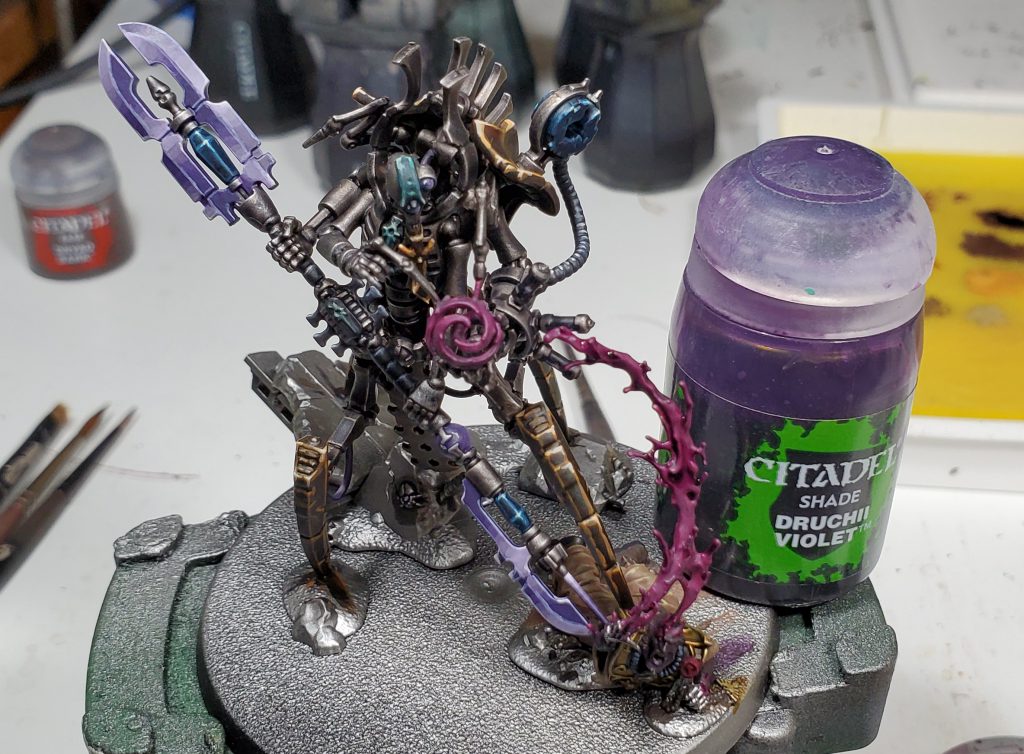
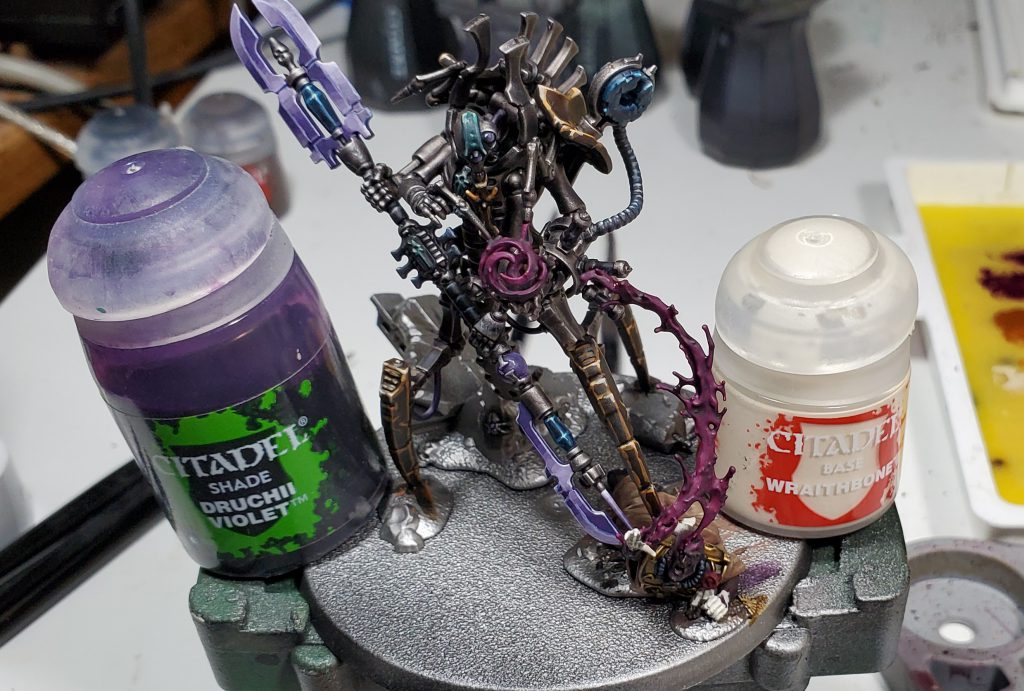
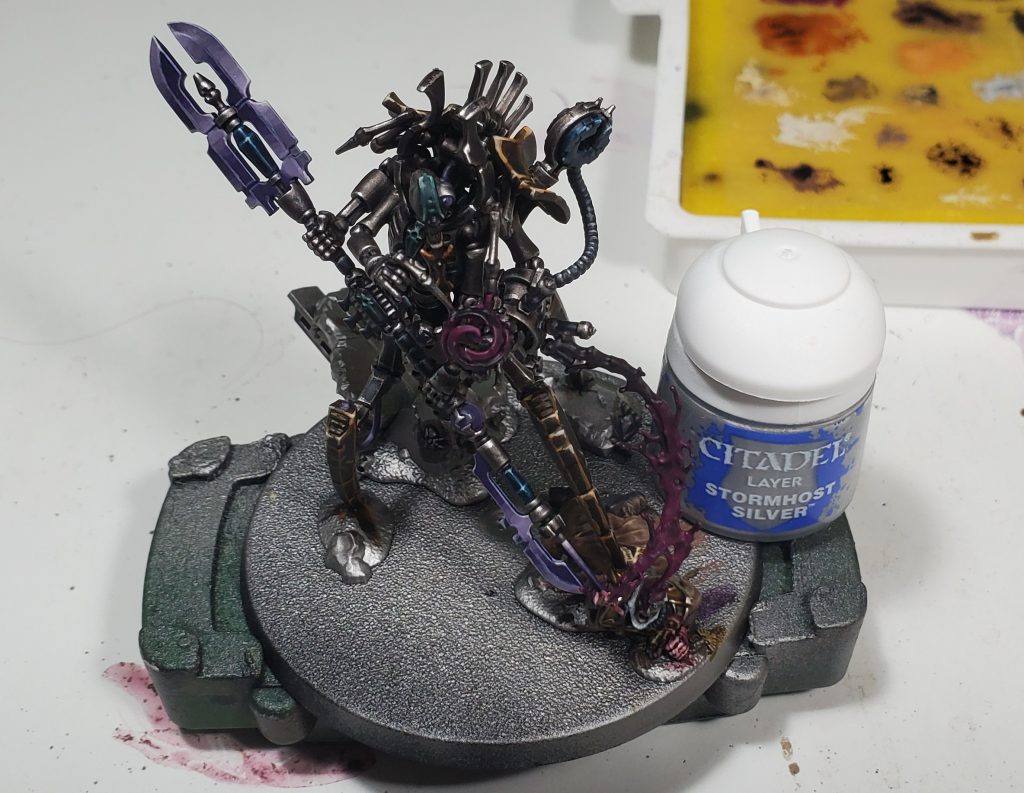
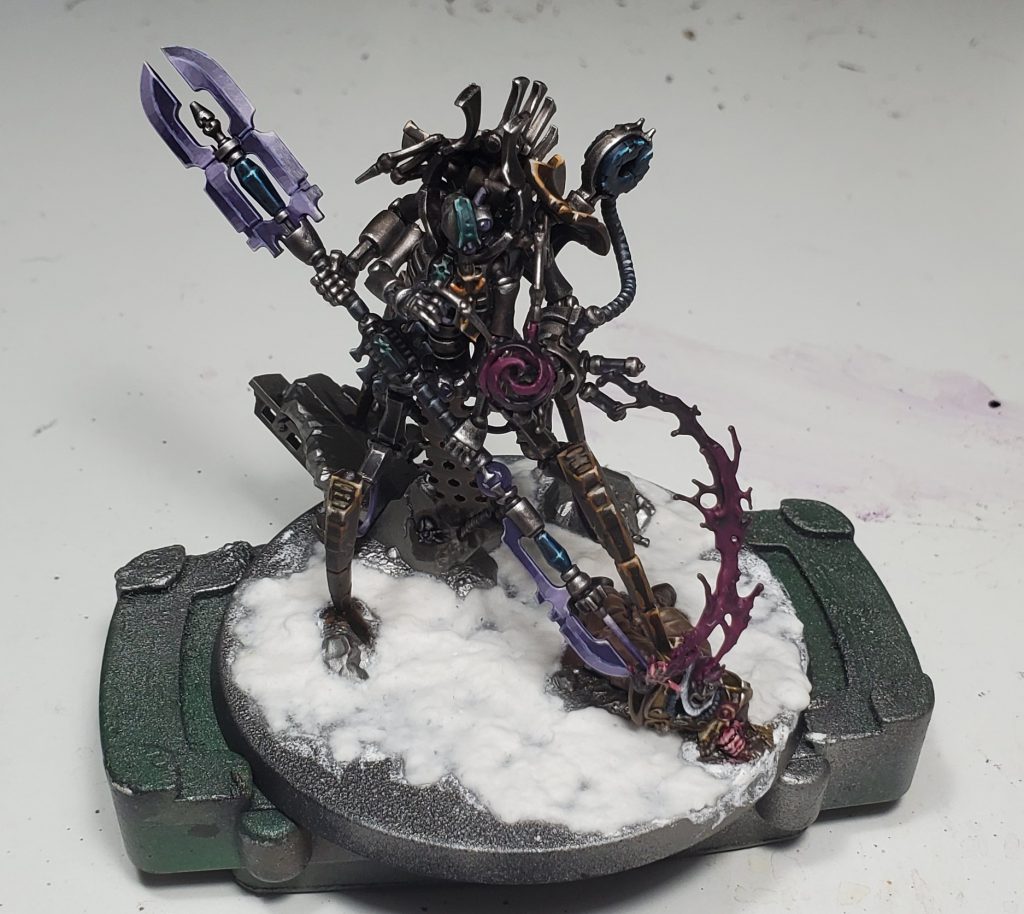
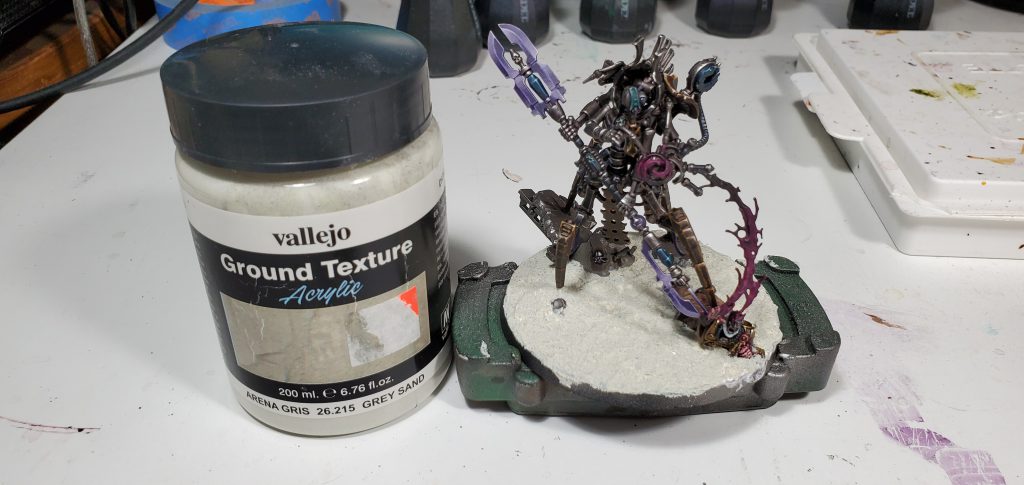
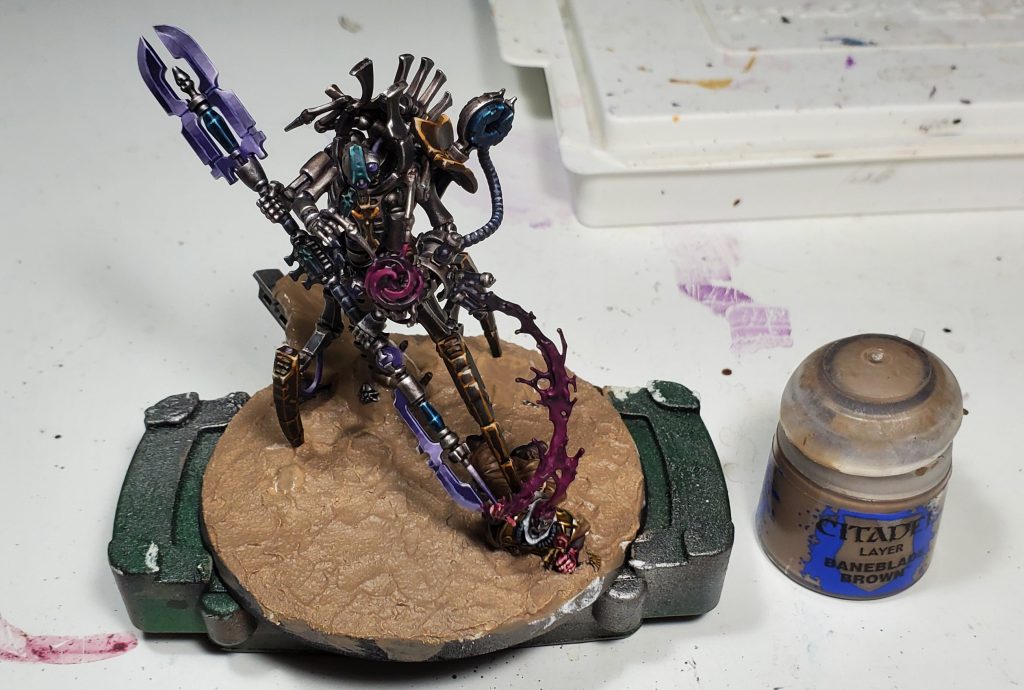
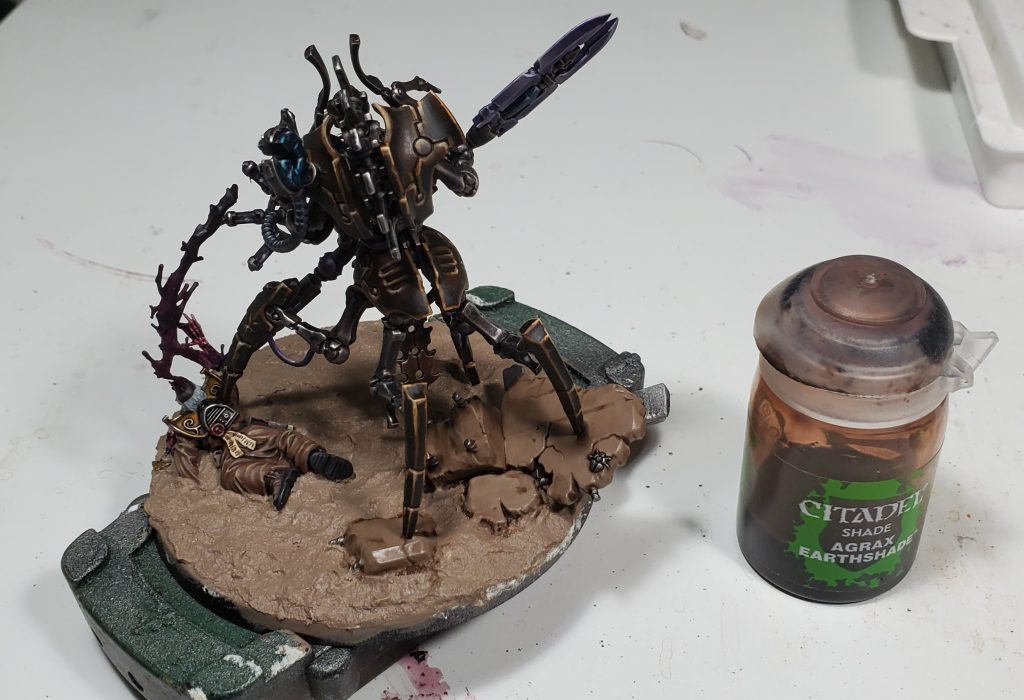
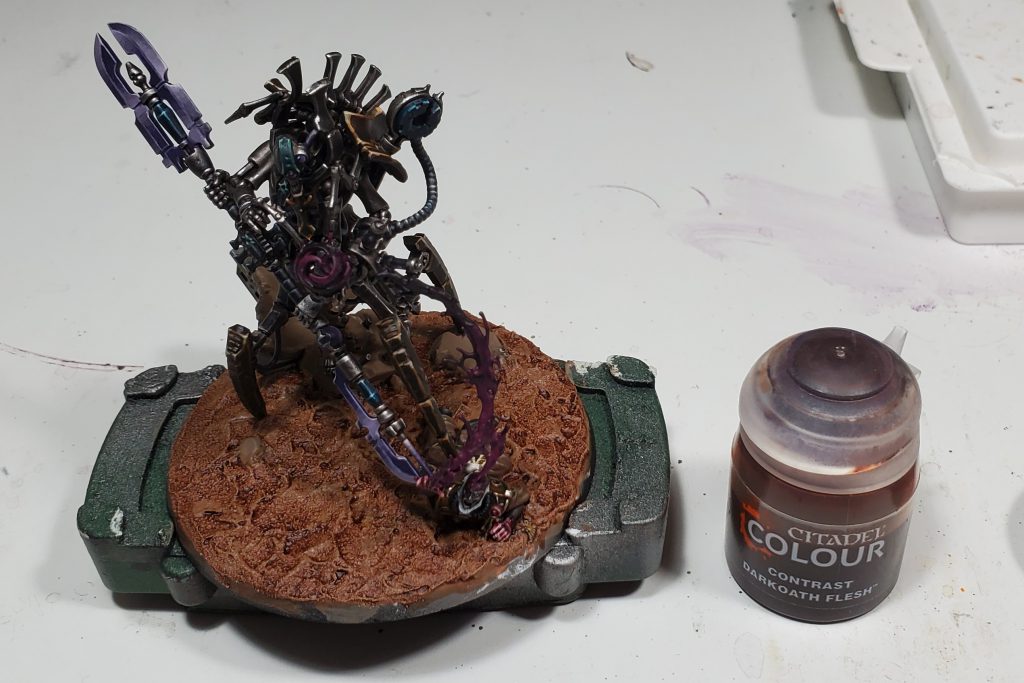
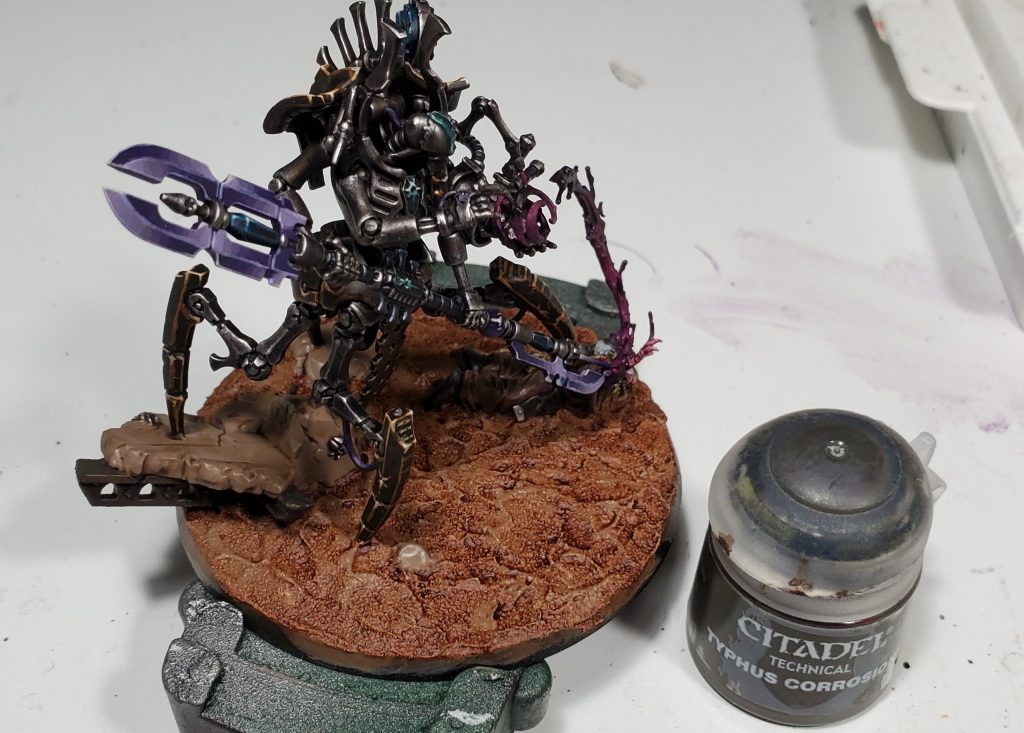
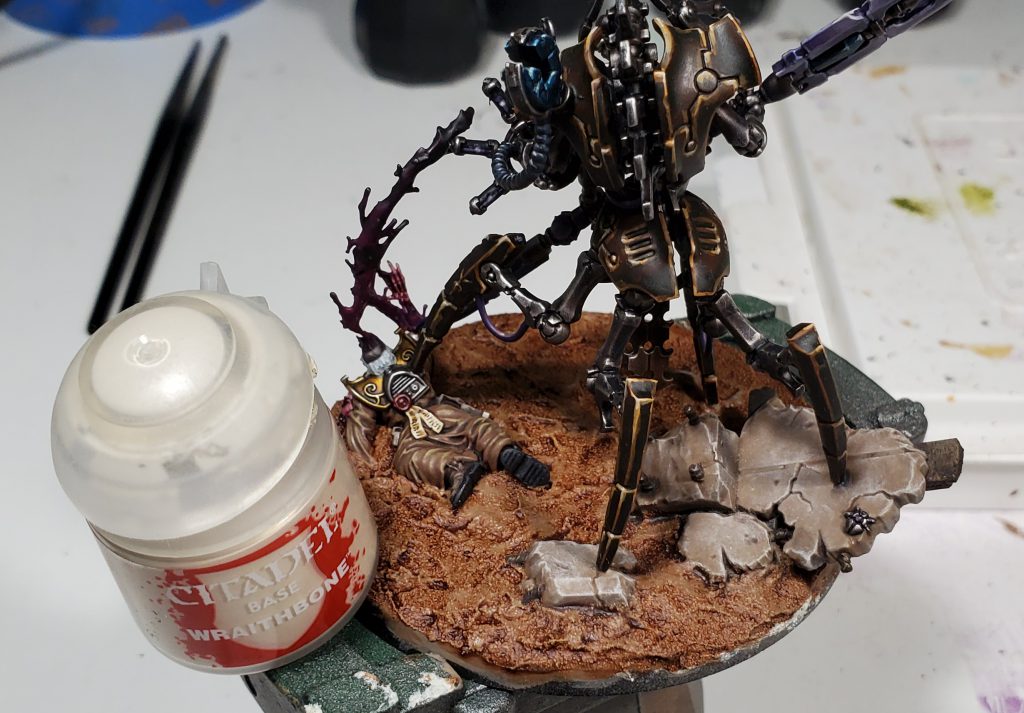
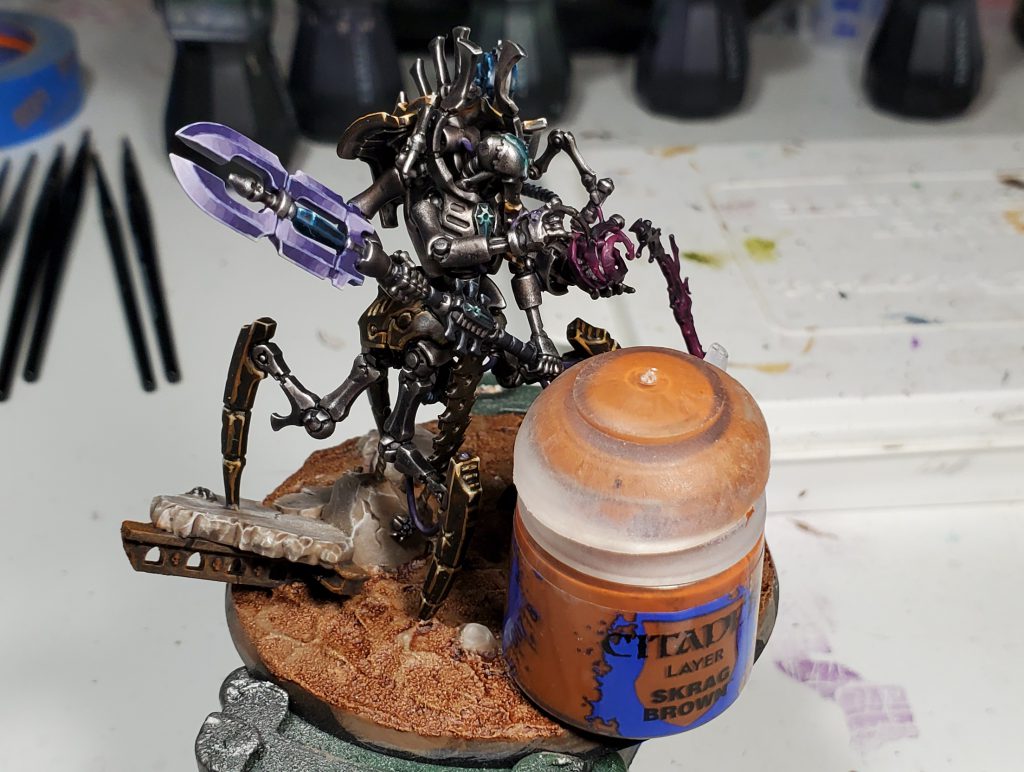
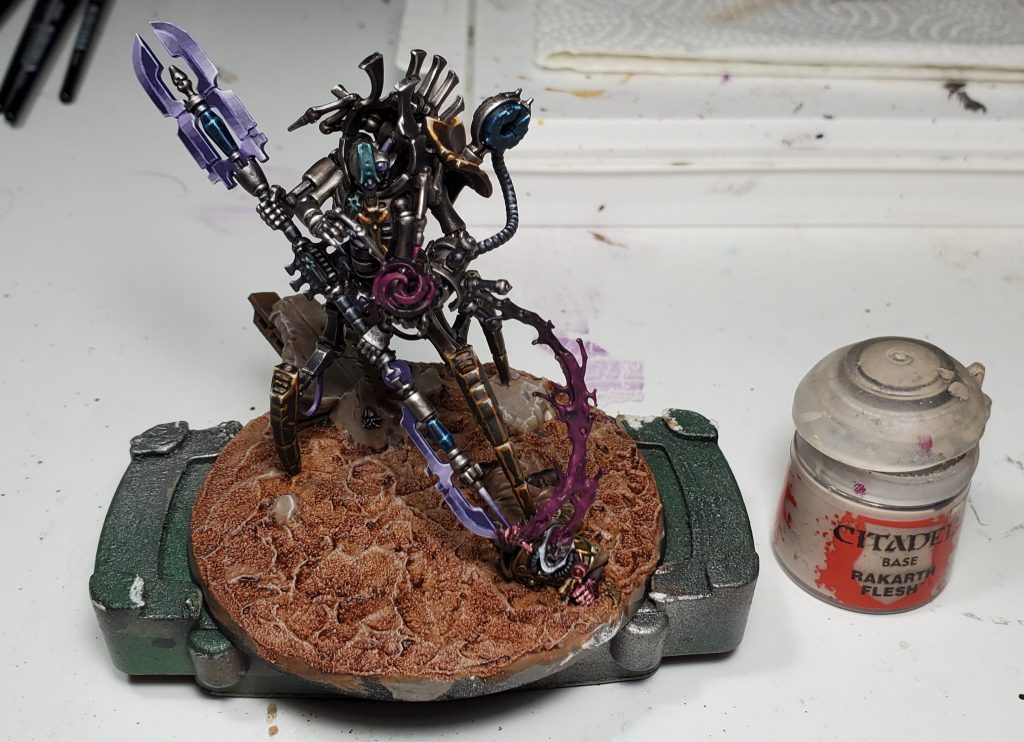
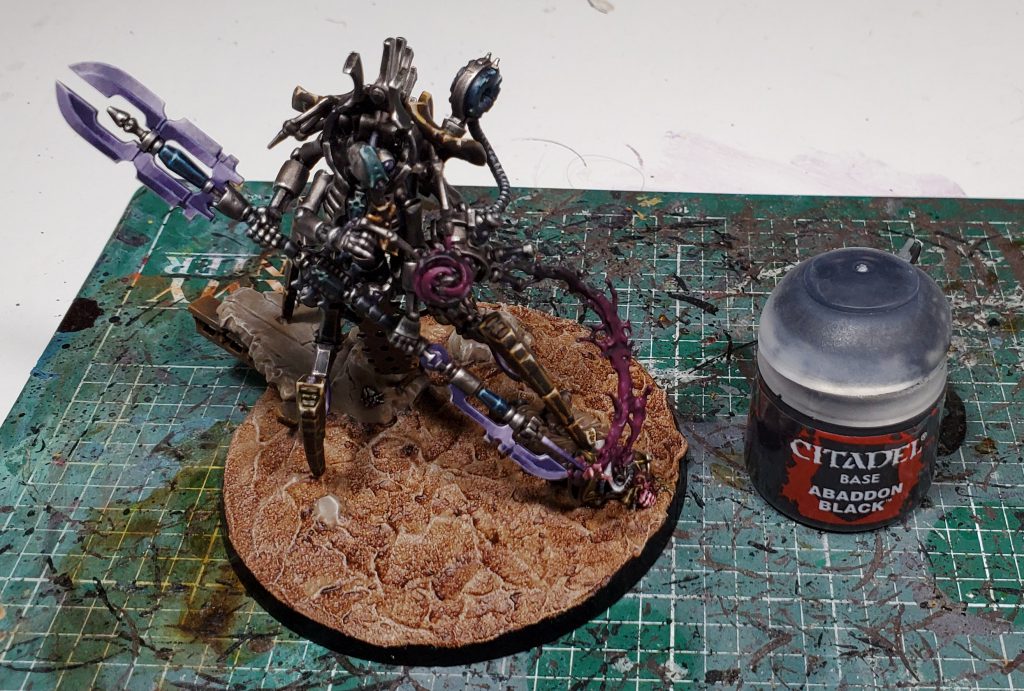
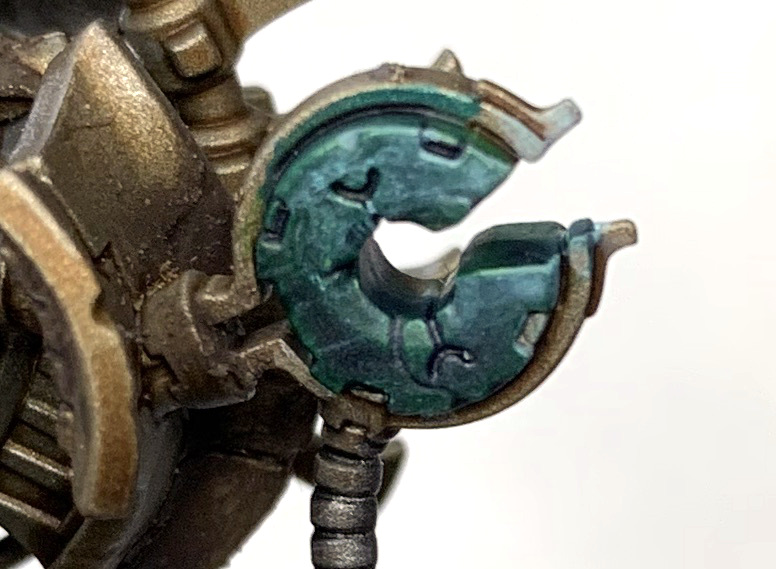
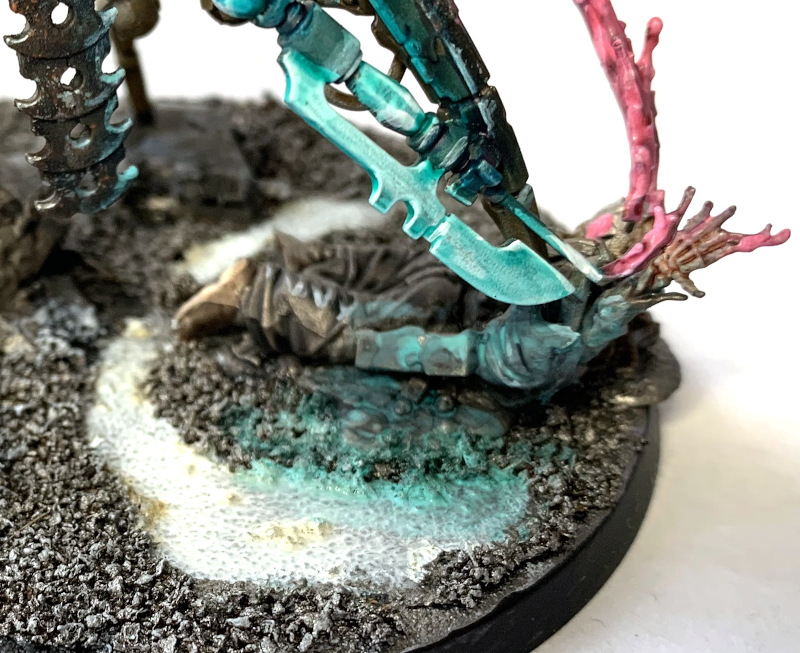
RichyP's Method - Click to Expand Most of the colours I used to paint Illuminor Szeras were from Citadel, with the exception of Vallejo Model Air (VMA) Steel and Vallejo Model Color (VMC) White. I used a Rosemary and Co. Series 33 Size 3 Sable brush for the whole thing, with the only non-brushed on paint being Citadel Leadbelcher Spray from the rattle-can. A tiny bit of sponge was used over the metal. I used a bit torn from a pan-scourer. My trusty hairdryer (optional, but who likes waiting for paint to dry?) These are exactly the same colours I used on all the Necrons I’ve painted recently. Unfortunately, I don’t have any in progress shots of Illuminor Szeras because I was trying to show off and get him painted the day he was released. I received him on the Friday, built him that night, then primed and painted on the Saturday. Speaking of Primer: He’s a Necron, that means cracking out the (t)rusty can of Citadel Leadbelcher Spray. I applied the basing material before priming in the same way I did with all my 2020 Necrons, it gives the ground a nice dark stone look after washing with black. I “edge-highlighted” the model by running some VMA Steel (Citadel Storm Host Silver will be fine) over the edges using a stiff sponge. This is basically an under-highlight that will show through after the Contrast step. I get the old, oily metal base colour by heavily covering all the metal parts with Citadel Contrast Skeleton Horde using a large brush, I used the same size 3 R&Co. that I used for the entire model, but if you like to do detail work with a small brush then use the larger one now to save trips to the paint pot. Then my good old faithful hairdryer was used to speed up the drying process. Thin some Citadel Typhus Corrosion with water and apply it to all the recesses of the metal (avoid any of the vents though as you don’t want to clog them up), this will give you a nice shadow and add some oily grime at the same time. Using a bit of sponge, in my case I used part of a pan-scourer, dab some Citadel Troll-Slayer Orange over parts of the model. It helps to wipe most of it off the sponge first as you don’t want to overload the metal with Orange. Using the same sponge do exactly the same with some Silver, I used VMA Steel but Citadel Stormhost Silver will work fine. I brushed the steel colour on the areas I wanted to be silver, such as those little bar bits between the hands and the arms and any pipes/cables. Thickly apply Citadel Emperors Children from the victim on the base and up to the halfway mark of the “stuff”. While it’s wet apply Citadel Genestealer Purple from the top (hand) to the middle point, then feather the two together. Also while they’re still wet, use some of the pink to add a few lines on the outer parts of the purple, and use some of the purple on the recesses of the pink. I hit the edges of the pink areas with some Citadel Fulgrim Pink too. Hairdryer/let it dry and wash the whole thing in Citadel Carroberg Crimson then add some water to it so it runs off all but the recesses. All the areas that are going to get the blue treatment e.g. the staff’s head, the slots in the chest and sides, the eyes etc.. get a coat of Citadel Wraithbone, in the case of recessed glowing bits such as the chest vents, fill the recesses but also run the edge of the brush around the raised parts at the top of the recess at the same time. When that’s dry, cover all of it with lots of Citadel Contrast Aethermatic Blue along with any areas that will have a blue glow, also while the actual blue areas are still wet run some pure white (VMC White / Citadel White Scar) into the vents and mix it a bit to get a REALLY light blue. Do the same on the edges of the staff, and the flat edges on the other blue parts. Now wait for the whole thing to dry, or carefully use a hairdryer from afar to avoid blowing the blue around before doing the next step. Thin down some Citadel Contrast Arkhelian Green with water and apply it to all the recesses in the blue glow areas, such as arm pits, reflection on the arms, between the fingers on the hand, creases in the staff head etc… Finally once it’s all dry add a few dots of pure white again, this time to most each vent recess and as a dot in the eye. Here’s a close up of the bluest of blue bits where you can (hopefully see what I mean) For the Blackstone disk on his back, I used the same blues, but then painted it Citadel Contrast Warp Lightning first before using the blues. This makes it look darker and more ethereal. I wanted to keep the base really simple as the model is really detailed. I drybrushed the currently leadbelchered base in Citadel Dawnstone, washed it with Citadel Contrast Basilicanum Grey and a final drybrush of VMA Steel / Citadel Storm Host Silver. For the Victim on the base, I used Citadel Contrast Wyldwood on his boots, Citadel Contrast Skeleton Horde on the torso and a layer of Citadel Wraithbone on his head. Once these were dry I used Citadel Contrast Darkoath Flesh on the face, painted the hair eyes, and beard with VMA White (which I also drybrushed over the trousers). Finally I covered the trousers in Citadel Contrast Basilicanum Grey. I also painted a puddle on the floor in VMA White as an excuse to add some more reflecting glow, while this is wet quickly do the next bit… On the victim, where the tip of the staff is close to him, I applied a wash of Citadel Contrast Aethermatic Blue, run this into the white puddle too, dragging the blue on the base near the victim. You should end up with a nice reflected blue glow in the puddle and on the floor. Apply Citadel Ard’ Coat over the white puddle to make it shiny. And that should be Illuminor Szeras done, while it looks like a lot of steps it’s pretty quick to do because there’s very few highlights thanks to the cheap and effective OSL effects and the sponged on metal. When I painted him it took around 2-3hrs from start to finish, but I did use a Hairdryer to save a lot of time between steps, also starting from Leadbelcher and using Contrast paints over it works really well. Rockfish's Method - Click to Expand In a field with stiff competition, Szeras would have to be my favorite model that GW has released to date, it is just the perfect level of detail to allow for fun techniques without getting too time consuming and results in a stunning model. I am a bit too lazy to do sub-assemblies, so you could probably make some steps a bit faster through doing that, but I would be a touch worried about long term durability with this fellows spindly little bits. I started by getting most of the metals out of the way, to minimize the number of base coats I like making use of washes and contrasts to differentiate each metal while maintaining a common base coat. While the agrax in the living metal gets obscured a bit by later stages, it helps give body to the colour and ties it into the carapace which will have a rich brown. While you could use nuln oil instead of basilicanum, I find the contrast creates a dense colour that would require multiple coats of nuln oil. Next up I blocked in and washed the rest of the panel/detail colours on Szeras, these are starting very dark so that I can get some really impactful highlights later on. While contrast over a basic grey/white base coat can look messy, here the wyldwood contrast over brown again creates wonderfully textured surfaces that give an aged implication. For the blade and lenses I just mixed and layered up through some purples, I will probably skip phoenician in future goes as it is a bit too subtle a transition. I don’t really have specific mixes and the number of steps between each varies a bit, but usually I would mix in the next colour twice before moving on. Note that I only used pure dechala and flayed one on edges and lense spots as they are a touch too bright to use without skewing the glow colour. After a quick stop off to base coat the seals and some leather on the base dude, I added highlights to the black stone and trim. I base coated the skin on the guy getting sucked up after the flesh spray, but since the initial colour is the same as the leather you could do it then instead to save a bit of time. It might be a bit more visible here then else where, but I am really fond of thicc roughly zenithal highlights, aka I focus the most major highlights on the upper surfaces and edges, this helps to maintain a rough source of light and saves a ton of time. You will see the purple wash pop up a lot here, I built up a lazy gradient on the flesh spray by just washing the crap out of it in a sequence of steps as this is a large object and it would take a while to build up a nice blend or highlight. For the robes and leather it might not be obvious but for each colour I would both drybrush and edge highlight the robes, I saw this in some gif somewhere and it looks pretty cool. Continuing the trend excessively us of layering washes, I slowly built up colour of the scoured bones in a similar way to the flesh spray. For the skin I built the highlights up in a few steps, I expect you could use a premixed paint for each but mixing can be faster than opening another pot. You could could probably also paint the tongue too but I did not bother. I often leave the final main highlight of large areas to end, because you can clean up mistakes with it. The white stuff is Sculptamold, I am just using it to blend the raised plastic pieces in to the rest of the base a bit more. The concrete gets drybrushed like crazy to get that look but you might be able to find a highlight and base colour that are a bit closer to save some time. In the final shot you will see some tufts, those are from Gamers Grass which is my currently preferred tufts company, I used their beige, light green and dry green tufts in this case. Have any questions or feedback? Drop us a note in the comments below or email us at contact@goonhammer.com. This article is part of a larger series on how to paint Necrons. To return to that series, click here.Colours used
Painting Szeras
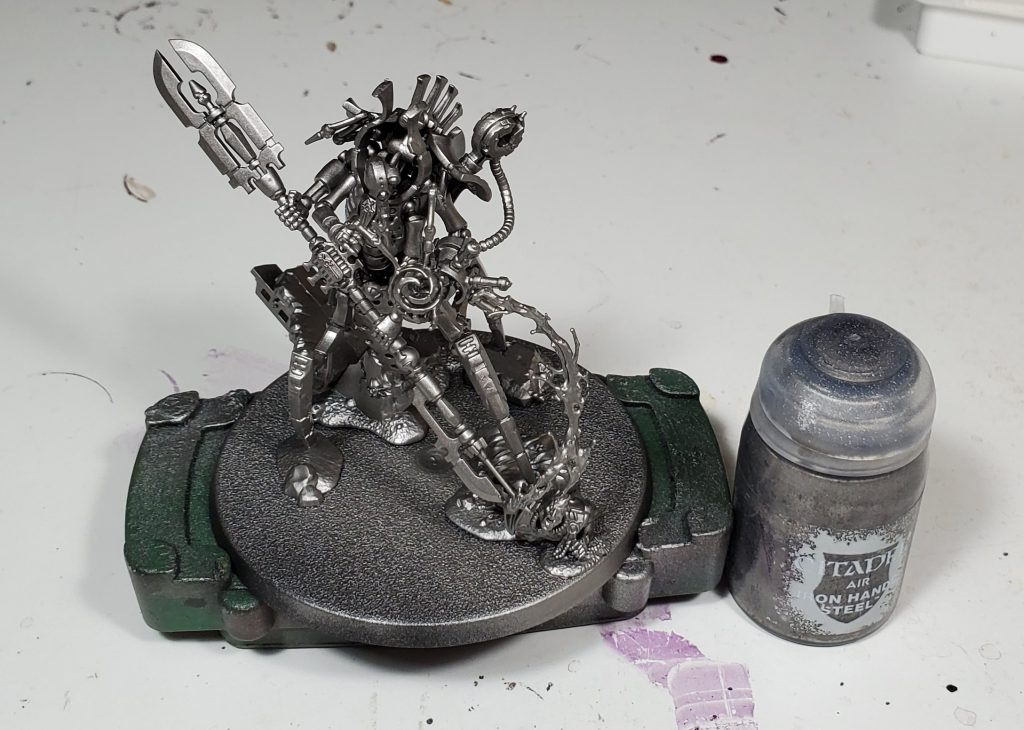
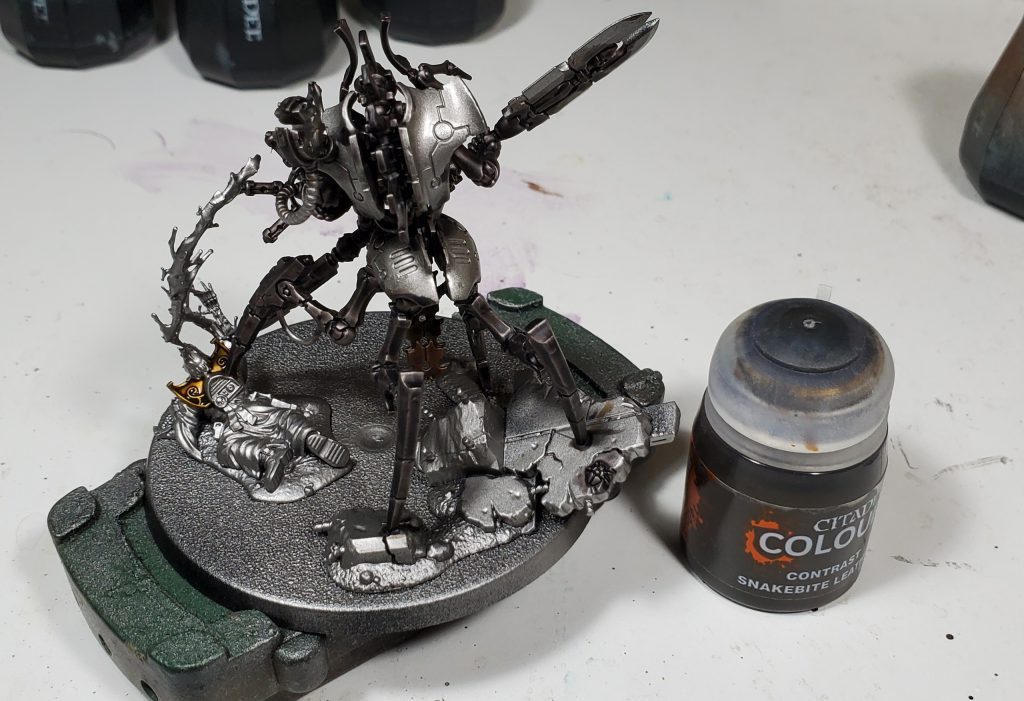
Step 0 – Primer and under-shade
Step 1 – Contrast pass 1
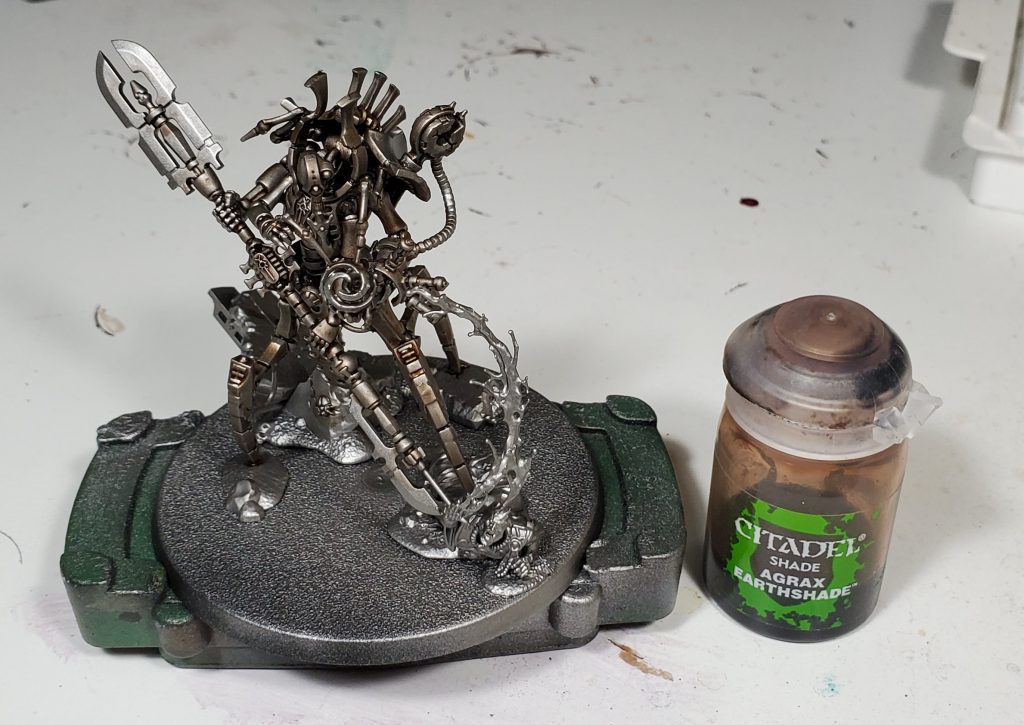
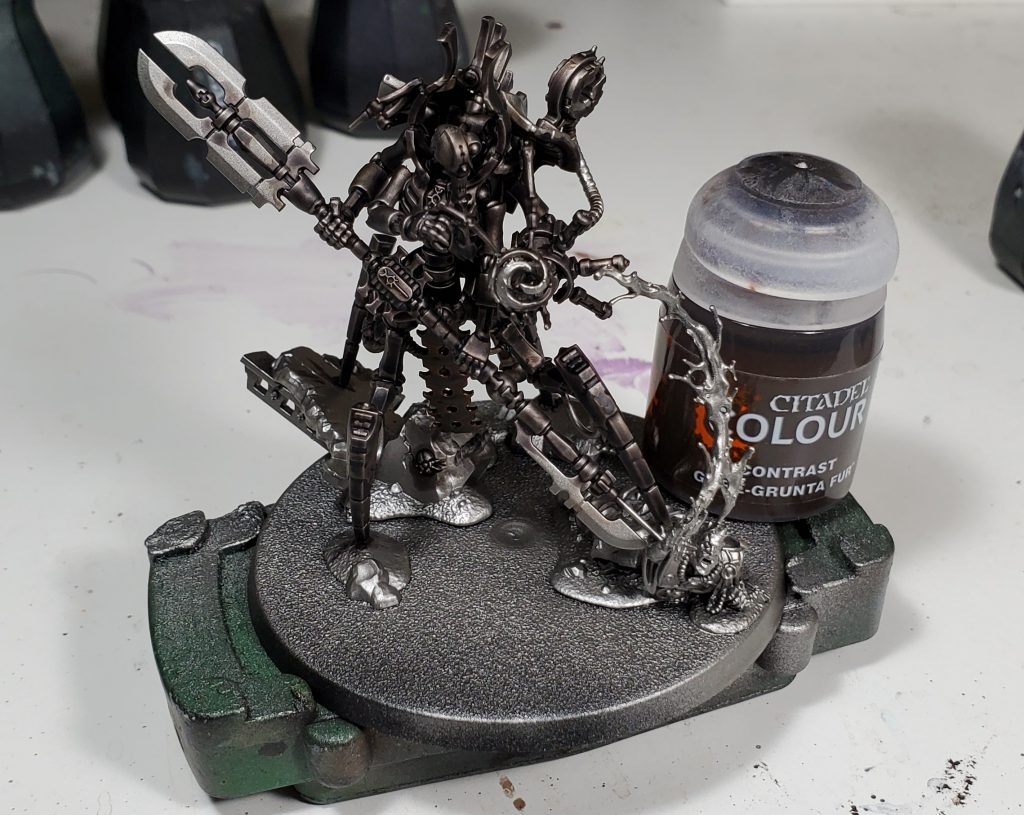
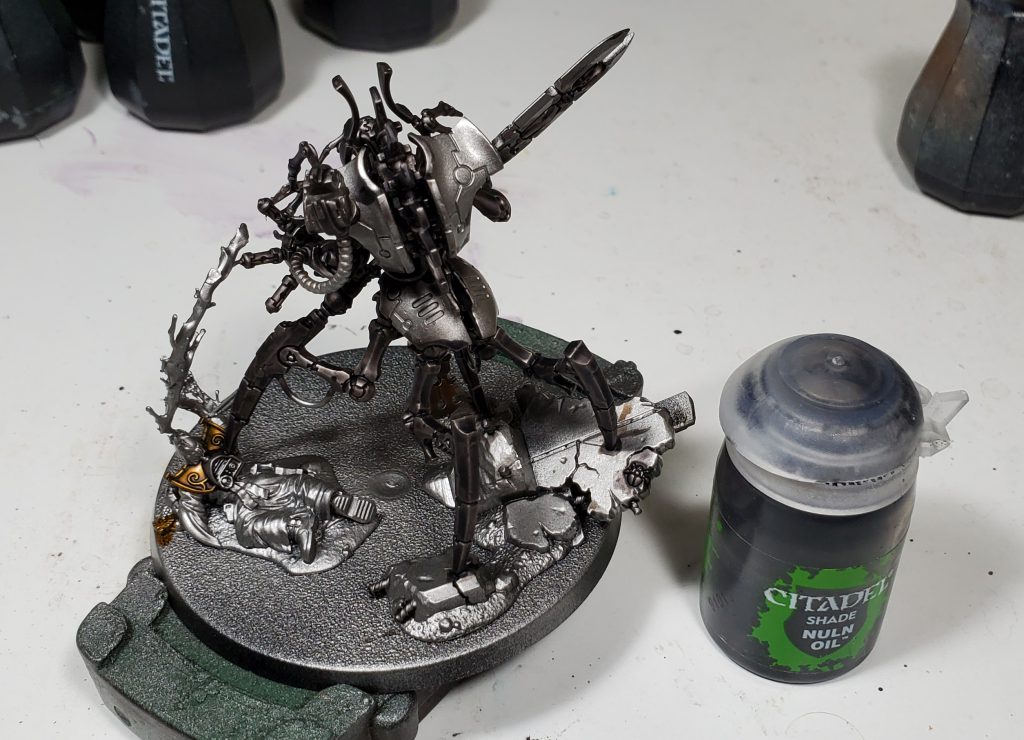
Step 2 – Shading the metal and adding scratches
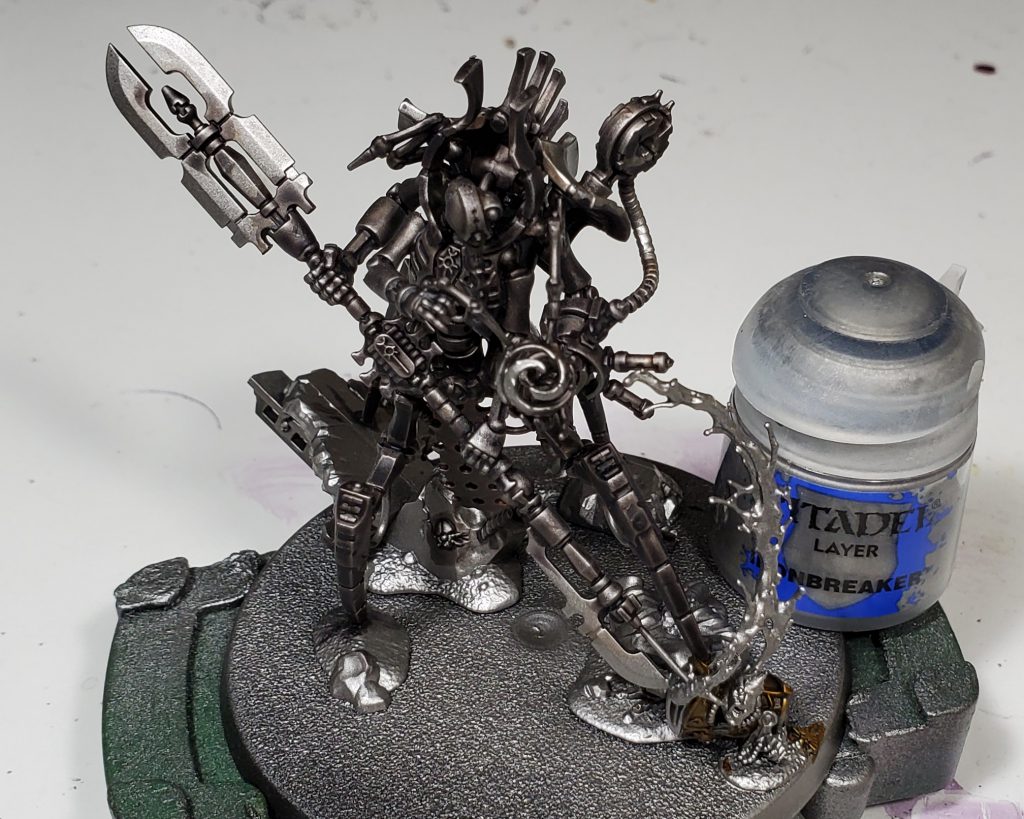
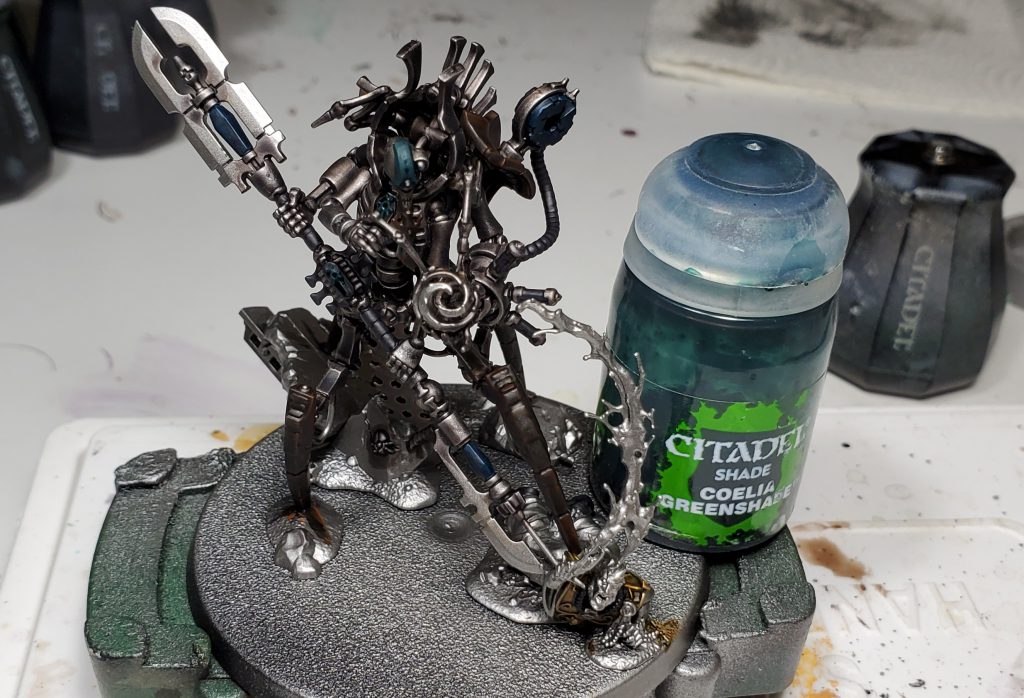
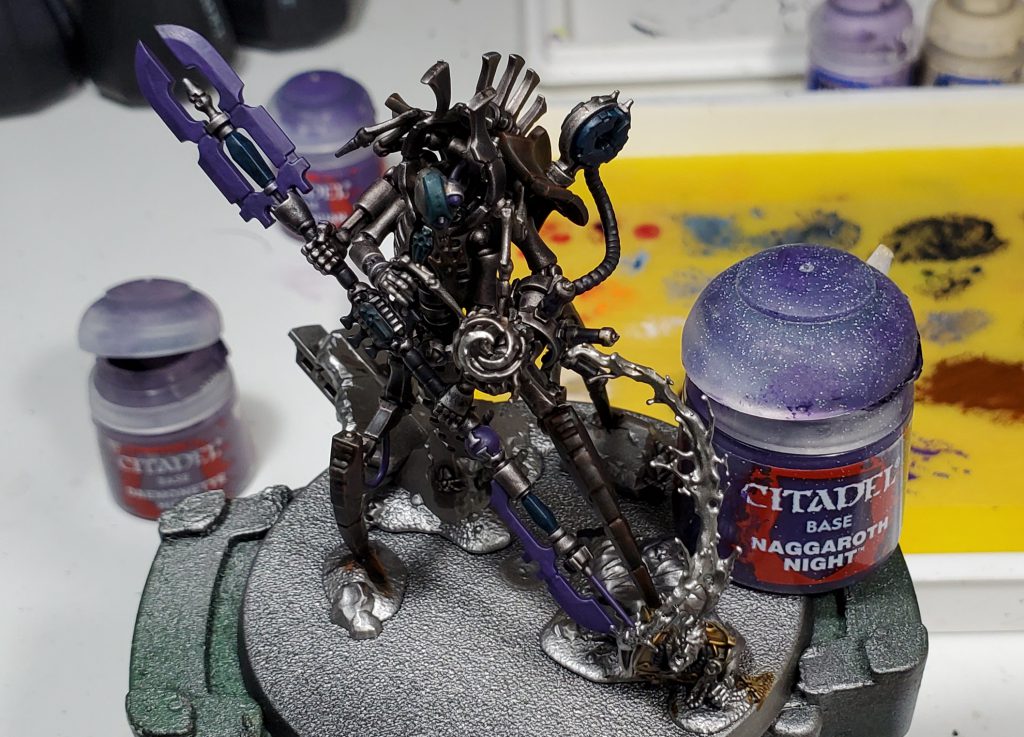
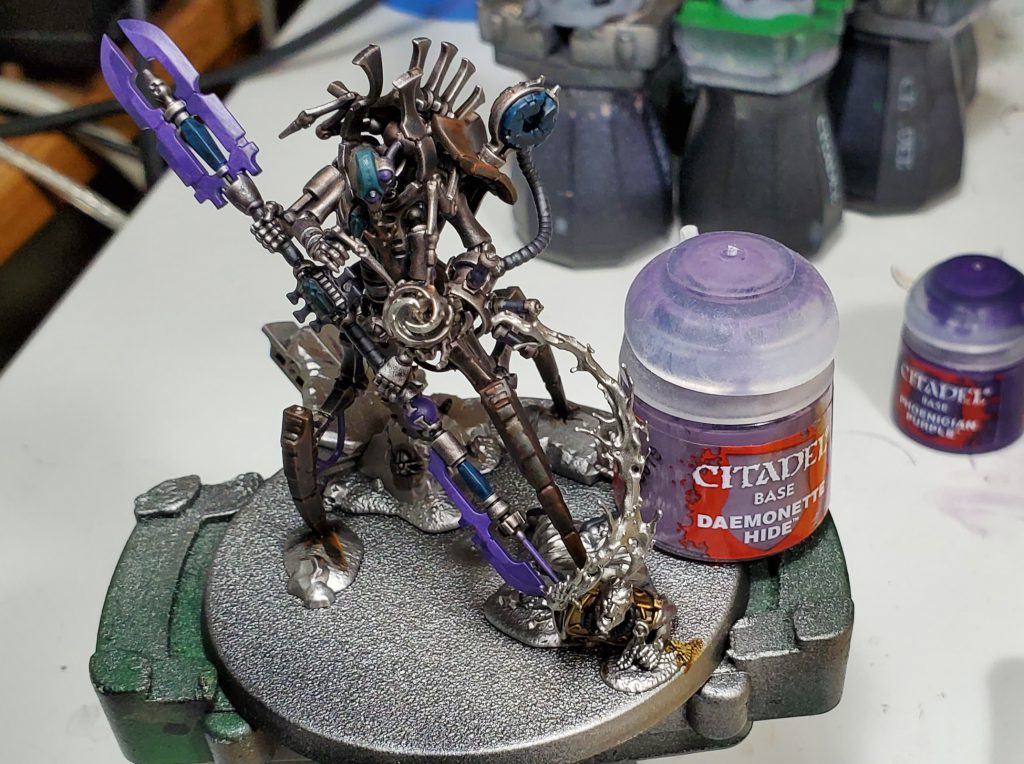
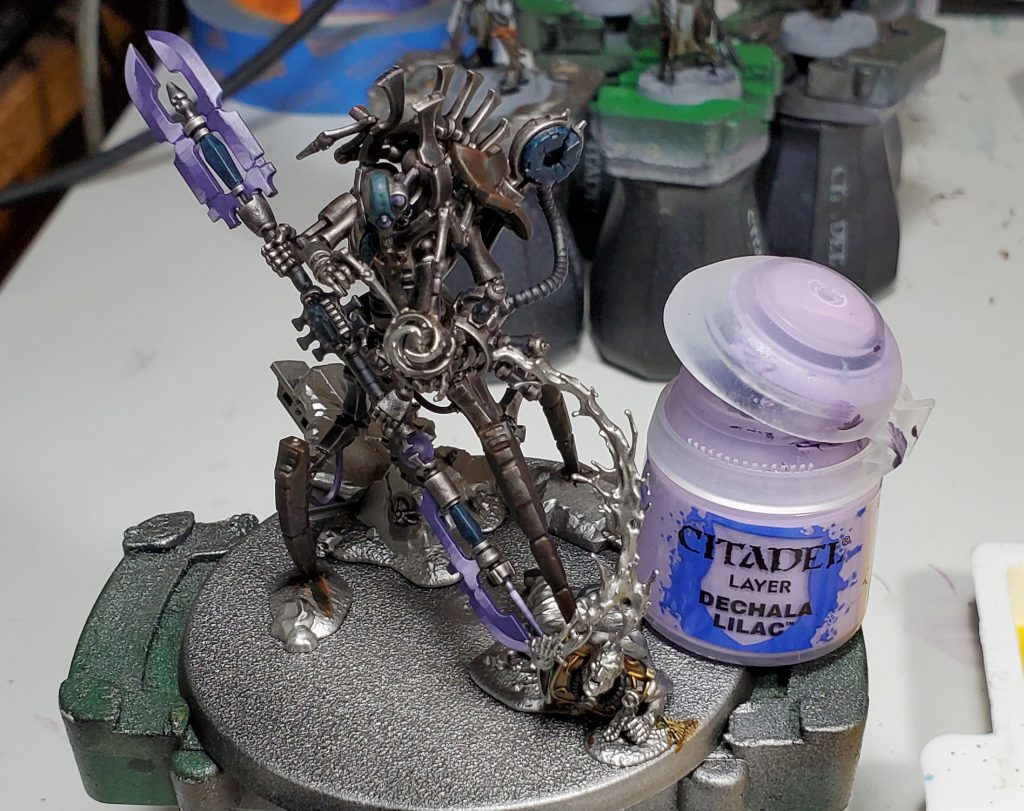
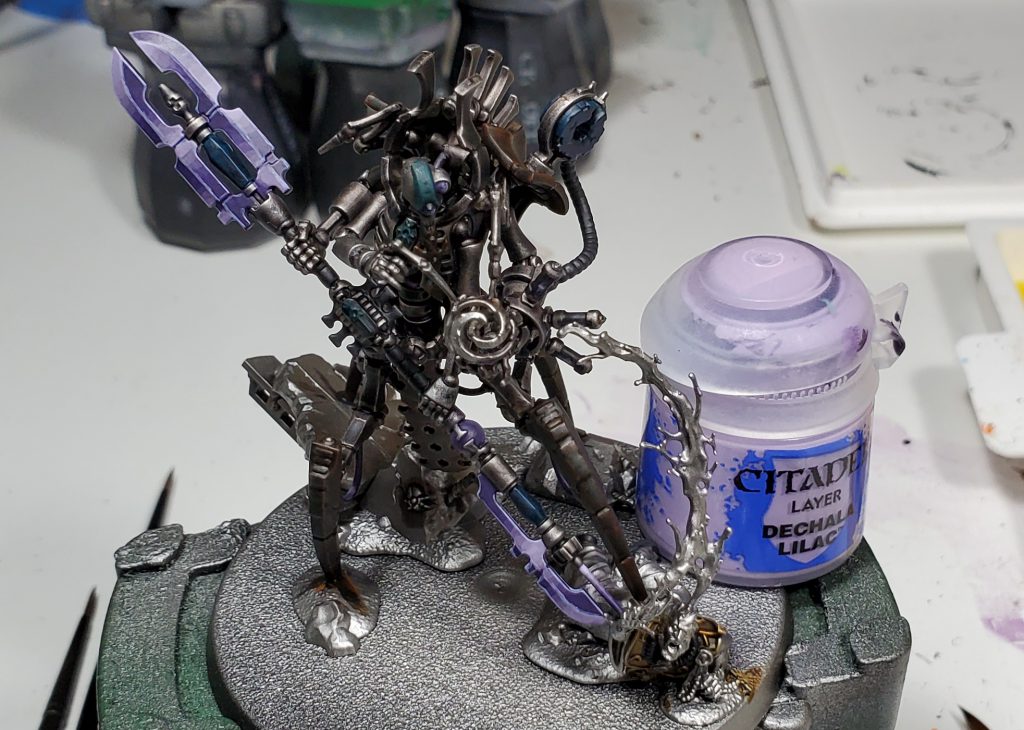
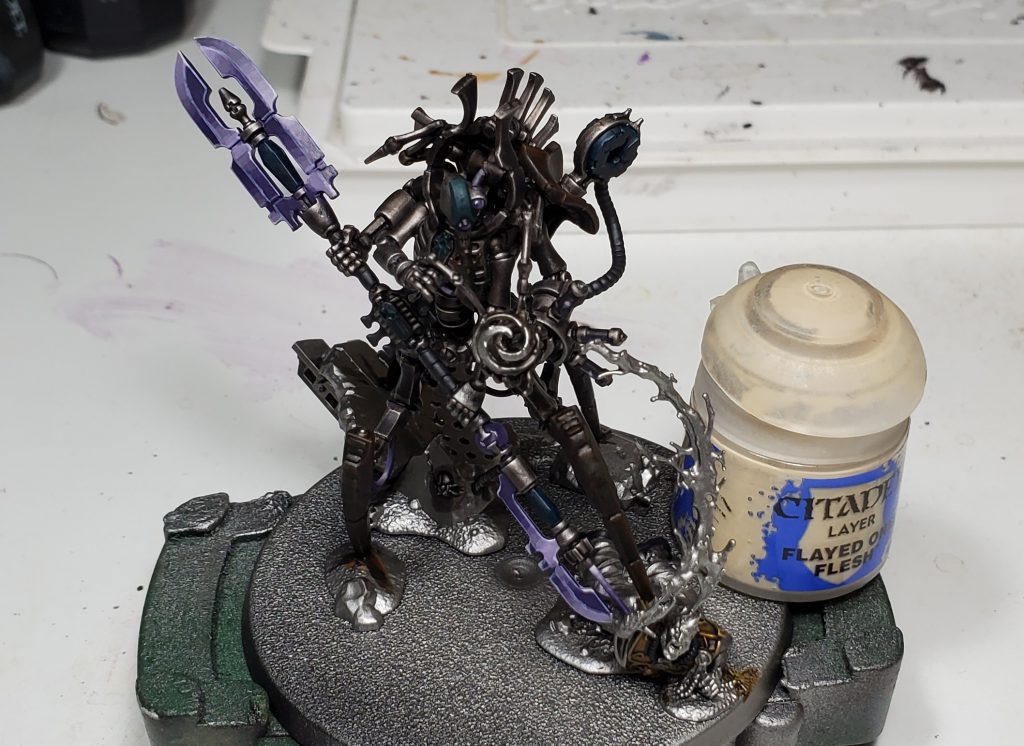
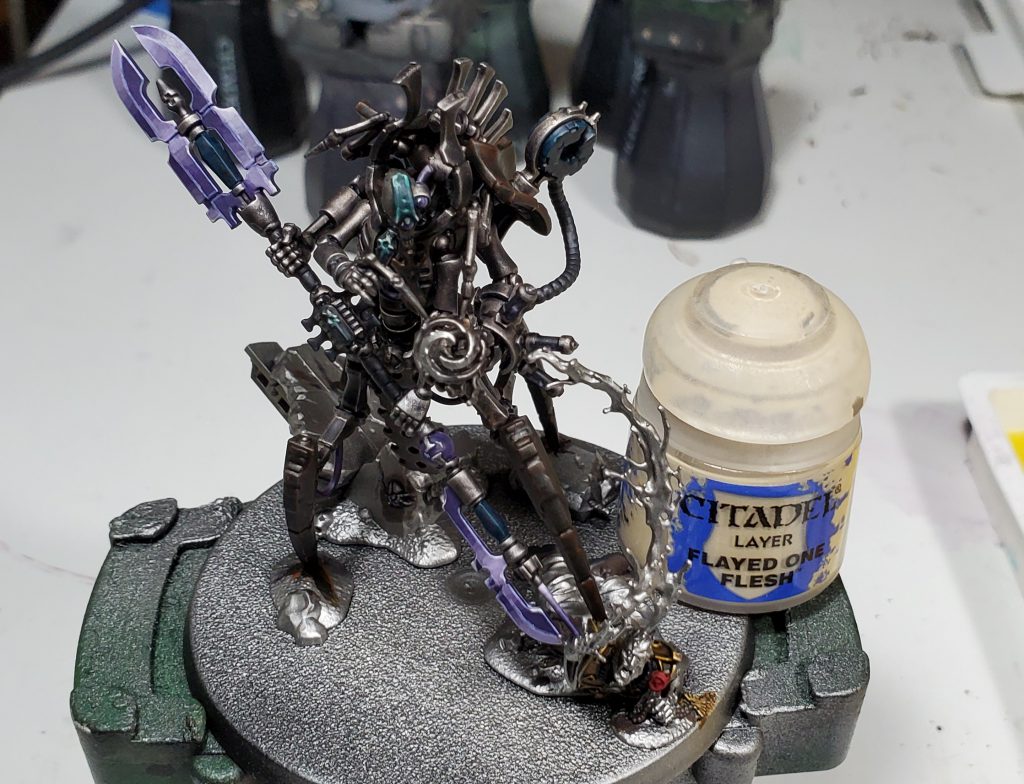
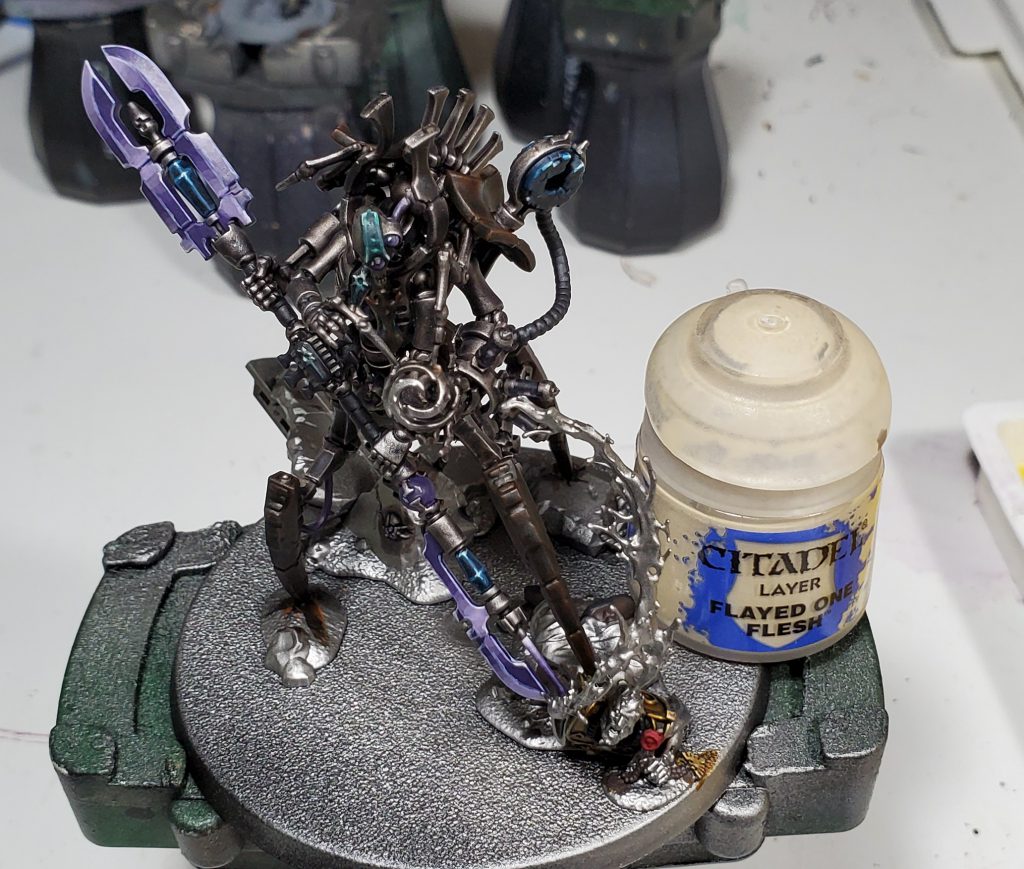
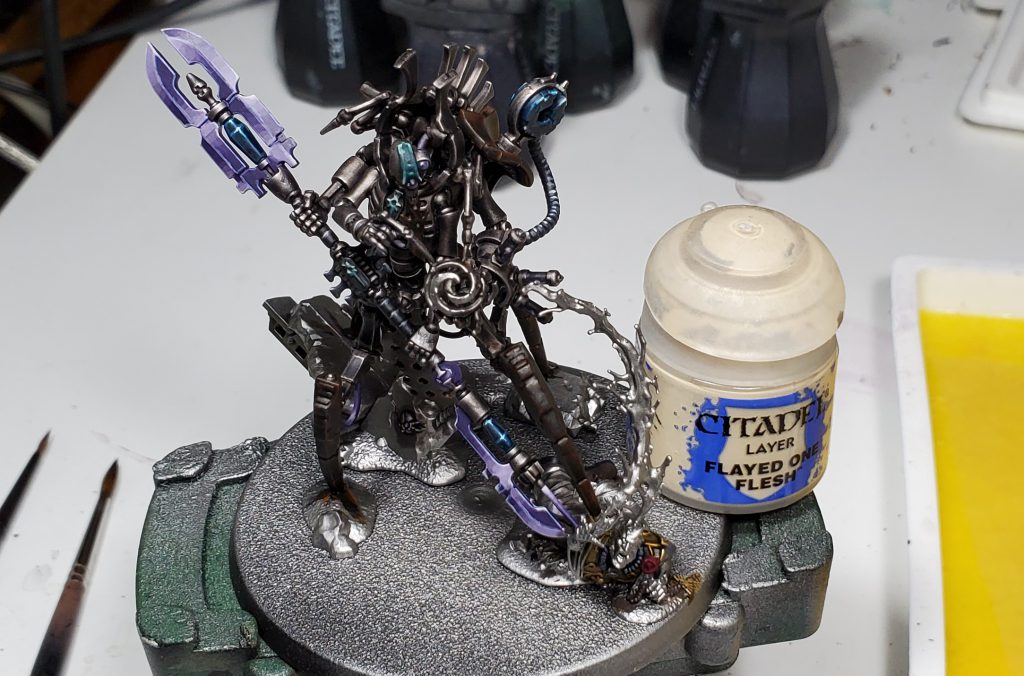
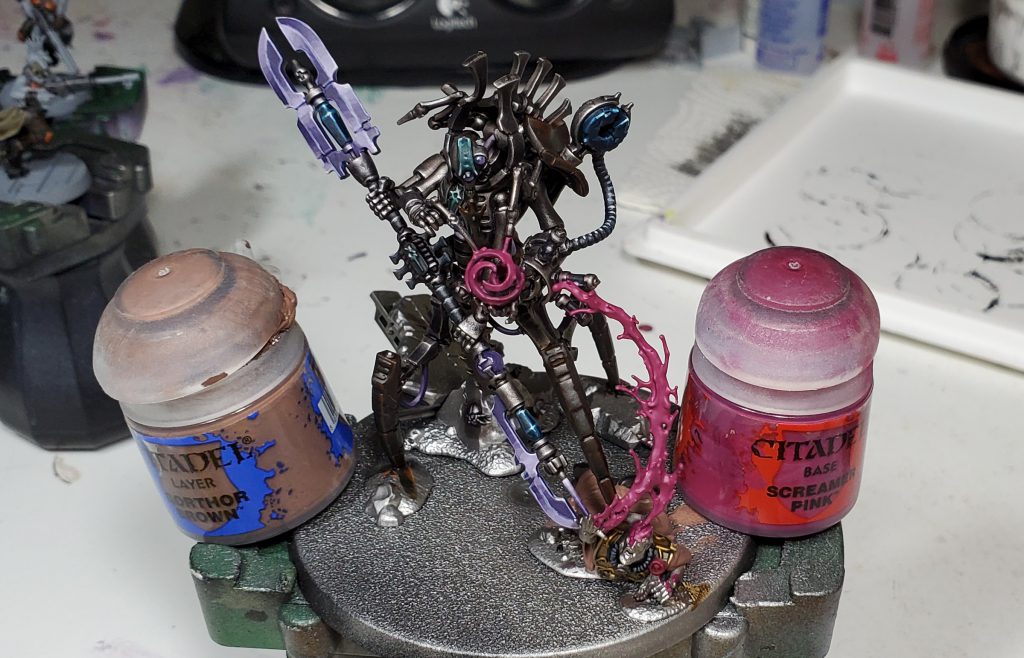
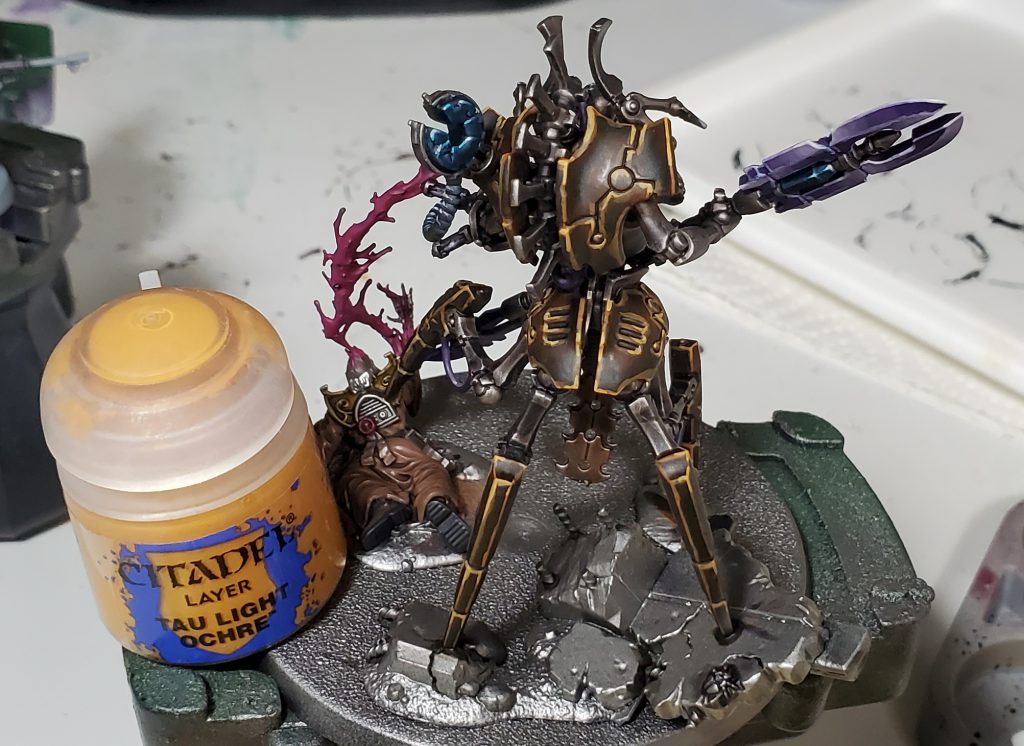
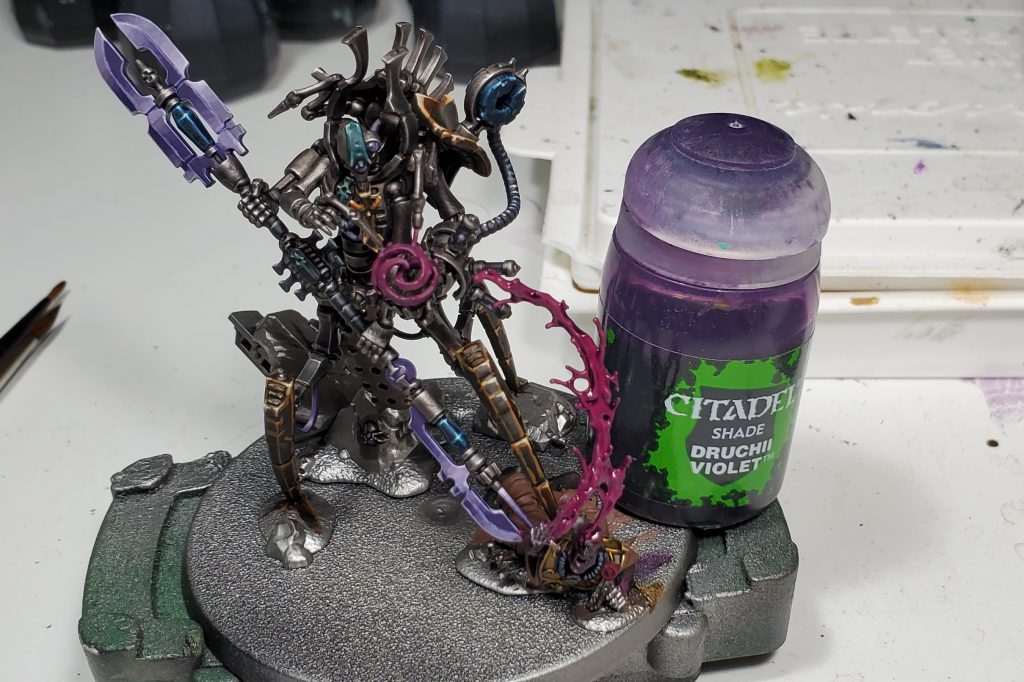
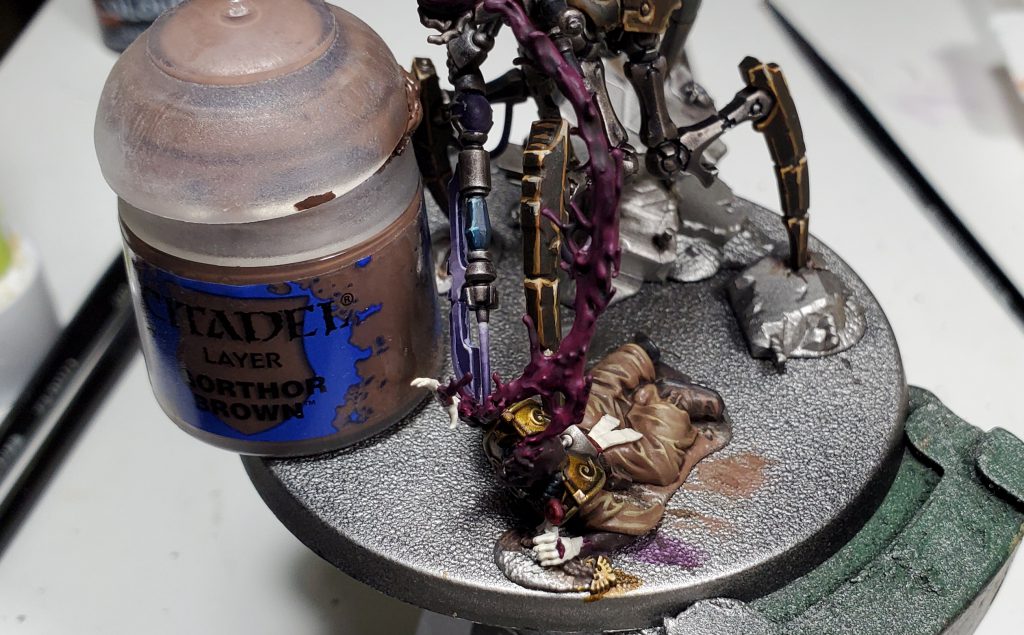
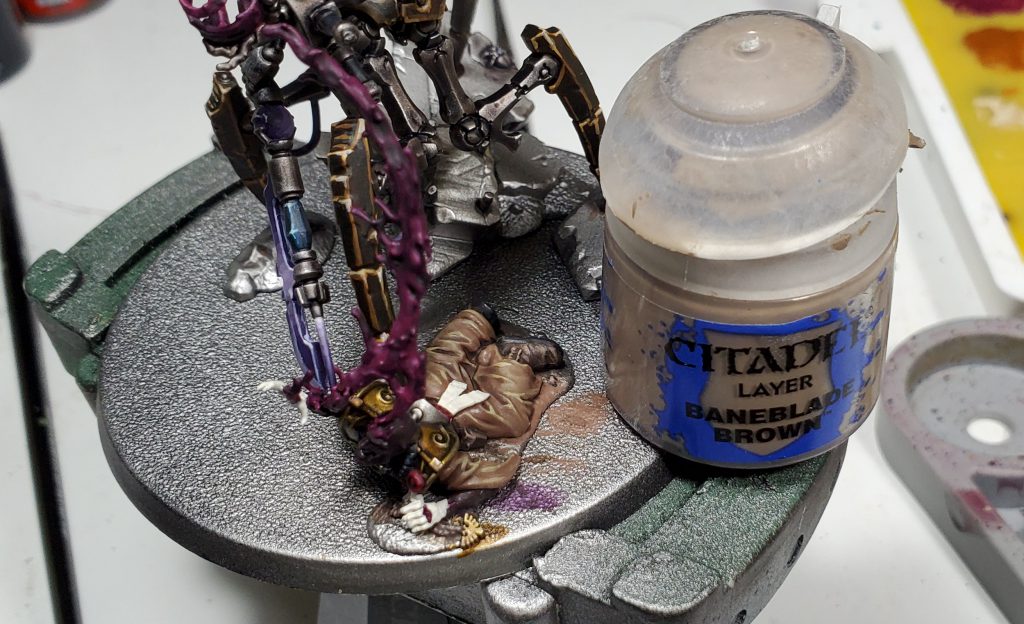
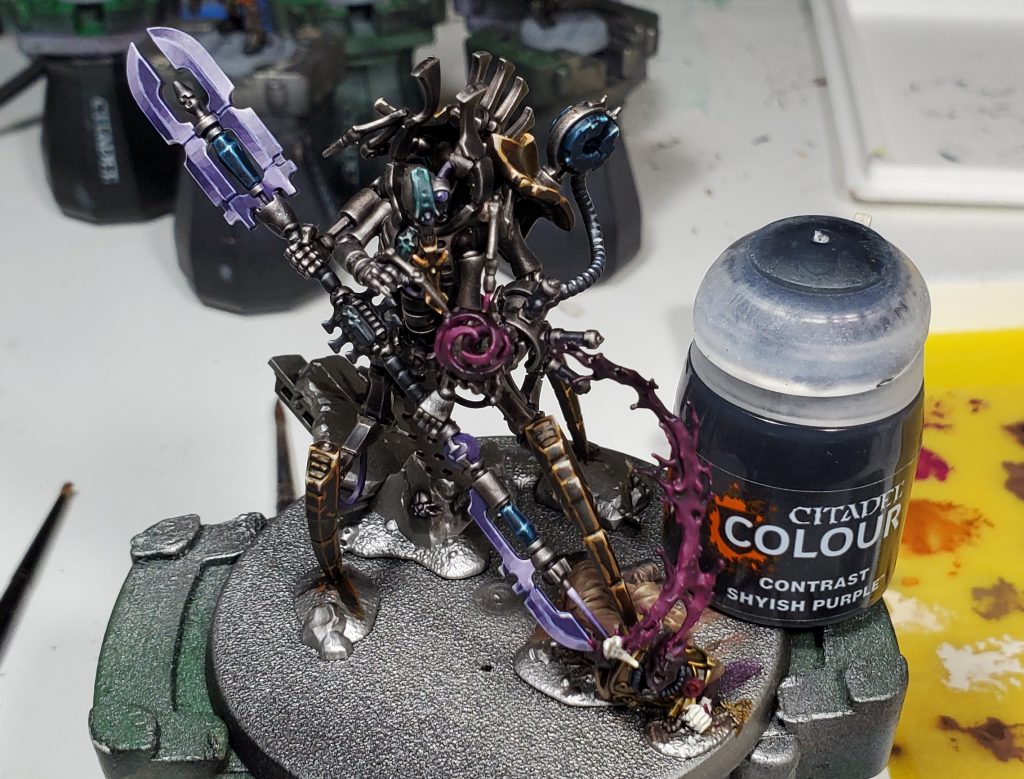
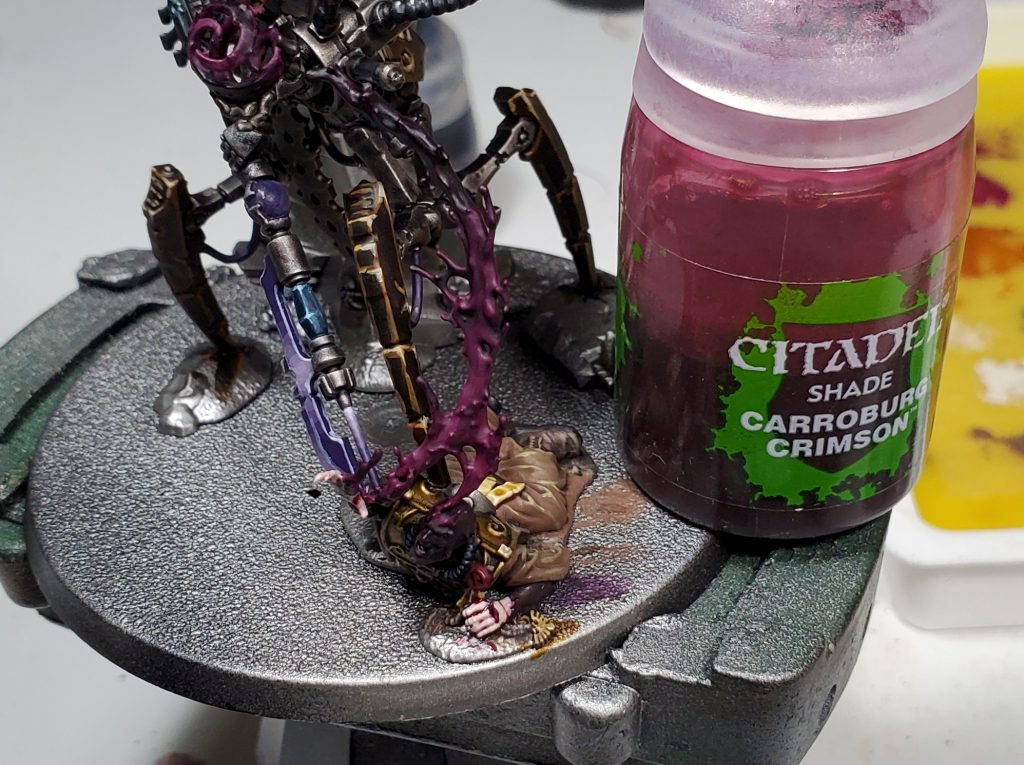
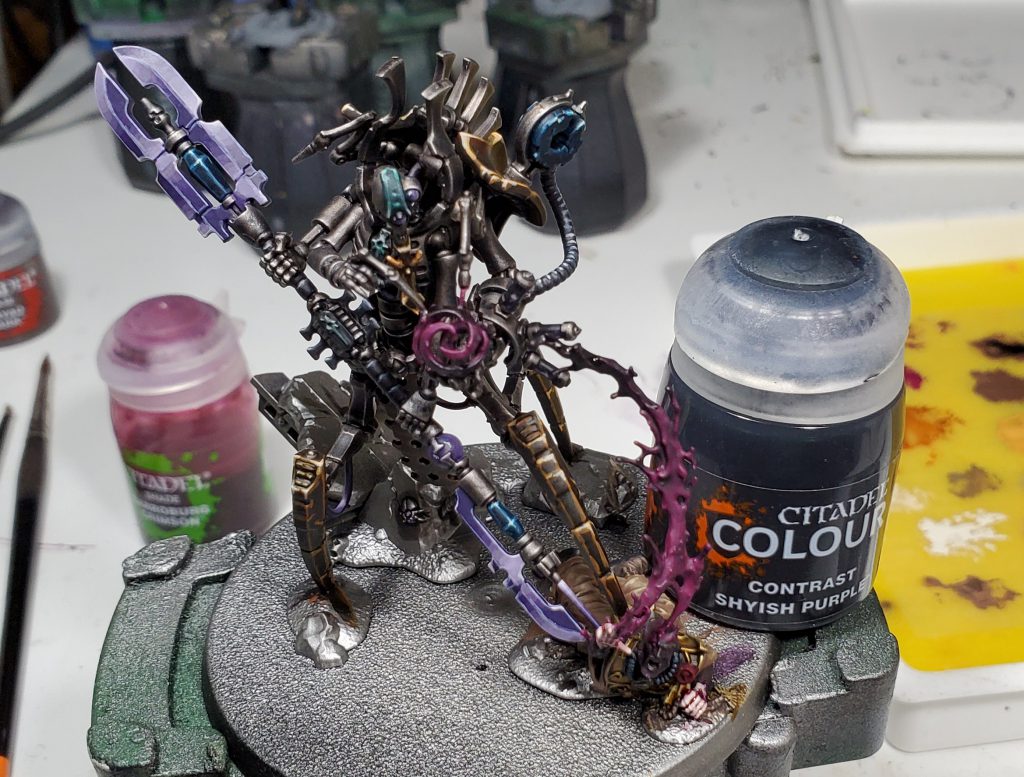
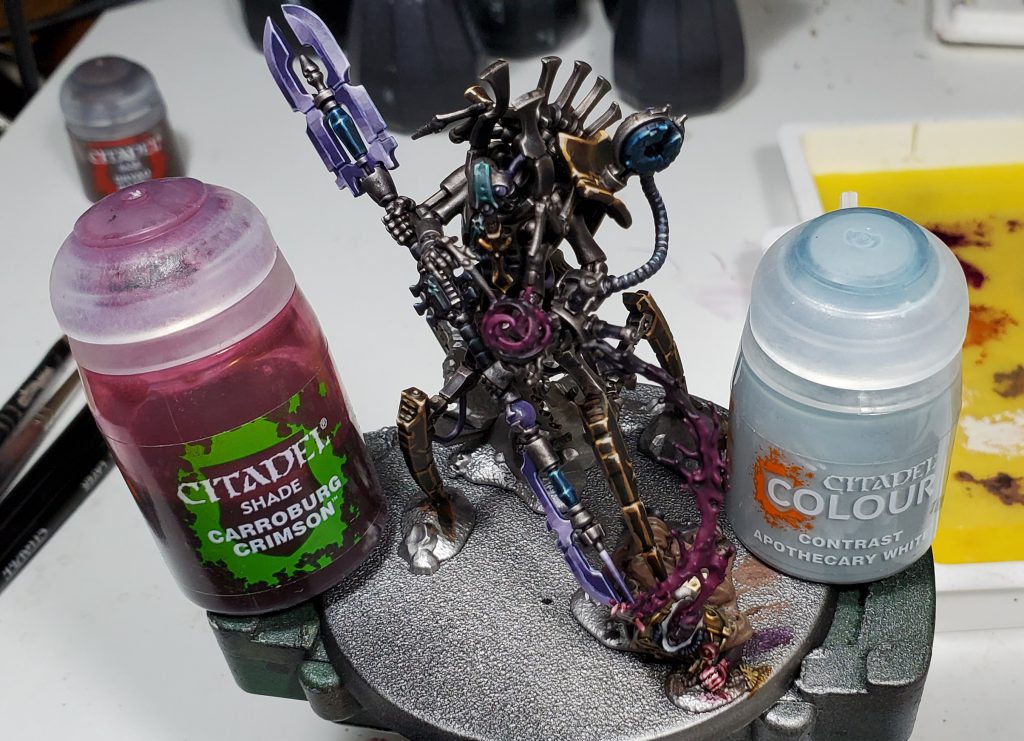
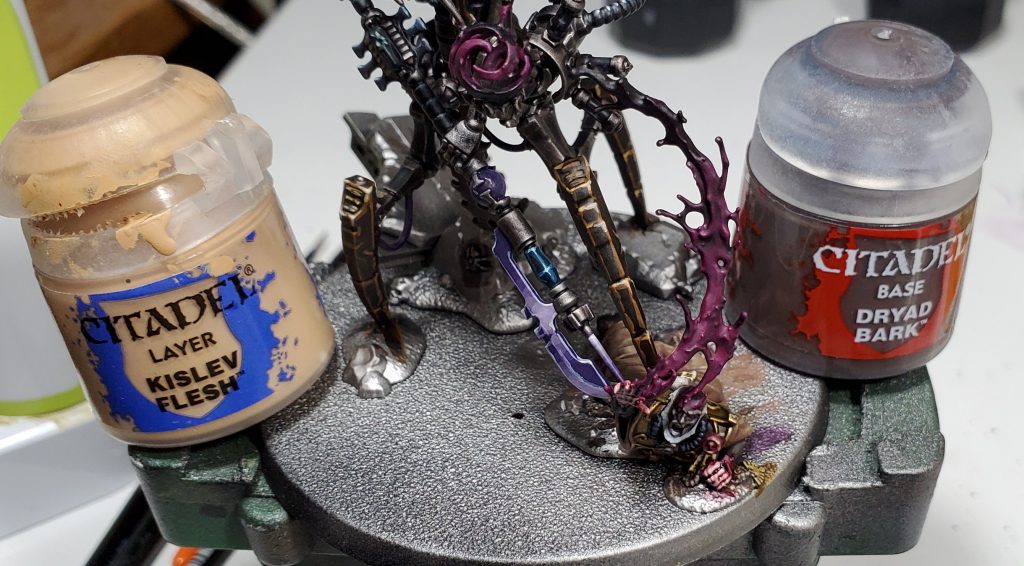
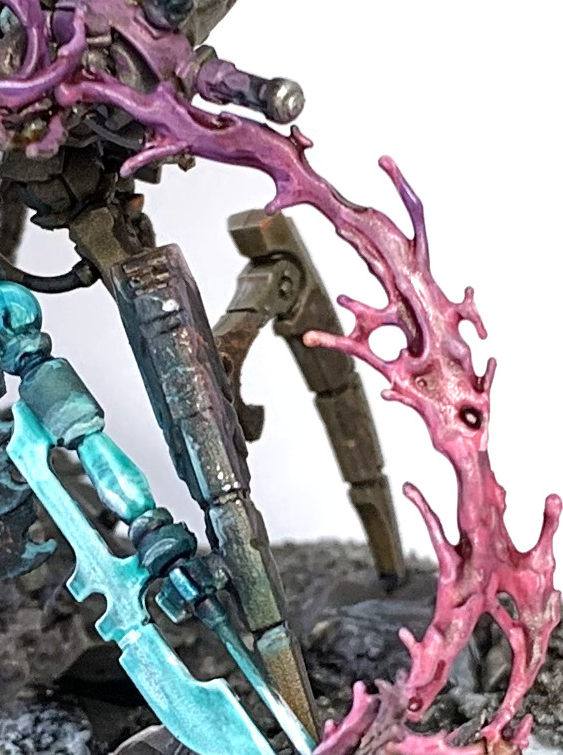
Step 3 – The Pink and Purple errr… bio-stuff?
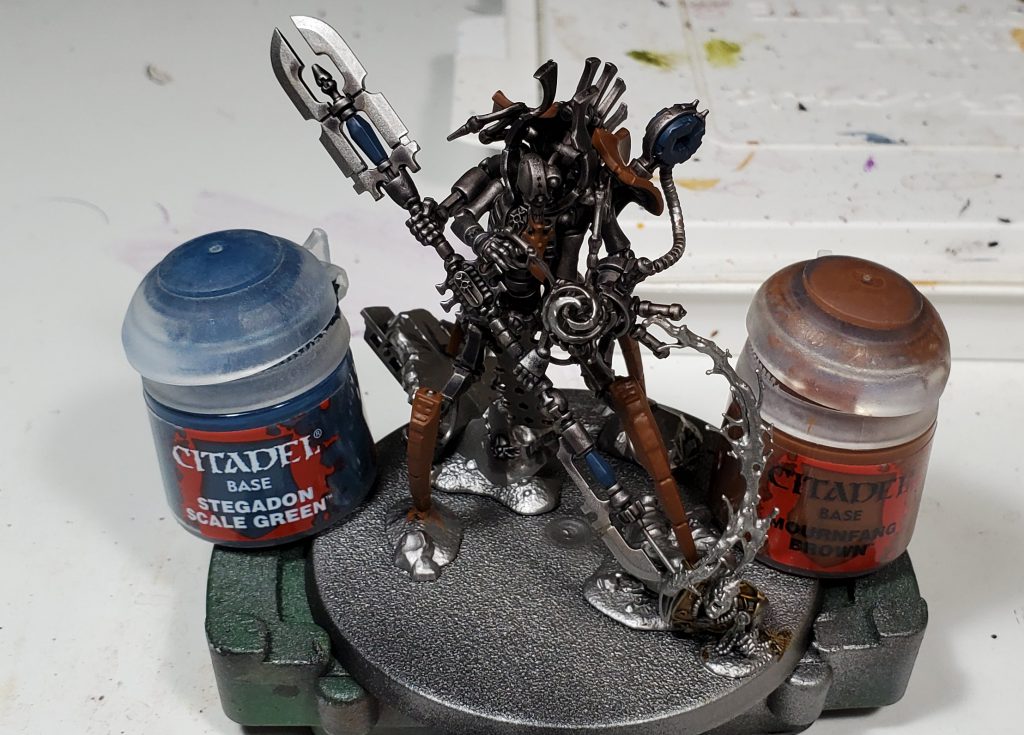
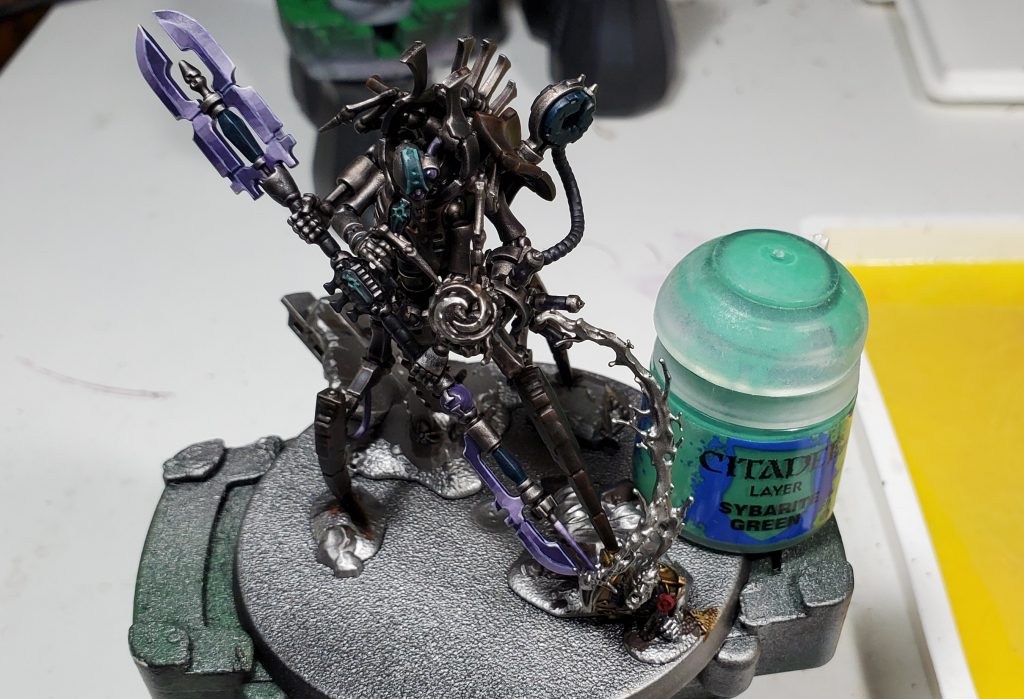
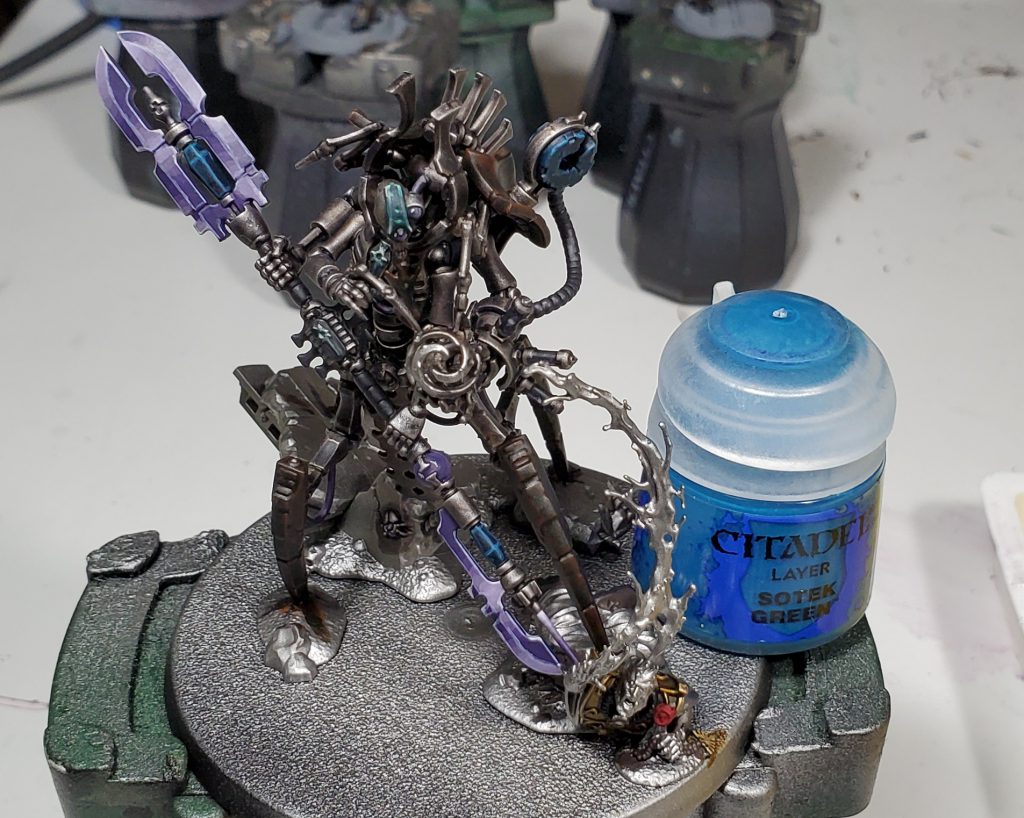
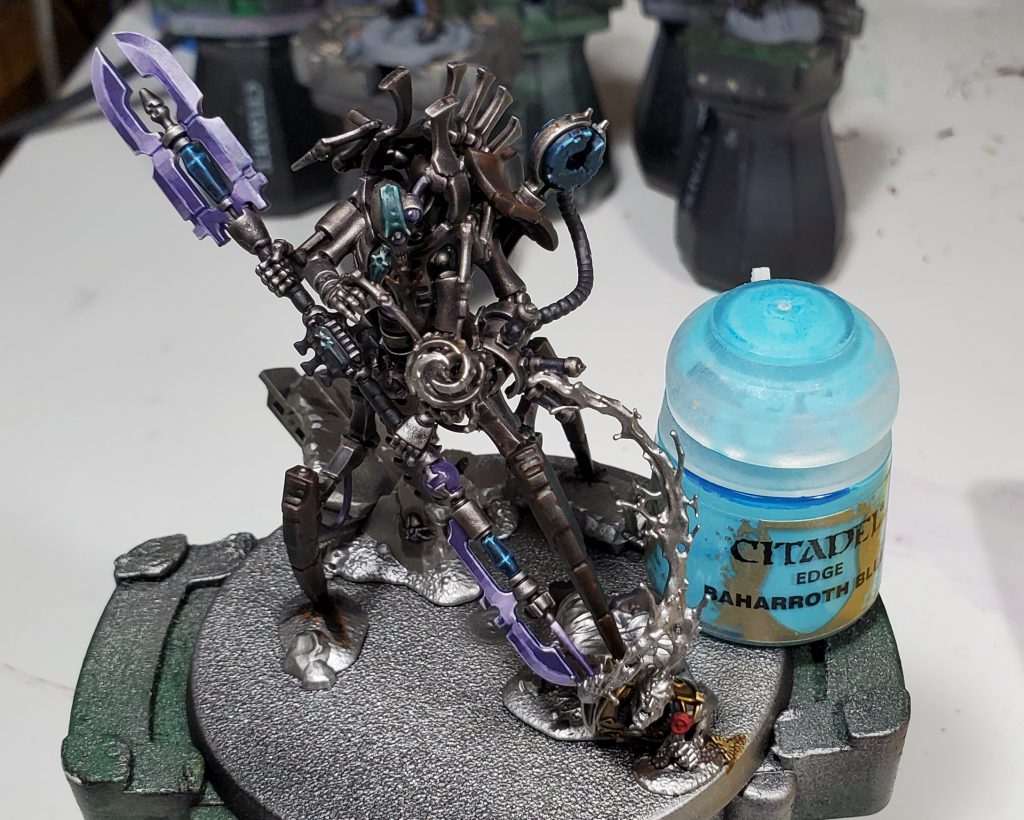
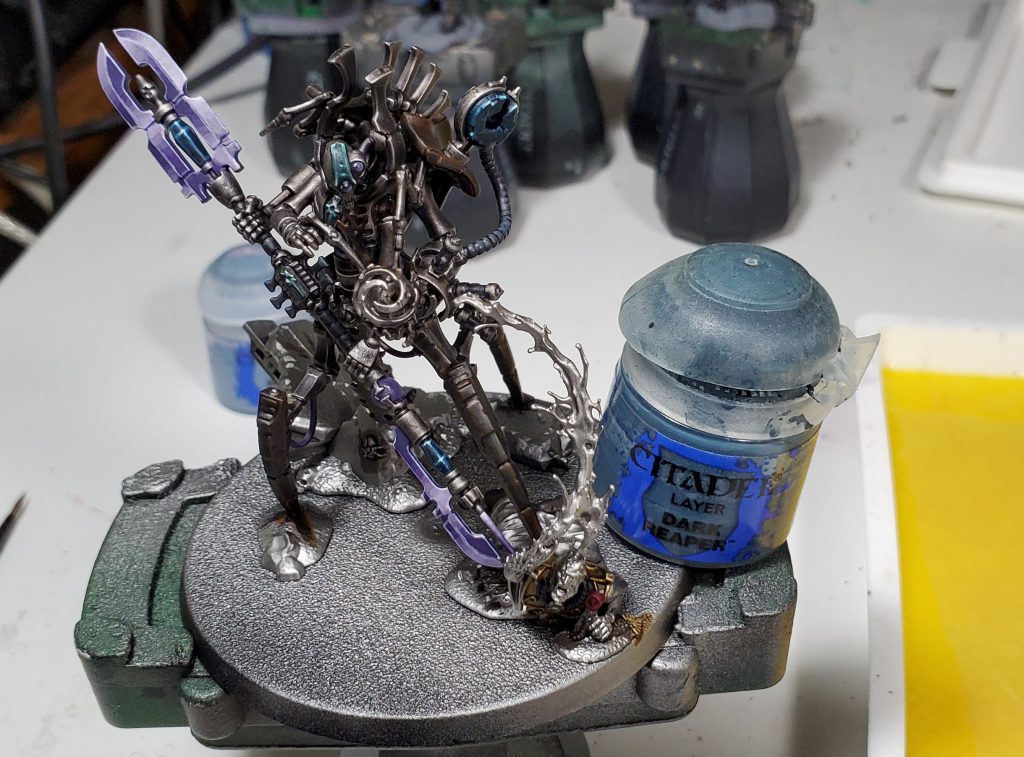
Step 4 – Painting the blue areas

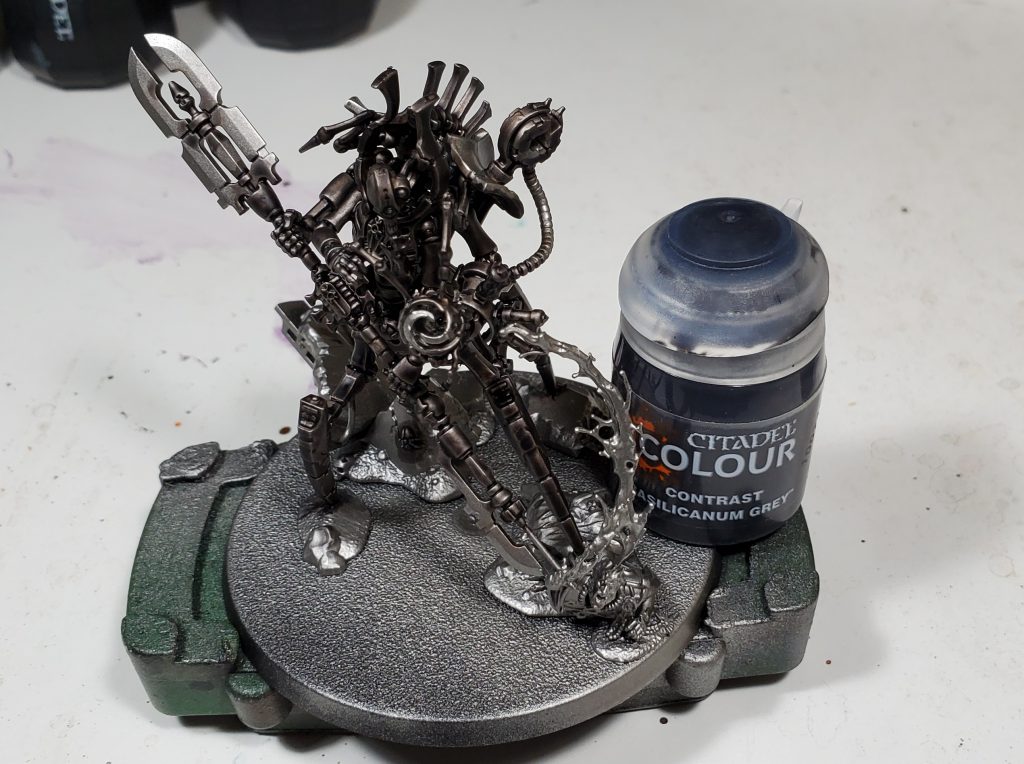
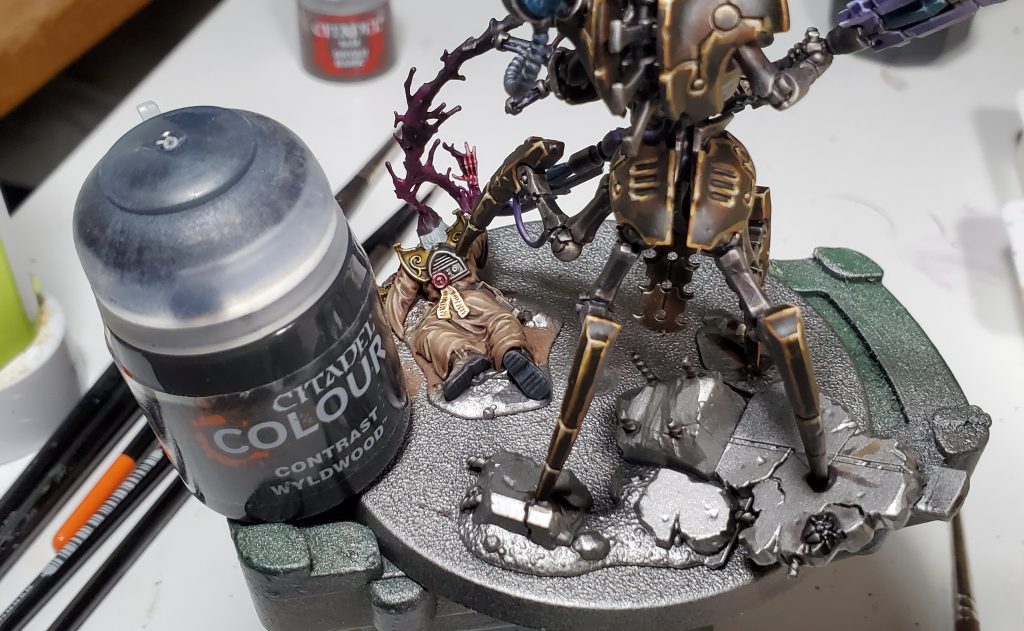
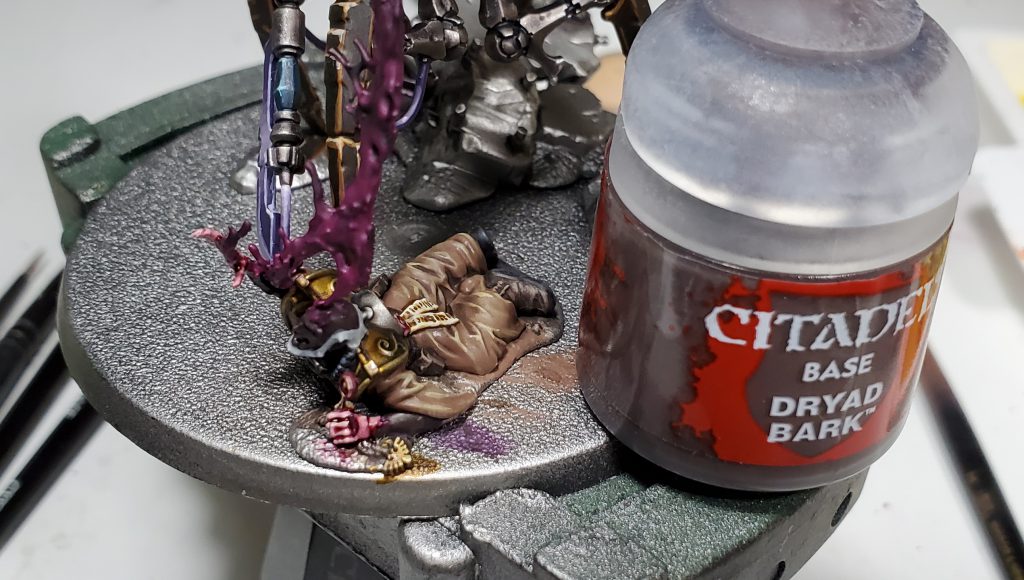
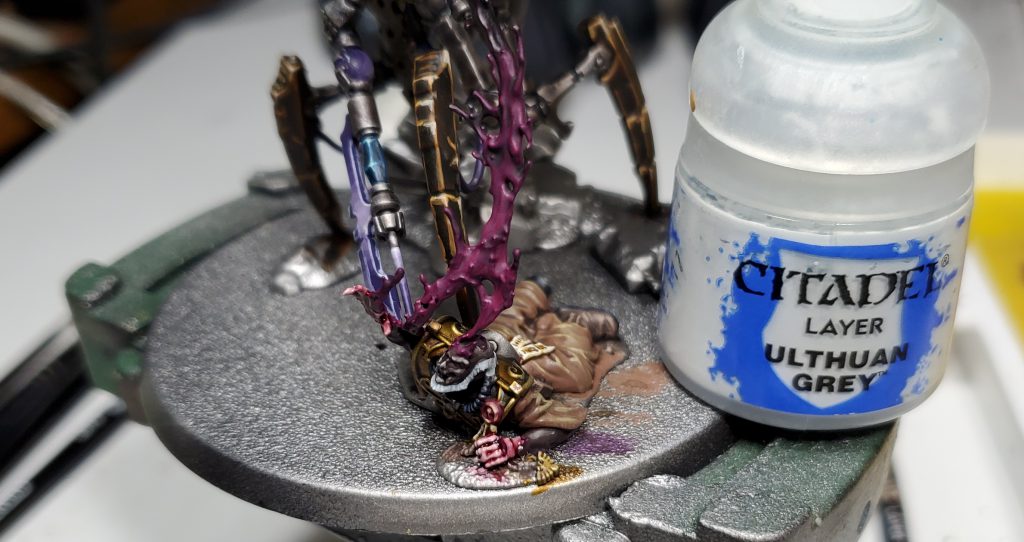
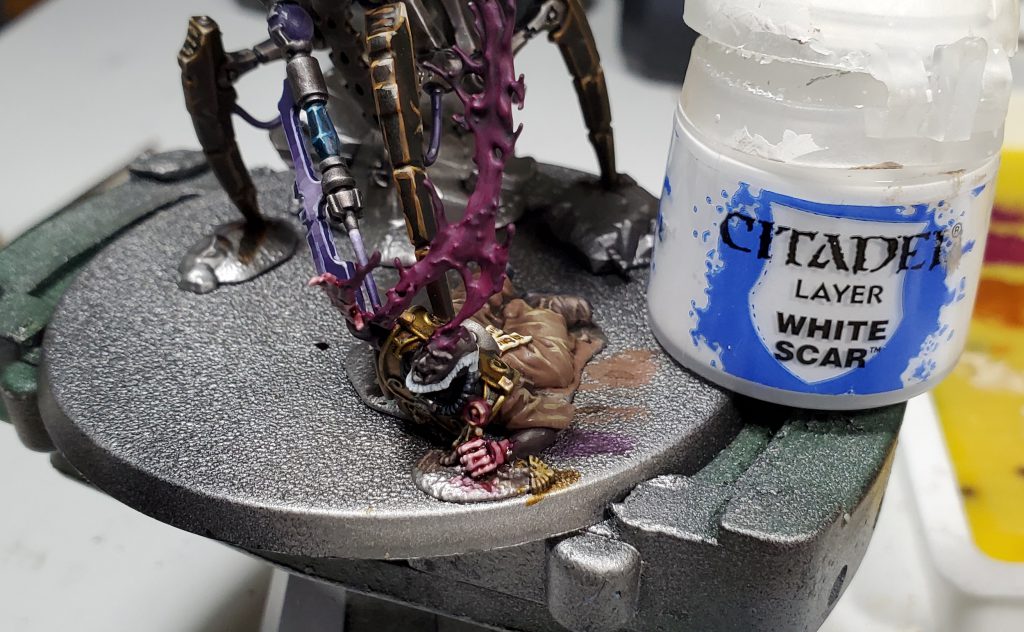
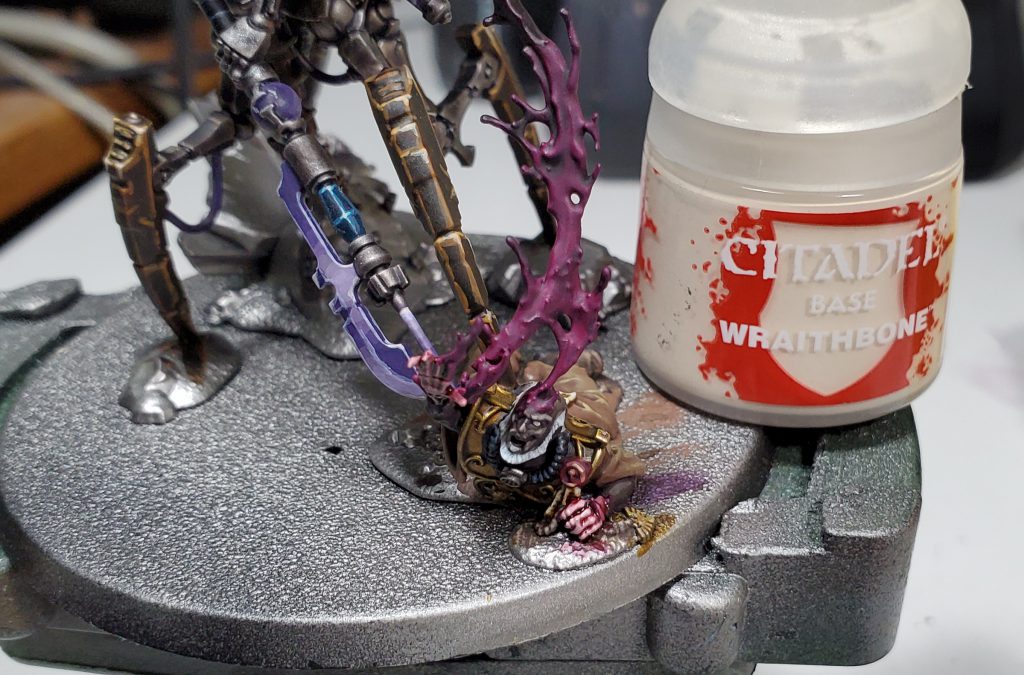
Step 5 – Base
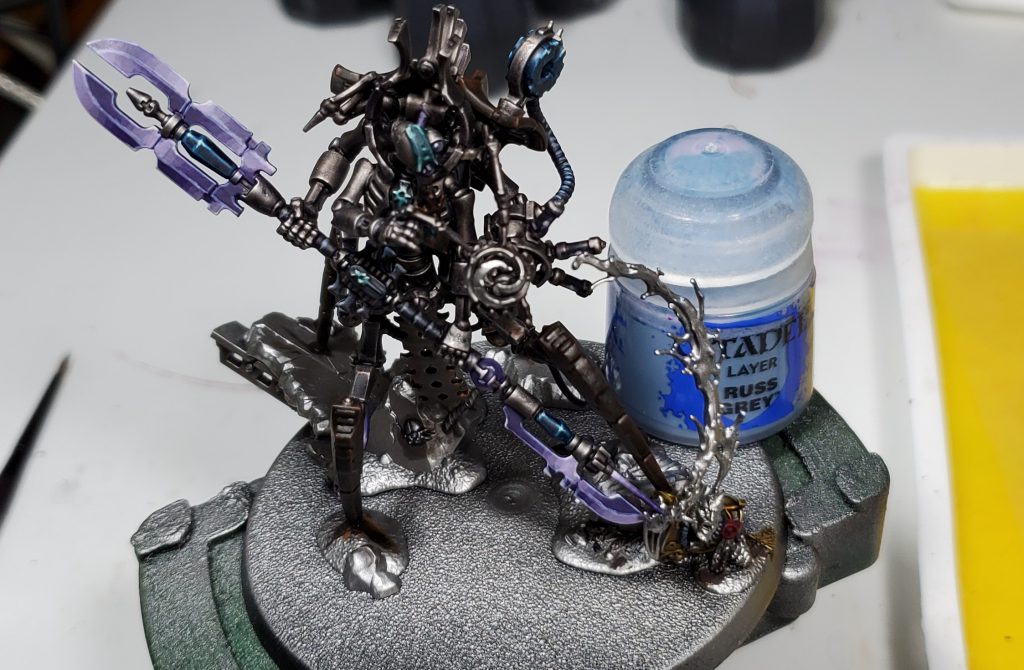
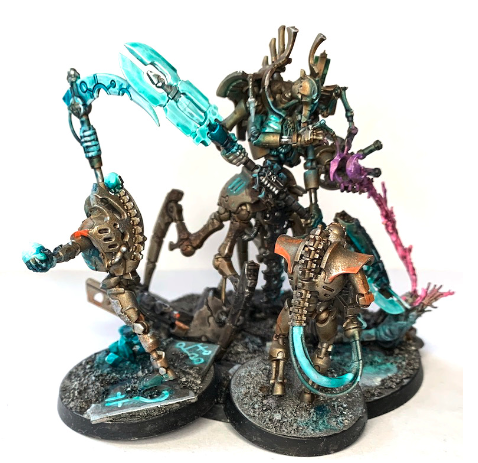
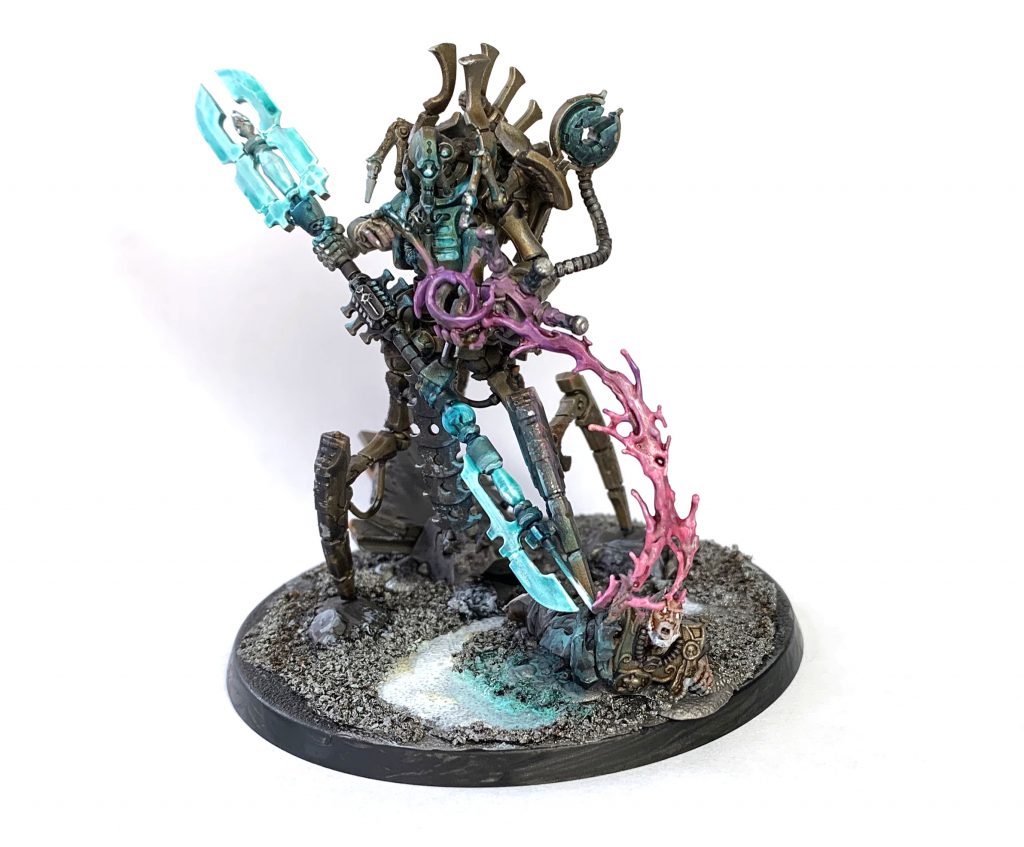
The Completed Model