In today’s final article on the fundamentals of Infinity, we’re covering common plays and tactical situations. If you missed any of our previous articles, you can check them out here:
- Part I: Strategy
- Part II: Building a Competitive List
- Part III: Playing in a Competitive Way
- Part IV: Initiative Rolls and Deployment
The purpose of the article is to discuss common situations which you may find occur in games of Infinity again and again. In previous articles we’ve gone through a lot of theory on how to plan out a game, build a list, deploy your models and make decisions during a game. What may be missing is the micro detail of how to actually execute Orders in specific situations. In part, this is because there’s no substitute for experience to learn this kind of thing. But once you are familiar with common plays, it saves you a lot of mental energy. Despite the hundreds of troop types and profiles in the game, Infinity models all draw from a common pool of skills and equipment. This means they fall into noticeable categories – gunfighting superiority Heavy Infantry models, for example, or disposable Warband models with template weapons – while retaining their own little unique points. Because units have clear uses that players should be trying, like seeking long range fights with HMGs or close combat with melee specialists, a lot of Orders fall into patterns that you’ll see over and over again. I don’t need to analyse every Order all the time because I’ve internalised how to do things in certain situations. That said, it’s always good to pause and consider how the micro situation affects the wider game. That’s something to add to the advice below, because it affects what you want the result of an Order to be – do you need the enemy model gone, do you need your model to survive, do you need either of them to move to a certain position – all of these outcomes have differing value based on the wider game. But today we are exploring exactly how to carry out your Orders in specific situations, under the general precepts of destroying the enemy, preserving your own models when possible, and getting free rein to secure the Objectives.
Table of Contents
Removing an Enemy ARO Piece
So, your opponent has the same train of thought about deployment as we discussed during previous articles – they have deployed most of their models prone, but have a Total Reaction Remote and a Missile Launcher in a Core Fireteam to halt your first-turn attack. You need to take those out, both to execute attacks on other models, and to stop them controlling the board at range, which would destroy your Order efficiency. This is a very, very common opening play to a game. Your first choice of tool would be a ‘sweeper’ firepower unit. Something with high BS, Burst 4 or greater, gunfighting mods (Mimetism, Multispectral Visor, Surprise etc) or enough resilience to survive a potential bad result and try again. Now think – is there any way you can get this piece into a your-positive, their-negative range band? Can you engage the AROs individually? Can Smoke (or White Noise) provide any positive bonuses or help you target a weaker piece without interference? You are looking to set up an advantageous FtF without spending too many Orders adjusting position or otherwise setting up first. You should also consider whether your sweeper unit wants to end up moving forward for further attacks, end the shootout Order in ARO position, or end up Prone and hidden.
Taking on the enemy’s best AROs head-on is where you often accept some risk, because if you win you can establish control of the long-range battle. But always consider if it’s worth it. Try to avoid, as the Active player, taking a coin-flip FtF where the odds are nearly equal. Yes, it may open up the game if you win, but in Round 1, there is usually some other way. You may be able to send an attack piece after more vulnerable or mission critical targets while avoiding LoF to the ARO pieces, especially by using Smoke. The enemy ARO pieces may be so resilient or well-positioned that the risk is too high – sinking all your Orders attacking them is what your opponent wants. A similar calculus applies to units like Total Reaction Remotes with Engineers Prone nearby – your opponent is hoping you will spend multiple Orders, and take risk, putting them Unconscious, after which they can be reliably revived with a single Order. Don’t engage such models unless you have a way to put them down for good.
So look for alternate modes of attack, or ways to make the FtF as one-sided as possible, before you attack head-on. When you do activate in LoF of an ARO piece, be sure to Move or Idle with the first half of the Order. If your opponent has a Hidden Deployment or other ‘gotcha’ ARO, you need him to declare it before you decide how to split your Burst.
One alternate way to attack a strong ARO piece would be to work a Direct Template or melee attack up close to them, thus attacking without a FtF shootout. The downside here is you need more Orders to approach, and probably smoke (or Eclise smoke – MSV is a very popular choice for ARO pieces) to make it work.
Another would be to use a mid-short range attack piece which starts in the midfield. Most ARO pieces get worse within 16″. With Camouflage, a model can generally get close to its target before choosing to engage (see the section below on attacking with Camouflage). So a close-range attack with gunfighting mods can be just as effective as a long-range shootout, justifying a couple extra Orders to approach.
Speculative attacks like grenade launchers, or Hacking, or Hacking to cause the Targeted state followed by using Guided Missiles, can all threaten an ARO piece without directly engaging their Shooting FtF rolls. On the downside, these can be very unreliable and Order-consuming plays due to their reliance on single dice rolls. You can easily sink a whole Turn without result. Consider the option if you have the tools on your list, and do it if the risk of direct engagement is unacceptable. This option tends to come out against super-AROs like elite snipers on full Core Fireteams. Not only does it avoid their shooting, but you can sometimes catch supporting models under Impact Templates. Remember that Hacking is best down though a deployed Repeater, e.g. one fired into position using a Pitcher – it hinders Hacking AROs, keeps your own Hacker back in safety and usually saves you Orders.
Finally, you can spend Command Tokens and use Coordinated Orders to dislodge a dominant ARO threat. Models cannot split Burst in ARO. So even a Total Reaction Remote or B2 Fireteam sniper can be vulnerable to 2-4 models all firing at it simultaneously. It has to Dodge, or take one FtF roll, which it may have a good chance of winning, and suffer 1-3 Normal rolls to hit it. This technique is expensive – Command Tokens are precious and have a high opportunity cost of other uses – and means you heavily risk one of the coordinating models, should your opponent ‘take the trade’ and try to take one of your attackers down with them.
The ideal weapons for this kind of Coordinated strike are B1, hard-hitting things like panzerfausts. The Spearhead can benefit from B3-4, but more than the weapons, consider how disposable your coordinating models are. 4 Daylami make for a great coordinated attack against a Core Fireteam Grenzer Marksman sniper. 3 of them and a Lasiq sniper is probably a worse idea than just 3 Daylami, because you may well spend that precious Command Token, and an Order, and reveal your markers, just to trade or lose one of your own valuable pieces. This Coordinated attack is not the most efficient option, but it can come in handy if you don’t have (or lost) your best individual gunfighters and non-shooting options.
Attacking With and Against Camouflage
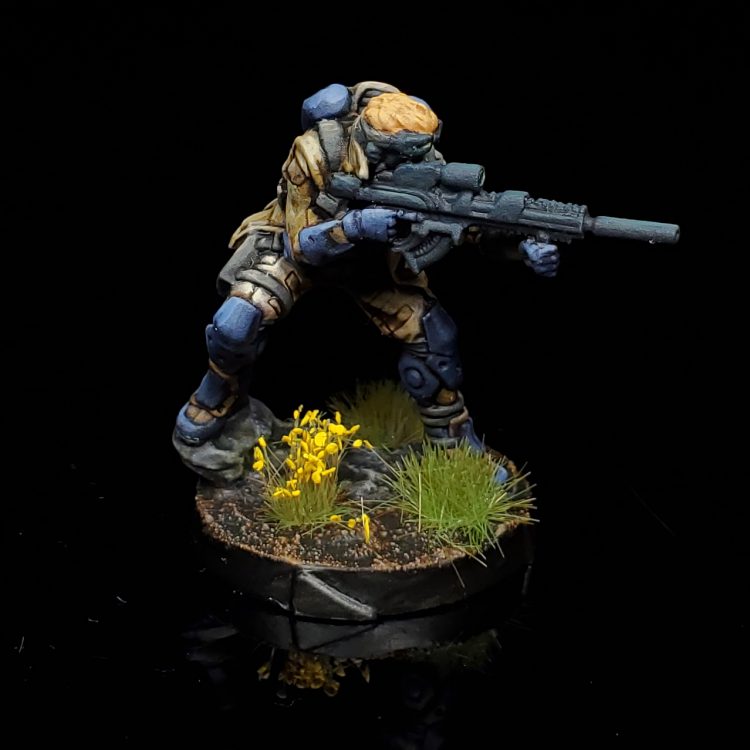
The value of Camouflage in defence lies in its ability to absorb Orders. By declining to ARO the Camo marker can make you spend a short skill to Discover, then fight with another Order. Good players often favour this response over revealing in ARO. They know they can have the same FtF in your next Order, so why not make you spend another? If you, as the Active player, move into LoF of a Camo marker and they do nothing, I’d move again, if you can get closer to your eventual goal position, while still staying in your positive range and staying in cover, or just do nothing. That means when you spend the next Order to Discover + Shoot, your opponent is at least given the nerve-wracking choice to do nothing, and risk receiving Normal shots without a FtF, or reveal himself, removing the risk you fail the Discover. Ultimately, the chance that you fail a Discover and simply can’t attack a Camo marker with your model during the Turn, makes them a real obstacle to efficient attack runs. You don’t want to leave them standing near your attack piece, ready to go after it with Surprise and the benefits of the Active Turn.
Vital to using Camouflage as a defensive strategy is having multiple markers, and having at least some be Decoys, Mines or cheap disposable models. If you have one Camo marker in your entire deployment, and it’s a key attack piece, its marker status alone is not a good thing to rely on for protection!
When hunting Camouflage targets, Intuitive Attack can be used as an alternative or second chance to Discover+Shoot, provided you have the appropriate Direct Template Weapon or Mines. Remember that if you can target an enemy model with a template, it may make it possible to hit nearby Camo markers simultaneously. Multispectral Visor, and getting to <8” range, are obviously also both helpful as they make it much more risky for your target to try and do nothing to remain a marker. But these same close ranges open up options for the Reactive Camo marker to place a Mine or use a Template in ARO – exactly the kind of trade the Reactive player wants. Sensor is by far the superior tool for hunting Camouflage and really the only good way to clear a dense midfield belt of multiple markers. It lets you reliably & efficiently strip this layer of delay and possible frustration, without exposing your model to template AROs or potential Mines.
As a tool for attacking, Camouflage is superb and it makes a Camo marker an Active turn predator of isolated models. Unless the Reactive model is very resilient and the Reactive player is confident the marker has no weapons posing a threat, they won’t dare Discover as an ARO – they’d Discover a volley of bullets coming at them unopposed! So the Camo marker can creep closer, into its ideal position for the eventual FtF, even walking past the 180 LoF arc of their target to shoot or enter melee from behind without any risk. The defensive solution to this is to have multiple models covering each other – the cheaper declares Discover while the one you value more holds its ARO.
Using and Defeating Mines and Perimeter Weapons
As we’ve previously explained about defence in Infinity, Mines and other deployable weapons are a great tool to delay the enemy attack or make them accept risk to move into certain areas. However, super agile or armoured models like Warbands with Dodge(+3)/(+6), TAGs or HI can brush them aside with minimal risk. Most decisively, any model with a Holoprojector can use its Holo-Echoes to set them off without any danger. Don’t rely too much on deployables if you see these sorts of attack pieces across the table from you.
If you want a deployable to actually bar entry to a vital area (E.G. an Objective Room), making it impossible for enemies to enter without taking some risk, try not to place it where the enemy can draw LoF to it without coming round cover at close range. However if it’s part of an overall defence where the aim is to delay the enemy and consume his Orders, placing a mine within LoF is fine. Even an MSV2 trooper, trying to Discover+Shoot at a mine from outside 8″, has a good ⅓ chance to fail the roll and waste an Order, and this gets worse for ordinary troops.
Remember that deployables can also be used to punch up your attacks in the Active Turn – place the deployable so its trigger area covers the model you want to attack (staying out of LoF yourself) and then use the next Order to draw LoF. Your opponent will have to Dodge against your shots, or Shoot and take the deployable weapon hit. Just be aware that your target can Dodge at -3 (normal if it has Sixth Sense) if you are within ZoC when you do the set-up Order. So don’t risk it if a successful Dodge would let the target escape the trigger area and/or LoF.

Attacking with Templates: Trading Up
Direct Template Weapons (DTWs) are great for using cheap models to attack at close quarters, because you can force a ‘trade’ rather than a FtF. Obviously the Reactive player can declare Dodge, so it is extremely slow and uncertain to take a target out with a Direct Template – against a chain rifle, even the most basic 1W model will usually have roughly a ½ chance to Dodge and a further ⅓ chance to pass its save anyway. This gets far worse when you consider valuable targets with high Phys, ARM or W/STR. So to be effective as attackers against single targets, cheap template-users need another form of attack to threaten with – this is similar to a ‘fork’ in chess, your opponent has to decide between two bad options.
Here’s how this works. You move into LoF, and now your Reactive opponent needs to declare their ARO. If they Shoot, you place the template and try to take the trade. If they Dodge, you declare Shoot with a BS attack – this will then be a FtF roll, meaning that barring unusually bad modifiers, like a target which has Mimetism (-6), their odds of escaping unscathed will be worse, while posing no risk to your model, so you can always try again. Even firing a Pistol is usually better against a single target than laying a template and hoping the target fails to Dodge. Note that against multiple targets, you generally use the template and hope the opponent is unlucky, more targets straight up means more chances for them to fail rolls. This ‘fork’ interaction is why a savvy Reactive player, when caught grouped up by an attacker with a DTW, will declare Dodge with his more valuable models under the template, and Shoot with the disposable ones.
Shotguns are especially good for this attack method due to their cheapness, wide availability and +6 range modifiers within 8″, but when the Active model has a DTW, any conventional close range weapon gives them the potential. Ideally the Active model should be cheap – if it’s too expensive it’s not a good candidate to trade away – but alternately it can be resilient enough to chance shrugging off enemy Shoot AROs. A TAG or HI with a heavy flamethrower, for example, can use this fork effectively.
A similar interaction is also possible with Warbands or any other cheap troop with a template weapon and melee skills. The Active player moves into LoF, and if the target Shoots, they use the template weapon, hoping to trade; if it Dodges, they move further forward, hopefully into reach of melee combat.
Attacking with Close Combat
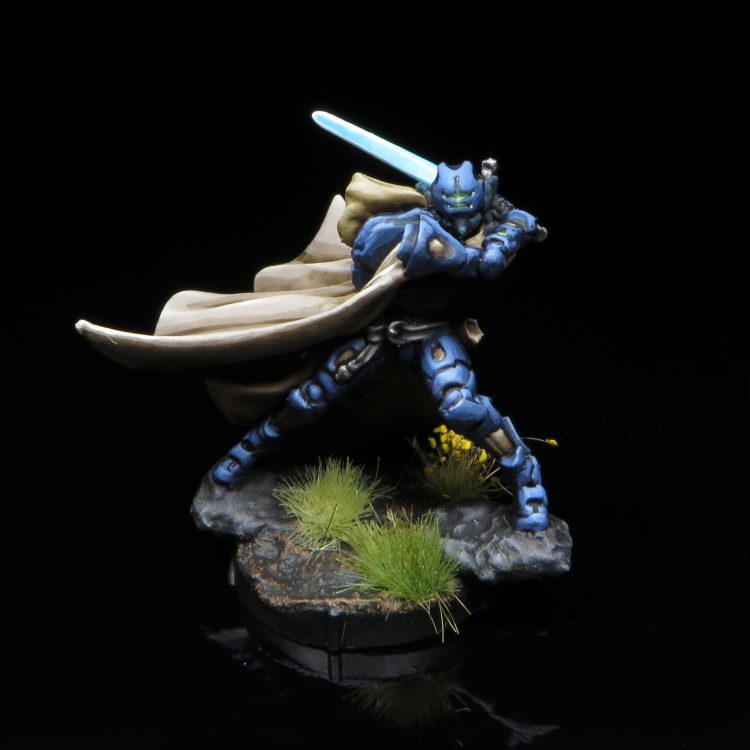
Melee combat is the exception not the rule in Infinity. However it can be a game winner if used right. Many expensive and powerful models are paying for their shooting prowess, but in melee a 6pt warband can have the upper hand. Even if you can’t finish off a target in melee, leaving a cheap unit tieing up the opponent’s expensive one can help neutralise them. Melee, being usually 1 dice per player, seems inherently very chancy. It is, up until the point where, with CC values over 20, further boosted by Martial Arts, a melee specialist actually has better odds of inflicting hits than almost any FtF shooting roll. If you have the right skills and the right close combat weapon type, melee is one of the surest ways to take something out. The difficulty is getting there – it’s Order intensive and dangerous. Therefore combat is mostly used as an asymmetrical solution to problems. When faced with a target tough or strong enough in FtF shooting that it can’t be attacked, you look to melee specialists as an alternative.
On the initial approach to close combat, if your opponent has no AROs, then it’s simply a matter of Orders to move closer, although that alone can be costly enough to make you think twice, compared to executing attacks at range. If your opponent has AROs across wide swathes of the table, your melee specialist probably isn’t going anywhere. Smoke and Cautious Movement can be used to cross narrow fire lanes where the ARO piece has a fleeting sight of the melee specialist’s approach. Trying to cross open ground by chaining smoke templates is just too Order intensive to work. If you need to work a melee specialist forward against superior AROs, look from the opponents point of view and try and identify the blind spots you can move in. But in many positions, you are better off engaging an ARO piece directly, even taking a significant risk, than trying to creep past its field of fire. It takes too many Orders. I personally find I am at greatest risk of over-reach when I am trying to push a decisive melee attack across the board. Once you get there, you still need a few Orders to actually fight.
How to close with the enemy for the final few inches into melee? If you can move from outside of LoF straight into Silhouette contact, you can usually risk a FtF roll, using your high CC (and Martial Arts) against the enemy shooting. But this is still a risk, and if your opponent has a Direct Template weapon, he can offer a trade, stopping any further attack run (likely after you’ve invested a few Orders moving up). The standard Active turn response to getting templated on the way into melee is to Dodge – most melee specialists should have a 60-70% chance to pass, and a chance to survive any ARM/BTS roll if they fail, after which they’ll be in melee. This is the best option when you are tight on Orders or are using a resilient model which is certain to survive one hit.
The safer option, if you can get close enough while still outside LoF, is to declare a Dodge (from outside LoF) that lets you move into Silhouette Contact. That way your opponent can’t shoot back, although if they Dodge successfully you can still be left swinging in the wind. That kind of maneuver depends a lot on gauging very short distances, and of course melee specialists with Dodge (+2″) will be far better at it than normal.
The above moves depend greatly on having the Stealth skill. A melee specialist really wants to approach models who have their backs turned or can be approached from round a corner, only gaining LoF at point blank range, if at all. As with all close quarters fighting in Infinity, your opponent making a Dodge in ARO as you approach can ruin the whole thing, putting them in a safer position or just wasting your Orders by creeping away from your reach. Stealth is therefore almost mandatory for setting up reliable melee attacks. If you don’t have it, think carefully about the target’s Zone of Control and how to enter and cross it with as few Orders as possible, and consider if your plan is still worthwhile if your opponent succeeds at a Dodge. Also remember that Sixth Sense nullifies Stealth.
The classic technique to cross that last few inches where your opponent has LoF is to chuck a smoke grenade. Due to the aforementioned risk of the opponent Dodging, this now needs care – it was far more reliable in N3, when the Reactive player could only attempt to change their LoF Arc when they took an ARO within ZoC/without LoF. Stealth doesn’t help in this case. So if your plan is to cover the last few inches in smoke, think whether a successful Dodge will move the target back into a position they could still see your next Order. If you can cover your target in smoke and still reach them under the smoke for melee in the next Order, even if they Dodge, that’s ideal.
Using and Countering Combat Jump or Parachutists
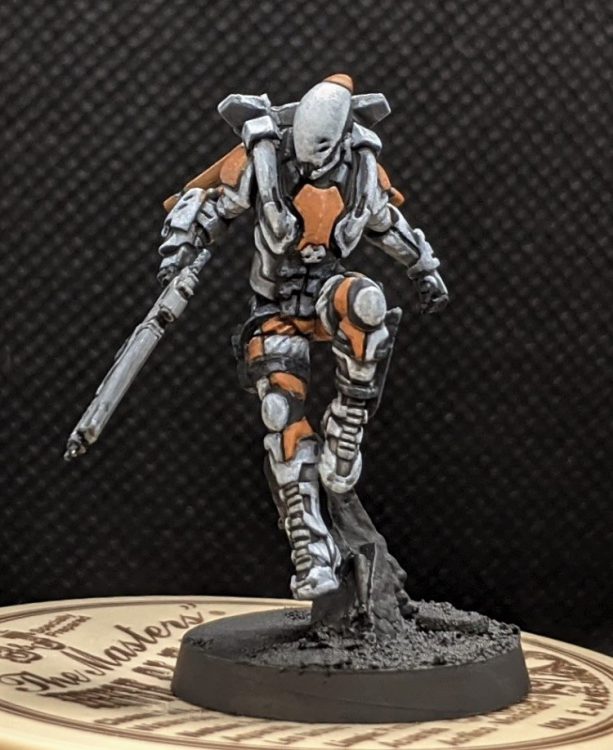
The value of these models is the ability to get right where you need to be, which could be on the flanks, rear or in the midst of the enemy. Specialist functions you’ve paid points for are also good deal – you could easily get in range to Hack a key target, land in position to Doctor/Engineer a vital model, activate or control an Objective or the enemy HVT. That simple use is especially effective when held until the endgame – if you still have some Orders left to resource it. When you have an airborne model in your list you should consider at the Tactical Phase whether you are likely to bring it in this Turn. Is it in the right Combat Group? Should it or other Orders be shifted around? There’s nothing worse than realising your drop trooper has a golden opportunity, but the Orders Phase (aka the body of the Turn) has already started and the trooper is sitting in Combat Group 2 with just one other Order available to it.
When using Combat Jump or Parachutist as an attack run, the first thing is to pick valuable or vulnerable targets – can you single out the enemy Lt and can your trooper take it? Are there any enemy models you can shoot from behind and outside of ZoC? It’s not bad to simply get a trooper immediately into position and take the normal, advantageous FtF rolls you look for in the Active Turn. But to justify including them in your list, and the impact on your Order pool, try to look for those specific opportunities. Such troops shine where the Mission wants you to get a trooper onto a central Objective, and they are practically an auto-include for Missions which want you to assassinate a Lt, Datatracker or other model buried in the opponent’s DZ. You want the trooper to enter outside of LoF and ZoC (obviously) but be able to immediately get into Partial Cover, which it can’t deploy into, and draw LoF to a target. If you have multiple targets available, remember the Warning rule – shooting one enemy model in the back will give others within its ZoC the chance to adjust its 180 degree LoF arc. So it pays to shoot the vital target before any others, or even to split Burst into the backs of multiple targets rather than engaging one by one as you normally would. Back-shots are rare and precious in Infinity, don’t waste them!
If you’re trying to deploy Combat Jump or Parachutist, and the enemy has covered the ideal spot with an ARO, consider whether you can get Smoke (or White Noise, if relevant) onto that spot. It may allow you to then move away from, or fight through, the ARO and continue with your ideal attack run. Due to the geography of a normal table, with Combat Jump aiming toward the enemy DZ and most troopers with Smoke starting in your own DZ, launchers are going to be a better option in most cases thanks to their range.
On the flip side, you should always try and be aware from deployment whether your opponent has Combat Jump and/or Parachutist options available to him. If you’re very certain they don’t, which will only be the case when facing certain Sectorials, or when you can see the opponent definitely has 15 Order-generating models starting deployed on the table, you can ignore this. But against all vanilla Factions and most Sectorials, the threat is there. So you want close-range AROs, ideally templates, covering your DZ and the flanks closest to it. Any decent ARO will deter a 1W or 1STR Combat Jump or Parachutist model from appearing on the board. Be aware that some factions can include more resilient options which can risk being hit by a single free shot. Covering your DZ is an art which comes with experience, but it’s made vastly easier if your force contains plenty of disposable templates. Yu Jing, for example, who often include 4 Kuang Shi with Chain Rifles in lists, can severely restrict opportunities for a Combat Jump attack run. Parachutists ordinarily can only enter on the flanks outside the enemy DZ – but there are a few who can enter risk-free from any table edge, including the rear, so that may need to be covered as well when playing against certain factions.
Using and Countering Suppression Fire
Newer players sometimes end up over-using Suppression Fire, finding it to be the ultimate Reactive Turn protection. More experienced players tend to use it only when the table position makes it most secure. There are many ways to safely take out a model in Suppression Fire. First, you can engage it from outside 24”, forcing it to break Suppression to Dodge or fire back normally. Second, you can engage it from 16-24” with a model with Mimetism, Surprise and/or Smoke-shooting. That will put the Suppressive Fire model, unless they have the right gunfighting mods, on such a large modifier that firing back would be suicidal. Third, you can advance a cheap Direct Template Weapon until it’s close enough to step out and offer a trade. Fourth, you move past it with a Camouflage marker – it can’t Discover without breaking Suppression, and once your model is past its front arc you can safely shoot it. Fifth, you block it with Smoke and move a melee combatant into it. Sixth, move a Hacker within ZoC, outside LoF, or fire a Pitcher nearby to Hack through. Declaring Reset will break Suppression Fire. Seventh, Speculative Fire will force the target to Dodge, breaking Suppression, or tank any successful hit you roll.
With all these ways to successfully attack it, you need to be very cautious about when you rely on Suppression Fire. Don’t rely on it where your opponent can approach to point-blank range, or can draw a bead on it from very long range. Be wary of Camouflage or Smoke Grenade-using models in position to attack it. That’s not to say it’s useless by any means. Suppression is worth using whenever you want to throw up a speedbump – your opponent could remove it with any of the means above, but that could take many more orders than simply moving a model into LoF and blasting it, which is usually the easiest move unless the target is in Suppression. Very resilient models also benefit a lot from Suppression Fire. Some of the ways to break it outlined above, like a suicidal chain rifle, won’t work against a suppressing TAG (although others like Hacking can). A really tough model can take more hits while hoping for a lucky suppression ARO.
A special mention needs to go to using a Coordinated order to throw up to 4 models at once in Suppression. This is one of the easier Coordinated Orders to set up and execute and it does give solid returns. Just remember that Suppression makes your Reactive models more of a risk/speedbump for your opponent to remove. It shouldn’t be used to stand up and fight all comers in the Reactive Turn.
So Suppression Fire, like most AROs, is a way to delay your opponent more than remove his models. Don’t expose a model you aren’t prepared to lose, even in Suppression. Where this calculation changes is in the late game. Not only is it vital you keep your opponent’s last push back from the Objectives or key targets, they may not have many Orders, attack options or models left to execute any of the cunning schemes described above. The endgame is where you really can give your opponent no option but to attack your Suppression Fire in a head-on FtF roll, hopefully at no better than even odds.
Using Hidden Deployment
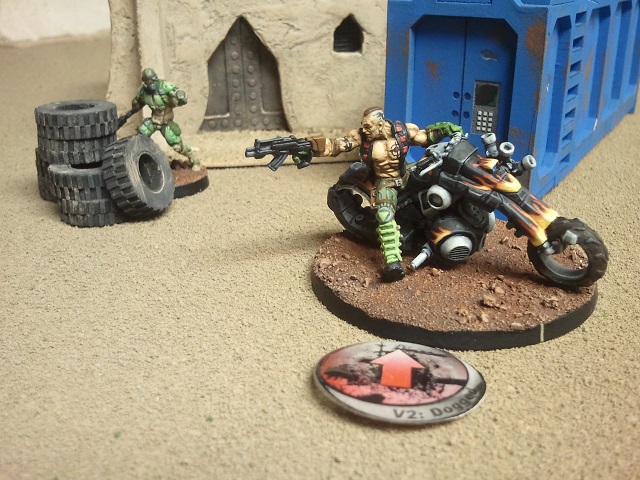
There are a couple of different roles that Hidden Deployment models usually fill. First, they can be shooters, typically at long-range, who seek to ARO the enemy when they least expect it. The goal in that case is to get unopposed or highly advantageous shots. Remember that revealing by declaring your ARO will normally have to be after the Active player’s first skill, so you’re still at risk if they have a usable weapon in range. You could deploy them covering an otherwise unprotected fire lane where you calculate the opponent will be Moving into LoF with the second part of his Order, or where you expect him to cross open ground with no cover, at a bad range band for him. Alternatively, you could position your Hidden model to cover another of your ARO pieces, preferably your strongest. The enemy activates to take out that piece (if you’re lucky, they foolishly declare Shoot without Idling or Moving to provoke your Hidden ARO) and then boom, they’re facing another high-quality ARO. This ‘gotcha’ move is high risk, high reward. Great way to ambush and perhaps cripple one of your opponent’s attack pieces, which could leave you dominating long range for the game. But if you’re unlucky and the first ARO piece goes down, your no-longer-Hidden model is in grave danger.
Good use of range bands, like a Hidden sniper being outside of enemy HMG range, is crucial to get the most out of Hidden AROs. A popular choice for these tactics is Missile or Heavy Rocket Launcher models. Impact Templates can be devastating in ARO because it hits any models that moved under the template during the Order. If your Hidden model can ARO Shoot at a Fireteam on the move, you’re likely to threaten several models at once, forcing your opponent to Dodge rather than Shoot with his leader and risk taking a simple hit on everyone else. Such AROs are one of the most devastating ‘gotchas’ in the game – but remember, you’re gambling on a single to-hit roll, so still very likely a 20-40% chance to miss the shot completely!
Deploying Hidden models in ARO is a tempting and very fun move. It can seriously disrupt the enemy plan, indeed the mere threat of it can cost your opponent Orders as they try to avoid the most dangerous situations. Just remember that revealing your Hidden model in the Active Turn is a lot easier to follow up. It also allows you to inflict the Surprise modifier in FtF, which is a nice little bonus. Always consider if your opportunity to fire in ARO is better than simply waiting. Is the enemy temporarily exposing vulnerable models? Or are they moving to a position where they will be exposed anyway? Will the actual FtF numbers be significantly different if you wait? Are you going to severely mess up the opponent’s wider plan by revealing? That last one especially might justify revealing in ARO, especially if you force your opponent to spend their Orders dealing with your revealed model instead of completing an Objective. But there must be some reason that justifies risking your Hidden model dying in the opponent’s next Order. Because of this, the ideal Hidden ARO isn’t just one that takes a Normal rather than FtF roll. It’s one you take on the last Order of the opponent’s Active Turn. You get the efficiency of using your Reactive Turn offensively and avoid the threat of immediate reprisal.
The second prevalent use for Hidden Deployment, which usually requires Infiltration or Forward Deployment, is to position near the Objectives. That leaves you ready to pop out in the late game, when more of the enemy threats have been removed, to efficiently activate the Objectives and/or hunt down enemies trying to control that vital area. Especially when going second, this is a game-winner. We discussed earlier how Camo markers are natural predators of single models. In Round 3, when your opponent has one or two isolated models controlling a central objective, a single relatively cheap Ninja can easily take them out and flip the game, without even needing too many Orders. Some missions really incentivise this play – to the extent players may try using Sensor to speculatively sweep the area around the Objectives, if they have the Orders to do so, earlier in the game.
Using and Countering TAGs
After a long period out of fashion in the competitive scene, TAGs are resurgent in N4. They are usually very well priced given their Tactical Awareness and offensive capabilities. They are great attack pieces, well capable (depending on the exact unit) of removing long range AROs or breaking through toward the enemy DZ. But the major difference between a TAG and a lesser attack piece, like a powerful Heavy Infantry, is their resilience. The baseline 3STR and 8ARM of the heavier TAG make it very hard to remove with conventional head-on shooting, unless you have specialised weaponry. It takes an average of 15 hits (not shots, successful hits after the FtF roll) from a normal HMG to down that example TAG in cover. An AP HMG will do the job in half the time, but that’s still at least several Orders of pure shooting, while a single lucky ARO from the Multi HMG most heavier TAGs carry will mess up smaller attackers. Attacking a full-STR heavy TAG straight on with a normal ammo weapon is a desperate move, more likely to cost the Active player their Turn or model than to achieve anything.
So a TAG is hard to kill head on, it’s inefficient and risky. Never try it unless you have the right tool, you have plenty of Orders to spend, and you are sure you can follow it up and finish it off. To take advantage of this resilience to normal shooting attacks, a sensible player will deploy their TAG looking out as an ARO threat, but in a position where it can fail its Guts Roll and move back into Total Cover should it lose some STR, or if a credible threat is engaging it. (Be careful if your TAG is a Religious Troop – it’s the last model you want foolishly holding position if it is in danger!) The chance of taking out a TAG with shooting will go up dramatically if you can get it out of cover and in a position it has nowhere to hide over a couple Orders. But that situation will seldom arise when the TAG is in its own DZ, and if it does you still need plenty of Orders even after getting your attack piece in position. It’s often best to simply not attack a TAG in its secure position at the back. You expend enormous effort and time for a chance at removing it. If you’re unlucky you will lose a valuable attack piece, and if you fall short by even a single Order, your opponent can undo your good work with an Engineer and you’ve wasted most or all of a precious Turn.
TAGs are far more vulnerable when they come forward to start drawing LoF to more targets. Some are better at dominating long range fights (typically those with a good 16-32″ B4 weapon) while some will seek the medium range (with an 8-24″ option) and be better suited to aggressive flanking maneuvers. But almost all TAGs can use their high Movement to swiftly gain LoF, helped by using their large Silhouette to ‘vault’ terrain – they can basically move onto anything shorter than S6 or S7, so they can easily get on top of low buildings and look over obstacles that would impede S2 attack pieces. Once a TAG has executed its attack though, as its Active turn comes to a close, there will be a point where a good player will pull it back. As tough as a TAG can be, even in Suppression Fire it doesn’t want to end its Turn within the enemy’s reach any more than most models. At least in Rounds 1 and 2, the owning player wants to keep it alive and a threat, and the best way to do that, by far, is in a position similar to deployment, well back with the opportunity to Dodge or Guts Roll into Total Cover, covered by other models to prevent close range attacks or Hacking. Watch out for enemies with Pitchers, or if your TAG ends in a position where enemies can enter ZoC without LoF to the TAG or any other friendly ARO – that’s how you get Hacked!
So a TAG will smash through most shooting AROs and can gut the opposing force if its attack run is not halted or delayed in some fashion. How to do this?
Firstly, the Active Turn TAG user still wants to preserve his Orders and avoid unnecessary risk. So some Shoot AROs may still restrain it. A Mimetism(-6) sniper outside the Tag’s good range bands will still give pause. Not so much because the TAG fears getting killed, but it doesn’t want to spend Orders taking hits for free, or firing back on 2s or 3s. Similar for a good quality Missile Launcher trooper in a Core Fireteam. A TAG almost certainly can take out most such AROs, but it’s a substantial risk of at least being damaged (Missiles can also offer AROs outside of most TAGs’ good ranges). These sorts of AROs can at least force expenditure of a few extra Orders at the start of the Turn, limiting how well the TAG can exploit a successful attack.
A more successful method of restraining an Active Turn TAG is with Hacking AROs. Like all Hackable units, TAGs must always be aware of the cyber threat in ARO. A single successful roll can completely wreck a Turn by bogging down the attack run. No TAGs have Stealth, so they can’t just walk through the Hacking Area out of LoF (although Cutters, Sphinxes and Uhlans can all bypass Hacking AROs by using their Camo marker state). So positioning some Infiltrated or Forward Deployed Hackers, or even better Repeaters, covering the avenues of approach to its targets will pay dividends here. Of course, this approach is dependent on terrain placement and the Active player can sometimes find a way past or through. But the standard course of action would be for the TAG player to spend orders neutralising the Hackers or Repeaters before they can safely move it up. That expenditure of Orders will severely limit their potential to execute an attack run with the TAG in the same Turn.
Because of the uncertainty element, Camouflaged or Hidden Deployment Hackers (or unexpected Repeaters, like Deployables laid in ARO by disposable midfield troops) excel at this role of delaying TAGs. The Active TAG player doesn’t know if that marker could hack it or not – will they risk it? The best case (for the Reactive player) is when the TAG spends several Orders moving before coming into the Hacking Area, then the Active player must change gears and further deplete their Orders removing the threat, before they can continue. This fractures their plan for the Turn and stops them planning their Order pool effectively. If your TAG is unexpectedly caught by a Hacking ARO, consider moving out of the Hacking Area, if possible, with your second short skill. This may be safer overall than declaring Reset and having to do so again during your next Order, against another ARO – it depends on what state the Hacking ARO is threatening you with. It’s far easier to get out of Immobilized (with a normal Reset) than Possessed or Isolated.
For removing Hacker threats to a TAG, Killer Hackers have a clear role, but be aware of the limitations of their Hacking Programs. Against high-BTS hackers and/or those operating through Repeaters (and thus behind Firewalls) they won’t be effective. Shout out to some prestige hackers with Trinity (AP) or similar buffed up versions, which might be a bit better. But a more common technique for removing Hacker AROs is to send in a disposable non-hackable troop first. An Irregular/Impetuous Warband can trade itself very advantageously for an infiltrating Hacker. Yes, it will soak up some Orders, but the Active player should usually accept that in Round 1 as it will limit their opponent’s options and open the game up for a more aggressive attack by the TAG in Round 2.
In ARO, Hackers normally default to Total Control or Oblivion against a TAG. They are higher damage to beat the BTS roll and the effect is much tougher to get out of. Total Control especially is devastating. The owner cannot try to reclaim the TAG until his next Active Turn. Be aware that Spotlight can also be useful against BTS9 TAGs, especially those with a Firewall Mod from some sneaky Wildcard Tinbot model accompanying them. As long as you succeed in the WIP roll (and beat any Reset from the TAG) then it will be Targeted, no BTS roll needed. That’s a minor benefit on the face of it, but you will probably want to kill the TAG entirely at some point, so it can be handy. But even against Reset, Oblivion or Total Control present an unignorable threat to a TAG which could laugh off most lone troops’ shooting AROs.
Is hacking a viable way to neutralise a TAG in the Active Turn? It all depends on the TAG owner’s options to remove the conditions afterward, and on the TAG’s significance to the wider game. First thing to understand is that Hacking is quite Order-intensive and does not always yield quick results. A B1 hacking attack in ARO on a TAG, with such high potential return, and interrupting what the Active player actually wants to do with his Orders, is a precious gift. The same attack at B2 in the Active Turn, against a Reset, can easily be inconclusive, draining multiple Orders for no result. First, you need to set up the Hacking, and Pitchers are your friend. They let you extend your Hacking Area efficiently and at no added risk. Actually moving your Hacker up to the TAG may be the only option you have, but it is inherently more risky as you’re now within the enemy’s reach, where they can use those non-hackable units to remove your Hacker in the following Turn.
Once you’re in position, you need to consider carefully which Program to use. The goal should always be to seal the TAG’s fate and get the most benefit for your Objective in the mission. So think through to the finish – if you plan to Isolate or Immobilise the TAG, can you eliminate or neutralise any Engineers the enemy has available? Can you provide AROs to further complicate any efforts to Reset/Dodge from the inflicted state? Or will it allow you to immediately and safely shoot the TAG, with a good chance of destroying it completely? If you try to Possess the TAG, what can you do with it with your remaining Orders? Can you kill critical targets or put the TAG in an untenable position before running out? The critical thing with Possession is it’s absolutely crushing, until the start of the owner’s next Active Turn, when they can remove it without risk at the cost of a Command Token. So it’s the best way (by far) to neutralise a TAG if the opponent has no Command Tokens left, but in most cases it’s on a tight timer. You need the Orders to make use of it, and it counts as belonging to the possessing Hacker’s pool, which you’ve already spent from to use the program. The obvious thing is to kill enemy models, and you can do so with abandon since you don’t really care if the TAG dies to friendly-fire AROs. But you also need to consider whether its position at the end of your Active Turn is a good springboard to counterattack you from. You want to leave a Possessed TAG (which you know will return to its owner via Command Token) standing out in the open under multiple hacking AROs, and shooting AROs if they’re high quality and don’t expose those ARO pieces to other, more dangerous enemy attacks. Even better, you can walk the Possessed TAG into an appropriate melee specialist in your force. It will then be locked into melee on the following Turn when it reverts to an enemy. In both those situations, be sure your lockdown on the TAG is strong enough it can’t just brute force its way free!
At the end of the game, Possession is a Null state, so counts for points killed as a Mission Objective. Isolated (or Immobilised) does not, so at the end of Round 3 it has little relevance for scoring – those effects are only useful insofar as they restrict the TAG’s ability to be moved into scoring zones, onto Objectives or stop your models from doing so. This is important as TAGs are more popular in Missions which score based on points killed, points in zones or models controlling Objectives. You usually need a plan to follow up Isolation/Immobilisation with a killing blow to help win these games.
Conclusion
Hopefully this explanation of how to get the most out of specific units, and the considerations in specific situations, will help you to make good decisions when playing Infinity. It is a deep and varied game – by familiarising yourself as a player with common interactions and all the factors which shape your decisions, you can save more mental energy for developing your plan to win the overall game.
Have any questions or feedback? Drop us a note in the comments below or email us at contact@goonhammer.com.
