
Last week I talked about all the ways a good player will defend themselves from harm (check out the Fundamentals of Defense here). This week you’re up against an opponent who won the Lieutenant roll and has given you the first turn. You now need to get across the table and do enough damage to counteract the scoring advantage going second will earn your opponent. Let’s talk about how you’re going to do that.
Part One: The Primary Attack Piece
Last week I spoke at length about a layered defense. I made particular note of how any individual asset can be cracked by a dedicated counter, so strength in defense comes from threatening in multiple ways simultaneously. This has a corollary when it comes to choosing your offensive asset of choice: multiple capabilities are preferable to raw strength.
In a lot of ways, any faction in any wargame is defined by its cheapest pieces. Chess is a game about pawns. Similarly in Infinity, every faction has ten+ top end pieces you could easily make the centrepiece of your gameplan, but you’ve only got the points to bring three, so how to choose what you should bring? My rule of thumb is that rather than looking for bigger numbers you should always look for unique capabilities.
An example in Yu Jing is not the Yan Huo. 48 points gets you a giant gun, decent stats, and nothing special whatsoever. It doesn’t have enough armour to make itself immune to small arms fire, it doesn’t have the ability to engage through smoke or against Mimetism-6 models, it doesn’t have any close range potency or mobility options, it can’t do anything special against hacking. It has good numbers but good numbers are not sufficient to justify its inclusion. This is the kind of piece I recommend avoiding when picking the centrepiece of your army.
As a mirror, consider again the humble Total Reaction HMG remote, available to all factions except Ariadna. This thing already provides a unique capability: full burst in ARO, making it a defensive and offensive piece equally. It has another unique function: It’s a remote, has two levels of unconsciousness, and can be repaired – making it extremely difficult to take out of the game. It’s only BS11 but a burst 4 HMG can brute force down the majority of overwatch pieces in the game if you’re willing to keep spending orders on it – buff it with an EVO hacker to give it marksmanship and repair it with an engineer if it gets unlucky and you’ll eventually dice that Kamau Sniper off the table through sheer weight of dice even if it takes extra order or two. All this and it clocks in at half the points of the Yan Huo.
(If there’s a theme in these articles it’s ‘always take a TR remote’)
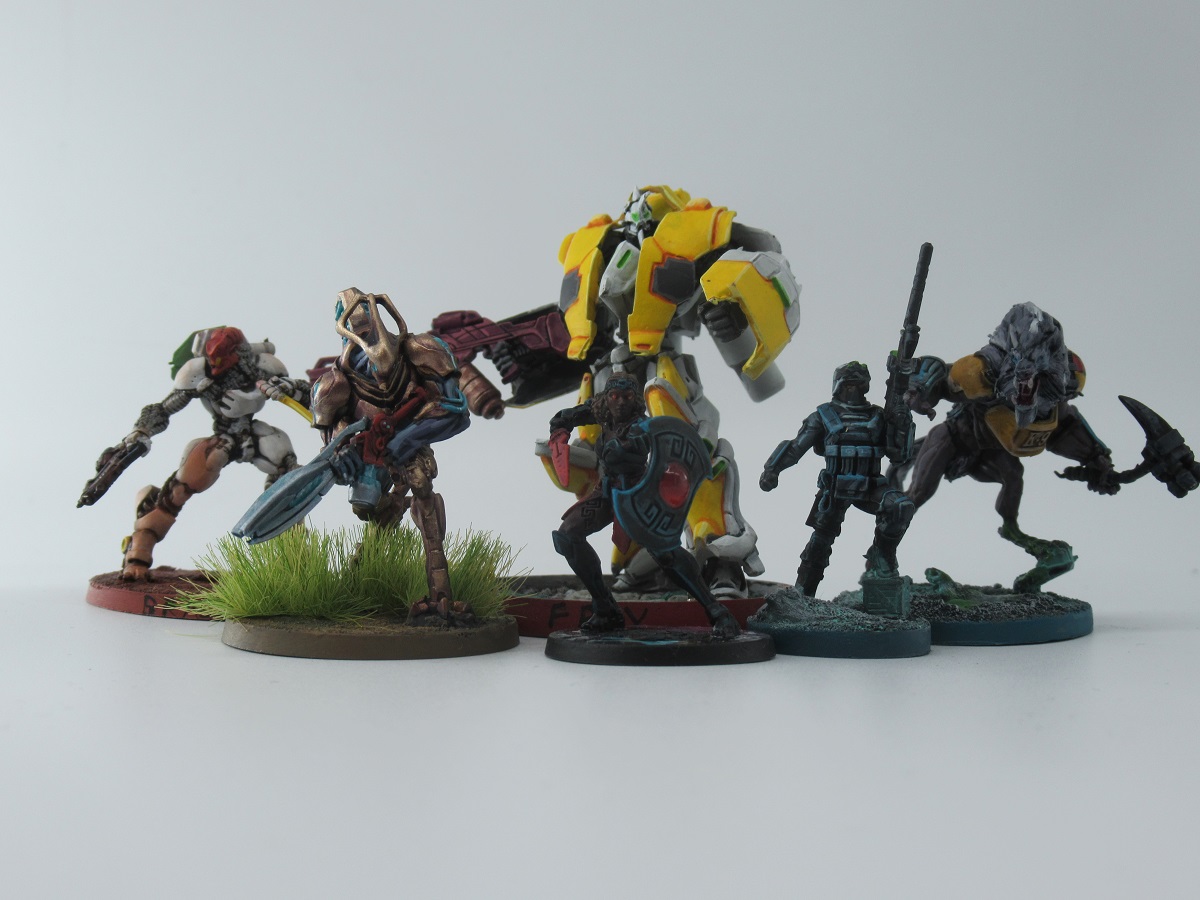
All the stellar examples of elite attack pieces tend to have some similar combination of unique capabilities. Here are some examples from a variety of factions. All of these are really good gunfighting platforms to begin with but come packaged with some additional capability that can blow a defense wide open:
Su Jian (Yu Jing): Unparalleled mobility and extreme resilience for its price. There’s practically nothing in the game that can move like the Su Jian does.
Charontid HMG MSV3 (Combined Army): Will carve through a defense that relies on camouflage like it’s not even there, comes packaged with free chain of command.
Jotum (PanOceania): Armour 10 BTS 9 means it’s immune to entire categories of weaponry. Did you know that if you buff it with Fairy Dust it’s immune to jammers?
Hector (Aleph): Brings two extra orders, a Firewall, a template weapon and grenades while being able to lead a full link team.
Equipe Mirage-5 (Ariadna): It is ludicrous what you can get done with smoke grenades in your opponent’s deployment zone.
Whenever you’re evaluating a luxury piece, consider it in comparison to A) Your faction’s generic light infantry and B) A TR remote. Even if the numbers are better consider it extremely skeptically if it doesn’t have a unique capability that doesn’t let it play a different game to the default options. A great attack piece will be able to penetrate a layered defense because its unique capabilities will let it cleave through multiple dangers at once. The Su Jian can cross the table in a third of the time of a light infantryman, find an angle around the hacking network with climbing plus, and shrug off a couple of chain rifle hits as it opens up on its prey. The Yan Huo will suppress the overwatch sniper and then shrug because there’s no way he can get past the hacker which is the second line of defense. Just like how I said an unlinked sniper, even a good one, doesn’t cut it for defense a single-role attack piece doesn’t cut it for offense.
Part Two: The Disposable Attack Piece
At the start of the game your opponent is at her most prepared. She’s set up a layered defense of mines, hackers, and overwatch guns that even your multi-role attack piece will struggle to get through. In these situations an essential tool to have in your army list is a disposable attack piece.
The key characteristics of a disposable attack piece are A) Low Price B) Delivery mechanism C) Asymmetrical Combat Ability. This is something that can be in your opponents backfield in 2-3 orders and trade up – something capable of assassinating a hacker, an obvious lieutenant or a fragile attack piece. This is where you place your bikers, your warbands, your drop troopers, your Infiltrating skirmishers. Something you can throw at your opponent like a grenade and not mind particularly if it dies.
It is always worth bringing a disposable attack piece of some kind no matter your list because you always run the risk of encountering a null defense – that is, a defense with nobody up on overwatch, relying entirely on hacking and mines to deter assaults. A disposable attack piece is also a great way to bait out any hidden deployment elements your opponent has – forcing a 32 point Noctifier out of concealment to shoot at a 5 point Shaolin Monk is a trade you should always be happy to have produced. Similarly, disposable attack pieces are fantastic for clearing out minefields or engaging midfield skirmishers.
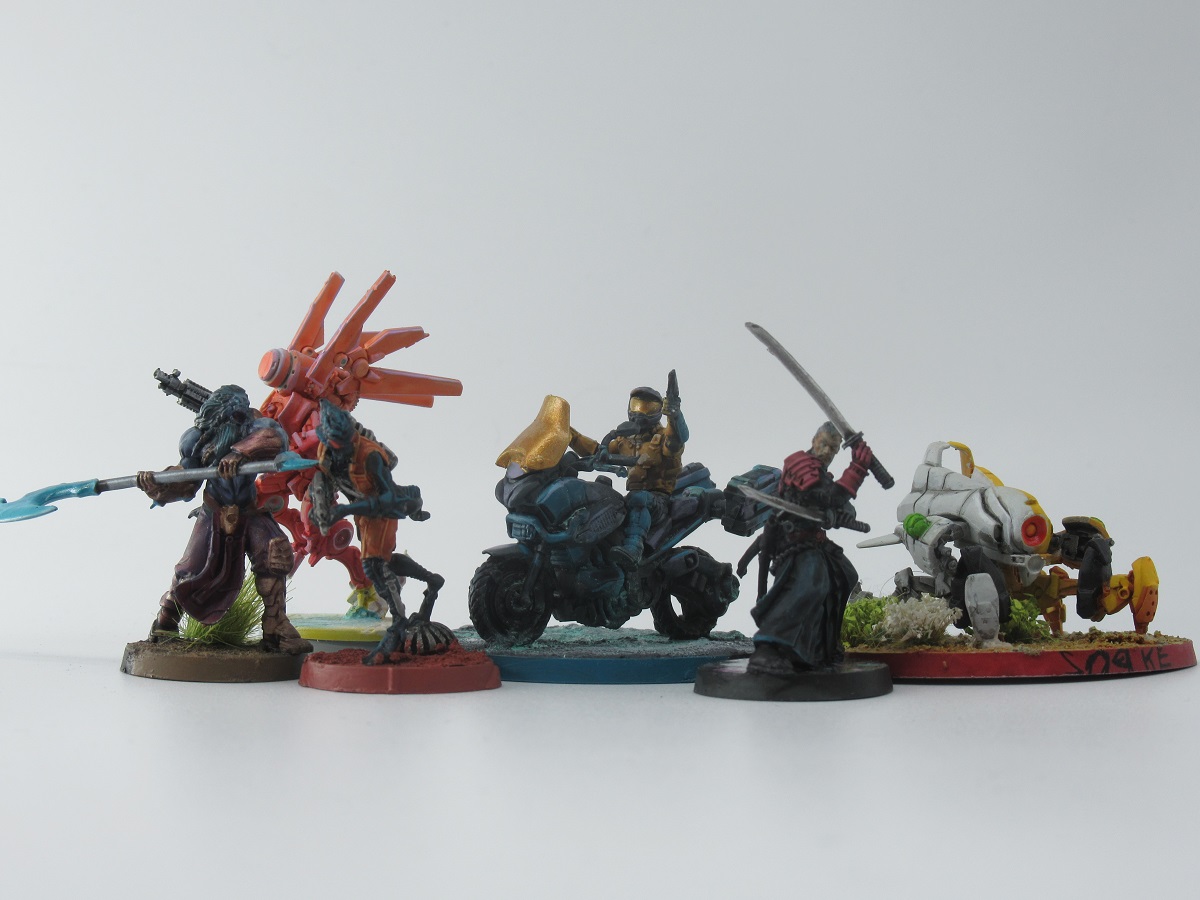
Standout platforms for this role include:
The Hungries (Combined Army): Four points gets you a grenade you can toss into your enemy’s neat defensive setup. These things are wonderful – lightning quick and almost impossible to be cost inefficient with.
Shaolin Monks (Yu Jing): The platonic ideal of a disposable warband, the Shaolin cost almost nothing, have smoke grenades, chain rifles and for a 1 point premium, good enough close combat to roundhouse kick a TAG.
Flamethrower Grunt (Ariadna): For 11 points you get to go to the casino and the prize is getting to flamethrower the enemy sniper at point blank range. Take a couple, odds are at least one will land.
Shotgun Bulleteer (PanOceania): These are a unique capability in PanO – the ability to engage quickly and at point blank range, and they have a tonne of synergy with TAG lists.
Yojimbo (JSA): One of the best warbands in the game, he can cross the table in no time at all, lay down CrazyKoalas and then hit a key target like a firetruck – and NWI means he can probably do it twice.
Hassassin Fidays (Haqqislam): It can be hard to recognize how ludicrously good the Impersonation rule is until you see it in action.
Every faction has some kind of Primary Attack Piece, but I find that a huge amount of the difference in how the various Sectorials play is their access to Disposable Attack Pieces – and one of the main draws of playing a Vanilla faction is having access to a huge and unpredictable range of these. A suspicious gap in an opponent’s list in Onyx Contact Force is likely to be a Noctifier, but that same gap in Vanilla Combined Army could be anything from a Cadmus to a Rasyat – and each potential threat vector puts additional pressure on your opponent’s deployment.
Part Three: Execution
Orders are an extremely precious resource in Infinity. Each turn you’ve got 10-15 to spend, and with them you need to score points, inflict damage, and secure your own position. The first principle is then be bold. The worst thing you can do is make a noncommittal attack, or spend orders retracing your steps. You have to be as decisive as possible, and that includes taking calculated risks – dodging through a mine gives the average Phys-13 Armour-1 piece around 75% odds of making it through, and if that risk results into you getting into your opponent’s backfield that can be a risk worth taking. Sometimes when you activate a piece, especially a disposable attack piece, you’re saying to yourself that this unit is not coming home – she’s going on a one way suicide attack mission to keep inflicting damage until she dies or runs out of orders. Sometimes you’ll do this with your primary attack piece. Be bold.
But not too bold. I played a Military Orders list for a while that included a Seraph and Mobility Armour Joan of Arc. On my first turn I’d send the Seraph in as a disposable attack piece – despite its 75 point cost it performs this role admirably, able to hurl the flamethower auxbot ahead of it to assassinate hackers, find angles across terrain with super jump, and blow through mines freely. But at the end of the attack run I’d always budget a few orders to withdraw it slightly and put it into suppressive fire before passing turn to my opponent. At this point, the Seraph would invariably die – but its death involved my opponent being forced to redeploy TAG-fighting weaponry to whatever ugly angle the Seraph had ended up holding and spend multiple orders chipping through three points of structure. When a piece ends on your opponent’s half of the table it is extremely vulnerable and extremely unlikely to survive the turn, but you can make them work for it. And if your attack kills three models and they have to spend four orders destroying your attack piece then their second turn is left with a tiny 3-8 orders, giving you immense momentum going into the next turn. In that list, I’d send in Joan on a turn two attack – again, she’s quick and deadly and capable of inflicting massive damage, and again ending her in a tricky position in suppressive fire represented another huge challenge to unpick that my opponent couldn’t afford to ignore.
The lessons here are be decisive in your attack and leave problems for your opponent. The best attacks transition seamlessly into the best defenses, keeping your opponent trapped in their deployment zone with ever dwindling resources as you claim midfield and the points therein.
Here are some specific techniques for different types of attack pieces:
Skirmisher Attacks
A Skirmisher here is defined as having Infiltration, Mines and a Marker State. Their chief advantage is being able to slip under the ideal rangebands of a big gun overwatch piece. Remember that total reaction remote I keep talking up? When it’s getting surprise shot (-3) from cover (-3) by a mimetism -3 target inside of 8′ it has ballistic skill of negative one. You can rush directly at an overwatch piece, daring them to choose between holding their ARO and sacrificing their rangebands or you firing an unopposed long distance shot at it. Careful when engaging powerful linked snipers because they’ll be immune to surprise shot and are usually pretty good shots with their pistols – those are targets you’re best off using a Mine Fork or direct template weapon against rather than fighting straight up.
The other advantage of Skirmishers is the Mine Fork. Say your opponent has a scary piece just around a corner. You can drop a mine around that corner, and then peek around the corner so you’re facing the mine and the enemy model at the same time. Now if they take an ARO they’re going to suffer an unopposed mine hit as well. If your opponent has deployed, say, an entire heavy infantry link team in a conga line then your skirmisher can likely kill them all over the course of a single turn using this technique.
When to withdraw: A combat group 2 skirmisher (i.e. one with 5 orders to spend) is likely going on a suicide mission. A skirmisher in CG1 should consider withdrawing early – skirmishers can be pricy – because move-drop mine is an efficient way to spend orders. End your turn re-entering camouflague if you just want to slow your opponent down, or in suppressive fire if you’re mimetism -6 and you’ve successfully assassinated any MSV/big gun attack pieces/warbands on that side of the table.
Warband Attacks
A warband here is defined as having good close combat skills, a direct template weapon, and ideally smoke grenades. They also come with some sort of speed booster to get them up the table if they’re not being observed, either an impetuous order or a motorbike or something. Warbands are ideally good at killing anything within 8 inches and they offer an enormous counterpunch against things like suppressive fire skirmishers – toss a smoke grenade around a corner off the impetuous order, spend one order moving into base to base contact, and then one order to kill the target. It’s always worth having some warbands on hand to clear your side of the table.
Warbands have guns but these guns are often much better for the threat of them than actually firing them. Chain rifles and flamethrowers get dodged 50% of the time and then armour saved often 50% of the time, meaning that firing one is a 25% odds kind of shot if your opponents declare dodge as their ARO. In that case you may be better off firing your own pistol to turn it into a face to face roll or keep walking to try to hit close combat. The exception of course being if you can catch 3+ models under a single template – that’s often worth firing the chain rifle for, but don’t be too surprised if it winds up doing nothing.
The ideal engagement for a warband is to throw a smoke grenade to block line of sight, walk into close combat, and then kill your opponent in CC. This is as close to a fixed outcome as you get in Infinity – there’s nothing as statistically certain in the game as a close combat expert fighting a non close combat expert, the math in Infinity changes dramatically with numbers over 20. However, this can be order intensive to set up, especially after you’ve cleared out the first smoke cloud of enemies and throwing another smoke grenade would require a speculative toss.
When to withdraw: Sometimes you won’t have quite enough orders to finish killing something – in which case the pro move is to walk into CC with an enemy primary attack piece and end turn. Close combat is the safest place for a lot of warbands to be when their turn is over, and if your opponent wants to spray bullets into that melee then any misses are going to be hitting their own model. Also remember that all warbands die instantly to MSV troops of any kind.
Drop Troop Attacks: A drop troop here is defined as something that has parachutist or combat jump. The first landing on them is very risky – 25% odds of winding up with a 30 point paperweight in your DZ is very nail biting. But landing one just right can let you engage a lot of opponents in their rear arcs which can be devastatingly advantageous. Consider bringing an EVO hacker to help guarantee that combat jump landing. You’re likely extremely fragile too so avoid models with template weapons like the plague – even forego cover to sweep out widely if it keeps you out of template range.
Drop troops are precision weapons. They usually don’t have enough gun to kill heavy pieces so you want to use them to prey upon the weak. Killing backfield cheerleaders, hackers, baggage remotes, or close-range encounters with TR remotes – things that can’t defend themselves. If there’s a big ARO piece consider fighting it with your long range guns to clear a landing zone for the drop troop. Most drop troops come equipped with weak, short range small arms – combis and shotguns mostly – but occasionally there’s a Spitfire or Red Fury option. These are actually worth a look, not for a turn one dive into your opponent’s DZ but for a turn 2-3 enfilade of a bunch of midfield pieces who are all facing your deployment zone.
Drop troops are great additions to combat group 2 – four orders is about the life expectancy of the average drop trooper. If you’ve paid out for a premium version it might make more sense in combat group 1. I’ll also point out that rooftops tend to be great places for drop troopers to land – you can fire at a variety of angles and then even end your turn prone atop one forcing your opponent into some sketchy climbing actions to try and dislodge them.
When to withdraw: Never. A drop troop fights until it dies, almost invariably – you’re in a target rich environment and there’s very rarely better things to spend orders on than a drop trooper who isn’t dead. I usually don’t even bother putting them in suppressive fire – the most defense I’ll have for a drop trooper is leaving it prone on a rooftop most of the time.
Heavy Infantry Attacks: Heavy Infantry is anything 2+ wounds and hackable. These pieces are exceptionally strong, tough, and well armed – but like a newly purchased car, you don’t want to scratch the paint. They’re pieces for when their counters have been cleared out – when the hacking net is down, when the mines are cleared, when there aren’t as many warbands clustered everywhere. You might even have them in a link, in which case you can count on them to reliably win any gunfight in the game.
If your opponent has a big hole in their defenses then you can absolutely just go ahead and attack, especially if your piece is quick. For anything that’s closing to your opponent’s side of the board, the Spitfire is the prince of weapons – ideal rangebands, great burst, able to hurt anything short of a TAG. If your piece has any mobility tricks like climbing+ or super jump keep a special eye out for angles to bypass any threats you don’t want to face or proceed into someone’s rear arc.
When to withdraw: Early. Sacrificing a 70 point Swiss Guard to kill three fusiliers and a flashbot is a disaster – and this more than anything else restricts how heavy infantry move around the table. Other attack pieces can be satisfied with dropping a mine and entering suppressive fire behind cover – a little three-order roadblock. Your premium pieces aren’t so disposable and they are best served ending up in the overwatch field of other friendly troopers. This goes quintuple for heavy infantry links – they’re the definition of eggs-in-one-basket. The exception is if you’re making it a specific part of your gameplan to have a key heavy infantry trooper die in order to slow your opponent down, but that’s usually only practical if the piece in question has some combination of A) High wounds/armour, B) Good at close combat and C) Can enter a marker state.
Part Four: Scoring
When you’re learning to play at a high level I honestly recommend not thinking about scoring as anything other than incidental. Just focus for a while on learning to kill your opponent. This will lose you a lot of games but it’ll build up a perception as to what your force is capable of when it goes all in on an attack – when that’s worthwhile and when that’s not. Once you’ve built up a feel for how the pieces engage each other and what’s realistic to expect from your attack runs then start to give more thought to how to score points.
To a certain degree you can play any mission like it’s Annihilation, and some factions (PanO) are way better at that than others (Haqqislam). But in practical terms, it’s very hard to table your opponent and often not worthwhile from a scoring perspective. Instead, each turn you want to figure out how to translate your offensive into board position.
Progressive Scoring Maps that reward you for controlling territory benefit a lot from creating roadblocks to stop your opponent getting out of their deployment zone, along with decisive attacks against exposed midfield pieces. Deployment Zone attacks should be focused at enemy gunfighters because they’re what threaten to negate your forwardly placed scoring pieces.
Box Control Maps that reward you for controlling a valuable asset or flipping consoles reward you for obtaining one turn’s worth of complete table dominance – at which point you can extract all the supplies from their boxes and stage a mass retreat into your deployment zone. If you don’t have enough firepower dominance to move the supplies unhindered it’s worth just focusing on degrading your opponent’s capability – playing these scenarios as Annihilation for two turns and then flipping all the objectives in a single turn 3 power play is absolutely valid.
Classified Missions that reward you for performing actions from the Highly Classified deck are all about surgical assassinations – killing a deadly attack piece is worth far less than an engineer snipe. After targeting the opponent’s specialist assets you can step back order spending on offensive actions and step up spending on performing classified objectives.
If you go all in on practising offense for a while you’ll learn when you don’t even need to bother scoring points and can instead just maximize damage for a turn – and you’ll also learn what kind of defenses you can’t get through. It’s the same principle as why a lot of new players in RTS games focus on cheesy rushes for the beginning stages – they’re learning what you can get away with, what you can punish, and what you have to respect.
Addendum: The Desperation Attack
It’s the top of turn 3. Your opponent will have one more turn after this and the game will end. Caution ceases to matter.
Grab your models and put them out in the open. Pick up your overwatch sniper link and hurl it across the table. Any command tokens you have left use them for co-ordinated orders to move move models even further. Stand everyone up in the open because unless there’s scoring involved in certain models being alive you don’t need them alive. Going all out on your final turn can be the difference between your opponent scoring a dramatic last turn objective flip or spending the turn caught in pointless gunfights with your exposed troopers.
Addendum 2: When To Tap The Brakes
If you’re in a full blood frenzy, killing everything, dice going completely your way, on the verge of tabling your opponent there should be a tiny little voice in your head that says: Hold up. If you’ve left your opponent with less than 75 points on the table they enter Retreat and Retreat is not your friend. When an opponent enters Retreat the game ends at the end of their turn regardless of how many rounds there are left to play – and if you somehow land such a haymaker blow that you kill them in turn one they can walk over, tap a single console or control one zone too many, you can find yourself with an embarrassing loss – especially if your gameplan revolves around doing damage for two turns and scoring everything on turn 3.
It’s rare to be in a situation where this becomes a concern especially in high level play, but if your opponent’s army is crippled just tap the brakes a bit. Instead feel free to set up some unfavourable trades if they stop your opponent from making even a minor play for score – this can be the difference between a major and a minor victory in a tournament.
Next Week: The VIRD
This concludes the Fundamentals of Offense! Offense is a lot more varied and complex than defense because there’s a lot of unique offensive capabilities and many one-of-a-kind threat profiles. While it’s worth thinking about the categories I’ve talked about here you’re often better served by focusing on the unique capabilities of each premium piece in isolation and what it brings to your gameplan. TAGs in abstract might be vulnerable to hacking, but a Szalamandra with Fairy Dust isn’t and that changes the way it approaches the battlefield and how you approach list building more generally.
Further, a lot of factions have unique limits on what they have access to – VIRD has nothing to fill the Warband role, O-12 has a shortage of Skirmishers, Ariadna lacks Heavy Infantry, and so on. Oftentimes these factions are forced to take substandard units so that they have a capability in those areas at all – nobody with access to all the factions would ever pick a Blackjack but Ariadna players often do simply because they have no choice, they need that function in their list. If you can’t fill a role, consider how you’re going to compensate for the gap in your army.
Next week I’m going to start with a deep dive into the ocean world of Varuna. The VIRD, a PanOceania sectorial, is one of the defining factions of Infinity and one I played at a competitive level for an extended period. It’s a sectorial I love, with incredible strengths and massive weaknesses – for brute force it’s the strongest army in the game, but being able to leverage that brute force can be surprisingly tricky.
Have any questions or feedback? Drop us a note in the comments below or email us at contact@goonhammer.com.
