
Back in January I wrote about my preparation for the IGL Satellite League. With the event now in the rearview, it’s time to talk about how things went.
Table of Contents
My Lists
For an earlier discussion of why I wanted to play White Company, general thoughts on the Sectorial, and mission analysis of the IGL Satellite event, see here.
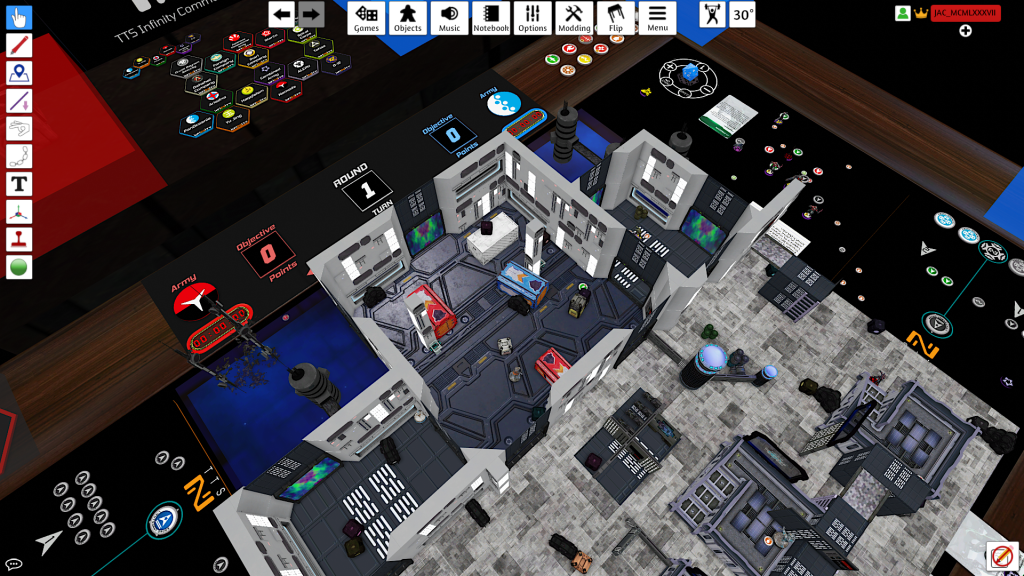
List 1: Frostbyte, Clighly Hassified
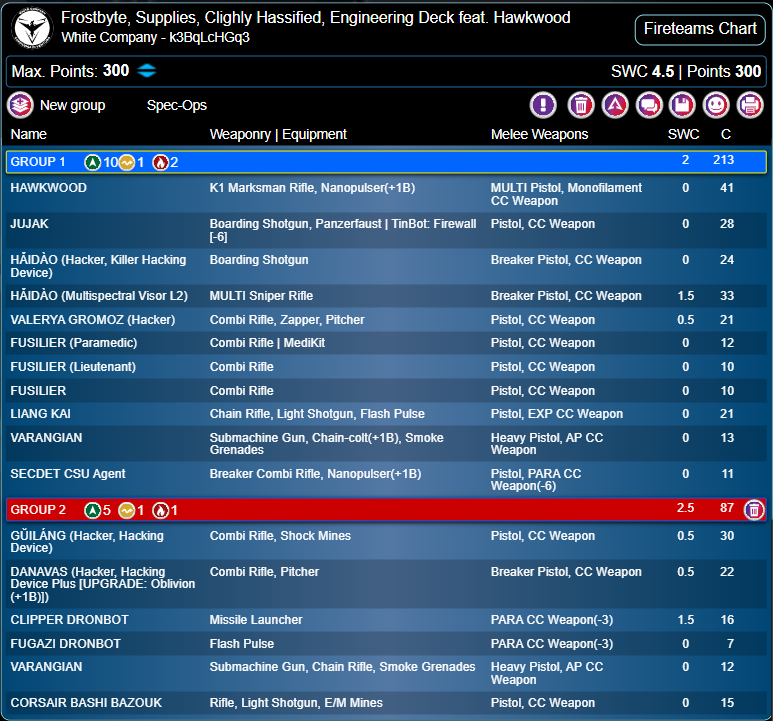
I knew I needed a list which could have HI, REM or TAG models to contest the scoring zone in Frostbyte, and since I could also expect to face such enemies in the midfield, it made sense for this list to include hacking and guided missile play, which of course is something White Co excel at. So I committed to the Clipper Dronbot, the Jujak Tinbot, which can combine with the Haidao KHD and/or Valerya to bolster their resilience in a hack-off, and to Hawkwood with his K1 – to deal directly with any high-ARM units. Varangians and Liang Kai are too much of a steal not to take, and give some much needed close combat punch, always a good alternative to deal with tough shooters. I rounded out the list with another Guilang hacker, to get places under Camouflage and score Objectives, and a Danavas to offer White Noise, provide more hacking, and an alternative source of pitchers. A Haidao sniper provides firepower to a defensive Core Fireteam at a reasonable price and gives me some smoke-shooting options and a way to deal with Mimetism-6.
This was also my Clighly Hassified list because massed hackers lets me choose hacking-centric objectives which are efficient, achievable – my opponent would struggle to scalpel out my 4 hackers the way they could 1-2 doctors or engineers – and still very useful in fighting the enemy. The dream would be to kill the enemy hackers in that mission, locking the opponent out of any such Objectives, but as we shall see my opponent had their own hacking strategy!
I figured the list could be used for both Supplies (I went with the other one) and Engineering Deck (where I did use it) due to the abundance of specialists, and still having midfield play options via the Guided missile, pitcher-enabled hacking, and Liang Kai.
I like that this list is Fireteam-flexible. I would end up employing a Jujak/Haidao KHD/Hawkwood Haris in one game, and big Core teams of a Jujak/Hawkwood/Valerya/Haidao/Haidao in two others. Where I think it fell down is that the hacking potential isn’t supported with any Guilang minelayers or Peacemakers, and despite the synergy White Company has in that area, hacking is still a contest, and as it happens I faced factions which can out-hack them. I also found, as with most Guided/hacking heavy lists, I was light on real direct firepower. The Haidao can be lost in ARO, and then you’re just down to Hawkwood, who is great, but a middleweight rather than a bulldozer.
List 2: Firefight, The Armory

As is my practice for The Armory, I just took my maximum close combat characters, and I thought that would work well for Firefight. A Tiger Soldier is a no-brainer for the latter, and I also really like a drop trooper in the Armory – players tend to focus on the room and that opens models up for back-shooting. Since I didn’t have them in the other list, I was strongly drawn to the Karhu, particularly the feuerbach who is probably the overall best 1W gunfighter in the game, taking into account his NCO, 6-2 Move and Climbing Plus. Concentrating on boosting my long range firepower (I was aware of the weaknesses of the other list) I went for a robust and straightforward pair of HMGs, an Orc and a Sierra Dronbot, with engineer support. This gave me a nice counterpoint to the other list, if I thought it was better suited to the map or matchup in Supplies/Engineering deck.
Ready, Set, Go
I was happy with my lists, although in retrospect I can also see the compromises I made in both, and could take some elements of each going forward. I did eventually manage to get two unranked games in, playing Firefight twice before the event began and Clighly Hassified before I had to play it for keeps. I won one, lost one at Firefight and pulled out a close win on CH, and at least got a bit of practice piloting these lists.
Game 1: Firefight
Pre-Game & Deployment
For my initial match, I drew against a Yu Jing opponent I didn’t know, who turned out to be from Montenegro. I love that the IGL gives you a chance to play against people from across the world you’d almost certainly never encounter otherwise. Now it was apparent from the start that this was an experienced player who took the game seriously, and unfortunately I lost the initiative roll he picked to go first, which is the undisputed right choice in Firefight. I don’t mean to sound overly negative, but in many match-ups I really think it is the first player’s game to lose. Although I was able to choose to deploy on what I think was the slightly stronger side, with some remote protected positions (chiefly Prone upstairs in complex buildings), I didn’t get much value out of forcing my opponent to deploy first, because of the nature of his list:

His initial deployment was again very good, and emphasised the strengths of the classic Yu Jing build. His Lt is one of the most secure and efficient in the game, his DZ is covered in disposable template, and all his valuable things are under Camouflage. I was fairly sure there was a Hac Tao HMG – perhaps the best of all Yu Jing’s various great NCO options, since my opponent did deploy something hidden, but wasn’t sure what his two reserve pieces (he spent a Command Token to hold two back). So my catastrophic errors at deployment were unforgivable. I focussed on my opponent’s Su Jian as the primary threat. It’s a terrifyingly mobile and resilient piece, and Duo’d up with a Tactical Awareness Zu Yong, as he had it, I knew it could cross the board and gut my vulnerable Lt and specialists. It was very exposed in its starting position, and I deployed my firepower (Karhu feuerbach) aggressively overwatching it. This was a wonderful use by my opponent of pressuring the second player with an aggressive close quarters attack piece, because (spoiler) that Hac Tao HMG would cut me up very easily where I’d tried to hold him off at range. I deployed most of my other stuff fairly hidden, with some limited AROs in my board half from my Orc HMG. In retrospect, I should have prioritised protecting my Lt in the most secure spot on the board, with Varangians and Shona, instead of my Karhu. My opponent’s reserves were a Beasthunter (which was deployed with options to attack into my Karhu, although I was protected by a mine) and Major Lunah. I compounded my errors by placing my TR bot further covering the Su Jian Duo – not even near my Engineer or his servant bot.
Round 1
My mistakes immediately came home to roost in my opponent’s opening plays. The Hac Tao, deployed centrally, was able to come out of hiding and attack my TR bot with its own Order. We both failed in the first FtF roll, but he tried again and put it down. He then re-camouflaged, acted again and put down my Karhu feuerbach. I felt an absolute rube to be suckered so completely. Neither gunfight was completely risk free for him but both were great opportunities. Due to the efficiency of NCO and Lt +1 Order, he’d only spent 1 Regular Order, and removed two of my key firepower pieces!
In retrospect his Su Jian’s aggressive deployment may have been a conscious bait, in which case I can only admit I was taken in. I can’t think why, calculating as I did there was a Hac Tao, I still put my firepower in those exposed ARO positions – clean against my principles. My opponent then committed his free Bashi Bazouk, laying an E/M mine to threaten my Orc HMG, and in a further disaster, forcing the issue with his light shotgun and knocking it out in one FtF roll. Bit unlucky there. The Bashi Bazouk traded for a decoy Fusilier as well in doing so.
My opponent was savvy enough about White Co to know that the Orc and Fusiliers were my only valid Lt options, so he then unleashed the Su Jian, achieving his Follow-Up classified while blowing past Liang Kai, who fortunately survived, and ending up 1 Order short of engaging (and therefore almost certainly killing) my Lt. I really should have deployed that Fireteam better against the known Bashi Bazouk threat. Rubbing it in, my opponent climbed Lunah atop some terrain and Super-Jumped thanks to the ITS mission rules, 2” up and down, allowing her to see and pick off my prone second-group Varangian. Finally his Beast Hunter revealed to try and loot a Panoply, but failed.
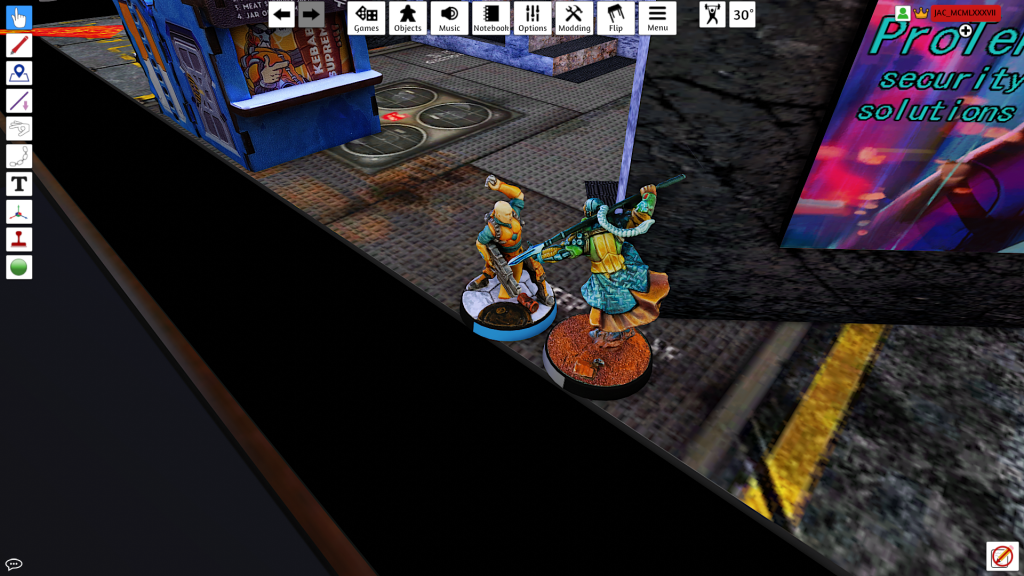
Phew. End of Turn 1 in the opening game of the tournament and I was fairly sure I’d lost. I was down 5 pieces including all 3 of my SWC guns starting on the table. I consolidated my combat groups, which left me with 1 Command Token remaining, with my Tiger Soldier on his own in Group 2. Essentially I’d committed all my tokens before spending a single Order. I need to review if this is a problem with my list, or if I should have played that differently. Between consolidating groups, reforming Fireteams and strategic use, there were just too many demands on those tokens in how I played. In any case, Liang Kai Berserked and killed the Zu Yong without being wounded himself, which was nice, but my opponent had already used that Duo as he intended, to deliver the Su Jian. I spent my first two Regular Orders trying to Paramedic my Karhu feuerbach, and failed the roll. Now the game was almost certainly lost as he was the only piece I had fit to remove Major Lunah in her long range ARO position, or the Long Ya. Triaging the situation, the one thing I knew I had to do was neutralise the Su Jian, because it was in my deployment zone, ready to kill my Lt and EVO hacker trivially easily. I sacrificed my own Bashi Bazouk to get an E/M mine down covering it – again, I could have played better and found a spot where I could get the mine into LoF, or carefully judged range, without exposing the Bashi to my opponent’s shotgun template. Then I used the 2-model Karhu/Beast Hunter Duo, moving out of my building, killing the enemy Beast Hunter (which unluckily took 2 FtF rolls) and finally threatening the Su Jian. My opponent correctly assessed that I had 1 Regular Order left, and a Su Jian can take 3 wounds in a single Order and still remain upright, thanks to the interplay of Remote Presence and No Wound Incapacitation. So he did nothing! Choosing to eat my multi rifle burst and not trigger the mine. I rolled 3 hits, but he only failed 1 save. Here I made a final error to polish the turd of my first turn. I spent the Beast Hunter’s irregular Order to break him from the Duo and lay an AP mine while tucking into cover. What I should have done was power him towards the Su Jian with his heavy flamethrower.
Round 2
My opponent was in an enviable position at the top of his Turn 2. He’d only lost his Zu Yong from his whole force, so his second turn would have all the Order punch of his first. The only critical rolls were at the outset. Major Lunah engaged the Karhu Paramedic in a genuine risk – her 2x 13s with a viral sniper, vs my 1x 13 with a blitzen – but his luck held true and the Karhu melted. Major Lunah then tried and failed to discover/shoot both the E/M mine, and the AP mine I’d wasted an Order placing. So he had to risk a (normal) Dodge on the Su Jian against the E/M mine. He needed an 11 and rolled … an 11. That was the last chance I really had to stay in the fight. Although he might still have got either his Hac Tao or a Shaolin past Liang Kai and killed my Lt that turn, once the mine was gone, the Su Jian swept up the Lt and EVO in two Orders. This left my opponent with more Specialists killed, more Lts killed, and more points killed, while I had precious little chance of evening up any of those scores. The only thing stopping him inflicting more casualties was how few targets were left. He scored a couple Panoplies and consolidated his position.
My second turn, being in Loss of Lieutenant, loss of the game, and a state of dejection, I basically played for revenge. Liang Kai managed to score my Net-Undermine classified; I sacrificed my engineer to a long-range Hac Tao ARO (hey, I was behind on specialists anyway) to catch Major Lunah at close range out of cover and burst her Unconscious; and most gloriously, I jumped my Beast Hunter through a window to face his Su Jian and burn it straight off the table with his heavy flamethrower. The Beast Hunter even survived the return template! Revenge is sweet, but it clearly wouldn’t change the outcome.
Round 3
My opponent, in his third and final turn, moved his Guilang FO up the table and achieved his Rescue classified on Major Lunah’s body, thus achieving a bonus OP (for it being in my table half) and ensuring he would achieve 10OP without needing to hit his third classified objective or secure the HVT. A lovely bit of play there, and it made my petty gesture of downing Major Lunah look very counterproductive. He threw a couple Kuang Shi forward and lost 1 or 2 to Shona and her Varangian buddy, but again that made no difference. Finally he just secured his position. There was no way I would have the Orders, position or firepower to attack his remaining specialist (the Guilang FO), which still wouldn’t have given me the edge there, or his secure Camouflaged Lt, or the Hac Tao which was his only high-points model remaining.
So my third turn was a damp squib. Down to 6 Orders, I tried to fight a Shaolin with Impetuous Liang Kai (which is just a toss-up) but lost the roll and died. That meant in order to secure the HVT, since my other classifieds were out of reach, I had to commit my Tiger Soldier there. Frankly my options of trying him against the Lt or Guilang FO wouldn’t have gained me anything – even if it had gone perfectly, I could only have denied some OP to my opponent, not scored any myself, and there was no way the scores would be close. So the ‘correct’ answer for tournament scoring was to try and get the point for securing the HVT, which the Tiger easily did, avenging Liang Kai on the monk in order to do so.
Summary
The game ended in a 10-2 defeat to Yu Jing, I had 83VP remaining to my opponent’s 158VP. This was a comprehensive defeat, and honestly I lost in my deployment and my opponent’s Turn 1.
I was very impressed with both his play and his list. Indeed I felt that my list style of mid-point models formed in Fireteams, with no marker states, was vastly inferior to his archetypal vanilla Yu Jing force, where everything was either hyper resilient (Hac Tao, Su Jian), entirely disposable (Kuang Shi, Monks) or could simply hide in Camouflage (Lunah, Beast Hunter, Guilang, Long Ya, Dao Fei). I can’t say that I would have done nearly as well going first against him as he did against me. But I certainly made it easier by exposing my long range guns to his. Even if I had not, I could have been rolled by that Su Jian, but that would at least have exposed my opponent to counter-attack and made him use more Orders. As with all crushing defeats, I hope I’ve at least learned something from the experience. This is also a good example of why it’s nice to play in the IGL – the field is strong and you constantly encounter players who you’ve never seen that can be considered experts.
Game 2: Clighly Hassified
Pre-Game & Deployment
So having been smashed in the first game, I drew against vanilla Combined Army in the second. My opponent was from Australia, and was fortunately free during the day so the time difference was manageable. He proved to be a nice guy and was clearly an experienced player.
This custom mission features a super interesting choice by both players before the start – you get to flat out choose two classified objectives, which mesh with your opponent’s to form the ‘flop’ of 4 shared objectives, just as in the standard ITS Highly Classified mission. You then each randomly generate a personal, secret classified, which can’t duplicate any of the shared ones, but is worth a whopping 3OP on its own. There’s clearly some depth in picking objectives that aren’t just convenient for you, but which can be denied to your opponent. As it happens, I picked HVT Espionage (hacker must make a WIP-3 roll within ZoC of the HVT), my opponent picked Telemetry (forward observe or Spotlight an enemy) and we both picked Follow-Up (medium or heavy infantry must make a WIP roll within ZoC of the HVT. That meant that Follow-Up became the ‘red deck’ version, which actually isn’t much harder – just imposes a -3 to the WIP roll – and was worth 2OP instead of 1. I also drew Predator as my personal classified objective.
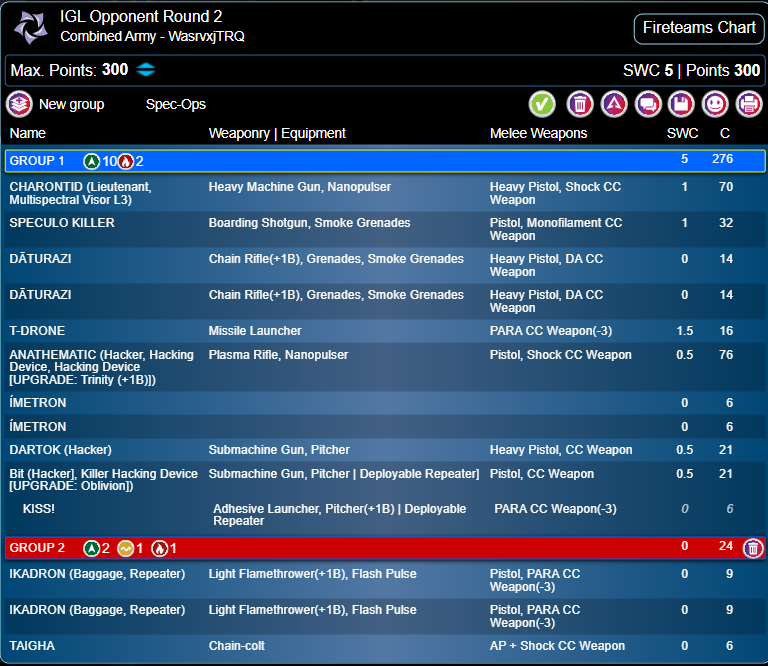
Now I won the Lt roll and chose to go first, reasoning that my opponent was likely to have brought the full might of Combined Army hacking capability, and therefore I would likely get all my vital hackers, except maybe the Guilang under its camouflage marker, wiped out if I risked going second. I therefore had to deploy relatively conservatively, with my HVT on my extreme right, holding Liang Kai back as my reserve. My opponent then deployed the usual spread of CA cheap defensive troops and warbands, notably including a Dartok, Bit & Kiss, and a missile bot. This would be a hacking heavy game. He had a Charontid HMG right in the back corner and obviously had an Anathematic in Hidden Deployment. It was clear from the Lt roll that one of these would be his Lt. His HVT was on his left, so basically along the same board edge as mine, although slightly more central. Ultimately, I put Liang Kai down on that flank to threaten a run at his Charontid and contest that HVT-area which I could see would be critical. My opponent placed his reserve, a Speculo in Impersonation, prone on a roof in my table half.
Round 1
First turn was a real choice as to whether to go about locking in objectives or trying to deal damage. Ultimately I was nudged to the former because these CA lists excel at not really providing targets. The only route to real offensive progress I could see would be to drop Pitchers with Valerya (which would either be long shots or require bringing my Core fireteam forward from their defensive position) and try to Isolate the Charontid. Potentially high reward as it was a possible Lt, but dropping Pitchers right into the enemy table half is a double edged sword when that horrible Anathematic is waiting in the wings, ready to use it against you in the next turn. So I simply spent some of my small-group Orders trading a Varangian for the Speculo, killing it with Berserk after being fairly lucky on two consecutive Discover rolls (although I was within 8” and out of cover, so couldn’t have a better chance). Not particularly fruitful but I had one eye on my Predator classified. Locking in 3OP, without having to gamble on Securing the HVT while going first, seemed a good idea to me. That freed up my Haris of Hawkwood, Jujak Tinbot and Haidao Killer Hacker to run up the table, the Haidao knocked out Bit with Trinity, and managed to achieve Follow-Up.
With my final Orders, in the small group, I managed to land a Pitcher with the Danavas, and Spotlight an Ikadron for Telemetry. So not a devastating turn, and my opponent had a powerful chance to counter-attack, but I removed 2 useful models and achieved 2 of the 3 classifieds.
My opponent started his turn by revealing his Anathematic, surprise surprise. That did confirm the Charontid was his Lt I suppose, otherwise he would have been in Loss. This fearsome monster immediately obliterated my Haidao – I obviously overestimated the protection afforded by Firewall-6. Doesn’t do much good when your opponent is still rolling 13s, and you don’t have any of your own BTS to stack with the damage reduction. There was a scrappy bit of play as it tried to kill the Jujak, who survived to Guts Roll into cover, and Liang Kai dodged close enough to threaten melee. I had thought that my Haidao MSV2 sniper, which was constraining the Anathematic’s forward movement, was also pinning down the Charontid at extreme range, but my opponent saw a good line where he could shimmy the Charontid prone to gain line of fire to Liang Kai without provoking the sniper shot. The mad monk was promptly gunned down. However my opponent wasn’t overly supplied with orders and this was more or less his turn. I’d lost a couple important models but still had the lead in Objectives. The problem was this giant, Mimetism-6, uber-hacker, objective-achieving machine sitting in the midfield controlling the area between the two HVTs. I can’t overstate how good a tool the Anathematic is for achieving all 3 of the shared classified objectives we had. You just can’t stop it in the Reactive Turn, because it has a marker state and tip-top stats in all areas, and 2 Wounds + NWI.
Round 2
So my immediate priority was to neutralise that Anathematic. I thought I had a good method – Pitchers went down from Valerya, no problem, time to use the Danavas’ Oblivion+1 Burst and Isolate this alien. I was rolling 3x 15s vs his 1x 16 for Trinity. Well, he rolled a good number, I didn’t, and the Danavas went down Unconscious. This was now a huge problem, because the Anathematic was now in my hacking area via my own Repeaters, and Firewall be damned, would easily eradicate Valerya, and the Guilang if I chose to reveal it, in its next Active turn. So I decided to risk Valerya on the same Oblivion attempt (2x 14s vs 1x 16 now). Failed and went unconscious. Wangled around my fireteam, shot a Daturazi that had moved forward Impetuously, paramedic’d Valerya, tried it again. Went down unconscious again. Well shit. The situation looked desperate and I finally revealed my Guilang to try a fourth time (2x 14s vs 1x 13, thanks to Surprise Attack). This time, I was successful and the beast was Isolated. But this debacle had absorbed my whole turn and I was down 2 of my own valuable hackers. I hadn’t been able to achieve the remaining shared objective or finish my own classified, and my Guilang was now my only conscious piece that could score the former. I hadn’t even had an order to spare to missile that targeted Ikadron!

My opponent’s first order of his second turn, quite sensibly, was to try and reset his Anathematic on a 7. Thankfully he failed. There then followed a dance of moving in his Ikadron and Taigha to hedge in my remaining options to score on his HVT, and he moved the Charontid into position and into suppression. Just as I was feeling that the turn had been manageable, he attempted to Spotlight my Jujak, with its Firewall-6, with his Dartok. Not a great chance, rolling for a single 7 against my 13, but unfortunately for me he crit on his second attempt, and promptly knocked the Jujak out with a missile. His Taigha moved further up and got Targeted by my Guilang.

Round 3
My Turn 3, I wanted to nab another melee kill for Predator, and to use the Guilang for HVT: Espionage. Even more, I needed to try and constrain my opponent from scoring all his objectives and pipping me at the post! I was running quite low on Orders, and had 2 split off in my small group, thinking I would use them on missiling the Targeted Ikadron and Taigha. I then missed both missile shots – yes, that is a 1/100 chance. While I was cursing my luck at the time, this was actually a blessing, because that Taigha was actually my chance to score another melee kill. I moved Hawkwood into the midfield, and by engaging the suppressing Charontid over 16”, had a slightly advantage in the FtF rolls. I was able to kill it in 2 Orders (my opponent used Mnemonica to make the Dartok his new Lt) and that enabled Hawkwood to close in on the Taigha, failing to down it with his pistol (I didn’t want to risk killing it entirely with shooting) and then dispatch it with his monofilament blade to lock in Predator. What a hero. Finally I considered moving my Guilang and simply rolling for HVT Espionage, although it was covered by an Ikadron’s Repeater and thus would have given the Dartok a free roll against me, on 19s for Trinity thanks to its Mnemonica-enhanced WIP. That would have at least been a chance (on 11s) to lock in the last classified. I rejected this risk because I thought the Guilang could contest the Anathematic’s Reset, which would be a vital roll. In retrospect, that was a mistake….
Because in his first move of his third and final turn, my opponent just used the Dartok’s Lt Order to roll Trinity against my Guilang on 19s, predictably wiping him out. D’oh! I should have risked him for an Objective Point when I had the chance. This let the Anathematic roll normally on a 7 to Reset, which it promptly succeeded. This was really a moment of high drama – my opponent had just enough orders to move the Anathematic toward my HVT, achieve both remaining classifieds (barring repeated failed WIP rolls, which is unlikely on a WIP16 model), which would then leave him Securing the HVT for a 10-7 victory! The only model I had with a chance to stop it would be the Haidao MSV2 sniper. My opponent calculated his remaining orders and chose to cross the Haidao’s firelane and dodge. He could have re-Camouflaged first, then moved across in safety, but that would have meant passing both objective rolls (on a 16 and a 13) first time in order to win. Sensibly, he elected to try and save an order to ensure against failing those rolls. He could also have crossed the firelane without dodging, which would have certainly got him past my line of fire and into position, but would mean giving me free shots and just gambling he wouldn’t be killed in one order by my B2 ARO. I think he made a reasonable decision, but it didn’t work out for him. He moved and my ARO beat his dodge, he passed his ARM saves but that meant he had to suffer a further FtF roll as he moved again toward the HVT. This time, I rolled exceptionally well – a crit and a hit – and his Anathematic went down. It was the only piece in any kind of position to score, so that was that.
Summary
This nail-biting finish left me with a 9-1 victory, with 142VP remaining to my opponent’s 67VP. But that is deceptive, I could easily have lost right up until the last turn. I am in awe of just how good a tool the Anathematic is in that sort of mission. I think I squandered a couple of tools in how I tried to deal with the enemy threat, and really was lucky to get away with it! I should certainly be more careful of top-tier hacking threats in the future (spoiler – this would come up again during the tournament).
Game 3: The Armory
Pre-Game & Deployment
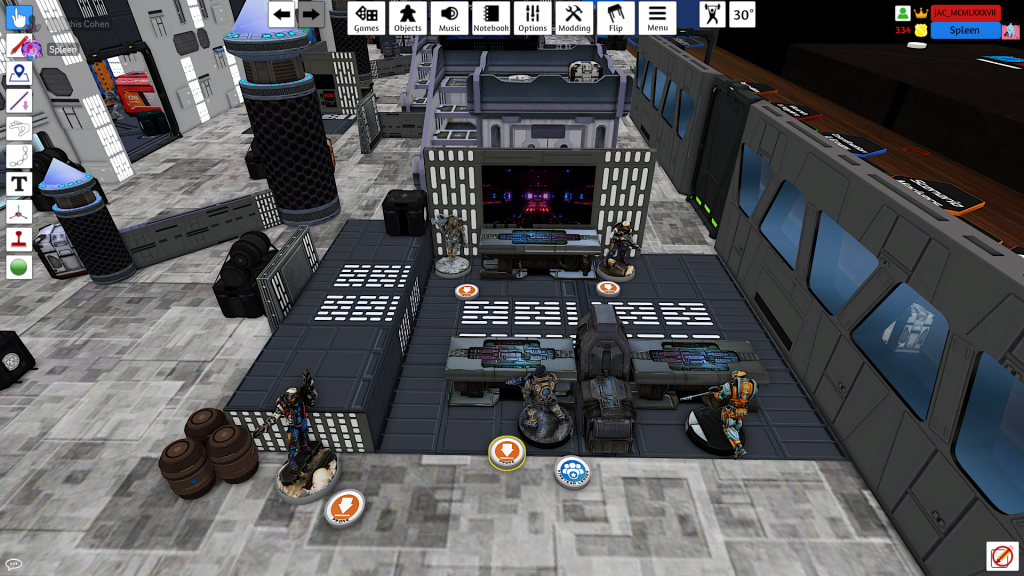
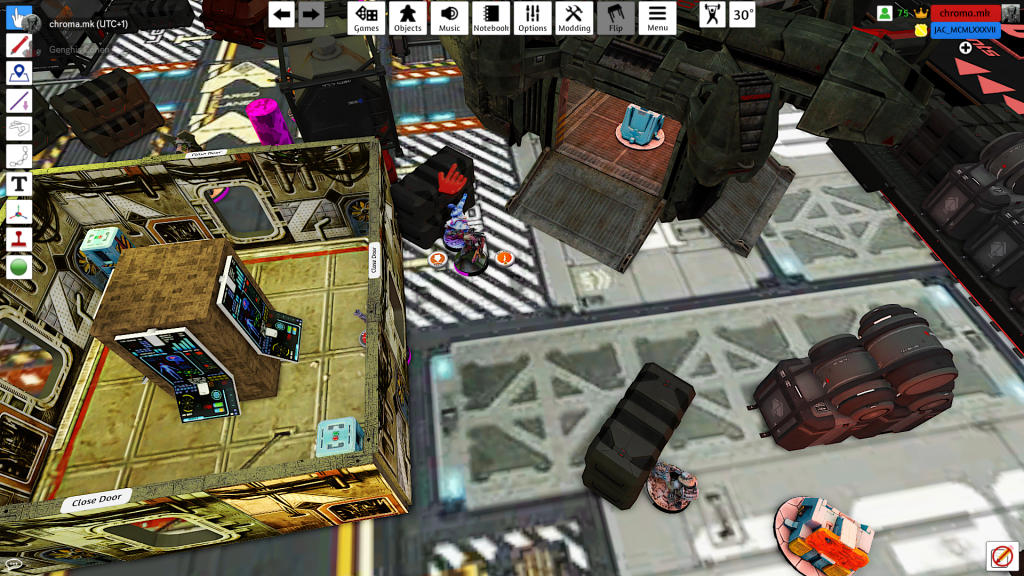
For my third game, I drew against Combined Army again, played by a very nice German chap. We have played against each other before at some point, but neither of us could remember the details clearly. Vanilla CA are of course a formidable faction, but to be honest I am happier facing them in the Armory than in some other missions. I think my White Co list is in a decent place to deal with their excellent cheap warbands, and while they do have some scary Silhouette 2 threats like Nourkias, I think in a lot of their builds they use stuff that can’t actually fit inside the Objective Room, making the game a bit simpler. The table here was apparently quite dense but had a few cheeky long lanes of fire crossing it.
I drew Rescue and Capture as my classifieds, which are both scored at the end of the game, so I mentally put them to one side. I won the Lt roll on a crit (although my opponent failed his roll anyway) and chose to go second. I considered picking deployment and letting him make the hard call, but frankly it’s just too strong an advantage for scoring in this mission. My only fear was being rolled by a Speculo and/or pitchers and guided missiles, so I chose to reserve my Beasthunter Minelayer, without properly thinking it through and realising his reserve pieces would still go down after mine!
I deployed the bulk of my forces on the right flank, with my HVT on the extreme right. Since I was going second I changed up my Fireteam plan, and put both Karhu, Shona, Liang Kai, and eventually the Beasthunter, into one big Core team. I would want Sixth Sense if the enemy came knocking. My Orc & Fusiliers Haris team was on the extrem right in a train carriage, with a Varangian to protect them. The Beathunter’s mine was also placed to cover my Lt and decoy. My other Varangian was in the centre, ready to Impetuous towards the Armory behind total cover, and over on the left I just had my engineer, EVO and TR bot scattered around.
Unfortunately I didn’t get a copy of my opponent’s list in this Round. He surprised me a bit with what he put down. He had a fairly usual pair of Taighas, pair of Daturazi, Imetrons, a Libertos Minelayer, one Ikadron, 2 flash pulse bots, a missile bot, tachimoto Sensor bot, an HMG TR bot, and an Anathematic that was clearly the Lt hacker version (my 4th CA opponent in a row to use it). Then he had a Caliban engineer, which was betrayed despite its marker state by its 2 servant bots – a very nice choice for this mission and to support the rest of his list. More unusually, he had Kerr-Nau, a plasma rifle killer hacker with White Noise, who was his only piece with pitchers. No Speculo and no Bit & Kiss! How refreshing.
Round 1
Starting his first turn, and docked 2 Orders, my opponent didn’t have great options to alpha strike me, which I think of as the correct play in the Armory. He took some Impetuous moves and then walked on a Fraacta drop troop with spitfire, on my right. While this is a nifty unit with its 2W, and he was near attacking into my Lt, I don’t think it was the best possible use. Coming down the board edge, he engaged a Burst 2 fusilier combi rifle within 8″ while also eating a mine, which cost him 1W to no result, then on the second FtF roll I crit and he went down. Clearly I was a bit lucky, but to be honest the fusilier he was fighting first wasn’t the Lt, and even if he’d been successful, to engage the Lt he would have had to tank a B2 flamethrower from the Beasthunter. The rest of his turn was spent moving up into the Armory, gathering some other units immediately behind it, and gathering two items from the Panoplies with his Libertos and a Taigha, which were the 2 models that ended the turn inside.
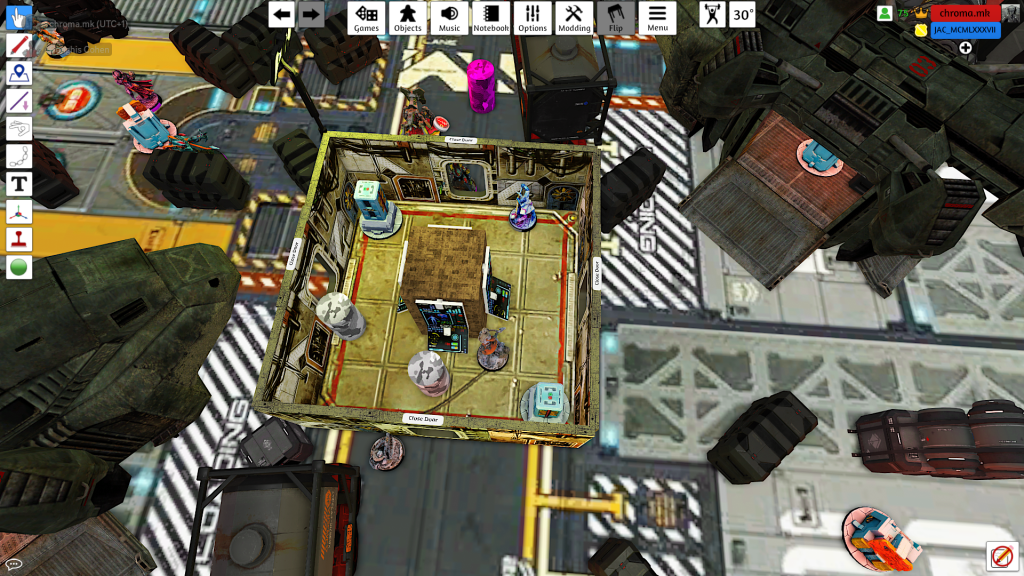
With my Order pool untouched for my Turn 1, and indeed a bonus Order from my EVO bot, I felt that I had a lot of options. Spending Orders freely, I swung my big Core into action, moving once then using my sweet B4 MSV1 feuerbach to kill a Daturazi and Taigha with successive Orders as the team worked forward. That brought me into a position where the Karhu multi rifle could see into the Armory and take over. I failed the first attempt to kill the Libertos and Taigha, got the Libertos on the second Order but it laid a mine, then advanced again while Discovering the mine, then again while shooting it. At this point the Taigha dodged back into LoF and threatened the Fireteam with its chain-colt. So I dipped over to group 2, brought the TR bot over into the centre and gunned it down. This left the Armory empty, my opponent had taken some cheap casualties and I could definitely score for the Round.
But what I really wanted to do was try and flamethrower the Caliban, a Daturazi and the sensor bot which were gathered behind the Armory. I’m a man of simple pleasures. This bit of optimistic overstretch meant I moved the Fireteam again, fought and killed his free turret with my Karhu multi rifle, then moved right up to the Armory while bringing my Beasthunter into LoF of all 3. It did not go well. The Daturazi dodged, the Caliban dodged into melee with the Beasthunter, the Sensor bot missed its shot back but tanked both heavy flamethrower hits to the face, and the Beathunter was Spotlit through a repeater! Compounding my silly play, I decided it would be efficient to use the Beasthunter’s Irregular Order to fight the Caliban and see what happened. I was on 21 to his 23, so I should have checked before trying this. I also forgot about Protheion. So the Beasthunter took a d-charge to the face and the Caliban became a 3W model and a major problem. To cap it off, since the Beasthunter was the Fireteam leader when I spent its Irregular Order, I’d broken the Fireteam anyway.
With my final Orders, I moved Liang Kai into the Armory and shotgunned the Sensor bot to death, but he got Spotlit in the process. I moved Shona to hide by the side of the Armory, and both Karhu to have limited overwatch from some cover nearby. This was a rather weak move and position, because clearly Liang Kai was going to get missiled and the team would instantly break. But I still spent my last Order moving my Varangian up behind the Armory in the centre, instead of trying to Reset. I figured that if I did the latter, it wasn’t guaranteed and would give that lurking Daturazi a chance to Dodge back into the Armory. It wouldn’t out-score Liang Kai but it would then be in position to Impetuous template a lot more stuff. I used my last Group 2 Orders to move my Varangian into position to help oppose the Caliban.
Round 2
My opponent was down a lot of models but had plenty of options left as we started Round 2. He chose not to Impetuous, and blew up Liang Kai with a missile, breaking my Fireteam. He then brought his TR bot into the centre, in a mirror of my move earlier, and attacked the Karhu multi rifle, which thankfully has a Blitzen. It wasn’t the ideal attack piece since Karhu are superiority gunfighters with MSV1 and Mimetism-3. He was on 4x 8s to my 1x 13, and I was very lucky, beating him in 2 successive FtF rolls and immobilising/isolating him on the second one. Fortunate, as I was out of Blitzen ammunition!
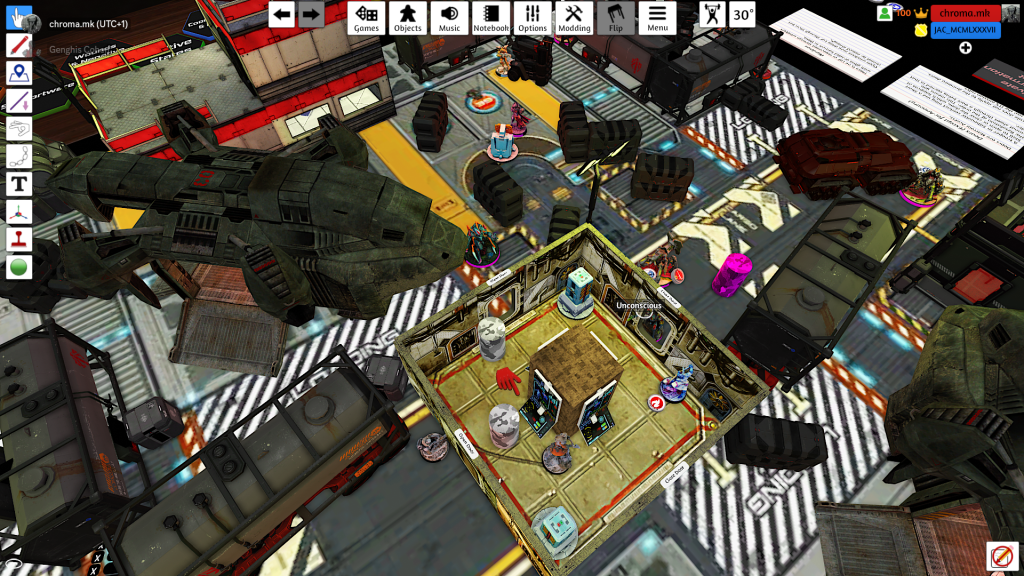
He then used his Daturazi to charge out, taking 3 templates from Shona and both Varangians, but laying his own B2 chain rifle over both my Karhu. The feuerbach dodged successfully, the paramedic failed and died, and the Dat went down too. The Caliban peeked out and downed my group 2 Varangian, passing its save against the template. Then my opponent took a melee coin flip. He moved out and engaged Shona. This entailed taking unopposed shots from my TR bot, which could just see him past the Armory as he rounded cover. We agreed that, hitting on 11s, it was very unlikely to do the necessary 3W to him. The fight would be decided by the two melee monsters, with his d-charge against my Dam18 AP+EXP weapon. We were both on 23, straight up…and I crit, the Caliban took all 4 wounds and died immediately, we didn’t even roll for the TR bot shots. Shona Carano, a hero of humanity. My opponent spent his final Orders coordinating move-moves, getting his Anathematic into overwatch of the far side of the Armory and an Ikadron just outside covering the room.
Beginning my second turn, I did rather feel the game was mine to win. I can’t overstate how much that is due to the result of the even melee duel between the Caliban and Shona. If the vile alien had won, and assuming he didn’t take 3 wounds from my TR bot during the Order, he would have gone back up to 3W with Protheion, and would have been a nightmare to deal with in the Armory. As it was, I could Impetuous move my Varangian into the Armory and throw smoke against the Anathematic’s ARO – again something of a coin flip, but I felt worth the risk, and in fact I won the FtF and screened the Anathematic out.
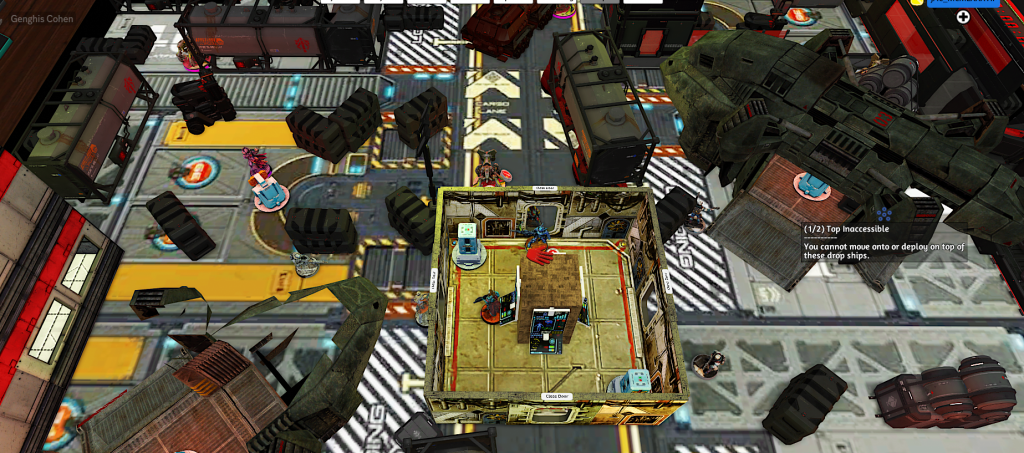
I then walked on my Tiger Soldier spitfire on the left flank, just outside the enemy DZ. I’d overestimated the distance to his flash pulse bot, so got Targeted, but I was ok with that. I was able to engage and destroy his missile bot with my next Order, and then shoot the Ikadron, which was covering the Armory with flamethrowers and its repeater, in the back. This gave me freedom of manoeuvre in the Armory, so I brought in Shona, she and the Varangian both looted the Panoplies, and finally my Karhu feuerbach nipped in, laid 2 AP mines, looted as well (which put me in the lead for that objective) and nipped out again to hide behind the room. So I scored again for Round 2, thanks to Shona and the Varangian.
Round 3
At the start of Round 3, my opponent pushed his Anathematic, felling the Tiger Soldier, then the Varangian, then Shona in a hail of plasma fire, while being wounded by AP mines. This let Kerr-Nau advance into the Armory, although I think he lacked the Orders to loot a Panoply.
I was left with surprisingly little to hand to both secure the room a third time, and either complete classifieds or Secure the HVT. I used the Karhu feuerbach to finish off the wounded Anathematic, while moving into ZoC of his HVT. I then turned to my Orc and Fusiliers. They booked it across the table, felling the Isolated TR bot en route to avoid the risk of it regaining sentience and making things difficult. My plan was to both hold the room, and perform Capture on one of the Unconscious CA models using the Orc. I ended up inside the Armory, exchanging pistol shots with Kerr-Nau, and being wounded by the Libertos’ original mine, which I’d avoided until now. So in the final Order of the game, it was Kerr-Nau and my wounded Orc standing in the Armory. I wanted to spend one more Order to fight him, and move into contact with a downed Ikadron for my second classified. Knowing I had a 9-1 victory (my opponent having achieved one classified, Telemetry, earlier) I still decided to risk it to make the 10. If I lost and went down, it wasn’t quite a matter of losing the game, but it would become a much narrower 5-4 win (since my opponent would hold the Armory for Round 3 and the end of the game). I do not support any serious competitive player doing what I did – the ‘correct’ answer is to rest there – but I felt that after the Caliban-Shona heroics it was unsporting to just let things go. I would purge the Armory of aliens or die trying. The FtF dice flew and my Orc took a plasma hit to the face . . . but saved both rolls.
Summary
Phew! Finished as a 10-1 victory to White Company, with 156 VP left to my opponent’s perhaps 26? This was a very fun game, a real slaughter as any Objective Room mission tends to be, and I have to admit how lucky I was at several key rolls, which would have sent things going the other way. I think my opponent was unwise to throw away his drop troop so quickly, although if he had been particularly lucky he could have put me into Loss of Lieutenant early on. Equally, I pushed forward maybe a tad too aggressively in my Turn 1, hoping to deal crippling casualties with my Beasthunter in a way that proved unsuccessful. If I’d lost both Karhu, rather than just 1, in the alien counterattack, and/or if the Caliban had not lost his fateful duel with Shona, the game would have been very close indeed.
To be continued…
That left me on 1 loss and 2 wins, so I could still hope to place somewhere near the top if everything went perfectly. Join us next time when I will walk through the latter 3 games of the tournament.
