
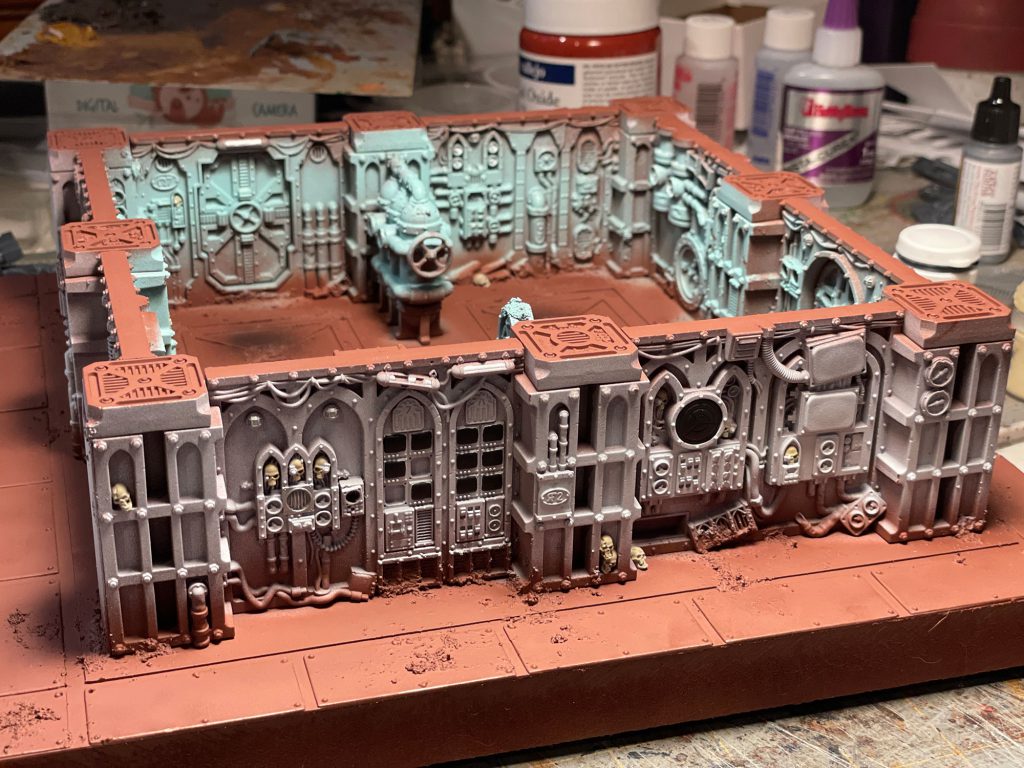
The new Kill Team Into the Dark boxed set is up for preorder today and inside is one of the most ambitious new terrain kits we’ve yet seen from Games Workshop. The Gallowdark terrain is a set of walls and debris used to model the interior of a space hulk and create cramped battlefields. It’s not necessarily new – we’ve had similar terrain before with the zone mortalis walls and columns GW made for Necromunda – but this new kit offers a completely different aesthetic.
In this article we’re going deep into the new terrain – how it looks, how to assemble it, and how it fits in both with the provided boards and the existing Zone Mortalis terrain.
Today’s Kill Team Coverage:
- The KT 2022 Annual and Kill Team: Into the Dark
- The Killzone Gallowdark Terrain Review (This Article)
- Imperial Navy Breachers Kill Team Review
- Kroot Farstalker Kinband Kill Team Review
- KT Annual: Gellerpox Infected Kill Team Review
- KT Annual: Elucidian Starstriders Kill Team Review
Before we dive in, we’d like to thank Games Workshop for providing us with preview copies of the Annual and Into the Dark boxed set for review purposes.
Also, if you haven’t already, go check out the new Intercessor Squad Kill Team. The rules can be found online for free here, and you can find our review of the team here.
Design & Modularity
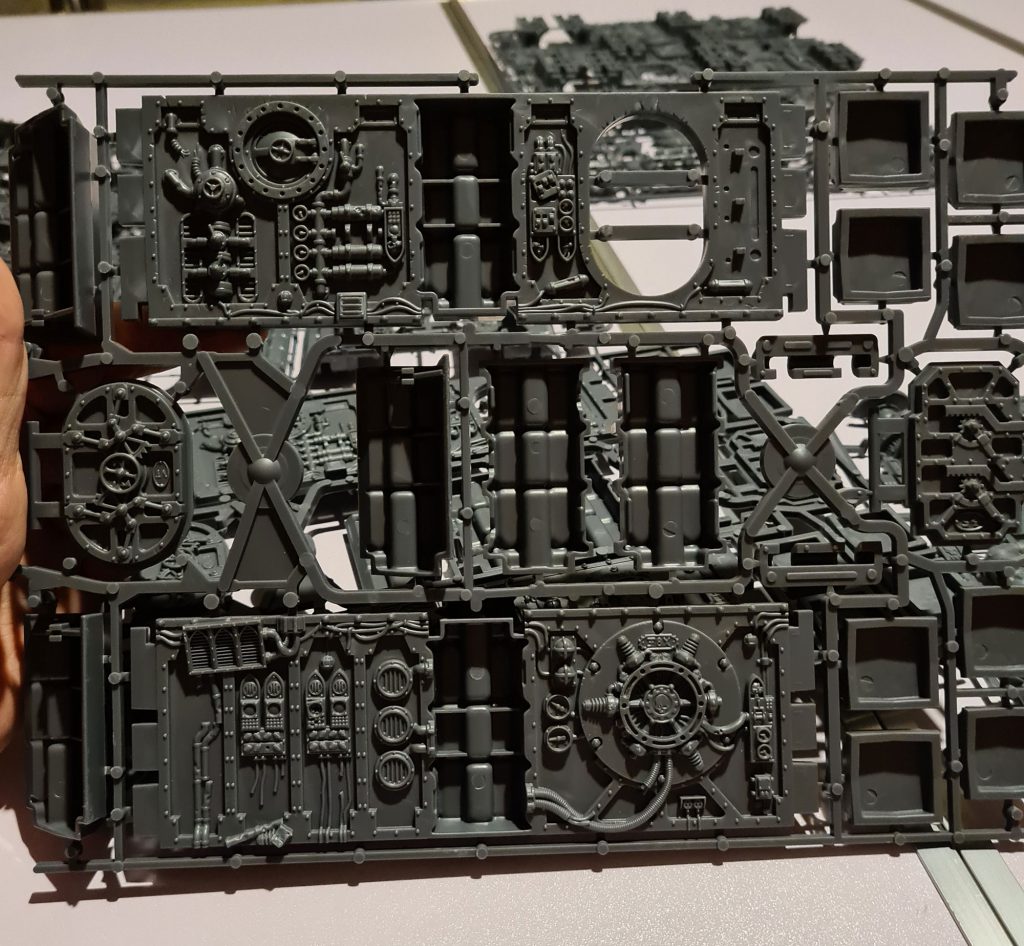
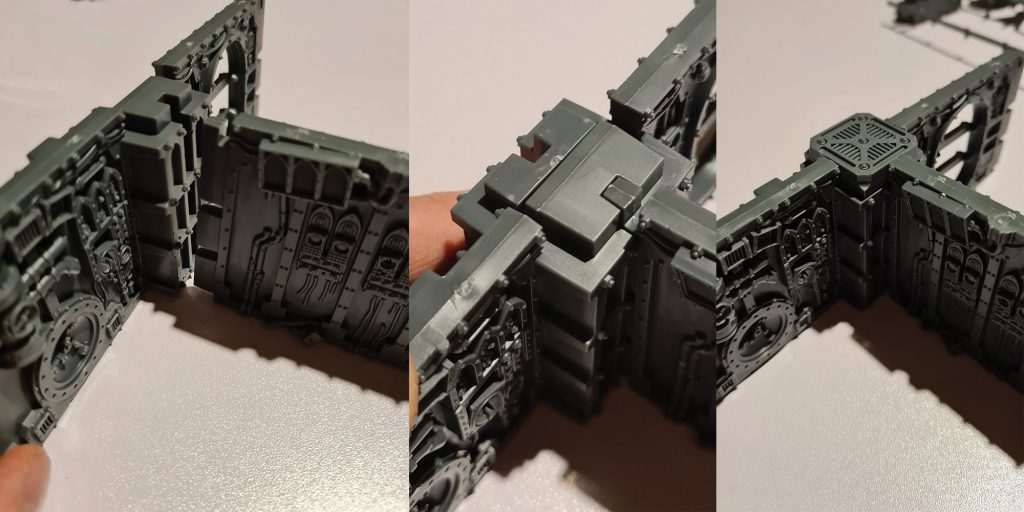
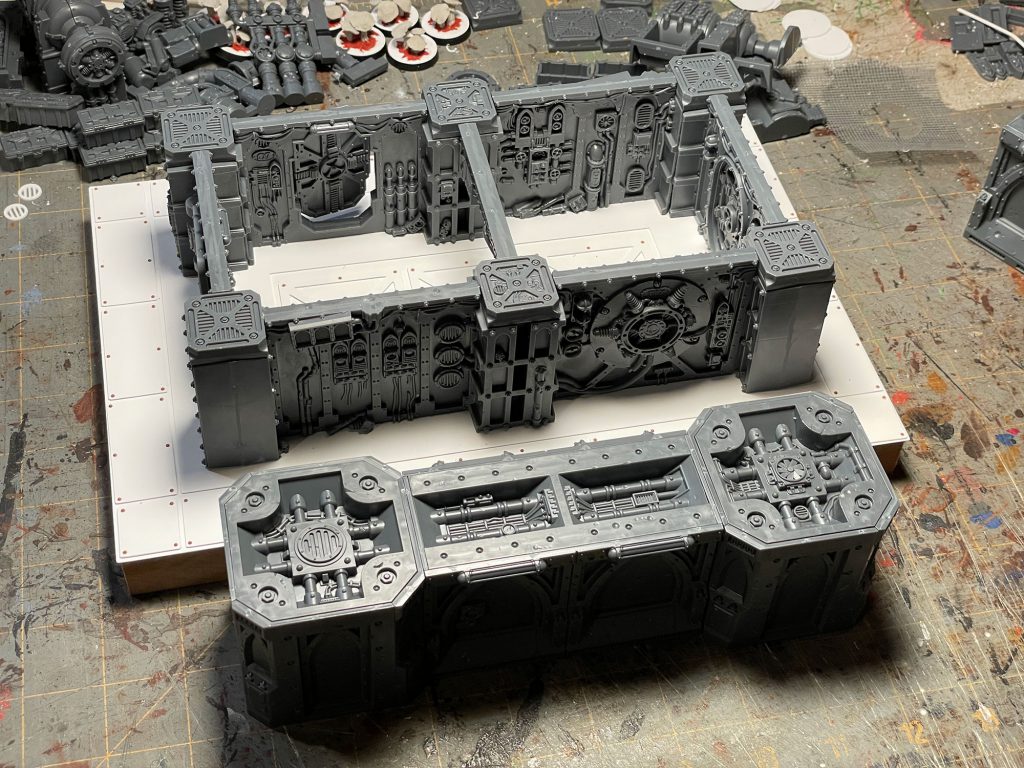
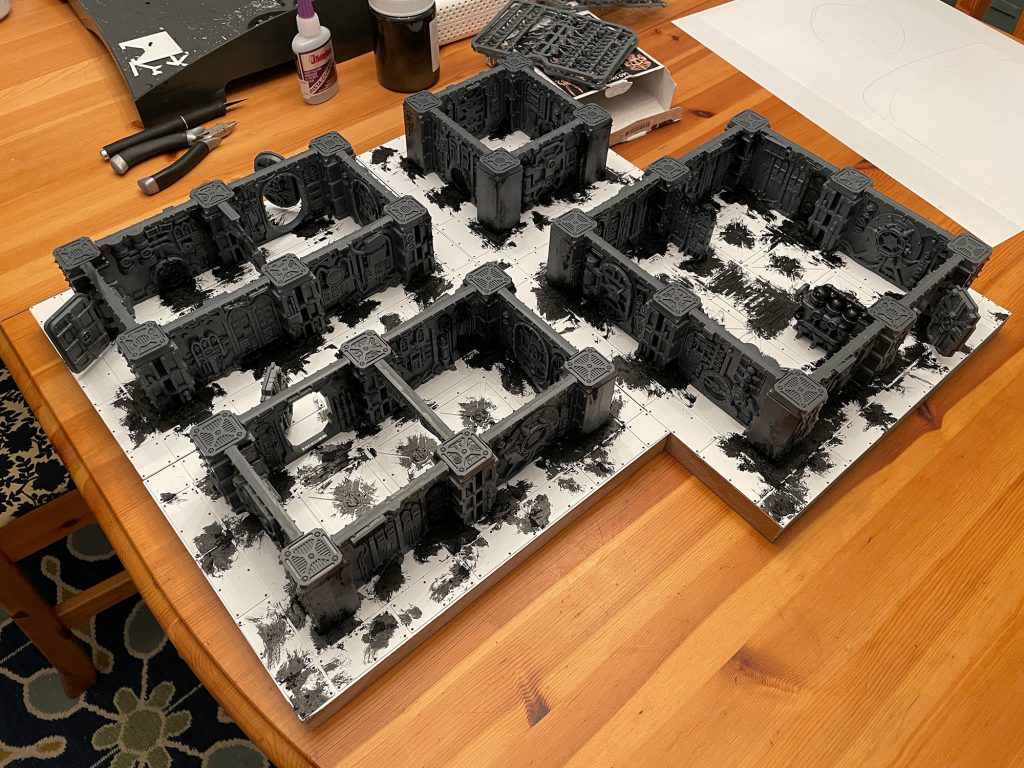
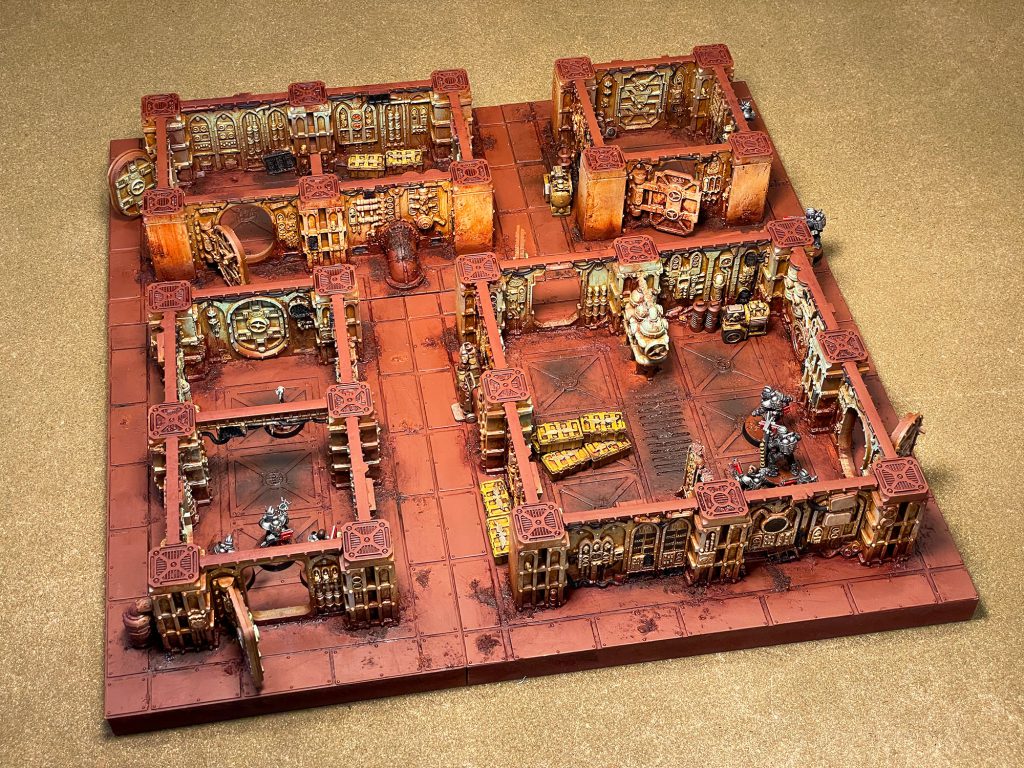
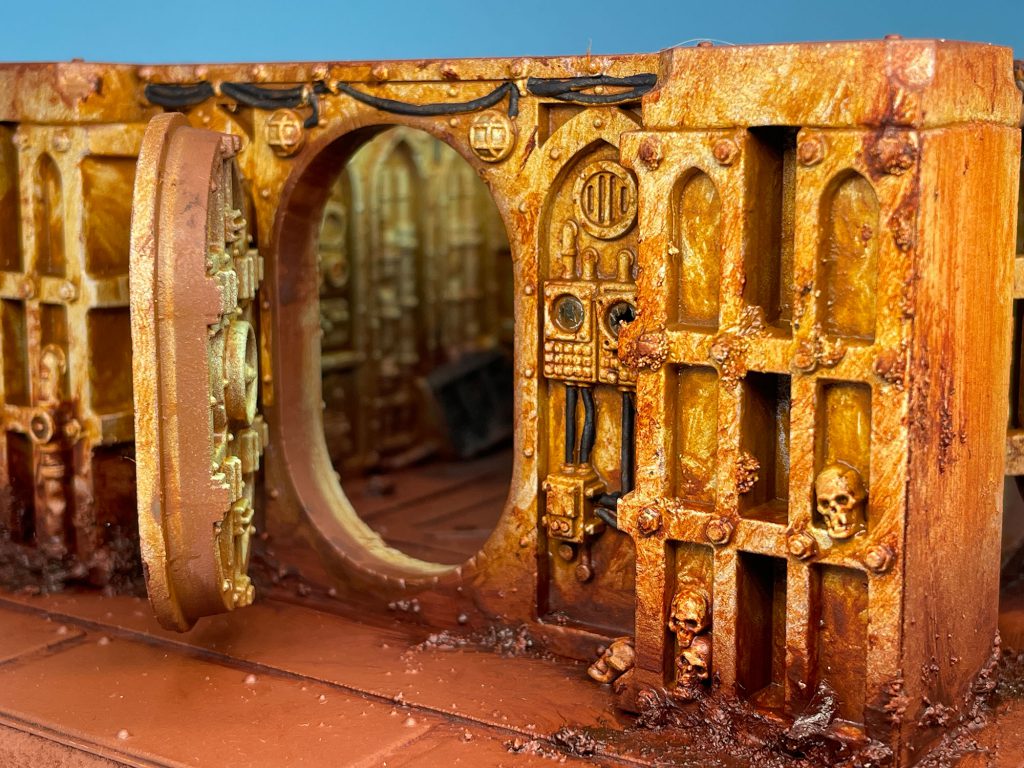
Taking the sprues out of the box, my first reaction was that this stuff is mega cool. Loaded with detail and dripping with 40K VIBES. And detail, oh god, so much detail. I spent an evening clipping all the parts and cleaning them up. The walls are designed to be put together and taken apart, with connections at the corners. To lock them together, there are caps that fit on top to hold the two parts together. There are stand-alone walls that can slot into columns and they’ve also included some half column end pieces to create a divider.
The intent is that for each of the missions you use all the parts to build a layout of corridors, which means keeping each part separate. All the terrain should easily store in the box which makes having this amount of terrain pretty feasible for most people.
My note here is how the parts assemble. The connections are TIGHT. I would recommend test fitting everything before paint, and clearancing any parts that are difficult to assemble. Getting them together will be even trickier when you consider the thickness of your primer and paint. Some care should also be taken when putting them together to not exert too much force on the parts. I broke off one of the column tabs trying to get it to sit flush together. And as I was reminded, the column caps are super-tight. Like, need something to pry them off tight. A fair amount of effort will be needed to make this stuff go together and come apart easily.
Compatibility with other kits
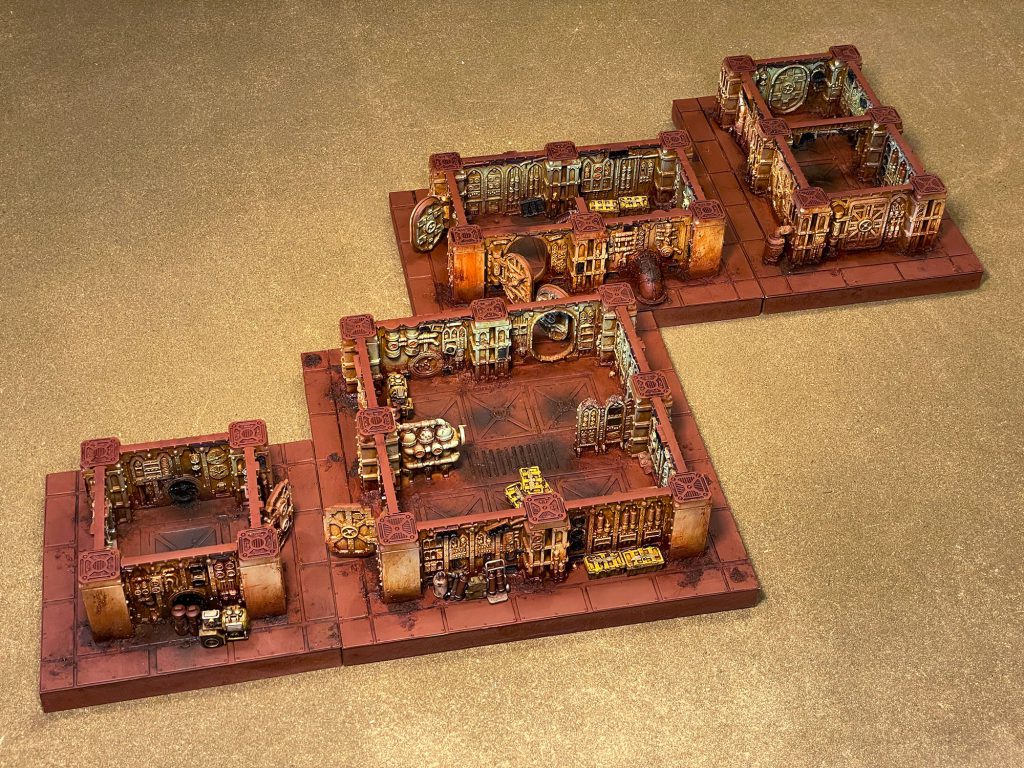
This is an interesting one. Where much of the existing (or recently departed) 40K terrain range was designed to seamlessly work together, the same is not entirely true for this stuff. Compared to its closest analog, the Zone Mortalis walls, the ItD walls are about one millimeter taller. An assembled Zone Mortalis wall of 2 columns and one long wall, are ten millimeters shorter than a double wall section. The columns are roughly one inch square, 28mm x25mm. The wall sections are about 72mm between the columns and only 5.5mm thick. This stuff will take up MUCH less space on a table than Zone Mortalis though, so more area for your operatives to run around.
There are a few places on the terrain that can accept pipes from the Sector Mechanicus terrain. I used the 90º angle pipe from the Alchomite Stack ,which I had to trim down for my application, but the height lined up perfectly. I cut down a vent to go on the opposite side of the wall. Other sections of pipe will work with this stuff, as it’s designed to clear the columns if you have it turn to parallel the walls.

Stand-out bits
I have to shout the designers of this stuff out, because there are some banger bits in here.
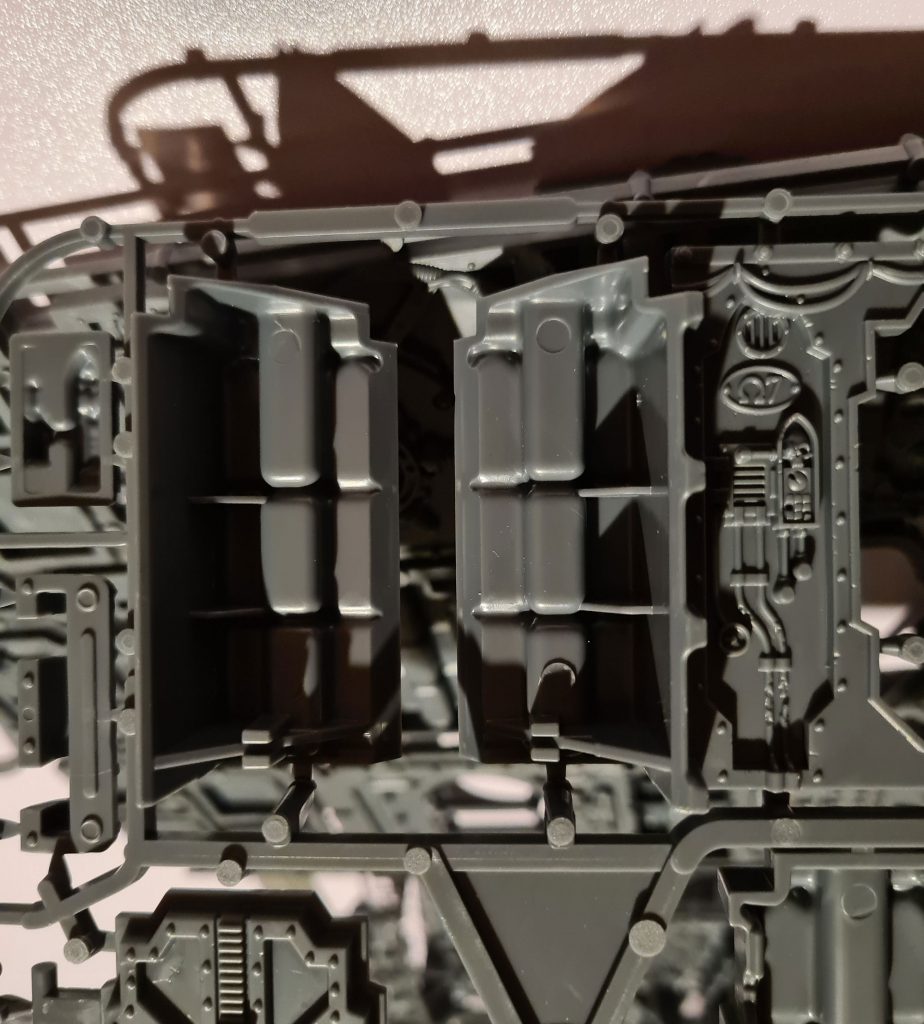
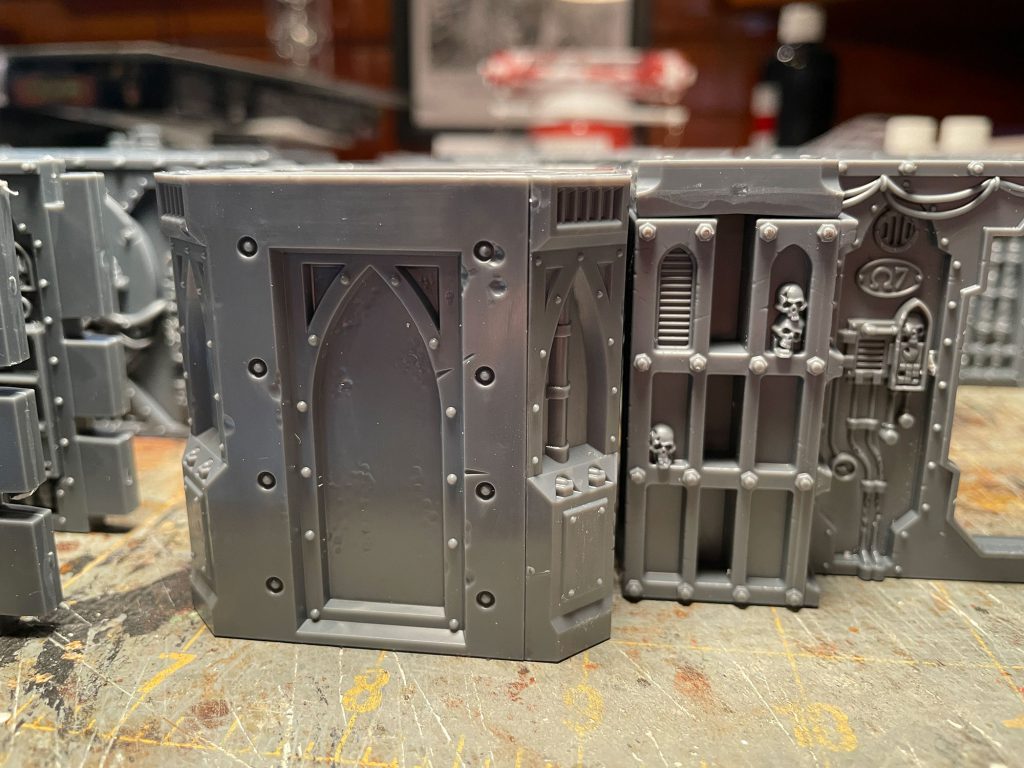
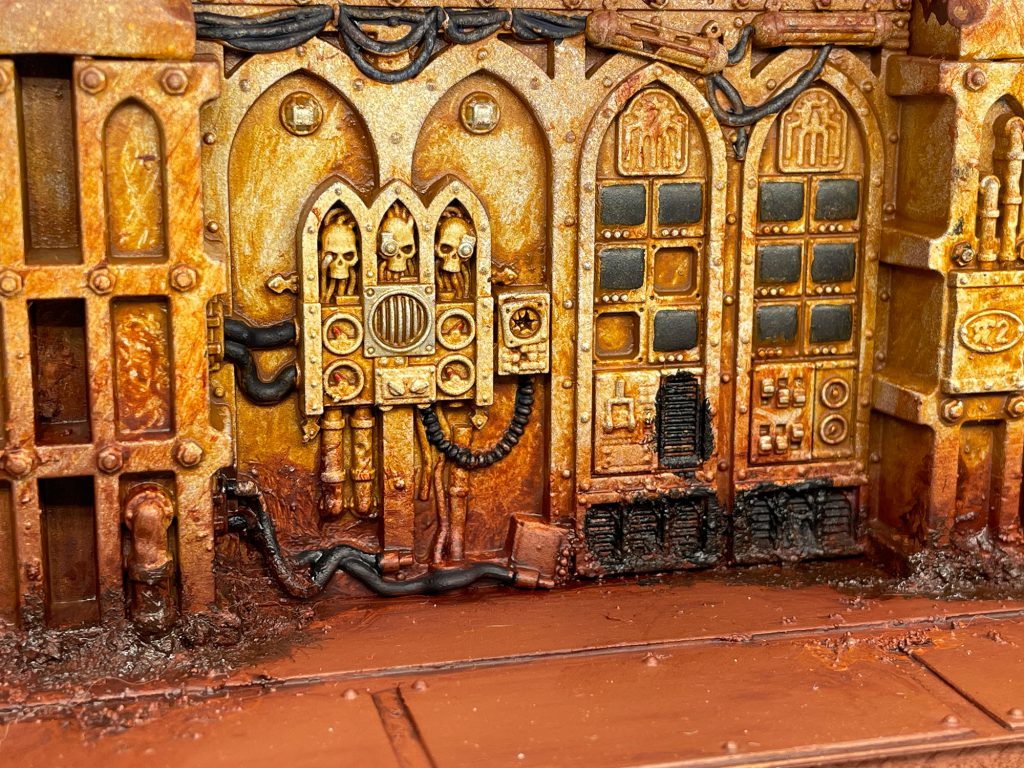
THE DOORS WORK. Probably my favorite thing from the kit and they still work even after primer and lots of oil paint. When assembling them, you do actually have to pay attention to the instructions, as there are doors and hinges that are paired. I didn’t and a couple of my hinges are upside down and a couple doors are stiffer than the others. Learn from my failings!
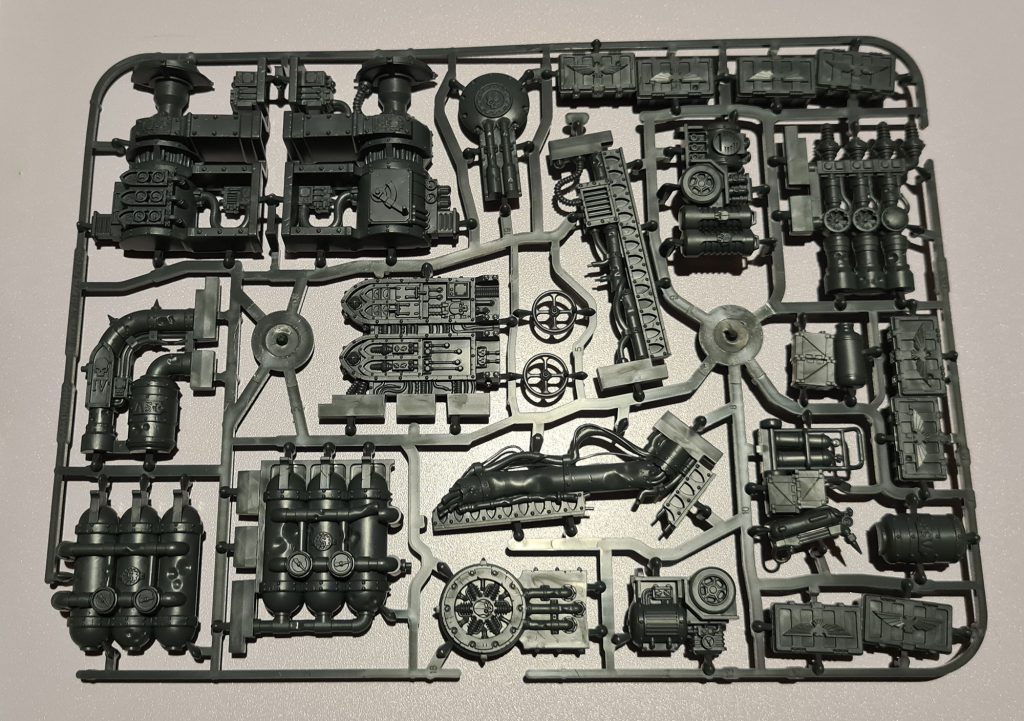
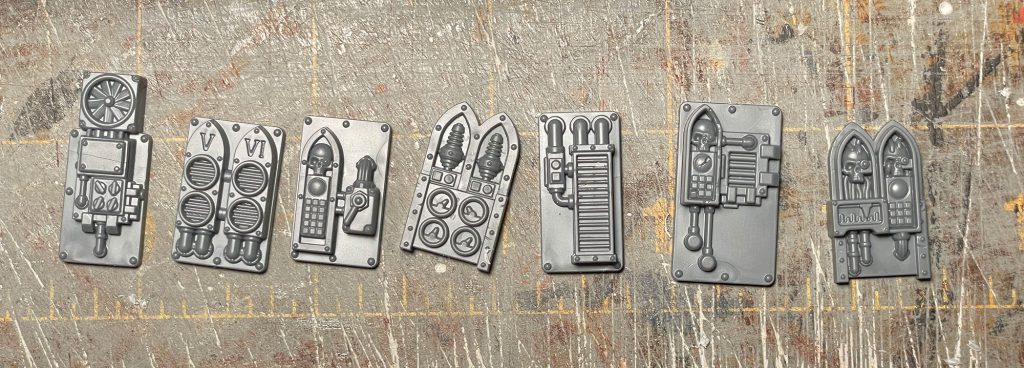
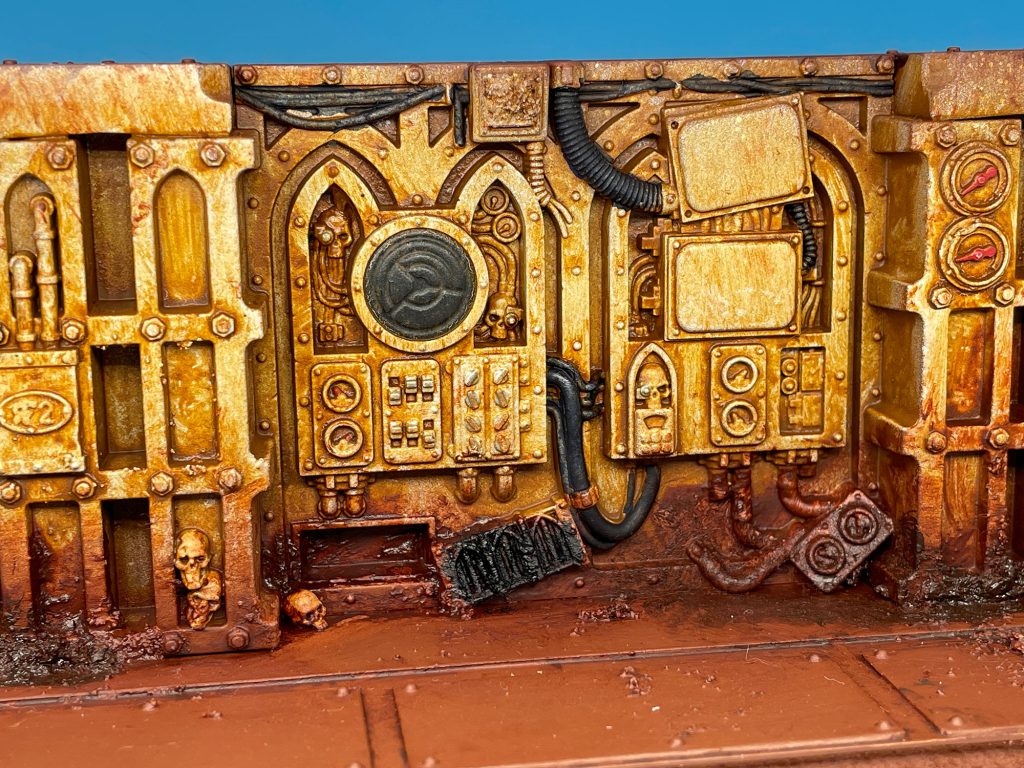
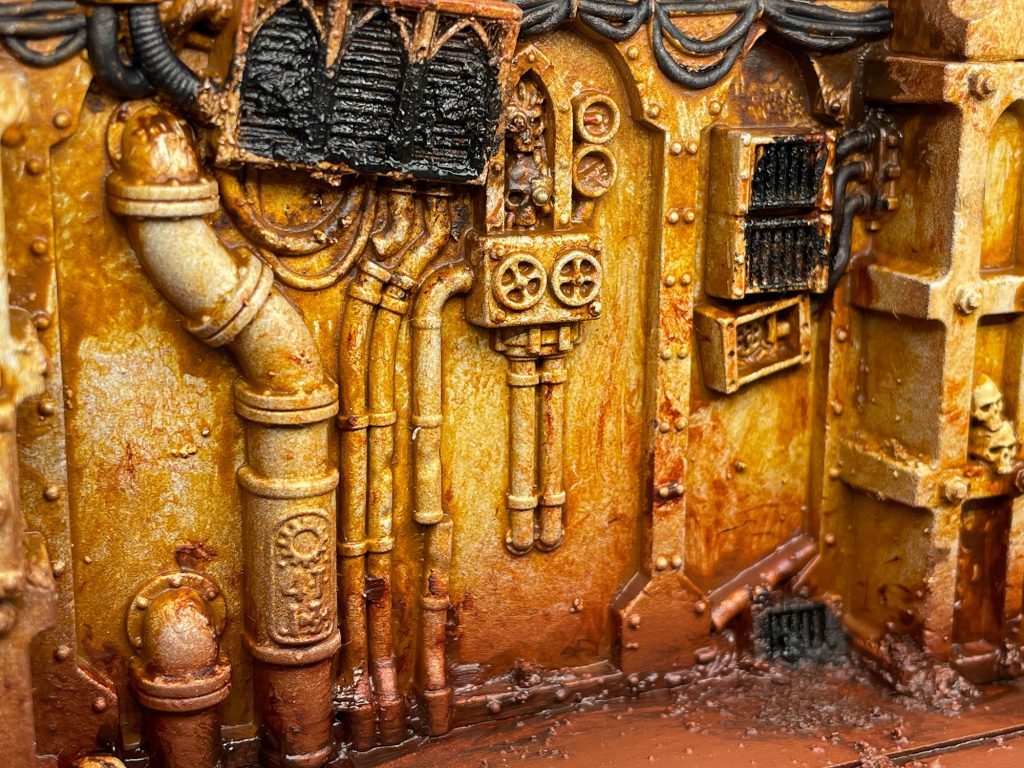
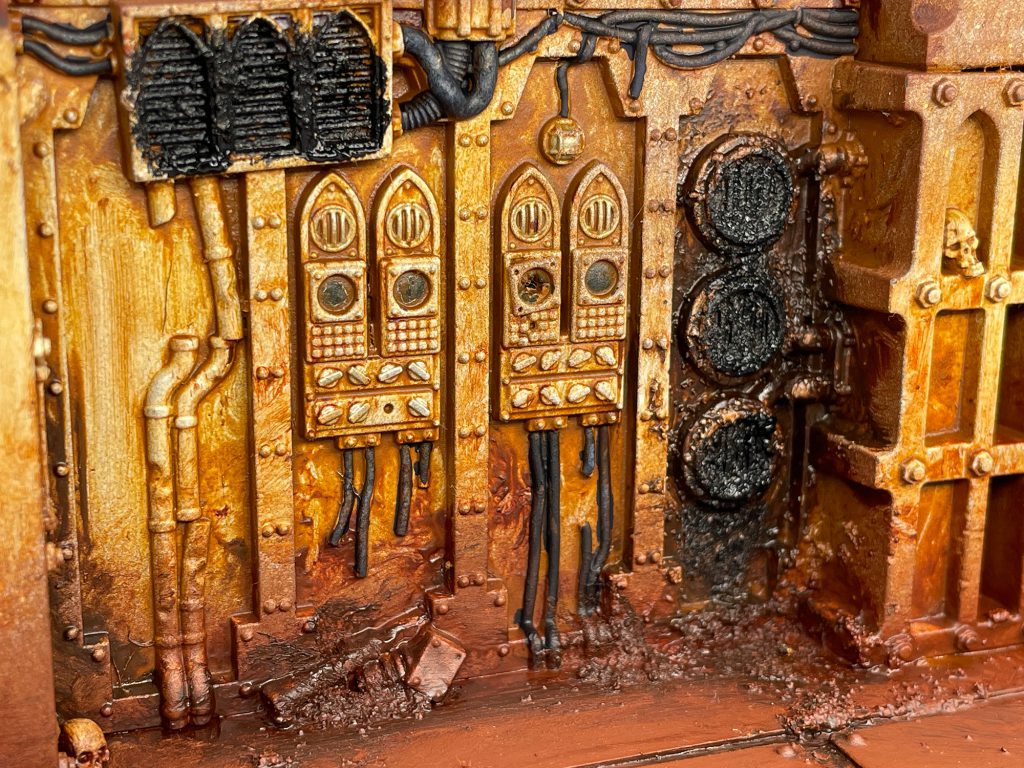
The entire accessory sprue is loaded with crates, generators, welding gear, dynamos and all your wall decorations. Mixed in with the column and wall sprues are these incredible little decorative bits: control panels, vents and gauges. They’re intended for the blank faces of the columns. I didn’t end up using them on my stuff, as I have plans that require the columns to be blank, but you can bet they’ll find a home with my future Necromunda terrain.
Using them for “unintended” purposes
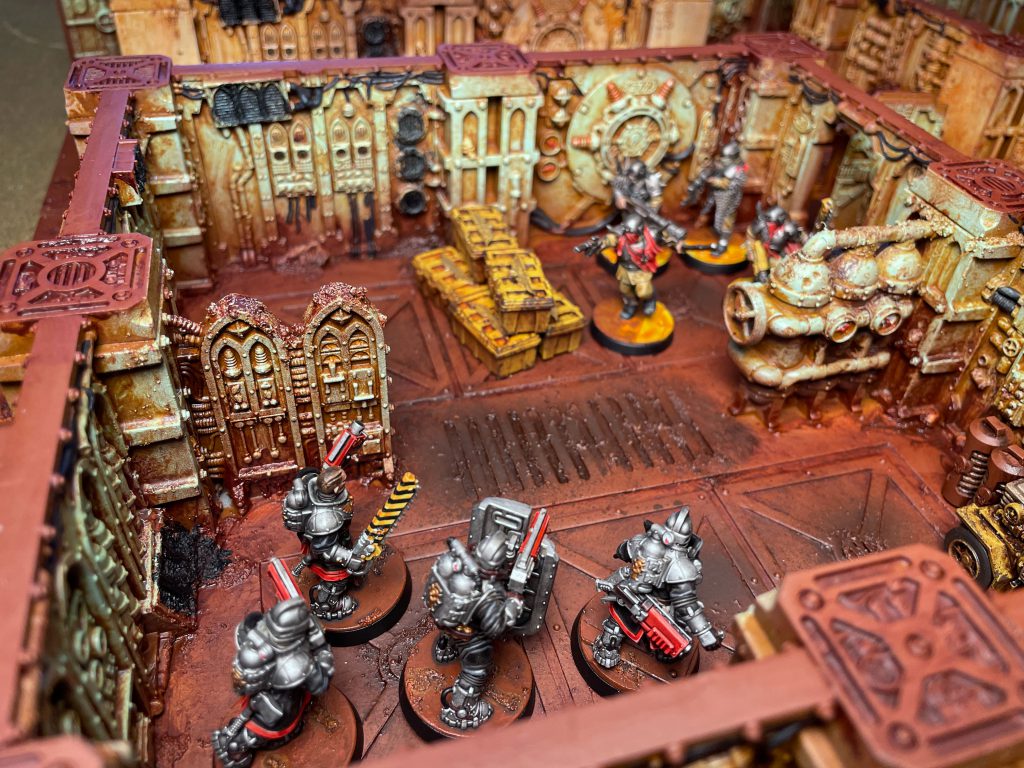
Their intended use is all well and good, but when do I ever leave something well-enough alone (ok, sometimes…). When I first saw this stuff I immediately thought of remaking the cardboard Space Hulk tiles. That is, until I pulled out my box of Space Hulk and realized the sheer volume of floor pieces in that game. So I reverted back to an idea I’ve had for years: a warren of corridors under my Necromunda terrain. Accessed through hatches hidden around the hive, gangers can drop down for subterfuge or get munched on by the gribbly things that inhabit the warrens.
Designing floors
Step one was to figure out how I wanted to assemble them. I spent some time playing with the components and seeing how much could be made from the kit. That turned out to be a two-by-two room, a pair of two-by-one corridors and a small one-by-one chamber or airlock. Once I had the pieces from the kit sorted, I took measurements and hopped into Adobe Illustrator to map out the size of the columns and walls to figure out the size of my floors. I decided to mount these to the same material as my regular Necromunda terrain, ¾” MDF. This step took some trial and error, and ultimately I landed on the size based on the feel of how much space would surround the large room. I ended up with an eleven inch square tile for the big room. The corridors are also eleven inches long, but their width was determined by lining up the columns and then having the tile fit halfway across some floor detail. Hard to explain, but in the end, all for pieces that I made can be assembled, puzzle-like, into a big square.
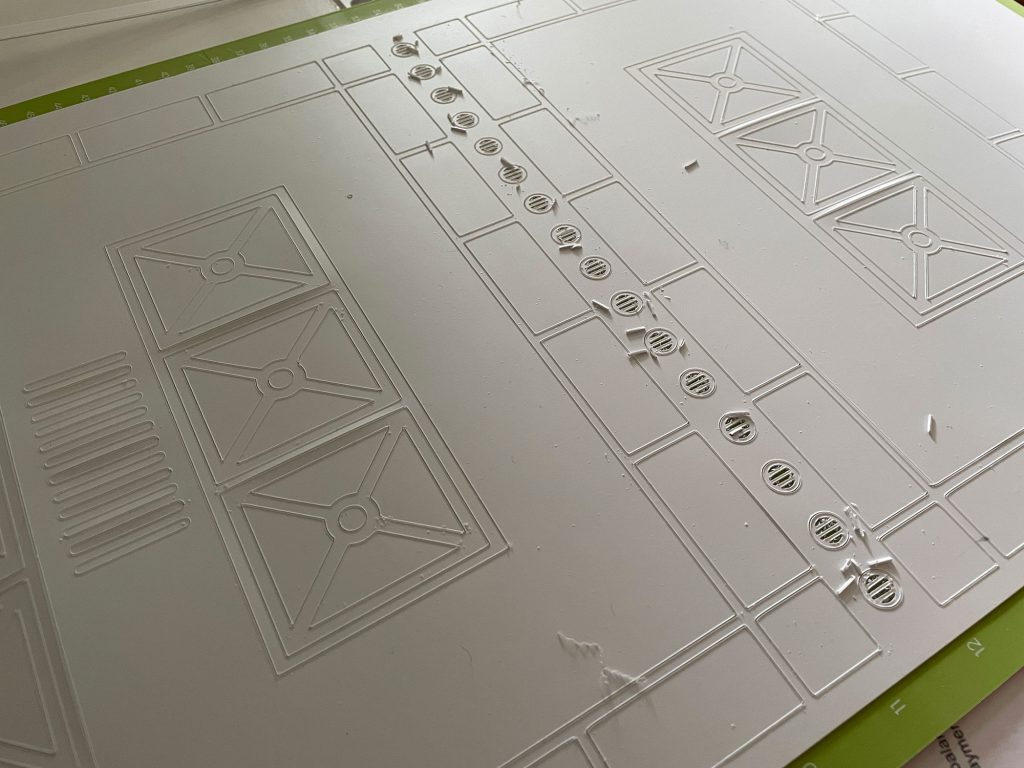
The design of the floors themselves are different from my “above-ground” Necromunda terrain. I didn’t want them to be the same: built by other people or at a different time. Less industrial, more structural and less busy. This space is sporting some X-braces for the interior walls with central vents and some outside, flat floor plates. I used slightly less rivets than usual, partially because of time restraints, but also as a visual nod that this stuff is different.
Assembly
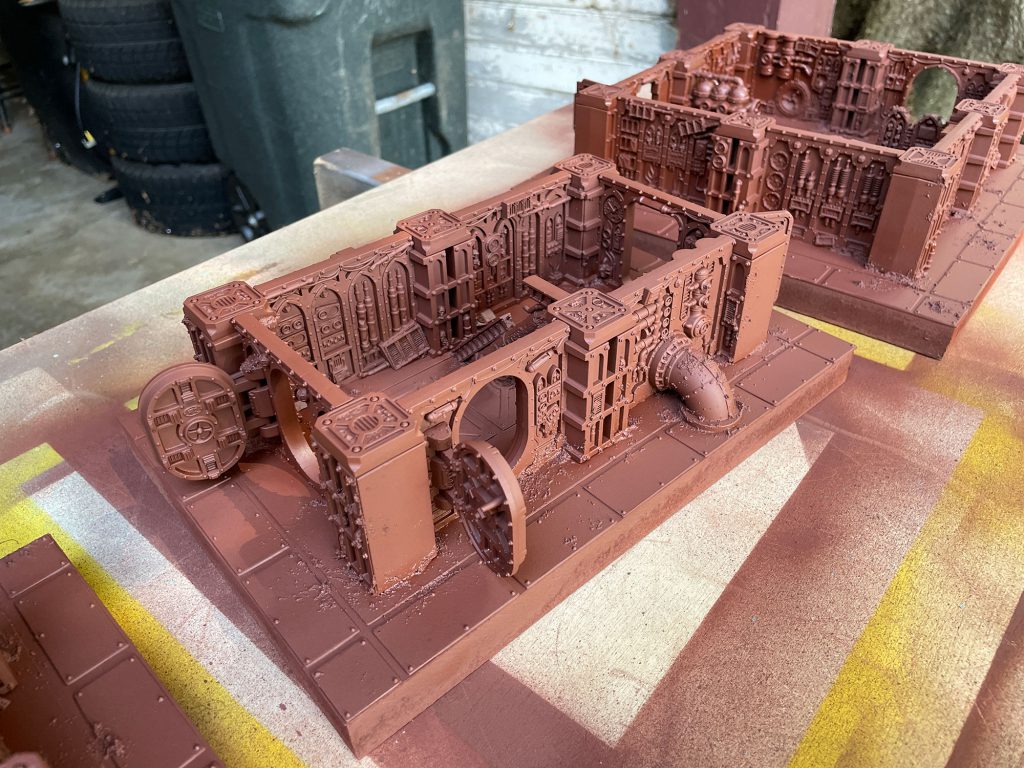
Like the rest of my terrain, styrene sheet is glued to the MDF baseboards, with layers of cut styrene on top. After that I assembled the ItD walls, adding an intact strut across one corridor and the damaged on to the other. Due to the space on the outside of the walls, I cut down one of the included pipes (which separated pretty nicely) and customized a Sector Mechanicus pipe as mentioned above. After the walls were together I added rivets. I potentially should have done this step first. Note that this will not be the only time that working on these walls is difficult because of how I assembled them. For all y’all that keep them separate, you’ll have a fine time painting them. The last step here is to add texture, and for this I used the same Vallejo Black Lava Texture Paste that I used on the Navis Breachers.
Painting the Terrain
I used the same paints and process that I use for all my other Necromunda terrain.
Step 1: Prime with Rustoleum Ruddy Primer
Step 2: Mask off the tops of the walls. I wanted them to just be rusty and provide a good contrast to the walls.
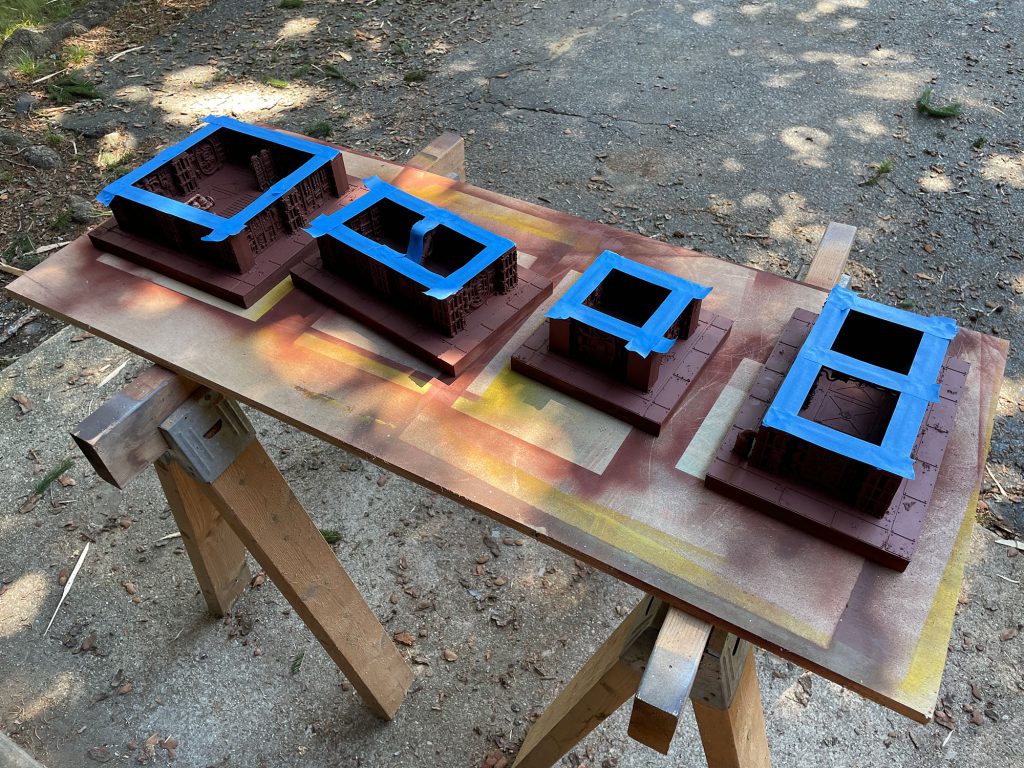
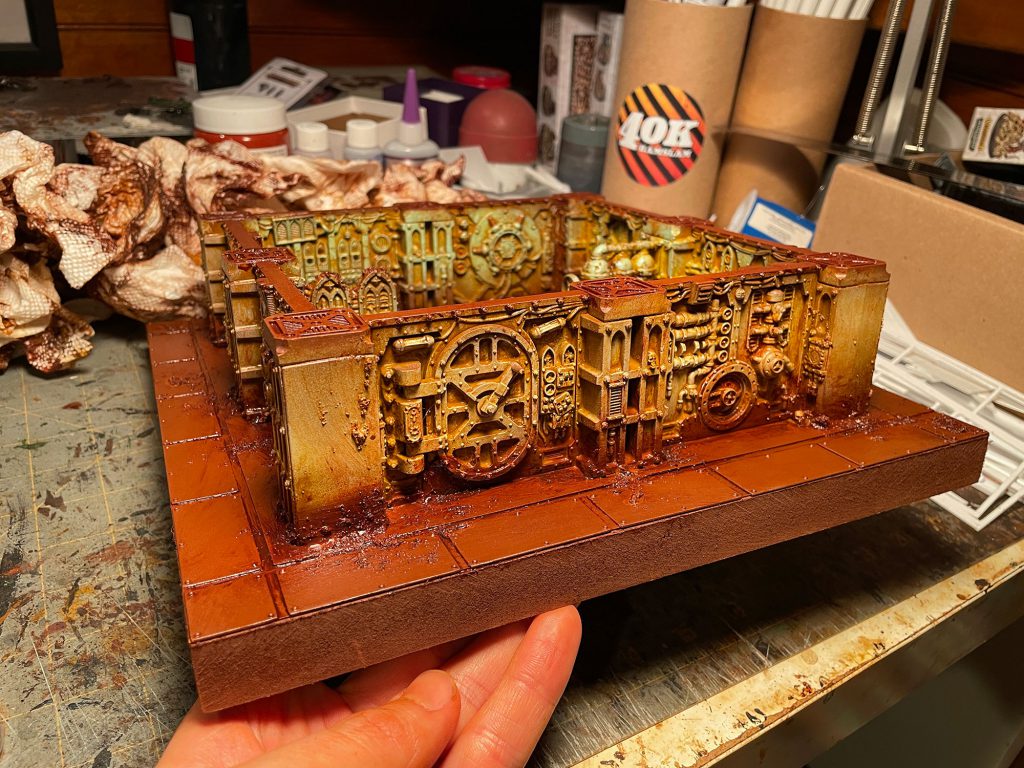
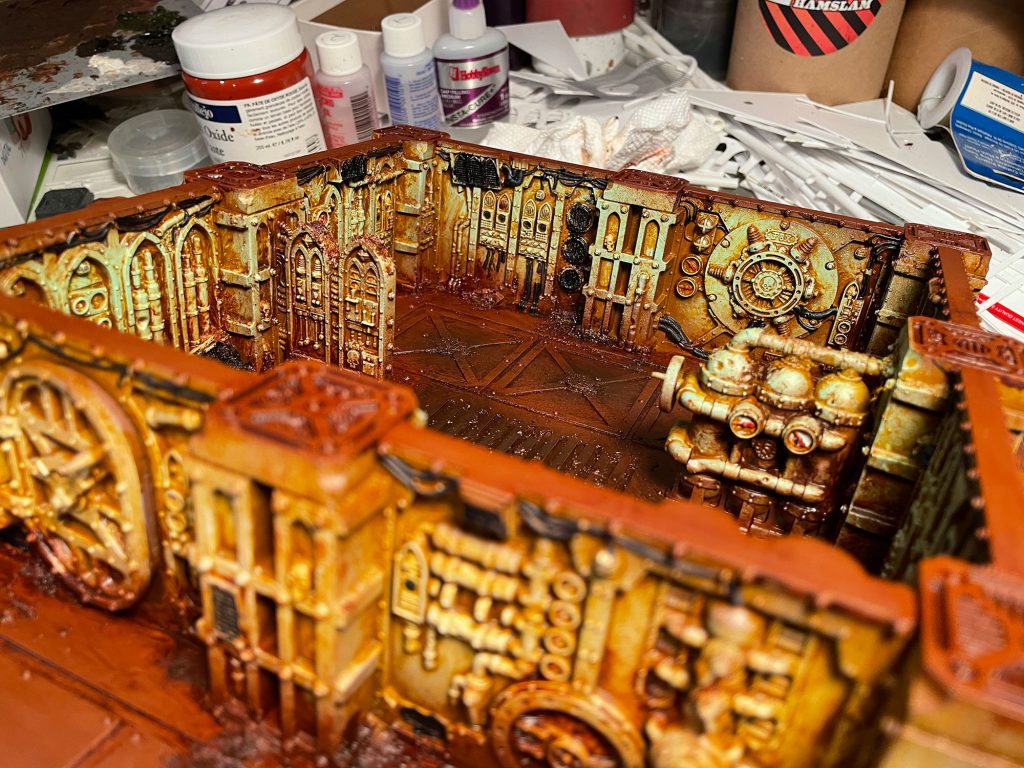
Step 3: Spray base colors. I used Army Painter white primer on the outside and Montana Gold Malachite Light on the inside.
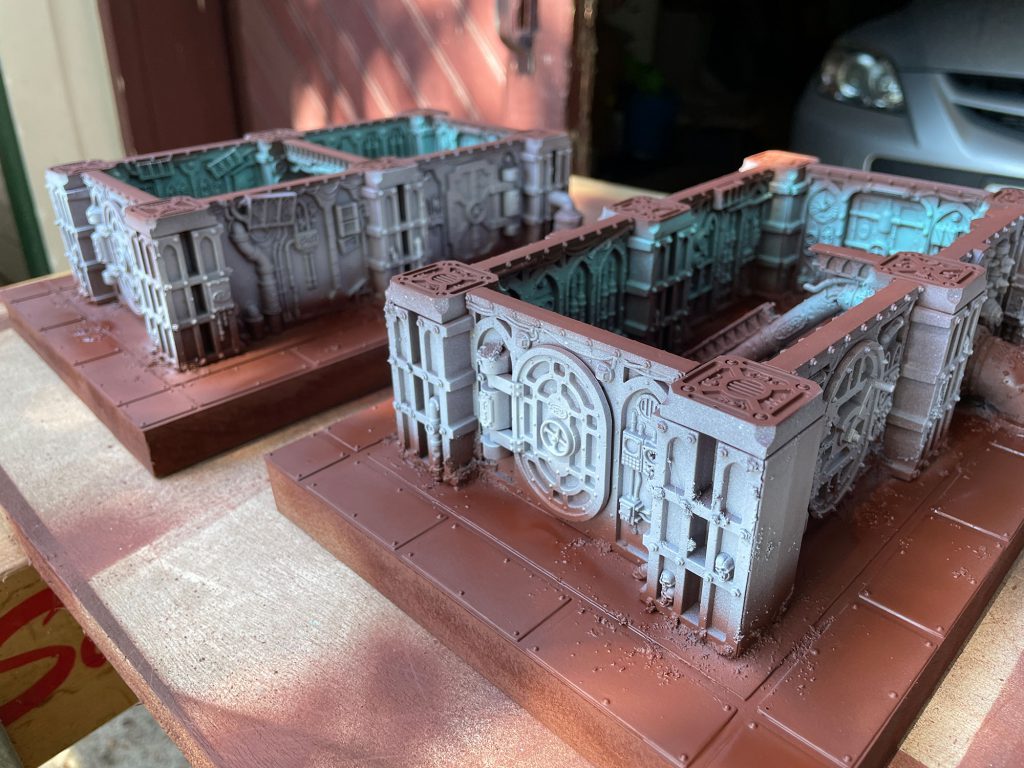
Step 4: Paint the screens black, the skulls bone and the switches, conduits, and a few other random bits silver.
Step 5: I use Winsor and Newton water-mixable oil points to finish my terrain. Yellow Ochre, Burnt Sienna, Burnt Umber, and Raw Umber are my main rust and grime colors and I use Payne’s Gray for vents and hoses. I apply a layer of the colors to one surface and then wipe off the majority with paper towels.
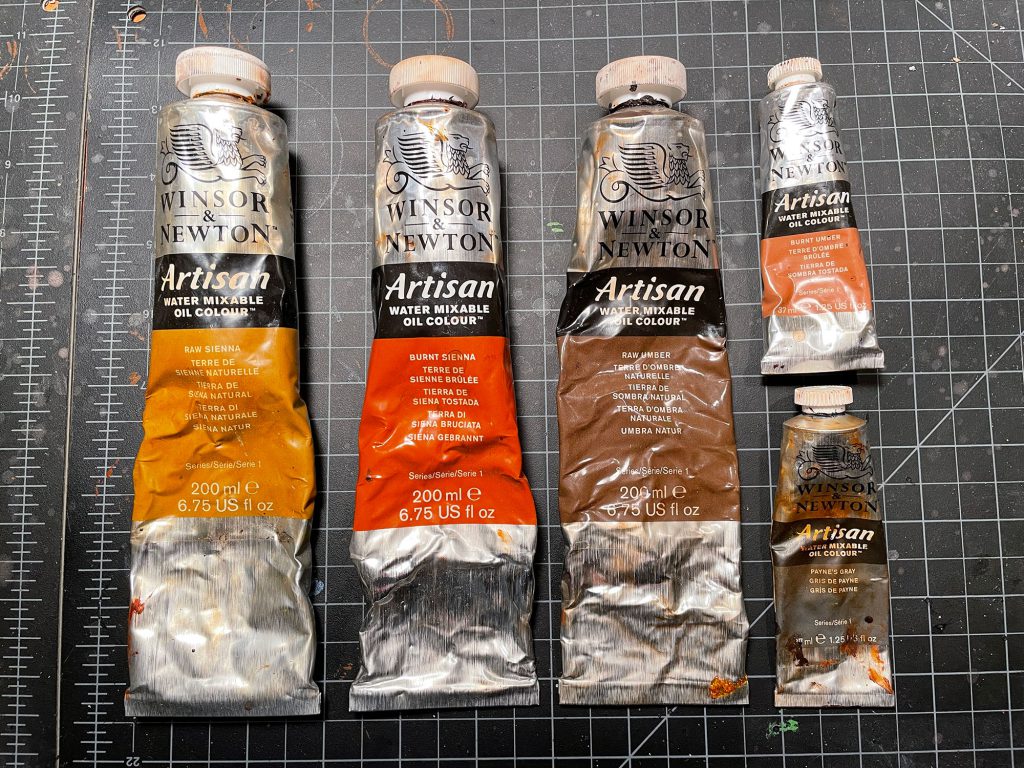
For these, the outer and inner walls got a coat of Yellow Ochre and Burnt Sienna with some Raw Umber mixed in. The floors got a coat of Burnt Sienna and Raw Umber. After a day I went back and added Payne’s Gray to all the vents and carefully painted all the cables and hoses as well.
After a week or so of drying time, it’s ready to play on, so let’s see some beauties!
What’s Next: More Reviews
That wraps up our review of the box and the basic rules for the Annual and Into the Dark, but we’ve got everything you could want to know about this set lined up. Head on over to one of our other reviews, and in the meantime if you have any questions or feedback, drop us a note in the comments below or email us at contact@goonhammer.com.
