
Harlequins are the elites of the Aeldari race, which means brighter colors, faster running and close range murder. All Aeldari orient their lives around defending their soul from Slaneesh. Asuryani create a synthetic afterlife, while Drukhari strengthen their souls through the torture of innocents. Harlequins forgo tricks and instead pledge themselves to Cegorach, the Laughing God, and trust him to fight Slaneesh for their souls while they devote their energies to fighting against the forces of Chaos.
In battle these warriors overwhelm their enemies in a furious onslaught and fall back before their foes can respond. In Kill Team they’re one of the fastest, hardest-hitting teams. If you enjoy breaking the normal rules for melee and movement they’re a cool team to play.
Strengths
- Fast – With an 8″ base move, a pseudo fly ability in their flip belts and an 18″ charge range on a 3d6 they move in ways that overwhelm a lot of defenses.
- Hard Hitting – Your standard model has 4 attacks base and access to an option of high Strength, AP or Damage. You also have access to Fusion Pistols, which let you put out very strong attacks at close range.
- Invulnerable Saves – All of your models have a 4+ invulnerable save, which
- Easy to Collect – Harlies are one of the one box kill teams. You can get a decent team with a single box of players, and if you have 40k models they’ll be effective in kill team.
Weaknesses
- One gimmick – Harlies are really good at rushing in close and doing damage, but if that trick doesn’t work there isn’t really a plan B.
- Lack of really powerful melee – Harlequins have really good mid tier melee options, but they don’t have ways to reliably kill Elites models that are multi-wound with a good strength and high toughness besides fusion pistols.
- Elite – Harlies tend to have 6-7 models at 100 points, which combined with their mobility is enough to contest objectives but they can’t do horde strategies.
- Weak to Psykers – Harlequins have few models, they’re one wound each and they need to be within 6″ of the enemy to do anything. They can’t play around the enemy putting out two mortal wounds each turn before the shooting phase even starts.
Competitive Rating
Harlequins are an uneven faction. If the enemy can’t handle you making 12″ charges fairly regularly, having an invulnerable save and being good in melee then you’ll win pretty easily. Kill Team: Elites added a lot of models there are capable of handling this. Lychguard, Marine Vets with chainswords, Custodes and Terminators are all able to take the charge and kill a T3 4++ model, which gives Harlies an uphill battle. They still have a chance to win, but the skill disparity you need forces me to give it a C rating for competitive.
Harlequin Special Rules
Flip Belts
This is more or less the Fly movement rules without the ability to fall back and shoot. Your entire team can ignore climb distance or models during movement.
Holo-Suits
All of your models have a 4+ invulnerable save.
Rising Crescendo
Your models charge 3d6″, and they can declare a charge on a target up to 18″ away. You can reliably hit charges over 9″ away (which means that you can get out of range of flamers), and you can declare charges on models that are far away and out of Line of Sight and decide where you want to go after rolling the dice.
Masques
Midnight Sorrow: The Art of Death
You fall back an additional D6″ and you consolidate an additional 6″. Movement options are usually better than they look but Harlequins already have a lot of movement tools. B
Veiled Path: Riddle-Smiths
At the start of each fight phase roll two dice and discard the largest. If the enemy rolls that value they miss. This is best against elite melee armies, since that activates 3’s and 4’s (and possibly 2’s for armies like Custodies). Against a lot of armies you’ll roll a value that would already miss. There will be times when it’s powerful but since it’s random you will have trouble planning around it. C
Frozen Stars: Hysterical Fury
If you charged or were charged, gain an additional attack. This is a little worse than on some factions because you’ll have a smaller number of models that already have lots of attacks, but it’s still a direct power upgrade to Harlequins main plan. B
Soaring Spite: Serpents Blood
Treat pistols as Assault if you advanced, and you don’t have penalties for advancing and shooting. This is only worth it for Fusion Pistols, but if you’re taking those it’s amazing. B
Dreaming Shadow: Sombre Sentinels
Subtract 1 from nerve tests (basically a worse version of gaining a point of leadership) and if your model dies they can fight again or shoot again on a 4+. It’s a solid sub-faction ability that doesn’t reward any particular play style. B
Silent Shroud: Dance of Nightmares Made Flesh
Subtract 1 from enemy’s models leadership if they’re within 3″ of any of your models, and when any of those models take nerve tests they roll two dice and discard the lowest. This is strong as far as leadership attacking mechanics go but you need an initial advantage to get it working and it’s useless against a lot of teams like Tyranids that can ignore leadership. C
Harlequin Weapons
Harlequin’s Blade
This is just the default melee weapon every model is equipped with but with a different name.
Harlequin’s Embrace
This is a power sword at +1 Strength (so Strength 4 on Harlequin models). It’s the cheapest melee upgrade and a huge step up from the basic blade.
Harlequin’s Caress
Basically a power axe. This usually hits at Strength 5 AP -2, which is a better profile against most targets than the Embrace but you pay an extra point.
Harlequin’s Kiss
The payoff melee weapon for Harlequins. This loses out to the others in Strength and AP, but D3 damage lets it exploit the Kill Team Injury Roll rules to reliably kill models.
Shuriken Pistol
Your basic S4 pistol with AP-3 on a wound of 6+. It’s not a good weapon but it’s free base equipment.
Neuro Disruptor
This has the same stats as a Shuriken pistol except it’s always AP-3 and D3 damage. You’d usually rather take a fusion pistol for a point more but it’s not a bad gun.
Fusion Pistol
A meltagun in pistol form. Strength 8, AP-4 D6 damage with a 6″ range (it used to have the melta effect, but it was removed in Errata). Your models are fast enough to get in range reliably and this can kill problem units like terminators or Bullgryns, but not being in melee or far away makes you vulnerable to being shot off the board.
Harlequin Units
Player
Or rather, Harlequin Unit (singular). This is your only data sheet, but it’s a good one. They have all of the special rules and weapon options we’ve talked about above, and with a 4+ invulnerable save and 4 attacks base players are probably the premier fast close range fighters in kill team.
They can have both a pistol upgrade and a melee weapon upgrade. It’s usually best to go with a melee weapon and the basic Shuriken Pistol to save points, but the Fusion Pistol is a really powerful weapon for the points.
There aren’t too many options but there are a few common load outs you’ll see.
Basic Model – Shuriken Pistol and Harlequin’s Blade
This isn’t particularly interesting but it gives you a fast model that can sit on objectives. I’d recommend this for your leader if you’re playing competitively since they tend to be a resource, and you probably want at least one or two more on the roster to clear up points.
Budget Melee – Shuriken Pistol and Embrace or Caress
These mostly fill the same role. They keep the points low enough that you can fit in 6-7 models, and are good enough in melee that nothing can ignore them. They won’t reliably put threats down with 1 damage weapons but they’re still better than a lot of melee specialists other factions have.
Melee Killer – Shuriken Pistol and Kiss
This is your most reliable killer, and where you want to spend your specialists. Taking three of these as Veteran, Combat and Zealot specialists will give you a hard hitting threat that runs through a lot of teams.
Pistoleers – Fusion Pistol and Embrace, Caress or Kiss
The fusion pistol is a good gun but you have to get close with it, and if you’re planning on getting close to scary things you should have a melee weapon. These models end up expensive so you have to watch the budget but they’re your best way to kill things like terminators or Bullgryns with the mix of high Strength, high AP and high Damage.
Harlequin Commanders
Troupe Master
The big brother of players. Masters have mostly the same options and abilities that Players do, they’re just more accurate (BS/WS 2+ instead of 3+), have an extra attack and an extra four wounds. Where Players are absurdly good in melee compared to other models at the same price point Troupe Masters are merely competent, so don’t expect them to 1v1 Terminator Captains. They mostly see use as CP generation Strategists, and you can pick any set of options without being “wrong”.
Choreographer of War (1 CP)
A troupe master can let all allies in 6″ re-roll failed wounds. This is a really strong Tactic and if you concentrate forces around him you can clear out even the strongest models in the game. A large part of the strength is that the other harlequins you play will have top tier stats for every other part of the attack funnel (number of attacks, hitting, AP) so this strengthens the weakest part of the funnel and can give you 50% more power against some targets. A
Death Jester
This model is just a little disappointing in Kill Team. It isn’t exactly bad, but a single point of damage and a lack of AP or shots means that the gun just isn’t reliable, and none of the extra effects are really crippling. Having a fast model that can advance and shoot at obscured models with no penalty is strong, but not really commander strong.
The Art of the Kill (1 CP)
Add 1 to wound rolls for friendly models within 6″ of this model. This makes the Jester wound most targets on 2’s, but it’s only good on other models if they want to stay within 6″ of the Jester. C
Shadowseer
Your psyker option. They’re a decent combat model, with less attacks than a Player but a better weapon and weapon skill, and they have a gun that deals mortal wounds reliably to low leadership models. Their main draw is that they’re a Cast 2 psyker with powerful spells and a cool tactic.
Staged Illusion (1 CP)
Instead of manifesting psychic powers, remove the Shadowseer from the battlefield and put it in reserves. Harlies have good ways to deep strike so this lets you play him aggressively and if you don’t like the end of the movement phase you can just nope out of it and redo it next turn. A
Harlequin Psychic Powers
Fog of Dreams (WC 5)
Select an enemy within 12″ of the psyker, that model subtracts 1 from hit rolls. This is an easy cast and stacking hit penalties from things like moving heavy weapons, cover, long range etc is powerful, so this becomes a solid utility power that lets you neuter an enemy champion for a turn. B
Webway Dance (WC 7)
Friendly models within 6″ have a 6+ Feel No Pain roll. Making your models tougher is nice, but you’re usually hoping to act decisively and kill things before they can target you. C
Mirror of Minds (WC 7)
Select an enemy model within 12″ and roll a d6 against an opponent’s d6. If your roll is equal or higher deal a mortal wound. Repeat until the enemy model is taken out of action or you lose a roll. This is a really powerful effect, you win on tied rolls and you put the mortal wounds on one after another so you can stack multiple injury rolls on the enemy. A
Harlequin Tactics
Prismatic Blur (1 CP)
When a model in your kill team advances, it gains a 3+ invulnerable save. Becoming 33% tougher is solid for a CP, especially if you know that you’re throwing a model into danger. B
Cegorach’s Jest (2 CP)
When an enemy model falls back from one of your model and there’s no enemies in 1″ of your model, you can shoot at the enemy that fell back as if it’s the shooting phase. Keep in mind that you’re potentially at long range and obscured, but getting an extra shot from a Fusion pistol is good. B
Warrior Acrobats (1 CP)
Advance 6″ instead of d6″. This is powerful if you need to go 13-14″ since it removes uncertainty. B
War Dancers (2 CP)
At the end of the fight phase, fight again. This lets you get a second activation with your best unit that’s in the best position. They have to survive a round of combat, but that’s only an issue against melee focused armies like Chaos Berserker lists. A+
Fire and Fade (1 CP)
After you shoot you can move up to 7″ as if it were the movement phase. This both lets you shoot and move, effectively extending the range of your guns, and also lets you move after everyone else has moved so you can take an objective or set up a charge next turn. A
Mirthless Hatred (1 CP)
re-roll failed hits and wounds in the fight phase against Slaneesh models. This is really strong but narrow, since Slaneesh isn’t even that popular in Heretic Astartes armies. D
Blades of Cegorach (1 CP)
After making a charge roll of 10+ add 2 to the attacks characteristics of that model. +2 attacks is a very powerful buff, and a charge of 10 is slightly below average for Harlequins. This is reliable and strong. A
The Joy of Lament (1 CP)
When an enemy model fails a nerve test, your models within 6″ don’t take nerve tests. This is a powerful effect but you’re an elite team with high leadership, so you won’t need it very often, and it requires correct positioning for something you can’t always predict. C
Theatre of War (1 CP)
When a commander is taken to 0 wounds, only a single dice is used for the injury roll no matter the damage characteristic of the attack. It’s a good way to defend a powerful model. B
Dance of Death (2 CP)
If you have a model in melee that hasn’t moved, move it 2″ so it’s more than 1″ from enemy models and you can declare a charge. This is an ability that breaks the standard movement economy and lets you move unpredictably. A
Ghosts of the Webway (2 CP)
This is a deep strike ability, but slightly different from most. You deep strike up to three models, but you do one first with the standard restrictions (more than 5″ from enemy models) and the other two have to come in within 2″ of the first model (and still 5″ from enemy models). It’s more expensive than some and your models are already fast, but it’s still a powerful ability that lets you come from unexpected angles. B
Point Blank Strike (2 CP)
Shoot a pistol after charging. This is pretty useless with Shuriken Pistols, but it’s a really strong effect for Fusion Pistols since they threaten things that laugh off your melee. You can also wait a bit to use this so the enemy can’t shoot the model if he kills the model he’s in combat with. B
Trickery and Deception (1 CP)
You swap two models that are within 8″ of each other. If they are within 1″ of an enemy model after the swap they’re considered to have charged, if they are not then they are considered to have fallen back. This is a neat trick, there’s probably a limited number of situations where it’s useful though. Your models are mostly similar so it best used to disrupt an opponents plan since it’s used at the end of the movement phase. B
Playing Harlequins
This is where we bring everything together, and if you look at the ratings I’ve given out things look great. Lots of A’s and B’s, a few C’s and D’s but nothing too bad. The issue is that these are all ways to put on a clown mask, get close to people and murder them. If that’s not a winning strategy then you’re not winning, you have no long ranged firepower or durable units to fall back on. Winning games means finding ways to make the limited tools you have work.
The first task is finding the path to victory. Can you kill the enemy in a frontal assault? Do you need to contest objectives? Your two strengths are your close range killing power and your mobility, but you need to decide whether you rely on one of those or exploit something else to win. Don’t be afraid to avoid fights and hide if it gets you the win.
If you decide that you need to kill, try to think a turn or two ahead and plan out your charges. You can expect to make 7+ inch charges, but the probabilities drop off after 12-13″. You need to get your models into position where they can’t be targeted and you’re also in a good spot whether you go first the next turn or not. Also remember that you can charge multiple models and decide which one to go for after the roll, or charge a model but not the guy with a flamethrower in front of it and use the flip belt to go over the model you didn’t charge.
Once you’re in combat think about how long you want to stay. You can’t be trapped easily because of the flip belt, so if you see a safe chance to fall back and contest an objective or pick up a secondary weigh it against the value of staying in combat.
Playing against Harlequins
The easiest counter to Harlies after the Elites book is to bring your own melee sources. Harlequins have to choose between being good against armor or being good against T4-5 models, and they have a decent save but are still 1 wound T3 models. Bullgryns, Ogryns, Terminators, Berzerkers, Striking Scorpions, Electropriests, Marine Vets with Chainswords and more can all go toe to toe with them in melee at a reasonable price point.
Remember that they have insane mobility options, and keep track of their models with powerful weapons (Harlequin’s Kiss and Fusion pistols mostly). Their budget models aren’t scary in melee against power armored or T4 models, so don’t be afraid to charge them. You should have an advantage in either durability or numbers, so use those.
If you’re a Psyker faction, ride your psybolts to a free win. It’s possible to screw up badly enough that you lose, but you’re very heavily favored.

Sample List
- Player, Leader, Dreaming Shadow
- Player, Leader, Frozen Stars
- Player w/ Fusion Pistol and Caress, Combat, Dreaming Shadow
- Player w/ Fusion Pistol and Kiss, Zealot, Dreaming Shadow
- Player w/ Fusion Pistol and Embrace, Veteran, Dreaming Shadow
- Player w/ Kiss, Combat, Frozen Stars
- Player w/ Embrace, Zealot, Frozen Stars
- Player w/ Kiss, Veteran, Frozen Stars
- Player w/ Caress, Combat, Frozen Stars
- Player w/ Caress, Veteran, Frozen Stars
- Player w/ Fusion pistol and Embrace, Zealot, Dreaming Shadow
- Player w/ Kiss, Zealot, Frozen Stars
- Player w/ Fusion Pistol and Embrace, Dreaming Shadow
- Player w/ Fusion Pistol and Embrace, Dreaming Shadow
- Player w/ Embrace, Frozen Stars
- Player w/ Embrace, Frozen Stars
- Player w/ Caress, Frozen Stars
- Player w/ Caress, Frozen Stars
- Player w/ Fusion Pistol and Caress, Dreaming Shadow
This list was piloted by Miguel León Jimenéz and took third at the Kill Team Grenada tournament in March. I haven’t talked to him about why there’s only 19 models, but this was designed for a 125 point tournament and opts for quality weapons in every slot except the leader. This should be able to run 7-8 man teams at 125 points, and gives an option between Embrace and Caress depending on the targets you’re expecting.
Again, I haven’t talked to Miguel but my guess is that the Dreaming Shadow subfaction is there to fight Psyker armies. Your models are elite but they’re still less expensive than Grey Knights or Thousand Sons Sorcerers, and if your models die in the psyker phase you can shoot back with a heavy gun or fight on a 4+.
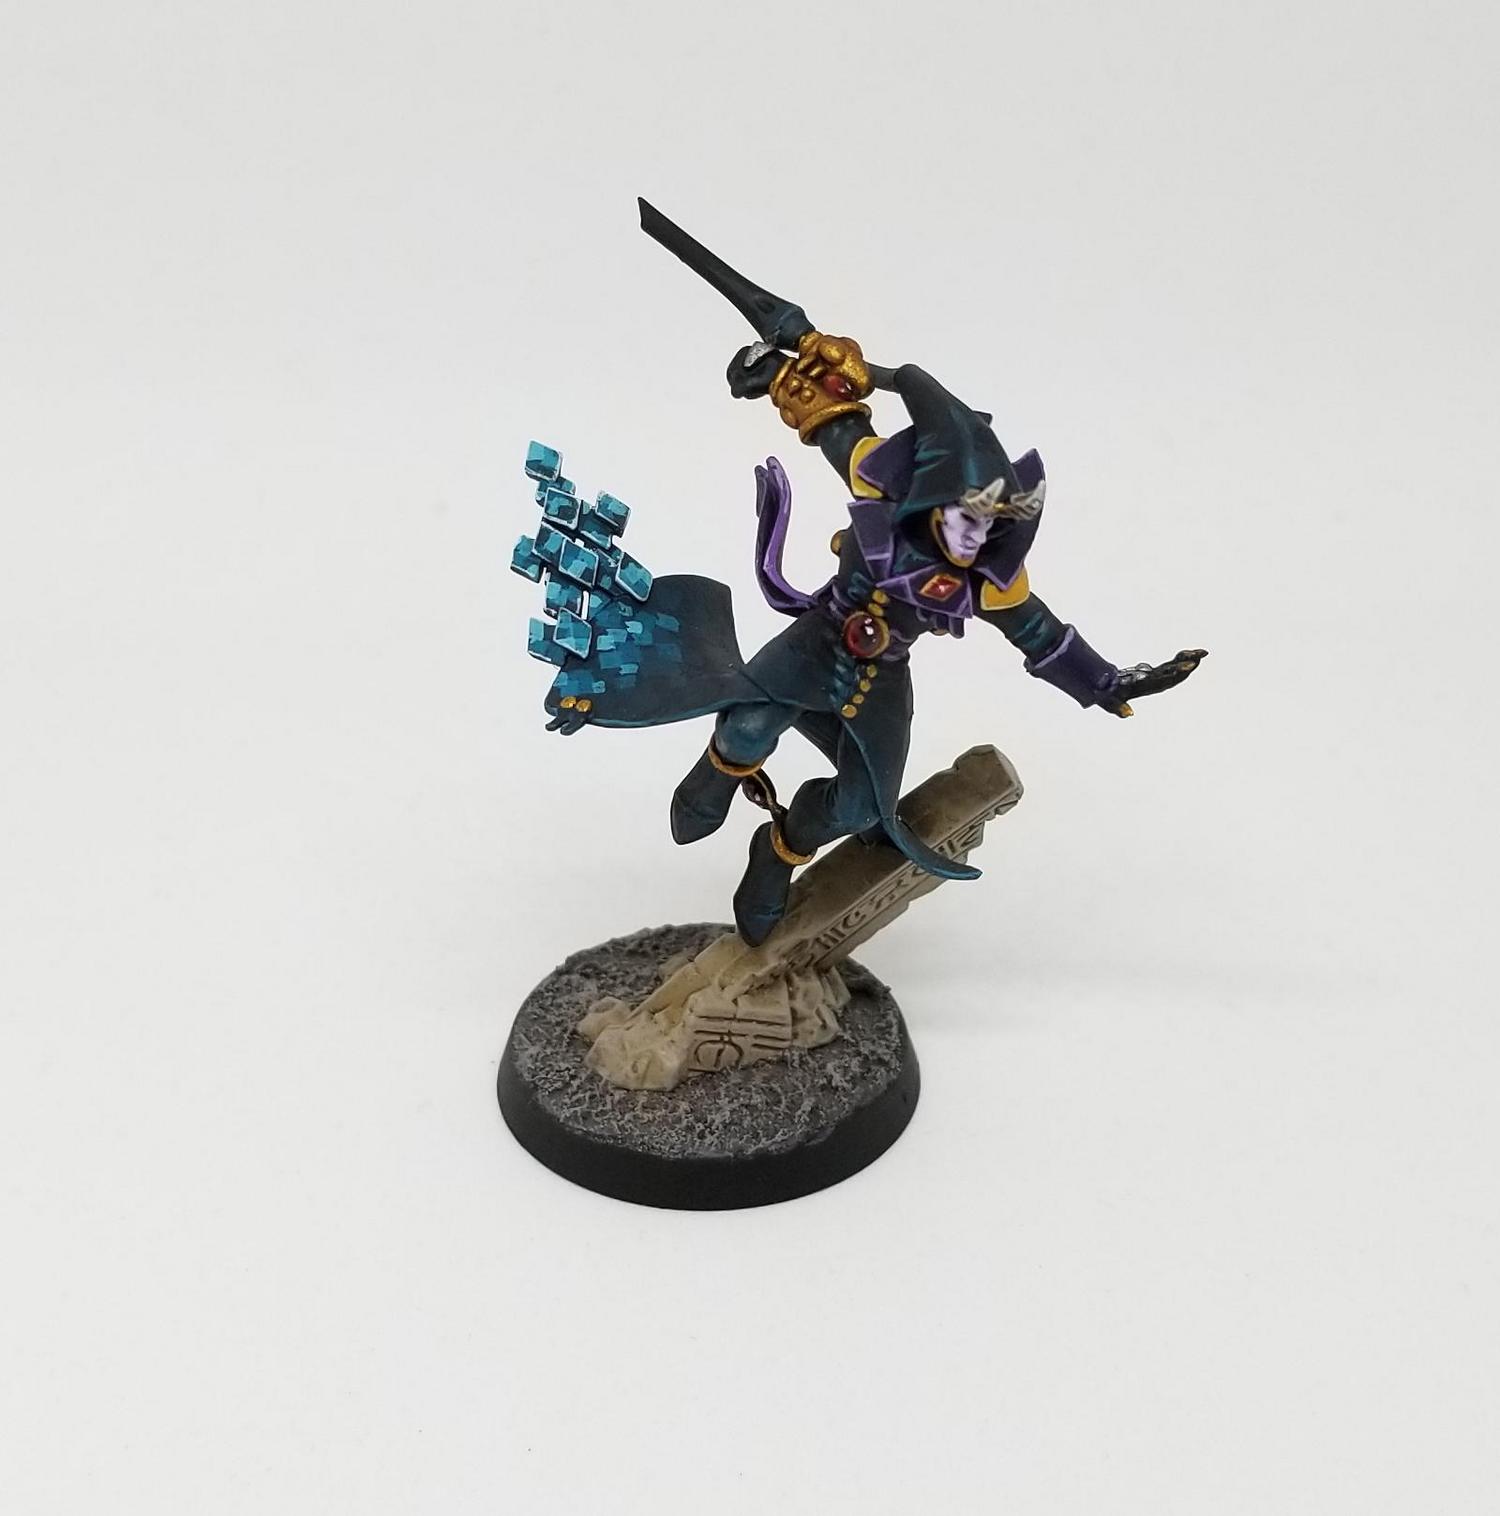
Painting and Modeling Harlequins
Harlequins are one of the most straightforward teams to build. There is a box. Buy it, build it, paint it and you’re good. If you want a 7-elf team at 100 points or any reasonable 125-point team you’ll need to get a second box.
Thoughts
Unlike some teams that are less competitive, I do recommend Harlequins. The mix of new models with nice sculpts, the way that 40k models can slot into the Kill Team and the fact that a single Troupe box is a legitimate team make it easy to dip your toes into, and the team has a lot of match-ups where it’s very solid. You’ll have a lot of interesting games and you’ll win quite a few of them. I see the lack of options as an issue but it’s the premier team for mobility and melee killing power, so a talented player could prove me wrong and take consistent wins with it.
Have any questions or feedback? Drop us a note in the comments below or email us at contact@goonahmmer.com.
