Games Workshop gave us an exciting look at the potential future of Horus Heresy this week, showing off Fafnir Rann and Dominion Zephon, two heralds of a new generation of plastic Heresy models with their own distinctly branded boxes. Today we’re talking about the assembly of those models and how to paint them.
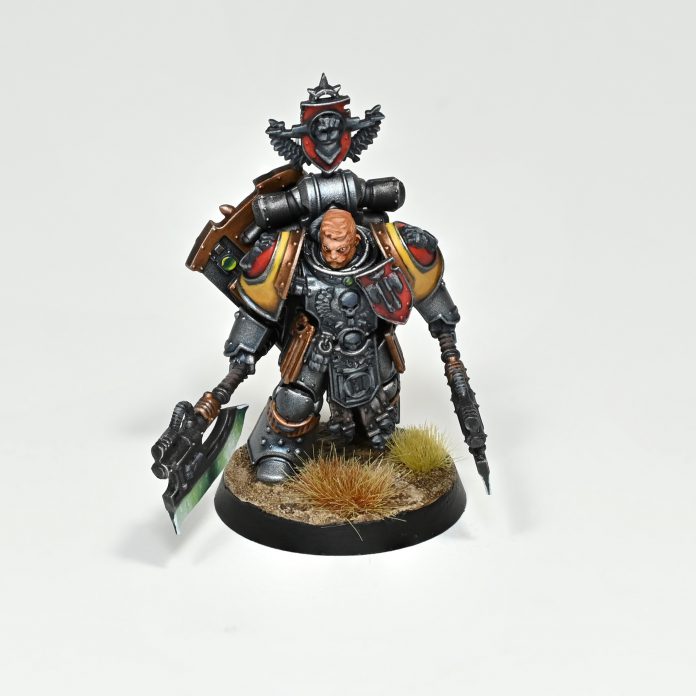
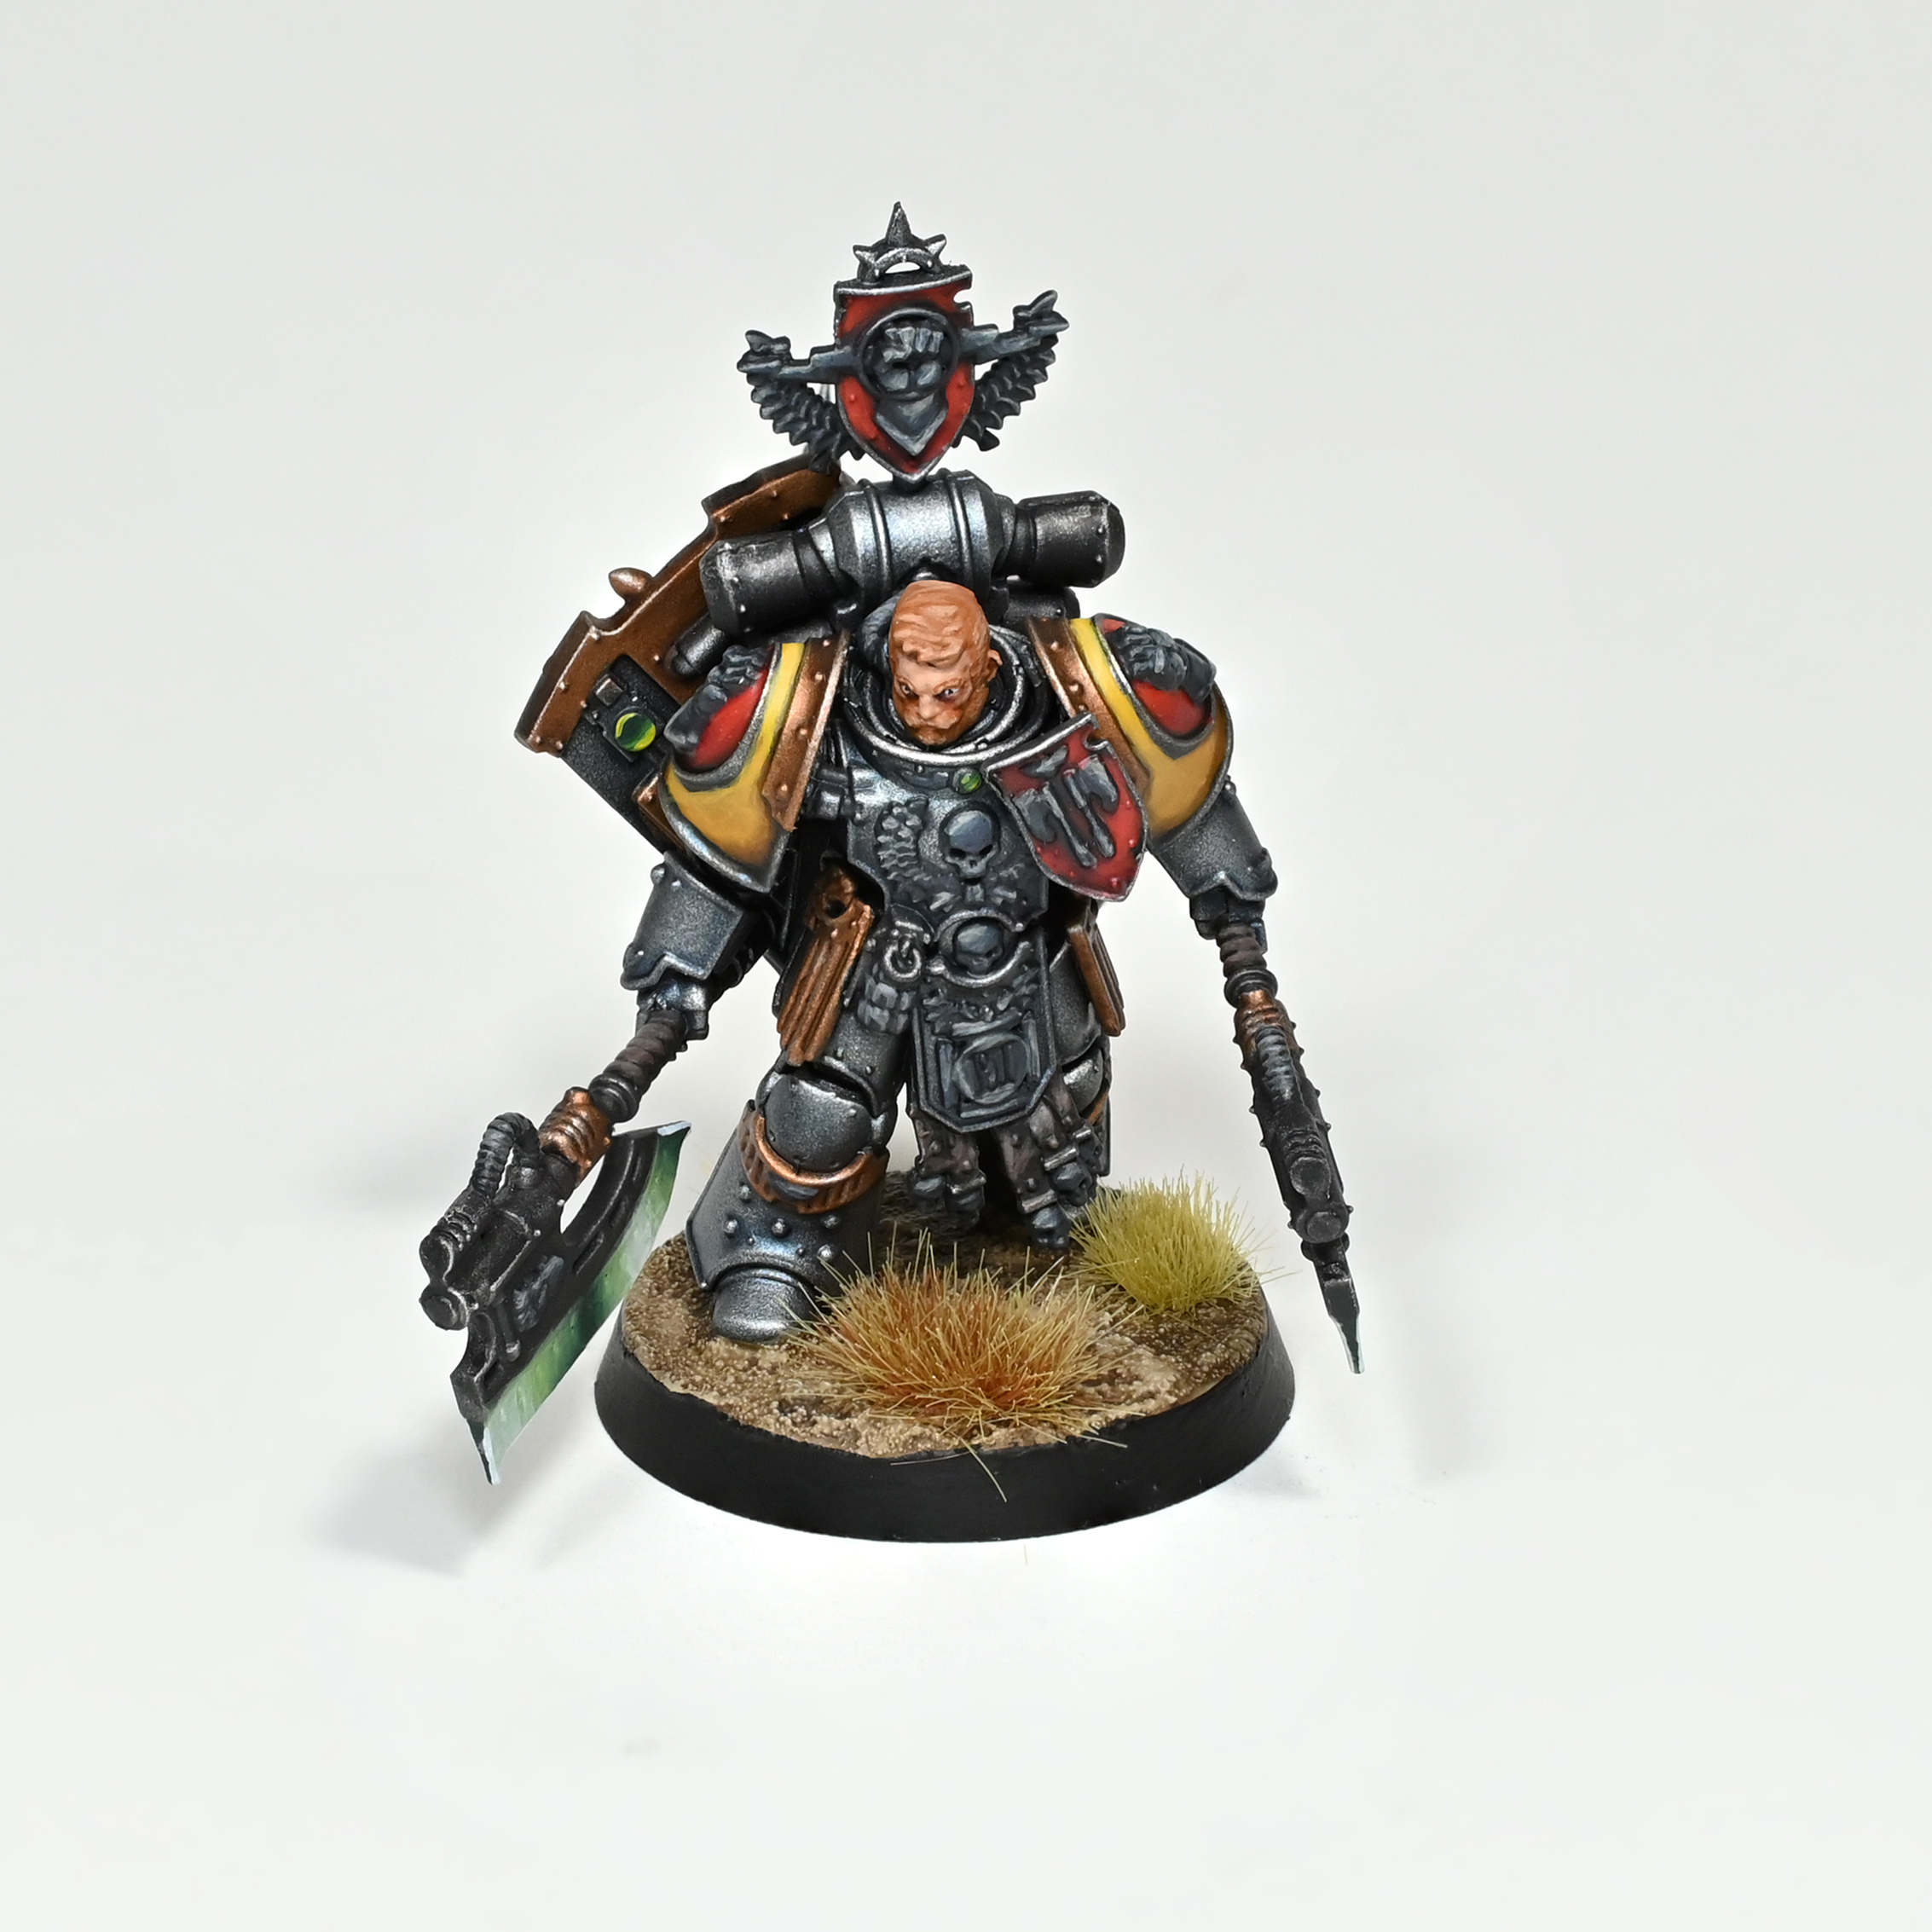
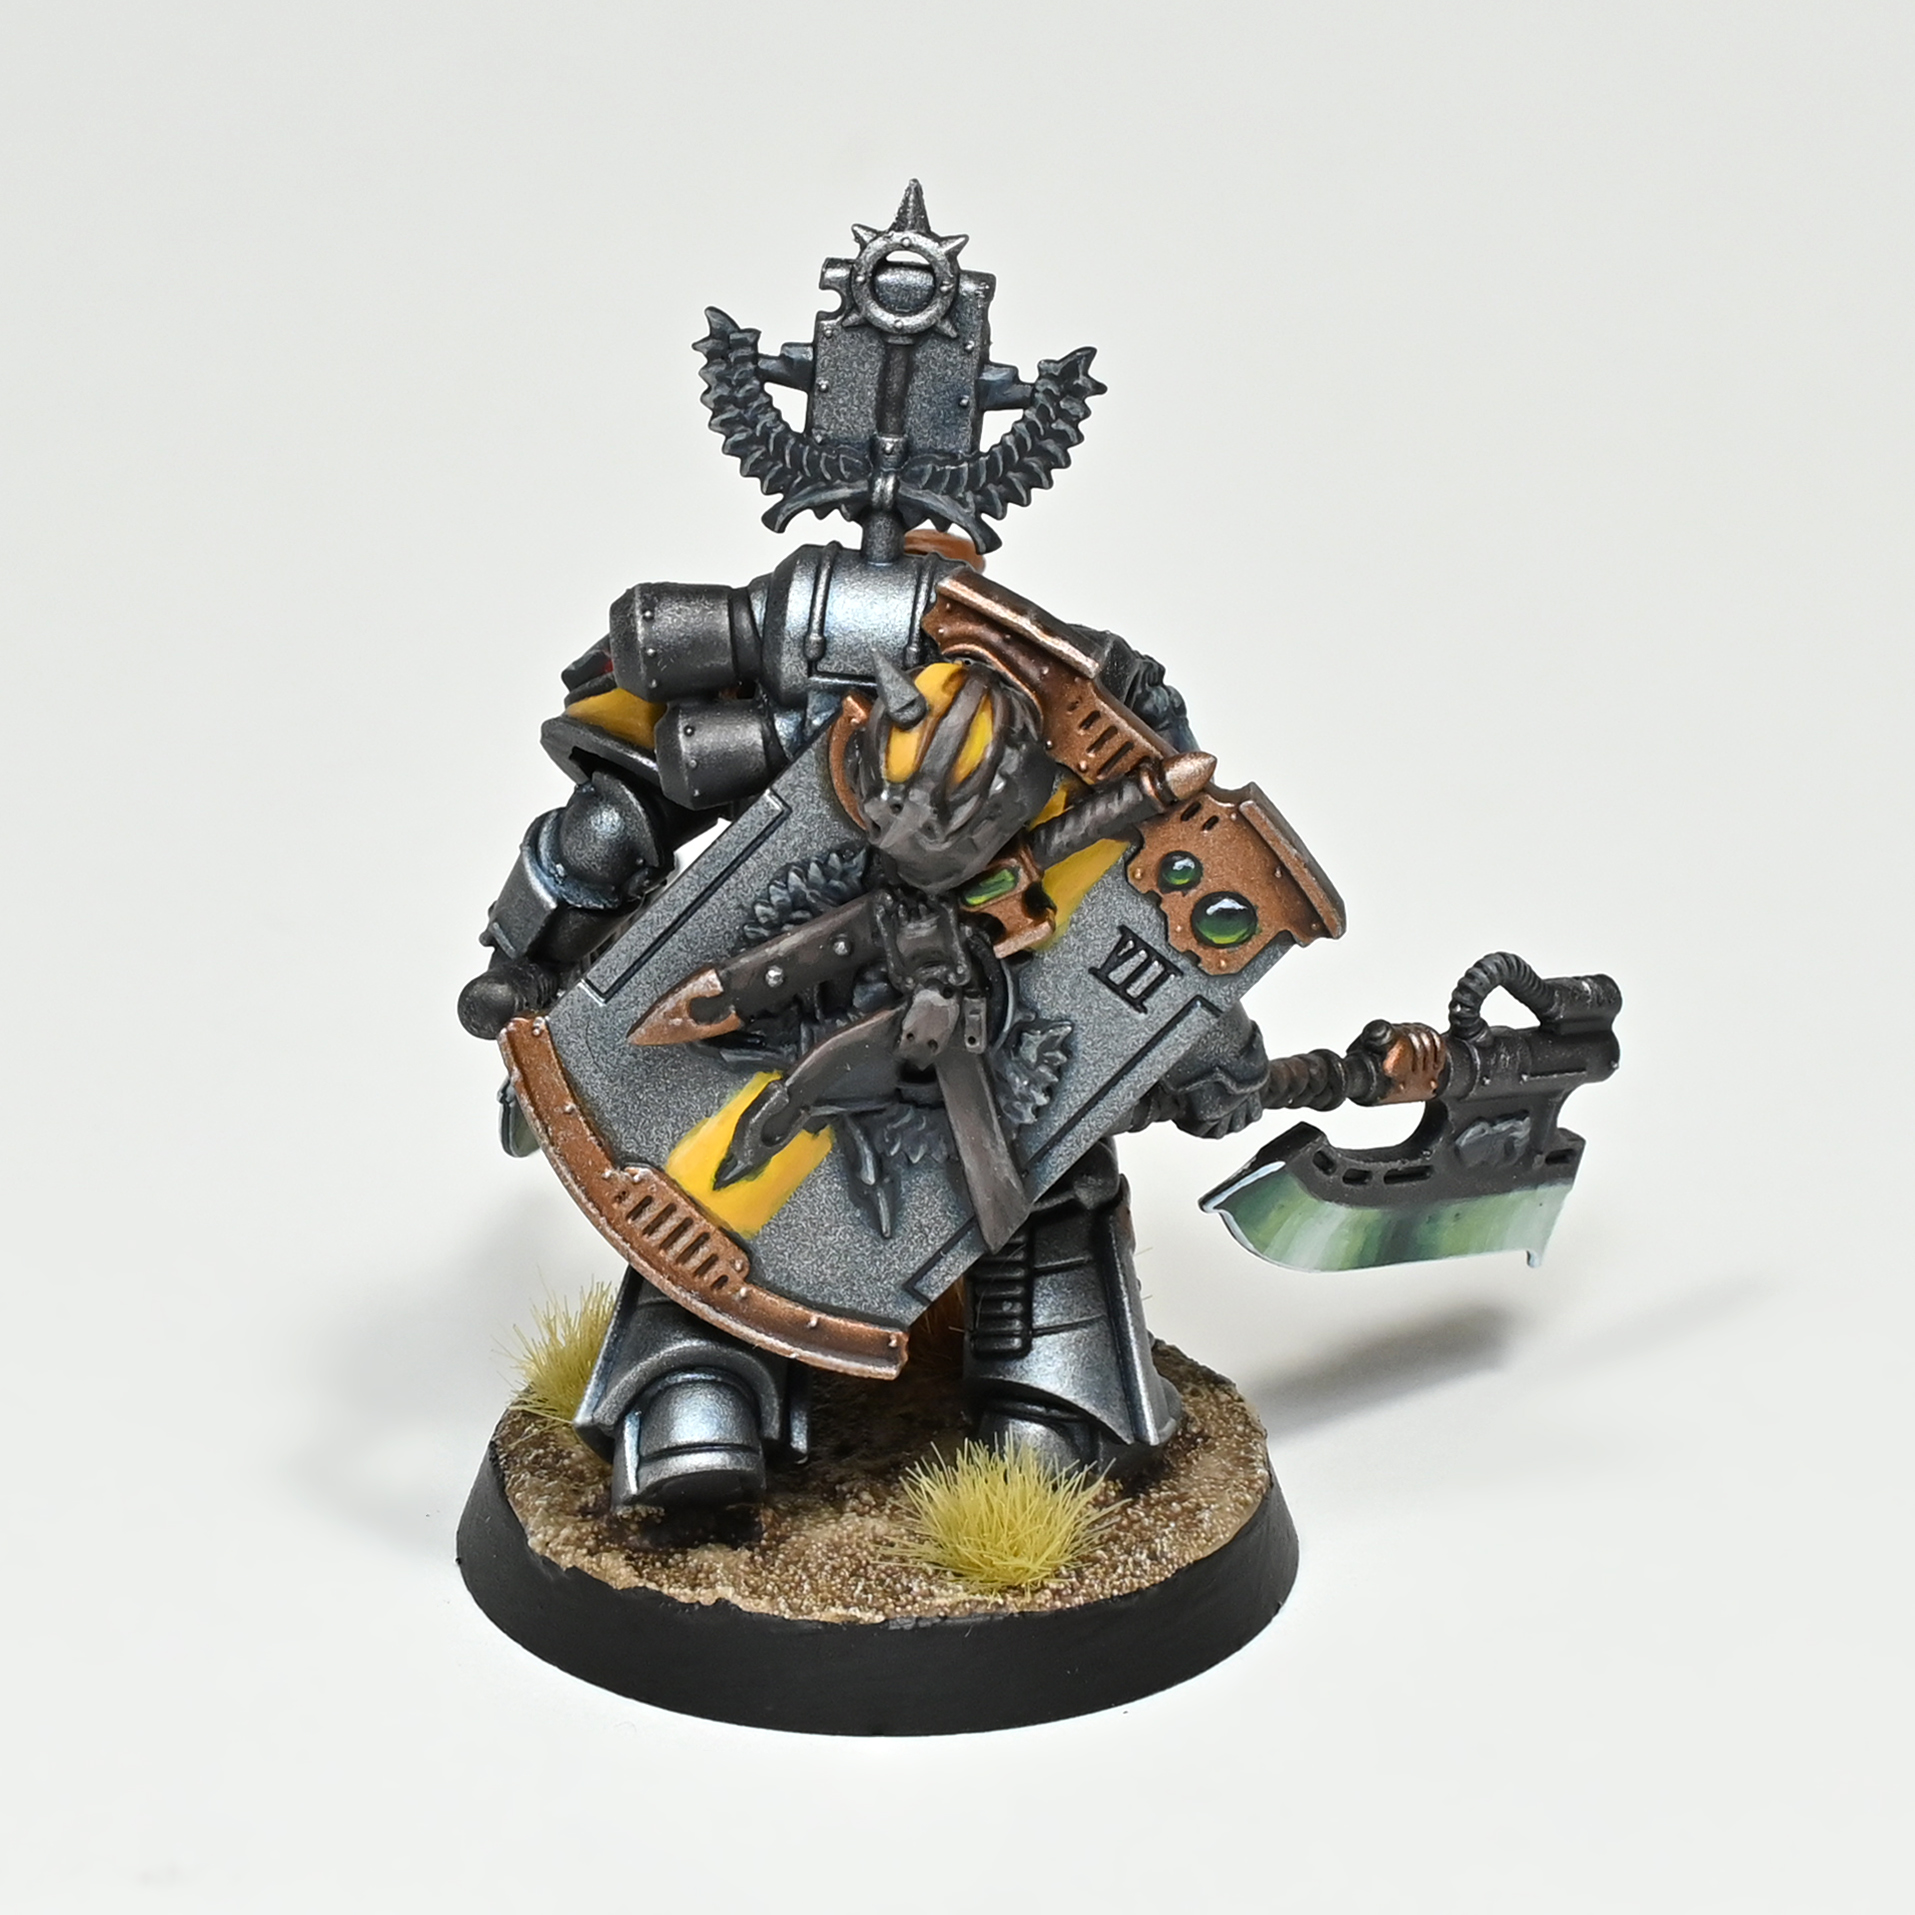
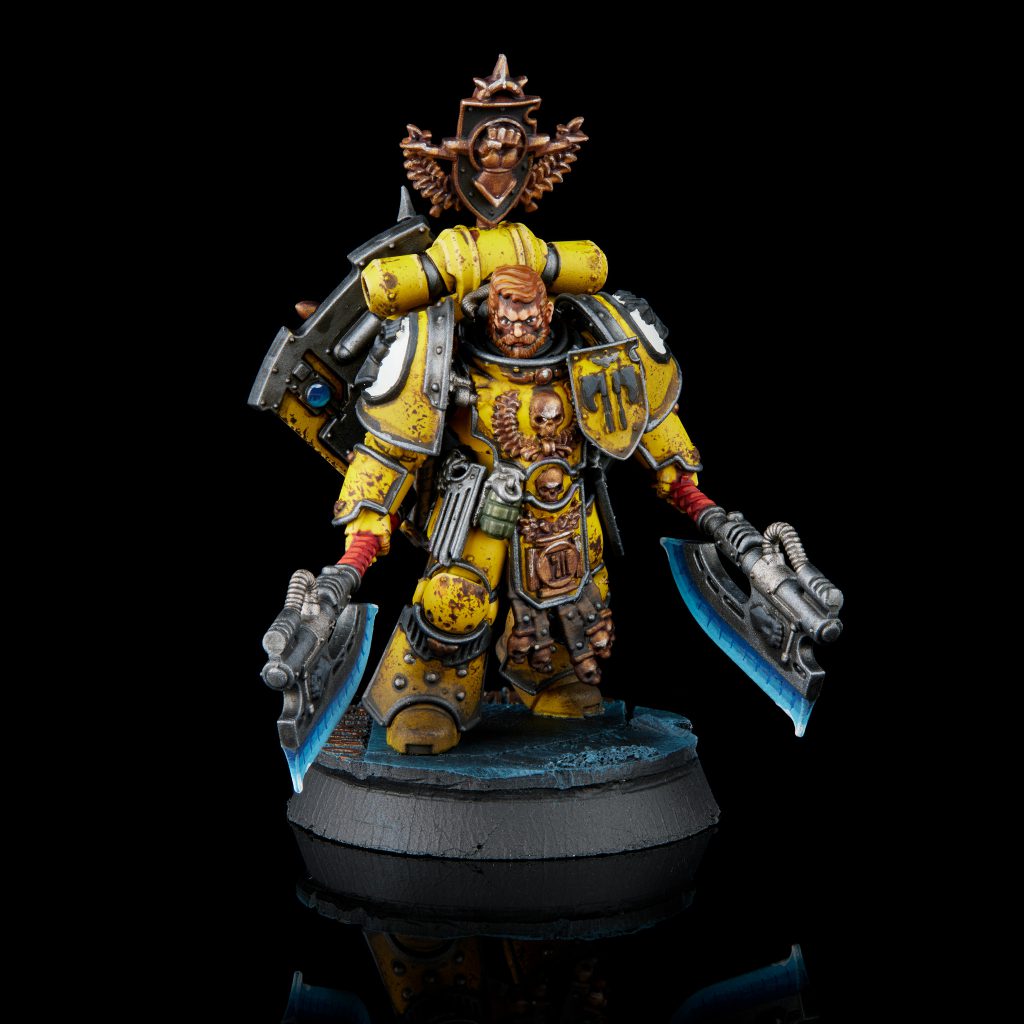
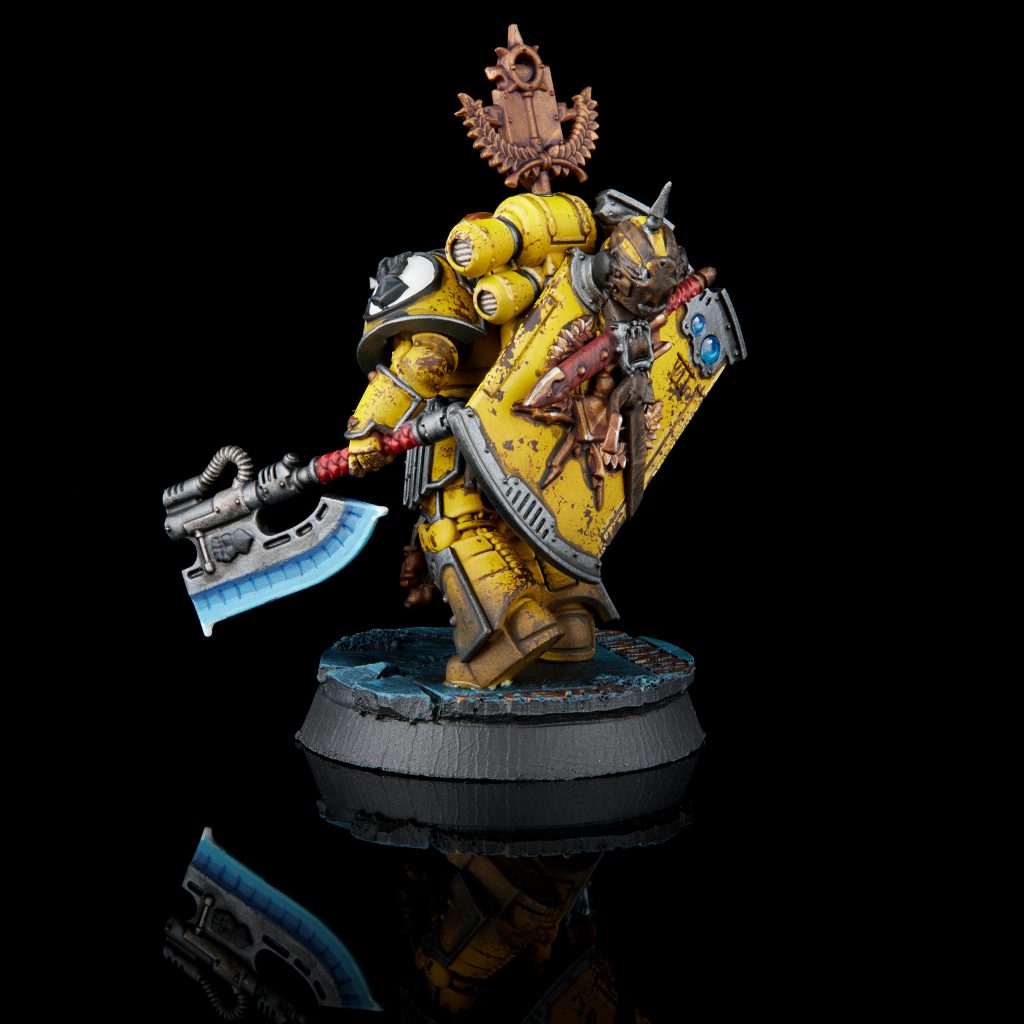
To get specific, in this article we’ll be looking at Fafnir Rann, captain of the First Assault Cadre of the Imperial Fists. Rann’s iconic axes make a appearance both in his hands and in iconography upon his tilting shield, now with the addition of a breacher shield and a heap of wonderful details. While the model has no head options, he still has his helmet ensconced on his shield in more leather straps then is decent in public.
You have pretty limited options for customization out of the box but they did fully model beneath his shield, and most of the small detail gear on the model is optional. This, along with distinct shoulder pads, arms, and head opens the model up as a wonderful base for conversions or using his bits elsewhere.

Fafnir Rann. Credit: Rockfish 
Fafnir Rann. Credit: Rockfish
Now for the build: The biggest thing to watch out for is that the shoulder pads are distinct and the instructions can potentially leave you in a lurch. They each have a different tiny indexing indent for the cables coming from Rann’s chest armour to index against, unlike to the arms which don’t have any thing to correctly align the pads. so if you were to follow the instructions you could glue them on so they don’t align to the cables from the torso and that would be a bad time. Keep an eye out when you assemble this bit.
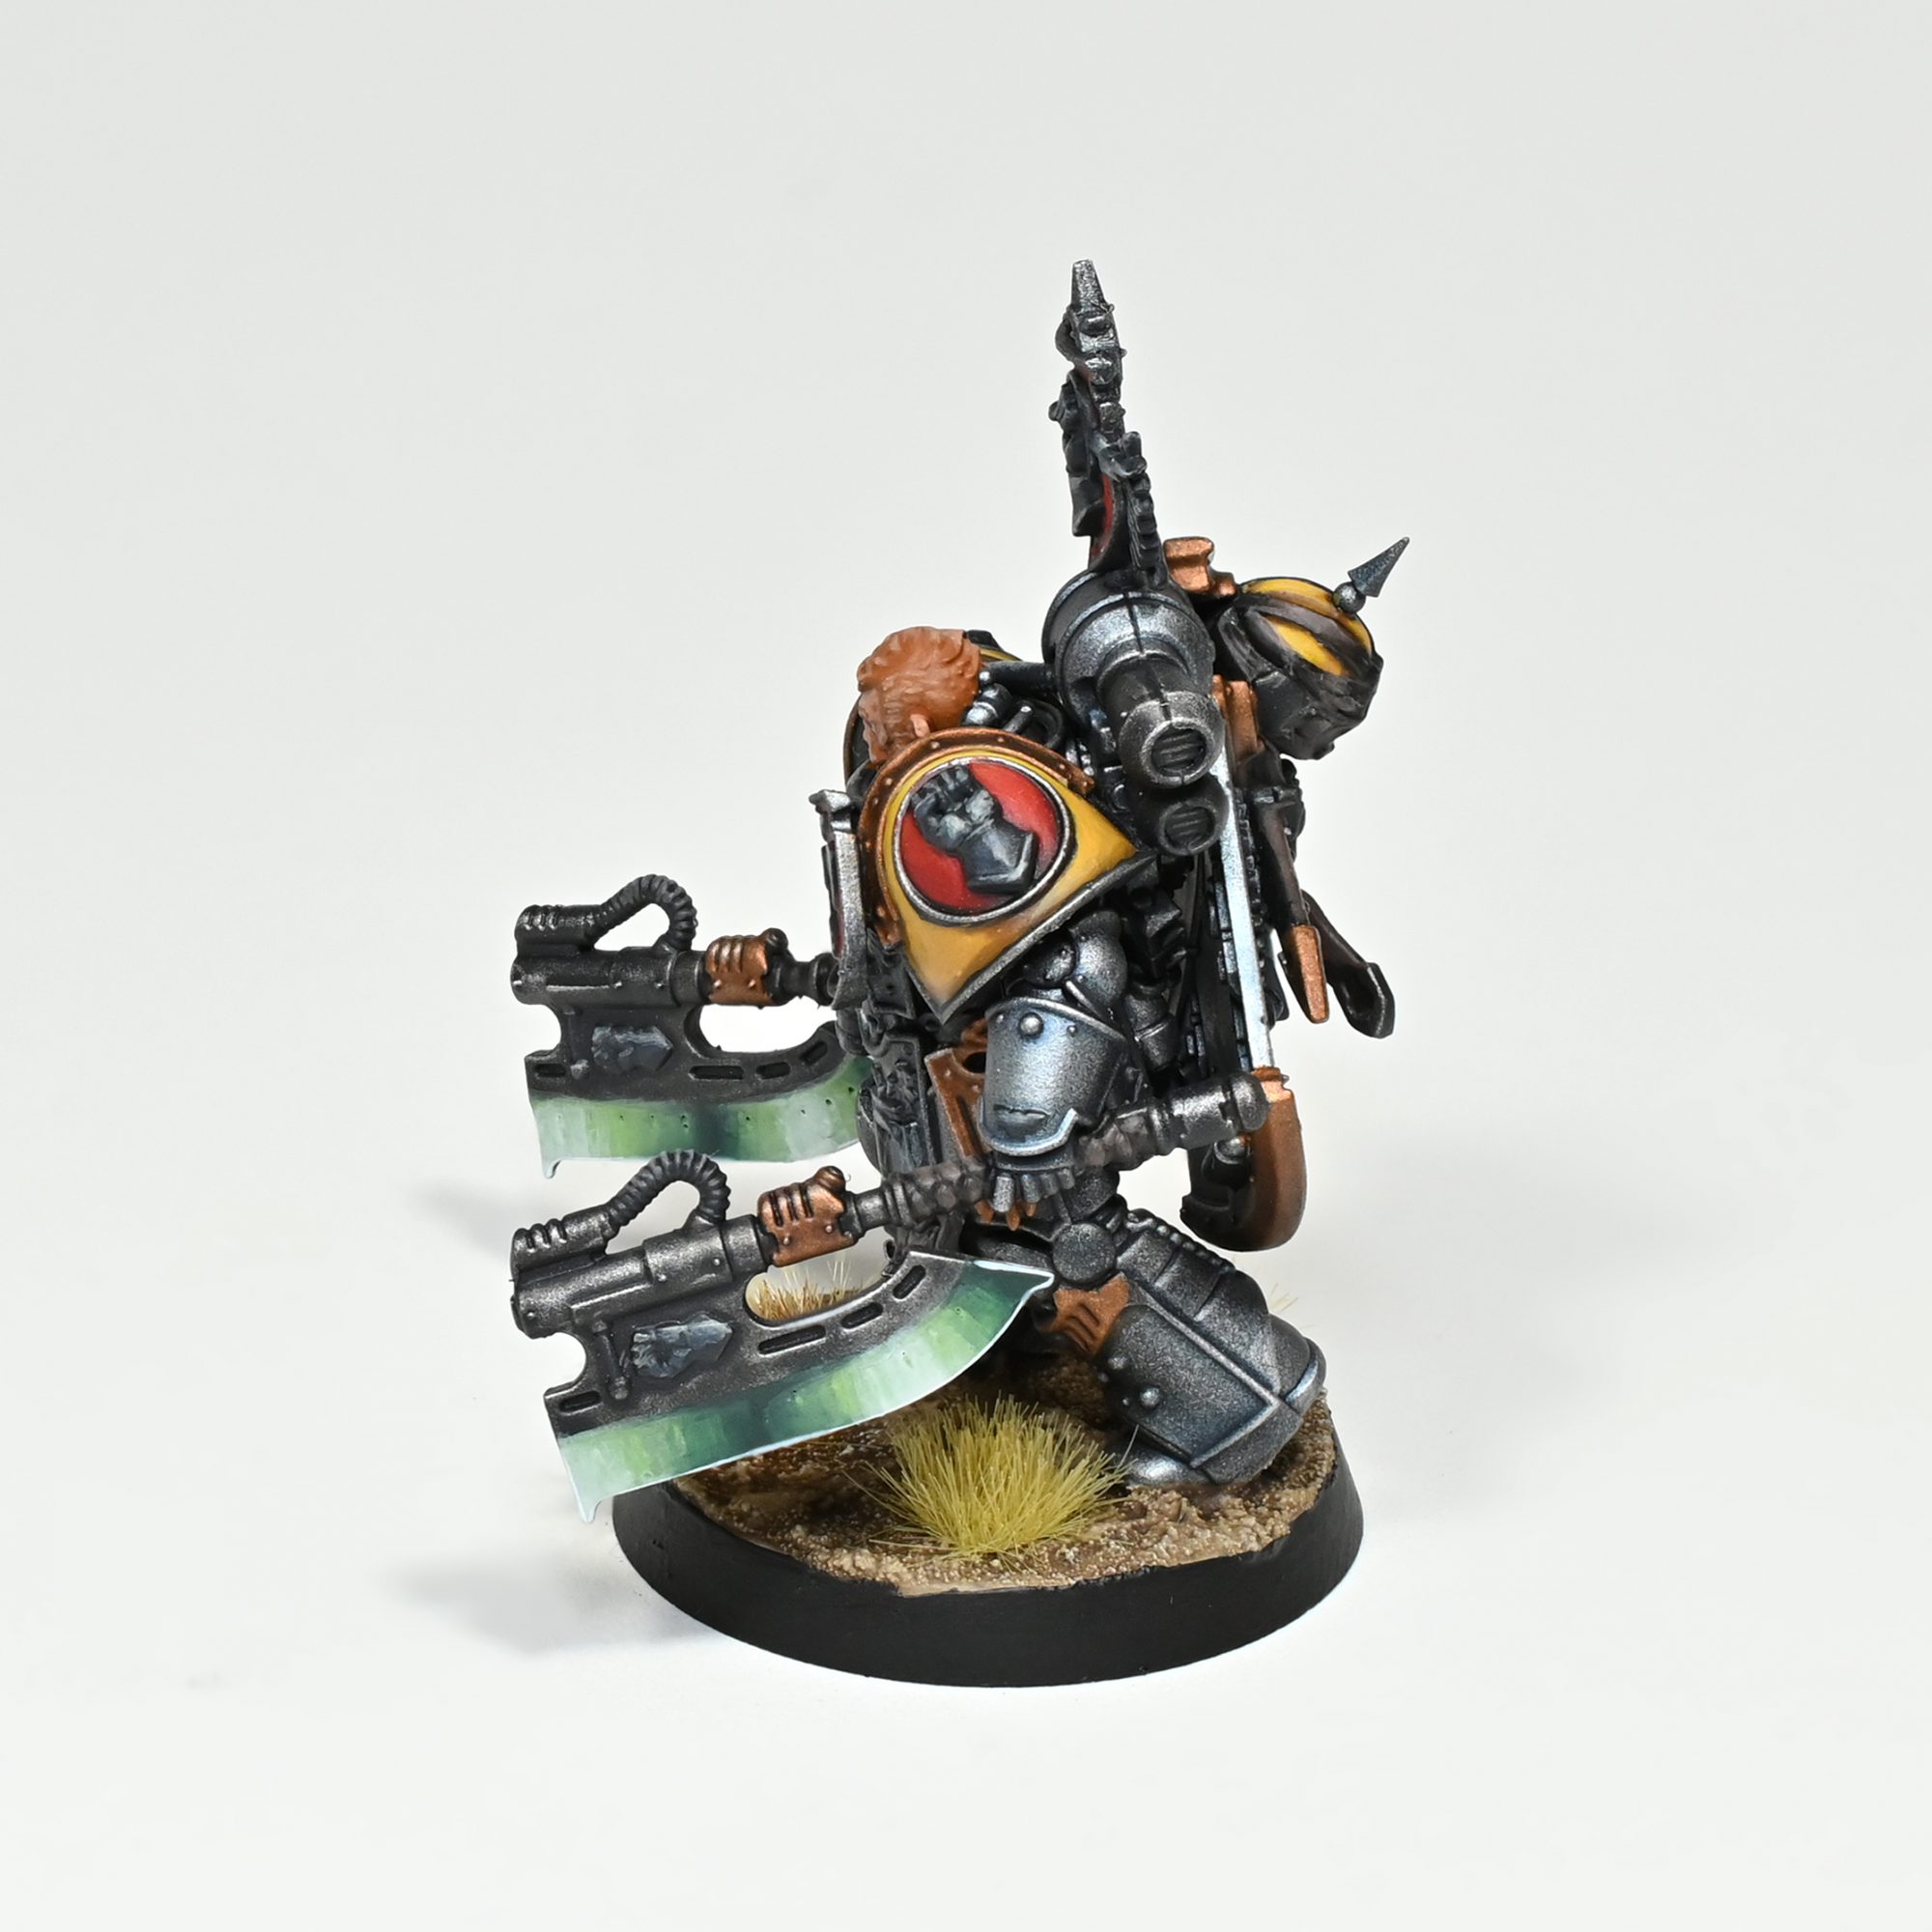
There’s a handful of other little odd choices in subdivision of pieces, none of them are major but are worth mentioning. The one everyone will talk about is the little itty-bitty cable connecting his backpack to his head, which is very much not fun to attach. There is another that I think is more egregious, the backpack vents are two simple halves with a brutal seam between, while you could just fill the gaps with a putty, its not great. In general there a lot more distinct pieces then you would expect, like there is a separate piece inserted into the top of his torso as part of his neck.
In the end the Rann still looks great, so I am more willing to overlook these issues on a character model. It does leave me somewhat worried about how the other 30k models turn out as these are issues that are more expected in models from a decade ago, with luck the rest of the range feels a bit more polished.
Painting Fafnir
Jack
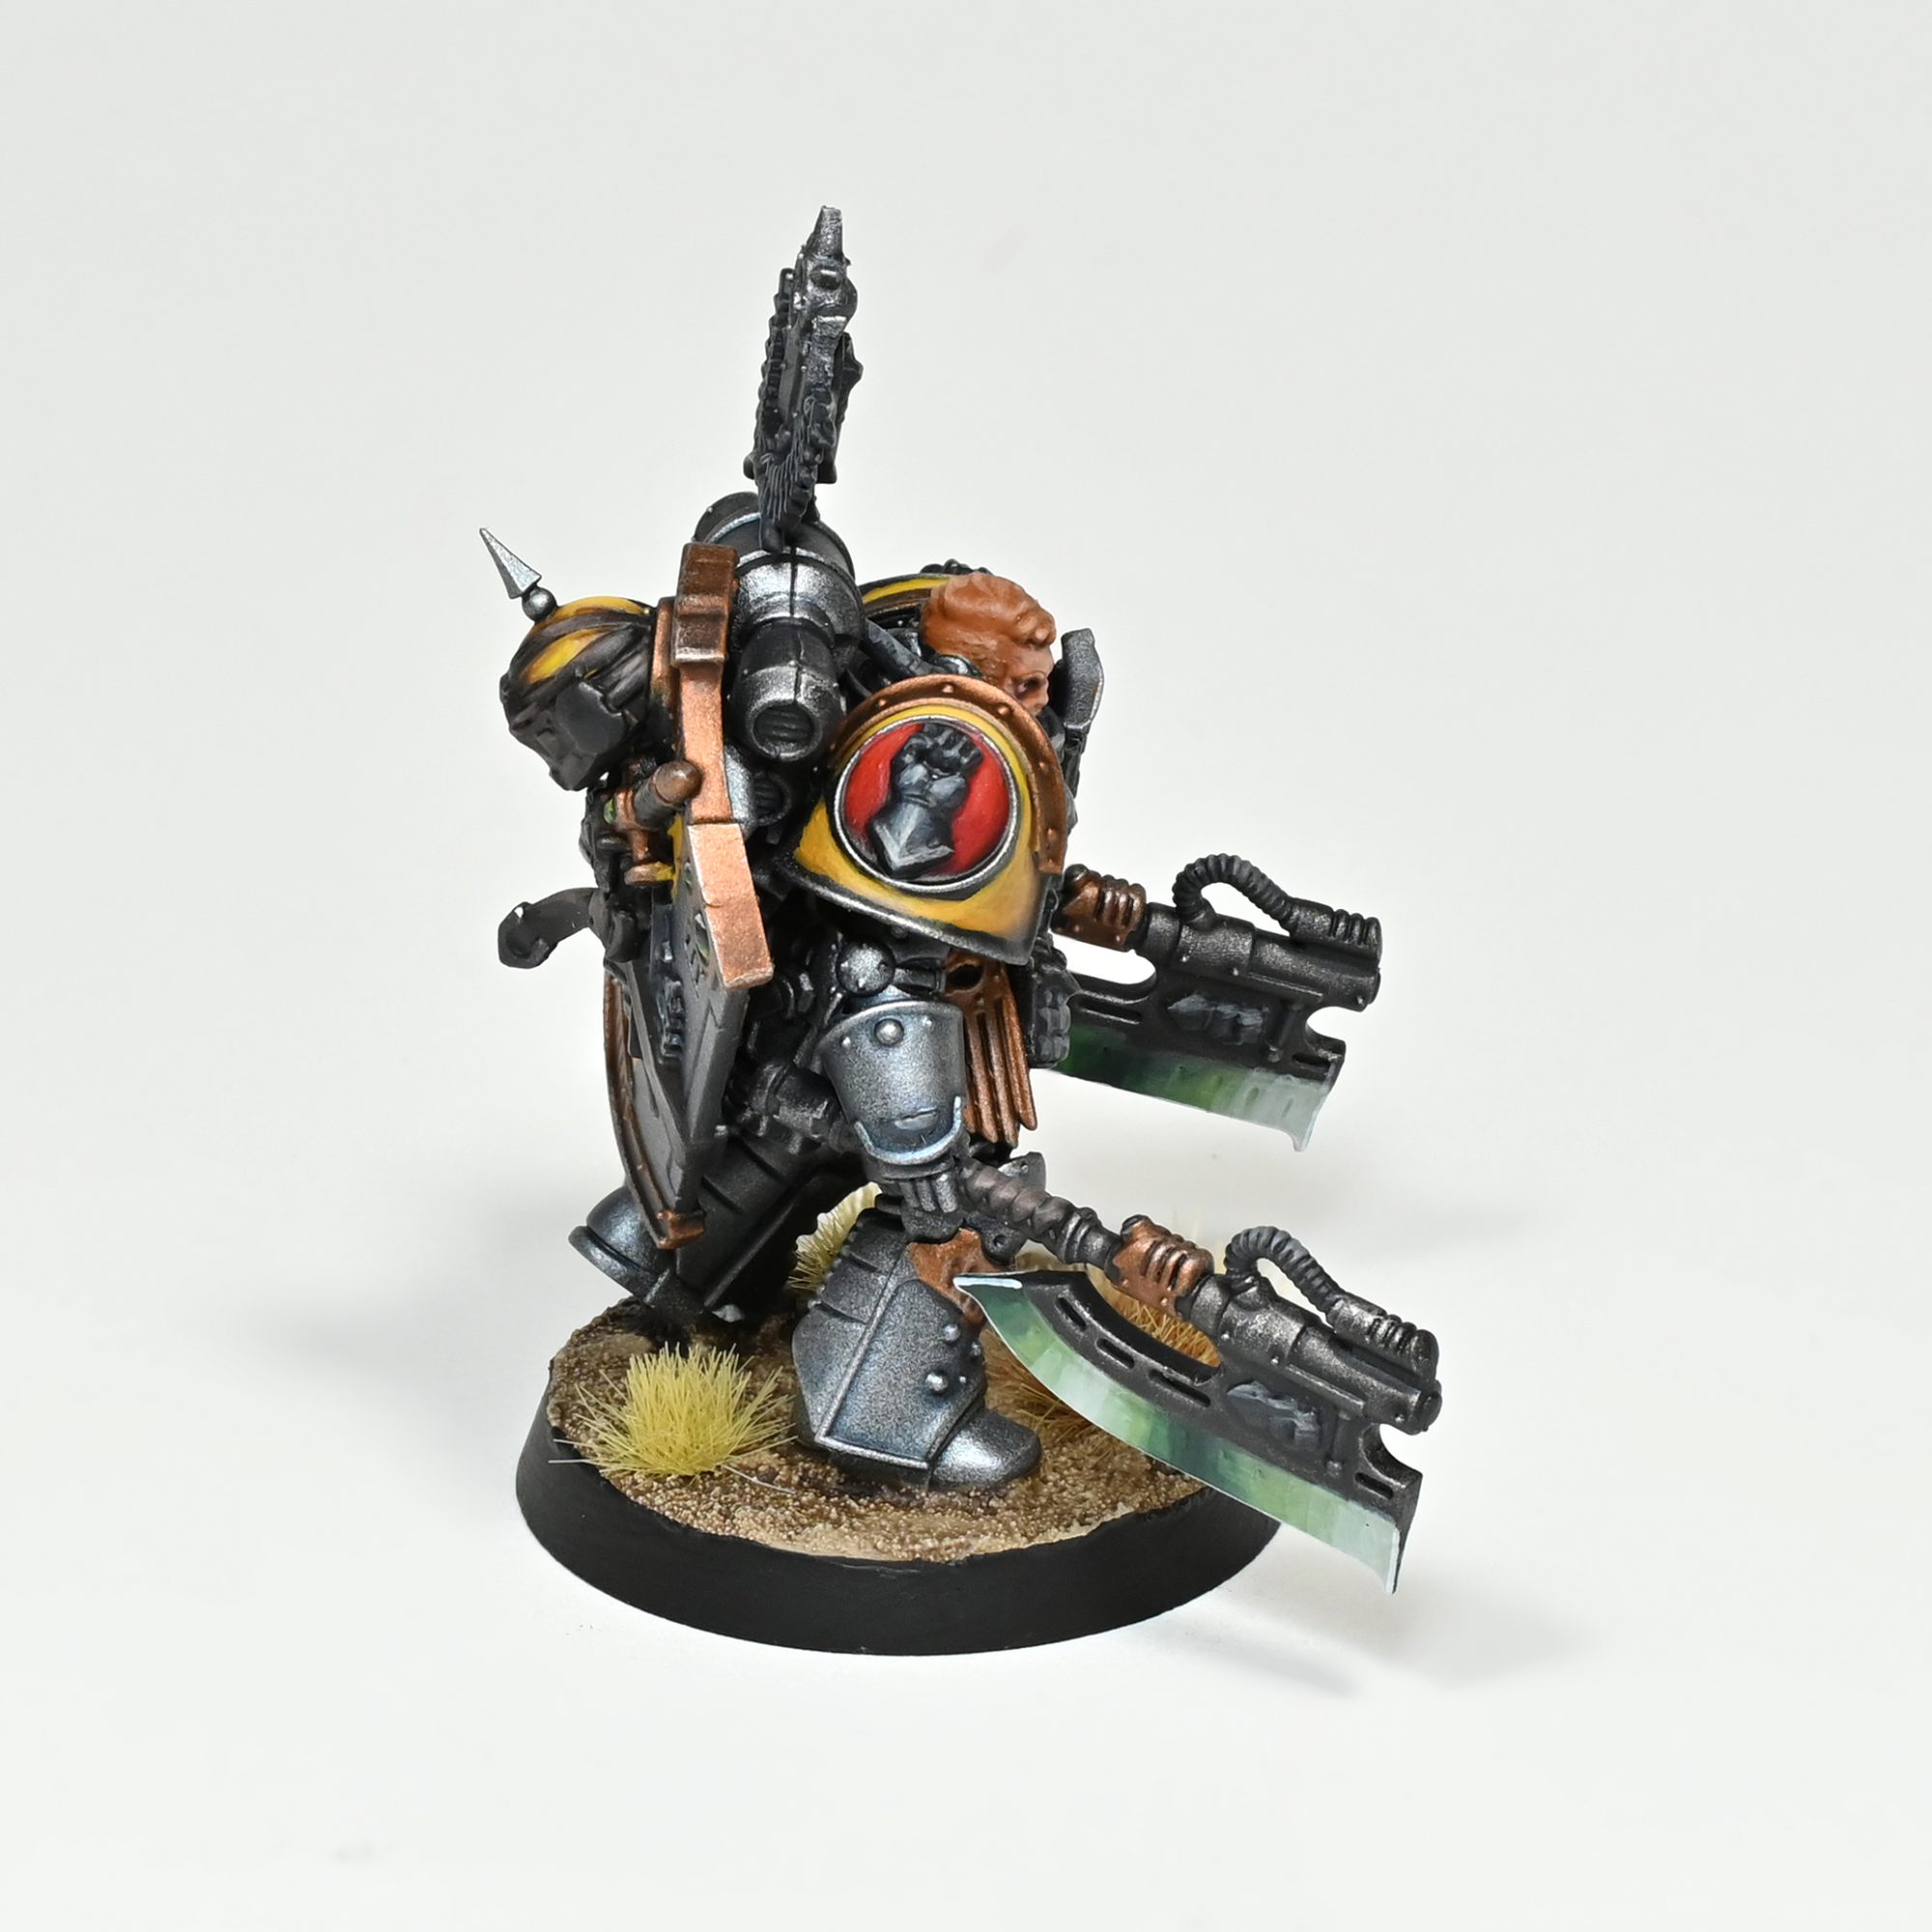
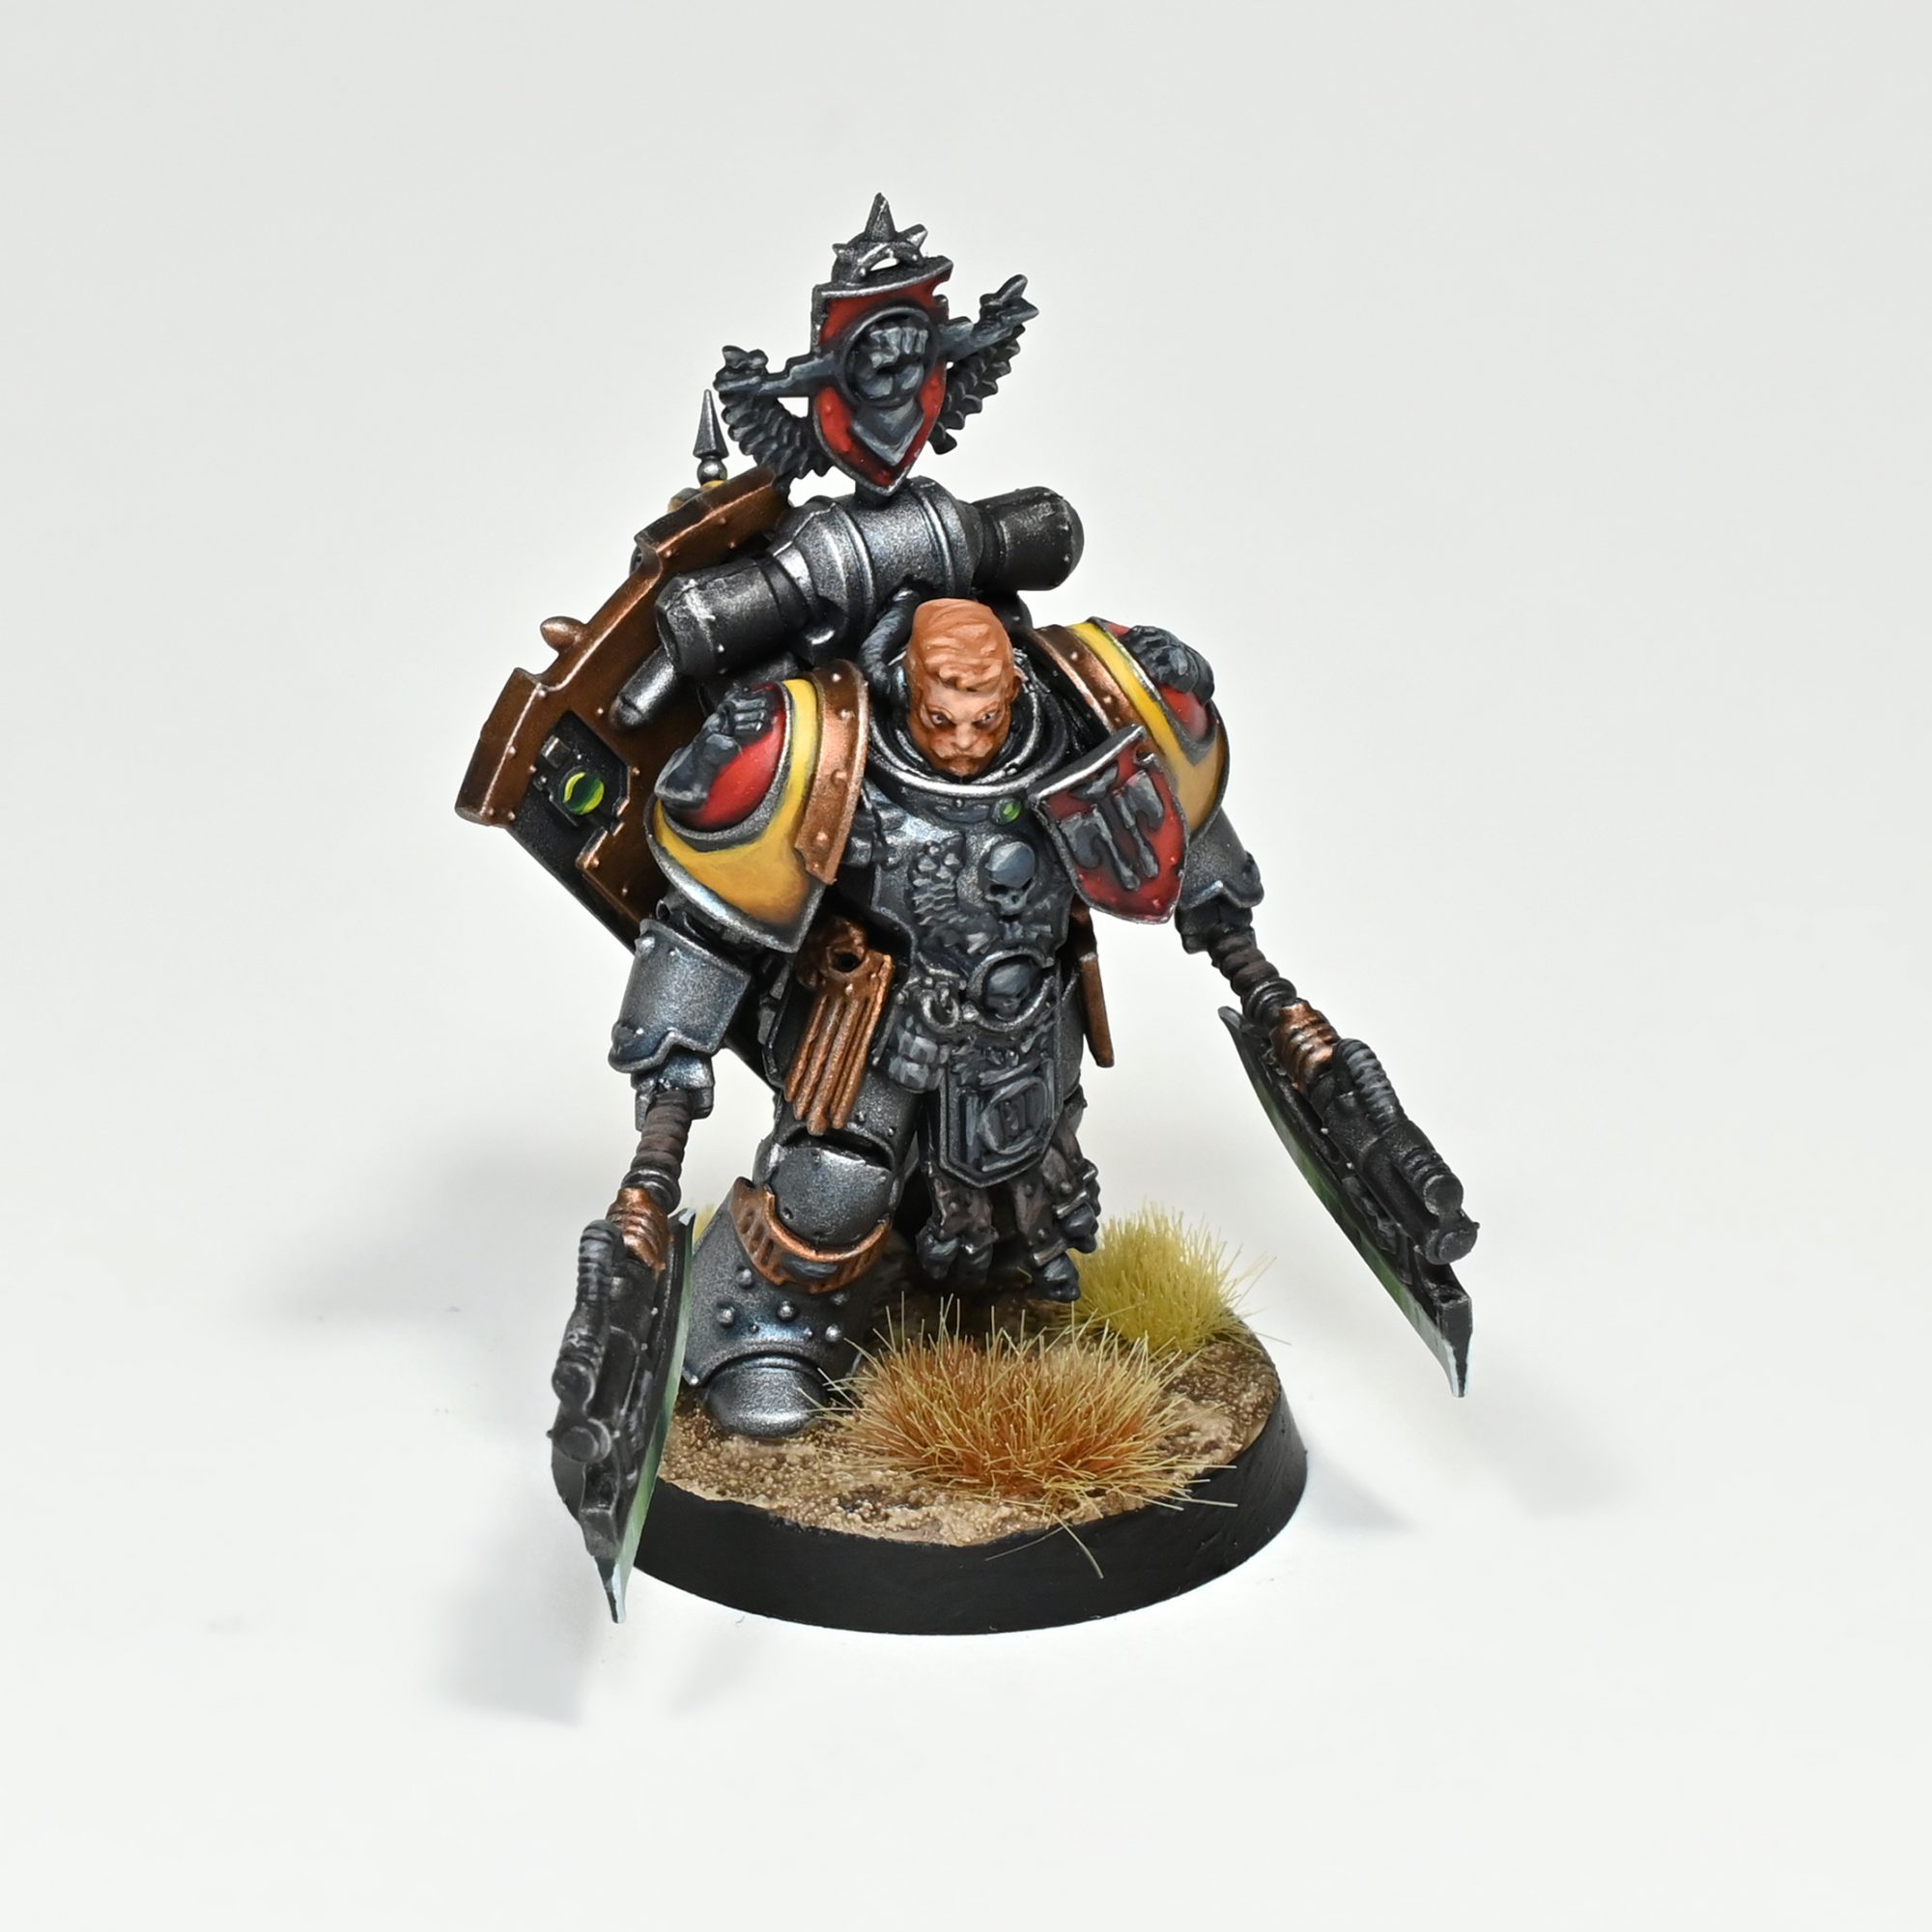
I found Rann to be quite a pain to build. While mold lines weren’t a big deal, most modern 40k models I’ve found to hide seams between parts better, and they all have much more definitive alignment for pieces. Everything here felt like I was wiggling it around until it looked right – especially attaching his tilting plate. I also found the detail to be more layered than many recent models, which while it looks great can be difficult to reach with a brush.
I painted Rann following my scheme in How to Paint Everything. The only spot substantially different on Rann than any other Imperial Fist for me is his hair, as I generally try to keep helmets on everyone. He’s a ginger, and I’m a little lacking on orangish browns. I basecoated the hair with Mournfang Brown, highlighted twice by mixing in a bit of Flayed One Flesh, then glazed the entire thing with Pyroclast Orange – one of the rarely used clear paints.
Rockfish
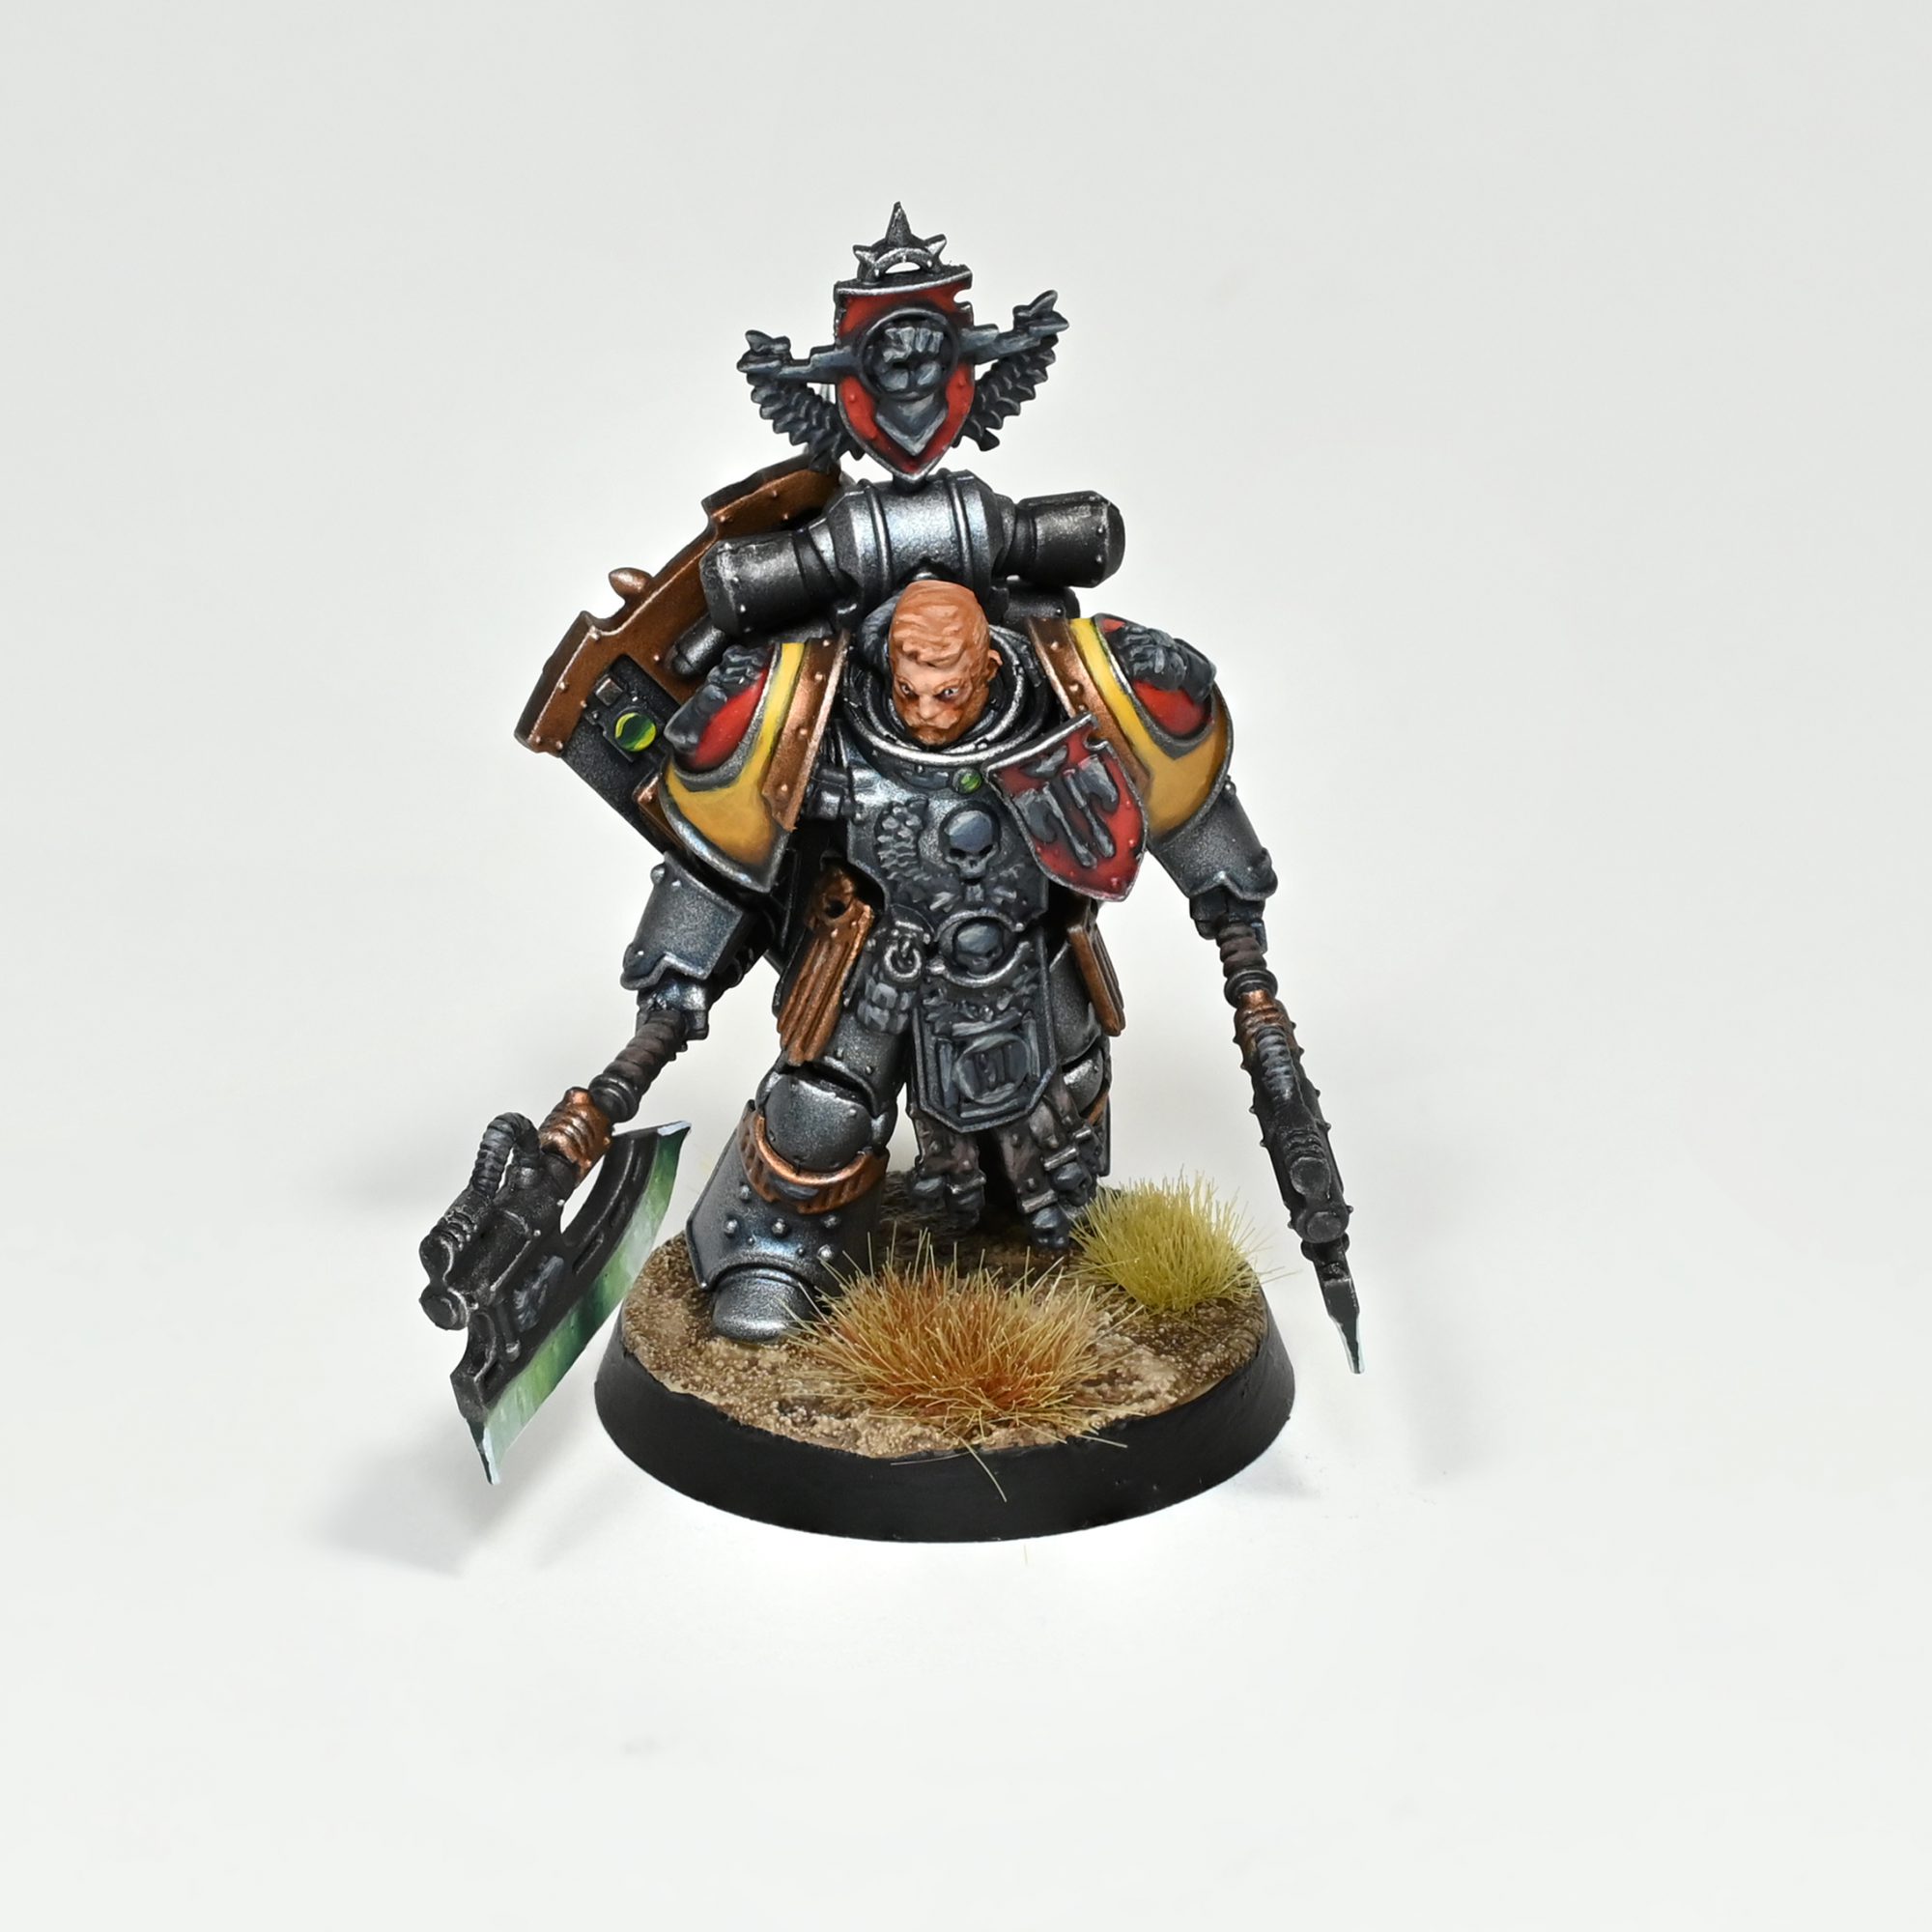
I wanted to do Rann in something other then the default imperial fists colours, so invoking his post heresy future I decided to do him up in his Executioner colours.
Base coats and washes
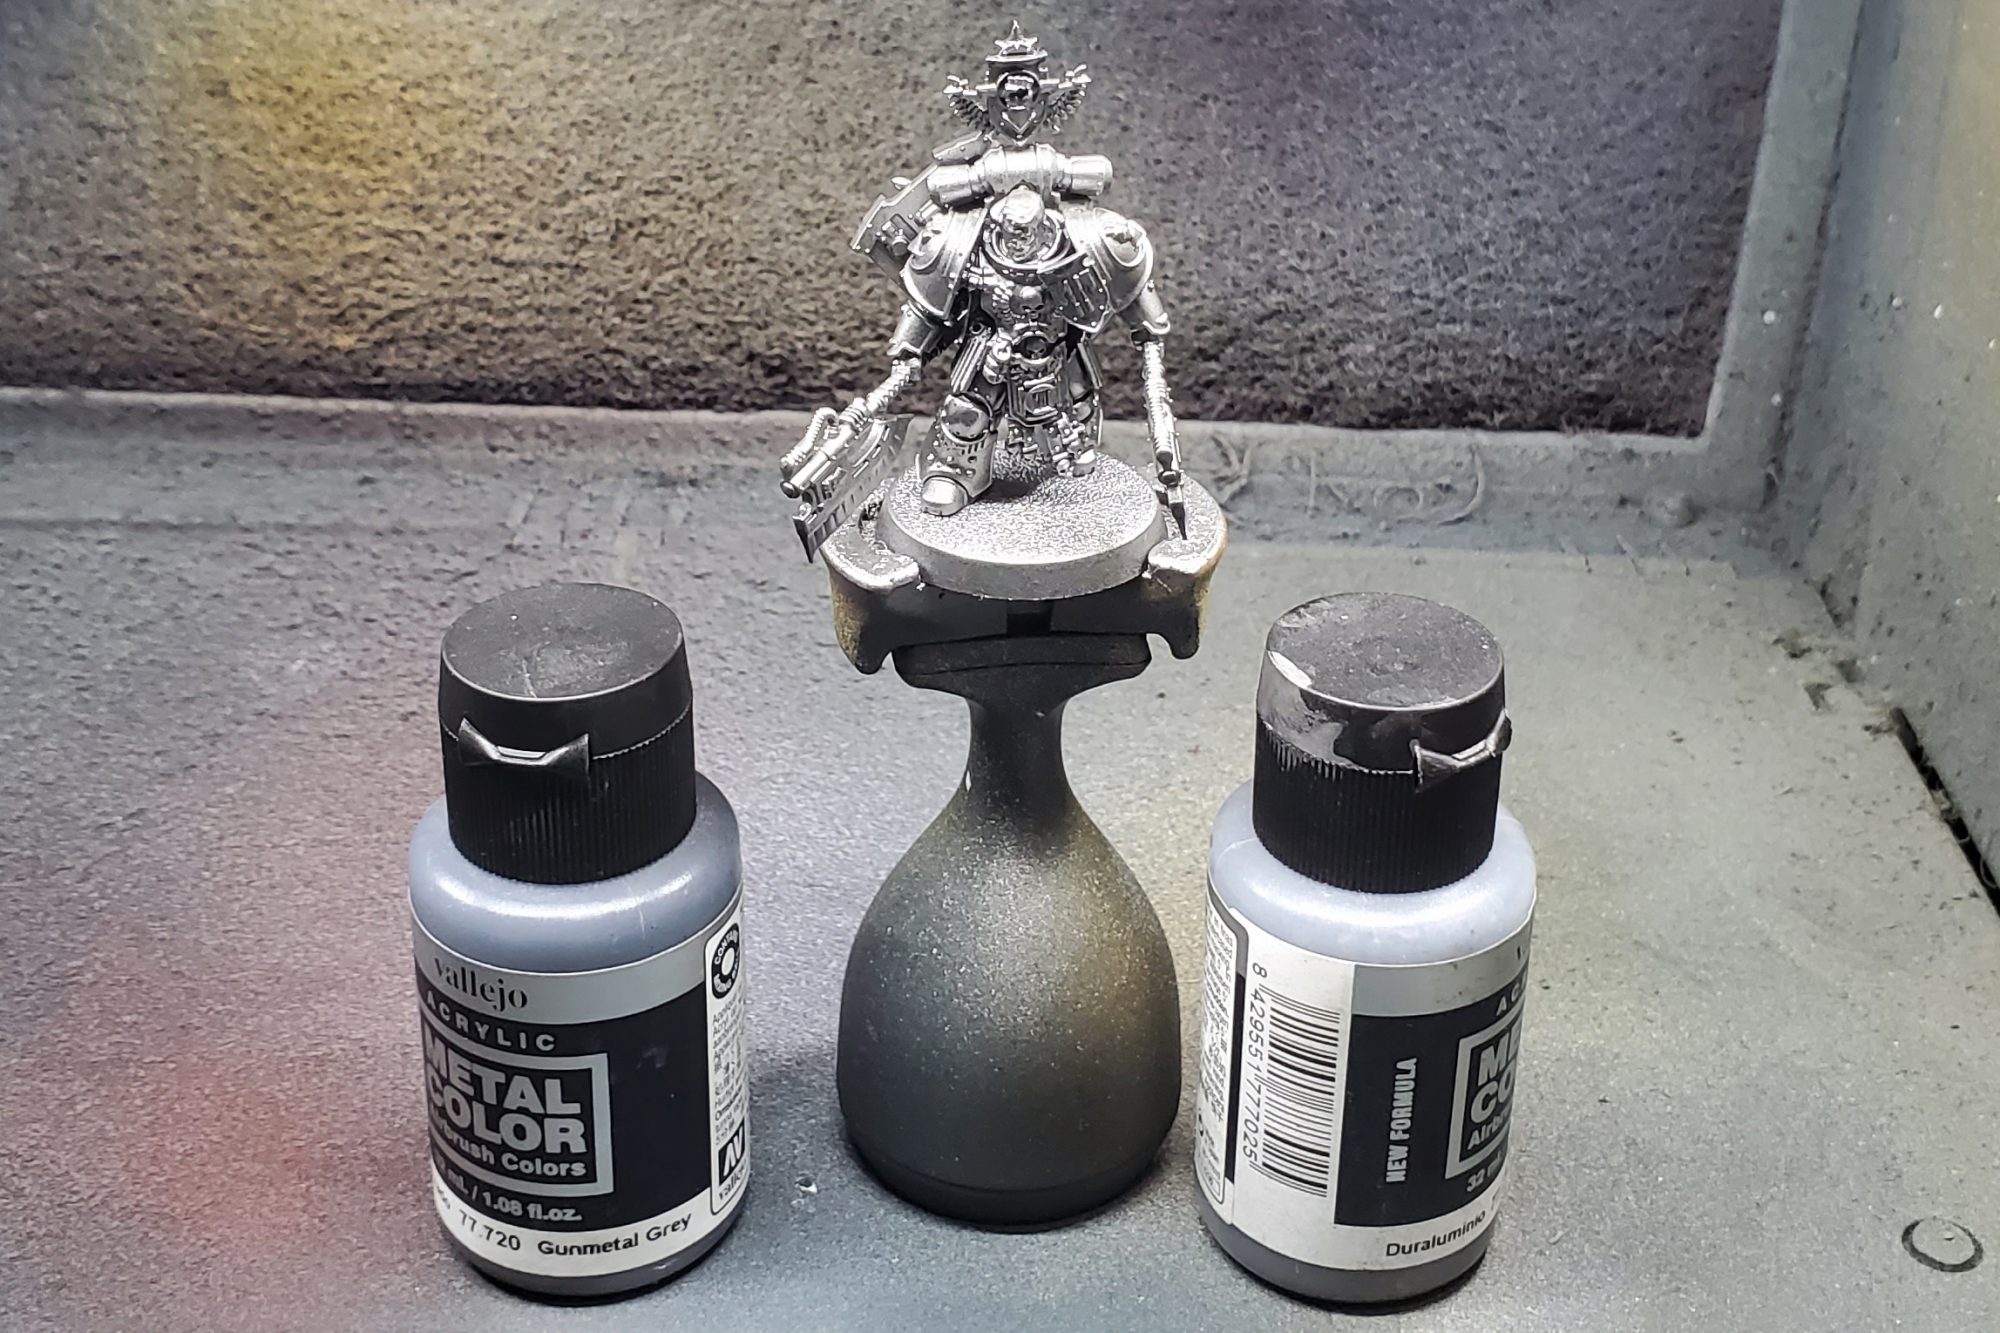
I started by Gunmetal grey all over, then a zenithal of Duraluminum, its not visible in the ultra glare lighting of the airbrush booth and you could consider going to a much darker initial coat if you want it more pronounced.
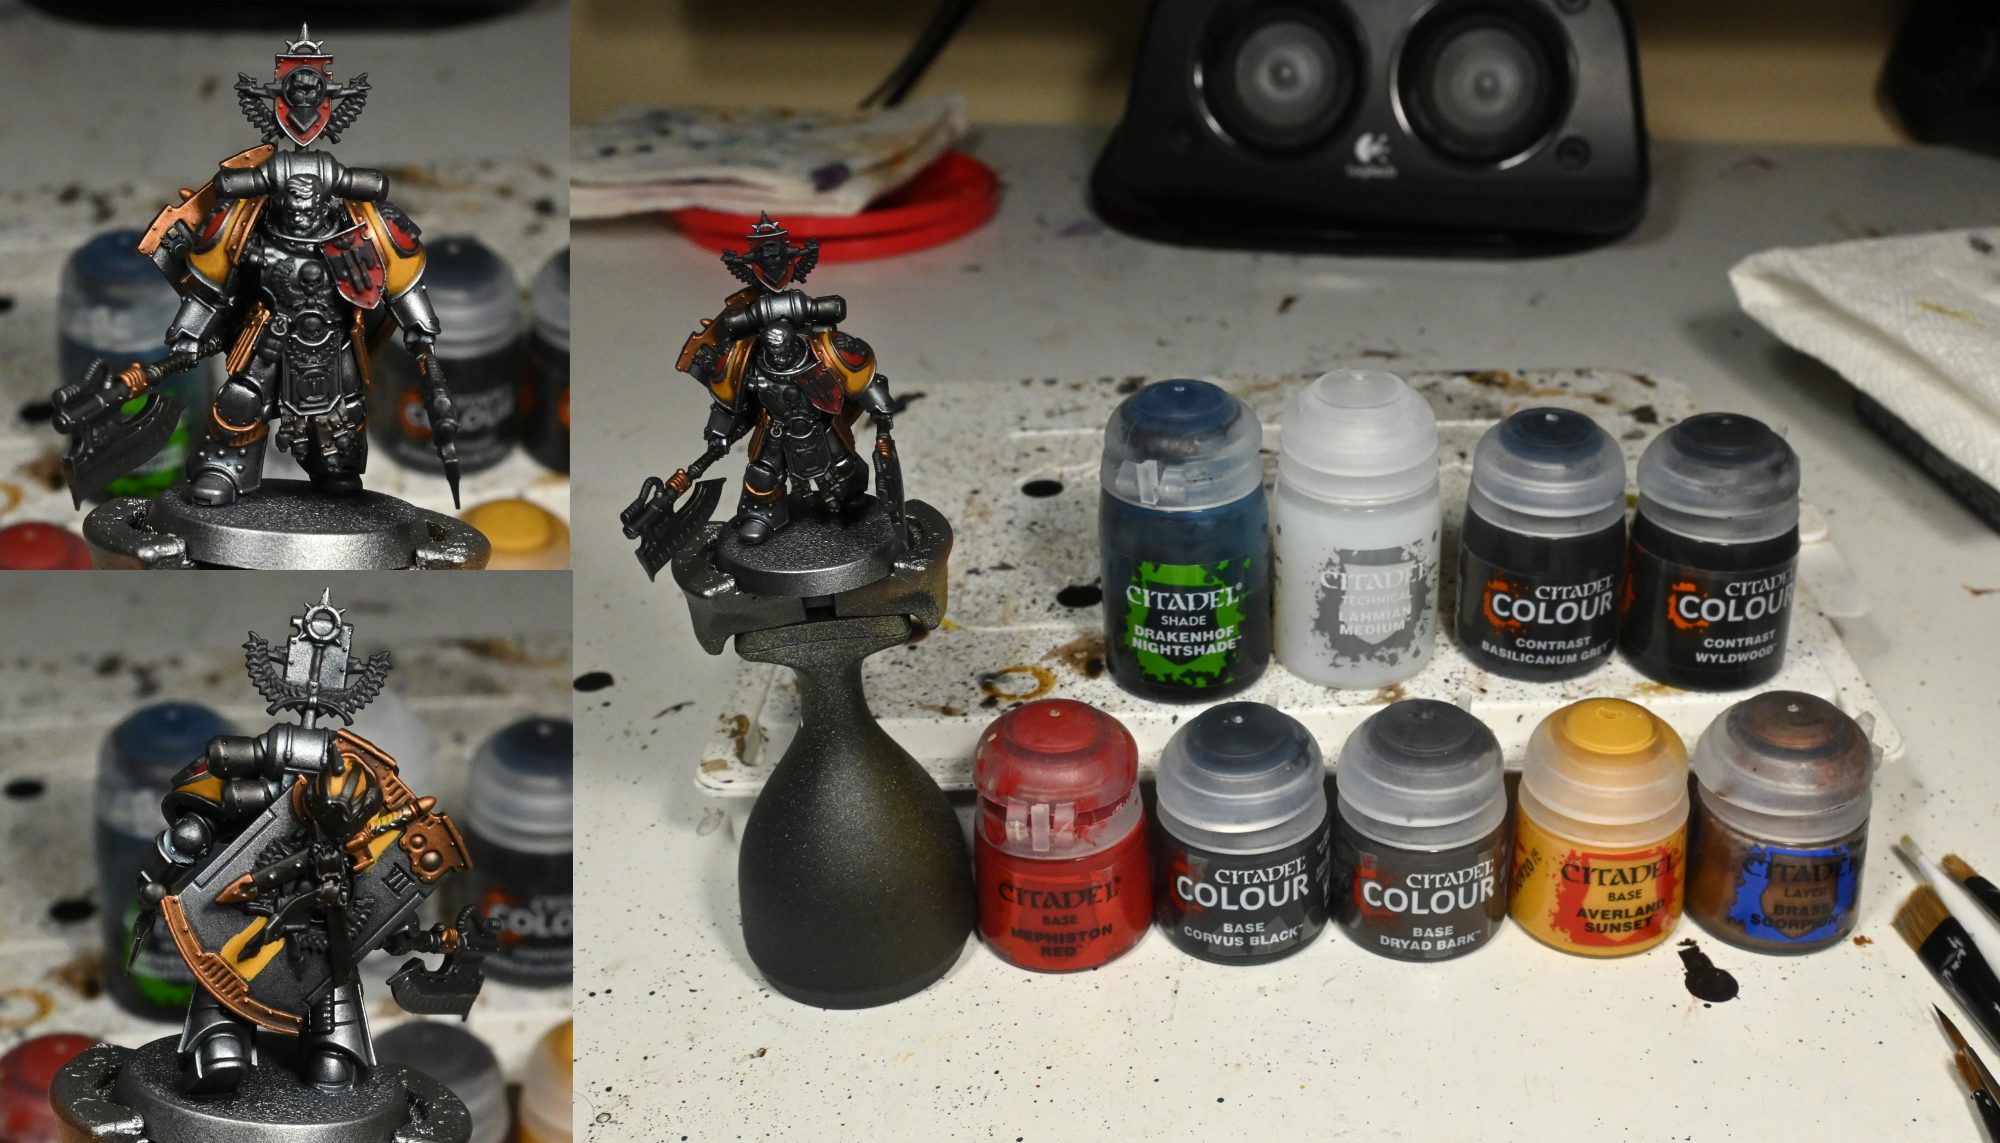
Once I am back to the painting desk, I do two thinned coats of Drackenhof across the whole model, you could do one thicker coat if you want the whole model bluer but two thinner coats gives crisper recesses and cleaner surfaces in my opinion.
To differentiate the steel of weapons and vents I hit those areas with Basilicanum Grey, the trim and metal details in brass scorpion to bring in the coppery colour GW often depicts on Executioner models.
Next up is running around to get all the other details:
- Mephistion in the inset areas of iconography panels
- Corvus for iconography itself
- Averland for the shoulder pads, helmet, and shield stripe
- Dryad Bark washed with Wyldwood for the leather
I forgot to include it in the picture, but I wash the red, yellow, and copper with Agrax at the same time.
Highlights
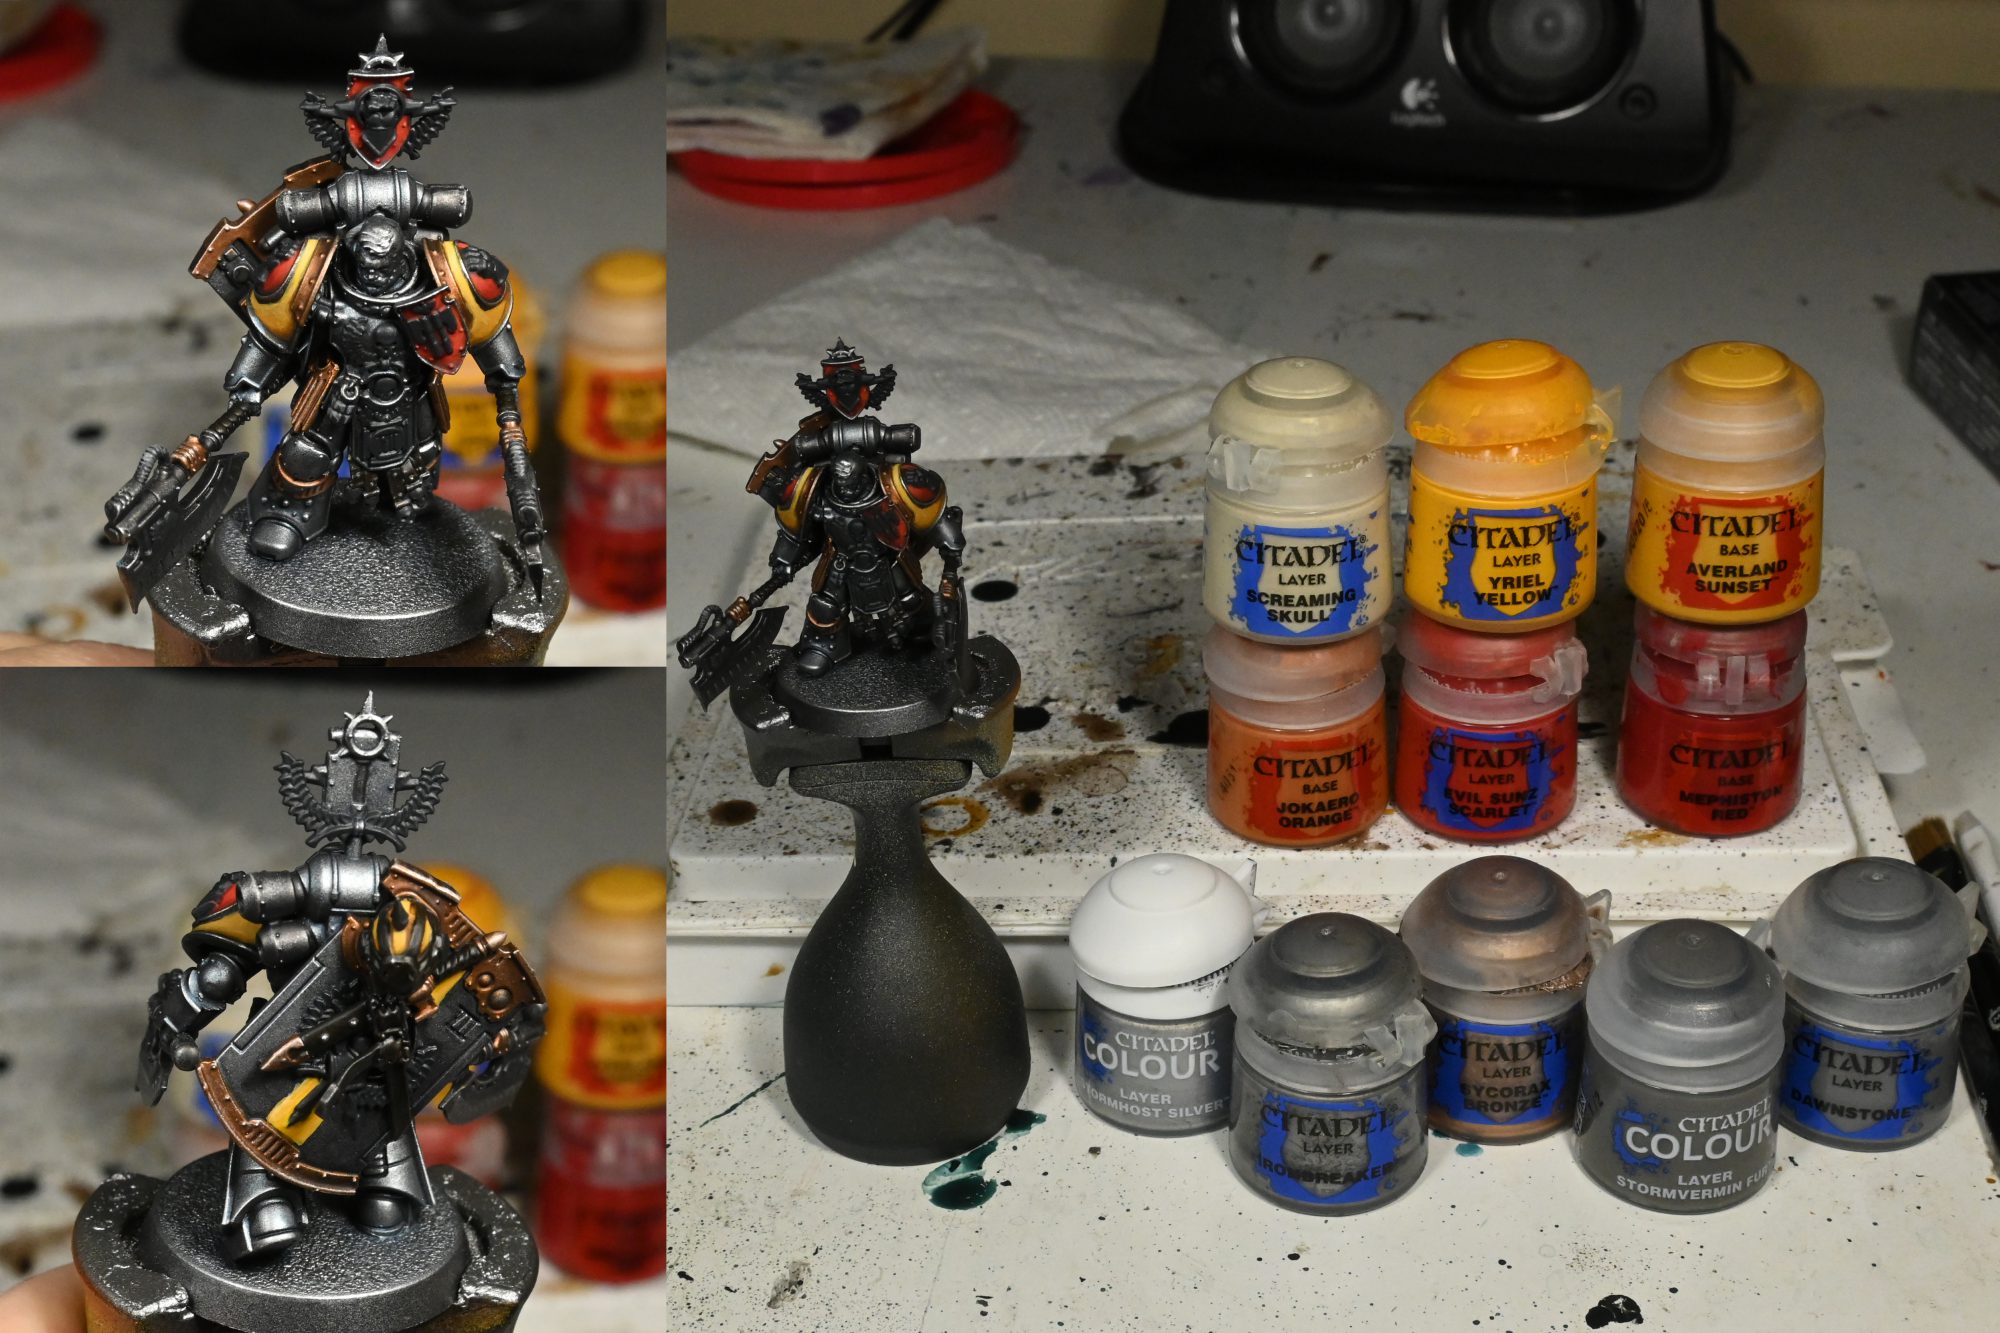
I started by dry brushing the metals, the steel and copper start with Iron Breaker and Sycorax respectively, then all the metal gets a soft drybrush of Stormhost Silver. With the metal done it is time to do a lot of glazing:
- Yellow starts with the base coats of Averland, then Yriel and finally a hint of Screaming Skull
- Red begins with Mephiston, then Evil Suns, and a little Jokaero which is filtered over with Evil Suns to not be too extreme
- Iconography works up through Dark Reaper, Karak and then Flayed One
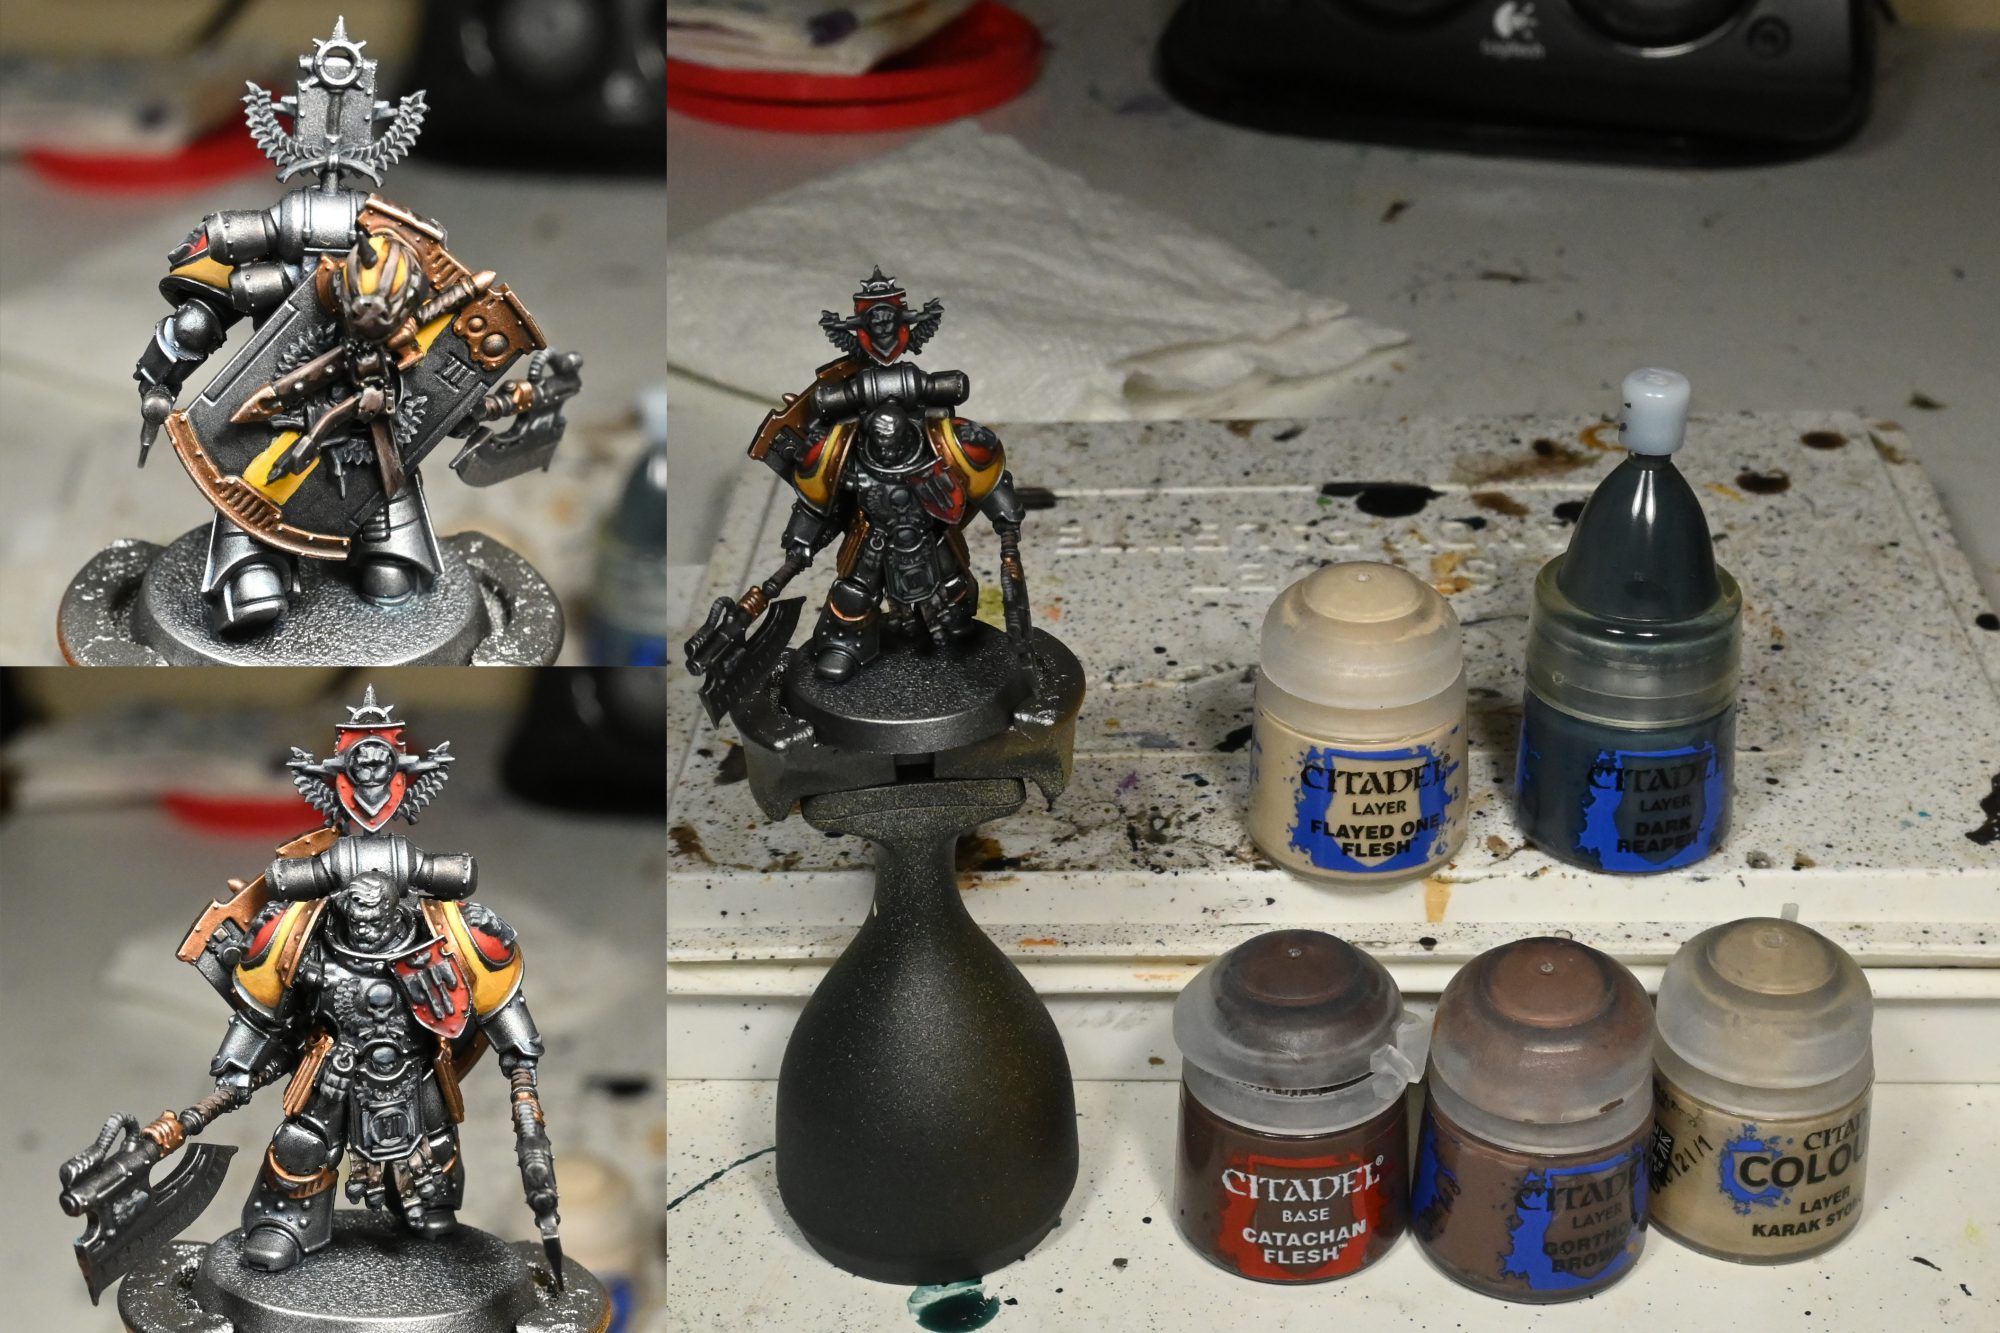
A few details get edge highlights of the following:
- Stormvermin and Dawnstone for the black pipes and such
- Catachan, Gorthor and Karak for the leather
Details
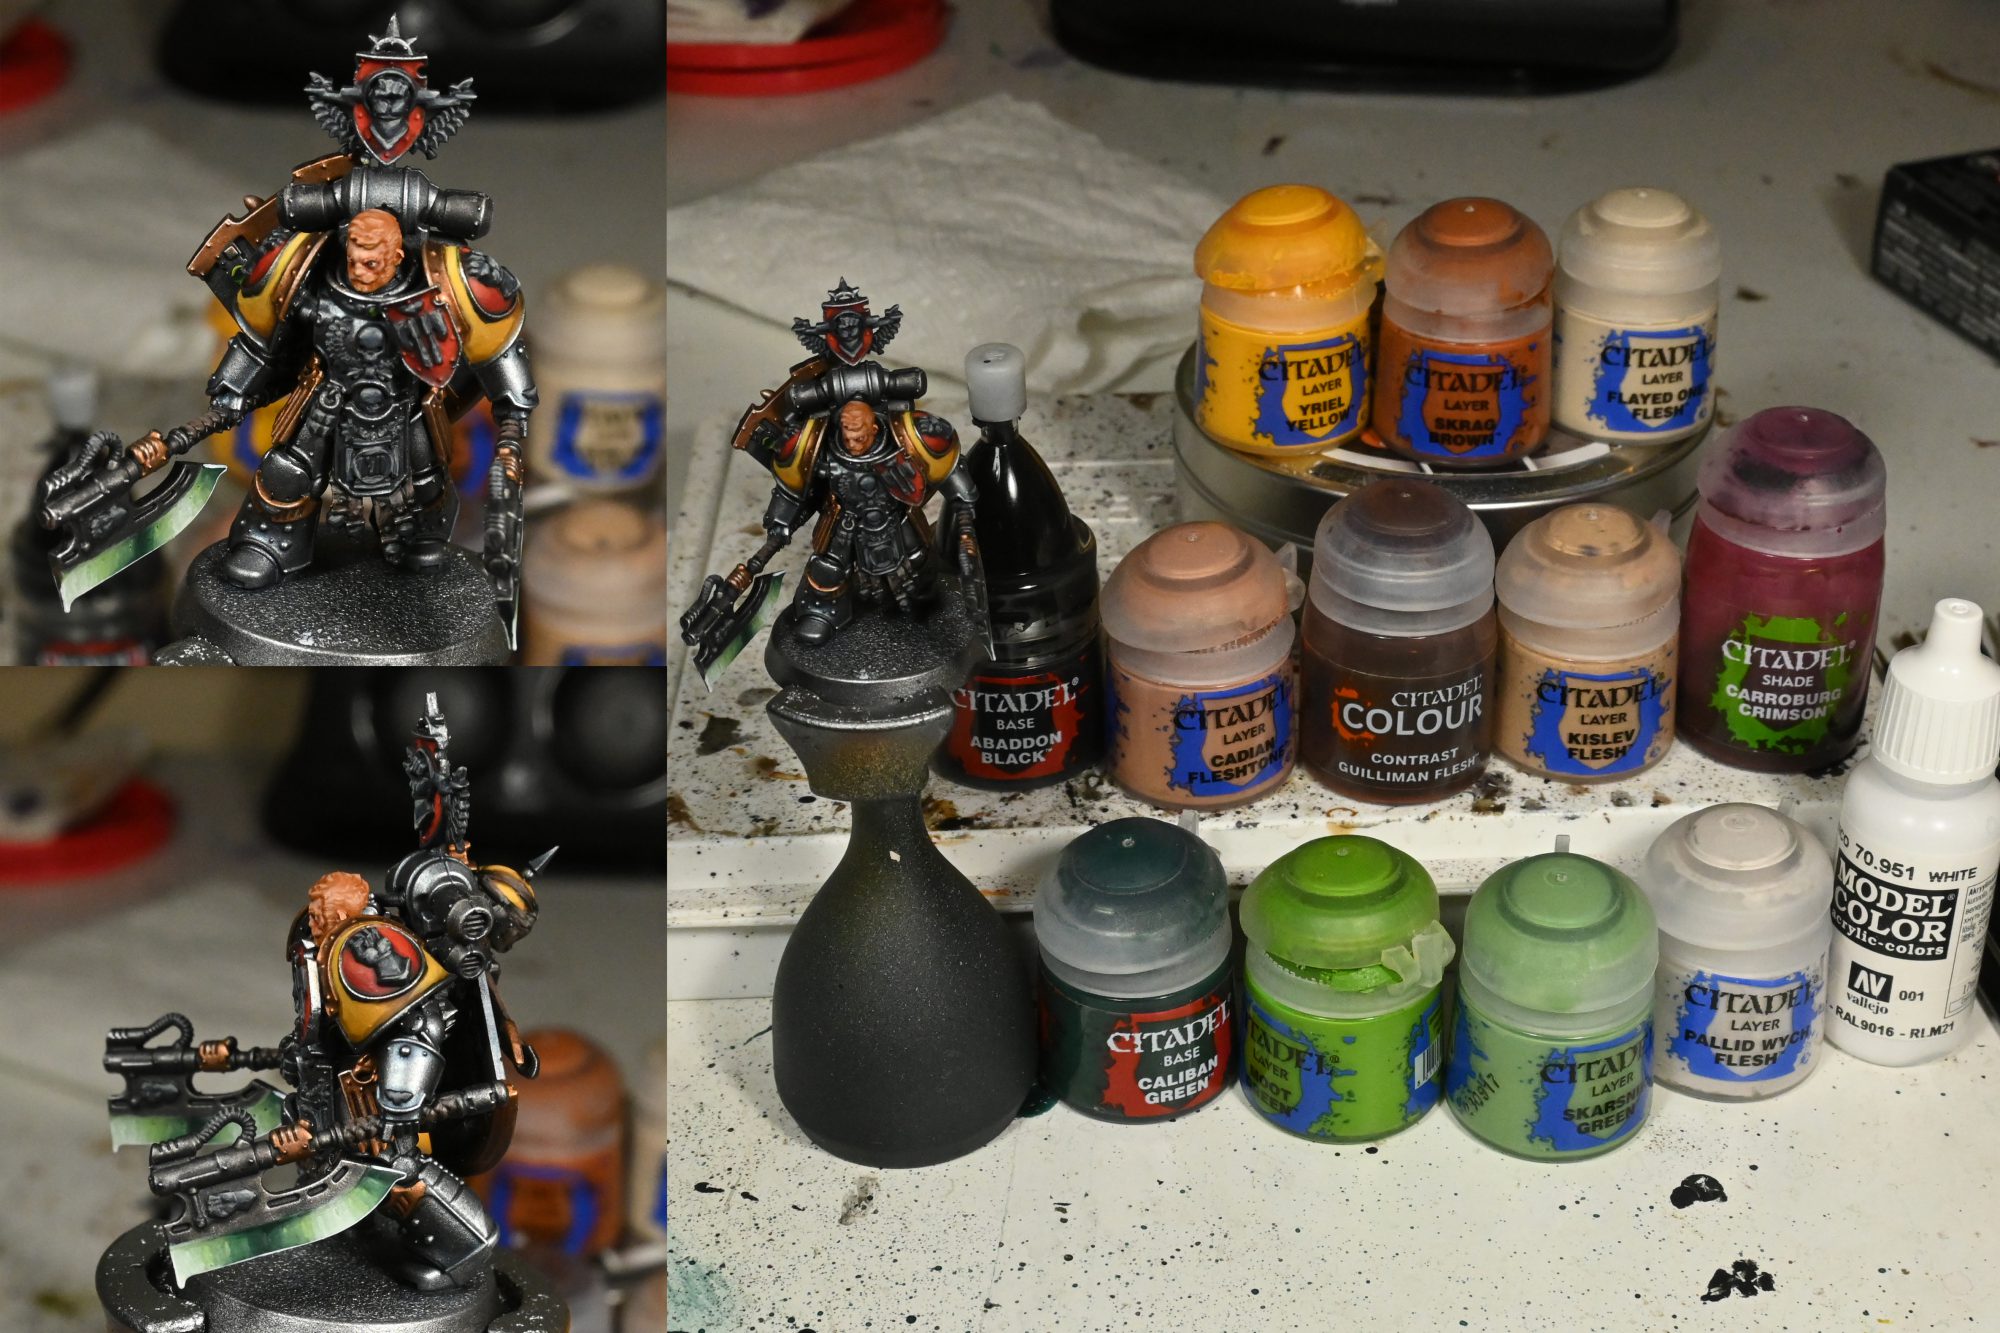
A lot is going on here, so let’s start with the head:
- The skin is Cadian washed Guilliman, that I then glazed back up to pure Cadian and then Kislev
- The hair is Skrag followed by little straight lines of Skrag with increasing amounts Flayed One, adding a bit more with each distinct highlight
- The eyes are Pallid Wych and Abaddon, for conventional eyes I do a horizonal line of the white partially covered by a vertical line of black, once you are happy with placement then go back and clean up the eyelids with cadian before shadowing his eyes with carroburg
The lenses are standard gems of Caliban Green then mixing up into Moot Green, pure Moot and finally Yriel before doing the the reflection in pure Yriel.
The glowing blades start with Caliban like the lenses but then I glaze Skarsnik, Pallid Wych, and then finishing off with a white edge highlight.
Finishing Up
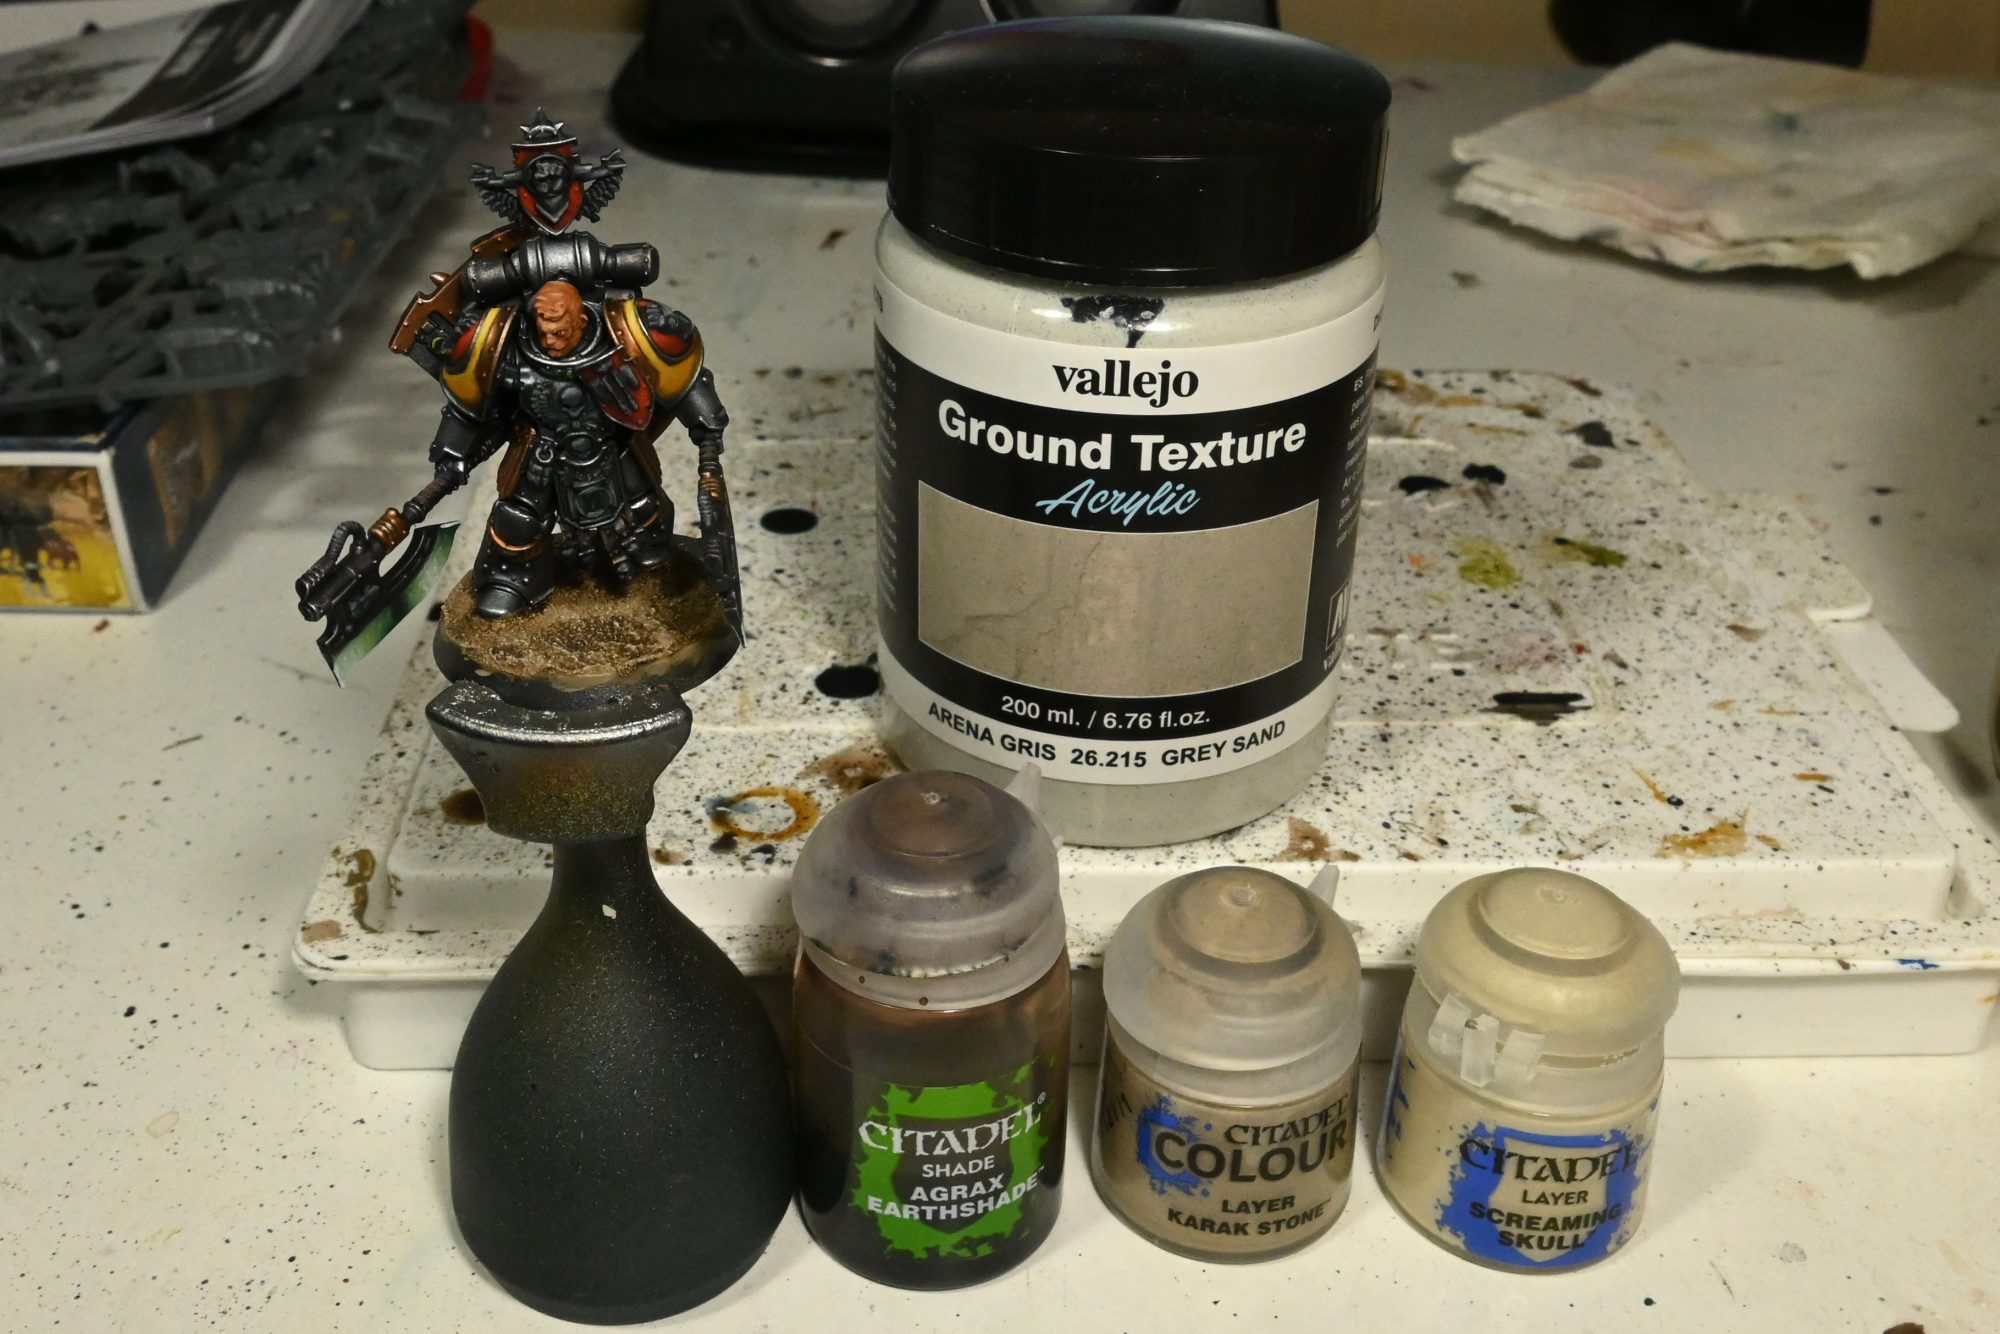
The bases are fairly simple, its just Vallejo Grey Sand with a coat of Karak, washed Agrax and drybrushed Screaming Skull. After that I varnish the model with Vallejo Premium Air Matte and then throw some beige tufts from Gamers Grass on and paint the rims black.

Fafnir Rann. Credit: Rockfish 
Fafnir Rann. Credit: Rockfish 
Fafnir Rann. Credit: Rockfish 
Fafnir Rann. Credit: Rockfish 
Fafnir Rann. Credit: Rockfish
Have any questions or feedback? Drop us a note in the comments below or email us at contact@goonhammer.com.
