
The Warhammer 40,000 universe is a massive place, and the “Narrative Forge” hobby articles encourage thinking outside the box (literally) when putting models together and stretching yourself out in the hobby. They aim to make hobbyists comfortable growing beyond imitating the models they see in their Codexes, and serve as a source of inspiration for anyone wanting to make an army that’s uniquely their own. This week, the Goonhammer crew are talking about displaying models: Building cases, laying out shelves, custom projects, how they approached the prospect of having a display case with their roommates and significant others, and letting your nerd flag fly.
Never Go Full Greg
Greg “Greg” Chiasson
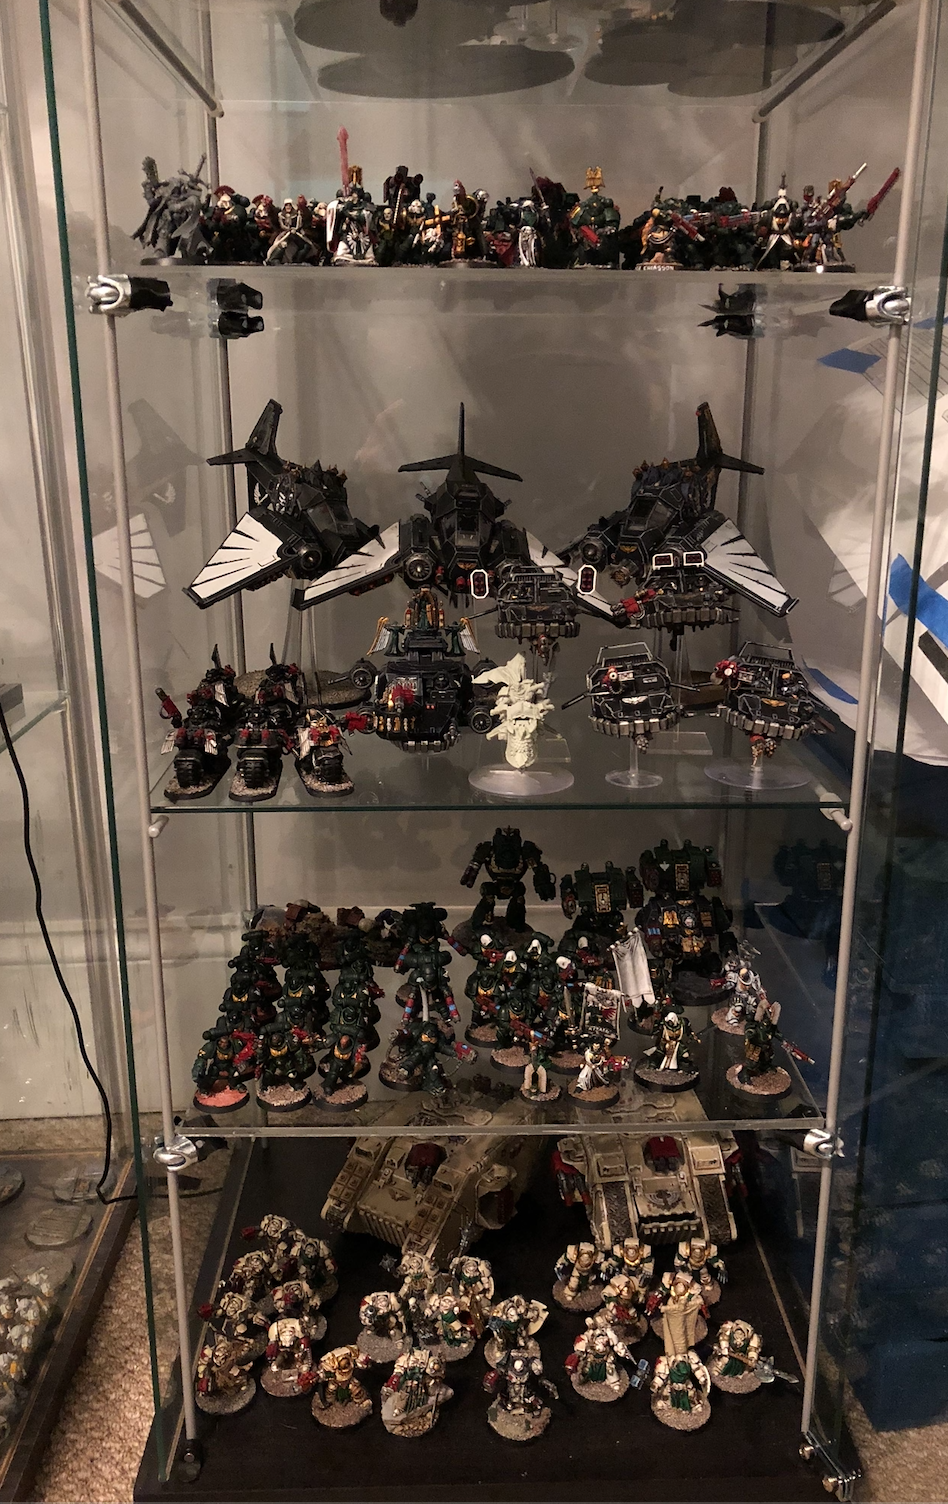
You might be surprised to hear this, but I don’t actually windmill dunk all my models in the trash immediately after I finish painting them (TheChirurgeon’s note: you probably should, though. Just sayin’). When they’re not dying on the gaming table, my bronze-tier curios are living in the consensus gold standard of curio cases, the IKEA Detolf. It’s a good choice: sealed to keep the dust out, glass all around, solid and easy to build, and as long as you have an IKEA handy and don’t have to pay the murderous shipping on 50 pounds of glass, cheap.
The only drawback is that it offers 4 shelves that are each a foot apart, for models that are mostly a couple of inches tall. I’ve tried a few solutions. Buying more cases is the easiest, though the hardest to justify to my fiancee. I bought some plastic risers, so could I could double-up on the shelves I did have, and that worked for a while, but eventually I started Googling around for more comprehensive solutions.
Inspiration
The most useful thing I found was this post by Igor Kromin – hilariously it seems like most of his posts aren’t Warhammer-related, but that is an Evangelion (which is basically a Gundam) in the background of his photos. The basic gist of it is simple enough – clamp something onto the vertical supports inside the Detolf, and then lay shelves on top of them. The biggest change I made from his instructions was to cheap out on glass and just buy a big sheet of plastic. This had mixed results.
Parts list
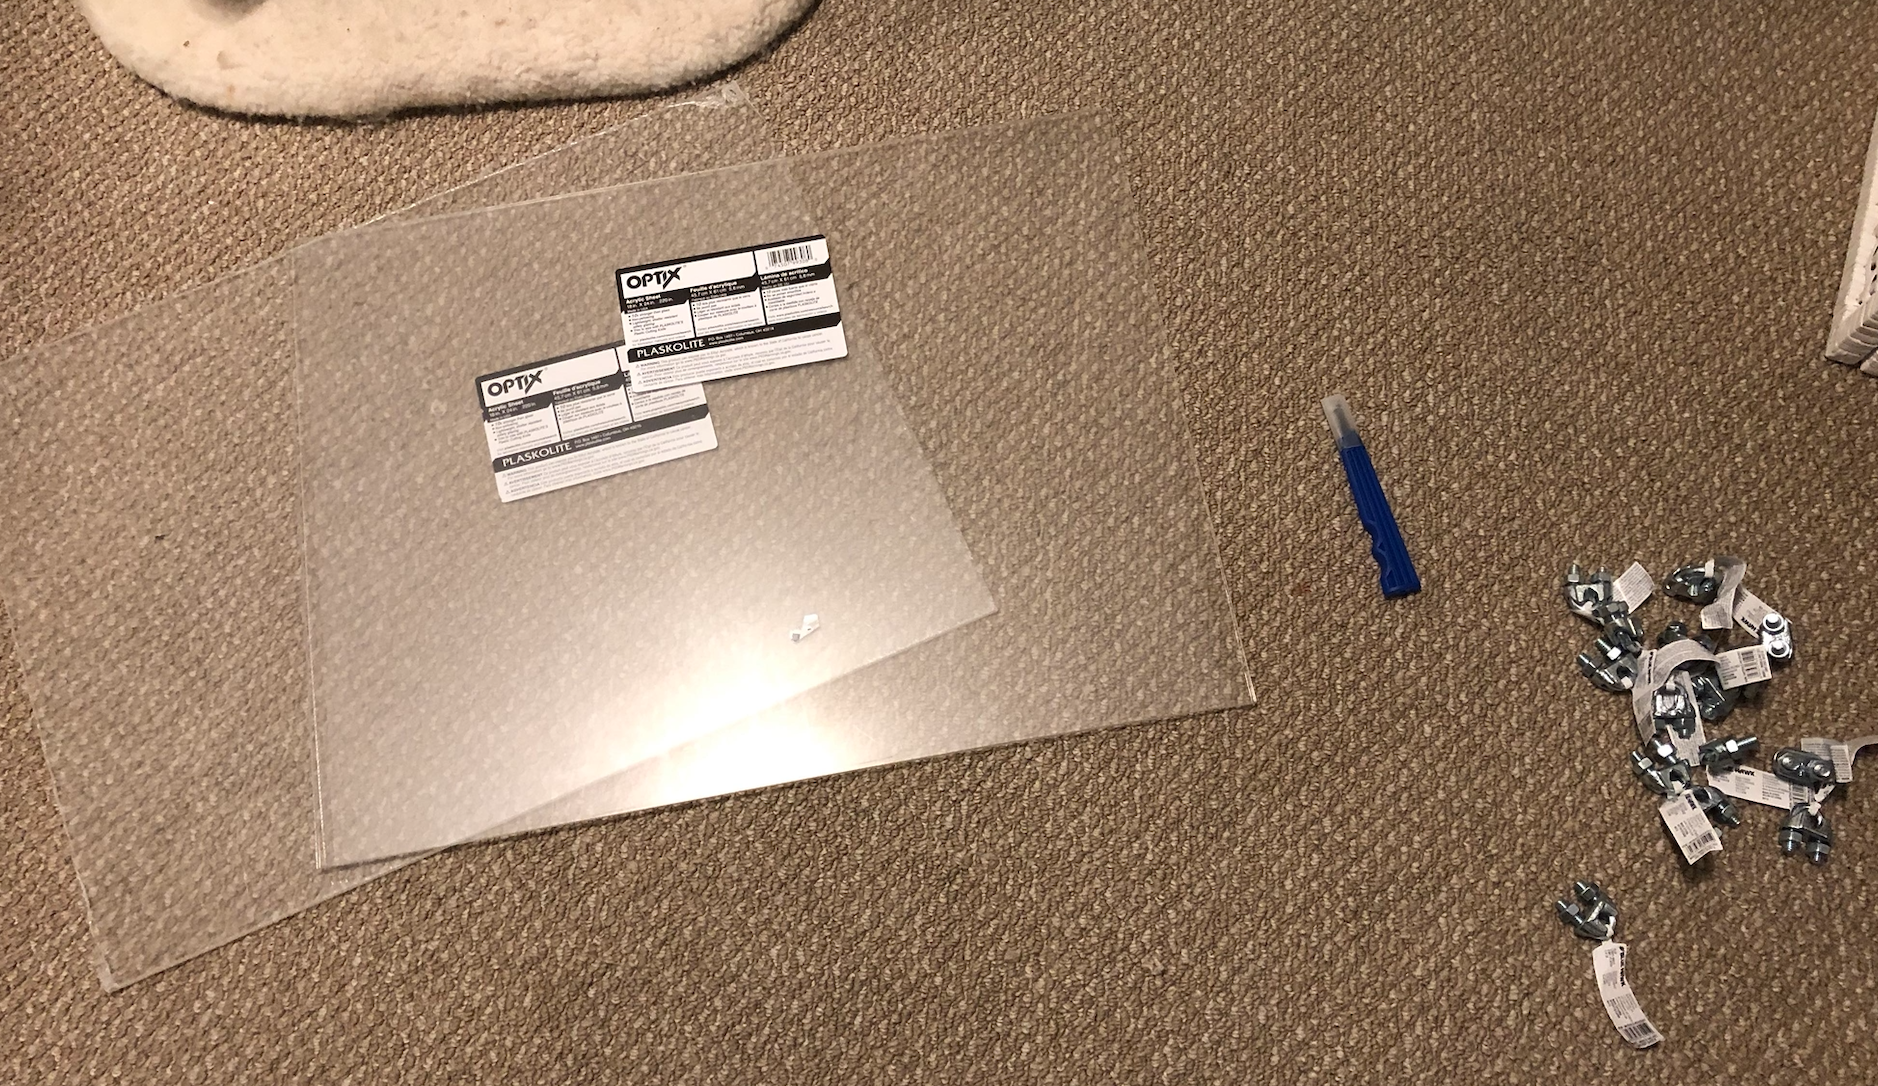
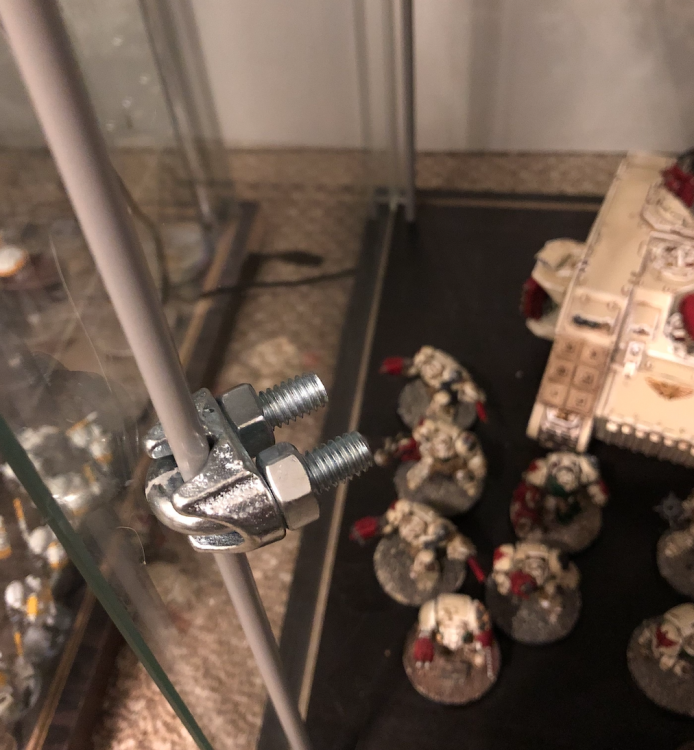
- I got 16 of these bad boys, 1/4 inch Wire Rope Clamps. If you’re looking for them, they’re usually by the cables, not with the rest of the fasteners – I started off looking at U-Clamps, but they’re all huge for our purposes. I should also point out here that if you’re using something that isn’t a Detolf, these steps still work, but you’ll need different sizes. One of my cases is actually a knock-off, and the clamps don’t fit over the poles on it.
- For the shelves themselves, I got two of these. The size was dictated by the measurements of the Detolf, which was about 12″x14″. A 24″x18″ sheet yields two shelves with a bit leftover, but if they’d had 24″x36″, or even 24″x30″, I could have gotten 4 out of a single piece. As is, since I didn’t want to stop at a second store or wait for shipping, I had to get two smaller pieces, but that’s fine. So that covers the length and width. In terms of depth, I found .22 inch to be about right – anything thicker is just going to be more expensive and take more work to cut, and the next thickness down, .10 inch, was too floppy.
- A Knife, or a plastic scriber. Tamiya makes an excellent one – for cutting sheet plastic like this they save a ton of time.
- Electrical Tape (optional but encouraged)
The Process
- Figure out the height you want for your new shelves. You can split the difference between the existing shelves if you want this to look deliberate, or base it off your models. I put one shelf about 9 inches up from the bottom, and a second about a foot off the next one, because that was the Rhinos shelf and it didn’t need much room.
- Screw the clips on, hand-tightening until you have them all at the same level, and then tighten with a wrench or pliers. You’re putting your models on here, so you want them to be really honked down on there, but you also don’t need to go crazy, because a square foot of warhams isn’t that heavy. I put the clips in at about a 45 degree angle, facing toward the center of the case. I found this worked better with the corners and the door, and the angle allows for some leeway if you got the cuts wrong. This part isn’t super fun, but trust me, it gets worse.
- Wrap the clips in a bit of electrical or other tape. This will keep the metal from fucking up the shelves, and hold it in place. Optional, but I wouldn’t skimp on this.
- Mark out lines on the plastic sheeting, being careful to be straight and even with this, since it’s the most important part.
- Make approximately one thousand light cuts on the surface, starting on one side and scoring the back whenever you get bored and feel like flipping it over. Don’t try and go all the way through, once it’s about halfway through you can just bend it until it snaps off. This part massively sucks and I hate it so much.
That’s about it, then you drop your shelves in and start putting models on them.
Look, People Are Gonna Find Out One Way or Another
Robert “TheChirurgeon” Jones
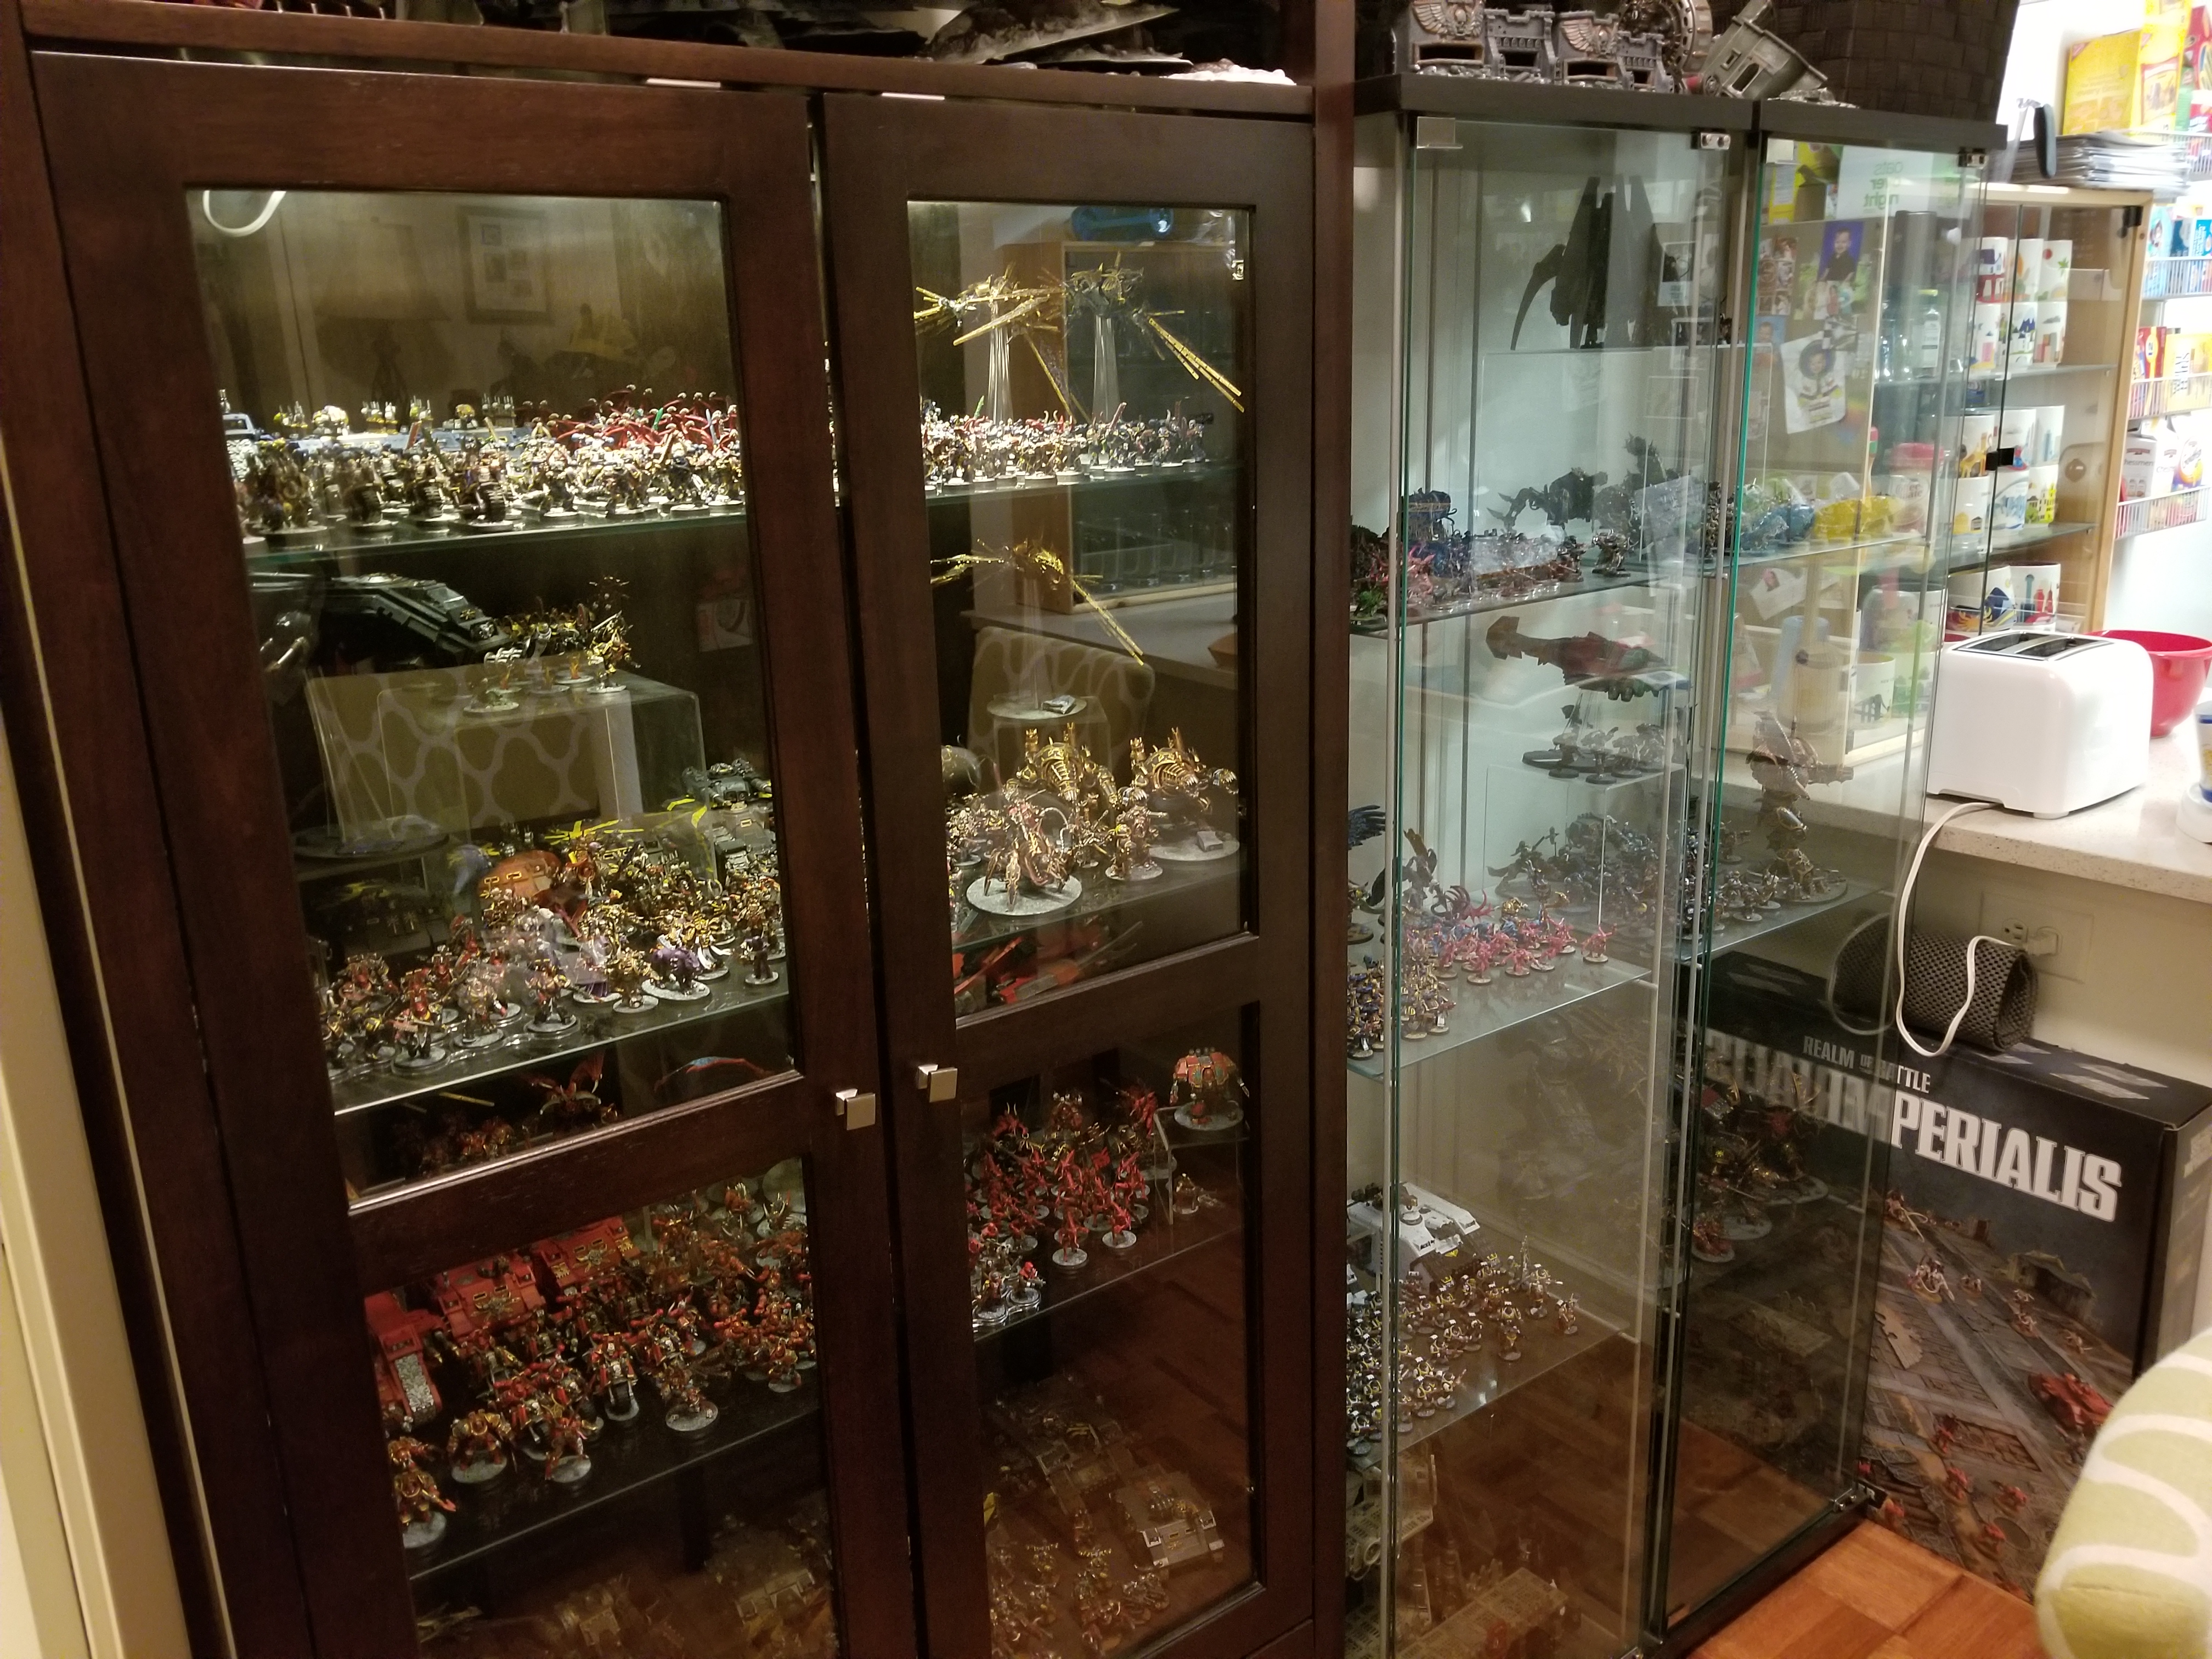
Like Greg, I live in a densely populated area. Unlike Greg, I live in a thriving city with rising property values and real mass transit, so buying a house that fits my family’s needs isn’t really within our (admittedly, considerable) financial means. So most of my hobby storage and display solutions are based around how I can do things with limited space. I decided early on that I wanted to have a display case for my space barbies, both because I am proud of how well painted they are and because it makes it way easier and faster to get them set up for games (and put away after). Fortunately for me, my wife is also a nerd and just all-around-excellent, and has been on board with my hobby from the beginning, except for the part where I have shitloads of unpainted miniatures and keep buying more. But the important thing is, we’re both OK with letting everyone know that I’m a huge nerd, so I not only have display cases, I keep them in our main room/dining area, where anyone coming over will see them. In my experience it’s rare that someone will give me grief about them and even if they do, I stopped having anything approaching “shame” long ago. Usually the conversations turn to questions about how I painted my sweet, sweet minis.
My current storage solution consists of one wooden cabinet with glass doors – an Aristo Halifax 2-door brown cabinet I ordered from Overstock.com back in 2011 – and two IKEA Detolf cases, which were added later when I outgrew the wooden case. I generally agree with Greg that the Detolfs are great, but I’ve found that they aren’t wide enough to display a full army well and while I liked the full glass doors on them, I was willing to sacrifice some of that to fit an entire army on one shelf.
If you spent any time on the cabinet’s product page, you may notice that it does not come with built-in lighting. About two hours after I had assembled the cabinet and put minis in it, I found myself saying “shit, this needs lights.” And so my plan to just have a cabinet turned into a hobby project all its own. If I were doing this today, I’d probably install lighting strips, which are easier and more effective. But I was (and remain) an idiot, so instead I installed LED cabinet lights that I ordered off of LightingDirect.com. They serve the purpose well and I was able to install 5 out of the 6 I ordered pretty easily, then drilled a hole in the back of the cabinet to run the cable for them through. Sadly, they’re starting to dim a bit so I may be ordering new ones soon, but they’ve run very well over the past seven years.

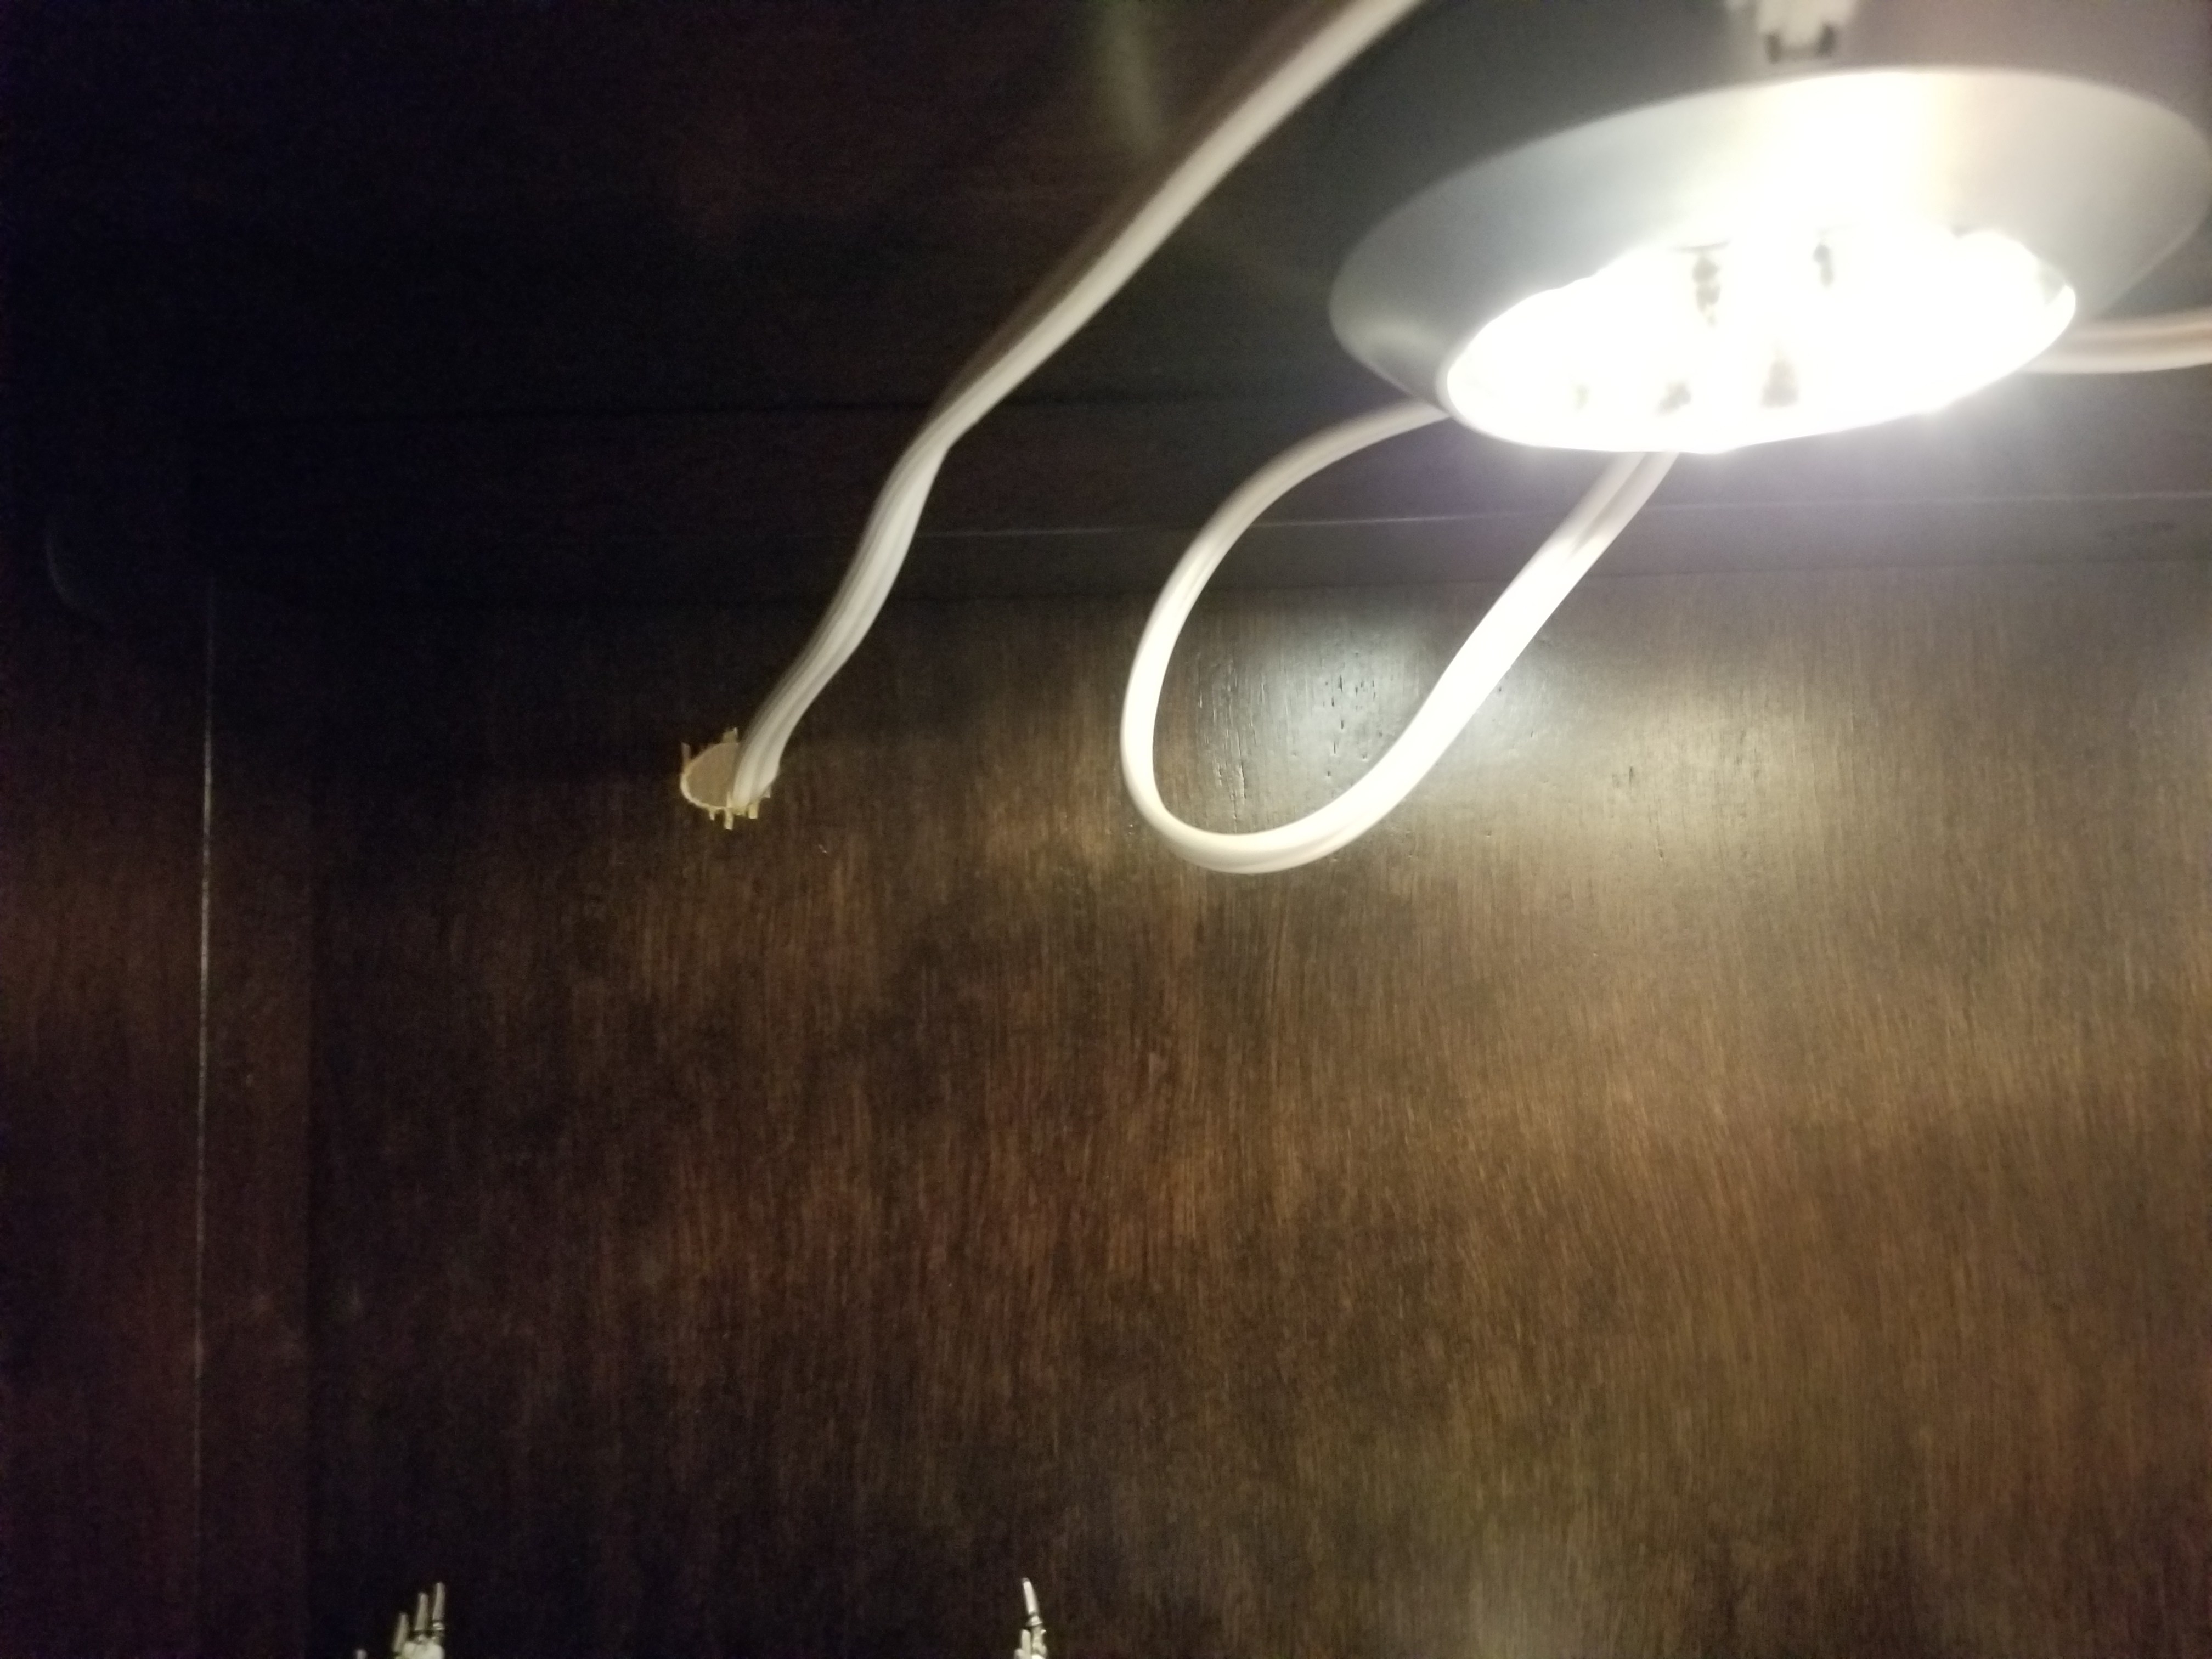
The lights were easy to install (I just screwed in the mounts to the underside of the case’s top), and they really do add a lot to the overall effect. The only downside is that the more you put on the upper shelves, the less light makes it down to the bottom shelf. Which is why I put my Iron Warriors down there. Both because they’re my worst-painted army overall, and because it’s fitting narratively for them. At some point I realized I’d need more space on my shelves and I was wasting a ton of vertical space, so I spoke to Greg and he recommended plastic jeweler’s case riser inserts, which gave me cool platforms to put flyers and jump infantry on, clearing up more space for other models. I tend to organize my armies on the shelf with the main warlord in the middle, the troops up front, and large tanks and war machines to the sides and back, since they’ll naturally sit higher and be visible over the rank-and-file models anyways.
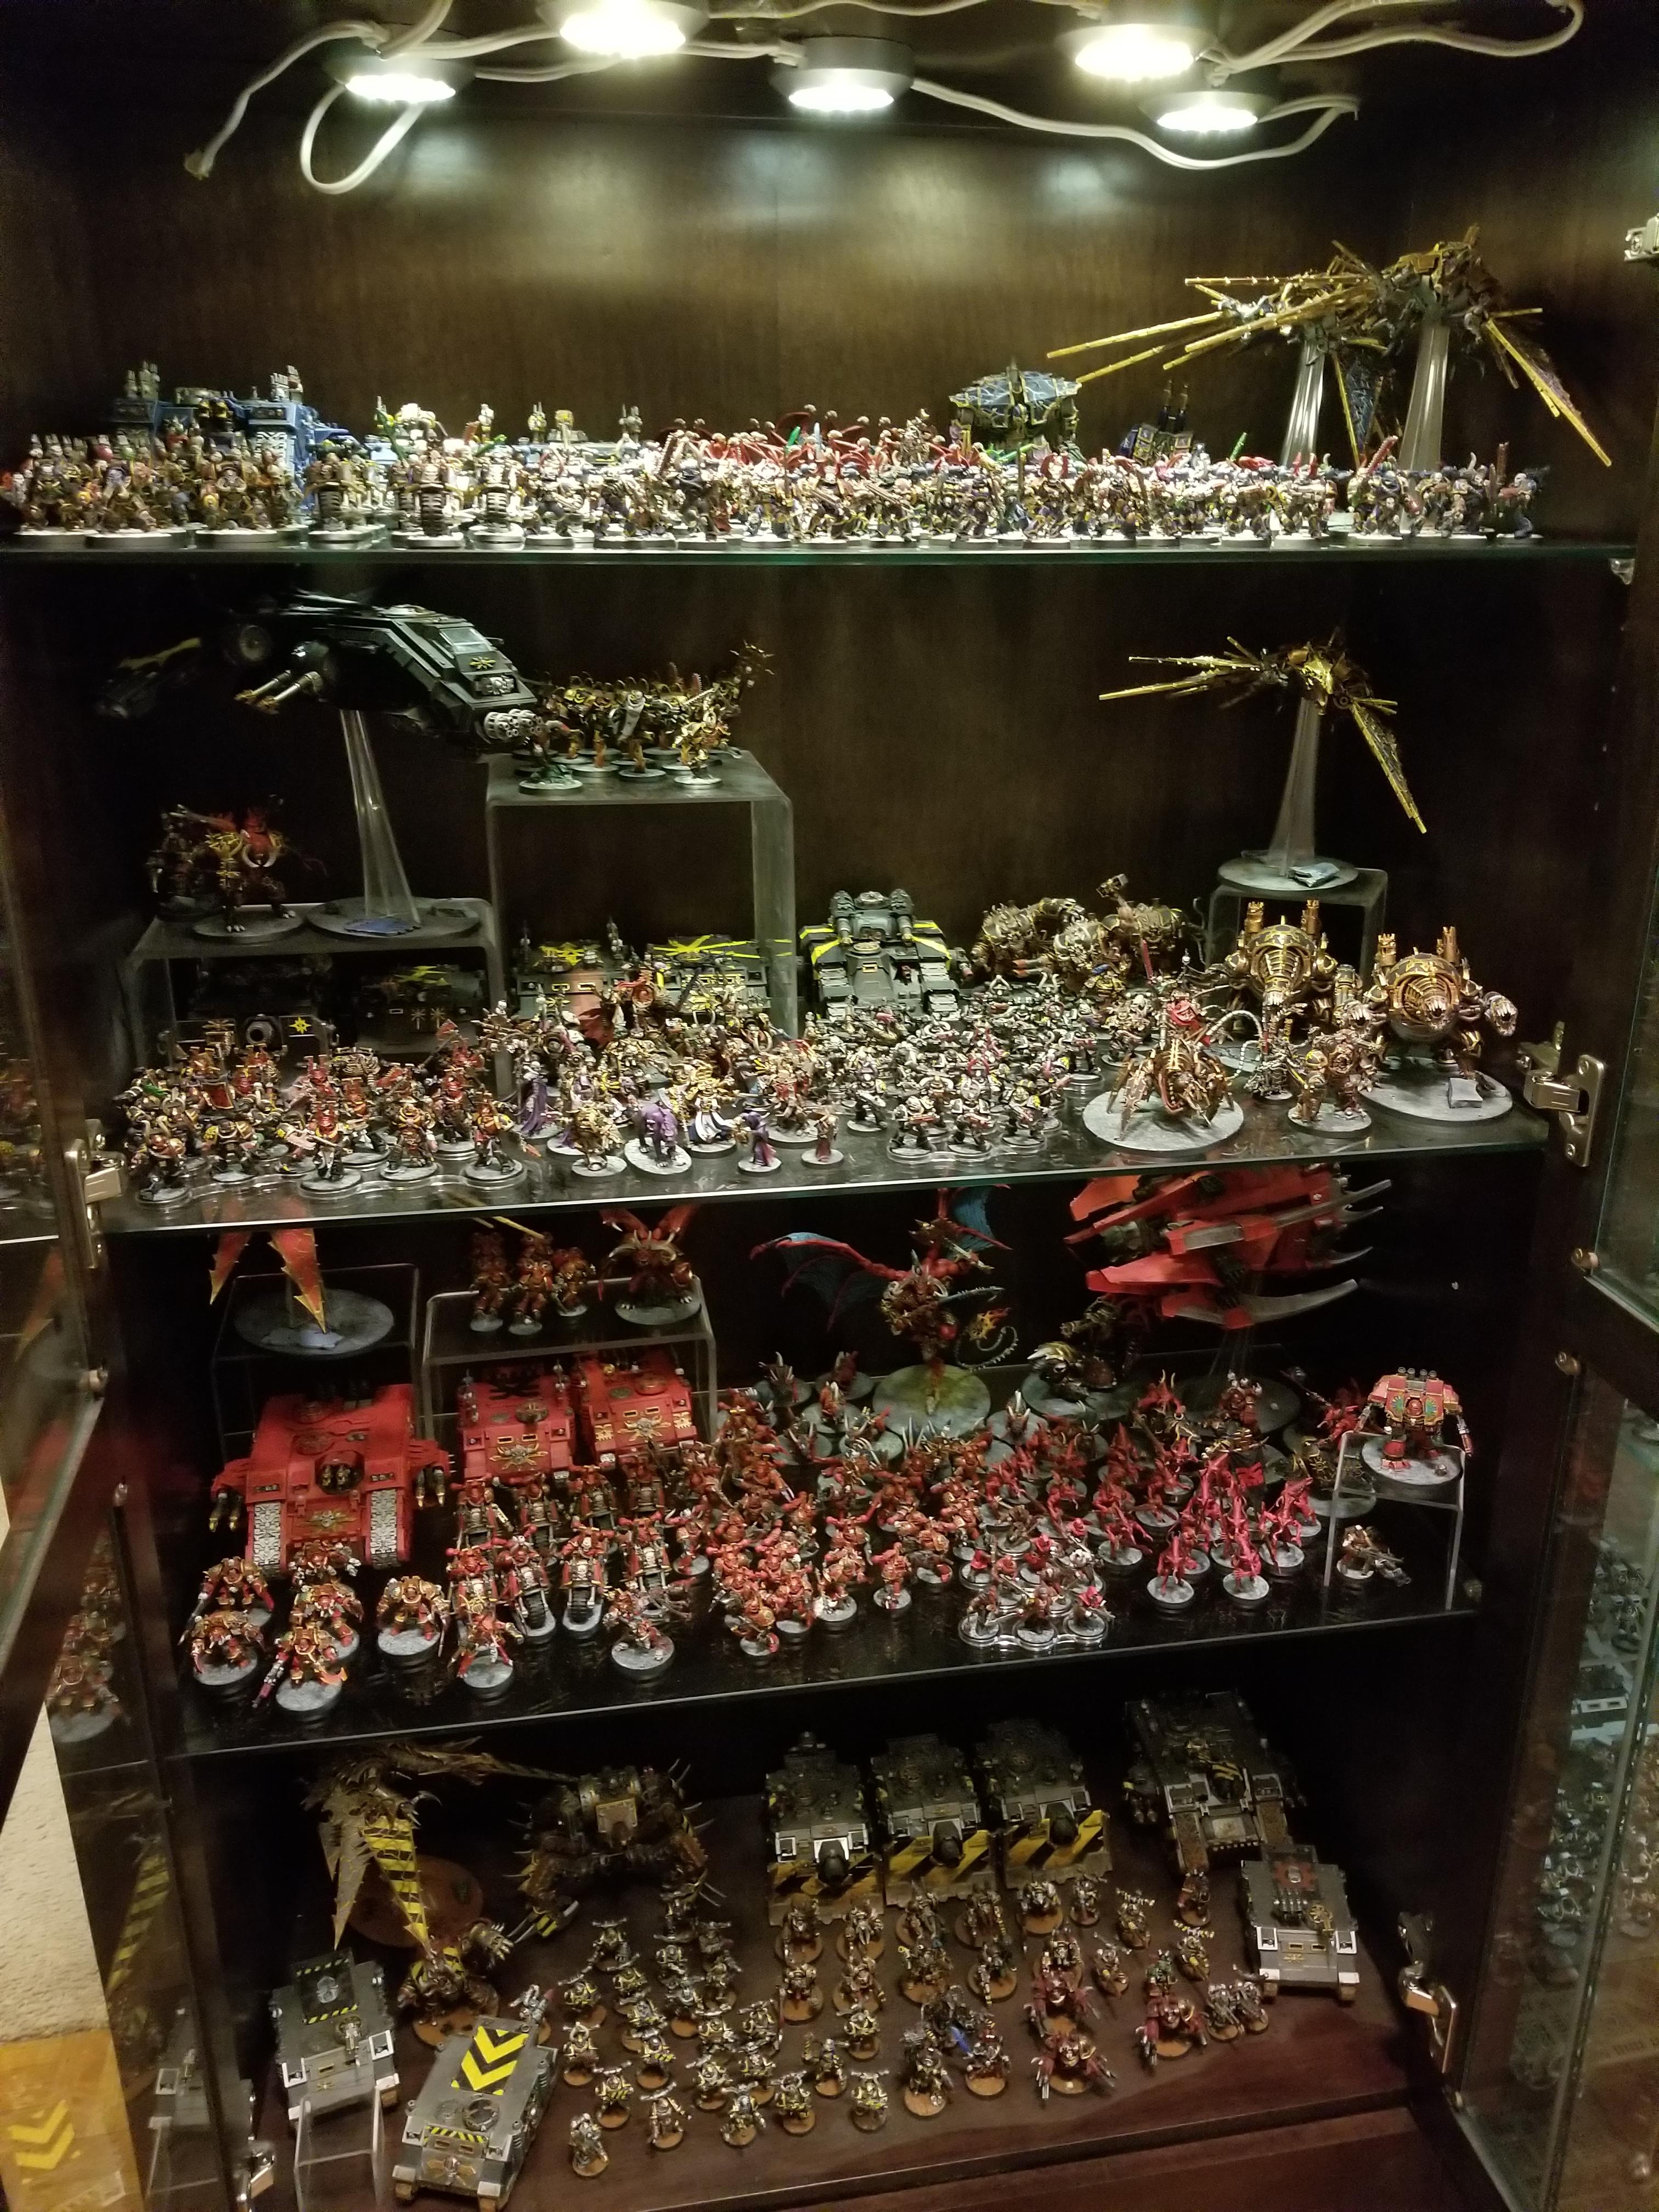
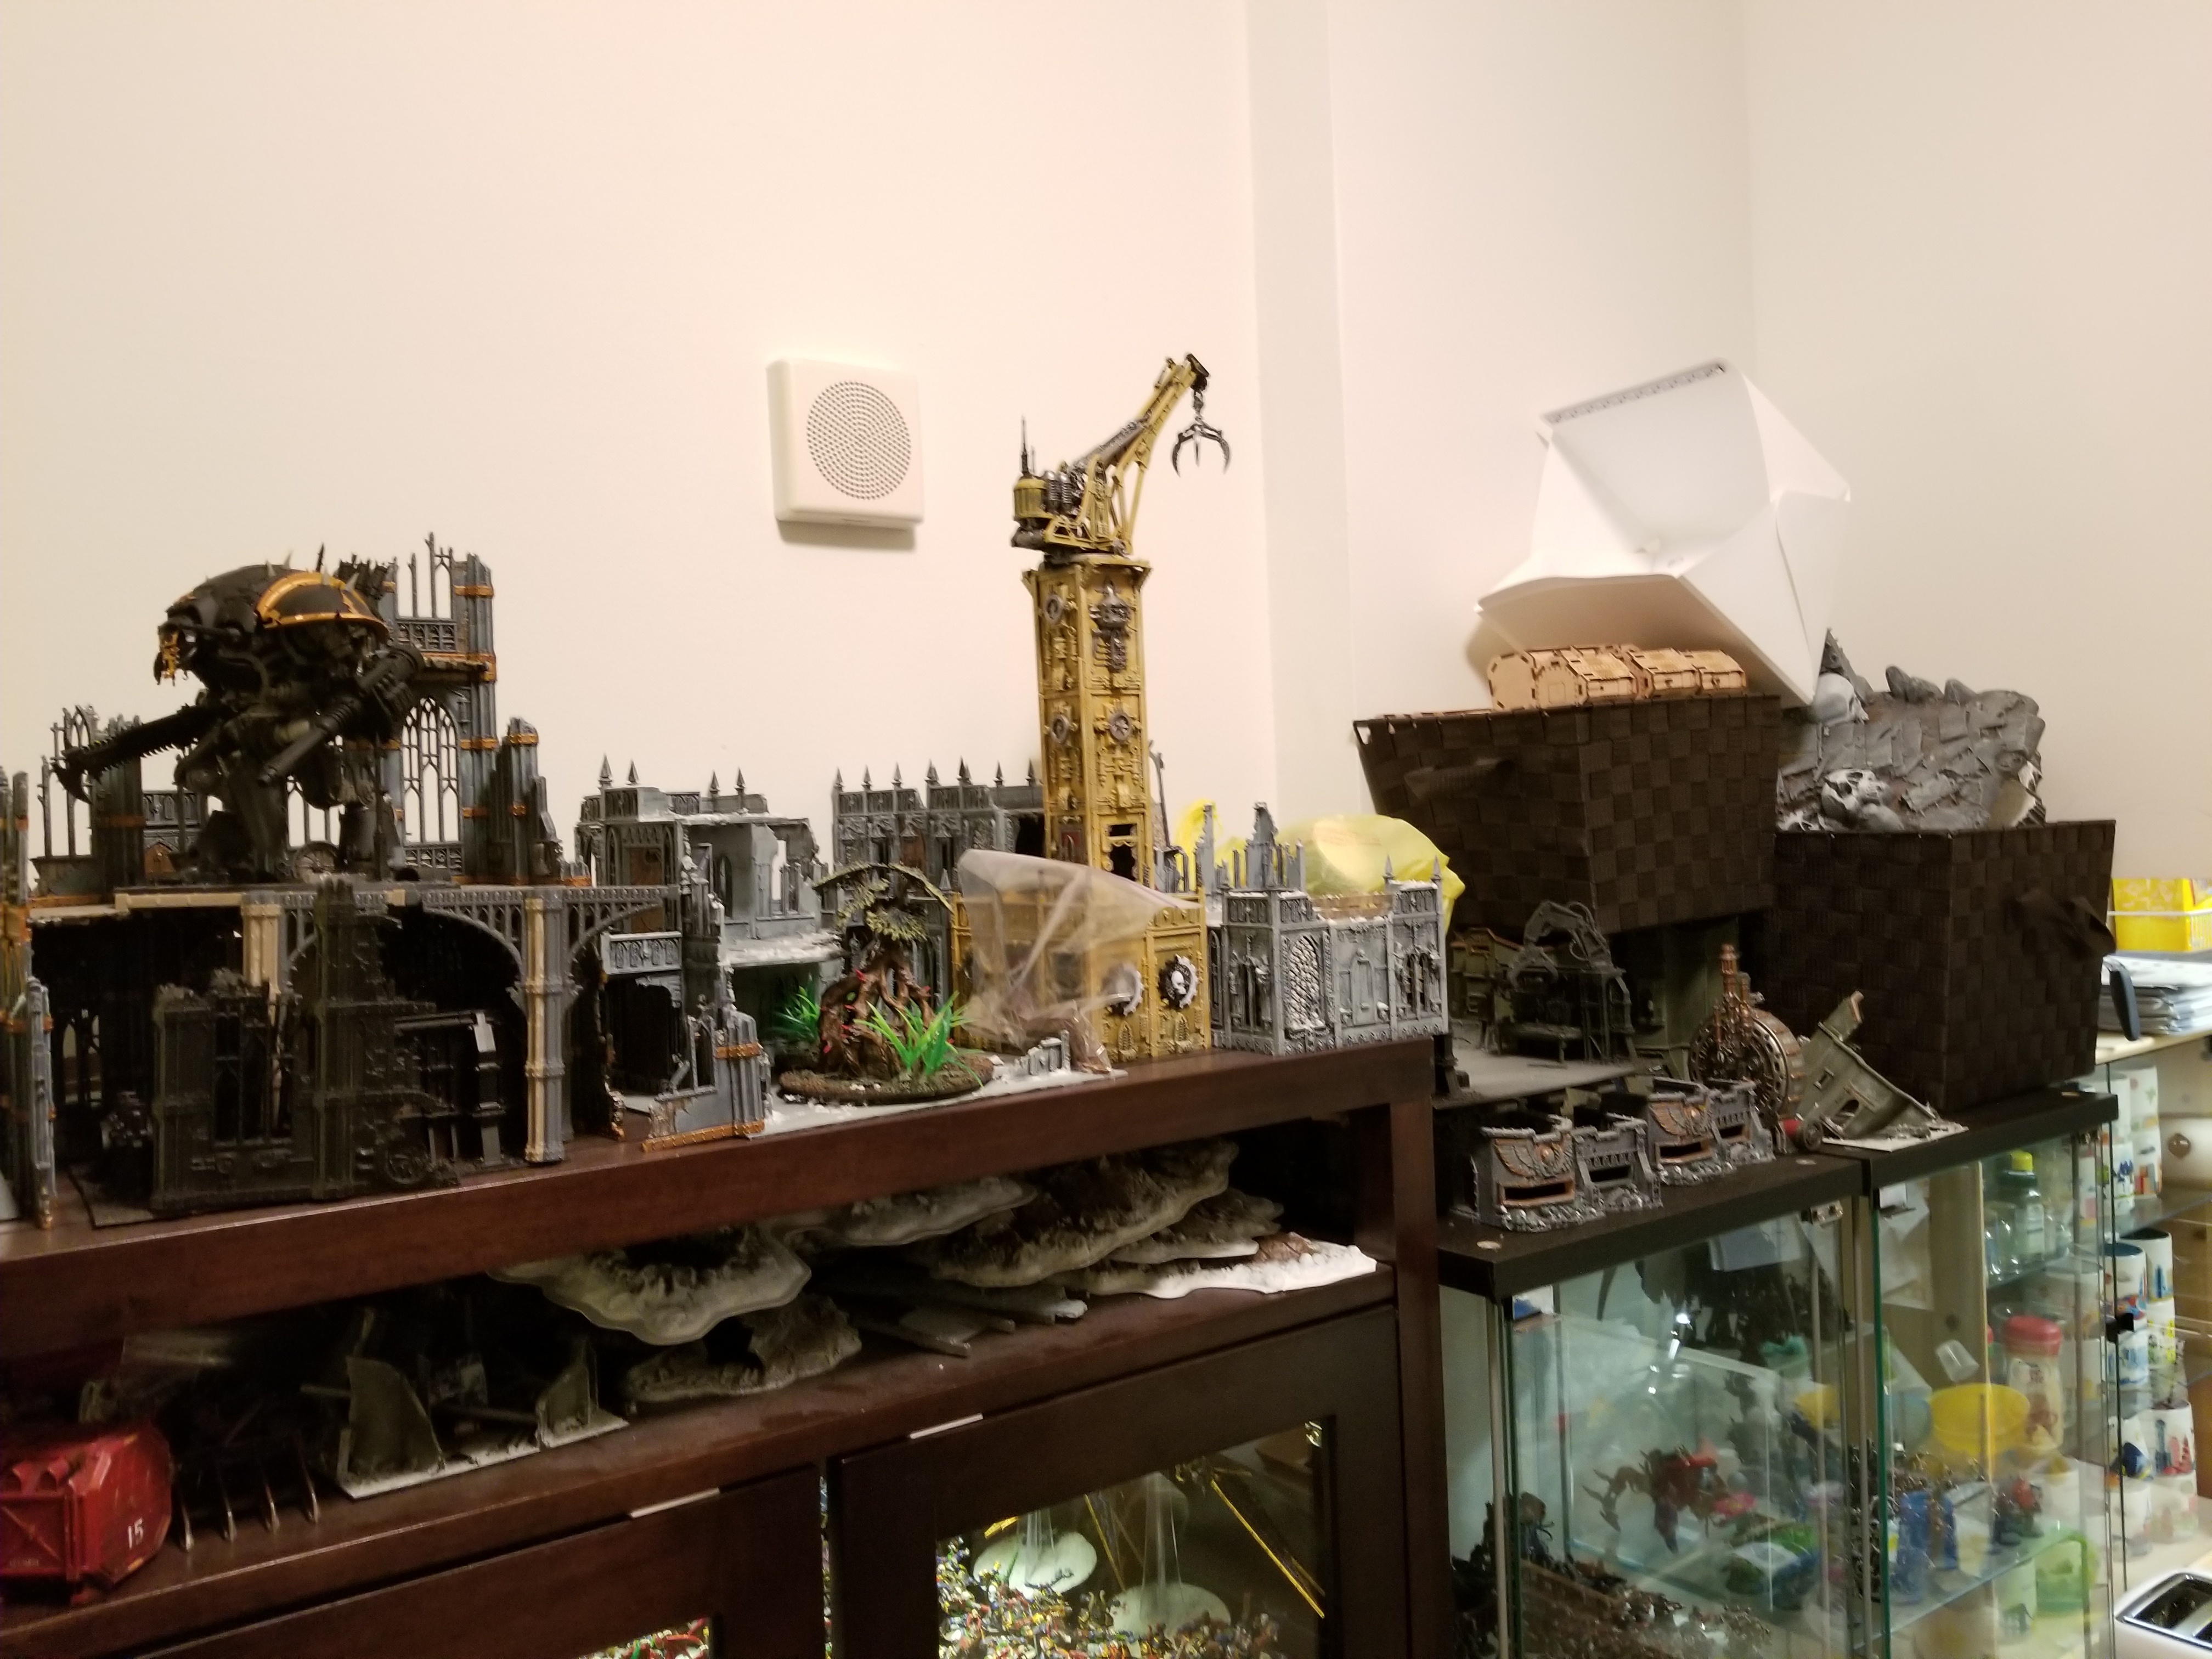
Because I’m short on space, I use the tops of the cases for terrain storage, so it’s easy to grab a table’s worth whenever I’m about to play a game. I have a Tetris-like configuration for the buildings, and everything else goes into one of the baskets. I also have a closet I keep some other, larger pieces in, but that’s in my son’s room and so I only put stuff in there that I’ll be OK with grabbing in advance.
Child-Proofing Your Cases
Finally, if you’ve read some of my earlier tournament reports, you know that I have a toddler. Sometimes I let him play with my minis, but it’s usually sturdier, plastic stuff I don’t care about, like the Galvanic Servo-Hauler tractor. For some reason he loves that thing. And ironically, my wife is the one who broke it, by stepping on it. But the point is, if you are going to have a kid around, you need to protect your minis. Not just because they can break them, but because smaller children will break them and then eat the parts that break off, which is worse (Also, watch out with dice: My son would always try to eat dice). Detolfs aren’t too big a problem for this, because their open handles are high up, and I haven’t seen toddlers figure out how to open them from below. The wooden case though, has lower knobs that are easily grabbed by a toddler-sized person. So when we were child-proofing all the cabinets in our apartment, I went ahead and installed magnetic child safety locks on the display cabinet doors too. I would highly recommend doing this yourself. It’ll save you a lot of headache.
You Spend Too Much Time on This Hobby To Hide It
Or maybe you don’t, and all of your mans look like they were painted the week before a tournament with the intent of meeting the “three color standard” rule. The point is, spend some planning out how you’re going to display your finely-painted, jewel-like objects of wonder. Spend time setting them up in a way that lets you frequently come back and see them, smile to yourself and go “damn, look at all that wonderful hobby progress.” It’ll either inspire you to paint more and finish off armies, or stop buying models you can’t paint that won’t fit on the shelves. Win-win either way, in my opinion. As always, we’re interested in what you have to say about this — do you have an interesting display case or solution? Have something you custom made and are proud of? Share it in the comments below, or send us some photos and a write-up to contact@goonhammer.com and we’ll work on how to feature it if it’s really cool.
