
Howdy scummers! As we prepare for the upcoming release of Necromunda: Ash Wastes, this seemed like a phenomenal time to hit up the Goonhammer contributors for their preferred methods for painting up Sector Mechanicus kits. SM seems like a solid way to “fill” up an Ash Wastes table, in a spirit similar to the terrain previewed for the next box! We just want to encourage you to paint up all the terrain you’ve been hoarding.
Sector Mechanicus Terrain
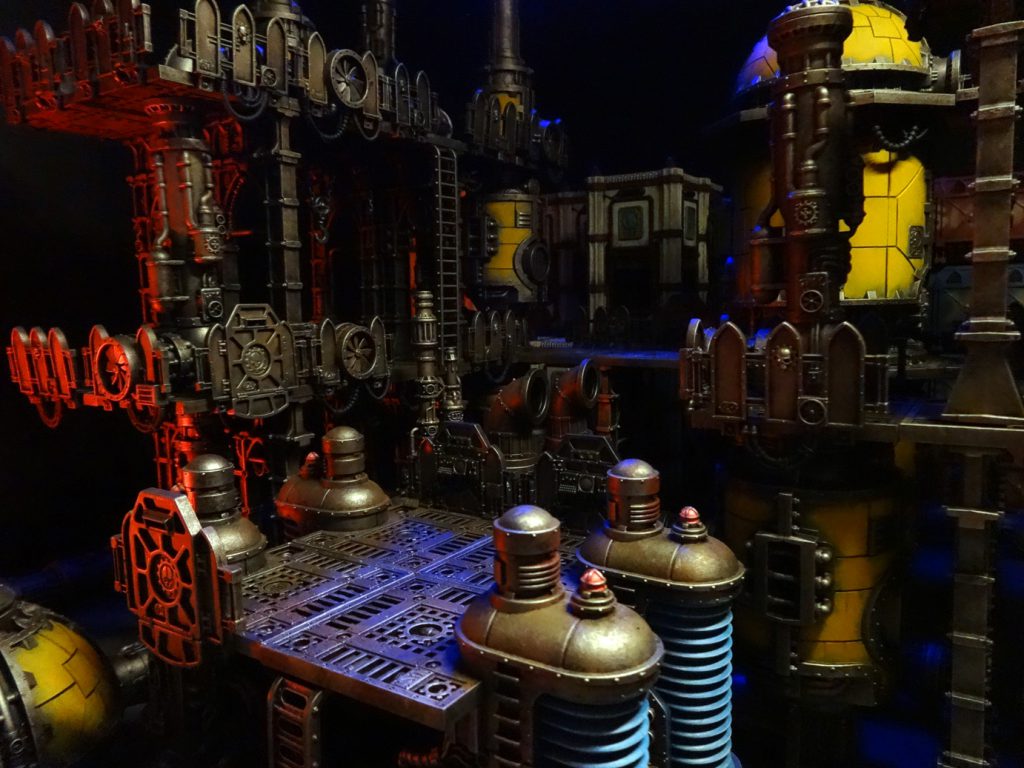
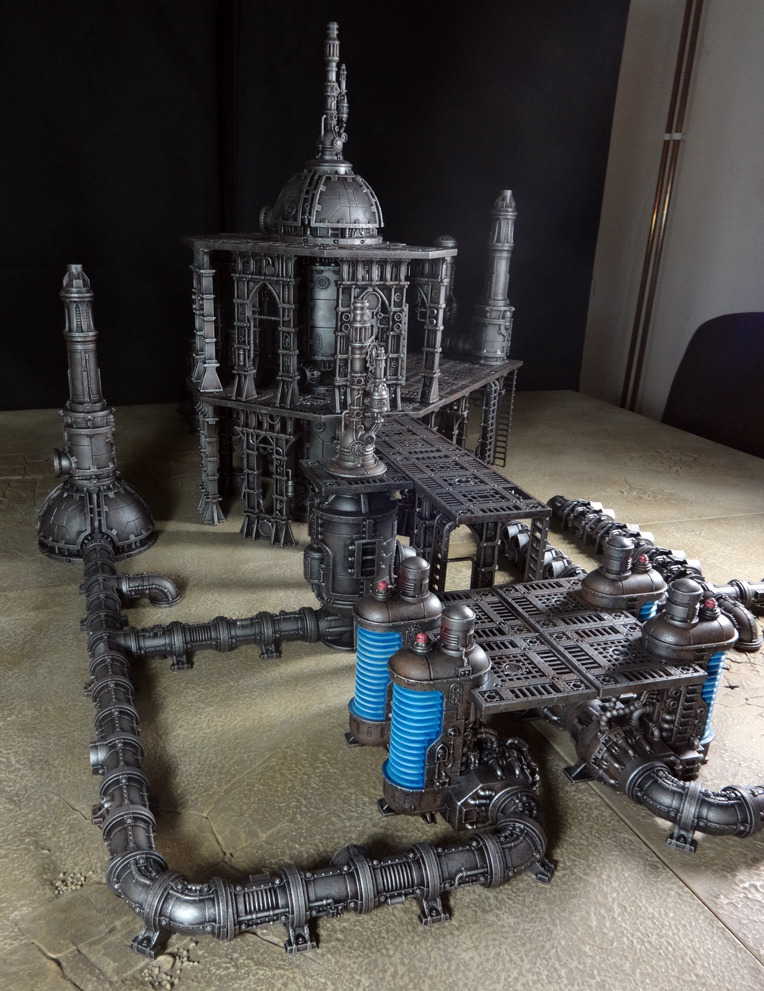
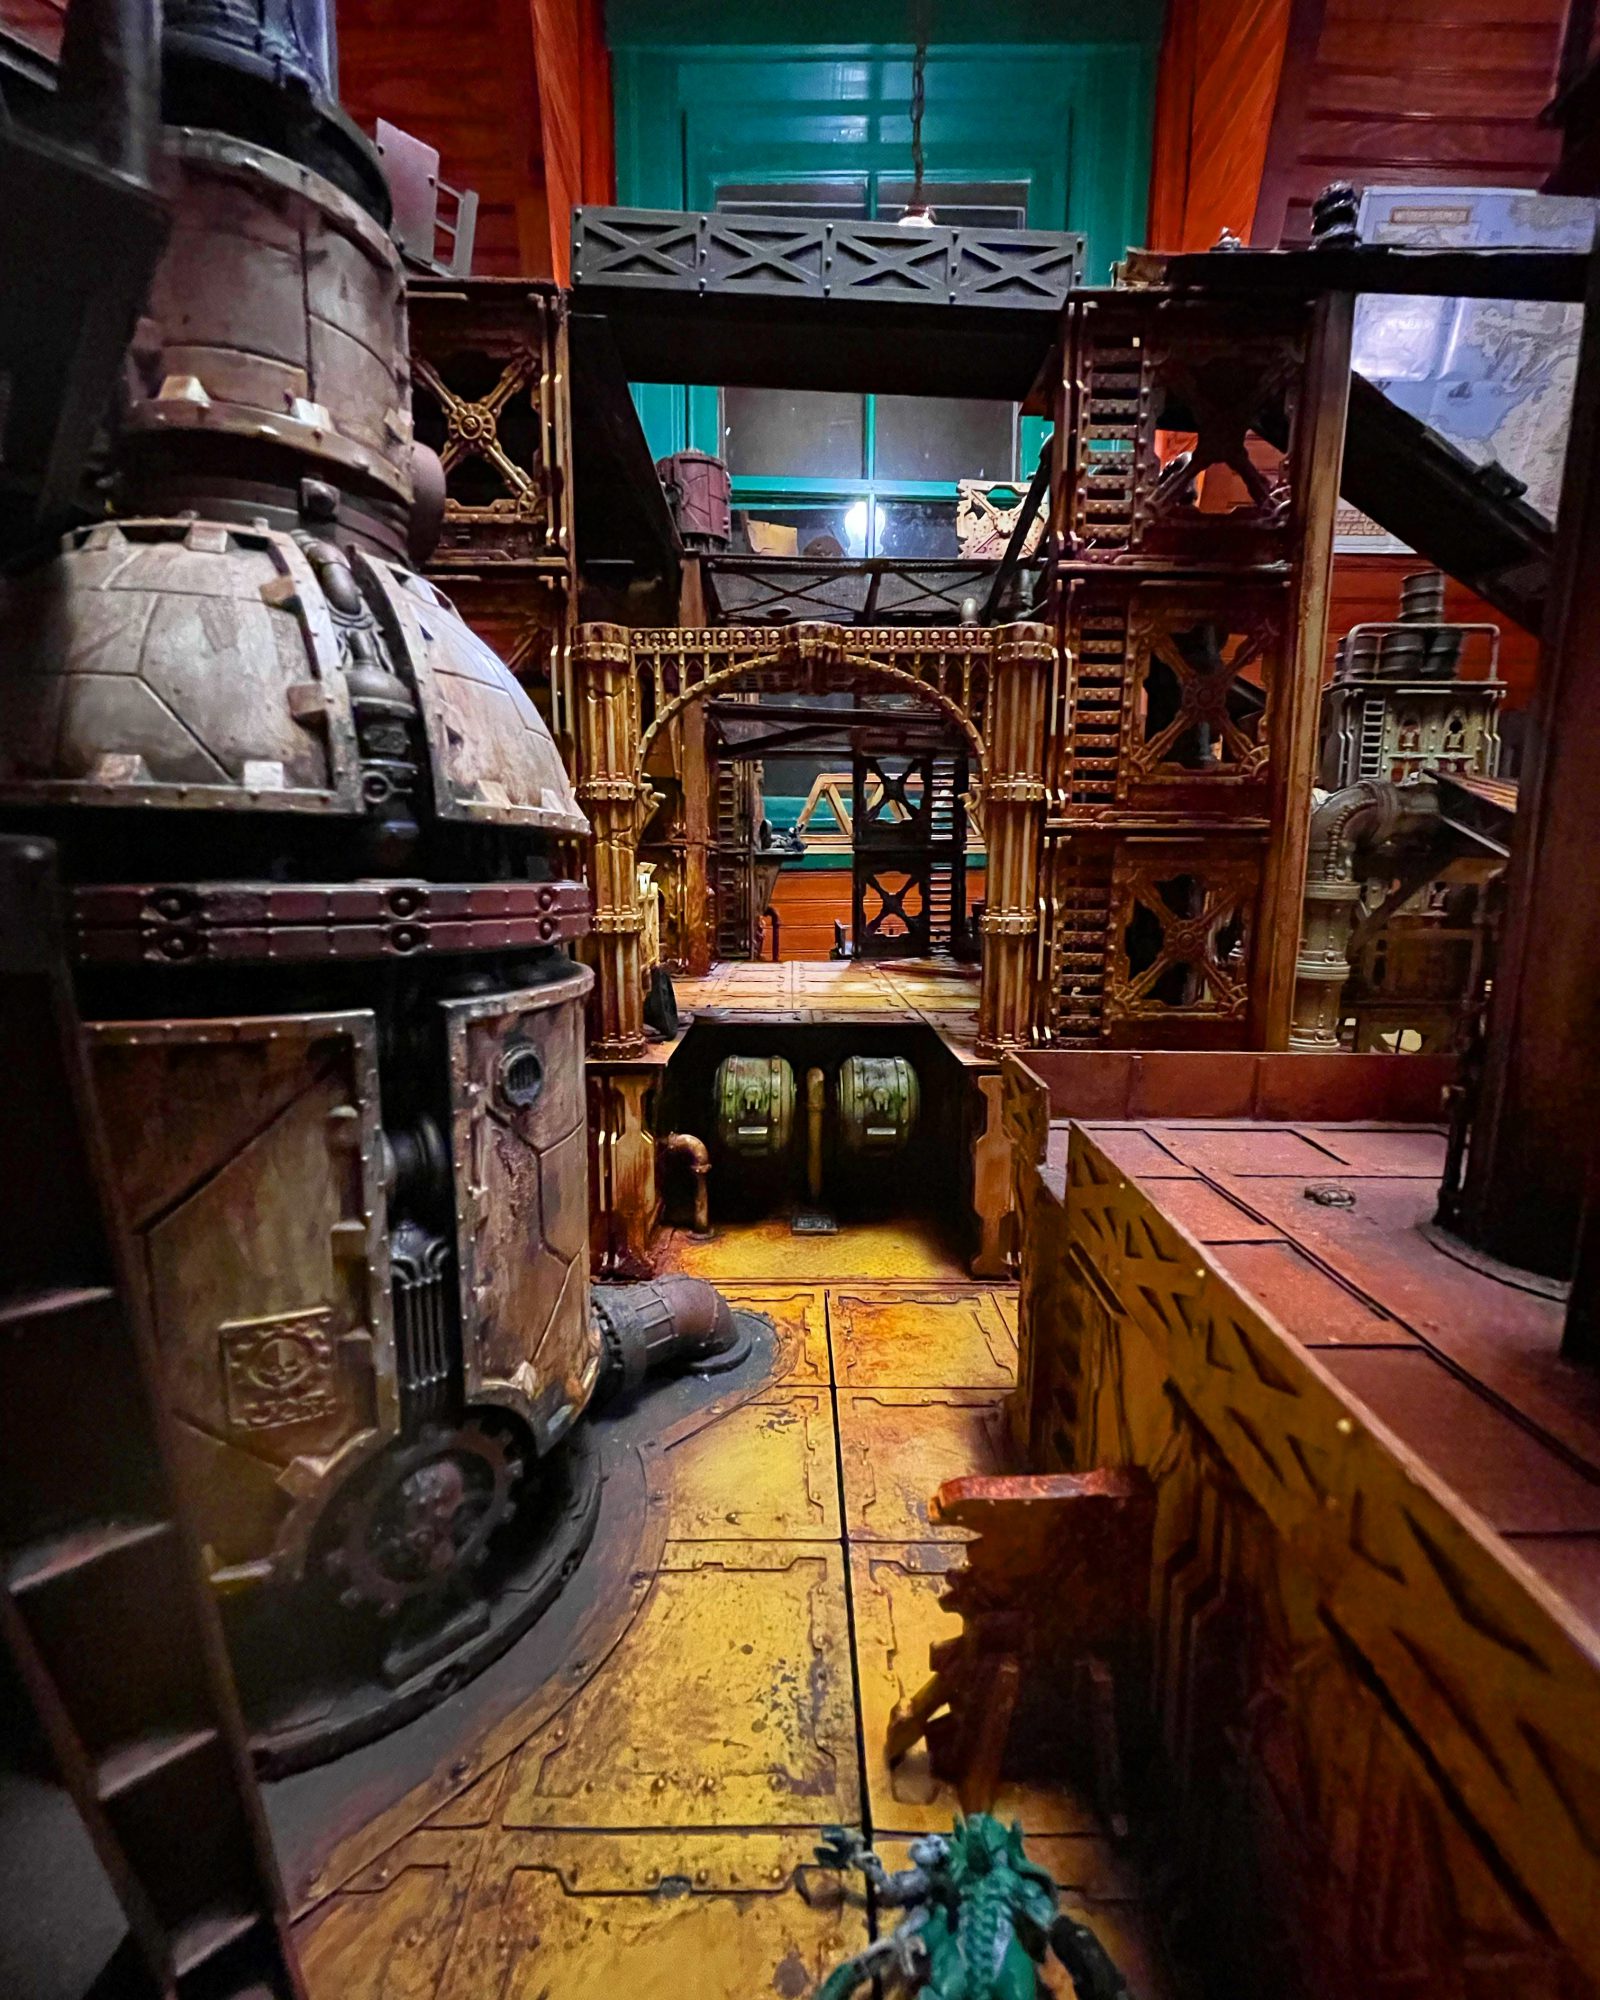
The Sector Mechanicus terrain first debuted in 2017 in the Shadow War: Armageddon boxed game, which came with a staggeringly generous assortment of terrain for playing with the two kill teams included in the box, Space Marine Scouts and Ork Boyz. The Sector Mechanicus terrain is fantastic for Necromunda and Kill Team, where its raised walkways and towering metal struts make for great cover and vertical battlefields. It’s also frequently used for games of Warhammer 40,000, where it’s a bit less useful thanks to not quite working with the game’s all-or-nothing visibility rules for terrain, but with the right setups can be a great addition to the battlefields of the 41st millennium.
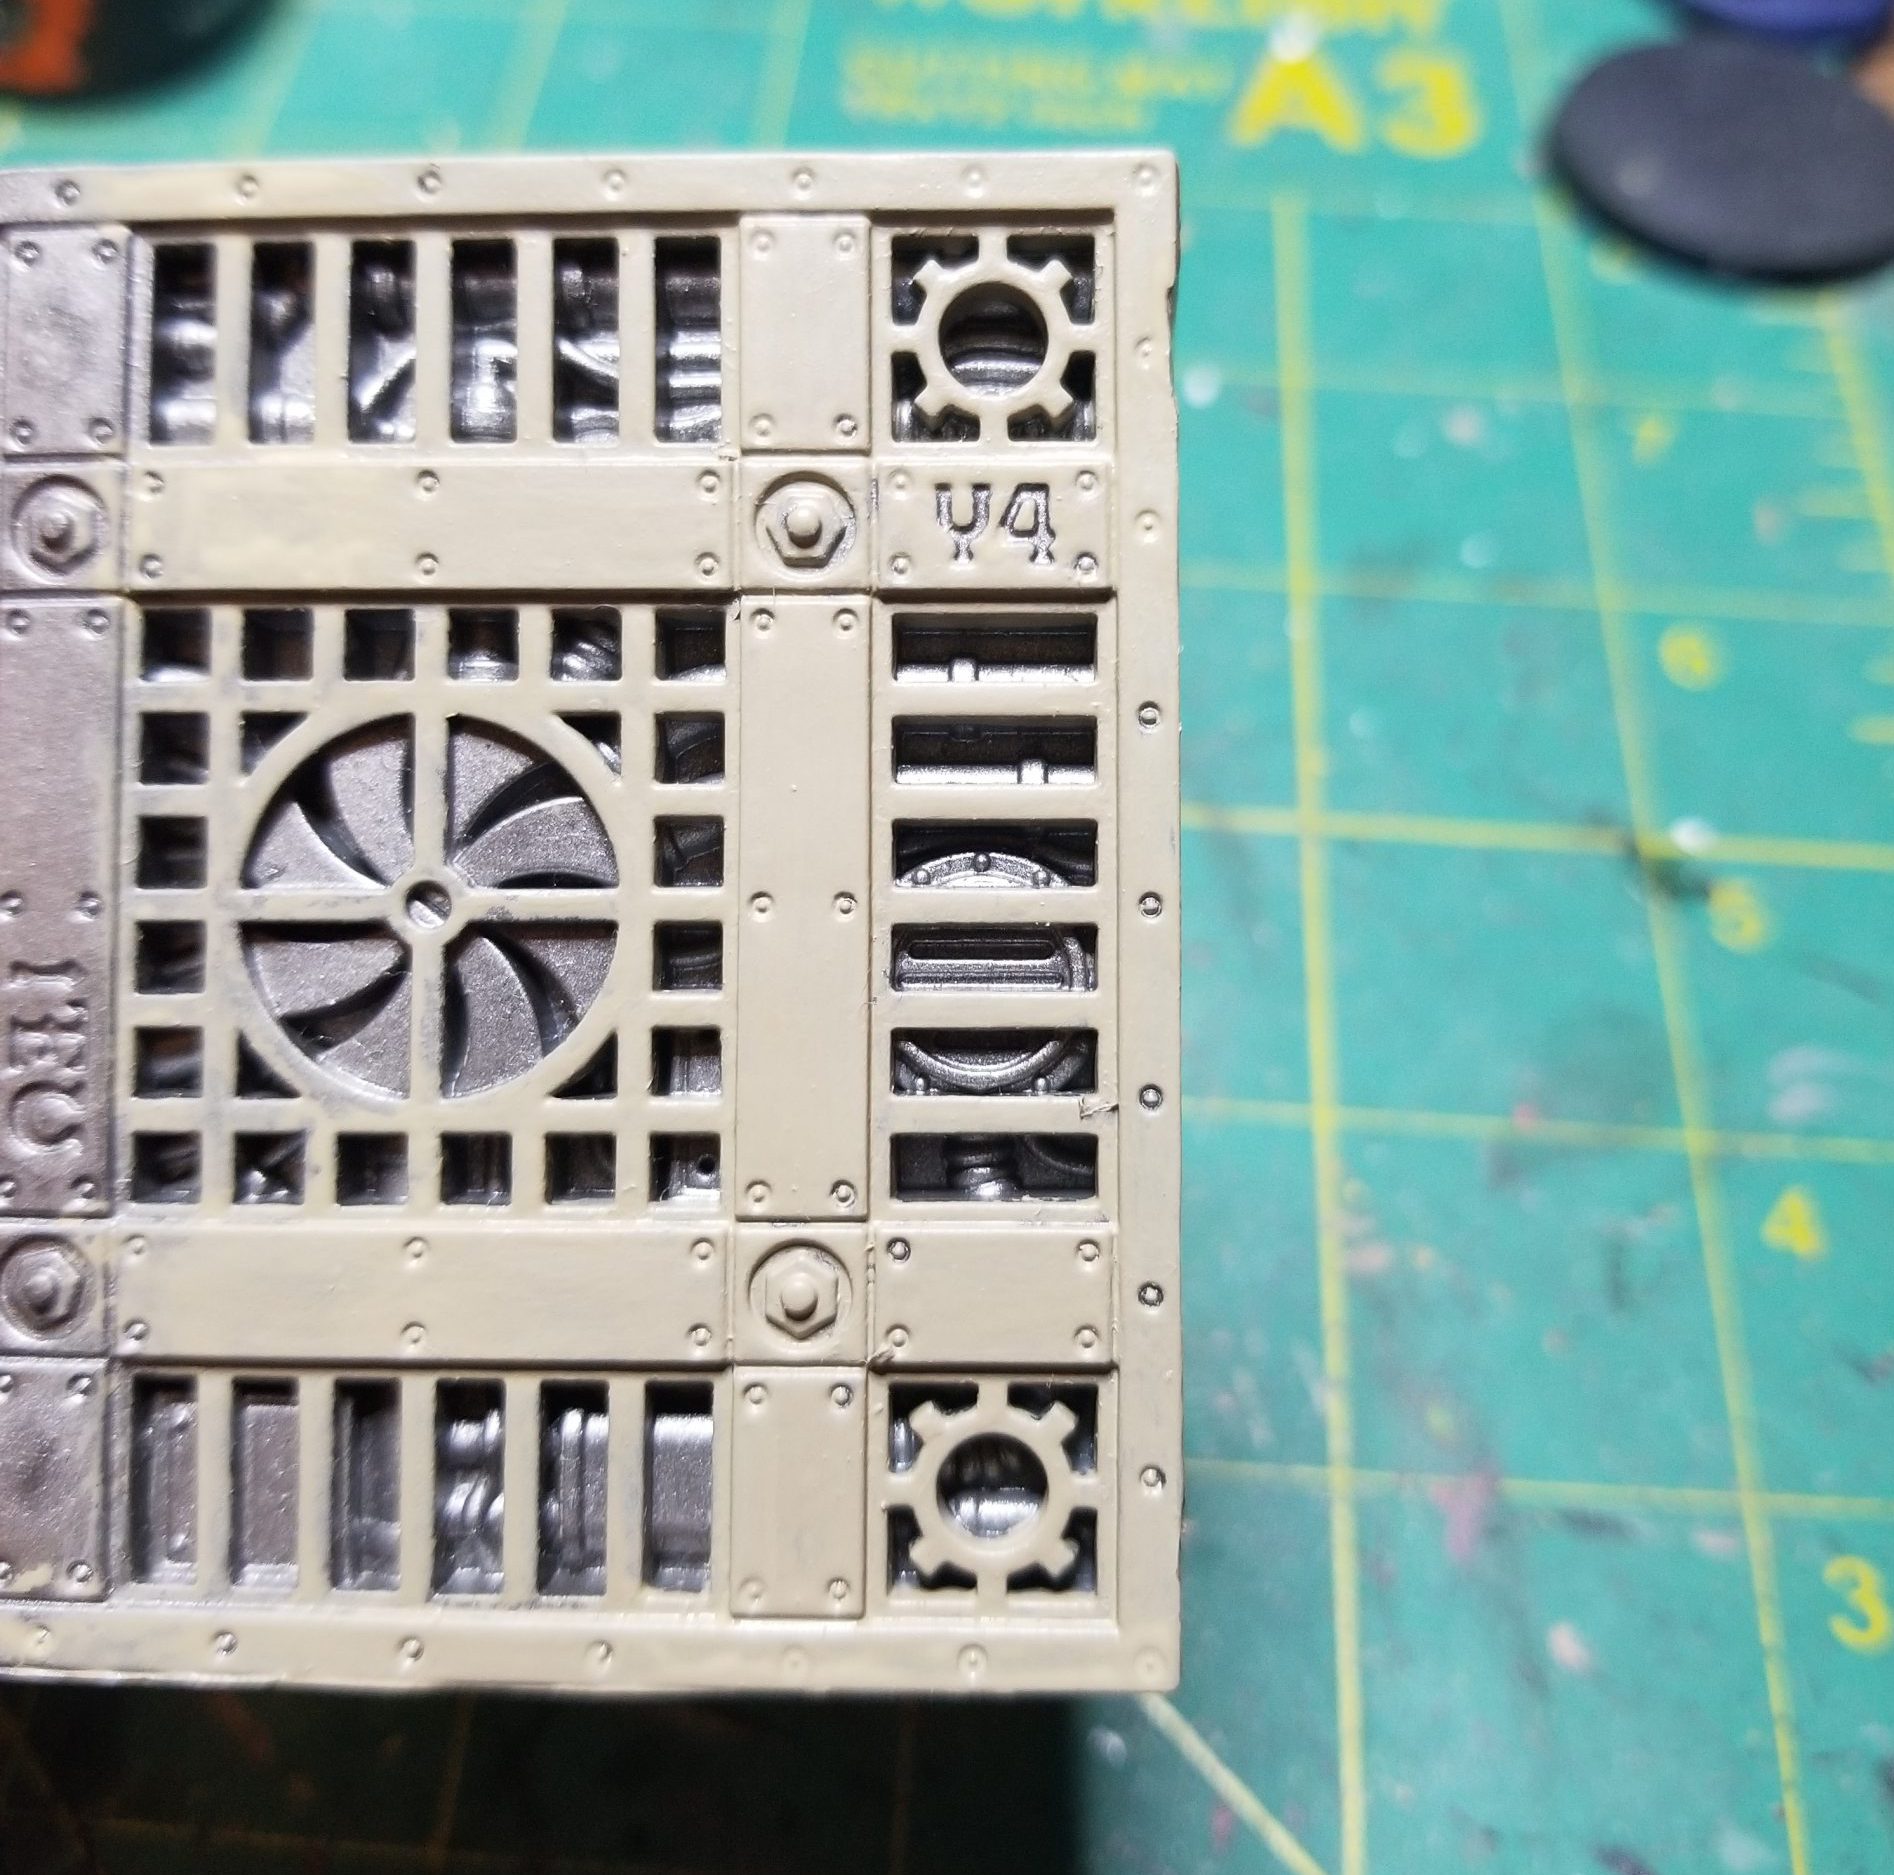
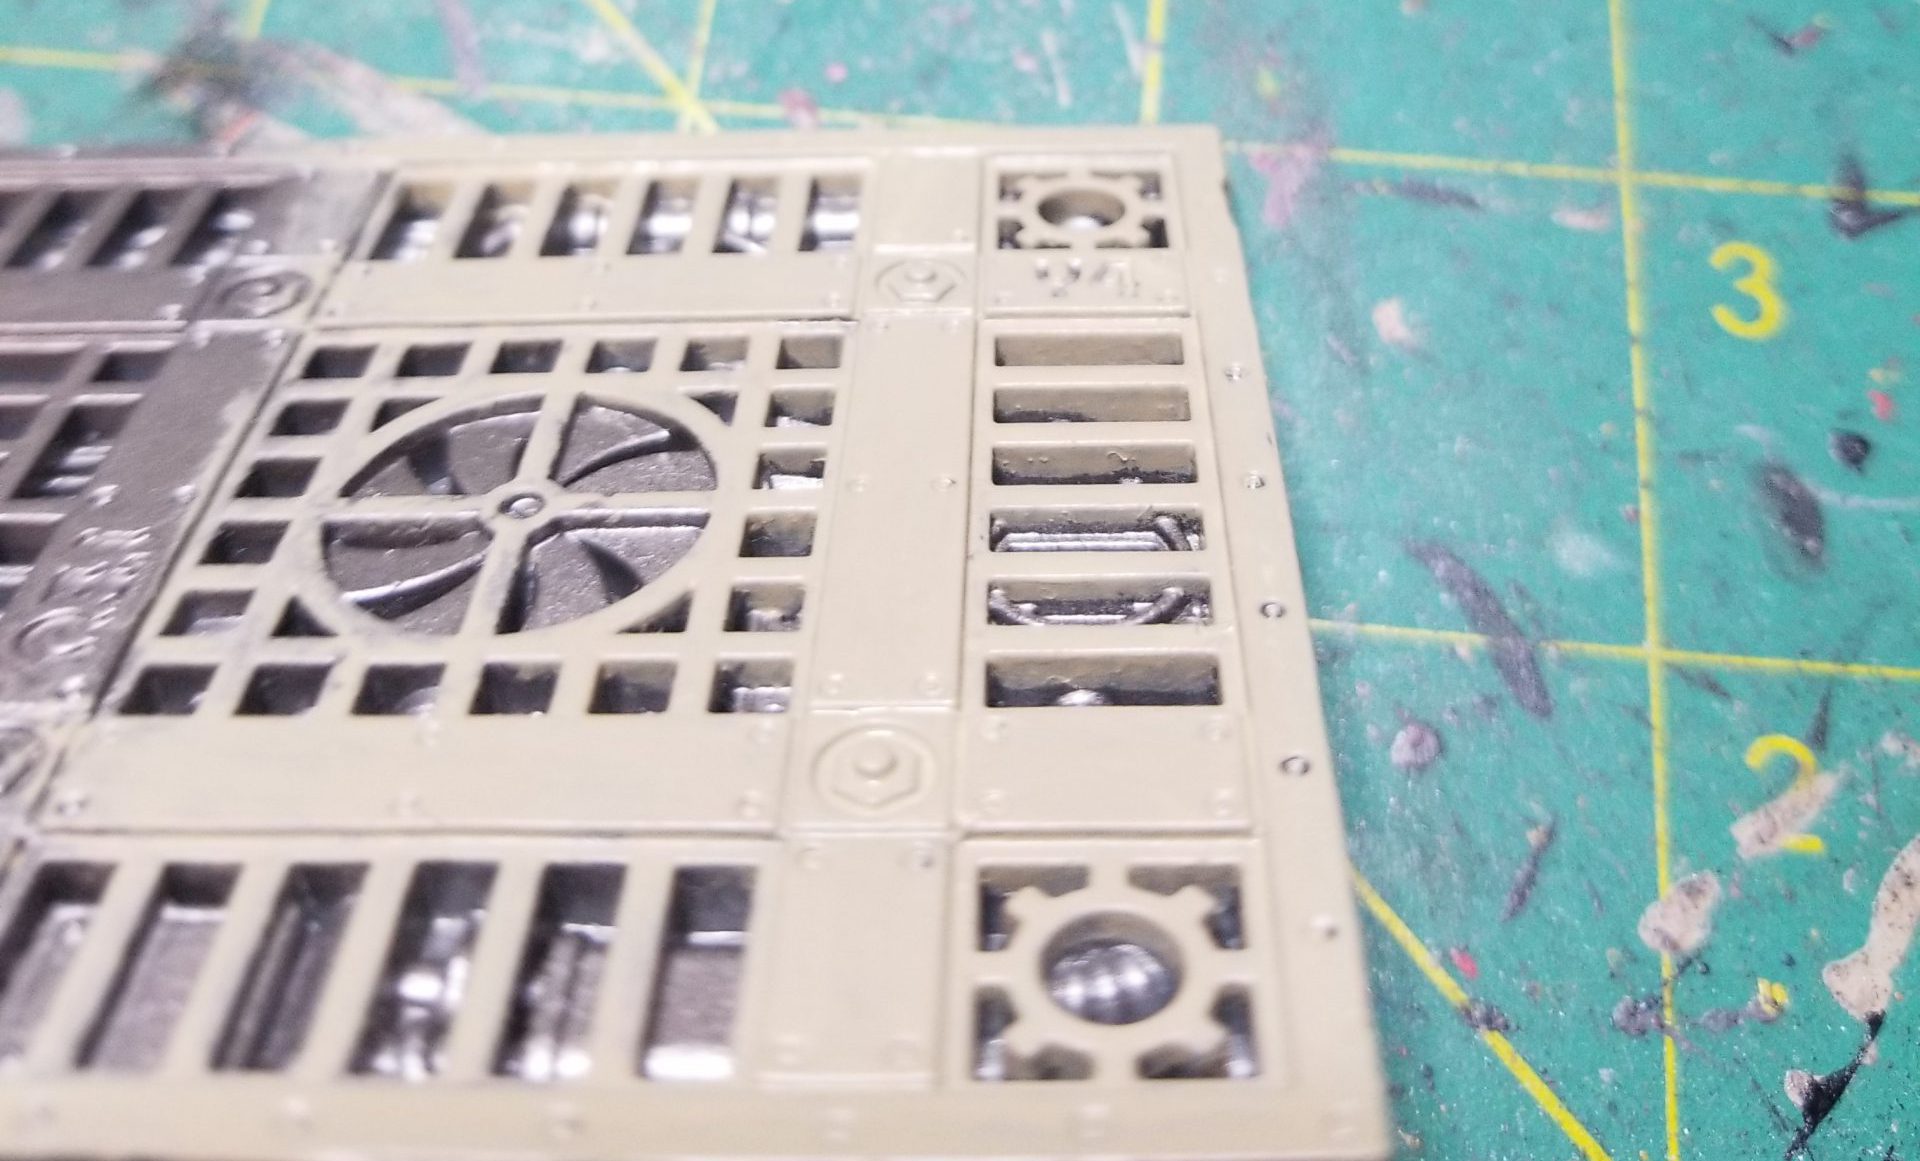
The terrain itself is extremely modular, able to be assembled and disassembled in a variety of ways, and consists of a series of furnaces, smokestacks, walkways, ladders, and metal support struts. Each piece of the terrain is loaded with details and there are tons of ways to assemble them. If you’re looking for inspiration or tips and tricks on terrain assembly using the Sector Mechanicus kits or any of the other kits GW has released recently, we’d recommend checking out Ray Dranfield’s Twitter page. He’s the designer for AoS terrain but did a good amount of work on the older 40k stuff as well. Scroll back far enough and you’ll find lots of fun examples of how to do more with the terrain.
Rob: As a fun footnote, the game itself (Shadow War: Armageddon) was little more than an afterthought to Games Workshop, a repackaged update of the Necromunda rules from the early 90s designed to move the new terrain kits. What they didn’t count on however was that people loved it, to the point that it might have legitimately hurt sales and enthusiasm for Kill Team 2018 when it released less than a year later.
Fowler: Oddly enough, Shadow War: Armageddon is what got me to really take the plunge on the hobby. Assembly note for people who want to maximize modularity (for Necro and Kill Team especially) – I highly recommend making some clipped walkways.

Using those clips on either end of a walkway lets you suspend between it two other terrain pieces. If you really want to cover more ground, combining two long walkways is an excellent choice.
You probably don’t need 3 clips AND a railing to support a long clipped walkway, but you also really don’t want it to fail! Use your best judgment.
Painting Sector Mechanicus
There are a ton of different ways to tackle this terrain, and a ton of different techniques you can employ to do the appropriate weathering and grime on your surfaces. We’ll cover a few here, but if you’re looking for more consider checking out the methods in some of our How to Paint Everything article on weathering.
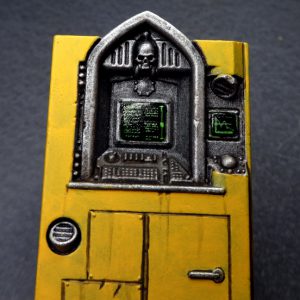
Additionally note that while Munitorum crates are not a part of the Sector Mechanicus terrain, they frequently show up on that terrain, and if you want ideas on painting those, you can find our article on painting them here and also the Necro-fied version here.
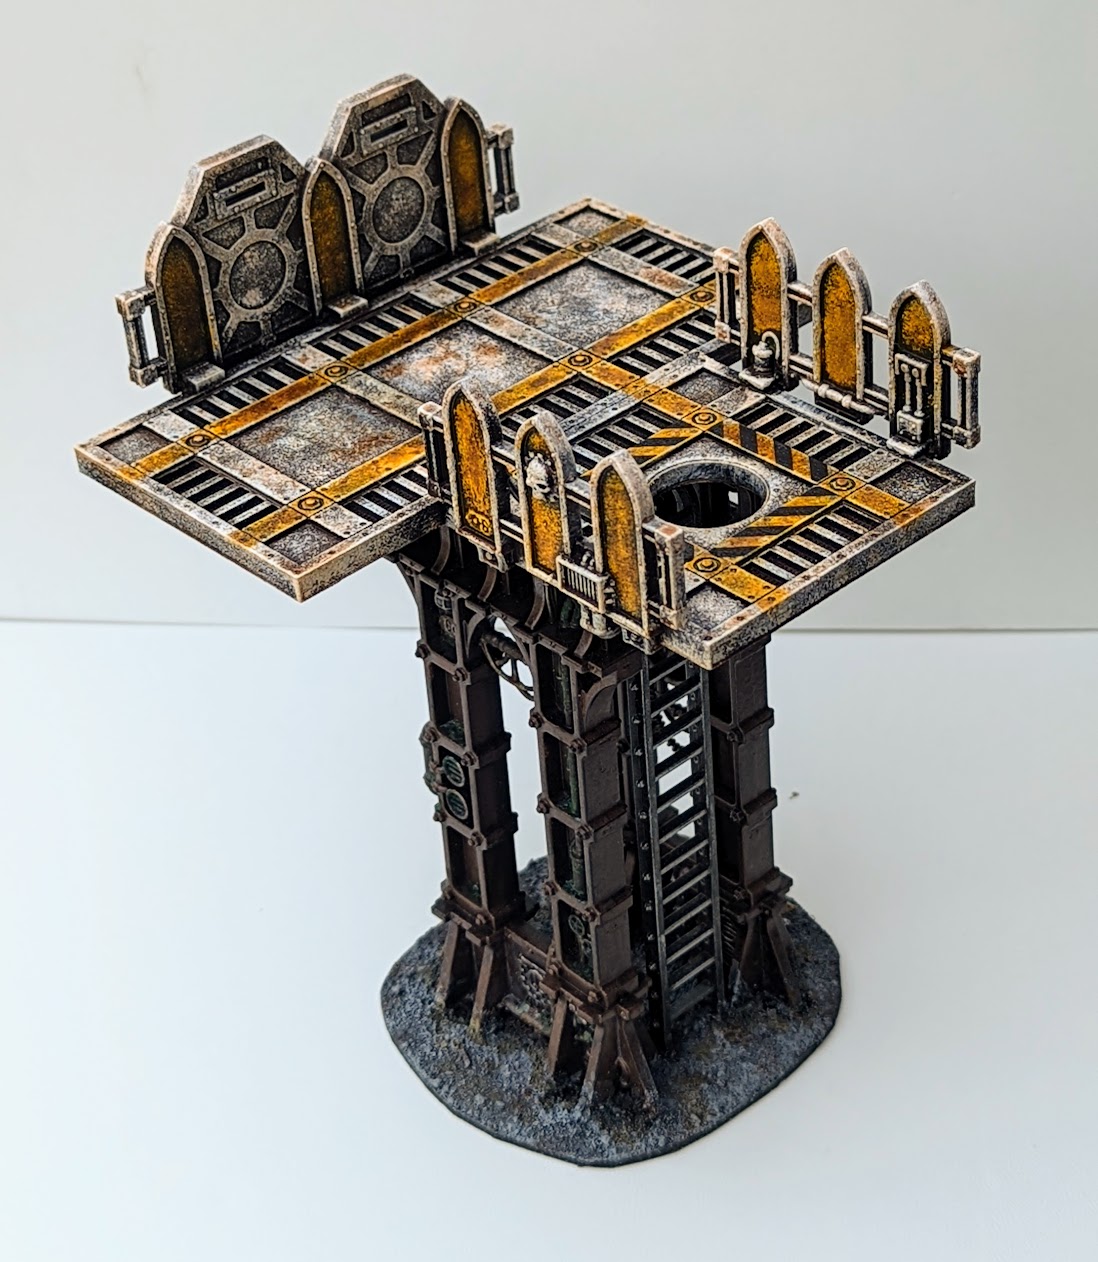
Fowler’s “OSHA Approved Ash Wastes” Method
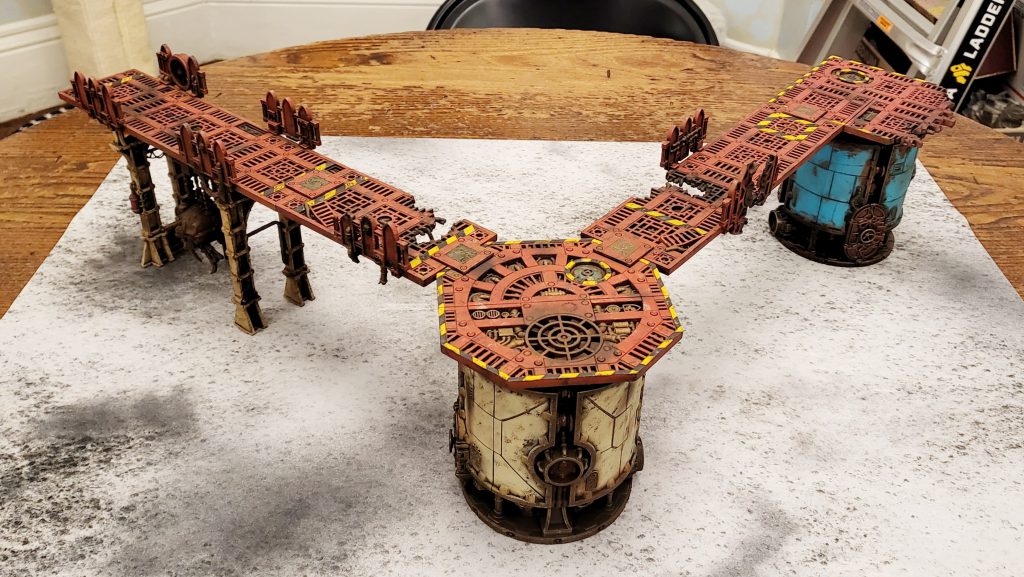
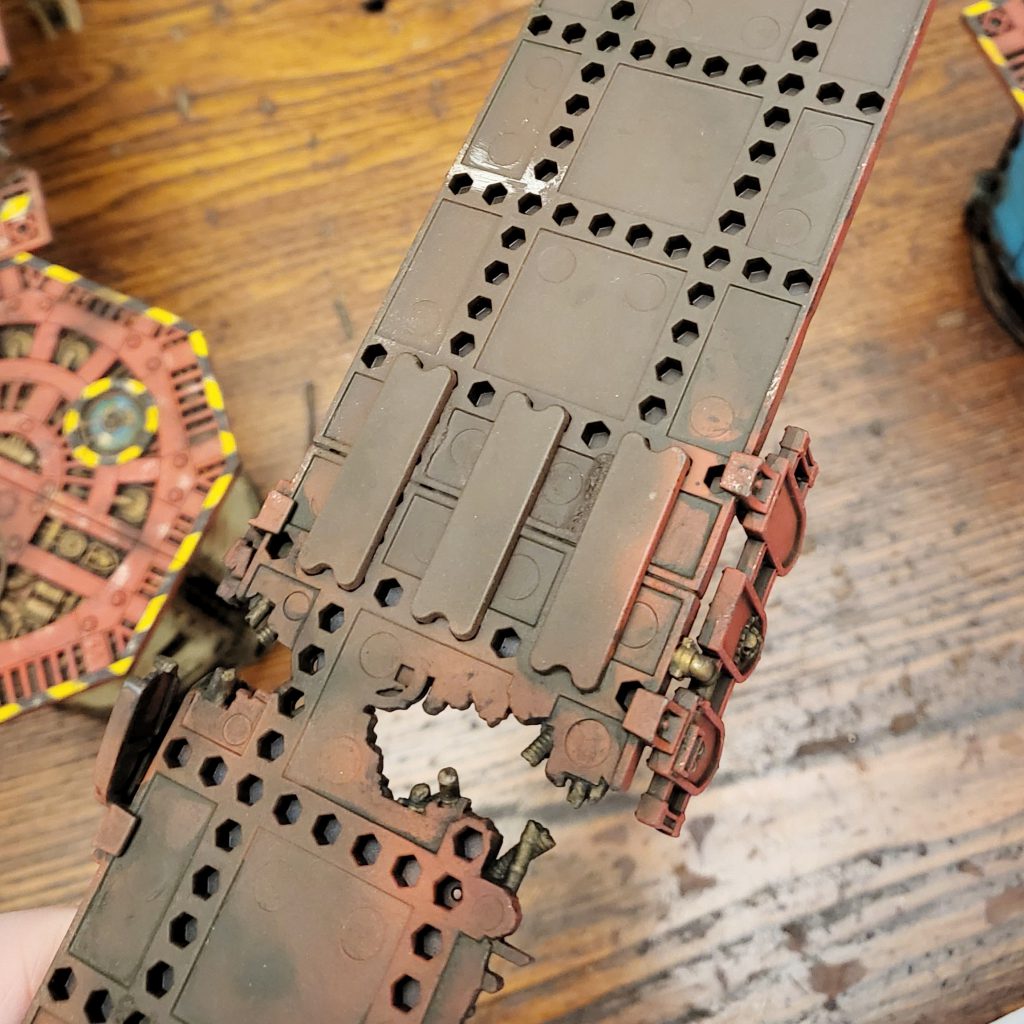
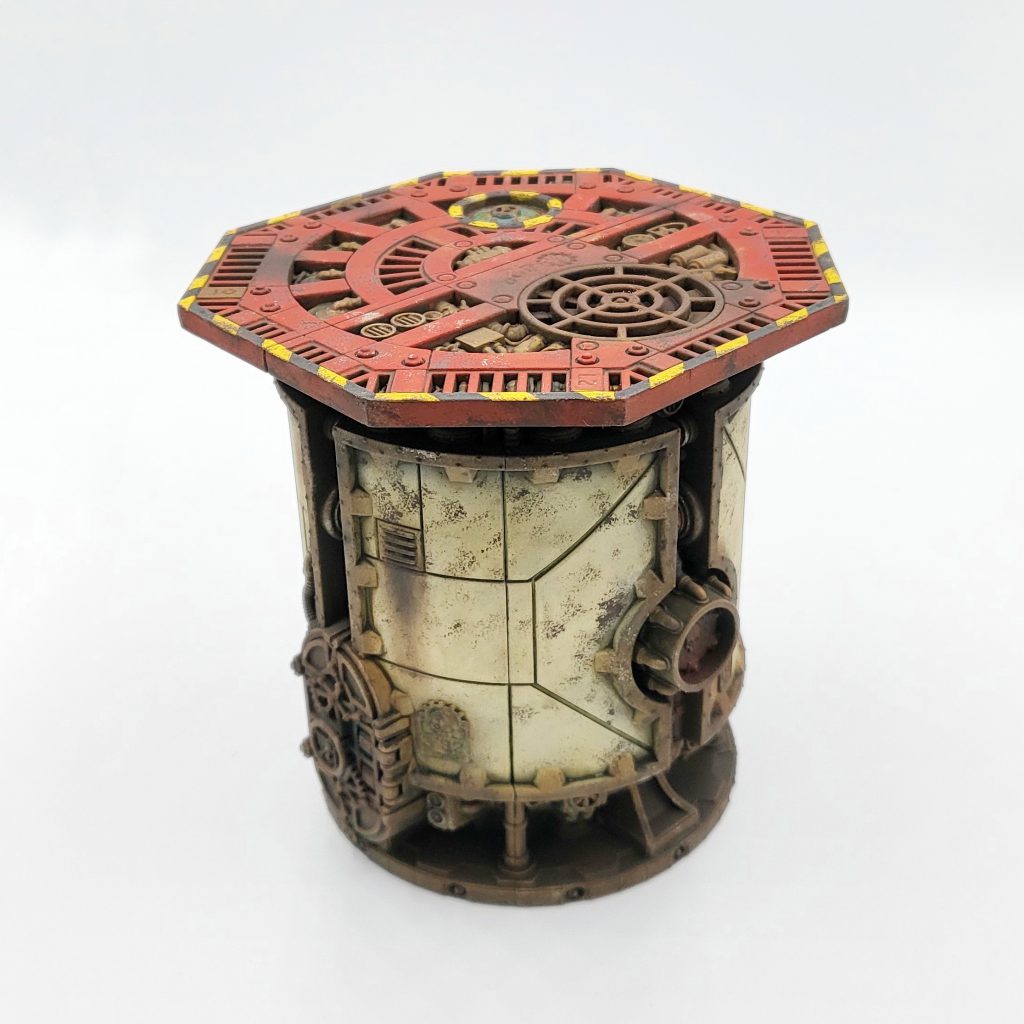
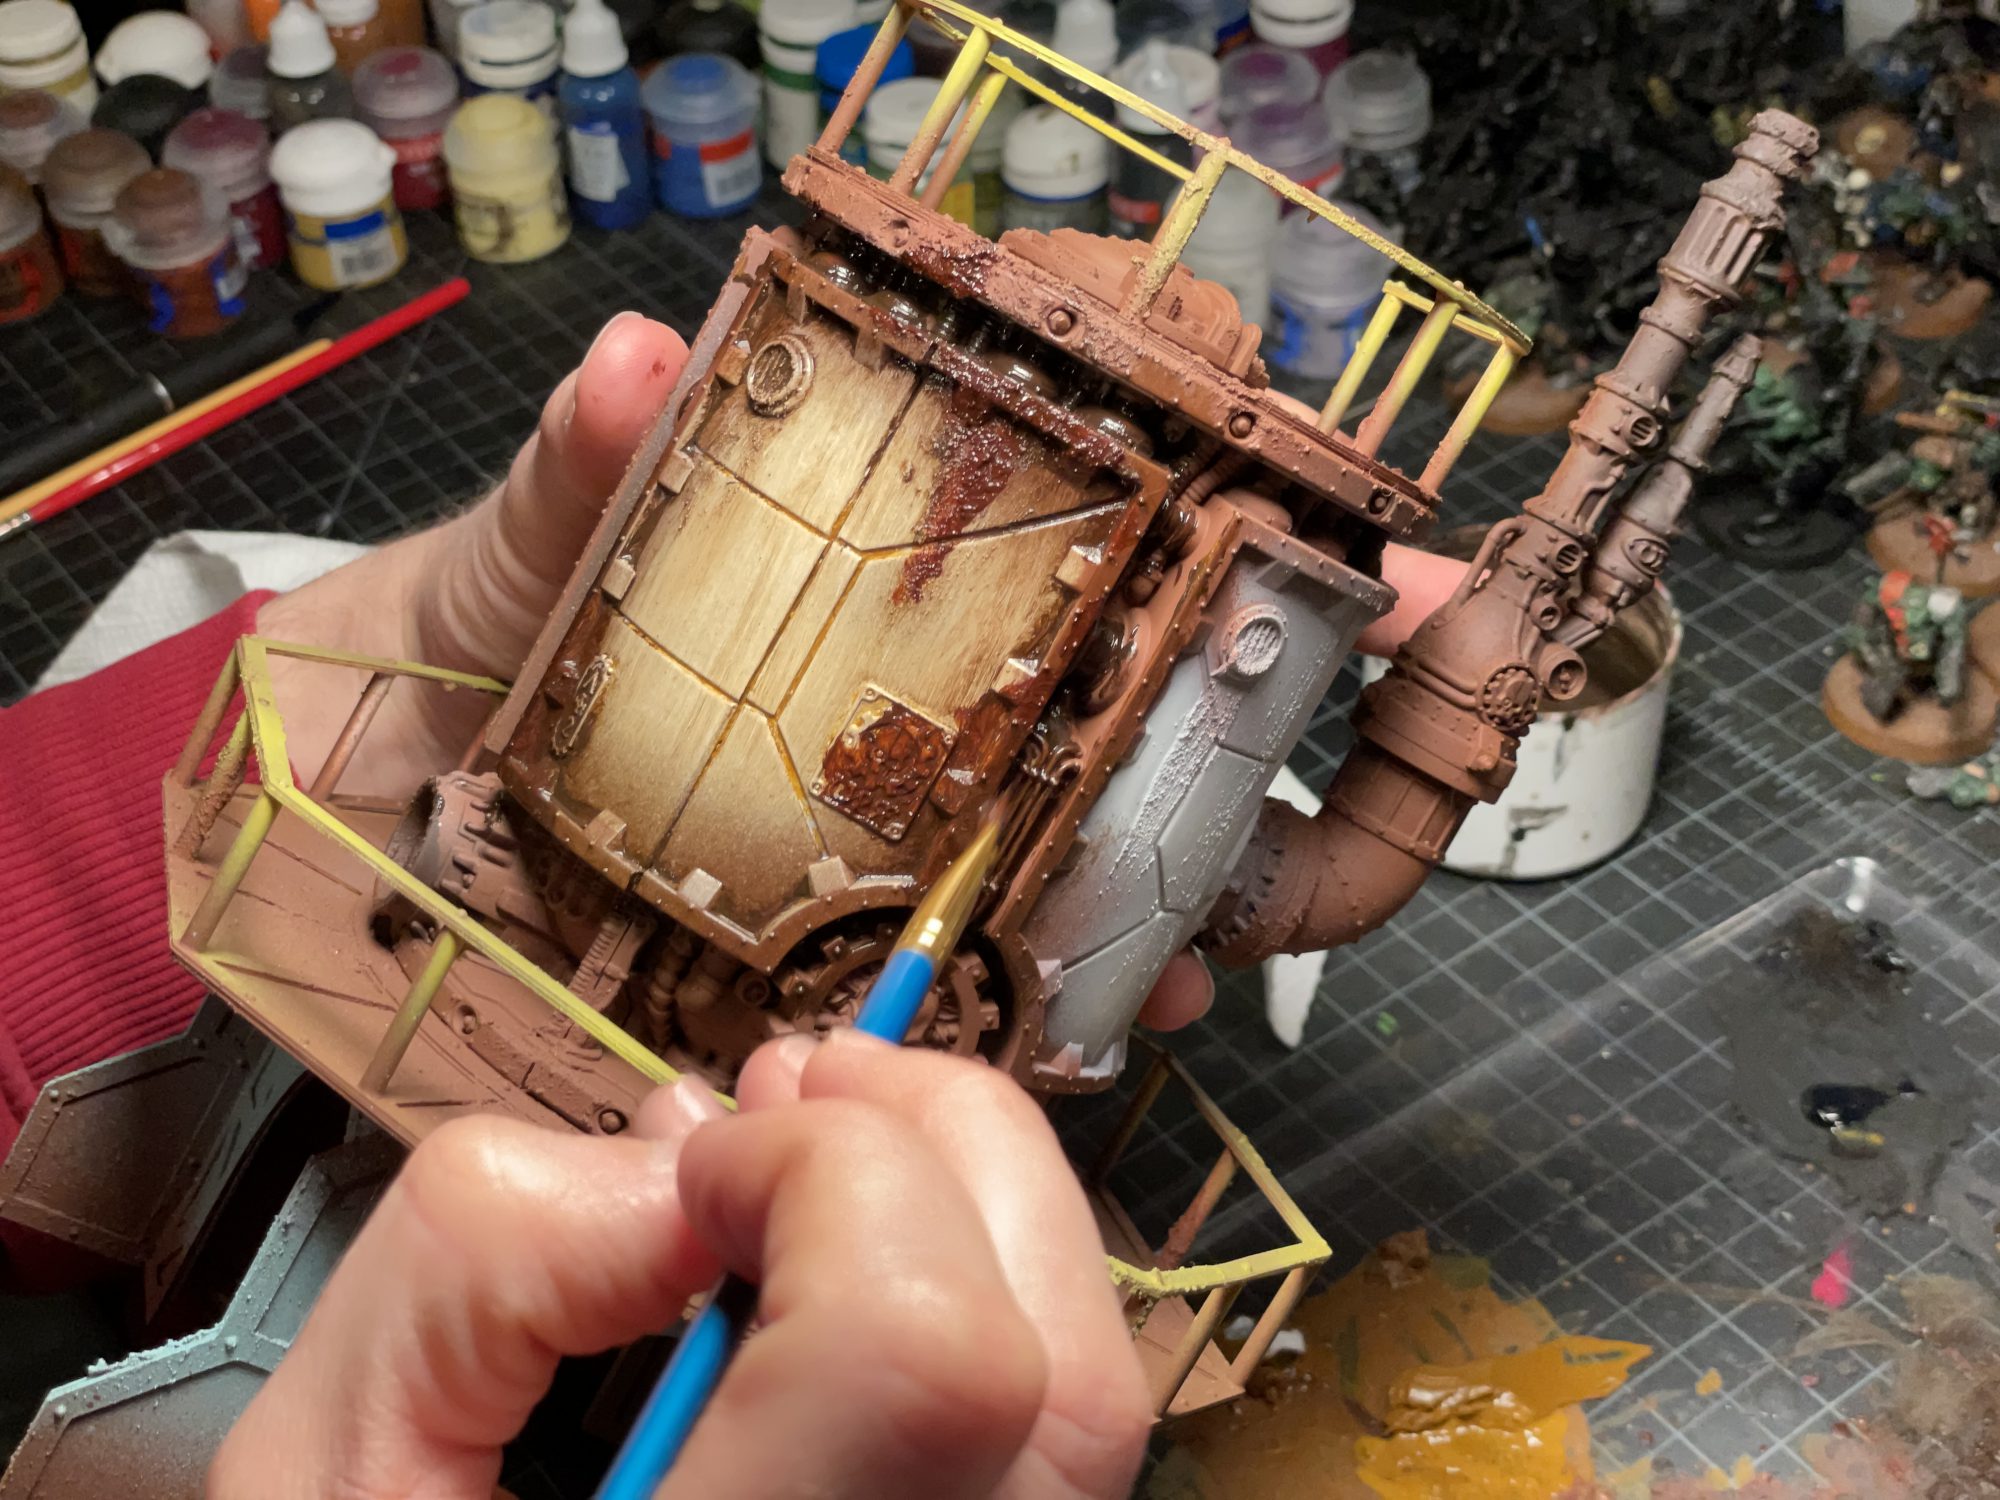
With the imminent release of Ash Wastes, I decided to finally build and paint up all of the Sector Mechanicus kits I have been buying up over the past few years. The scheme I’ve got here can be toned waaaaay down if you want to turn it into a speedpaint as well. The basic gist of it is red platforms and bone-colors supports.
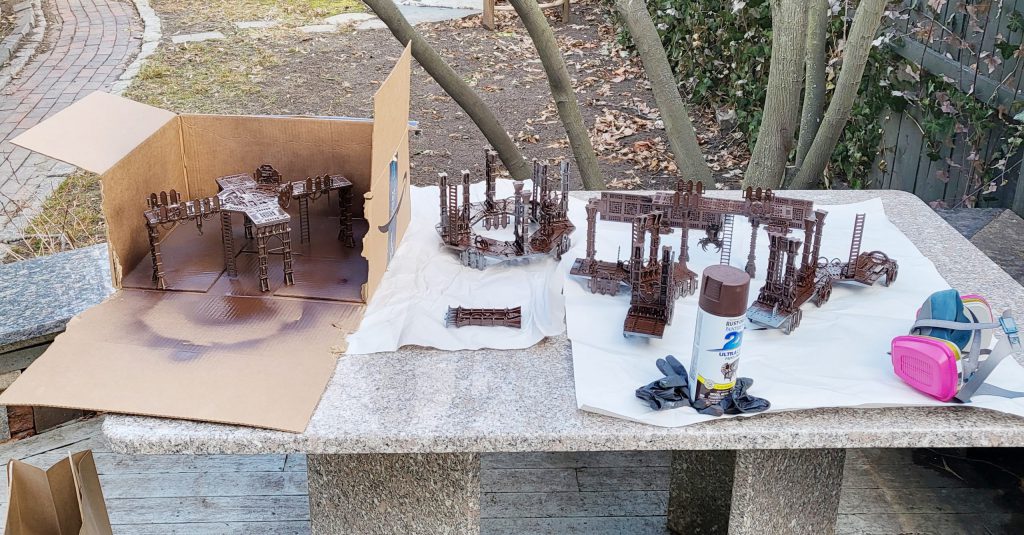
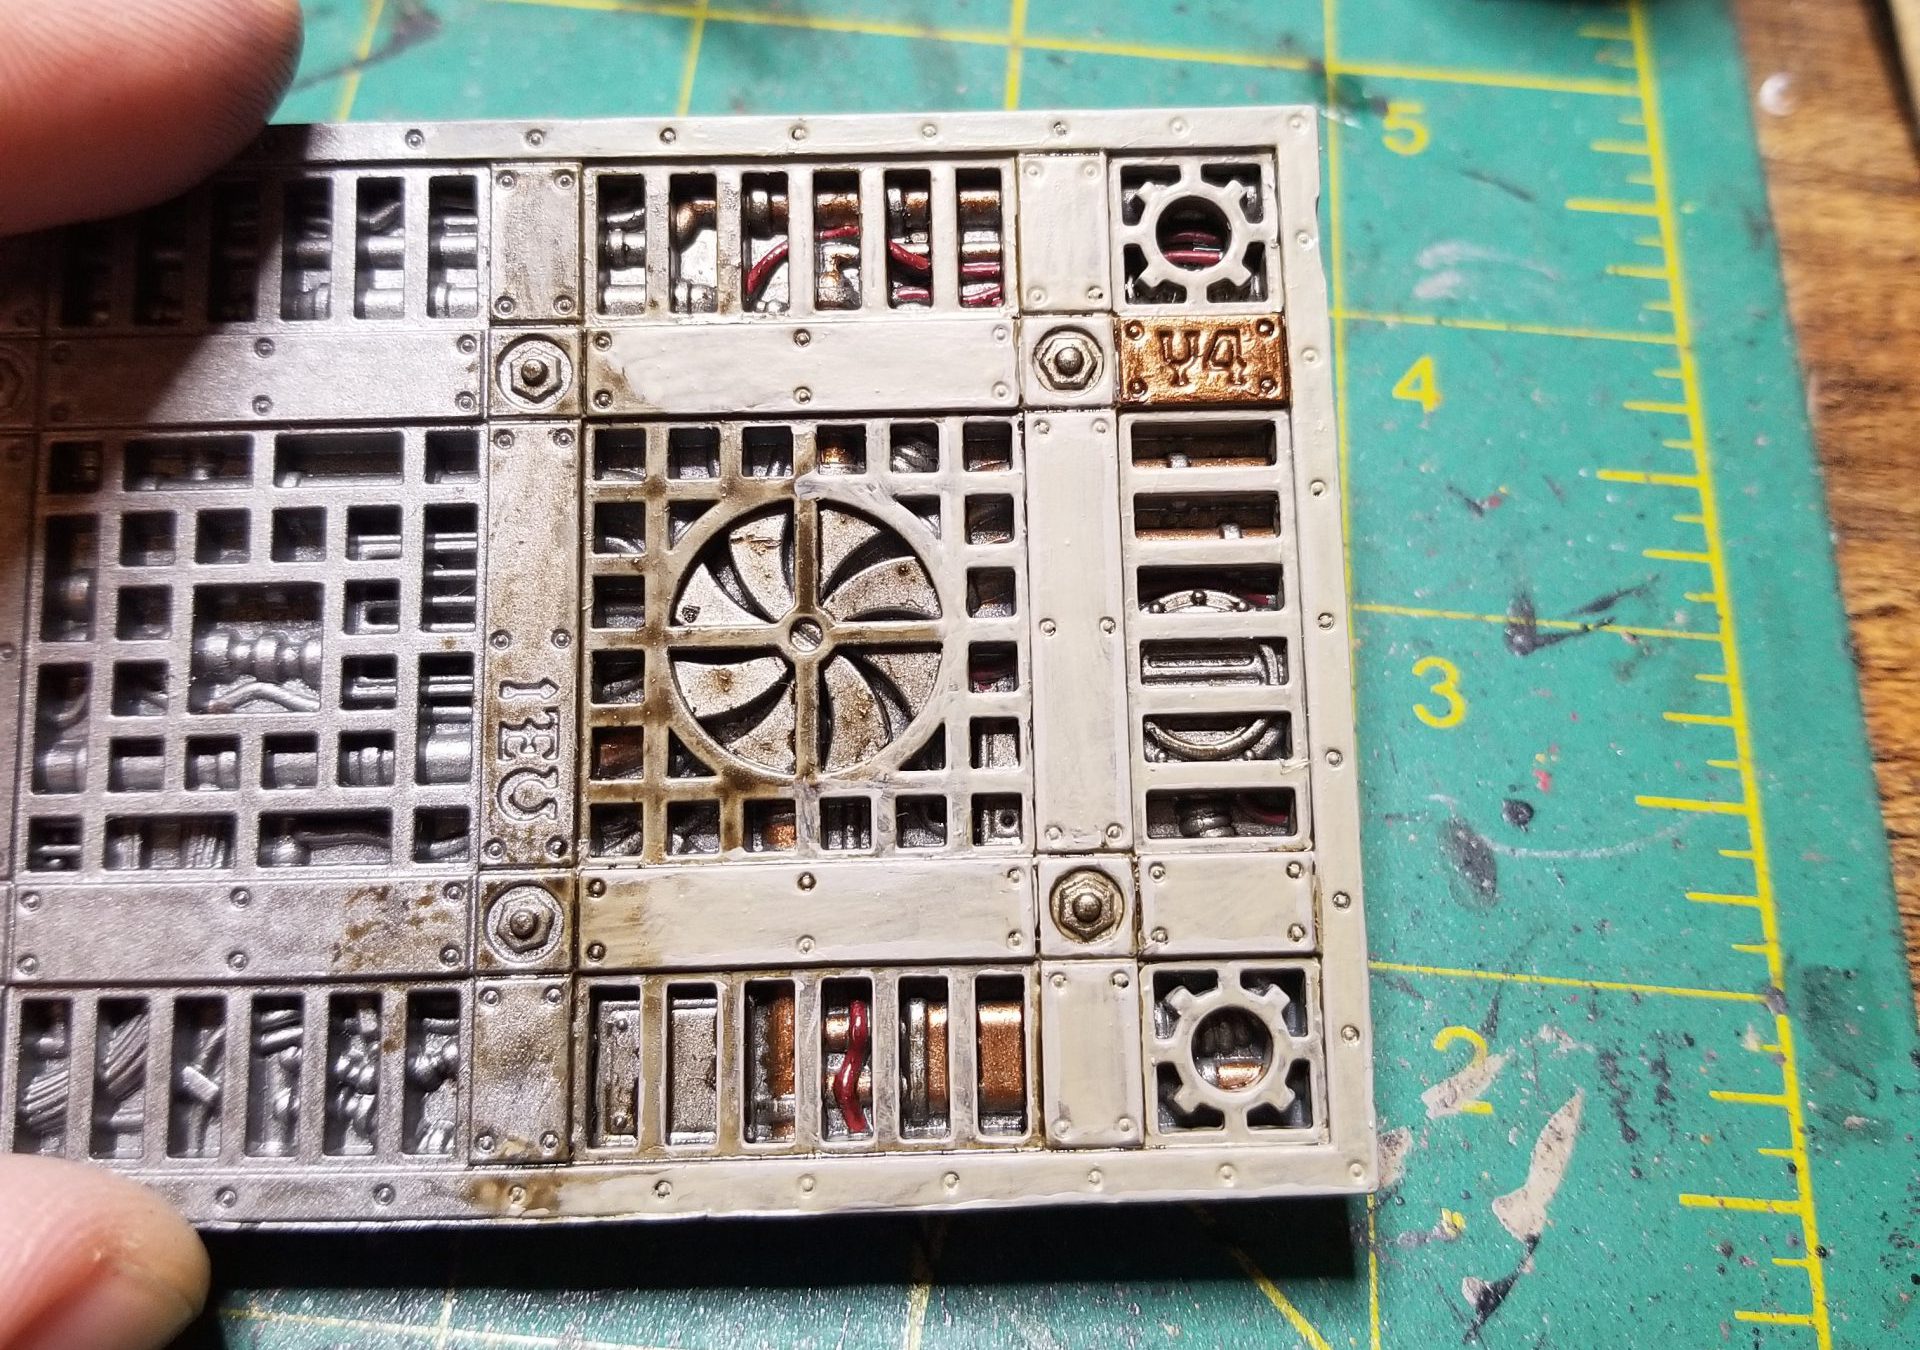
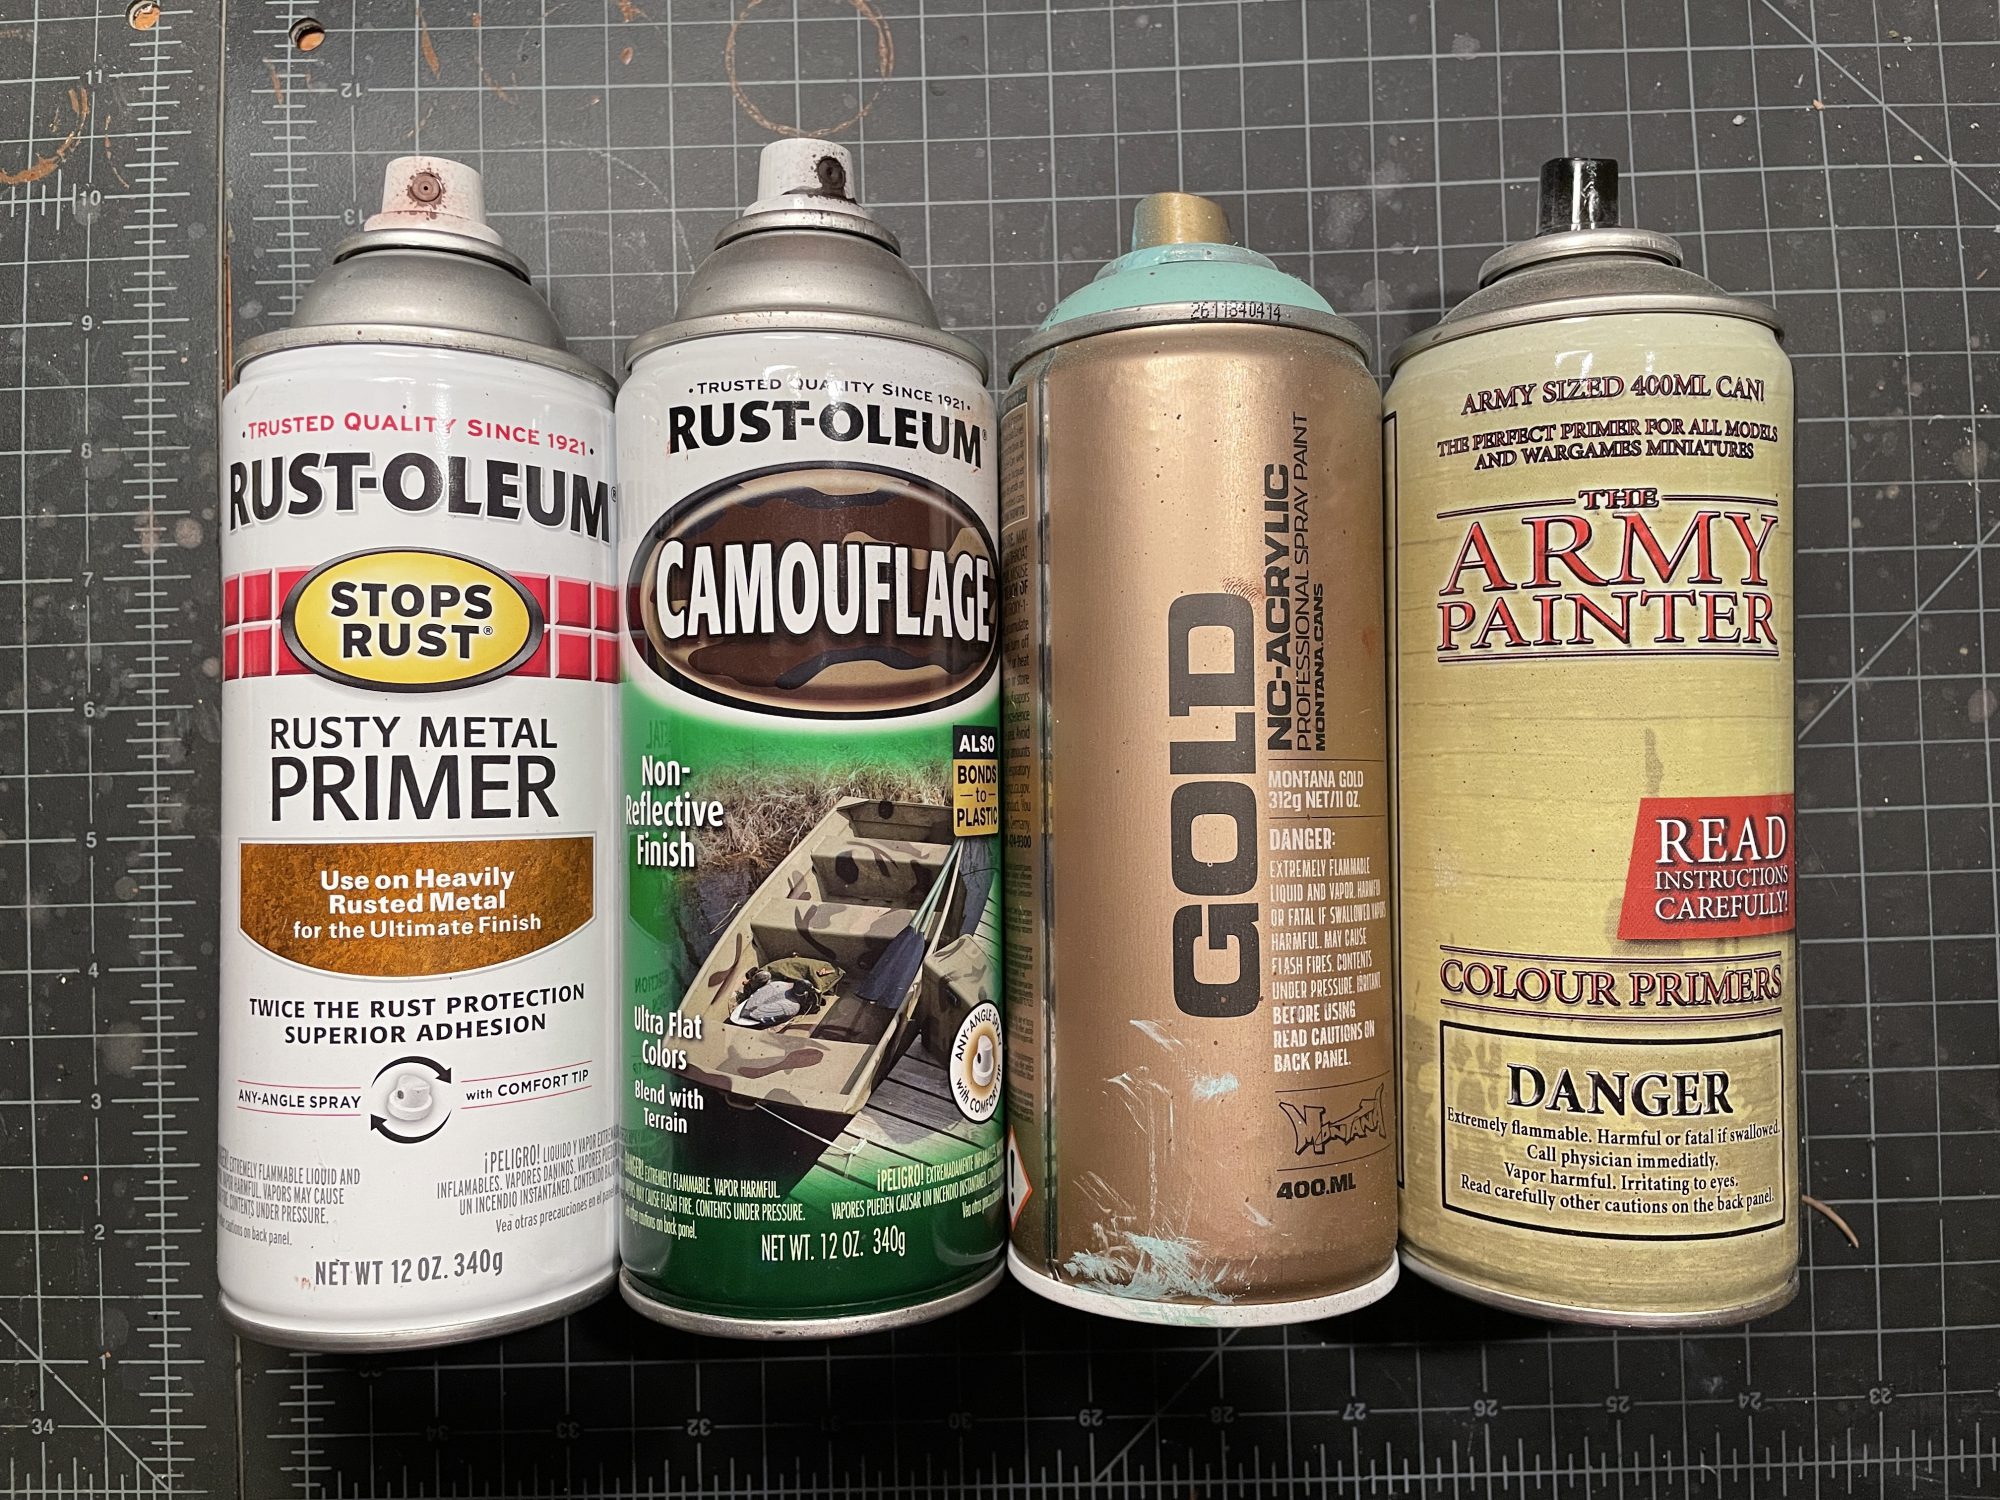
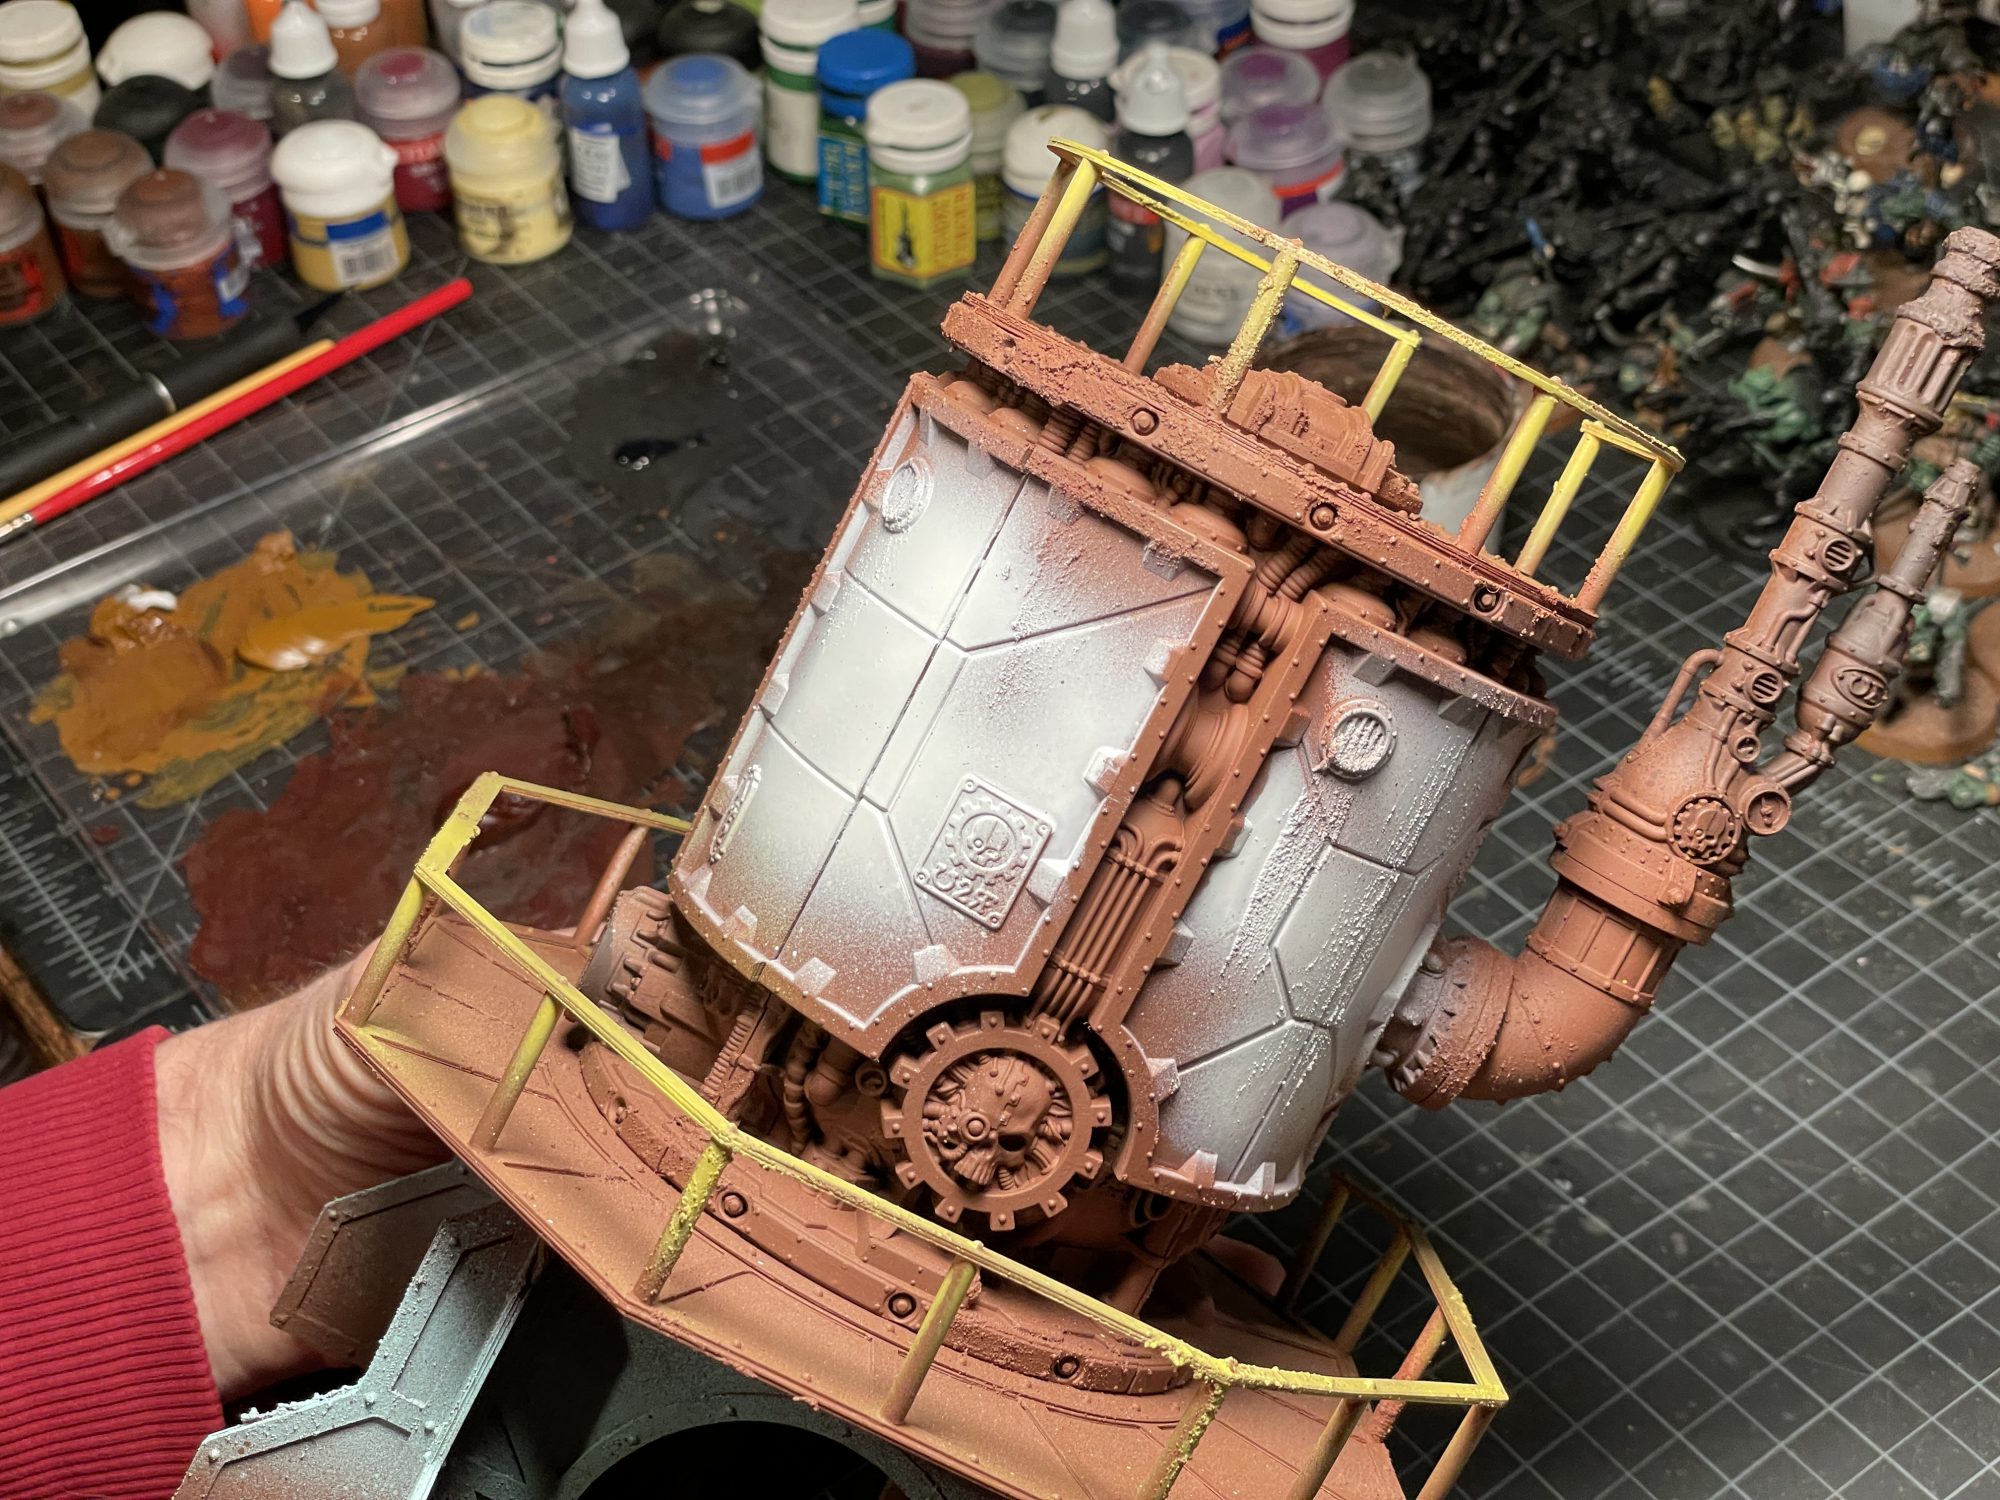
First step here was priming brown. I used a rattlecan as this terrain is likely going to spend time time in transit or at the club. If at all possible, I HIGHLY recommend painting this in at least some sub assemblies: legs would get primed with Wraithbone, walkways and attached railings get Mephiston Red, dangly things and the mechanicus skull gets leadbelcher (or a darker metal if you have access to one. I realized the sub assembly thing with one set of pillars left, so I went hard mode with the airbrush. Legs were messily hit with Vallejo Bonewhite (Wraithbone or Ushabti would work), walkways with Badger Minitaire Scorching Red (slightly more orangey than Mephiston Red, but in the neighborhood), and the dark steel metallics got Vallejo Metal Color Burnt Iron. The ferratonic furnaces and scatter pieces were basecoated with Army Painter Rough Iron, which is pretty close to Warplock Bronze.
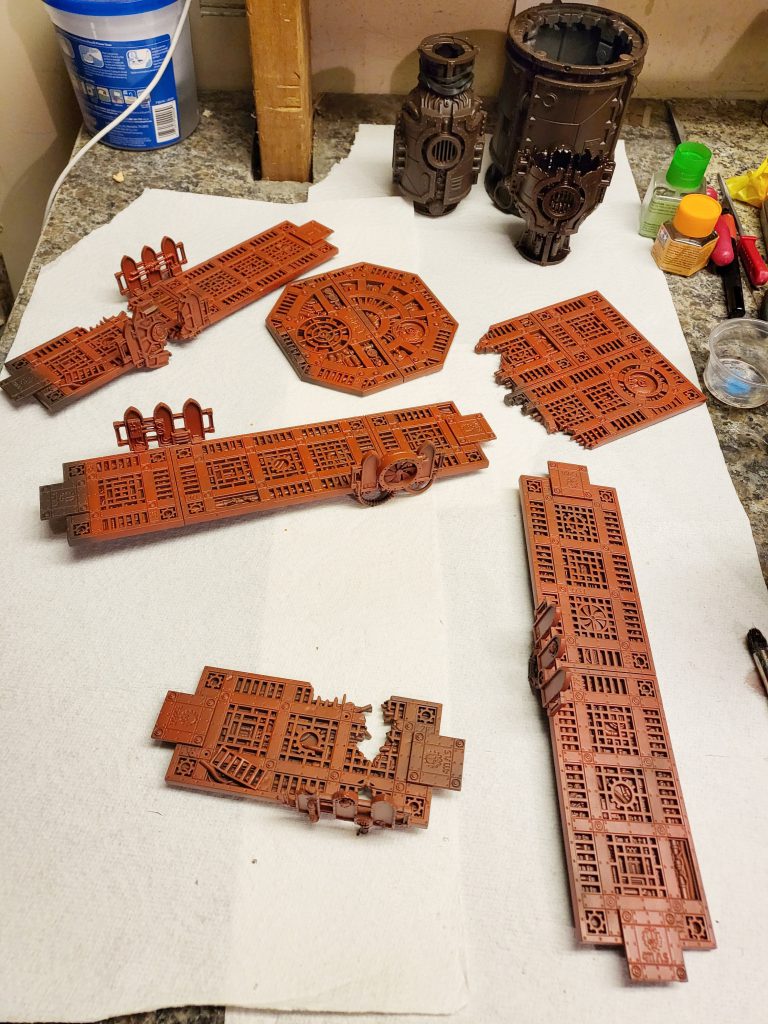
Next up is drybrushing; legs get a light drybrush of Pallid Wych Flesh, walkways get a heavy drybrush of Evil Sunz Scarlet, and dark metallics get a light drybrush of a slightly brighter metal (brushing Leadbelcher over Burnt Iron is great). The Furnace tank and scatter get a heavy drybrush of Brass Scorpion. You can airbrush or stipple on a main panel color for the tank at this point – in my scheme I have Averland Sunset, Vallejo Bonewhite, and Golden High Flow Acrylic Teal on different pieces. If you airbrush and have some overspray, go back over the edges with a drybrush of Brass Scorpion to blend it back in.
Now that the general colors are picked out, you could do some sponge weathering and call it a day… but with a few more steps this terrain will really sing! I pick out the mechanicus skulls, number plates, the centers of the terrain clips, and pipes (including the ones on the top of the terrain if you are ambitious) with Scale 75 Necro Gold – and gave bigger details a quick drybrush of Sycorax bronze. Fan blades were picked out with Burnt Iron and drybrushed with Stormhost Silver.
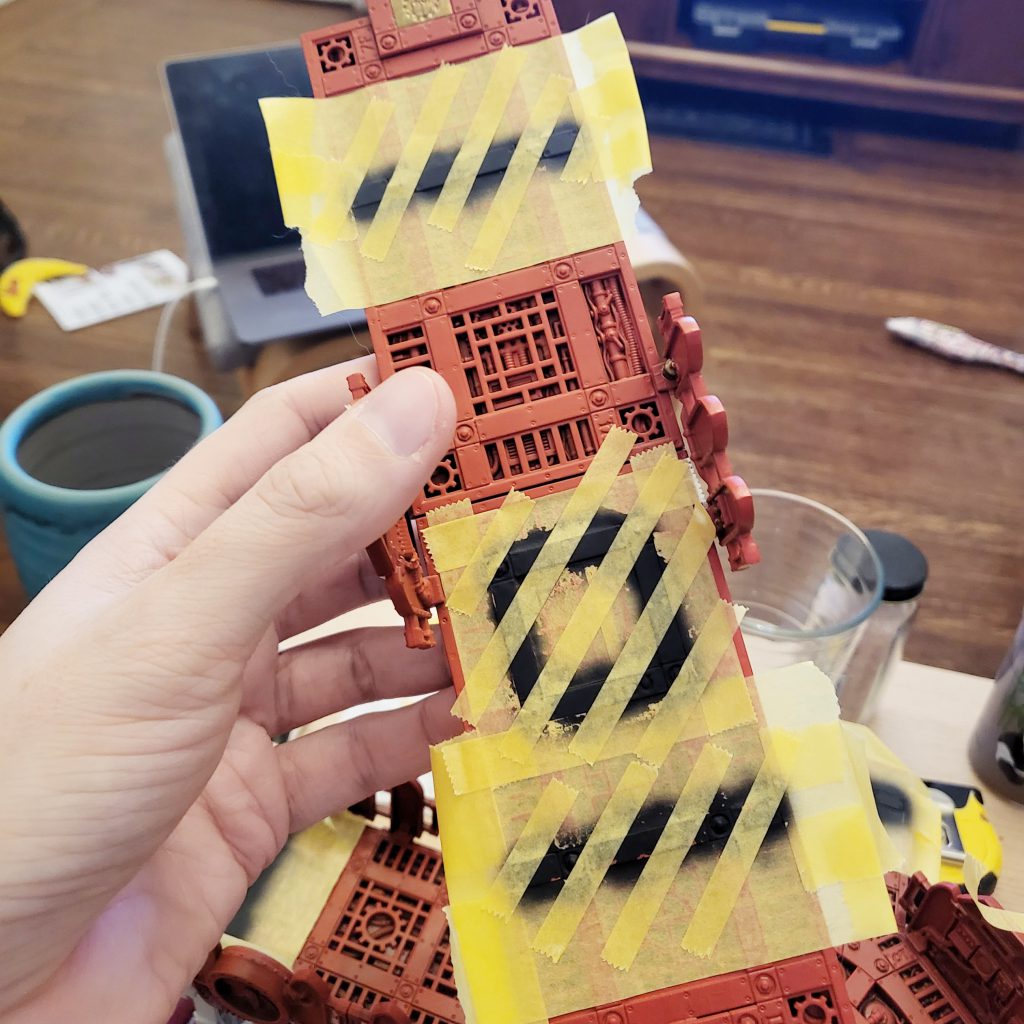
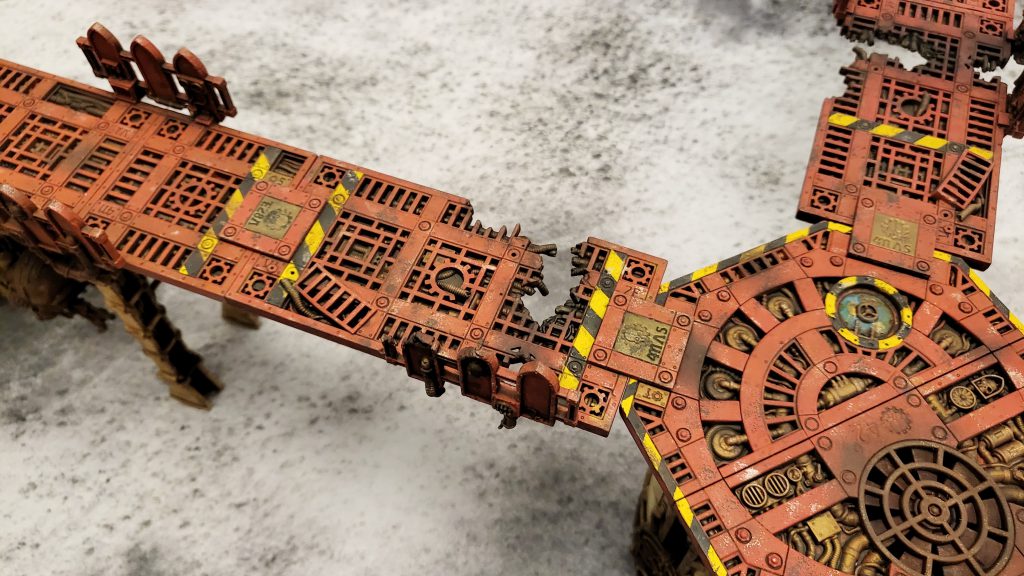
At this point I added the hazard stripes. 6mm tape is perfect for the details on this terrain! I started by blocking it out with Corvus Black. Yellow is two passes each of Averland Sunset and Flash Gitz. Yes I do paint the yellow for my hazard stripes over black and no one can stop me. With all of the details set – it’s time to sponge weather! Vince Venturella’s recent video about painting terrain has a phenomenal guide for this step. I start out with Stormhost Silver and sponge all over – focusing on edges and any parts where things are broken. Next, I switch to Dryad bark and sponge all over, making sure to hit some of the same areas.
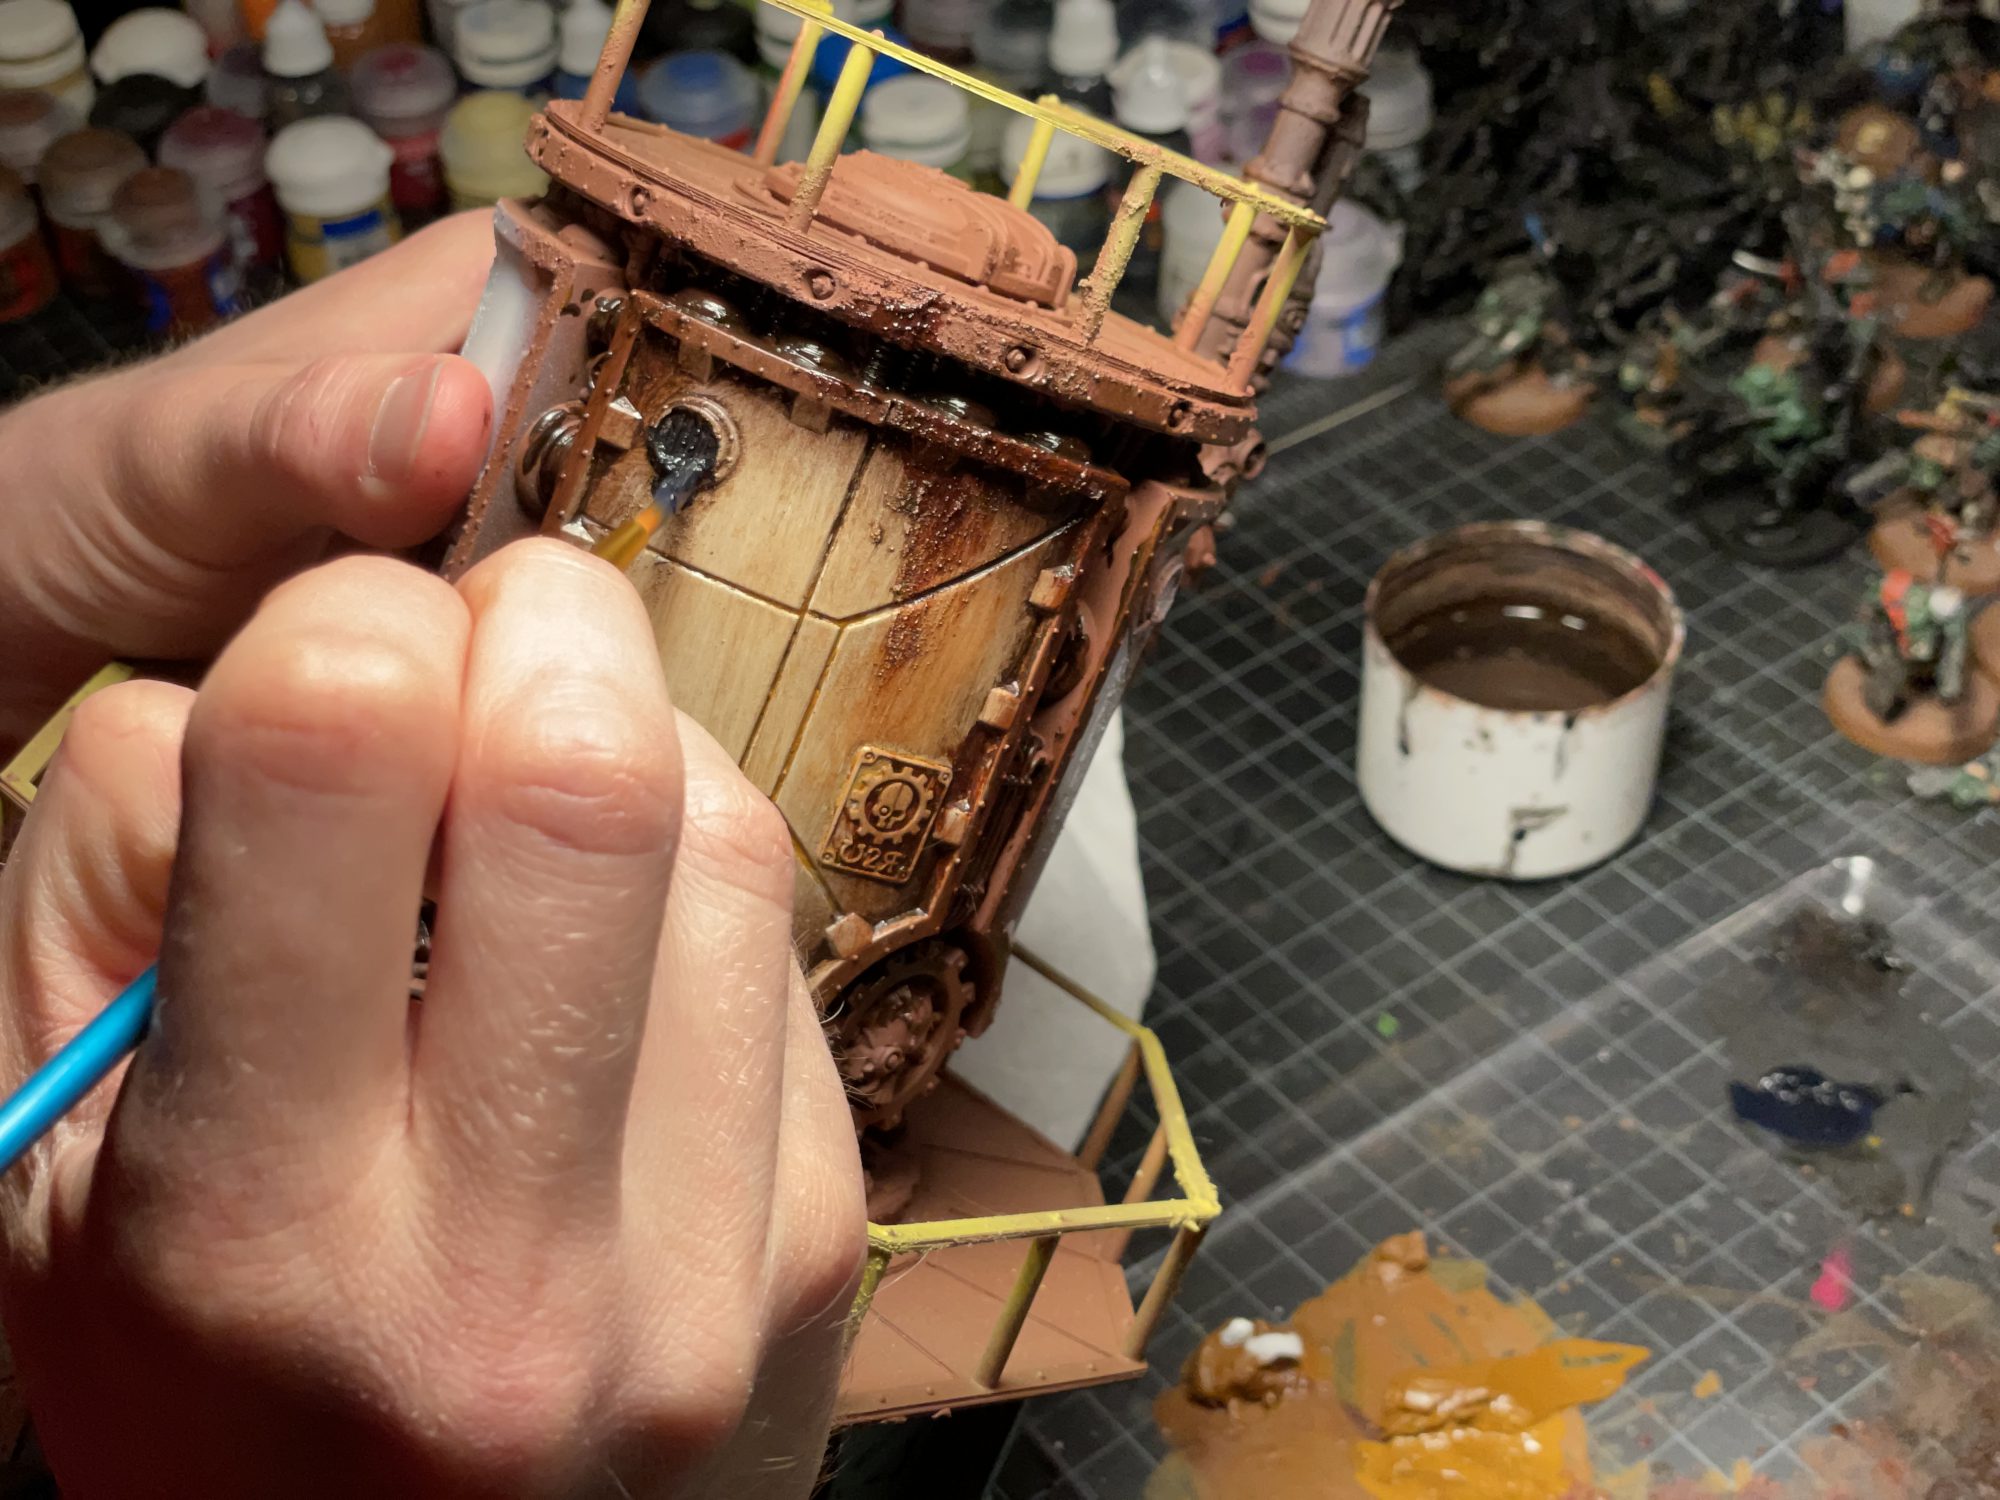
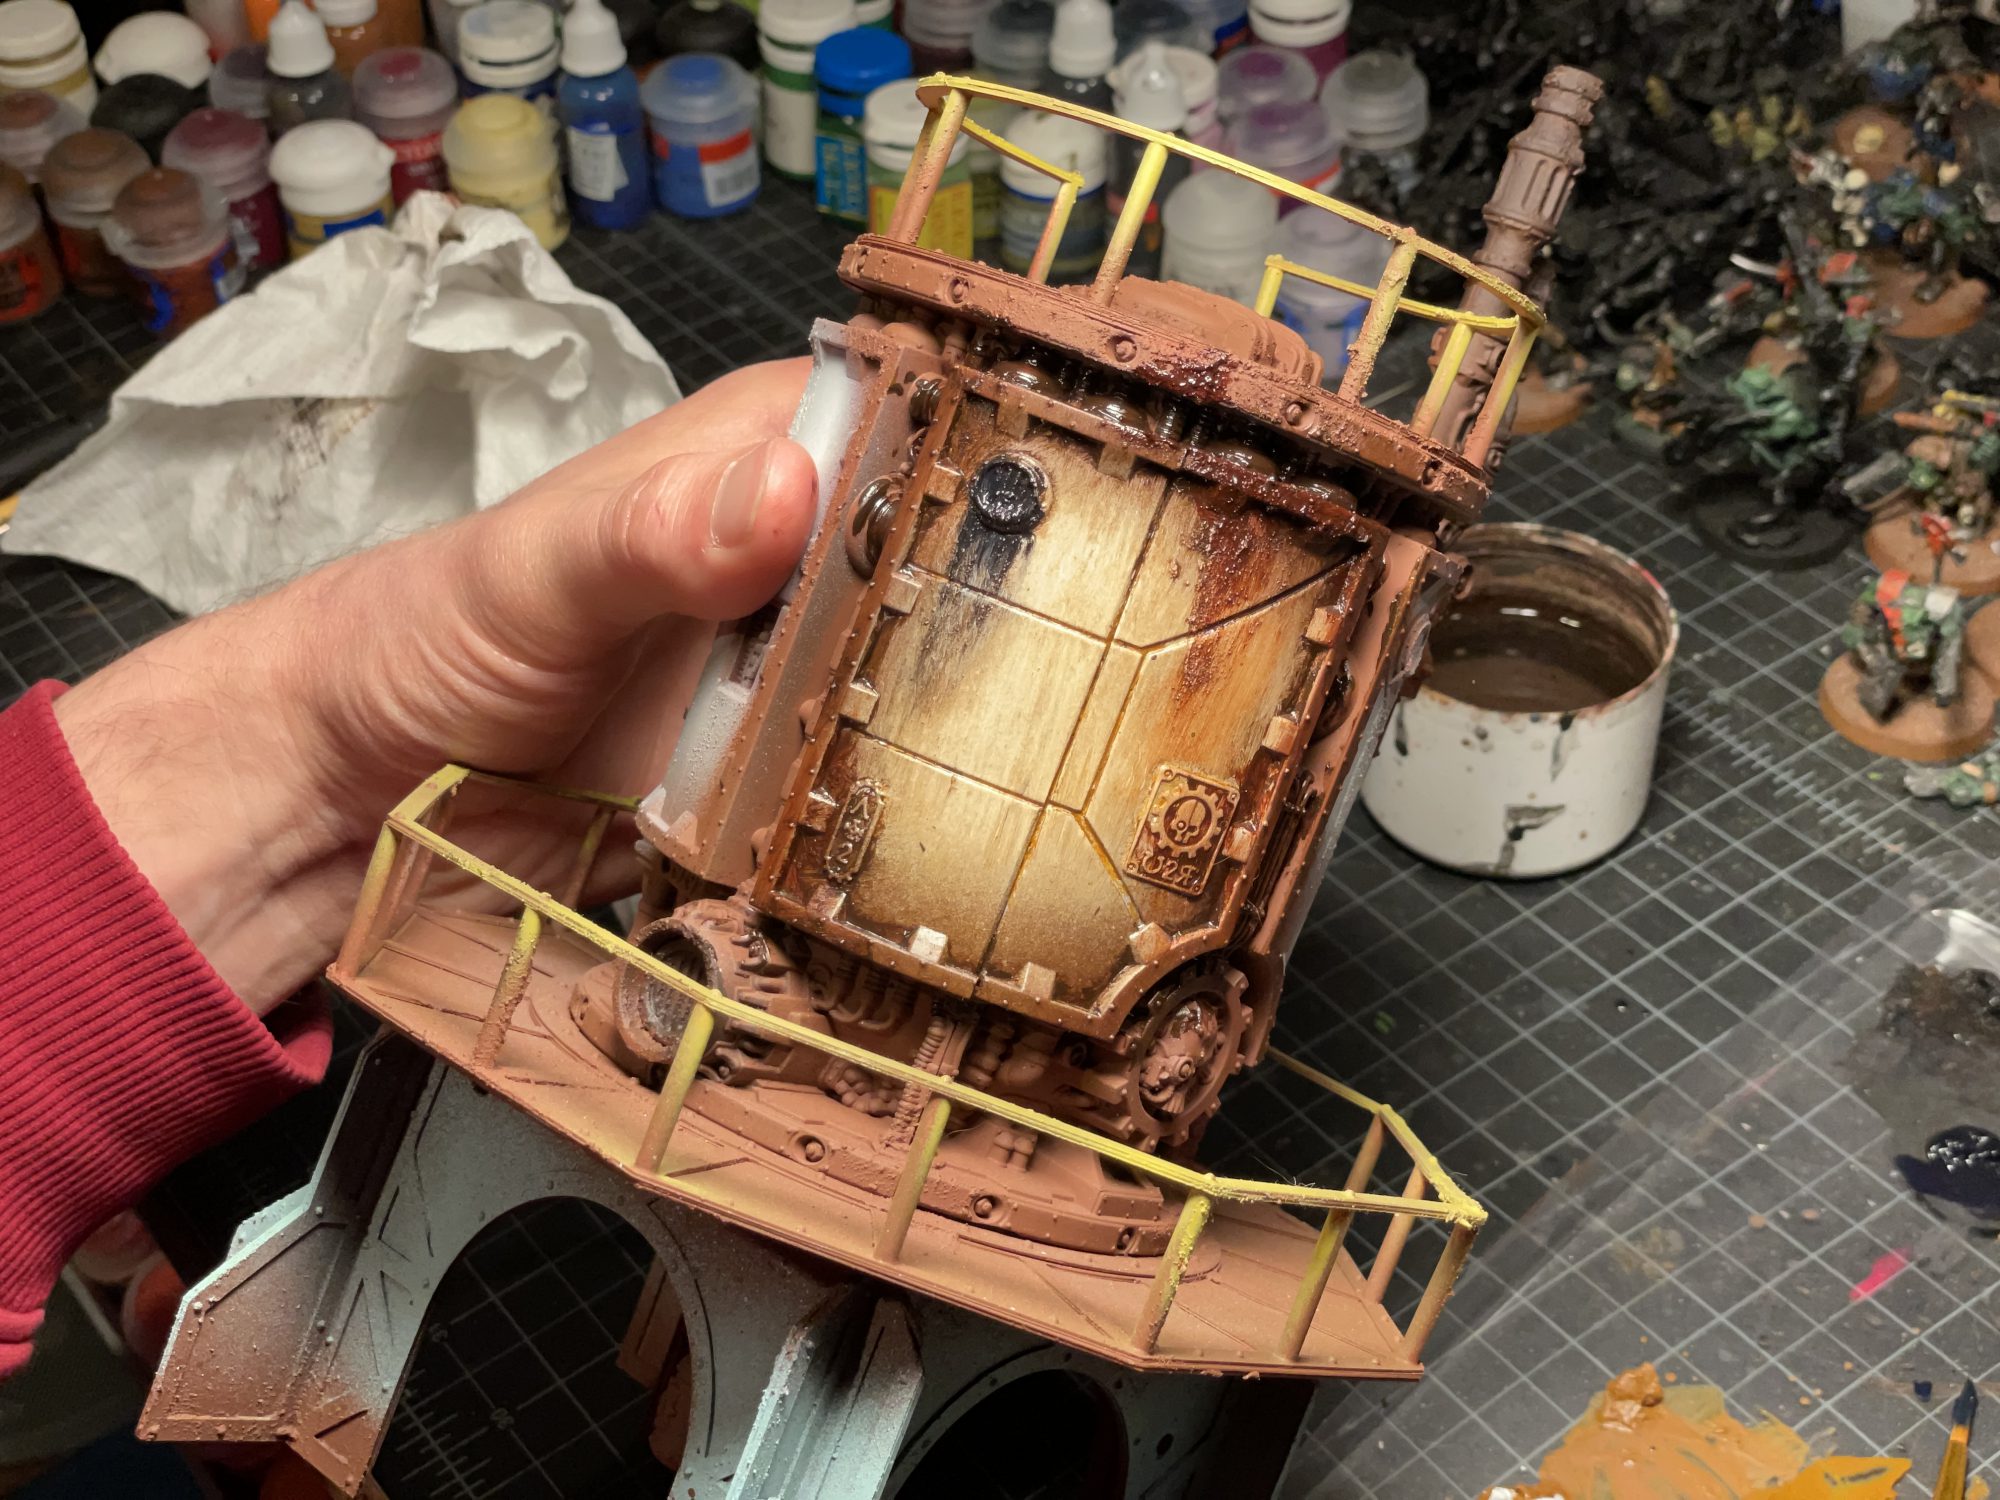
And now, enamels! On the furnace tank, I accentuated the edges of the main panel with some Tamiya Panel Liner, before coating the entire thing in Ammo By Mig Winter Streaking Grime. The rest of the terrain gets coated in regular Streaking Grime. I clean up using soft makeup sponges and a little bit of odorless thinner. Once that was dry, everything got a quick coat of matte varnish. I brushed Dirty Down Rust onto the mechanicus skull, fans, and some other assorted areas. You can get a similar effect with Rust Streaks enamel effect as well. Lastly, I used pigment powders to add some “burned” effects on broken platforms, add more depth to rust on metals with dark reds & oranges, and put some very subtle “ash” accumulation on the bottom inch of the legs and tank. Another bit of matte varnish and they are ready for the table!
TheChirurgeon’s Method
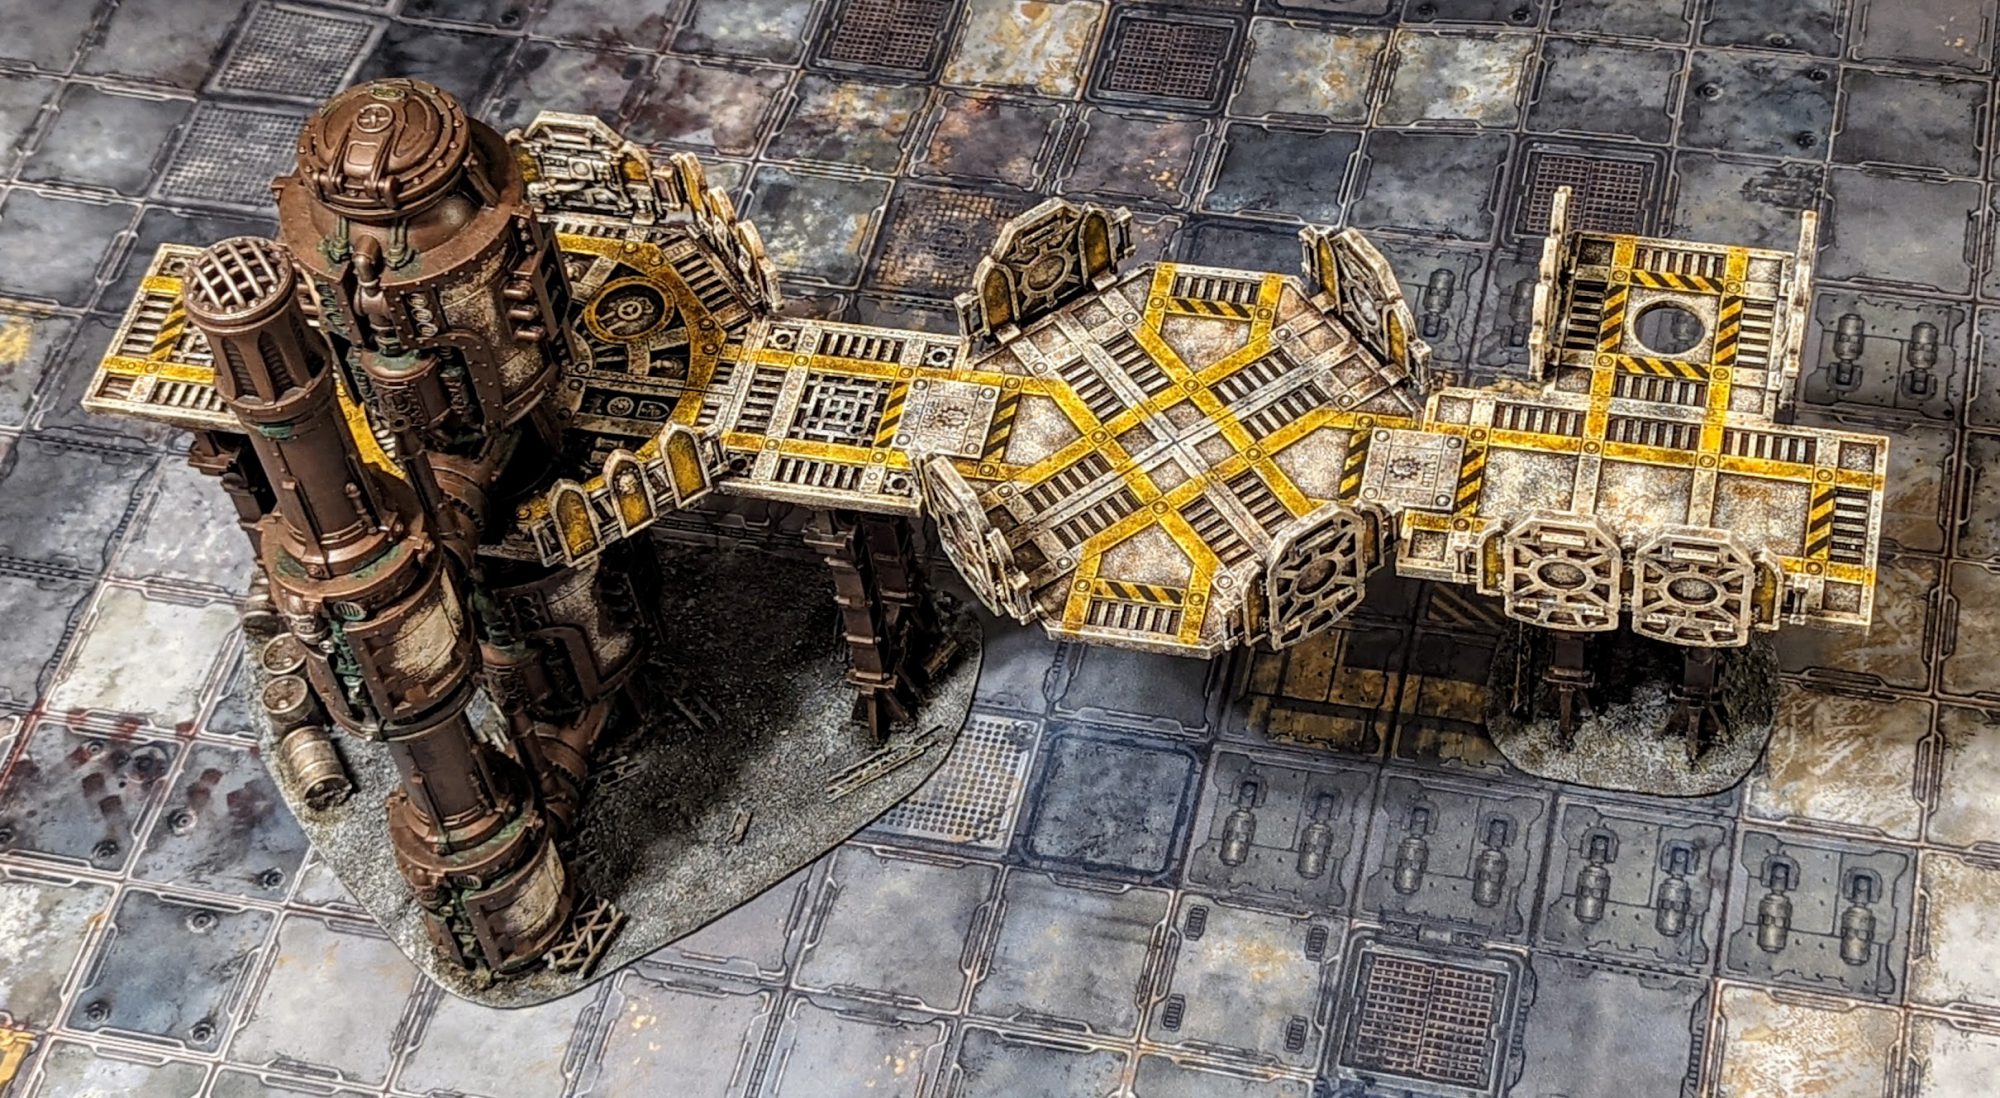
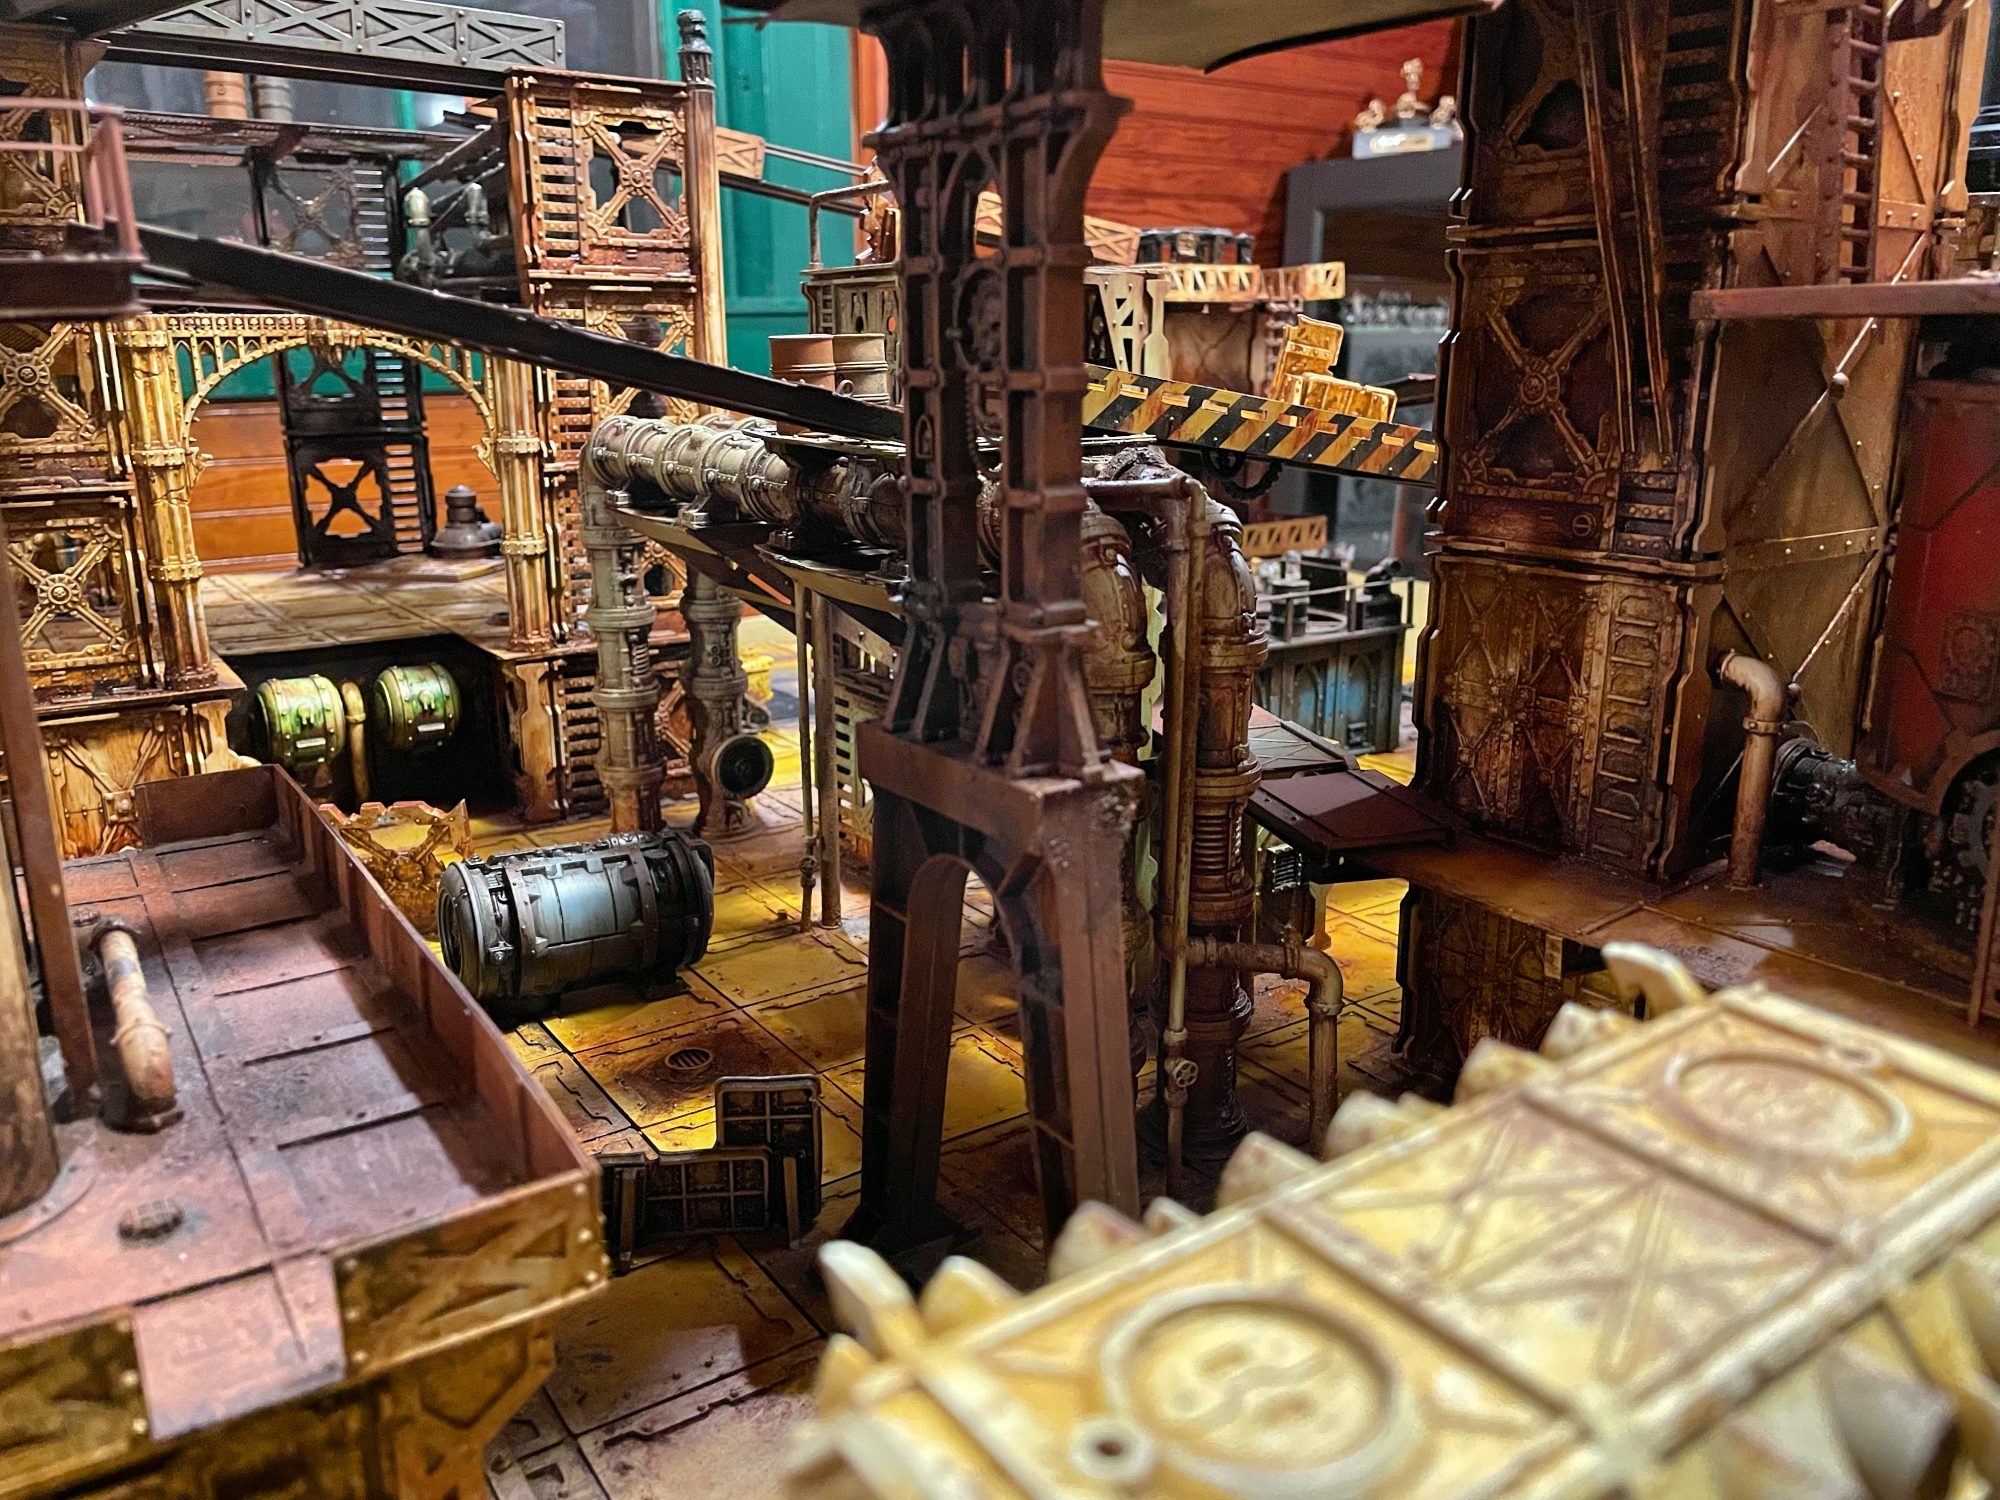
I’ve painted a metric assload of Sector Mechanicus terrain over the last few years, starting with Shadow War and just accumulating more through various Kill Team boxes. I bought a few extra kits and ramped up production last year however in order to finish my “ocean drilling platform” table for a Crusade event we were running.

With the sector mechanicus terrain, the biggest question is how you’re going to paint the platforms. The struts are, for the most part, pretty simple in my method – they’re just Leadbelcher with some details picked out in copper and red, coated in Agrax, and then weathered with Typhus Corrosion. The real challenge here are the platforms, which have tons of little details – there’s a real question about how much work you want to realistically do on them. Well, if you have brainworms like I do, consider this method.
First, I start by (shockingly) priming the platforms with Leadbelcher. This is one of the few times I don’t prime black, but it’s way easier to work on them this way.

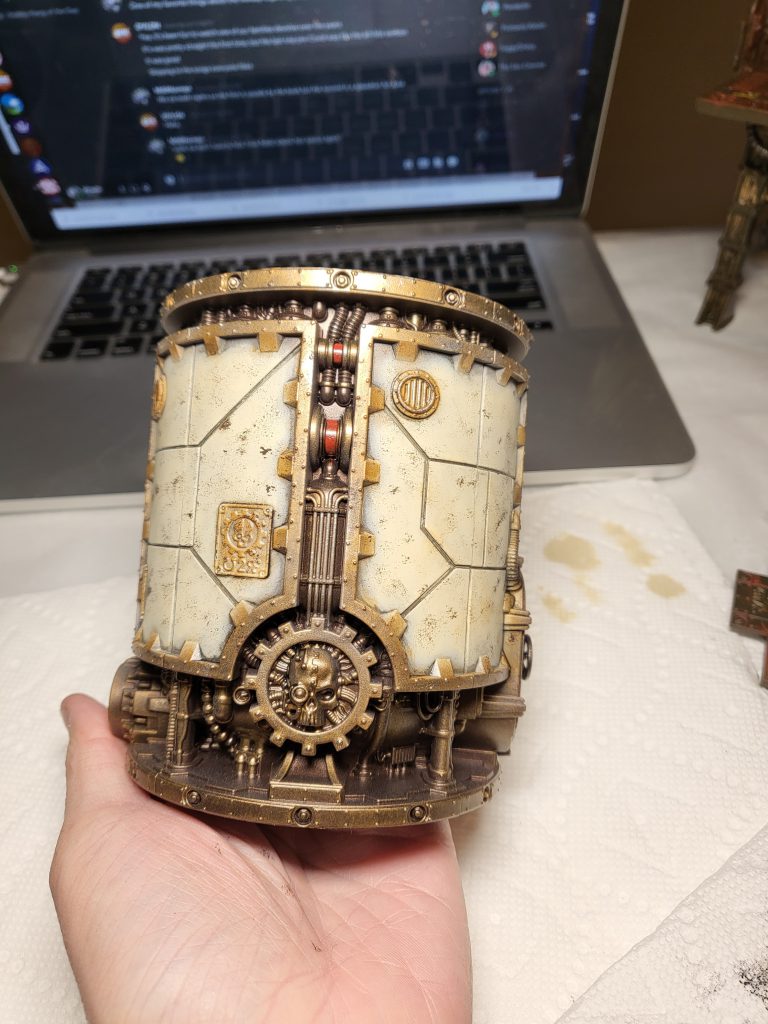
Next comes the base color for the walkway. I liked the light beige-ish color they used on the original mechanicus terrain shown off so I went with that as my scheme. I apply a few thin coats of Karak Stone to get the base color for the walkway I need.
One thing to note here and the biggest pain about this is that I also paint in the recessed parts of the walkway. This is a big pain in the ass and a seemingly minor thing but it makes a huge difference when you look at the model on the table.
Once that’s done the next step is to add variety of color to the innards of the platform. You can do this before you lay down the karak stone if you prefer, but I find it easier to touch that up if I slip. Here I usually get some of the pipes and make sure to get some kind of continuity of color on them using Balthasar Gold. The goal is just to add a splash of color variety, which goes a long way.

Then I come back and do some of the most prominent wires with Mephiston Red. I’m especially interested in the ones that go over some of the pipes. Again, a little goes a long way here.
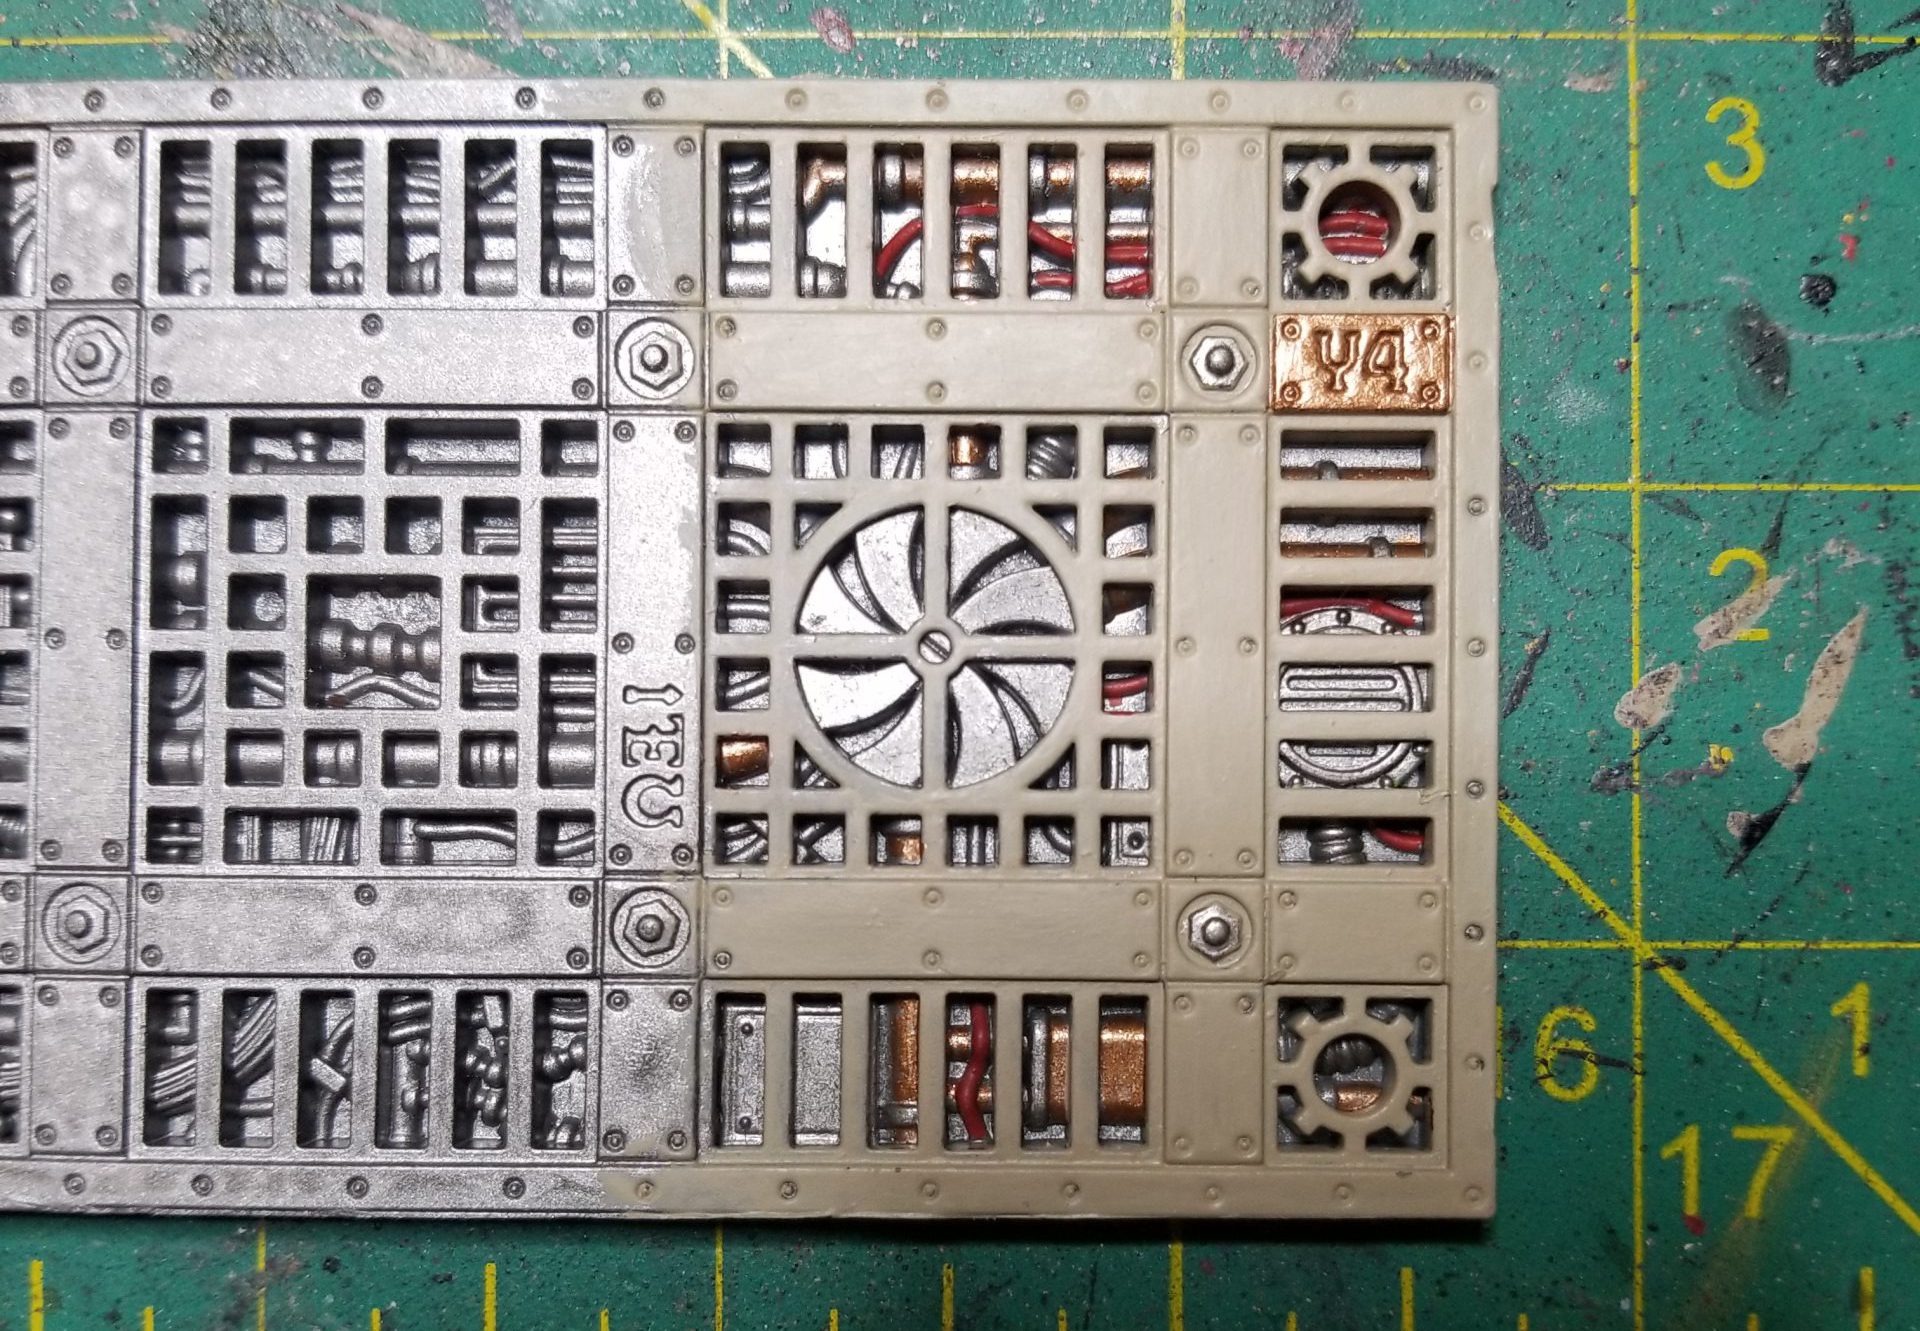
Once that’s done I go back and touch up any mistakes, then I lay down some color on the upper platform details, picking out the bolts and the copper plates. Once that’s done it’s time to coat the whole thing in Agrax, then hit the raised portions again with Karak Stone to even them out. I don’t have to be super precise on this coat – I’m both going to edge highlight and also my major goal here is to add lots of color variety and depth. A thin coat or two will leave grime showing through, and that’s what I want.
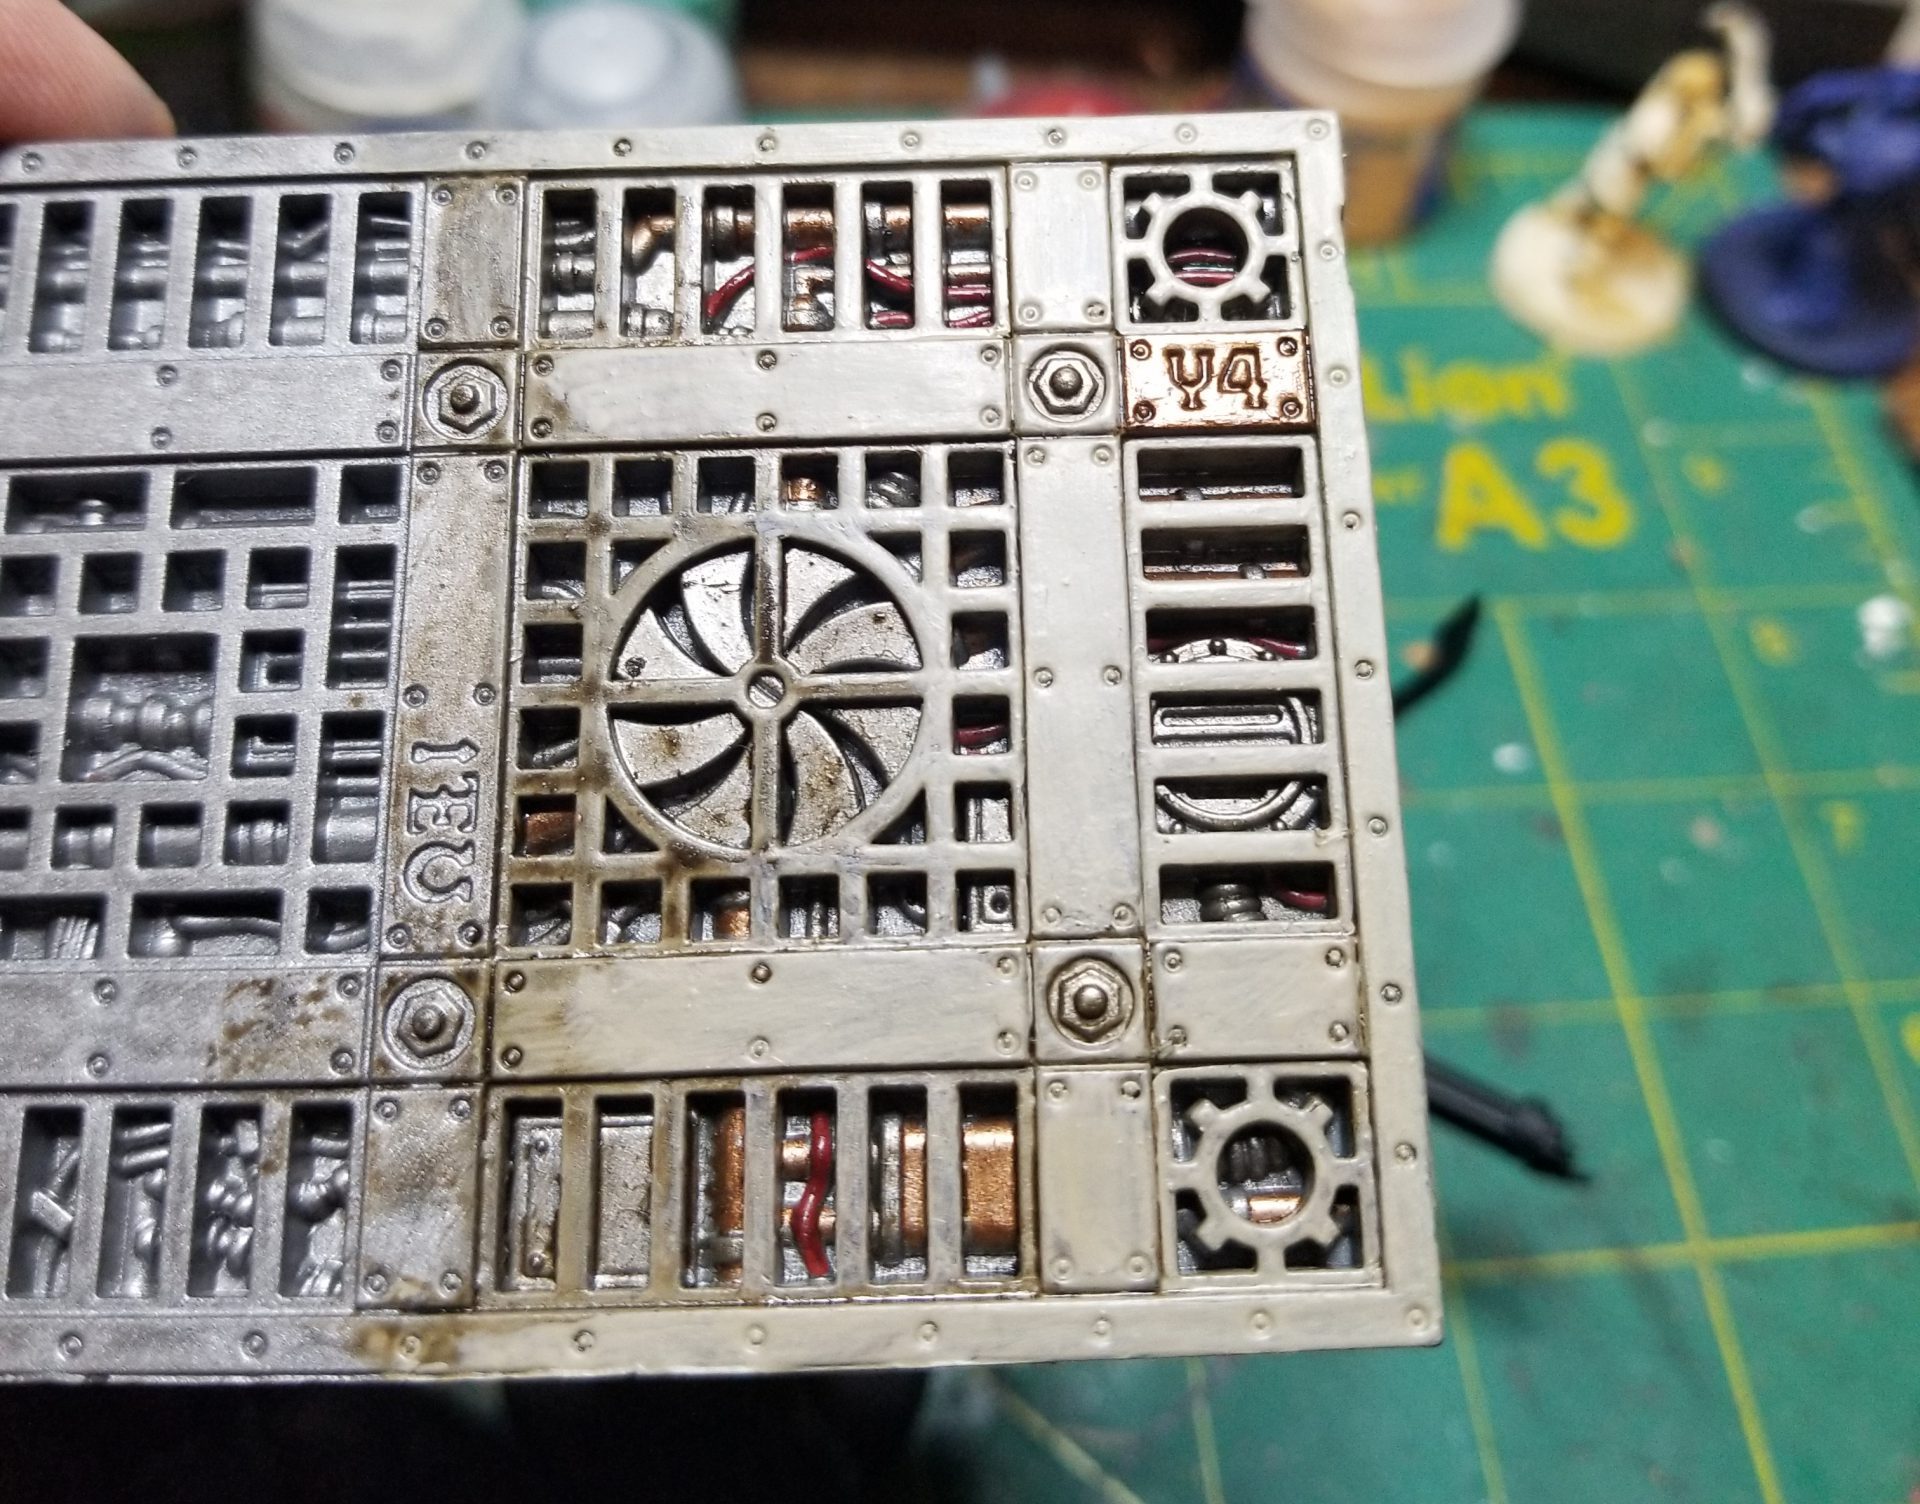
Next comes the edge highlights. This is a bit subtle and hard to see, but I’ve edge highlighted the entire thing – including the interiors – with Rakarth Flesh, though Reaper Polished bone also works if you want something more pronounced. This is time-consuming, but again, worth it for the effect.
That leaves us with just one step left: Weathering. This is another spot I don’t want to spend a ton of time, so I take an old flared out brush or a piece of sponge and just dapple Typhus Corrosion all over the surface to give it lots of grime spots and dirt. I’ll smudge a few as well.

The final effect is a bit time consuming but is an effect that I’m very happy with. Painting the in-set details makes a *massive* difference in the overall appearance of the terrain and it doesn’t take a lot to get some striking results – the most time-consuming part of the process by far is painting the inside recessed walls and doing the edge highlights. But stick with it and you can get some very cool results.

I tend to not vary things up too much in my process, sticking to those colors in order to keep things quick, but you can do the same method and just swap out the platform color trivially. I think I’d still start with a Leadbelcher base however, or paint the top with lead belcher, at the very least – it’s much easier to do that than come back and paint the insides with Leadbelcher later if you prime a different color.


Charlie’s Fast & Lazy Method
These kits are dripping with texture, and you can do incredible things with the painting. I did none of those things, because I needed to get this stuff on the table quickly. Fortunately, all that texture does a lot to compensate for a quick paint job, meaning that you can have your very own demented Victorian train station in no time at all, as pictured below.
Broadly speaking, there’s three phases to this: grungy metal, then a pop of bright colour on the flat panels, then some minimal detailing.
Phase One: Basic Grungy Metal
This will give you a low-effort metal with enough brown in it to avoid looking overly fresh.
(1) Priming
Spray prime black.
(2) Rust Stipple
Use a BIG brush to stipple inconsistent patches of a mid-brown over the primer spray. You want to be as messy and inconsistent as possible, with some patches of brown being fairly solid, and others being pretty much just a drybrush. Pretty much any mid brown will be fine for this, although going as dark as Citadel Rhinox Hide would probably be fine. Personally I was using the big ol’ keg of Calthan Brown that came in the old Citadel Scenery Painting set. If you’re not sure about the brown you’re using, just do a small bit of scenery to completion and see how it all sits together.
(3) Basic metal
Drybrush a dark metallic over the whole thing. I used Army Painter gunmetal, but I’m sure Citadel Leadbelcher would be fine too.
(4) Edge drybrush
Edge drybrush everything with a light silver. I used Citadel Necron Compound, but I think Vallejo Air Steel would also work well.
Alternative rustier method
Switch the black primer for a brown one. I’ve been using TT Combat’s Laser Cut Brown. Then, after following the other steps above, slosh some rusty tones into some of the recesses. Literally any watered down rust-coloured paints will do. Personally I’ve had some success mixing Vallejo matte medium with rusty pigment powders; if you want to see how that method looks on a mini, it’s what I used on the killa kan below:

Doing the rusty recess shade will definitely add time to the process, but you could probably skip it if you find a primer spray that’s a perfect rusty colour. I found the Laser Cut Brown a little too reddish to be left unadulterated.
Phase Two: a Pop of Colour, and a Dash of Actual Finger Painting
Yellow traditionally needs a few layers, and these things are large. Given the slightly rusty and oily look of the metal, I didn’t want the panels to look too pristine, which they would do with just a flat coat of paint.
Using a large flat brush, I liberally stippled Averland Sunset within the middle of the yellow areas. This had the effect of dumping a higher thickness of paint onto the area without leaving streaky brush marks. I wouldn’t do this with an actual model – you’d fill in the surface details – but for a big flat area of terrain like this? Perfect. Very quick, too. Also means the edge of the stippled area fades out a little, preventing any harsh lines going in to the next step.
That next step involves a good-size brush (about a size 2 or 3 should do) and going around the unpainted edges with somewhat thinned Averland Sunset. You want to work quickly to get a single smooth layer without brush marks in it. Thanks to the transparency of the paint, it looks like you’ve done a grimy recess shade around the edges of the yellow section. You’ll probably need to do this twice to get the right coverage, but with the paint having been thinned and with Averland Sunset having the coverage of the gods, this is surprisingly fast work.
Streaks
I applied Reaper’s Brown Liner to the gaps between the panels to add some contrast. Next, to add the streaks, I applied sporadic dots of Brown Liner at the lower edges of the horizontal panels and immediately smudged them downward using my finger. Would enamels and cotton buds and white spirit look better? Yes. Was my method insanely fast? Also yes. A word of warning: as soon as you put a dot on the surface, you need to wipe with your finger immediately. I can’t emphasise that enough. Doing two or three dots right next to each other then smudging them is fine, but don’t apply dots to the whole section and then try and smudge them; you’ll get horrible tidal stains.

Phase Three: Detailing
Screens
This was also quick and simple: matte black, then pure white for the writing, then a green glaze, then gloss varnish.
Cables
Throw some Black Templar Contrast paint over the cabling, since it’s proabably been caught in the blast radius of your rampant drybrushing. I used Contrast rather than, say, Corvus Black, because it flows very smoothly and as such, it’s quicker.
Primaris Kevin’s Fast But Highly Flammable Method
Over the past few years I’ve managed to accumulate a significant backlog of Sector Mechanicus terrain. I loved the look and whenever I could get a box at a discount (like a certain Kill Team starter box) I would jump on it. After assembling a few structures I realized that I had no idea how I wanted to paint everything, so I primed black and went exploring. It started with a trophy that Fowler had painted with a product called “Rub n’ Buff”, a wax-based metallic paint which looks amazing with little effort. From there I explored sponge painting, oil washing, and eventually custom-printed decals for the hazard stripes so that I didn’t have to mask anything. I wanted a look that was viable in both the depths of the Underhive and the remote corners of the Ash Wastes, and I think this works.
You may notice that some of the pieces on the model aren’t from the Sector Mechanicus kit. That’s because in addition to collecting pieces the natural way, I also own a desktop-scale backlog generator that I’ve been using to experiment with custom pieces of terrain. The floor pieces I modeled myself because I wanted something simpler and with a few more options than what GW designed, while the barricades on the right are parts that I remixed from Thingiverse. Additive manufacturing is a good way to enhance kits and make them your own, especially when you need one last piece or want something that isn’t commercially available.
Most of the material I use is intentionally inexpensive and designed for large applications. This process would work very well for batch painting, and that actually might be beneficial if you want everything to look consistent. Using custom mixed oil washes and sponging parts can lead to slight variations in tone and appearance depending on how consistent you are between batches, but to be honest it’s not that big of a deal and things aren’t supposed to look perfect anyway.
Ingredients
- Approximately 0.08″ thick peel and stick vinyl floor tile
- Sand with tiny rocks stolen from your child’s sandbox
- Vallejo Earth Texture (Black Asphalt)
- Various bits and junk from your bits box that will look good on the ground
- Watered down PVA glue stolen from your child’s school supplies
- Rub n’ Buff Silver and Spanish Copper
- Makeup brushes (I like the elf eyeshadow, foundation, and eye crease brushes)
- Craft paint (Ceramcoat Black, Burnt Umber, Rain Gray, and White)
- Oil pigments (Winsor & Newton Burnt Umber, Burnt Sienna, and Lamp Black)
- Mineral spirits (or another medium for thinning the oil paint)
- Black spray paint (Krylon Fusion Satin Black)
- Matte and gloss varnish (Rust-Oleum Painter’s Touch 2X Ultracover)
- Dirty Down Verdigris
- Acrylic ink (Liquitex Ink! Yellow Orange Azo)
- Sepia wash (Games Workshop Seraphim Sepia)
- Laser decal paper and a laser printer
- Microscale Industries Micro Sol and Set
Preparation and Painting
The model starts with a base of ~0.08″ peel and stick vinyl floor tiling. They come in 12″ x 12″ sections at most big box hardware stores and can be cut with heavy duty scissors. I make sure that the model overhangs the base anywhere that I might want to have two pieces next to each other. I apply Vallejo texture paint around the parts where the model touches the tile. The base was then flocked with sand from my kid’s sandbox, and some extra bits were added like a support sprue from a resin print. A watered down mixture of PVA (I aim foro the consistency of milk) keeps everything sealed in.
The model is then primed black, and then everything but the base is hit with a layer of Rub n’ Buff Spanish Copper. This serves as both the base for the copper support pillars and the undercoat of rust for the painted sections. I think apply a light coat of Rub n’ Buff Silver over areas I want emphasized like the pipes in the pillars and any ladders. The top surfaces are then sponged with white acrylic craft paint fairly aggressively. You want to continue to dab on the paint until the model looks well covered. It might be worth painting a demo piece in order to get a sense of how much you want to do, but this is the Underhive/Ash Wastes so don’t worry about being perfect. Once you’re done seal the whole thing in a gloss coat.
Next up is the oil wash. This will take awhile to dry so do it in a well ventilated area and keep things away from the kids whose sand and glue you appropriated for the project. I use a mixture of 50/50 burnt umber and burnt sienna with just a little bit of lamp black added, and then apply it to the whole thing. This will stain the white to make it look aged and depth. After the first coat go back and apply some dabs of extra wash here and there to make the top look uneven and dirty. Use thin coats and check your work in between until you’re satisfied with the result; you can also remove some wash using a towel damp with paint thinner to wipe off excess. Leave it out to dry (it may take a few days) and then seal with a matte varnish.
From here is the detail work. I use acrylic inks over the raised details on top and inside the barriers to add some visual interest and serve as the underlayer for anywhere I want hazard stripes. I then custom printed hazard stripes on decal paper and cut them to size since I’m lazy and didn’t feel like masking and airbrushing everything. They’ll go right on top of the ink and with some Micro Set will soften and conform to the part. You may need to use a knife to poke holes where the plastic overlaps a rivet hole. After the ink dries a layer of sepia wash tones things downs and blends it all in. For the mechanical bits in the pillars I applied some Dirty Down Verdigris and then applied some sepia wash to blend it in.
The floor starts with a stipple of gray craft paint, followed by successive sponging applications of a mixture of gray and white, gray and black, a little bit of burnt umber, and then some random applications of sepia wash to make the ground look polluted and dirty. Finally I did a very light sponging of gray craft paint to bring it all together.
DYLON’s Underhive paint scheme
So, I know these jamokes up there think their method is easy, but…. they’re using multiple steps and dry brushes and highlights…. All I’m saying is that my method has about 10 less steps than either of theirs. One key step to prepare the Sector Mechanicus terrain for paint is applying some Vallejo Oxide Paste to areas that you want heavier rust and grime.
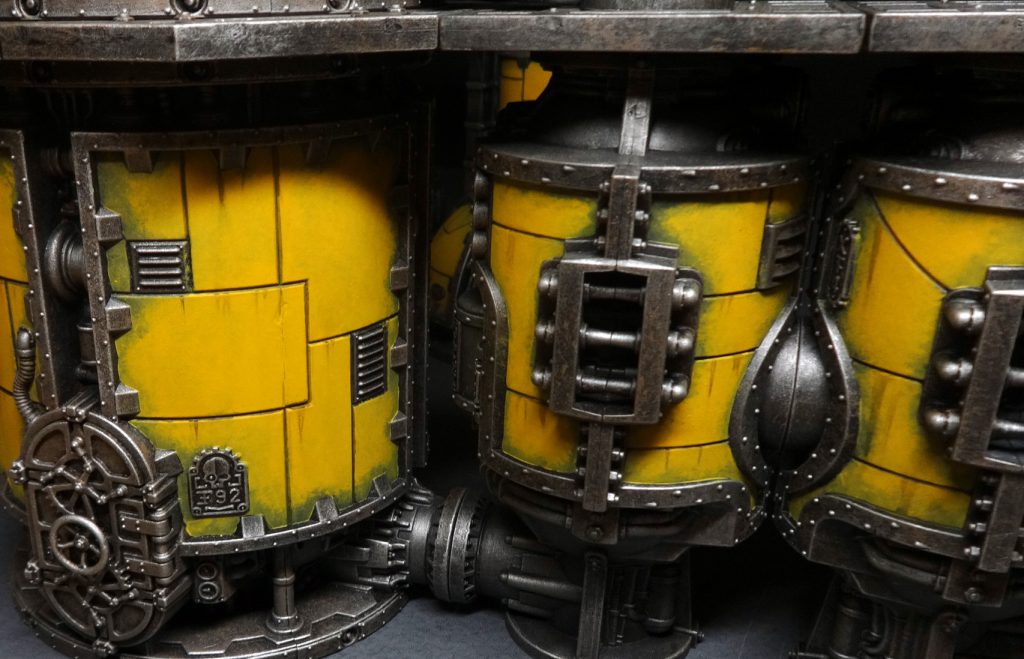
First thing, let assemble our paints. I basecoat all my terrain with Rust-oleum Ruddy Primer. Once that’s dry, I pick out my major color blocks with an Army Painter color primer or a Montana Gold spray. I do all my floors in yellow and use white or industrial green for most walls or buildings. I will add in some red or grey sparingly. I will spray some areas of Ruddy Primer or the undersides of platforms with Rust-oleum Camouflage dark brown to add in some variation to the rusty areas. Once those are dry, mask off any areas you want hazard stripes and spray a base of yellow and the mask off the stripes themselves and spray with Camouflage dark brown and/or black.
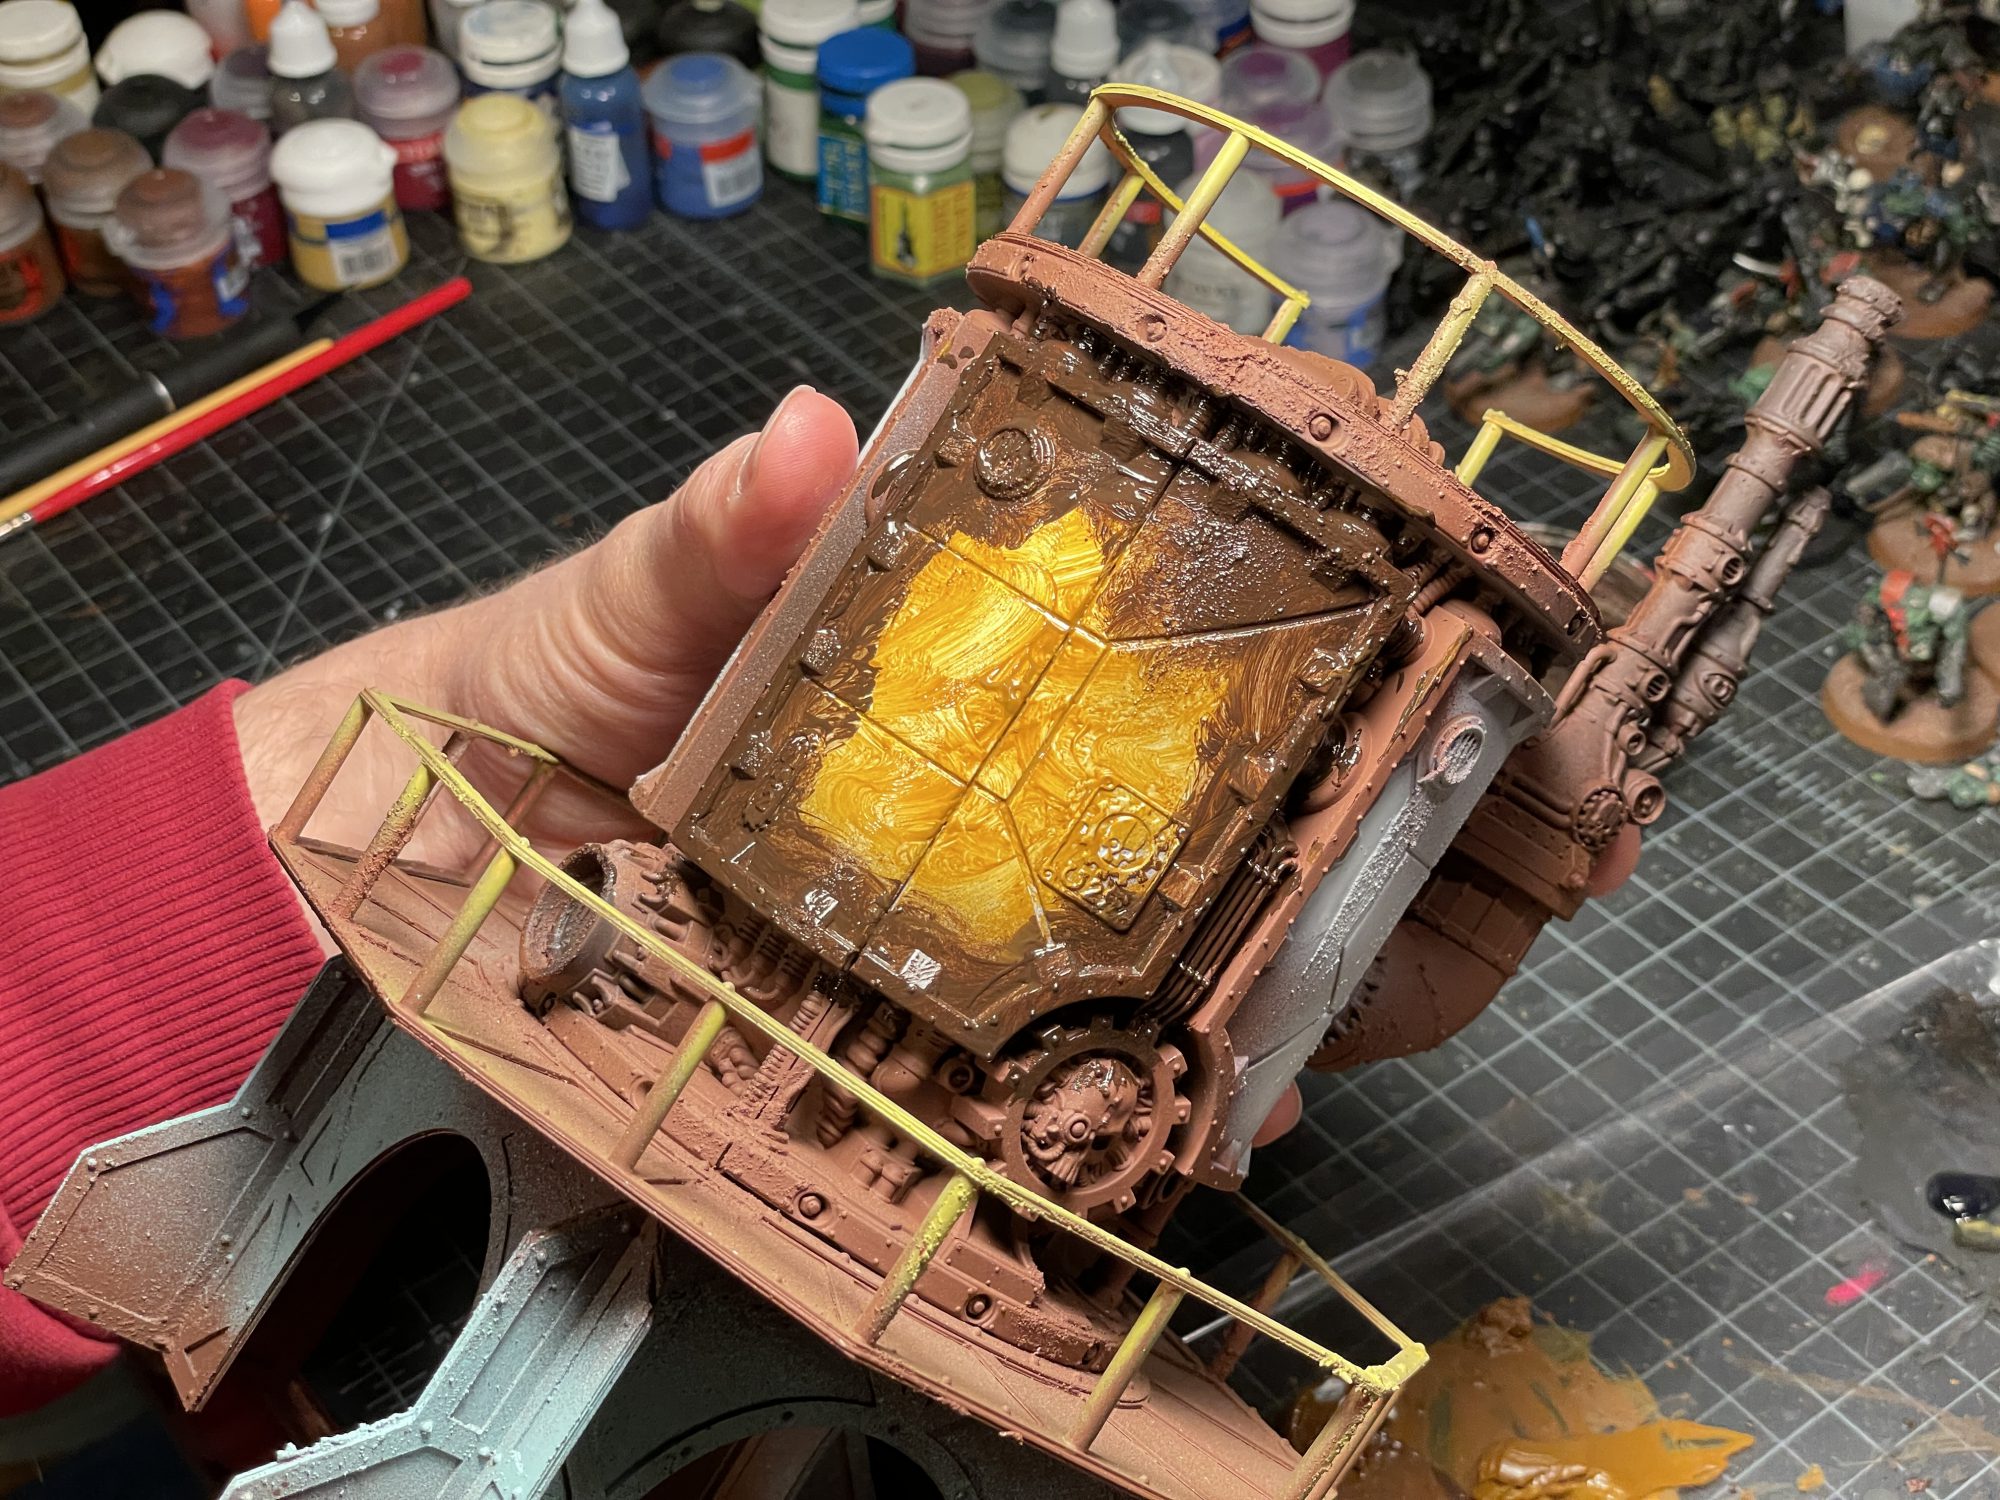
After a few days, you’re ready for the next and final step. I use Winsor & Newton water-mixable oil paints. Get them out and squeeze some of each color on your palette. I try to get the consistency of the oils to be a little thicker than Citadel paint, though I’ll often use it straight out of the tube if I want more of the paint to stay on the piece.
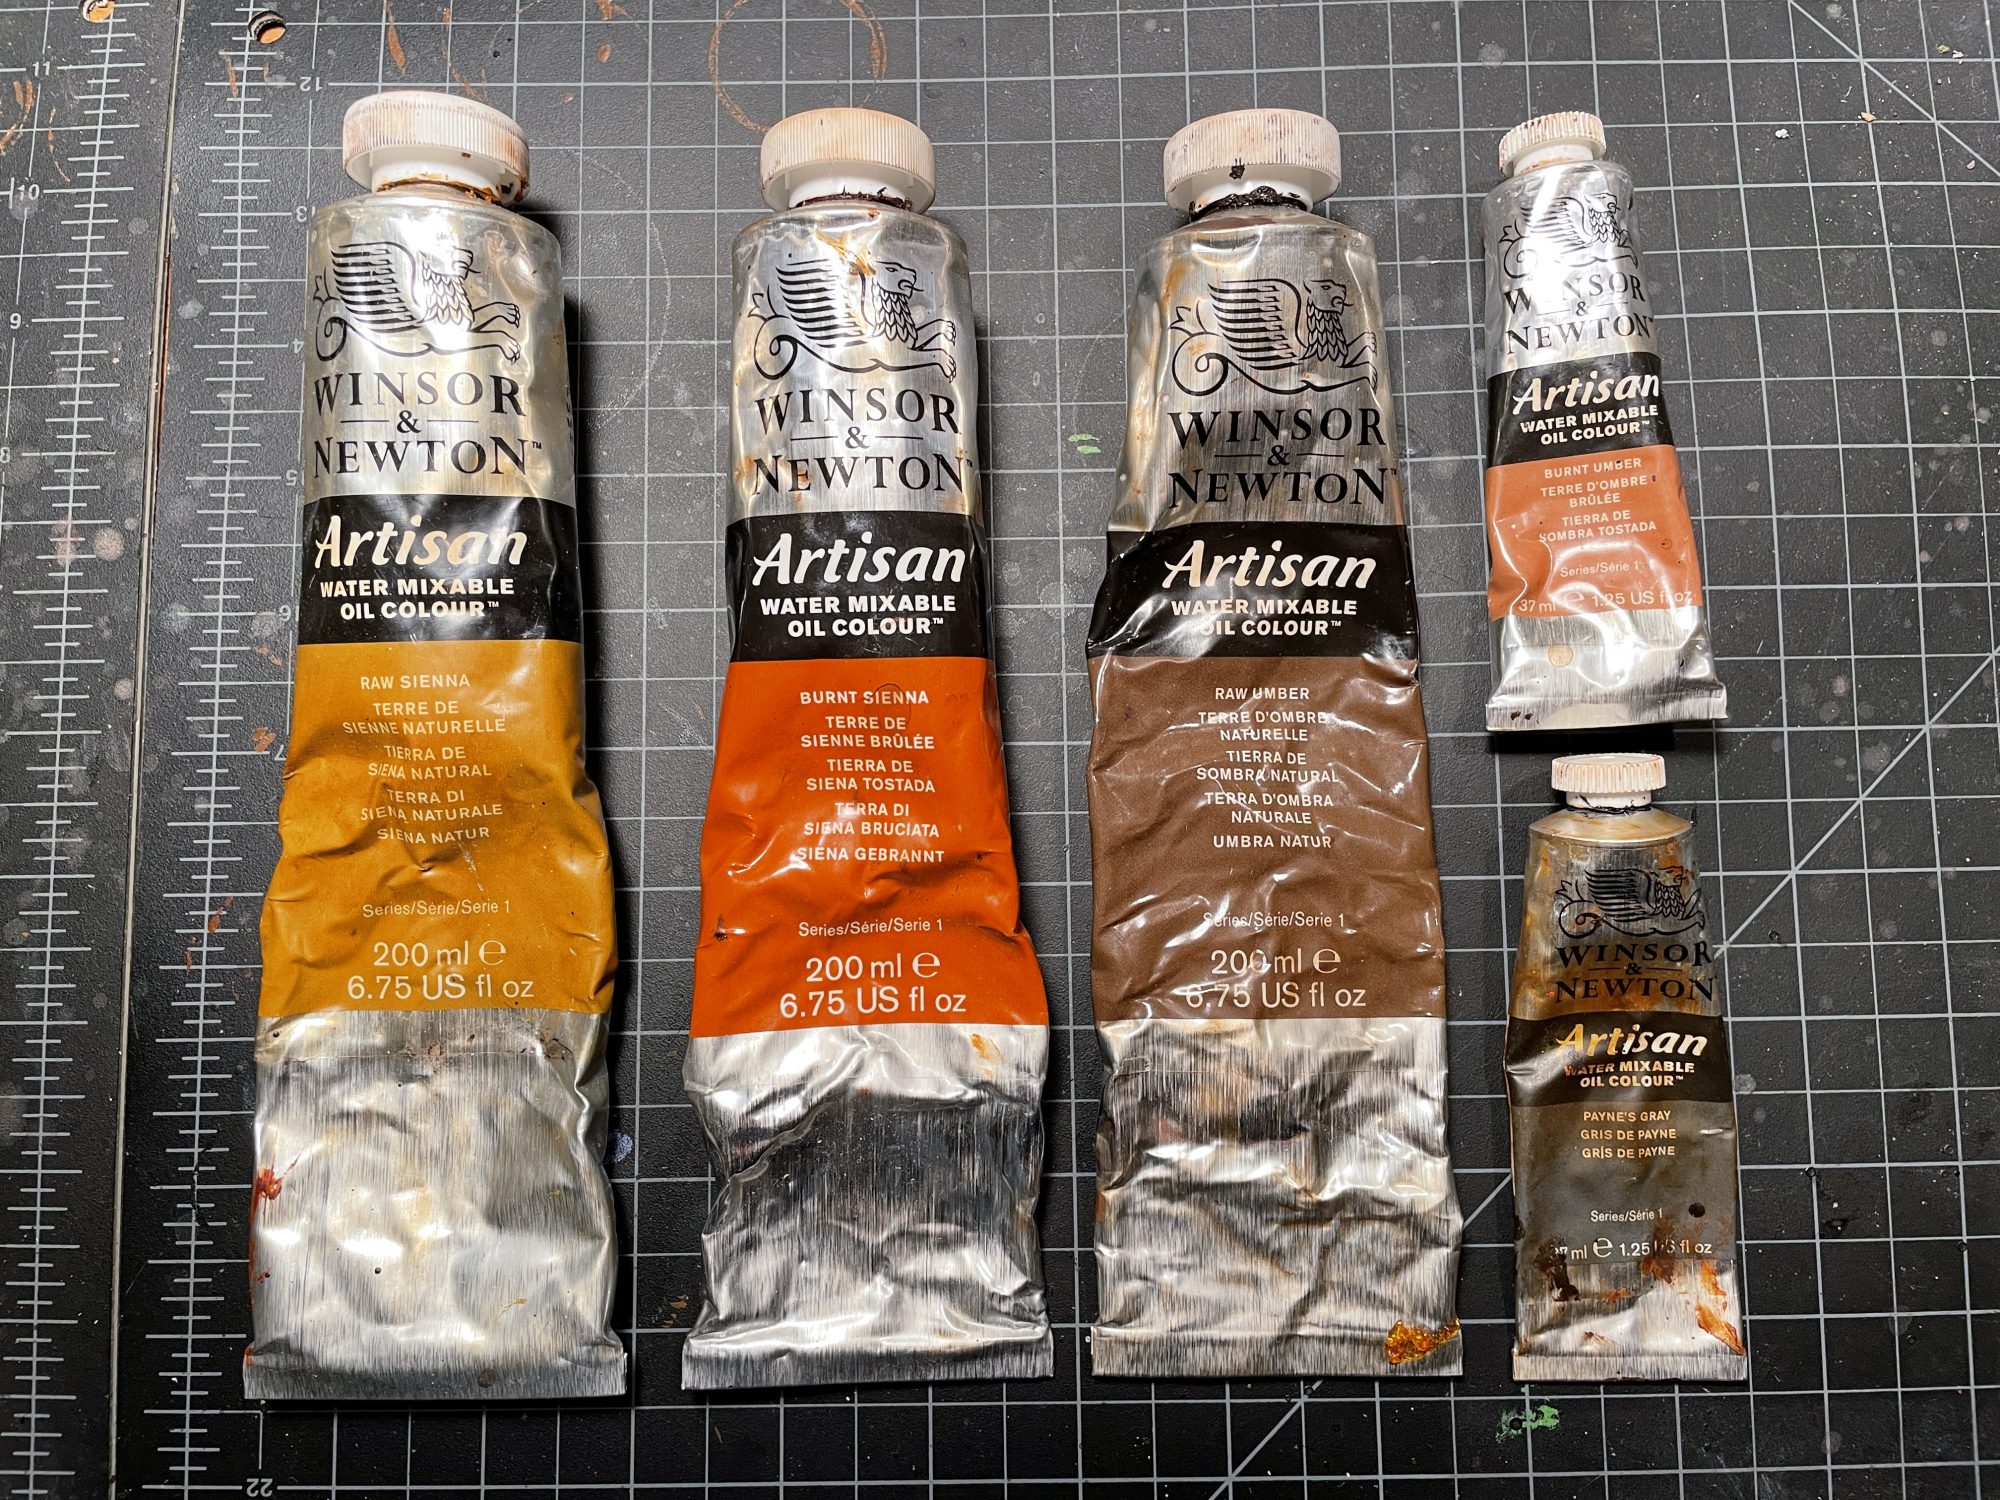
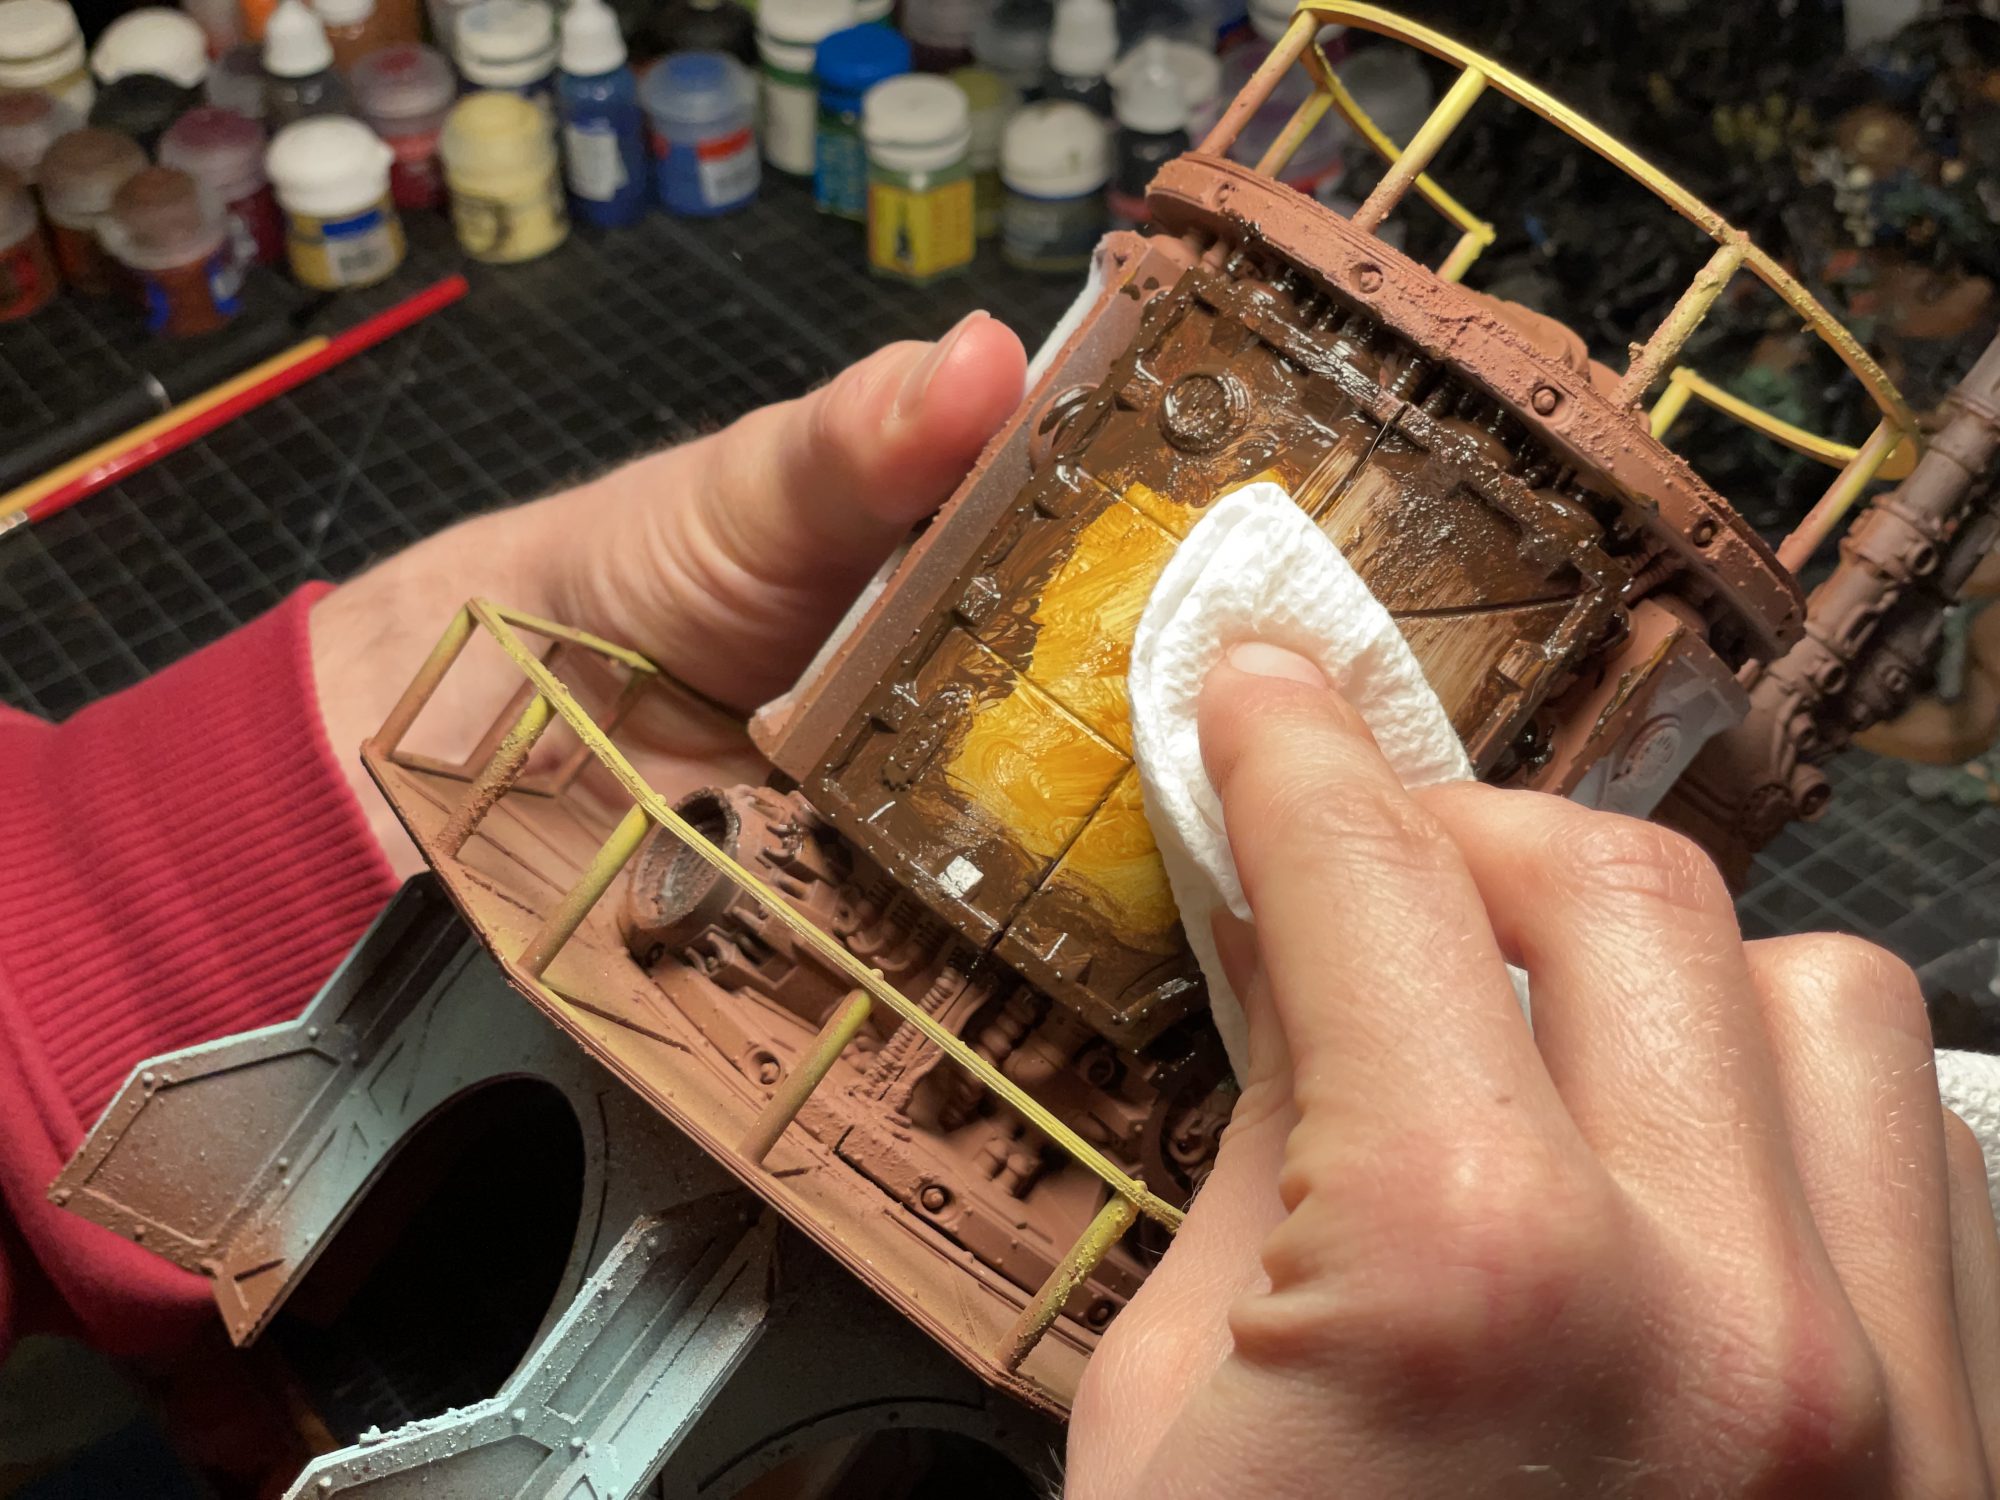
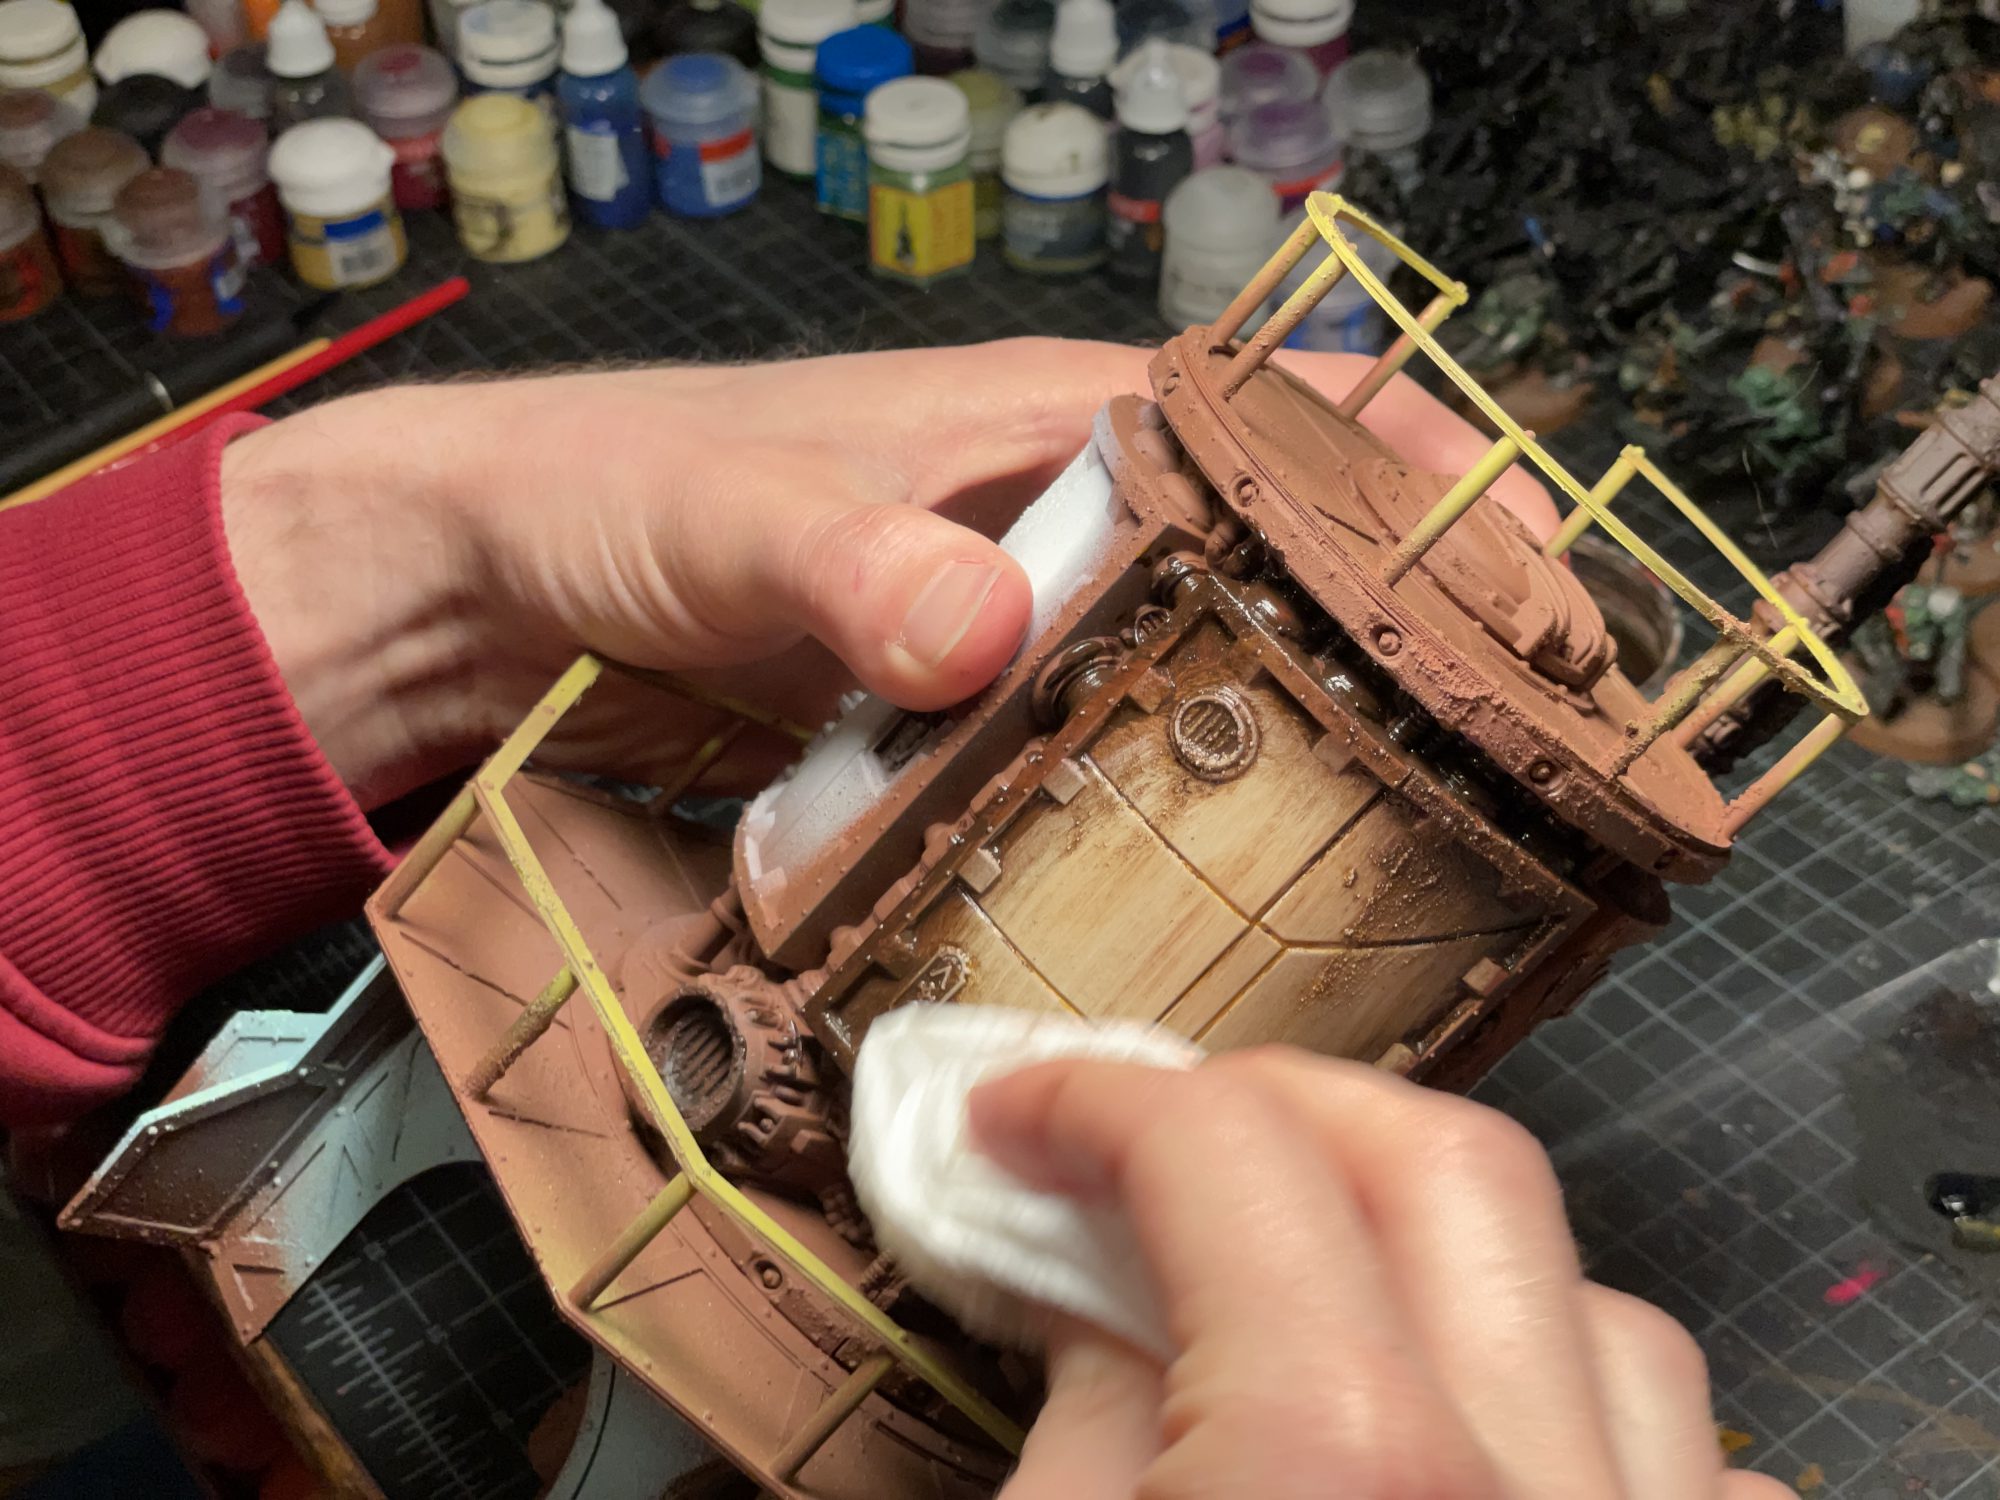
To apply the oils, use a good-sized brush and work quickly. For my floors I use Raw Sienna for the main areas and some Burnt Sienna and Raw Umber in rusty or grimy areas. For walls or other Sector Mechanics things, the oil color depends on base color. Stronger, darker colors (industrial green, red, grey, or blue) work better with Raw Umber and Burnt Umber, while white works with raw Sienna and Burnt Sienna. Once you know what colors you need, apply a heavy coat of color and then grab a paper towel and rub the area to pull most of the color off, leaving paint in the recesses. I use a downward motion to mimic how water or effluent would drag grime down the model. The oils will stain your base coats and your transitions will be super smooth. Then you can go back with a small brush and add in rust streaks with Burnt Sienna or Paynes Gray for vents, pipes, or other grimy areas. You can then stipple some areas with unthinned Burnt Sienna and Raw Umber for scales rust patches. Take a look at the slideshow below for a step-by-step.

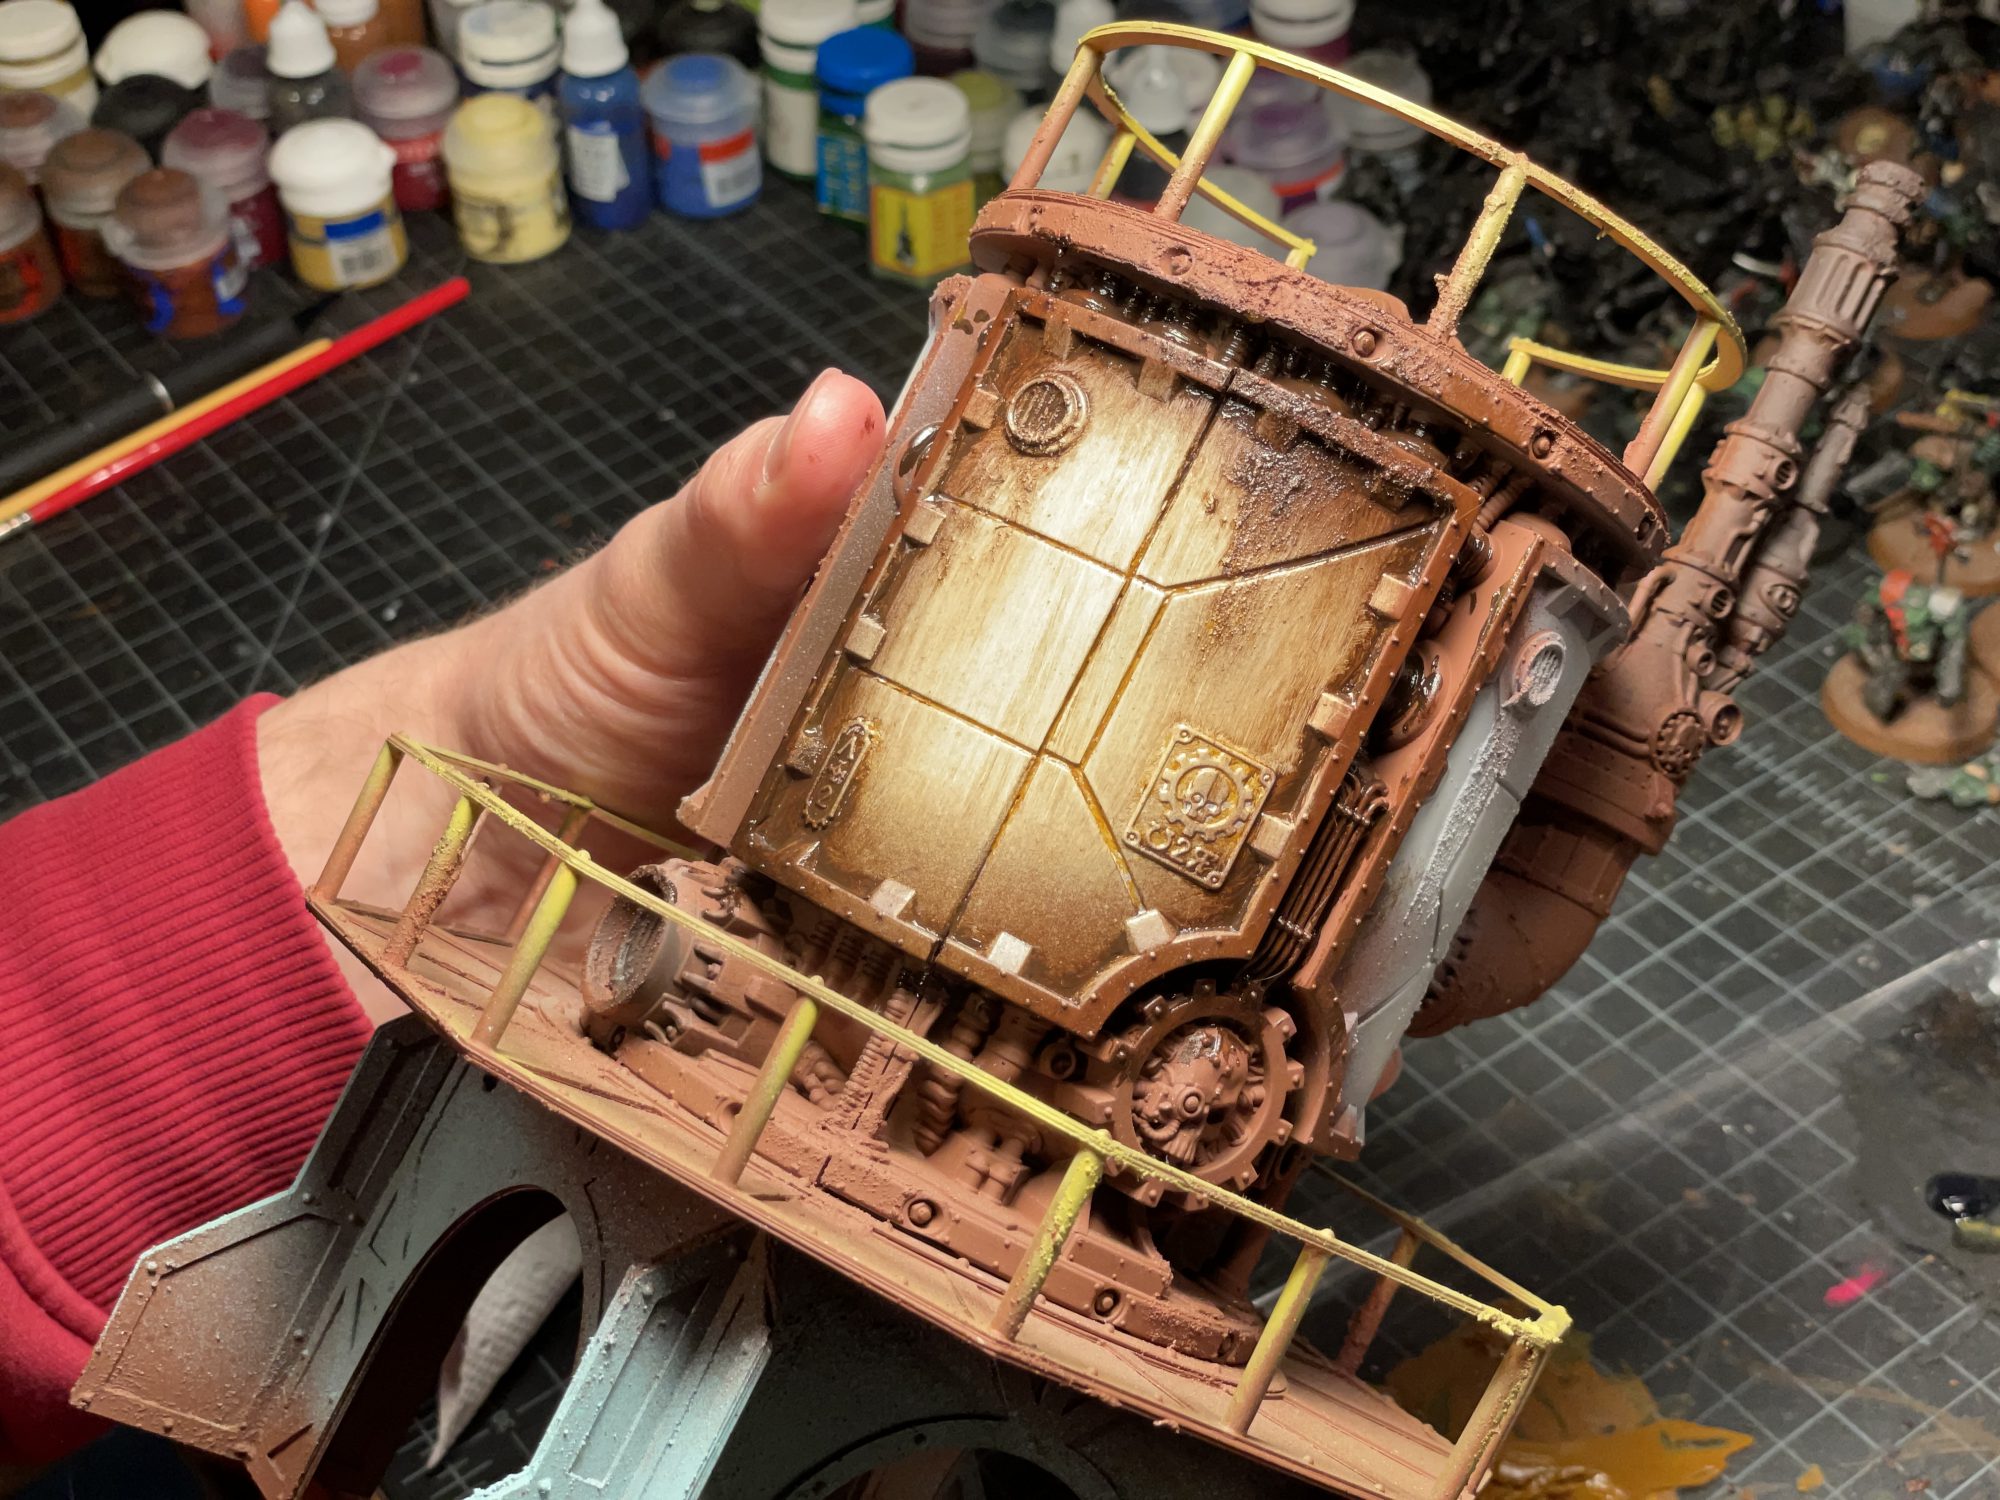
And that’s it. Find a safe place to for it to sit while it dries and don’t touch it for a week. The oils will dry and make a nice tough finish.
And that’s it! We highly encourage you to pick up and paint your entire backlog. If that backlog includes Sector Mechanicus terrain, we sure hope this helps. Any other classic terrain or kits you want to see take the roundtable approach on? Drop us a line at Necromunday@Goonhammer.com.
