
Howdy Scummers! Welcome back to another exciting edition of Necromunday! This week, we’re taking a look at Necromunda’s most recent Forge World kit: the Slopper and Scabber! While not necessarily models that you’ll end up using in every, or even many games… they’re great kits with a ton of character, so we wanted to take a closer look at ‘em!
Building the Scabber
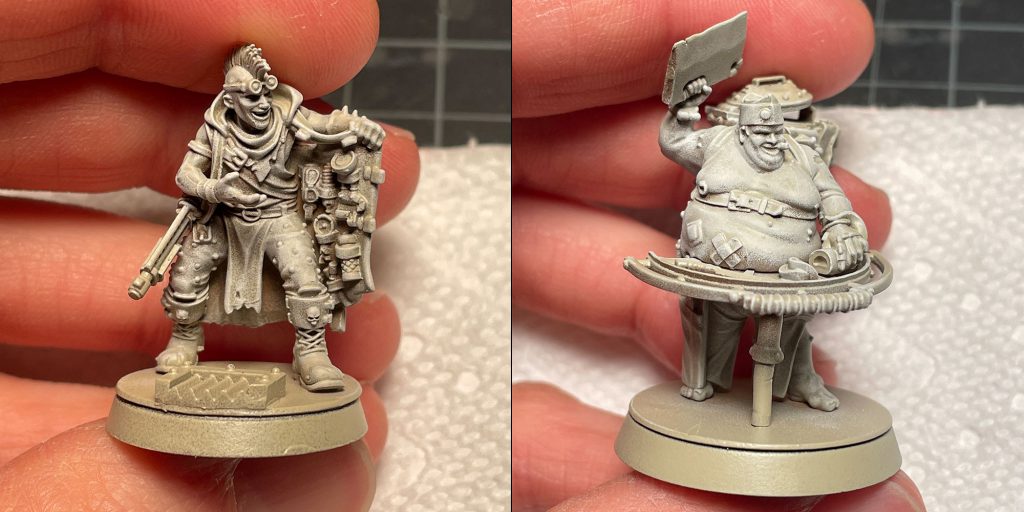
Dan: I had a little bit of time between assembling and painting Blood Bowl goblins to tackle putting these minis together, and I started with the Scabber, because of the two, I like it more. It came together really easy! I’ve been working with a lot of Forge World resin lately, and these new sculpts that they’re putting out are honestly getting better and better. Let’s take a look at our parts, here:
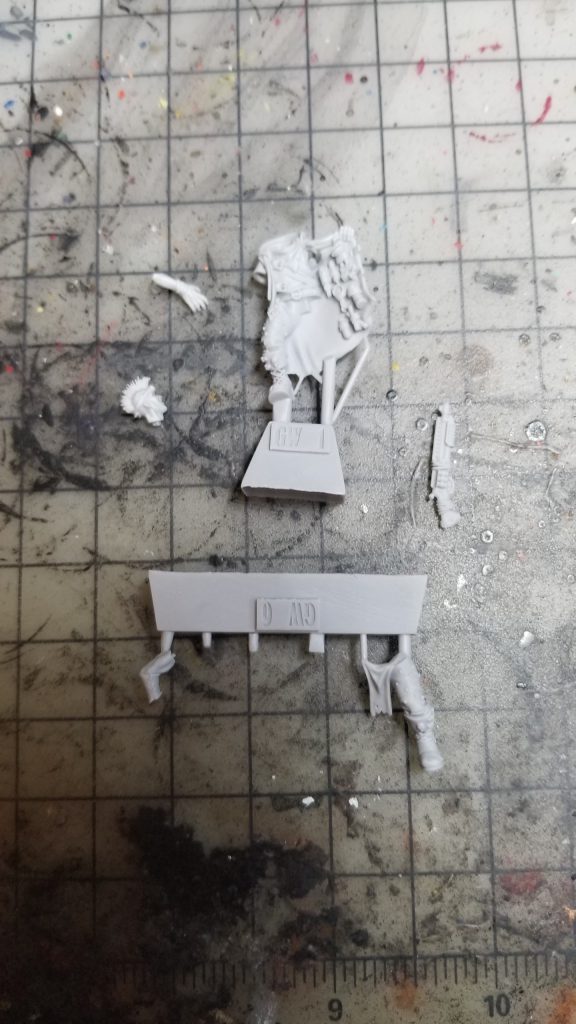
Pretty straightforward!
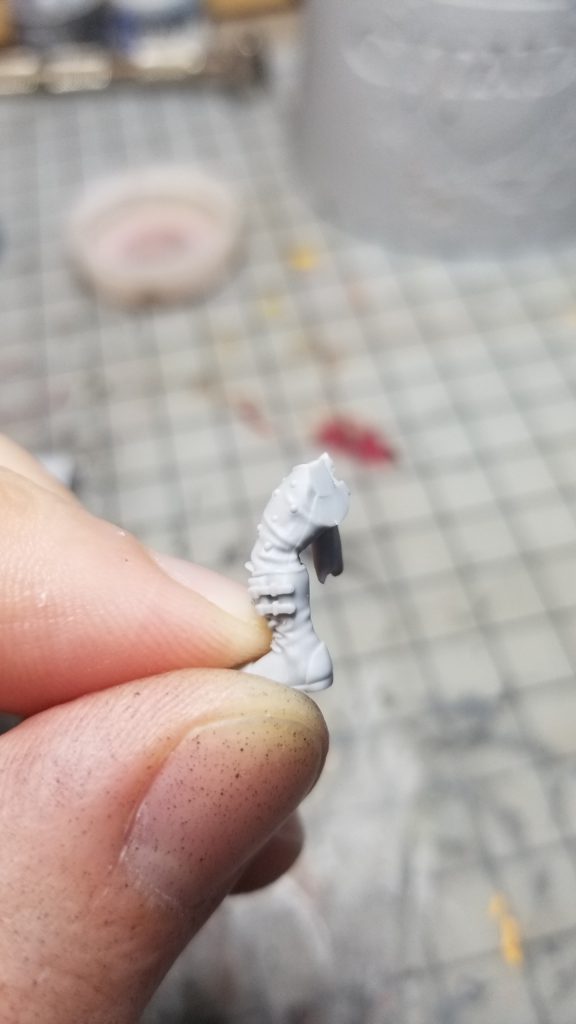
I only had trouble with a few tiny mold lines on this model, like this one on the outside of his left leg:
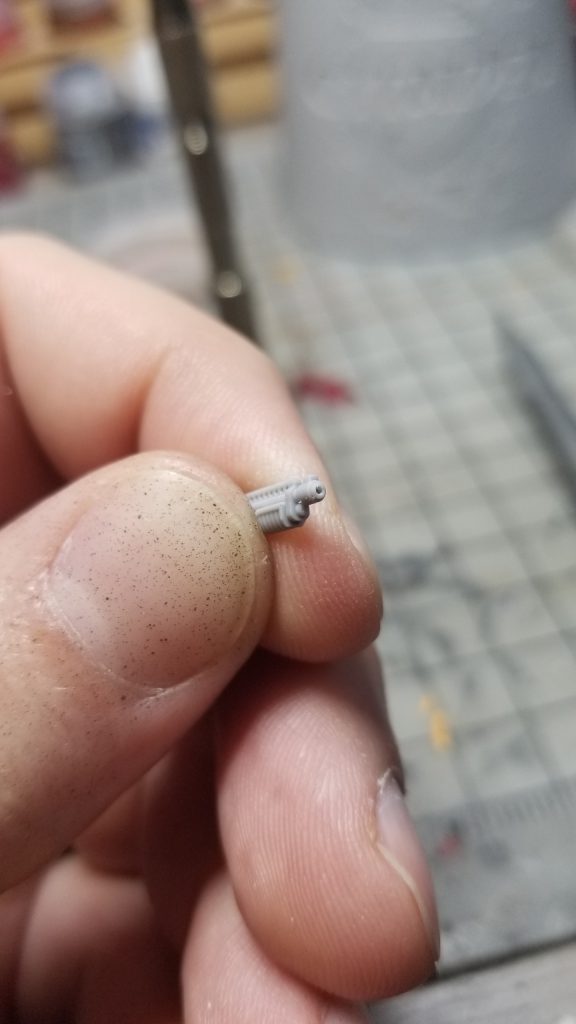
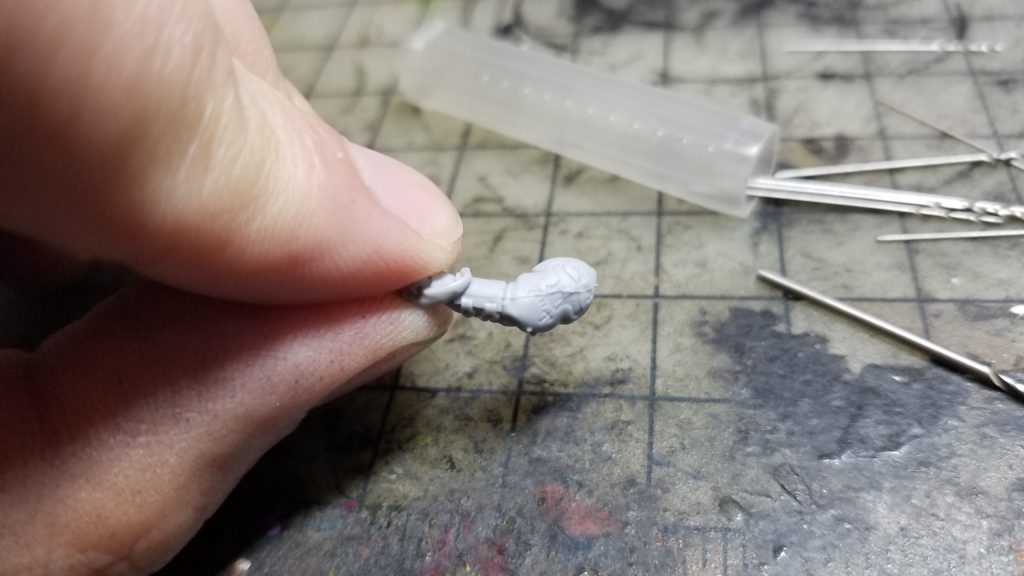
The Scabber’s shotgun is pretty tiny, but I managed to find a small enough bit to drill the barrel! Always drill your barrels, kids!
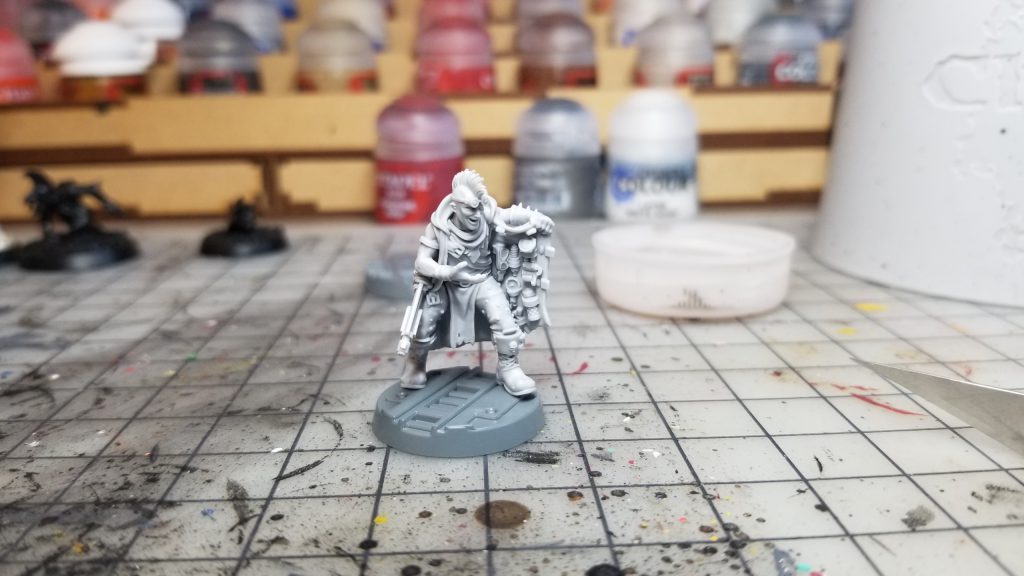
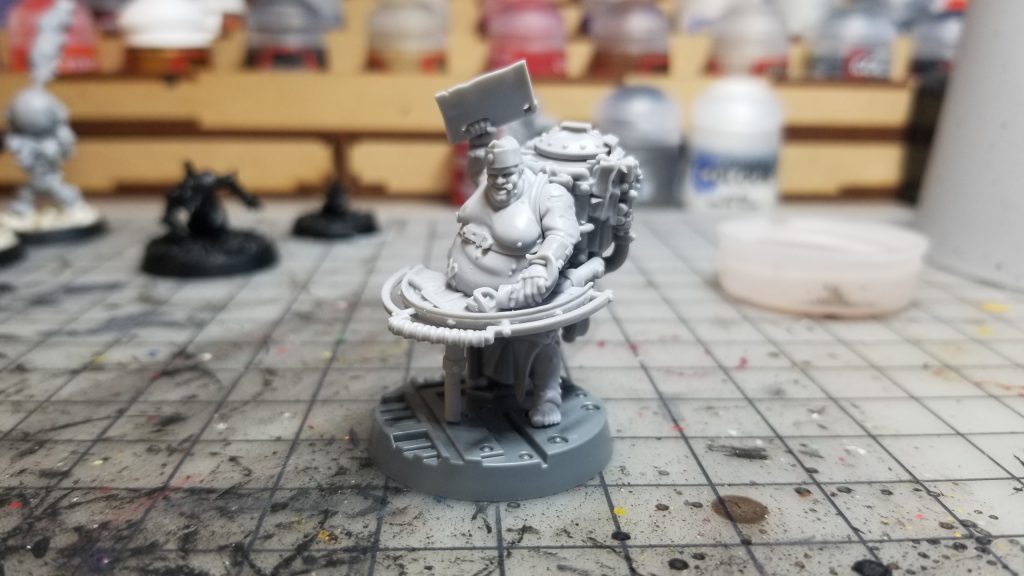
After cleaning up the tiny mold lines and drilling out that tiny barrel, assembly was a breeze! I’m honestly blown away at how detailed and good this model is. I mean, look at it!
DYLON: Trickiest bit I found was carving out the arm hole and then carefully placing the arm holding up the coat. Had to get the tweezers out and dry fit it a few times to make sure I know where it was going.
Building the Slopper
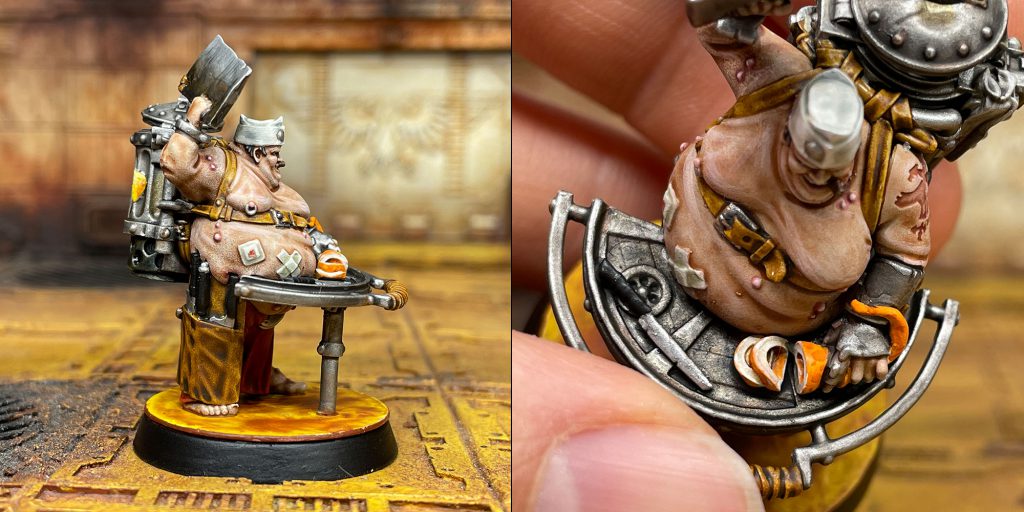
DYLON: I found this to be a little tricky, so learn from my mistakes. You have to put his cutting board in first before you glue on the torso. I didn’t and was lucky my super glue hadn’t set fully. On his back, I assembled his stewpot with the lid ajar and later noticed that FW had theirs closed…. Though you could assemble it wide open and paint the soup inside. I appreciate the instructions pointing out all the openings they intended you to trim out, as you could easily miss so of them, like under the handle on the backpack soup container.
Dan: So, unlike Dylan, I had a ton of trouble with this model. Let’s start with the instructions:
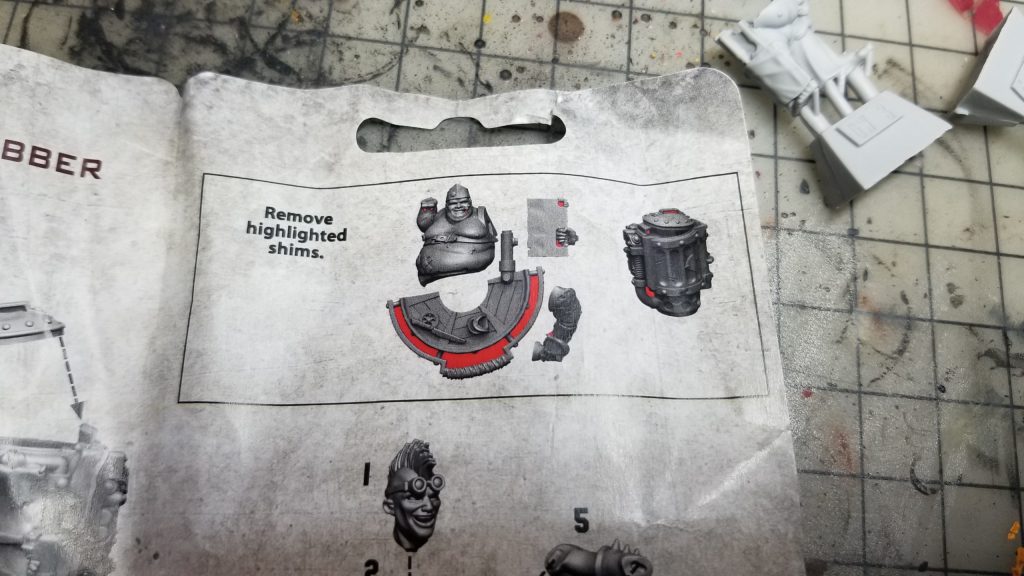
As soon as I saw this I went, “Ugh. Well this fuckin’ sucks.” Getting rid of tiny flashing on resin models is a serious pain in the ass. Especially when most or all of it is connected to extremely flimsy or tiny parts. The good news is that while you really do have to remove the flashing on the workbench, the rest of them are too small or inconsequential to matter, and can honestly be ignored.
I, too, was excited to paint the soup, but the way the kit is put together, you really can’t see it. Because the soup can’s hinge is on the same side as the guy’s cleaver, you can’t have the soup can open. It’s blocked by the cleaver arm. And you might as well just glue it shut, because even if you prop it open, you won’t be able to see what’s inside. It’s kind of a bummer.
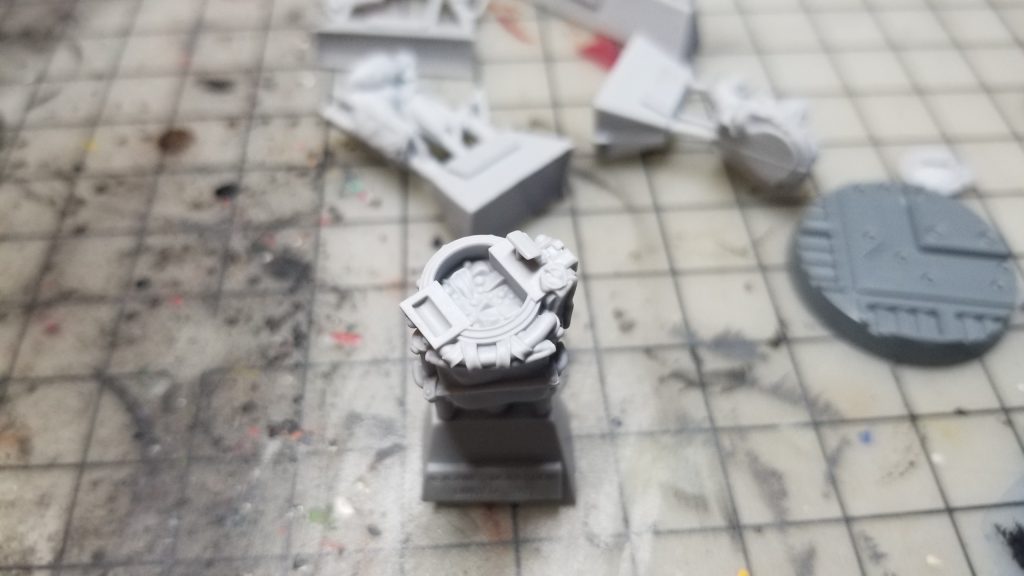
It needs to be stressed that you should attach the workbench to the model’s legs FIRST. Unlike Dylan, by the time I realized this, my brand new tube of Loctite had glued the torso to the legs extremely well. I could not get the two sides apart, even with the help of some pliers. I had to shave down one end of the slot on the workbench that slides into the model’s belly to get it to fit. Fortunately, you can’t see it on the finished model, but it was my only option.
The truly shitty part of this model is this awful mold line that runs right down the middle of the Slopper’s Necromunda brand/scar:
This is egregious. There’s no easy way to clean this up without damaging the detail of the brand, and it was a HUGE bummer to see this on the model. I was honestly crestfallen to see this, and it really colors my evaluation of the kit.
All in all, it’s a very good-looking model with somewhat frustrating instructions and a truly awful mold line. If it didn’t have that dang line, I’d give this kit a 100% positive review, but since it does, it’s a disappointment, and that’s a shame.
Painting the pair
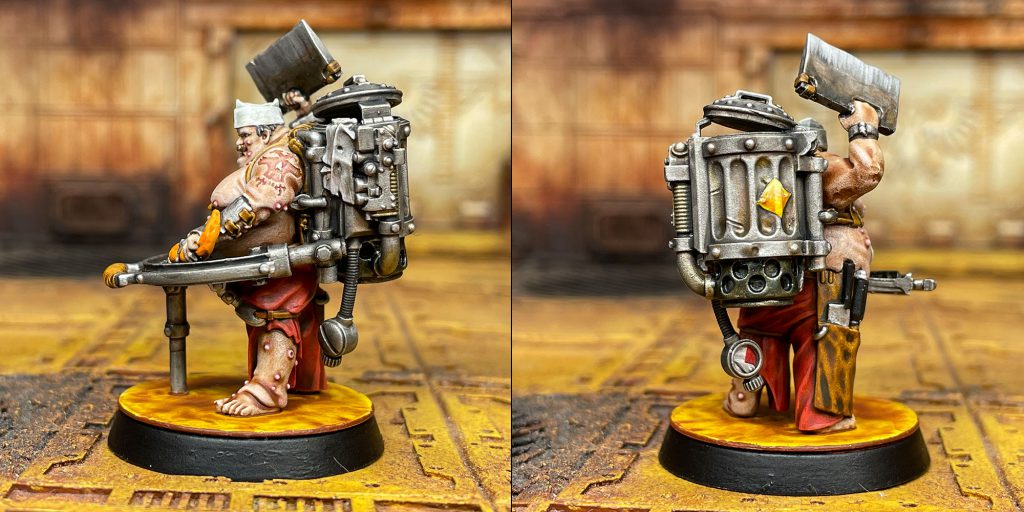
DYLON: I approached these guys like the rest of my Necromunda stuff with my usual prime: Army Painter Leather Brown undercoat with an Army Painter Skeleton Bone zenithal spray on top. I then drybrush the entire mini with white and then it’s ready to go.
I started by painting the skin on both before I moved on to the rest of the minis. For both, I used Guilliman Flesh straight over the basecoat.
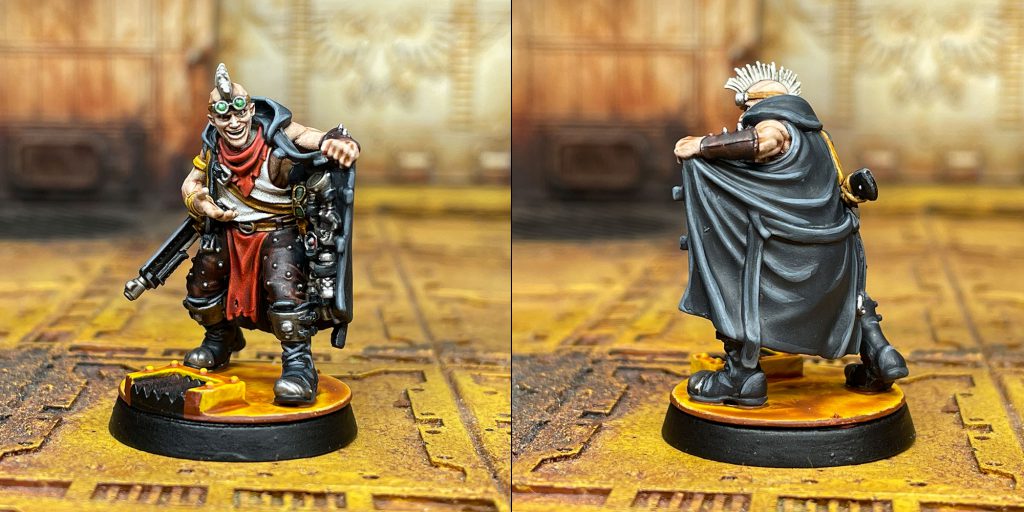
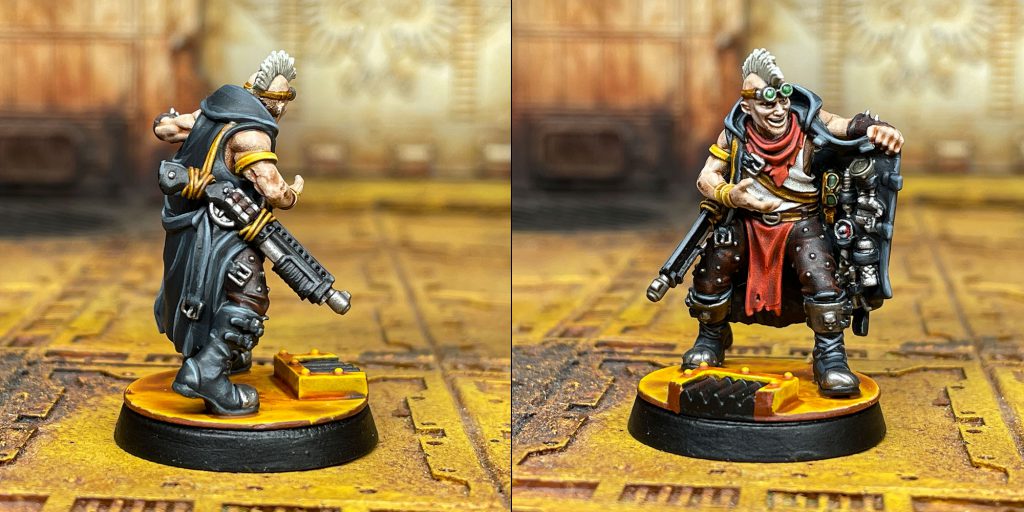
For the Scabber, I highlighted his tank top with pure white and painted his loincloth and bandana with Blood Angels red. I painted his pants with Cygor Brown and the straps with Snakebite Leather. While doing the straps I painted the red areas with a thinned coat of Snakebite to give them a little more definition. The red cloth then received a highlight of Wild Rider red. His jacket and boots were based with Corvus black and highlighted with white mixed in. His mohawk was painted white and got a coat of Apothecary white with a dash of Skeleton Horde mixed in before a light wash of Nuln Oil. His armband received a coat of Iyanden Yellow and I painted his gun black with a highlight. I painted and washed the metals and then I used Warpstone Glow over the silver for his goggles, with a white dot for the finishing touch. A couple other details and his base and he was done.
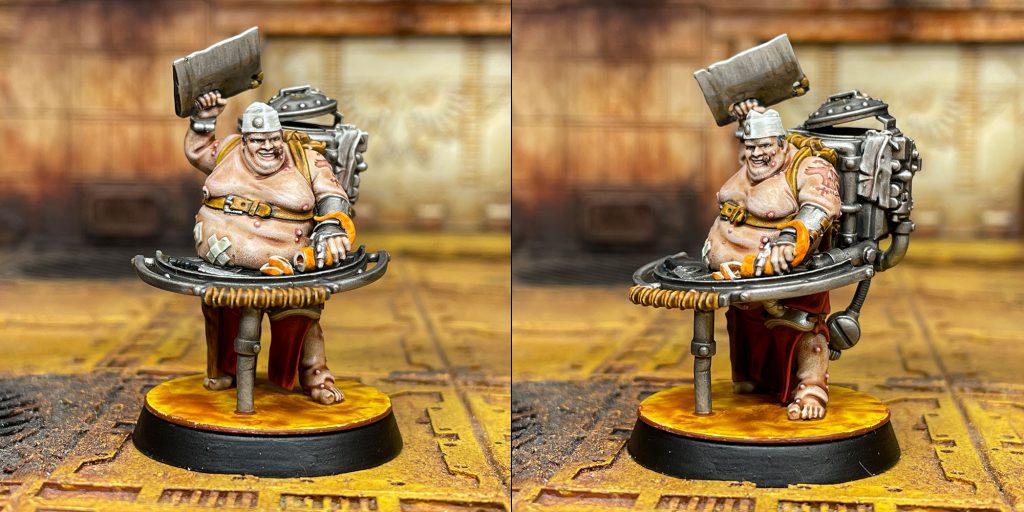
For the Slopper, I added some highlights to the skin with a mix of Guilliman and white. Because he has so much skin, I felt it needed a little boost. I highlighted his buboes (pimples?) with white and then glazed them with a 25/75 mix of Volupus Pink and Contrast Medium. I added some of this to his brand/tattoo as well. His pants were painted red in the same method as the Scabber as were the straps. The tentacle was painted white and then I put a coat of Old Citadel Fiery Orange on the outside. I added some spots with Citadel Vermin Brown. I used lots of layers to build up grime on his backpack cooker, with Nuln Oil, Snakebite Leather, Army Painter Soft Tone, Black Templar, Vermin Brown, and Black. Very much a process by feel, slowly building it up. I added some of this same process to his cutting board, to make it feel old and used. His hat was painted in the same way as the Scabber’s hair, but with a highlight of white on top.
Final Thoughts
DYLON: These 2 are busy models to paint and took me longer than I was expecting based on the variety of materials sculpted on them, the amount of detail, and the way some of those details needed to be painted. I think I probably spent around 2–2.5 hours on each one, painting them over 3 nights. They were a lot of fun, and super characterful. They do take some planning as there are lots of overlapping textures/materials, so color choice is important. I’ve been working to use mostly neutrals with one accent color to focus my paint schemes, but it can take some mental work to figure that out before putting paint to brush.
Dan: I haven’t been able to paint mine yet. I’m in the middle of a whole Blood Bowl thing and that’s where my attention lives at the moment. However, they’re both wonderfully detailed and chock full of character. The Slopper isn’t perfect, but I’m glad I have one either way.
And that’s all we’ve got for this one! While our crew’s been waiting patiently for more Ash Wastes news, we’ve enjoyed making more hobby-side articles. Got a Necro hobby topic you want us to cover? Have strong feelings about which is the best Slopper model – the big boy or the hobbit? Did you punish your Hobby Golf score and pick up the Underhive Sector box? Drop us a line at Necromunday@Goonhammer.com.
