This weekend we get a massive dose of Kill Team goodness, as preorders go live for two major Kill Team releases:
The 2022 Kill Team Annual, which has rules for all of the teams published in White Dwarf over the past year, plus two additional teams
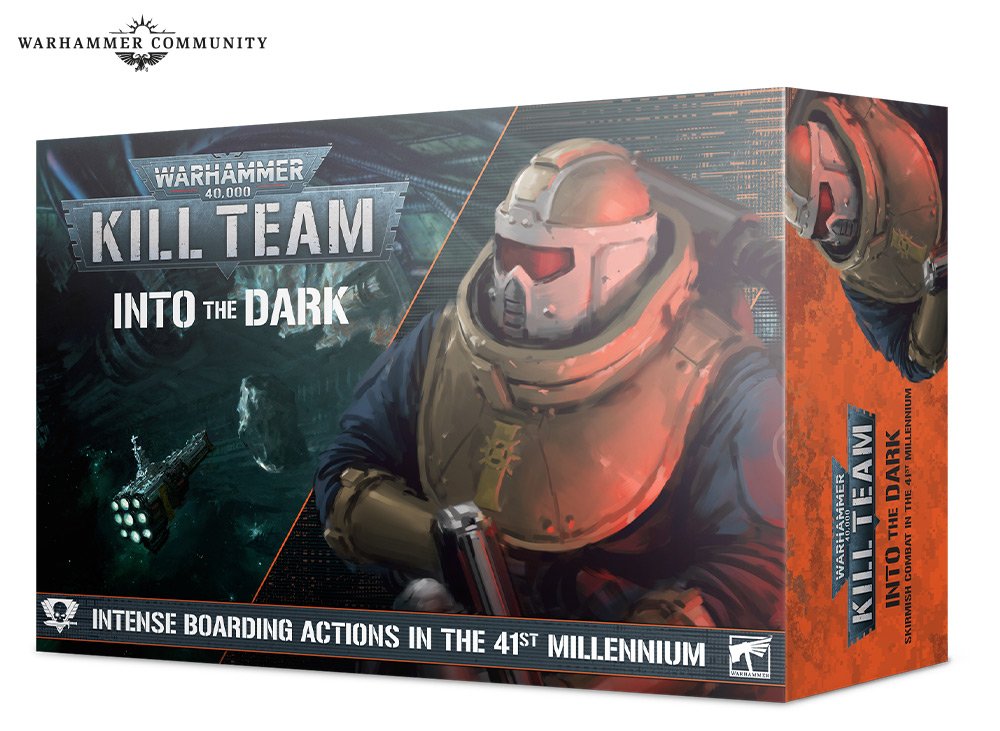
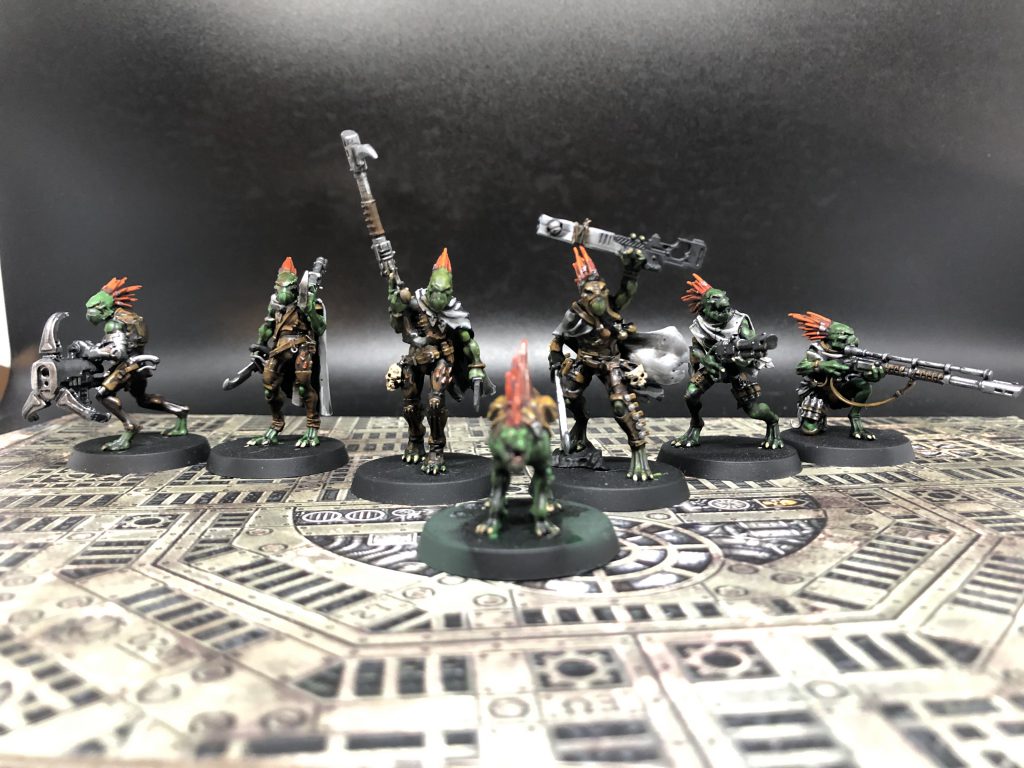
Kill Team: Into the Dark, which adds rules for an all new killzone to the game – Gallowdark – and gives us teams for Imperial Navy Breachers and Kroot Mercenaries.
We’ve got a whole host of articles lined up to cover what is truly a massive amount of content to cover today. In this article we’re going to run through the basics of the KT 2022 Annual and the Into the Dark boxed set. We’ll cover the rules for playing games in the Gallowdark and Close Quarters, and we’ll cover the awesome new Space Hulk terrain kits for Into the Dark. Then in today’s other articles we’ll cover the four new kill teams and their models.
Today’s Kill Team Coverage:
The KT 2022 Annual and Kill Team: Into the Dark (This Article)
Before we dive in, we’d like to thank Games Workshop for providing us with preview copies of the Annual and Into the Dark boxed set for review purposes.
Let’s start here, because this is the fastest part. The Kill Team Annual 2022 collects the kill teams added in White Dwarf over the last year. Specifically, Thousand Sons Warpcoven, Adeptus Mechanicus Hunter Clade, Genestealer Cults Wyrmblade, and Harlequin Void-Dancer Troup kill teams. Additionally, there are two more teams in here that are all-new to KT21: The Elucidian Starstriders and Gellerpox Infected return. You can find reviews for these two teams in the links above.
The rules for the returning teams are essentially the exact same rules printed in White Dwarf. They’ve made some small corrections – the Sicarian Ruststalker Assassin had its Transonic blade attacks corrected to 5, for example – but the datasheet updates have not been included in here, so you’ll still want to keep a copy of that around.
This is ultimately good news for anyone who wanted to get ahold of the rules for these teams, and it’s all pretty complete so far. Annuals make the White Dwarf release cycle a bit more tolerable and it’s good to see these teams return in a format everyone can pick up.
Kill Team: Into the Dark
Now it’s time for the real stuff. The newest boxed set for Kill Team is Into the Dark and it’s massive. Inside you’ll find the Into the Dark rulebook, rules for Kroot Farstalker Kinband teams, rules for Imperial Navy Breacher teams, and a ton of new terrain for making ship interiors for games that take place on space hulks – a Killzone called Gallowdark.
Unboxing
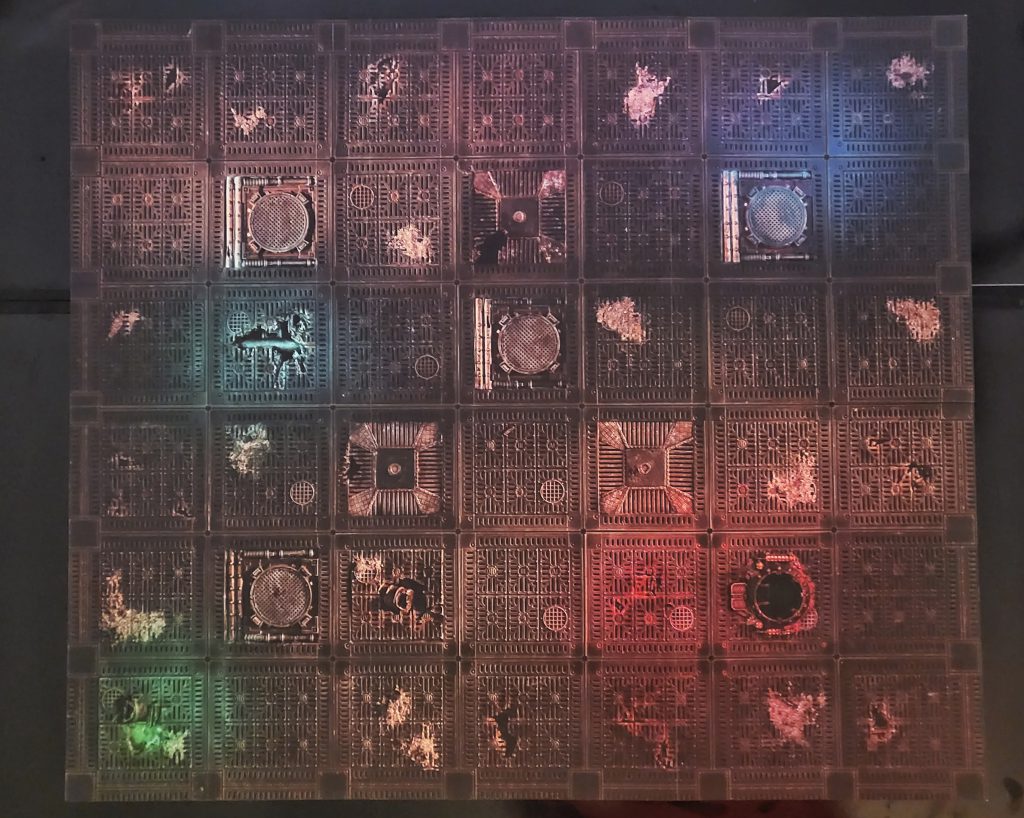
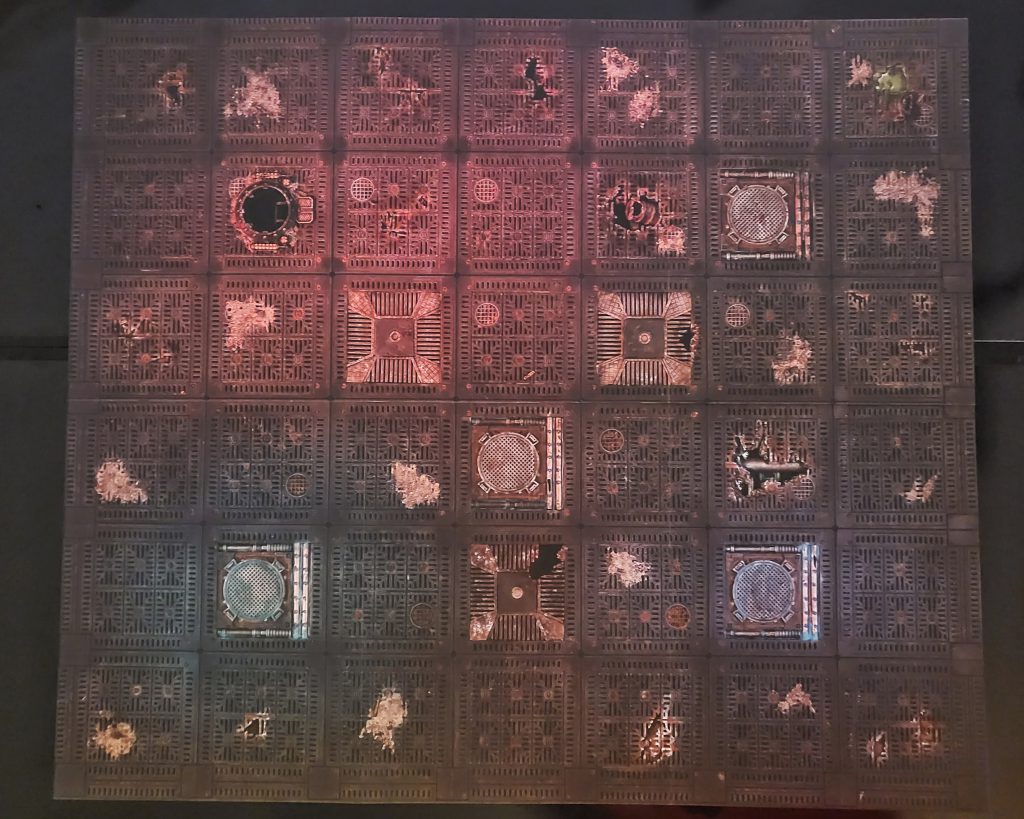
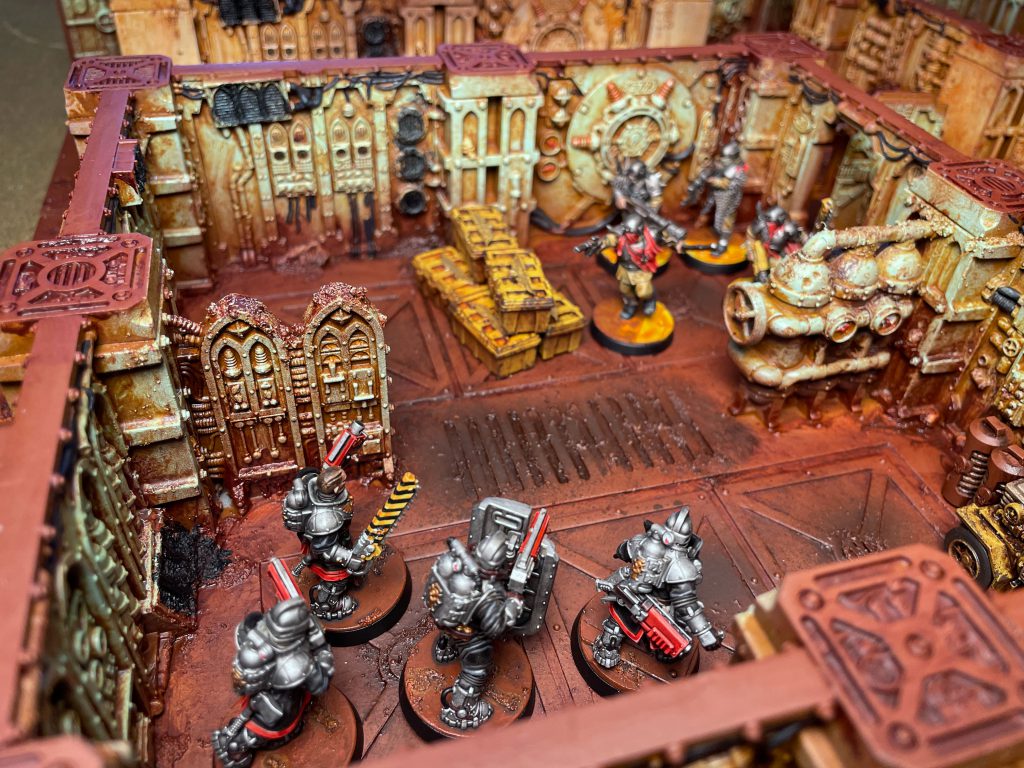
Into the Dark is a hefty box that contains everything you need to get started with Kill Team in the dim hallways of the Gallowdark.
Credit: Games Workshop
Core rulebook
Into the Dark rulebook
Play aids: Dice, measuring sticks, six barricades, two tactical ops cards decks, and tokens
We discuss the models and terrain in the articles linked above, but I want to call out the excellent game board here. It’s likely to make it onto many Necromunda and 30k Zone Mortalis tables as well… and we hope that it hints at a future floor tile release.
The Rules
On top of giving us new Kill Teams to draw upon, Into the Dark aims to drastically change how Kill Team plays in general by moving players into the cramped confines of a Space Hulk, dredging up memories of the game of the same name, Zone Mortalis, and Kill Team: Arena. In this section we’re going to cover the rules for playing games in the Gallowdark, how they affect your teams, and the missions in the book.
Credit: Greg Chiasson
Unlike prior kill zone rulesets that gave us 1-2 new terrain keywords, Killzone Gallowdark is more like a full re-imagining of the Kill Team rules. This book introduces a number of rules that will drastically change how teams interact with one another and the missions they’re fighting over.
The rules here are broken into two sections: The rules for playing Close Quarters games, and the rules for playing in Killzone: Gallowdark. The best way to think of it is that Gallowdark are the terrain rules for specific terrain features unique to the Gallowdark, while Close Quarters are a set of scenario rules that modify how the game is played. You can play a game in Close Quarters that isn’t Gallowdark, but all Gallowdark games use the Close Quarters rules.
Credit: 40khamslam
Killzone Rules: Gallowdark
Gallowdark games are played on a 607mm by 704mm board that uses the Close Quarters rules. It’s an indoor killzone with walls and hatchways and, most importantly, no vantage points. For those of you keeping track of metric conversions at home, 607mm by 704mm is 23.9″ by 27.7″, giving it a different shape from the existing 22″x30″ kill team boards and one that’s a bit more square. This also means you could even more plausibly play Gallowdark games on a 2’x2′ Zone Mortalis board, though you still lose some space in the process. How they decided on this board size, I will never know.
If you want to know more about the terrain, including how it measures up to the Zone Mortalis terrain, check out our terrain review here.
Terrain Rules
There are two major terrain features in the Gallowdark: Walls and Hatchways. There are also a few minor features but those are the by far the most important. Also note that Gallowdark games don’t contain any vantage points, and as such this will drastically alter how some teams play.
Walls
While walls already exist in Kill Team, they’re another thing entirely in the Gallowdark – a fundamental part of the game with rules designed to capture the cramped quarters feel.
Credit: 40khamslam
The most important change here is that operatives can never move over or through walls, regardless of any other rules, unless the wall has the Accessible trait. Additionally, line of sight can never be drawn through a wall, and operatives are never valid targets if every cover line drawn to it passes through a wall – similar to how smoke effects work. When determining range it may never be measured over or through walls, AND must take the shortest possible route to the target. Lastly, to benefit from cover or obscuring a cover line must be drawn through a corner or end of a terrain feature. This last detail seems to be in place due to the terrain provided in Into The Dark having small indentations and uneven surfaces that could technically be used to gain cover based on strictly following of the wording of the Core Rules.
The rules in this section give a number of illustrative examples that make this whole thing easy to understand and work with, and it’s all pretty straightforward and common-sense in how it works.
Of course, suddenly barring any movement or shooting through walls has a dramatic impact on the game and how certain teams play, and that’s something we’ll revisit in a bit.
Credit: 40khamslam
Hatchways
Hatchways are walls with two additional parts: a Hatch and an Access point. Additionally, a Hatchway is considered to have one of two statuses: Open or Closed. When Closed, a Hatchway is basically a Wall in all respects, and while Open the Hatchway gains the Accessible Trait, which allows operatives to pass through parts of the wall within 1 inch of the Access Point as if they were not there. Additionally, regardless of whether they are Open or Closed, operatives within 1 inch of the Access Point may make the Operate Hatch (1 AP) action. This action changes the status of the Hatchway from Closed to Open and vice versa.
Other Terrain Bits
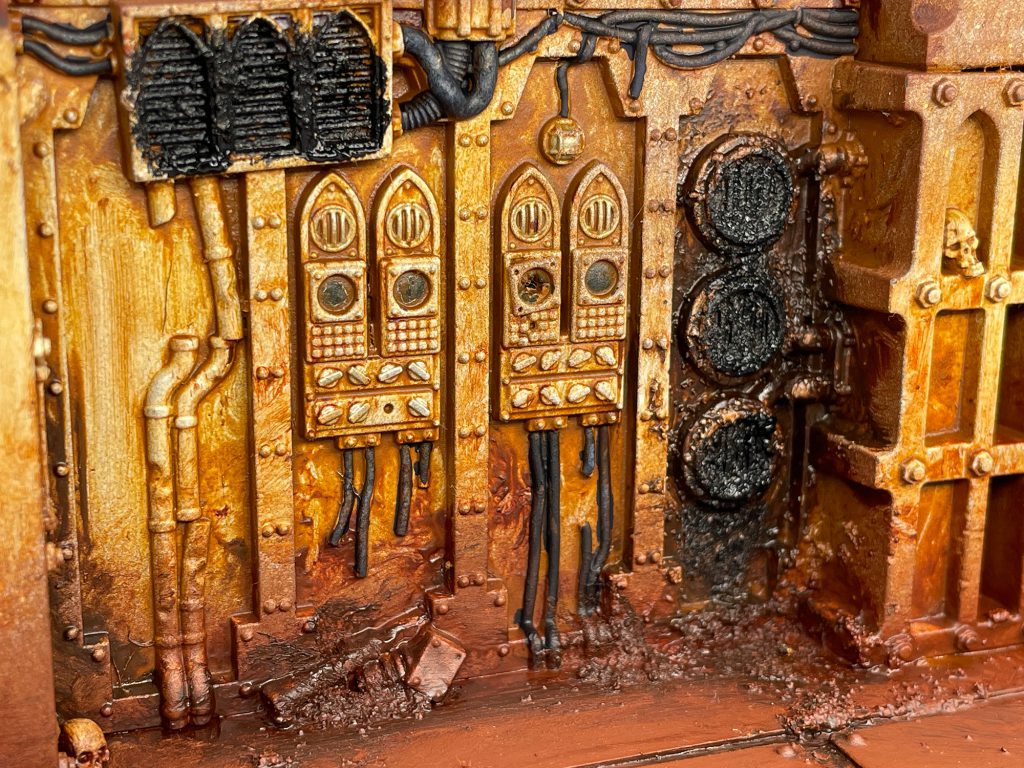
In addition to these two big rules, there are also rules for Pipes (Light, Traversible), Barricades (just normal barricades with Light and Traversible, but they look cool), and Ancient Apparatus, pieces of machinery sticking off from the walls at various points. Some missions basically turn these doodads into objectives to hold.
Close Quarters Rules
In addition to the terrain rules for Gallowdark, we have the Close Quarters rules, which dictate more of how battles are played when space is tight and operatives clash in cramped hallways and tunnels. There are several rules here to note, including two actions specific to the Close Quarters rules – Guard and Hatchway Fight.
Credit: 40kHamslam
Guard
The first of two unique actions specific to this ruleset, all operatives in Close Quarters games may perform the Guard (1 AP) action. Once you do this, the operative is considered to be On Guard until it does one of the following: Performs a Guard Attack, performs any other action (excluding Pass), an enemy operative ends an action within engagement range of it, gains the Conceal Order, or the Turning Point ends. Additionally, the Guard action counts as a Shoot Action, and as such requires an Engage Order and can’t be performed while in Engagement Range of an enemy operative.
The reason you go On Guard is because doing so allows you to interrupt an enemy’s action. During each enemy operative’s activation, after they perform an action, you can activate one friendly operative who’s On Guard to make one of the following:
An Overwatch action
A free Fight action
A Point-blank Overwatch
This final option allows the operative to perform the Overwatch Action while within Engagement Range of an enemy, with the stipulation that the attack must be directed at an enemy within Engagement range, and that operative loses the ability to roll combat dice until the end of that enemy’s activation.
Essentially this returns us to the older Overwatch rules from Zone Mortalis and the Ready rules from Kill Team ’17, and helps mitigate how difficult it will be to get good lines of sight on enemy models who can hide around corners. This ability will be especially useful in helping ranged teams fend off charging adversaries, who in turn will have a much easier time staying out of line of sight to execute around-the-corner charges. Now your operatives can line up in waiting and fire at them as they round the corner.
Hatchway Fight
This is basically a Close Quarters-specific replacement for the Fight Action, and is meant to prevent issues with melee combat around hatchways. The Hatchway Fight (1 AP) action can be perform if the operative is base contact with a hatch, not in engagement range with enemy operatives, and an enemy is within 2 inches of the hatch’s Access Point. Basically, this lets you fight through hatchways.
This change is required as the standard fight rules would make it possible for operatives to prevent opponents from getting within engagement range due to not being able to fit their bases on the other side of the hatchway.
Additional Rules
There are a few extra special rules for Close Quarters to keep track of.
Condensed Environment
Weapons with the Blast, Torrent, or Splash Special rules gain the Lethal 5+ rule
Weapons with the Indirect rule are now limited to a 3 inch range.
Shooting attacks that draw a cover line through any operative that has more than 5 wounds, has an engage order, and is not in base contact with the shooter reduce the number of attacks of that weapon by 1.
Additionally, Barricades can be set up anywhere in Close Quarters games as long as they’re more than 6 inches from your opponents drop zone, 2 inches away from other barricades and access points, and not on top of terrain lacking the insignificant trait.
Finally, the Seize Ground, Hold the Line, Sabotage, and Vantage Tac Ops are no longer valid. If this means you can no longer form a six card deck of Tac Ops for a game, i.e. you’re a Compendium Team, you may choose Tac Ops from another archetype that is available to that team.
The Gallowdark Mission Pack
Into the Dark also introduces a new set of 9 missions specifically meant for competitive play. However, unlike those found in the main rulebook, Gallowdark missions come with pre-determined terrain configurations, all of which provide unique, yet symmetrical, board layouts. While many Kill Team events tend to not allow player placed terrain, the Gallowdark Critical Operation Pack explicitly prevents it.
From a matched play standpoint this may be a welcome change for many, but it also means there is no advantage to picking any particular drop zone. In Core Kill Team, during match set-up, the player who is the defender gets to choose their Drop Zone, but as a consequence they must set up first and lose ties during the Scout Phase. With the removal of Drop Zone variation there is now NO advantage to ever being the Defender in a game. While the advantages granted to the Attacker – winning Scouting Phase ties and deploying second – aren’t huge, it is still something worth pointing out for future game balance considerations.
Before we get into the specifics of each mission a few things are worth pointing out about them:
In general, players rarely have open line of sight from their own drop zone to the opposing player’s, and even in situations where they do they have plenty of room to hide their operatives. This coupled with the lack of vantage points, and Indirect being restricted to 3 inches, makes deployment a much less stressful situation for players as they don’t have to worry about snipers or heavy gunners blowing up their key operatives before they have a chance to do anything.
Additionally, drop zones come in two general configurations: corner and edge with the former generally being being much smaller and covering roughly half the area as the edge deployments. However, missions with edge deployments often have walls running through them forcing players to split their teams with operatives less capable of coming to aid of one another.
1.1 – Command Station Control
Players are arranged in opposing corners with 3 objectives markers running diagonally between them, each located in a separate room. This missions is the most straight forward out of them all, there are no additional mission actions, and each objective marker is worth 1 VP at the ending of each Turning Point. This means that only a total of 12 Primary Objective points will be scored during the entirety of the match, and thus players need to be especially careful of which Tac Ops they choose.
1.2 – Power Surge
Edge deployment coupled with 4 objective markers running along the centerline of the board, each in a different room. The defender then selects either the right-most or left-most marker to be the start of the Power Surge with the other markers being numbered 1 through 4 sequentially. All operatives have access to the Siphon Power (1 AP) mission action that can only be performed within 1 inch of the objective marker whose number corresponds to the current Turning Point. Performing this action will award that player 1 VP, and that marker may not have that action performed on it.
Additionally, players score 1 VP at the end of the Turning Point if they control one or more objectives, and an additional 1 VP if they control more objectives than their opponent. This means that players can score a maximum of 3 VP on the primary objective during each Turning Point meaning this is another mission where Tac Ops selection is key. Additionally, the Defender choosing where the Power Surge will begin at can be an effective way to dictate the flow of the battle.
1.3 – Supply Raid
Another edge deployment setup with 4 markers, however only two of them are located along the centerline, with the other two being placed closer to each player’s Drop Zone. This mission functions similarly to 3.1 Secure Archeotech in that players may perform the Pick Up action on each objective marker, which will score them 1 VP the first this is performed. Otherwise, objectives are scored at the end of the battle with players gaining 1 VP for each marker they control and additional 1 if an operative is carrying it. For those keeping track this is another mission where not many Primary points are up for grabs with this one coming out to 12 in total between both players. With this mission in particular it is easy to see players having an early stalemate, especially given how difficult it may be to prevent the other player from returning the nearest objective to their deployment zone.
2.1 – Junction Assault
This mission introduces the concept of Sectors of Control, as opposed to Objective Markers, in which the board is divided into 3 sectors, players who have an operative in both sectors (I.E. standing on a dividing line) must choose which sector their operative is occupying at the end of each Turning Point for the purposes of scoring.
This mission is very interesting as it presents players with numerous open firing lanes that lead to their opponents drop zone. At the end of each Turning Point players score 1 VP for each sector that has no enemy operatives on their side of the centerline, and an additional 1 VP for each sector that they have an operative within 3 inches of their opponents drop zone.
This particular mission gives players incentive to be aggressive, while trying to prevent their opponent from crossing the centerline. With some sectors being divided into multiple lanes elite teams may find this particular mission difficult when it comes to preventing their opponents from being on their side of the board. Basically this mission comes down to trying to overwhelm your opponent in a particular sector so that you can score two points on it, while denying them any. If neither player moves aggressively this mission could easily lead to a stalemate on Primary points leaving Tac Ops to make the difference.
2.2 – Full-Scale Attack
Edge Deployment and 6 Objective Markers with two bordering each players Drop Zone, labeled Alpha, and two running the center of the board, labeled Beta. At the end of each Turning Point each marker labeled Beta is worth 1 VP and an opposing player’s Alpha markers are worth 2 VP.
This mission is similar to the previous in that it has more open firing lanes than most missions, and encourages players to be aggressive in order to prevent a stalemate over the center objectives.
2.3 – Mysterious Signature
Another edge deployment mission with 6 objective markers with the big difference being that the markers are split between two large rooms with each player having easier access to the room bordering their drop zone. Of the nine missions available in Gallowdark this one is the one organizers are most likely to skip, and this is largely due to how mission scoring works. Operatives are able to perform the Scan (1 AP) action while within 2 inches of a marker they control ONCE per turning point per Kill Team. When they do so roll a D6 adding one for each objective marker than has been removed so far. On a result of a 6 that marker becomes The Source and all other objectives are removed. If less than a 6 that marker is removed and the player scores 1 VP.
Once The Source is revealed operatives may perform the Pick Up Action on it. Aside from the Scan Action the only other way to score primary points is by controlling The Source at the end of the battle for 3 VP with an additional 3 VP if The Source is being carried.
As you can see this mission leaves more up to chance than any of the others, and there is always a chance that The Source may simply be the first objective marker a player scans giving the opponent almost no time to respond. Of course this knowledge could simply result in a game of chicken where neither player chooses to perform a Scan simply because they’re worried it will up their opponents odds of finding it.
None of this is to say that this mission can’t be fun, in fact it seems like the kind of mission more suited for Narrative Play simply because it mixes strategy AND randomness.
3.1 – Forge Stronghold
The Gallowdark version of Seize Ground where we have corner deployments with 5 objectives split up amongst 5 rooms with three central objectives located in small rooms towards the center of the map, and two outlying objectives located in larger rooms that wrap around the center ones.
Each objective is worth 1 VP at the end of each Turning Point for a maximum of 4. Once this happens that objective marker is considered Secured by your team, and operatives no longer need to stand on it for it be considered under your control.
Here we finally have a departure from previous missions where we saw the maximum primary points available over the course of a match to be rather low. In this case we have a total of 20 points up for grabs, and the ability to abandon them in favor for others if no enemies are close enough to recapture them.
3.2 – Vault Plunder
The Gallowdark version of Awaken The Data-Spirits. You have corner deployment with 6 objective markers, two centrally located in smaller rooms designated as Vault 1 and 2, and the remaining four located outside and adjacent to these rooms designated as Conduits 1 and 2 (two markers basically corresponding to each Vault). At any point during the match operatives may perform the Power Down (1 AP) mission action to score 1 VP and remove the marker.
At the end of the battle players controlling a Vault objective score 2 VP for each corresponding Conduit that had the Power Down action perform on it, to a minimum of zero.
This mission is less complicated than it seems simply because it will be very difficult to prevent other players from performing the Power Down Action, meaning the match is likely to come down to who controls the Vaults. Hypothetically you can choose not to perform the Power Down Action in an attempt to minimize the points your opponent gains, something that is more optional for horde teams who can afford to leave operatives behind to perform the action at a later Turning Point. This mission, as many of the others we have seen at this point, has a low number of primary points available, 12 in total.
3.3 – Exposed Trove
Our final mission is the Into the Dark variant of Loot and Salvage. Here we have corner deployments with 4 objective markers, two located in expansive rooms occupying the non-drop zone corners, with the other two labeled Alpha and located in smaller rooms centered in the board with access points placed in such a way as to make them difficult to reach.
Operatives can perform the Claim Loot (1 AP) mission action while within 1 inch of a marker they control to score 1 VP, this can only be done to each objective once per Turning Point, to a maximum of 3 times per team per Turning Point. At the end of the battle each Alpha Objective is worth an additional 2 VP.
This is perhaps one of my favorite missions in the book. It is balanced, has the opportunity for decent scoring, and provides the opposing teams just enough options to reliably interfere with one another.
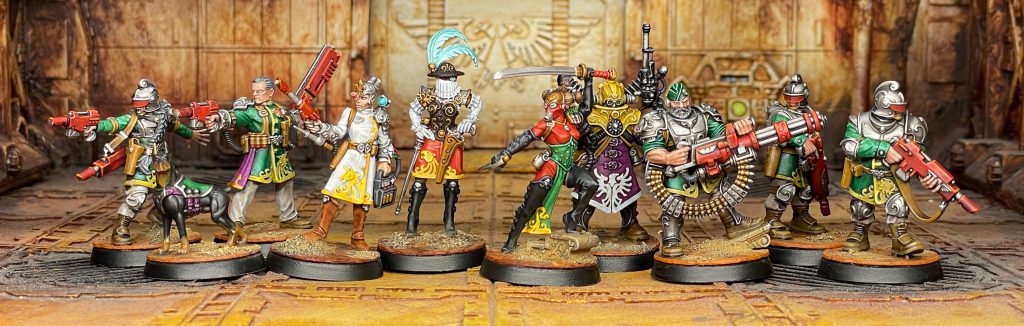
Elucidian Starstriders. Credit: 40khamslam
Winners and Losers in The Dark
While understanding just how much these rules will shift things competitively for our teams is very difficult, there are a few predictions we can make:
Teams with operatives that have GA2 or 3 APL are automatically going to have a leg up in Close Quarters games. Much of the combat in Kill Team is going to revolve around how action economy works with Hatchways, which are best viewed as a action penalty for any player looking to attack their opponent. This means that operatives best suited to getting around this problem will either need the APL to open the Hatchway and still perform useful actions, or being part of group activation where one operative opens a Hatchway so that another may act.
Teams that rely heavily on ranged snipers, vantage points, FLY, or indirect weapons are going to take a hit. Fly has been greatly reduced in its usefulness, and snipers may have a very difficult time finding targets.
Perhaps the biggest possible boost is to teams that have abilities that let their operatives pass through terrain. However this one comes with a big asterisk: It is unclear if this will be the case is because RAW the current Gallowdark rules prevent operatives from passing through walls regardless of any other rules. This means that the Kommando Breacha Boy, Wyrmblade Writhing Ingress Ploy, and The Breacher Hatchcutter currently are all incapable of actually using their abilities in Kill Zone Gallowdark. If this is what the rules writers intended is unclear, so keep a lookout for future F.A.Q.s pertaining to this issue.
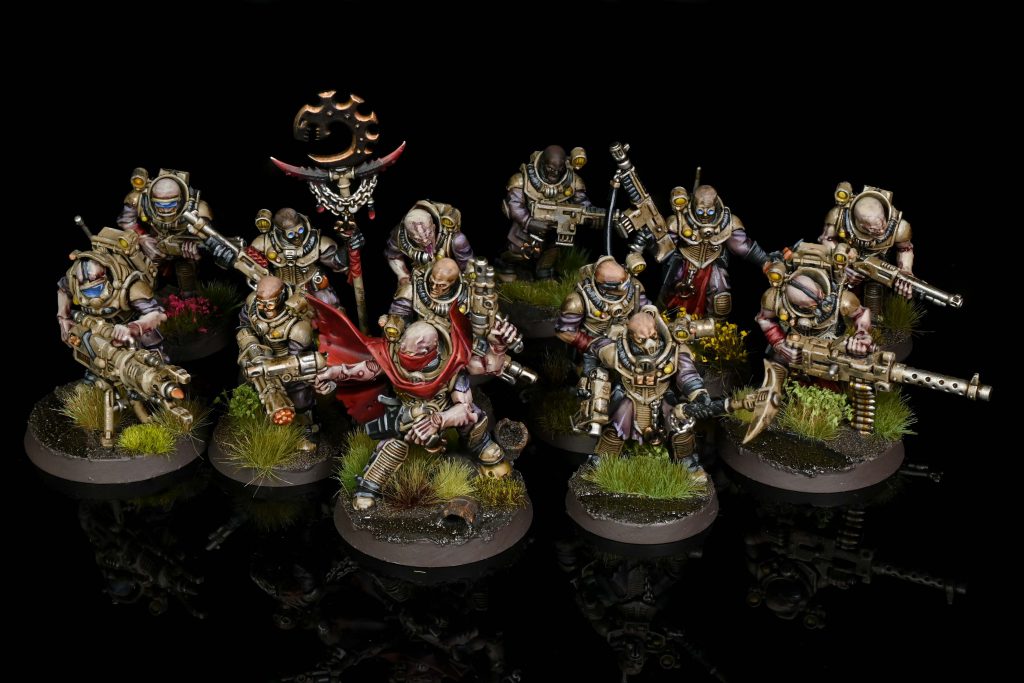
Wyrmblade Kill Team. Credit: Rockfish
Winners
Wyrmblade and Kommandos – Both of these teams have the ability to move through walls, and have ploys that allow operatives to be placed outside their starting zones. Anything that allows teams to circumnavigate doors is very powerful, additionally both of these teams either have access to effective close ranged weapons or are have effective melee combatants.
Novitiates – This team is armed almost exclusively with short ranged weapons, and has access to some of the deadliest Torrent weapons in the game. On top of this they have several close combat specialists that will be right at home in the close confines of Gallowdark boards.
Losers
Void-Dancers – Losing Fly as a means to quickly traverse the battle field is a huge blow to Harlequins. Fly still has its uses as it still allows them to pass over friendly and enemy operates to help mitigate the close confines of the Gallowdark, but this is still a significant downgrade in ability. Additionally, powerful characters such as the Death Jester lose much of their allure now that vantage points are gone and firing lines are greatly reduced. It seems strange that Harlequin players may actually find themselves in a position to take Players in place of the either the Death Jester or the Shadow Seer. Despite this, one shouldn’t view these changes as spelling the end of Void-Dancers, but more as them being brought down to the same level that other teams are forced to play on. In fact, the close confines of Gallowdark boards will likely favor their close ranged shooting and lethal close combat abilities.
Pathfinders – A strong team that has been a staple of competitive boards since it was introduced, unfortunately Pathfinders rely heavily on shooting, and the Gallowdark introduces nothing to favor this. Line of sight blocking walls make it even more difficult to put Markerlights on enemy operatives, and their 4+ to hit/wound means that they will have difficulty making effective use of the Guard Action. Additionally, they lack any weapons with the Torrent special rule, and have very few weapons with Blast.
What’s Next: More Reviews
That wraps up our review of the box and the basic rules for the Annual and Into the Dark, but we’ve got everything you could want to know about this set lined up. Head on over to one of our other reviews – we’d recommend the terrain review next – and in the meantime if you have any questions or feedback, drop us a note in the comments below or email us at contact@goonhammer.com.
This website uses cookies so that we can provide you with the best user experience possible. Cookie information is stored in your browser and performs functions such as recognising you when you return to our website and helping our team to understand which sections of the website you find most interesting and useful.
Strictly Necessary Cookies
Strictly Necessary Cookie should be enabled at all times so that we can save your preferences for cookie settings.
If you disable this cookie, we will not be able to save your preferences. This means that every time you visit this website you will need to enable or disable cookies again.