There are many different aspects of strategy that contribute towards doing well at a game of 40K, many of which we’ve published articles about, but when you get right down to it your core goal as a player in any competitive strategy game is to absorb information about the game state, process it and use it to make good decisions. One of the things I love about 40k is how vast the array of situations that will arise over the course of a game can be, constantly testing both players ability to come up with the best solutions to the problems in front of them, and (generally) rewarding the player who makes the sharper choices.
Today I want to talk about what’s generally the first challenge that faces you in any given game – reading your opponent’s army list. Looking at what you’re facing and working out how that should feed into both your initial actions and overall game plan is a hugely important skill, and one I have a particular affection for – the three cool lists series is one of my favourite things to work on because it lets me flex this particular set of muscles. Oddly, however, the actual process of how to appraise an opposing army list isn’t something that’s been too heavily covered in the great body of strategic work out there. That’s honestly kind of weird, for two reasons:
- It’s tremendously important – you will literally do this in every game you ever play and doing it well is hugely advantageous.
- It’s an area where you can actually develop a consistent process with some reasonably solid rules.
The latter makes this area stand out a bit in 40k, because the flip side of how wide the set of possible situations is in a game is that it’s incredibly difficult to produce universally applicable rules and advice for many important aspects. The closest we’ve ever come before is in discussing picking your ITC Secondaries (which yes, will get an update for 2020 at some point once the Coronavirus actually lets me play some games), which makes a tonne of sense because it’s very much a specific application of the more general principals we’re going to discuss today. What sets this area of the game apart from others is that there’s a much more consistent set of parameters within which you’re operating. Obviously there is still variety game to game and list to list (there wouldn’t be much to talk about otherwise) but when what you’ve got is two evenly pointed armies poised pre-deployment there are some consistent questions you can start to ask about how they’re likely to interact, and today we’ll teach you how to answer those and turn the resulting knowledge to your advantage.
Levels of Information in an Army List
Writing about strategy is often extremely helpful to honing my own skills because it forces me to take automatic thought processes I’ve built up over many, many games and actually examine what I’m doing so that I can distill it and explain it to the audience in meaningful terms. Here the first thing that needs to be outlined is what levels of information exist within an army list.
On paper an army list is a bland collection of words and numbers, but that’s not much use to us. That information is only useful to us when we apply context and knowledge to elevate it into something we can make use of, and when I talk about levels of information in a list I’m referring to the key stops along that route. Leaving aside philosophical rabbit holes about bootstrapping your understanding of language I basically think there are three meaningful levels of information in a given 40K army list:
- Quantitative information – on a most basic level, how many of each model and unit is in the army list?
- Qualitative information – what can each unit do?
- Strategic information – taken together, what does that mean for the game and your plan?
Those sit on two neat sliding scales – they go from most to least obvious, and least to most useful.
Understanding that lets us define our goal when reading an army list – we want to take the quantitative and qualitiative information from it, and extract the juicy, strategic goodness hidden within. Then we use that to brutally crush our opposition, obviously.
Making those strategic leaps is going to be what we focus on today. Quite a lot of the articles and guides out there that do talk about army lists get very focused on qualititive information – specifically, they deep dive on what “gotchas” you need to look out for from various armies. We are going to talk about how to make sure you have all the qualititive information you need to make strategic decisions, but if you’re looking for a big list of all the nasty movement tricks various armies can pull, or how the latest awful combo works you should take a look at our faction specific Start Competing guides instead.
Key Unit Facts
So what do we need to know about the units in our opponent’s lists? Furthermore, in the hypothetical scenario where you aren’t a weirdo internet guttersnipe who has read every codex and expansion book, how do you make sure you ask the right questions about units you aren’t familiar with?
Broadly, I think you need to know the following about each of the units in an opponent’s list to build up a strategic picture:
- What can it kill? Is it a threat to everything or can it only efficiently hurt a sub-set of the units in your army?
- What can kill it? Can a light peppering of bolter fire blow it off an objective in an emergency, or does it need lascannons pointed at it when you want it dead?
- Where can it do stuff from? If it’s a shooting threat, does it need to get in position to line up shots, or does it ignore LOS and have a range of “the table”. If it’s a melee threat or a tough unit that wants to hold objectives, how fast can it get where it’s going?
The capabilities of every unit are made up of a combination of its statline, weapons, special abilities and army-level abilities that can affect it, but once you mix all that together the above three fundamental facts are what you need to be getting out. If you’re looking at a unit that you’ve never seen before this is the knowledge gap you need to close. An important thing to stress is that this isn’t the same as needing to know the entire statline of every unit in your opponent’s army, and indeed trying to pick that up on the fly at the start of the game is going to slow things down a lot and probably overload you with information you don’t need.
The same applies for special abilities, and I’m gonna be real here – I couldn’t tell you off the top of my head the full set of abilities that combines to make the Nurgle possessed bomb work. What I do know is that if my opponent has a fully buffed up squad then essentially anything in my army that it touches dies. It doesn’t matter to me whether the exact combination of exploding damage abilities means that it can wipe my units twice or three times over, as soon as it crosses the threshold of “reliably obliterates any of my units” I can just stop caring and focus on the more important questions of how fast they are and how I kill them. You can hit similar points with other capabilities too – once a shooting threat has a range of 48″, for example, it’s really hard to avoid being shot by it on a range basis alone, and once a gun’s range is at least 48″ the exact range above that stops mattering nearly as much.
In a situation where you’re not familiar with an army I’d strongly recommend not getting your opponent to list out the statlines of every single unit. Instead ask high level questions about most stuff and save the deep dive for units that cost a lot of points (like 200+) or your opponent has brought multiple of. Even then just reading the statline might not be your best option. Ask:
- What can it kill in a turn?
- What are its defences like?
- What’s its threat range?
- Do you have any abilities that can significantly change any of that?
The last one is our final important lesson for this section, because it hits on what special rules we need to think about from our opponent. At this point in 8th armies have an eye-watering number of special abilities and it is flatly impossible to keep abreast of all of them. Luckily you don’t really need to. Opposing abilities that make stuff incrementally better at their existing roles don’t super matter from a strategic point of view because they don’t change any of those three key characteristics. Re-roll hit auras are a good example of this – they’re great to have in an army sure, but their impact is “everything is a bit better at its job”, and the consequence of that for your opponent’s plan is probably limited (unless they have a way of removing the aura).
The kind of abilities that really matter are:
- Abilities that allow for a big spike of damage within a unit’s normal role. Double shooting is the canonical example here – if an opposing shooting threat kills a unit every time it shoots, and has a way of shooting twice, then I’m motivated to change my deployment or movement to try and only expose one target to it at a time. More out there examples would include psychic powers like Infernal Gateway that can delete multiple units in the right circumstance.
- Abilities that substantially affect a unit’s speed – redeploys and double moves, mostly.
- Abilities that change the category of what they can kill or get killed by. If a unit can normally only kill infantry, but a buff lets it punch out a tank, that’s important for your strategic planning, as are defensive boosts that can no-sell certain types of attack. Tear Them Down allowing Bloody Rose Zephyim to shred tanks is a good example on the offence while Grot Shields is a good example on the defence, essentially switching off shooting attacks.
- Anything that massively breaks the normal rules of how and when units interact. Objective Secured is the most common, special case Heroic Interventions or counter-charge abilities are probaby the next most frequent.
All of these impact on our strategic assessments of units, so knowing about them helps when we try and take our understanding to the next stage.
Admittedly that can still be quite a broad set of stuff, and ultimately some of this can only be learnt by repetition, but even with complicated armies chances are good that only like a third of their possible strategems and tricks are going to be relevant in a given game. If you’re struggling to keep on top of all of it, you can also just focus in on the capabilities of the more expensive units in your opponent’s army – it’s pretty likely that knowing the full set of what a 300pt Centurion unit can do is going to help you more than understanding every trick an Intercessor squad has up its sleeve. All of this is about making sure the information you’re acquiring is the important stuff, and sometimes that means discarding less relevant facts.
This level of understanding of our opponent’s units does start to have real value. Knowing what defences a unit has lets you apply probability to assess how much stuff you probably need to shoot at it, while knowing threat ranges lets you, turn to turn, make sure your juiciest targets don’t get smashed. However, the real prize from going through this process isn’t this qualitative information – it’s bringing it all together into a strategic view of what you’re up against.
Strategic Considerations
Army Capabilities
When you start a game of 40K what you’re up against is more than just a collection of units – it’s an army. In a competitive environment, your opponent is likely to have put at least some amount of care and consideration into how they’ve put that army together, with the goal of making a whole that’s greater than the sum of its parts. Over the course of the game, as both sides experience attrition, the game might devolve into a struggle between units, but over the first few turns you need to contend with the army. By this point you’ve been through your opponent’s list and made sure you know the key capabilities of their units – the next step is to build those all up into a picture of their army’s capabilities.
Units can have lots of different exact roles on the table, but the role of an army is to win games. In pretty much all forms of competitive 40K, you win games by holding objectives and killing stuff in order to acquire a victory point lead. With that in mind, when I’m evaluating armies I’m broadly trying to rate them on three different capabilities, and asking four followup questions that will affect my planning for the game.
The capabilities I’m assessing are basically scaled up versions of unit capabilities, often arrived at by roughly summing up the power of the individual units. Overall, I want to know:
- How well does this army kill light units? What volume firepower or horde-clearing melee do they have?
- How well does this army kill heavy units? How many lascannons are they packing. Can any of their characters rip a tank apart?
- How well does this army control objectives? Can they flood objectives with bodies? How much ObSec do they have? Have they got units that can grab a point from 20″ away?
Most all-comers lists are going to be able to do all of these to some extent, but will often be particularly good at one, and maybe a bit weaker in another. It’s also useful to understand how broadly based the army’s capabilities in each area are. If an army has a decent amount of anti-tank punch, but it’s all concentrated on a few vehicles that has a big strategic implications.
Strategic Questions
Once we know an army’s capabilities and where (if applicable) they’re concentrated we can extract these strategic capabilities by asking some key questions about it. Knowing the answers to these will affect our strategic priorities in the early turns of the game, and this is where going through the process of understanding your opponent’s list really starts to pay dividends.
Can I Table this Army?
It’s hugely, hugely important to go into a game knowing whether blowing your opponent clean off the board is a realistic goal. If it isn’t, you need to make sure you’re being a bit more conservative with your units, as you need to be planning for a full length game.
Be realistic about this – there’s no shame in having to make a plan other than “just kill everything”, it just tends to need to be a bit more considered and long-term. If your answer is “yes, if I roll well” you’re usually going to have a better chance of winning if you plan as if the answer was “no”. You should probably also assess whether there are any conditions that would change your answer to this – you might be able to table your opponent if you go first, but is that still true if they win the roll off?
How Can I Meaningfully Reduce the Army’s Capabilities?
This is the critical strategic question you want to be thinking about as soon as you’re on a plan more complex than “table them in a few turns”., and will have big impacts on your target priority. The capabilities listed above are, ultimately, the things armies need to do to score VP and win games. If you can stop your opponent being able to do one of them, then that will slow down their VP accumulation and boost your chances.
Do I Want to go First or Second?
In ITC, which is the most common competitive format, going first has the advantage of giving you the first crack at hurting your opponent’s army (and consequently, reduce their capabilities), but going second tilts the scales of how well each army can control objectives thoroughly in your direction. In raw terms, you should assess which of these is more valuable in service of you building up a winning capability advantage and prepare to pick accordingly, or adapt your plans when your opponent picks the one you wanted.
What Does a Big Play Look Like From this Army?
Most armies can operate effectively all the way through the game, but many will have one or more big plays they can pull, key points where a bunch of abilities can come together to land a devastating blow. Examples of these would be a Genestealer Cult army bringing in the big hitters from deep strike on turns 2 and 3 and the brutal shooting phase a Tau army can pull off using Kauyon when the foe is in range. Usually these big plays can be mitigated, so understanding when your opponent is trying to land them is crifical.
What Does Game Over Look Like For Me?
You can’t win them all – but by thinking ahead to how you might lose a game, you can attempt to put mitigating factors in place to reduce the chance of it ending that way. Obviously there’s frequently going to be a risk of “they high roll and kill all my stuff” but here we’re looking for more match-up specific ways that a game can go terminal for you – non-standard game overs, if you like. Often this is related to the big plays your opponent can pull – returning to the example of Genestealer Cults, letting them bring in deep strikers and wrap units on multiple flanks on turn 2 will often very quickly take a game out of your hands. It can be a bit less specific than that, and lean more on how much force each player is able to bring to bear. If you’re up against a mechanised force with a shooting army, them getting close enough to just consistently ram your shooting units and stop them firing probably locks you out of the game, even if you’re still moving models around for the rest of it.
Strategic Implications
Our answers to these questions plus the picture of their army’s capabilities build our priorities going into the game. 40K is a game of almost infinite variety, but you could do worse as a general statement of what a winning game looks like than “I removed a capability their army needed to win and prevented them from doing the same thing to me”. ITC primary missions are a great way to think about this more specifically. Most armies at least somewhat favour the killing or objective primary, and we can think about what their winning narratives might sound like.
A Tau army heavy on guns might be aiming for “I out-shot them, and killed enough of their objective grabbers early that they couldn’t pull ahead”.
An Ork army planning to flood the board, on the other hand, might say “I grabbed all the objectives early, and tied up their anti-infantry guns for most of the game”.
The specifics might change, but I’d wager a lot of winning games for both factions could be boiled down to these rough descriptions. In both, the army does the thing that scores it points, while removing the capability the opponent needs to fight back. In the Tau’s case, the latter is a case of target priority – the Tau player can be confident they’ll win a gunfight overall thanks to all their big shooting units being surrounded by shield drones, so it’s more meaningful to remove the enemy’s objective secured units. For the Orks they can’t so trivially reach out and kill the things troubling them, so instead they focus on other means of degrading the key capability, here just swamping the units that might shoot them with Ork bodies, perhaps aided by Da Jump.
In an ideal world you can reach out and degrade whatever capability is most troublesome to you, but that won’t always be possible – if your opponent is playing an Expert Crafters Eldar list, for example, it can be very tricky to take out their anti-tank capability without almost tabling them. At that point, you instead need to flip things around and ask whether there’s a capability you can meaningfully attack, and adapt your game plan accordingly. The dedicated Expert Crafters lists tend to be very low on objective secured troops, have a limited number of push threats (some Wraithseers, maybe) and be less efficient at clearing infantry than heavier threats. That means that by removing a relatively small number of their units you can have a big impact on their ability to hold objectives, and they’re less well set up to do the same to you. Even if your army doesn’t go into most matches expecting to try and win the objective game, here killing off their board control units is the easiest level you have to push, so you should adapt your plan and target priority accordingly.
This is also something you can re-evaluate as the game proceeds, and it’s particularly important to do so after a notably bad or great turn from your opponent. If they roll red hot and blow a quarter of your army off the board turn one, it becomes super important to make sure you’re aiming at their army’s weakest point, as you have less killing power and fewer bodies to accomplish stuff with. Conversely, if your opponent moves a bunch of stuff up into engagement range then rolls awfully you might find yourself with a much broader set of realistic goals, and a chance to put them out of the game entirely by eliminating some key threats and giving yourself an insurmountable advantage.
All of this comes back to a simple understanding – you and your opponent are both trying to play through a series of events where you utilise your army’s capabilities to win the game. Your goal when assessing their army is to work out where you can shove a massive wrench into their plans, allowing your preferred version of events to be the one that comes to pass.
Putting This Into Practice
One of the big advantages of talking about this topic is that the bulk of the strategy here happens pre-battle based on army lists alone – so we can actually show how we’d put this into practice by evaluating a few lists.
Obviously there will always be more factors than just what’s in your opponent’s army – what you’re playing can affect how important some capabilties are, and the missions you’re playing will affect your planning. Here, we’re going to carry out our evaluations on the basis that we’re playing a relatively balanced list with a mixture of targets and that we’re playing ITC missions. To gather our test subjects I’ve reached out to the rest of the Goonhammer team, so without further ado let’s bring on our first contestant.
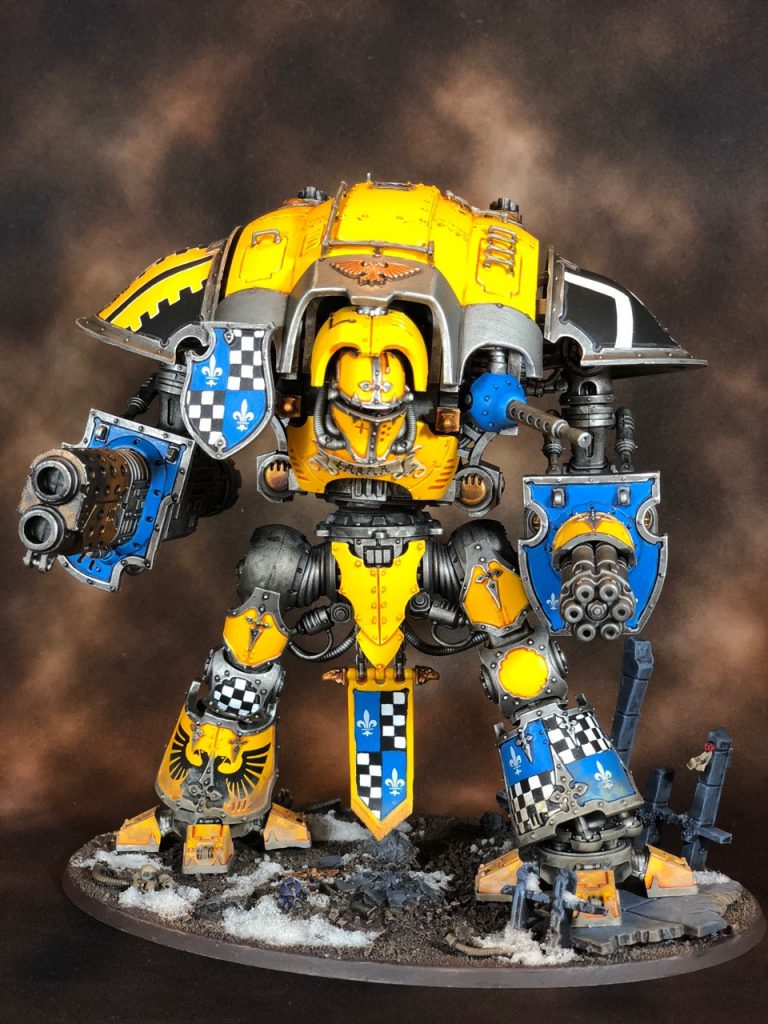
Contestant 1 – Naramyth’s Training Army
The List
Army List - Click to Expand ++ Super-Heavy Detachment +3CP (Imperium – Imperial Knights) [75 PL, 1,404pts] ++ + Configuration + Household Choice: Questor Mechanicus . House Krast: Household Tradition: Cold Fury + Lord of War + Knight Crusader [25 PL, 468pts]: Heavy Stubber, Ironstorm Missile Pod, Thermal Cannon, Titanic Feet . Avenger Gatling Cannon w/ Heavy Flamer: Avenger Gatling Cannon, Heavy Flamer Knight Crusader [25 PL, 468pts]: Heavy Stubber, Ironstorm Missile Pod, Thermal Cannon, Titanic Feet . Avenger Gatling Cannon w/ Heavy Flamer: Avenger Gatling Cannon, Heavy Flamer Knight Crusader [25 PL, 468pts]: Heavy Stubber, Ironstorm Missile Pod, Thermal Cannon, Titanic Feet . Avenger Gatling Cannon w/ Heavy Flamer: Avenger Gatling Cannon, Heavy Flamer ++ Battalion Detachment +5CP (Imperium – Astra Militarum) [17 PL, 183pts] ++ + Configuration + Regimental Doctrine: Astra Millitarum, Storm Troopers + HQ + Tempestor Prime [3 PL, 35pts]: Frag & Krak grenades, Hot-shot Laspistol Tempestor Prime [3 PL, 36pts]: Bolt Pistol, Frag & Krak grenades + Troops + Militarum Tempestus Scions [5 PL, 42pts] . 5x Scion: 5x Frag & Krak grenades, 5x Hot-shot Lasgun . Tempestor: Chainsword, Frag & Krak grenades, Hot-shot Laspistol Militarum Tempestus Scions [3 PL, 35pts] . 4x Scion: 4x Frag & Krak grenades, 4x Hot-shot Lasgun . Tempestor: Chainsword, Frag & Krak grenades, Hot-shot Laspistol Militarum Tempestus Scions [3 PL, 35pts] . 4x Scion: 4x Frag & Krak grenades, 4x Hot-shot Lasgun . Tempestor: Chainsword, Frag & Krak grenades, Hot-shot Laspistol ++ Spearhead Detachment +1CP (Imperium – Adeptus Mechanicus) [25 PL, 413pts] ++ + Configuration + Forge World Choice . Forge World: Graia: Dogma: Refusal to Yield + HQ + Tech-Priest Dominus [7 PL, 80pts]: Macrostubber, Omnissian Axe, Volkite Blaster + Heavy Support + Skorpius Disintegrator [6 PL, 111pts]: Belleros Energy Cannon, Broad Spectrum Data-tether, 3x Cognis Heavy Stubber, Disruptor Missile Launcher Skorpius Disintegrator [6 PL, 111pts]: Belleros Energy Cannon, Broad Spectrum Data-tether, 3x Cognis Heavy Stubber, Disruptor Missile Launcher Skorpius Disintegrator [6 PL, 111pts]: Belleros Energy Cannon, Broad Spectrum Data-tether, 3x Cognis Heavy Stubber, Disruptor Missile Launcher ++ Total: [117 PL, 2,000pts] ++
This army is ideal for this exercise, because this is what Naramyth uses as something of a gatekeeper list for test games with new armies he’s devised. This list isn’t complicated but it does have a lot of power, and thus helps benchmark whether a new brew is worth serious consideration – if it can’t get past this, chances are good that it isn’t going to tear up the metagame.
Capabilities
This list contains a relatively small number of units, so it’s easy to look at all of them.
Knights Crusader are good at killing pretty much any kinds of targets – their thermal lances can take out vehicles while their avenger gatling cannons, missile pods and melee are great against hordes. They’re also very resilient against everything except high-end melee units. Special ability wise, one of them here probably upgrades their AGC to Endless Fury, and the ones in this list are potentially a bit better at both shooting and melee than normal – Knight of the Cog gives them access to re-roll 1s in shooting, while House Krast makes them very dangerous in melee. Finally, they’re also reasonably fast.
Skorpius Disintegrators are a shooting threat that’s best against mid quality vehicles and multi-wound infantry. They also have enough shots to do well against hordes, and can hurt big stuff, but mid-quality stuff is where they shine. They are moderately tough, but will die much faster than knights to anti-vehicle firepower. Finally, they provide the extra capability of being great at picking off stuff hiding out of sight thanks to their energy cannons.
Finally, Scions are an objective holding unit that trades numbers for the ability to pop in out of deep strike, and also thus protect themselves from being wiped off the board early on. Multiple units could present a threat to an enemy objective grabber, but they mostly aren’t dangerous in the numbers present here.
The characters largely relegate to being objective holders/buff providers as well.
What does this add up to at an army level? I think it’s fair to say that overall this list is:
- Good at killing light targets, and Excellent at it if the Knights hit melee. Pretty much everything in it can hurt them bad.,
- Pretty Good at killing heavy targets and Good at it if the knights get into melee range.
- OK at controlling objectives. The Knights provide a strong push threat, and the Scions can hold them for a bit on demand, but the number of bodies in the list is pretty small.
Strategic Implications
Lets go through this properly for our first example and ask our five questions:
- Can I table this army? Maybe yes if we go first, probably not if we go second. A balanced army should, ultimately, be able to pop a Knight a turn when operating at full efficiency, so if you go first you can potentially chew through this, but because the rest of the army is also vehicles you might find yourself without enough tools left to kill them once the knights are dead. Going second, it feels very unlikely that you’ll have the tools to kill all the knights and all the Skorpii after withering a full turn of their fire.
- How can I meaningfully reduce this army’s capabilities? The easiest capability of this army to go after is its ability to contest objectives against ObSec stuff. It only has 16 troop models, and killing them very quickly after they come in should be pretty practical. Assuming your army has any board control at all, that makes killing the Scions a high priority. In terms of reducing its killing power things are much tougher. For heavier units you do have a decent lever – killing a Knight substantially reduces the threat this army presents to your heavier stuff, whereas killing off a Skorpius (or even two) doesn’t save you. For lighter units things are tougher – basically every unit in this army is a threat to them. With that said, the Knights are the biggest threat, meaning killing one is still the best way to reduce this army’s ability to target you. Do bear in mind that thanks to Machine Spirit Resurgent you need to kill a whole Knight to make any difference to this army’s damage output.
- Do I want to go first or second? The answer to this hinges on whether you can reliably kill a whole Knight with the first turn. The Knights can do an appalling amount of damage to pretty much any force with an uncontested turn, and are tough to hide from, so if you can consistently kill one before they get a turn that’s hugely advantageous, and worth going for. However, if you can’t do that you probably want to go second – this army is already weakest at holding objectives, so if you think that’s how you’re going to need to beat it then tilting those scales more towards you is potentially a good choice. Doing that also seriously impairs the utility of the Scions to the list, as it means they can’t drop in and immediately hold an objective at the end of a battle round.
- What does a big play look like from this army? It doesn’t really have one. The Knights are going to move up the board and try and overwhelm you, but it’s very predictable.
- What does “game over” look like? Against almost every type of opposition, the Knights get vastly deadlier once they close to melee range and are active in two phases. I would say that if this army pulls off any turn where they charge with all three knights, that’s going to be game over about 95% of the time – you have allowed them to overwhelm you and probably won’t recover.
What does all of that mean? Well, basically, it means we have two priorities:
- Kill the Scions. This makes the list’s weakest capability even weaker, and is easy to do.
- Completely destroy at least once Knight. Once the Scions are dead, the main way we make a big difference to this lists capabilities is to remove a Knight. This significantly degrades their anti-heavy capability, while avoiding our game over condition of all three Knights charging us. Basically no army can tank this lists offensive capabilities all the way through, so even something like horde Orks that wants to play board control probably needs to aim to focus in and remove a robot.
It also lets us identify what isn’t a priority:
- Killing the Skorpii doesn’t achieve much. The Knights can hurt all of the same targets the Skorpii can and more. On top of that, if the Knights aren’t dealt with they’ll get better over the course of the game as their melee comes online and you run out of tools that can damage them. While they’re easier to kill, you only want to be putting firepower into the Skorpii if:
- You need to secure kill one for ITC.
- You have a lot of good units with no-LOS firepower of your own.
The latter point is a good learning one. If you were packing a bunch of Basilisks on a board with good LOS blocking terrain the Skorpii would suddenly be providing an additional specific capability to this list, being pretty decent at gradually removing T6 stuff hiding behind big rocks. At that point, there suddenly is a big payoff to removing them, because it allows your Basilisks to operate uncontested for the rest of the game. Normally, however, there’s nothing that killing the Skorpii achieves that killing a Knight doesn’t do better.
Overall, that’s a pretty nice example to start off with. This list only really presents us with three choices of targets, but applying our analysis lets us identify that two of them are much, much better choices than the third. Let’s move on to our next contestant.
Contestant 2 – Booley’s Scorpion Intercessors
The List
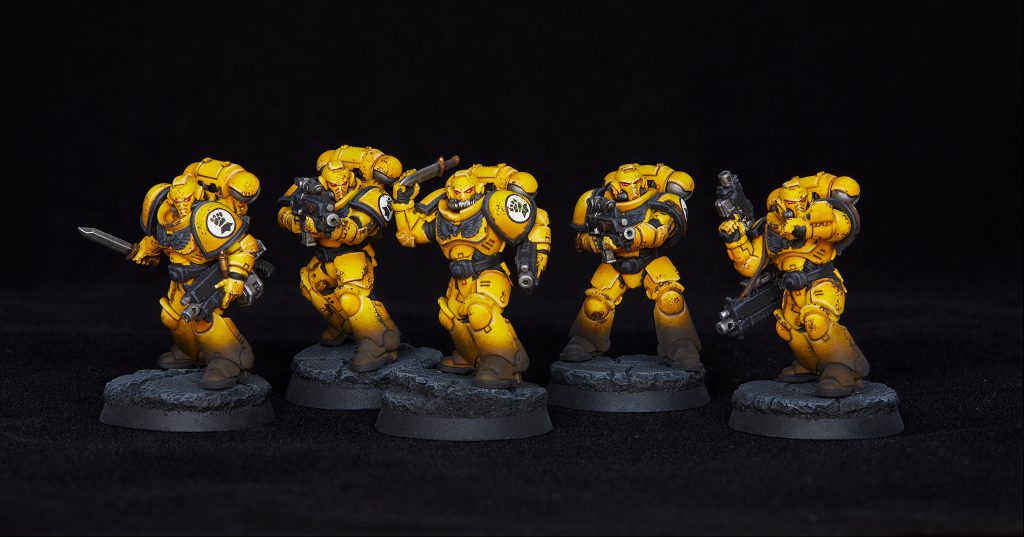
Our next challenger comes from Booley, who has taken time out from extolling the virtues of TANK to come up with a list leveraging the many, many Intercessors he’s painted:
Army List - Click to Expand Red Scorpions Battalion (Imperial Fist Successors – Inheritors of the Primarch) Primaris Chaplain 5x Intercessors w/ stalker bolt rifle, Sergeant w/power fist Red Scorpions Battalion (Imperial Fist Successors – Inheritors of the Primarch) Carab Culn the Risen – Hero of the Chapter – Stubborn Heroism 10x Intercessors w/bolt rifle, Sergeant w/power first Redemptor Dreadnought w/ heavy onslaught Thunderfire Cannon
Primaris Librarian – Tome of Malcador
Primaris Lieutenant
5x Intercessors w/ stalker bolt rifle, Sergeant w/power fist
5x Intercessors w/ stalker bolt rifle, Sergeant w/power fist
Gravis Chapter Master
Techmarine – Warlord – Master of Machines + Hand of Dorn (via Sentinel of Terra)
10x Intercessors w/bolt rifle, Sergeant w/power first
10x Intercessors w/bolt rifle, Sergeant w/power first
Redemptor Dreadnought w/ heavy onslaught
Capabilities
This list is:
- Excellent at killing light targets. Anti-infantry firepower for days, plus the melee punch of Intercessors against hordes.
- Good at controlling objectives. It’s extremely durable on ones it gets to, thanks to 45 Intercessors with a FNP, but doesn’t have the speed to reach out and grab distant ones.
- Mediocre against heavy targets unless the right units get into melee or it gets a full round of shooting in devastator doctrine
Strategic Implications
- Can I table this army? Unless you’re packing massive amounts of D2 firepower, probably not (and even then the FNP makes this dicey). Our last contender probably can – but most armies can’t. This army is enormously durable.
- How can I meaningfully reduce this army’s capabilities? Keep it at a distance. The big chink in this army’s capabilities is that it’s weak against some kinds of targets in the mid game. Turn one the Fist doctrine will let it blow tanks apart, but the guns it wants to do that with are short ranged enough to be evadeable. After that, it’s leaning on melee to close the gap – but it’s pretty slow.
- Do I want to go first or second? Very likely second. Your challenge against this army is that once it starts grabbing objectives it’s tough to shift, but going second substantially reduces the number of units you’ll need to kill to pick up some Hold More points. In addition, you can counter deploy to avoid them leveraging their turn one firepower.
- What does a big play look like from this army? Opening up with the stalker bolt rifles and onslaught gatling cannons on turn one with Legacy of Dorn up. The shooting threat this army presents at the right range turn 1 is a substantial spike above its normal capabilities.
- What does “game over” look like? This army doesn’t really present a non-standard game over threat – even if you let it get the right range turn one, it won’t do game-ending damage. It’s going to grind you out over six turns, not surprise and sucker punch out of nowhere.
The big takeaways from properly assessing this army is that the game is going to be about range and resource management. This list wants to grind you into the dust, and it has the staying power to stand and chew up anything you push towards it. Your best tool for reducing its capabilities is to control what it has the range to do that to. You want to be very careful not to let it get a knockout first turn, and after that your priority targets are basically:
- Whatever is closest to your good stuff.
- The minimum amount of stuff you need to remove to secure Hold More
- The minimum number of kills you need to secure Kill More
Your big advantage in achieving that is that past turn one the threat ranges this army presents to armoured targets are extremely predictable, giving you pretty wide leeway to move your vehicles to where they can do the most damage. If you’re a relatively killy shooting army, with careful management of distance gradually pushing this force back should be pretty practical as long as you’re patient about it and don’t throw yourself into the maw of its guns trying to achieve an unrealistic tabling. This is a marathon, not a sprint, and you want to carefully space out killing the Space Marines to maximise your score according to the format.
It’s a much harder job if you’re a melee force, as you’re going to have to move within this army’s threat range to fight it. In that case you need to lean on its low mobility to dominate the board. You need to push back the entire wave it presents and not let anything lap round the sides – your priority targets become anything that’s threatening to open up an additional flank. If you’re playing a horde melee army there’s a good chance you’re going to lose the attrition war here, so it’s critical that you keep it contained for as many turns as possible so that you can build up a points lead in case you’re later overwhelmed.
This list gives us far more complicated outcomes than the training list, but with a careful analysis of its capabilities we can still take some big strategic implications away – hold them at arms length and cull their numbers.
Contestant 3 – Boon’s Elf Bullshit
The List
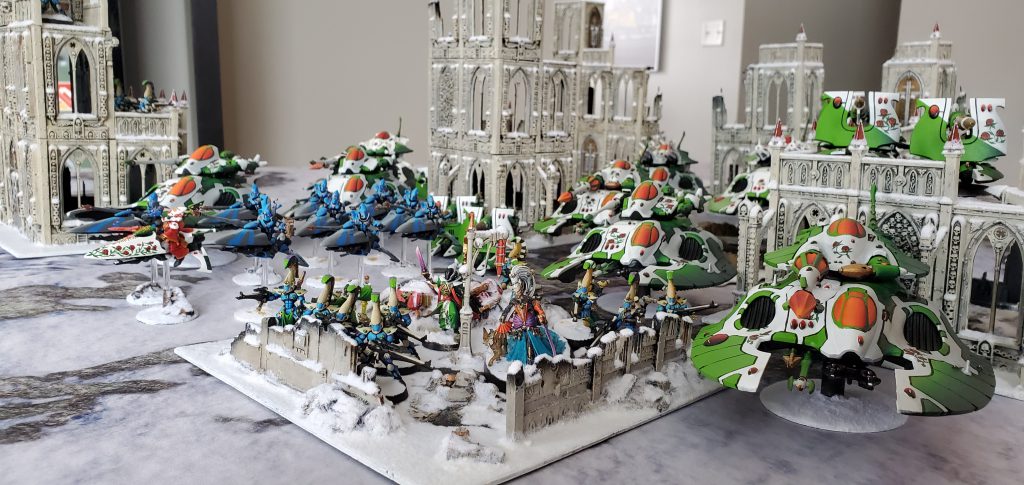
It wouldn’t be a Wings article without some elf nonsense bouncing around, but this one doesn’t come from me. Instead, we’re looking at Boon’s 2nd place list from the Two Rivers GT.
Army List - Click to Expand ++ Battalion Detachment +5CP (Aeldari – Craftworlds) [47 PL, 8CP, 809pts] ++ Craftworld Attribute + HQ + Farseer Skyrunner [7 PL, 132pts]: 0. Smite, Shuriken Pistol, Twin Shuriken Catapult, Witchblade Spiritseer [3 PL, 55pts]: 0. Smite, 6: Seer of the Shifting Vector, Craftworlds Warlord, Shuriken Pistol + Troops + Dire Avengers [3 PL, 58pts] Dire Avengers [3 PL, 55pts] Dire Avengers [3 PL, 55pts] + Fast Attack + Shining Spears [14 PL, 242pts] Shining Spears [14 PL, 212pts] ++ Spearhead Detachment +1CP (Aeldari – Craftworlds) [58 PL, 1CP, 769pts] ++ Craftworld Attribute + HQ + Yvraine [6 PL, 115pts] + Fast Attack + Hornets [9 PL, 105pts] Hornets [9 PL, 105pts] + Heavy Support + Night Spinner [8 PL, 117pts]: Crystal Targeting Matrix, Twin Shuriken Catapult Night Spinner [8 PL, 117pts]: Crystal Targeting Matrix, Twin Shuriken Catapult Support Weapons [9 PL, 105pts] Support Weapons [9 PL, 105pts] ++ Spearhead Detachment +1CP (Aeldari – Craftworlds) [31 PL, 1CP, 422pts] ++ Craftworld Attribute + HQ + Warlock Skyrunner [4 PL, 62pts]: 0. Smite, Shuriken Pistol, Twin Shuriken Catapult, Witchblade + Heavy Support + Falcon [9 PL, 120pts]: Crystal Targeting Matrix, Starcannon, Twin Shuriken Catapult Falcon [9 PL, 120pts]: Crystal Targeting Matrix, Starcannon, Twin Shuriken Catapult Falcon [9 PL, 120pts]: Crystal Targeting Matrix, Starcannon, Twin Shuriken Catapult ++ Total: [136 PL, 10CP, 2,000pts] ++
. *Custom Craftworld*: Expert Crafters, Masterful Shots
. Faolchu’s Wing
. 4x Dire Avenger: 4x Avenger Shuriken Catapult
. Dire Avenger Exarch: Two Avenger Shuriken Catapults
. . Exarch Power: Avenging Strikes
. 4x Dire Avenger: 4x Avenger Shuriken Catapult
. Dire Avenger Exarch: Avenger Shuriken Catapult
. . Exarch Power: Avenging Strikes
. 4x Dire Avenger: 4x Avenger Shuriken Catapult
. Dire Avenger Exarch: Avenger Shuriken Catapult
. . Exarch Power: Avenging Strikes
. 7x Shining Spear: 7x Laser Lance, 7x Twin Shuriken Catapult
. Shining Spear Exarch: Star Lance, Twin Shuriken Catapult
. . Exarch Power: Swooping Dive
. 6x Shining Spear: 6x Laser Lance, 6x Twin Shuriken Catapult
. Shining Spear Exarch: Star Lance, Twin Shuriken Catapult
. . Exarch Power: Skilled Rider
. *Custom Craftworld*: Expert Crafters, Masterful Shots
. Hornet: Crystal Targeting Matrix, 2x Hornet Pulse Laser
. Hornet: Crystal Targeting Matrix, 2x Hornet Pulse Laser
. Support Weapon: Vibro Cannon
. Support Weapon: Vibro Cannon
. Support Weapon: Vibro Cannon
. Support Weapon: Vibro Cannon
. Support Weapon: Vibro Cannon
. Support Weapon: Vibro Cannon
. *Custom Craftworld*: Expert Crafters, Masterful Shots
Capabilities
This list is:
- Excellent at killing heavy targets. The acumulated Expert Crafters boosted firepower will dunk them at range, the Spears can also pick things up close, and there’s also a decent MW output.
- Good at killing light targets – as long as the Spears are alive. Their shurikens will make a hideous mess of hordes. The rest of the army is only OK at this.
- OK at holding objectives. It’s fast and has a good push thread in the Spears, but the Dire Avengers will die easily and if the Spears die it doesn’t have much follow through.
Strategic Implications
- Can I table this army? Yes. If you can push past the Shining Spears everything else can be chewed up.
- How can I meaningfully reduce this army’s capabilities? Remove the Dire Avengers and kill and/or manage the impact of the Spears. They’re the big source of anti-infantry and the best push threat this army has. Unfortunately this might be easier said than done, as they’re extremely resilient. Other than that, this army only has a few things that ignore LOS, so using terrain to your advantage reduces its damage.
- Do I want to go first or second? Usually first. This army has plenty of bite sized chunks of things you can remove that meaningfully reduce its firepower, and going first also gives you more time to position against deep striking Spears.
- What does a big play look like from this army? Beyond its hefty turn one firepower, the big plays from this list come from the Spears. The Exarch powers clue you in that one unit likely starts on-board while the other deep strikes. The two big things this list can do are to Quicken the on-board squad into your face turn one or to slam both squads into different parts of your army on turn two. Either of these can put you a long way onto the back foot.
- What does “game over” look like? Shining Spears are insanely deadly and also aren’t trivial to shift – you need either a powerful melee counterpunch, high volume mid-quality shooting or mortal wound output to remove them. If you let them use their mobility to remove your sources of these before you can bring them to bear, they’ll probably just take you apart over the rest of the game.
This list is, fundamentally, all about the Shining Spears. They may only be about a quarter of the points, but they’re both the list’s best anti-horde tool, the nastiest push threat and the thing that threatens to end the game early if you let them get out of control. The rest of the army is good (and the Dire Avengers are another angle you can attack) but with the Spears gone it becomes distinctly less than the sum of its parts, maybe capable of blowing an armour-heavy army off the board but crumbling to other archetypes. In addition, if you can punk out the Spears early this list is much more consistently able to be tabled than the other ones we’ve looked at – so if you think you have a realistic plan for a brutal dunk on the bikers, do that first.
Spears, of course, are a bastard nightmare to deal with, which is why lists like this can so successfully lean on them. They’re fast, can buff up to absurd invulnerable saves with Protect, and can come out of Deep Strike with big charge boosts. You need to identify what in your list is going to be best at preventing the Spears from living their best life and plan your game around doing so. If you have a powerful melee threat of your own, hold it just behind your front lines so the Spears can’t get first strike on it, but will eat a counterattack if they come at you. If you have lots of psykers, again hold them in reserve ready to Smite a unit down when they commit. Alternatively, if you don’t have any great tools to fight them use every screening trick in the book to minimise how much damage they can do, and bring taking out those Dire Avengers even higher up your priority list in order to give you an angle to attack the game on.
Mobile, durable threats are some of the nastiest things in the game to deal with, and the important lesson this last list shows us is that there are some units that are simply so high-impact that they cannot be ignored – if they’re there you have to plan your whole game around them.
Wrap Up
This went a bit deeper and more theoretical than some of our articles do, so we hope it was still useful to you. Evaluating army lists is the kind of skill that’s pretty evergreen, and while some of the exact criteria would change, you could comfortably take similar methods to what we’ve outlined here across to other games like Age of Sigmar.
This is an area I especially love thinking about, so if you have any comments or suggestions please do get in touch either via the comments or at contact@goonhammer.com.
