
You may recall our article from last year where we discussed owning your own 3D printer, which included an overview of how to approach resin printing. We wanted to revisit this topic and spend a little more time talking about how to get the best out of your printer, from selecting models right through to cleaning your print.
Before we start, let’s take a quick run through some of the software and tools that we’ll be using to help us with our prints:
Software
- PrusaSlicer – what we’ll be using to add supports to our model initially
- Chitubox – the slicer which generates instructions for our printer
- Photon File Validator – a program to check our instructions for islands, more on this later
Tools
- A resin printer (naturally!)
- Resin (in this example I’m using water washable)
- Spatula style paint scraper
- Broad bladed scalpel – optional and be careful
- Tupperware pickle jar
- Cleaning solution (I’m using water but you may need IPA or an alternative like Denatured Alcohol)
- Kitchen towels or shop towels
- UV curing station (I’ll provide a link and my thoughts on a homemade one)
- UV safety glasses
- Nitrile gloves
Mike’s workflow – complex object
Lots of simpler 3D models may not need supports, and many paid models may come pre-supported. However there’s plenty of models out there that have neither pre-supported options or obvious simple orientations for easy print, so I spent quite a while figuring out a work flow that worked for me and I’m still learning as I go. One of the earliest lessons I learned was the Chitubox’s hollowing was only okay, as if often left artefacts, so I start by hollowing with Meshmixer. You can just use Chitubox or PrusaSlicer for this step but I prefer Meshmixer, as it allows you to do a couple of other things like check surfaces.
Start by importing your STL in to Meshmixer and then Edit > Generate Face Groups. This clarifies where we’ll be locating drainage holes, because once you’ve hollowed your model all the lovely resin needs somewhere to go! Next up, click Hollow and begin the configuration. I tend to select an Offset Distance, which is your shell thickness, of between 1.5mm and 2mm. If the model allows I’ll add two well spaced drainage holes of at least radius 2mm, or a single hole of at least radius 3mm. The bigger the hole the better as it makes clean up easier and saves you resin!
Once we’re done hollowing, it’s time to export the model so open up File > Export, then save your newly hollowed model as an STL. We’re going to keep going to easier and automated route here and open up PrusaSlicer next, as this is going to take care of most of our supports. Open up PrusaSlicer and load up the model you just finished hollowing out then auto-orient it and check if it’s sane. You’ll want an orientation that minimises the number of supports on visible detail. It can take a little while the run the auto-orient so you once you have a feel for what looks right it’s often easier to do it yourself.
Auto-generate your supports at around 75% and do a quick check for islands, which are areas where it may initially print without being attached to the model or a support. Once you’ve happy, export the model again using the option “Export plate as STL including supports”.
It’s finally time to slice that model up! Assuming you’re working with a printer that uses Chitubox, fire it up and load the model. Once it’s loaded, slice and save. You now have your model ready for checking in Photon File Validator, which well tell you on a layer by layer basis where any errors may occur. It’ll also do it’s best to fix the model for you! With the model loaded, hit Fix and then Auto Fix and let it run.
You’ll like have some areas that couldn’t be fixed and you have a few options at this point. You could manually delete the islands in Photon File Validator, assuming they’re single layer issues or fairly small details (remember each layer is 0.05mm at default settings so you won’t miss a few pixels). If it’s a large detail that’s somehow been left unsupported I’d actually recommend going all the way back to PrusaSlicer and adding your additional supports there. I ran in to issue with multiple anti-aliasing passes and doing everything in Chitubox where pieces of the model ended up obliterated.
Once you’ve managed to find all your islands and fix them one way or another, Photon File Validator will show as green and tell you there’s no more errors! So save your file, and at this point you’ll be able to review your print settings one last time. Assuming you’re happy with the settings and your model it’s error free there’s only one step left, and that’s actually printing it! I’m going to assume you can load the model to your printer and know what you’re doing at this point.
Resin post processing
There are a number of commercial options in this space, and they’ve review well. I went down the home made route with mine and bought a resealable pickle jar for my washing. I’m currently using water washable resin so a quick dunk and shake takes the resin off.
For curing I followed this guide to make my own curing station, it’s not fancy but it definitely does the job which is a huge benefit in a country that isn’t guaranteed sunshine year round!
Mike’s updated workflow
I’ve been wanting to revisit this article since picking up Lychee Slicer, which has somewhat revolutionised my approach to supporting and printing models. I always felt my original process was quite involved, with multiple applications performing various functions. Lychee has it all. It gives you the option of a one click solution for orientation, supports and adding a raft. You’ll still need to hollow the model and add drainage holes yourself but it has you covered everywhere else. Once you’ve had it add supports for you, you can use the built in island detector to check if it’s missed anything. Overall it’s a huge time saving and in the series of images below I’ll take you through my new process.
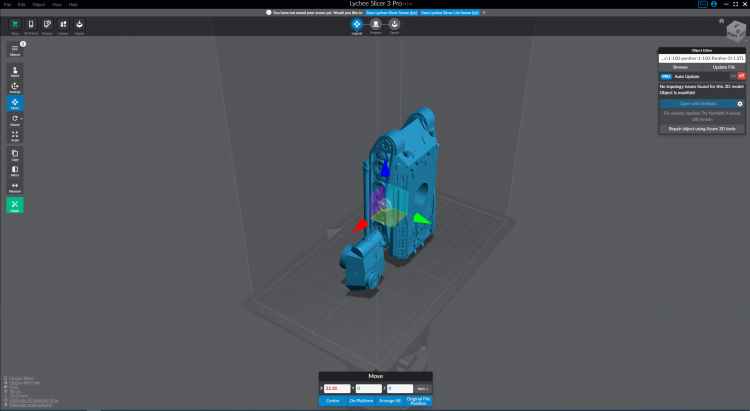
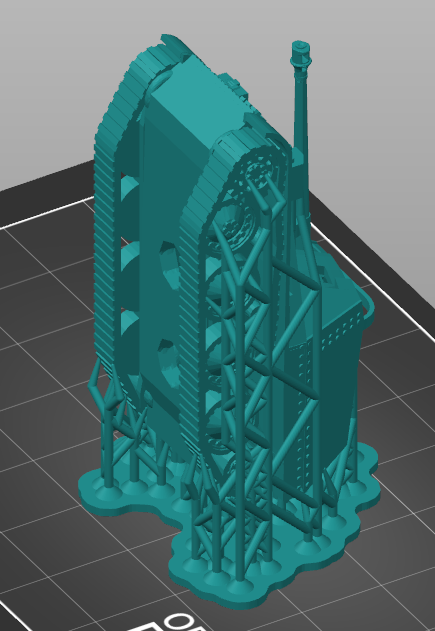
Here’s the basic layout view for Lychee Slicer, which lets you make the usual adjustments to a models orientation and position on the bed. There’s also a nifty clone feature which will copy a model, supports and all, then auto-arrange them for you.

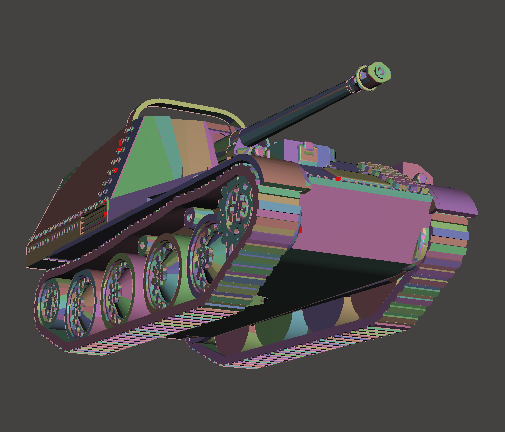
The magic menu! I like printing my tanks upright because I dislike having to support the treads and it’s generally easier this way. As you can see there’s options for orientation, supports, bracing, support optimisation and adding a raft. Once I’ve run this I’ll generally find the lower point and add some heavy and medium supports manually.
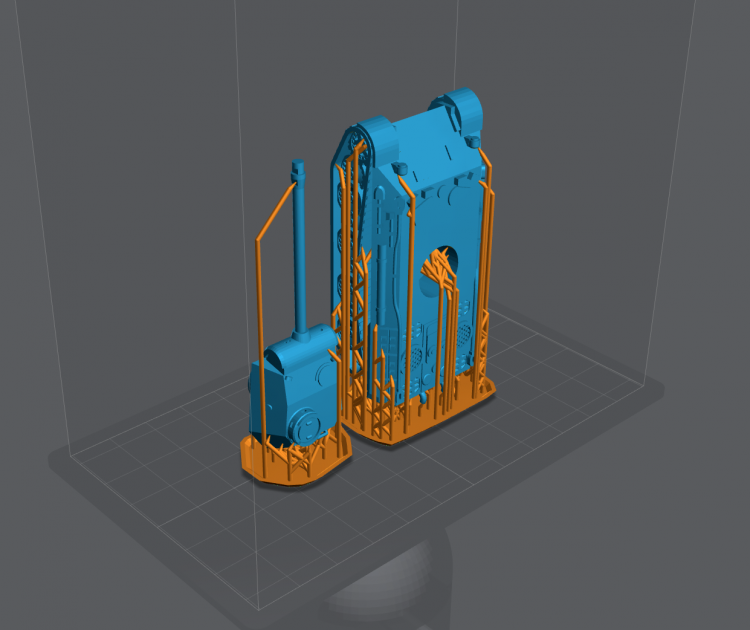
And the results of our magic! The supports don’t look too bad and running the island detector at detailed only found 12 additional areas to support on the hull, so not too bad for five minutes work and all in the same software suite. At this point the project is basically ready to print and Lychee lets you configure and save resin settings, like any other slicer. If you’re a pro user there’s a number of additional features, the most useful of which I’ve found to be manually adjusting supports at different points instead of just the contact point position.
After getting by the the homemade clean and cure solution for a while, I decided to upgrade to an Elegoo Mercury Plus and it’s been working great for me. It’s a simpler process than multiple pickle jars and the homemade curing chamber but it’s obviously more expensive a solution.
Ryolnir’s Workflow with the AnyCubic Wash & Cure Machine
I’m fairly new when it comes to 3D printing but I’ve learned a LOT in a short time. I spent a ton of time doing research on exactly which 3D printer best suited me, and taking the advice from my good friend Mark, went with the EPAX X1. The EPAX X1 is quite similar to other printers like the Elegoo Mars or Anycubic Photon except it allows me to be incredibly stupid and has a “self-leveling+pre-leveled” printing plate. Sweet! So far, so good. The only issues with printing so far have been personal error and by using a filter and pouring the resin back into the bottle, cleaning the build plate with some isopropyl alcohol, I was able to get things going again ASAP.
The EPAX X1 recently had a hardware refresh (it is now technically the EPAX X1-N) which came with new firmware, forcing users to use a proprietary Chitubox format, .ctb for printing. This is mostly fine as Chitubox is easy to use, but until things like PrusaSlicer support the format, it can be a pain using an STL in one program and having to slice it in another. There are many guides online for how to bring a print from Chitubox, to PrusaSlicer, to the Photon File Validator, so I won’t cover that here, but rest assured it can be a journey! I am still incredibly happy with my purchase, and it will only get easier as .ctb is supported by more software.
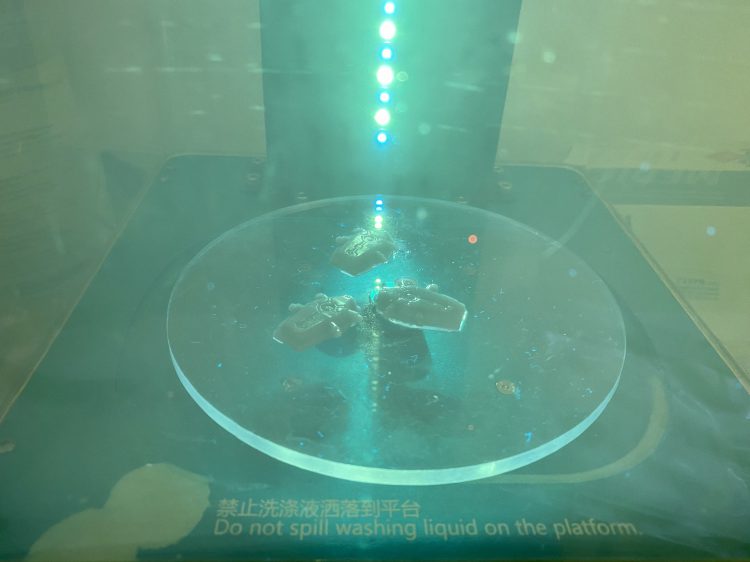
The other thing I purchased that has been a huge game changer for my experience was the AnyCubic All-in-one Wash & Print Machine. A relatively premium product for the process at $219 MSRP, the station does exactly what it sounds like – it reduces my overall printing process to two devices. When a print is finished, I use a soft plastic scraper to remove it from the printing plate (WHILE WEARING GLOVES) and place it into the washing station’s metal wire basket, submerging it into a tub of cleaning solution. I currently fill the tub with the popular industrial cleaner La’s Totally Awesome (common for stripping minis) as isopropyl alcohol is very hard to come by at this time in the US.
Once submerged, you simply place the cover on the station, pick a time, and press start. There is an automated whirlpool effect that helps clean the excess uncured resin off of your prints, and then alternates to spin the other way for a more thorough cleaning. The timer allows you to set it at 2, 4, or 6 minute cycles. I personally run it for 6 & 4 back to back, just to be sure. Once the cycles are finished, I very briefly dunk the parts in a small bit of isopropyl alcohol (or similar) just to ensure there is no loose resin before curing. You could also probably just dunk it back in the La’s Totally Awesome without having to have a separate bowl. I should just probably do that…
OK! So now it’s washed, but let’s see this baby cure! (Once you clip off the supports using your favorite hobby knife/nippers of course…) To cure, you move aside the cleaning tub and add the curing plate onto the device. I’ve found this to be a bit of a tight fit so just make sure you have it lined up properly. Once it’s on, you can set your prints down on the plate and cover them with the UV-resistant casing again. From here, you can only again pick a time, switch the machine to “Cure” and let it rip! The station automatically rotates the curing plate so that the UV lights can evenly cure your entire print. The time you’ll want to use will vary and you will likely have to set it to cure for multiple sessions, just be careful that your prints don’t start to brown or otherwise. Curing time is a bit of a learned technique – you’ll have to feel it out as you print various sized things.
Overall, this Wash & Cure machine has been such a huge help into my journey in the hobby. I have great respect for the home solution my fellow 3D printing hobbyists have come up with, but I ultimately wanted to keep my total component count down greatly and have a station I could leave out at all hours without worrying about it. If you’re looking for either a way to level up your process and make sure you’re “doing it right” or just a simple all-in-one solution as a person new to 3D printing, I highly recommend you look into it!
Pendulin’s Workflow
I’m pretty clueless when it comes to 3D printing, and to 3D models, and to most things really. However, I tripped and stumbled my way through learning a workflow that’s given me good results.
The first project I wanted to work on was some custom tokens for Kill Team. I wanted resin arrows that I could place next to my specialists, with their specialism name printed on it. This way, the token doesn’t mess with the base size (like those tokens all over the internet that wrap around base itself), nor is a permanent thing like painting “COMBAT” on the rim of the base.
First step was sculpting the 3D model. Sculpting? Drawing? Modeling? I don’t know the term. I am bad at this, but I managed to watch enough Blender Tutorials on YouTube to create this.
Once I had the STL, I needed to align it and place supports. For that, I use PrusaSlicer.
Now for these tokens, aligning and supporting it is kind of a trivial case. The entire back of it is perfectly flat and there are no overhanging supports. This makes printing it while laying perfectly flat optimal. However, in every other stl I’ve printed, that’s not been the case. So let’s pretend we actually need to align it and place supports.
To do that, I launch PrusaSlice, and make sure I have “default SLA” selected in the Printer dropdown. I’m sure I could fiddle with these settings, but again, I am bad at things. Next, I drop the model in, right click it, and hit “Optimize orientation.” Using the advanced power of Maths, it rotates the model until a SLA printer will have minimum issues with it.
For adding supports, I then click the “SLA Support Points [L]” button on the left (the one with the hexagon that has supports), and click “Auto-generate points”. Again, you can mess with the settings here, but again I don’t because I’m bad at this.
Once that’s done, I export it as an STL, and load it into Chitubox for slicing. Fortunately, I own a common SLA printer, the AnyCubic Photon, so Chitubox already has printer settings available for it. I make sure those are selected (and turn on antialiasing!). Then I drop the model or models in, make sure it all fits the print tray, and slice away.
Then the boring steps you can read about anywhere. Ensure you have proper ventilation, safety glasses and gloves, level the printer, fill the vat with liquid resin, load the file, click print, make sure you know how to clean the resin vat safely afterwards, blah blah blah.
Back to interesting things, once printed, these models will be covered in unwanted liquid resin. If you don’t properly clean and post-cure them, then you’ll wind up with blurry details and models that feel closer to rubber than to plastic.
So first thing after a print finishes, I take the print and drop it in a mason jar with isopropyl alcohol. Giving it a gentle shake, I let it sit in there for a couple minutes. I then transfer it to a second mason jar with much cleaner isopropyl alcohol, and give it another shake. For these two jars, I don’t dump the isopropyl I just reuse it. I’m sure it’ll get dirty enough at some point where this is no longer possible, but I’m like 20-30 models deep in printing and it still seems fine.
Next I toss the model into a small ziplock bag, pour in some isopropyl, and throw the whole thing into my ultrasonic cleaner. I think I paid $25 for it on Amazon, so it wasn’t anything too pricey. Fill the vat of the cleaner up with water, and let it run for a couple minutes. Once that’s finished, I’m fairly confident all the liquid resin has been removed, so I give them a quick rinse under the sink. Then toss them straight into the ultrasonic cleaner (this time without the bag of isopropyl alcohol), for another couple minutes of scrubbing.
Next up is removing some of the supports. I leave enough of them on so that the model can remain standing upright on the supports, but I’ll remove as many as I can. I want to make sure the post-cure can actually reach the model itself and I’m not just post-curing supports.
Then the final step, the fun one.
When these models finish printing, the resin is still soft. You can easily scratch it with a fingernail if you aren’t paying attention. To harden this up, you need to post-cure it. While you can buy dedicated post-cure booths, I went with this.
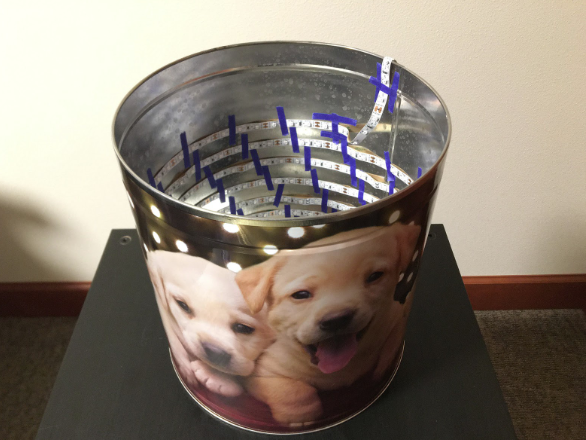
That’s one of those popcorn tins you see pop up in all the stores during the holidays. I got one of those, a 33 foot strip of 395-405nm LEDs, and a cheap solar powered rotating display stand. Total cost was like $20.
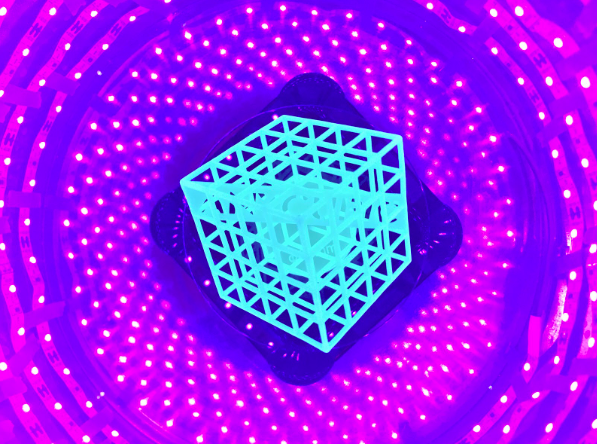
I put the display stand in the tin, model on the display stand, close the tin lid, and turn it on. It highly varies for how long I’ll let it stay in there, but somewhere between 5 and 20 minutes.
NOTE: These lights might be harmful to your eyes, so don’t stare at them. Wear protective glasses or just leave it off until it’s sealed closed. I’m not a doctor, I’m just a guy that wants functional eyeballs, so why risk something like this. It’s not worth damaging your sight just so that you can look at something for a while. I took this photo with my camera held at arm’s-length, not with me staring down into it
Once cured, I then trim off the rest of the supports. Sometimes the model needs a little bit of sanding or gap-filler to fix support holes, but I’ve found that PrusaSlicer does a fantastic job of placing supports to minimize this work.
Depending on if the model feels done at this point, I might toss it back into the cure booth for a while. This is something you just have to learn for yourself, as each type of resin will take different amounts of time to cure, and behave differently at various curing durations. Play around with this to find what works for you.
Once the model is finished, I prime and paint them as I would any other model. As for the Kill Team tokens, well, they turned out perfectly!
Wrap-up
That’s it for our wander through the world of resin printing – we hope this is helpful! As ever, if you have any feedback or comments, then hit us up on Facebook or Twitter, or e-mail us at contact@goonhammer.com.
