
It’s not controversial to say that Kill Team has been a bit of a mixed bag. With four major expansions (Rogue Trader, Commanders, Arena, and Elites) in a little under a year, plus more than two dozen faction and killzone box sets introducing new tactics, and monthly White Dwarf articles that introduce new factions and rules, Kill Team has become the most fractured game set in the Warhammer 40,000 universe.
Released in December 2019, the Kill Team Annual provides players with an updated resource that covers all of these bases and then some. If you’ve been grousing about having to buy a specific faction box to get tactics or missing an issue of White Dwarf, this book collects nearly everything released for Kill Team over the past year, including all the tactics and new faction content. It also has updated points, datasheets, and tactics for every faction and collects this all in one book, making it a must-buy for any serious Kill Team player.
There’s a ton going on here, and a lot of changes to the game’s factions that will have a massive impact on balance and play in 2020. In our review we’ll cover not just the book’s contents but also the impact these adjustments have on the factions and the game. In Part 1 today, we’re going to talk about the general content of the book and what you need to know, as well as the updates and new content for the Chaos factions in Kill Team. Then in Parts 2, and 3, we’ll talk about the updates and new content for the Imperial and Xenos factions in the game, respectively, and what they mean for competitive play.
So grab a glass of whatever your preferred drink is, dig in, and get comfy. Because this is gonna be a long one.
Table of Contents
What’s in the Book
This section has a rundown of what the book holds, for review purposes. We can use this to go quickly over stuff like “all this was reprinted from X.”
Open Play Content
The Kill Team Annual introduces Flexible Doctrines for Open Play, rules for creating your own Specialisms for Kill Team characters. This functionally lets you mix and match whatever specialist abilities and Tactics you want into your own tree, so feel free to create incredibly broken trees that avoid all of the bad or useless abilities that may gunk up some of the game’s specialisms coughSCOUTcough.
This ends up just being a listing of all of the existing specialist tactics and abilities in the core rulebook, with no real guidelines for how to mix them up, and offers nothing in the way of new abilities for players to consider. It’s relatively disappointing, but we can appreciate the effort to have something for Open Play.
Narrative Play Content
The Narrative Play section of the Annual collects all of the Narrative Missions from the expansions (Rogue Trader, Commanders, and Elites), and the kill team boxes (such as Krogskull’s Boyz and Starn’s Disciples) into a single location. These missions are a mixed bag, usually replacing a specific mission in the Narrative Missions list of the Kill Team core rulebook. They tend to be tilted a bit in their faction’s favor.
What’s missing from these (oddly) are the Kill Zone missions, which are nowhere to be found (likewise for the Kill Zone tactics and other content).
Matched Play Content
The largest section of the book, the Matched Play section compiles an insane amount of published information for Kill Team from 2019. Let’s run through the contents:
Matched Play Missions
The Matched Play section of the Annual starts with a reprinting of all of the Matched Play missions from each of the Kill Team expansions and boxed sets. These give players a lot more options for Matched Play but note that, like the Narrative Play missions, they’re each geared toward a single faction, requiring that one player be playing that faction, and typically giving that player the greatest Strategic Advantage. As far as missions go, these are kind of all over the place, depending on when its boxed set was released. Some require Commanders, others give one side a small advantage. Most of them are narratively interesting, but I’m not sure how balanced they are.
All The Points Values, With Updates
Every points value in the game has been printed in one big, easy-to-access section of the book. If you were sick of checking across two books to build your lists, this can be a real help. Most values haven’t changed, but a few have been updated — we’ll note those in our Faction Reviews, below.
New Tactics
In the Tactics and Psychic Powers section of the book, it lays out the all Tactics available to every single faction, with updated CP costs. This includes tactics that were printed in box sets once and haven’t been seen since, so if you missed your chance to get a copy of the Death Denied tactic, now’s your chance. Though note that it now costs 3 CP to use — several tactics have received updated wording or costs, which we’ll outline below.
New Factions and Datasheets
Finally, the Annual includes reprinted (and in some cases, updated) rules for additional Kill Team factions that were first published this year in White Dwarf. This includes the Blackstone Fortress Servants of the Abyss faction, Chaos Daemons, and Kroot Mercenaries, plus rules for the good guys in Blackstone Fortress. It’s also got updated datasheets for Chaos Space Marines and all the Vanguard Space Marine units.
What’s Not In The Book
As we’ve mentioned, the big missing content from the book are the missions, tactics, and content around Kill Zones, which are notable omissions. There’s also a dearth of Arena content – everything in the matched play section focuses on Matched Play, with little direct mention of Arena. As big fans of the Arena gameplay, we’d have liked to see something around Arena in the book, but perhaps it came out too late in the year for there to be content to include.
Also, while Inquisitor Eisenhorn’s rules are in the book, his datasheet is nowhere to be found, another big miss given how important he is as a Commander to many kill teams.
Faction Reviews: Chaos
Look, Chaos needed help in Kill Team. The Heretic Astartes faction never received the squad box treatment, despite the release of a new multi-part plastic Chaos Space Marines kit, and was stuck with weapon options from the kit released in 2004. Likewise, neither of the Elites boxes for Death Guard or Thousand Sons gave their factions new Tactics to work with either, just reprinting the ones they’d previously had access to. So we were delighted to see that Chaos got help across the board in the Kill Team Annual, with new Tactics, a new datasheet for Heretic Astartes, and an entire faction in the form of reprinted Chaos Daemons from White Dwarf. But was it enough? Let’s see.
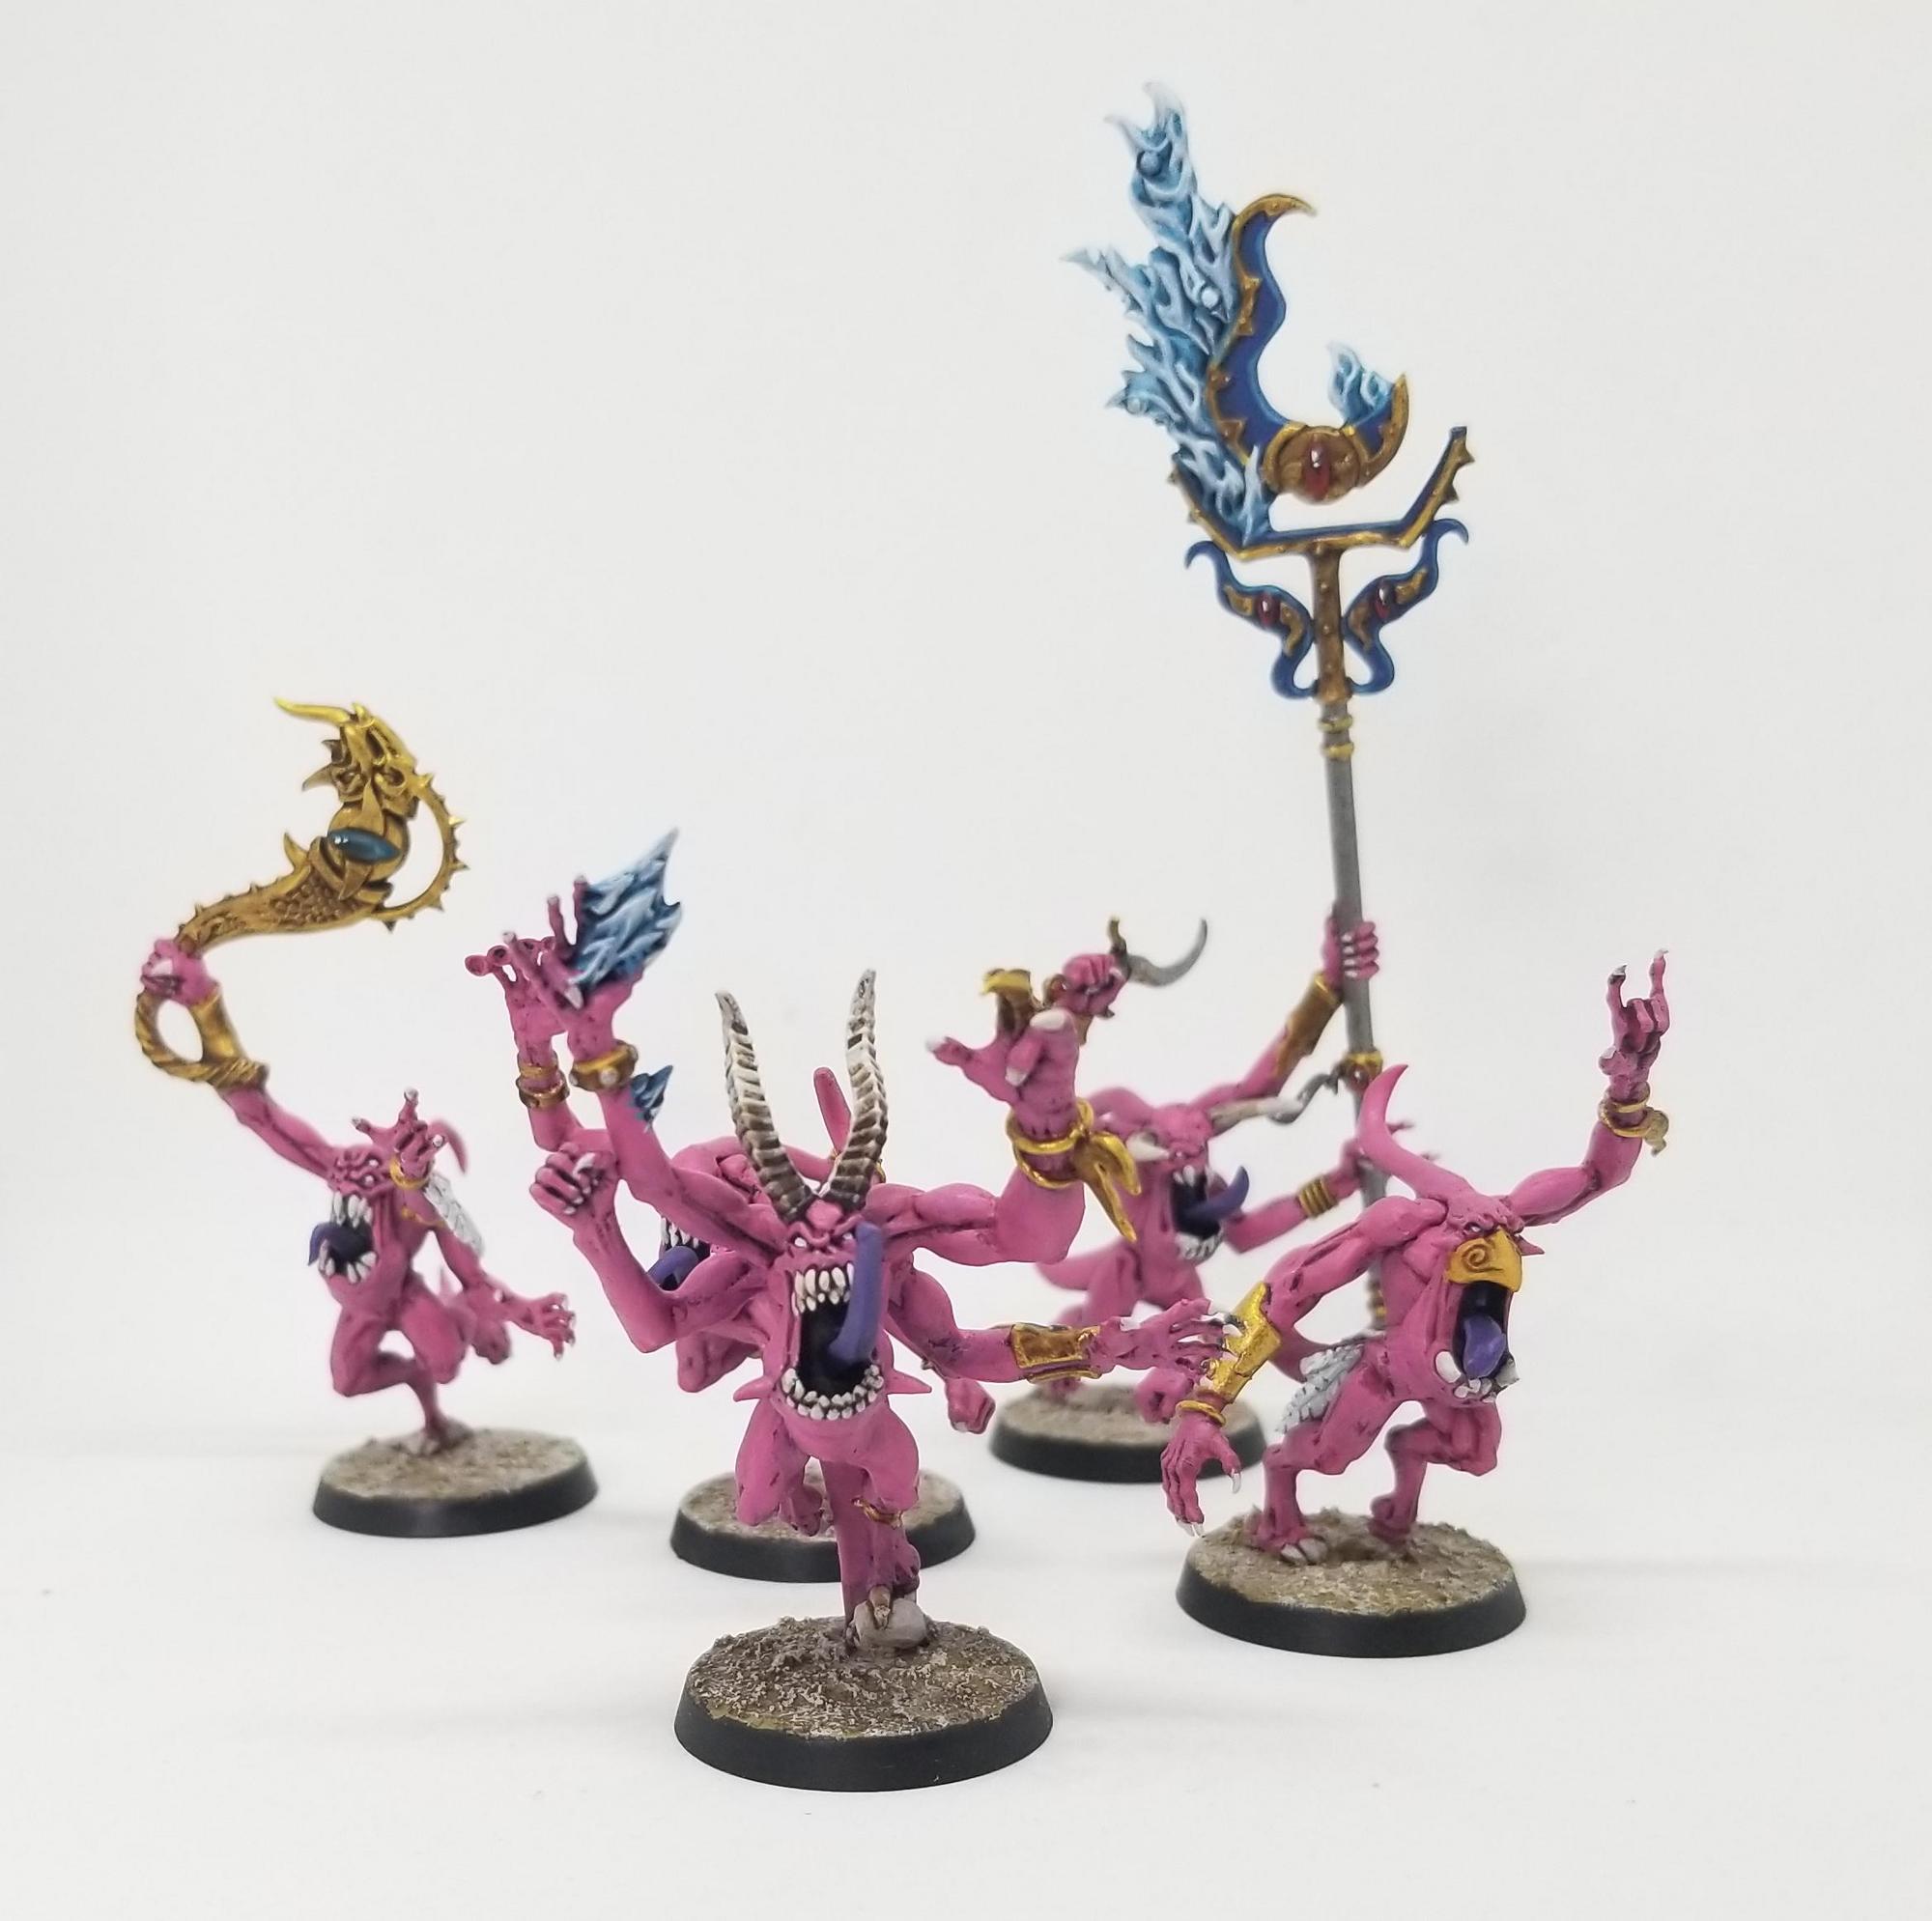
Chaos Daemons
Chaos Daemon kill teams were first introduced in White Dwarf a few months ago and overall they’re an interesting faction, albeit one that doesn’t quite feel fully fleshed out. They consist of the four basic troop daemons – Bloodletters, Horrors, Plaguebeaerers, and Daemonettes, though you can take champions, banners, and instruments for each as well.
Units
Each of the Daemons is specialized and competent at a role, and there’s no incentive or reason to go mono-god so you’ll be taking mixed teams. All Daemons have a 5+ invulnerable save, which makes them reasonably tough for the cost, and they can take an Instrument (+1 to charge or advance for same god Daemons within 6” of the icon) and an Icon (unique for every god). The Instruments and icon bearers give you access to four different options for a Comms specialist.
Bloodletters
The close combat killer daemons. They’re T3 with no special defensive or ranged abilities, so you need to do the work to set up charges, but they are blenders in melee. They come with power swords that do 2 damage on a 6 to wound and if they charge they get +1S and +1A. They fight like a melee-equipped veteran Marine for half the points. Their icon lets Bloodletters re-roll charges.
Daemonettes
Weaker than Bloodletters in melee but they have an additional inch of movement and they always fight as if they charged. They can be good against some of the armies where Bloodletters are overkill or you can’t guarantee a charge, like Harlequins or Orks. Fighting as if they charged changes a lot of combat math against aggressive teams. Their Icon lets them inflict mortal wounds on a 6 to wound.
Horrors
Probably the most unique Daemon. They lack a powerful melee attack, but they have Psychic powers and an 18” S3 assault 2 ranged attack. Their gimmick is that when a Pink Horror is reduced to 0 wounds it doesn’t take an injury roll, it’s just removed from play and replaced with two Blue Horrors, and when a Blue Horror dies it’s just replaced with a Pair of Brimstone Horrors. In order to fully clear a Pink Horror out you need to kill 5 models, which can be difficult even if they get progressively more and more useless, and the increase in model count can make them a nightmare to deal with when they’re holding an objective. Horror Icon Bearers have a chance to do a mortal wound to a nearby enemy.
Plaguebearers
These Nurgly Bois are the tanks of the Daemon army. They’re only mediocre in melee with a single S4 attack that re-rolls 1’s to wound, but they’re 3 points less than a Marine scout and at T4 with a 5+ invulnerable save and a 5+ Disgustingly Resilient roll they’re quite a bit tougher. They can tarpit a lot of armies and help you play the objective game. Their Icon Bearer reduces the leadership of nearby enemies.
Tactics
Being new, Chaos Daemons get the short end of the stick with regard to Tactics.
- Reality Blinks (3 CP) – When a non-Horror Daemon is taken out of action roll a dice. On a 4+ that model is restored to 1 wound. They don’t take a flesh wound or go out of action, but 3 CP is a lot to spend on a 50/50. D
- Pestilential Aura (1 CP) – Pick a Plaguebearer. If it’s obscured, enemy attacks get an additional -1 to hit. This fits in with what Plaguebearers do and is reasonably priced. A
- Deadly Dance (1 CP) – A Daemonette rolls a 3d6 to charge. This lets it comfortably charge 10+ inches. A
- Mutating Fire (1 CP) – A Horror’s shooting attack becomes AP-3. The attack’s strength isn’t high enough to make great use of it but for 1 CP it’s a reasonable effect. B
- Cleaving Blow (1 CP) – A Bloodletter’s melee weapon gains an additional point of damage until the end of the Fight Phase. Multi-damage weapons are much more likely to take enemies out of action and a combat specc’d Blood Reaper with this active can threaten elite models. A
- Warp-spawned Terror (2 CP) – Add 1 to nerve tests for enemy models within 3” of any Daemons from your Kill Team. This is conditional but if you have injured enemies in melee range it can help you chain-route the enemy team. C
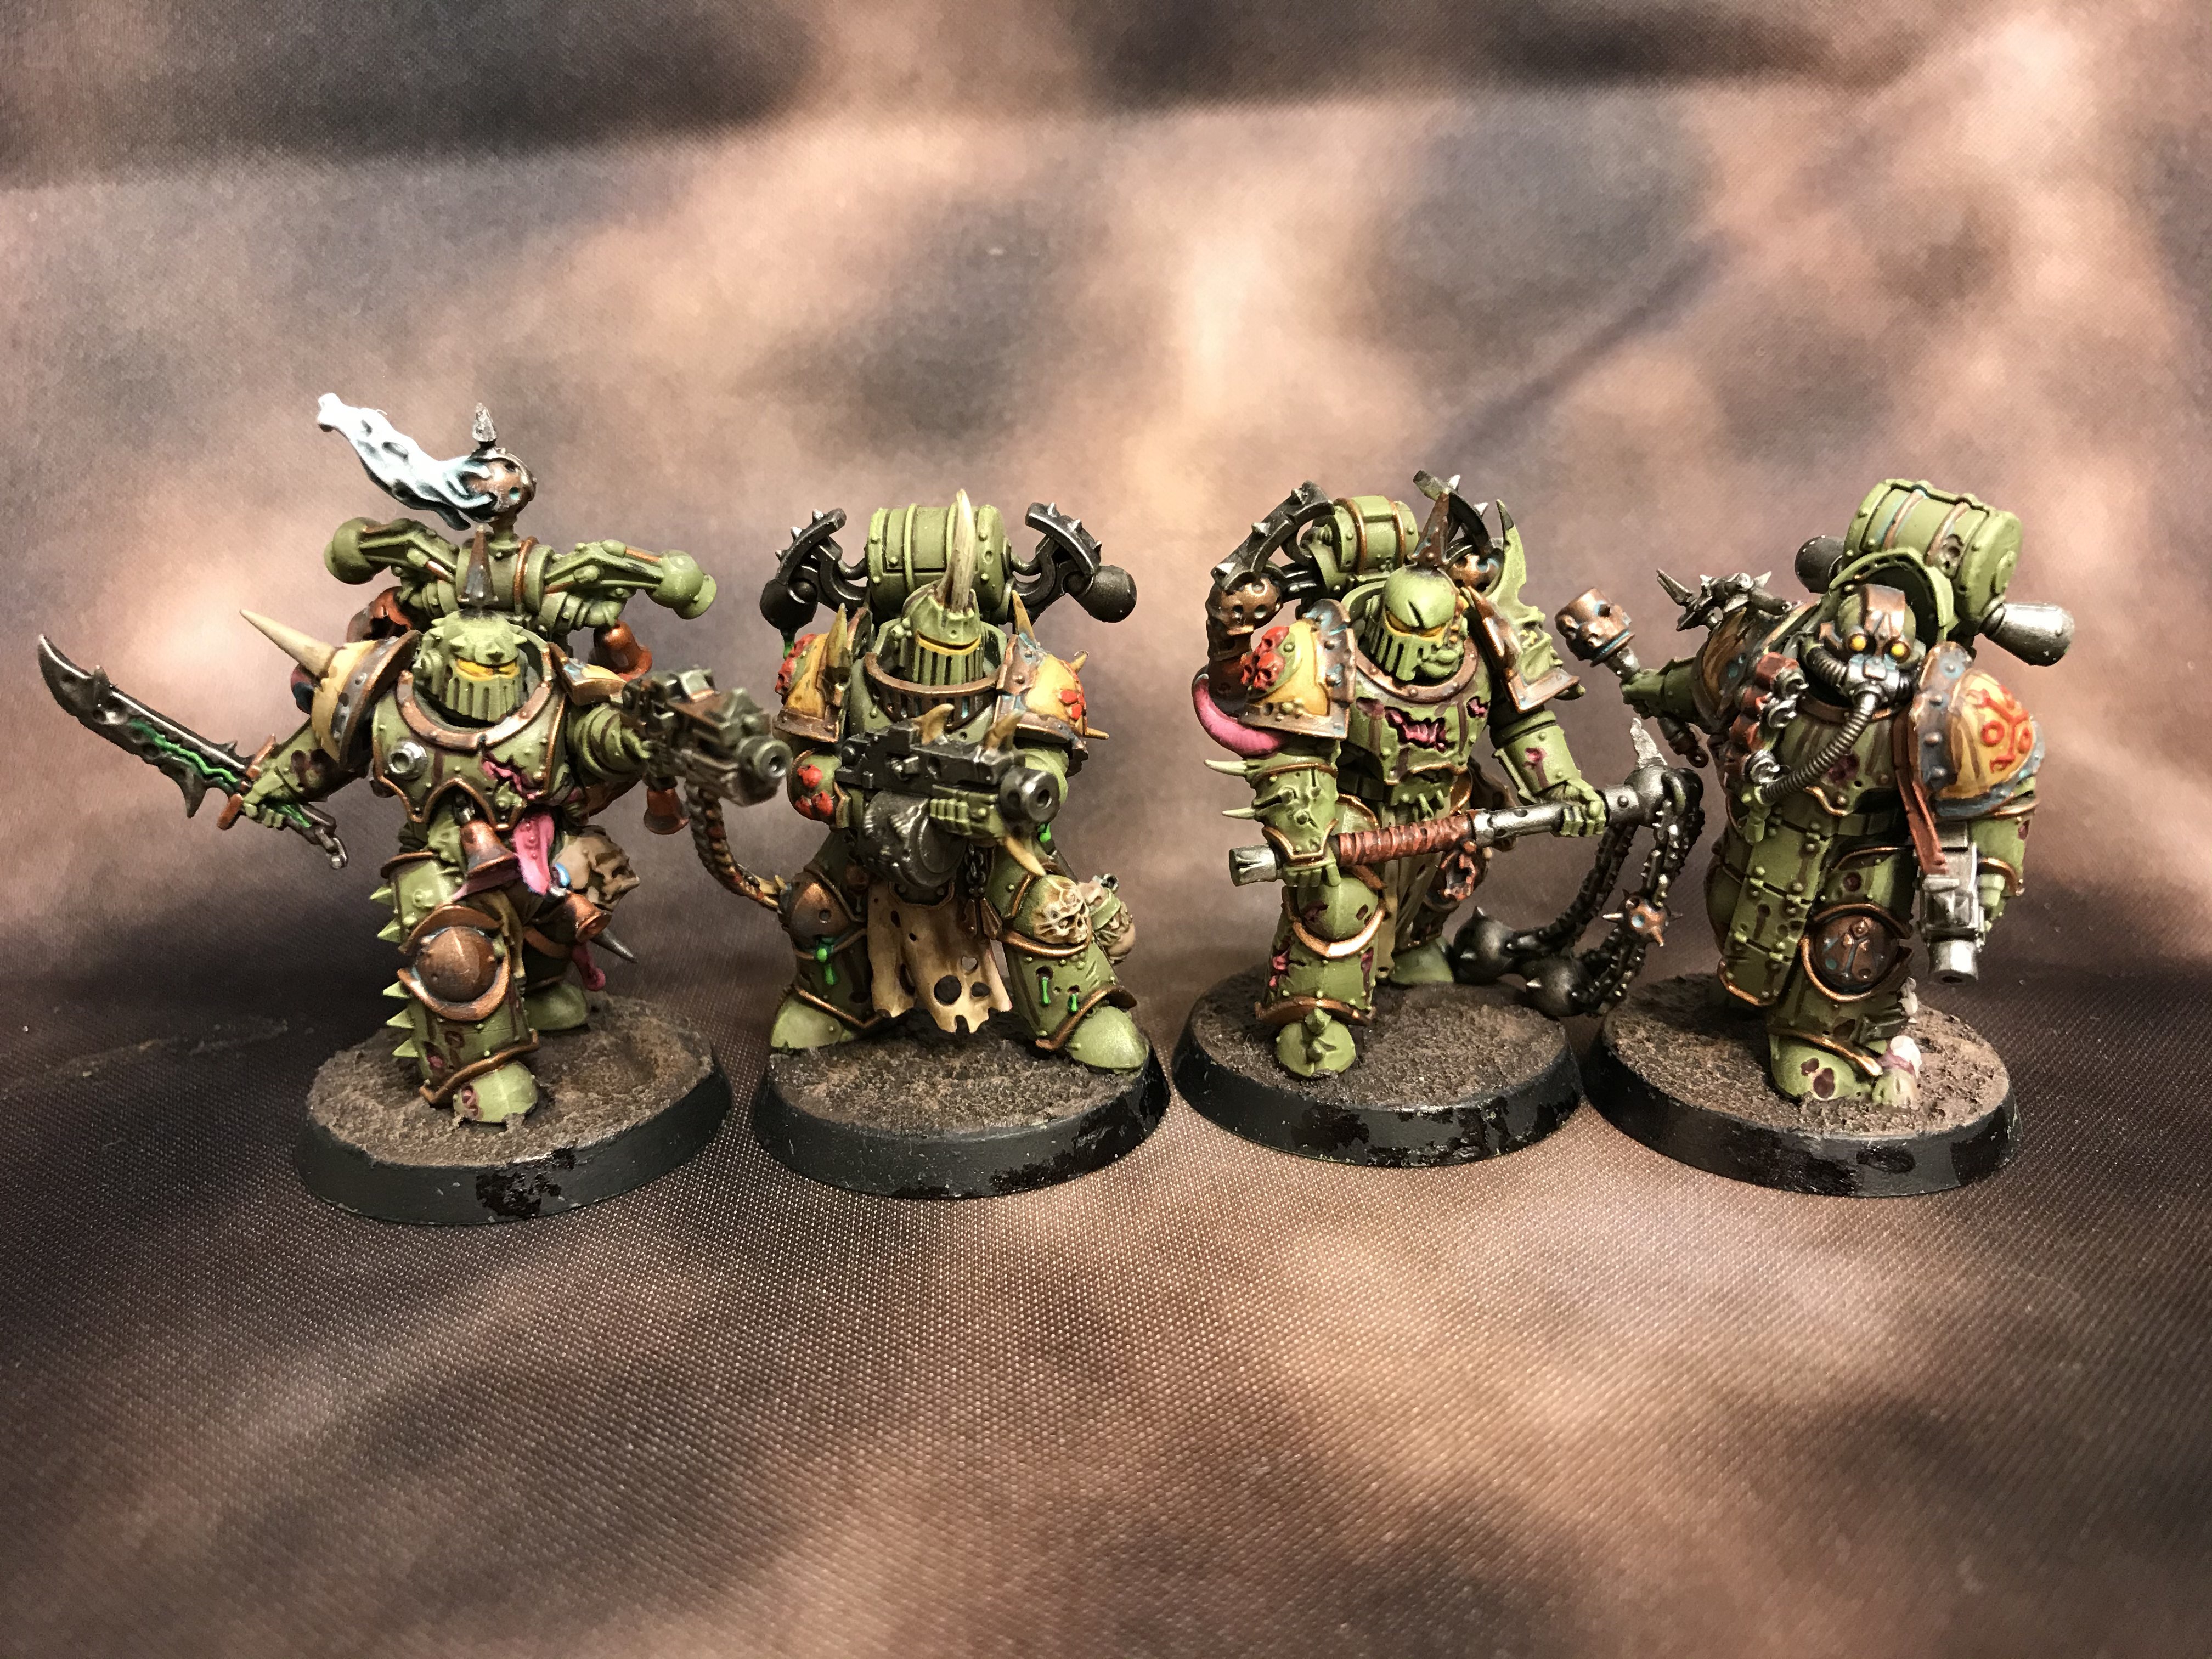
Death Guard
Points-wise nothing changed from the existing books, but the Death Guard got a few new tactics to help give them an extra boost. We’ve already covered Death Guard Kill Teams in depth in our faction tactics article, so click here to check that out.
New Tactics
- Death March (1 CP) – Use at the start of the Movement phase to give all of the models in you kill team +2” Movement for a turn, but they can’t Fall Back, Advance, or charge. Although the Death Guard need all the Movement they can get, most of the time they ignore the penalties for Advancing anyways, and you’ve probably given them a Blight Launcher. The end result is something that might be useful if you need to get off some extra bolter shots, but falls short of being useful because of the extra restrictions. C+
- Leaking Brain-Fluid (1 CP) – Use when a Poxwalker from your kill team suffers a flesh wound, and then they don’t have to take Nerve tests for the rest of the battle. I love the flavor here, and it can be helpful for keeping one of the buggers around. B
- The Three-Eyed Fly (3 CP) – Use at the start of the turn if you control exactly 3 objectives to get +1 to your Disgustingly Resilient rolls while you’re within 3” of each objective. Expensive and incredibly situational but insanely powerful when it goes off. But as Death Guard, controlling three objectives seems like a tall order. B-
- Grandfather’s Tally (1 CP) – Use at the start of a Shooting or Fight phase, if exactly 7 enemy models have been killed this game. For the rest of the turn you can re-roll failed wound rolls. Very strong, but also very situational and won’t even be possible against elite teams. C+
- Grasping Tentacles (1 CP) – Use at the start of the Movement phase to pick a non-shaken model within 1” of an enemy model, and prevent a single enemy model within 1” from Falling Back this turn. A great way to both protect yourself and ensure something you started fighting last turn doesn’t survive. A
- Inured to Pain (2 CP) – Use when a model on your team takes a Flesh Wound. They ignore any penalties to hit from flesh wounds for the rest of the battle. Helpful if you think you might be tanking multiple flesh wounds on a particular model, but given that you’re already ignoring the first flesh wound thanks to Transhuman Physiology, but the time you get the second one, you’ve spent 2 CP to mitigate something that might not matter when your opponent rolls a 3+ or 4+ on the injury result. C
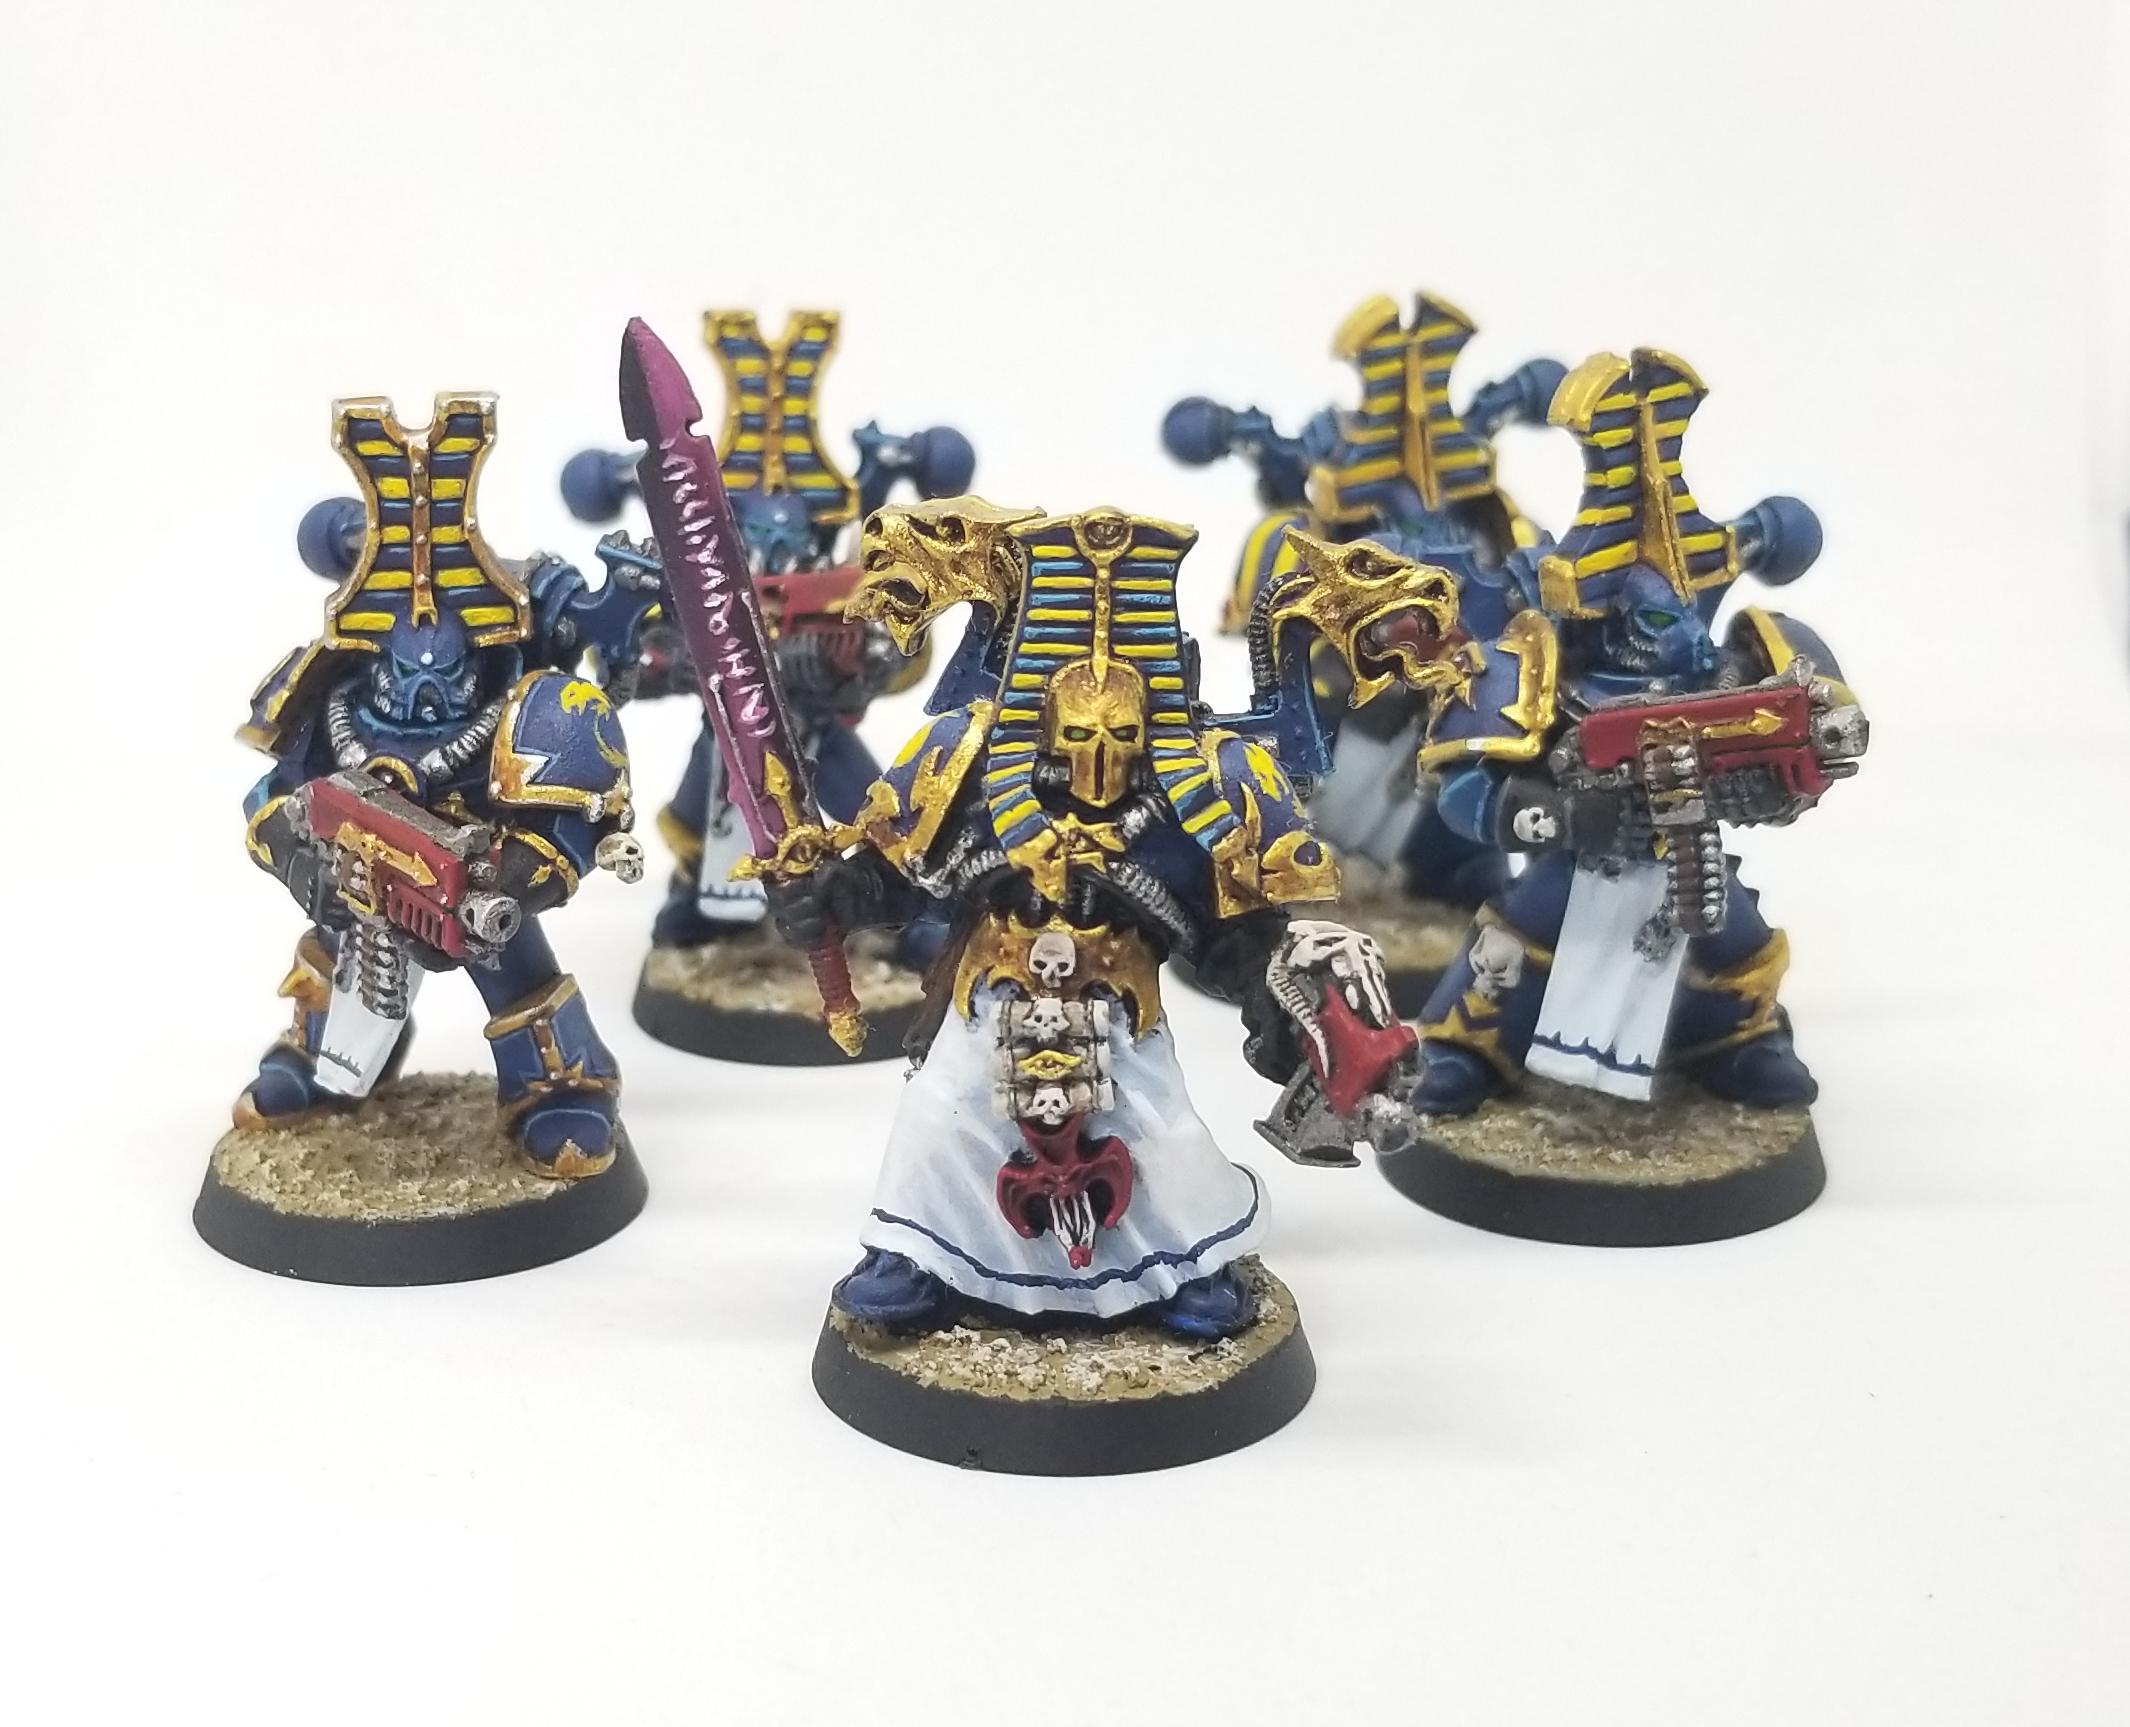
Heretic Astartes
Having gone this far without a box set (with custom tactics) or an update to their basic squads to reflect their new range following the Codex release in April, Chaos Space Marines were due for an update. We’ve covered Chaos Space Marines before in our in-depth review here, but the annual gives the Chaos Space Marines unit a new datasheet, which is a mixed bag:
- A single Chaos Space Marine Gunner can now take a heavy bolter, missile launcher (5), or autocannon (3 points). The missile launcher is a bit pricey (though versatile), but the autocannon is very reasonably priced, and as a S7 AP-1, 2-damage weapon with 48” range, it’s worth consideration on a Sniper, Demolitions, or Heavy specialist.
- Aspiring Champions can now take Chainaxes (1 point) or Power Mauls (1 point). Note that power mauls and chainaxes cost the same points-wise, but power mauls are S+2 and so better 100% of the time.
- On the “What the hell are you thinking?” side of things, they didn’t add the Combat Specialism as an option to the Chaos Space Marine datasheet, so now Chaos Space Marines have lost that specialism previously granted in an FAQ. Thanks, guys.
New Tactics
Additionally, Heretic Astartes kill teams get a bunch of new Tactics to play with. This is a massive improvement, because they functionally only had five before this release, and only two of them were any good. The annual gives them a whopping 11 new Tactics, including one that’s potentially a game-changer for Chaos Space Marines. They also give you a reason to run marks other than Khorne. Let’s run through the new ones:
- Temptations of Power (1 CP) – Use at the start of a battle round to give all of the models in your team that don’t have a mark a single mark of your choosing. This would be a lot more useful if it last until the end of the battle but as is, it’s very situational. D
- Blessed With Resilience (1 CP) – Use at the start of the Movement phase to give a NURGLE model +1 Toughness for the rest of the turn. Very helpful for making a key model tougher to kill and a compelling reason to use the Nurgle keyword on your Plasma gun or Autocannon gunners. A
- Endless Cacophony (2 CP) – Use in the shooting phase to shoot a second time with a model with the SLAANESH keyword. This is amazingly good. The only thing holding it back is the Chaos armory but autocannons, plasma guns, and combi-weapons make fine targets for it. A+
- Grisly Trophy (1 CP) – Use in the Fight phase when your Commander kills an enemy model. For the rest of the phase you can re-roll wound rolls for friendly models within 6” of your commander. This is solid in games of Commander. B
- Desperate Pact (1 CP) – Use at the start of your Movement phase to do 1 mortal wound to your Commander. If they don’t die from this, they get +1 Strength, Toughness, and Attacks for the rest of the battle. You can only do this once. This a fine trade-off to use at the start of the battle when you’re likely to survive. B
- The Price of Heresy (3 CP) – Use in the morale phase to kill a Chaos Cultist within 3” of an unshaken Chaos Space Marine. Every other Cultist on your team that can see that Chaos Space Marine automatically passes its Nerve tests. This is a great way to keep a Cultist-heavy kill team (so, all of them) in line with minimal cost, if you can use it to get rid of an injured Cultist. The LOS specification gives it a lot of value in non-Arena games. The biggest downside is how expensive it is, but it can keep you around after a real bad turn. B
- Path to Glory (3 CP) – Use when your level 1/2/3 Commander kills an enemy commander. Your Commander immediately goes up a level and gets a new ability. This is absurdly expensive for a power that you only get to use when you’ve essentially already won. Hell, half the Commander missions end when a Commander dies, so you can’t even use this. Not a fan. D
- Daemonic Attack (3 CP) – Use when the enemy suffers a perils to give them 3 mortal wounds instead of D3. This is straight nasty and will kill most non-commander psykers. It’s pricey and situational, but when it comes up, you’ll want ot use this 100% of the time. B+
- Let the Galaxy Burn! (2 CP) – Use in the shooting phase to give models within 3” of an objective of your choice the ability to re-roll wound rolls of 1. Strong in standard games, especially if you can stack multiple models on an objective and combos well with a Cultist flamer. Shame it won’t help you with Overwatch though, and does nothing for you in some Arena missions. B+
- Guided By Fate (1 CP) – Use at the start of the Movement phase to give a TZEENTCH model a 5+ invulnerable save. Like Blessed with Resilience, this is a great addition that finally gives you a reason to use marks other than Khorne. Helpful when you know a meltagun or Frag Cannon might be around the corner. A
Servants of the Abyss
by Tom “Zero” Song
Servants have finally made their way from Beta rules and WD articles into a published book and gotten a few new toys to boot. As this faction was introduced as an entry point for Blackstone Fortress players into Kill Team, the focus seems to be steering toward that product line. Datasheets for existing models have stayed the same though the models are capped at Max sizes to reflect the BSF box contents. We also see rules for the Traitor Command box: The Traitor Commissar, the Chaos Orgryn, and a new Tactic, Into Them You Dogs! which reflects the new commander’s ability to keep his forces in line through violence and intimidation.
We’ll cover these guys in greater detail in a future KTT article, but for now we’ve got some quick hits on the faction:
Units
For an add-on faction, Servants of the Abyss have more options than several of the game’s official factions. The variety gives them a lot to work with. The new additions to the Kill Team Annual are the Traitor Commissar, an alternate Commander for the group, and the Chaos Ogryn, a devastating mauler in close combat.
Chaos Beastman
One of the three core horde options the Servants of the Abyss. Beastmen are two points more than a guardsman but are stronger, tougher, and hit harder when they charge into combat. They make fine Combat and Zealot specialists, and work well as front-line assault units.
Traitor Guardsman
Essentially a less versatile version of loyalist Guardsmen, Traitor Guard give up a few ranged weapon options for the ability to take melee weapons and pistols. Your gunners can take flamers or krak grenades, and the Sergeant’s main value is being your team’s cheap Leader Specialist option. You’ll want to have a way to keep these guys from failing morale tests during a game, which is where Black Legionnaires can be helpful.
Negavolt Cultists
Negavolt Cultists can be surprisingly tough and can hit pretty hard in melee, but they’re also expensive for what you get. Another fanatical melee unit you can throw headlong at opponents. They get a bit of a nerf in the Annual now that they’re Max 4 on a Kill Team. It matches the number in the BSF box, but it’s a bummer if you were running more.
Cultists of the Abyss
Like Chaos Cultists from the Heretic Astartes faction, but with much better weapon options and the ability to bring higher AP shooting to the table thanks to the fact they all have frag and krak grenades for some reason. They can also take a grenade launcher or heavy stubber, and the champion can give you another Leader option that isn’t terribly expensive, either.
Rogue Psyker
We were hoping Rogue Psykers might come down in cost in the Annual but they’re still wildly overpriced for what they bring to the table. They’re more expensive than Grey Knights despite being much more fragile and being more likely to roll Perils. While it’s an interesting option for Servants of the Abyss to have multiple regular psykers on a roster, they just aren’t worth it.
Black Legionnaire
Basically a Chaos Space Marine with a boltgun and no Legion Trait and no weapon options. They can take the Combat and Zealot options (unlike their Heretic Astartes cousins, who just lost the ability again, hilariously), but can’t take melee weapons so it’s not great. Their primary value is that they can give nearby chaff units the ability to re-roll Nerve tests, keeping your other units in line. You probably won’t need more than one on your team at a time.
Chaos Ogryn
At first blush, the Ogryn seems a bit overcosted for most standard games — with the model count changes and the fact that his Bodyguard buffs a nearby Traitor Commissar it would seem that despite being an infantry unit he will likely only find a home in Commanders games. Then again, he hits like a truck and Servants of the Abyss will have extra points to spend on things so maybe he’ll be worth it in 150-point games.
Cultist Firebrand
A solid option for a cheap commander, but only has access to the Ferocity and Strength specialisms. His Hellfire Torch is pretty nasty, though. Too bad his other ability is a suicide effect that will lose you the game in most Commander missions.
Obsidius Mallex
One of the faction’s three Commander options, and potentially the worst of them due to his cost and the fact that he only has access to the Fortitude Specialism. Hits like a freight train with his Thunder Hammer, though, and can absolutely wreck enemy Commanders in melee combat.
Traitor Commissar
With his meatshield at his side, the commissar seems like a solid add for Commanders games, especially for the growing number of lists which more heavily fields traitor guard over other infantry units. He’s also only 20 points in his lowest form, making him one of the cheapest Commanders in the game and the cheapest Servants of the Abyss have access to by a country mile.
Tactics
- Servants of the Long War (1 CP) – Same as it is for Heretic Astartes. Which is to say, not that great. C
- Expendable Minions (1 CP) – Allows you to tank a hit for one of your HERETIC ASTARTES kill team models with a non-ASTARTES model within 1″ in the Shooting phase, transferring the the attack wholesale. Helpful for protecting your more expensive models, particularly when they’re on an objective. B+
- Blackstone Trinket (2 CP) – Use when an enemy PSYKER casts while within 6″ of a model in your Kill Team. Roll a D6 and on a 4+ the power is negated. This is expensive but bonkers good against Psykers and will be money against Grey Knights and Thousand Sons. A
- Fully Charged (2 CP) – Works in the Shooting phase to give two Negavolt Cultists within 1″ of each other +1 to their invulnerable saves for a round. Was more useful before Negavolt Cultists were capped, but Negavolt Cultists with a 4+ Invulnerable save and a 5+ feel no pain save are pretty tough to dislodge. B
- Into Them You Dogs! (2 CP) – Use in the Morale phase to have your Traitor Commissar kill a nearby traitor guardsman or cultist to get re-rolls on your break test and to automatically pass any nerve tests. Will be helpful when you’re going horde-big. B
Thousand Sons
Magnus’ boys saw no changes to their loadouts or points costs, but like the other Chaos factions, did see the addition of some solid new stratagems. The biggest of these is likely to be Webway Infiltration, which we’re already fantasizing about combining with Warpflamers, though Guided By the Past also has legs.
- Vengeance for Prospero (1 CP) – Use at the start of the Fight phase to cause Death to the False Emperor to trigger on a 4+ instead of a 6+ against Space Wolves models. Which will definitely, totally happen and not be something you forget about. D
- Guided by the Past (1 CP) – Use when you shoot or fight with a model to re-roll hit rolls with a single model against enemy models that have already shot or fought this phase. A useful bonus if you’re up against a bunch of readied models, or forced to fight last. Re-rolling hits is a solid bonus and your models are tough enough to tank a few hits before responding. B+
- Guided by the Future (1 CP) – Like guided by the Past, only even more useful because you can use it to target units that haven’t been chosen to fight yet. Even better, you can use both to get all the re-rolls you need. A
- Webway Infiltration (2 CP) – Use at the end of the Movement models to take up to 3 units from your kill team in Reserves and put them anywhere on the battlefield more than 5” away from enemies and within 2” of each other. This is an immensely useful ability to have, basically giving you additional Teleport Strike for non-Terminator models. This is money for dropping an important unit where you need it. A
- Ritual Slaughter (1 CP) – Use in the shooting/fight phase, if exactly 9 enemy models have been taken out of action during the battle. You get to re-roll failed wound rolls for your team for the reset of the phase. Very powerful, but this is never going to come up, and when it does, you’ll have already wiped out 9 models on your opponent’s kill team so this won’t matter in the slightest. F
- Power of the Cabal (2 CP) – Use when you’re about to attempt a psychic test to get +1 for each unshaken friendly model within 3”. More helpful for Commanders who have access to the Discipline of Tzeentch, but otherwise it could be useful for pushing out boosted Psybolts. B
- Boon of Tzeentch (1 CP) – Used in the psychic phase when you roll a 9 for a psychic test with your Commander. You get to manifest an additional power. This will rarely come up, and it’s only active in games where you have a Commander. C
- Soul Flare (2 CP) – Use when a Commander Psyker from your kill team eats it. Before they go, roll a D6 for each enemy unit within 9” of them. On a 6, the model you roll for suffers a mortal wound. Pretty big radius to spite your enemies with, but again only useful in Commander, where you’ve usually lost when your commander dies. C
- Empyric Translocation (1 CP) – An Exalted Sorcerer (Commander) tactic that allows you to teleport models on the battlefield to within 3″ of your Exalted Sorcerer’s Location. It’s a very handy trick to have, and when combined with Teleport Strike and Webway Infiltration really changes the way Thousand Sons play. A
- Architect of Fate (3 CP) – Another Exalted Sorcerer (Commander) tactic that allows you to un-ready all enemy models within 9″ at the start of the Shooting phase. Very expensive but insanely powerful against the right circumstances, and if you’ve readied appropriately, can lead to some blowout turns. B+
- Bestial Prophet (1 CP) – A Tzaangor Shaman (Commander) tactic that gives him an aura that gives Tzaangors +1 to hit rolls. Its a huge bonus if you’re running Tzaangor-heavy teams with a Shaman Commander. A
Next Time: Imperium
That covers the forces of Chaos. Next time we’ll take a look at the Imperial forces and how those have changed, and what that means for the factions going forward. There’s still a ton to cover, but if you have any questions, feedback, or notes, feel free to drop us a message in the comments below, or email us at contact@goonhammer.com.
