
The Warhammer 40,000 universe is a massive place, and in the Fabricator General hobby articles, we cover larger, more complex projects that might be daunting to newer entrants to the hobby. This week, the Goonhammer crew are talking about building a display board for your army that matches their character and makes the ideal stand for submission to Armies on Parade.
Carefully painting and basing all of your miniatures is only the first step, really. Once you’ve put in the time and effort to paint an army, the next step is showing it off. We already talked last week about buying, building, and setting up a display case. But what if you want to take your miniatures on the road, either to a tournament or to submit to an Armies on Parade competition? Well then you’re going to need a tray to transport them on. And while any old cookie sheet or cheap folding cart bought from Amazon to be abandoned on the convention floor will work for the tournament grinders out there, you’re after something with a bit more visual flair. Something that helps tell the narrative of your army, and ties them together visually. Something that really draws the eye and paints a visual story. Something that screams “give me that award for best painted, thanks.” You need a display board.
I will admit that my own display board efforts have been somewhat lazy–I have historically been a “throw the army on a 2×2′ Sector Imperialis tile” kind of guy. And while I’ll talk about that to set the table for doing more, I’ve also enlisted several other very talented hobbyists to help talk about their own table projects and how they planned and built some very cool display boards.
The Basics
We’re going to dive into a few different approaches here, but before we get into practical examples there are a few basics we can talk about that apply to pretty much any display board project.
- Think about the story you want to tell. You’re not just building a big tray here, you’re building a small diorama, telling a visual story. Think about what you want to accomplish narratively with your board – Is your army mustering for war? Parading through the city triumphantly after a major campaign victory? In the field en route to a major engagement? Think about the story you’re trying to tell, and build your board around that.
- Have a plan. The best display boards — and hobby projects generally — start with a plan. Take a pencil and piece of paper and plot out what you want to do. Plan the materials and measure everything out. Plan where each model is going to sit and make sure that there’s enough room for your entire army to sit comfortably on the display board (and ideally with room to grow a little). Will you have to travel with your board? Does it need to be mostly flat or can it have a lot of vertical elements? Does it need to be magnetized? The more of these questions you can answer before you start cutting and painting, the easier the project will be.
- Know where each model is going to go. As part of your plan, figure out where models are going to go. You don’t just want to plop them down anywhere; you want to draw the eye to most impressive models, the ones you’ve spent the most time on.
- Match the army’s bases/theming to the board. This seems like a no-brainer, but it’s worth pointing out. Boards look best when they match the army’s basing theme. If you’ve got jungle bases, don’t put the models on an urban display board.
The Lazy Ham’s Approach, i.e. “Buying Your Way Out of It”
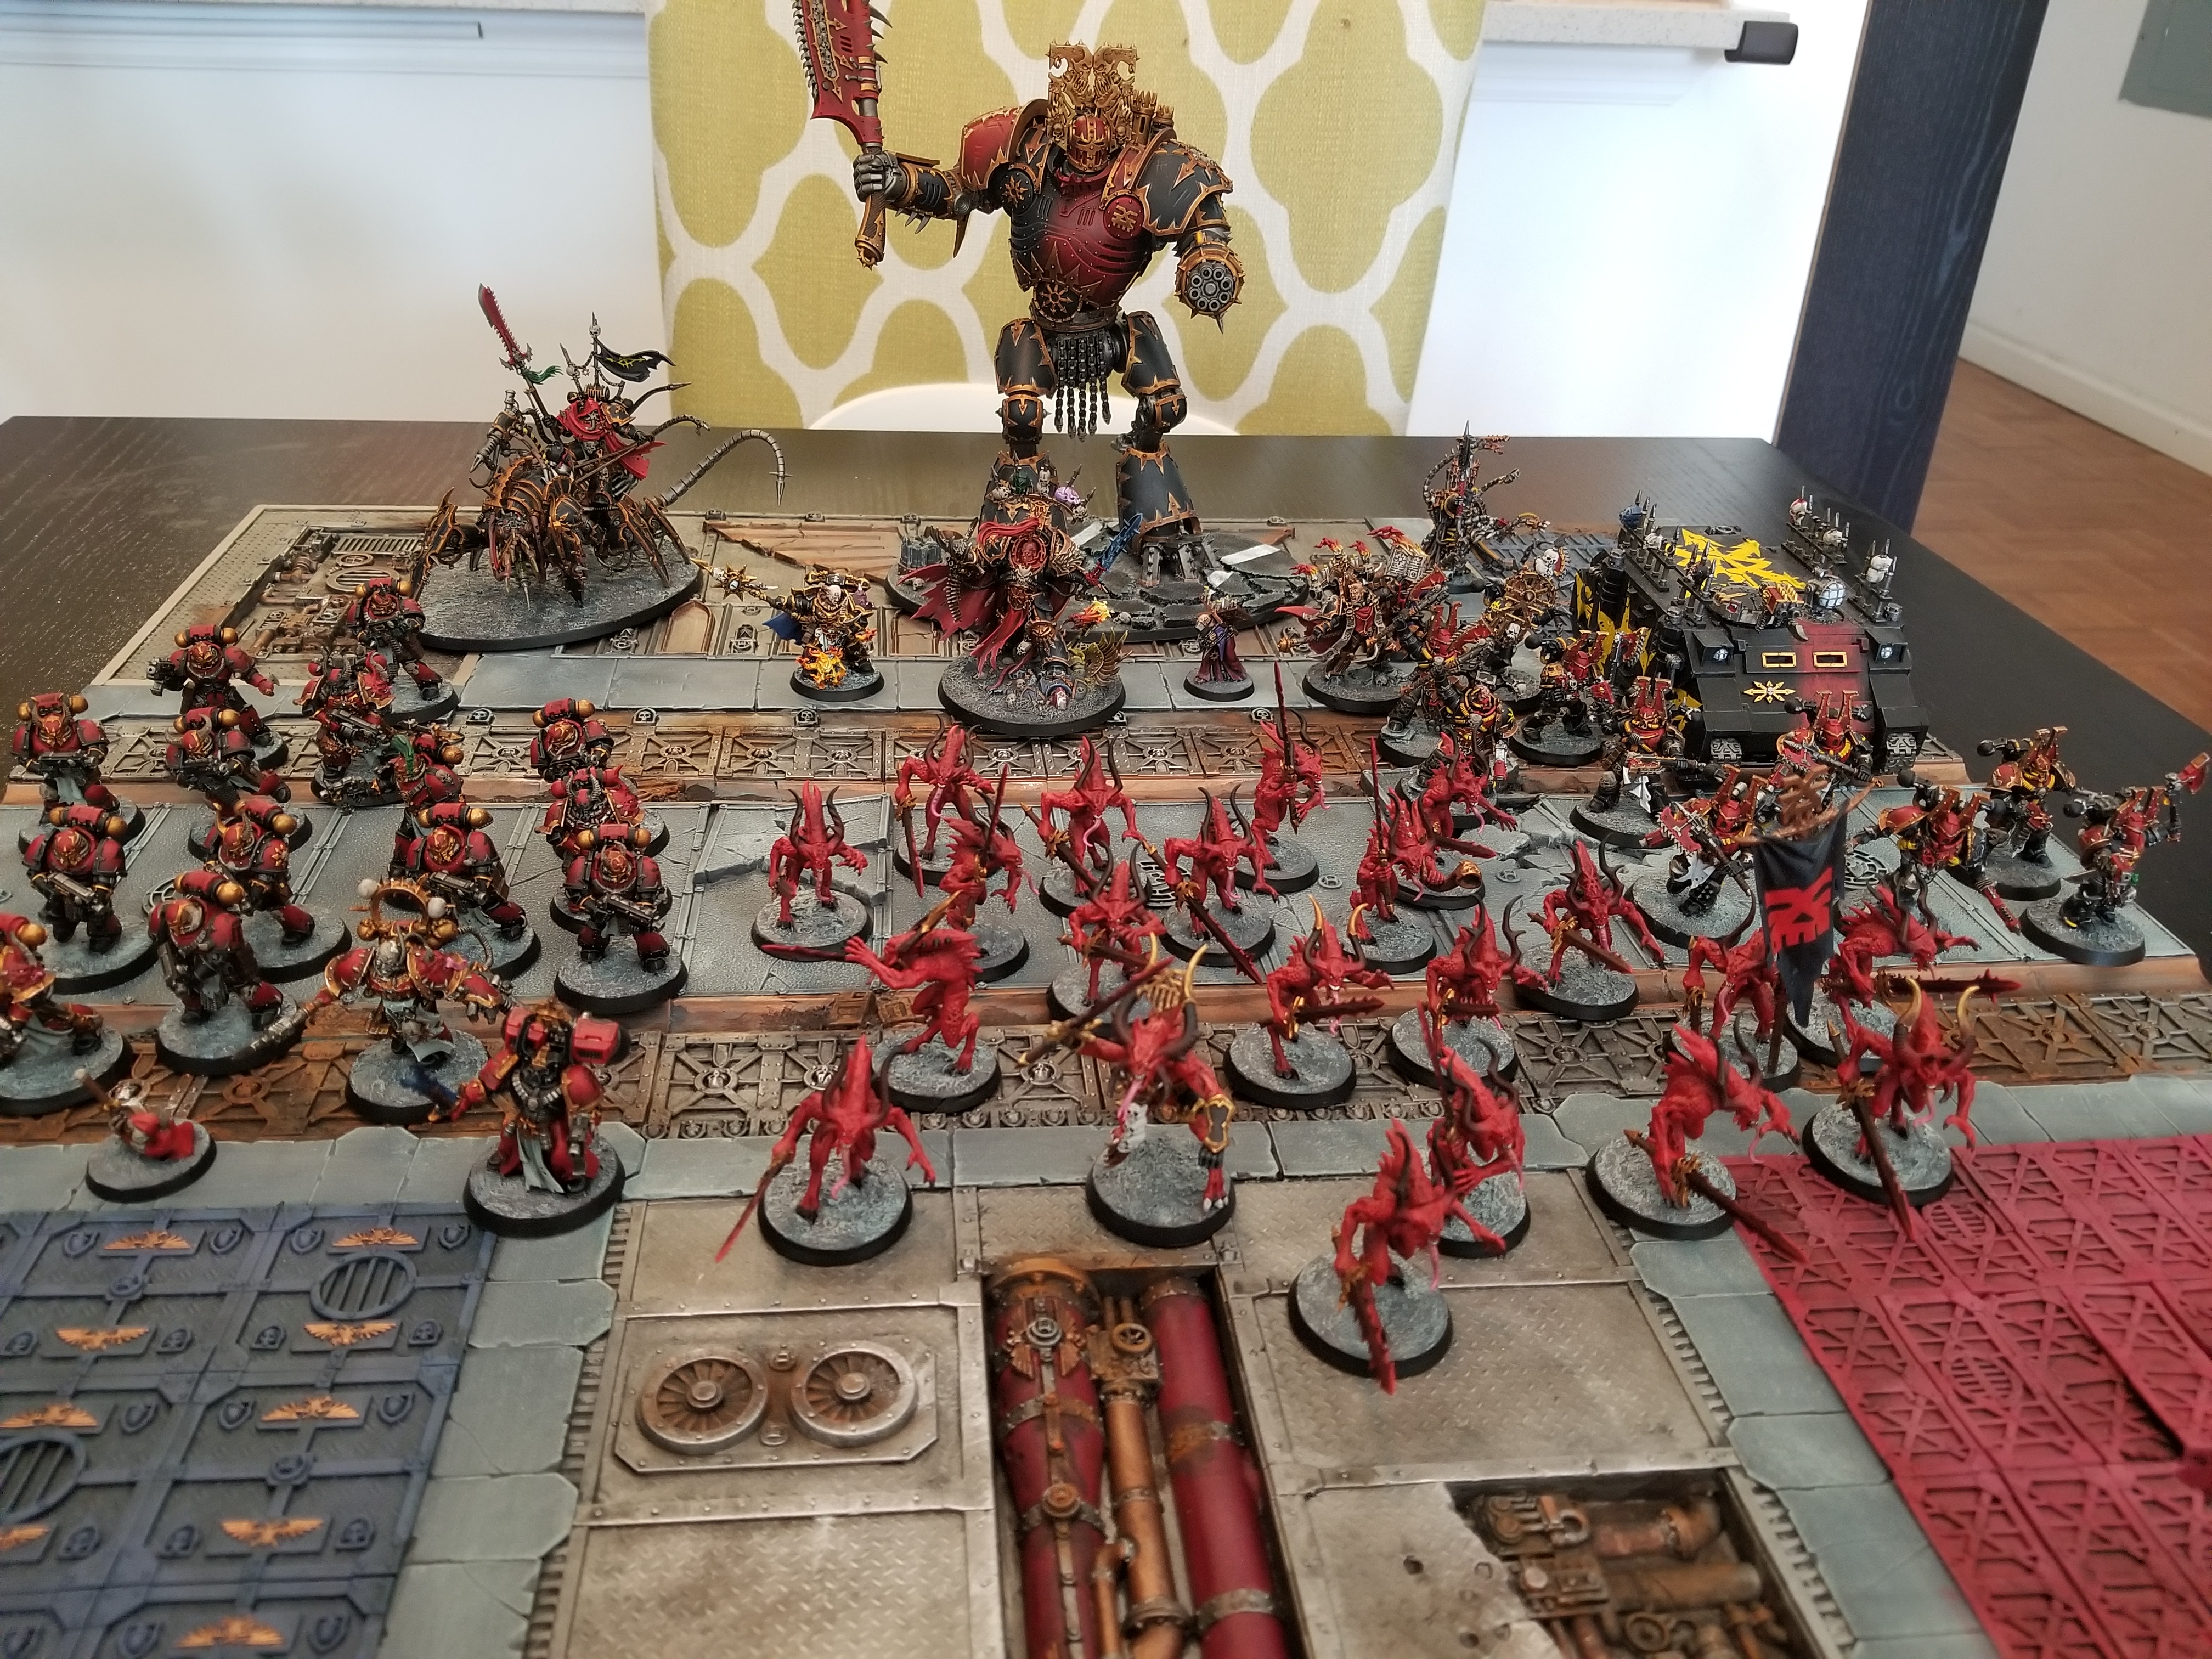
If all you need is something that will hold a large number of minis and isn’t going to take a super-long time or investment, then by all means, use a Realm of Battle tile. At a full 2’x2′ they’re a little unwieldy, but they’re made of plastic, match the Games Workshop aesthetic well, and come in a variety of themes and layouts. They can also be quickly made as flat or as tall as you want to make them. I’ll admit, I personally am super-lazy when it comes to my display board. This is primarily because I live in an apartment in the New York City area, and so my storage space for things that can’t be stacked is pretty limited. The Sector Imperialis boards are ideal for this because all six of them take up very little space and fit into an easy-to-store case. Also because most of my armies have generic concrete basing. This would work even better if I used the matching bases, but I’m not about to shell out for those. Anyways, you can see that the effect is decent, but it’s not gonna win me any awards. I’ll likely look at adding magnets to the next tile I paint so I can mimic Campbell’s approach (see below), and have a tile with terrain attached.
Exploring Your Options
If you want to go down this route, you’ve got a few options that I’m aware of.
- Games Workshop’s Realm of Battle tiles come in a few flavors. Namely, Sector Imperialis (seen above), and the Age of Sigmar Shattered Dominion board. There’s also a third, discontinued Realm of Battle Board that’s system-neutral and has hills, if you can find it.
- Forge World also sells some tiles. They’ve discontinued the Zone Mortalis tiles, but they still sell a bunch of different very detailed (very expensive) Realm of Battle tiles that match up with the existing plastic tiles. They also sell a Necron-themed tile.
- Secret Weapon Miniatures also sells a bunch of 1’x1′ modular tile sets that come in a variety of themes. You’ll want to glue them together or put them into a frame if you’re using more than one, but they’re pretty detailed and work well.
Charlie’s Board
What do you get when you combine passion, ignorance, and a YouTube degree? My display board for the Michigan GT. There are plenty of things that didn’t go as planned, but it was a great learning experience, and I got to try out things I never would have tried otherwise.
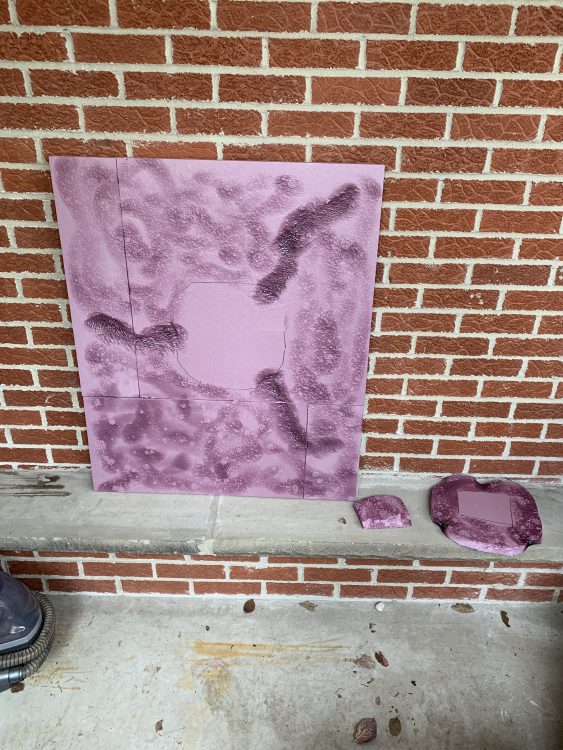
My initial vision for the board was for it to look obviously Nurgle. If someone walks up to the board, they should know immediately what I’m going for. I decided to use a spare Feculent Gnarlmaw as the centerpiece of the board, the part that would hopefully catch your attention, and I also wanted to play with the tri-lobe/triangles you see in a lot of Nurgle art. I started by laying out my army to get a sense of how big I wanted it to be and then made it about 6″ in each direction larger, so the board wouldn’t be cramped. It turned out that it was a mistake to make it this big. Always measure your doors and space in your car, folks.
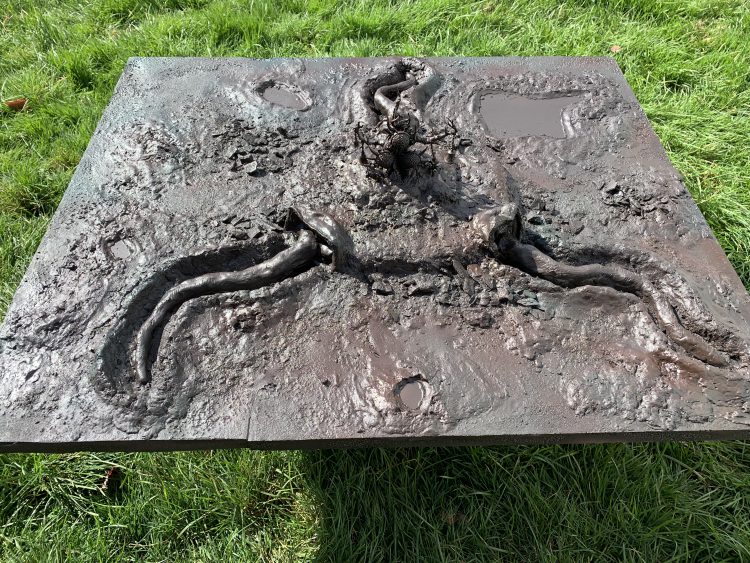
With a couple of rough plans drawn up, I turned to YouTube. I’ve been following the “Luke’s APS” channel for awhile and recalled he had done a series on making a Kill Team board. His first video in the series is invaluable if you’ve never made a display board before. It’s easily translatable to a display board. Based on the video, I took my XPS foamboard and a blowtorch and easily blended the pieces of foam together and created interesting ground texture. DO NOT use a blowtorch on foam. Just because I did it in a well ventilated (i.e. outside) area doesn’t mean anyone is recommending you do that. It creates noxious fumes. And badass looking foam.
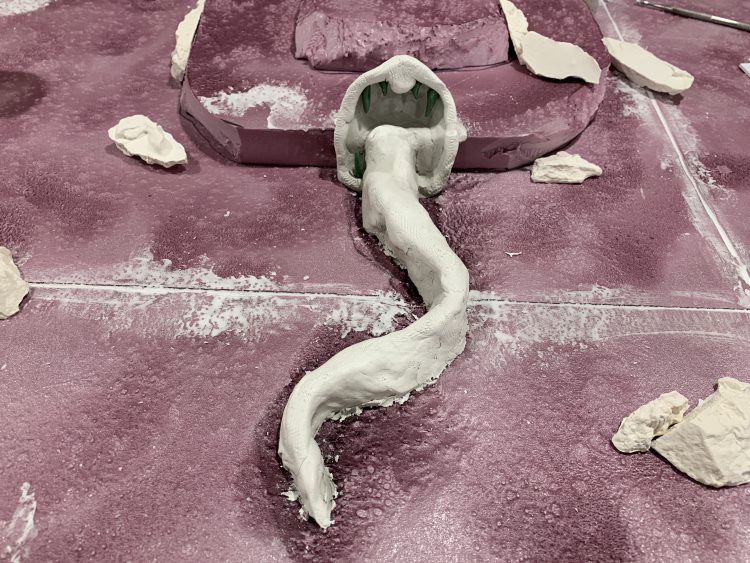
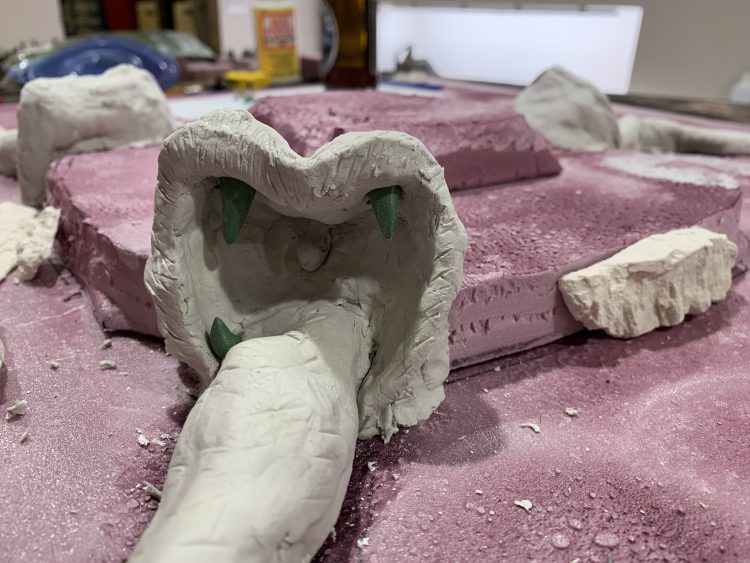
For the tentacles, I used another tip from Luke – air-drying clay. Forming the core with aluminum foil, I sculpted the tentacles and mouths around them. Sculpting is hard, y’all, and I have a newfound appreciation for those who do it. The mouths are clearly mouths but didn’t quite turn out with the expressions that I was shooting for. Greenstuff was used for the teeth because that was much easier to work with.
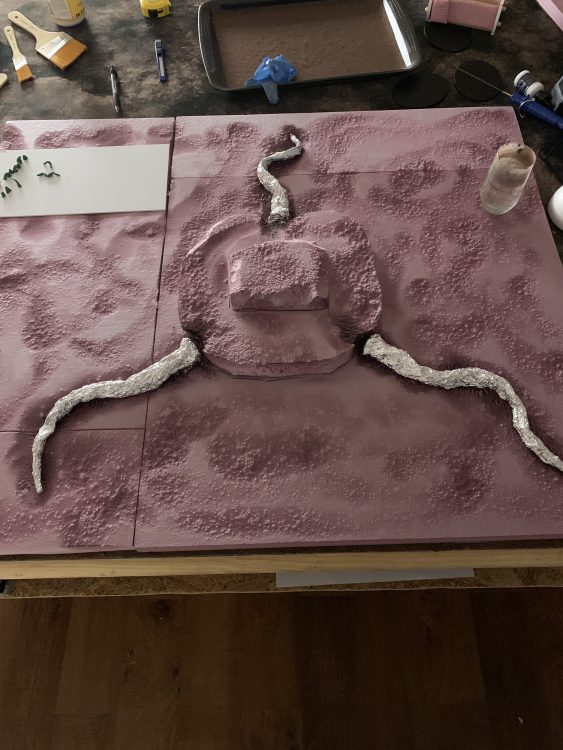
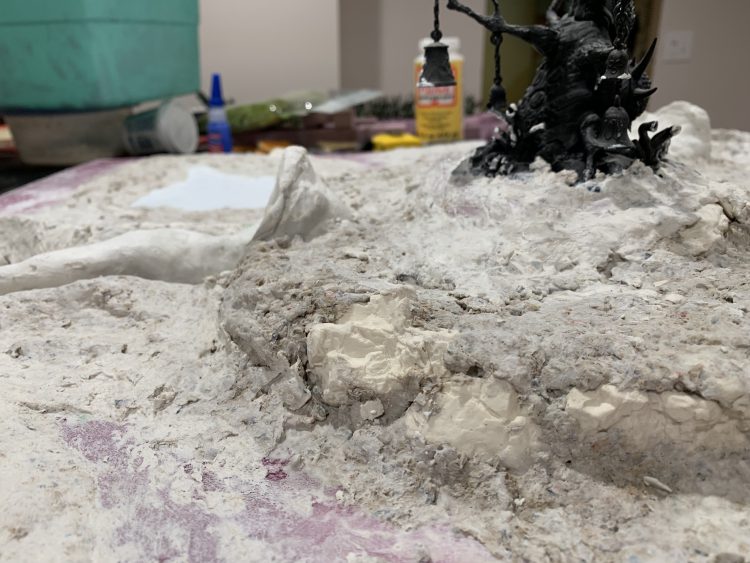
You’ll notice that I added some plaster rock molds, another first for me. I ended up using quite a few of those, but they became indiscernible after the next step, which included blending a lot of the components together. To do that, I mixed 50/50 cellulose insulation (essentially recycled paper) and plaster of Paris as a homemade “sculpt-to-mould.” Once you get the mixture down, it’s pretty easy to work with and I enjoyed building up the ground texture.
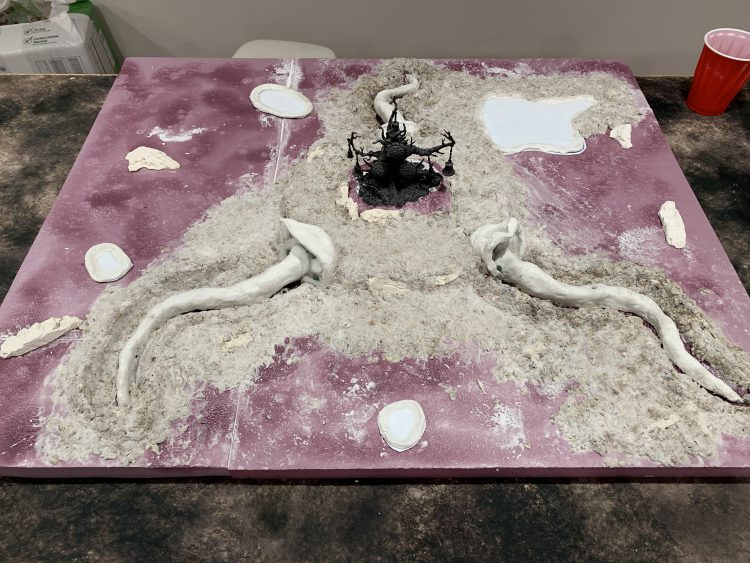
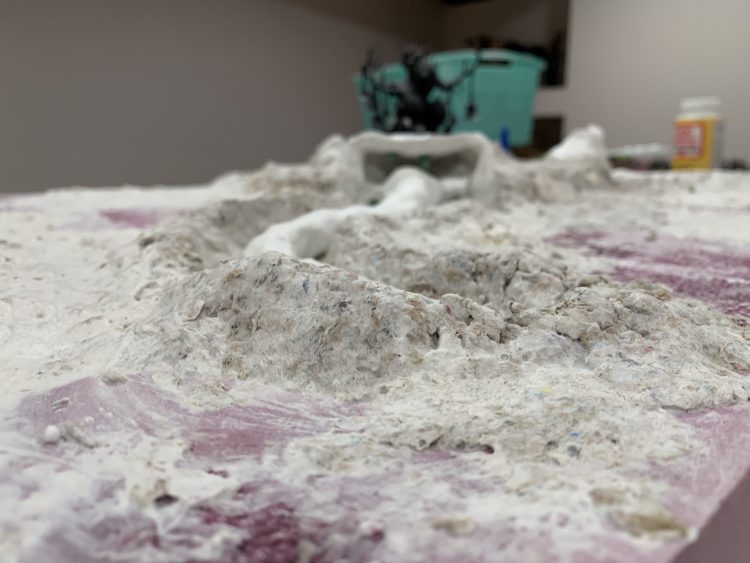
I made a base of plasticard and surrounded it with air-drying clay in order to form where I wanted the pools of blood and goo to be. This, too, was blended in with the sculpt-to-mould.
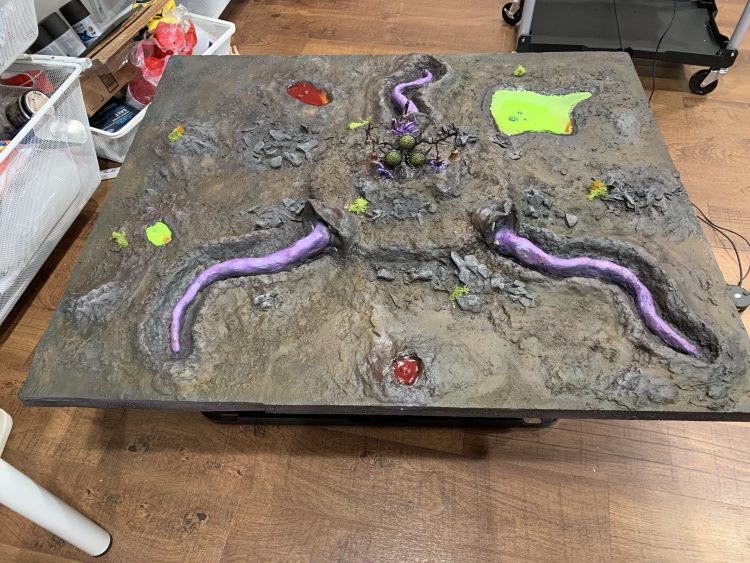
At this point, I was ready to paint. I got 3-4 cheap cans of spray primer from Home Depot and did the base and rough highlights of brown and green. The spray did eat into my foam a little bit which I wasn’t expecting. However, most of the foam was covered with sculpt-to-mould or plasticard so the damage was minimal.
The resin I used was Vallejo Still Water Effect, which is incredibly easy to use. You pour it from the bottle to where you want it. BOOM! Done. However, I still managed to mess that up by not having level plasticard bases for the pools. This meant that it flowed to one side of the larger pools. I tried to fix this by slightly tipping the board, but this turned out to be the wrong decision. I should have just poured more layers. Also, I was going for slime and blood bubbles in these pools. I took a semispherical bead with one flat side, primed them, then assumed I could pour resin and the paint color in at the same time over both the pool base and primed black “bubbles.” I was wrong. It would have been much better to paint the “bubble” beforehand.
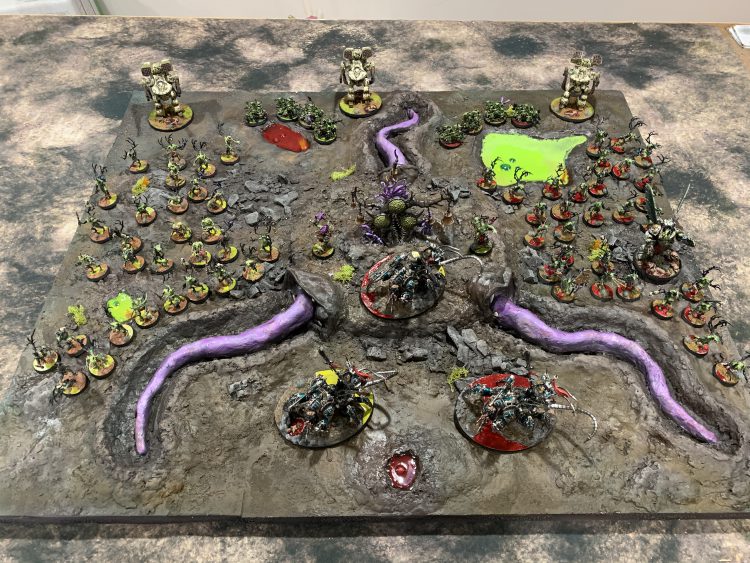
Overall, it’s a solid display board, especially for my first attempt. Next time, I’ll make sure it’s smaller and better matches the color of all of my bases, since it’s a bit off.
SRM’s Board
Campbell originally built his current display board for the 2019 NOVA Narrative Event, and wrote about doing so in his Road to NOVA series. We’ve reproduced that content here, because it’s fantastic:
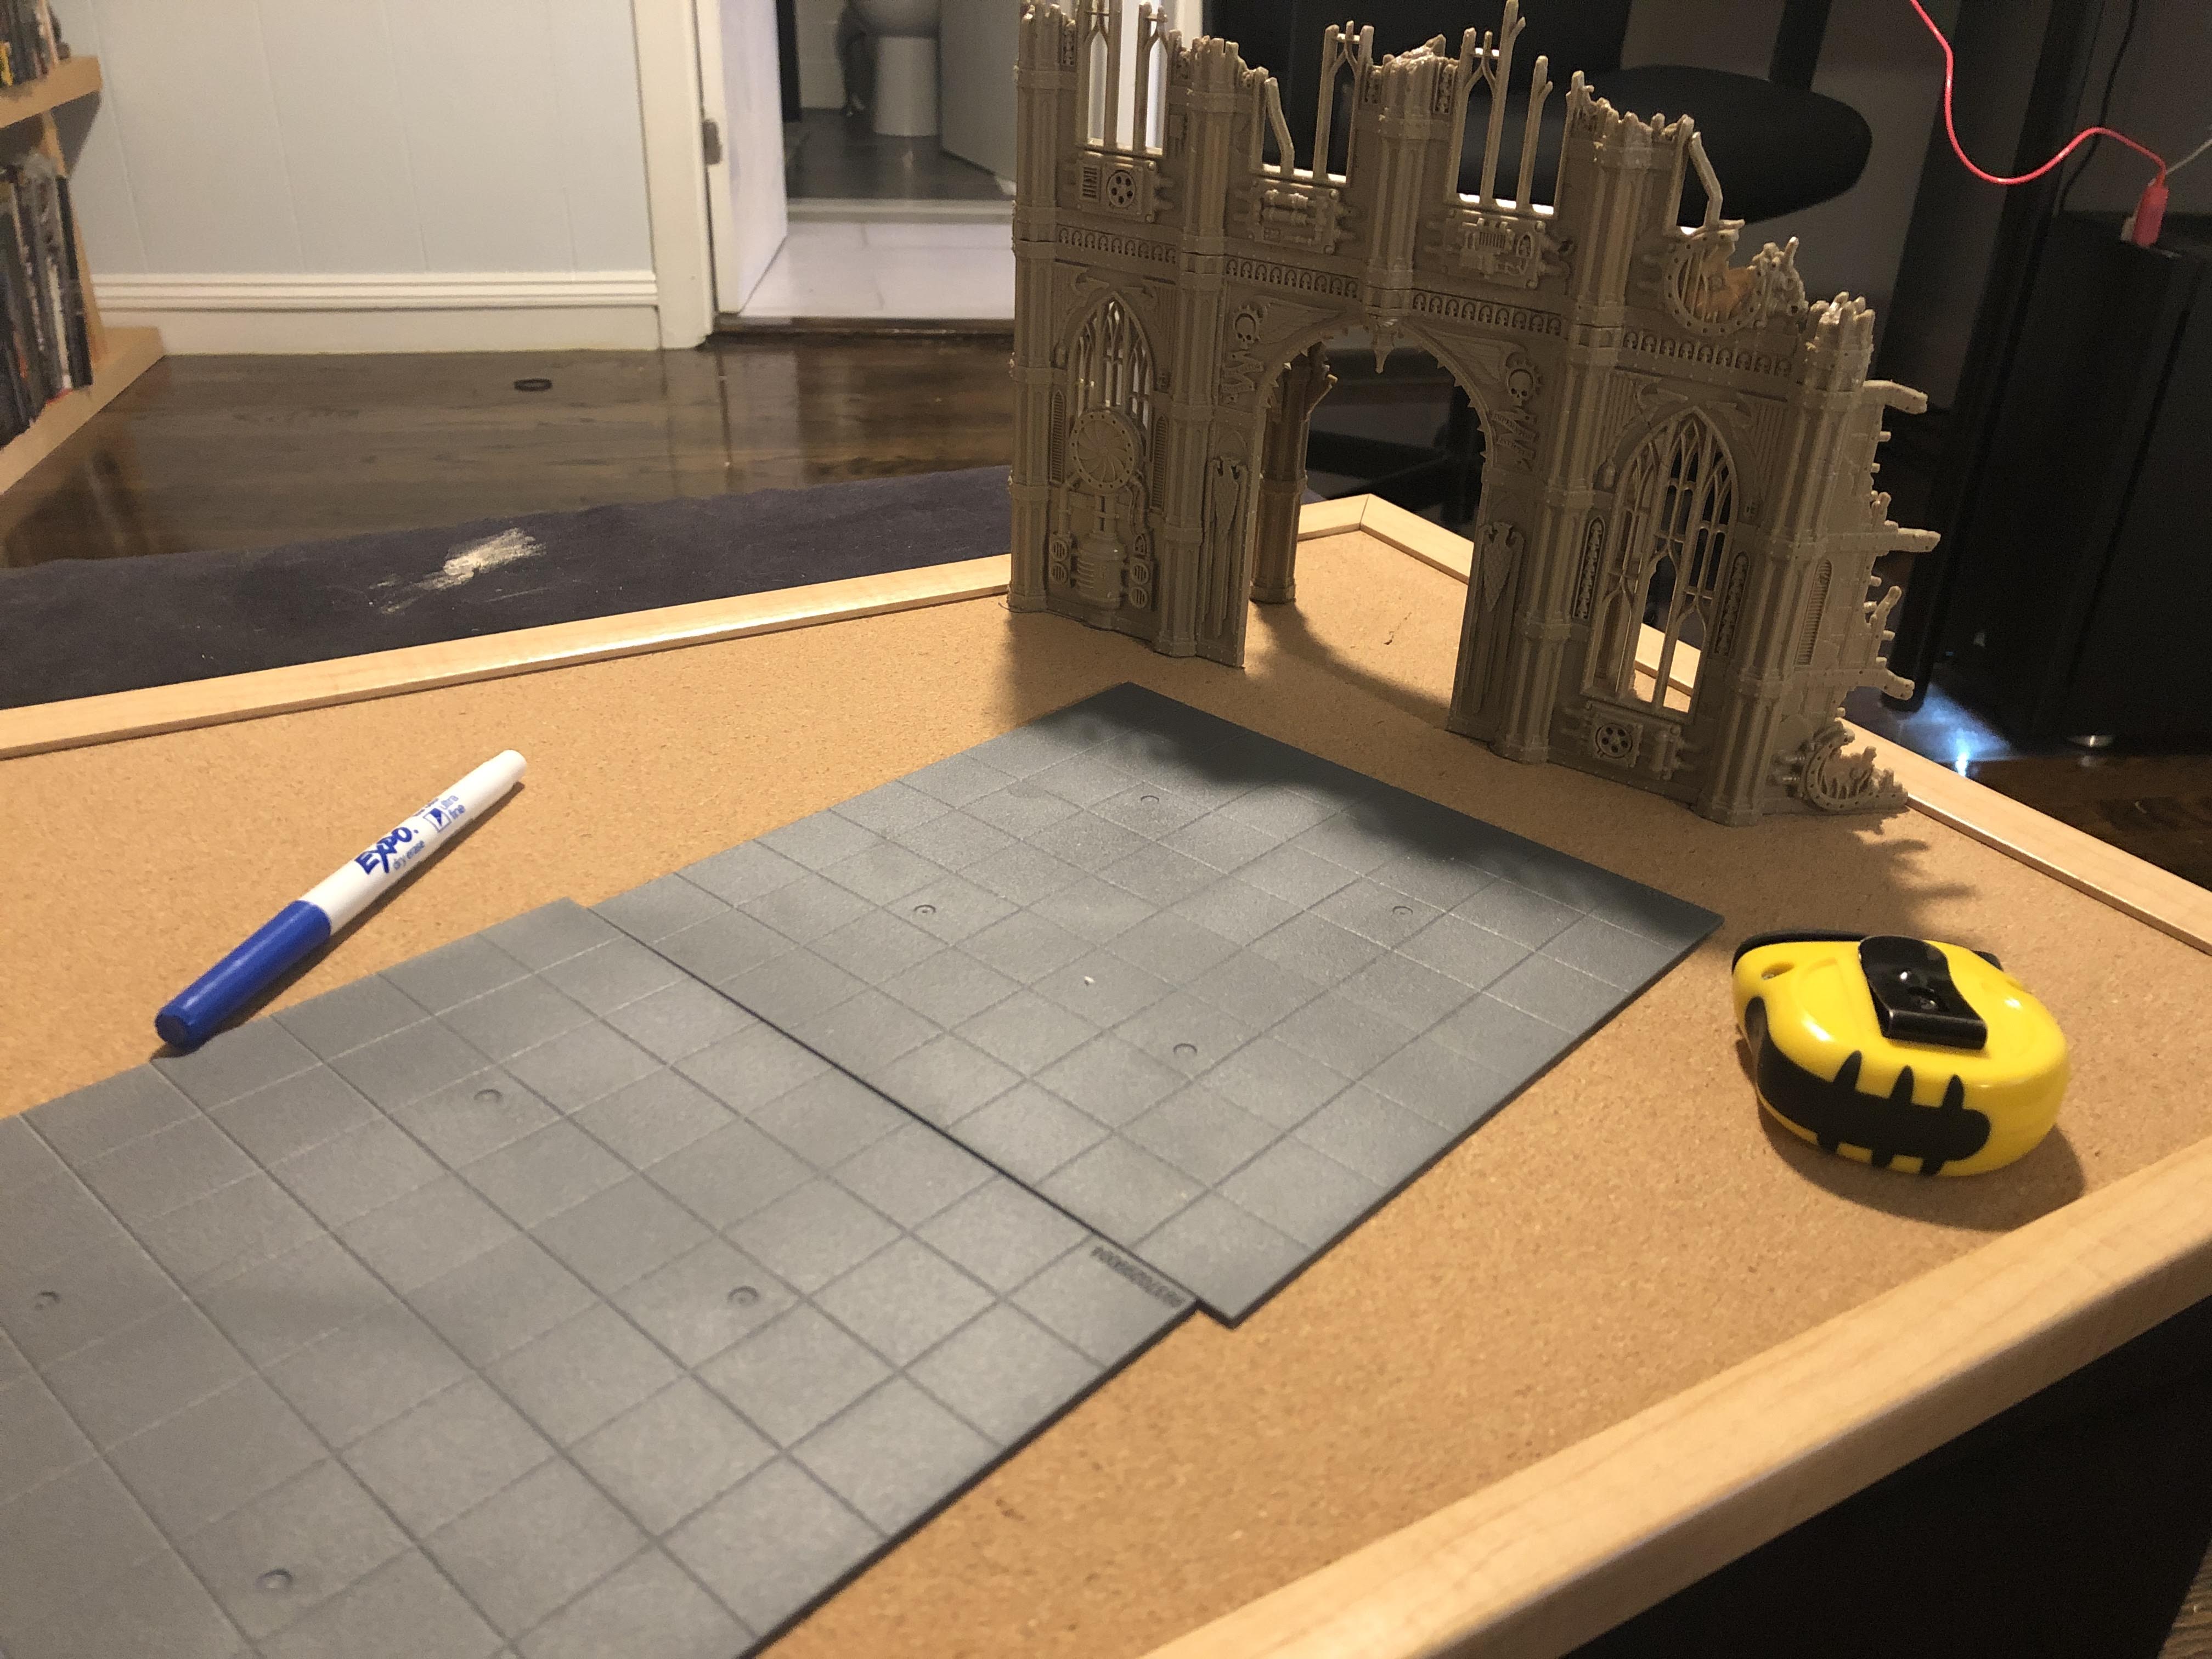
I’ve told the story multiple times on the Badcast about how I built and painted my existing display board whilst extremely drunk in a hotel in Maine the night before a tournament in 2014. It had served me well but it had seen better days, and so I decided it was time to build a new board for NOVA. But first I needed to gather materials and plan. I got some tacky glue, basing sand, a corkboard, measuring tape, and some graph paper, and started mapping things out:

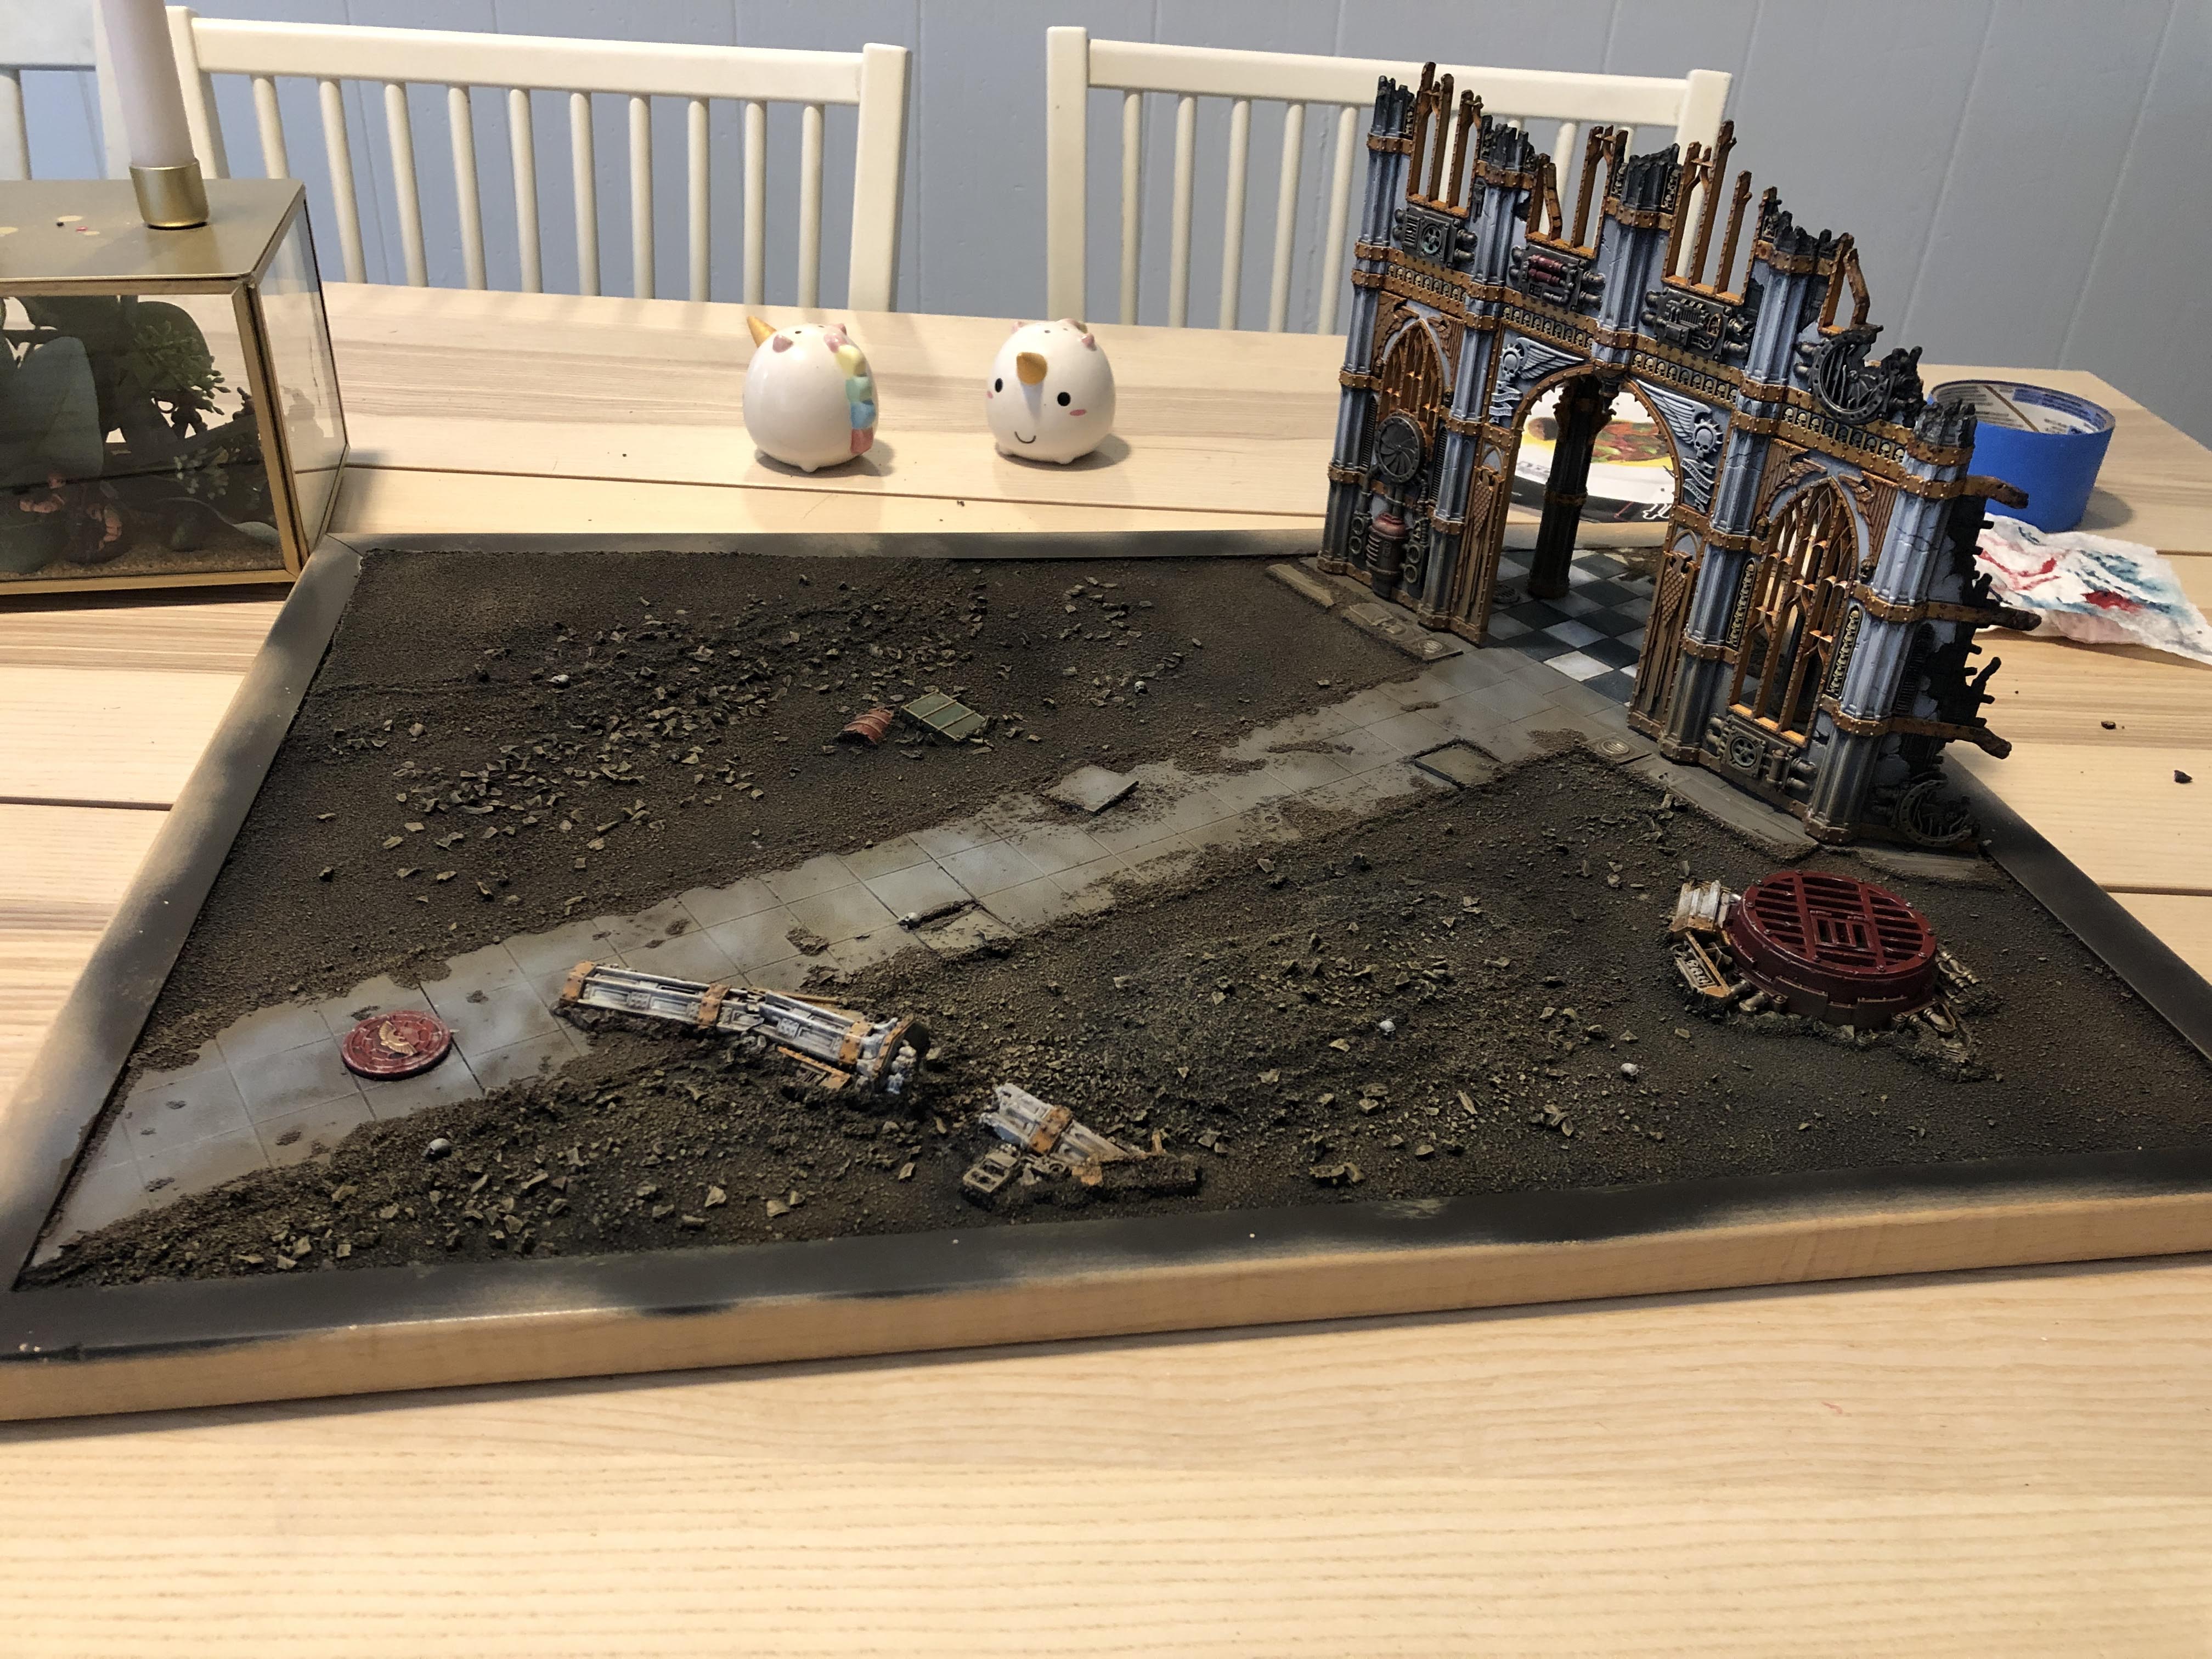
The plan would be to have a long road leading up to a building, at which point the floor would be tiled. The building would be magnetized for ease of transport, and it along with some hills would add some visual interest. I’d also add some scattered debris, skulls, and so on to make the field look more realistic, and I’d paint it to match the winter theme of my models’ bases. As for the roads and floor, I would remain extremely on brand and use out of production WHFB movement trays for them, because of course I would.
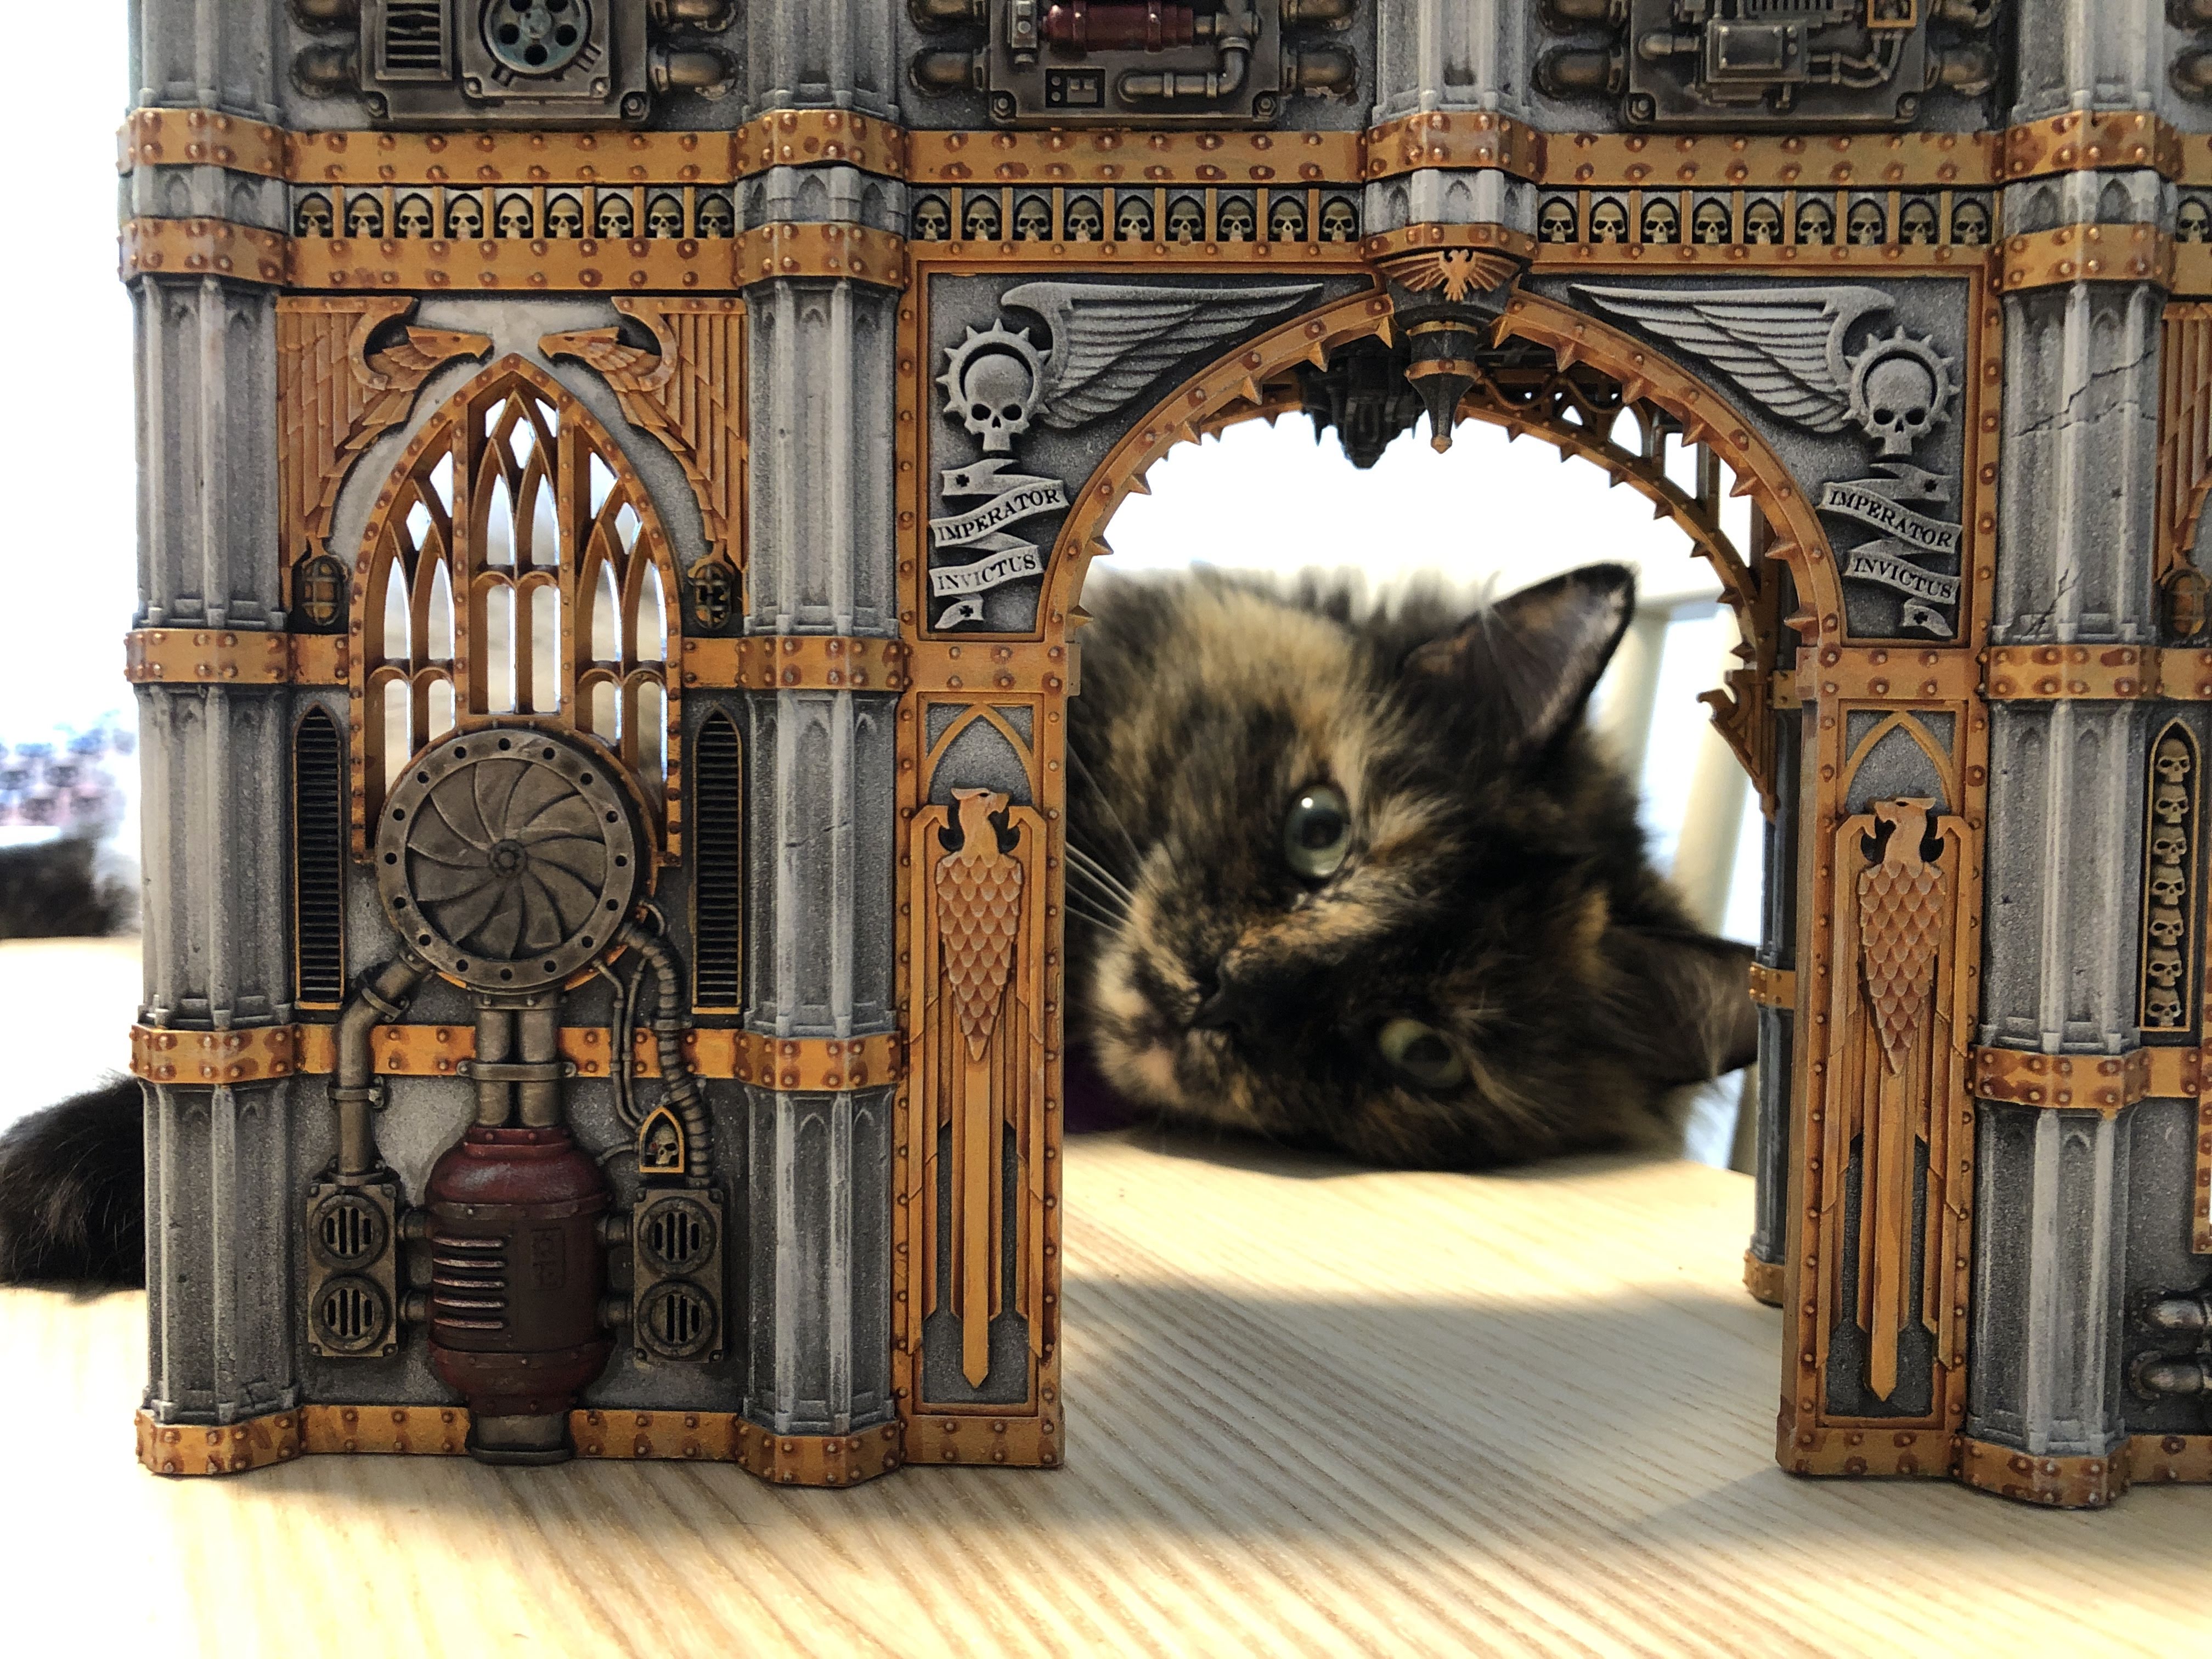
The building was fairly straightforward – new GW kits go together rather easily after all. Once it was done I could figure out the angle of the road and see if all my dudes fit on the board. Fortunately, they did!
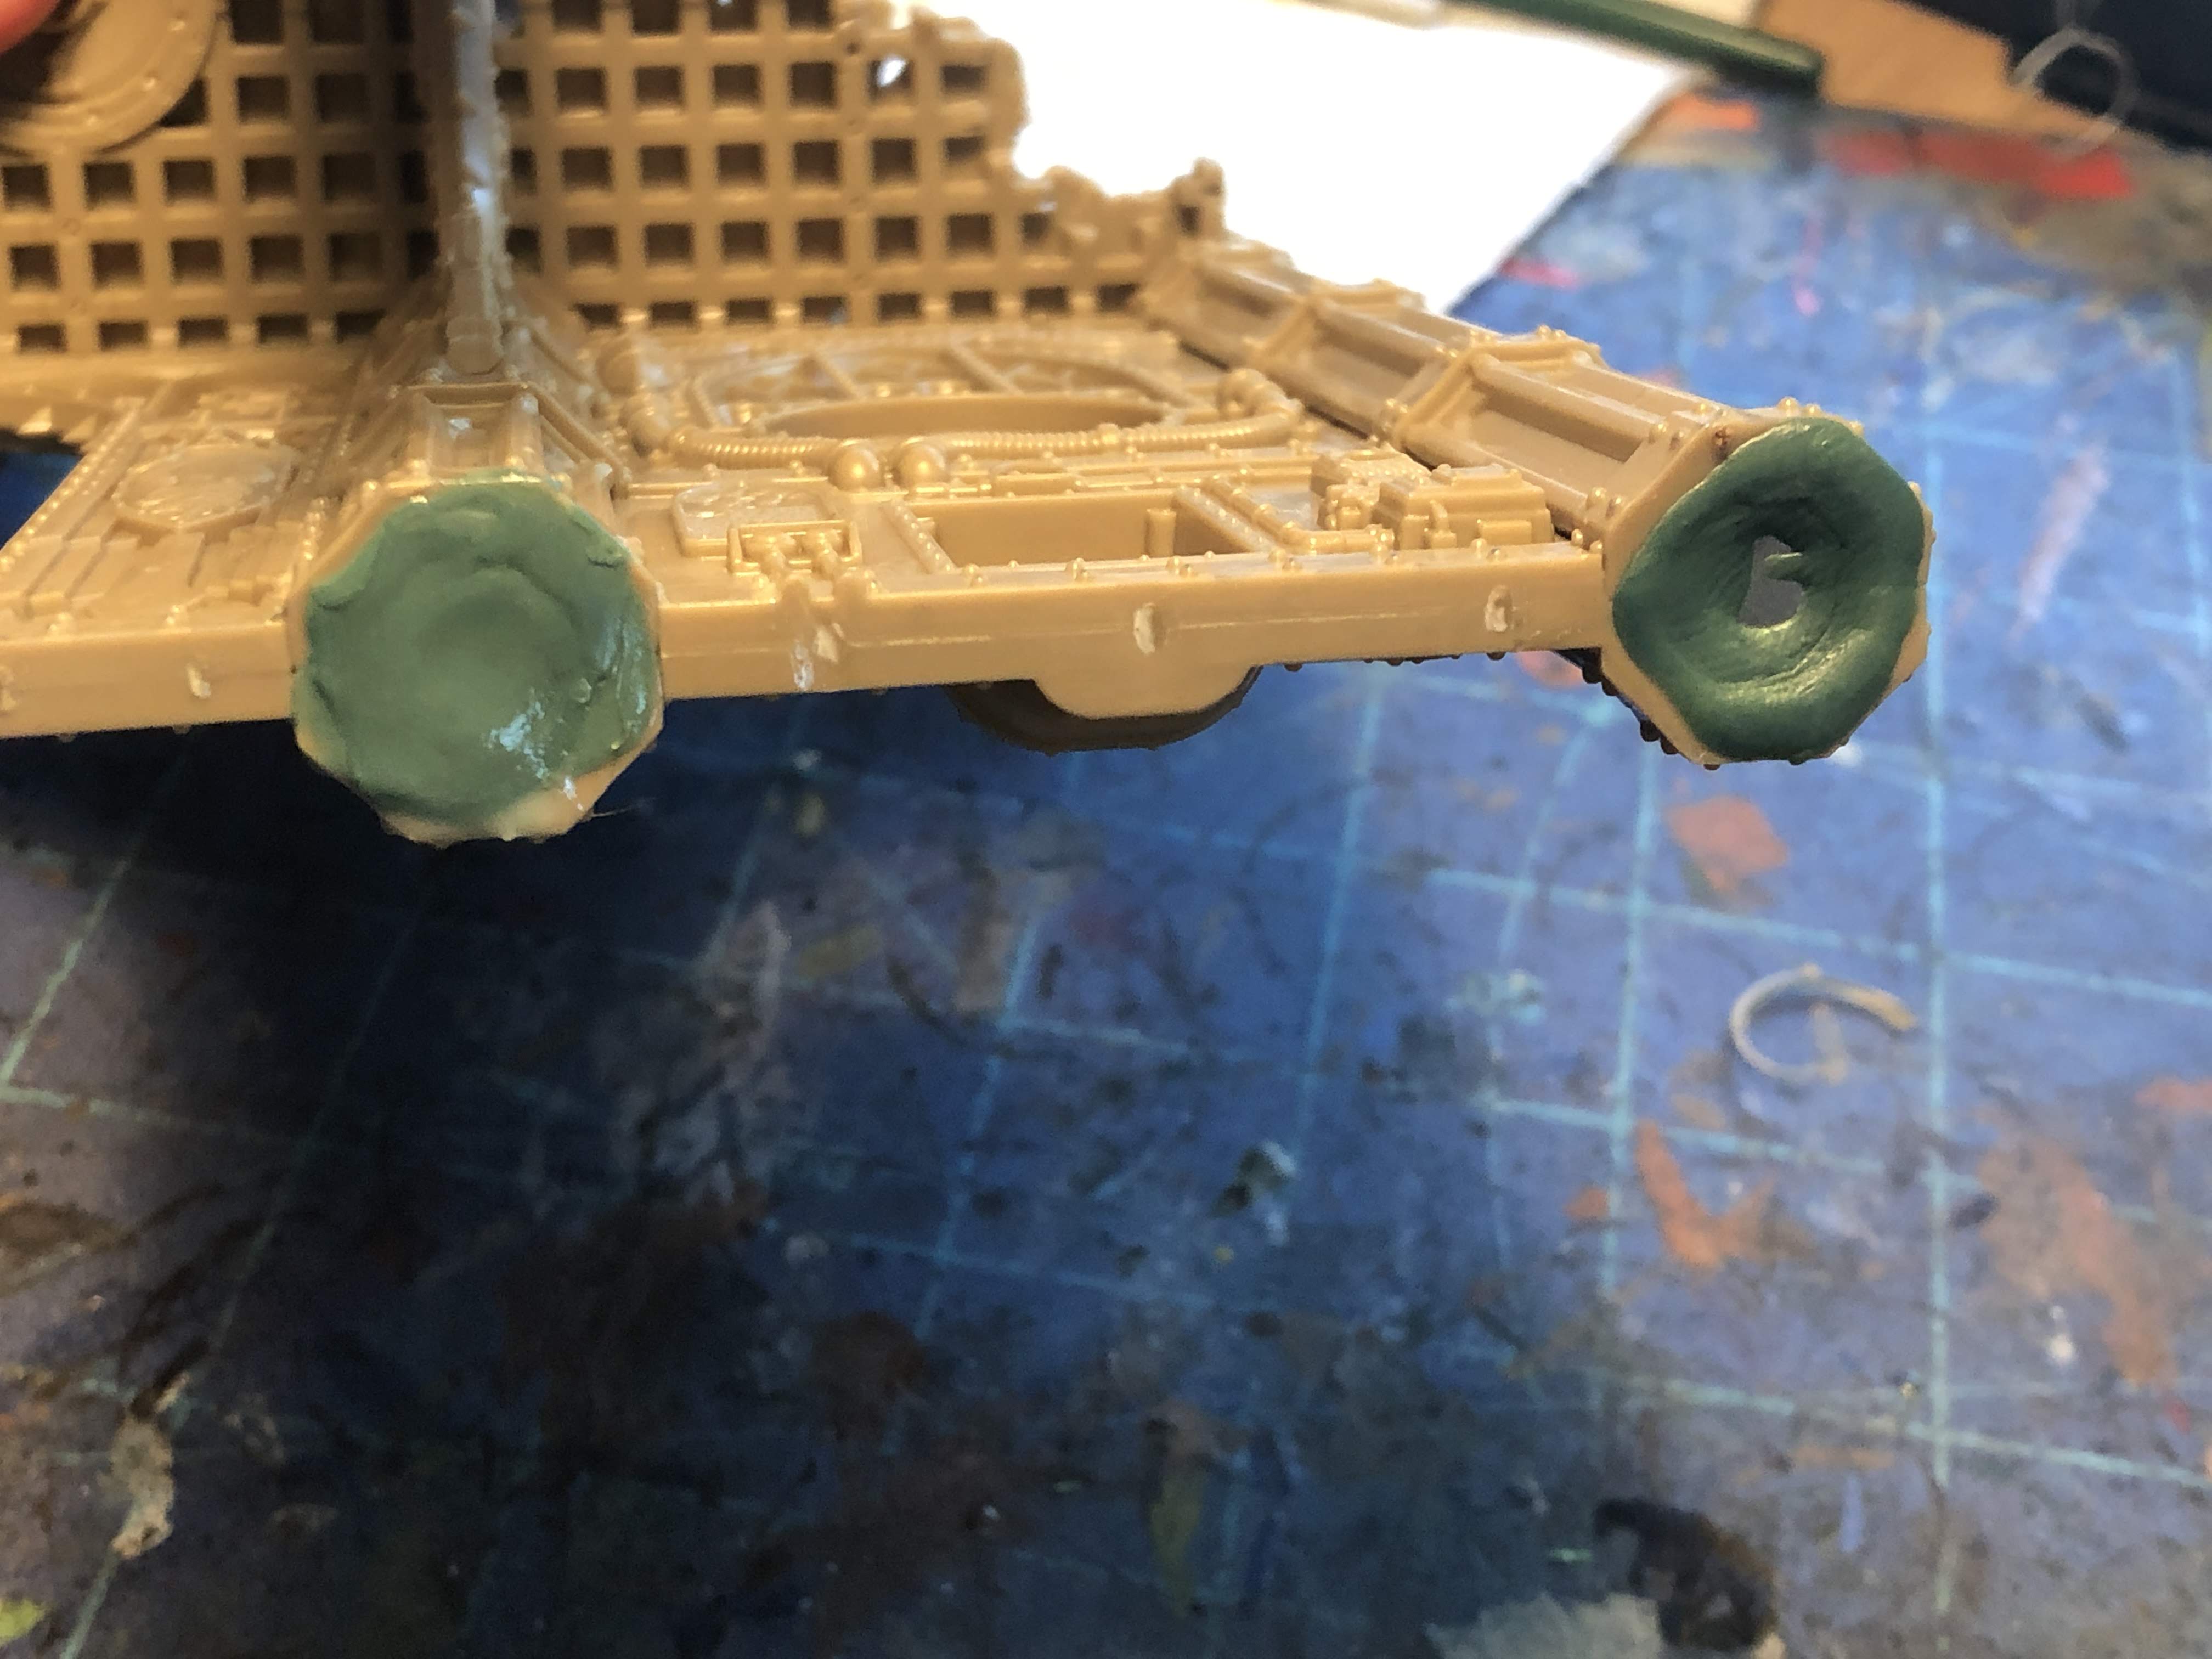
I started with the interior of the building, where I used the 20mm side to represent floor tiles. Using a power drill, I sunk a few magnets into the outer edge. Later I’d sink a few more in to support the interior columns, but you get the gist. I covered them in glue and green stuff, which I had to sand down to get flush.

Meanwhile, under the columns, I twisted in big gobs of green stuff and sunk in more magnets. Once dry, I had to carve away some green stuff, but they still held:
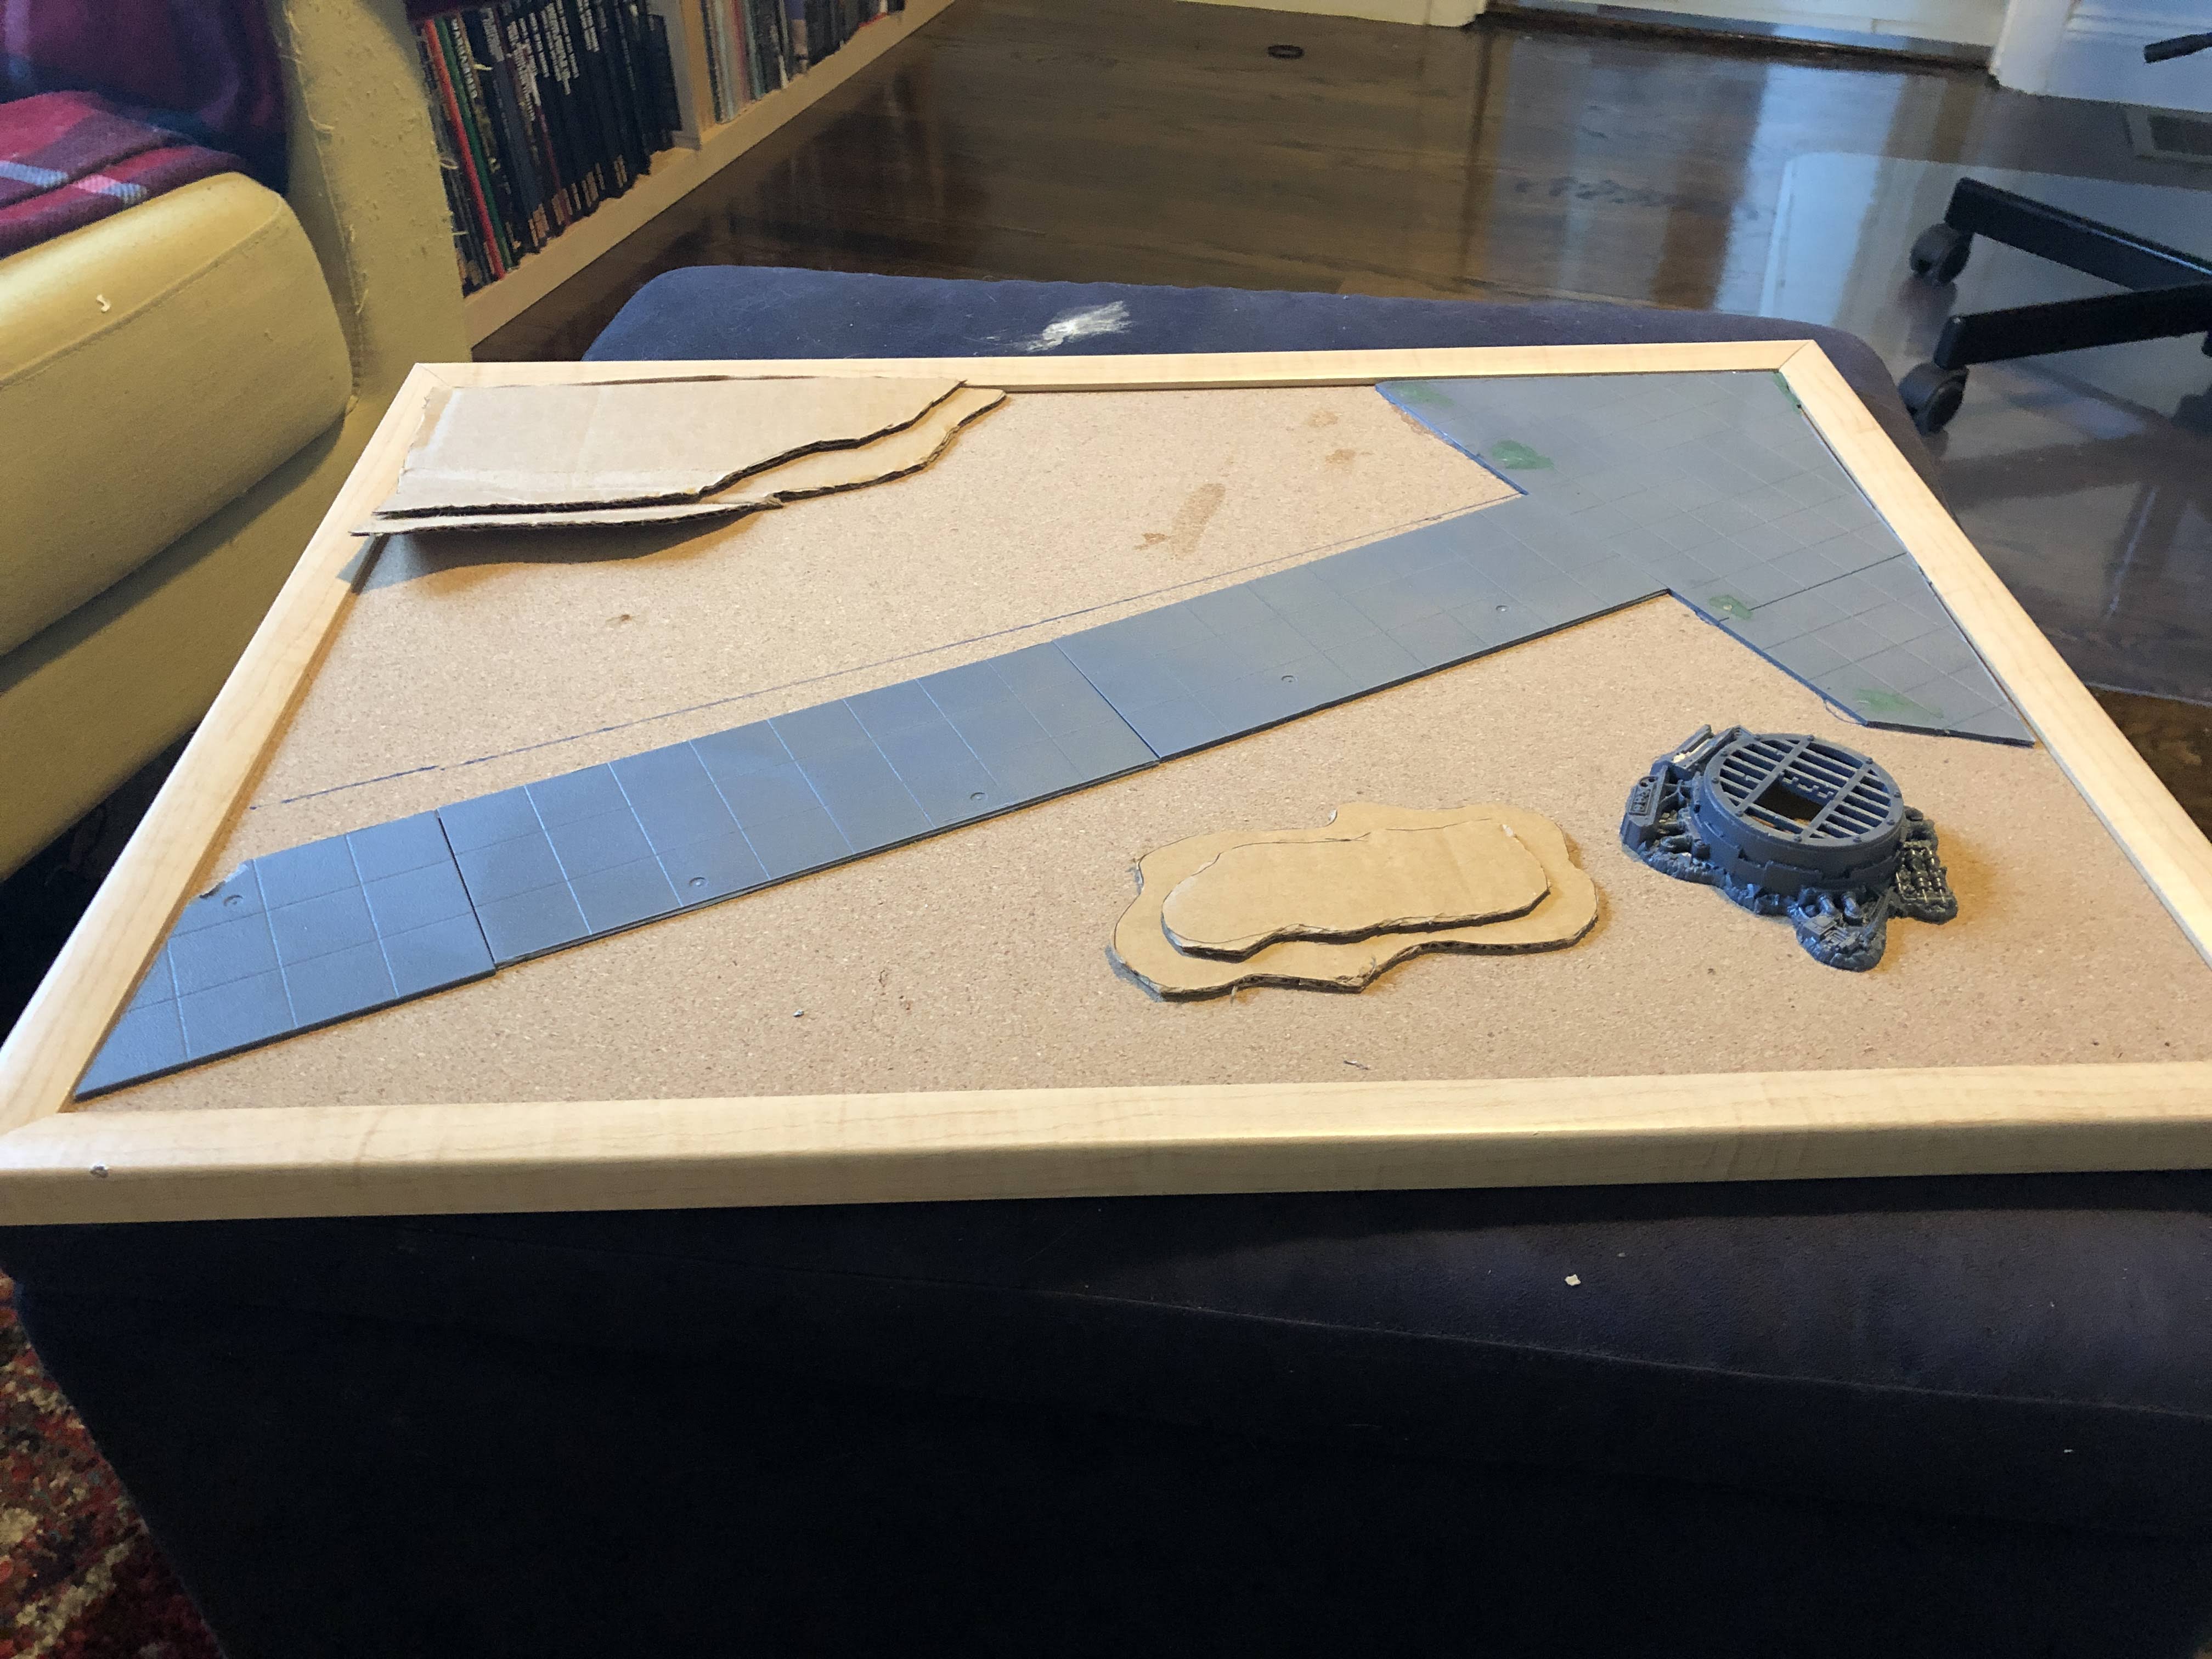
With the footprint of the main attractions settled, I figured it would be time to work in some hills and give the board a more organic feel. I again stayed extremely on brand here and cracked open my old How to Make Wargames Terrain book that GW published in 1996.

It took a box cutter and some time, but I worked them out. I glued them down with PVA glue, which required pinning down the floppy hill on the left with a thumb tack. I also figured where I wanted the sewer to go:
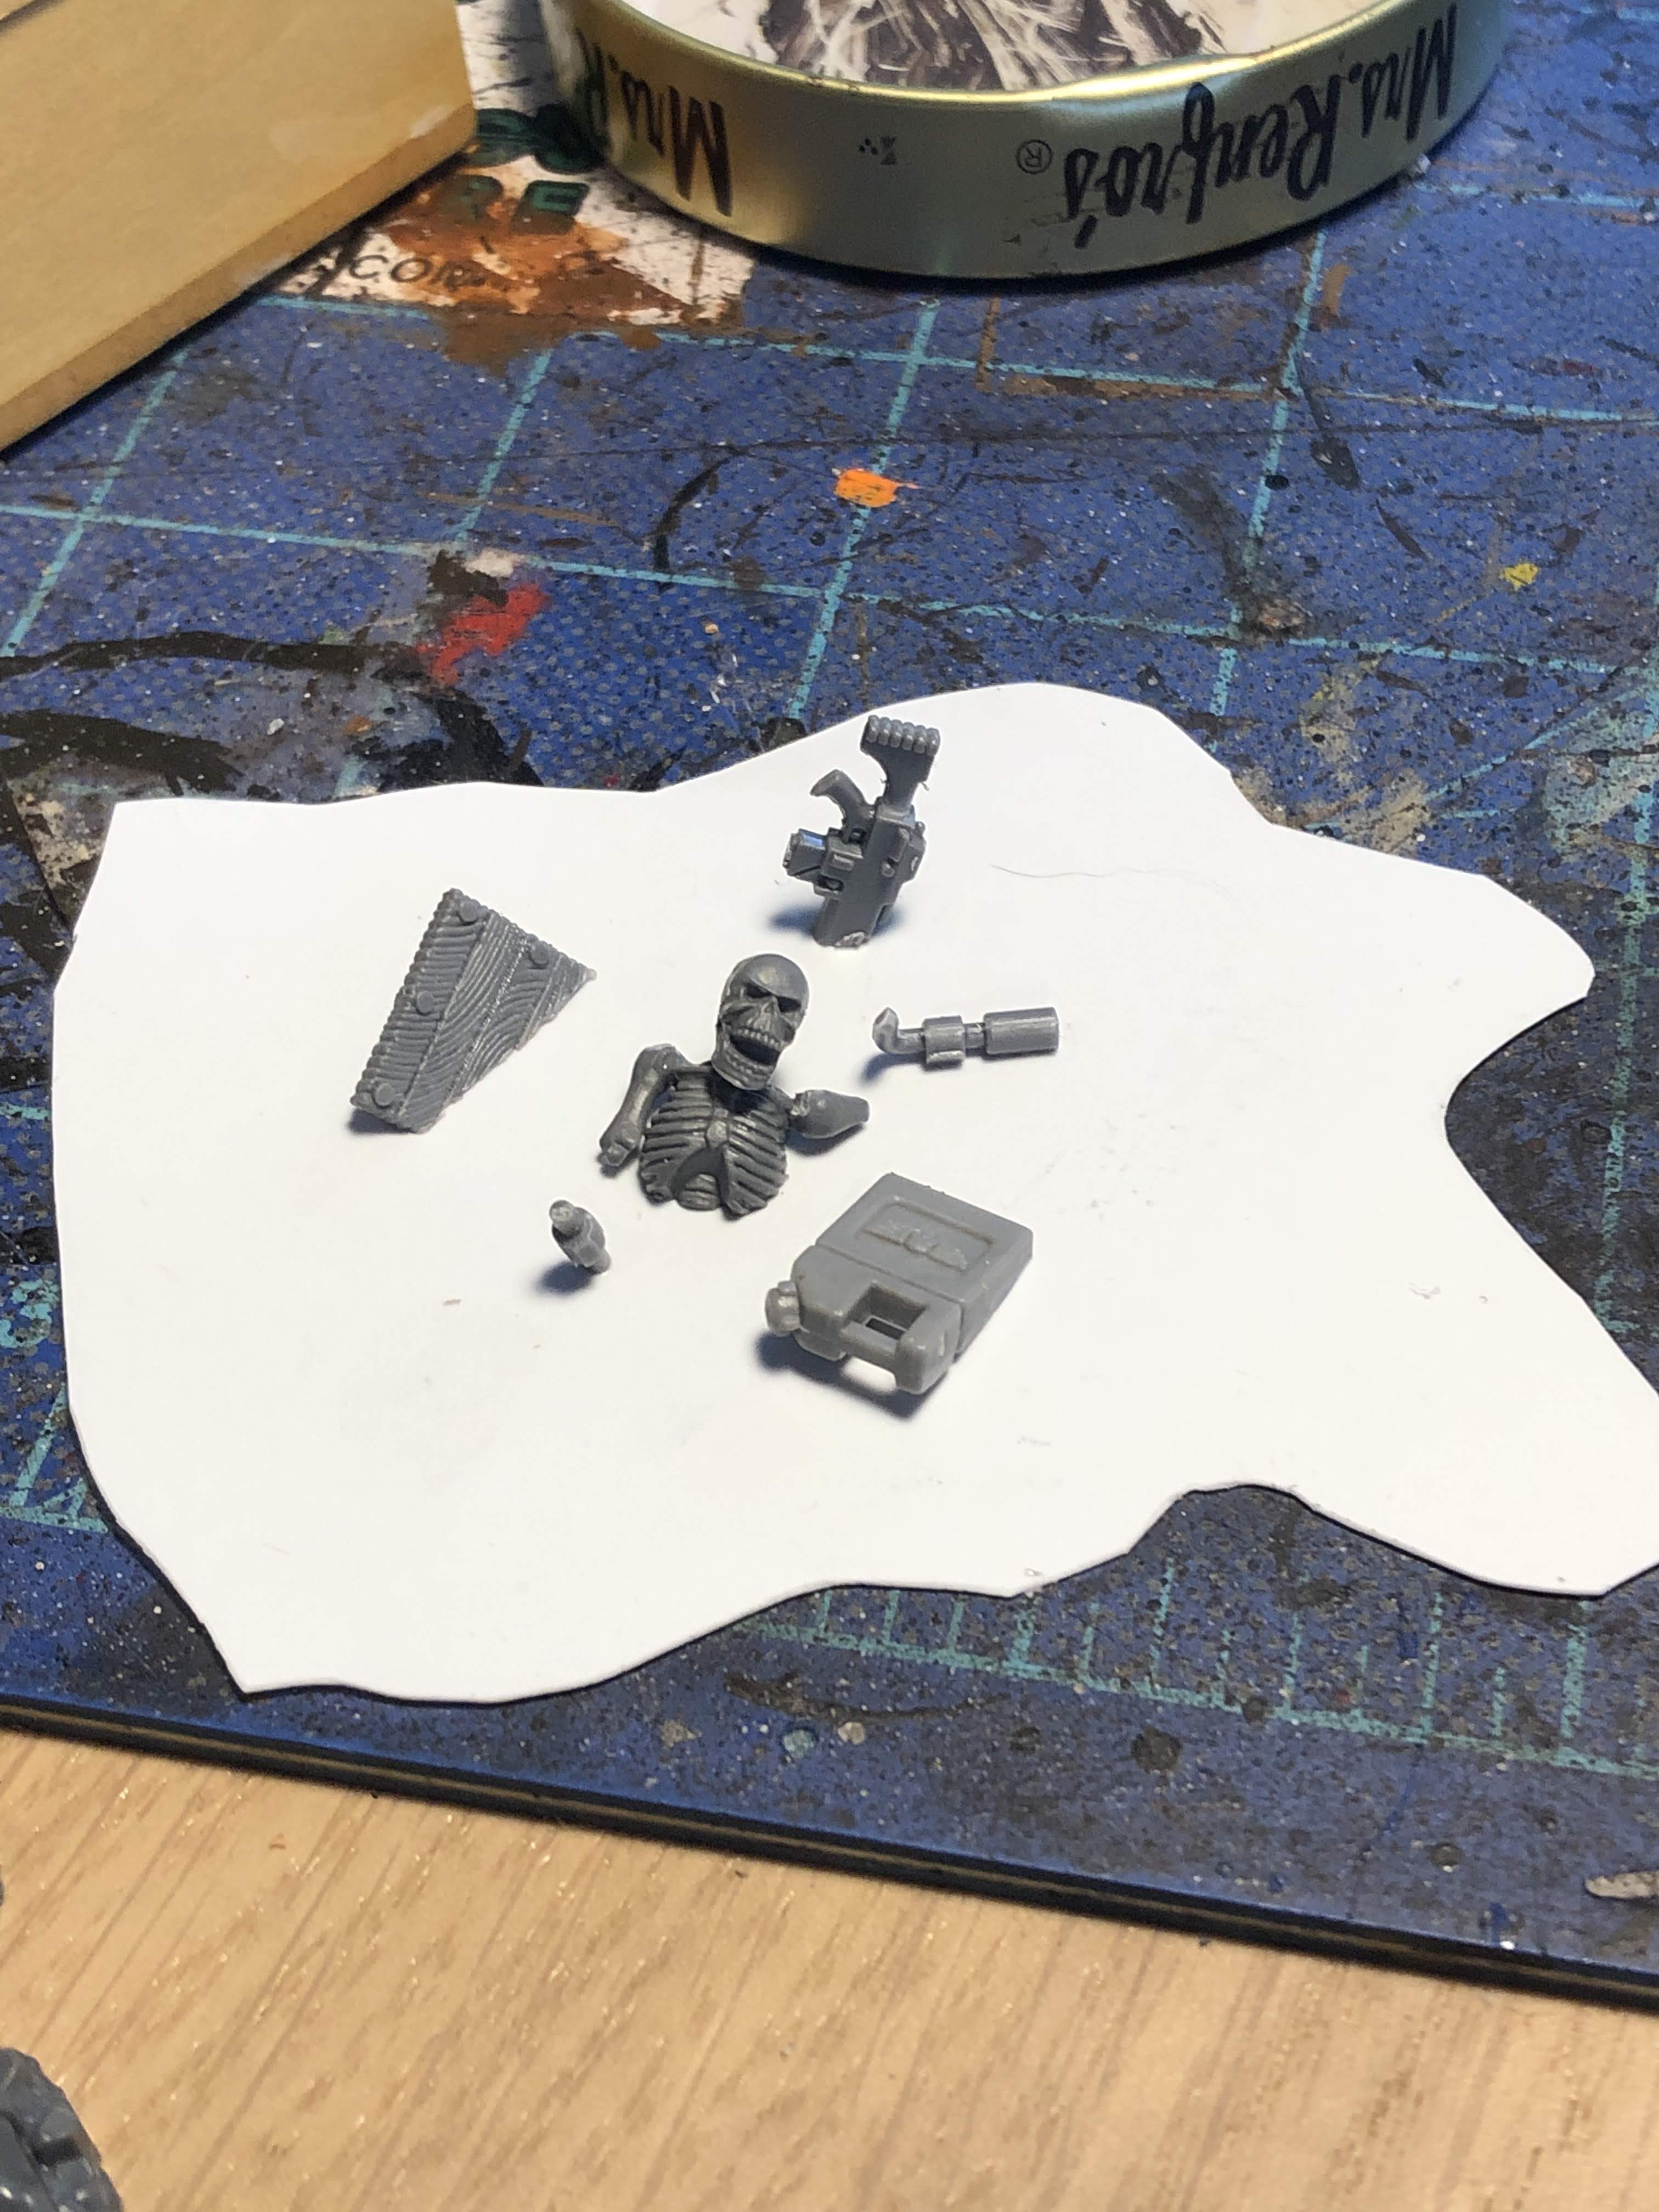
I stupidly didn’t take a picture of it painted, but under the sewer I wanted some grody details. I cut out some plasticard to shape and cut up some bits to look submerged. I later painted it with a bunch of greens and contrast paints and it looks suitably murky and gross. I would paint it, stick it under the sewer grate, and leave it masked off for the rest of the painting process, but you can see the construction here:
The board was starting to come together, and it was time to add a little more interest to it. I did some weathering to the roadway, but also cut out some pavers to give it more of that war-torn feel. I also ended up cutting my hands a few times doing this, as the plastic is particularly stubborn, but live and learn, right? I dropped in a few sunken barrels and boxes from the Sector Imperialis basing kit, and also built a sort of sidewalk around the building’s foundation. There were also some nice vents and a manhole cover here, which I added to the board. The last touch on the road was to add a fallen column coming from just off-screen as it were, using the Urban Conquest bits. Now it was time to add some sand!
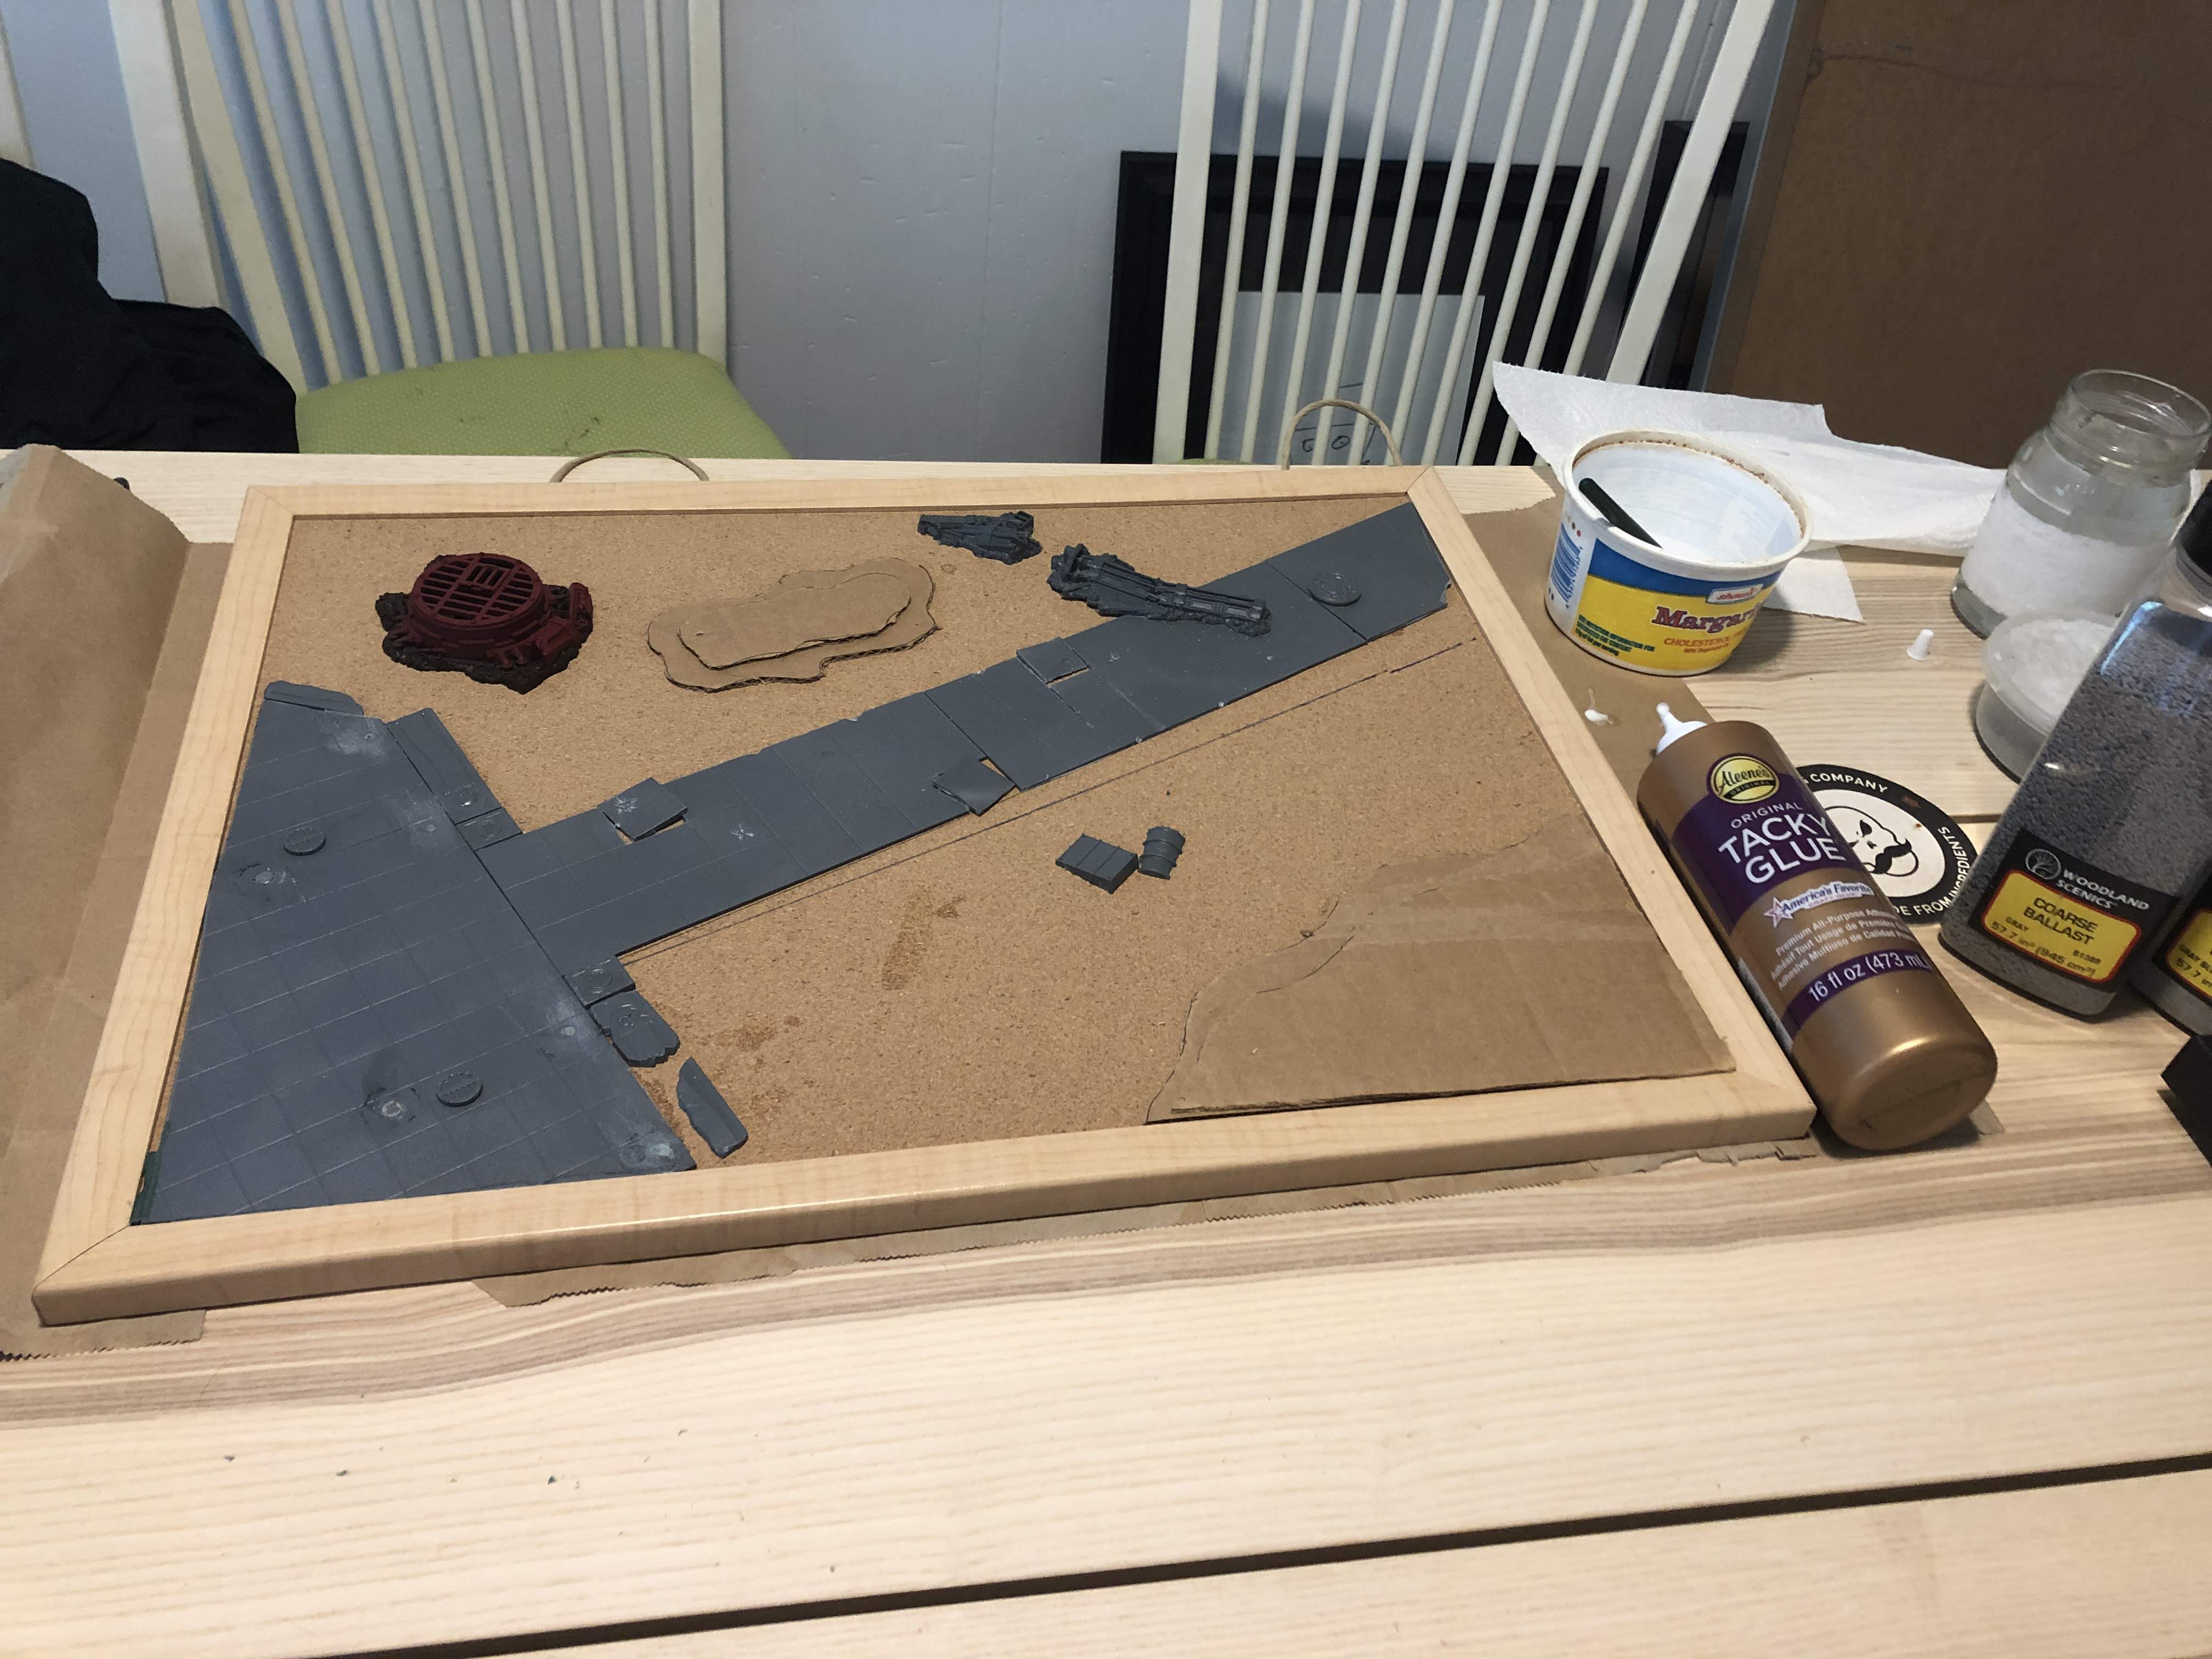
It would need a bit more on the hills and road edges to blend them in, but the mix of sands I’ve amassed over the years was looking good.
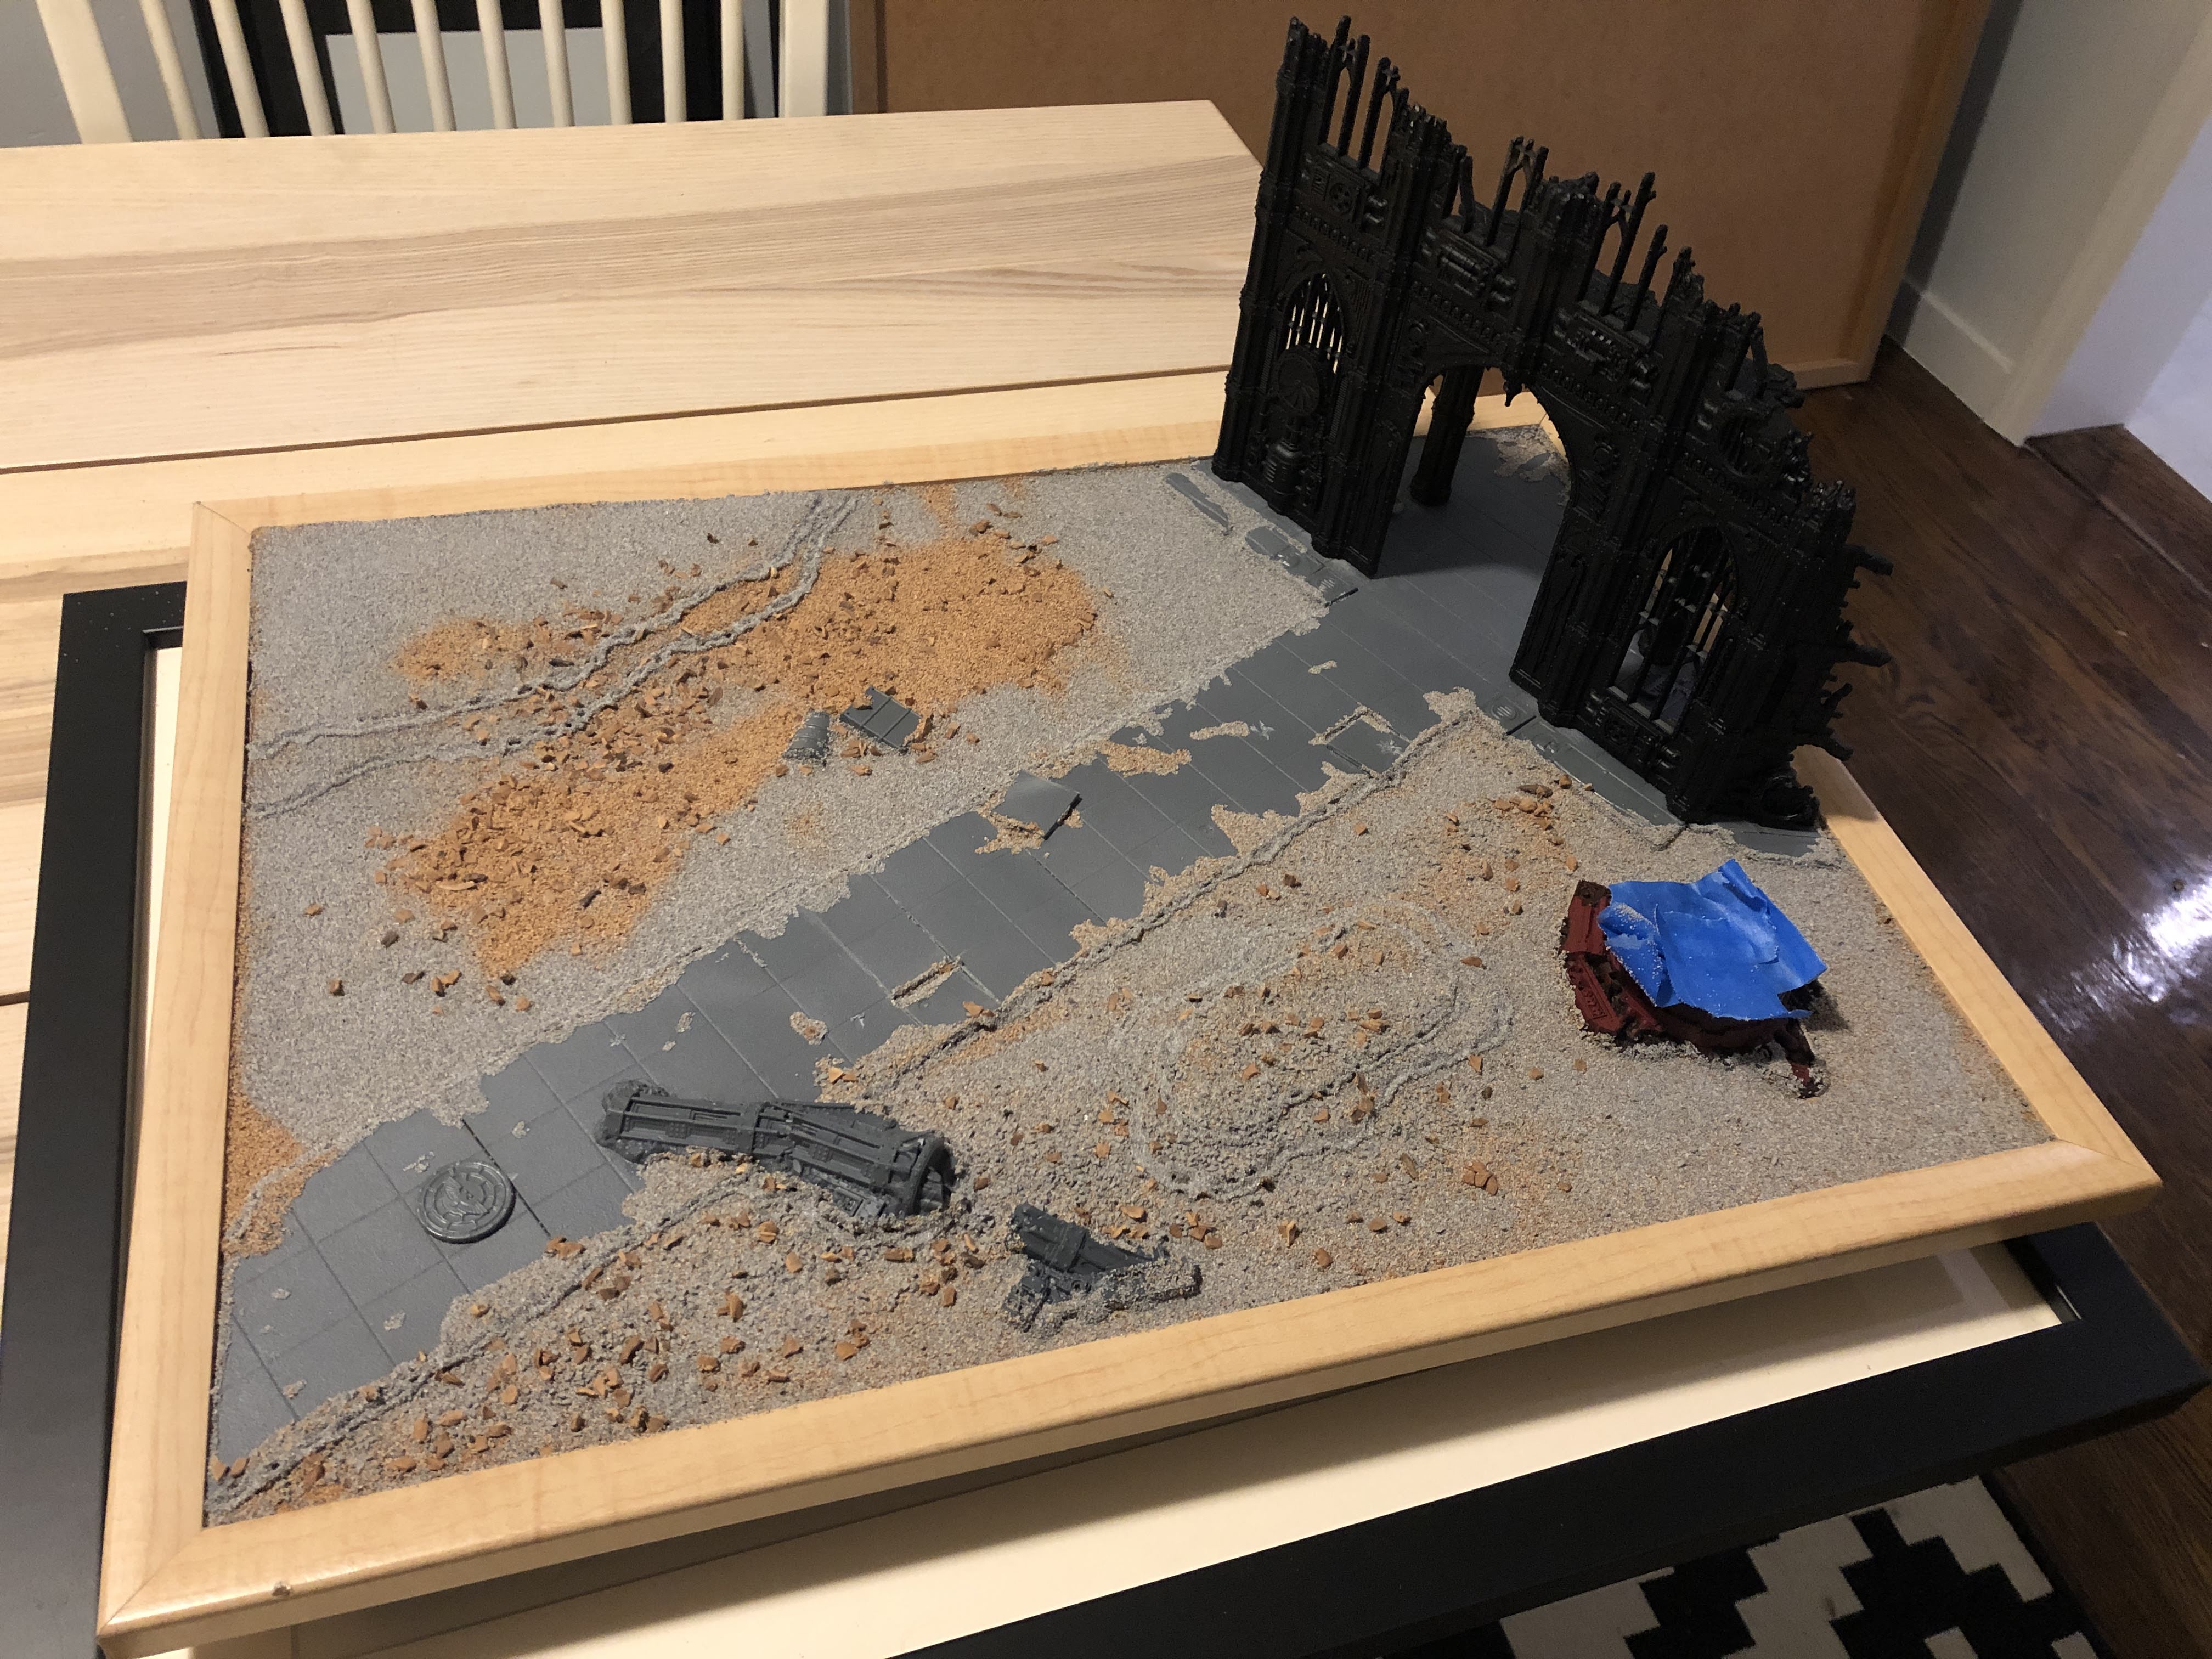
It was also time for the moment of truth RE: my magnets:
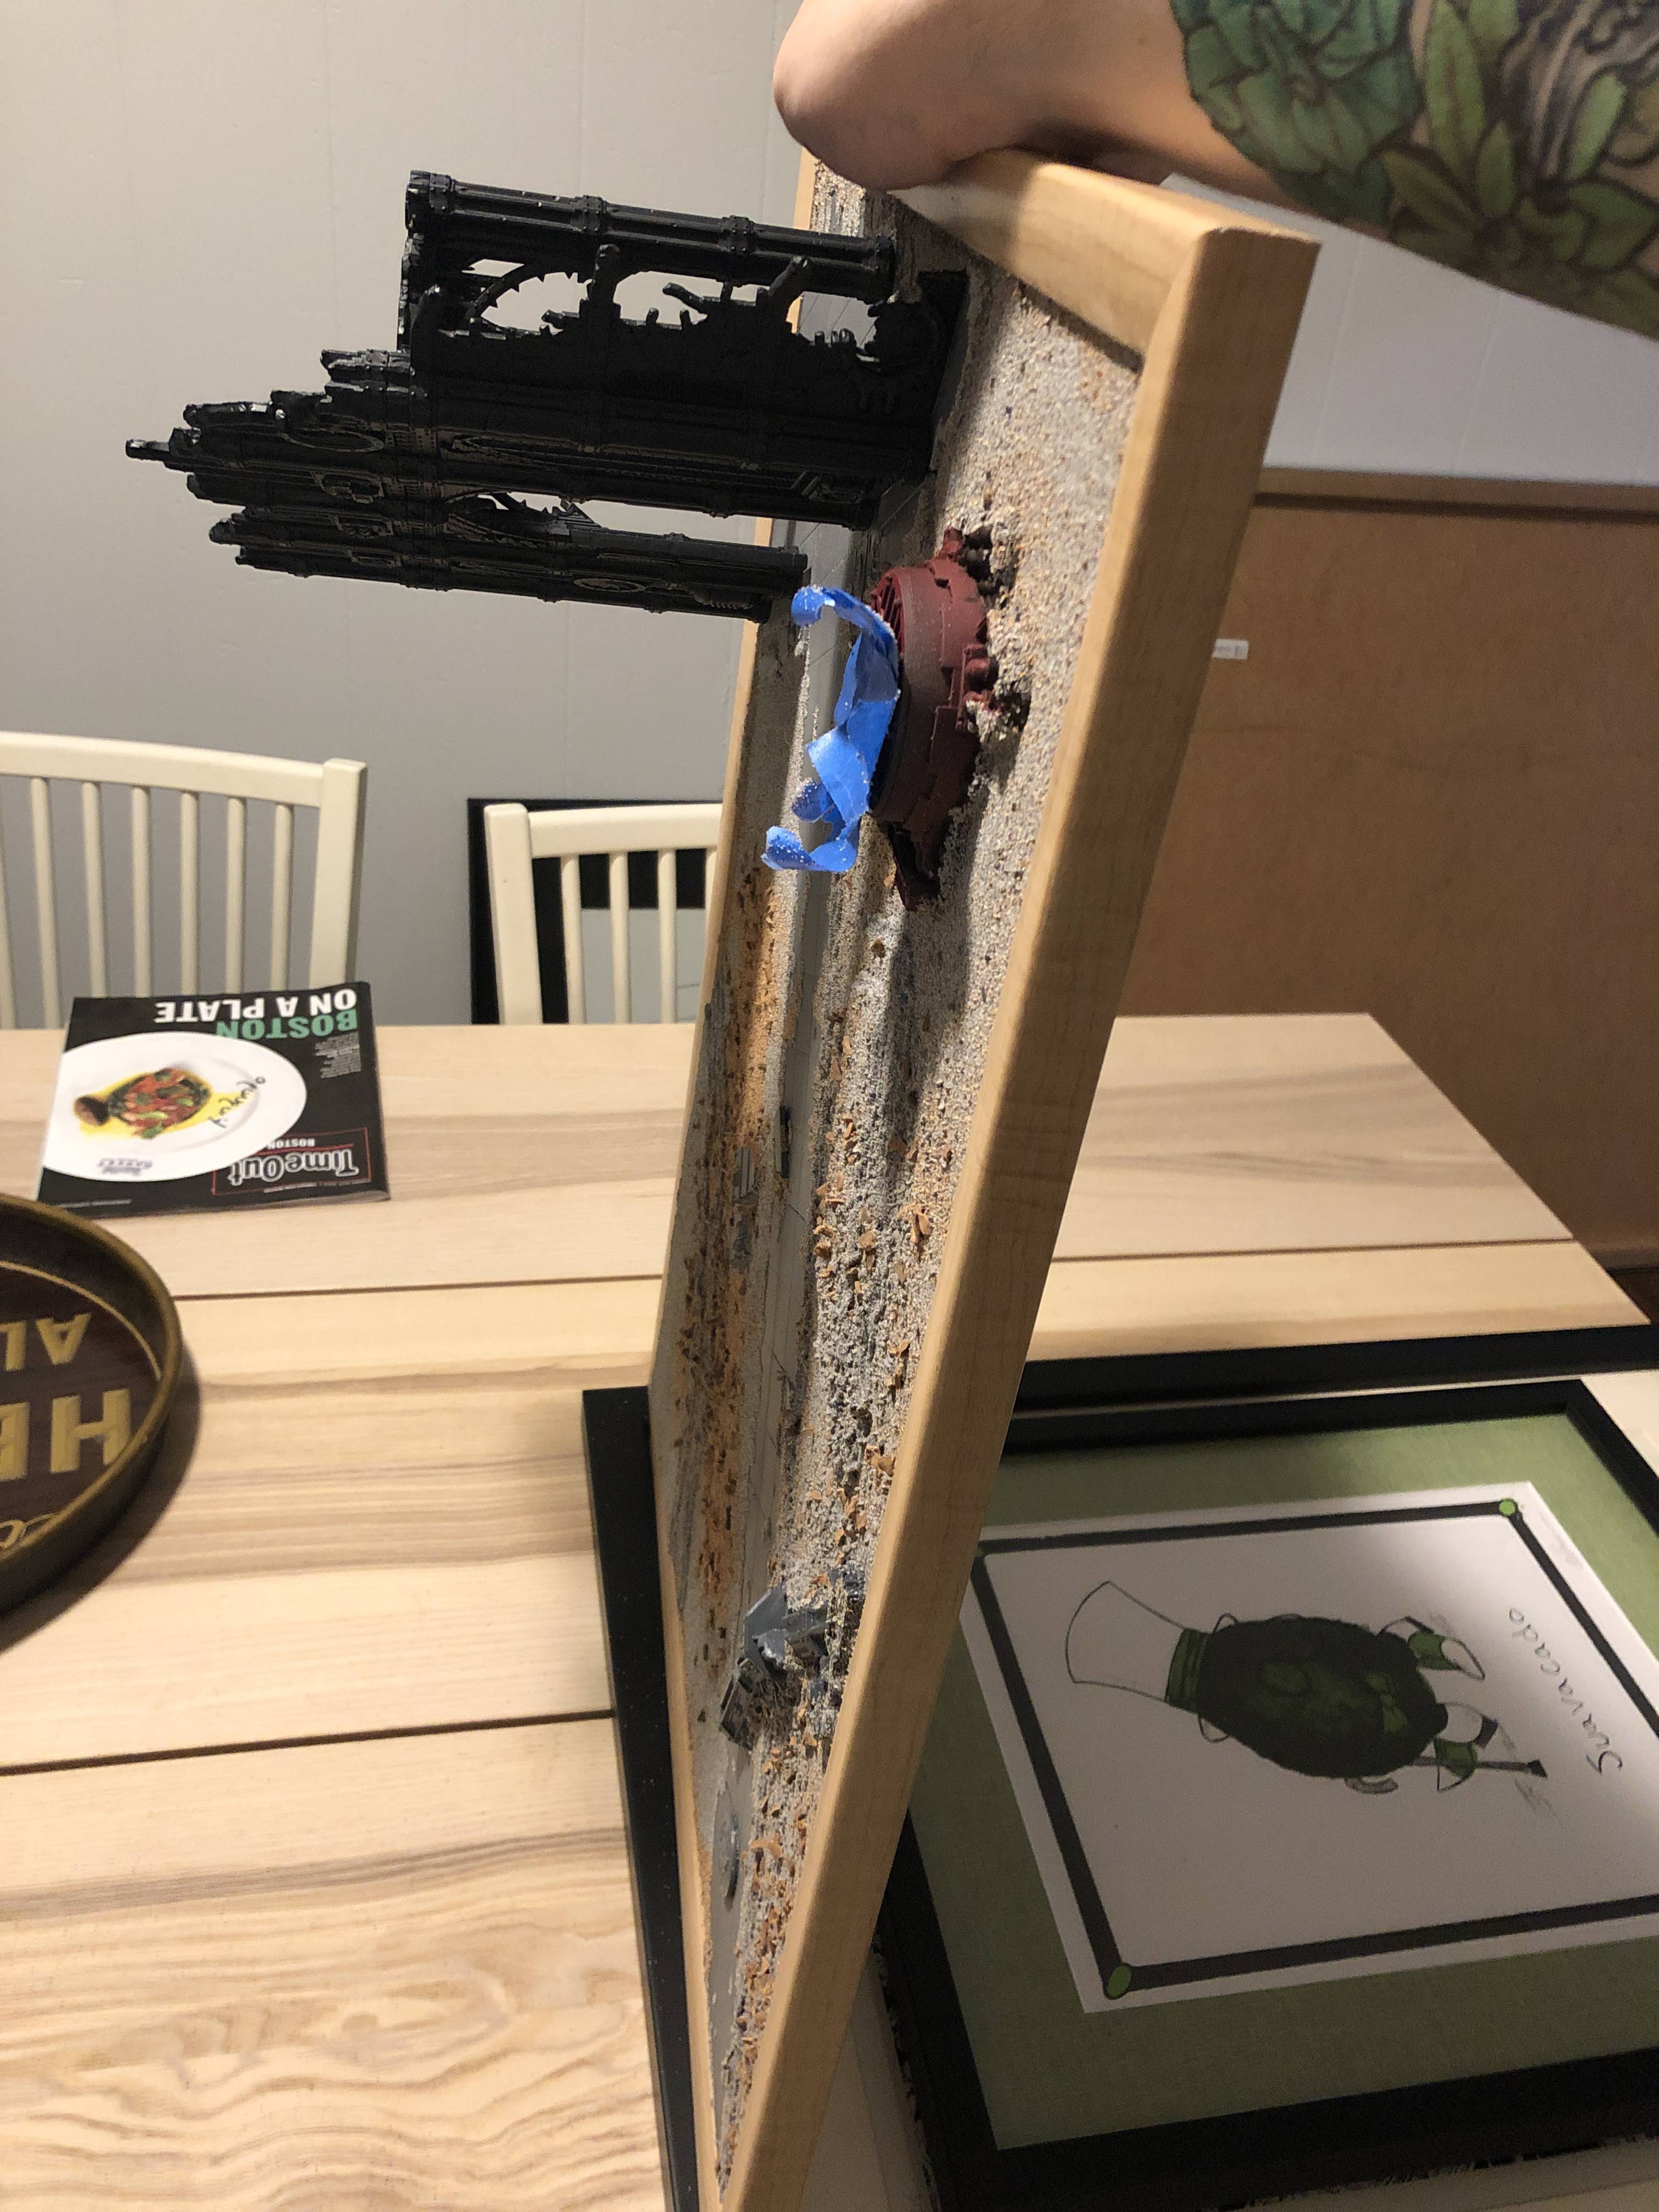
Hell yeah buddy, I spilled sand all over my dining room table with that one! You may have noticed the building was black but now it’s white – I used a modified version of Warhammer TV’s Warcry terrain tutorial for it, and I’m super happy with the results. When I paint another one of these I won’t go so hard on the metallics though, they were a massive pain in the butt. There’s also no fewer than 80 skulls on this damn thing.
 Most importantly, Noomi likes it:
With the building done, it’s time to return to the board. Using masking tape and a few colored sprays, I got the main colors blocked out:

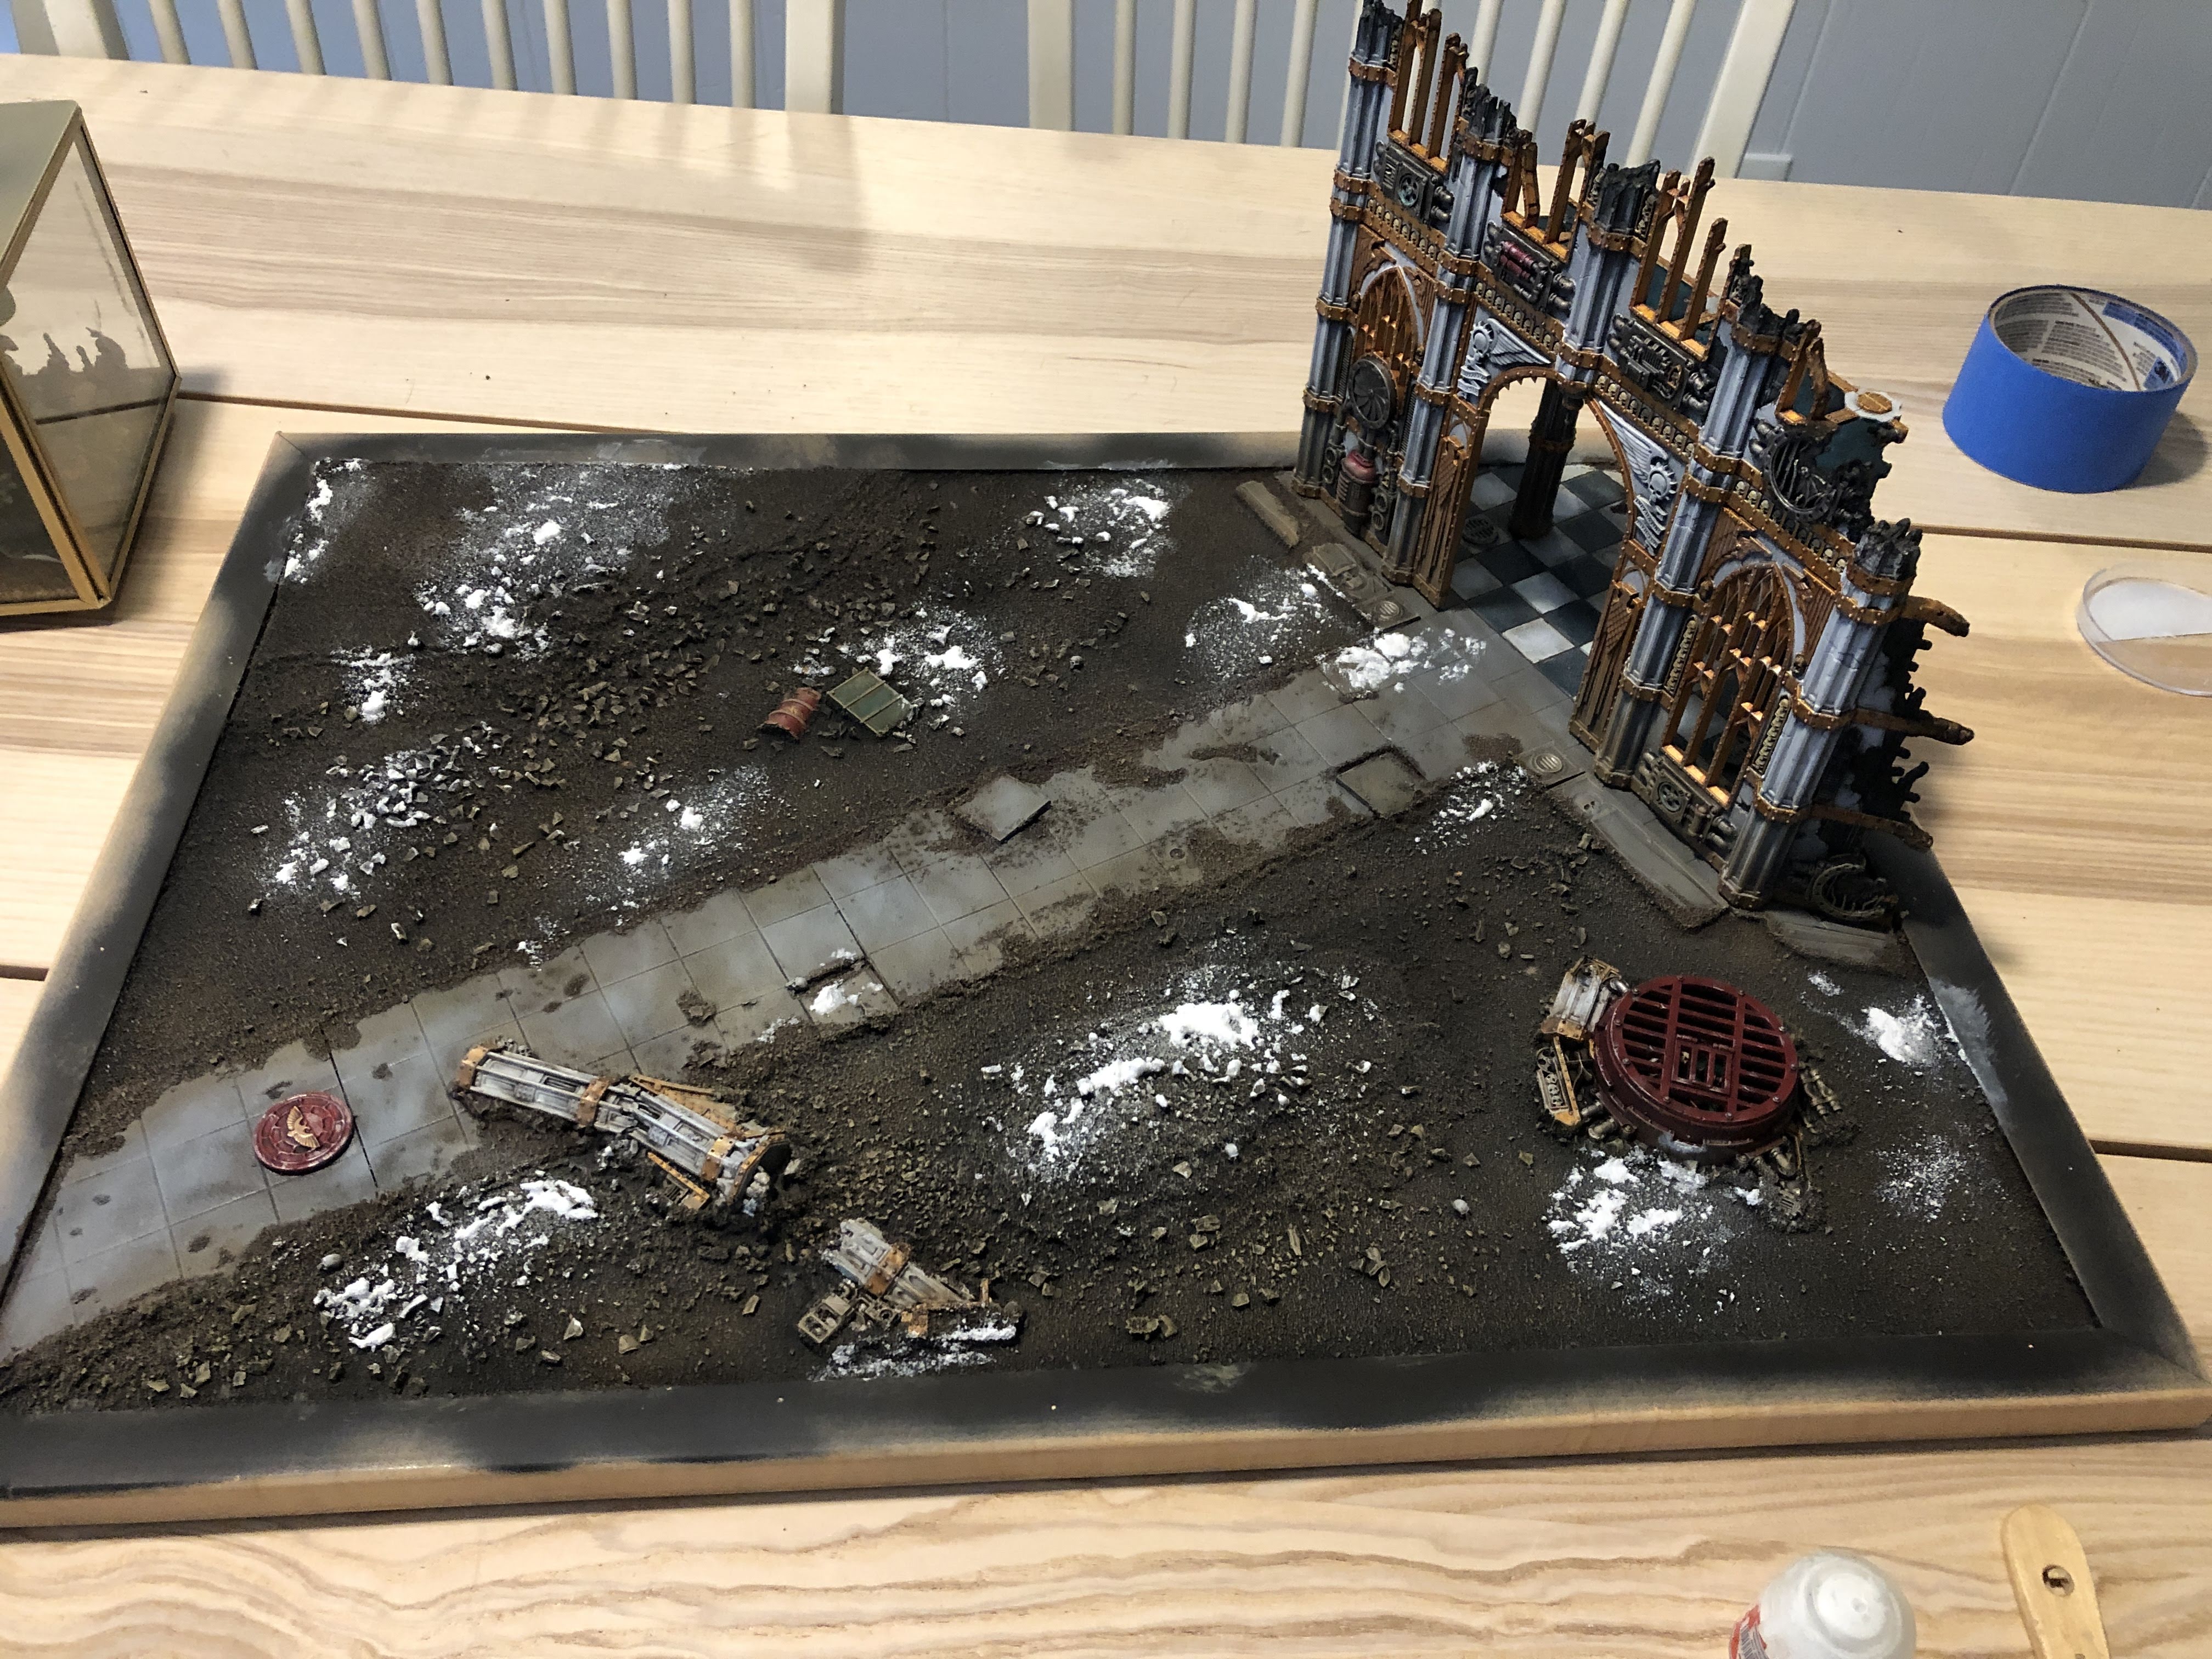
The roads got a healthy coat of Agrax Earthshade followed by a Celestra Grey drybrush, and I picked out the fallen columns in the same color palette as the building. The tiles were Ulthuan Grey and Incubi Darkness, washed black and drybrushed white. I filled in the lines later with watered down Rhinox Hide to clean up my messy brushwork and add definition. I also washed the recesses on the sewer grate with Agrax, and hit it up with a drybrush of Necron Compound. The board followed my basing scheme and got successive drybrushes of Steel Legion Drab, Tallarn Sand, and Karak Stone. I also did some more weathering on the building, adding dust to the bottom with the same colors of the board and black on all the blasted bits.
The last step was snow. My normal snow technique looks frankly kind of gross on large swathes of board. My fiancee thought I was growing mold cultures on my old display board, so I thought I’d try something different. This time I mixed PVA glue, snow, and Ceramite White paint into a paste which I gingerly brushed over some parts of the board.
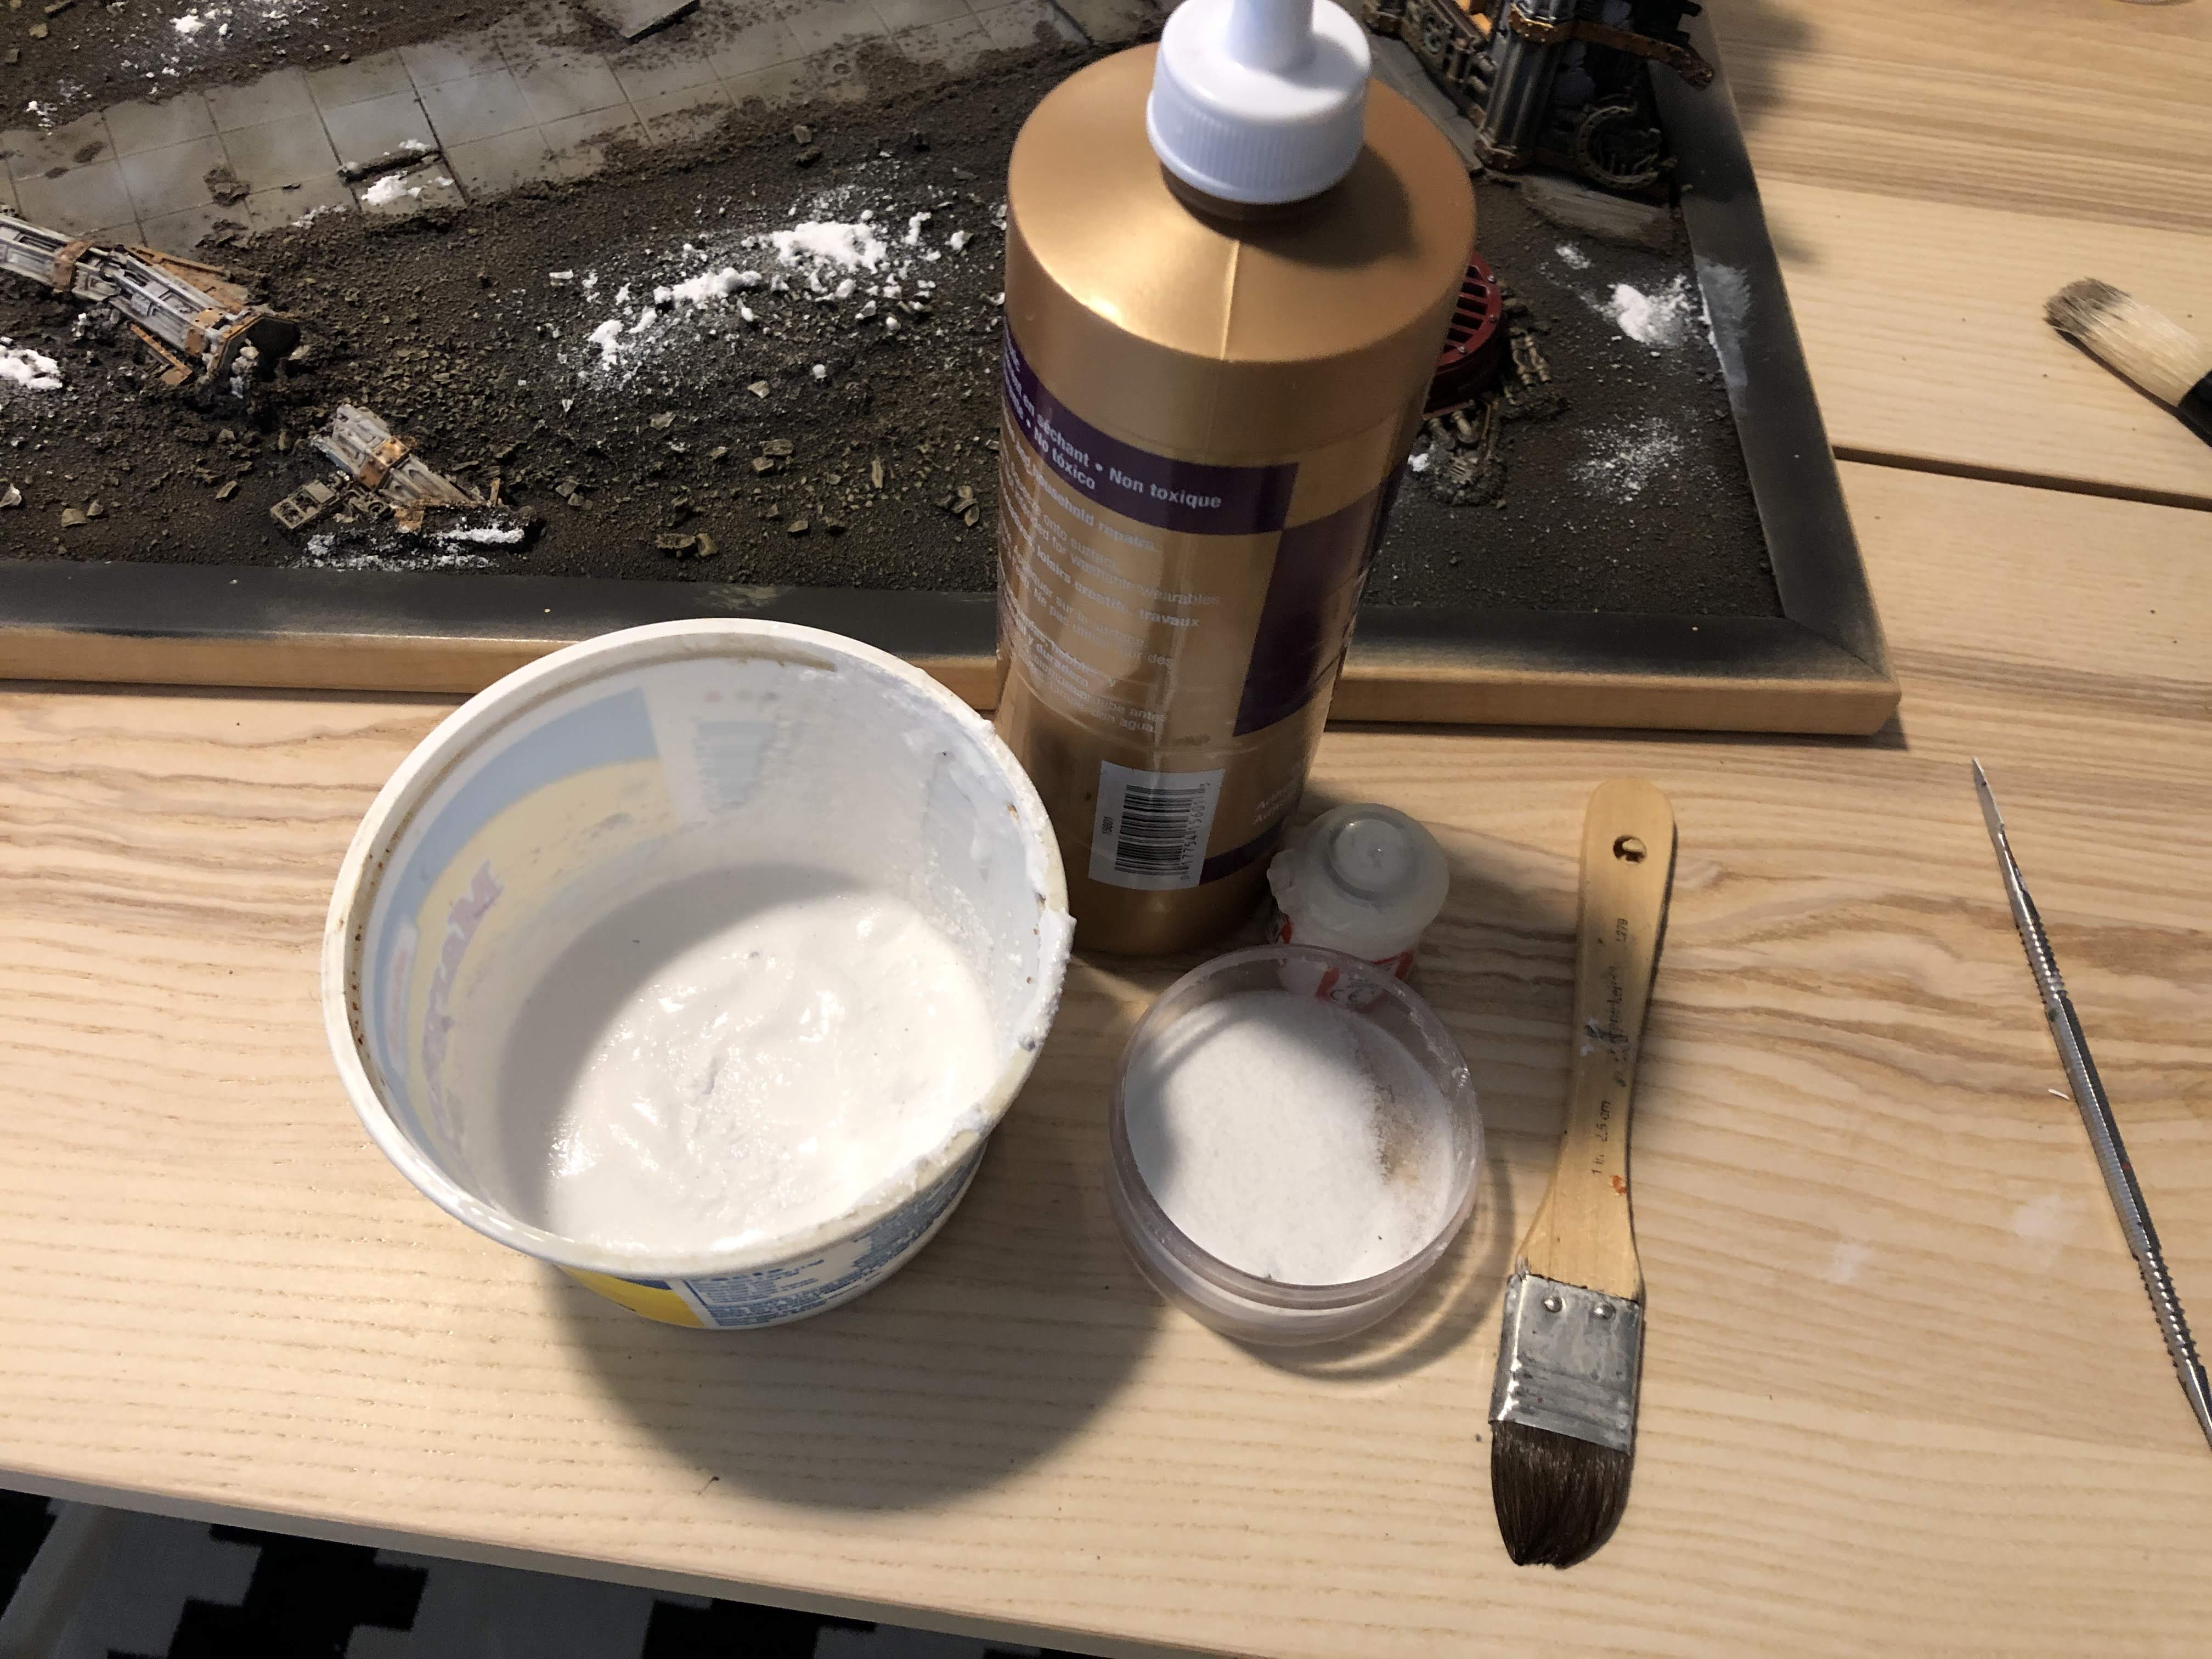
I was careful with this stuff as it was super thick, but it came out pretty well.
I had two steps left. First, I had to paint the edges. Second, I’d have to varnish the board. For the edges, I masked off everything:
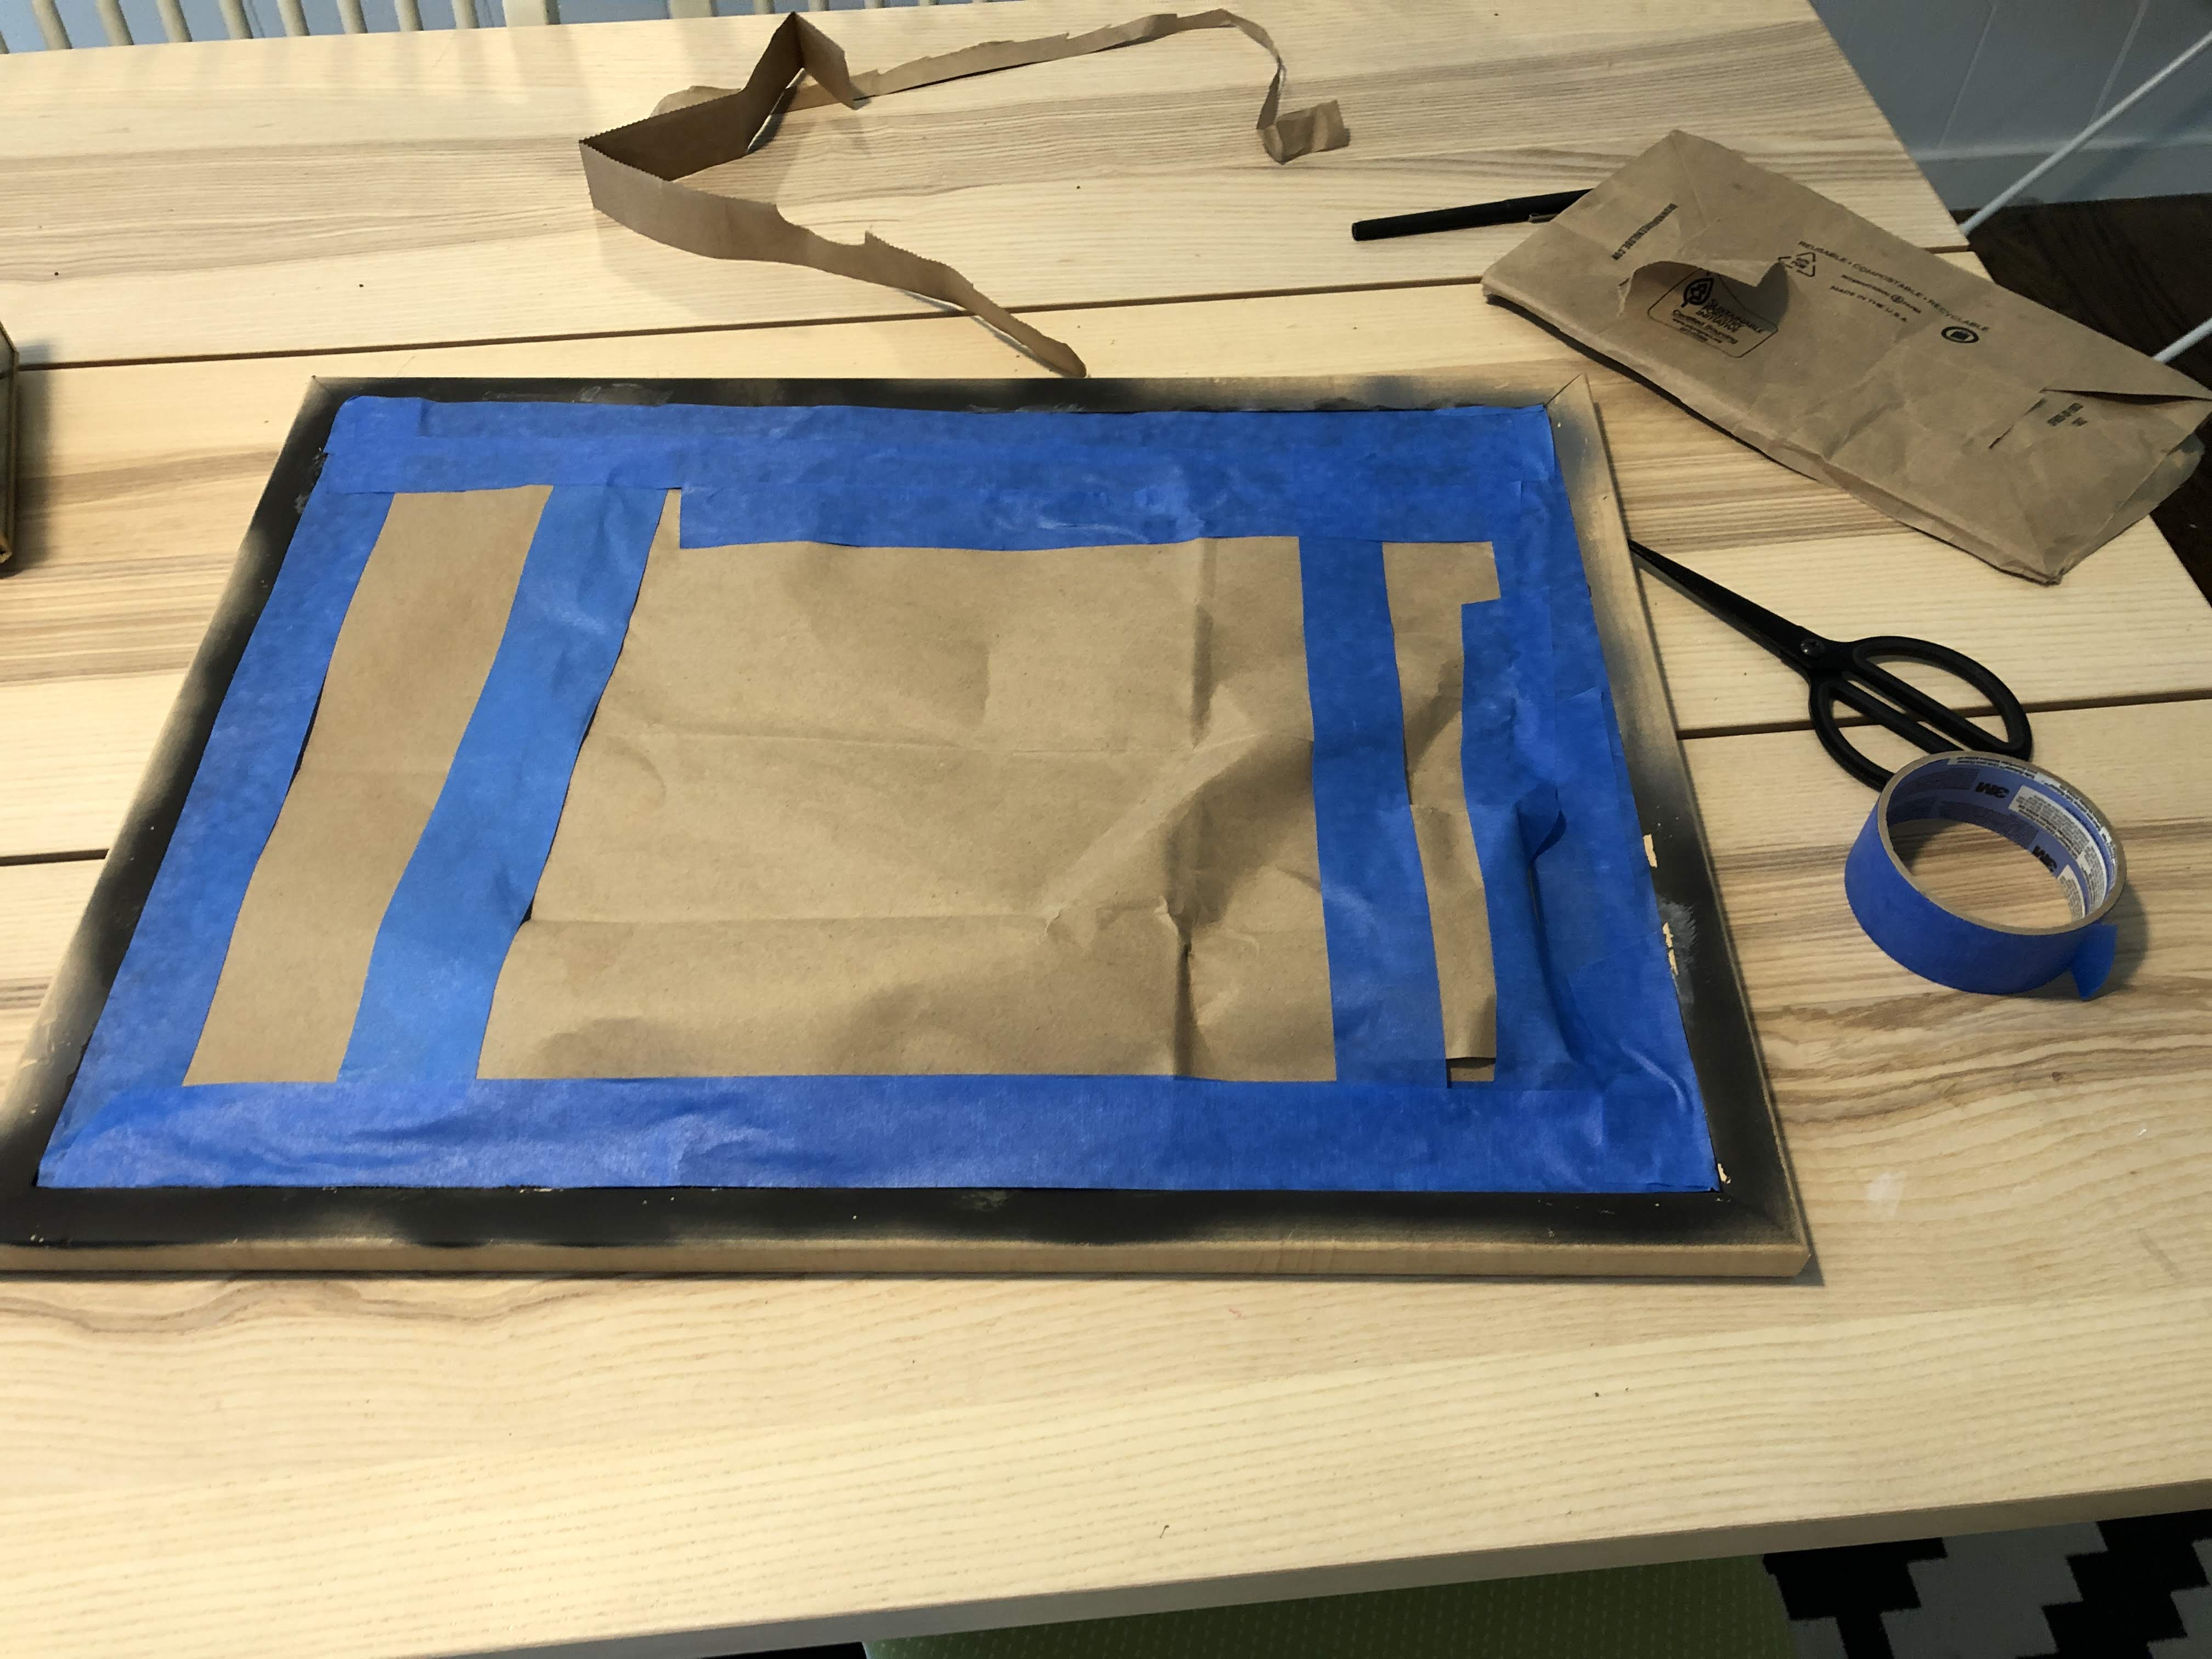
I was going to use a few pretty thick coats of satin black primer here, so to avoid it sticking to the ground I used my trusty priming box. I was pretty stocked with the results, even if I had to tidy up some interior edges:

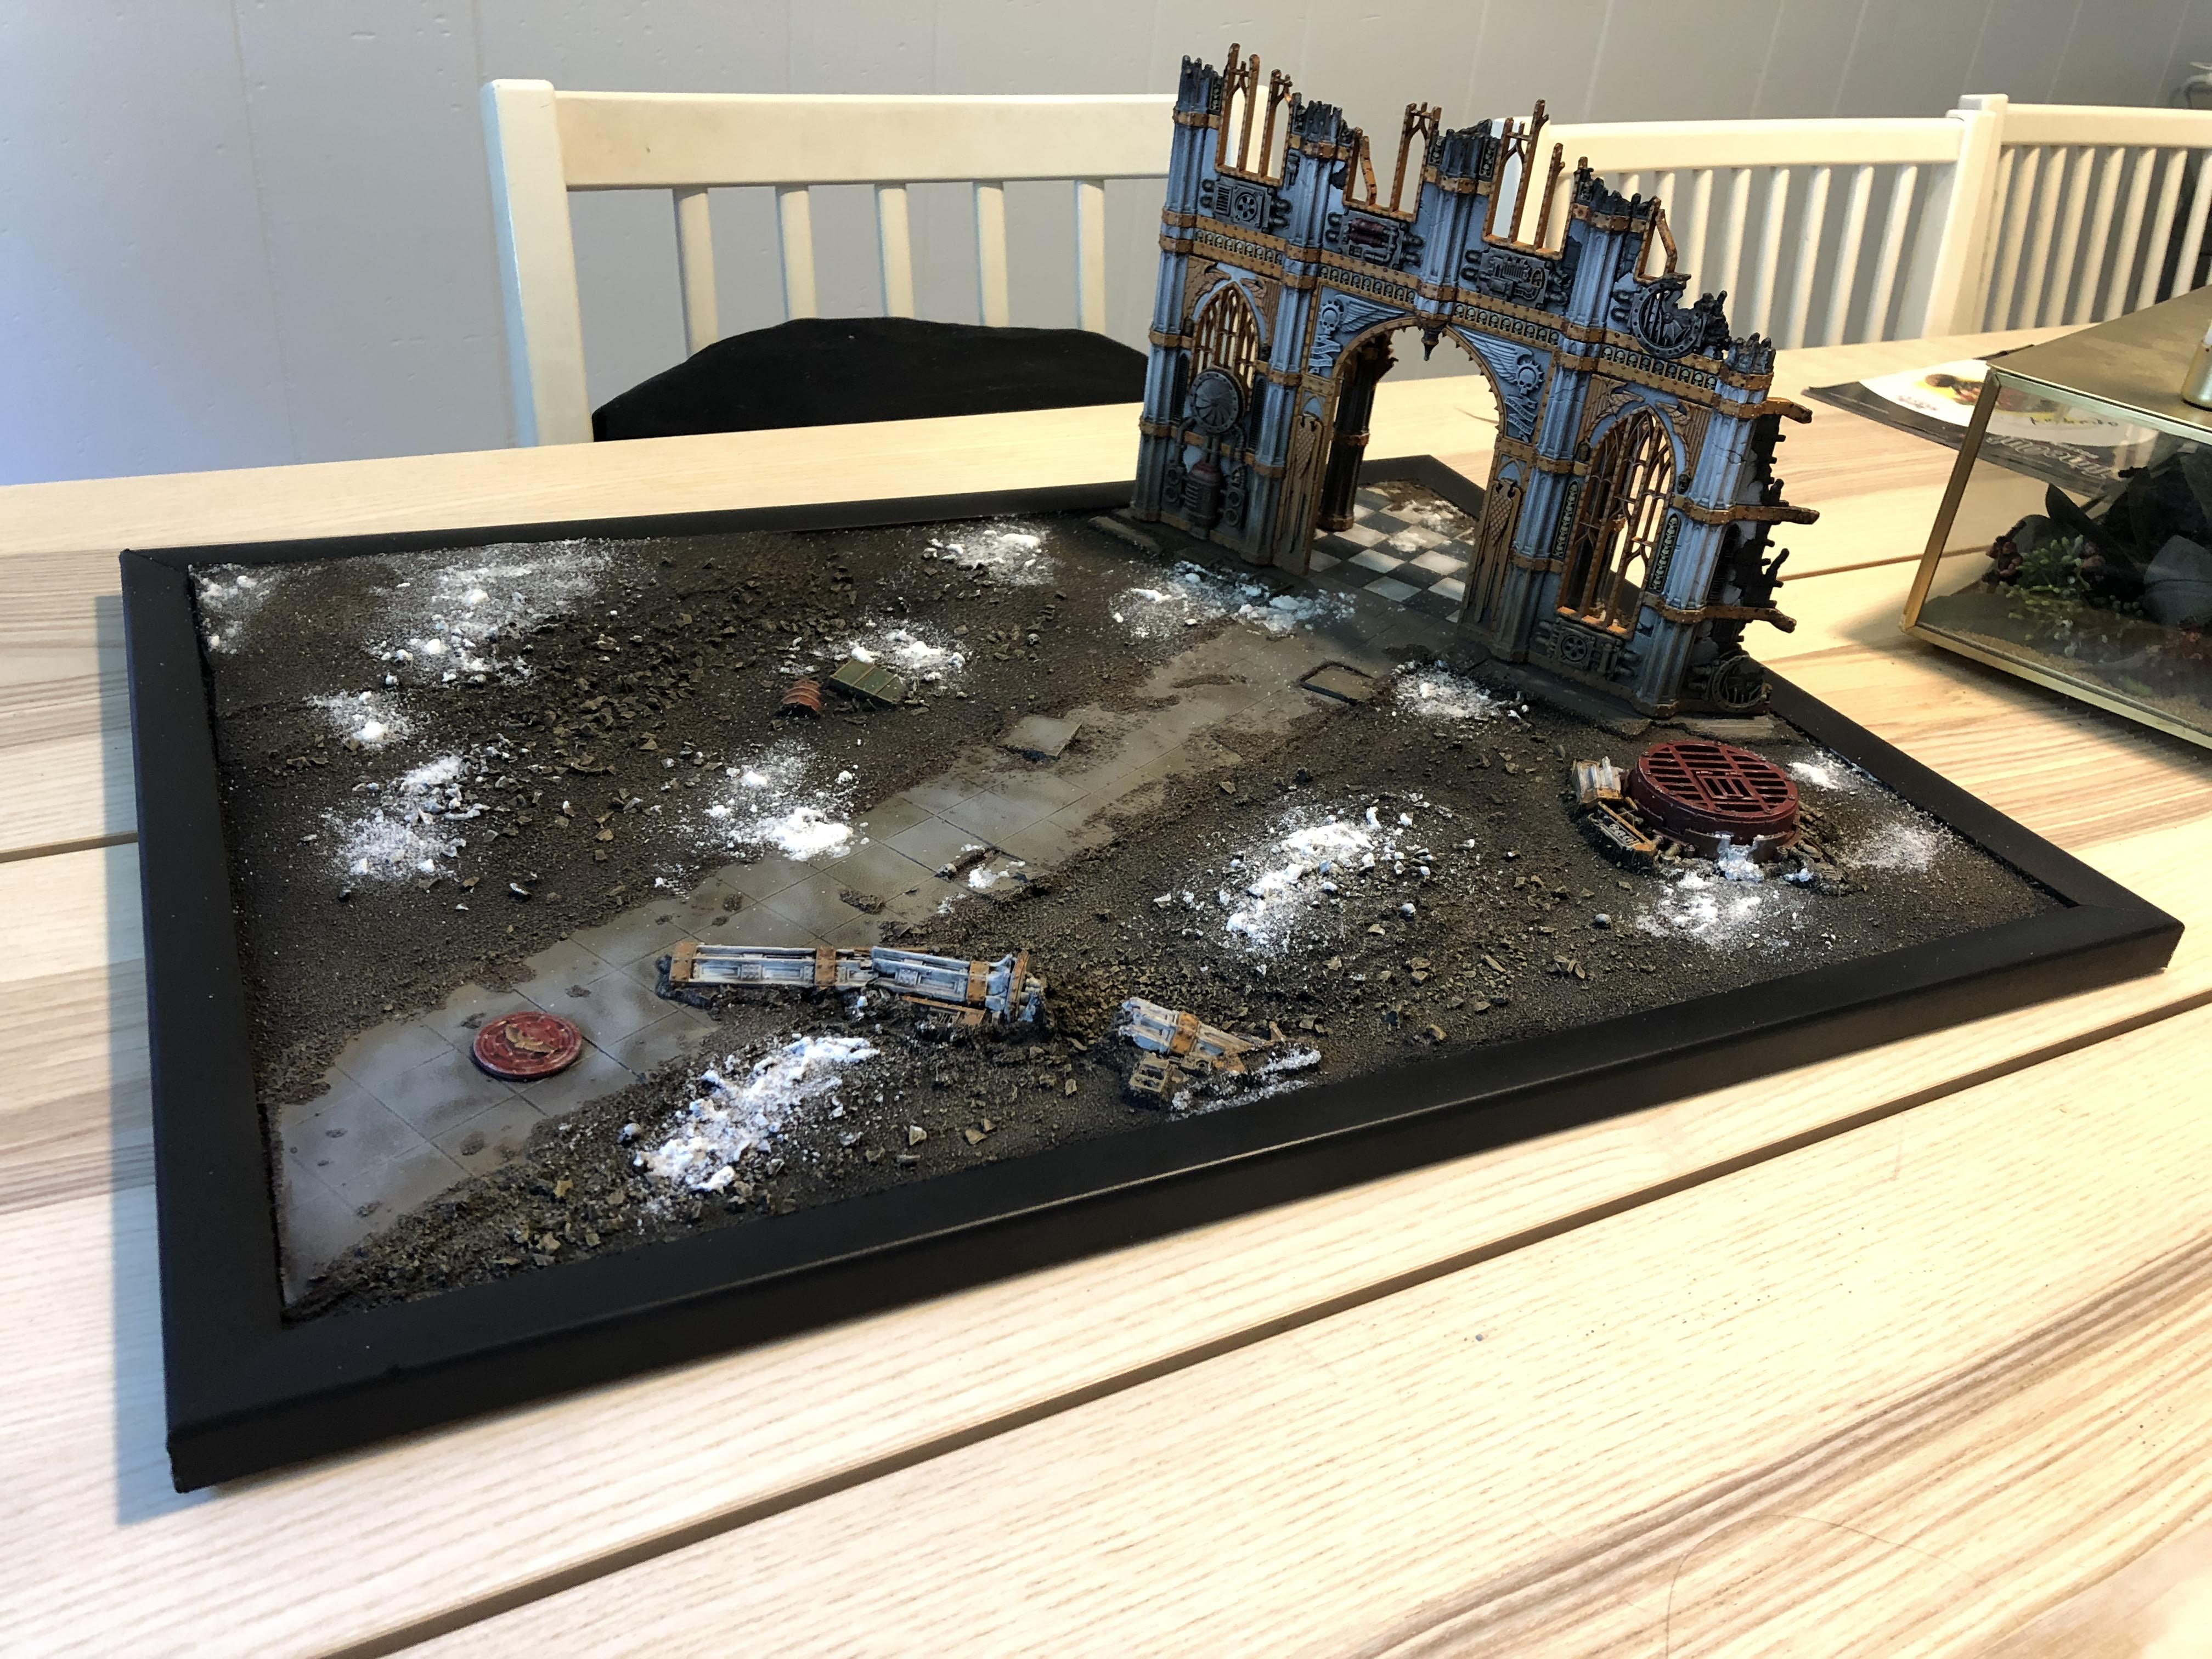
It was a real nice day out that day, so I varnished the board and the building with Testors Dullcote. Before hitting the board with varnish, I did sprinkle some loose snow over all the white areas to give the snow a bit more volume and realism:

And here’s the board, all finished and still reeking of aerosol:
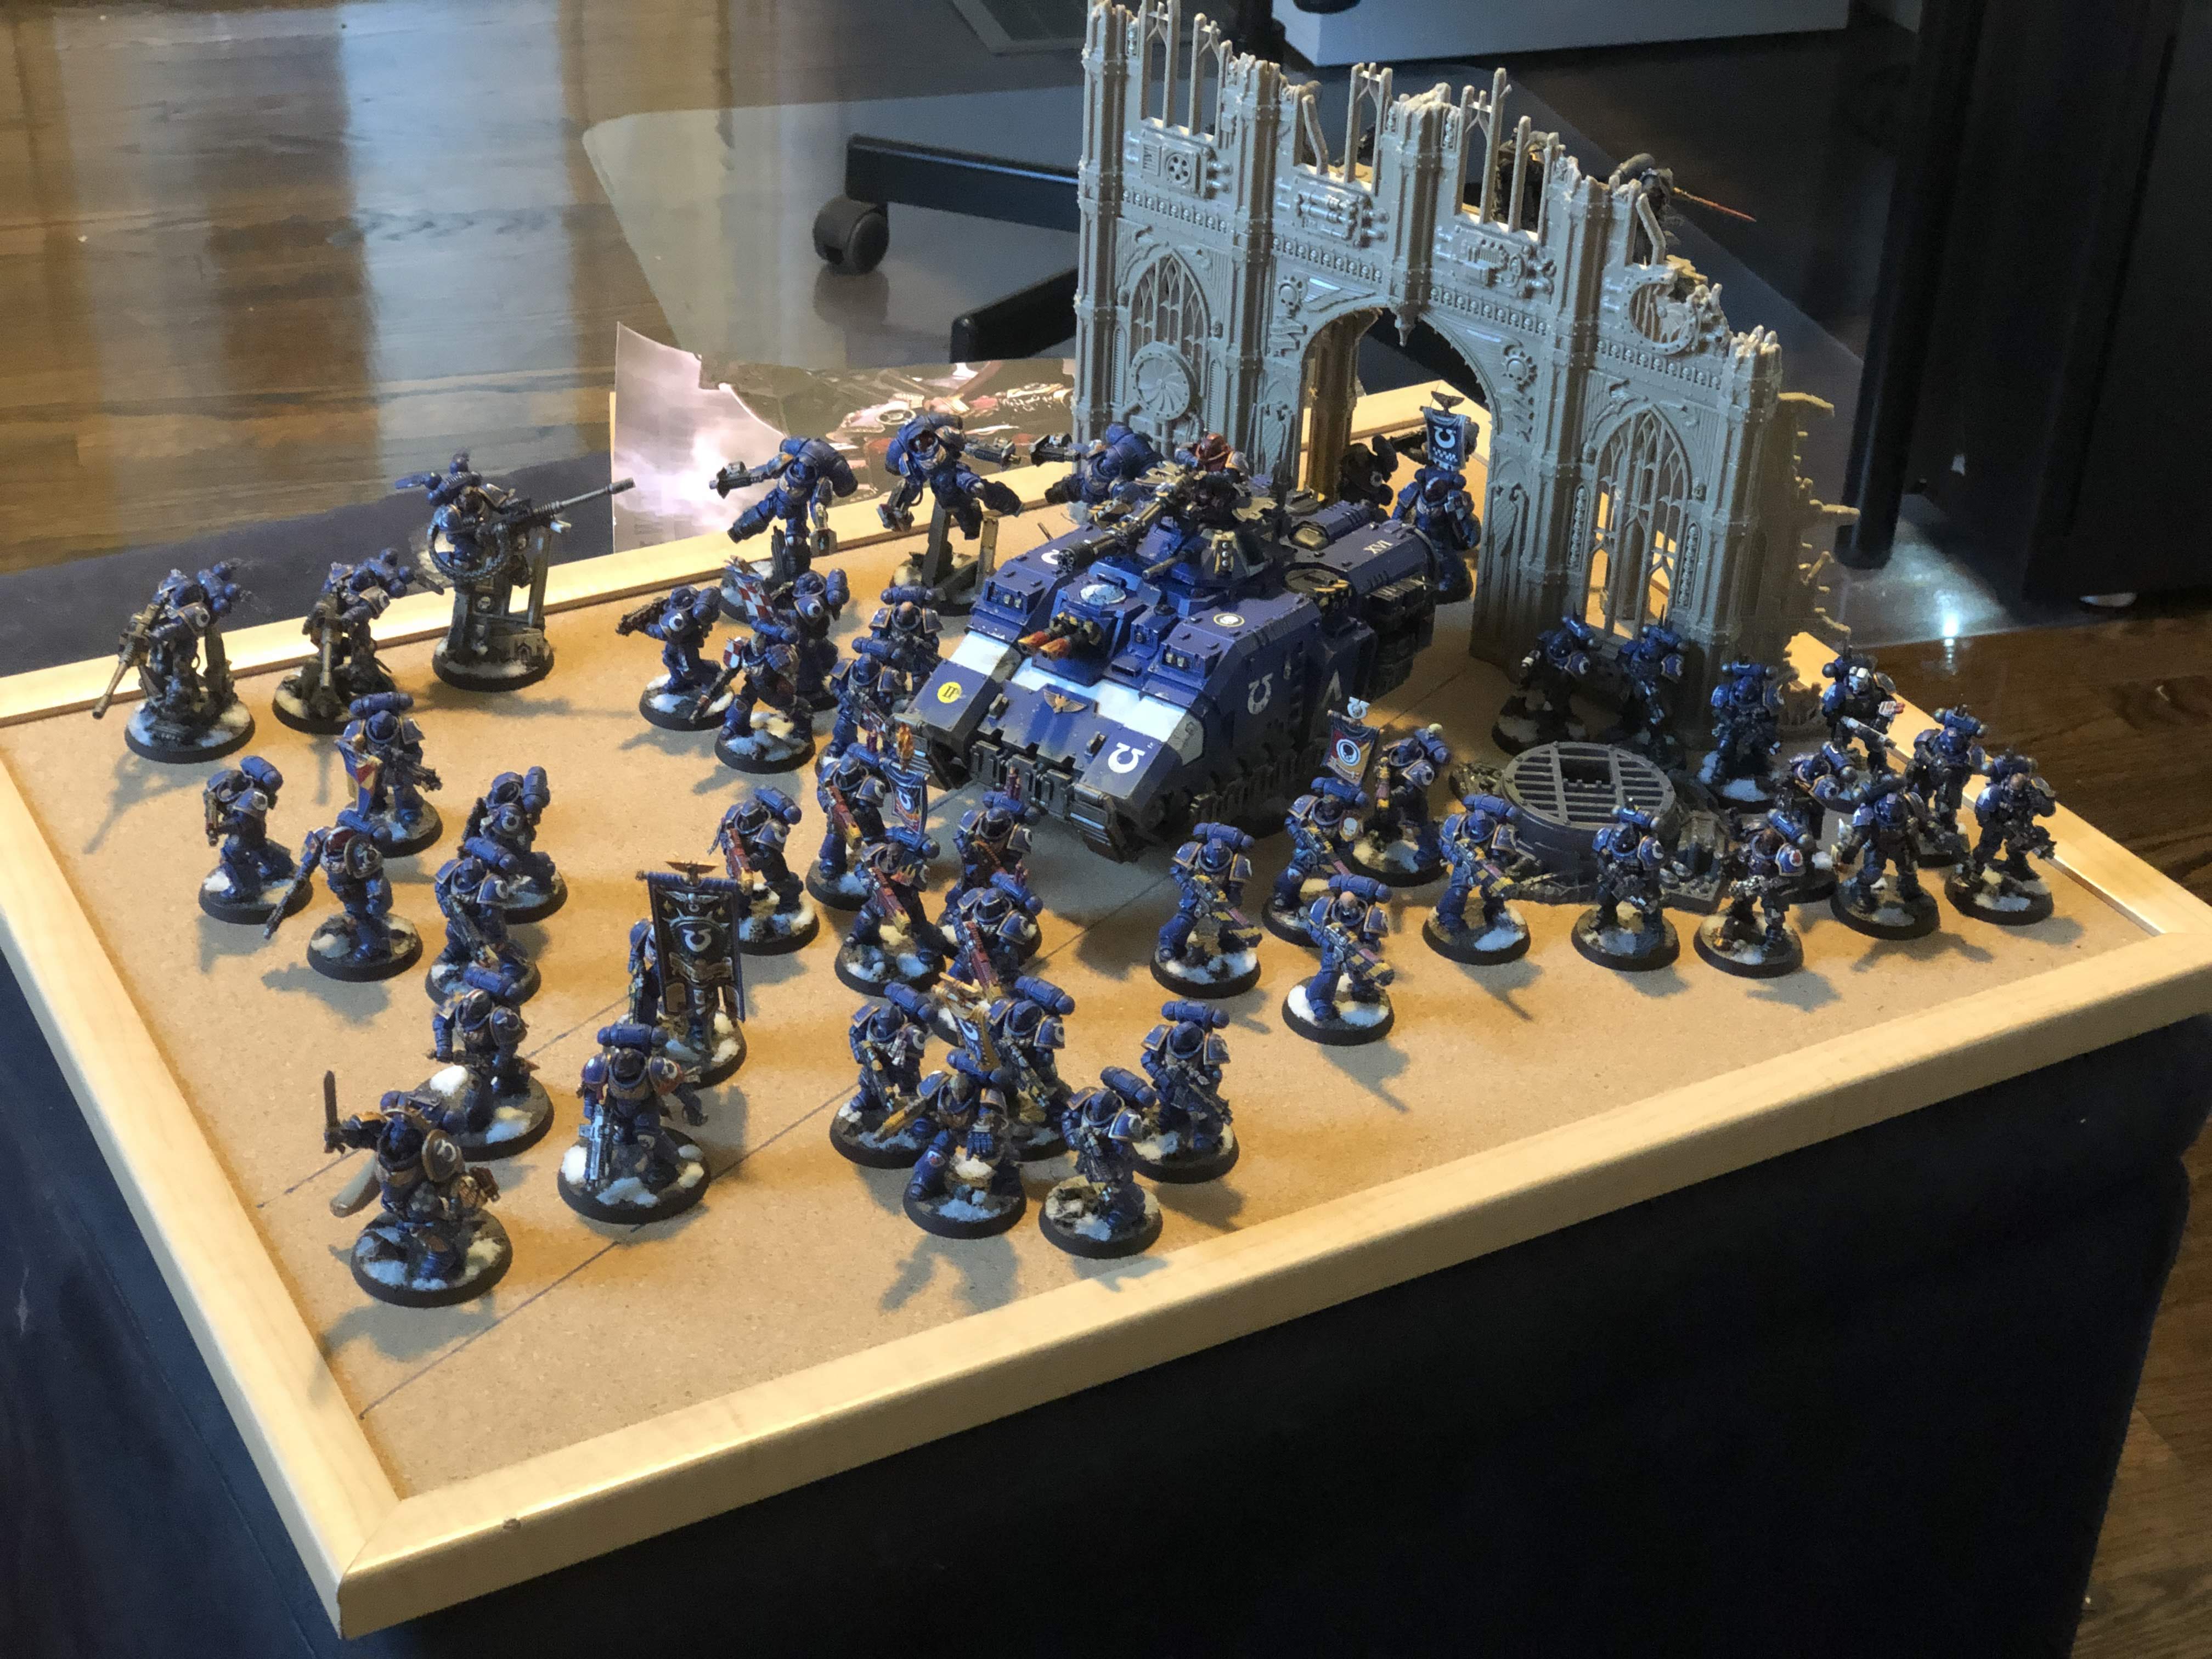
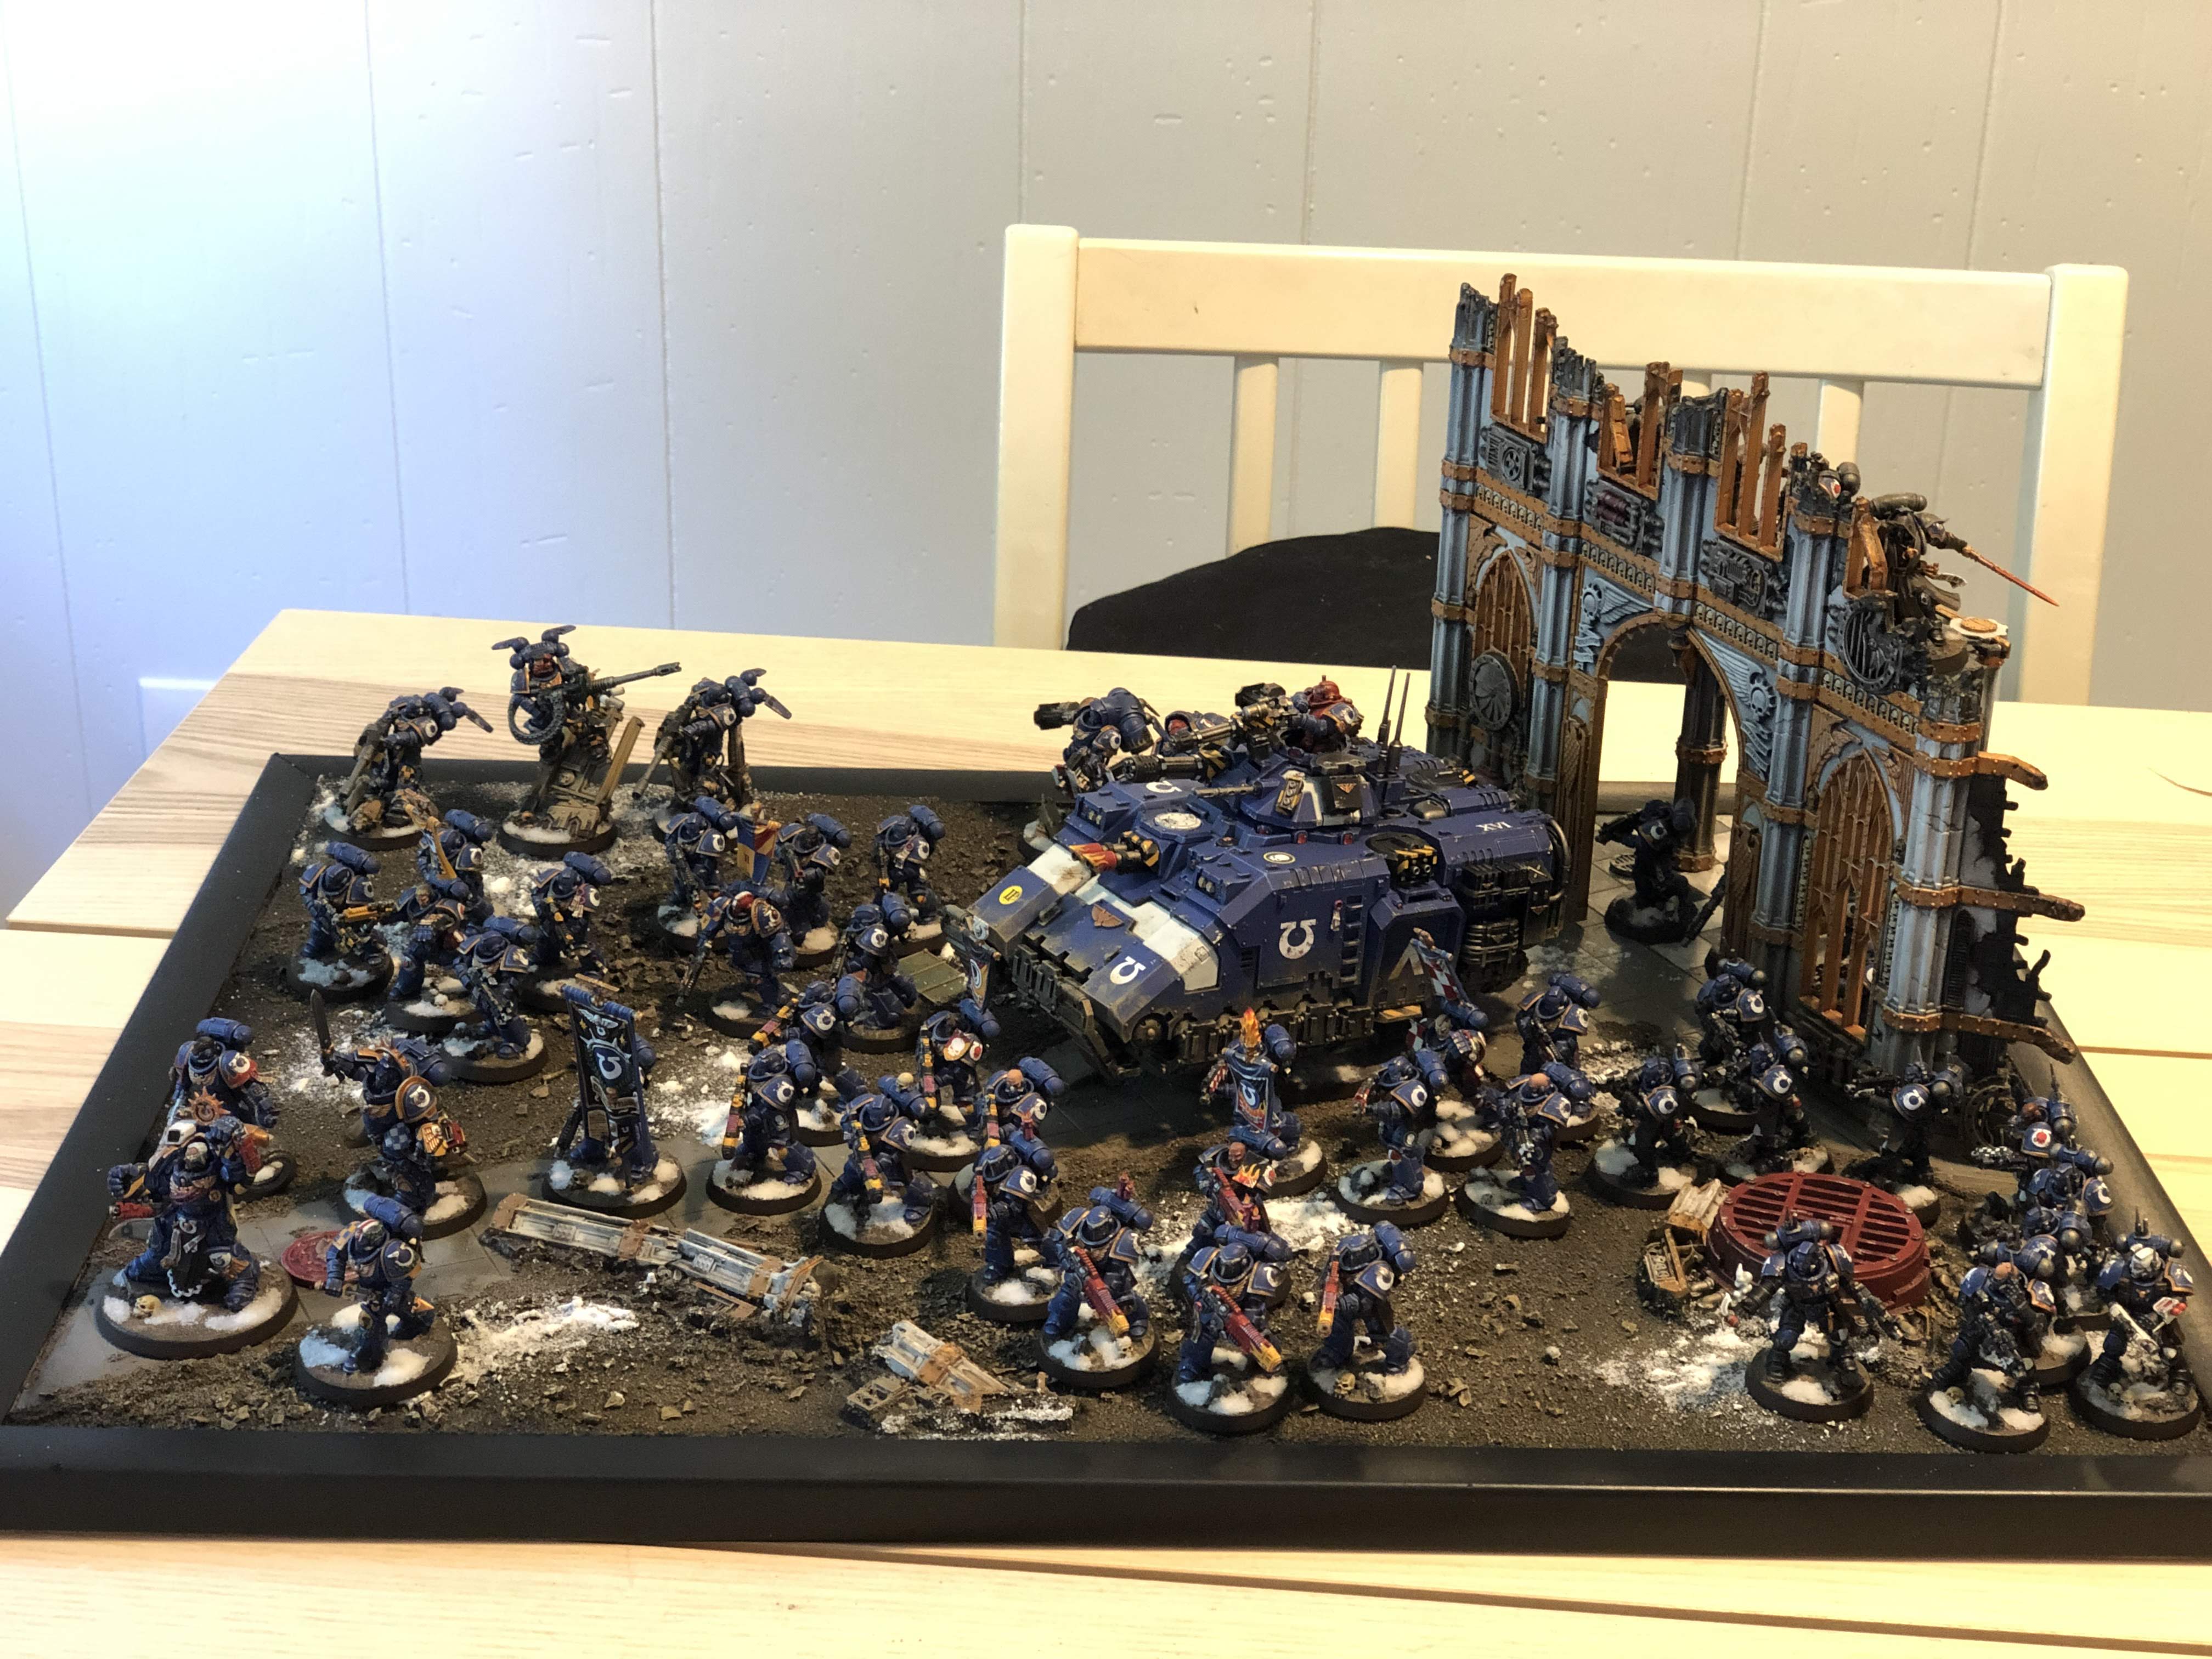
And at last, the moment of truth, where all my Ultramarines are arrayed on top of it.
JD Reynold’s Approach
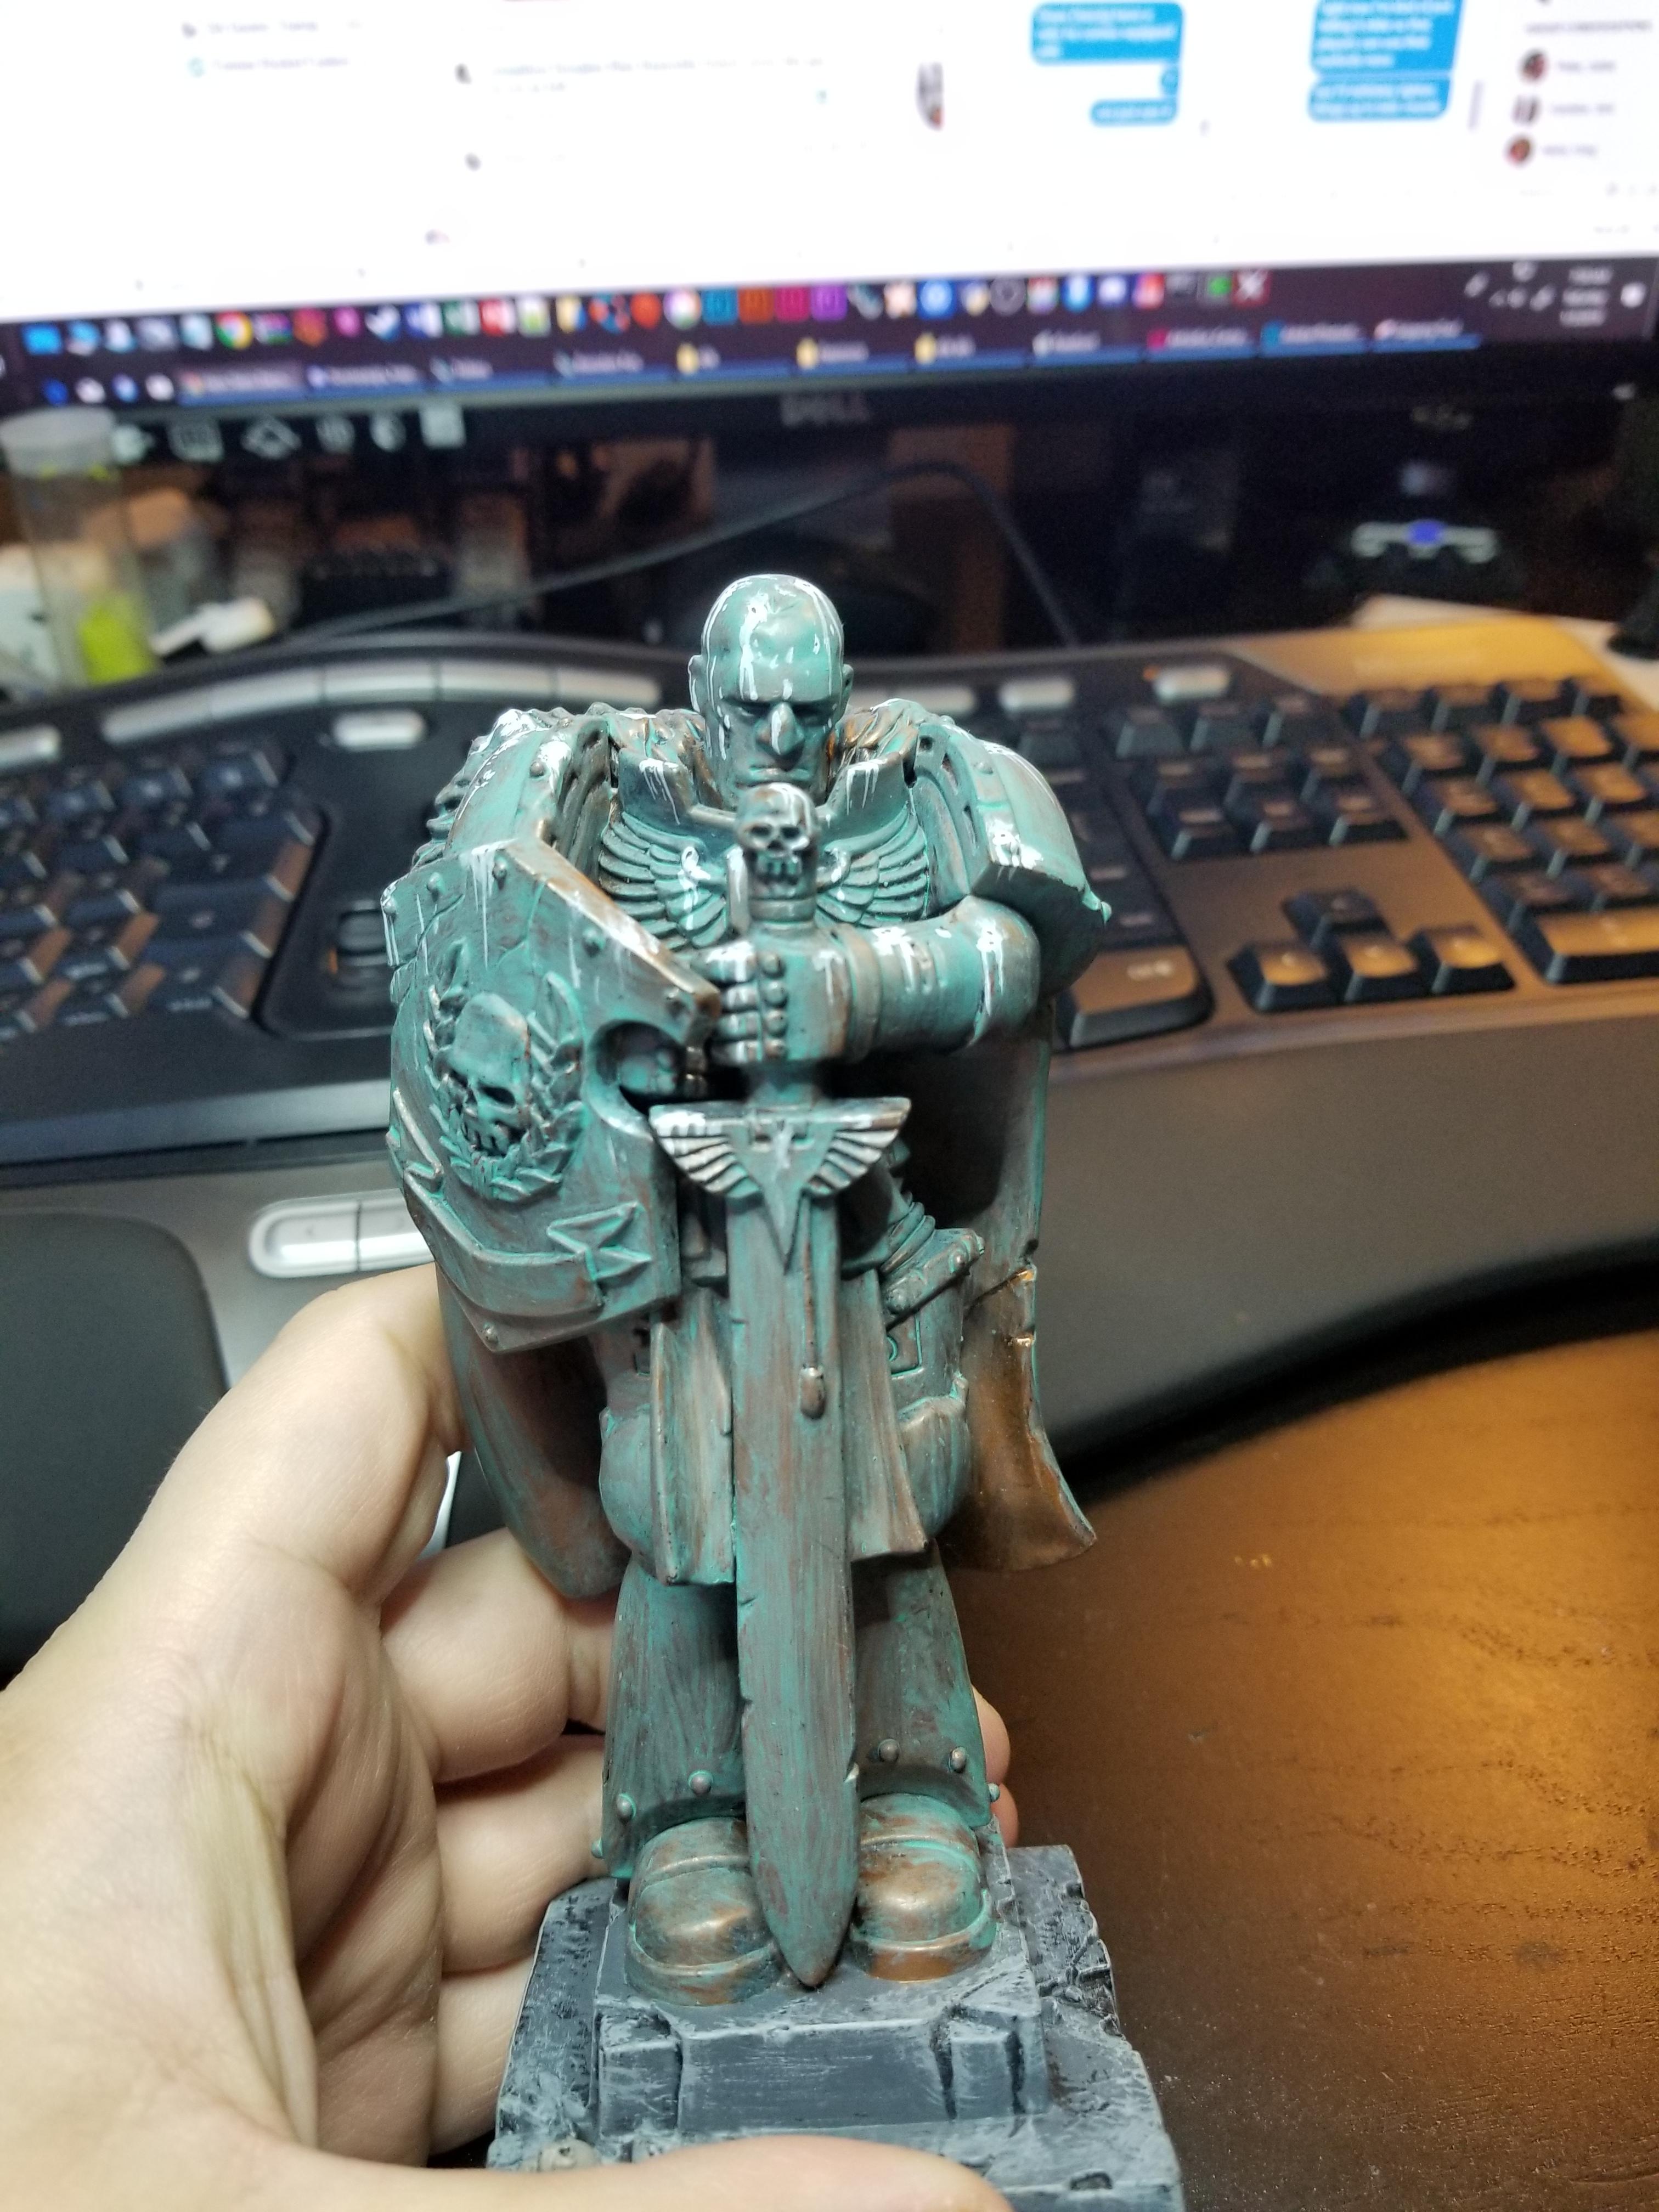
This is our 2019 Team Tournament Display for Adepticon. This was primarily constructed by our teammate Brian who used a combination of 3D Printing, Traditional Foamwork, and Airbrushing to create an excellent display board. The roadway is from Secret Weapon Miniatures’ City line, and was painted by me, while the statues were painted by Goonhammer’s Robert Jones with some clever chaos artwork hidden on the backside of one, and copious amounts of bird droppings. Brian printed the archway and gate, while using a layered airbrushing method using Halloween web decorations to create an excellent marble effect. The columns were also 3D Printed, and then simply topped with Space Marine models base counted in various metallic to give them the illusion of being statues.

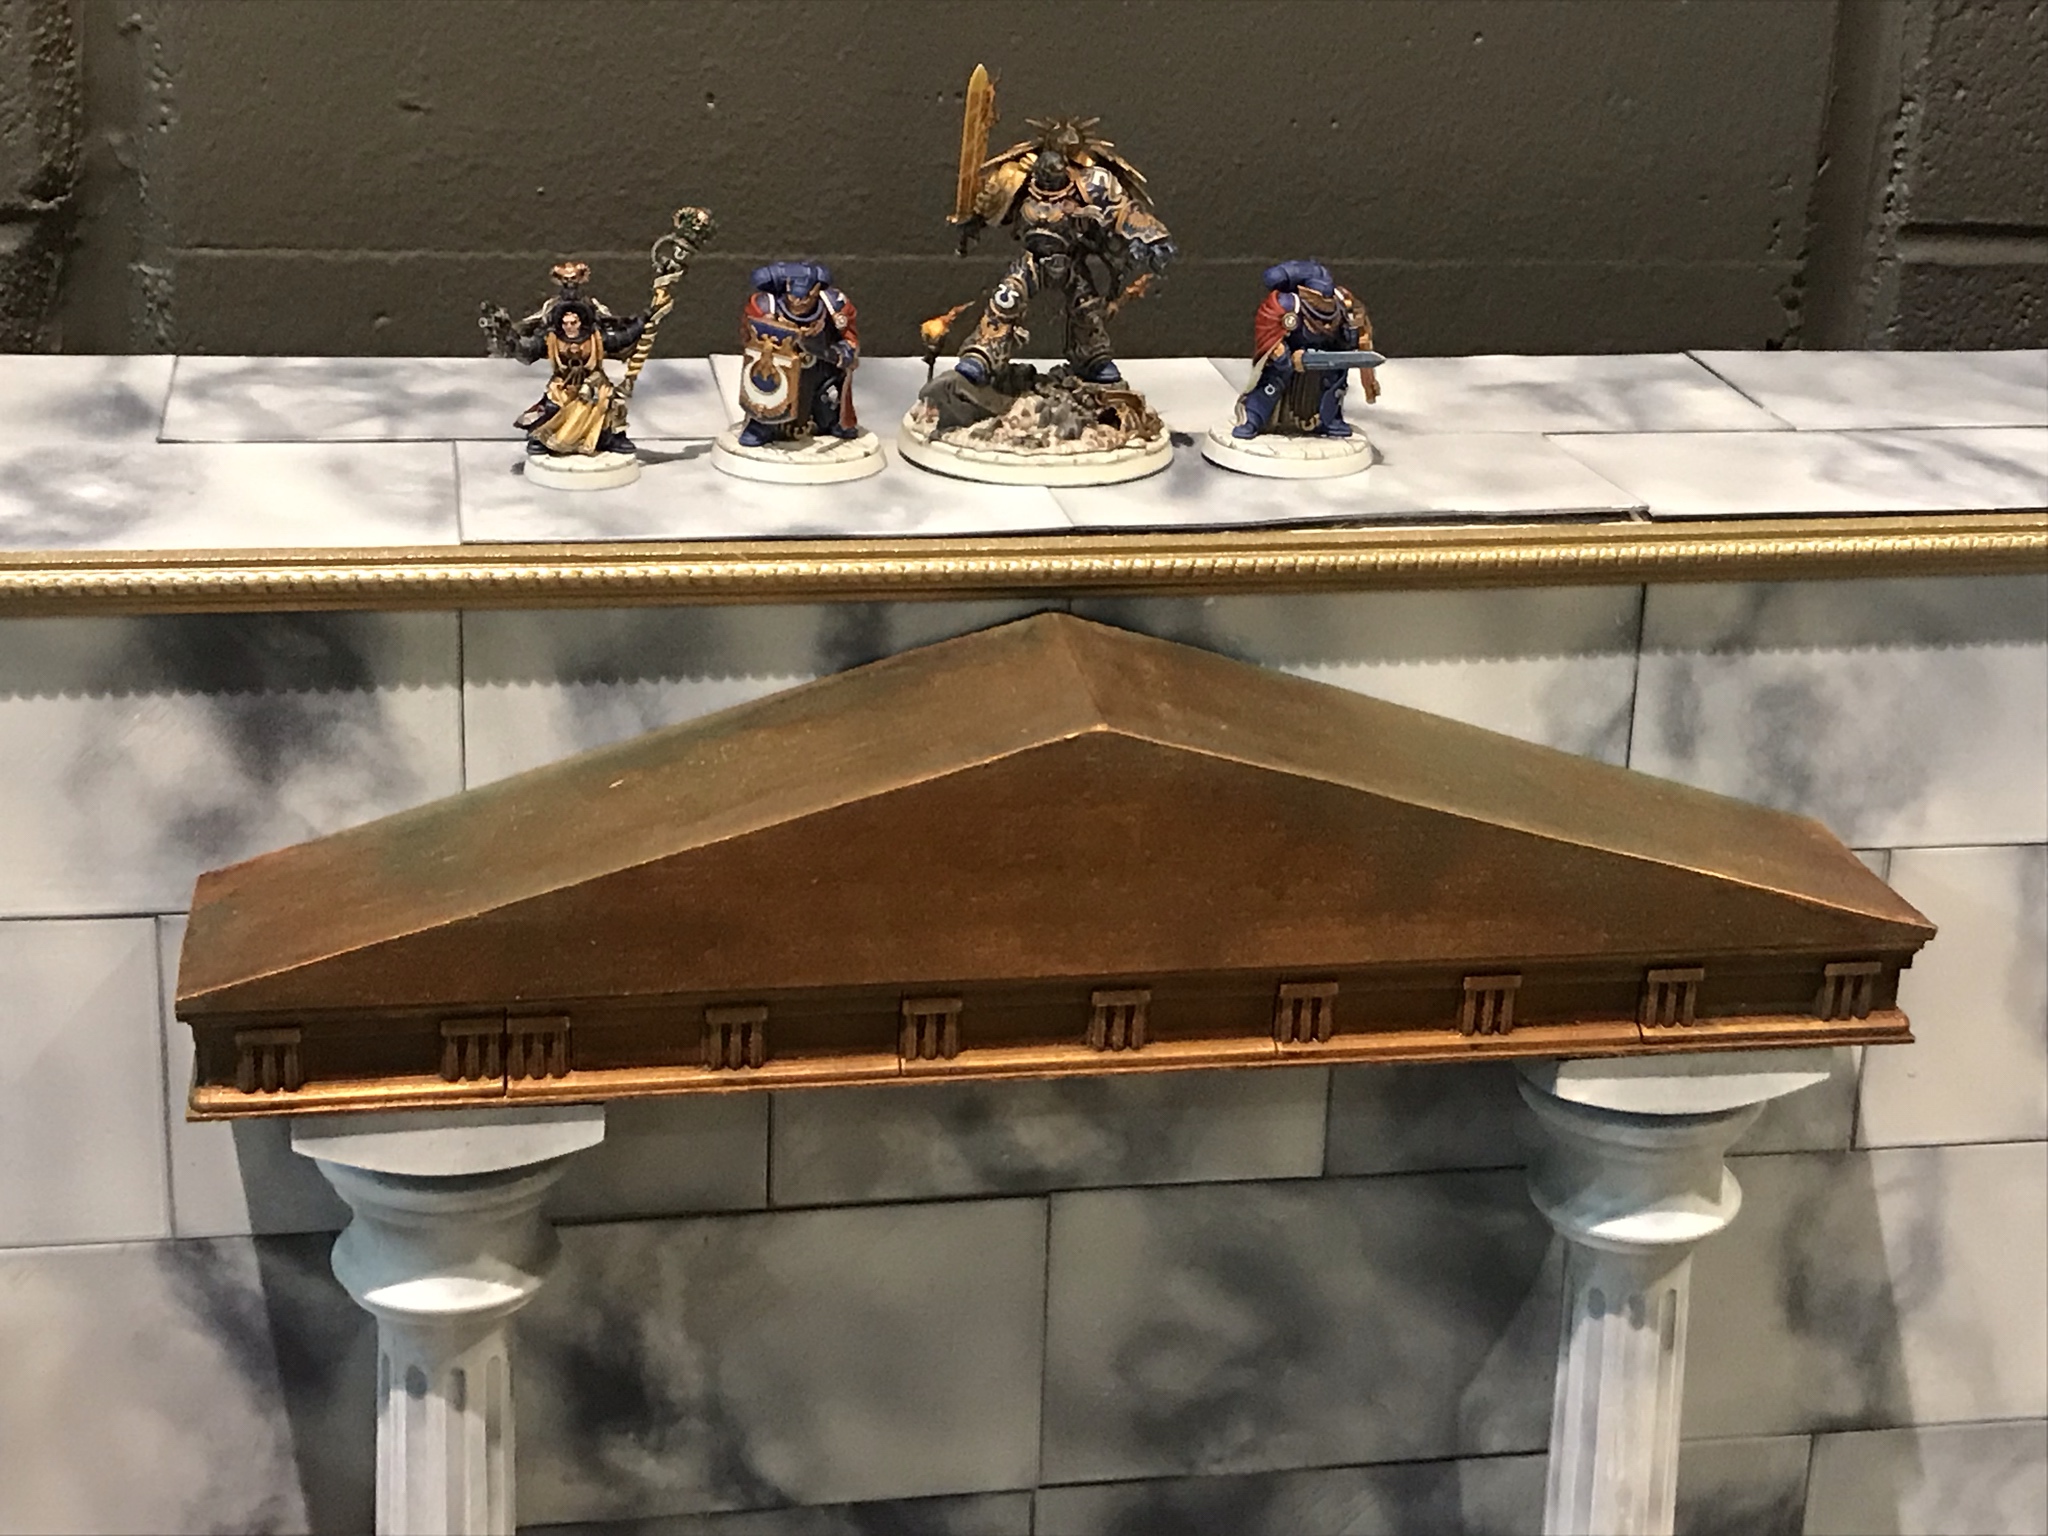
TheChirurgeon’s Note: I helped with this one! The guys were running out of time working on the display board and asked for help painting the statues. Being the fast, diligent painter that I am, I was happy to oblige. I painted the marble, copper, and bronze statues, respectively. Being the good Chaos worshipper that I am, there was no way that I was going to just paint up some Imperial statues like some kind of jerk. So I decided to add a little flair, in the form of some graffiti on the back of one statue. Then BuffaloChicken suggested that he had been adding tiny birds and bird poops to the terrain he made for his brother and I realized that my task was clear. I’ll cover painting graffiti in a future Narrative Forge but for now, let’s go with the easy win.
Painting bird poop mini-tutorial: Don’t overthink it — just do white splatters with Corax White or whatever, and paint the dots of splatter and running drips. Then, using a dark brown, add tiny flecks on top of that for the turds.

I’m pretty sure JD’s more serious teammates did not appreciate my tasteful graffiti and bird poops, and that’s why they put the one statue in the back in front of the wall. So Mission Accomplished, really.
Go Flaunt Your Army
Hopefully this has given you ample inspiration to start planning your own display board, and the multiple approaches have shown you that you have multiple options when it comes to doing this, depending on how involved you want the process to be. If you do start building your own board or you have any questions or comments you want to add, feel free to drop us a note in the comments below or email us at contact@goonhammer.com. If you’ve got a display board you want to show off — or better yet, an army and a display board — let us know! We’re always looking for armies for our Thursday Army Showcase series.
